[youtube]http://youtu.be/hn1Y0Cn7M1w[/youtube]
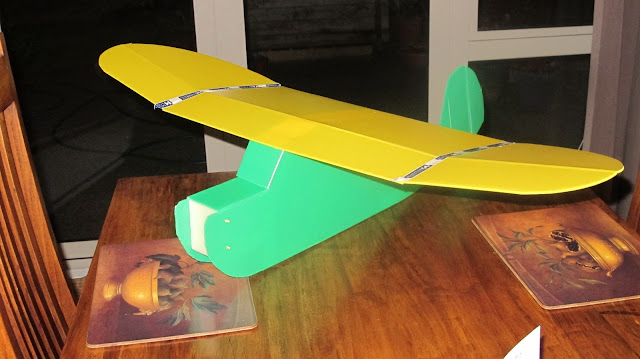
Some tail heavy flying quite a hairy flight the CG was set as specified on the plans. The next flight was much better with the CG set at the wing leading edgeunfortunatelyno video from that flight the camera went missing near the end of the session in the grass somewhere  New Indoor 50% Fogey
This video shows piloting using the bad method. The Coroplast held up well (which is why I love it so) with the pretty hard impact failed on the foam to Coroplast interfaces which it what I hoped would happen when I flew it into the ground at mach 1
[youtube]http://youtu.be/Po5Zp3e6AiI[/youtube]
Its all fixed now and ready for a calmer day as I was una ble to fight the wind, she just climbed with every gust of our patented New Zealand summer wind
Testing today I found I don't have enough thrust to roll on our course grass at the field.Hand launching in our typically wind weather this time of year she flew but had very little power in reserve.
More power :0
[/b]
Turnigy L2210-1650 Bell Style Motor
Kv:1650 rpm/vVoltage:7.4~11.1v(2~3s)No load Current:1.3AMaxCurrent:22AMax Power:250W
Shaft Size :3mm
Shaft Length:28mm
Dimension:28mm x 17mm
Weight:50g
[/b]
[/b]
[/b]
[/b]
[/b]
[/b]
[/b]
[/b]
The motor prop maps as follows.
Current Power Thrust
5A 57 Watts 300 Grams
10A 114 Watts 547 Grams
16A 172 Watts 730 Grams
28A 276 Watts 1020 Grams Over current by 6 amps so no full throttle.
Should be able to fly level at 10 amps or less will be running a 1000mAh 3C
[/b]
[/b]
[/b]
Capacity:[/b]1000mAh
Voltage:[/b]3S1P / 3 Cell / 11.1V
Discharge:[/b]35C Constant / 45C Burst
Weight:[/b]92g (including wire, plug & case)
Dimensions:[/b]76x35x17mm
Balance Plug:[/b]JST-XH
Discharge Plug:[/b]XT60
The Turnigy L2210 1650kv should solve the problem for another 26 Grams well forward, and I get double the thrust. I still needed to move the GC forward with the 24 Gram so the bigger 50 Gram motor solves that without adding ballast.
Hextronic 24 Gram 1700kv not enough grunt on test today, won't roll on my flying field.
Servos mounted externally
Underside wing detail
Foam joints to set tip angle whole wing weighs 215 Grams
center section is 500 mm tips as the plan
Wing detail braced front and rear with Carbon tubes 16 grams
HK i86 gyro board
I put a hatch over the empty chamber in the nose as the CG isstubbornly to far back
<iframe allowfullscreen="allowfullscreen" frameborder="0" height="360" src="http://www.youtube.com/embed/7Rnq1Yb81RM?feature=player_embedded&wmode=opaque" width="640" style="display: block; margin: 10px auto; max-width: 100%;"></iframe>
Progressing mounted the servos on the outside so they areaccessible. Now with a yellow rail fin with Bamboo spars, still nice and light.
Motor mounted and made a hatch over foam nose structure for the RX and any other bits. The ESC will be on the bulkhead in the air flow
The 610mAh battery ismountedwell forward withVelcroto get the CG forward, the CG seem stubbornly to far aft will probably need some balance or a 1000mAh 3C to balance her out.

Myglue lessCoroplast and25mm thickextruded Polystyrene foam construction using high strength double sided tape and Bambooskewers
Currently theair frameweighs 376 Grams bare, not servos, radio, motor or battery.
First use aPritt Stickto fix the plans to the inside and cut round with a sharp knife. I glued along the lines on the plan only so I could get the paper off.
I used the blunt end of my steel rule to crease the flutes where all bend lines are on the plan
Then I removed the plan paper before the glue was fully dry which makes it easier to get off.
This is the outside surface
Make a renforceing foam core to fit inside the tail section so you don't have to glue the corners, used double sided tape on 3 sides of the foam core.
Looking aft from the nose and top view with sides folded up
Adding the fron bulk head. This peice makes the whole fuse pretty stifftorsionallyalong its length. Th nice feature of Coro and double sided tape is it fails at the tape joint in a crash.
Front bulkhead in position at right angles and flush with the ben of the bottom section. The bulkhead is 100 mm high and in my case 64mm wide
Note the coroplast want to bend along the middle of a flute so the width you get will corespond to the pitch of the flutes in the Coroplast used.
Front bulkhead with a line at 55 mm from the bottom
From the top
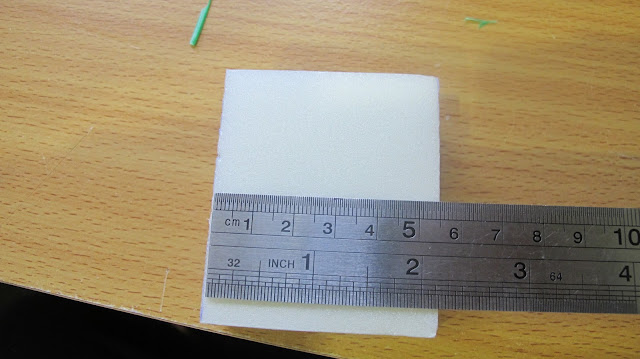
Cut a 55mm piece of foam for behind the screen upto the leading edge
 |
| 55 X 64 mm |
Fixed and chamfered to accept the wing section