Okay, I managed to get a little work done over the weekend, and I've got a handful of photos to share with you.


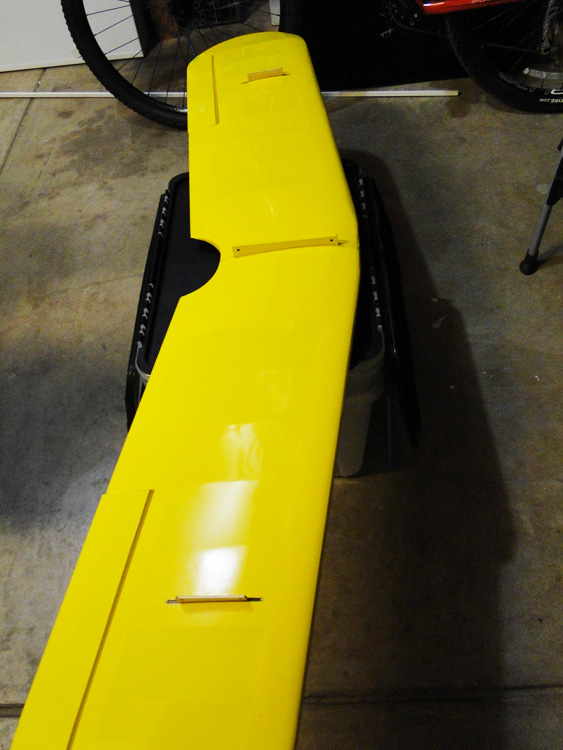


The first photo is the top view of the joined lower wing. You can see in the closer look in photo 2 that I have some X's on tape. This is a little trick I taught myself years back. How many times have we gotten a wing brace all sanded so that it fits perfectly, only to have it give you trouble on final assembly because we put the wrong end into the wrong side? So, on top of my braces, I use a sharpie to mark an X on one side, and I put tape with X's on that side. I used to put O's on the other side, but I'm fond of overkill. Match the X's and life gets easier when you're juggling wing halves and braces and epoxy. You can also see that I pulled strings through each wing half and taped the knotted ends out of the way. Those strings will help get your servo wires through the wing. Once I got both halves pressed tightly together, I grabbed an old sock or small piece of clean rag, and soaked it in Denatured Alcohol. After wiping the excess epoxy off, I used the alcohol to clean the area, and then I wiped it dry, and used tape to secure it for a nice, pretty joint. Ironically, this is mostly for my OCD on this wing, as there is a belly pan going over the bottom joint, and the top joint ends up inside the plane.
Use the same principle on the top wing, though, and you'll have a nice assembly when you finish. On my top wing (both wings, actually), before doing anything else, I went ahead and fit the Interplaner strut mount brackets into the wings first. Looks easy. It's not. The holes were too tight and had bits of glue, so I had a considerable amount of carving with my X-Acto knife and sanding with little home-made tools I made using popsicle sticks (epoxy stir-sticks) and sandpaper. I'm pleased to say, though, that the end result is a rock-solid mount bracket. When you assemble the top wing, remember to put the Cabane Strut mount bracket piece in between the wing halves, and to carve away the extra covering so there's plenty of surface to glue together. I also used some rough sandpaper to scuff up the mating surfaces, as I found them to be almost shiny, and I want my epoxy to have something rough to soak into and grab onto. This looks like a nice, easy assembly, and from a mechanical perspective, it really is simple. Once you factor in two wing halves, holes for the braces, the braces, and both sides of the Cabane bracket that sandwiches in between, you realize that when you begin assembly on this wing, you're going to be busier than a one-armed paper-hanger. I recommend taking two or three dry-runs, pretending that you have (a ton of) epoxy mixed, and running through the routine of spreading it onto all those surfaces, and getting some into the holes, and then assembling it, pressing it together, cleaning off the epoxy that squeezes out, cleaning off the area, and taping it securely. You'll be amazed at how much you have to do in the short time you have with the curing epoxy. I recommend AT LEAST 30-minute epoxy be used, because when you mix this big of a pot of epoxy up, the curing time shortens as the pot grows warmer. 45 minute epoxy would be ideal. I kept three extra sheets of wax paper off to the side, just in case, and 20 half-sheets of paper towels for wiping goo. I used ALL the wax-paper sheets, and only had three half-sheets of paper towels left! But as you can see, the end result was a nice, clean, pretty assembly.
I normally do all my pin-hinges before assembling joined surfaces, but this time I decided to wait on that until the wings are joined. I hope these photos are helpful.
~ Jim ~