I don't know how many of you have run into the same problem I have, that you can't find any online balsa distributor or LHS that sells strip ailerons much over 1.5" wide. If the you do find them online, then often one or two of the dimensions is way off. Very often I'm enlarging plans or I want to add flaps to a kit that was designed without flaps, and I run into this challenge. I suspect a lot of guys will just proceed with building barn door ailerons and flaps. But, I was born and raised in this hobby with every ARF or kit I ever built having strip ailerons, and I just prefer to stick with what has worked well for me. As they say "Necessity is the mother of invention" and I have devised this method for making nice uniform custom ailerons. (But some how I'd bet that somebody else has figured this out too. LOL).
Anyway, here's photos of how I make the larger sized ailerons or flaps. I'm currently building an old 95" Hobby lobby SR. Telemaster kit that has only the ailerons. The ailerons are 2" x 9/16" thick (it couldn't be a nice, normal 1/2" thick, right?! LOL) , and I want to add 20" flaps with the same dimensions to match. So I bought 3/4" x 2" x 24" balsa blocks from National Balsa when I ordered my supplies from them. (I had to buy 3/4" because they don't sell 9/16" or 5/8" thick balsa)
Essentially, you will start the job by using a leading edge and a trailing edge of the exact dimensions you want your flap or aileron to be. To match my Tele kit's premade ailerons, I wanted my 20" flaps to be 9/16" thick at the hinges, and 3/32" at the trailing edge. You can also use 1/8" wire which is easier to find at the local Home depot then is 3/32". I then sawed a piece of basswood (or any harwood) to 1/4" thick x 9/16" high x 24", and applied a piece of masking tape over it, and pinned it to the front of the 3/4" balsa block with T-pins. I then screwed the balsa block to a sheet of basswood (any sheet thickness is ok) with about a 1/8" hangover, so the 3/32" wire would have that 1/8" ledge to lay on and stay put. I placed the 3/32" wire onto that ledge and fastened the 3/32" K&S wire at both ends of the balsa block. This 3/32" wire will be used to make a trailing edge out of the balsa block. I then screwed the whole assembly to a 2"x4", and locked that 24" long assembly in my vice. I used thin scrap veneer or scrap balsa sheeting where needed to serve as shims to hold everything firm between the 2"x4" and the basswood sheeting so nothing budges. If you don't have a vice, then you might want to screw the 2"x4" onto a workbench to hold it still. This way you can use both hands to sand the balsa block without it sliding around with each stroke. Also, the 2x4" block holds the balsa up high enough to clear your work table surface when you sand.
You then use 60 to 80 grit sanding blocks to sand the balsa into the 9/16" x 3/32" flap or aileron. (or whatever size you chose) You avoid sanding the masking taped leading edge, or the wire trailing edge until you've removed 95% of the excess balsa. You will find it is easy to sand right down to the masking tape without actually sanding through the tape. By the time you are sanding the leading edge so that the masking tape is starting to sand off, you will have completed the job or are 99.9% done. If you sand through the tape, just add another tape on top and continue sanding very carefully until you're done. Of course, the 3/32" trailing edge (or 1/8" TE if you used Home Depot 1/8" wire) is easier to shape, because the metal wire will not allow you to sand beyond the thickness of it. You will see the wire get shiny and feel it too, and know you are done.
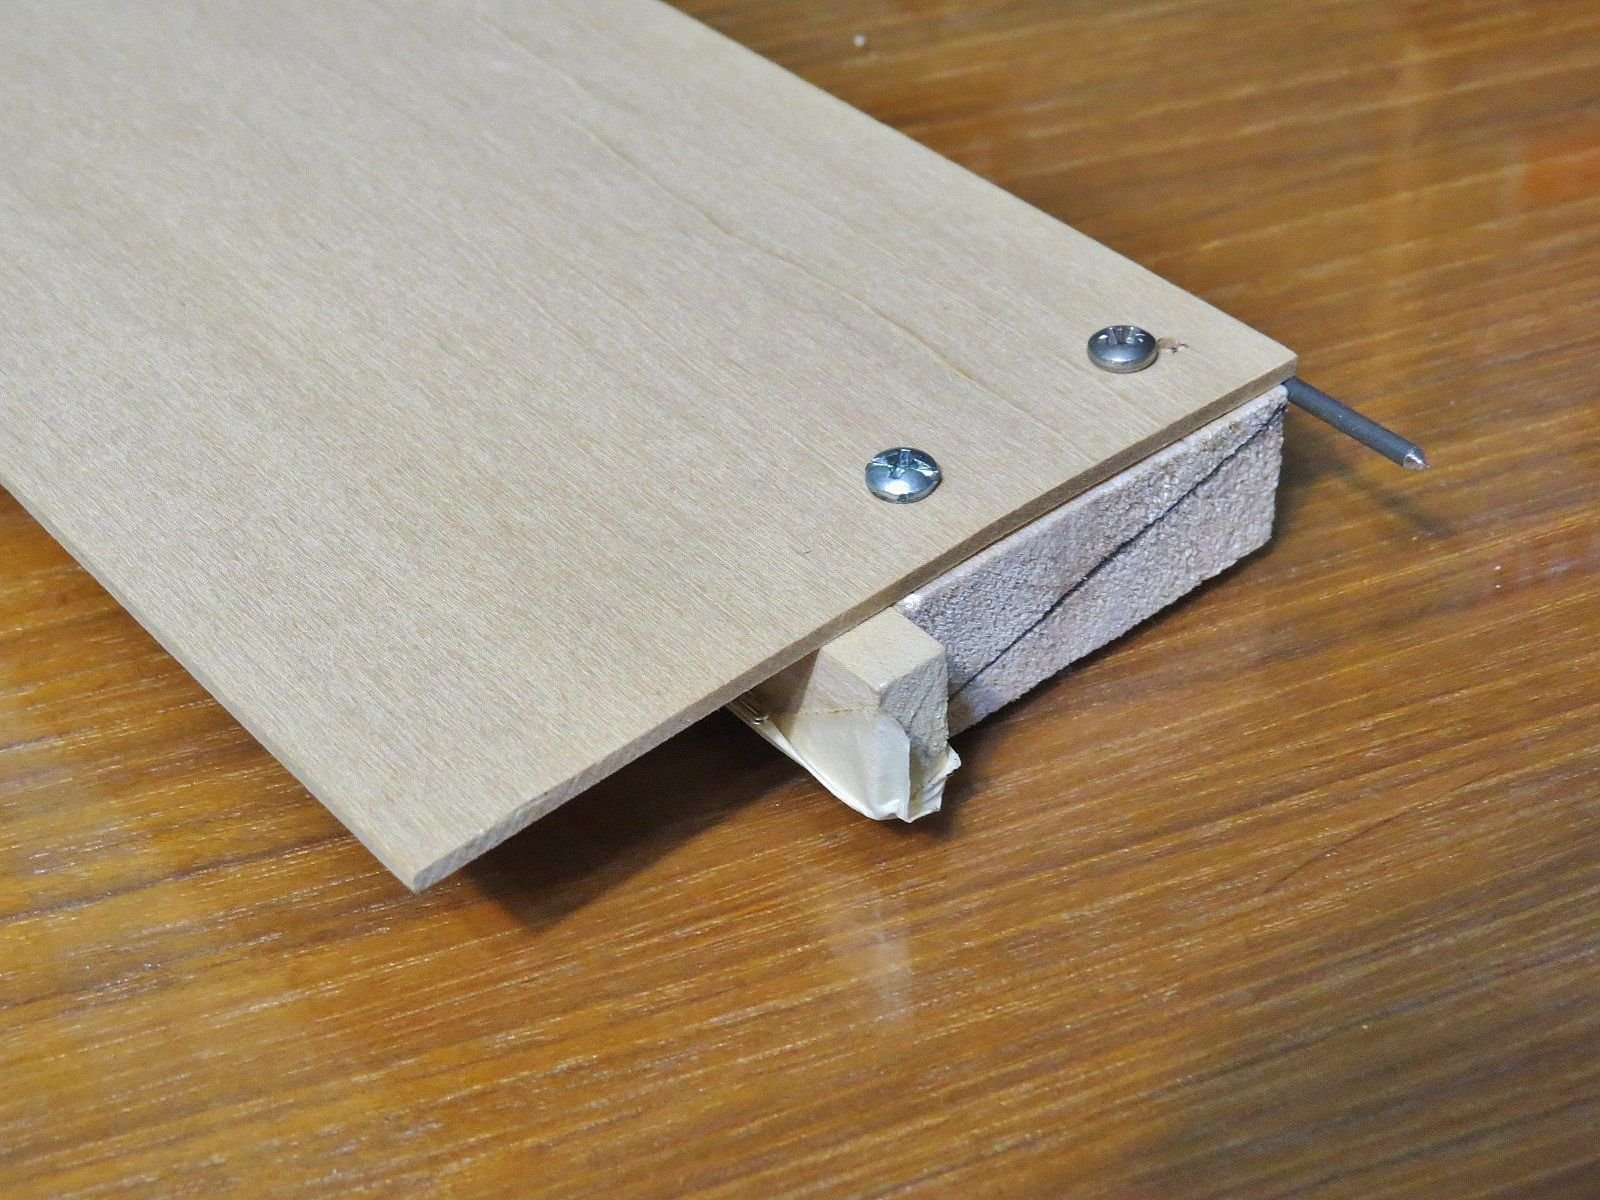 Photo above; A view of the underside. One end of the block with screws. Each end gets cut off and discarded later when the job is completed.

Above photo shows the small ledge or overhang of wood that the 3/32" trailing edge wire rests on. Also, the wire is held on each end with a screw.
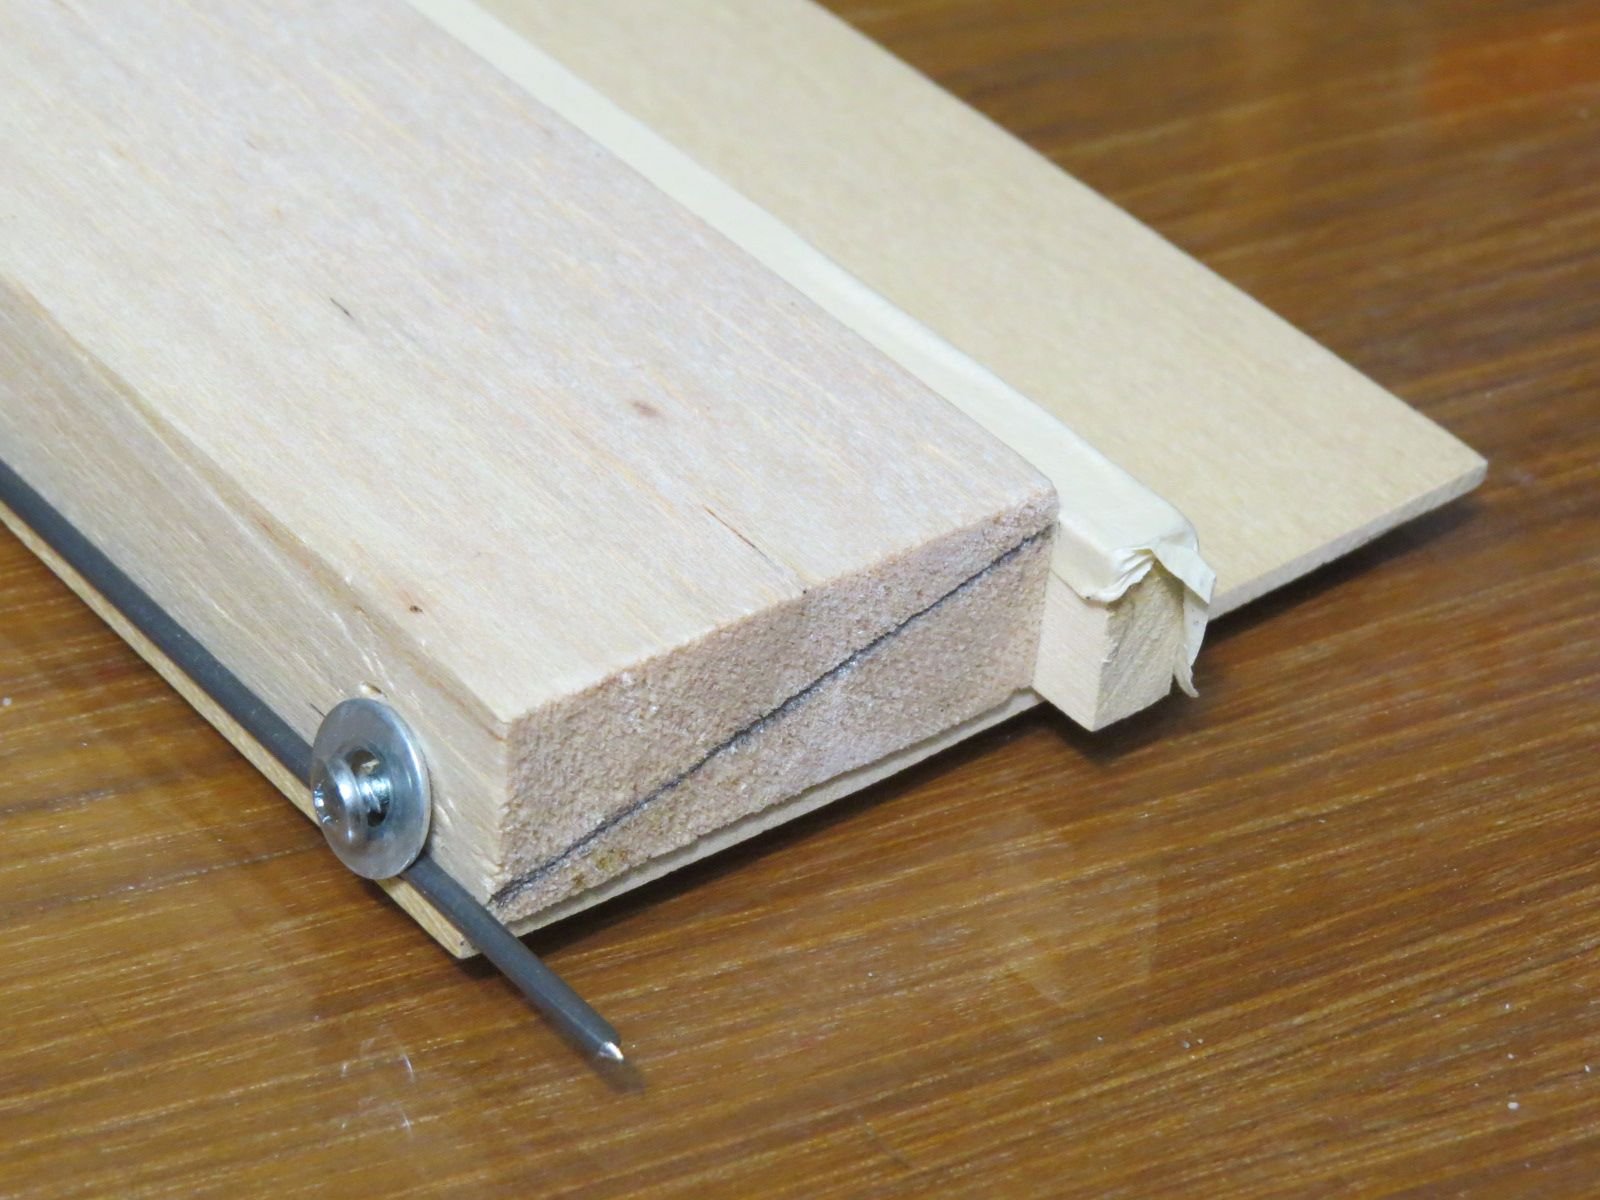
Photo above;
9/16" high hardwood leading front edge has a strip of masking tape the full length. The tape prevents the sanding block from going beyond the leading edge hardwood block.
I drew a pencil line to show how the balsa block will be sanded and shaped from the top of the leading edge to the top of the 3/32" trailing edge wire.
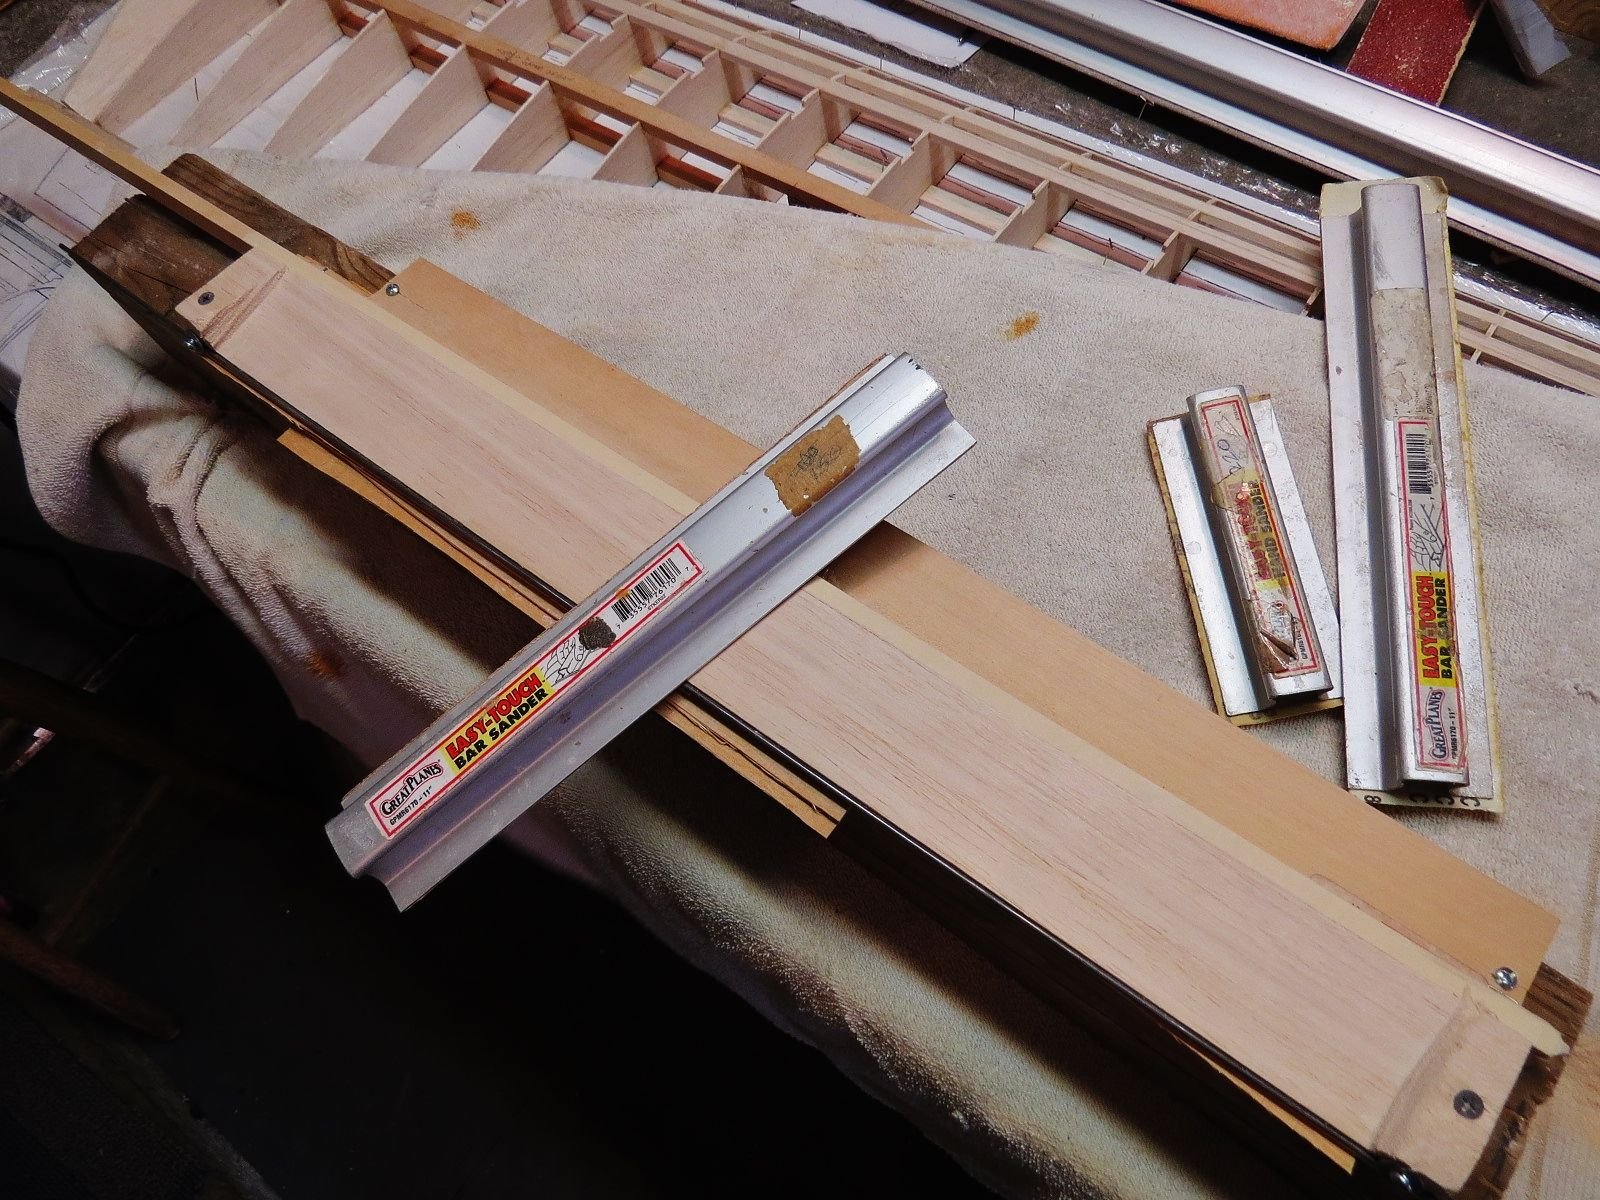
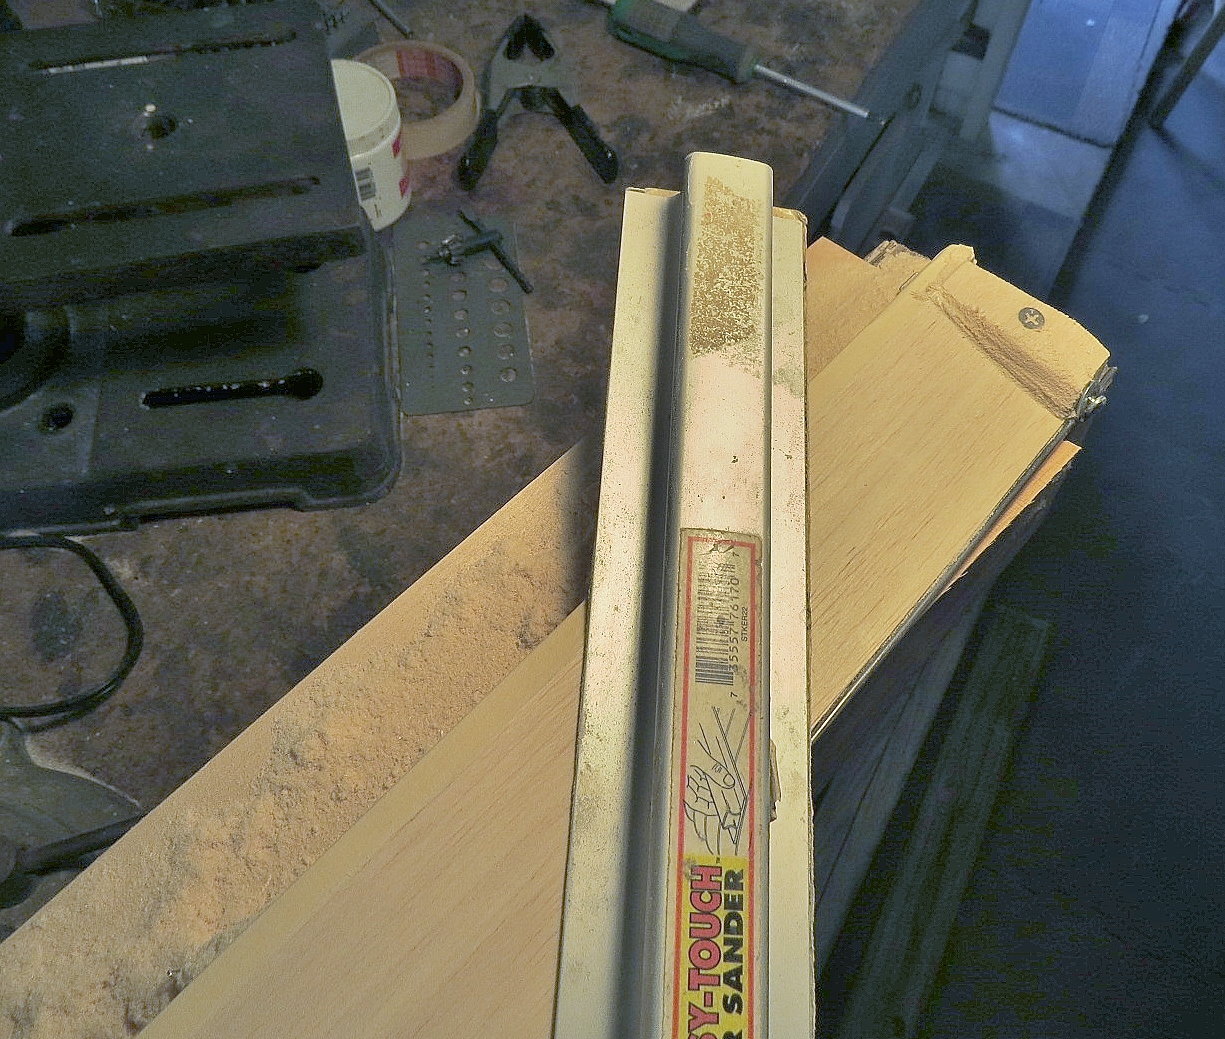 Here I have the 3/4" x 2" block of balsa with basswood screwed to a 2x4",and locked in a vice to hold everything firm. This allows me to use long and controlled strokes with 60-80 grit sanding bar. There's also some scrap veneers or scarap balsa sheets shimmed between the basswood platform and the 2x4" to keep it from budging.
Above photo; Everything mounted on a 2x4" and locked in a vice.. C
lose up of the masking tape covered hardwood leading edge, and the metal 3/32" wire trailing edge.
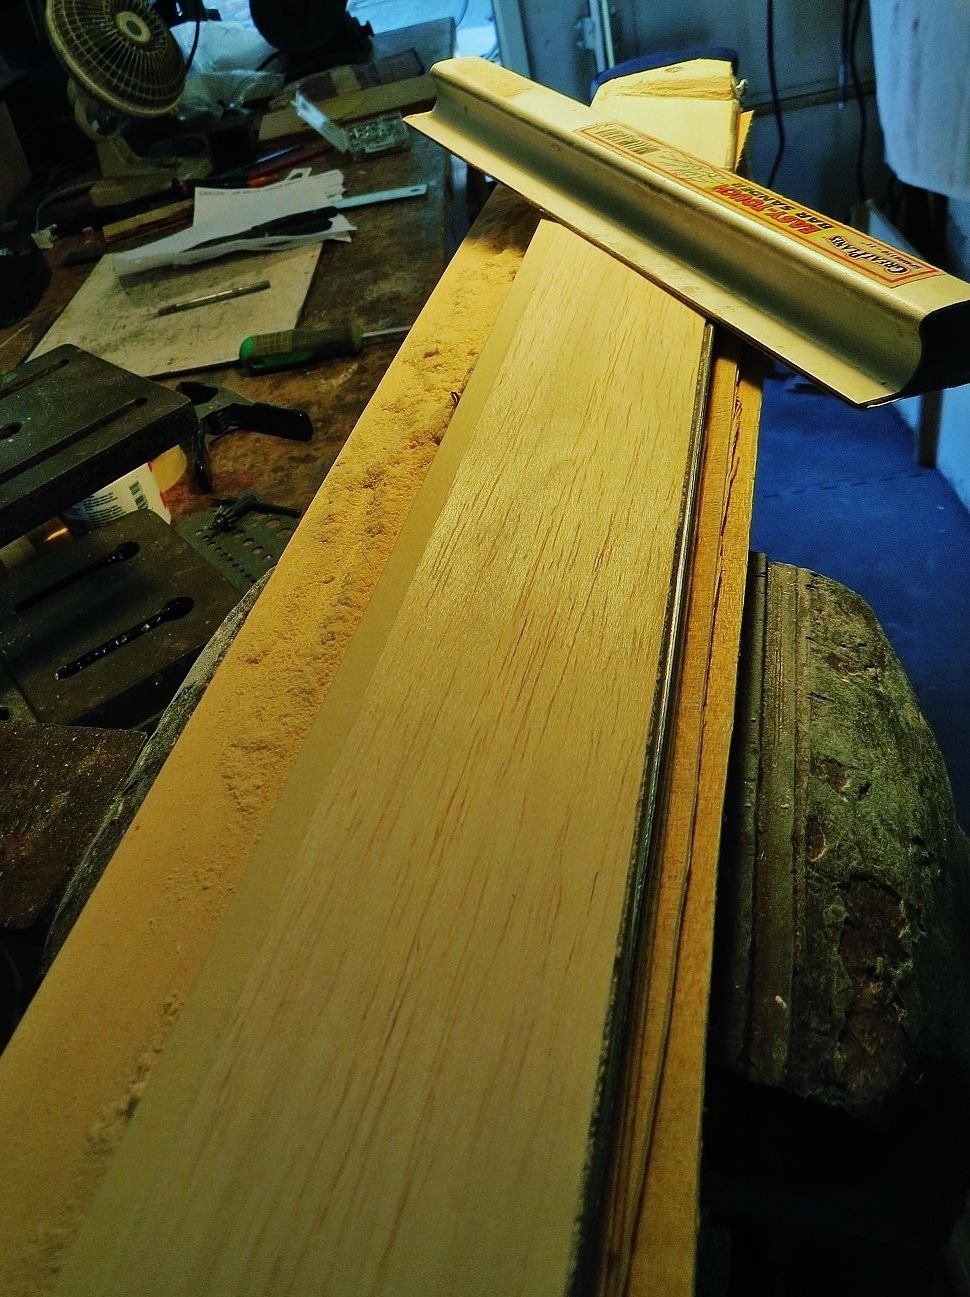
Above photo;
Just about done here and ready for 100 - 180 grit finishing strokes. That's the vaneer shims that you see under the basswood sheet. There are 2 screws on the underside of each end of the basswood sheet (which holds it to the balsa wood block) When you screw that whole thing to a 2" x 4" (so you can mount the 2"x4" in a vice), there is going to be a space between the basswood and the 2"x4" where the screw heads stick out . So just use scrap vaneer or balsa sheets stuffed into the gap wherever needed in order to keep things from wobbling around when you sand it. 60-80 grit paper really bites into that balsa wood, so just shim wherever you need to prevent shaking with each sanding stroke.
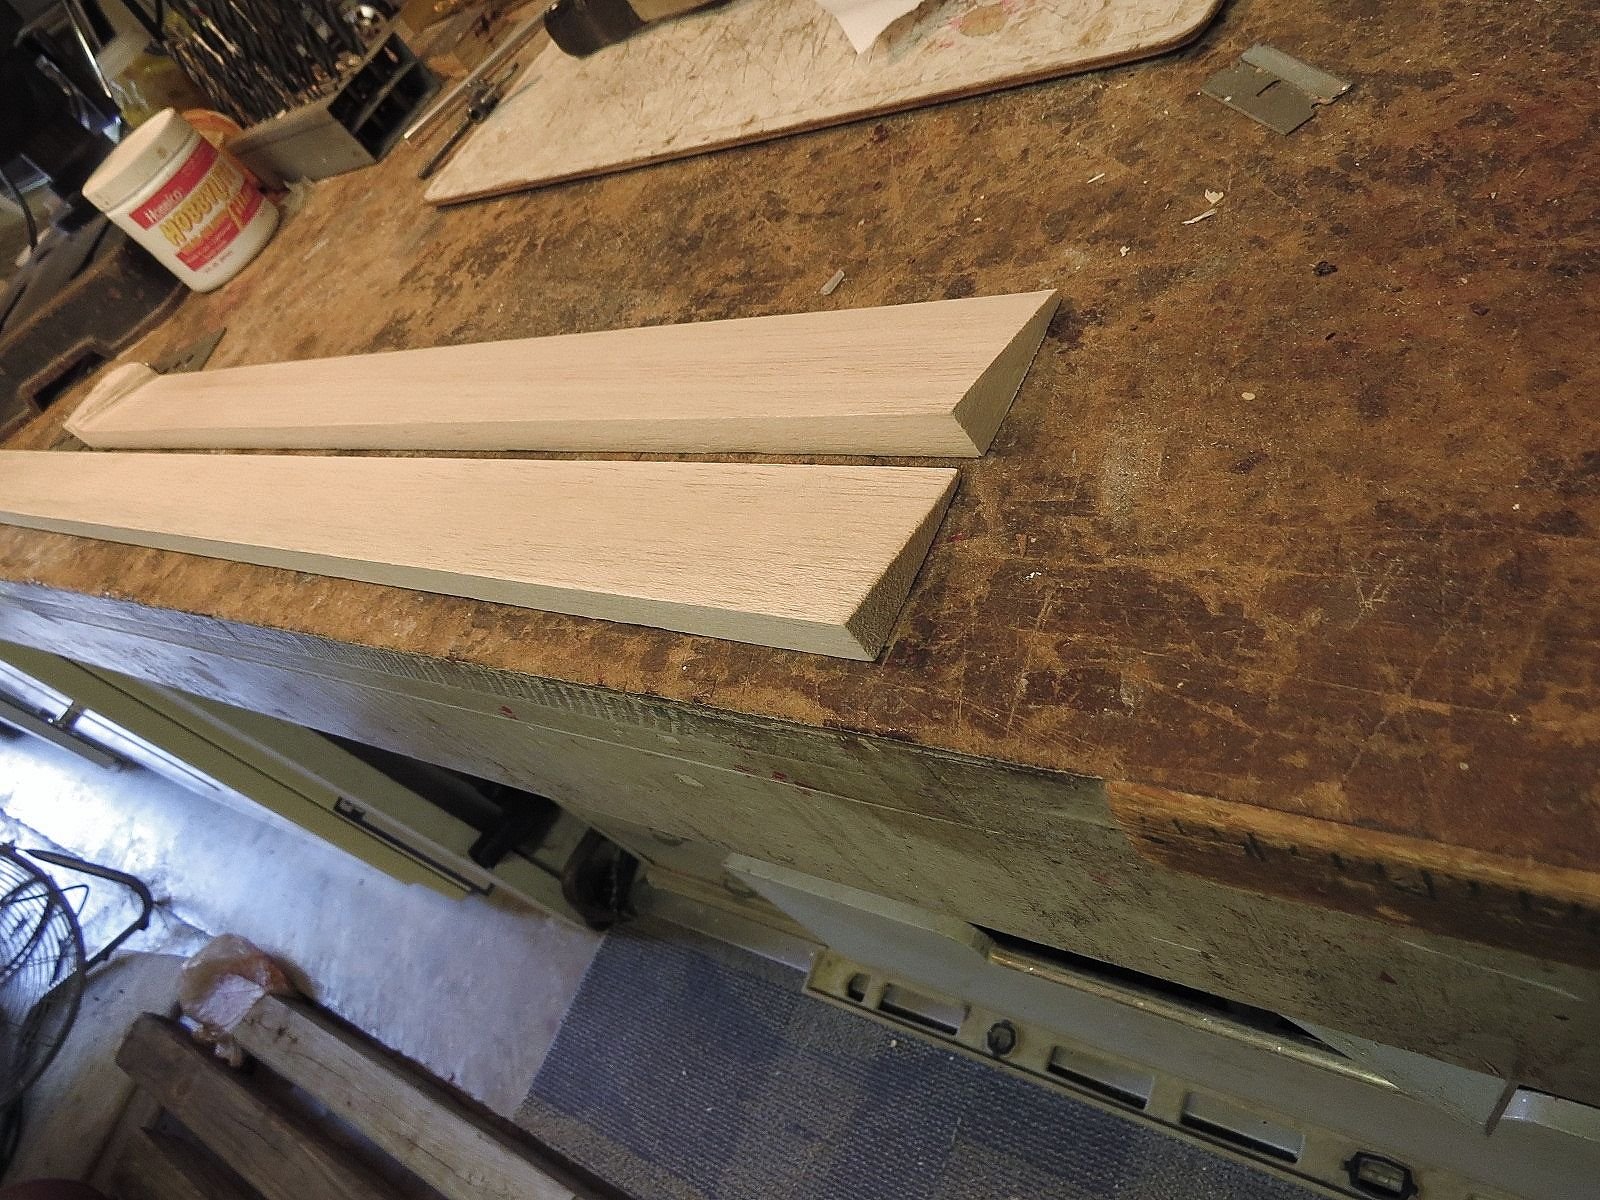 Above photo; Here's the newly completed 2"x 24" aileron with one end of it cut off. (we cut off both ends to discard the ends with the screws) It is on the right, and the SR.Telemaster kit's aileron is on the left. Perfect match.