


Which GP Big Stik?
 05-09-2015, 05:10 AM
#1

Thread Starter
Join Date: Jun 2010
Location: RIO, GREECE
Posts: 94
Likes: 0
Received 0 Likes
on
0 Posts
Hi all,
I have recently purchased a second hand Great Planes Stik. It needs some TLC and for this I need the manual from Great Planes. I have found two links on their site:
http://www.greatplanes.com/airplanes/gpma1220.html
http://www.greatplanes.com/discontinued/gpma1225.html
Both are referring to the same plane but the specs are different. I tried to match it to my plane but the length of the fuselage does match any of them (from firewall to end of fuse not including rudder or elevator). As far as the wings is concerned I do not know if the measurements in the site is referring to the leading edge or the trailing edge or in the middle of the span.
My measurements are:
1) fuselage 116 cm
2) wing LE 155 cm
I would appreciate your help.
Thanks,
StZ
 05-11-2015, 12:46 PM
#2

I've had 3 sticks. Starting point for CG is on the wing spar. Wing span measurement should be taken from the widest point. GP Sticks have a square wing with no wing tips so leading, middle and trailing edge wing span measurements should be the same. The manuals you've downloaded should give you a good starting point for control throws.
John
John
05-11-2015, 01:45 PM
#3
Thread Starter
Join Date: Jun 2010
Location: RIO, GREECE
Posts: 94
Likes: 0
Received 0 Likes
on
0 Posts
Thanks for your reply JNorton.
I do know that usually the CoG is at the spar but it is not always the case. The GP Stiks do not have a square wing. Check the photos in GPs web site and you will see that they also have a triangular wing tip.
My main concern is the CoG and the engine size for the model. Some minor damages that are on the fuselage and wing I suppose I can fix relatively easy.
Also knowing the exact model would help me in finding out issues that other members had with this model and how to tackle them.
05-11-2015, 09:27 PM
#4
My Feedback: (13)
Hay STZ,
I've flown several of the GP sticks and their quality has not always been the same. The airframes all fly quite well, but on the 60~90 size Big Stick, you will need to beef up the tail area a bit. There are several threads on the GP Ugly Stick builds...so go see if you can find them. I install 20cc gas engines in the 60~90 size stick, but I needed to reinforce the tail area just forward of the leading edge of the stab, aft to the end of the fuselage on all four side (I would suggest you do this mod prior to installing the rudder and elevator. Also I mounted my elevator and rudder servo's aft for CG considerations and made 1/8" plywood mounts for them. The balsa used on some of GP sticks can be a bit soft, so if you go with a larger engine, you will need to beef up the fire wall, and I also installed a fuel tank hatch for easier access to the gas engine electronics and throttle servo. I mounted my fuel tank on the CG, placed 1/8" aircraft plywood floor over the landing gear and used the landing gear from the large big stick...its cheap...less then $20 bucks. I needed the taller landing gear to clear the 17/6 prop I used on my 20cc gas engine.
Mine was a tail dragger and the only way I fly any Stick type model. The vertical presentation was something to see...it would go vertical clean out of sight if you wanted.
This is one kick ***** fun model to fly...very predictable and will glide for ever, even at 10#'s.
Soft Landings Always,
Bobby of Maui
Last edited by Bob Paris; 05-15-2015 at 11:26 PM.
05-13-2015, 02:08 AM
#6
Thread Starter
Join Date: Jun 2010
Location: RIO, GREECE
Posts: 94
Likes: 0
Received 0 Likes
on
0 Posts
What about the engine size? I have seen many models with OS 91 2 stroke on them. I was going to do the same but I do not have the prop clearance. Also the engine must be an overkill for this model since it weighs less than 7 pounds!!!
Any thoughts/suggestions?
Any thoughts/suggestions?
05-13-2015, 11:02 AM
#7
Thread Starter
Join Date: Jun 2010
Location: RIO, GREECE
Posts: 94
Likes: 0
Received 0 Likes
on
0 Posts
Thanks for your suggestions. As I have mentioned this is a second hand model already built. However I bought it with damage on the tail. The portion just ahead of the elevator stab was cracked. I was told that it was due to bad handling rather than a weak tail! Anyway, I had to remove completely the tail from the rest of the fuse in order to make the repair better and stronger. I hope that I have made a proper job.
Concerning the landing gear I convert it to a tail dragger and I had to move the landing alloy forward reinforcing it on the inside with some 5mm ply. However i do not have any prop clearance for the 91FX or even adequate clearance for the 75AX that is available. Looks that I have to make another taller landing gear.
I had 2 SPAD Sticks and I loved them. The first one had too many flights and it was getting "old". The second one experienced a receiver signal loss and ...RIP. Both were flying very well. I would like to think that this proper Stik from GP would be even better.
StZ
05-13-2015, 03:26 PM
#8
Senior Member
My Feedback: (-1)
Join Date: Jun 2008
Location: Pomeroy,
OH
Posts: 182
Likes: 0
Received 0 Likes
on
0 Posts
I Have a great planes 40 stick with a 46 fx fly's great! Balanced mine right on the main spar.Four cell pack right behind the servo tray. Low rates by the book. High rates as much as I could get with out binding. On her maiden I did a roll on takeoff that's how well it fly's just felt right! The reason I got this plane was to fly out of small fields. I can fly it were I wouldn't dare fly my big stuff. Lol
05-14-2015, 04:16 AM
#9
Thread Starter
Join Date: Jun 2010
Location: RIO, GREECE
Posts: 94
Likes: 0
Received 0 Likes
on
0 Posts
I Have a great planes 40 stick with a 46 fx fly's great! Balanced mine right on the main spar.Four cell pack right behind the servo tray. Low rates by the book. High rates as much as I could get with out binding. On her maiden I did a roll on takeoff that's how well it fly's just felt right! The reason I got this plane was to fly out of small fields. I can fly it were I wouldn't dare fly my big stuff. Lol
Has anyone put flaps on these planes?
05-14-2015, 04:53 AM
#10
Senior Member
My Feedback: (-1)
Join Date: Jun 2008
Location: Pomeroy,
OH
Posts: 182
Likes: 0
Received 0 Likes
on
0 Posts
My buddy was flying his one day and he was a new pilot at the time. We see something fall off the plane that I built lol. So he passes the radio to me and I make a slow low pass over the runway and see the main landing gear has falling off. Oops make sure to use locktight! I lined up with the runway and greesed it best landing I ever had. No damage at all this plane will make you look good just a great design!
05-14-2015, 05:51 AM
#11
Thread Starter
Join Date: Jun 2010
Location: RIO, GREECE
Posts: 94
Likes: 0
Received 0 Likes
on
0 Posts
What I have done on mine is that I have removed the supplied blind nuts (I am not a great fan of blind nuts) and instead I used lock nuts. Should be OK now. Anyway a quick inspection before each flight will save me from serious troubles with the landing gear.
05-15-2015, 10:30 AM
#12
Thread Starter
Join Date: Jun 2010
Location: RIO, GREECE
Posts: 94
Likes: 0
Received 0 Likes
on
0 Posts
Following your suggestion, I will also mount the fuel tank on the CoG. However I would like to ask you what is the length of your fuel lines. Mine come up to 7.87 inches up to the remote needle valve and another 4 inches up to the carb inlet. These seem to be quite long fuel lines. Will there be problems with the fuel supply?
Let me know what you have done.
Thx
Let me know what you have done.
Thx
05-16-2015, 12:19 AM
#13
My Feedback: (13)
Hay StZ,
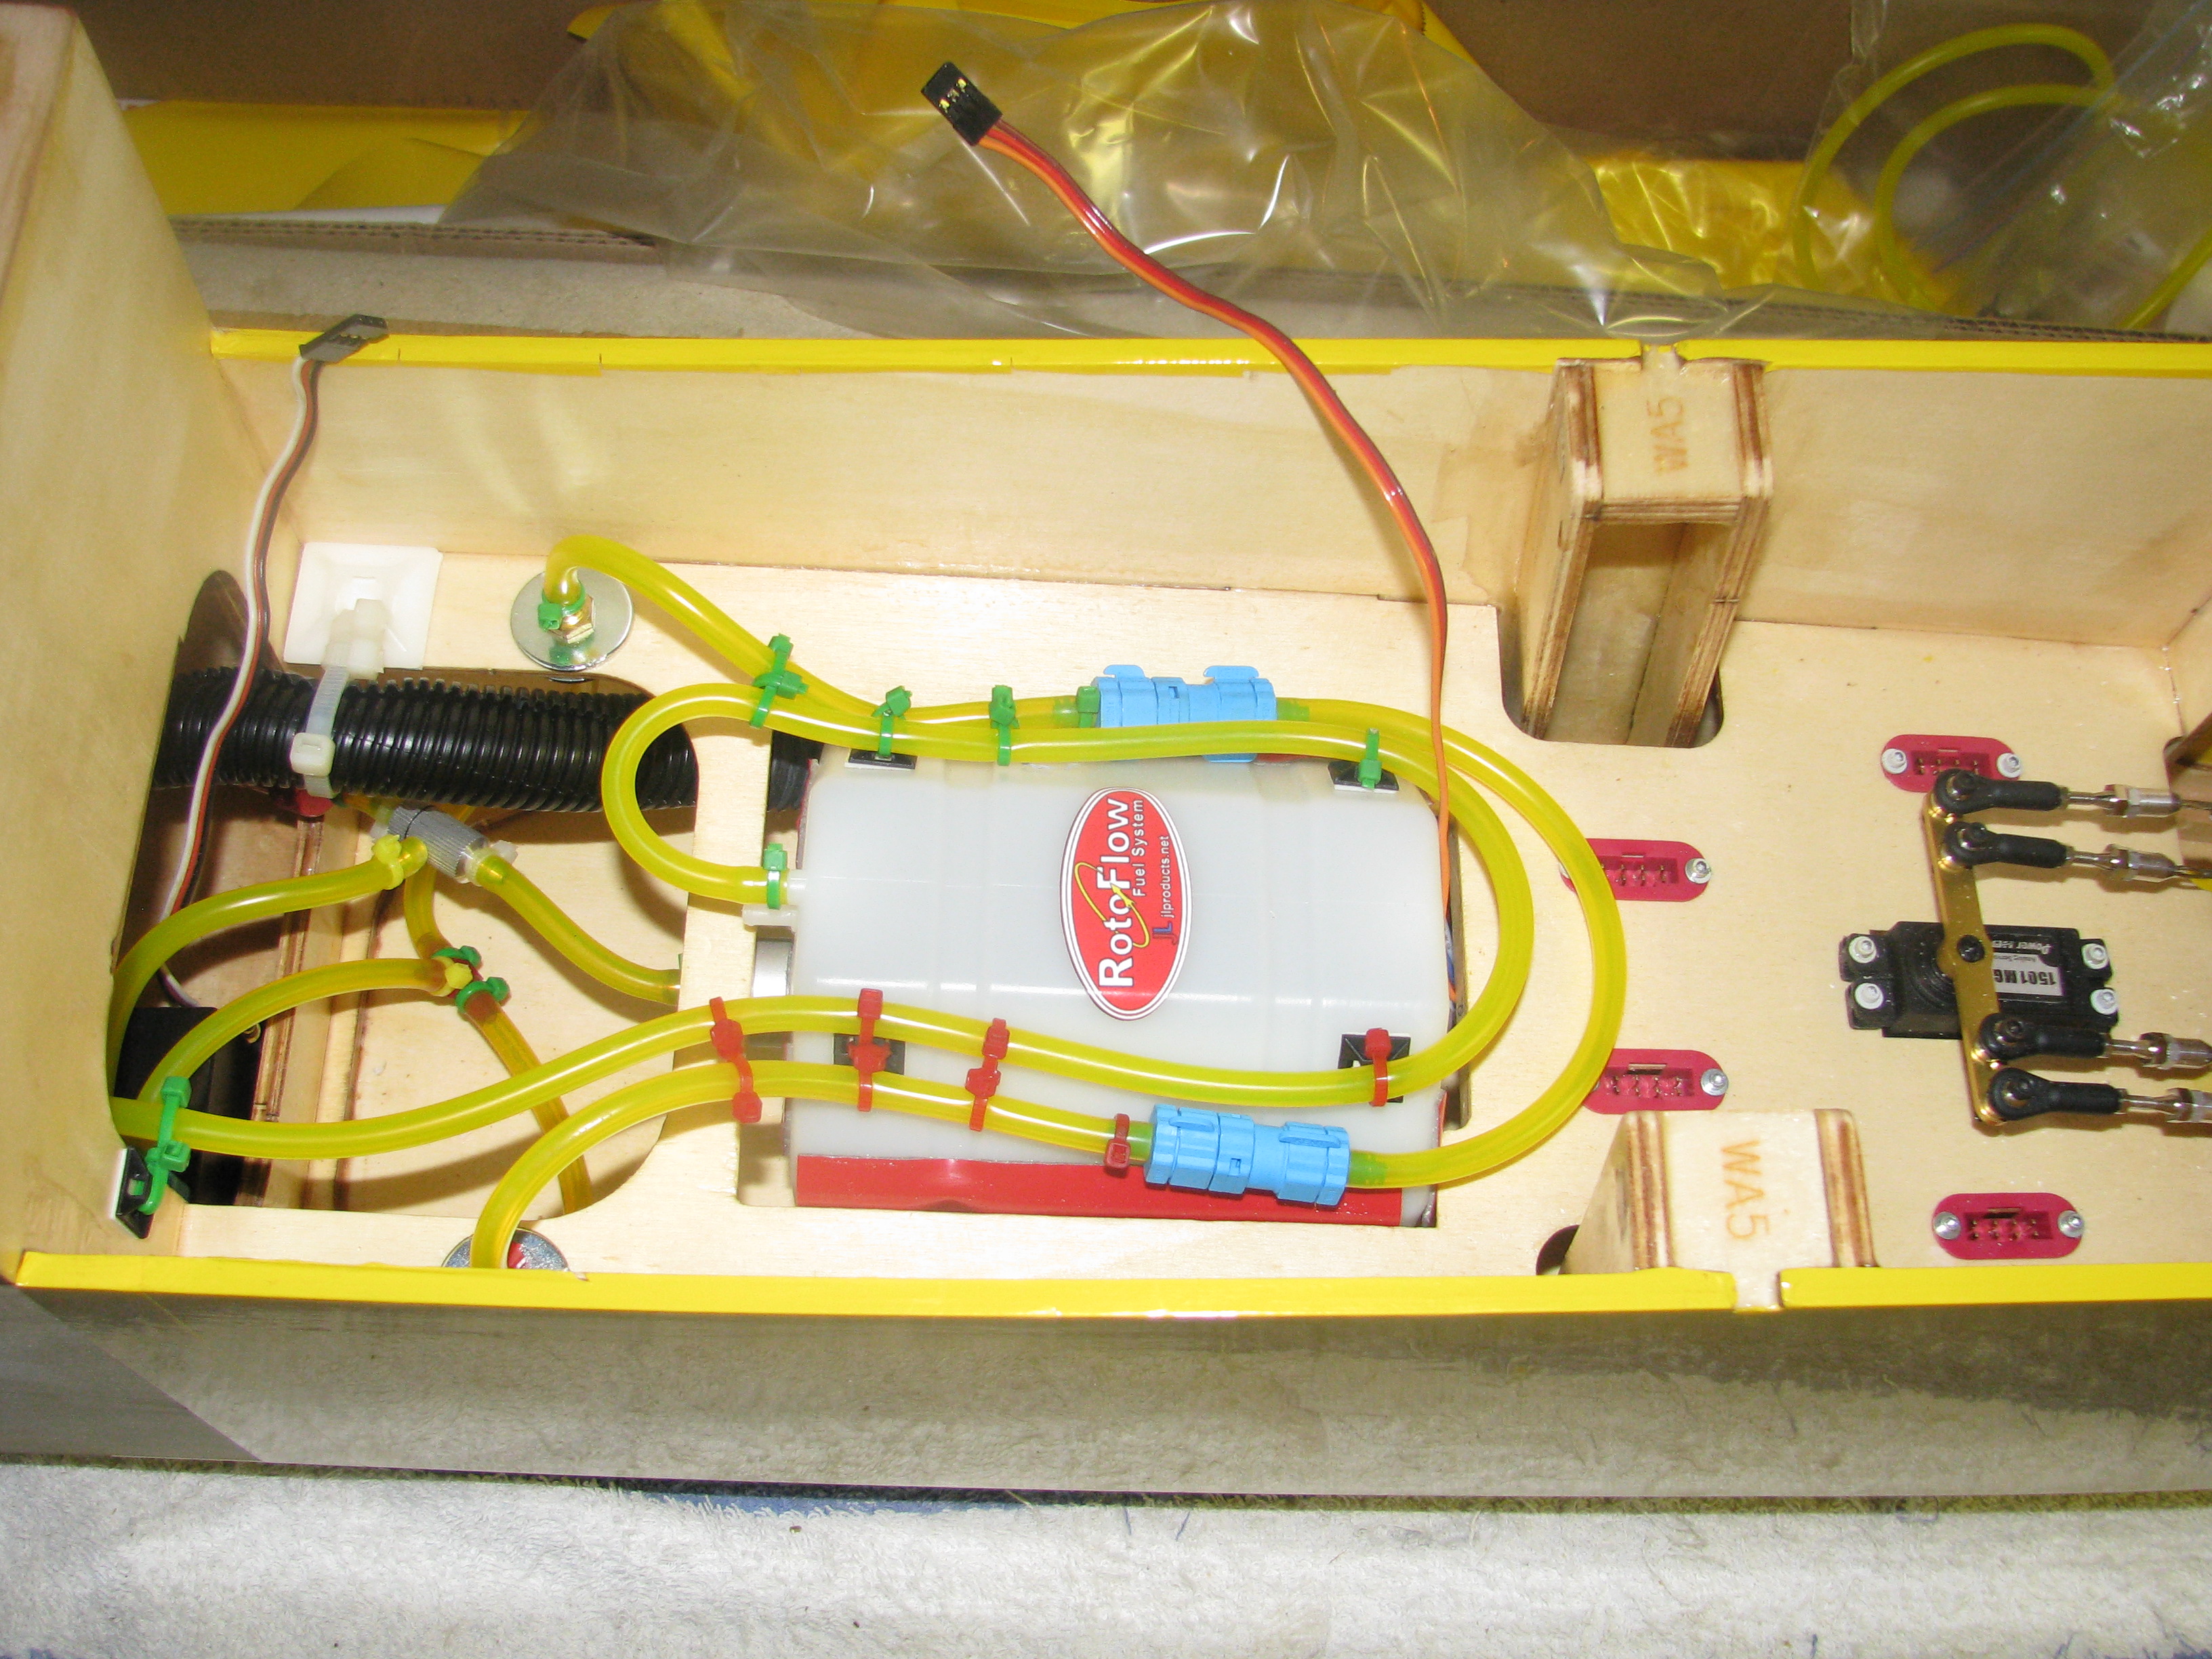
I had a gas engine in my model, but if your using a glow engine, placing your fuel tank over the CG is not a good idea. The fuel draw may be way to much for your glow engine. Gas engine carbs are a pressure type carb, with a built in fuel pump, so I am able to place the fuel tank anywhere I wanted. The RCG 20cc gas engine is a perfect fit to the model, and my RCG 20cc gas engine was the engine model that bolted up to a standard type glow engine mount. Just pick the right mount for the gas engine your using. If you use a gas engine or large glow engine, you can use the main landing gear for the Large GP Big Stick. The main landing gear is under $20.00 from Tower and works great on the .60~.90 Big Stick-I used 3-1/2" wheels for the mail landing gear. All my ugly stick type models are tail draggers, so you will need to use a nice tough tail wheel for your model. Its a easy modification to do, so don't be intimidated to do the modification. Make sure you place an extra piece of 1/8" light ply to support the tail wheel assembly on the bottom of the fuselage. It does not have to be to long...just enough so you can have some justice to support the tail wheel assembly.
http://www3.towerhobbies.com/cgi-bin...?&I=LXRWW9&P=7
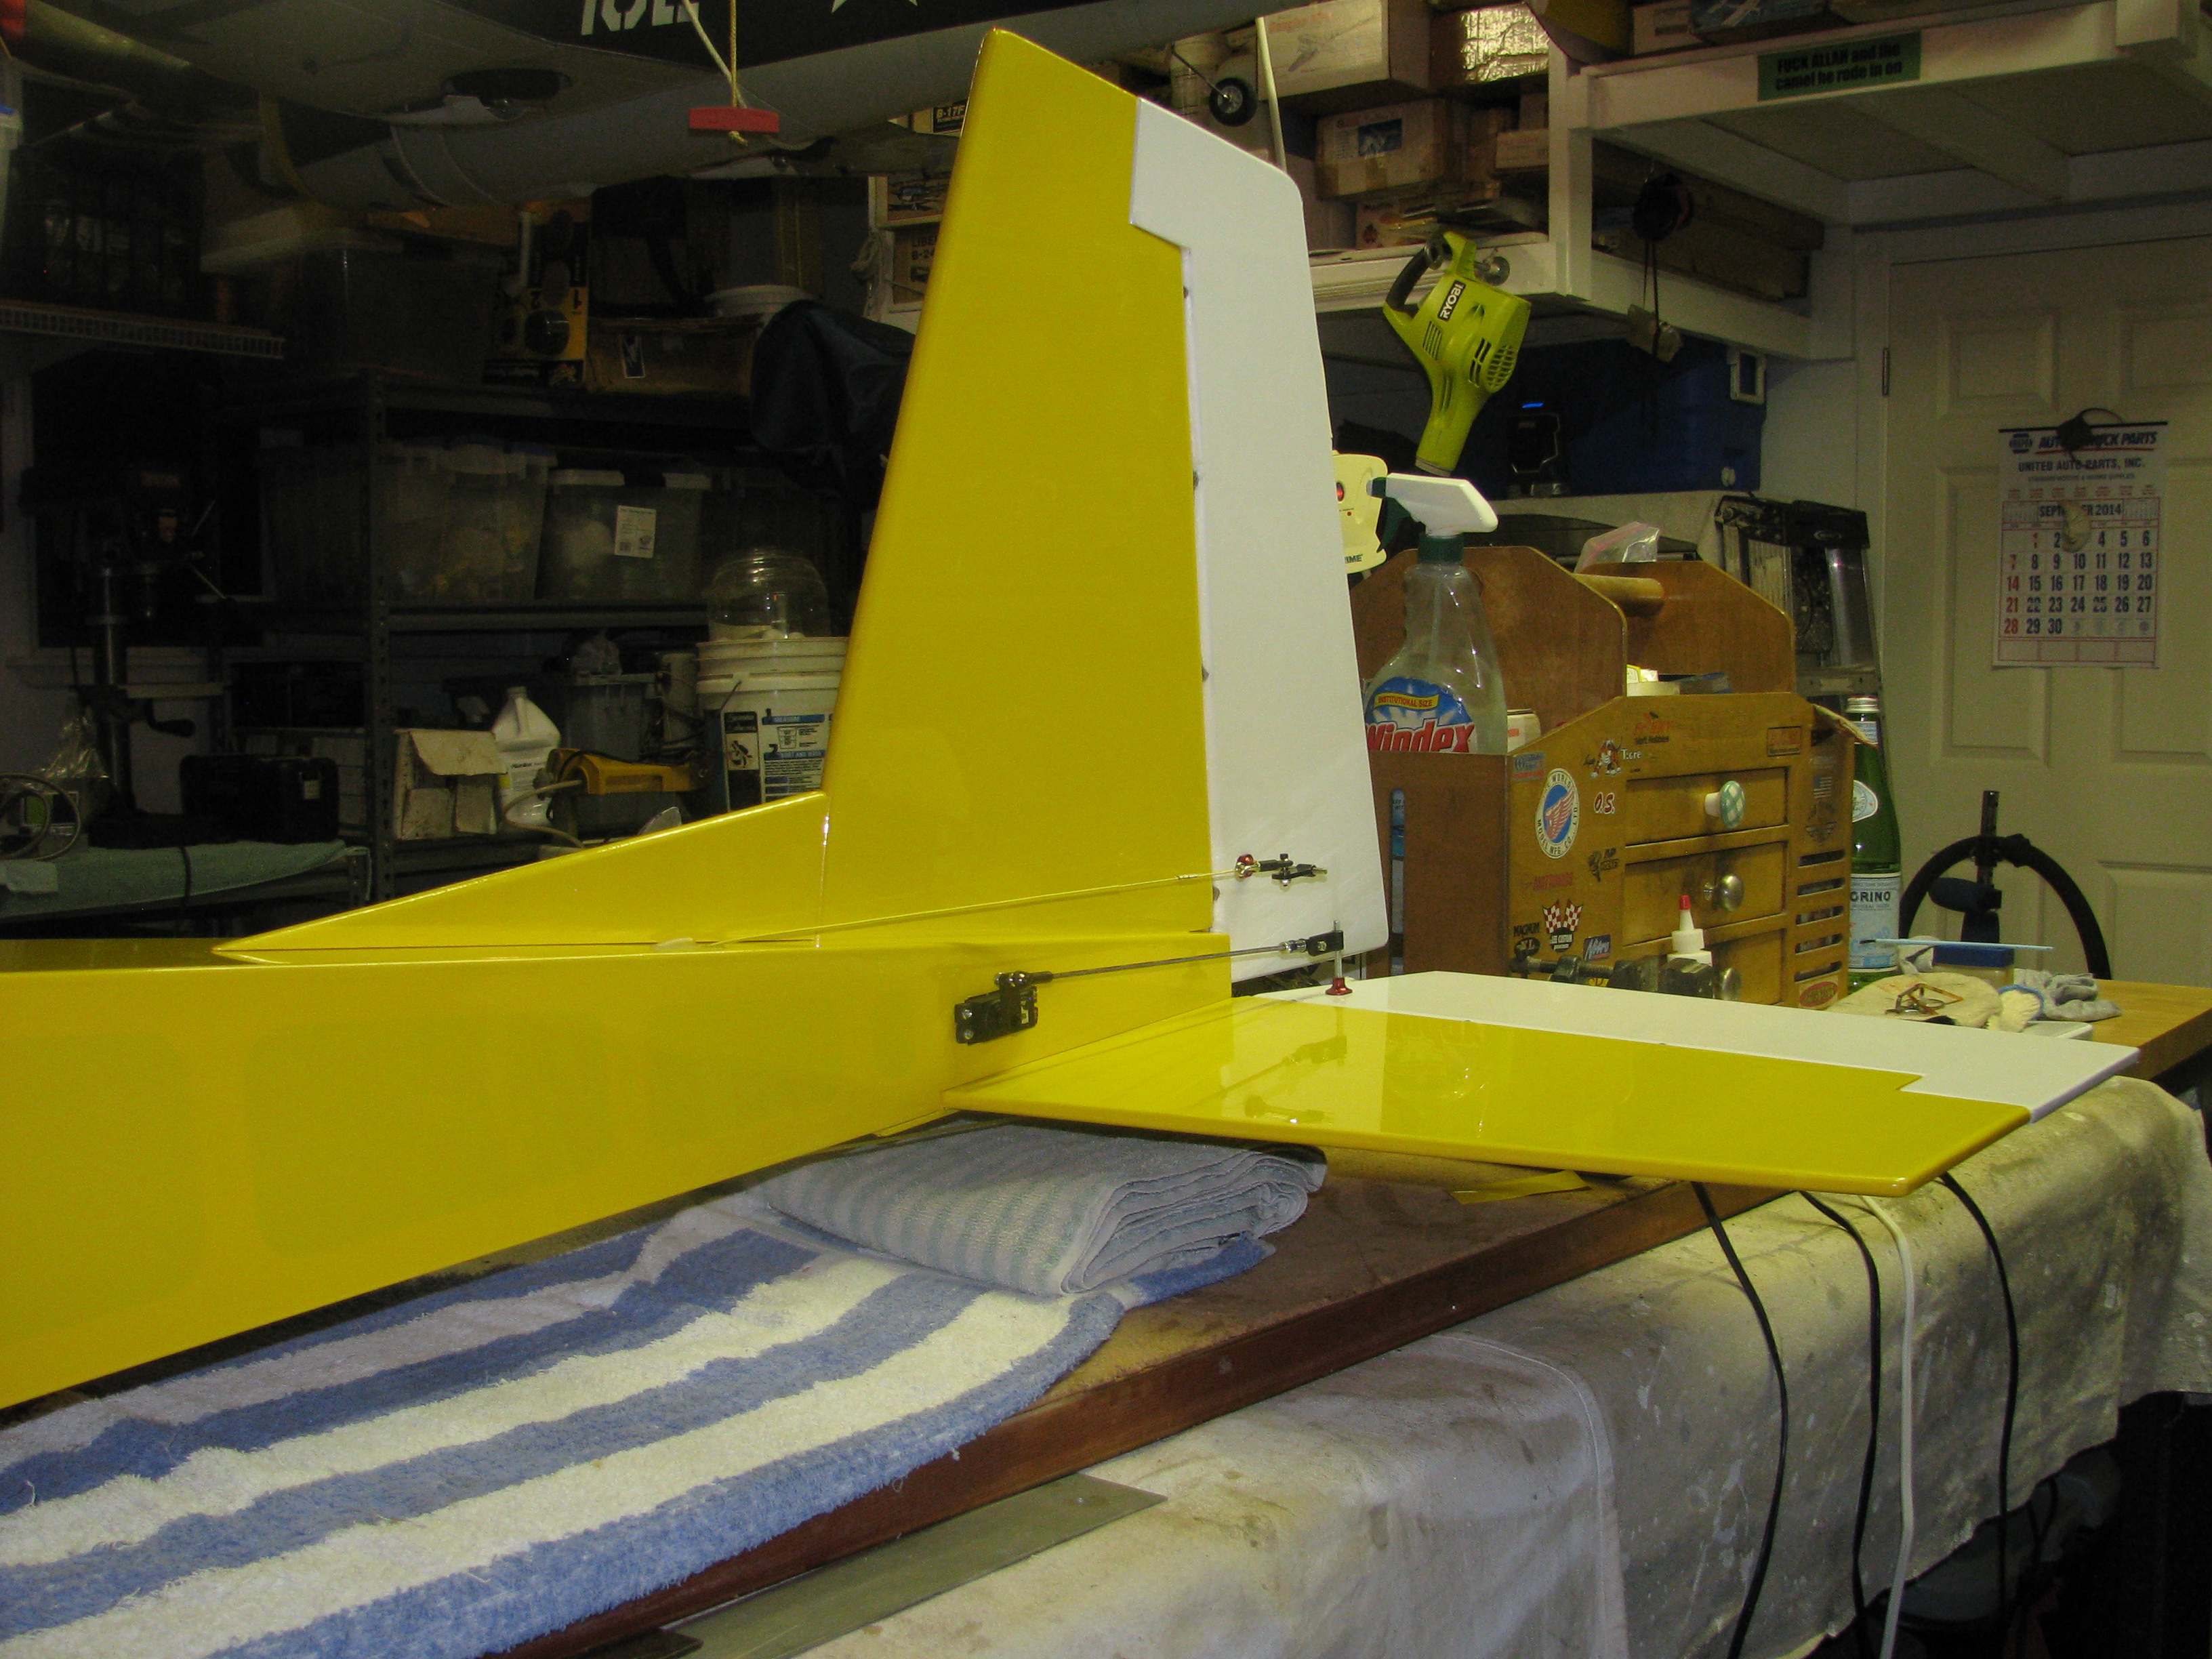
Since I had a 20cc gas engine in my model...it built nose heavy...so I placed both my rudder servo and elevator servo aft in the tail area, just forward of the leading edge of the horizontal stabilizer. I made a nice 1/8" plywood plate to support the servo...I used good aircraft grade ply...not light ply, and cut a hole for the servo in the plywood and enough over lap to give the servo a nice support. I ran one control rod to the elevator, with a pull on the elevator horn, for up elevator. I always pull for up, with the elevator horn on the top of the elevator...not on the bottom. For the rudder servo, run one push rod to the rudder itself and run a second push rod under the fuselage to the tail wheel for steering control. The steering push rod can have a few bends in it and it will still work just great. I use a larger control arm on the rudder servo to reach under the fuselage for tail wheel steering. It works like a charm, is simple to adjust and though I'll admit it does not have the best appearance...just remember...this is an UGLY STICK...not a Pretty Stick.
The above is the tail wheel assembly work like a charm and look kind of scale. I've yet to bust one of these units...and believe me...I abuse the heck out of my landing gear.
Also I highly suggest you beef up the TAIL OF THE AIRFRAME. From about two inches forward of the horizontal stabilizer, aft all the way to the end of the fuselage, I placed high quality 1/64 ply, on all four sides. I removed the covering first and removed just enough covering to lay my 1/64 ply on the airframe. Then I just used thinned epoxy to fuel proof the 1/64th ply. If you go with a larger engine...its a must do modification. Do this modification before you epoxy on the rudder and stabilizer, for doing it first is much easier. If you don't do this modification...eventually this area will crack and you will lose the model. The latter GP Big Sticks all have this issue...but the earlier kits were ok, not the last couple of series runs of this airframe. The balsa used now is just to soft for the fuselage in my opinion.
With a 20cc gas engine in the model it will clear the runway, with half Flaperons in less then three feet, then go vertical clean out of sight. The vertical presences is amazing even at 10#'s and it will accelerate in the vertical too. And the best part of all of this...this model will glide for ever, dead stick.
I've built from kits and ARF's, Ugly Sticks for over 40 years and its the most fun model I've ever flown. Its the most predictable model I've ever had my hands on, and nothing I've ever flown, will take off or land so sweet. Its not the most aerobatic model ever designed, but with some practice...will fly well...very well indeed.
Let me know if you need any more help...
Soft landings Always,
Bobby of Maui
I had a gas engine in my model, but if your using a glow engine, placing your fuel tank over the CG is not a good idea. The fuel draw may be way to much for your glow engine. Gas engine carbs are a pressure type carb, with a built in fuel pump, so I am able to place the fuel tank anywhere I wanted. The RCG 20cc gas engine is a perfect fit to the model, and my RCG 20cc gas engine was the engine model that bolted up to a standard type glow engine mount. Just pick the right mount for the gas engine your using. If you use a gas engine or large glow engine, you can use the main landing gear for the Large GP Big Stick. The main landing gear is under $20.00 from Tower and works great on the .60~.90 Big Stick-I used 3-1/2" wheels for the mail landing gear. All my ugly stick type models are tail draggers, so you will need to use a nice tough tail wheel for your model. Its a easy modification to do, so don't be intimidated to do the modification. Make sure you place an extra piece of 1/8" light ply to support the tail wheel assembly on the bottom of the fuselage. It does not have to be to long...just enough so you can have some justice to support the tail wheel assembly.
http://www3.towerhobbies.com/cgi-bin...?&I=LXRWW9&P=7
Since I had a 20cc gas engine in my model...it built nose heavy...so I placed both my rudder servo and elevator servo aft in the tail area, just forward of the leading edge of the horizontal stabilizer. I made a nice 1/8" plywood plate to support the servo...I used good aircraft grade ply...not light ply, and cut a hole for the servo in the plywood and enough over lap to give the servo a nice support. I ran one control rod to the elevator, with a pull on the elevator horn, for up elevator. I always pull for up, with the elevator horn on the top of the elevator...not on the bottom. For the rudder servo, run one push rod to the rudder itself and run a second push rod under the fuselage to the tail wheel for steering control. The steering push rod can have a few bends in it and it will still work just great. I use a larger control arm on the rudder servo to reach under the fuselage for tail wheel steering. It works like a charm, is simple to adjust and though I'll admit it does not have the best appearance...just remember...this is an UGLY STICK...not a Pretty Stick.
The above is the tail wheel assembly work like a charm and look kind of scale. I've yet to bust one of these units...and believe me...I abuse the heck out of my landing gear.
Also I highly suggest you beef up the TAIL OF THE AIRFRAME. From about two inches forward of the horizontal stabilizer, aft all the way to the end of the fuselage, I placed high quality 1/64 ply, on all four sides. I removed the covering first and removed just enough covering to lay my 1/64 ply on the airframe. Then I just used thinned epoxy to fuel proof the 1/64th ply. If you go with a larger engine...its a must do modification. Do this modification before you epoxy on the rudder and stabilizer, for doing it first is much easier. If you don't do this modification...eventually this area will crack and you will lose the model. The latter GP Big Sticks all have this issue...but the earlier kits were ok, not the last couple of series runs of this airframe. The balsa used now is just to soft for the fuselage in my opinion.
With a 20cc gas engine in the model it will clear the runway, with half Flaperons in less then three feet, then go vertical clean out of sight. The vertical presences is amazing even at 10#'s and it will accelerate in the vertical too. And the best part of all of this...this model will glide for ever, dead stick.
I've built from kits and ARF's, Ugly Sticks for over 40 years and its the most fun model I've ever flown. Its the most predictable model I've ever had my hands on, and nothing I've ever flown, will take off or land so sweet. Its not the most aerobatic model ever designed, but with some practice...will fly well...very well indeed.
Let me know if you need any more help...
Soft landings Always,
Bobby of Maui
05-16-2015, 01:08 AM
#14
Join Date: Nov 2013
Location: Victoria AUSTRALIA
Posts: 82
Likes: 0
Received 0 Likes
on
0 Posts
StZ, Bob is right regards your tank location. If you have a glow engine keep your tank up to the firewall.
Been flying Stiks of various sizes on and off for around 40yrs too. (40yrs? that went quick!)
Mine are scratch built not GP hope I'm not off topic.
Last one around 80" with RCGF 20 and yes it was a blast.
Latest a bit larger with DLE 30.
Whatever size, they are great to fly, and as mentioned slow down for great landings.
Design 50yrs old now, thanks Phil Kraft for a great model!
05-16-2015, 08:46 AM
#15
Thread Starter
Join Date: Jun 2010
Location: RIO, GREECE
Posts: 94
Likes: 0
Received 0 Likes
on
0 Posts
I am out of my league here!!! Both Bob and lean-run have been flying for over 40 years now! What can I say... Thanks guys for your great advice.
Concerning the Stiks now. By the way is it Stik or Stick?
Fuel tank will be placed on its usual place in order to avoid fuel starvation problems. I will be using a OS 91FX and I will have to install a larger landing gear. Tower has the LG for $27 but I think I will make my own since I do have some 4mm (0.16") aluminum strip at an inch width. Will weld a larger plate for securing it under the fuse to withstand heavier landings.
I have already made it a tail dragger by passing the gear wire through the elevator and epoxying the wire between the horn plastics. What I have not done is to make a stronger support under the fuse. I will see how it goes and will make the modification later on. Bob, the tail wheel link that you 've posted seems to be a great assembly and i will definitely have it in mind for the future.
As I have mentioned the engine to be used will be .91, but since I have had already 3 spad stiks, (I gave one away as a present), I will be very tempted to go ahead and make a Big stik suitable for a 20-30cc gas engine. The model is easy enough to make and I enjoy a full model build from scratch rather than an ARF. I will have in mind all the suggestions mentioned in previous posts. Lean -run what wing span has your DLE 30 stik?
Since my model already had a broken tail I had it fixed before posting this thread. I was not aware of the issue that these stiks have but I think i made a strong repair to the tail. I will keep an eye on the balsa around the tail to avoid serious issues and to fix it better when necessary.
I am thinking of splitting the ailerons and installing flaps. However I do not know what percentage of the ailerons, flaps should be. Is it 30%, 40% or what? Any suggestions?
05-16-2015, 11:52 AM
#17
My Feedback: (13)
Hay StZ,
To be honest the fire wall on my last stick (stik...who cares...) was not modified to hang on to the RCG 20cc gas engine. I did coat the inside of the fuel tank bay with thinned epoxy to keep things tight and it work well, until the ground jumped up and disabled...reknitted my airframe...Grrrrr ( I just hate it when this happens). Since I did add fuel tank bay top hatch, I made sure I beefed up the hatch area and used six servo mounting screws to secure the hatch. I made a solid 1/8" aircraft grade plywood frame inside the fuel tank bay to support the hatch door, and the hatch door was made out of the same ply. This is important so that the stress of the power plant will not distort the forward part of the fuselage. I like a solid nose to all my Sticks, because this area gets a real pounding and if its weak...in time things will come lose in this area. Did you ever see an engine depart an airframe...I have...and on my models too, so learned a while ago to make this area nice and stiff. I will even lay in 1/32nd. aircraft grade plywood onto the sides, inside the fuel tank area to strengthen up this area of the nose.
Please take notice, that there are two kinds of plywood available to us in the hobby. Aircraft grade quality plywood and light ply. Most of today's ARF's are built with light ply...and not a good selection in my opinion, but cheap to buy. I use light ply in some applications, but I buy and use mostly "aircraft quality plywood." What I mean by "aircraft quality plywood" is the stuff real man carrying aircraft are made of. The difference in price is a bit more, but in strength..."aircraft quality plywood" is hands down, triple the strength for the thickness, then light ply. I buy my plywood from Balsa U.S.A. and I have used them for my plywood and balsa purchases for many years. If you ever see a larger model built of light ply have a hard landing, most the times...the damage done is near total. Usually the landing gear is ripped out and the fuselage is seriously damaged. If you kit build or build from plans...the same model and can select proper ply wood, most the time all you will do is spread the landing gear a bit with little or no damage. In the years past, there were no ARF's in the hobby and every one built from kits or scratch built from plans. But today that is not the way most fly. Where light plywood will have three layers to the plywood...aircraft quality plywood will have five or seven layers of wood, with better wood too. Asia light plywood is no were near the strength of quality aircraft grade plywood and is made out of softer wood too. Quality aircraft grade plywood 1/64" thick has three layers, 1/8" five layers and 1/4" up to seven layers.
No need to split the ailerons for flaps...go with flaperons. If you have a computer radio its a simple mix and they work like a charm...and in the air...you will have a much more responsive Ugly Stick, with full span aileron action. I set my flaperon option to three settings. "zero" flaps, 15% and 30%. With full flaps, make sure your ailerons have full travel. If you make full flaps go down to far, with flaperons, you will not get enough down movement to the aileron down deflection. You do not need a lot of flap to get a real reaction to your Ugly Stick.
Another thing I use is "differential ailerons." That is more up aileron then down aileron, with aileron application and this helps with adverse yaw issues. While were at it...use a bit of CAR, coupled aileron and rudder. You mix in a bit of rudder with aileron movement and this helps cancel out adverse yaw action with aileron application. If you do not know how to mix this with your transmitter, either find a more skilled pilot to help you mix your Tx (transmitter), or go to the manufacturers web site and call some one that can dial this in for you. Most all modern Tx's can do this today...40 years ago, only Kraft with their Signature series Tx's had this option available to the hobbyist. Understand...you need a bit of experience to know how much is good...so maybe in the beginning, its better to keep things simple for yourself. Its going to take some time to understand how a model flies for you and what you like...but its a much more complex and interesting hobby then most folks understand in the beginning. Being a retried military and commercial pilot...I've been in aviation all my life and at 68 years young...have knocked a few models around in my time. Your choice of an Ugly Stick for a leaning model is a great choice in my opinion.
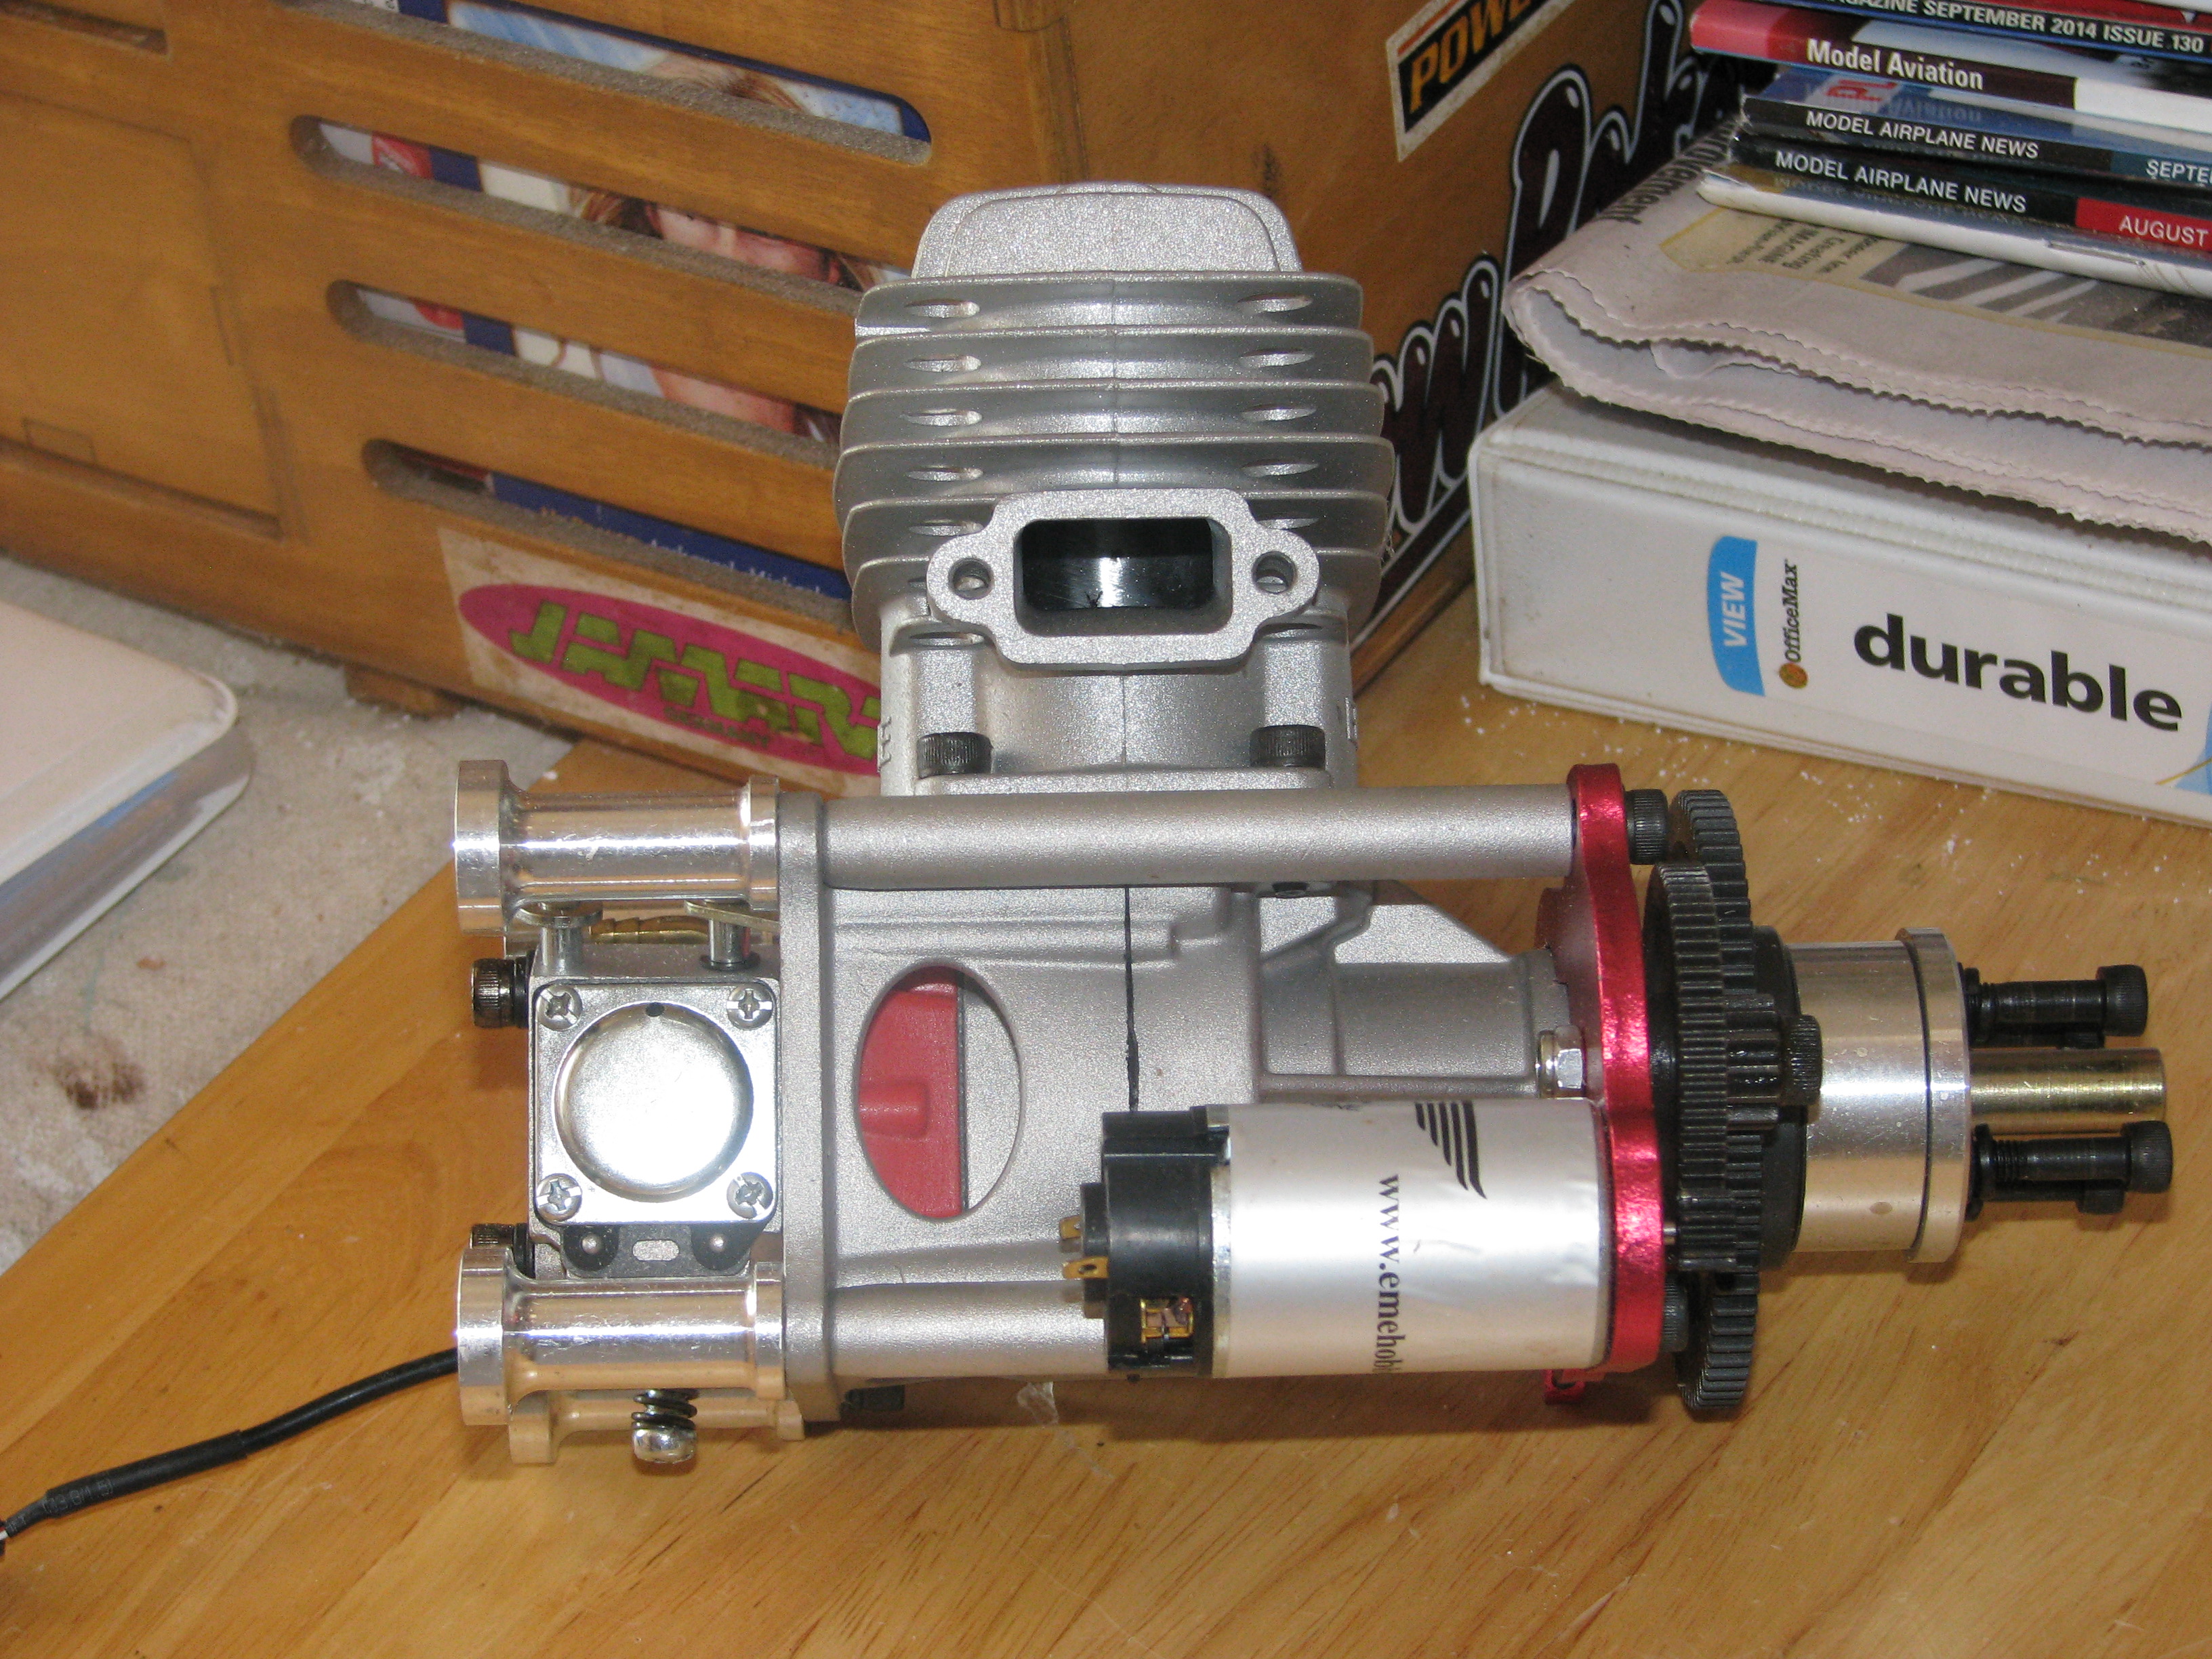
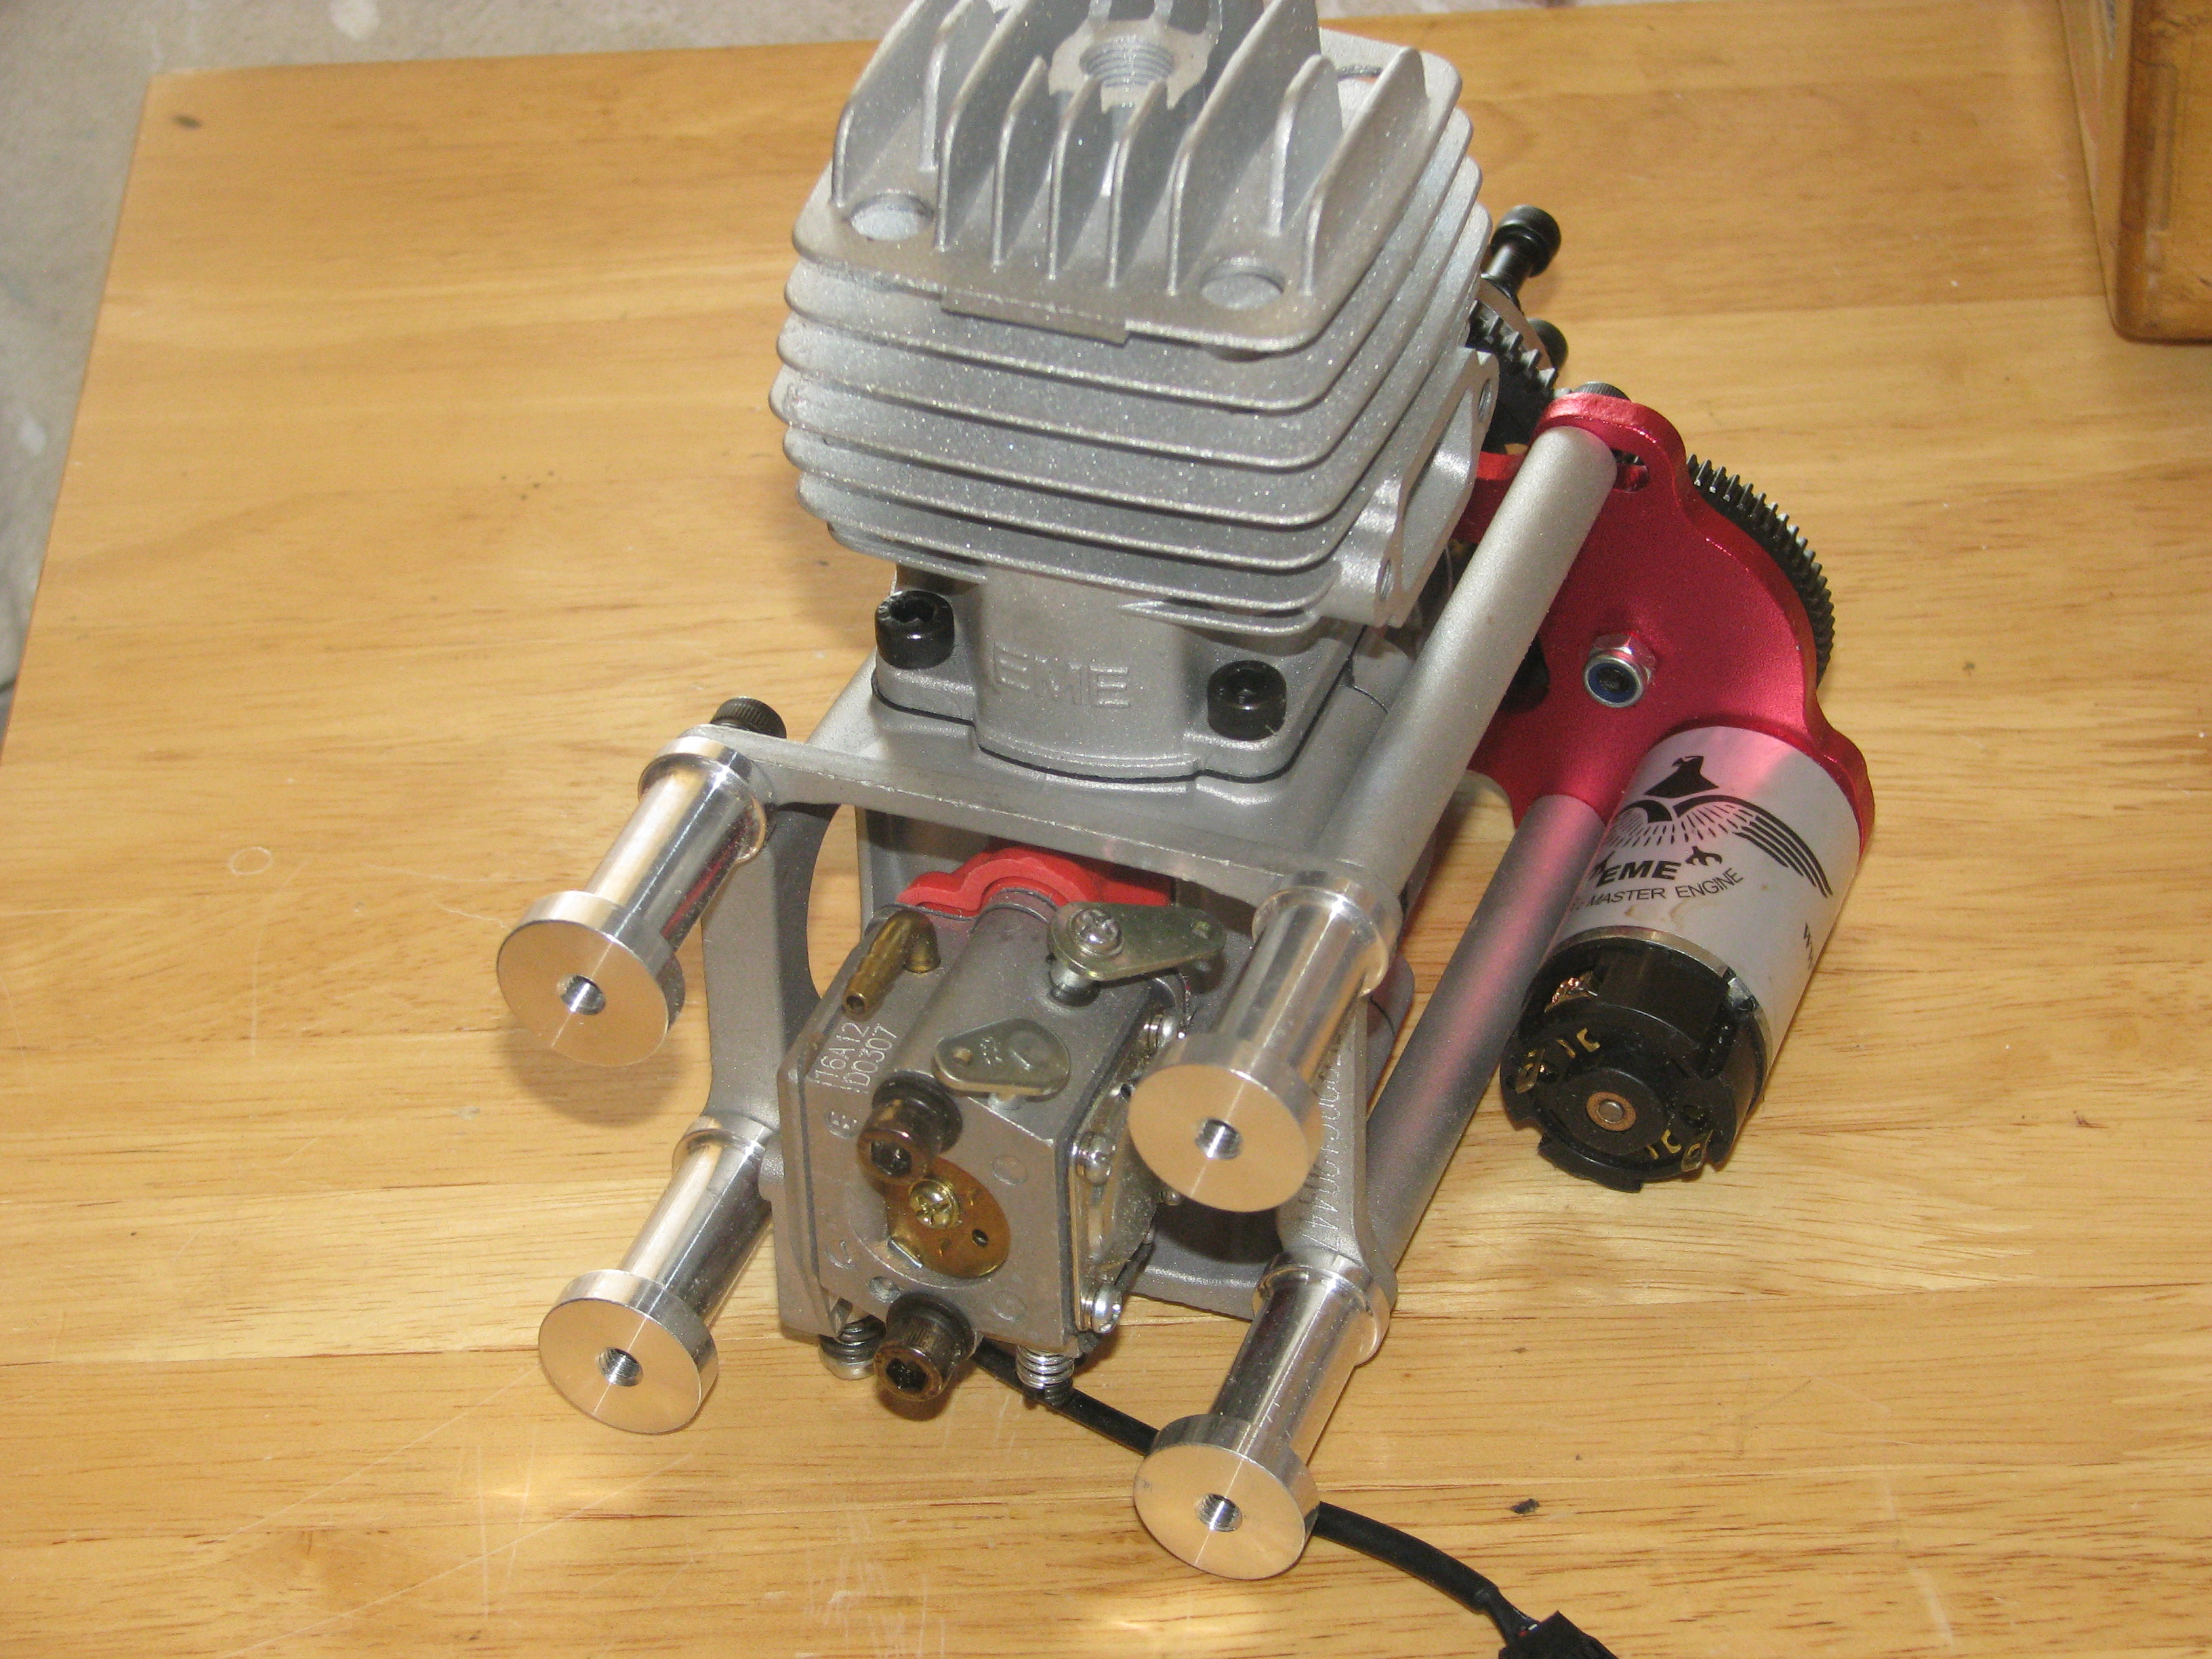
My current kit build is an AMR Giant Ugly Stick Twin. It has a 106" with span, is for twin 35cc gas engines and the largest Ugly Stick build for me. The elevator was made removable for easy transportation (no matter how large your model is...you have to get it to the flying field and all I have is a VW Vanagan to do the chore). I've the fuselage built and now about to get into the wing build. The model I'm building is modified from the standard kit, but the beauty of building from a kit, or a scratch build model...You can make it into anything you want. I am installing two auto electric start EME 35cc gas engines, smoke for both engines, an electronic yaw dampener, electronic twin sync for the engines and one of the more complex models for me.
Have a great time on your Ugly Stick...
Soft Landings Always,
Bobby of Maui

To be honest the fire wall on my last stick (stik...who cares...) was not modified to hang on to the RCG 20cc gas engine. I did coat the inside of the fuel tank bay with thinned epoxy to keep things tight and it work well, until the ground jumped up and disabled...reknitted my airframe...Grrrrr ( I just hate it when this happens). Since I did add fuel tank bay top hatch, I made sure I beefed up the hatch area and used six servo mounting screws to secure the hatch. I made a solid 1/8" aircraft grade plywood frame inside the fuel tank bay to support the hatch door, and the hatch door was made out of the same ply. This is important so that the stress of the power plant will not distort the forward part of the fuselage. I like a solid nose to all my Sticks, because this area gets a real pounding and if its weak...in time things will come lose in this area. Did you ever see an engine depart an airframe...I have...and on my models too, so learned a while ago to make this area nice and stiff. I will even lay in 1/32nd. aircraft grade plywood onto the sides, inside the fuel tank area to strengthen up this area of the nose.
Please take notice, that there are two kinds of plywood available to us in the hobby. Aircraft grade quality plywood and light ply. Most of today's ARF's are built with light ply...and not a good selection in my opinion, but cheap to buy. I use light ply in some applications, but I buy and use mostly "aircraft quality plywood." What I mean by "aircraft quality plywood" is the stuff real man carrying aircraft are made of. The difference in price is a bit more, but in strength..."aircraft quality plywood" is hands down, triple the strength for the thickness, then light ply. I buy my plywood from Balsa U.S.A. and I have used them for my plywood and balsa purchases for many years. If you ever see a larger model built of light ply have a hard landing, most the times...the damage done is near total. Usually the landing gear is ripped out and the fuselage is seriously damaged. If you kit build or build from plans...the same model and can select proper ply wood, most the time all you will do is spread the landing gear a bit with little or no damage. In the years past, there were no ARF's in the hobby and every one built from kits or scratch built from plans. But today that is not the way most fly. Where light plywood will have three layers to the plywood...aircraft quality plywood will have five or seven layers of wood, with better wood too. Asia light plywood is no were near the strength of quality aircraft grade plywood and is made out of softer wood too. Quality aircraft grade plywood 1/64" thick has three layers, 1/8" five layers and 1/4" up to seven layers.
No need to split the ailerons for flaps...go with flaperons. If you have a computer radio its a simple mix and they work like a charm...and in the air...you will have a much more responsive Ugly Stick, with full span aileron action. I set my flaperon option to three settings. "zero" flaps, 15% and 30%. With full flaps, make sure your ailerons have full travel. If you make full flaps go down to far, with flaperons, you will not get enough down movement to the aileron down deflection. You do not need a lot of flap to get a real reaction to your Ugly Stick.
Another thing I use is "differential ailerons." That is more up aileron then down aileron, with aileron application and this helps with adverse yaw issues. While were at it...use a bit of CAR, coupled aileron and rudder. You mix in a bit of rudder with aileron movement and this helps cancel out adverse yaw action with aileron application. If you do not know how to mix this with your transmitter, either find a more skilled pilot to help you mix your Tx (transmitter), or go to the manufacturers web site and call some one that can dial this in for you. Most all modern Tx's can do this today...40 years ago, only Kraft with their Signature series Tx's had this option available to the hobbyist. Understand...you need a bit of experience to know how much is good...so maybe in the beginning, its better to keep things simple for yourself. Its going to take some time to understand how a model flies for you and what you like...but its a much more complex and interesting hobby then most folks understand in the beginning. Being a retried military and commercial pilot...I've been in aviation all my life and at 68 years young...have knocked a few models around in my time. Your choice of an Ugly Stick for a leaning model is a great choice in my opinion.
My current kit build is an AMR Giant Ugly Stick Twin. It has a 106" with span, is for twin 35cc gas engines and the largest Ugly Stick build for me. The elevator was made removable for easy transportation (no matter how large your model is...you have to get it to the flying field and all I have is a VW Vanagan to do the chore). I've the fuselage built and now about to get into the wing build. The model I'm building is modified from the standard kit, but the beauty of building from a kit, or a scratch build model...You can make it into anything you want. I am installing two auto electric start EME 35cc gas engines, smoke for both engines, an electronic yaw dampener, electronic twin sync for the engines and one of the more complex models for me.
Have a great time on your Ugly Stick...
Soft Landings Always,
Bobby of Maui
Last edited by Bob Paris; 05-16-2015 at 12:04 PM.
05-16-2015, 04:23 PM
#18
Join Date: Nov 2013
Location: Victoria AUSTRALIA
Posts: 82
Likes: 0
Received 0 Likes
on
0 Posts
Hi StZ., 30cc Stik 82" span x 14.5" chord. Fus. is 2x1/4" ply lamination firewall and complete fus made from 1/8" hardware shop ply.
Not overly heavy for size but strong.
Still balances ok with elev. and rudder servos at the tail.
Good luck with future builds!
ps I use c/f landing gears on mine. Not prone to bend like allum. Lots of sizes for prop clearance.
Not overly heavy for size but strong.
Still balances ok with elev. and rudder servos at the tail.
Good luck with future builds!
ps I use c/f landing gears on mine. Not prone to bend like allum. Lots of sizes for prop clearance.
05-18-2015, 01:25 AM
#19
Thread Starter
Join Date: Jun 2010
Location: RIO, GREECE
Posts: 94
Likes: 0
Received 0 Likes
on
0 Posts
Hi Bob,
thanks for all your great info. I have carefully read all of your suggestions and I have decided to go ahead and make a fuel tank hatch so I can make the firewall stronger to avoid issues with the slightly larger engine. I might add some extra reinforcement on the other 3 sides of the fuse around this area all the way back to the servo area.
Concerning the flaps. I do own the Futaba T8FG transmitter updated to 12 channels so I will not have a problem mixing the channels to have flaperons. Although I am new to this transmitter is a complicated one to "master" coming from a simple 6EXA model.
I was under the impression that differential ailerons are used when the wing profile is NOT symmetrical. Since the stik has a fully symmetrical wing do I have to use differential ailerons? Will it make a difference? If yes how much difference between up and down (measured in degrees)?
Finally, it is an amazing model the one you are currently building! And a big one too! I hope I had the time, money and space to build something like that. I would love to see video of the maiden flight if possible.
Thanks again.
05-18-2015, 01:27 AM
#20
Thread Starter
Join Date: Jun 2010
Location: RIO, GREECE
Posts: 94
Likes: 0
Received 0 Likes
on
0 Posts
05-18-2015, 01:47 PM
#22
My Feedback: (13)
Hay StZ,
These are triple servo connector plugs, that I purchased from "Tail Dragger R/C" and allow you to plug in three servos into the fuselage with one connection. Since I have a twin engine model, with multiple servo connections...I needed to connect six servo connections from each wing half's, into the fuselage to set up the model to fly. By using two-triple servo connectors for each wing, I only had to connect four plugs to connect the wings into the fuselage...not 12 servo connectors. It cleans up the wing and fuselage connections and makes a simple chore to mount the wing. By color coating the four multiple plug connector, you will not miss connect any servo to the receiver and besides being quick and easy...it also looks kind of cool.
http://www.taildraggerrc.com/exclusi...nels-one-plug/
There are now other products out in the modeling world that will allow you to connect up to four servo's into one plug connector.
I use and highly recommend HD1501BBMG servo's. I buy mine from Troy Built Models and the last time I purchased these servo's from them, I got them at less then $13.00 a servo. I've used these servo's for years and I've never had one fail yet. These are powerful with an excess of 230"/#'s of torque with 6 volts. These servo's are the same size as any standard servo, in most cases, are cheaper then most standard servo's from any radio manufacturer and are the best servo deal I can find. They are reliable, standard size, so fit into most all model applications and work. I only use five cell nickel batteries in my models now and all my models fly with HD servo's and nickel batteries.
http://www.troybuiltmodels.com/items/HD-1501MG.html
Soft Landings Always,
Bobby of Maui
Last edited by Bob Paris; 05-18-2015 at 01:55 PM.
05-18-2015, 09:54 PM
#23
Thread Starter
Join Date: Jun 2010
Location: RIO, GREECE
Posts: 94
Likes: 0
Received 0 Likes
on
0 Posts
Bob,
These servo connector plugs are very good. I had a look at taildraggerrc and they have a few nice products. Good to have them in mind.
The Power HD servos are very popular and they have very good reputation for reliability. Excellent value for money too. I do use them in my models also.
Thanks again for all the info.
05-18-2015, 10:35 PM
#24
My Feedback: (13)
Hay StZ,
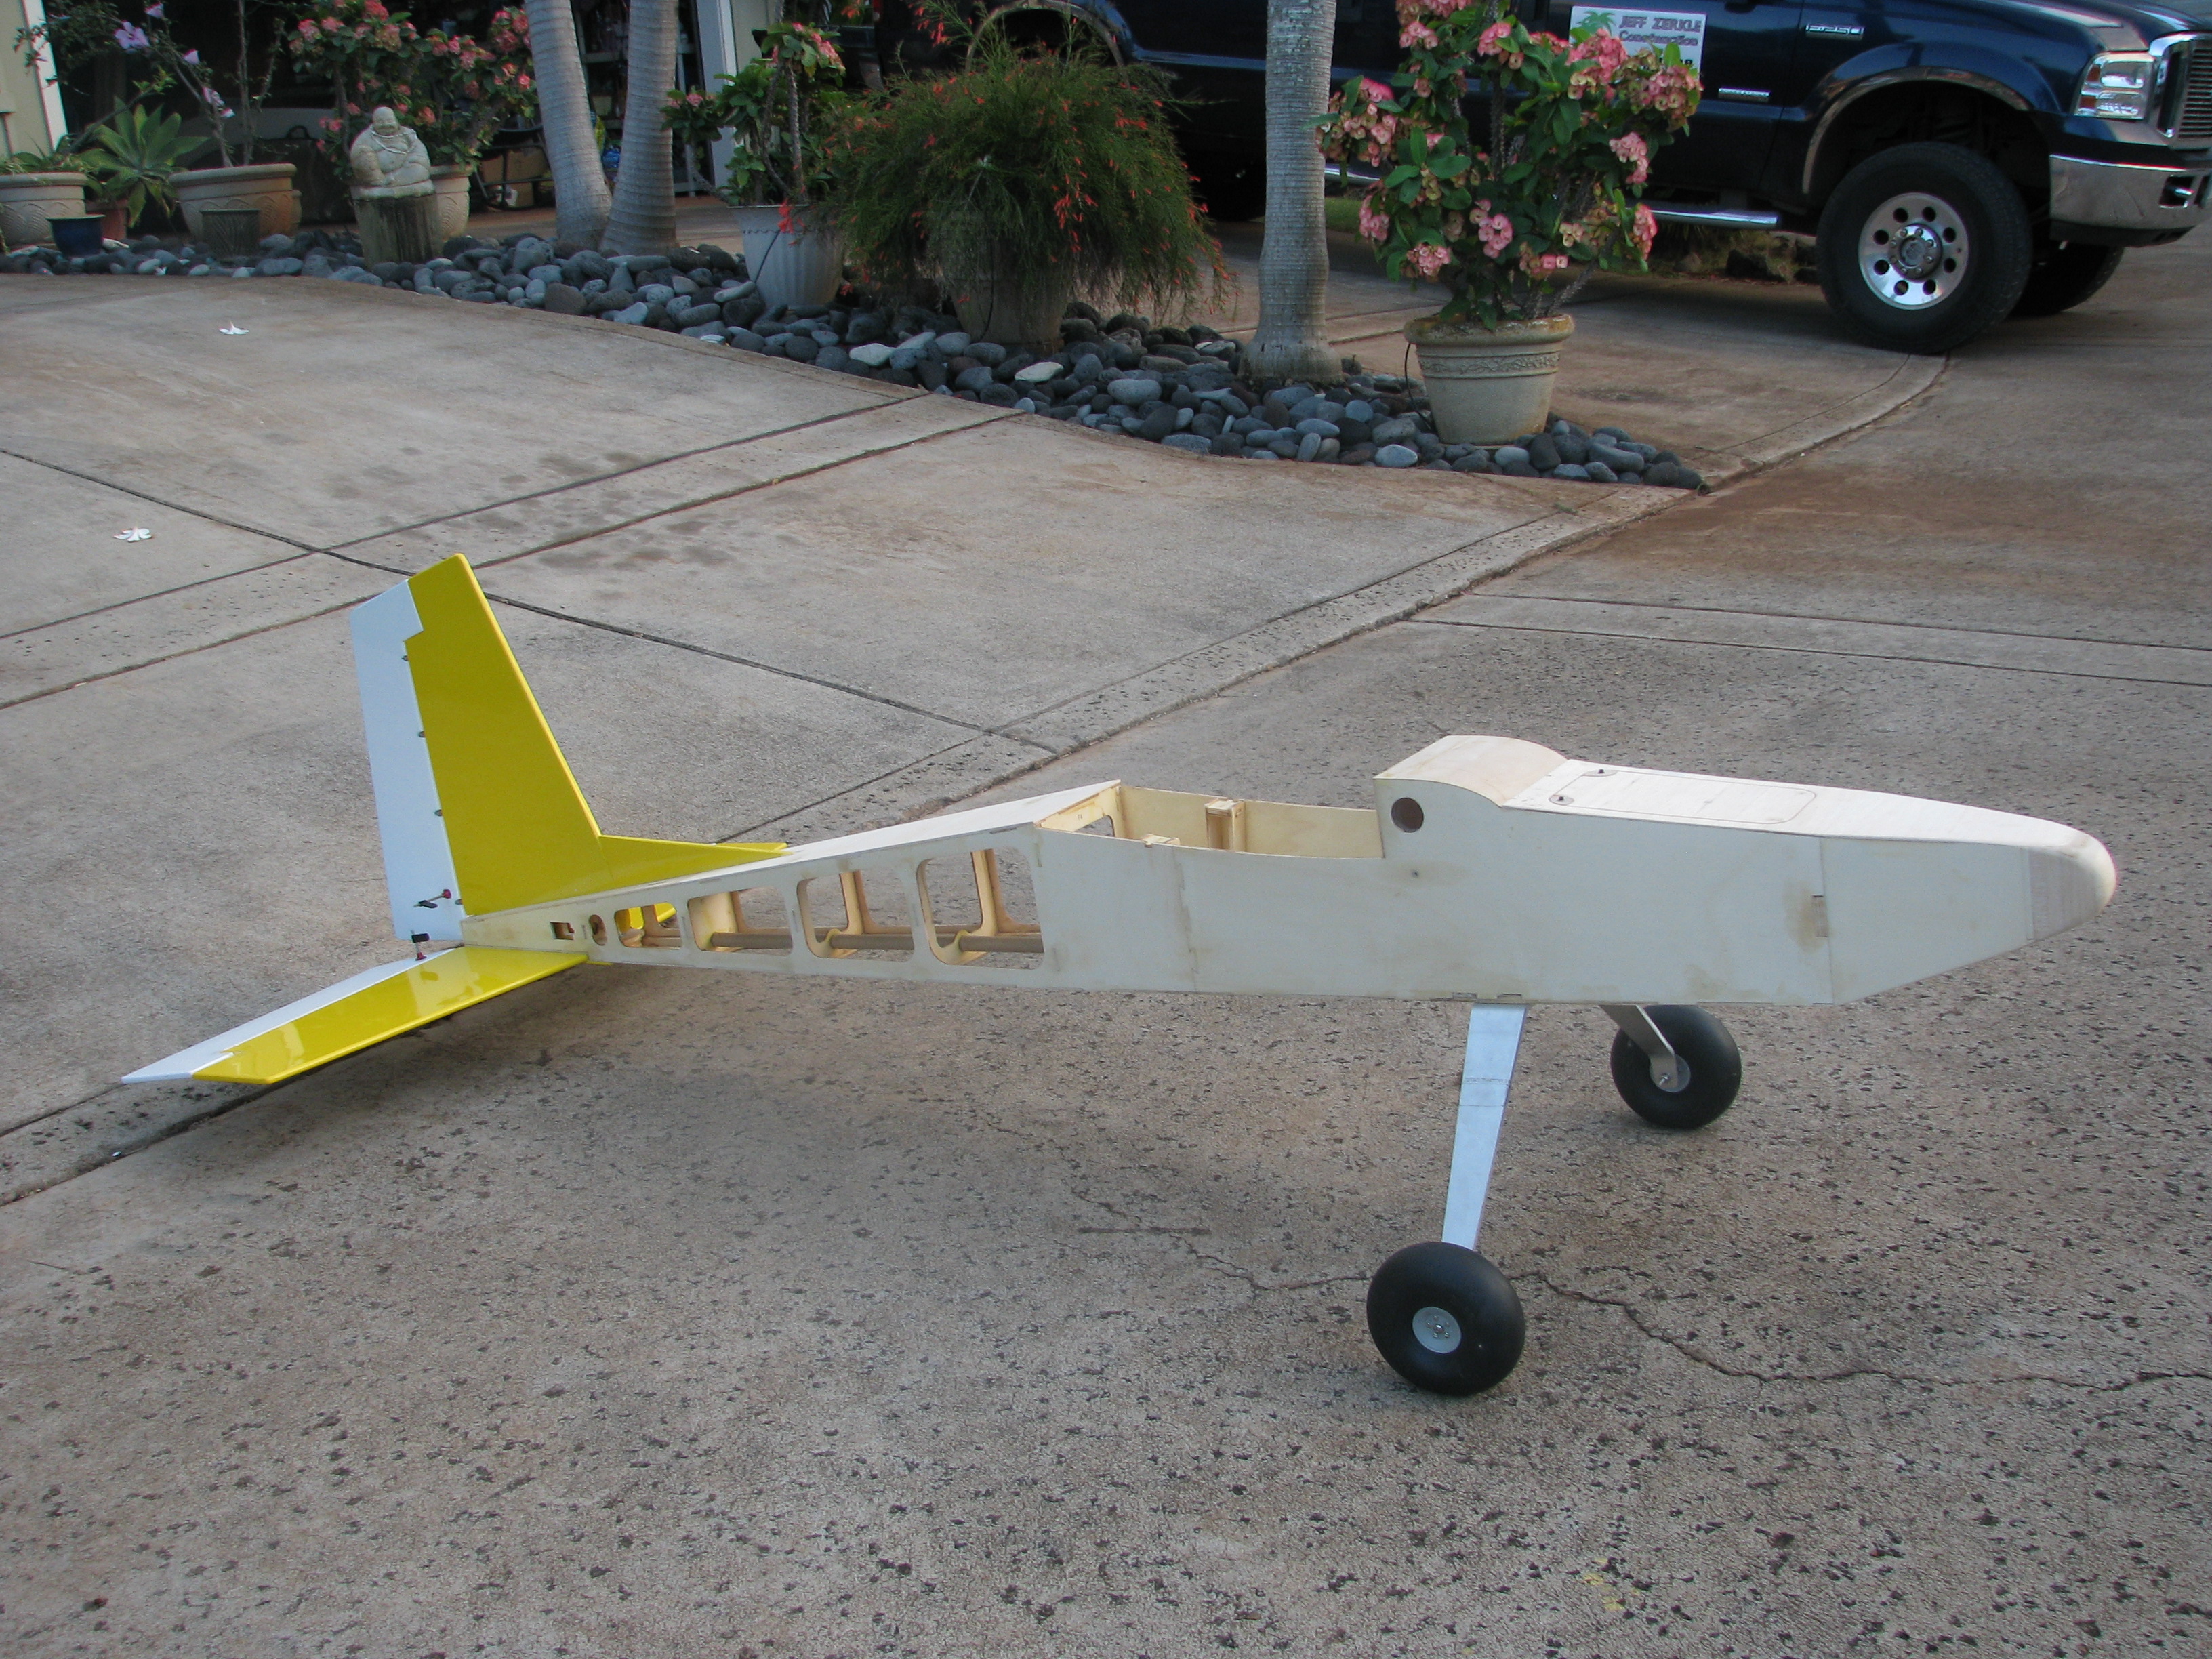
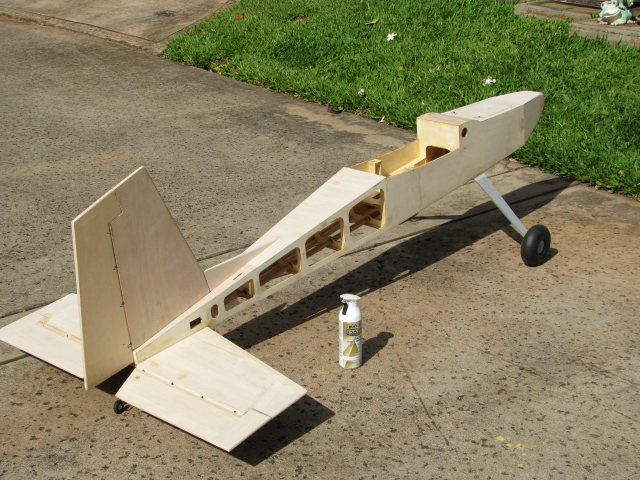
Keep us posted on your build and for sure...PICTURES are a must. I also am very interested in your maiden flight...so let us know your progress. If you have any questions don't be afraid to ask...either I or Lean Run, will help you along.
This just tickles the me to no end...a guy from Down Under in Australia, another from the mid Pacific in Hawaii...are both helping a newer modeler in Greece. Now that's amazing... : )
Soft landings Always,
Bobby of Maui
Last edited by Bob Paris; 05-18-2015 at 10:38 PM.
05-18-2015, 10:56 PM
#25
Thread Starter
Join Date: Jun 2010
Location: RIO, GREECE
Posts: 94
Likes: 0
Received 0 Likes
on
0 Posts
As far as pictures is concerned will do post some as the work continues and eventually a video from the maiden.

