


Seagull Spacewalker II 120 Arf
 11-30-2013, 02:34 AM
#401
Senior Member
Join Date: Apr 2009
Location: Bahrs Scrub 4207 Queensland, AUSTRALIA
Posts: 175
Received 0 Likes
on
0 Posts
I decided not to use self tappers to mount the cowl.
I glued ply blocks with blind t-nuts inside and using the same 3mm phillip head bolts and tappered cup. I will be also butting a rubber/silicone washer under neath to help with vibration and will use a bit of blue locktite.
[IMG] [/IMG]
[IMG] [/IMG]
I glued ply blocks with blind t-nuts inside and using the same 3mm phillip head bolts and tappered cup. I will be also butting a rubber/silicone washer under neath to help with vibration and will use a bit of blue locktite.
[IMG]
 [/IMG]
[IMG]
 [/IMG]
 11-30-2013, 02:38 AM
#402
Senior Member
Join Date: Apr 2009
Location: Bahrs Scrub 4207 Queensland, AUSTRALIA
Posts: 175
Received 0 Likes
on
0 Posts
I am still finishing the baffle in the cowl to direct air directly over the cylinder head.
Still need to finish glueing with epoxy and give a thinned down coat to fuel proof and strengthen. Then I will mask and spray red.
[IMG] [/IMG]
[IMG] [/IMG]
[IMG] [/IMG]
[IMG] [/IMG]
Still need to finish glueing with epoxy and give a thinned down coat to fuel proof and strengthen. Then I will mask and spray red.
[IMG]
 [/IMG]
[IMG]
 [/IMG]
[IMG]
 [/IMG]
[IMG]
 [/IMG]

 11-30-2013, 02:49 AM
#405
Senior Member
Join Date: Apr 2009
Location: Bahrs Scrub 4207 Queensland, AUSTRALIA
Posts: 175
Received 0 Likes
on
0 Posts
Some pics of the Receiver.
I am using a 9ch DSMX RX that came with my DX18. It has 2 Satellites. I have one one the side and one at the back. I made a bracket and glued in top hump to get the satellite as far back with in reason.
I am using JR Switches 2 for RX with sepertae batteries and 1 for ignition with another battery.
Batteries are all Life04 1450mHa 2s 6.6v.
You can see the batteries under the pushrods on a braket I glued to the bottom of the Fuse and then Velcroed them in place.
Needed to get as much weight further back as I could.
Will still need around 60Grams of dead lead in the tail.
[IMG] [/IMG]
[IMG] [/IMG]
[IMG] [/IMG]
I am using a 9ch DSMX RX that came with my DX18. It has 2 Satellites. I have one one the side and one at the back. I made a bracket and glued in top hump to get the satellite as far back with in reason.
I am using JR Switches 2 for RX with sepertae batteries and 1 for ignition with another battery.
Batteries are all Life04 1450mHa 2s 6.6v.
You can see the batteries under the pushrods on a braket I glued to the bottom of the Fuse and then Velcroed them in place.
Needed to get as much weight further back as I could.
Will still need around 60Grams of dead lead in the tail.
[IMG]
 [/IMG]
[IMG]
 [/IMG]
[IMG]
 [/IMG]


 11-30-2013, 02:55 AM
#407
Senior Member
Join Date: Apr 2009
Location: Bahrs Scrub 4207 Queensland, AUSTRALIA
Posts: 175
Received 0 Likes
on
0 Posts
I bought a trailer to carry my planes around and carpeted it. I make wheel chocks for my planes then staple Velcro on bottom so they stick to carpet.
I will post pics when they are finished and in the trailer.
[IMG] [/IMG]
[IMG] [/IMG]
[IMG] [/IMG]
I will post pics when they are finished and in the trailer.
[IMG]
 [/IMG]
[IMG]
 [/IMG]
[IMG]
 [/IMG]
11-30-2013, 03:00 AM
[/IMG]
11-30-2013, 03:00 AM
#408
Senior Member
Join Date: Apr 2009
Location: Bahrs Scrub 4207 Queensland, AUSTRALIA
Posts: 175
Received 0 Likes
on
0 Posts
Pic of front.
I only wanted the hole for the chocke to be smaller as I did not want to much extra air in to have to get out. I also thought this hole would help feed fresh air to the back for the carby.
[IMG] [/IMG]
[IMG] [/IMG]
Thats about it for now will post some more when I get time to work on her again.
Regards Greg
I only wanted the hole for the chocke to be smaller as I did not want to much extra air in to have to get out. I also thought this hole would help feed fresh air to the back for the carby.
[IMG]
 [/IMG]
[IMG]
 [/IMG]
Thats about it for now will post some more when I get time to work on her again.
Regards Greg
07-29-2014, 02:34 AM
#413
Senior Member

Join Date: Apr 2009
Location: Bucharest, ROMANIA
Posts: 103
Likes: 0
Received 0 Likes
on
0 Posts
You have to start building and go flying ! But I have to admit, in my case, this hobby has also to do with collecting planes (in boxes or simply ready to fly).
07-30-2014, 12:39 AM
#414

Join Date: Jan 2013
Location: Berlin, GERMANY
Posts: 152
Likes: 0
Received 0 Likes
on
0 Posts
I am building one and expecting to receive an OS GT 22 in next few days. I have a 300ml (10-11 oz) tank, would that be large enough, original tank is 600ml, it is way too big for gas I guess. I am also wondering where/how to install the tank. How does it balance with GT 22? Should I have the ignition in the cowl or somewhere behind the firewall?
08-31-2014, 02:45 PM
#415
Senior Member
My Feedback: (5)
 08-31-2014, 02:49 PM
#416

My Feedback: (54)
Join Date: May 2008
Location: East Hartford,
CT
Posts: 445
Likes: 0
Received 0 Likes
on
0 Posts
At this point in my life and hobby, it seems that mine is the same. I have planes ready to fly and ready to assemble and build. YES, I said assemble and build. As I have a couple of ARF's that I consider will be assembled. But I also have a Balsa USA Eindecker, which I will be " building ". After all of these years, I have finally learned the difference between assembling and building.
") I have my Spacewalker RTF. All I have to do is bind my transmitter to it.
10-06-2014, 01:23 AM
I have my Spacewalker RTF. All I have to do is bind my transmitter to it.
10-06-2014, 01:23 AM
#417
Join Date: Jan 2013
Location: Berlin, GERMANY
Posts: 152
Likes: 0
Received 0 Likes
on
0 Posts
I have now about 20 flights on my SW (or 4-5 liters of gas) with OS GT-22 and I can say that now it does fly quite well after ironing out the bugs. Building was not difficult, I was quite pleased with the quality in general but both quality and the instructions were not up to level with a quality arf such as H9. I find that the wood is quite soft, so, one has to be cautious while handling the model. I did use all the parts in the kit minus the tires, I installed 100mm high quality tires on and I just last week I removed the wheel pants as they get slowly warn out on our grass field in the club. I also put in 2 life batteries right behind the cockpit/hatch as my engine was heavier than recommended engine and I also installed the tank right at the CoG.
For the maiden, I balanced a little of nose heavy of the instructions (11cm) and my maiden was extremely distressing, first, the plane wanted to nosedive which I have corrected with 7-8 clicks up elevator but then it was extremely pitch and aileron sensitive but I could get it fly straight. Upon landing I added a lot of expo (I normally don't use any expo) and follow up flights were much better but still not quite right. I assumed that up pitch was needed by nose heaviness, so I incrementally added weight to tail next flights until it was absolutely tail heavy and nearly unflyable. I also had a lot of problems with my spektrum radio, the plane sometimes went between full power and fail-safe, and sometimes I lost control totally for couple of second. I solved the radio problems by getting a Graupner mz24 and it seems to work quite well. I still fly now with 7 clicks of up elevator, which is probably an problem with wing incident but I stopped fighting it, so I fly as is. I still think the plane is slightly pitch sensitive but manageable. In general, I am happy with the performance of the plane, landings are very easy, it is quite acrobatic for a trainer-like plane. Hammerheads and Cuban 8s are very much fun, loops are not very good, it tends to yaw left, I guess I should mix some right rudder to the throttle.
Current bug I am working on is to get the engine temperature down. I have checked with a club mates IR temperature sensor and found that engine temp was above 100 deg Celsius which is a bit too hot, I also did the spit test and it sizzles right away, I think I am running it too hot. I did richen the high end but it did not change the temperature much. I have extended now the air inlet and baffled it, lets see whether it will help. I have plenty exit area, so I assumed that problem was the inlet. I am a bit worried that I might have ruined the engine as it it in running in stage. I have used high quality synthetic oil with 1:20, hopefully that has prevented a potential problem.
All in all, I can recommend the plane, it was worth to deal with problems, it flies nicely and easily once setup well and it is easily put together in the field. OS GT 22 is plenty of engine for it.
10-06-2014, 05:14 AM
#418
Scuba... You should not feel alone in thinking the plane was initially nose heavy due to the up elevator trim needed (in my case 1/4 inch). What I soon discovered however was that the up trim needed for powered flight, did not match the trim needed for a proper glide slope for landing, it needing a close to neutral elevator. I'd checked the incidence numbers during the build and found them to be zero/zero for wing and stab and rechecking verified it. That left the question of what was at play causing the issue.
Having been into RC going back to the mid seventies and around mentors who cut their teeth on free flight who taught the discipline that a plane was trimmed for power off and then thrust compensated for power on, that principle was applied to the Spacewalker II. The problem of course is that up thrust in an engine is not common and the Spacewalker's cowl aligns with the spinner and that means that up thrust would be a major headache.
We now of course have the alternative to mix trim instead of changing thrust angle, so it was a matter of mixing up trim with throttle (or down trim with low throttle). When going full throttle, the elevators were trimmed up the 1/4 inch. When cutting throttle to land, they of course trimmed near neutral for a proper glide slope. That seemed to work fairly well albeit not perfectly, which will be explained shortly but first, some words about what was probably going on.
The Spacewalker has a generous and fairly thick low wing and a high engine thrust line. That seems to create a lever couple between the drag of the wing and the thrust of the engine that pitches the plane down. To counter the pitch down forces, up trim is needed, but when engine power is cut, the pitch down force goes away, leaving too much up trim and the model wants to linger aloft down the runway producing long landings where the plane then slows too greatly above the ground and plops down hard and bounces yielding three landings during one approach, hence why the mix is needed.
Are there any negative affects from the mix? Yes. The most notable is when going vertical. As the plane slows, the drag of the wing goes away, now leaving an up trimmed elevator with no force to counter so the plane pitches to the canopy. Such is likely not a problem to the average sport flier and if that is the case.... provide the throttle to elevator mix so that power on is in trim and power off is in trim and enjoy and stop reading.
If however, the canopy pitch when going vertical is disconcerting, there is a fix. Trim the elevator neutral under full power. That is done by adjusting the decalage and in the case of the Spacewaker which has a fixed horizontal stab, doing so must be done at the wing. Give the wing a hair of positive incidence. What worked for me was to glue a sliver of 1/64" ply to the bottoms of the forward wing positioning/retaining bolt holes and the tops of the aft. Then using a round file, slightly dress 1/64" from the other side of the holes. That was all it took on mine to achieve a neutral elevator under full power and solve the canopy tuck when going vertical. I also found that a throttle mix was no longer needed for landing trim albeit your mileage may vary on that. I'll explain.
I personally am uncomfortable having to give down elevator to produce a proper glide slope so will always do a throttle to elevator mix if it is needed. But, if the plane needs a bit of up trim to achieve a proper glide slope, I'm comfortable doing that with the stick while landing after all, pulling on the stick is part of the flair process and seems natural.
I hope my comments were understandable and perhaps helpful or at the minimum were interesting.
10-06-2014, 01:40 PM
#419
Senior Member
My Feedback: (5)
Scuba... You should not feel alone in thinking the plane was initially nose heavy due to the up elevator trim needed (in my case 1/4 inch). What I soon discovered however was that the up trim needed for powered flight, did not match the trim needed for a proper glide slope for landing, it needing a close to neutral elevator. I'd checked the incidence numbers during the build and found them to be zero/zero for wing and stab and rechecking verified it. That left the question of what was at play causing the issue.
Having been into RC going back to the mid seventies and around mentors who cut their teeth on free flight who taught the discipline that a plane was trimmed for power off and then thrust compensated for power on, that principle was applied to the Spacewalker II. The problem of course is that up thrust in an engine is not common and the Spacewalker's cowl aligns with the spinner and that means that up thrust would be a major headache.
We now of course have the alternative to mix trim instead of changing thrust angle, so it was a matter of mixing up trim with throttle (or down trim with low throttle). When going full throttle, the elevators were trimmed up the 1/4 inch. When cutting throttle to land, they of course trimmed near neutral for a proper glide slope. That seemed to work fairly well albeit not perfectly, which will be explained shortly but first, some words about what was probably going on.
The Spacewalker has a generous and fairly thick low wing and a high engine thrust line. That seems to create a lever couple between the drag of the wing and the thrust of the engine that pitches the plane down. To counter the pitch down forces, up trim is needed, but when engine power is cut, the pitch down force goes away, leaving too much up trim and the model wants to linger aloft down the runway producing long landings where the plane then slows too greatly above the ground and plops down hard and bounces yielding three landings during one approach, hence why the mix is needed.
Are there any negative affects from the mix? Yes. The most notable is when going vertical. As the plane slows, the drag of the wing goes away, now leaving an up trimmed elevator with no force to counter so the plane pitches to the canopy. Such is likely not a problem to the average sport flier and if that is the case.... provide the throttle to elevator mix so that power on is in trim and power off is in trim and enjoy and stop reading.
If however, the canopy pitch when going vertical is disconcerting, there is a fix. Trim the elevator neutral under full power. That is done by adjusting the decalage and in the case of the Spacewaker which has a fixed horizontal stab, doing so must be done at the wing. Give the wing a hair of positive incidence. What worked for me was to glue a sliver of 1/64" ply to the bottoms of the forward wing positioning/retaining bolt holes and the tops of the aft. Then using a round file, slightly dress 1/64" from the other side of the holes. That was all it took on mine to achieve a neutral elevator under full power and solve the canopy tuck when going vertical. I also found that a throttle mix was no longer needed for landing trim albeit your mileage may vary on that. I'll explain.
I personally am uncomfortable having to give down elevator to produce a proper glide slope so will always do a throttle to elevator mix if it is needed. But, if the plane needs a bit of up trim to achieve a proper glide slope, I'm comfortable doing that with the stick while landing after all, pulling on the stick is part of the flair process and seems natural.
I hope my comments were understandable and perhaps helpful or at the minimum were interesting.
Having been into RC going back to the mid seventies and around mentors who cut their teeth on free flight who taught the discipline that a plane was trimmed for power off and then thrust compensated for power on, that principle was applied to the Spacewalker II. The problem of course is that up thrust in an engine is not common and the Spacewalker's cowl aligns with the spinner and that means that up thrust would be a major headache.
We now of course have the alternative to mix trim instead of changing thrust angle, so it was a matter of mixing up trim with throttle (or down trim with low throttle). When going full throttle, the elevators were trimmed up the 1/4 inch. When cutting throttle to land, they of course trimmed near neutral for a proper glide slope. That seemed to work fairly well albeit not perfectly, which will be explained shortly but first, some words about what was probably going on.
The Spacewalker has a generous and fairly thick low wing and a high engine thrust line. That seems to create a lever couple between the drag of the wing and the thrust of the engine that pitches the plane down. To counter the pitch down forces, up trim is needed, but when engine power is cut, the pitch down force goes away, leaving too much up trim and the model wants to linger aloft down the runway producing long landings where the plane then slows too greatly above the ground and plops down hard and bounces yielding three landings during one approach, hence why the mix is needed.
Are there any negative affects from the mix? Yes. The most notable is when going vertical. As the plane slows, the drag of the wing goes away, now leaving an up trimmed elevator with no force to counter so the plane pitches to the canopy. Such is likely not a problem to the average sport flier and if that is the case.... provide the throttle to elevator mix so that power on is in trim and power off is in trim and enjoy and stop reading.
If however, the canopy pitch when going vertical is disconcerting, there is a fix. Trim the elevator neutral under full power. That is done by adjusting the decalage and in the case of the Spacewaker which has a fixed horizontal stab, doing so must be done at the wing. Give the wing a hair of positive incidence. What worked for me was to glue a sliver of 1/64" ply to the bottoms of the forward wing positioning/retaining bolt holes and the tops of the aft. Then using a round file, slightly dress 1/64" from the other side of the holes. That was all it took on mine to achieve a neutral elevator under full power and solve the canopy tuck when going vertical. I also found that a throttle mix was no longer needed for landing trim albeit your mileage may vary on that. I'll explain.
I personally am uncomfortable having to give down elevator to produce a proper glide slope so will always do a throttle to elevator mix if it is needed. But, if the plane needs a bit of up trim to achieve a proper glide slope, I'm comfortable doing that with the stick while landing after all, pulling on the stick is part of the flair process and seems natural.
I hope my comments were understandable and perhaps helpful or at the minimum were interesting.
Last edited by Granpooba; 10-06-2014 at 01:43 PM.
10-06-2014, 07:09 PM
#420
If the needed upthrust were done, the engine would look weird and the space around the spinner would be far out of alignment. I can never recall seeing a plane given up thrust. The Spacewalker is a bit of an anomaly in that regard. Few low wing planes have that degree of drag to a wing and that high of an engine thrust line.
I think the better course is to simply do an elevator to throttle mix. Shimming the wing bolt holes was quite easy as well... far easier than messing with up thrust and much better looking. Plus that, how much up thrust would get the job done? Who knows?
I think the better course is to simply do an elevator to throttle mix. Shimming the wing bolt holes was quite easy as well... far easier than messing with up thrust and much better looking. Plus that, how much up thrust would get the job done? Who knows?
10-06-2014, 11:54 PM
#421
Join Date: Jan 2013
Location: Berlin, GERMANY
Posts: 152
Likes: 0
Received 0 Likes
on
0 Posts
Thanks for the great advice. Seasoned experts in my club have very similar comments; either stab and wings are not level or the wing incidence incorrect. The advice I got was just to ignore the extra up elevator, which I think it makes sense because I do not experience much glide slope problems. My landings are quite OK, both two and three point landings are possible. Of course due large wings, one has to be easy on elevator after touchdown as the plane will want to take off again  .
.
.
10-07-2014, 04:18 AM
#422
There are two possible approaches to the use of the elevator when landing the Spacewalker. You outline the first, to make a wheel landing and be very careful with the elevator to avoid going airborne after touchdown. The other is to bend the stick. What I mean is that the flair finishes out with the stick pegged full up elevator for a stall landing. The wheel landing works well on a smooth runway but not so much on a rough one. A bump will cause the mains to pitch some angle of attack to the wing and it will fly again or the sink rate of the wheel landing is too great and the struts absorb the shock, then spring back and force the wing to have angle of attack to fly again, or the sink rate caused the tail to continue inertia and drive the wing into angle of attack and fly again.
Wheel landings with my Spacewalker too often incur bunny hops. On my field it does better with a stall landing but because it has a lot of lift, the stall has to be deep or it is a wheel landing.
The Spacewalker is one of the easiest planes to fly the landing approach and one of the harder to make the touchdown.
This conversation with you just reminded me of something that I'd intended once to try with the Spacewalker but never got around to... long story but I suffered a flat spin with it all the way to the ground and it was out of commission for a while. Design dynamics show a magic number exist for the inclusive angle made by drawing a line perpendicular from the wheel axles to the planes datum line and one to the CG. That number should be 17� +/- a couple. If less, the plane will be too tippy during taxi... more and it will suffer bunny hops on landing due to inertia driving the tail down and producing angle of attack.
I may do that this morning and fly the Spacewalker this afternoon and try some wheel landings and see if it does better.
11-04-2014, 08:45 AM
#423
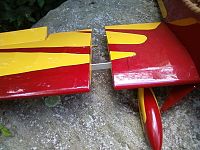
Hello all. Can anyone ID the manufacturer of this Spacewalker kit (powered by a Saito FA 130t)? I have looked at all of the threads here on RCU and find none using the three piece wing with the center-section separately bolted to the fuse. It is a great idea and allows the fuse to stand alone on it's LG. Thanks.


Sincerely, Richard Sig 1/4 J3, Zenoah G23; H9 1/4 J3 (gen 1), YS F120; GB Anniv Cub (NIB), Saito 56 (?); Spacewalker II, Saito FA 130t
Sincerely, Richard Sig 1/4 J3, Zenoah G23; H9 1/4 J3 (gen 1), YS F120; GB Anniv Cub (NIB), Saito 56 (?); Spacewalker II, Saito FA 130t
11-05-2014, 07:21 AM
#424
Senior Member
My Feedback: (5)
Hello all. Can anyone ID the manufacturer of this Spacewalker kit (powered by a Saito FA 130t)? I have looked at all of the threads here on RCU and find none using the three piece wing with the center-section separately bolted to the fuse. It is a great idea and allows the fuse to stand alone on it's LG. Thanks.
Sincerely, Richard Sig 1/4 J3, Zenoah G23; H9 1/4 J3 (gen 1), YS F120; GB Anniv Cub (NIB), Saito 56 (?); Spacewalker II, Saito FA 130t
Sincerely, Richard Sig 1/4 J3, Zenoah G23; H9 1/4 J3 (gen 1), YS F120; GB Anniv Cub (NIB), Saito 56 (?); Spacewalker II, Saito FA 130t
11-06-2014, 06:20 AM
#425
Join Date: Jan 2013
Location: Berlin, GERMANY
Posts: 152
Likes: 0
Received 0 Likes
on
0 Posts
A word of warning on CA hinges: Two of three hinges on my left aileron were totaly obliterated. I was lucky that I noticed this on the ground and this is just after 5 hours airtime. I replaced the left aileron hinges with pin hinges and will keep am eye on the remaining one. Additionally I the hatch bolts keep getting loose in flight, so I have lost them all and once the cocpit flew off during the flight, lucky that it fell on grass without damage. I am using nylon screws instead of metall bolts now and it does not get loose in flight anymore.