


Pay It Forward Build Thread!! Sig LT-40 build
 12-03-2010, 12:48 PM
#826
Senior Member
Join Date: Sep 2006
Location: Hutsonville,
IL
Posts: 157
Likes: 0
Received 0 Likes
on
0 Posts
I've emailed SIG and am waiting on their reply...The fuselage is pretty straight forward...I think if I could get the measurements of the tail pieces I could probably go ahead and build them...along with a picture so I can semi duplicate the shapes..
 12-03-2010, 02:28 PM
#827
Senior Member
Join Date: Jul 2010
Location: Westren Australia, AUSTRALIA
Posts: 228
Likes: 0
Received 0 Likes
on
0 Posts
You should try starting a new thread and maybe post it in the Kit Building section. I'm sure someone would have a set they could post you?
01-14-2011, 12:58 PM
#829

My Feedback: (1)
I lost my trainer last year do to my fault, Someone was talking to me and I took my eyes off the plane and the student got it out to far for these eyes to see, and crash! So I am building the LT 40 for the new trainer! Sure love to build and this is a great kit, happy to see others enjoy it as well!
02-25-2011, 09:18 PM
#830
Senior Member
Join Date: Sep 2006
Location: Hutsonville,
IL
Posts: 157
Likes: 0
Received 0 Likes
on
0 Posts
Well I have the Senior finished with a few modifications...waiting on a good day to maiden it...Have the LT-40 ready to cover....will do that tomorrow...putting a Saito 50 on it...should be enough to pull it around the sky...here's a few pic of both of them....added bolt on wings to the LT-40 as well as the Kadet Senior...both of these are kit builds with a little changes..the Senior I made it a tail dragger and added ailerons...took most of the dihedral out...
02-25-2011, 09:27 PM
#831
My Feedback: (1)
Both look very nice! great job on the covering! I have to maiden my LT-40 its ready. And I have a Tiger 2 on the bench got the tail feathers done now on the wing. Sure do love building! Let us know how the maidens go. Good luck!
02-25-2011, 09:40 PM
#832
Senior Member
Join Date: Sep 2006
Location: Hutsonville,
IL
Posts: 157
Likes: 0
Received 0 Likes
on
0 Posts
I sure will..I've been out of the hobby for 15 plus years...boys are grown and I have time to fly again...I'm like you I love to build but not real comfortable flying...I have TF Corsair that is partially built that I will do next...I'm wanting to build a 100" Stuka from Ziroli planes...I have an air siren I picked up at a swap meet a couple of weeks ago...so I guess I'll build a plane around it..
08-04-2011, 12:26 PM
#834
Senior Member
Join Date: Jul 2011
Location: Elgin,
IL
Posts: 150
Likes: 0
Received 0 Likes
on
0 Posts
RC Ken
Great build thread and I know you are busy but where is the final act?!? I feel like I sat through a great movie but missed the ending. (unless it is posted somewhere else) I was waiting to see the fuse covering, final touches and full assembly.
BTW this thread was excellent. I never thought I would ever touch a kit and stick with the ARF but now I see that it is not as hard as I perceived and now I think I will build my first plane this winter. Thanks for the inspiration to do this.
05-21-2013, 12:53 AM
#835
Junior Member
Join Date: Apr 2005
Location: melbourne, AUSTRALIA
Posts: 1
Likes: 0
Received 0 Likes
on
0 Posts
Just thought I would say thanks and to let you know that 8 years after the original build, people are still appreciating the information and advice you give.
01-20-2014, 07:04 AM
#836
Junior Member

Join Date: Jan 2014
Posts: 1
Likes: 0
Received 0 Likes
on
0 Posts
Just finished reading the thread front to back. Just wanted to give a huge shout out to RCKen. Very, very informative. I hope to obtain the skill level that you have some day.
While reading the thread, I was looking at all the hobby sights and put together a pretty good kit. I am going to go with the PT-40. I used to build models as a kid, and am looking forward to getting back into the hobby. Also being deployed with time on my hands really helps get your research done and keeps you from making quick decisions. Lots of time to think about it.
Big thank you to everyone else who put their little tiddly bits of information in. Big help.
01-20-2014, 05:40 PM
#837

Just finished reading the thread front to back. Just wanted to give a huge shout out to RCKen. Very, very informative. I hope to obtain the skill level that you have some day.
While reading the thread, I was looking at all the hobby sights and put together a pretty good kit. I am going to go with the PT-40. I used to build models as a kid, and am looking forward to getting back into the hobby. Also being deployed with time on my hands really helps get your research done and keeps you from making quick decisions. Lots of time to think about it.
Big thank you to everyone else who put their little tiddly bits of information in. Big help.
While reading the thread, I was looking at all the hobby sights and put together a pretty good kit. I am going to go with the PT-40. I used to build models as a kid, and am looking forward to getting back into the hobby. Also being deployed with time on my hands really helps get your research done and keeps you from making quick decisions. Lots of time to think about it.
Big thank you to everyone else who put their little tiddly bits of information in. Big help.
Ken
05-17-2014, 06:32 AM
#838
Junior Member
Join Date: Dec 2013
Posts: 7
Likes: 0
Received 0 Likes
on
0 Posts
Ken, Your thread inspired me to build an LT 40. Last season was my first and it was quite successful. I'm starting flying season two now and starting to work on my next plane. Thank you for your efforts.
05-28-2014, 05:58 AM
#839
Do you have any pictures of your LT-40?? We'd sure love to see them here.
Ken
06-02-2014, 04:03 AM
#840

Ken, does it have to be an LT-40? Would a slightly modified Jr be okay to put in this thread? I've started working on one from the plans of a long ago destroyed kit so.......................
 The more the merrier in my mind.
09-01-2014, 07:01 PM
The more the merrier in my mind.
09-01-2014, 07:01 PM
#842

My Feedback: (1)

Join Date: Sep 2002
Location: Grand Rapids, Mi
Posts: 28
Likes: 0
Received 0 Likes
on
0 Posts
RCKen - First off I want to Thank-You for all the time and information you have invested in this build thread. You have contributed a very considerable amount of your valuable wisdom and knowledge in building this Airplane. So much so that you've given me the confidence to build one myself! Well. almost by myself.
I bought three planes at an auction. Two of them are ABF's ( Already Been Flown ) and one is a Semi completed LT-40 Kit. The Kit looks like someone started with good intentions, tried to follow the instructions, got confused and gave up. I checked the parts inventory and all the pieces are there, so I just need to fix a few problem areas and should be airborne by next spring!
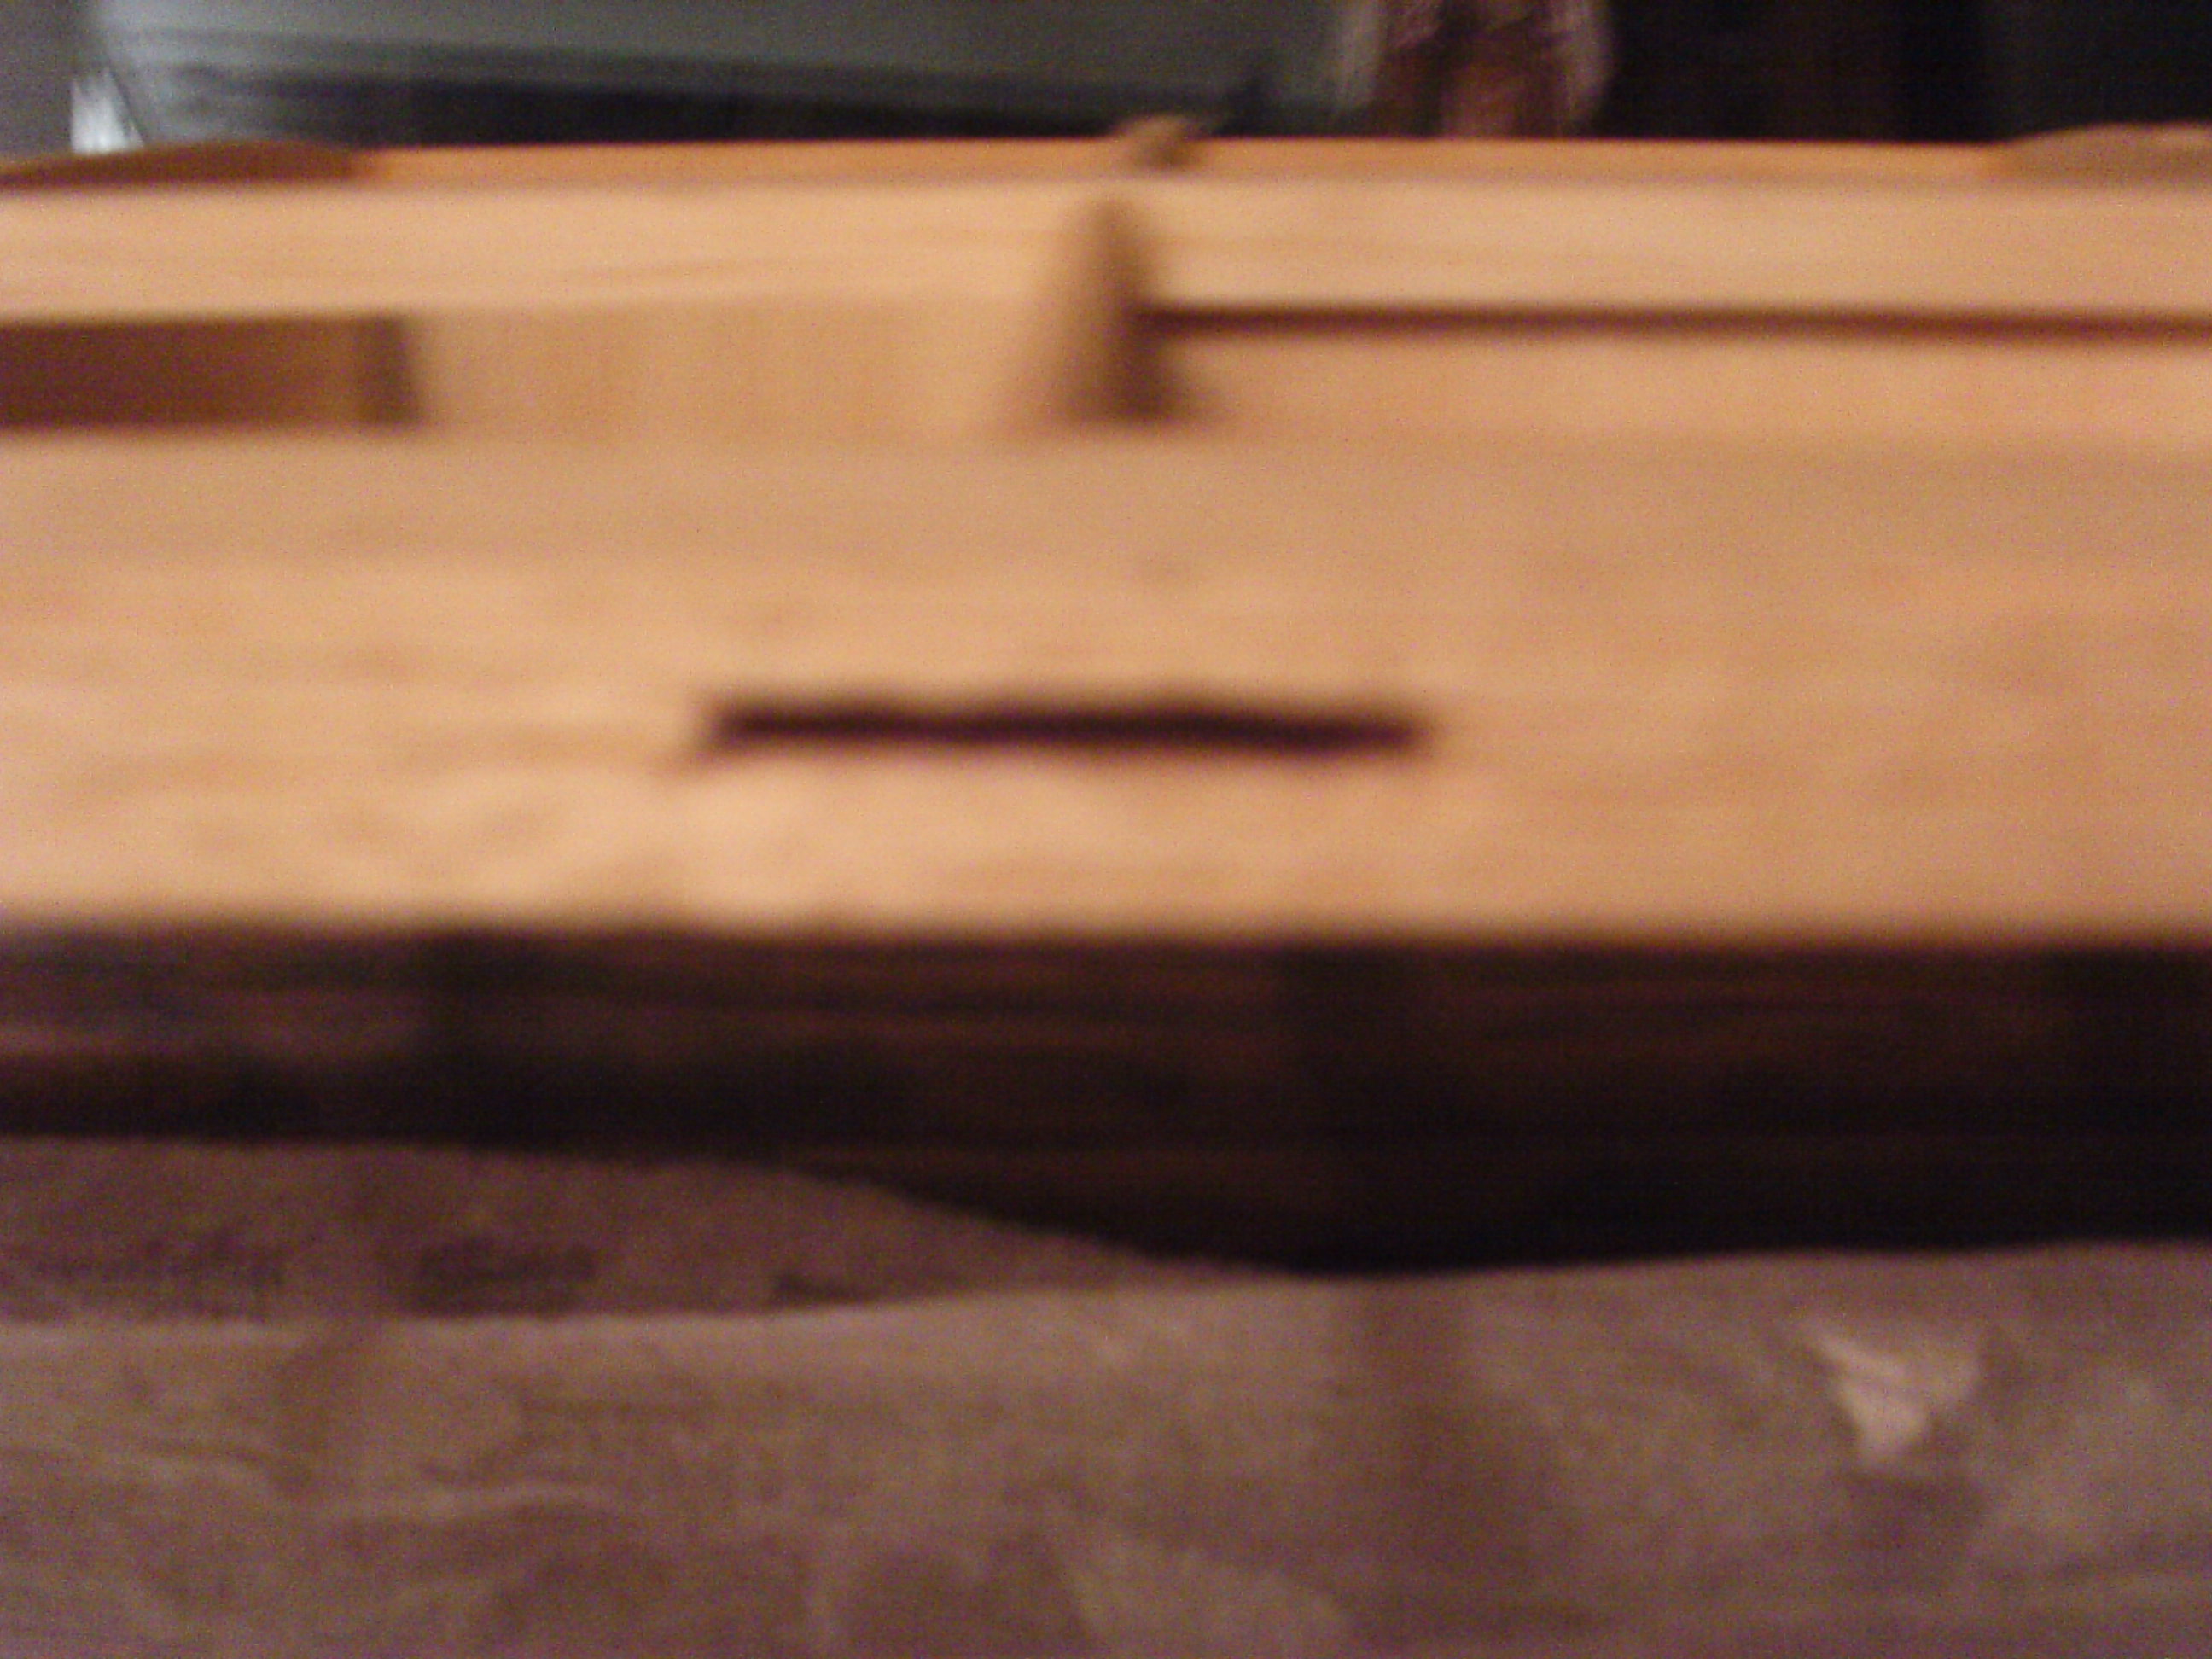
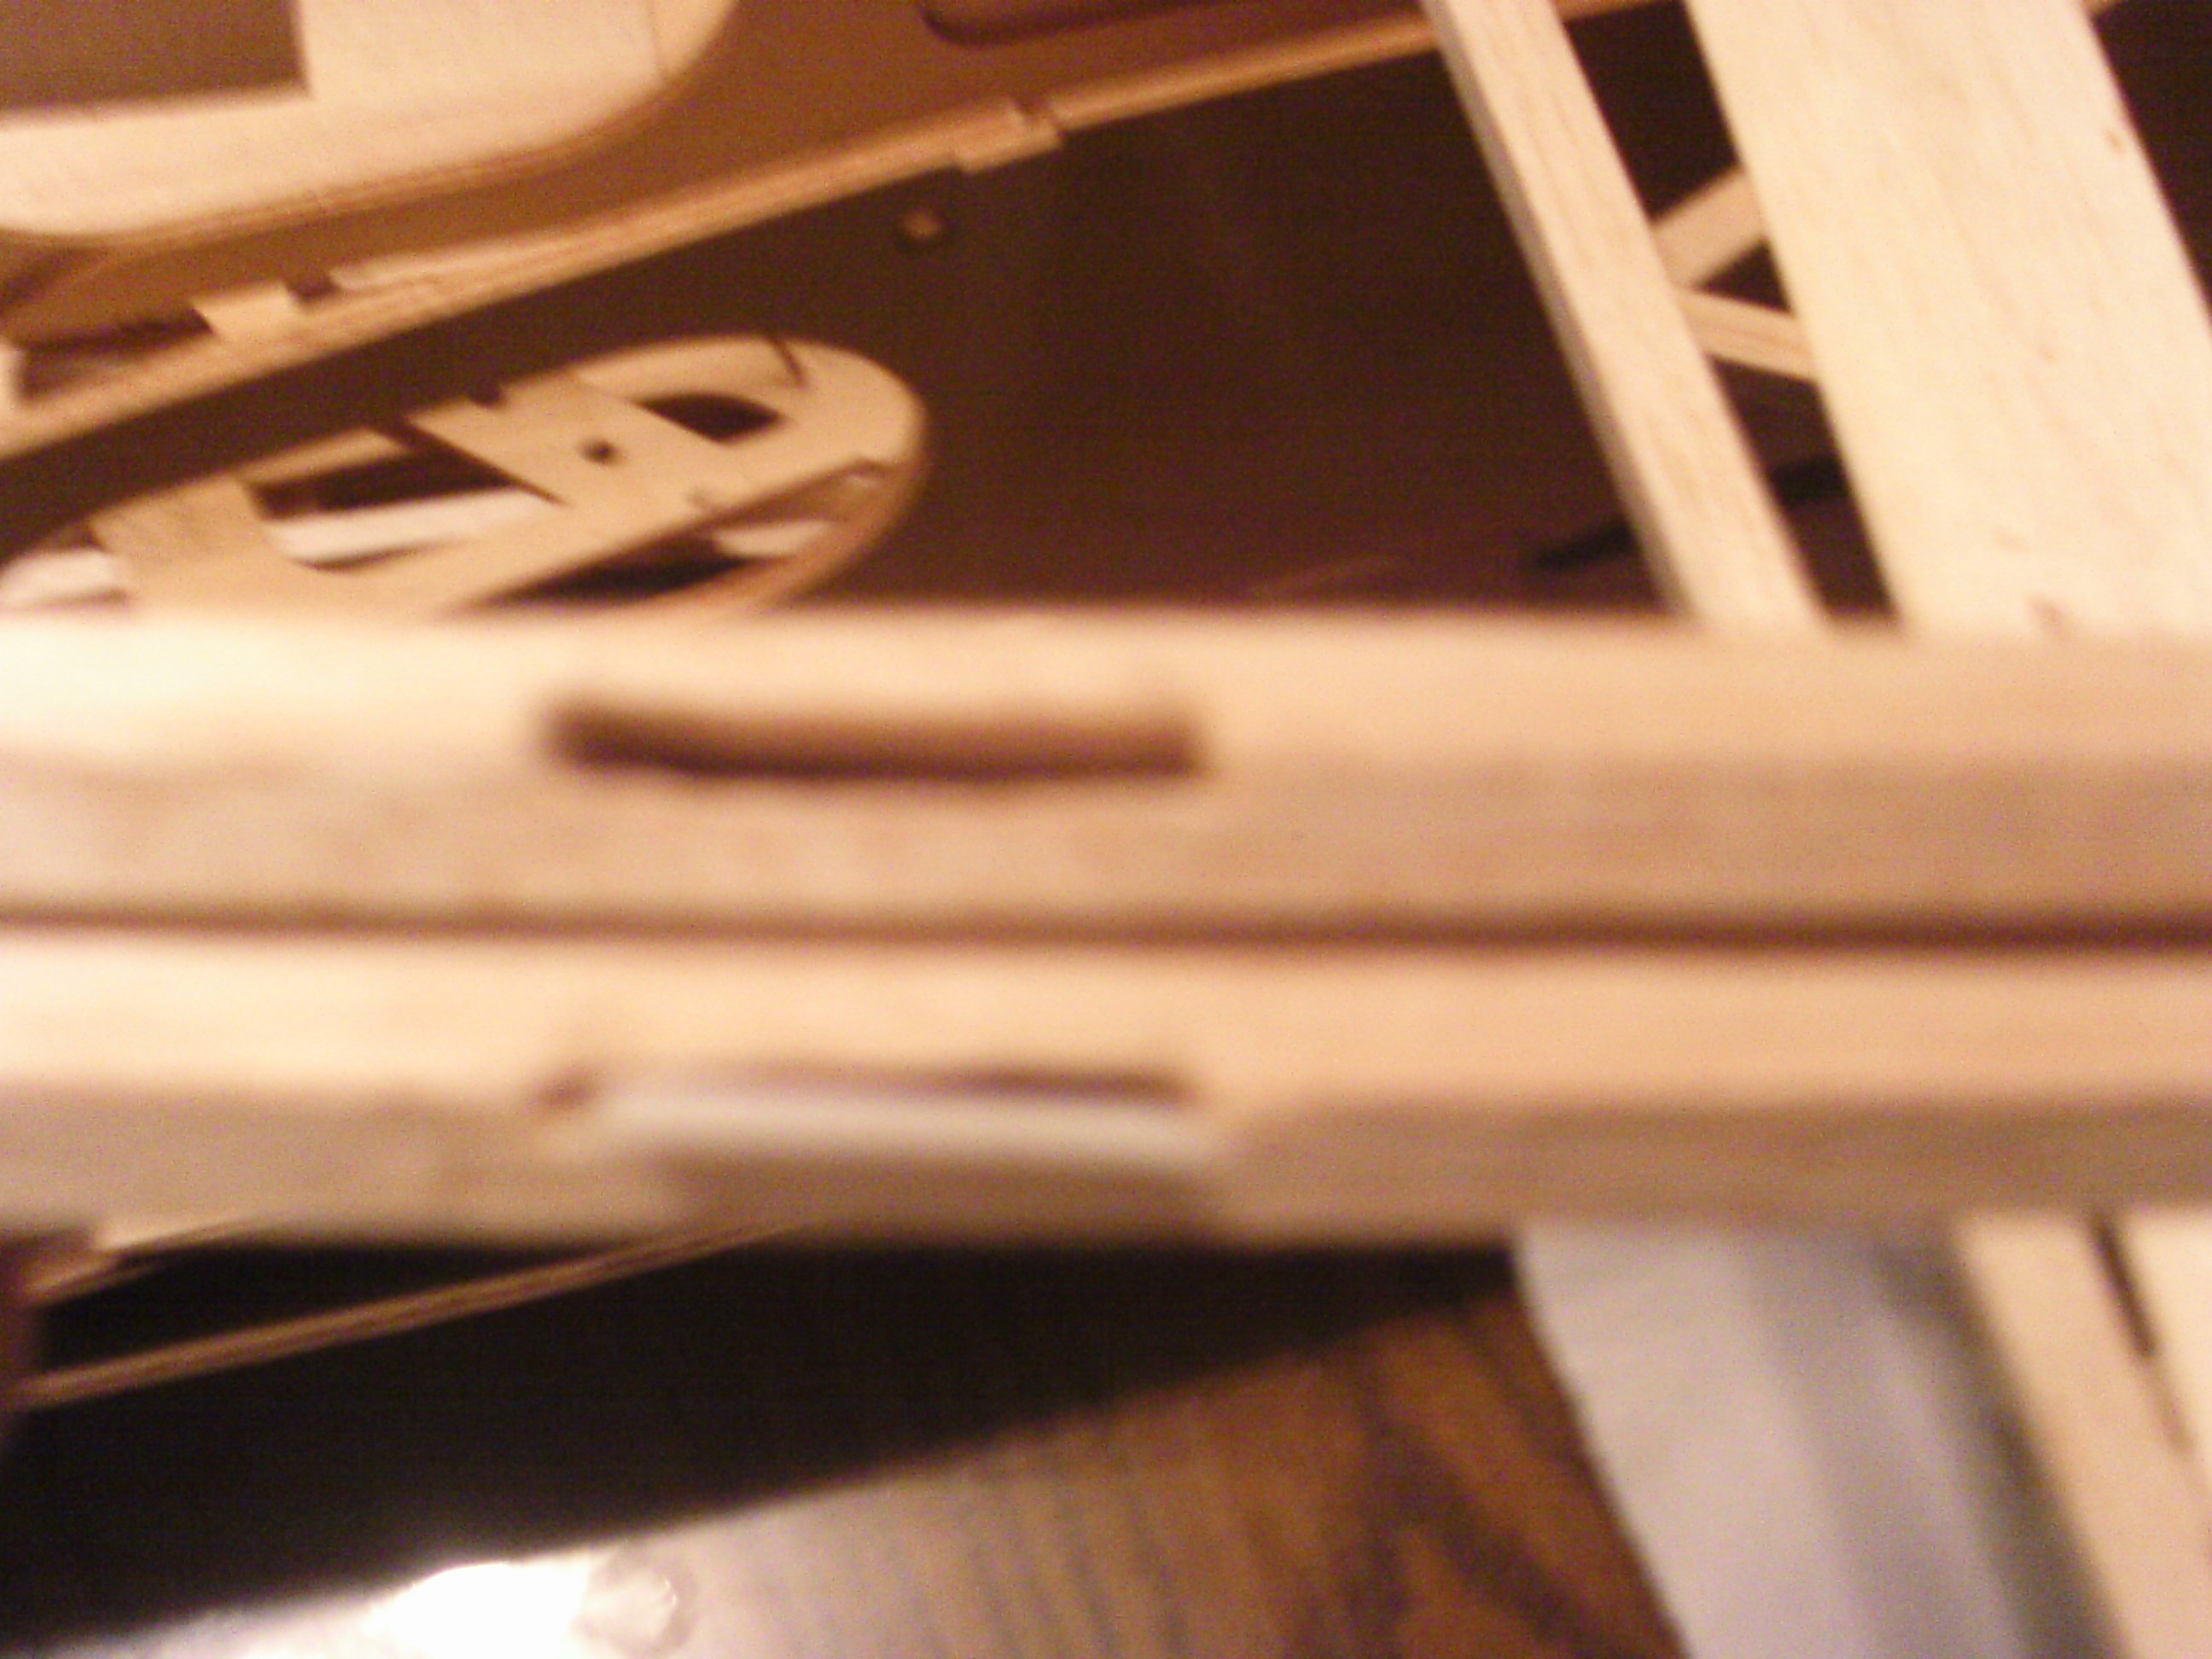
The most obvious problem is the former builder hacked the slots for the hinges. I don't know how thin of a slot the power hinge slottter tool makes, but what this guy did was carve out a cavern in the TE and ailerons. I would appreciate your advice on how to fix these oversized holes, as I don't think Thick CA would be appropriate to fill the gap and get a good hinge joint. I've included some pictures for you viewing pleasure. Again, Thank you for making his build thread
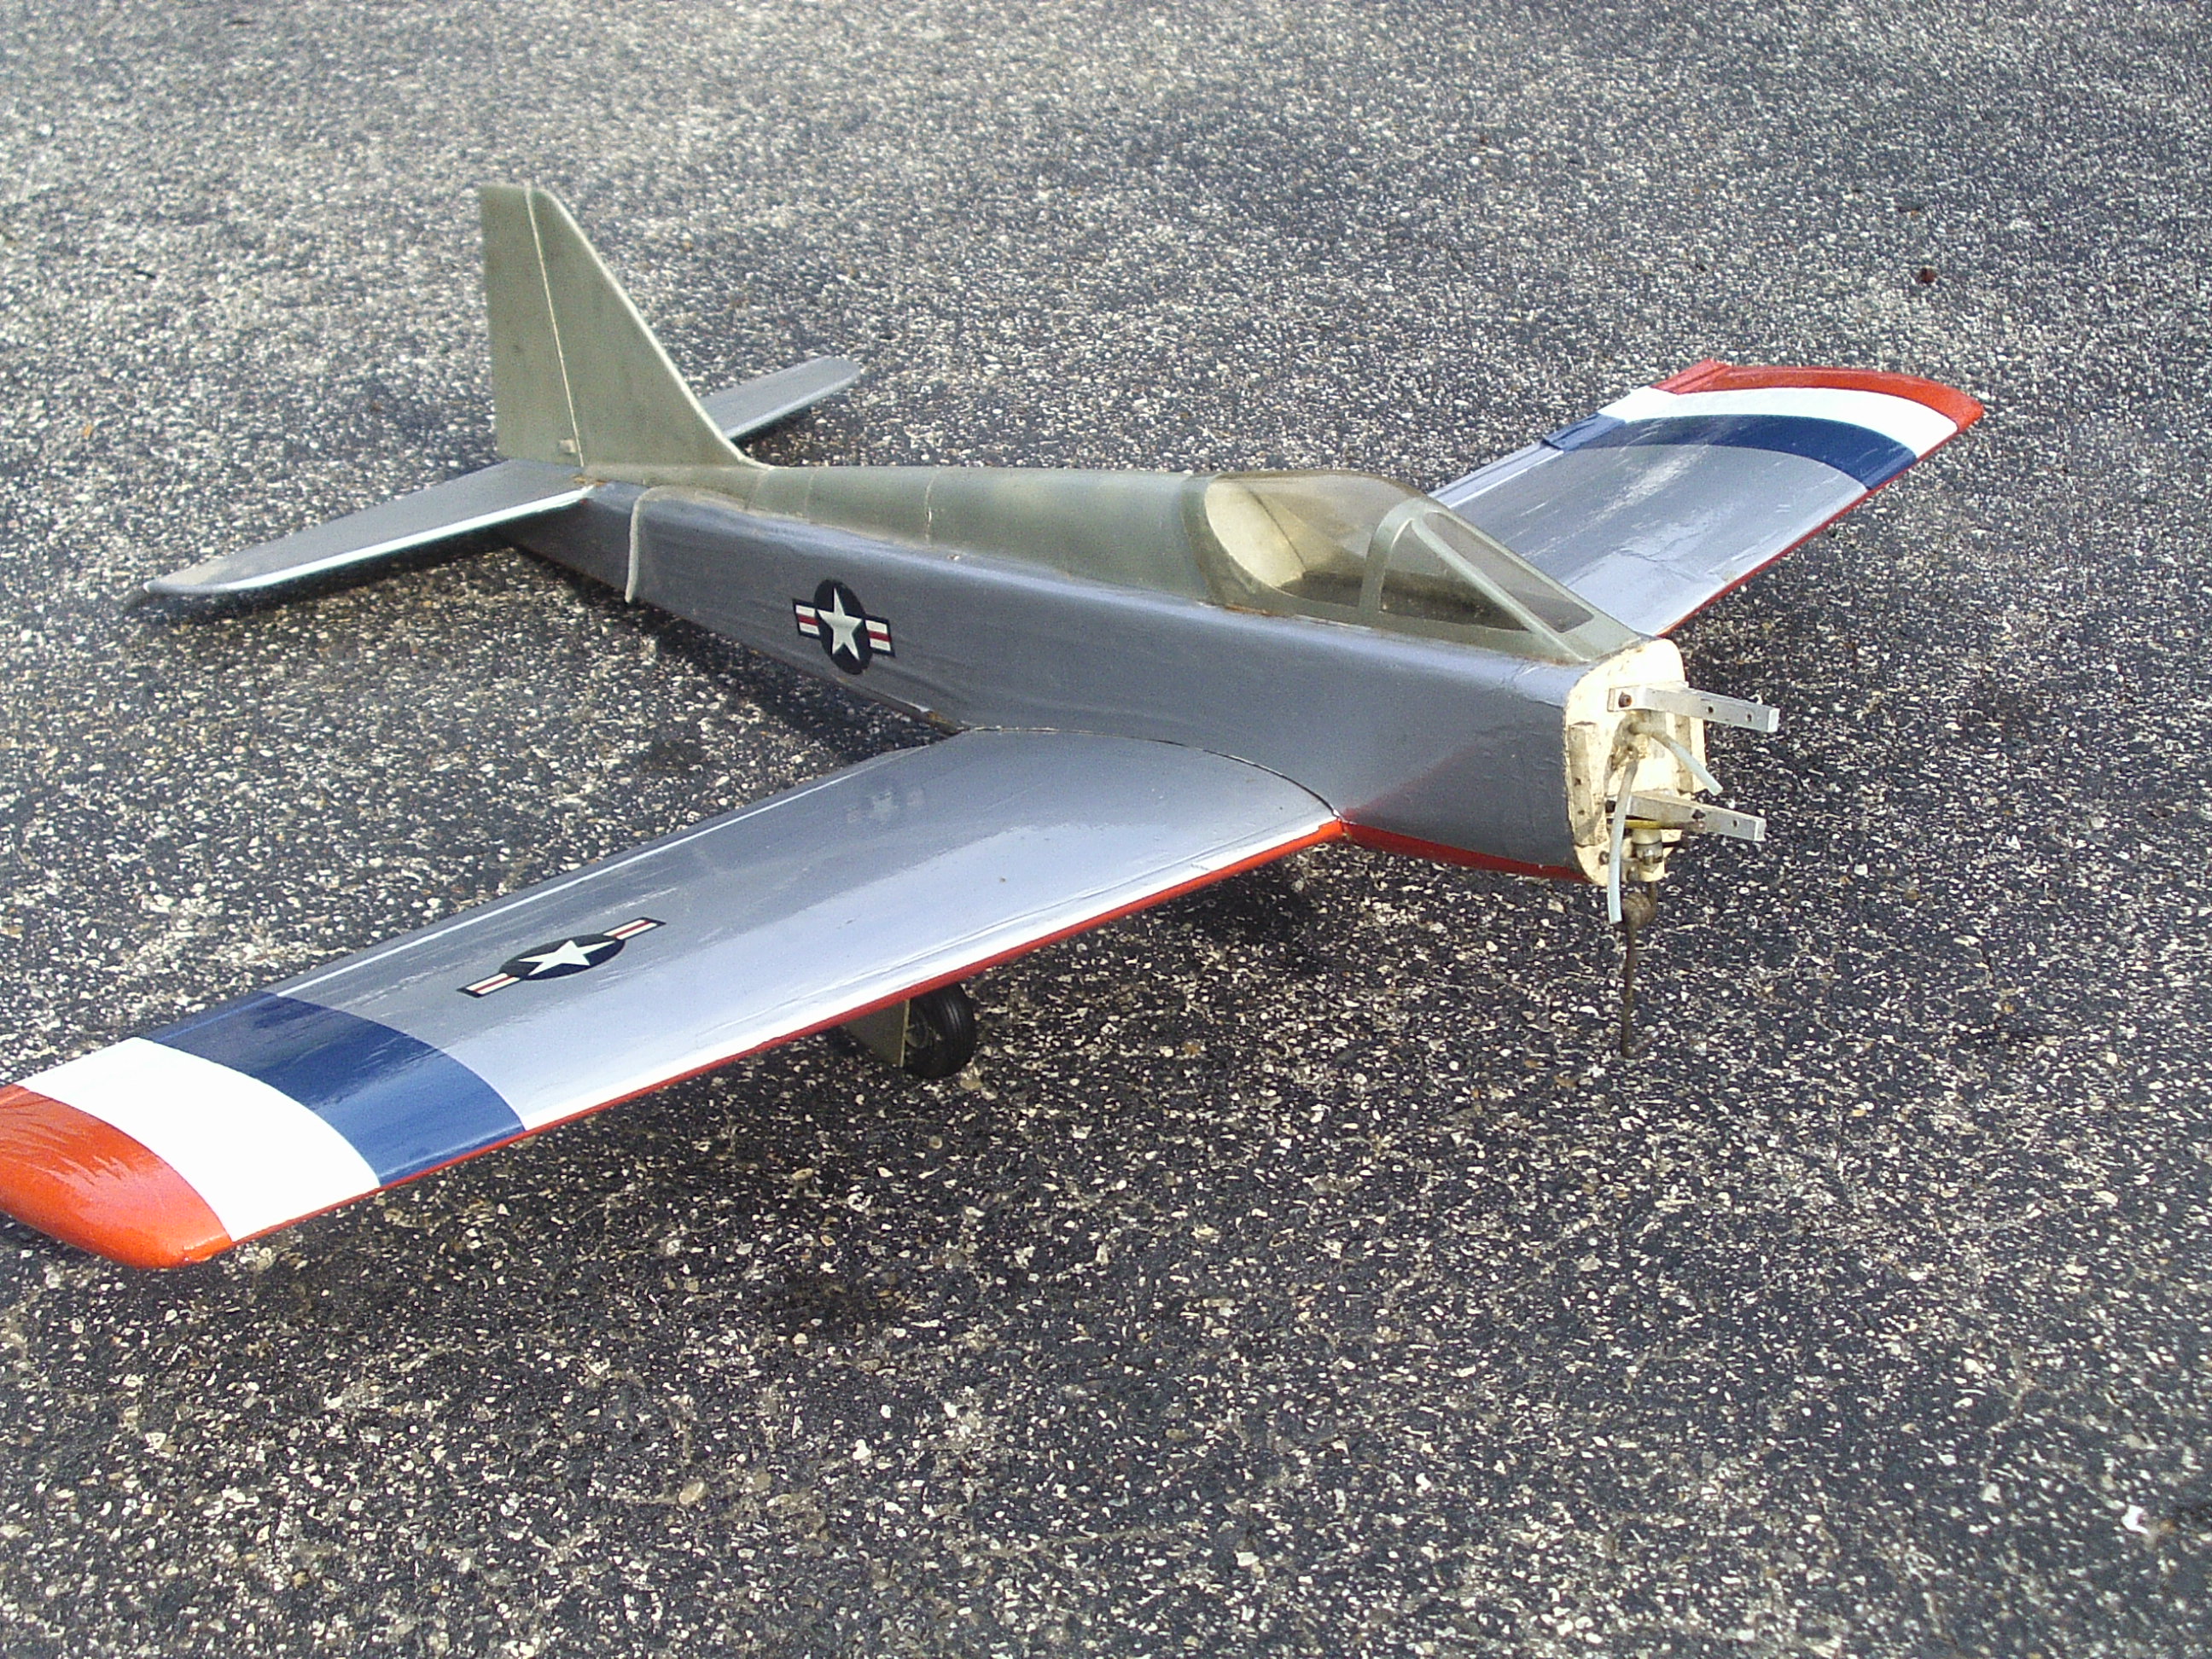
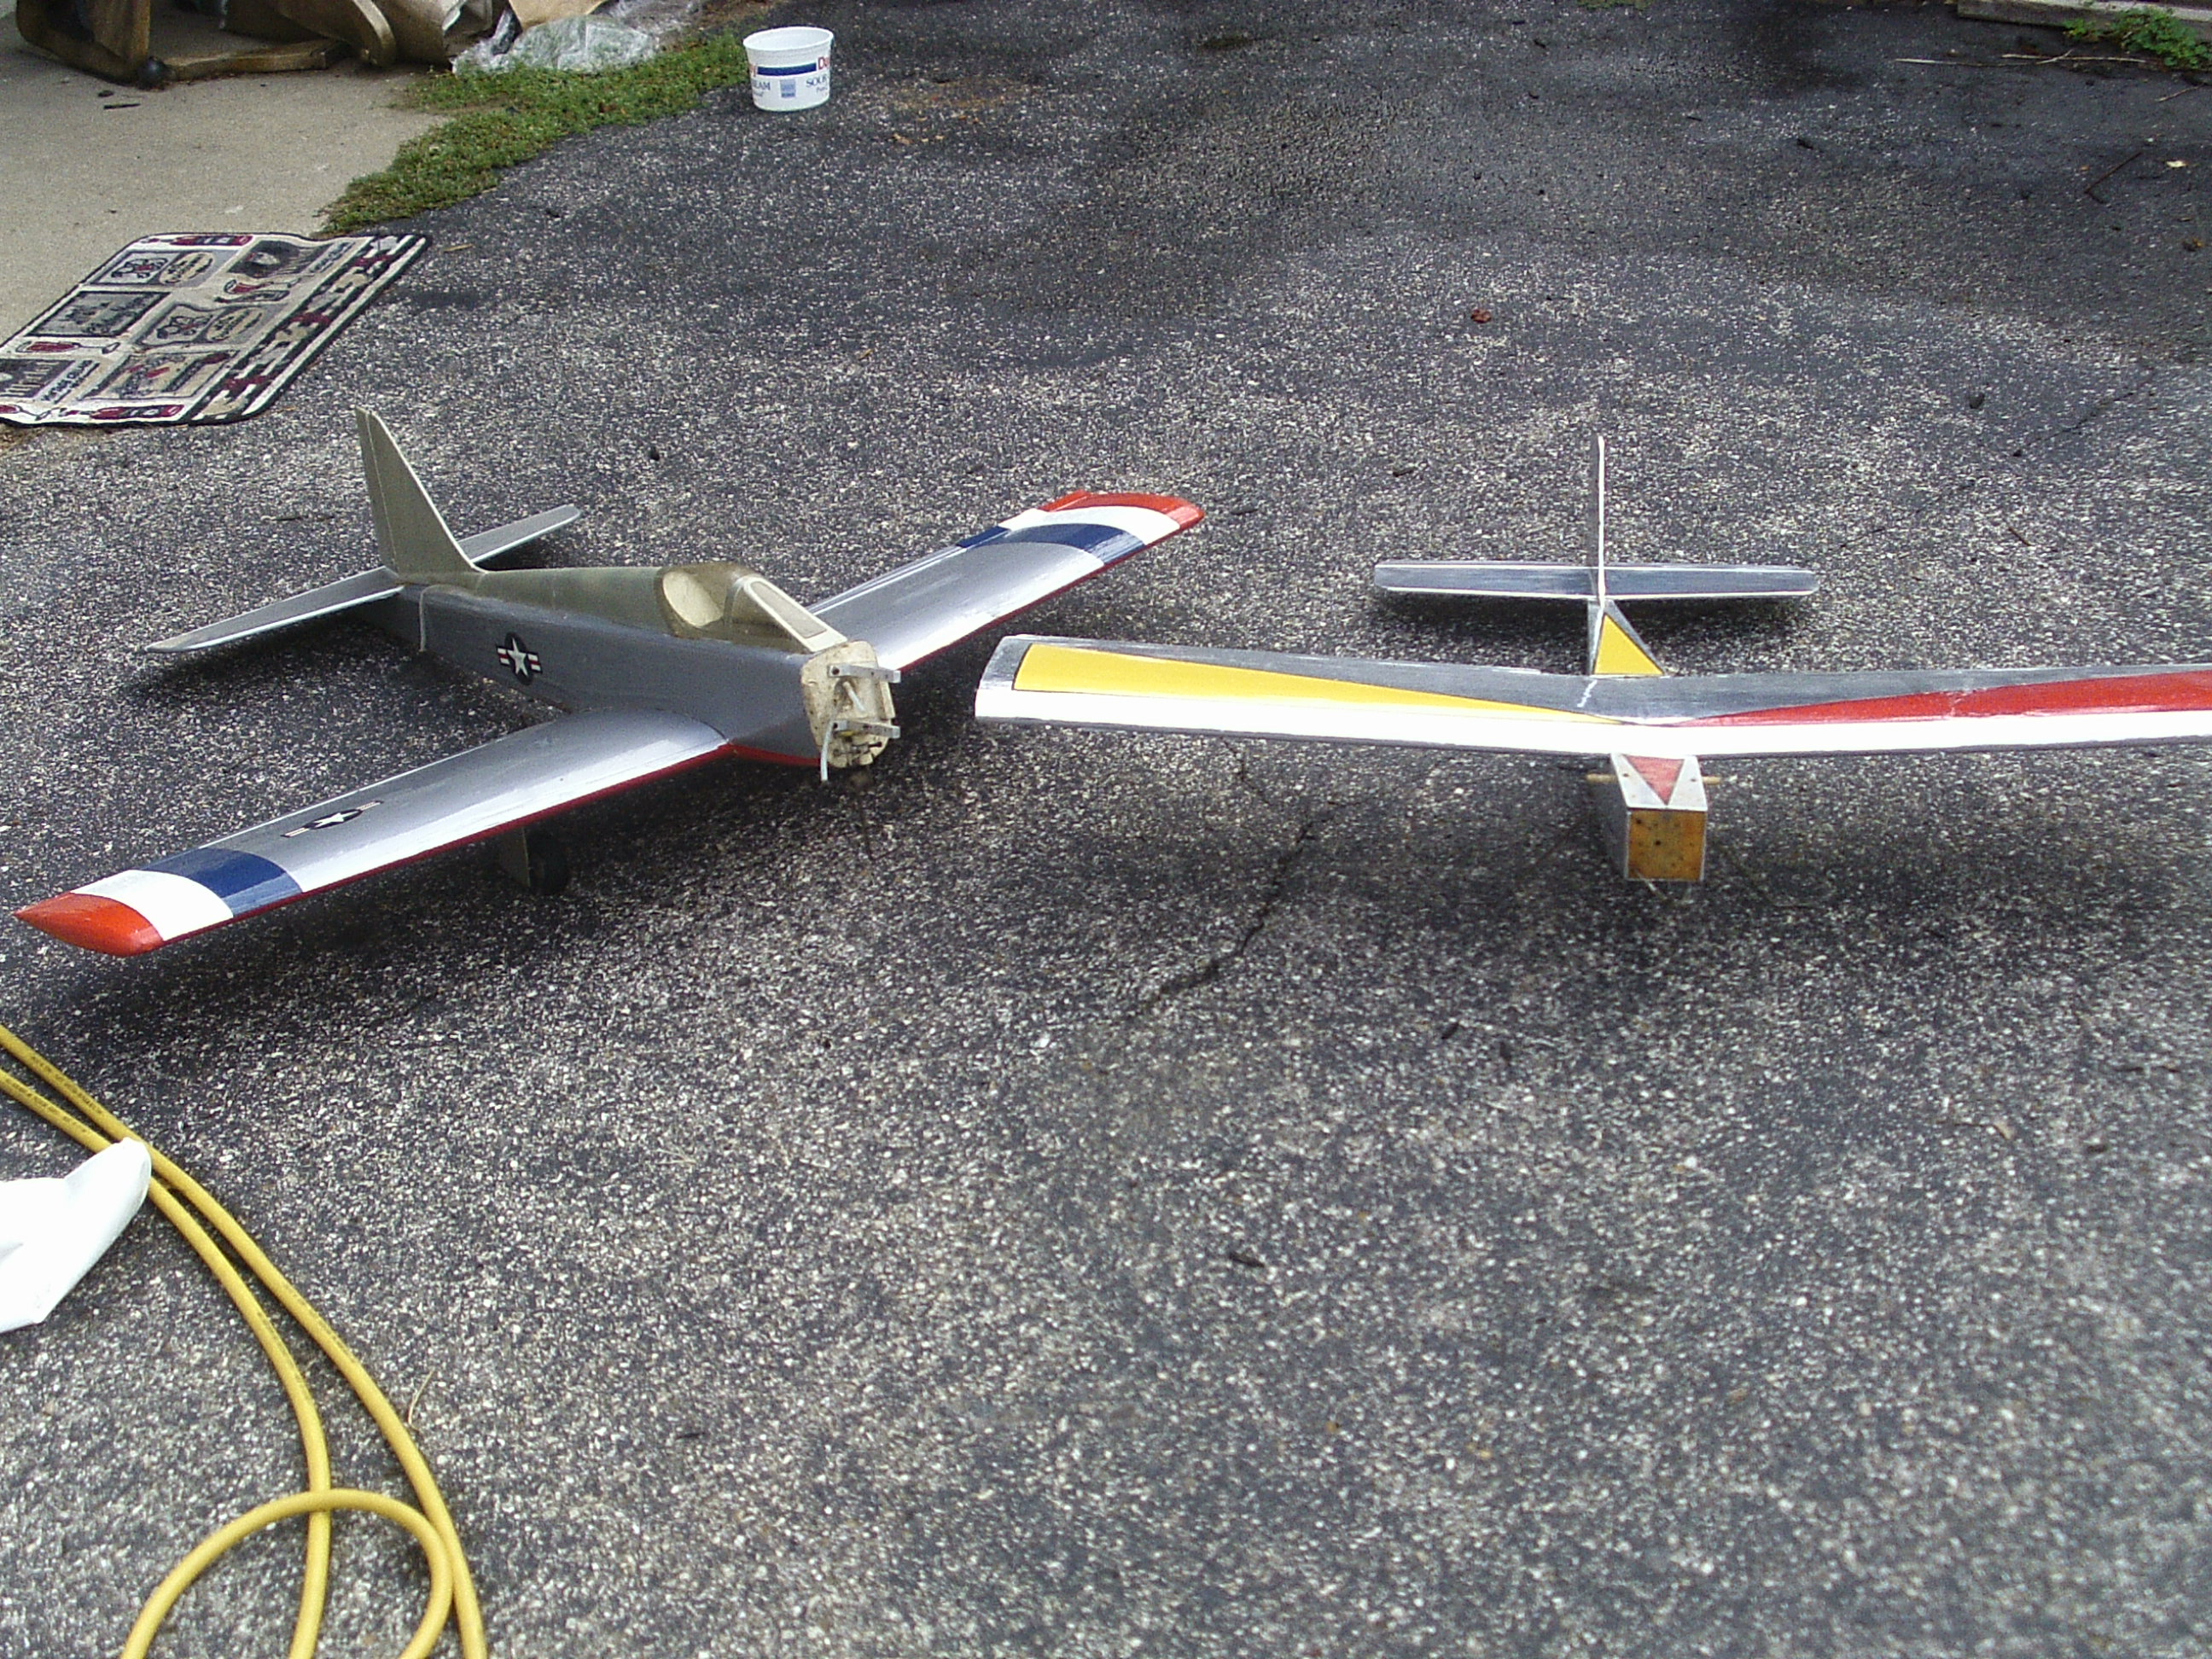
1 - Pic of the two ABF planes
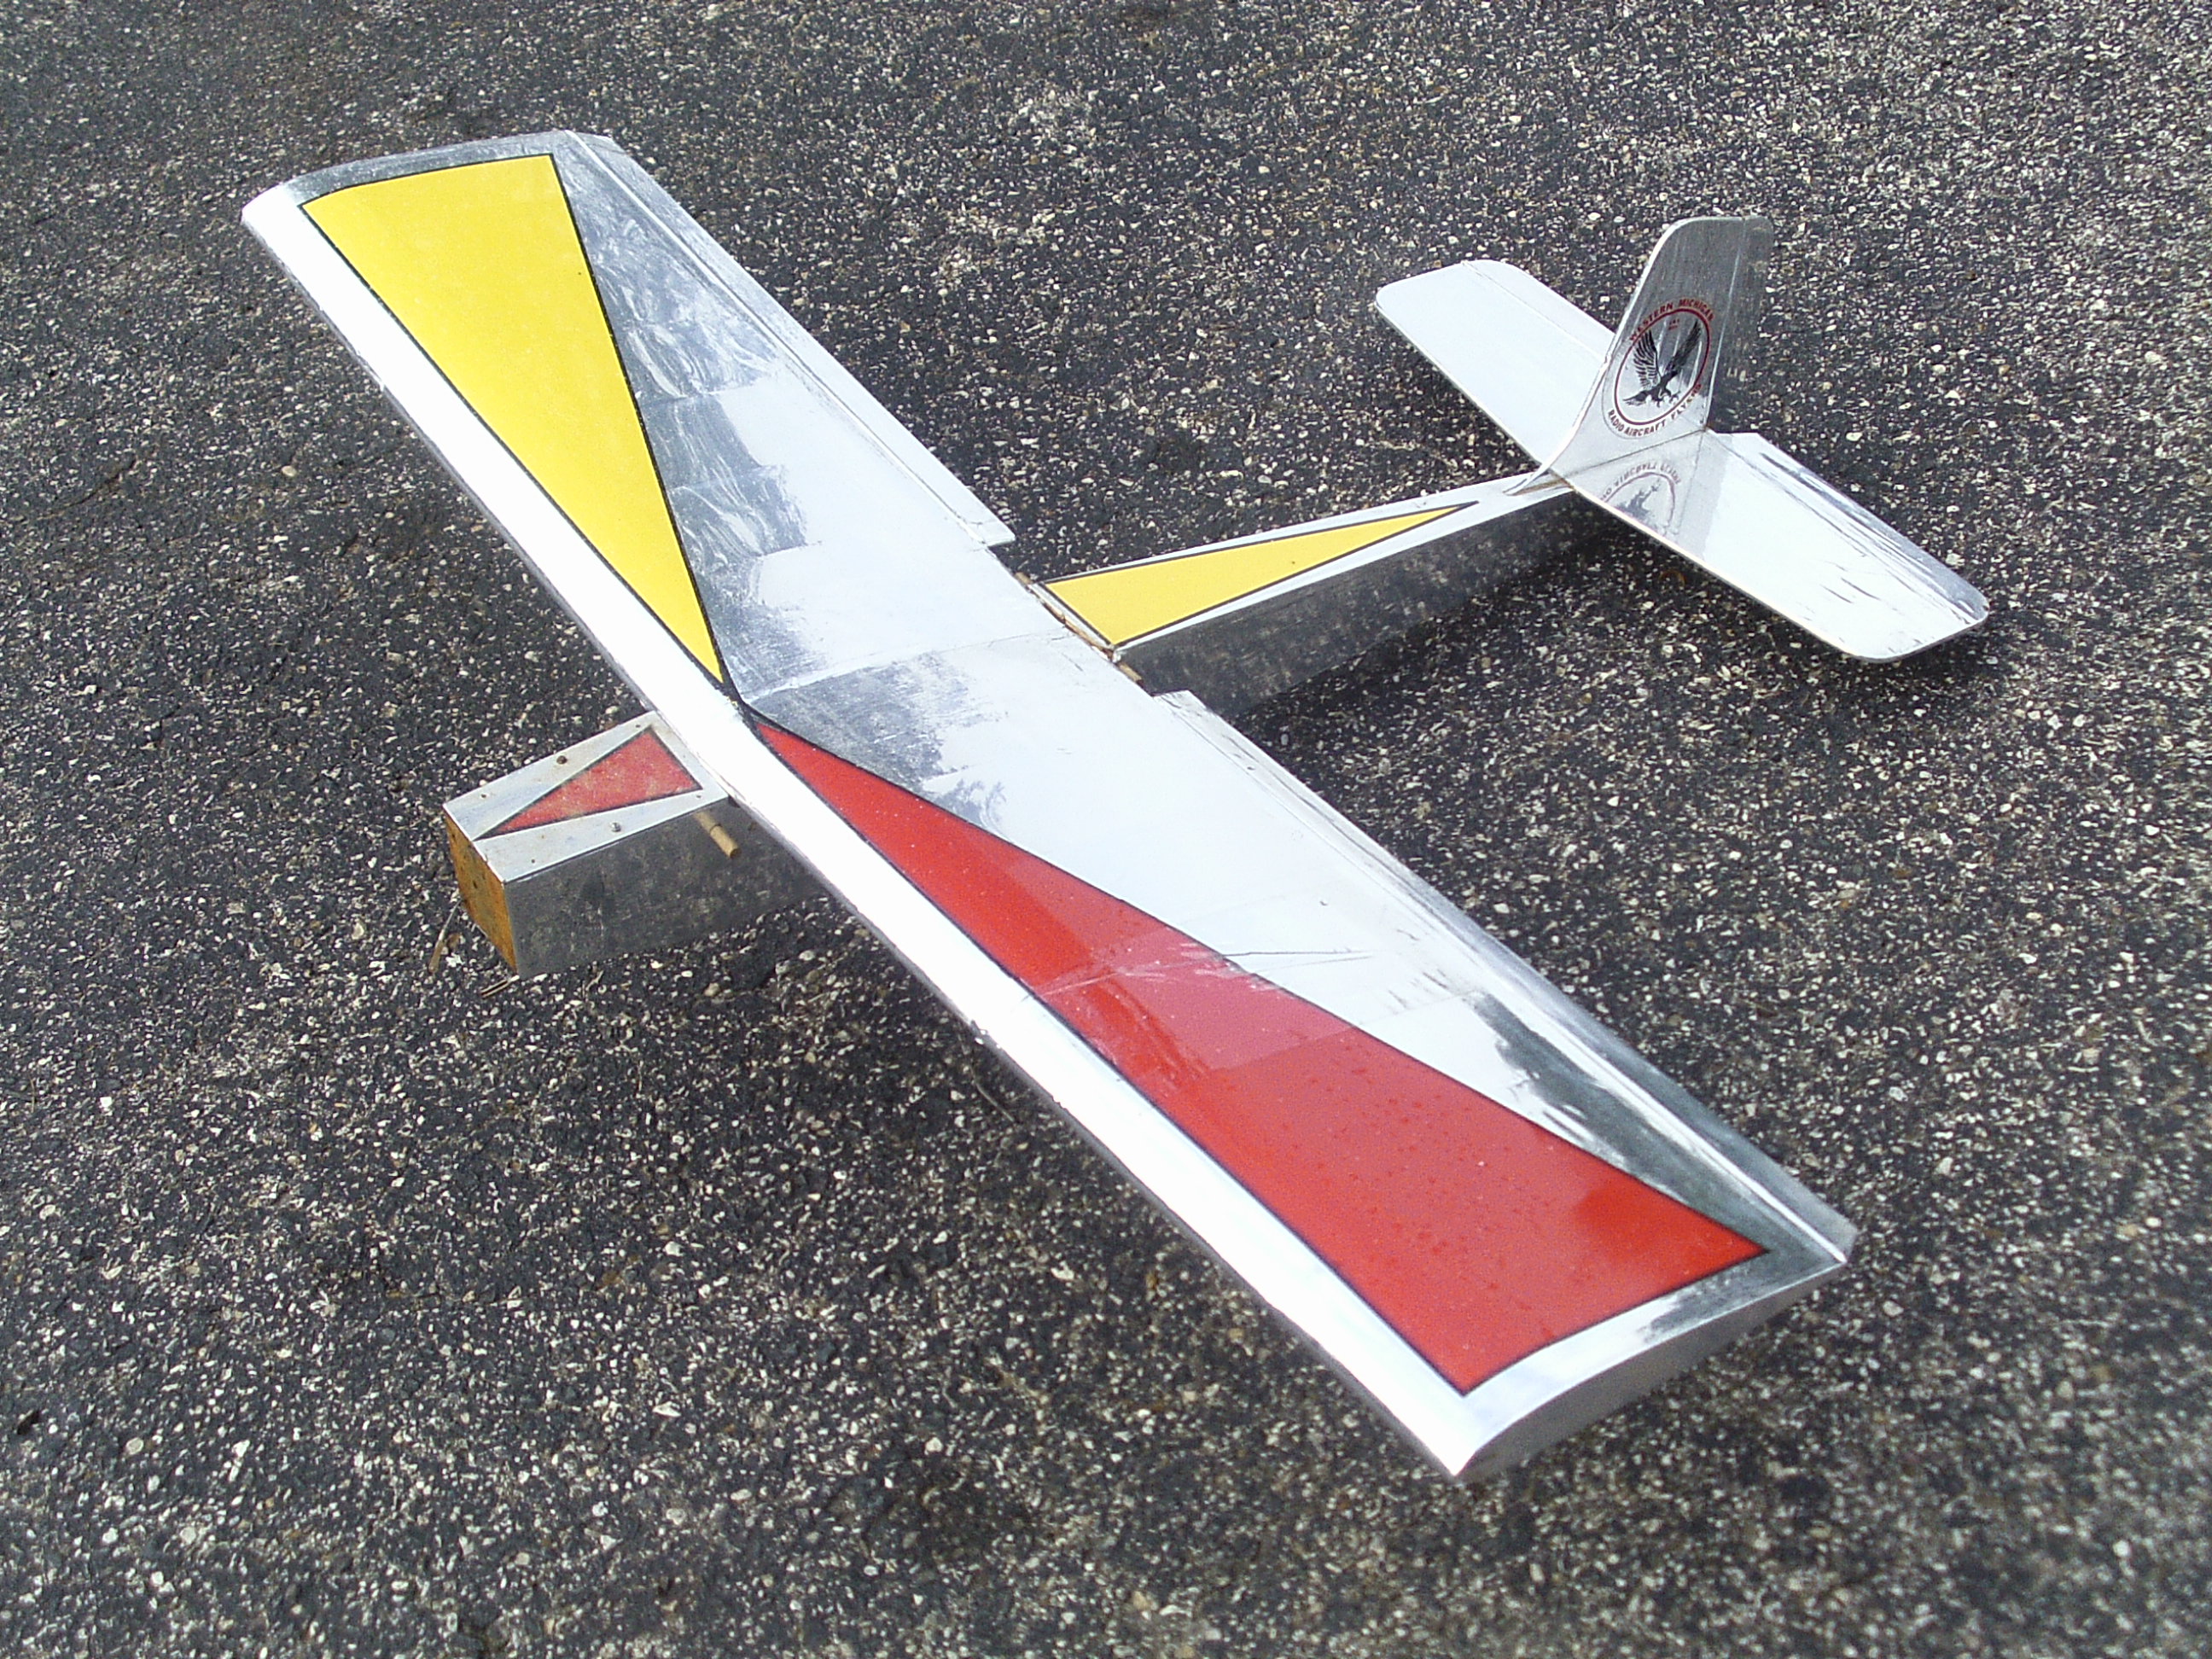
2 - Could this be a Sig Kougar ?
3 - Top Wing Trainer
4 - Close up of the Wide Gaps for Hinge slots
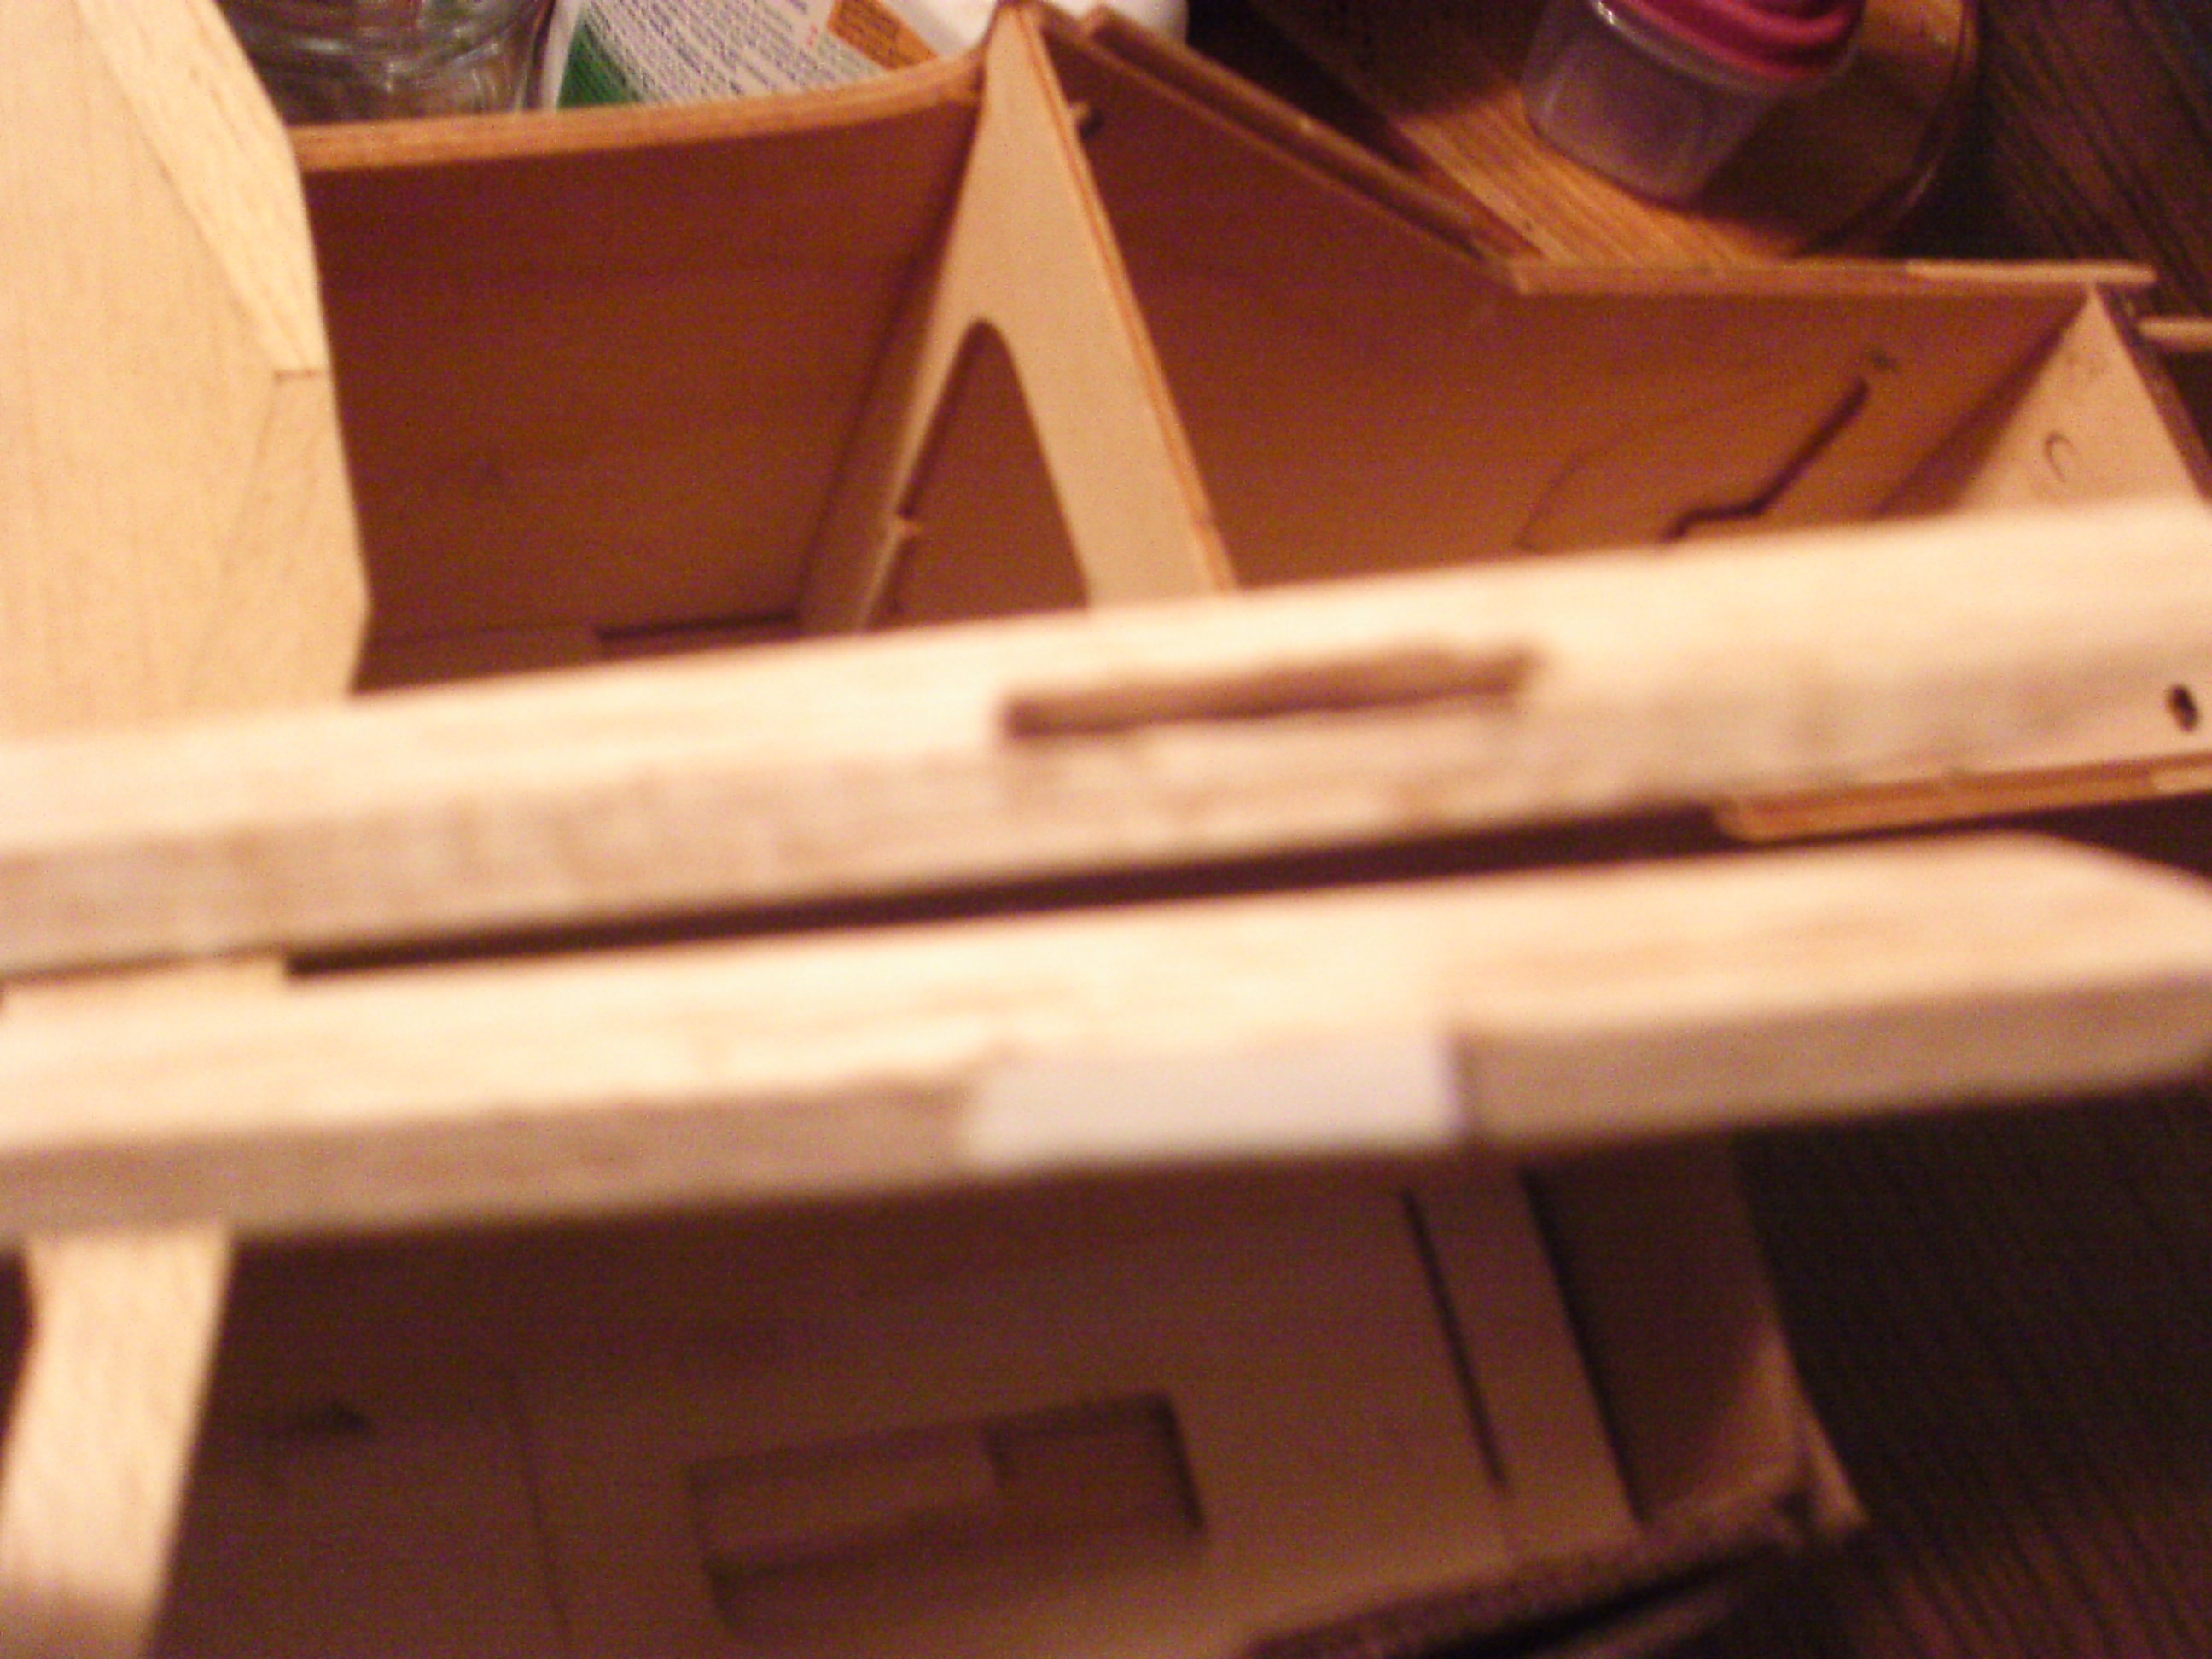
5-Close up of the Ailerons 6- Future site of my Building Table and OOdle's of tools...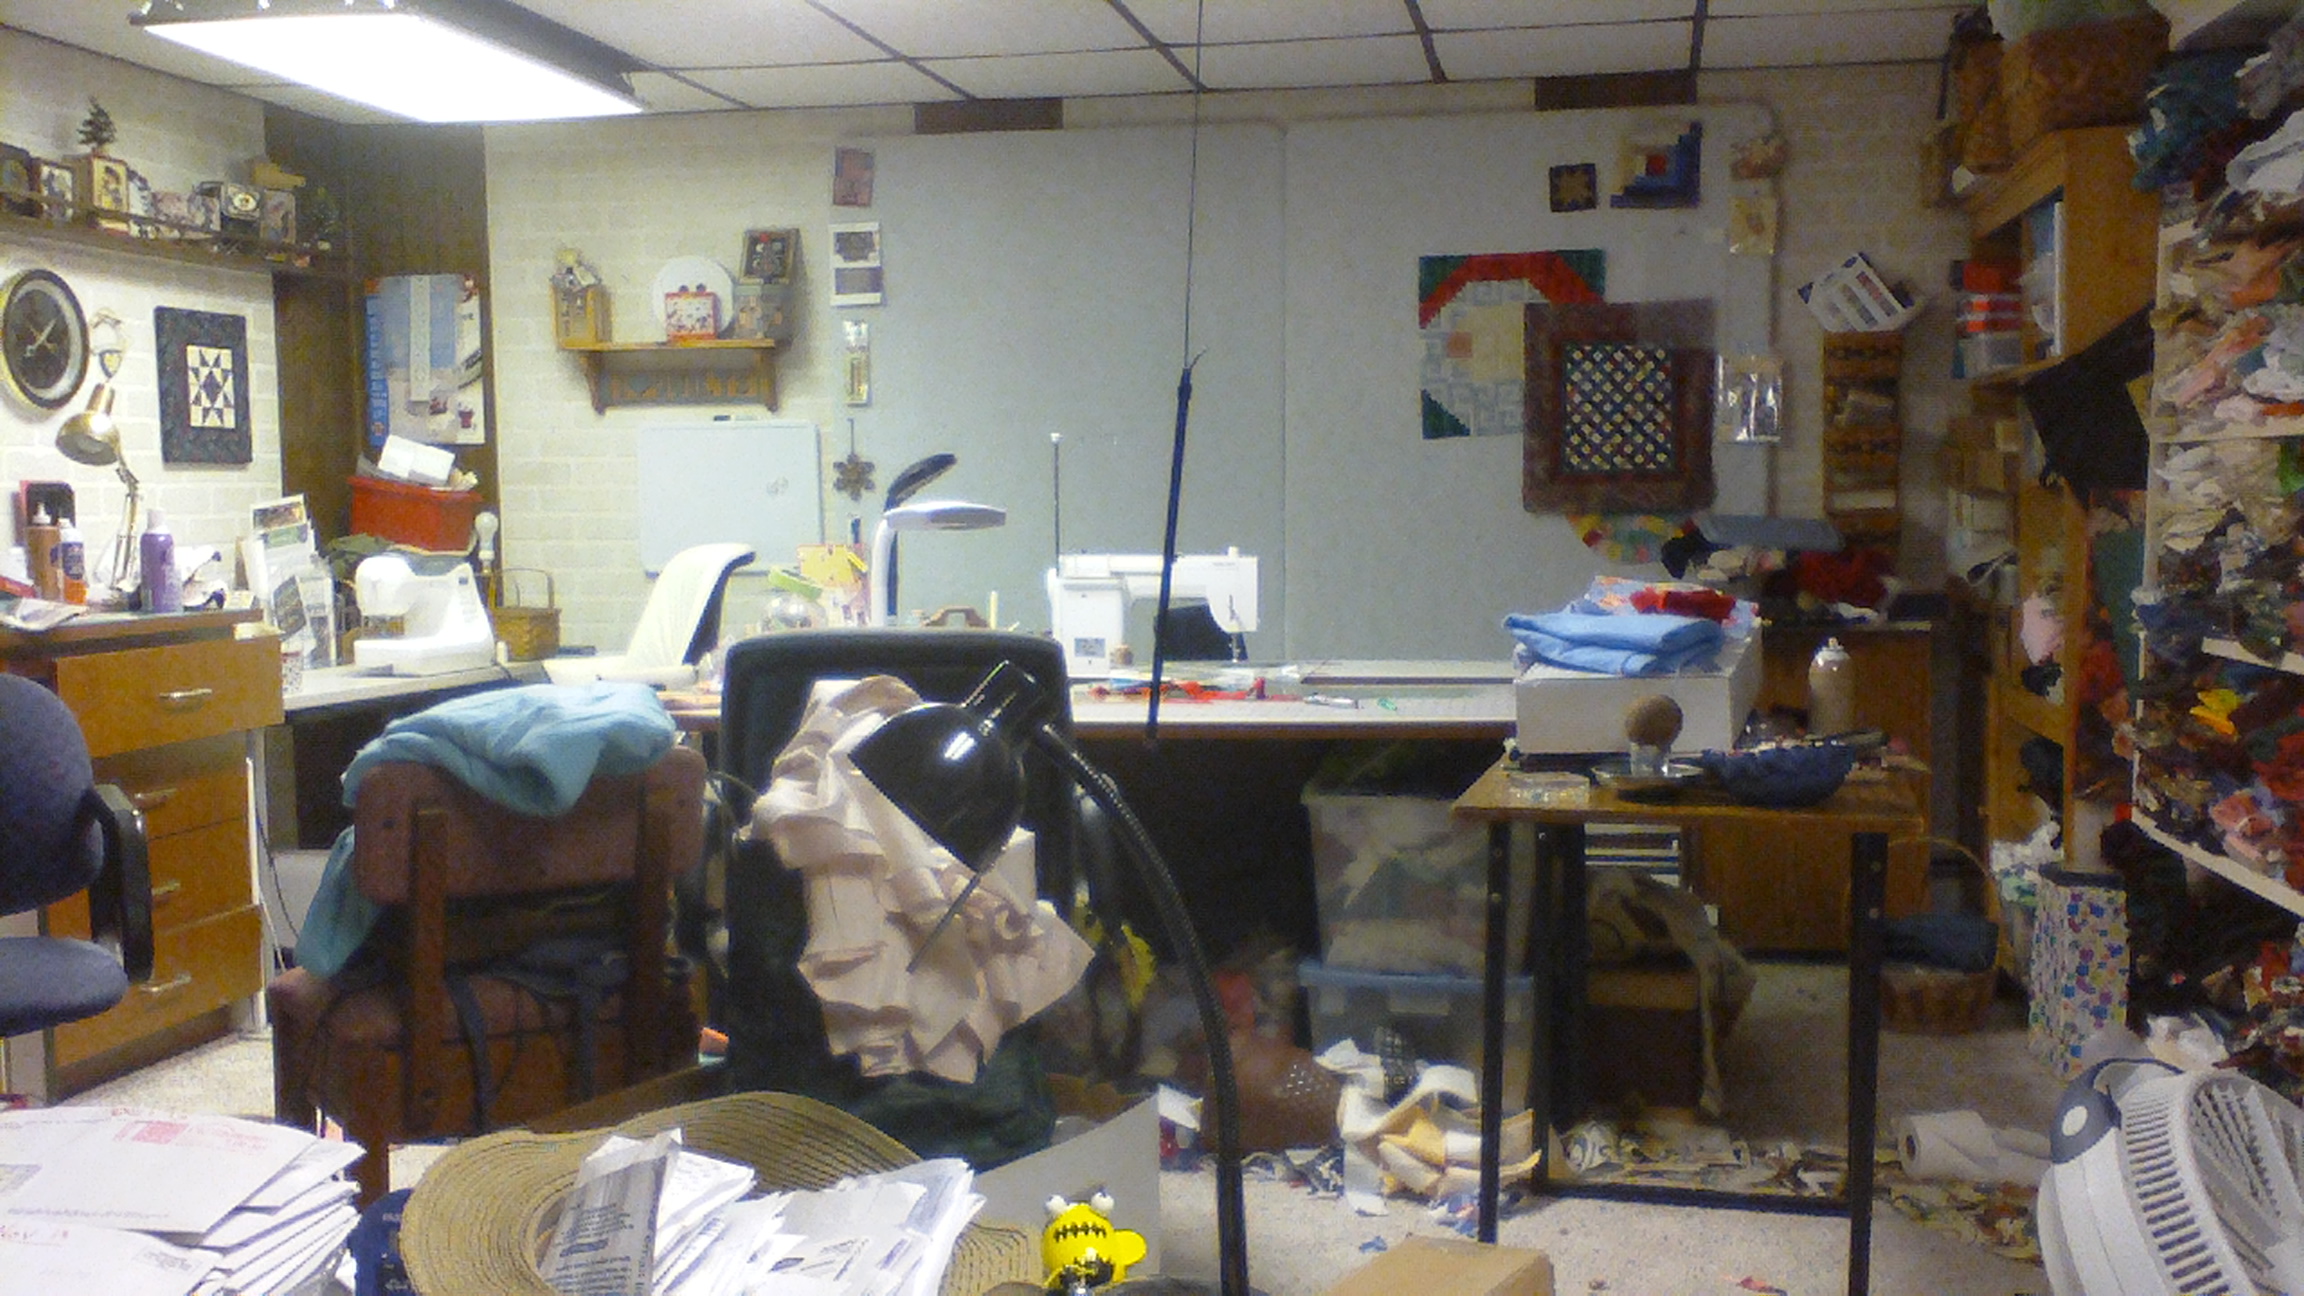
^
I bought three planes at an auction. Two of them are ABF's ( Already Been Flown ) and one is a Semi completed LT-40 Kit. The Kit looks like someone started with good intentions, tried to follow the instructions, got confused and gave up. I checked the parts inventory and all the pieces are there, so I just need to fix a few problem areas and should be airborne by next spring!
The most obvious problem is the former builder hacked the slots for the hinges. I don't know how thin of a slot the power hinge slottter tool makes, but what this guy did was carve out a cavern in the TE and ailerons. I would appreciate your advice on how to fix these oversized holes, as I don't think Thick CA would be appropriate to fill the gap and get a good hinge joint. I've included some pictures for you viewing pleasure. Again, Thank you for making his build thread
1 - Pic of the two ABF planes
2 - Could this be a Sig Kougar ?
3 - Top Wing Trainer
4 - Close up of the Wide Gaps for Hinge slots
5-Close up of the Ailerons 6- Future site of my Building Table and OOdle's of tools...
^
09-02-2014, 05:38 AM
#843
My Feedback: (2)
Hi Renegade,
If I could toss my $.02 in here, I had a similar situation with an LT-25 I'm currently completing. Someone with good intentions and bad skills got to it first but I've just about fixed all the issues.
FYI, when I use my Slot Cutter, even with the thicker blades, sometimes the slot is still a very snug fit on a CA hinge. I think that these 'caverns' (well said) are going to be a problem. I don't think that thick CA is the answer and the loss of all that wood will create a weak spot in the spar. One of those is going to get you someday when it buckles in flight.
IMHO, and for what it's worth, I would cut some filler pieces (called a Dutchman) for each of those slots and insert them. Carve them for a snug fit but DON'T glue them in yet (more in a second). Between the slots, you could cut fresh holes for Robart pin hinges. Once these holes are properly located, you could then glue in your filler pieces in with THIN CA. The Thin CA will wick in nicely and strengthen that weak spot.
If you should glue the Dutchmen in before you drill holes for those Robart pin hinges, the thin CA could migrate through the surrounding wood and make it as hard as a rock, and difficult to drill for those Robart hinges.
As I said earlier, just my $.02
Bob
09-04-2014, 06:31 AM
#844
RCKen - First off I want to Thank-You for all the time and information you have invested in this build thread. You have contributed a very considerable amount of your valuable wisdom and knowledge in building this Airplane. So much so that you've given me the confidence to build one myself! Well. almost by myself.
I bought three planes at an auction. Two of them are ABF's ( Already Been Flown ) and one is a Semi completed LT-40 Kit. The Kit looks like someone started with good intentions, tried to follow the instructions, got confused and gave up. I checked the parts inventory and all the pieces are there, so I just need to fix a few problem areas and should be airborne by next spring!
The most obvious problem is the former builder hacked the slots for the hinges. I don't know how thin of a slot the power hinge slottter tool makes, but what this guy did was carve out a cavern in the TE and ailerons. I would appreciate your advice on how to fix these oversized holes, as I don't think Thick CA would be appropriate to fill the gap and get a good hinge joint. I've included some pictures for you viewing pleasure. Again, Thank you for making his build thread
1 - Pic of the two ABF planes
2 - Could this be a Sig Kougar ?
3 - Top Wing Trainer
4 - Close up of the Wide Gaps for Hinge slots
5-Close up of the Ailerons 6- Future site of my Building Table and OOdle's of tools...
^
Ken
05-16-2015, 09:30 AM
#845

Join Date: Feb 2015
Location: Angels Camp, CA
Posts: 67
Likes: 0
Received 0 Likes
on
0 Posts
Hi Folks
I am building my first ever kit (an LT40) following the directions in this wonderful thread. However, I have run into a snag.
I am at the point where I am test fitting the W5 ribs. The main hardwood spar has been doubled with the shorter balsa piece. The WS-B2 sheet is glued in. The 36 x 3/8 x 1/4 balsa rear spar is glued in, the WS-B3 sheet is glued to the rear spar and the trailing edge.
However, when I try to do the test fitting with the ribs, they fit fine on the main spar, but I find the rear slot on the ribs is both too shallow and too wide for the rear spar.
I had problems determining how to orient the rear spar piece. But it looked from the plans and the thread photos that it should go with the 1/4" surface against the table, making it 3/8" tall. It fit the best on the plans that way, and the photos seem to show it that way. But the rear slots on the ribs won't accept it the other way either, the slots are not wide enough.
So did I glue the rear spar in wrong (should it have the 3/8 face against the table?), or do I have to cut the slots in the ribs deeper for every single rib?
Thanks in advance for any help!
05-16-2015, 09:47 AM
#846
Join Date: Feb 2015
Location: Angels Camp, CA
Posts: 67
Likes: 0
Received 0 Likes
on
0 Posts
DOH!
I used the wrong piece of wood for the rear spar. The piece I used was the 5/16 x 1/2 x 36" one, but I should have used the 1/4 x 3/8 x 36" one. I believe I can fix it now.
If that's the worst mistake I make on this build I will be fortunate!
I used the wrong piece of wood for the rear spar. The piece I used was the 5/16 x 1/2 x 36" one, but I should have used the 1/4 x 3/8 x 36" one. I believe I can fix it now.
If that's the worst mistake I make on this build I will be fortunate!
05-16-2015, 10:58 AM
#847
My Feedback: (-1)
Angles Camp, that's cool, I was from Mariposa. I recall they flew out of Corsgold when I was still there and we flew a lot down at the Fresno club. The field at Mariposa sort of got closed before I moved due to lack of members and not being used or having AMA insurance. Where do you plan on flying now days?? The Merced club is still going strong too.
05-16-2015, 11:03 AM
#848
Join Date: Feb 2015
Location: Angels Camp, CA
Posts: 67
Likes: 0
Received 0 Likes
on
0 Posts
I am a member of the Mountain RC Flyers club. We are fortunate to have found a rancher who has a private 400' x 36' paved runway with an 800' grass extension (he owns a couple Luscombe full size airplanes) that he lets us use, free. The club built a 30' x 15' shade shelter with tables, and we have a porta potty the club pays for the servicing. It's a great little facility out in completely open country, no trees or other obstructions. It's out off of Hunt Road near Copperopolis. Small club, great bunch of guys!
Last edited by michaelnel; 05-26-2015 at 02:48 PM.
05-16-2015, 11:17 AM
#849
My Feedback: (-1)
Couldn't say that about the field at Mariposa, we weren't allowed to bring in a cat to level anything and the oak trees would give us a ground effect if you went over them. It was a great place to learn to fly though, if you learned there you could fly anyplace. Here in the Vegas are we fly a lot from dry lake beds and if you have a cross wind you just land into the wind direction instead of fighting the cross wind. Learn to fly on the LB and you have a very hard time at a real field. 7 sq. miles of flat will spoil you.
Mariposa was also short and down hill but we had the best fun fly events I have ever been to. The guys in the valley loved to come up the hill and get out of the fog.
Mariposa was also short and down hill but we had the best fun fly events I have ever been to. The guys in the valley loved to come up the hill and get out of the fog.
05-26-2015, 02:53 PM
#850
Join Date: Feb 2015
Location: Angels Camp, CA
Posts: 67
Likes: 0
Received 0 Likes
on
0 Posts
And fix it I did. I now have the wings built and much of the fuse (I just finished the windshield & hatch stuff in post #311). Having great fun and building a strong, straight airplane, I hope!
Last edited by michaelnel; 05-26-2015 at 02:57 PM.


