


Building a Tiporare .40
 11-16-2011, 03:09 PM

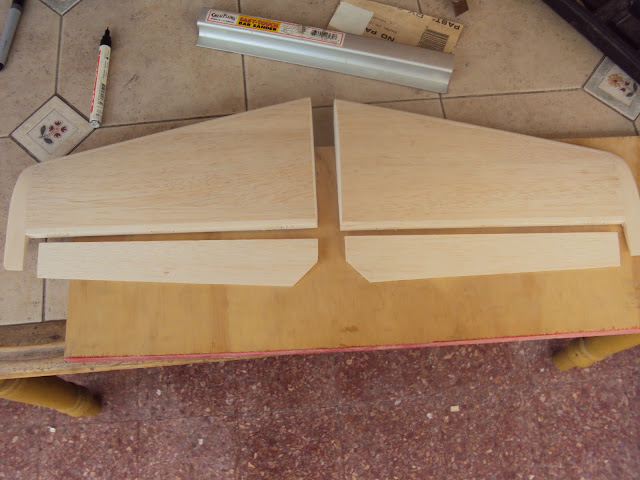
beautiful set of flying surfaces!
Say, I was wondering if you are familiar with the shoe shine technique for wing/stab/fin tips? I can't recall whom I learned it from but it's very effective. Basically, it aids in obtaining tear drop smooth and shaped symmetric tips:
You take the wing or stab panel (much easier to do this before joining panels) and hold it between your legs lightly but firmly while sitting down. You then take a piece of 320 followed by 400 (and 800 if you like) grit sand paper and using a length that is about 6" long, you wrap it over the tip span wise. By holding the paper in your two hands, one on either side of the wing, you then "polish" the tip back and forth along its chord by moving the paper side to side.
Don't know if you use that but if you haven't, it's worth trying - it lends that sexy look and feel to your model!

David.
 11-17-2011, 02:07 AM
Kind regards,
Kenneth
11-17-2011, 10:39 AM
So do I, but I am always willing to try something new. I'll start on a discardable tailplane.
Kenneth
11-17-2011, 09:01 PM
 11-18-2011, 09:16 AM
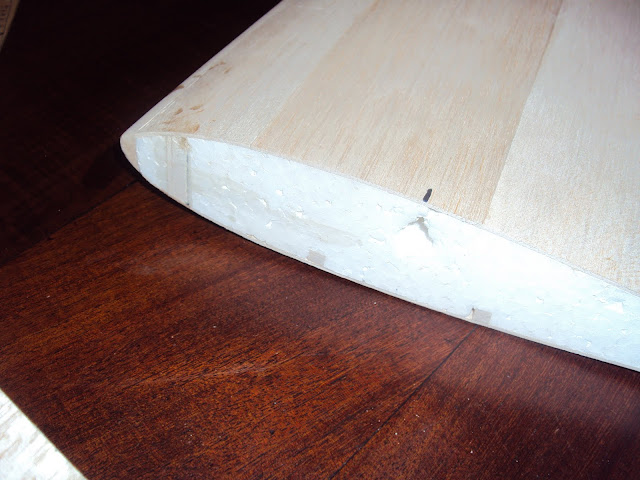
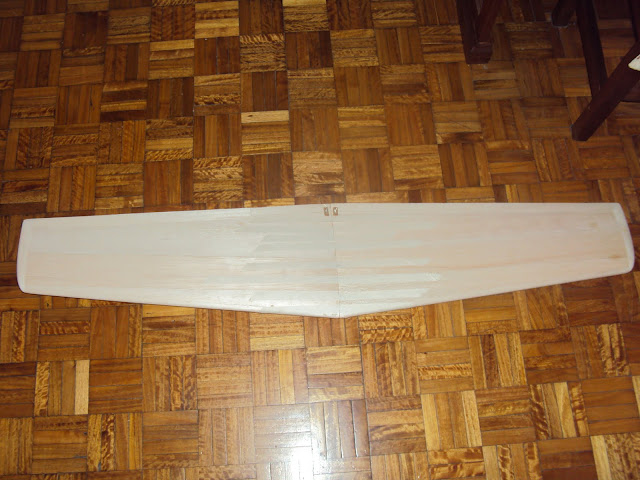
I tried your "shoe shine" technique today on the wingtips of a 60" x 60" pattern plane I am building and it worked a treat.
I got most of the shaping done with the razor plane and then "shoe shined" the wing tips with 120 grit. This tends to work off any asymetry in the "roundedness" between top and bottom surfaces.
Something else I tried when shaping my wingtips after shoe shining is using abrasive or sanding sponges sold for decorating for final shaping. They works beautifully, they don't clog and they don't leave flat spots.
I bought a set of three recently for peanuts, 80, 120 and 200 grit. Their dimensions are 4"x3"x1" and they are really handy. The 80 grit is rather vicious and needs treating with care. The fuzz and scratches left by the 80 are cut down by the 120. The 200 leaves things ready for final hand smooting with 400 sandpaper. I will never use sanding blocks when shaping tips or cowls again.
Give sanding sponges a try.
Kenneth


 11-19-2011, 07:19 AM
glad to hear the shoe shine technique worked for you. Those sponges sound interesting, I'll have to try some out.
Just to note on some of the above comments, I personally don't use the shoe shine technique for shaping. I do like most others when it comes to that and use the traditional small razor plane and sanding blocks (I'm quite fond of the GP aluminum T blocks now - always used wood blocks in the past). On tips I typically produce the fish shaped tip with the plane and masking tape and then finish off with a 220 grit block. I then go back at it with a 120 grit to produce the rough contour of the tear drop. I then smooth out some with 220 or 280 grit. As we know, the blocks leave flat spots even if just grazing the soft wood.
The shoe shine comes in at this point as it eliminates any flat spots by following the general contour of the tip which has already been pre shaped. Because pressure is mostly even around the contour of the tip, the sanding happens over the entire surface of the tip at once - from top to bottom. This is why it's effective at yielding symmetry. Unlike the blocks it is also sanding cross-grain since the grain is lengthwise on the tip. Because of this I generally do not use anything heavier than 320 grit paper and only use that if the wood is harder and calls for it. So basically it's a "fine tuning" technique reason for which I refer to it as polishing rather than shaping.
These of course are just my experiences.
David.


 11-19-2011, 05:47 PM
11-20-2011, 04:07 AM
11-19-2011, 05:47 PM
11-20-2011, 04:07 AM
Thank you Roary m!<o ></o>
></o>
As you can see I don´t have a workshop so I´mbuilding were my time and wife let me... balcony, kitchen, dining room!<o></o>
Regards,<o></o>
<o> </o>
Chino<o></o>


 11-20-2011, 11:33 AM
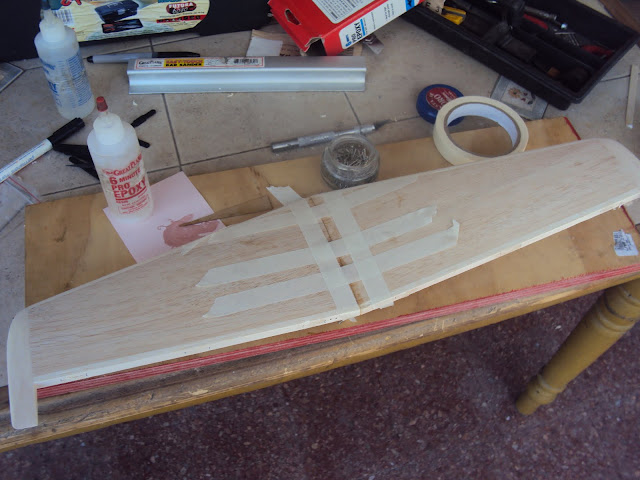
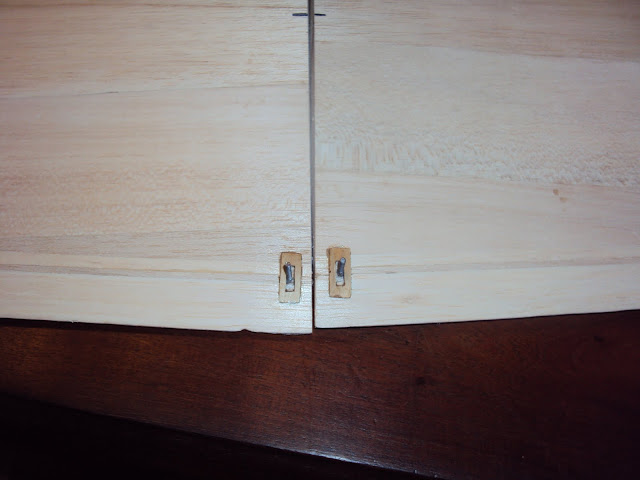
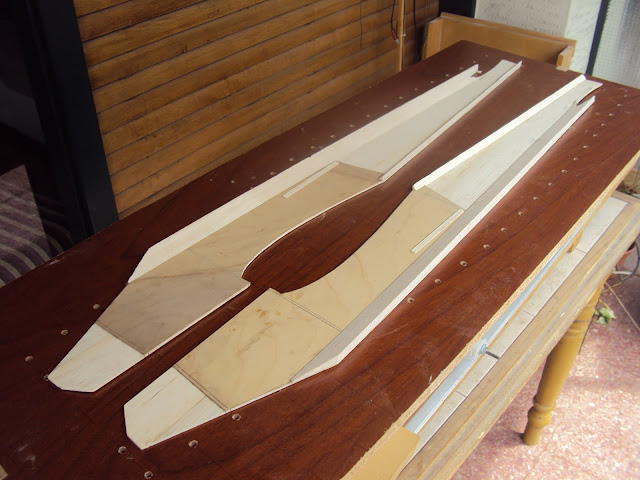
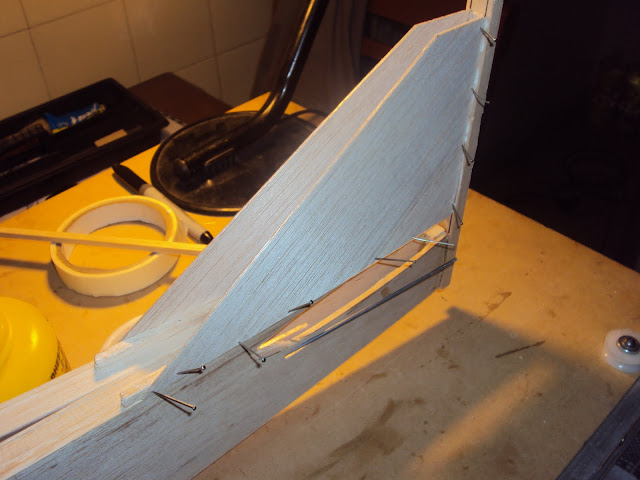
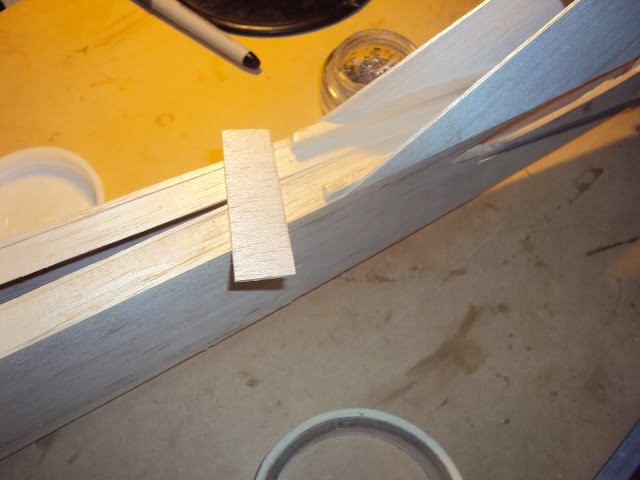
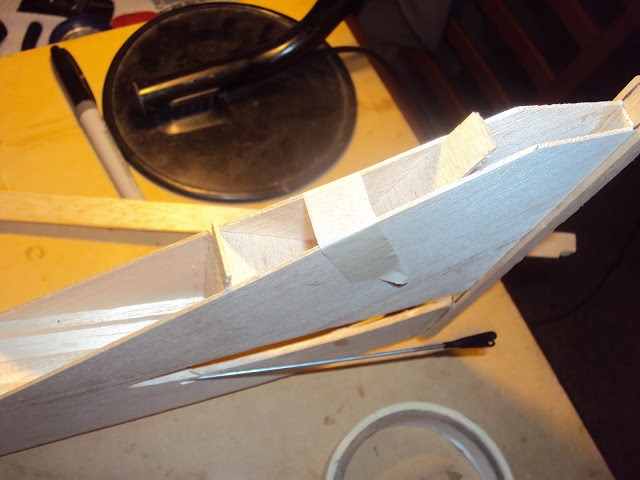
Building the fin. This is my free interpretation of the plan because it isn´t very specific about how to build it.<o></o>


 11-21-2011, 10:34 AM
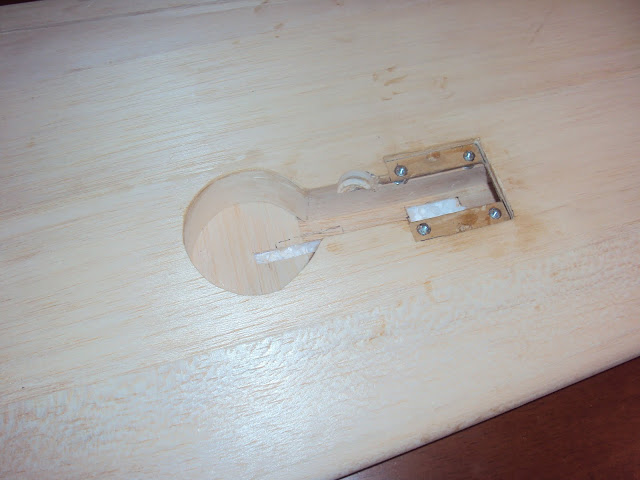
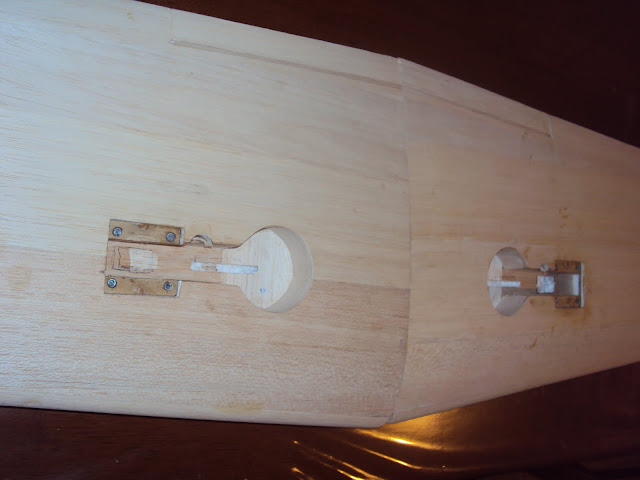
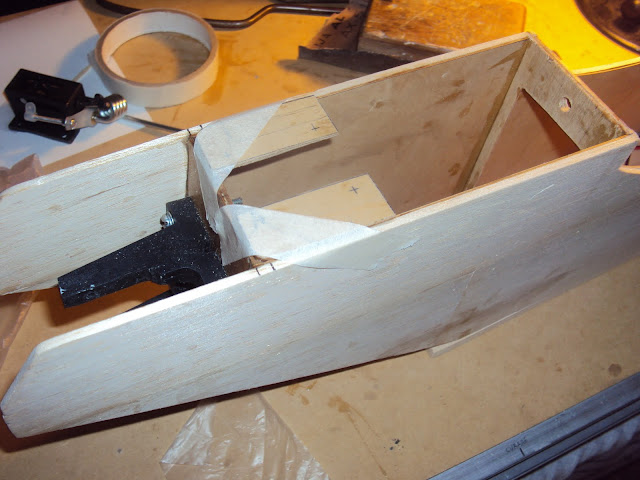
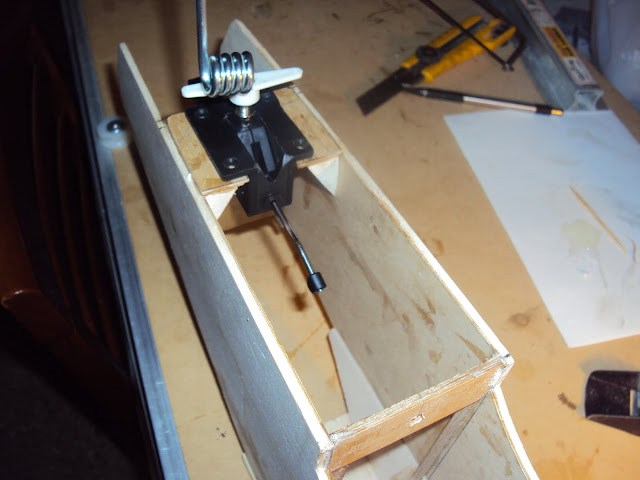
Can't recall if you were going to use single sided steering earlier but this approach using P-P wires strikes me as better on the Tipo. You should be able to put a NG retract servo beside the wheel on a lightened fuel tank plate (1/16" ply) unless you plan to use a single servo (I admire those who have the stamina to do so - I can't bring myself to do it). If you setup your rudder using P-P too with it center mounted, the linkage and servo becomes the heart of your model...
 (the elevator servo is the guts!) Pull the linkage from the outside of the servo arm for rudder and inside of the arm for steering. You'll need a couple of holes in the sides of your F2 former to pass the steering wires. Easier to do this now before sheeting the canopy area. I'd suggest using a couple of nyrod lengths in the holes.
Don't know what tank you have in mind but you might want to consider half a pound of fuel (8 oz) to keep things lighter what with the retracts and gear. Was that a DuBro 10 oz in earlier pics?
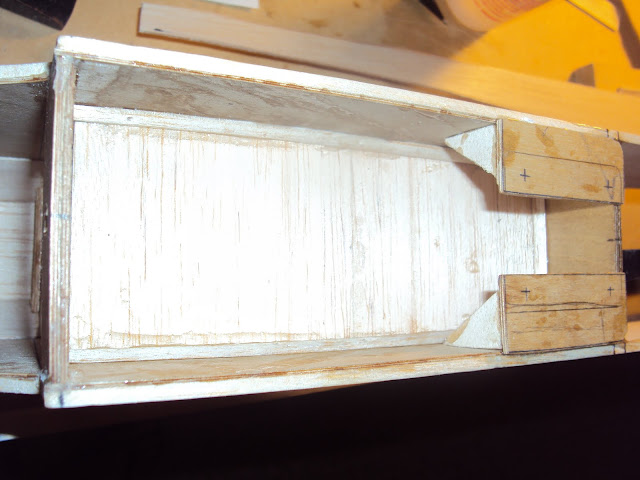
A coupla' other ideas... Put some lock nuts on the back of your motor mount screws behind the blind nuts, then cut the screws off so they are flush with the lock nuts - permanent mount with no need for thread lock! I'd also seriously brace the back (and maybe front) of that firewall with tri-stock but you probably already have that planned. 3/8" stock should do. Might want to glass the front to the sides as well before you add the bottom and top balsa sheet. I'd also recommend using a square piece of 3/8" balsa to close off the front of the nose prior to adding the 1/16" ply nose ring. You can then bore out the balsa to the inside diameter of the ring in order to mount the engine. A little 1/4" tri-stock behind the 3/8" balsa "nose former" all around might also aid in the shaping. Also, don't forget that you'll want to hollow out the "canopy" balsa tri-laminate (3/8" I suspect) after shaping it externally so use rubber cement or tack glue it (CA) to the side tops.
The nose is a little tricky to shape, especially the chin to nose ring transition but the photos of the 2m model I posted should help. The following CU pic might also help for shape reference. I would work on the fuse from the back forward starting by producing a smooth squarish box. Make sure you mount the wing before final shaping the fuse - it should be much easier with the "right" angles than a smooth missile! The shoe shine technique should also work nicely on the fuse top once shaped. BTW, I wouldn't build those fillets on to it before you have a finished and shaped fuse but prior to final 400/600 grit sanding.
Replied to your PM - hope it helps.
David.
Edit: Replied to PM2 as well. [8D]
11-21-2011, 11:30 AM
David,<o></o>
Thank you for your comments, ideas and recommendations. <o></o>
The tank will be a Dubro 8 oz., the inside of the #2 bulkhead is dimensioned for passing this tank, but I´m in doubt of make the canopy detachable.<o></o>
I was trying the shoe shine techniques and it works great!<o></o>
Am I the first one to build a Tipo .40? Or maybe the second one…. I didn´t find any other.<o></o>
Which is the equivalent in Argentina for rubber cement????<o></o>
<o></o>
Chino<o></o>
<o></o>
11-21-2011, 11:39 AM
no, not a removable canopy. Just remove it to hollow it out and once that is done, glue it on permanently. For lightness and space for the fuel tank!
DuBro 8 oz - excellent.
Second Tipo 40 as far as I know - at least on the forum. The other one was a WK glass/foam version as I mentioned some posts up. Rare kit.
Rubber cement - same as suggested for the "fake hinges" to shape ailerons and elevators. Remember good old Google; as mentioned, the internet is your friend.

David.
11-21-2011, 12:02 PM
Yes, Google is very good but I asked if there are someone in the forumwho knows which the equivalent product in Argentina… I mean J-B Weld here is “Poxipol” and maybe Rubber Cement is "Plasticola",“Boligoma” or something like that...<v:shapetype id="_x0000_t75" coordsize="21600,21600" o:spt="75" oreferrelative="t" path="m@4@5l@4@11@9@11@9@5xe" filled="f" stroked="f"> <v:stroke joinstyle="miter"></v:stroke> <v:formulas> <v:f eqn="if lineDrawn pixelLineWidth 0"></v:f> <v:f eqn="sum @0 1 0"></v:f> <v:f eqn="sum 0 0 @1"></v:f> <v:f eqn="prod @2 1 2"></v:f> <v:f eqn="prod @3 21600 pixelWidth"></v:f> <v:f eqn="prod @3 21600 pixelHeight"></v:f> <v:f eqn="sum @0 0 1"></v:f> <v:f eqn="prod @6 1 2"></v:f> <v:f eqn="prod @7 21600 pixelWidth"></v:f> <v:f eqn="sum @8 21600 0"></v:f> <v:f eqn="prod @7 21600 pixelHeight"></v:f> <v:f eqn="sum @10 21600 0"></v:f> </v:formulas> <vath o:extrusionok="f" gradientshapeok="t" o:connecttype="rect"></vath> <o:lock v:ext="edit" aspectratio="t"></o:lock></v:shapetype><v:shape id="Imagen_x0020_1" o:spid="_x0000_i1025" type="#_x0000_t75" alt="http://www.rcuniverse.com/forum/js/punymce/plugins/emoticons/img/trans.gif" style="width:.75pt;height:.75pt;visibility:visible;mso-wrap-style:square"> <v:imagedata src="file:///C:\Users\FLOYDI~1\AppData\Local\Temp\msohtmlclip1\ 01\clip_image001.gif" o:title="trans"></v:imagedata></v:shape>[img]file:///C:\Users\FLOYDI~1\AppData\Local\Temp\msohtmlclip1\ 01\clip_image001.gif[/img]<o></o>
About the canopy, I understand that I´ve to hollow it, but maybe the problem will be the tank installation or any fix that I´d do latter.<o></o>
<o></o>
Chino<o></o>
11-21-2011, 10:08 PM
Chino
I guess its called "ideas by proxy". I'll stop brainstorming now; it's actually therapeutic and takes my mind off other more concerning things...
Build on!
David.
11-22-2011, 12:49 AM
Plasticola is what is known in the English speaking world as PVA or white glue. I wouldn't use this for it will take a chunk out of one of the pieces tacked with it when you try to separate them.
Boligoma, from memory is a clear glue in a ball point container like some roll-on deodorants designed to stick paper and for arts and crafts. I don't think this would work. The name Boligoma is misleading due to the traditional habit of classifying most crafts glues as "goma de pegar"
I think what David is suggesting is a rubbery contact cement. Here in the UK we used Copydex which smells strongly of ammonia. It is popular for veneering foam wings.
The closest I can think of in Argentina is Poxi-Ran. However, it smells of solvents so I would't use it for veneering. I also suspect that, given that it is used by cobblers (zapateros) to stick soles on shoes that it may be stronger than Copydex or the rubber glue David is suggesting. I would test Poxi-Ran on some scrap pieces to determine how thinly to apply the glue to avoid pulling chunks out of your trailing edge or aileron stock when you try to separate them.
I hope this helps.
Kenneth
11-22-2011, 01:53 AM
Thank you Kenneth, Poxi-Ran is the name I waslooking for. <o></o>
11-22-2011, 02:00 AM
If you wish to make your canopy removable, I have been using magnets with great success. I got 50 for £4 ($6) off eBay. They are Neodymium Disc Magnets 6x3 mm and they are great - very strong. No more messing around with latches or screws. All you need apart of the magnets is some scrap wood fixture to prevent the canopy from sliding sideways.
If you can't get any suitable magnets, I am travelling to Bs. As. on the 6th December for 3 weeks so I can bring you some, although I suspect that the model will be finished by then given the speed you work at. Maybe we can have a beer. Also, I must meet the woman that lets you build on the kitchen or dining room tables. Women like your wife are few and far between. If I tried such a stunt, all my stuff would instantly be tossed over the balcony, followed by me.
Saludos,
Kenneth


 11-22-2011, 02:14 AM
Thank you Kenneth, PM me when you are here. I´ll be glad to have a bear with you.
My wife knows that I was involved with airplanes since I was a child. So, she will not challenge that!… But I clean everything even though I use a lot of time setting up the “workshop” and cleaning than building…