Building a Tiporare .40
 11-22-2011, 05:19 AM

 11-22-2011, 06:20 AM
Thank you 8178 for your nice comment and for sharing your experience. I saw all of your building (Tiporare, Blue Angel, etc.) thread, videos and learned a lot for my Curare (http://www.rcuniverse.com/forum/m_10672934/tm.htm),who is the first pattern plane I build. You are one of the best builders inthis forum. <o ></o>
></o>
ThisTiporare .40 is for training purpose, before I fly my Curare... less $$$$ inthe air! I am trying to keep it simple and cheap. That´s why it has Chinese retracts, one servo for ailerons, etc.<o></o>
Regards,
Chino
11-23-2011, 06:34 AM


 11-23-2011, 08:12 AM
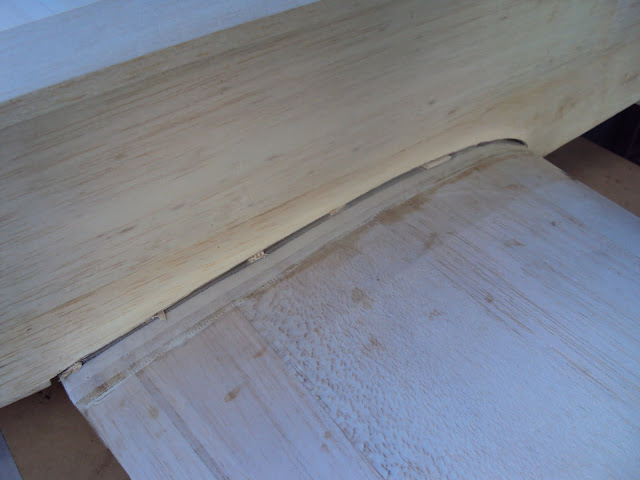
Nice work, however I think that by putting the aileron servo box where you did you cut a hole in the stress highpoint of the wing severely weakening it. If I were you I would put in full depth ply braces in front and behind the servo box to take the compression loads that would have otherwise been taken by the piece you cut out. Without this reinforcement your wings may clap together if you yank the elevator too hard at full speed.
Kenneth
11-23-2011, 09:58 AM

I guess that's always a possibility isn't it? I was having similar thoughts. On the other hand there are wings like that of Hannos Curare which had centers that were more of a void than wing!
I do recall that the Curare plans show two braces like you describe though. In some respects this is one of the nice things about retracts with integrated servos. But enough thinking aloud.
Diego,
Given the wing will have a thin ply plate (1/32 in?) on the bottom TE for the bolt, an idea might be to brace the wing in the back between the two servo wells and in the front ahead or flush with the front of the retract pocket. 1/16" ply rectangles should be more than ample unless you want to save some weight and use a 1/16" balsa & CF laminate.
I might also go ahead and lay some 3/4 oz glass on the bottom of the wing out to the retract bays atop the existing heavier glass. For this I'd use a 50/50 mix of 30 min epoxy & alcohol using as little as possible. The glass also makes for a better undercoat compared to the more granular 5-6 oz cloth - nicer MK job.
Not much more building left! Just a little shaping... ;-)
David
11-25-2011, 03:08 AM
Kenneth and David, yes, when I saw the holes for the fist time I thought the same way.<o></o>
But I´m thinking about to reinforce the zone, I don’t know how yet, but maybe some plywood and epoxy as you said.<o></o>
If you see my Curare thread the wing has two plywood dihedral reinforcement, look at this link:<o></o>
http://www.rcuniverse.com/forum/m_10672934/mpage_3/key_/tm.htmPost #64<o></o>
But in theTiporare plan there isn´t any reinforcement.<o></o>
11-30-2011, 12:33 PM


David, I´m still thinking how to do the wing fillet, maybe as you described me in the PM, but I saw the way 8178 did it in the Blue Angel.<o></o>
11-30-2011, 01:51 PM
I can't recall what I described in the PM but I can show you some pics of the one I did recently. The BA is a little different because it has a full belly pan and it uses a former which is mated to the front fuse bulkhead. It actually uses a former in the back too - basically the BA has an "integral" wing leaving the fuse looking as if the wing was bolted on to the side unlike the Tipo. Most Japanese designs of the 80's were designed like the much earlier BA in that respect.
For the Tipo all you need is a "nose chin". The trick is to cut an oversize block the width of the fuse at the wing LE and then trace the airfoil (from the fuse side plan) on to the sides of the block. You then carve out the inside of the block so that it seats nicely on to the wing. The important thing is that is mates nicely on the sides and it tapers into the wing as it thins out. Once your wing is mounted, which it is, you can glue on the carved out block (use light balsa) and then sand it on the top and around the edges to "fuse airfoil" so to speak. You will still need some epoxy and MB to produce a smooth transition between the balsa block and the wing.
I like to paint the wing center sections if covered with plastic as it makes for a more durable and smoother looking finish. If doing so, you will want to glass the "nose job" and then when you prime you will have to add some body filler to sort out any minor imperfections in your epoxy/MB job - it might look perfect but by the time you prime it you will tell yourself - "who on earth did this shoddy job!?"

In the end it turns out nicely... (painted pics).
David.
11-30-2011, 02:05 PM
11-30-2011, 05:16 PM
I must have been thinking of producing a hollow chin in a framed up fashion.
In retrospect, the chin is small enough that I'd just go with the balsa block as suggested above. It will make it stronger and easier to finish I suspect. But I suppse either way works, the balsa sheet sides (triangles) might just be a little tedious to work with.
David.


 ]
12-02-2011, 05:59 AM
]
12-02-2011, 05:59 AM

This is one of the finest tutorial build threads that I've ever seen. I wish that I could have seen this 30 years ago!
Take care,
Frank
12-02-2011, 07:34 AM
I hope the PM's were helpful. One thing you could do is cut a 1 mm ply chin former that is attached to the fusu where the wing LE meets it. This former can be used as a fixed guide or template to shape both the bottom of the fuse and the wing chin to the same profile. It can be done without but the thin ply just makes it a little more durable.
I would suggest shaping the fuse first in that area prior to shaping the wing balsa chin block. By the way, the term "fillet" usually refers to a small transitional contour that is typically made with filler material (e.g., epoxy & MB). So the chin block itself wouldn't be a fillet per se. I thought there might be some confusion on that in the PM's.
David
12-03-2011, 07:47 AM
the large black DuBro bolts that it appears you are using are pretty good. What I like about them is that you can use a glow plug wrench to install and remove them rather than a ball driver. The flat head bolts look a little nicer as they are more flush but they are not much fun to use.
Just use a darker color for the wing center section finish...[8D]
David
12-04-2011, 02:30 PM
Diego,
This is one of the finest tutorial build threads that I've ever seen. I wish that I could have seen this 30 years ago!
Take care,
Frank
12-04-2011, 02:31 PM
Here are a few photos of various methods to detail the wing to fuselage...
Rusty Dose
Team Futaba
12-04-2011, 02:32 PM
Diego,
I have also found this thread very informative. It is always nice to see an airplane taking shape.
Nice job,
Teo
12-04-2011, 02:38 PM
Thank you David for your comments, I´m nowdoing the wing fillets (I saw the last post of R_G, very good explanation). I will post some pictures tomorrow.<o></o>
Even though you suggest me those bolts, I´mconsidering to change them!!!!  <o></o>
12-04-2011, 03:51 PM
The wings that Rusty posted are from different models. The one with the blue painted channel in the center is of a Calypso. I don't think any are for a Supra Star but maybe I should let him do the talkin'!
David.