Building a Tiporare .40
 02-07-2012, 09:43 AM
#151
Senior Member
Thread Starter
Join Date: Jun 2010
Location: Buenos Aires, ARGENTINA
Posts: 323
Received 0 Likes
on
0 Posts
Yes, it worked !l! <o ></o>
></o>
This isn´t the only idea I copied from you.Thanks for share with us the way you build this kind of models.  <o></o>


 02-11-2012, 03:33 AM
#154
Senior Member
Thread Starter
Join Date: Jun 2010
Location: Buenos Aires, ARGENTINA
Posts: 323
Received 0 Likes
on
0 Posts
Hi!<o></o>
Two questions.<o></o>
Is there a way to slow down the speed operation of the retract servo? <o></o>
Which are the control settings for a Tipo??<o></o>
Thankyou!<o></o>
Chino
02-11-2012, 04:04 AM
#155
Junior Member
Join Date: Oct 2008
Location: CheltenhamGloucestershire, UNITED KINGDOM
Posts: 22
Likes: 0
Received 0 Likes
on
0 Posts
Hi Chino,
To adjust the servo speed, try something like this:
http://www.hobbyking.com/hobbyking/s...idProduct=8863
Regards,
Kenneth
To adjust the servo speed, try something like this:
http://www.hobbyking.com/hobbyking/s...idProduct=8863
Regards,
Kenneth
 02-12-2012, 08:10 AM
#161

My Feedback: (3)
Join Date: Apr 2008
Location: Montreal,
QC, CANADA
Posts: 5,200
Likes: 0
Received 5 Likes
on
5 Posts
And here I was wondering if I was the only one feeling that way. Poor fuse... Maybe we need to start a pool for Chinos pipe and then send it to you! [8D]
David
David
02-12-2012, 01:47 PM
#162
Senior Member
Thread Starter
Join Date: Jun 2010
Location: Buenos Aires, ARGENTINA
Posts: 323
Received 0 Likes
on
0 Posts
ORIGINAL: 8178
Can’t talk you into filling in the fuselage cut and slinging a pipe under the wing?
Can’t talk you into filling in the fuselage cut and slinging a pipe under the wing?
Hi 8178! This model is a "trainer" for flying my Curare later, and I don’t want to buy a pipe for a .40.
I´m planning to build a SupraStar and maybe a Tiporare 60 later...both with pipes!<o></o>
02-17-2012, 04:05 PM
#165
 02-18-2012, 09:30 AM
#166
Senior Member
Thread Starter
Join Date: Jun 2010
Location: Buenos Aires, ARGENTINA
Posts: 323
Received 0 Likes
on
0 Posts
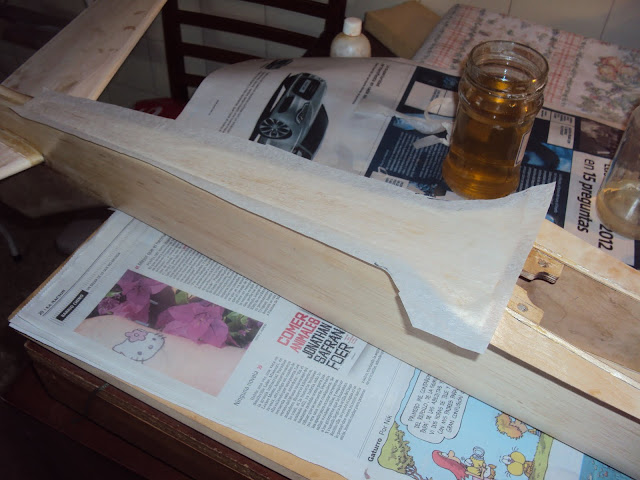
I can say that the Tipo is easier to build than the Curare for sure…. but I can´t tell you anything about the flight characteristics yet.I´ll post pictures of the painted Tipo fuse soon.
02-21-2012, 05:17 PM
#167
Senior Member
Thread Starter
Join Date: Jun 2010
Location: Buenos Aires, ARGENTINA
Posts: 323
Received 0 Likes
on
0 Posts
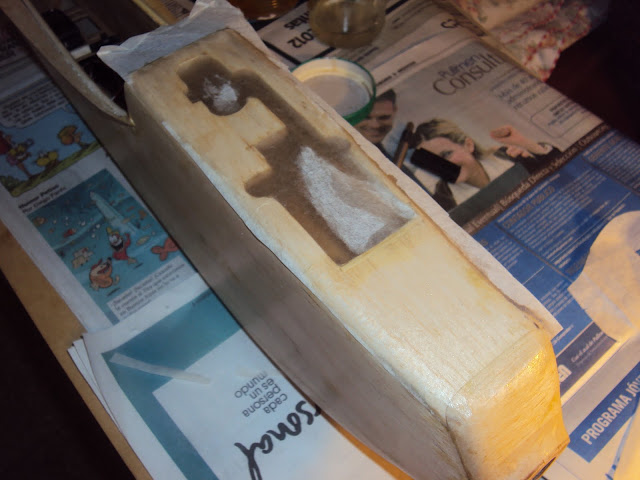
Ready for painting...


Applying the primer (Lustrekote Primer).
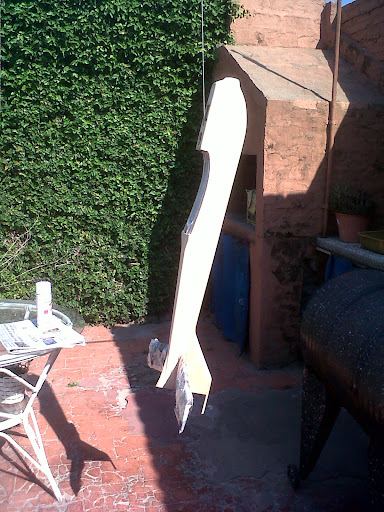


Now the turn of white paint (Lustrekote).


Blue.


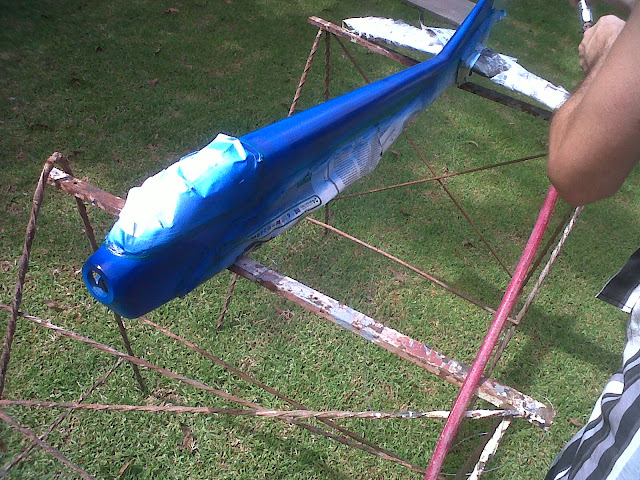


Red.


The black canopy.


And the final result, needs some gloss.


Will continue...
02-21-2012, 07:16 PM
#168
My Feedback: (3)
Join Date: Apr 2008
Location: Montreal,
QC, CANADA
Posts: 5,200
Likes: 0
Received 5 Likes
on
5 Posts
Nice Diego,
it's always a great day when a paint job is done. Say, I'm wondering if you maybe followed Dick Hanson's article trim scheme. I can't quite recall it but it somehow looks similar.
I replied to your PM with details on the clear coat (CC). I see that you have a spray gun in one of your shots so you should be able to shoot your CC without issue. As mentioned, I'd recommend using an automotive acrylic urethane. I don't know what brands are carried down in Argentina but I'd imagine you can source DuPont or PPG. Either one would be fine or any good quality stuff they might use in auto repair shops. Get a 2 part (2K) catalyzed urethane. The stuff that air dries instead of curing is not the same.
The catalyzed stuff typically takes 1-3 days to cure, after which you can buff it up (and cut down on the buttery texture the gloss will have when cured) with a mild liquid or wax polish. Don't use anything too abrasive. I like NuFinish car polish. You apply it liberally to the fuse with a soft cloth, run it in lightly while wet, let it dry for 30-60 minutes and then buff it off with a soft cloth removing all residue and leaving a nice smooth and silky surface. Your hand will just slip off when you run it down the fuse.
As mentioned, make sure your surface is thoroughly wet sanded to uniformity with extra fine grit paper and a bucket of warm soapy water. Use automotive 1600 or 2000 grit paper. Before applying the urethane CC, wipe the fuse down thoroughly with denatured alcohol (with little or no water content) and then pass a tack rag to insure it is grease and dust free. Anything that is on the surface when you shoot the CC will remain there unless it is bad news and you have to sand down the CC to get rid of it. Of course, you then have to re-shoot which adds weight - no good. a light tack coat of CC followed by a wet coat is all you need to seal in and add depth to the finish.
Hope this helps,
David
02-22-2012, 06:10 AM
#172

My Feedback: (5)
Join Date: Jan 2002
Location: Pass Christian,
MS
Posts: 207
Likes: 0
Received 0 Likes
on
0 Posts
Chino,
Nice job of painting! On your clear coat, test it before you spray it on the airplane to make sure that it is compatible with the Lustrecoat. That "Frog" tape works pretty good, doesn't it?
Frank
Nice job of painting! On your clear coat, test it before you spray it on the airplane to make sure that it is compatible with the Lustrecoat. That "Frog" tape works pretty good, doesn't it?
Frank
 ]
02-22-2012, 07:50 AM
]
02-22-2012, 07:50 AM
#174
My Feedback: (3)
Join Date: Apr 2008
Location: Montreal,
QC, CANADA
Posts: 5,200
Likes: 0
Received 5 Likes
on
5 Posts
Chino,
for curved lines you want the 1/4" vinyl tape from Scotch 3M. It can be bought at automotive stores. It will conform to just about any compound curve without curling up as shown in one of your pictures. The curling up is aggravated by the fact that you are using fairly wide tape. Whenever possible, I like to use fairly narrow (1/4"-1/2") tape close to the paint line even if straight, I will previously mask it offset by a little under the tape that will go near the line. For example if using 1/2" tape, I'll mask off 1" say about 1/4" away from the paint line and then apply the 1/2" tape on top at the paint line. With the vinyl 1/4" in compound curves, I don't do that, I just mask off the area keeping the full width of the tape down on the model. Any other masking then goes over top. The only disadvantage to that technique is that it makes it more complicated to pull the masking that defines the paint line without lifting the other masking tape first. I like to lift the paint line masking back prior to removing the remainder of the mask (tape/paper) in order to verify the line for even paint thickness. This helps when you proceed to wet sand the division as it prevents you from getting too thin at the break and possibly sanding off the paint on the edge.
The difference between a "flat" wet sand job without loosing the division color and having gone just past it is minimal so one has to be careful. I find it helps to achieve this when using lacquers compared to regular enamels. As I don't paint with urethanes, I don't know how they behave when wet sanded but I suspect they are easier and more resilient so make for an easier job. The hardest paint to sand is the water borne for obvious reasons. Since it is so thin and light and evidently water soluble, one can omit sanding paint line divisions with this kind of paint and simply CC over top. One less thing to do in the finishing... and wet sanding accounts for 75% of the work in my experience.
I wouldn't suggest you use Lustrekote clear gloss for the top coat. You mentioned you used another paint beside LK for the blue if I understood correctly. LK is not very tolerant of other paints and in any case is an acrylic lacquer based clear (according to Tower's web site - I'm still not entirely convinced of that). As mentioned, I suggest you use this for your CC - you won't regret it.
http://www.spraymax.de/index.php?id=361&L=1
You should be able to buy it somewhere - try your auto parts store (e.g., NAPA or similar). You will only need one can for the fuse - two coats, no more. Let the second flow. Whatever you do, make absolutely sure you don't touch it with anything once applied! Hang the fuse from the stab to cure for 48 hours in a dust free area.
BTW, I noticed you are shooting paint in a rather "comfortable" pair of shorts with plenty of skin exposed - most natural during warm summer days. I recommend you don't do it (at least your torso and face) and use a good spray mask, glasses and nitrile/latex gloves. When shooting the 2K, cover yourself from tip to toe - trust me, you don't want any of it on you. The only time when we can relax a bit with painting is when using water borne - much less toxic, reason for which I'm hoping to move in that direction for general finishing (except for the CC).
David
for curved lines you want the 1/4" vinyl tape from Scotch 3M. It can be bought at automotive stores. It will conform to just about any compound curve without curling up as shown in one of your pictures. The curling up is aggravated by the fact that you are using fairly wide tape. Whenever possible, I like to use fairly narrow (1/4"-1/2") tape close to the paint line even if straight, I will previously mask it offset by a little under the tape that will go near the line. For example if using 1/2" tape, I'll mask off 1" say about 1/4" away from the paint line and then apply the 1/2" tape on top at the paint line. With the vinyl 1/4" in compound curves, I don't do that, I just mask off the area keeping the full width of the tape down on the model. Any other masking then goes over top. The only disadvantage to that technique is that it makes it more complicated to pull the masking that defines the paint line without lifting the other masking tape first. I like to lift the paint line masking back prior to removing the remainder of the mask (tape/paper) in order to verify the line for even paint thickness. This helps when you proceed to wet sand the division as it prevents you from getting too thin at the break and possibly sanding off the paint on the edge.
The difference between a "flat" wet sand job without loosing the division color and having gone just past it is minimal so one has to be careful. I find it helps to achieve this when using lacquers compared to regular enamels. As I don't paint with urethanes, I don't know how they behave when wet sanded but I suspect they are easier and more resilient so make for an easier job. The hardest paint to sand is the water borne for obvious reasons. Since it is so thin and light and evidently water soluble, one can omit sanding paint line divisions with this kind of paint and simply CC over top. One less thing to do in the finishing...
and wet sanding accounts for 75% of the work in my experience.I wouldn't suggest you use Lustrekote clear gloss for the top coat. You mentioned you used another paint beside LK for the blue if I understood correctly. LK is not very tolerant of other paints and in any case is an acrylic lacquer based clear (according to Tower's web site - I'm still not entirely convinced of that). As mentioned, I suggest you use this for your CC - you won't regret it.
http://www.spraymax.de/index.php?id=361&L=1
You should be able to buy it somewhere - try your auto parts store (e.g., NAPA or similar). You will only need one can for the fuse - two coats, no more. Let the second flow. Whatever you do, make absolutely sure you don't touch it with anything once applied! Hang the fuse from the stab to cure for 48 hours in a dust free area.
BTW, I noticed you are shooting paint in a rather "comfortable" pair of shorts with plenty of skin exposed - most natural during warm summer days. I recommend you don't do it (at least your torso and face) and use a good spray mask, glasses and nitrile/latex gloves. When shooting the 2K, cover yourself from tip to toe - trust me, you don't want any of it on you. The only time when we can relax a bit with painting is when using water borne - much less toxic, reason for which I'm hoping to move in that direction for general finishing (except for the CC).
David