


Bridi ESCAPE new build. any tricks or tips would be lovely !

 11-06-2015, 05:58 AM
#27

It's just like gorilla glue but less foaming. I spread the glue on the wood only, put everything together and in the sandwich for a few minutes with weight on it.... Then pulled ask the wood back off and lightly misted water above the bench and reassembled. This way I could look at the foam and make sure there was plenty of glue transfer. This glue is slow but says it will work on pretty much anything
11-06-2015, 06:19 AM
#28
You guys and your big plastic squares .lol Right about the time i retired as a carpenter they came out with lazers so now i mark my center of the fuse front ,middle and back and line the lazer up to the marks. You seen cheap lazers go around the corners of a room ?
Yep it goes up the rudder your trying to line up too , does not get any straighter than that. , So I square and glue my rudder on the elev then lazer the rudder to the fuse. joe
Yep it goes up the rudder your trying to line up too , does not get any straighter than that. , So I square and glue my rudder on the elev then lazer the rudder to the fuse. joe

 11-06-2015, 09:35 AM
#30
Not sure what header you are planning but Leo from http://www.klasskotemo.com/ Is making headers for the NR's to fit. I have the prototype for my XLT.
This is close to the Jenesco 1004 Rossi header. It is made long for tuning.

This is close to the Jenesco 1004 Rossi header. It is made long for tuning.
11-06-2015, 11:48 AM
#34
Contact him directly as this was a prototype to check the fit on the Bridi kit.
Leo is a class act and will respond back quickly.
I don't work for him, we have just struck up a friendship over the past couple of years. I get my a lot of my supplies from him and he is a blazing fast shipper.
Good luck,
Leo is a class act and will respond back quickly.
I don't work for him, we have just struck up a friendship over the past couple of years. I get my a lot of my supplies from him and he is a blazing fast shipper.
Good luck,
11-06-2015, 11:51 AM
#35
Senior Member
You guys and your big plastic squares .lol Right about the time i retired as a carpenter they came out with lazers so now i mark my center of the fuse front ,middle and back and line the lazer up to the marks. You seen cheap lazers go around the corners of a room ?
Yep it goes up the rudder your trying to line up too , does not get any straighter than that. , So I square and glue my rudder on the elev then lazer the rudder to the fuse. joe
Yep it goes up the rudder your trying to line up too , does not get any straighter than that. , So I square and glue my rudder on the elev then lazer the rudder to the fuse. joe
 11-06-2015, 02:02 PM
#38
I have kept a few pattern planes of mine from those years but a plane your father built and shared his time with you while off work is a real treasure . Got my little guy cutting out parts and sanding them to the print long ago and he is 13 now and a pretty good builder in his own rights. MTK i will put a end to this now ,your a much better builder than iam so i will not listen to anyone else but you and never try to learn from anyone else either . lol joe
Last edited by joebahl; 11-06-2015 at 02:07 PM.
11-06-2015, 05:07 PM
#39

Thread Starter
My Feedback: (1)
Join Date: Sep 2004
Location: moline,
IL
Posts: 121
Likes: 0
Received 0 Likes
on
0 Posts
got my robart spring air retracts filed down and working smooth today. just going to use these. going to sand the stabs tomorrow at work and get ready to cut elevators out tomorrow. motor will be ordered tonight.
11-07-2015, 02:24 PM
#40
Thread Starter
My Feedback: (1)
Join Date: Sep 2004
Location: moline,
IL
Posts: 121
Likes: 0
Received 0 Likes
on
0 Posts
Not sure what header you are planning but Leo from http://www.klasskotemo.com/ Is making headers for the NR's to fit. I have the prototype for my XLT.
This is close to the Jenesco 1004 Rossi header. It is made long for tuning.
This is close to the Jenesco 1004 Rossi header. It is made long for tuning.
I sent hime an email. he didn't seem to know what I was asking for. I ordered my engine last nite and got a 1" header. ill heat up and bend the header if possible since I hanvt got that far into building, I can make the plane fit the header I guess
11-07-2015, 04:54 PM
#41

My Feedback: (73)

Join Date: Dec 2004
Location: USA, Earth
Posts: 288
Likes: 0
Received 0 Likes
on
0 Posts
Nappyroots2182,
Not sure who you contacted, but it was not me. If you need a custom header down the road: www.klasskotemo.com I use the correct metric tubing and factory NovaRossi components. You can also PM me.
Leo
Klasskote Missouri
Ballisticaircraftcompany
Not sure who you contacted, but it was not me. If you need a custom header down the road: www.klasskotemo.com I use the correct metric tubing and factory NovaRossi components. You can also PM me.
Leo
Klasskote Missouri
Ballisticaircraftcompany
11-07-2015, 06:32 PM
#42
Thread Starter
My Feedback: (1)
Join Date: Sep 2004
Location: moline,
IL
Posts: 121
Likes: 0
Received 0 Likes
on
0 Posts
Ok thanks. Yes I'm still interested in the correct header. I'll contact you. I tried to email you and it kept bouncing back add a bad email. I emailed klass direct and they didn't know anything about it. But now I do 
11-08-2015, 02:13 PM
#44
My Feedback: (3)
Join Date: Apr 2008
Location: Montreal,
QC, CANADA
Posts: 5,200
Likes: 0
Received 5 Likes
on
5 Posts
Not sure why the Escape has a 2-1/4" spinner. 2-1/2" would look better on the model allowing for a less pronounced cowl contour. It also makes life easier on 60 size engines/props. I think this is one of the things that Chuck Cunningham addressed in the Great Escape - it just made sense.
The convoluted header required on the model is another bizarre thing. I mean, this is a pretty straight forward fuse top header situation. If it can be done on the Deception, no reason why it shouldn't on the Escape.
No disrespect whatsoever but Joe was great at designing planforms; internal structure..., not so much.
If I put this fellow into CAD one day, I'm going to fix all that unnecessary complexity.
David
11-08-2015, 02:16 PM
#45
Thread Starter
My Feedback: (1)
Join Date: Sep 2004
Location: moline,
IL
Posts: 121
Likes: 0
Received 0 Likes
on
0 Posts
few good ideas. I may look into the slightly larger spinner. would help hide some motor since the blocks wouldn't get tapeded so much. I'm about ready to carve out the upper nose block and glue it on. might make the bottom nose a hatch since I cant find a way to get a gas tank in from the wing area
11-08-2015, 03:39 PM
#47
Thread Starter
My Feedback: (1)
Join Date: Sep 2004
Location: moline,
IL
Posts: 121
Likes: 0
Received 0 Likes
on
0 Posts
former 2 is all ground out also top block is. still cant get the tank in and out. I rather build a hatch anyway since I'm not using a nose retract. anyway got my elevators cut and capped off today. everyday I like to do at least one step as I'm just getting back into this building thing
~[URL=http://s852.photobucket.com/user/bikerboy2182/media/Mobile%20Uploads/20151108_173256_zpsri2dapvc.jpg.html]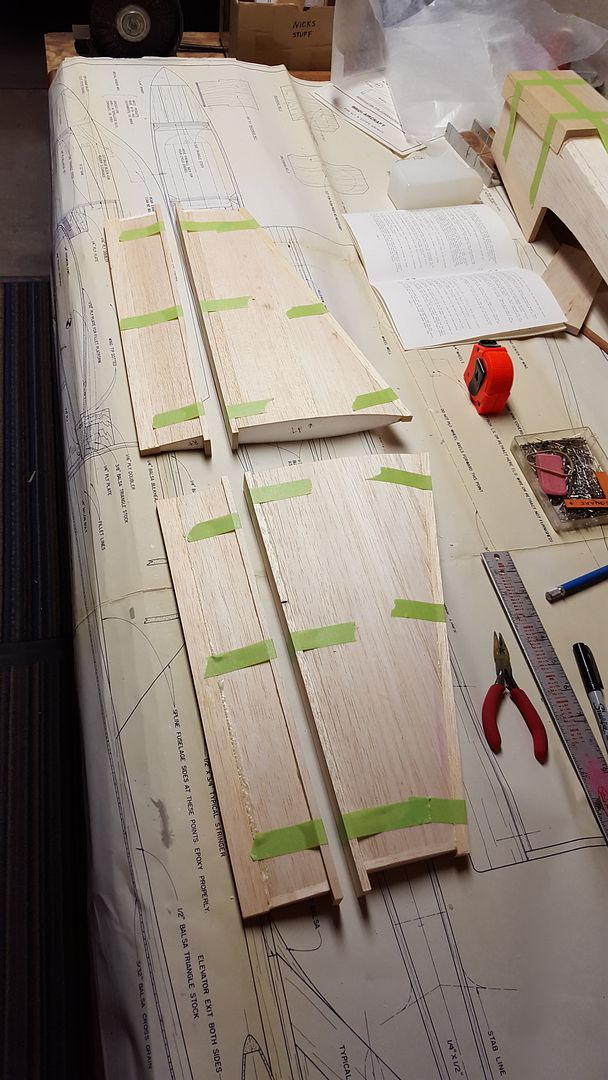 [/URL
[/URL
~[URL=http://s852.photobucket.com/user/bikerboy2182/media/Mobile%20Uploads/20151108_173256_zpsri2dapvc.jpg.html]
[/URL
 11-08-2015, 07:18 PM
#49
My Feedback: (1)
Not sure which tank I have in mine but it fits OK; have to use a piece of packing tape around the tank to make a tab for pulling it out.
Will check tomorrow and see if I can identify the tank without removing it.
Jim
Will check tomorrow and see if I can identify the tank without removing it.
Jim
Last edited by Jim Oliver; 11-08-2015 at 07:23 PM.
11-08-2015, 07:59 PM
#50
Senior Member
Not sure why the Escape has a 2-1/4" spinner. 2-1/2" would look better on the model allowing for a less pronounced cowl contour. It also makes life easier on 60 size engines/props. I think this is one of the things that Chuck Cunningham addressed in the Great Escape - it just made sense.
The convoluted header required on the model is another bizarre thing. I mean, this is a pretty straight forward fuse top header situation. If it can be done on the Deception, no reason why it shouldn't on the Escape.
No disrespect whatsoever but Joe was great at designing planforms; internal structure..., not so much.
If I put this fellow into CAD one day, I'm going to fix all that unnecessary complexity.
David
The convoluted header required on the model is another bizarre thing. I mean, this is a pretty straight forward fuse top header situation. If it can be done on the Deception, no reason why it shouldn't on the Escape.
No disrespect whatsoever but Joe was great at designing planforms; internal structure..., not so much.
If I put this fellow into CAD one day, I'm going to fix all that unnecessary complexity.
David
Thanks for bringing Bill Cunningham up, a fellow I've known for many years. I forgot his involvement with the model's pedigree. His Great Escape eventually matured into the Malibu. I had one of those and it was a fine flier. Bill returned to top level aerobatics very briefly (I saw him last in the 2007 Nats) but he didn't make the F3A Finals. Speaking with him afterwards, his business was all consuming not allowing him to devote enough practice time to toy airplanes.
If you ever had the drive to ink the next Escape, I'd love a set of plans or a laser cut kit of same. Retirement is here next year and I'll have plenty of time. The place has already been chosen (sunny FLA, yeay!)