Go Back  RCU Forums > RC Airplanes > Pattern Universe - RC Pattern Flying > Classic RC Pattern Flying
Reload this Page >

Bridi ESCAPE new build. any tricks or tips would be lovely !

Community
Search
Notices
Classic RC Pattern Flying Discuss here all pre 1996 RC Pattern Flying in this forum.

Bridi ESCAPE new build. any tricks or tips would be lovely !

Thread Tools
 
Search this Thread
 
Old 11-17-2015, 05:59 AM
  #76  
MTK
Senior Member
 
Join Date: May 2004
Location: Whippany, NJ
Posts: 5,386
Likes: 0
Received 1 Like on 1 Post
Default

Originally Posted by nappyroots2182
Sorry about the pic. The purple prop hub is just laying on the shaft. When assembled it's a perfect gap. The pic was only to show the throttle arm. I'll post another pic
It looks great. Good job on the fit. A bit snug but it should work. You could always relieve some of the wood out of the cheeks if something interferes.
Old 11-17-2015, 06:35 AM
  #77  
nappyroots2182
Thread Starter
My Feedback: (1)
 
Join Date: Sep 2004
Location: moline, IL
Posts: 121
Likes: 0
Received 0 Likes on 0 Posts
Default

This is only a rough fit to make everything work. It will get thinned out add much as possible before finish work. I'm working on the wings while I have my ball links and pushrods on order. Droppin in some mini hitec digital on the ailerons today so I can sink them as deep as possible to keep only the arm hopefully outside the panel
Old 11-24-2015, 08:25 AM
  #78  
nappyroots2182
Thread Starter
My Feedback: (1)
 
Join Date: Sep 2004
Location: moline, IL
Posts: 121
Likes: 0
Received 0 Likes on 0 Posts
Default

been sick so I took a break. just getting back on target. last nite I glassed the tail halves so tonight I maybe able to glue the stab in the fuse. got the wing drilled and bolted down and ready to glass. now comes the smaller parts of the buld that will slow me down. got a good fitting header and can finish trimming out the cowl area and shaping farther. I need to get the tail on so I can do a CG check and see where I need to install my servos at.
Old 11-24-2015, 08:30 AM
  #79  
nappyroots2182
Thread Starter
My Feedback: (1)
 
Join Date: Sep 2004
Location: moline, IL
Posts: 121
Likes: 0
Received 0 Likes on 0 Posts
Default


~[URL=http://s852.photobucket.com/user/bikerboy2182/media/Mobile%20Uploads/20151120_130850_zpsrg0m8kfp.jpg.html][/URL
Old 11-26-2015, 09:17 AM
  #80  
edp
My Feedback: (5)
 
edp's Avatar
 
Join Date: Nov 2002
Location: Canton, OH
Posts: 622
Received 6 Likes on 5 Posts
Default


Hey Nappyroots,
Here is Leo's header for the Bridi kits. I'm keeping all your progress in mind when I start my Escape next.
Attached Thumbnails Click image for larger version

Name:	100_2105.JPG
Views:	649
Size:	964.9 KB
ID:	2132627   Click image for larger version

Name:	100_2106.JPG
Views:	652
Size:	740.4 KB
ID:	2132628  
Old 11-26-2015, 09:35 AM
  #81  
nappyroots2182
Thread Starter
My Feedback: (1)
 
Join Date: Sep 2004
Location: moline, IL
Posts: 121
Likes: 0
Received 0 Likes on 0 Posts
Default

That header looks good. My 2" stock header is going to work so I'm good there. I'm on the bench checking and adjusting incidences now. After setup, my wing didn't match the tail and one wing was warped. It's pretty straight too. Also my firewall changed to so glad I bench check this stuff. Now I'm on to the wing and tail fillets and Sandingg down the vertical for sheeting. Not really any visible progress to get pics of right now. It's time for the no fun tedious stuff
Old 11-30-2015, 12:37 PM
  #82  
nappyroots2182
Thread Starter
My Feedback: (1)
 
Join Date: Sep 2004
Location: moline, IL
Posts: 121
Likes: 0
Received 0 Likes on 0 Posts
Default

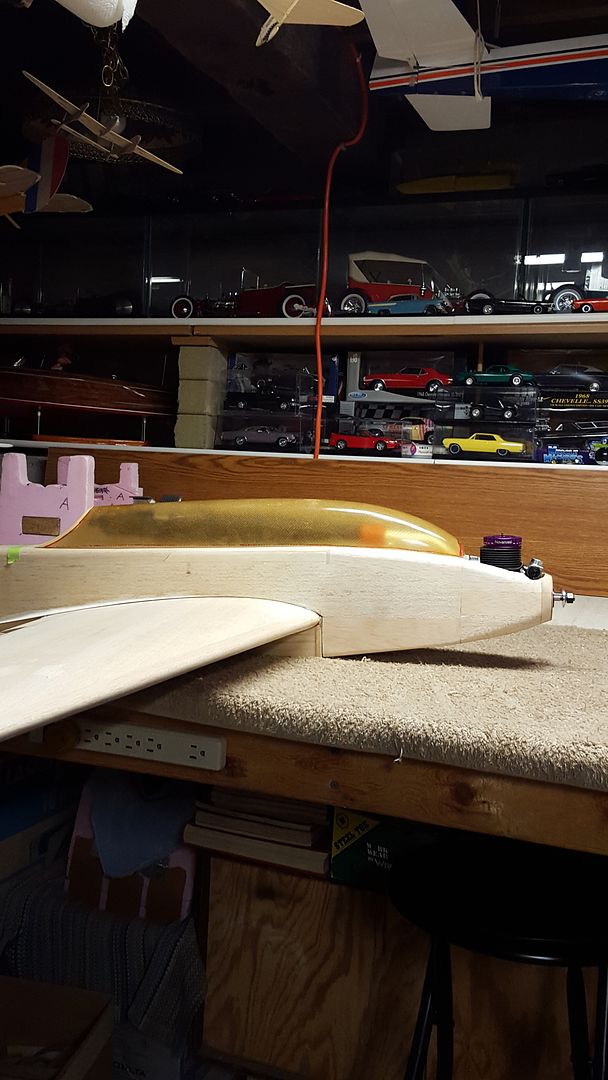
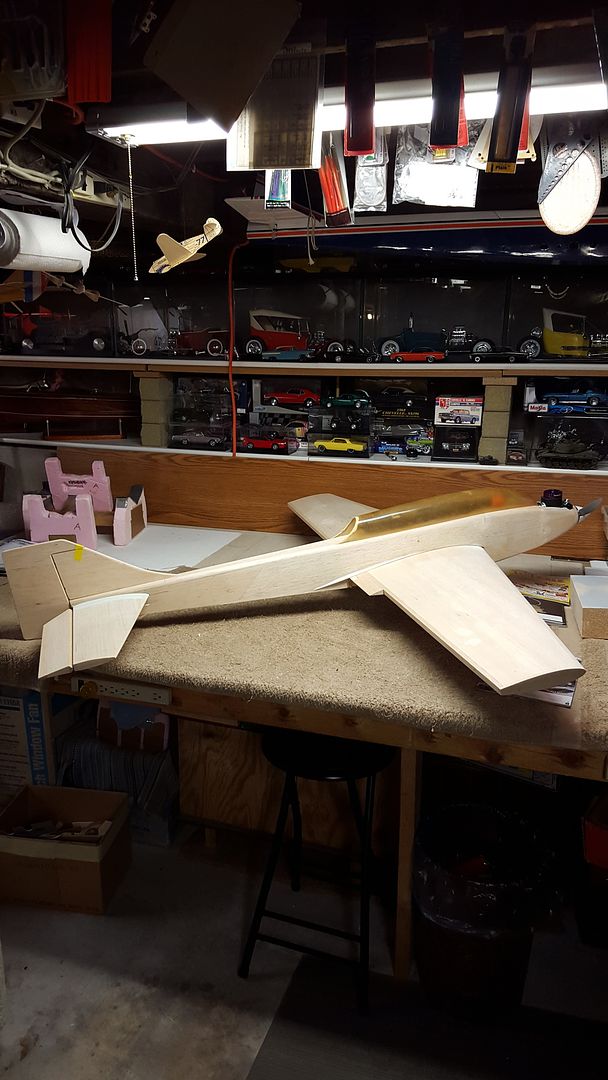
Got it dry fit and cg check. I can put the servos behind the wing saddle like I wanted. Running two elevator servos to make setup easier. I got the tail sheeted since this pic and retract bays done. I just need to install rudder servo and pushrod, and glue fin on before I can do fine sanding. Everything on the scale is 7lbs before I put the finish on it. Pretty happy so far
Old 11-30-2015, 12:40 PM
  #83  
nappyroots2182
Thread Starter
My Feedback: (1)
 
Join Date: Sep 2004
Location: moline, IL
Posts: 121
Likes: 0
Received 0 Likes on 0 Posts
Default

Old 12-15-2015, 02:56 PM
  #84  
nappyroots2182
Thread Starter
My Feedback: (1)
 
Join Date: Sep 2004
Location: moline, IL
Posts: 121
Likes: 0
Received 0 Likes on 0 Posts
Default

well ive been burned out and on a break. still deciding my finishing ideas. well I was taking a break I painted my hayabusa motorcycle. now I'm slowing picking away at this thing again. all I need to do is hinge the ailerons and finish the final sanding before painting. so close but so far. I'm loving the way its turning out

~[URL=http://s852.photobucket.com/user/bikerboy2182/media/Mobile%20Uploads/20151201_190449_zpspymtzqie.jpg.html]
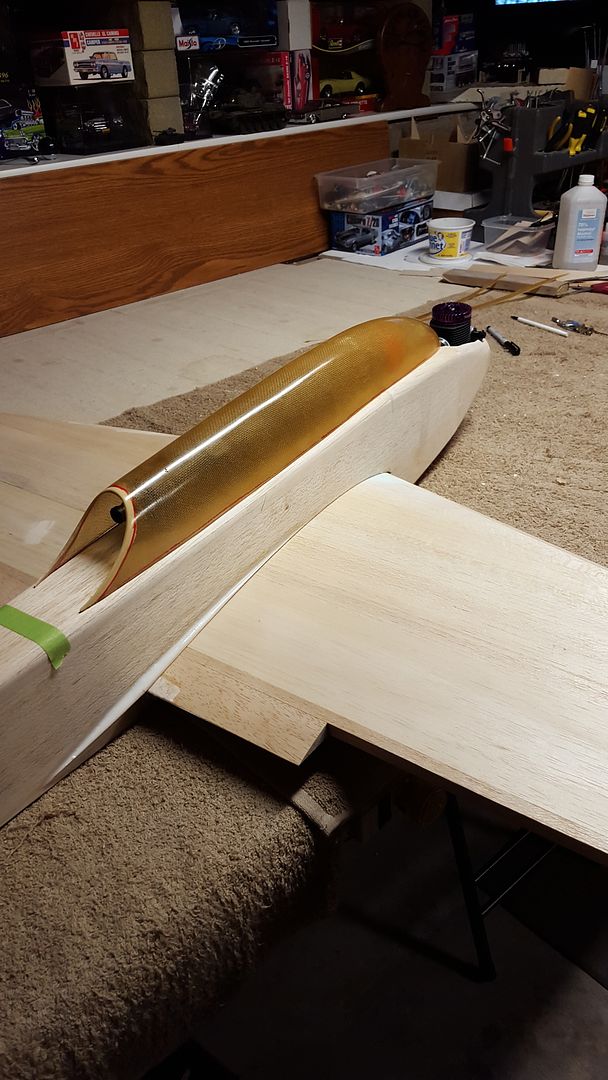
[/URL

Old 12-18-2015, 05:55 AM
  #85  
crashEMhard
 
Join Date: Nov 2008
Location: , IL
Posts: 124
Received 5 Likes on 4 Posts
Default

Let's see progress
Old 12-18-2015, 06:18 AM
  #86  
nappyroots2182
Thread Starter
My Feedback: (1)
 
Join Date: Sep 2004
Location: moline, IL
Posts: 121
Likes: 0
Received 0 Likes on 0 Posts
Default

These pics are the latest. I'm burnt out. Time to buy an arf !!
Old 12-18-2015, 11:11 AM
  #87  
MTK
Senior Member
 
Join Date: May 2004
Location: Whippany, NJ
Posts: 5,386
Likes: 0
Received 1 Like on 1 Post
Default

ARF? ARF?? Bah Humbug!! LOL

C'mon, you've done so much of the work already you're almost there. You can do it!
Old 12-18-2015, 11:52 AM
  #88  
nappyroots2182
Thread Starter
My Feedback: (1)
 
Join Date: Sep 2004
Location: moline, IL
Posts: 121
Likes: 0
Received 0 Likes on 0 Posts
Default

I took a few weeks off of the build to repaint my hayabusa. I'll be back on the escape this weekend doing sanding. Ergh sanding !
Old 12-18-2015, 11:53 AM
  #89  
nappyroots2182
Thread Starter
My Feedback: (1)
 
Join Date: Sep 2004
Location: moline, IL
Posts: 121
Likes: 0
Received 0 Likes on 0 Posts
Default

Old 12-18-2015, 12:07 PM
  #90  
computermonkey
My Feedback: (90)
 
Join Date: Sep 2004
Location: Oklahoma area
Posts: 666
Received 2 Likes on 2 Posts
Default

Thats sharp.
I'm wanting to start a XLT or a Great Escape.....trying to decide.........and yes there is a lot of sanding in these kits.
Old 12-19-2015, 02:09 PM
  #91  
nappyroots2182
Thread Starter
My Feedback: (1)
 
Join Date: Sep 2004
Location: moline, IL
Posts: 121
Likes: 0
Received 0 Likes on 0 Posts
Default

Originally Posted by computermonkey
Thats sharp.
I'm wanting to start a XLT or a Great Escape.....trying to decide.........and yes there is a lot of sanding in these kits.

well as far as I know, the only main difference is the XLT had the anhedreal stab.
Old 12-19-2015, 02:12 PM
  #92  
computermonkey
My Feedback: (90)
 
Join Date: Sep 2004
Location: Oklahoma area
Posts: 666
Received 2 Likes on 2 Posts
Default

A little more, XLT had a bigger wing, Great Escape the wing was mounted in the middle shoulder, Great Escape the had the elevator just a hair about the wing center line.
Old 12-19-2015, 03:38 PM
  #93  
nappyroots2182
Thread Starter
My Feedback: (1)
 
Join Date: Sep 2004
Location: moline, IL
Posts: 121
Likes: 0
Received 0 Likes on 0 Posts
Default

got my color scheme picked out. same orange I have left from my motorcycle, pearl white, and gloss black. I love it. hard part will be finding time to do it !

~[URL=http://s852.photobucket.com/user/bikerboy2182/media/734843_10156284858880246_4629910915005691614_n_zps kyvns8qz.jpg.html]
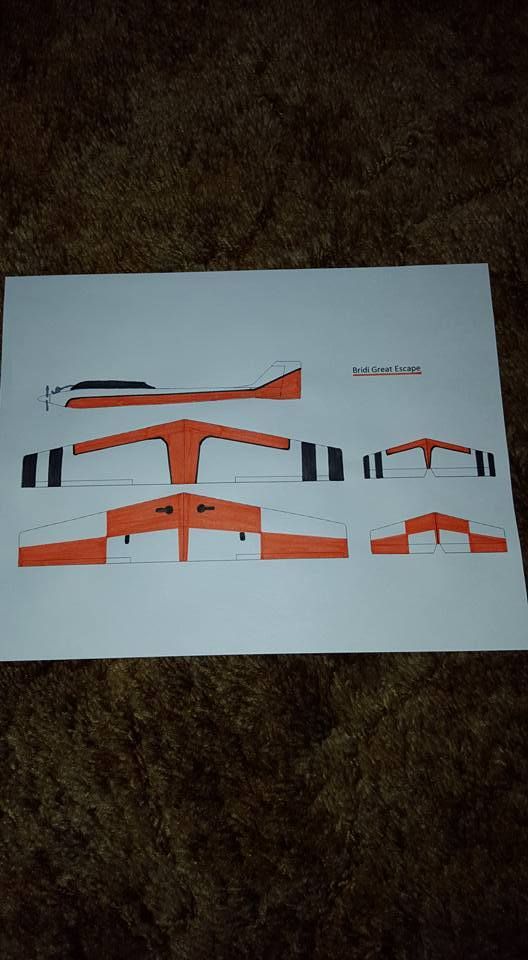
[/URL
Old 12-19-2015, 09:08 PM
  #94  
flyonenow
My Feedback: (1)
 
Join Date: Apr 2005
Location: Perris, CA
Posts: 18
Received 0 Likes on 0 Posts
Default

That's a Killer color on the Busa. Nicely done! Hang tough on the Escape. It'll come together. Looks like you maybe using the same color?

Paul
Old 12-19-2015, 09:11 PM
  #95  
nappyroots2182
Thread Starter
My Feedback: (1)
 
Join Date: Sep 2004
Location: moline, IL
Posts: 121
Likes: 0
Received 0 Likes on 0 Posts
Default

Same orange yes. I have lots left. Lol
Old 12-20-2015, 04:37 AM
  #96  
computermonkey
My Feedback: (90)
 
Join Date: Sep 2004
Location: Oklahoma area
Posts: 666
Received 2 Likes on 2 Posts
Default

Sharp.
Old 12-20-2015, 10:11 AM
  #97  
flyonenow
My Feedback: (1)
 
Join Date: Apr 2005
Location: Perris, CA
Posts: 18
Received 0 Likes on 0 Posts
Default

Doh! Guess I would have known that if I read your whole post.

Build on.
Old 01-04-2016, 08:38 AM
  #98  
nappyroots2182
Thread Starter
My Feedback: (1)
 
Join Date: Sep 2004
Location: moline, IL
Posts: 121
Likes: 0
Received 0 Likes on 0 Posts
Default

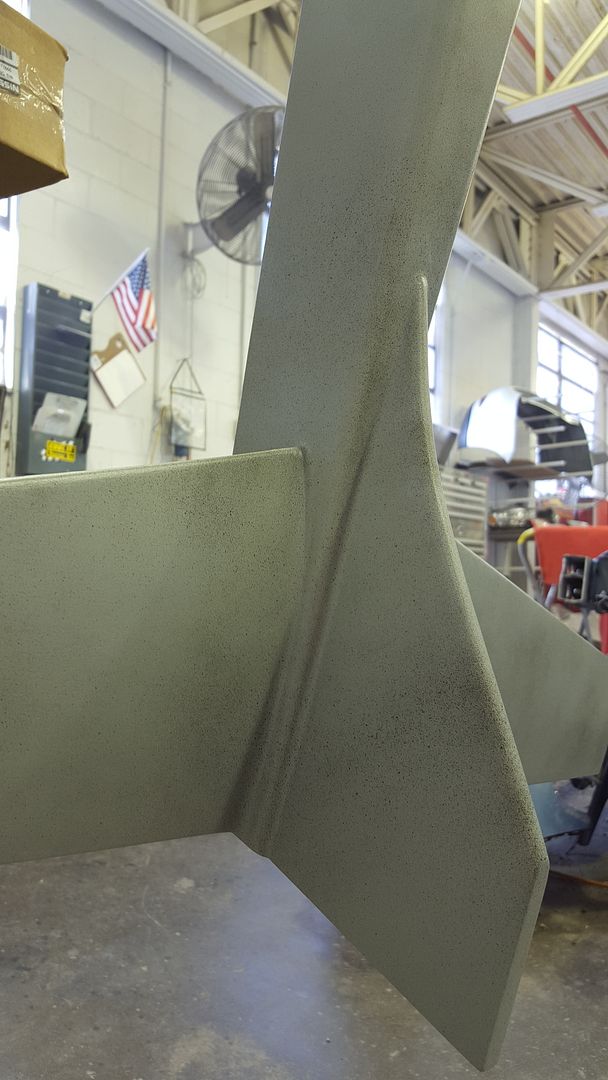
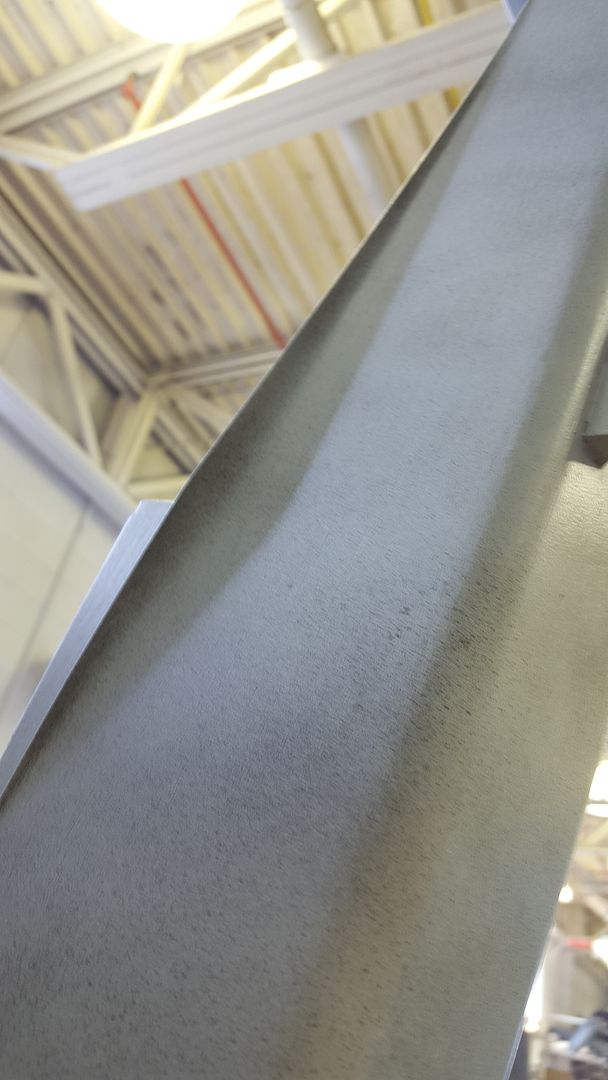
got some primer on my bird over the weekend. most of it came out great. some spots ill have to fill and fix as I sand the plane. overall this primer I used fills great and drys fast. its a method not many people know or use but my buddy that has a lot of pattern planes only does it this way. after 15 years, his planes still look new. I'm using a method I fee comfortable using since no one around had time to help with glssing and I didn't want to screw anything up. finishing up my quickie 500 scat cat then back onto more sanding


Old 01-04-2016, 04:27 PM
  #99  
flywilly
My Feedback: (121)
 
Join Date: Feb 2002
Location: glen allen, VA,
Posts: 2,264
Likes: 0
Received 30 Likes on 29 Posts
Default

so.... what's the primer?
Old 01-04-2016, 04:44 PM
  #100  
nappyroots2182
Thread Starter
My Feedback: (1)
 
Join Date: Sep 2004
Location: moline, IL
Posts: 121
Likes: 0
Received 0 Likes on 0 Posts
Default

Evercoat feather fill g2. I used a whole quart but will need to use part of a second after doing my controls and fixing small areas.


Contact Us - Archive - Advertising - Cookie Policy - Privacy Statement - Terms of Service -

Copyright © 2024 MH Sub I, LLC dba Internet Brands. All rights reserved. Use of this site indicates your consent to the Terms of Use.