


Advice needed in restoring a Dirty Birdi 40
 01-28-2018, 06:39 PM
#76

Thread Starter
My Feedback: (1)
Join Date: Sep 2010
Location: Grants Pass,
OR
Posts: 209
Likes: 0
Received 0 Likes
on
0 Posts
I'll live with a slightly large spinner before I do any re painting or body work.
David, I'll try to figure out your instructions on posting photos with a smart phone. I'm not the most tech savy person.
Lamar
David, I'll try to figure out your instructions on posting photos with a smart phone. I'm not the most tech savy person.
Lamar
 01-28-2018, 07:41 PM
#78
Thread Starter
My Feedback: (1)
Join Date: Sep 2010
Location: Grants Pass,
OR
Posts: 209
Likes: 0
Received 0 Likes
on
0 Posts
It looks like some photos went through. I couldn't figure out how to post from my gallery, but I was able to run out to my shop and take a picture with my phone and the file was added.
I'll be letting the fuselage set for at least a week before I do any more work on it. I'm in the process of covering the main wing now. I'll try to post some photo progress tomorrow.
Lamar
I'll be letting the fuselage set for at least a week before I do any more work on it. I'm in the process of covering the main wing now. I'll try to post some photo progress tomorrow.
Lamar
01-29-2018, 10:20 AM
#79
My Feedback: (3)
Join Date: Apr 2008
Location: Montreal,
QC, CANADA
Posts: 5,200
Likes: 0
Received 5 Likes
on
5 Posts
Looks good Lamar!
lf you want it to really have some kick and durability to the finish, you should now wet sand it with 2000 grit wet to flatten it. It will feel counter intuitive to do this but have ye faith.The idea is to remove any gloss that is put in with the paint as it realty is not that good of a fuel proofer. It will also thin out the finish and flatten it so there is no overlap between colours and base. Once done, wipe it down with alcohol, tack it and you can add your decals/lettering. I would recommend some metallic striping tape of any colour you like to separate the colours and it will have a little more personality that what the paint can offer alone. When it's all done, let it sit for another few days at constant temperature and humidity and when you're ready to shoot the CC, wipe the model down again with a damp low lint cloth, let it evaporate and pass a tack cloth on it just before shooting the CC. Make sure you handle the fuse with gloves only as you'll apply grease to it otherwise. I prefer nitrile (non allergenic blue) but you can also use latex (white). Make a rod type support for the fuse that you can attach to the motor mount blind nuts allowing you to rotate the model from the nose. Kind of like a skewered kebab.
Then comes the moment of truth! You mix up your SM can per directions and you shoot the model twice only. The CC is the heaviest and thickness of the paint so you want to be mindful when applying to not add too much weight. They way it is applied is you first shoot a mist "tack" coat making sure it is speckled. You don't want the first coat too thick or it will run and there is no fixing it while it's wet. Then, once properly misted everywhere, you then apply the "flow" coat on. This one is applied until the surface looks buttery. Again be careful to not apply too much. Just enough so that it looks shiny and wet but no more or it will also run. That said, the product is great stuff and has great action from the nozzle which is patented. It's like a spray gun for all intensive purposes. Same spray pattern and all. Note that you need to use the entire can within 24 hours (12 hours ideally) as it cures once catalyzed IN THE CAN. So it's not like a 1K (1 stage) paint can which stays solvent so long as it's not exposed to the air. THIS will harden so you may end up wasting some unlless you have some other painted parts you want to clear. I recently shot an entire 60 size fuse with about 2/3 of a can and had enough left to shoot two additional painted cowls I had prepped. With the DB40 fuse only you will probably use 1/3 to 1/2 the can. Don't be tempted to shoot more than it needs. You'll just be adding weight with no additional benefit.
Very important. Don't let the wet fuse touch anything. And I mean anything. If it does. You will have to wait until it thoroughly cures and then sand it out and unfortunately re-shoot that area. In other words, don't let it happen like it happened to me last time on the wing center section. let it cure on the same skewer you made to shoot it making sure it is in a dust free space where there is low activity (basically no one goes in except for you). Once a few hours pass, you can rotate the skewer 180 degrees to make sure the CC is not flowing due to gravity. It is very viscous so it holds pretty well if properly shot. I like to let it cure 6 hours with the canopy down and then 6 hours with the canopy up. This way any "excess" will naturally flow to the bottom of the fuse but in reality it ends up evenly distributed. We're just talking a few hundredths of a mm in any case but it makes things nice and uniform in terms of final thickness.
Let it cure for a full 48 hours before you touch it at all. At that point it will feel "greasy" to the touch which is just a result of the catalyzer being "expelled" so to speak while the acrylic urethane hardens. Leave it a total of 7 days (good insurance for 100% cure) before you proceed to polish it. I like NuFinish liquid car polish which is applied on quite wet, you allow it to dry turning white in the process and then you take a nice clean soft cotton cloth and warm up your polishing arm. You basically rub off all the dried polish and apply a little vigor to the surface being mindful of it's weak spots in the structure. The surface will be transformed from the buttery feel to one which is silky smooth and super hard. It will also shine like crazy and be almost mirror like. Make sure you wipe and polish off the surface really well (again using gloves) and take pride in your masterpiece! Unless you hit the fuse against something hard, the finish will last for years to come. Either way, it will be the best quality protected finish you can give a model airplane.
If you've never shot a plane with good quality CC, prepare to be amazed...
David
01-29-2018, 05:46 PM
#80
Thread Starter
My Feedback: (1)
Join Date: Sep 2010
Location: Grants Pass,
OR
Posts: 209
Likes: 0
Received 0 Likes
on
0 Posts
Thanks again David for the finishing instructions to the paint job. The paint job I've done on this plane so far is already the best for me I've ever done. I really appreciate the possibility of taking the finish to the next level of quality, but I'm going to have to think on that for awhile while the fuselage is curing out and I'm finishing up the main wing.
I already made up a shaft to attach to the firewall. I used it while paintikng with primer and colors on the fuselage. I already had plans on applying 1/8" blue stripping tape on the paint seams between the red and white.
Today I got the Koveral fabric applied to the bottom of the wing. I'll try to get the top covered tomorrow. Then it will be several coats of Minwax Polycrylic thinned some with water, and a little talcum powder mixed to fill the weave.
Lamar
.
02-12-2018, 08:03 AM
#81
Thread Starter
My Feedback: (1)
Join Date: Sep 2010
Location: Grants Pass,
OR
Posts: 209
Likes: 0
Received 0 Likes
on
0 Posts
Time to give an update on my restoration progress. I finally got my computer back, so I'll first post some pictures of progress that I wasn't able to post before. This first group of pictures just show the preparation for fuselage painting.
02-12-2018, 08:42 AM
#82
Thread Starter
My Feedback: (1)
Join Date: Sep 2010
Location: Grants Pass,
OR
Posts: 209
Likes: 0
Received 0 Likes
on
0 Posts
Now an update on where I am now with my progress.
I have been working on the main wing. I first covered the wing with Sig Koverall, attached with Minwax polycrylic..Once trimmed and shrunk down, I applied 4 more water thinned and talcum added coats of Minwax polycrylic. This was lightly sanded with 400 grit paper. I'm keeping track of how much weight is being added to the process as I go. The bare wing prior to covering weighed 19.86 oz and after the covering with Koverall & Minwax polycrylic the weight was 21.98 oz. 2.12 oz increase in weight.
I then applied Rust-Oleum sandable primer to both sides of the wing and did a wet sand with 400 grit sandpaper. The weight of the wing is now at 24.51 oz. It is really a little less than that, because I haven't removed the primered masking tape. Today I am going to apply some Rust-Oleum Gloss white to the top side of the wing where I will be putting the large check graphic.
Lamar
03-08-2018, 09:23 AM
#84
Thread Starter
My Feedback: (1)
Join Date: Sep 2010
Location: Grants Pass,
OR
Posts: 209
Likes: 0
Received 0 Likes
on
0 Posts
The latest update on my Dirty Birdy restoration. I know it's been awhile since my last post, but I have been slowly making progress on my restoration. I think you could say I'm on the home stretch now. The painting process takes quite some time for allowing proper drying. All pieces are painted and clear coated now..I have been letting everything set for quite awhile since clear coating to allow good surface hardening prior to reassembly.
Attached is a photo of the paints I used in my process. I did what I think is thorough testing of the paints prior to painting for glow fuel compatibility. I had used the Rust-oleum colors before on other builds, and they have worked great. This is the first time for using the Minwax Helmsman Spar Urethane for clear coat. I think the final look with that clear coat is great. The properties stated for the Spar Urethane sounds like it is well suited for the job. Has UV protection, flexibility, is fuel proof and is easily available and not too expensive. Time will tell.
I'll post the final photos once all assembled.
Lamar
03-10-2018, 05:47 PM
#87
Thread Starter
My Feedback: (1)
Join Date: Sep 2010
Location: Grants Pass,
OR
Posts: 209
Likes: 0
Received 0 Likes
on
0 Posts
I actually haven't started reassembly yet. While I was waiting for the clear coat to dry, I got involved on another plane repair. That's done now, and I will start putting the DB back together this week. It should be kinda like assembling an ARF now.
Lamar
Lamar
 03-25-2018, 11:17 AM
#90
Thread Starter
My Feedback: (1)
Join Date: Sep 2010
Location: Grants Pass,
OR
Posts: 209
Likes: 0
Received 0 Likes
on
0 Posts
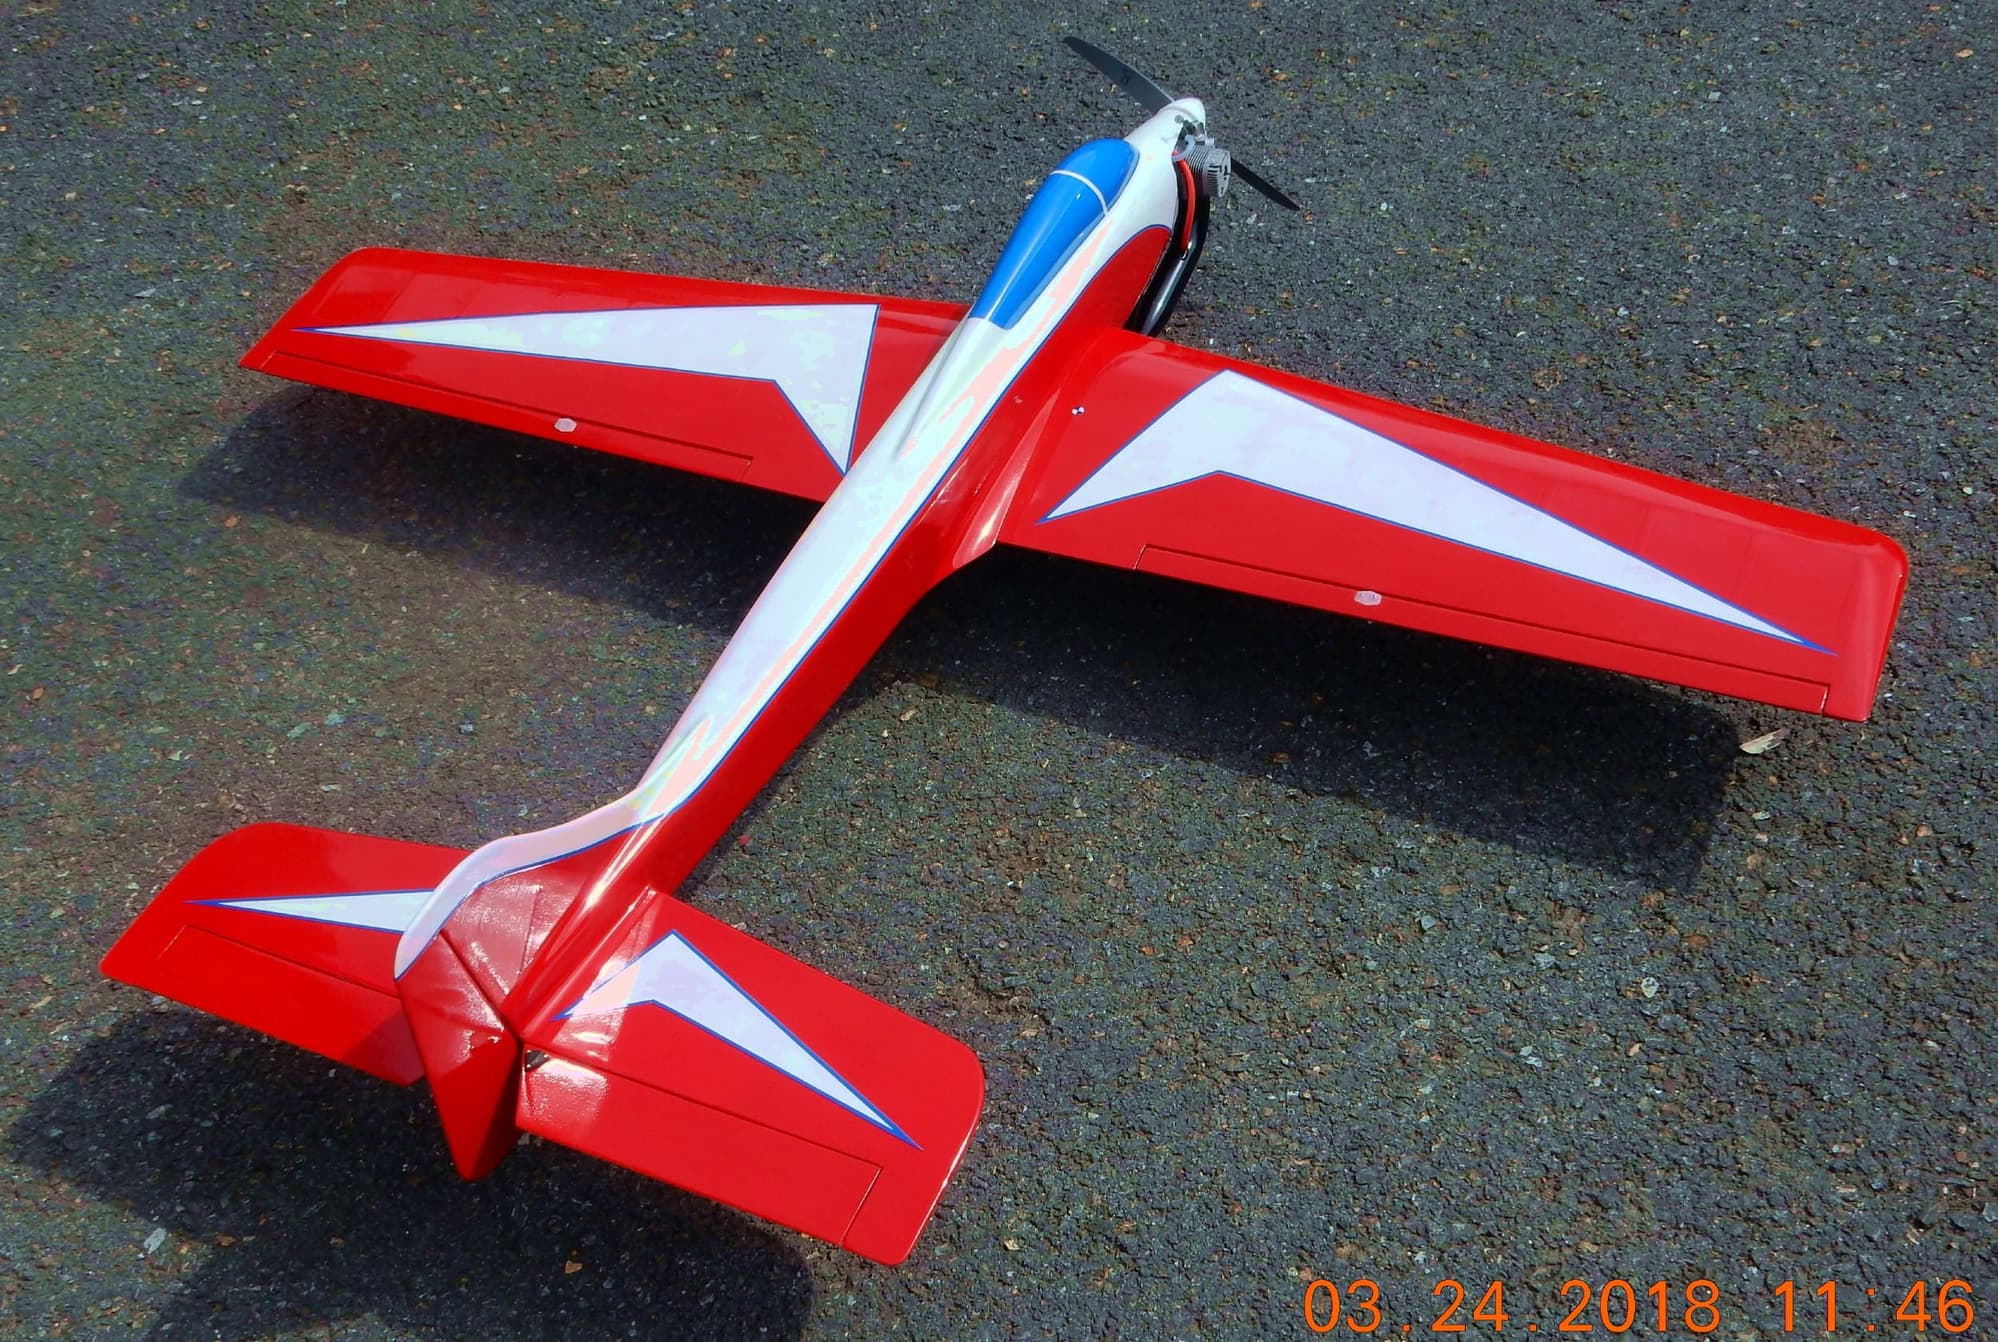
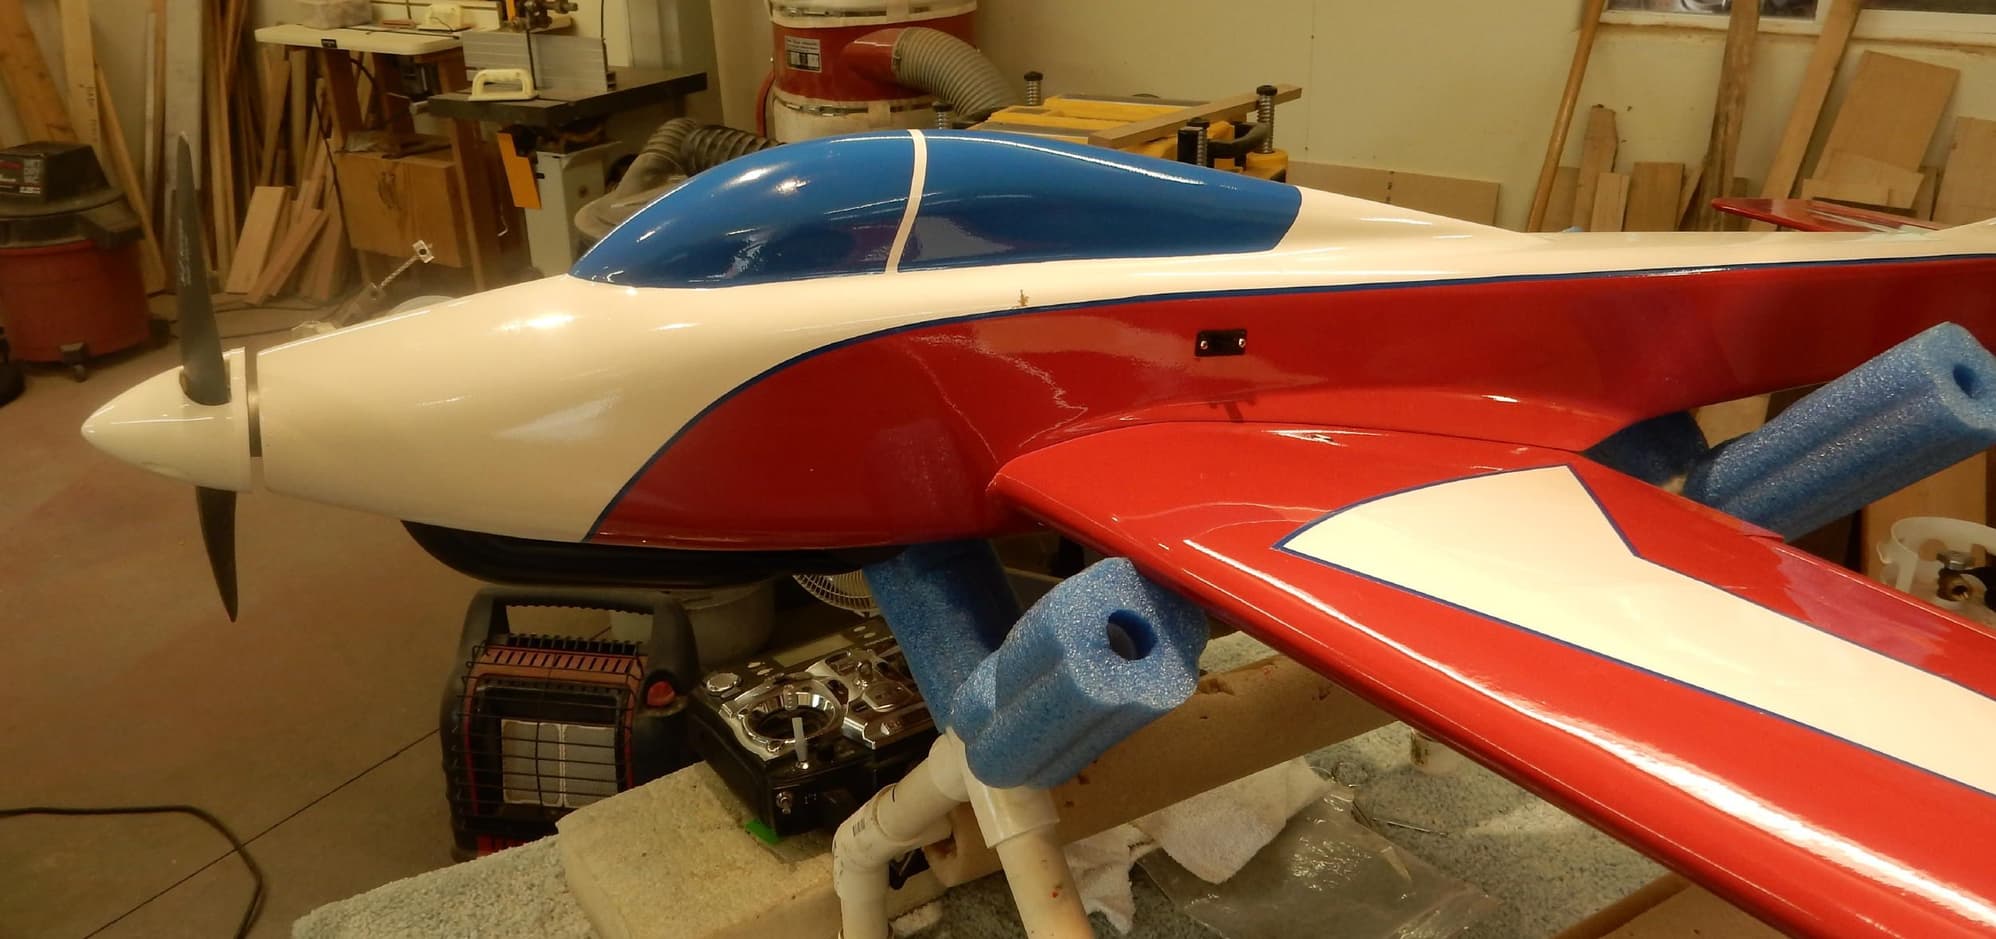
Well, I'm finally done with my Dirty Birdy restoration (almost). I say almost because there are a couple items still needed to take care of. It has been a little over a year since I started this project, and a lot of hours spent working and thinking on it. I've built quite a few kit planes (Not counting ARF's) and this is the most time I have ever spent on one plane. With that said, I'm going to be real nervous on the maiden flight. The conditions will have to be perfect for that day. I'm expecting that this plane will be a little faster than I'm used to flying, and I don't look forward to speed.
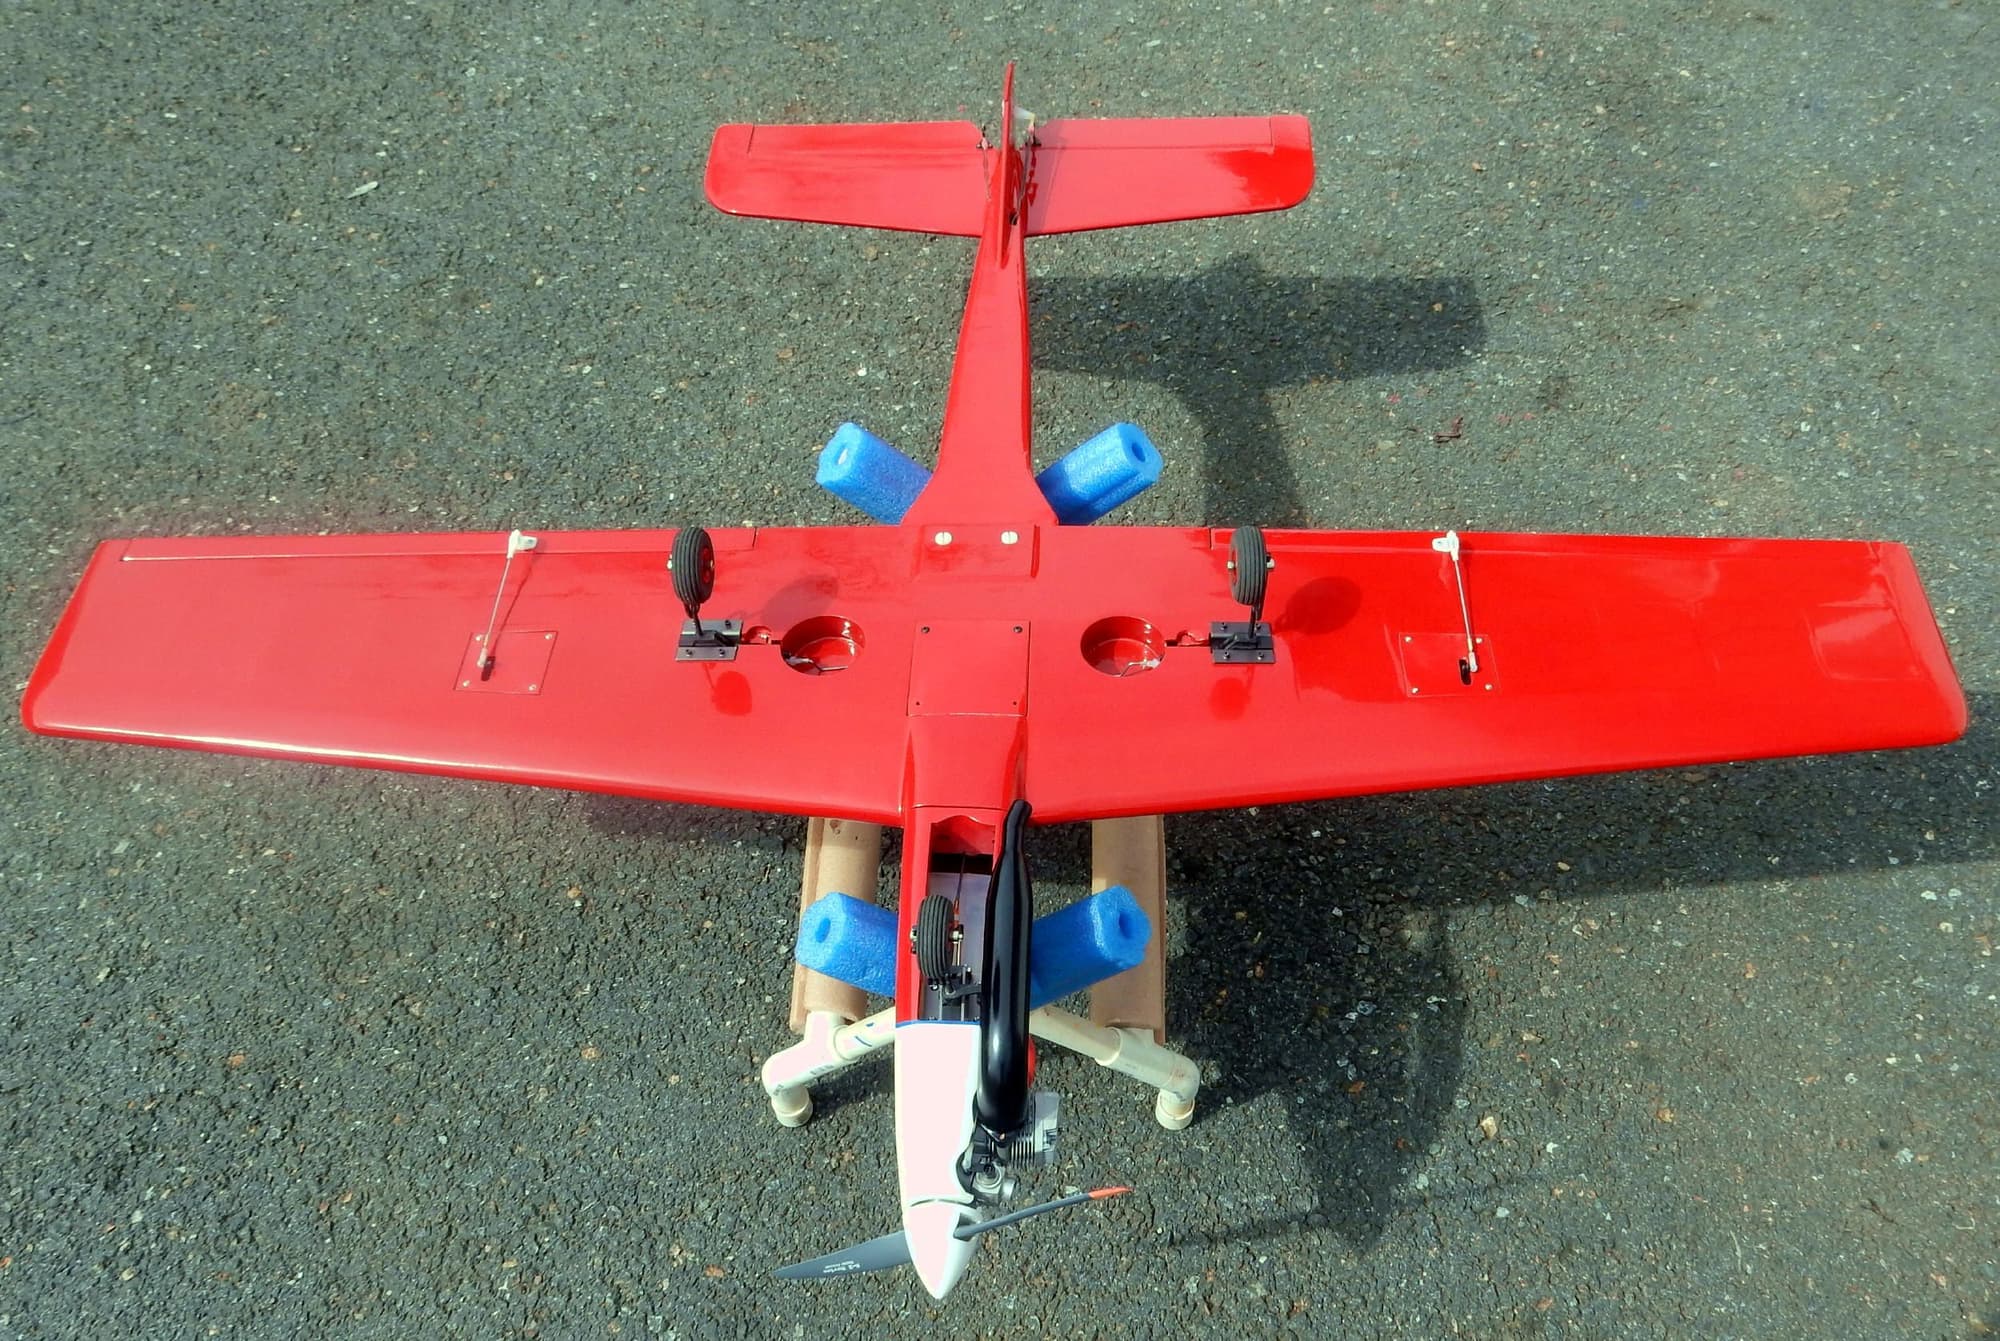
The final weight came out more than I was hoping. Final weight is 6 lb 12 oz. I do think it is lighter than the original build of this plane probably 30 years ago. It had basically the same covering, and was painted, but I have installed all mini servos, lighter retracts, foam wheels and a lighter fuel tank, plus I sanded the fuselage down more and removed balsa and other wood weight where I could.
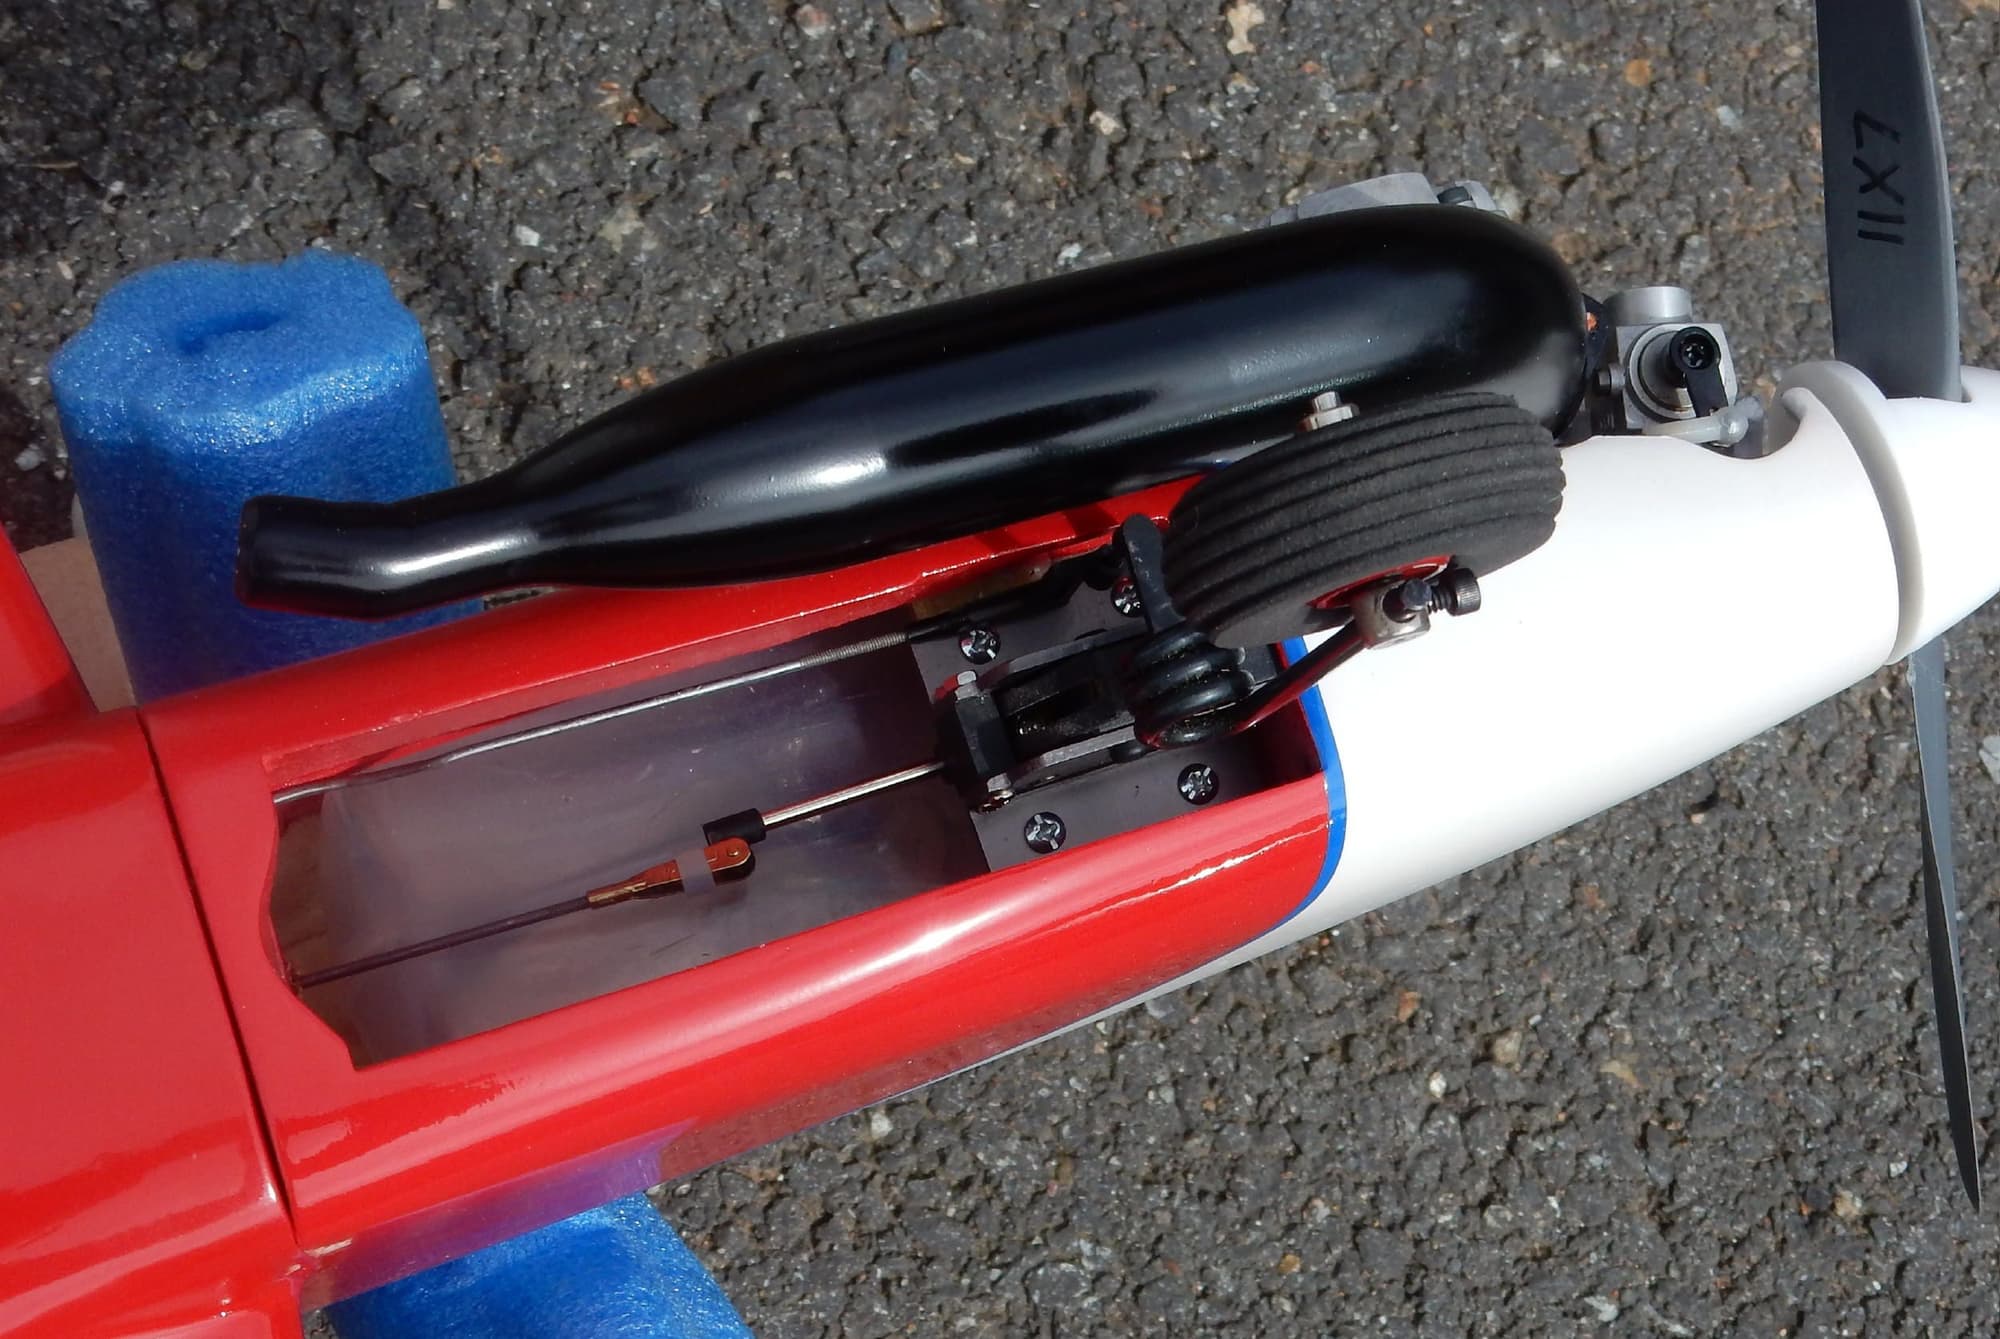
I have an aluminum spinner that I put on originally that I think looks much better than the white plastic, but after checking balance of the plane, I am nose heavy, so I have the lightest spinner and prop I could put on to keep from having to add too much tail weight. I used the CG point that David mentioned, 6" from trailing edge as my reference point. As of now with no tail weight added, the plane balances about 5/8" forward of that point. I need about 1 oz weight added at the tail to to balance. Let me know of those figures.
The prop I have installed now is an 11 X 7 Master Air Screw S-2. I would appreciate the recommended size for thrust and less speed. I don't need speed. I want to use this plane for flying in the Sportsman NSRCA category. I have been presently flying the Phoenix Sbach 342 with 55" ws. What can I expect to be different when I fly the DB? As I mentioned before, I will be nervous on maiden flight day. I'm even considering getting someone more expert than me to do the maiden.
A couple things that I would do differently If I was doing this project again or in my future builds. I covered the fuselage with 3/4 oz glass cloth, but I used Minnwax polycrylic to attach. I should have stuck with the Zap finishing resin. The surface of the fuselage I believe would have been much harder, and not as prone to dings. The other thing I did wrong, and will never do again is do the final clear coat without doing a complete cleaning of my shop first. After the clear coat had dried, I seen there were a lot of dust particles settled on the the dry clear coat. I didn't redo, just lived with the results. Before I did the final clear coat on the main wing, I did a very thorough cleaning of my shop first, and the final product was much better. The other thing I noticed yesterday, and will try to be much more careful in the future to keep from happening again. I spotted a place on my fuselage where the paint had blistered up like when using paint remover. It is about 1/4" in size, and I think I accidentally dripped some thread locker when I was mounting the motor. I do remember having to wipe away a drip, but I must have missed one. One thing I forgot to mention, once I finished centering the engine in the cowl, I think the 2" spinner looks OK. If you remember I had concerns on the size on a earlier post. That's about all I can think of for now. Let me know any advice on concerns I have.
Thanks
Lamar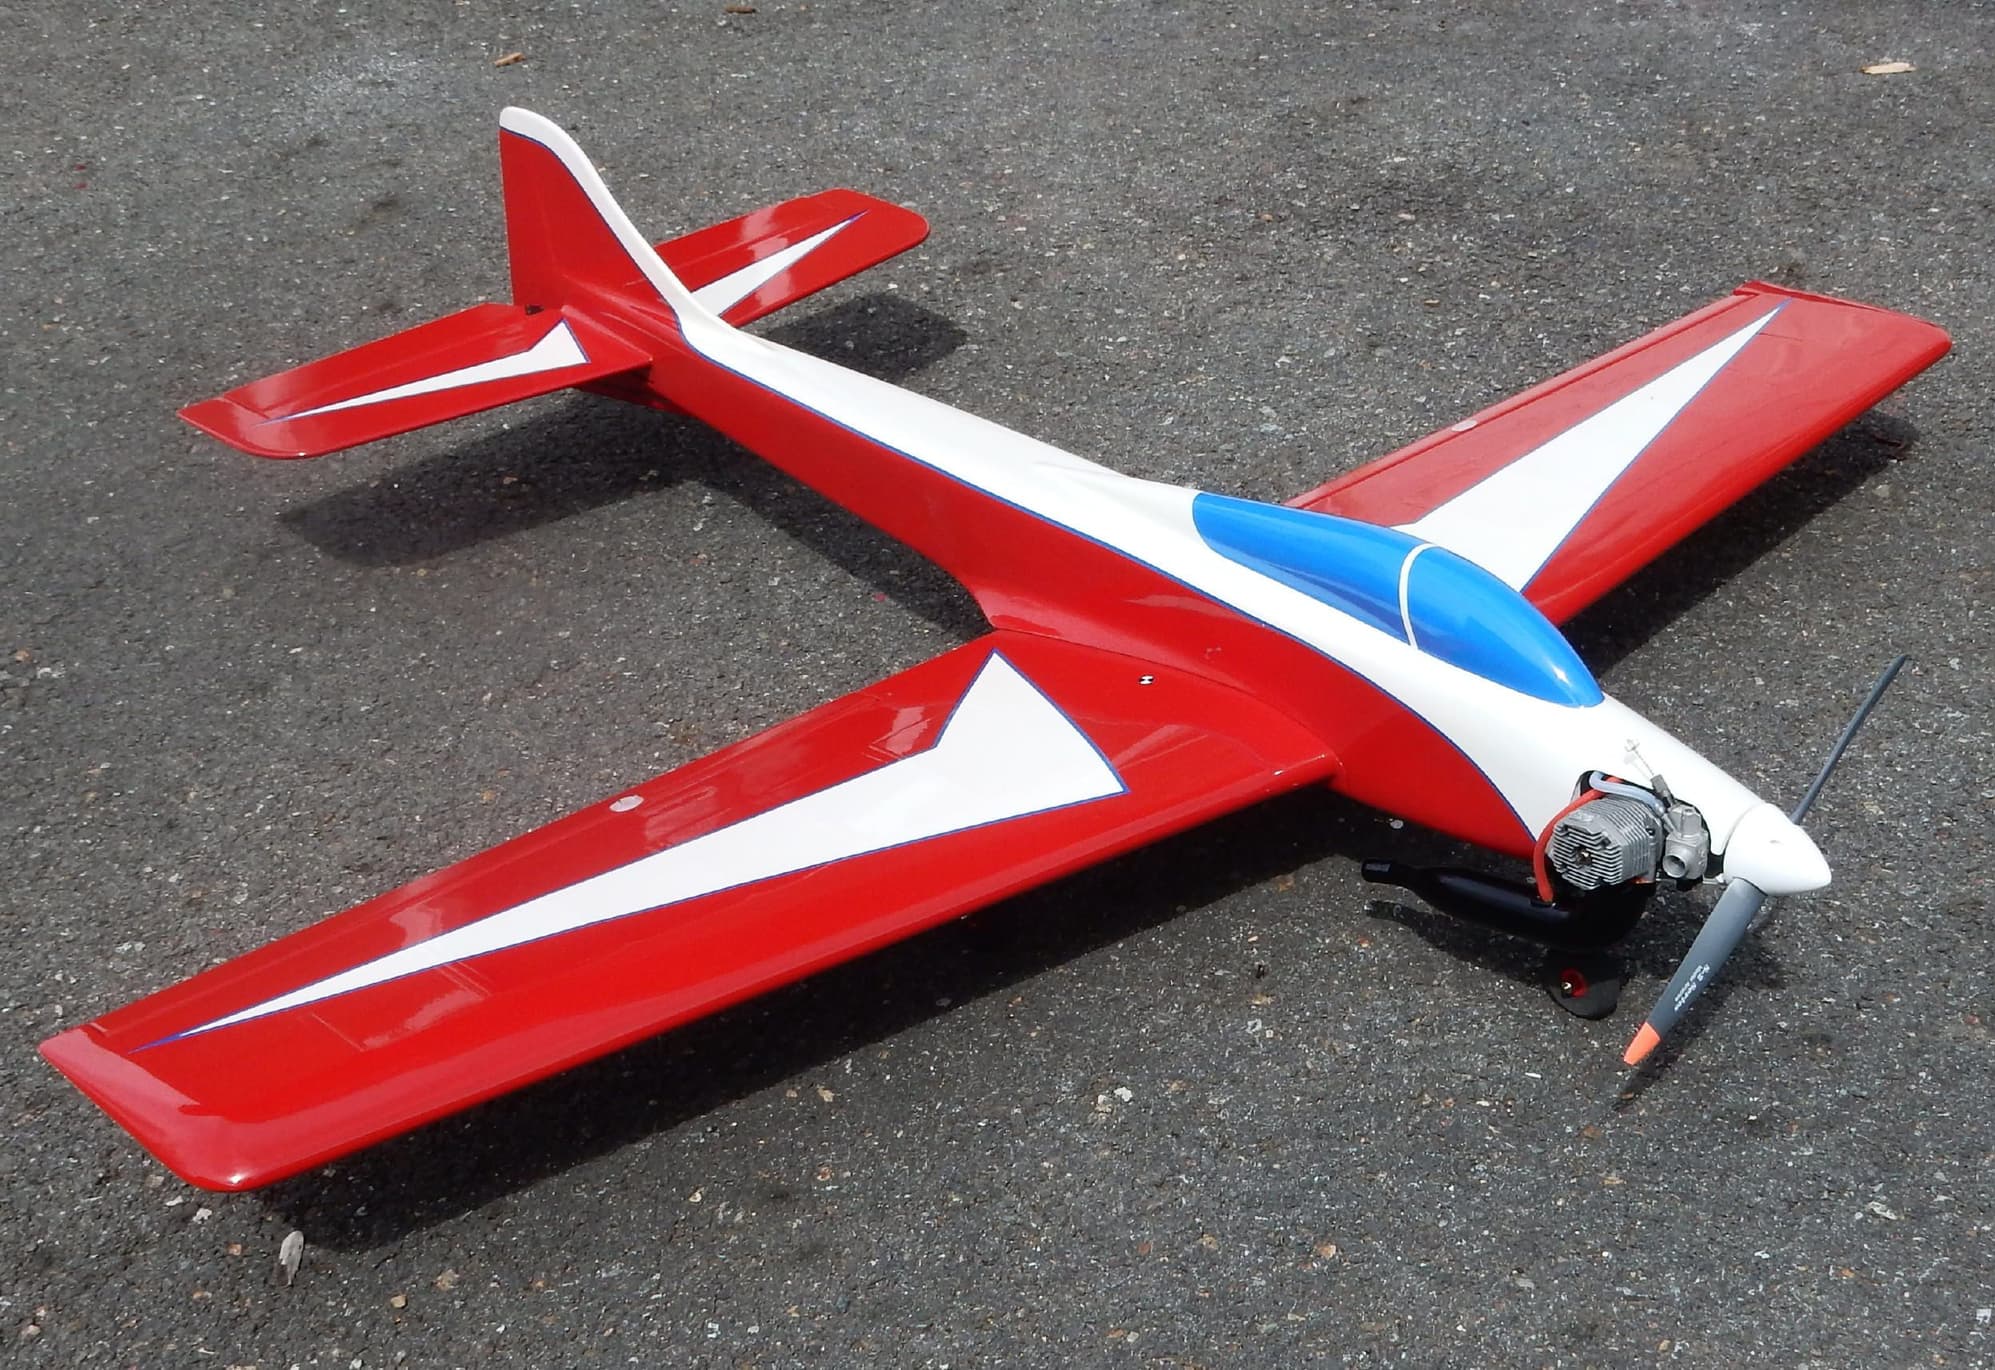


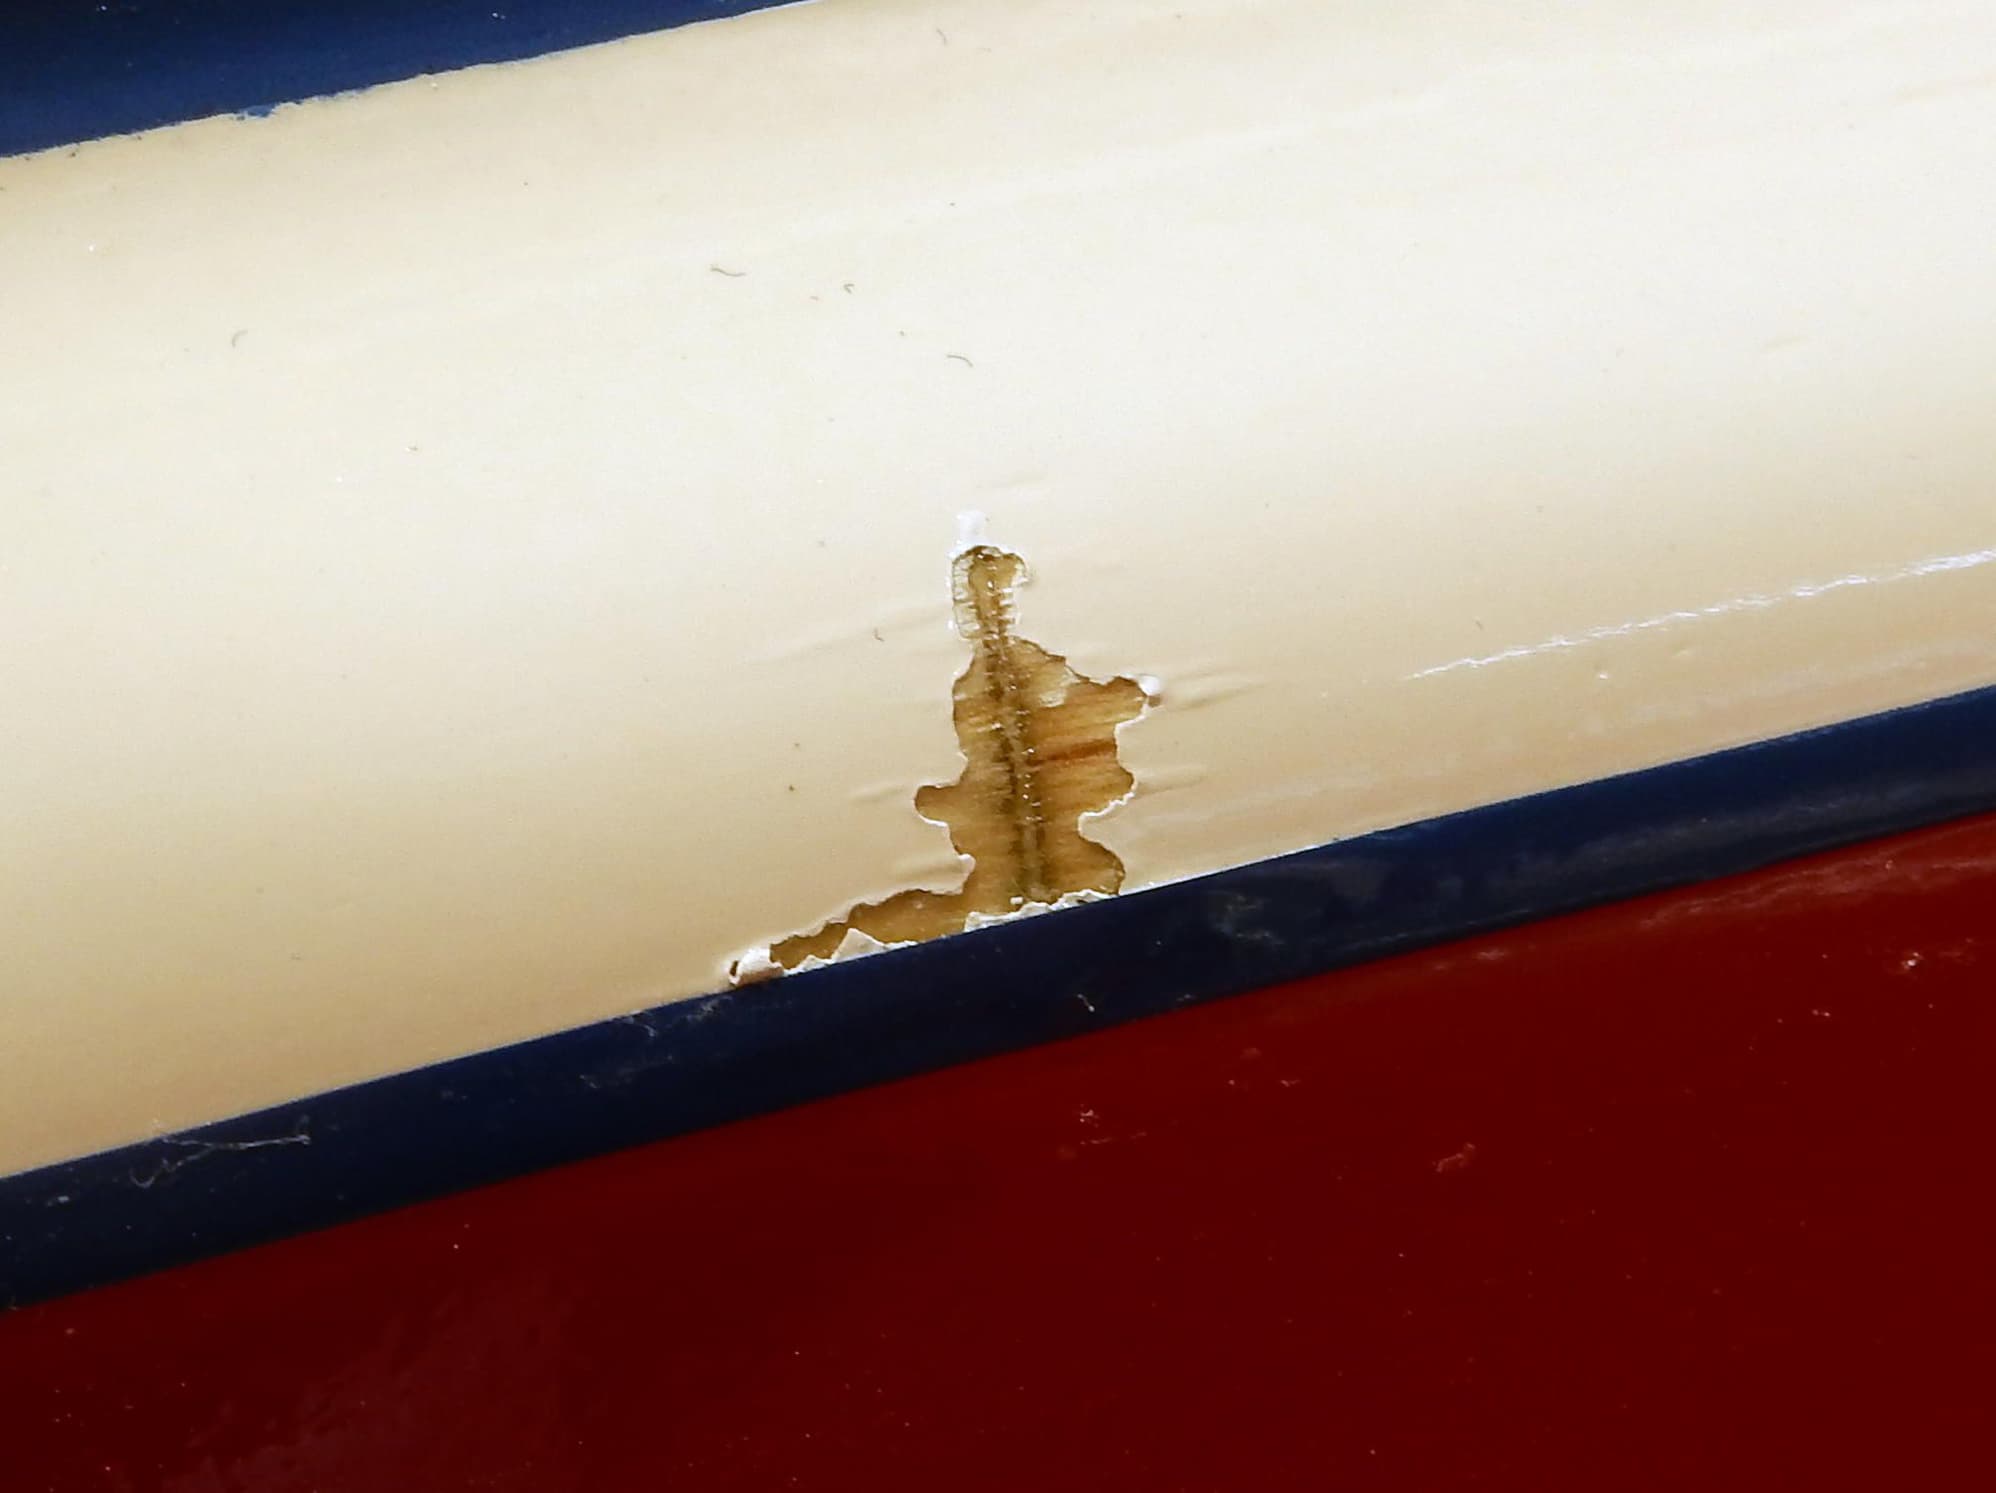
Blistered paint.
The final weight came out more than I was hoping. Final weight is 6 lb 12 oz. I do think it is lighter than the original build of this plane probably 30 years ago. It had basically the same covering, and was painted, but I have installed all mini servos, lighter retracts, foam wheels and a lighter fuel tank, plus I sanded the fuselage down more and removed balsa and other wood weight where I could.
I have an aluminum spinner that I put on originally that I think looks much better than the white plastic, but after checking balance of the plane, I am nose heavy, so I have the lightest spinner and prop I could put on to keep from having to add too much tail weight. I used the CG point that David mentioned, 6" from trailing edge as my reference point. As of now with no tail weight added, the plane balances about 5/8" forward of that point. I need about 1 oz weight added at the tail to to balance. Let me know of those figures.
The prop I have installed now is an 11 X 7 Master Air Screw S-2. I would appreciate the recommended size for thrust and less speed. I don't need speed. I want to use this plane for flying in the Sportsman NSRCA category. I have been presently flying the Phoenix Sbach 342 with 55" ws. What can I expect to be different when I fly the DB? As I mentioned before, I will be nervous on maiden flight day. I'm even considering getting someone more expert than me to do the maiden.
A couple things that I would do differently If I was doing this project again or in my future builds. I covered the fuselage with 3/4 oz glass cloth, but I used Minnwax polycrylic to attach. I should have stuck with the Zap finishing resin. The surface of the fuselage I believe would have been much harder, and not as prone to dings. The other thing I did wrong, and will never do again is do the final clear coat without doing a complete cleaning of my shop first. After the clear coat had dried, I seen there were a lot of dust particles settled on the the dry clear coat. I didn't redo, just lived with the results. Before I did the final clear coat on the main wing, I did a very thorough cleaning of my shop first, and the final product was much better. The other thing I noticed yesterday, and will try to be much more careful in the future to keep from happening again. I spotted a place on my fuselage where the paint had blistered up like when using paint remover. It is about 1/4" in size, and I think I accidentally dripped some thread locker when I was mounting the motor. I do remember having to wipe away a drip, but I must have missed one. One thing I forgot to mention, once I finished centering the engine in the cowl, I think the 2" spinner looks OK. If you remember I had concerns on the size on a earlier post. That's about all I can think of for now. Let me know any advice on concerns I have.
Thanks
Lamar
Blistered paint.
03-25-2018, 02:08 PM
#91
That is one nice looking plane! I love it. Sure brings back memories.
it May be a bit heavy but it will fly nice. Just be careful on sharp pull outs and turns.
ive forgotten what motor you have. I had a string of K &B Motors. .40 stock. .40 with tuned pipe and pump, 6.5 stock with rear exhaust, 6.5 with tuned pipe and pump, these were all really fast but very stable planes in their days. The plain .40’s all ran with 10-6 tornado or Top Flite props. The 6.5’s all had high pitch 9” props. Even though the planes were very fast they slowed down nicely as the speed props were not very efficient at idle or low speeds.
be sure to check the prop to ground clearance. The nose gear struts are not very stiff so you can get prop strikes easily.
My guess is that 11” props are going to be very close unless you lengthened the gear struts.
im pretty sure this plane will be like all of mine....rock steady and smooth flyer. These were very competitive in the rocket pattern events of the day.
be sure you test the stall speed as soon as you can, see what it does. Mine just dropped the nose no rolling.
Byron
03-31-2018, 12:57 PM
#93
My old "Master Modeling" books lists Polyurethane Enamel as a not being compatible over Alkyd Enamel and Acrylic Enamel. Could this be a reason for the peeling. I tested clear lustrekote on Rustoleum enamel and had the paint instantly craze.
03-31-2018, 03:13 PM
#94
Thread Starter
My Feedback: (1)
Join Date: Sep 2010
Location: Grants Pass,
OR
Posts: 209
Likes: 0
Received 0 Likes
on
0 Posts
Thanks for the reply back. I took the plane outside in some good light using a magnifying glass and took a better look, and pressed my fingernail against the spot. As I did, it looked like oil seeping out of the balsa. This is a very old plane, and I think fuel may have soaked in at one time. Only that one .25 inch spot has showed up so far. I tried a fix that may or may not work. Knowing that oil and paint are not compatible, I made a patch large enough to cover the bare spot and extend onto the solid painted area using white stick on trim material. After scruffing up the patch, I painted it with the same Rustoleum I used on the body. It's not perfect, but it's better than it was.
Lamar
Lamar
03-31-2018, 03:28 PM
#95
My Feedback: (3)
Join Date: Apr 2008
Location: Montreal,
QC, CANADA
Posts: 5,200
Likes: 0
Received 5 Likes
on
5 Posts
Lamar,
your DB40 looks great! Good job. Let us know how she flies on the re-maiden!
Jim,
Lustrekote is lacquer based and generally it's clear should be avoided at all costs. One can apply enamel on top of lacquer and urethane on top of enamel but not the other way round. So, if mixing systems, the order is:
Dope > Lacquer > Enamel (yuk!) > Urethane.
I really like lacquer as it can be misted on in several fast drying coats. It flashes in 10 min or less. Enamel is IMO the worst paint to use on our models as it goes on thick and takes forever to dry (a day minimum). But.., many rattle can paints are either lacquer (e.g, Duplicolor) or enamel (e.g., Rustoleum). My favorite paint is acrylic urethane which is typically catalyzed (e.g., Wings West Paint). That stuff also takes long to "cure" but it is great stuff and very durable. Of course, the preferred clear to use on our models is also acrylic urethane which can be applied atop just about anything. Either in 1K (non catalyzed) for electric/gas models or 2K (catalyzed) for glow models. 2K is always best but more expensive and it's a one shot deal once mixed.
Clearing a 40 size plane like the DB takes just about one can of 2K SprayMax. A 60 size takes a can and a half so about $30 for a 40 and $45 for a 60. Pricey but well worth it IMO. Also, unlike epoxy clears, 2K urethane is impervious to UV so the model will never yellow if properly painted and cleared.
David
