


old timers look here must be 50+ years only
 09-21-2019, 07:03 PM
#7251

Mike
 09-22-2019, 02:31 AM
#7254

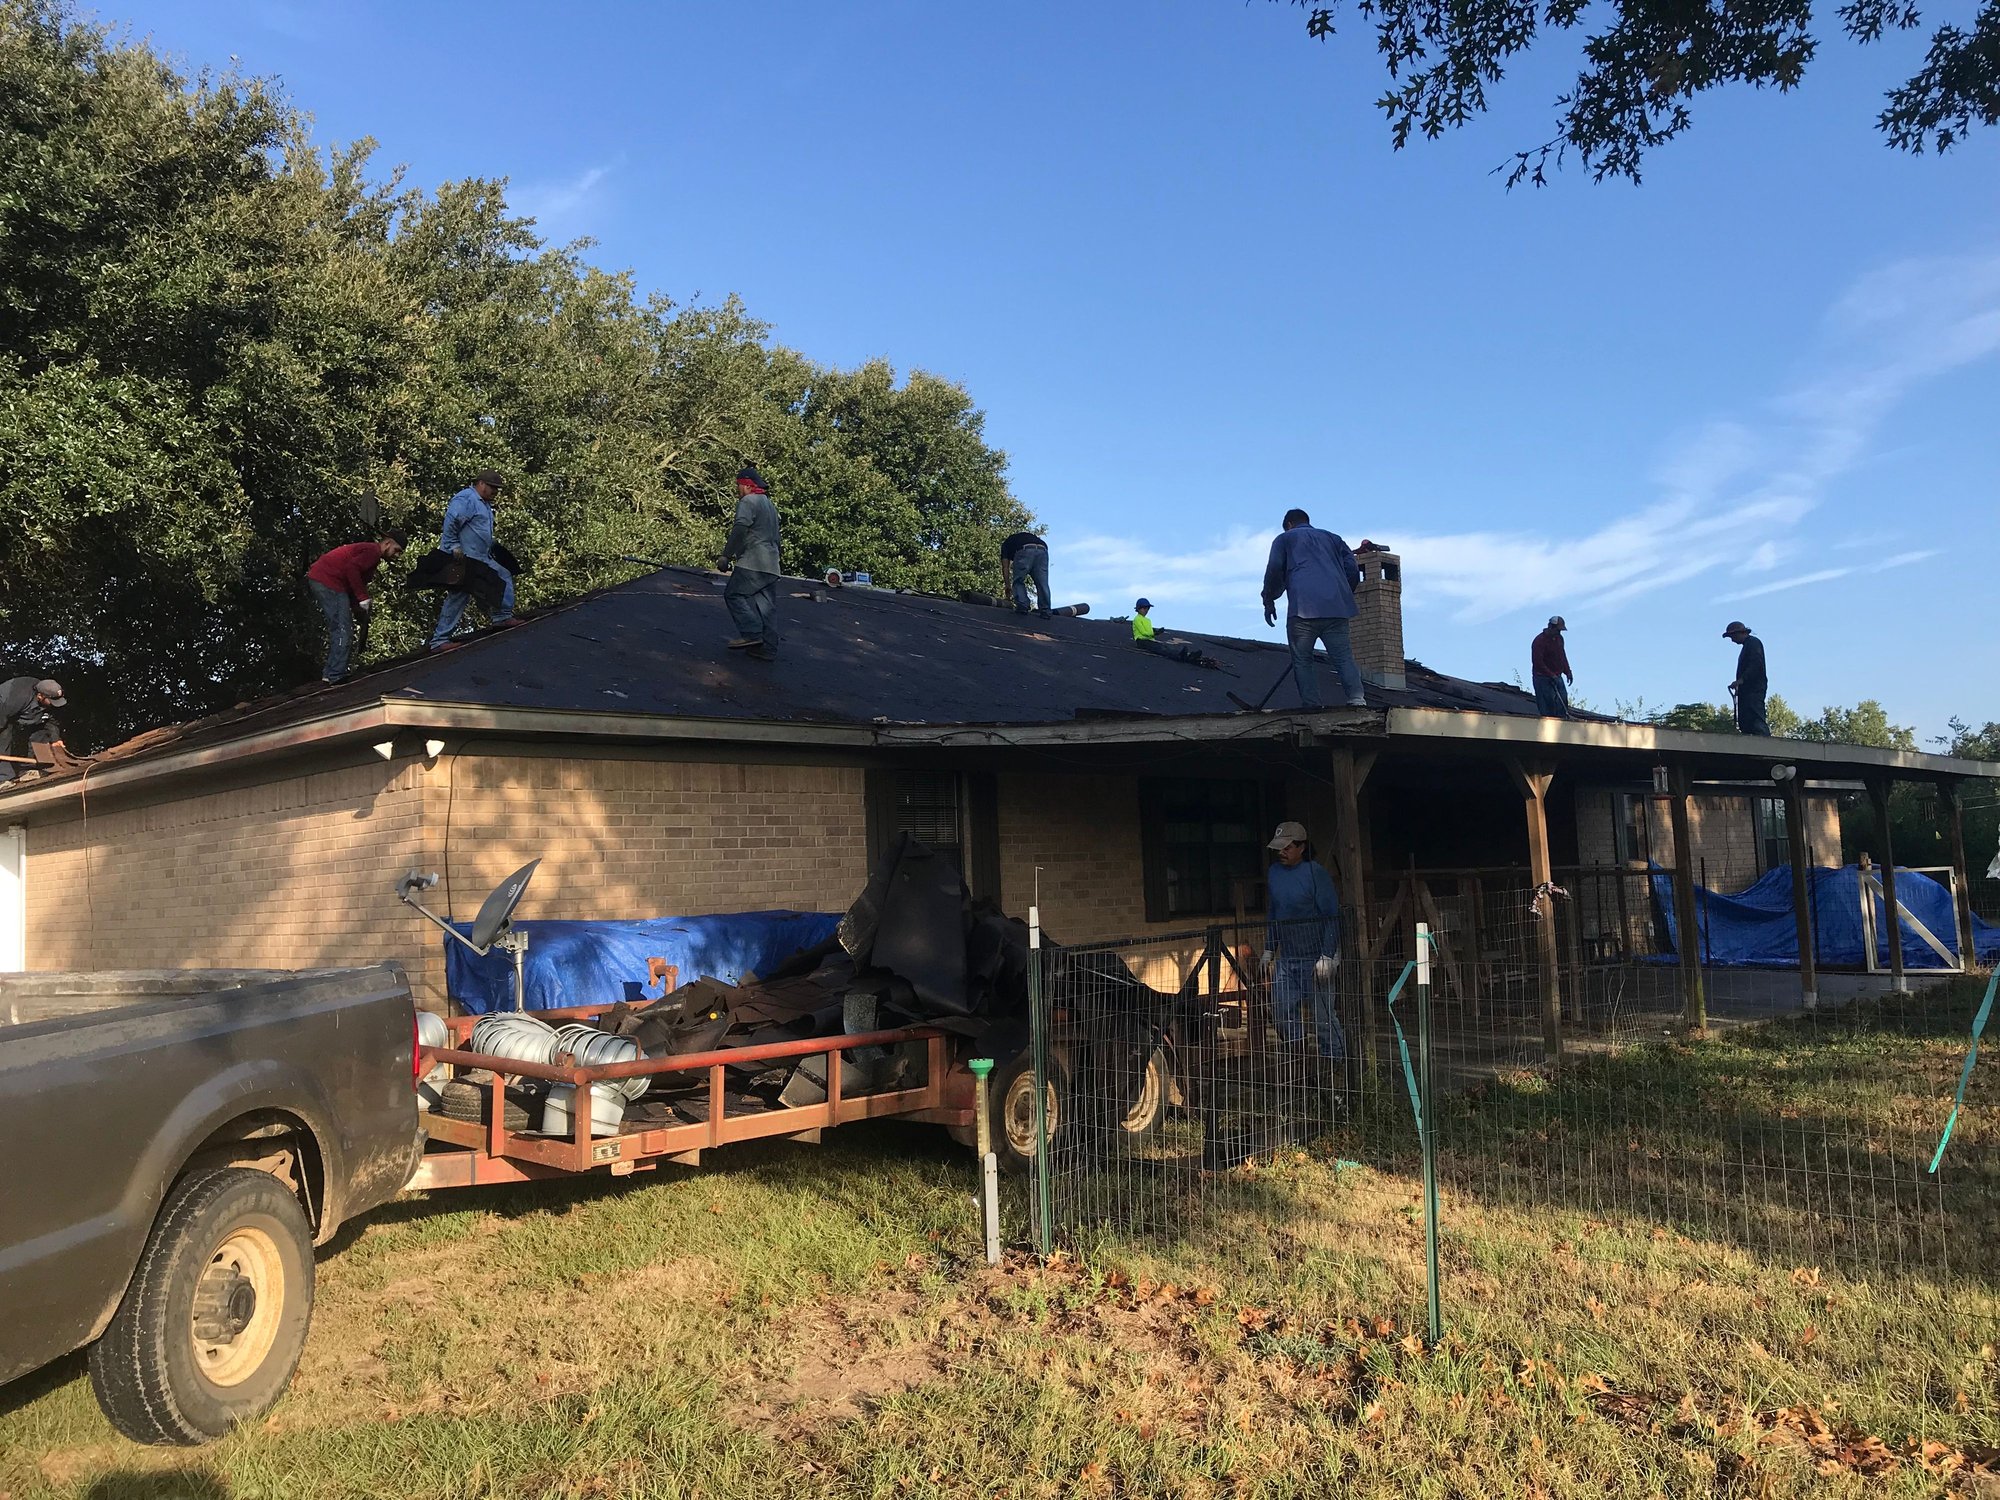
I�m getting a new house roof before the rainy season gets here. This crew worked 11 hours yesterday. Got about 3/4 done. Should finish the job today. What a mess tearing the old roof off. I�ve pressure washed the house. I�ll use my airless sprayer to spray a coat of primer. Then paint it if the cold weather does not get here too soon. That tree root problem plus trimming the tree limbs some, delayed this roof job. Weather is now turning to the cooler side. About time as it has been a hot hot summer. So hot I decided I had to fix my truck AC. The job turned out easier than I had thought. Now I have had good AC for this hot August-September.
 09-22-2019, 07:14 AM
#7255
Looks like you need to replace some fascia boards, look a bit on the rotted side. I have enough of that on my house to know.  I'll be more than happy to send some rain to France, We have had enough to last months. Last week 4-5" fell in a couple hours here, and it has rained all day yesterday and some really big bands are going by today.
I have been wanting to put up a new TV antenna, but the weather has not cooperated.
My workshop flooded again, just finally got it dried out, and the rain yesterday got more water in. GRRRR.
I'll be more than happy to send some rain to France, We have had enough to last months. Last week 4-5" fell in a couple hours here, and it has rained all day yesterday and some really big bands are going by today.I have been wanting to put up a new TV antenna, but the weather has not cooperated.
My workshop flooded again, just finally got it dried out, and the rain yesterday got more water in. GRRRR.
09-22-2019, 08:48 AM
#7256


Join Date: Apr 2008
Location: Measnes, La Creuse, France.
Posts: 2,129
Received 146 Likes
on
123 Posts
The rain has given me the opportunity to work on the Big Guff.
I am building the Big Guff's fuselage pretty well as Walt Good built his: 1/4" sq (6mm) frame, balsa block from the nose to the firewall, 1/16" (1.5-2mm) sheet from the firewall to the trailing edge, grain vertical and 1/32" (0.8mm) balsa sheet over everything, grain running horizontally. I only differ from Walt's method of construction by using the 1/32" sheeting with the grain across the fuselage top and bottom rather than in line with it. So far I've finished the port side, and as you can see, I'm waiting for the glue to dry before shaping the 1/32" sheet to conform to the lower longeron and tail platform. Then I'll have to sheet the starboard side. The fuselage is already very rigid. Apologies for the untidy workshop.
The fuselage is so long that I've had to elongate the pushrod for the elevator. The rudder will be actuated by a closed loop.
Here's a few pictures for you.
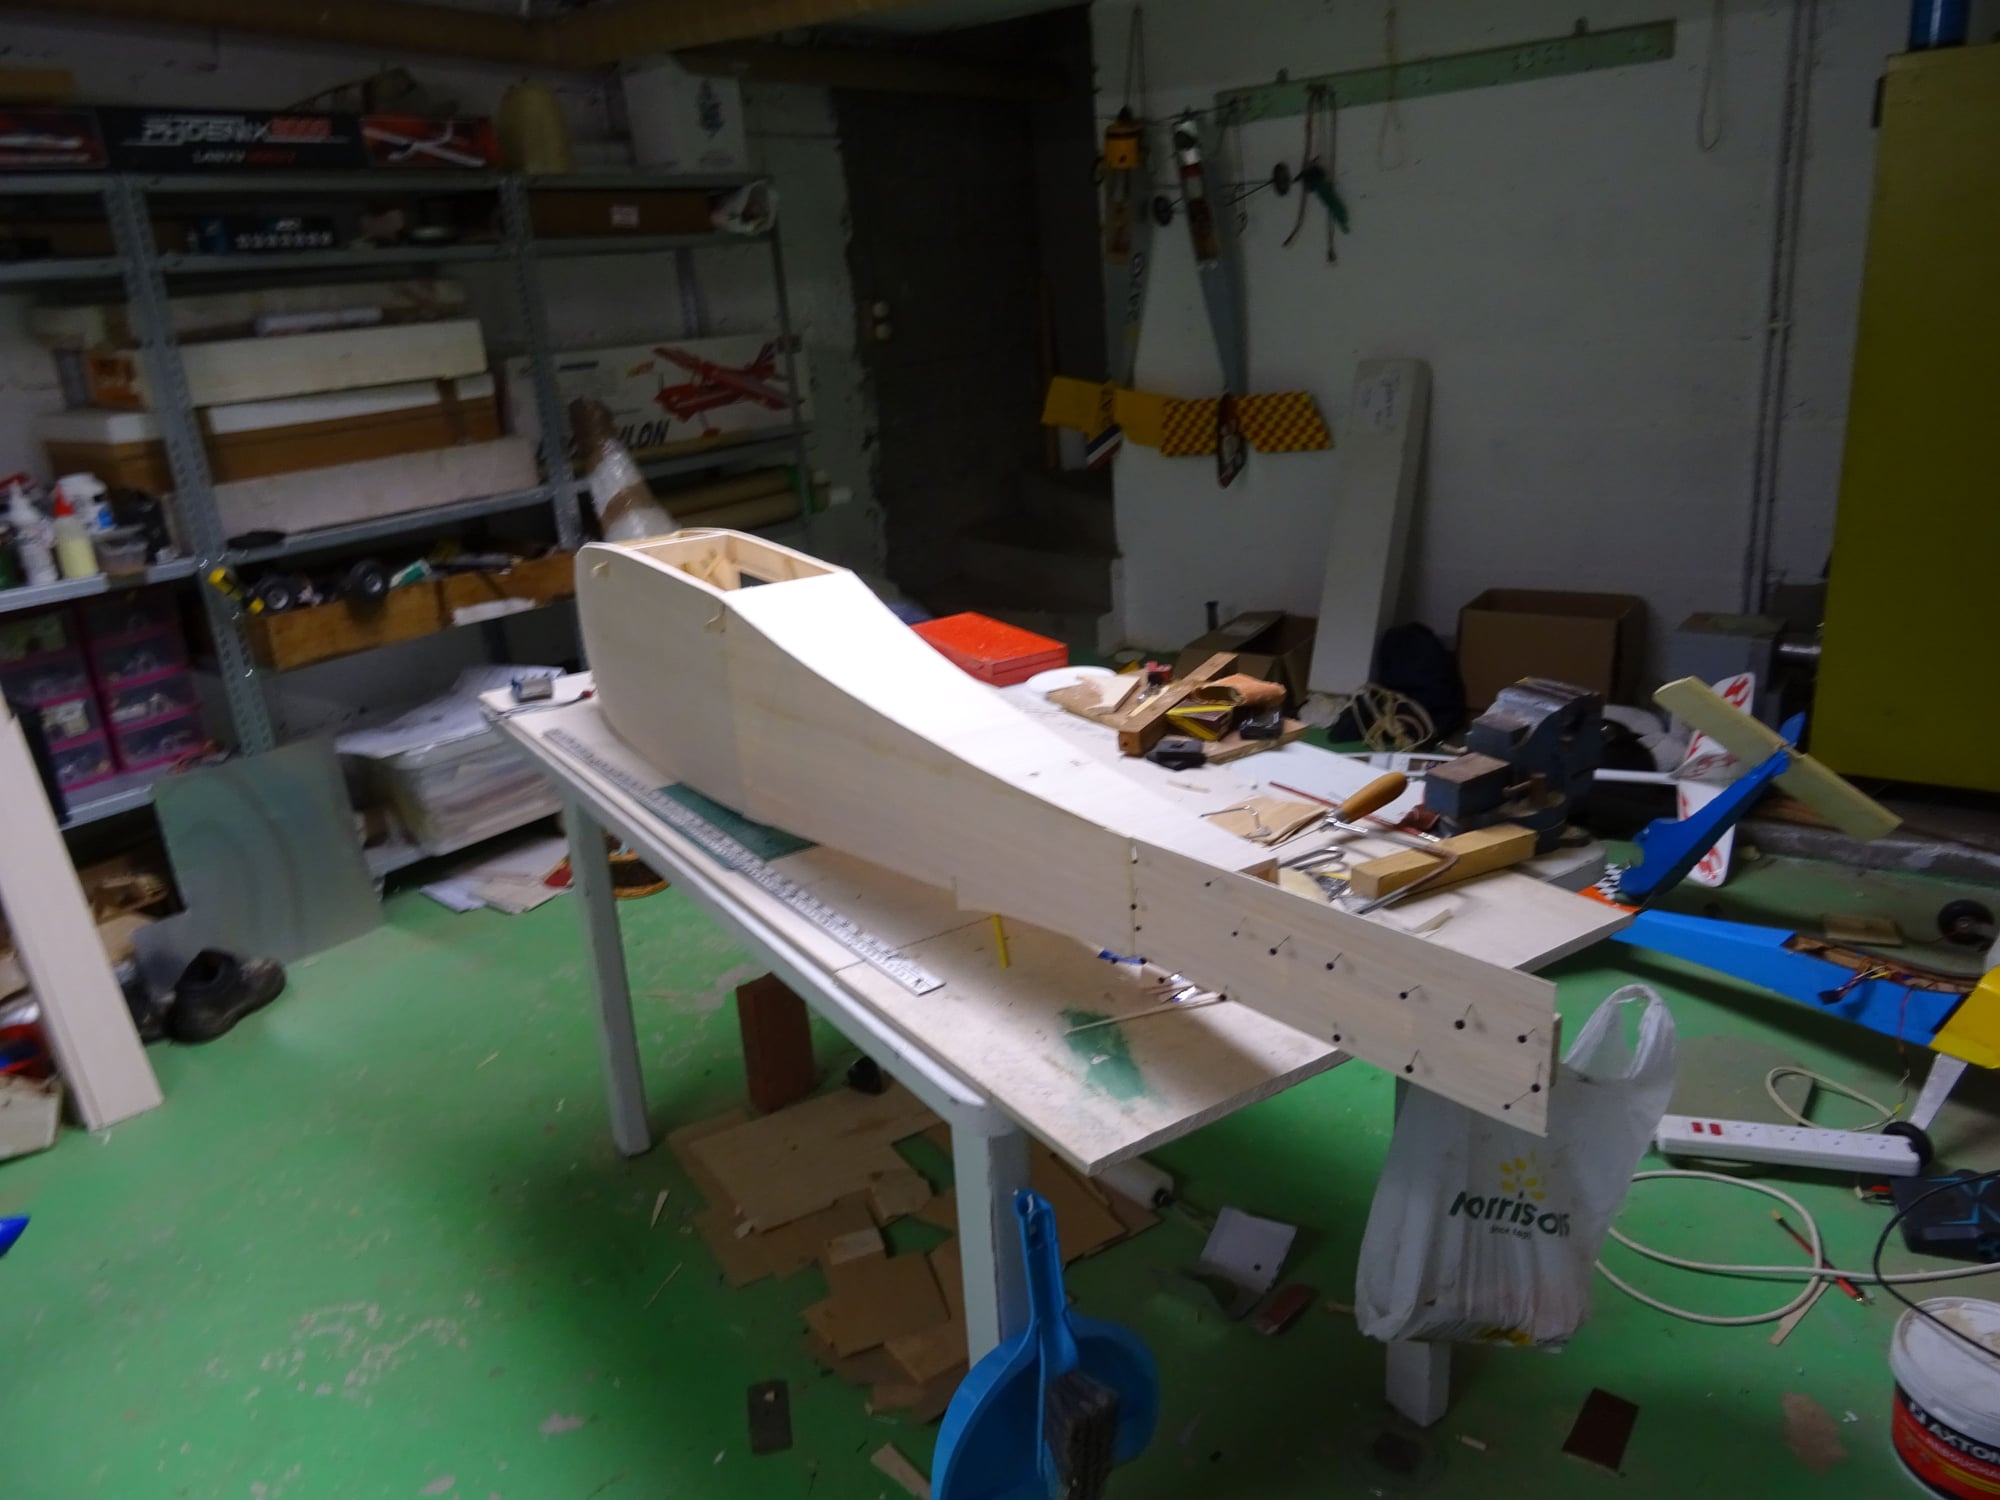
Port side of the Big Guff fuselage fully sheeted. Waiting for the glue to dry.

Starboard side yet to be sheeted.
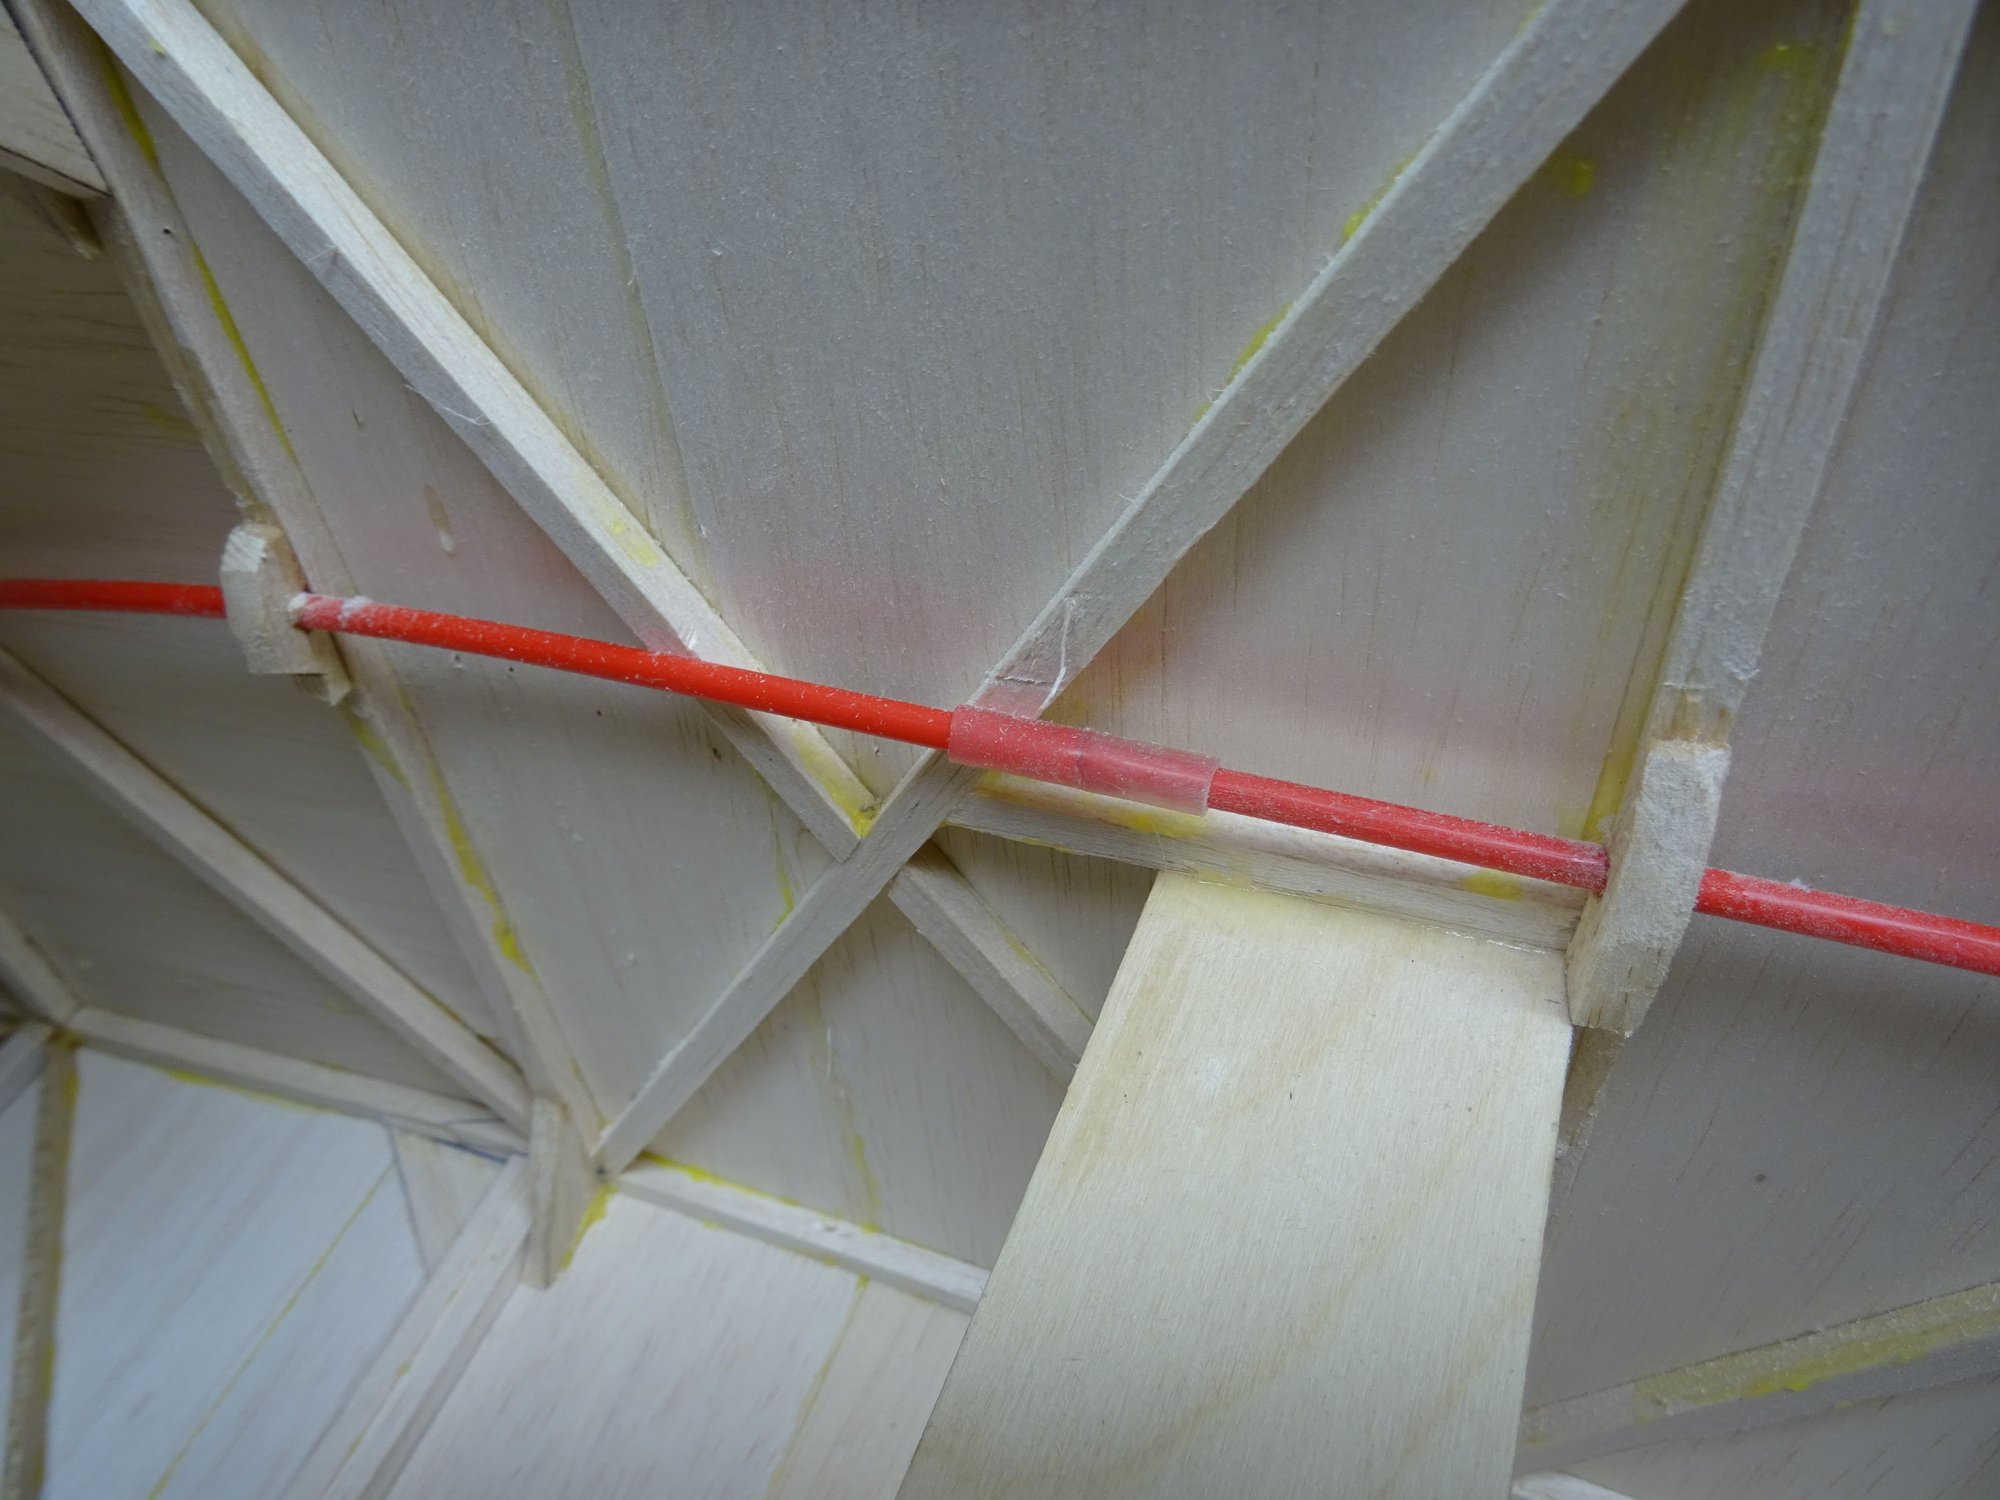
Outer pushrod elongated with fuel tubing!
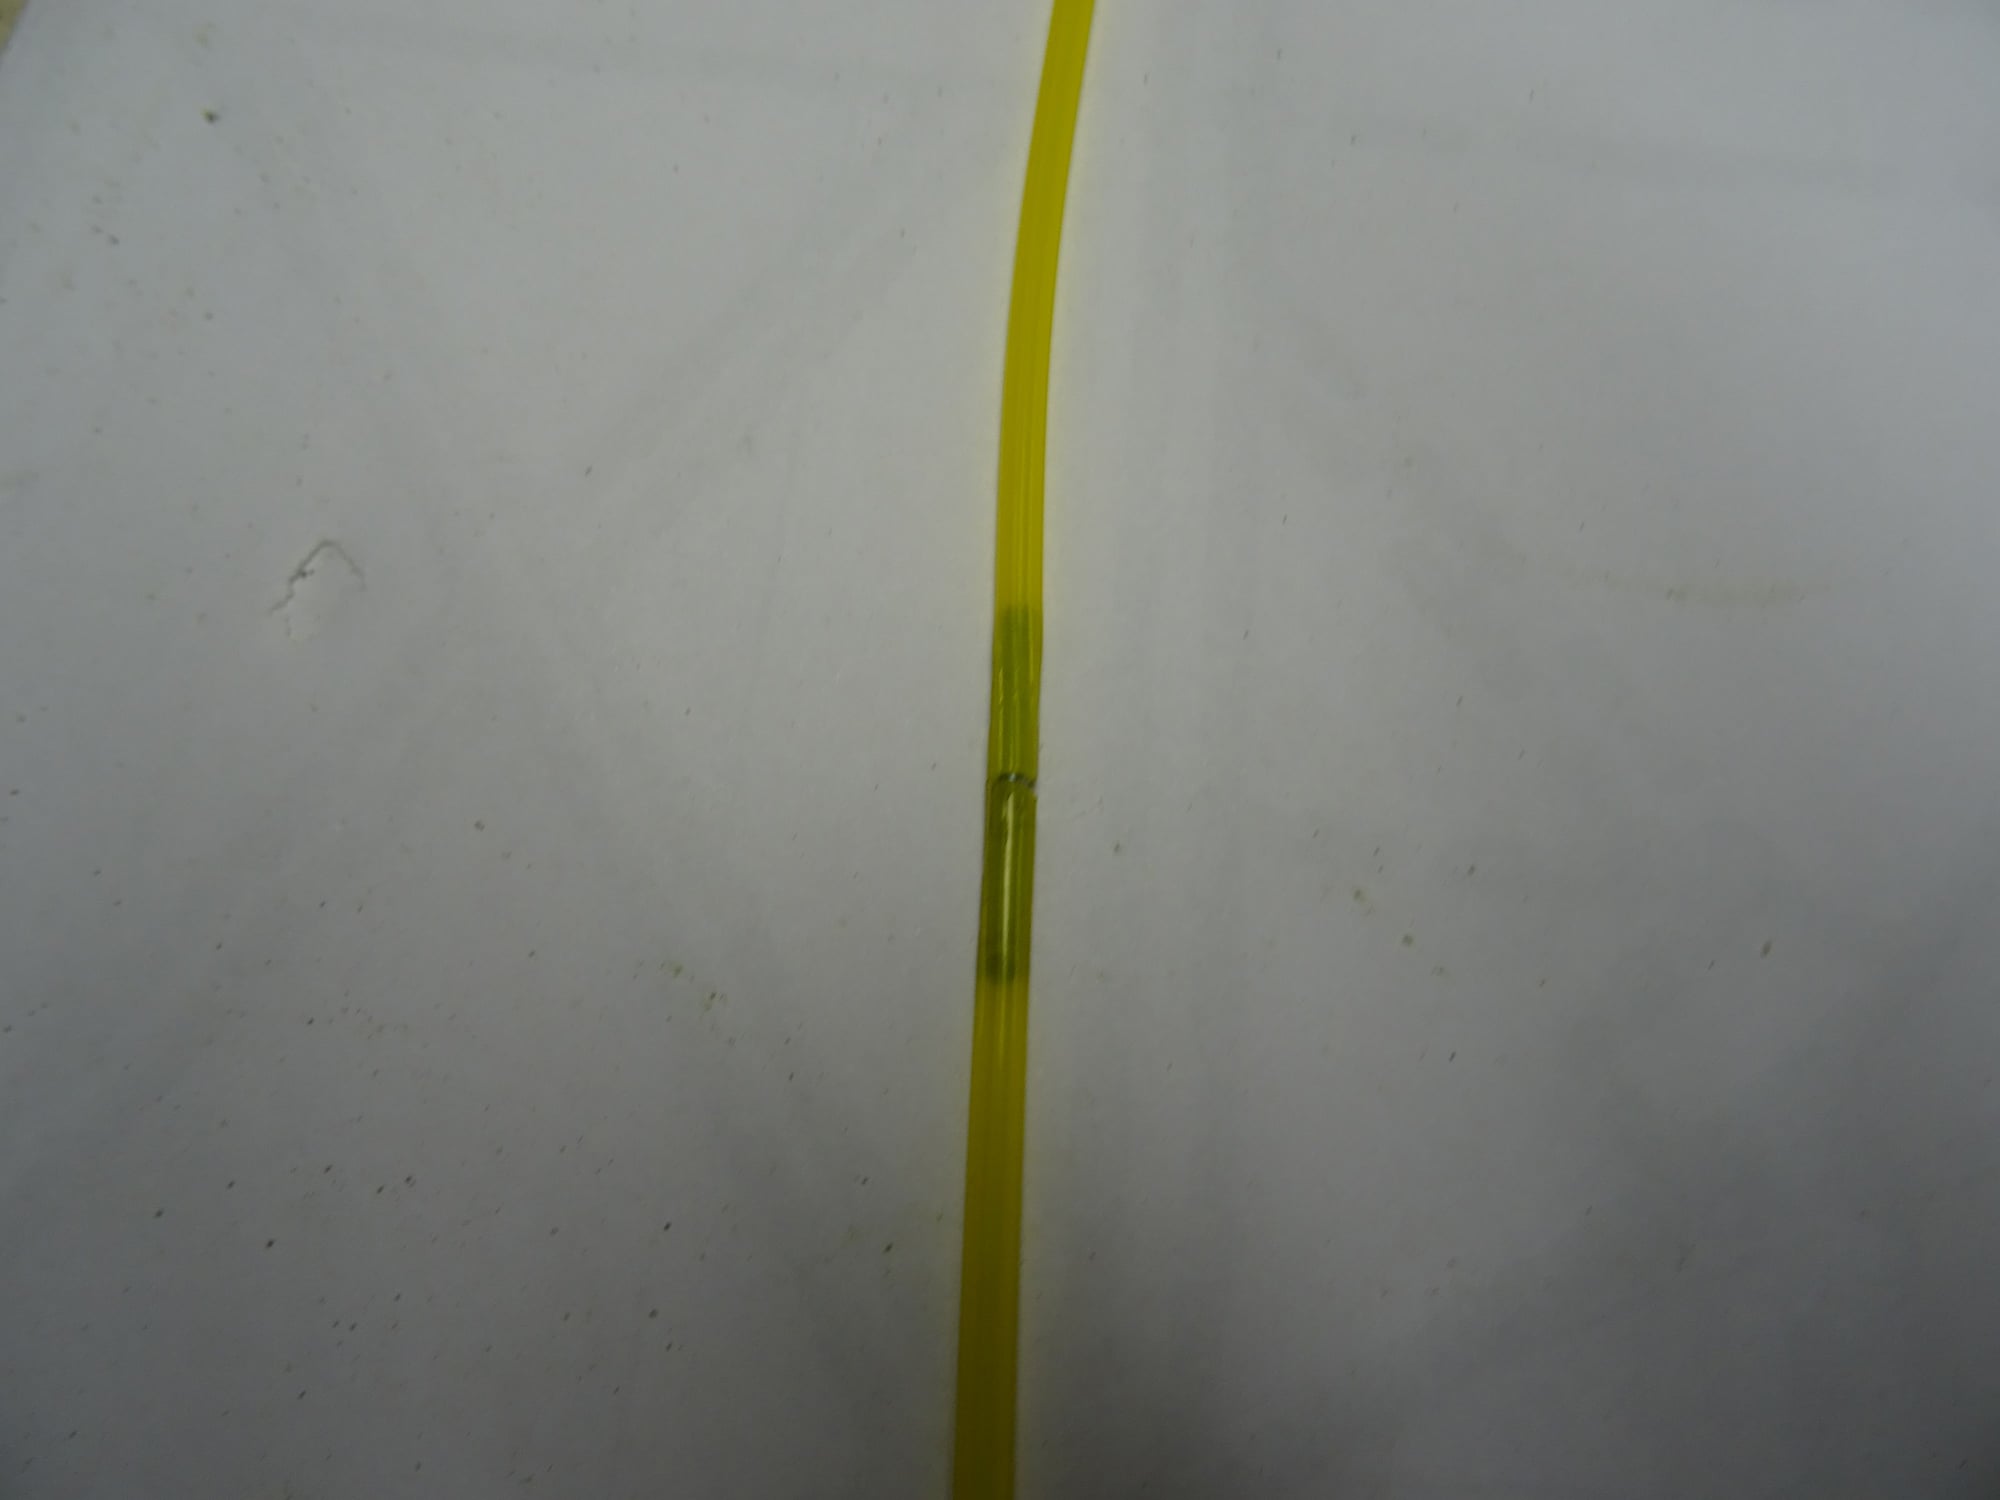
Push rod inner joined by a small length of threaded rod.
I am building the Big Guff's fuselage pretty well as Walt Good built his: 1/4" sq (6mm) frame, balsa block from the nose to the firewall, 1/16" (1.5-2mm) sheet from the firewall to the trailing edge, grain vertical and 1/32" (0.8mm) balsa sheet over everything, grain running horizontally. I only differ from Walt's method of construction by using the 1/32" sheeting with the grain across the fuselage top and bottom rather than in line with it. So far I've finished the port side, and as you can see, I'm waiting for the glue to dry before shaping the 1/32" sheet to conform to the lower longeron and tail platform. Then I'll have to sheet the starboard side. The fuselage is already very rigid. Apologies for the untidy workshop.
The fuselage is so long that I've had to elongate the pushrod for the elevator. The rudder will be actuated by a closed loop.
Here's a few pictures for you.
Port side of the Big Guff fuselage fully sheeted. Waiting for the glue to dry.
Starboard side yet to be sheeted.
Outer pushrod elongated with fuel tubing!
Push rod inner joined by a small length of threaded rod.
09-22-2019, 02:35 PM
#7257
I took advantage of the rain to be in my workshop, which thankfully has dried out. Had to make a couple corrections to W1 and W2 for the Liberty Sport, and then inventoried the parts, found I am short a 1/4 x 1/2" stick for the spar.  I do have 1/4" stock to make it from though, so will do that for the center section. While I had the laser powered up, I made some gussets for the wing out of 1/8" balsa, took all of 5 minutes to program the cuts, and burn them. Then I tried a grayscale engraving on Alder. It kinda sorta looked like what I was going for, but lacks enough detail to be worth it. Still have some work to do to get it close to what I would like. Might work out better doing a reverse image on Lexan.
Of course now all I can smell is burnt wood, apparently the seam on the blower leaks, so not all the smoke gets pulled out, so I sealed it with metal duct tape.
I do have 1/4" stock to make it from though, so will do that for the center section. While I had the laser powered up, I made some gussets for the wing out of 1/8" balsa, took all of 5 minutes to program the cuts, and burn them. Then I tried a grayscale engraving on Alder. It kinda sorta looked like what I was going for, but lacks enough detail to be worth it. Still have some work to do to get it close to what I would like. Might work out better doing a reverse image on Lexan.Of course now all I can smell is burnt wood, apparently the seam on the blower leaks, so not all the smoke gets pulled out, so I sealed it with metal duct tape.
09-22-2019, 03:52 PM
#7261
There's nothing wrong with PINK airplanes . When I built my Extra 300 , we covered it in Pink, Purple and White . Every time we demoed it we got lots of neat comments about it , and I have to say that it was one of the prettiest planes around. Sorry I can't send a picture as proof as it was neat. Red
09-23-2019, 02:51 AM
#7262
Well 15 hours total for a new roof. This crew worked like a well oiled machine. All rotted wood replaced with new. Have to put up a new antenna pole as my old one was too rusted. Three section pole but would not fully collapse. I had to just drop it at about a 20� extension.
acdii I feel your pain with water in the workshop. Nothing worse than water intrusion into house or workshop. Hope it stays dry.
Telemaster that is a nice build on the Big Guff. I like stick built frames. I was given some balsa. One box was assorted size sticks. Lots of wood for stick built models. Which one to build?
Since I moved my model into the house to try to finish the covering, I found that my routine was all wrong. In the past I would go out and work then see if I had the energy to build. Often I would set it aside for another day; just too tired. Now my routine is work on the model building in the morning before going out and getting tired. Works better for me. I have model just about covered. Will post a picture when finished.
09-23-2019, 04:31 AM
#7263
It will be my turn for a new roof in a few weeks. That big storm we had took down tree branches that actually damaged the 1 X 6 decking in addition to trashing the roof shingles. I just paid the insurance renewal so I can expect a big increase next year. I'm going to see if they can back the antenna tripod back a couple of feet if the cables will stretch that far to improve reception.
09-23-2019, 05:29 AM
#7264
I have a new Wineguard to install so we can get OTR since Directv was cancelled. We either have something to do in the evening, or it is raining. SMH. My workshop is finally dry enough to work in, had a little dribble come in from the storms on Saturday, but vacuumed it up. Did some more work with the laser too. I started building the center section for the top Liberty Sport wing and found that W1 and W2 were wrong and had to redo them. I had some scrap 3/32 laying around so didn't have to waste a full sheet for the 7 ribs. I also made some gussets from 1/8" stock for the wing. Having the laser sure is coming in handy, and the software is getting easier to use. There are wing fairings made from 1/32 plywood that I cut using the laser, and those are now installed and used balsa filler to make the fillets. Once that is dry and sanded to shape I will harden it with CA. Almost to the point where I can final sand to shape the fuse and get the covering started.
I also tried doing some grayscale engraving, this will take some time to perfect, have to get the speed and power settings just right, and it varies depending on the wood. I may work on reducing power to the minimum, keeping up the speed and doing multiple passes on the next round, AFTER I clean the focal lens. Dumb me forgot to turn the blower and compressor on and hit the laser on, smoked the hell out of the thing, which means there is now residue on the lens.
I also tried doing some grayscale engraving, this will take some time to perfect, have to get the speed and power settings just right, and it varies depending on the wood. I may work on reducing power to the minimum, keeping up the speed and doing multiple passes on the next round, AFTER I clean the focal lens. Dumb me forgot to turn the blower and compressor on and hit the laser on, smoked the hell out of the thing, which means there is now residue on the lens.
09-23-2019, 07:09 AM
#7266
The lens is a PITA to clean. Have t disassemble the head unit and try not to drop the lens, and not touch it since skin oils can ruin the coating. It can chip real easy if not handled properly.
09-23-2019, 09:45 AM
#7267
09-23-2019, 10:09 AM
#7268
Which model are you looking at how high off the ground and what distance to broadcast antenna. I�m still getting Directv but it goes offline when weather is in the area. I need local TV to keep track of local severe weather or during a power outage. I made my own antenna which worked fine for local channels. I need to reach out about 65 miles. I had it up about 25-30 feet to clear a tree. Tree is gone now so maybe I can work with a lower height. I have to repair the antenna as it crashed down when I was trying to lower it. Looking at maybe trying a factory made Antenna. I�m still going to work with my homemade to see how it works at a lower height. In the mean time it is Directv only.
I haven't decided yet if I want to mount it on the top of our 3 section tower, which is somewhere around 30' I think, at least I think each section is 10', or put it where the original one is located on our chimney. We used to have a beat up old Wineguard on the house when we first moved in, so replaced it with the one that can be obtained anywhere, a cheap RCA. Don't do it. The beat up old Wineguard with missing elements had better reception. I think I will just put it where the existing one is for now, and move it later if I need to, but when first put up I was seeing stations from Rockford, IA, IN and WI. I have to find the control for the rotator first so I can snychronize it before installing the new one.
09-23-2019, 11:01 AM
#7269
I have had good luck with this one.
https://www.channelmaster.com/Digita.../cm-4228hd.htm
I had the Radio Shack Archer brand similar to the Winegard in the link above. It was torn down by high winds in storms one too many times so it had to be replaced. Mine antenna is is on a mast held by a tripod on the roof.
https://www.channelmaster.com/Digita.../cm-4228hd.htm
I had the Radio Shack Archer brand similar to the Winegard in the link above. It was torn down by high winds in storms one too many times so it had to be replaced. Mine antenna is is on a mast held by a tripod on the roof.
Last edited by FlyerInOKC; 09-23-2019 at 11:04 AM.
09-23-2019, 11:09 AM
#7271
If I recall correctly the Winegard is a good 6 feet long. It is a great antenna. I went with the channel Master this time because the design was a little easier to handle and erect by one person. I was hoping the change might put less stress on the tripod and mast too.
09-23-2019, 11:13 AM
#7272
It is a long one, but very light weight. What damaged the first one were tree branches, it was mounted on one of those three pole towers I mentioned before right against the house and a maple tree is right next to it which beat the crap out of the elements. I put the replacement up on a 20 foot mast, that is secured to the brick chimney, and has been there for at least 15+ years and undamaged, but cheap crappy elements that don't do what they are supposed to. Don't buy RCA!
09-24-2019, 01:45 AM
#7273
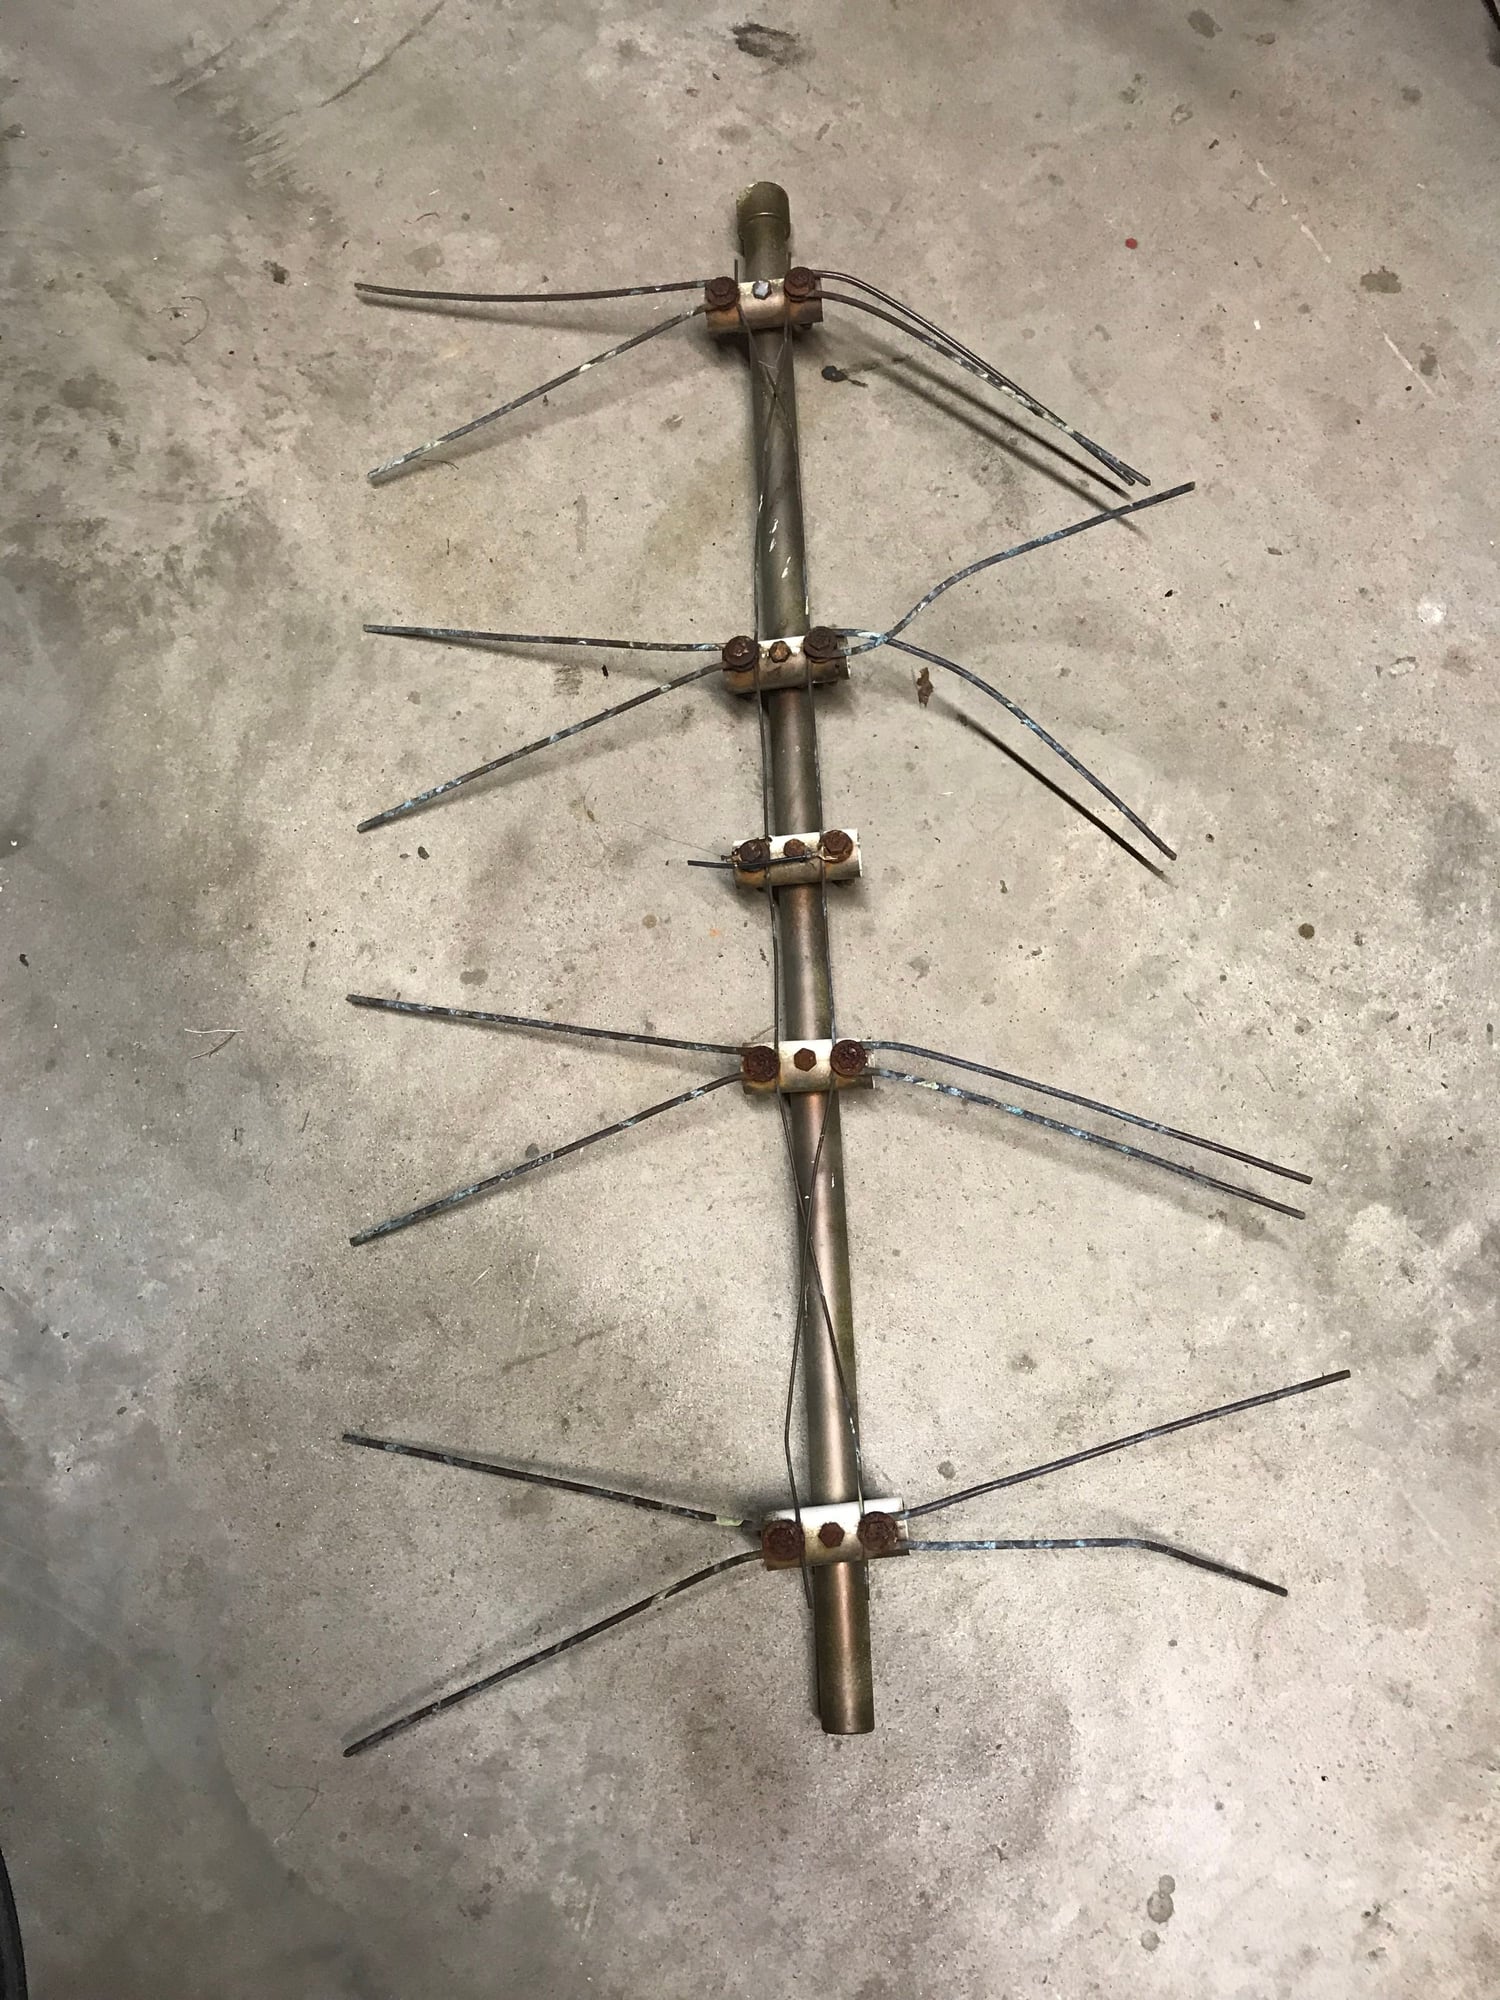
Thanks guys for the antenna info. I can�t handle the Winegard. Just too big. This house had one when I bought the house. The wind here would really give it a workout. I made my little 4 element antenna and that has worked for years. I had an intermittent problem with one channel; too far and tree in the way. Now tree is gone.
Here is my little antenna; 3� by 20� light weight. I�m going to fix her up, put a screen behind it and give her another go. May have to buy a new mast. Thinking may go 8 elements. Just have to experiment a little. Thanks again.
 09-24-2019, 03:31 AM
#7274
Join Date: Apr 2008
Location: Measnes, La Creuse, France.
Posts: 2,129
Received 146 Likes
on
123 Posts
Have you ever noticed that there seems to be two types of modeller?
However, I've watched the progress of two other builds on line and they were both finished in orange, and there's at least another one in a museum somewhere in the USA, Muncie perhaps, which is also finished in orange,so that's four out of five. Here's one of them.
But it's not just Big Guffs. Most of the Kwik Flis, and other Phil Kraft models, that I've ever seen, were finished in the orange and black of Phil's original and most of the Goldberg Falcons in red, white and black.
I once had a friend, dead now these fifteen years, who always finished his models in the same colours as the box art. There's nothing wrong with this but I suppose I must belong to the awkward squad as I've always finished my models in different colours.
As an example, when I suggested that I was going to cover the fuselage of my Big Guff in Dark Green/ Olive Drab Solartex simply because that was what I had got surplus to requirements, it provoked a critical response on an American forum.I found out yesterday that I had rather more orange Solartex in stock than I thought and briefly it crossed my mind that by ordering a couple of more rolls, my Big Guff could look the same as everybody elses but I'm blowed if I'm shelling out �12 a metre plus postage for orange Solartex. Olive drab it is! The orange is ear marked for my Senior Telemaster.
It's just a thought.
- Those who finish their models in the colours of the prototype or in the same colours as the model depicted on the box-lid.
- Those who always finish their models in a different colour scheme to those of the original model.
However, I've watched the progress of two other builds on line and they were both finished in orange, and there's at least another one in a museum somewhere in the USA, Muncie perhaps, which is also finished in orange,so that's four out of five. Here's one of them.
But it's not just Big Guffs. Most of the Kwik Flis, and other Phil Kraft models, that I've ever seen, were finished in the orange and black of Phil's original and most of the Goldberg Falcons in red, white and black.
I once had a friend, dead now these fifteen years, who always finished his models in the same colours as the box art. There's nothing wrong with this but I suppose I must belong to the awkward squad as I've always finished my models in different colours.
As an example, when I suggested that I was going to cover the fuselage of my Big Guff in Dark Green/ Olive Drab Solartex simply because that was what I had got surplus to requirements, it provoked a critical response on an American forum.I found out yesterday that I had rather more orange Solartex in stock than I thought and briefly it crossed my mind that by ordering a couple of more rolls, my Big Guff could look the same as everybody elses but I'm blowed if I'm shelling out �12 a metre plus postage for orange Solartex. Olive drab it is! The orange is ear marked for my Senior Telemaster.
It's just a thought.
Last edited by Telemaster Sales UK; 09-24-2019 at 03:35 AM.
09-24-2019, 04:43 AM
#7275
I did my LT40 in the box colors because I like it. My Rascal C was the same base colors as the box but with a green interior instead of gray and gold instead of silver pen stripes. My 1/5 SIG Cub got bright yellow instead of Cub yellow and 1945 Civil Air Patrol insignia. My 182 if I ever finish it will be in modern CAP livery. Scale aircraft, my preferred media, gets something scale looking. More is civilian than military so there is a lot of flexibility but will still be counterbalanced by the Pink Pete N Poke. I guess that makes me a bit of both worlds. 