


Electriflying Top Flite Stinson Reliant
 10-29-2018, 06:43 AM
#76

Thread Starter

Join Date: Mar 2006
Location: Southport UK
Posts: 187
Likes: 0
Received 0 Likes
on
0 Posts
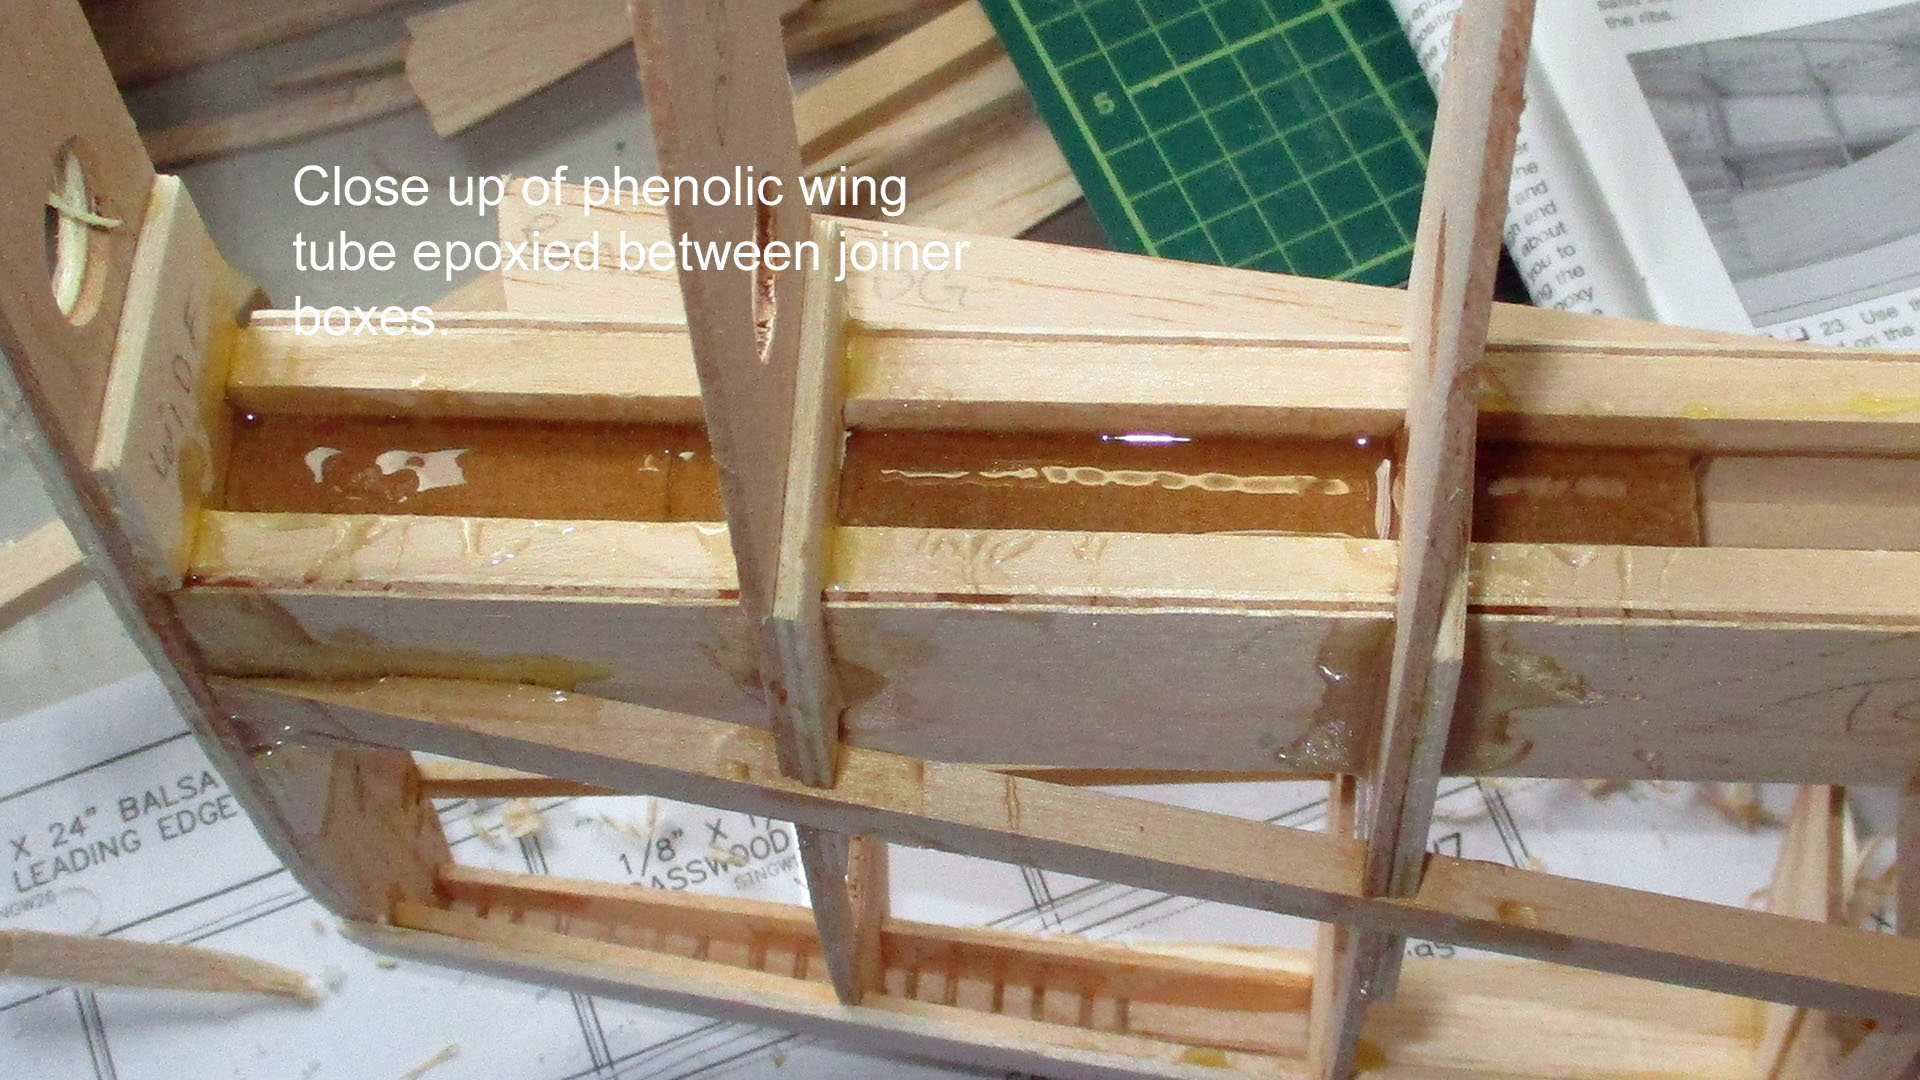
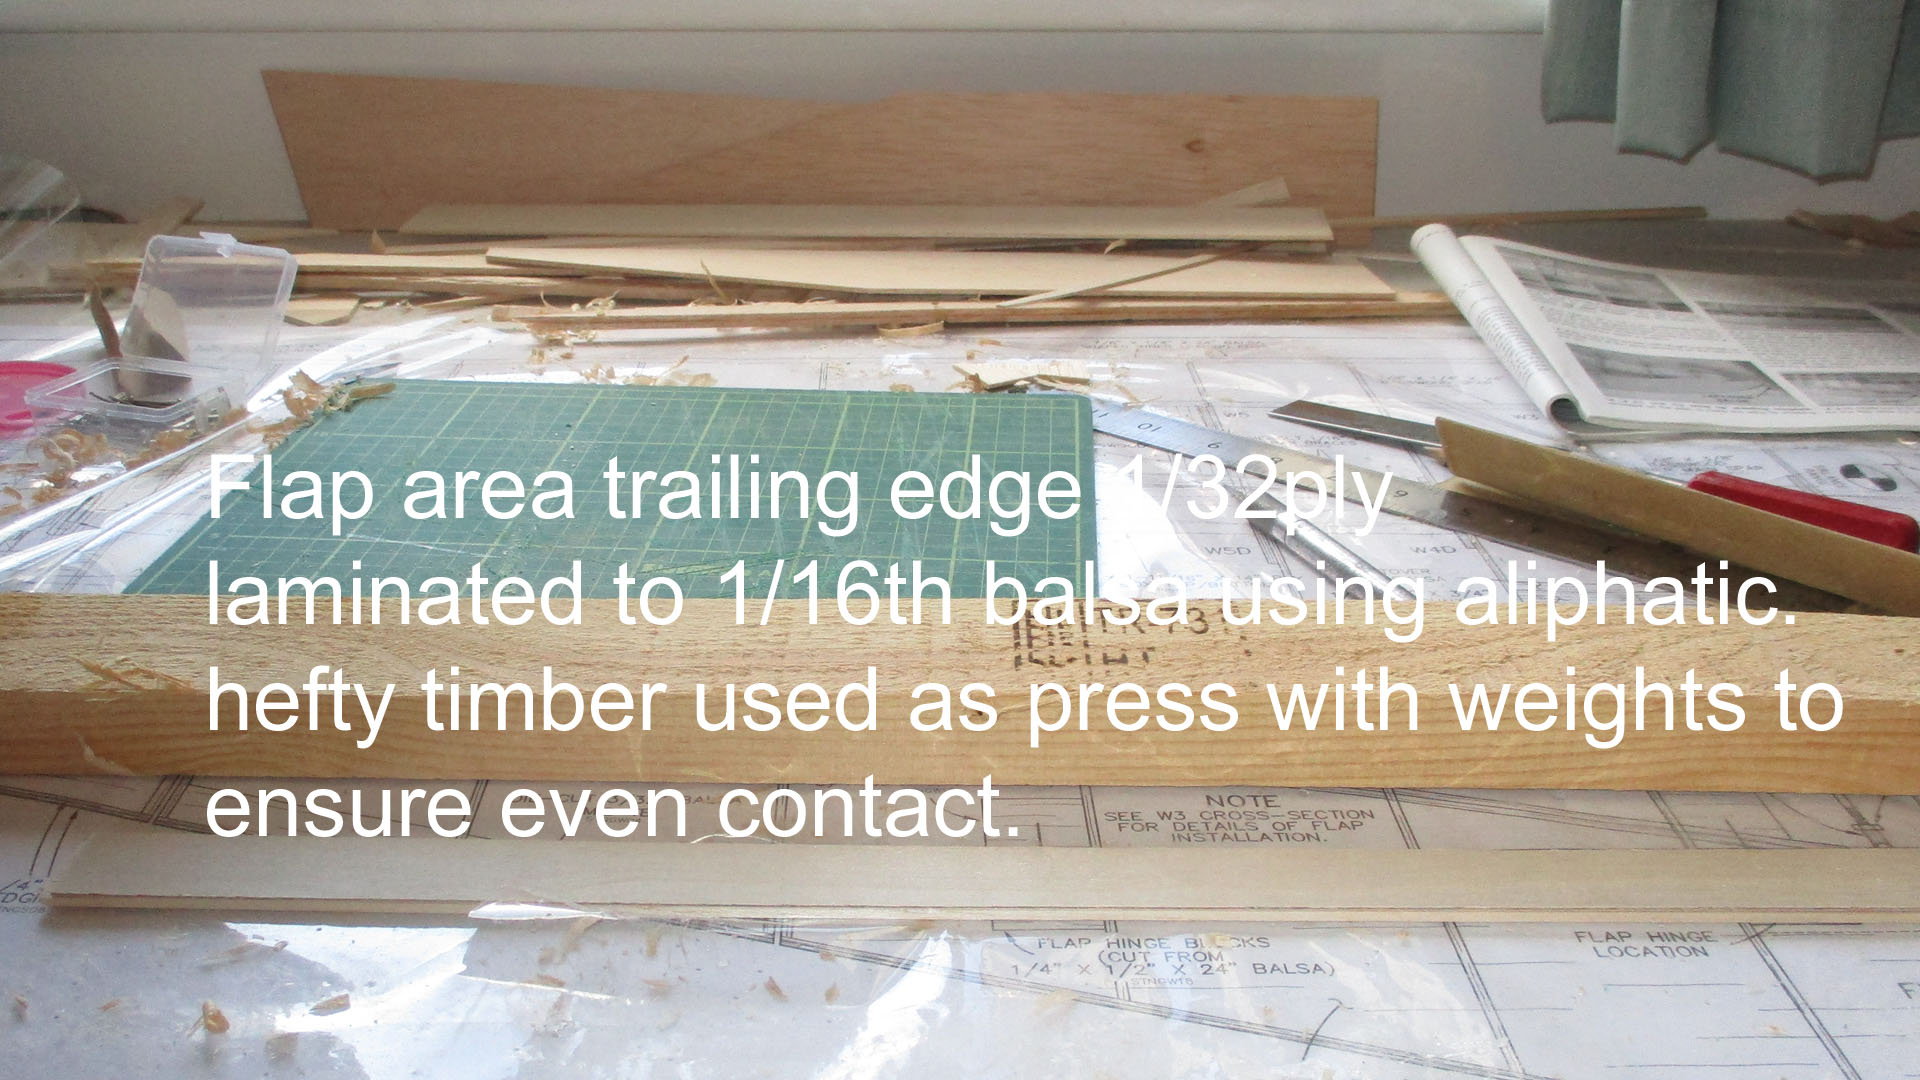
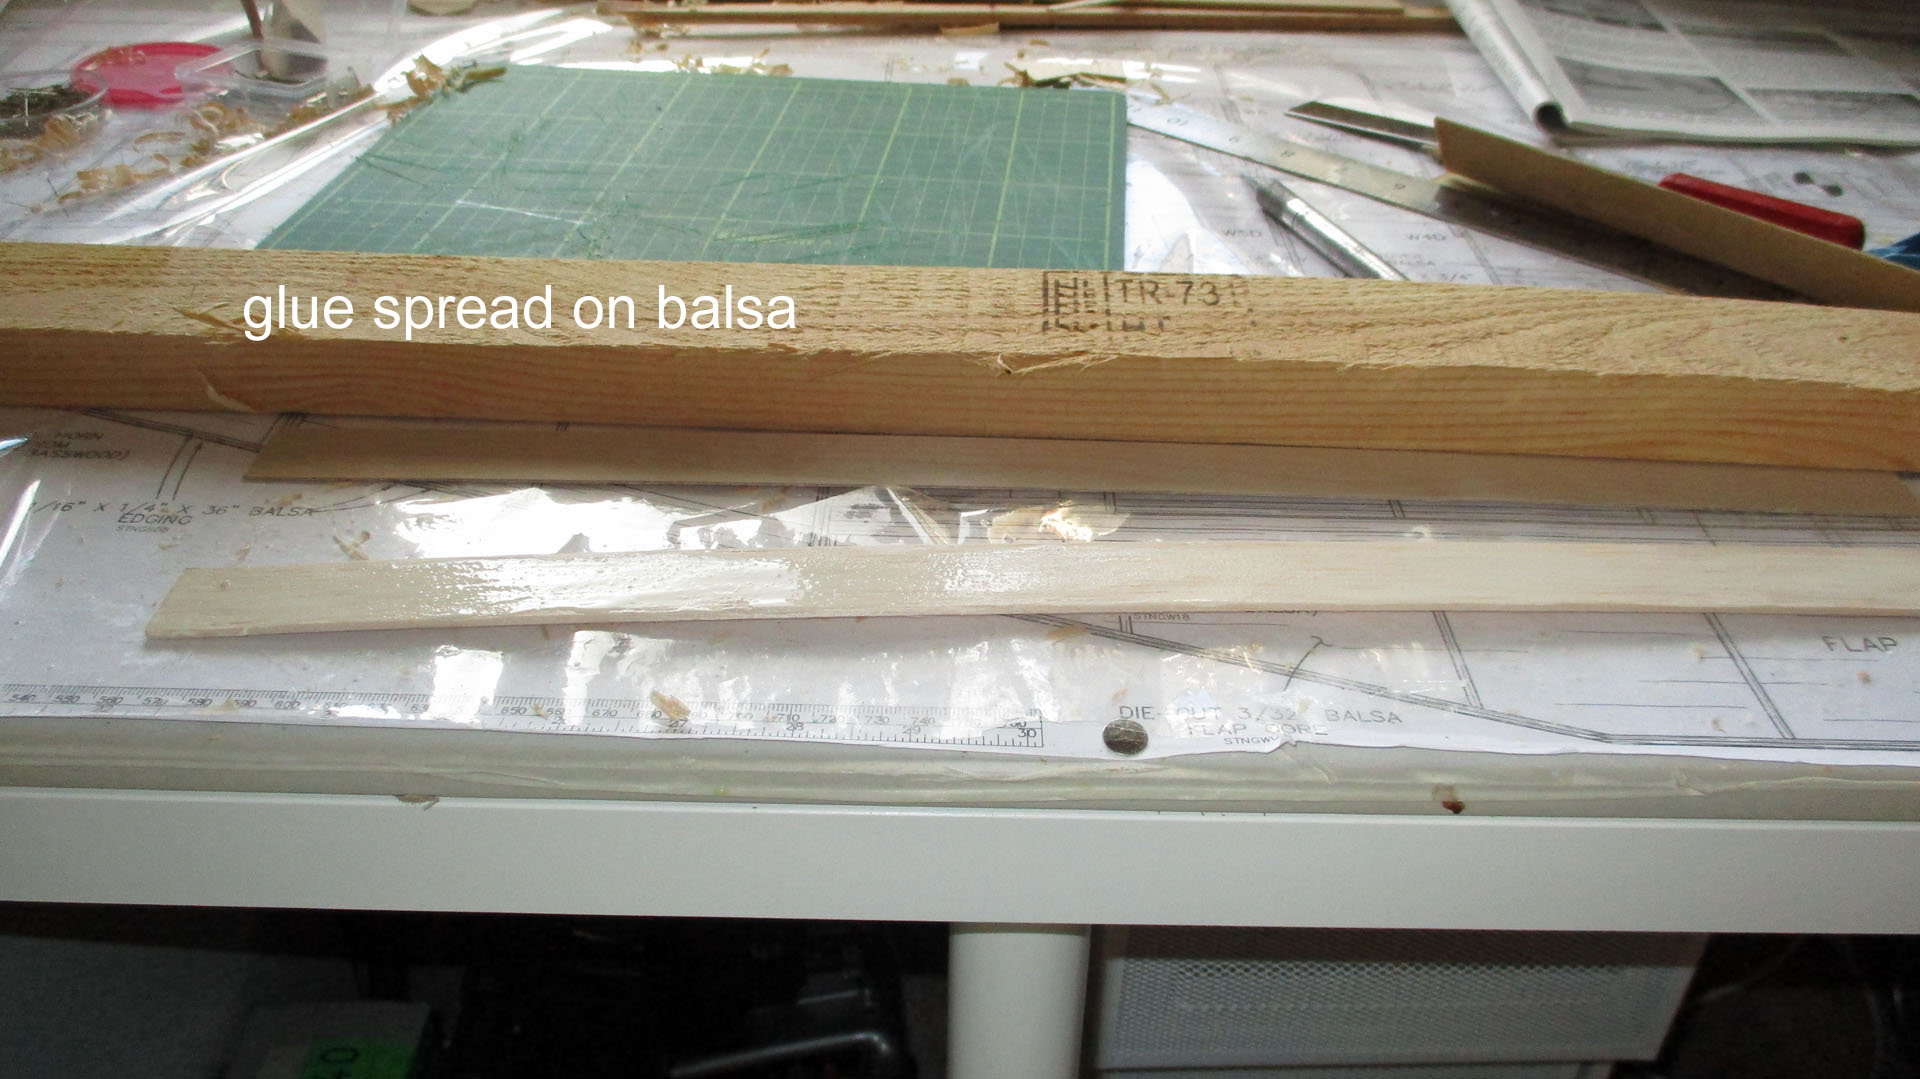

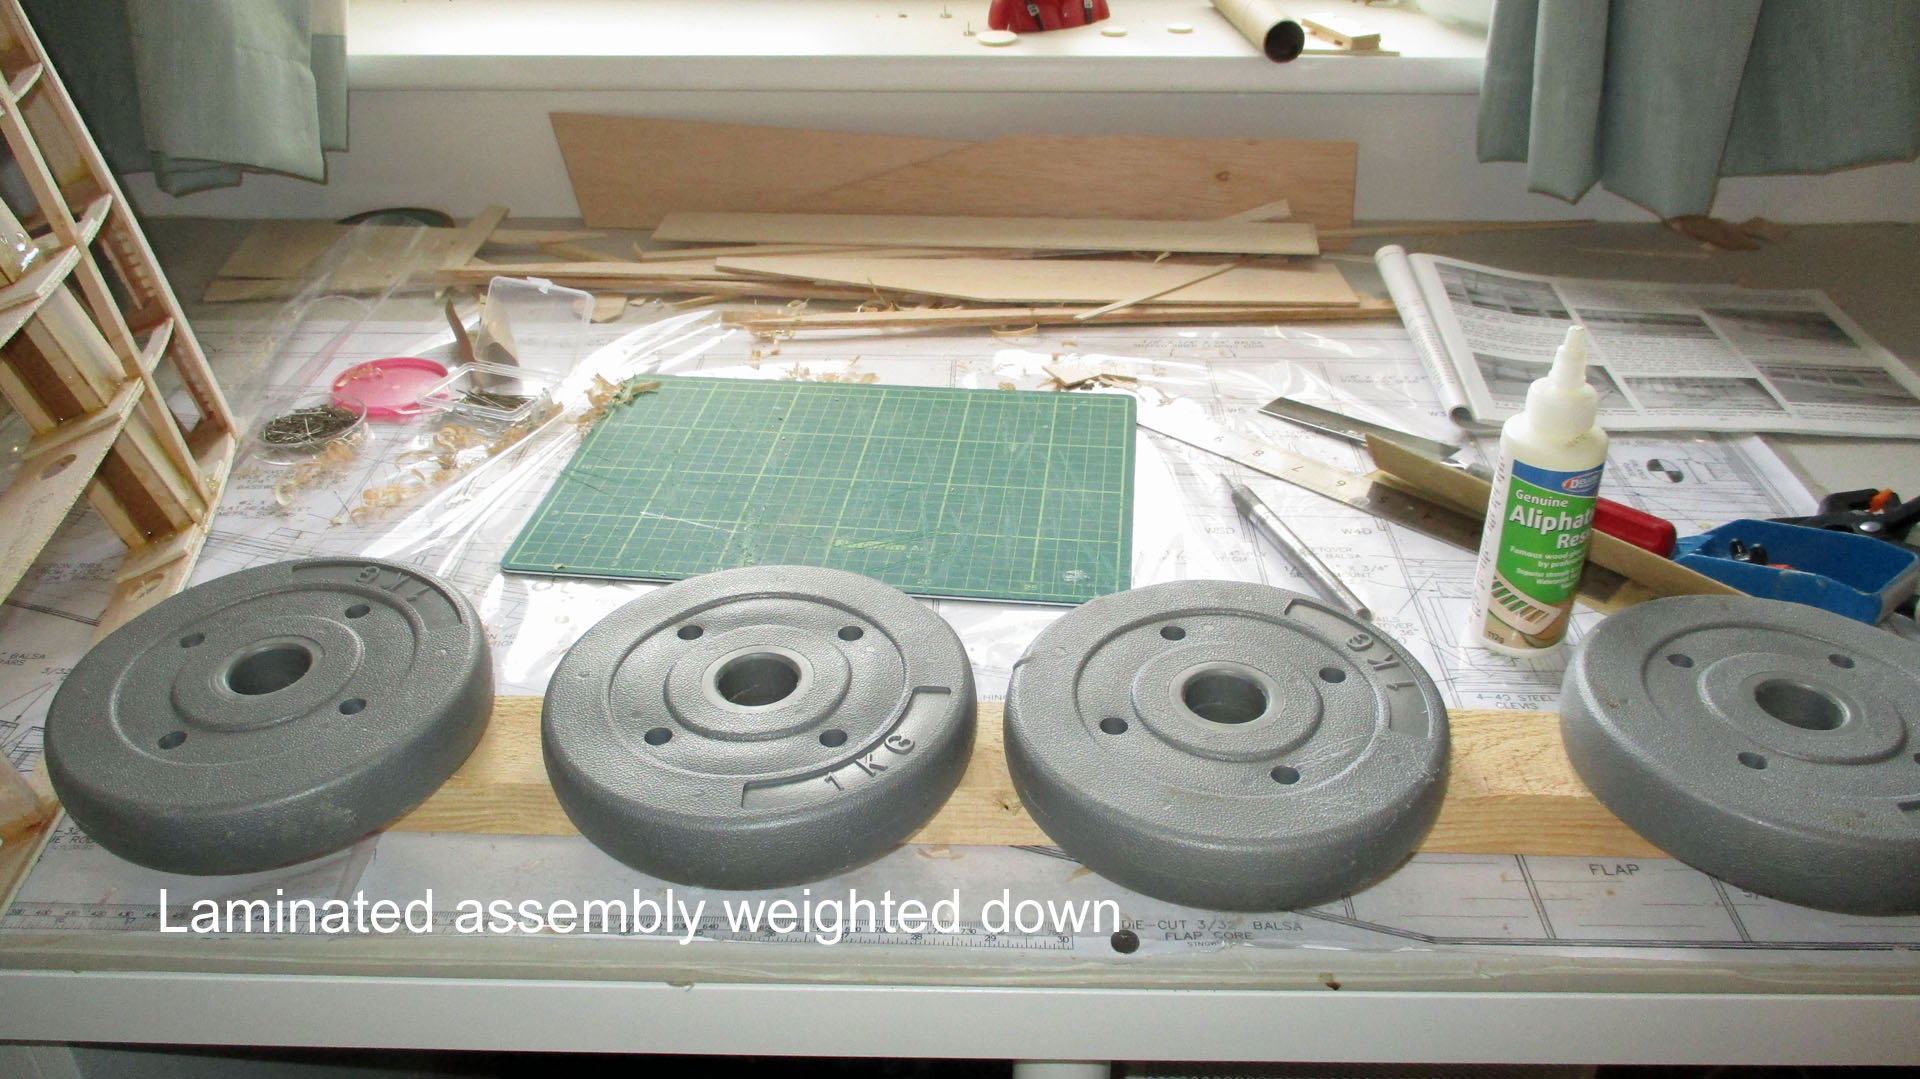

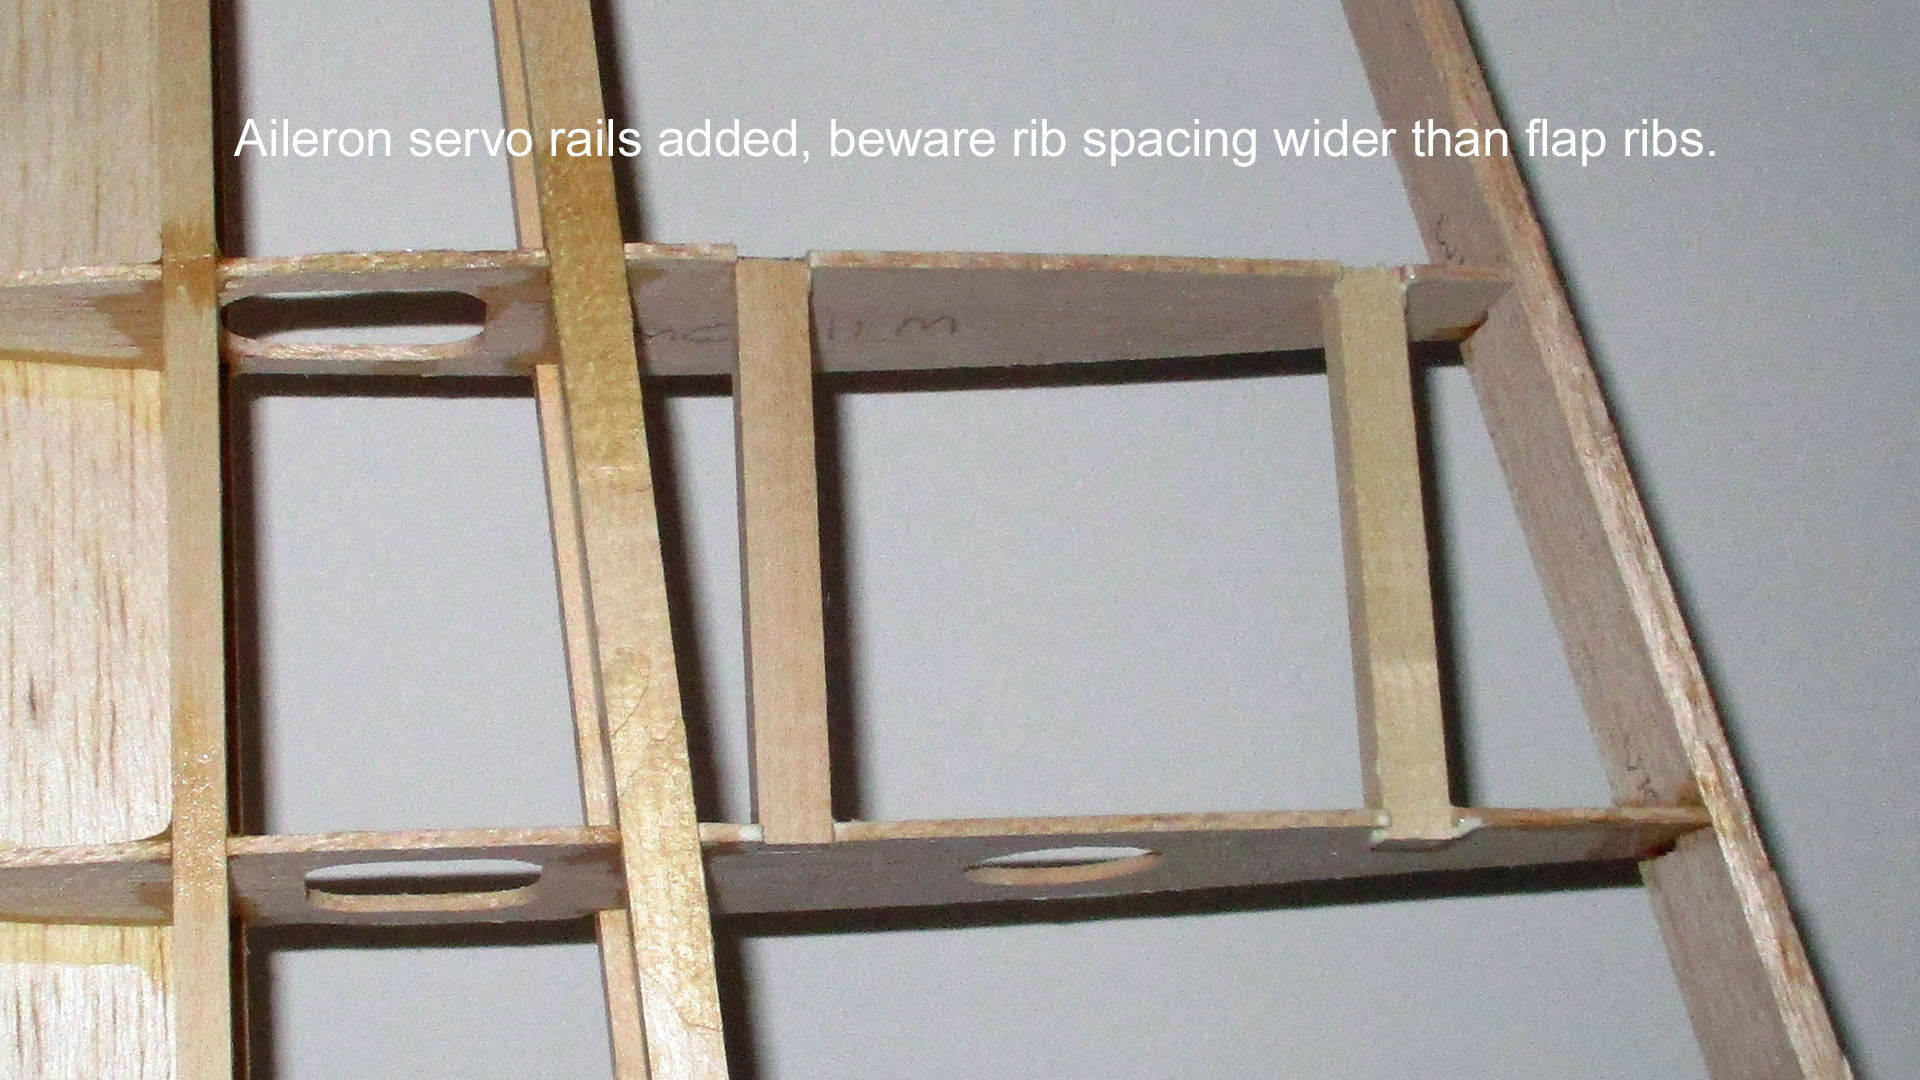
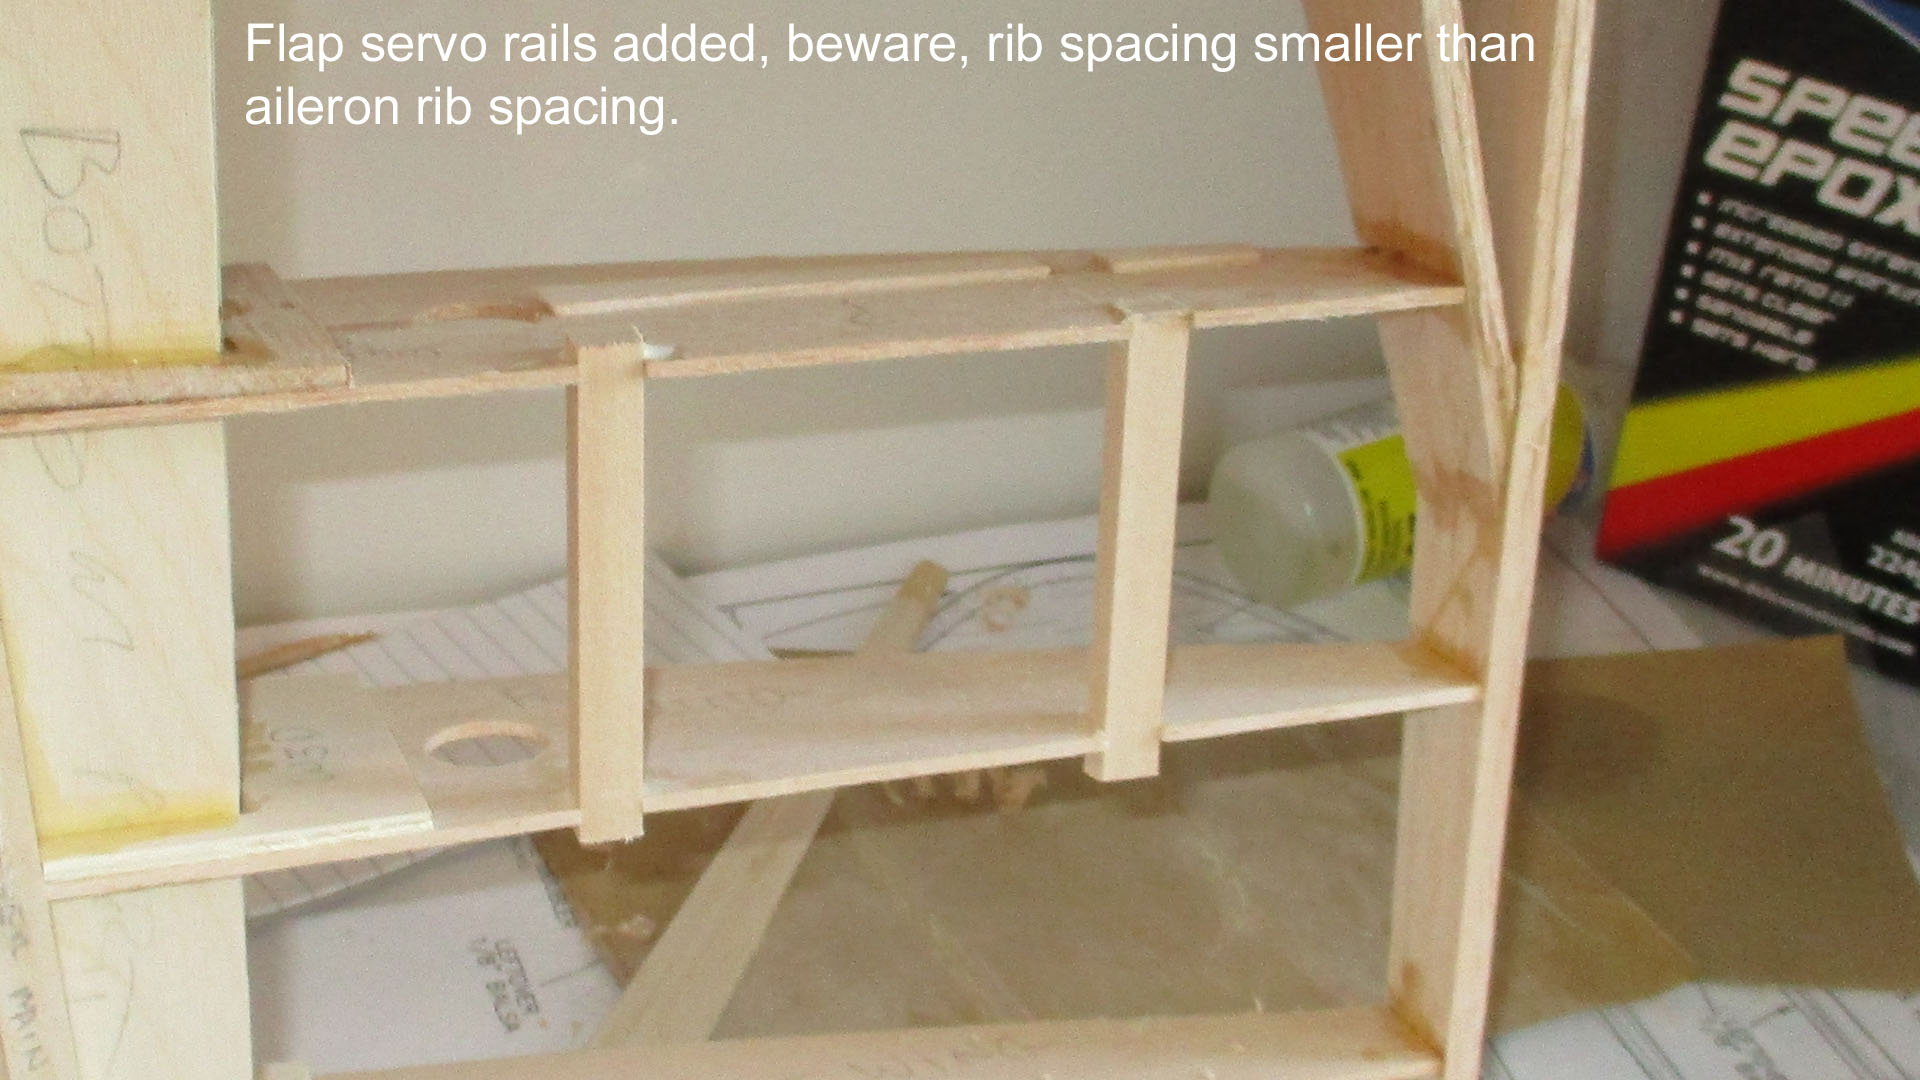
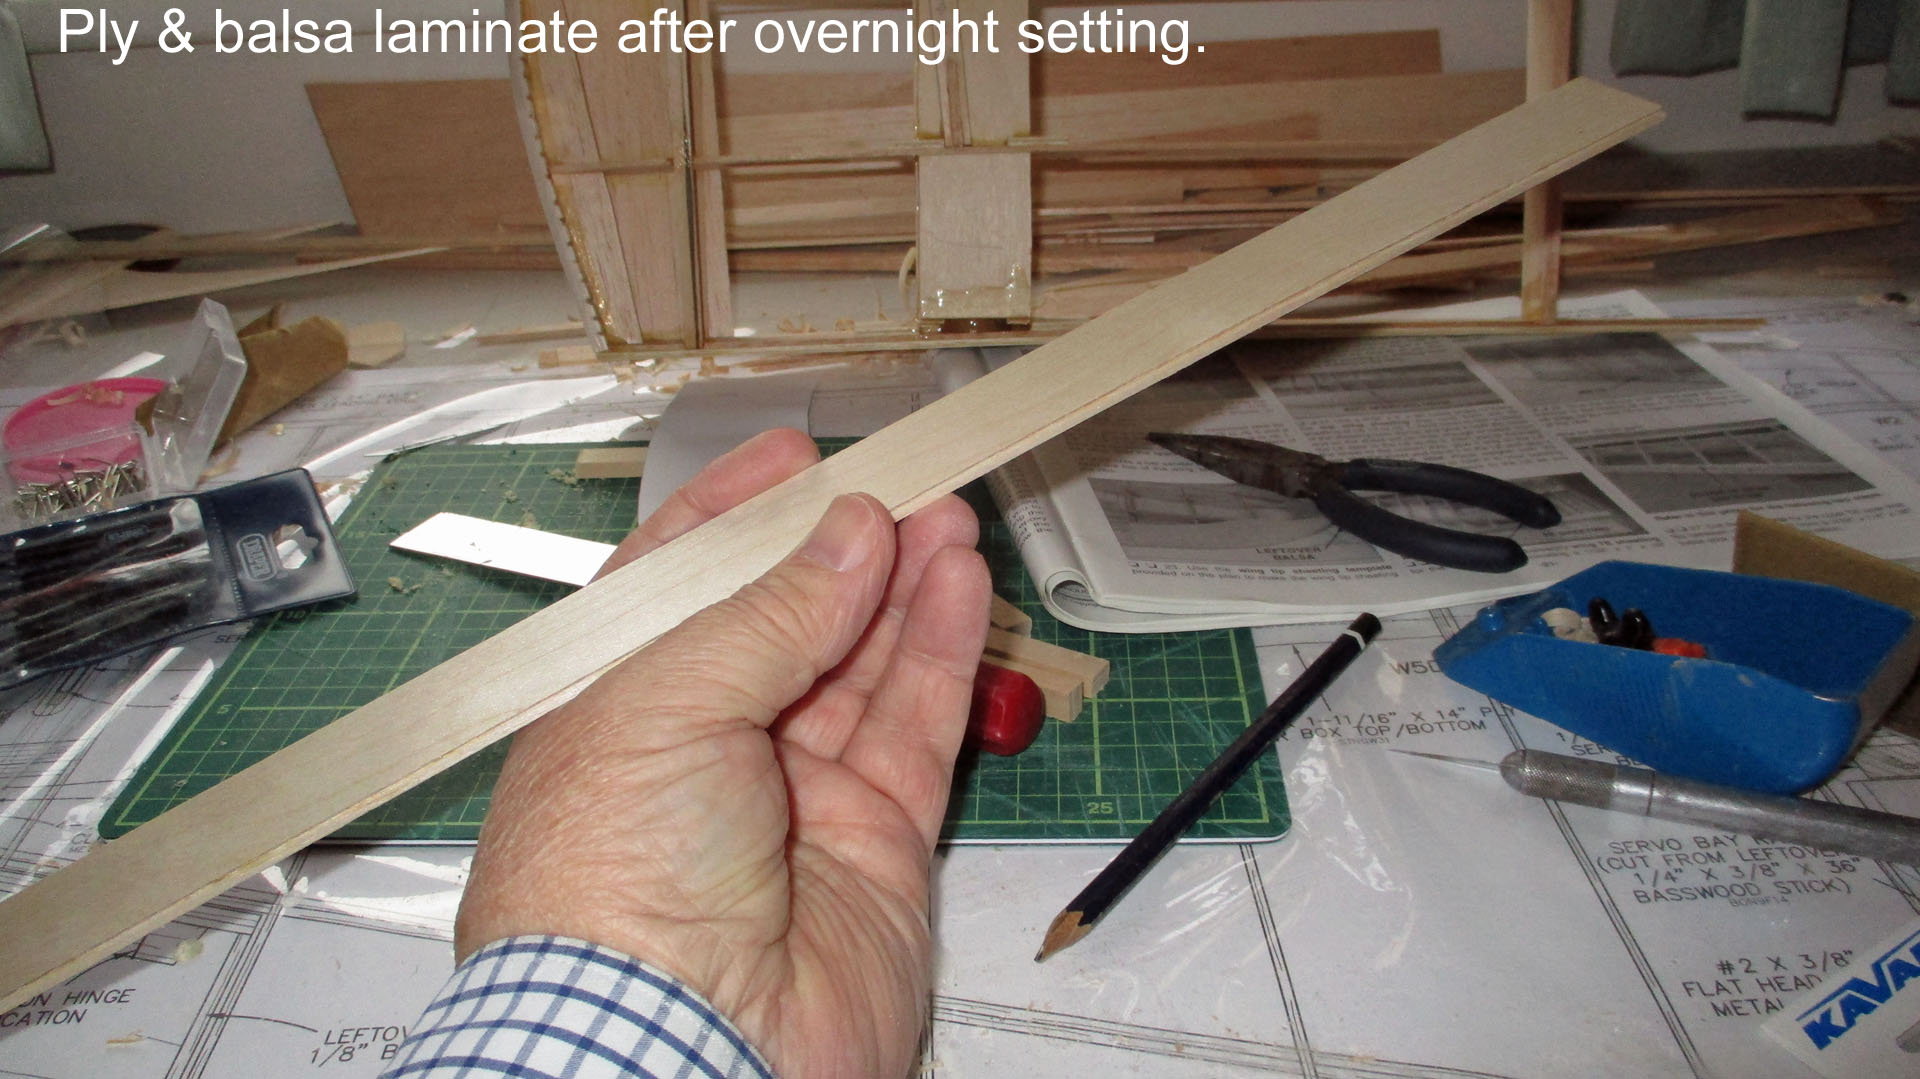
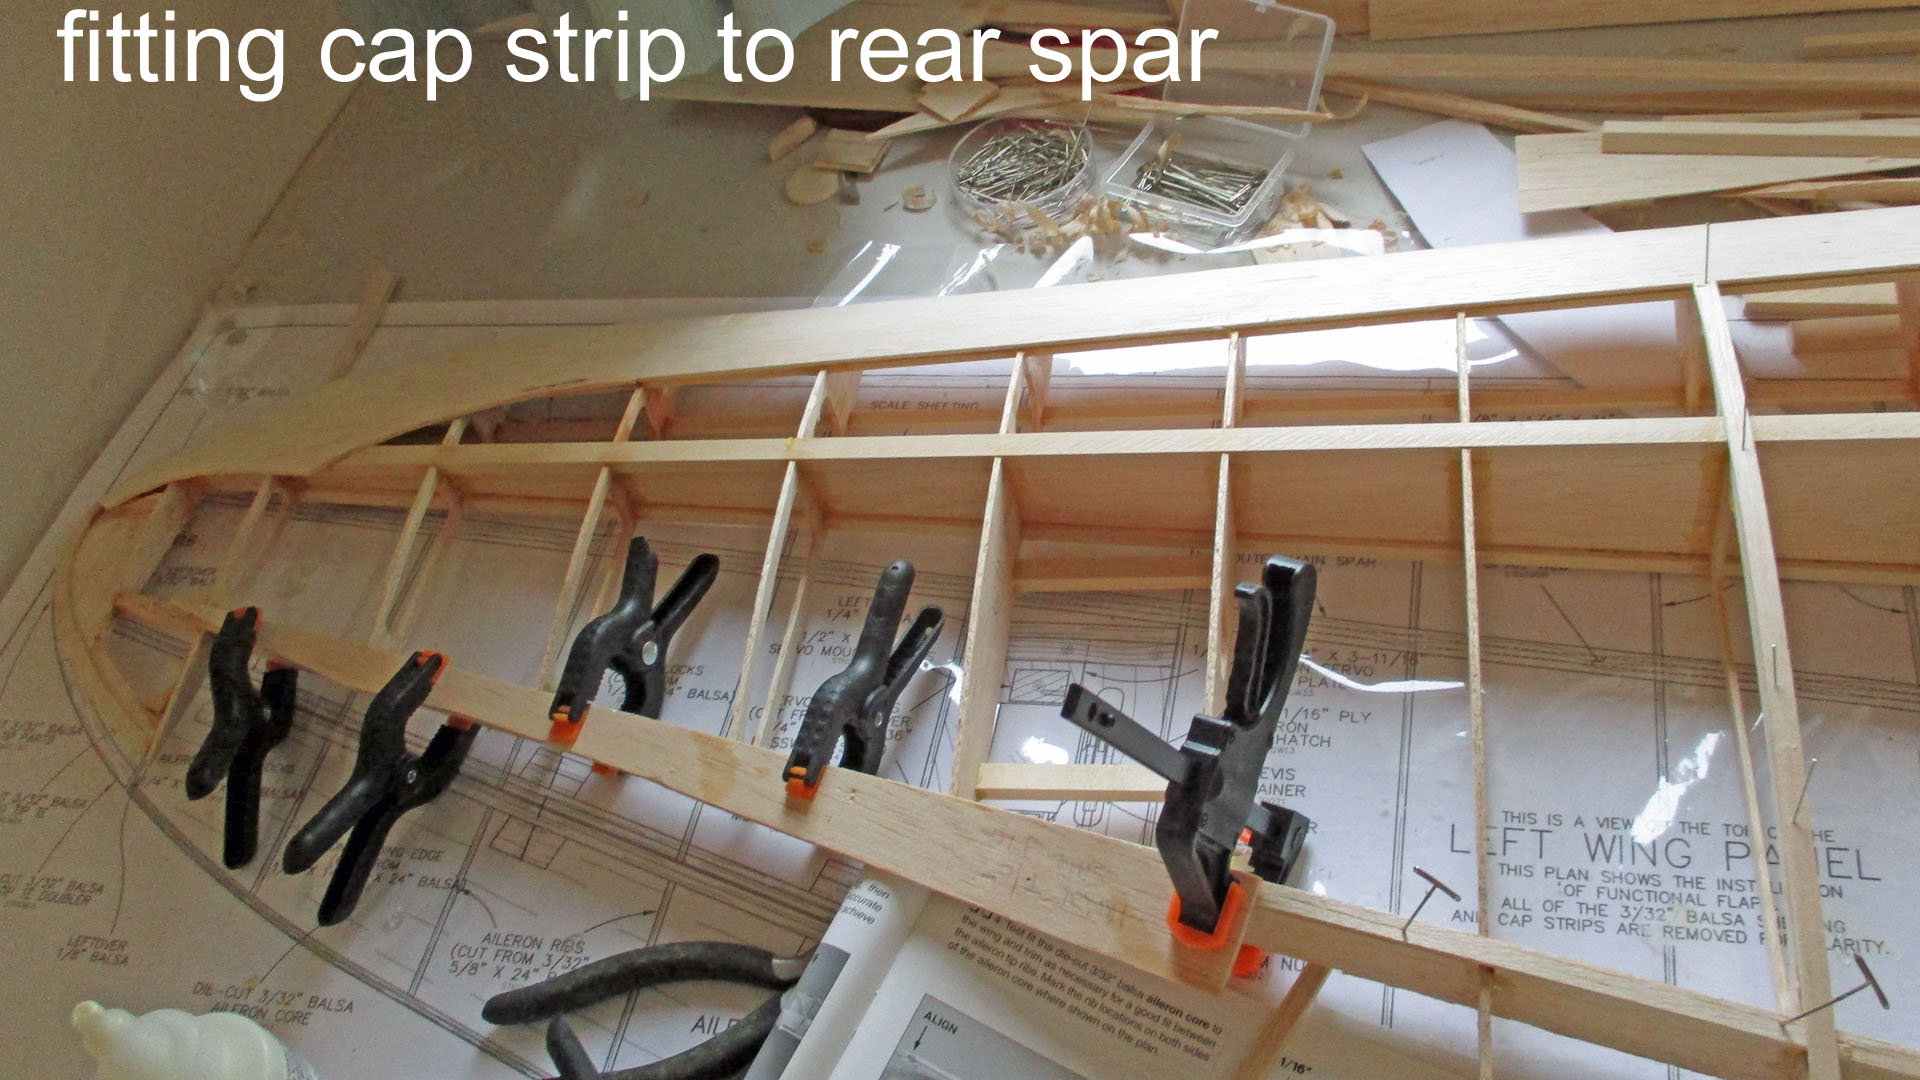
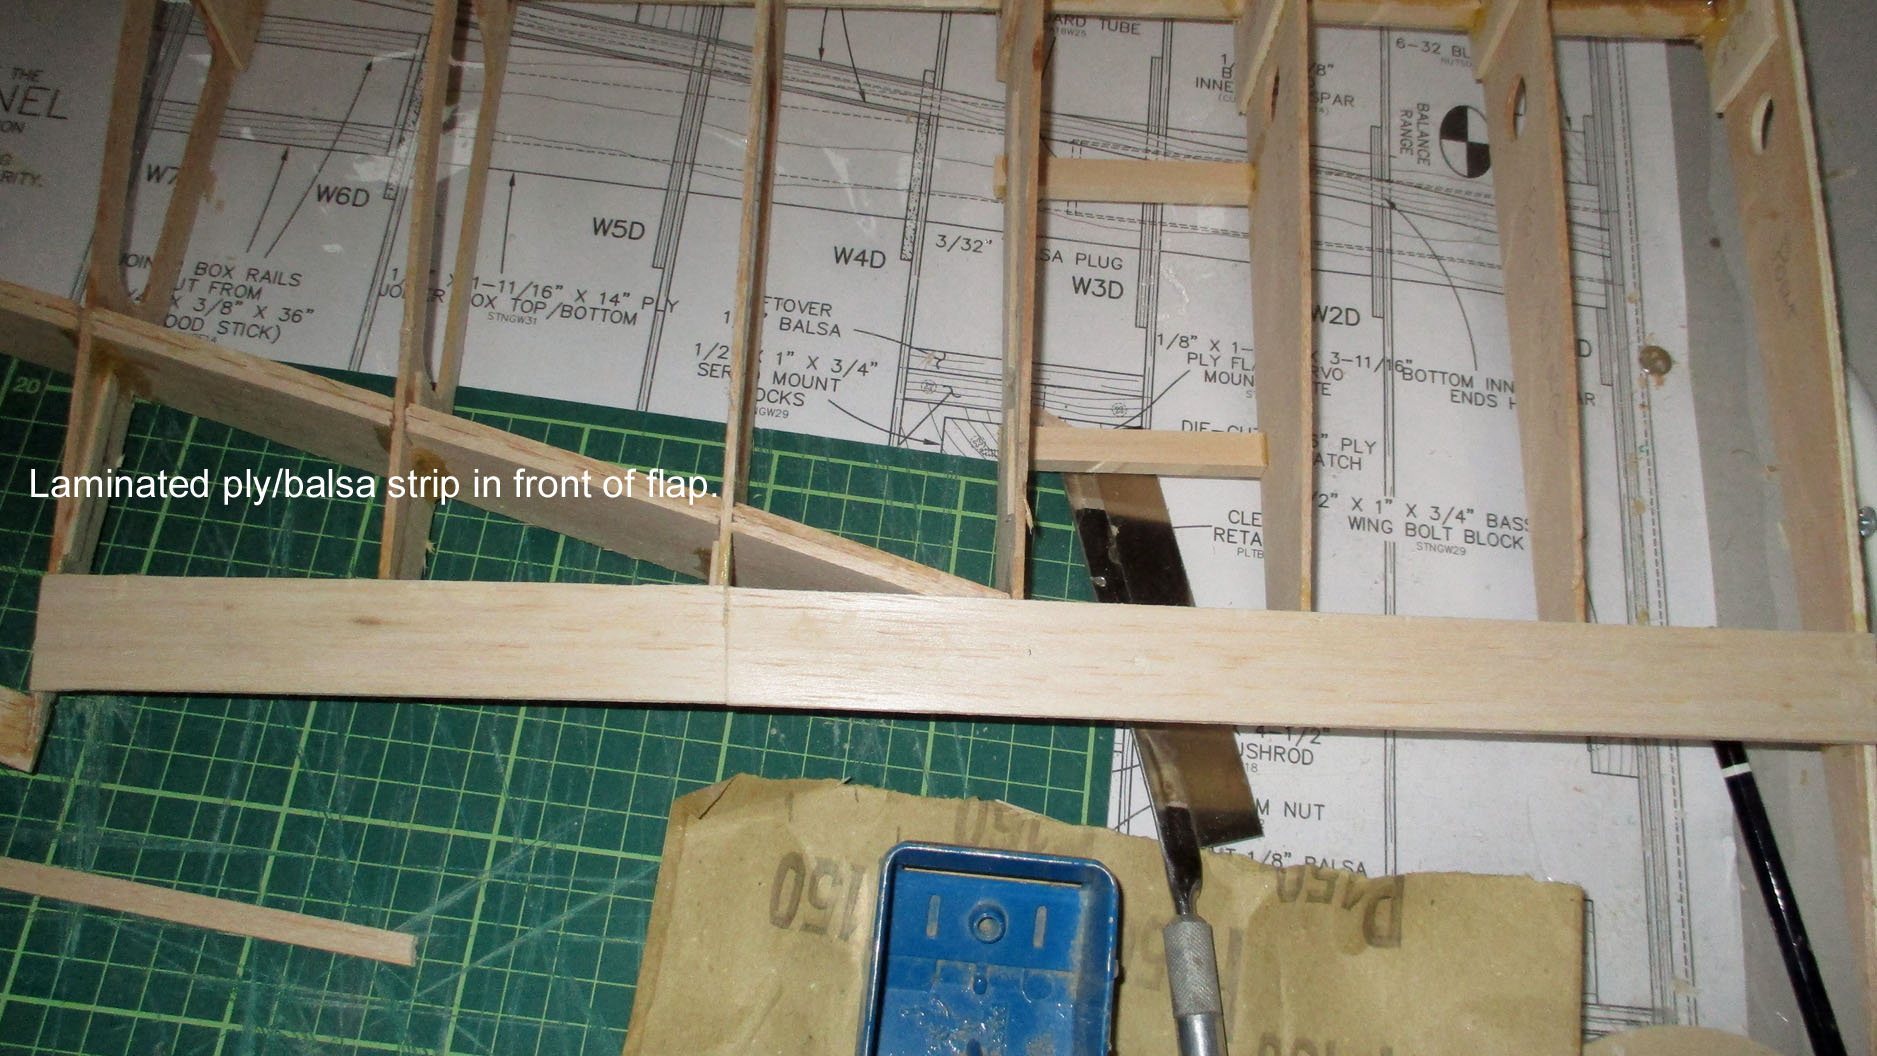
I have never been happy with the aileron & flap hinges, although I bought the required number & type of Robart hinge points, the flaps in particular too messy & the angles suggested for the ailerons don't look right. So I asked the question on my UK site & got numerous answers, so I have spent a couple of hours replying & commenting. Sunday I epoxied the wing tube assembly. Then watched the Mexican GP. Consequently, not much building. Stayed up to 1am to watch Louis Hamilton win his 5th world championship, so this morning I was not in a building mood. Anyway, after my breakfast granola I was ready to start. Although the wing looks fairly finished it isn't. So today's tasks included, removing the tacked on jig strips, (Tip) don't use too much glue when adding them, I did & they were a pig to remove). Then I reinforced further the wing tip I broke, laminated the 1/32nd ply & 16th balsa strip which forms the trailing edge above the flap & finally fitted the flap & aileron servo rails (beware, the rib centres differ.) I still have to build the aileron & flap & sheet the underside leading edge..
 10-30-2018, 04:57 AM
#77
Thread Starter
Join Date: Mar 2006
Location: Southport UK
Posts: 187
Likes: 0
Received 0 Likes
on
0 Posts
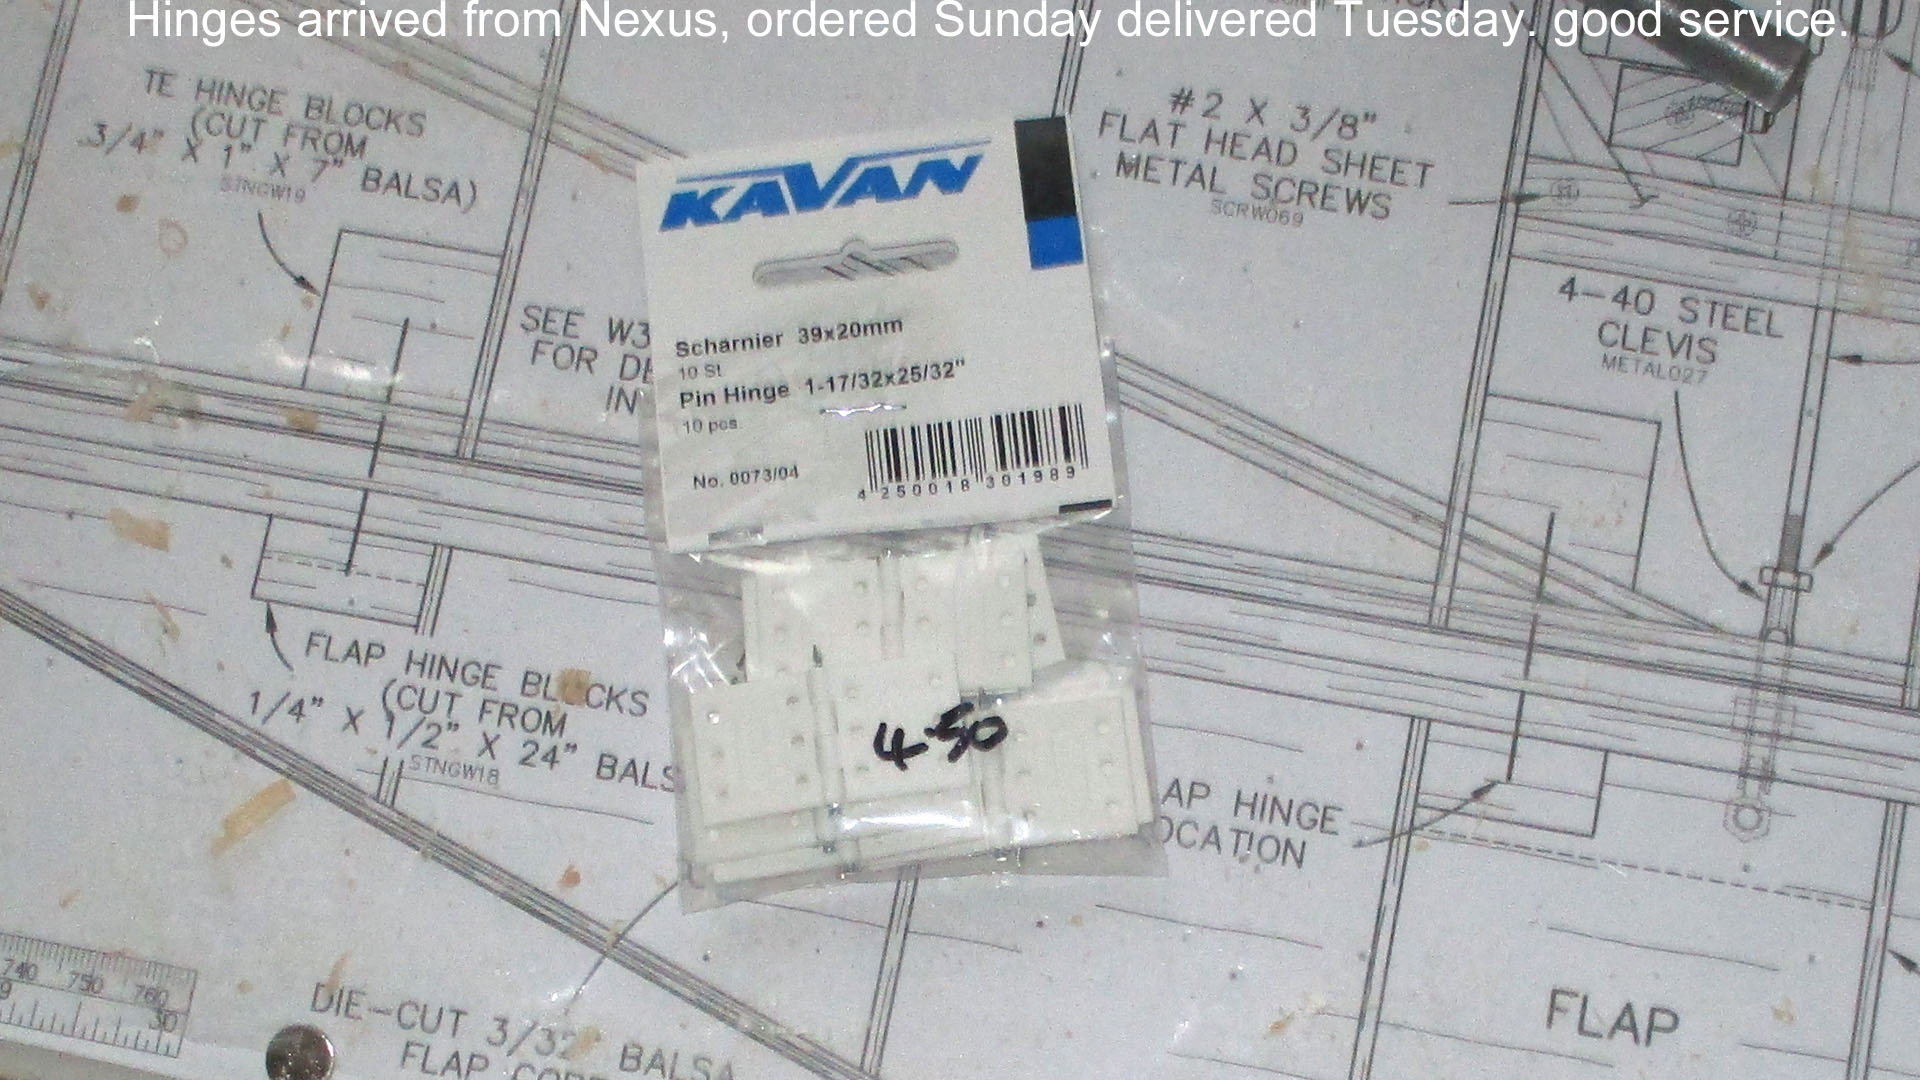
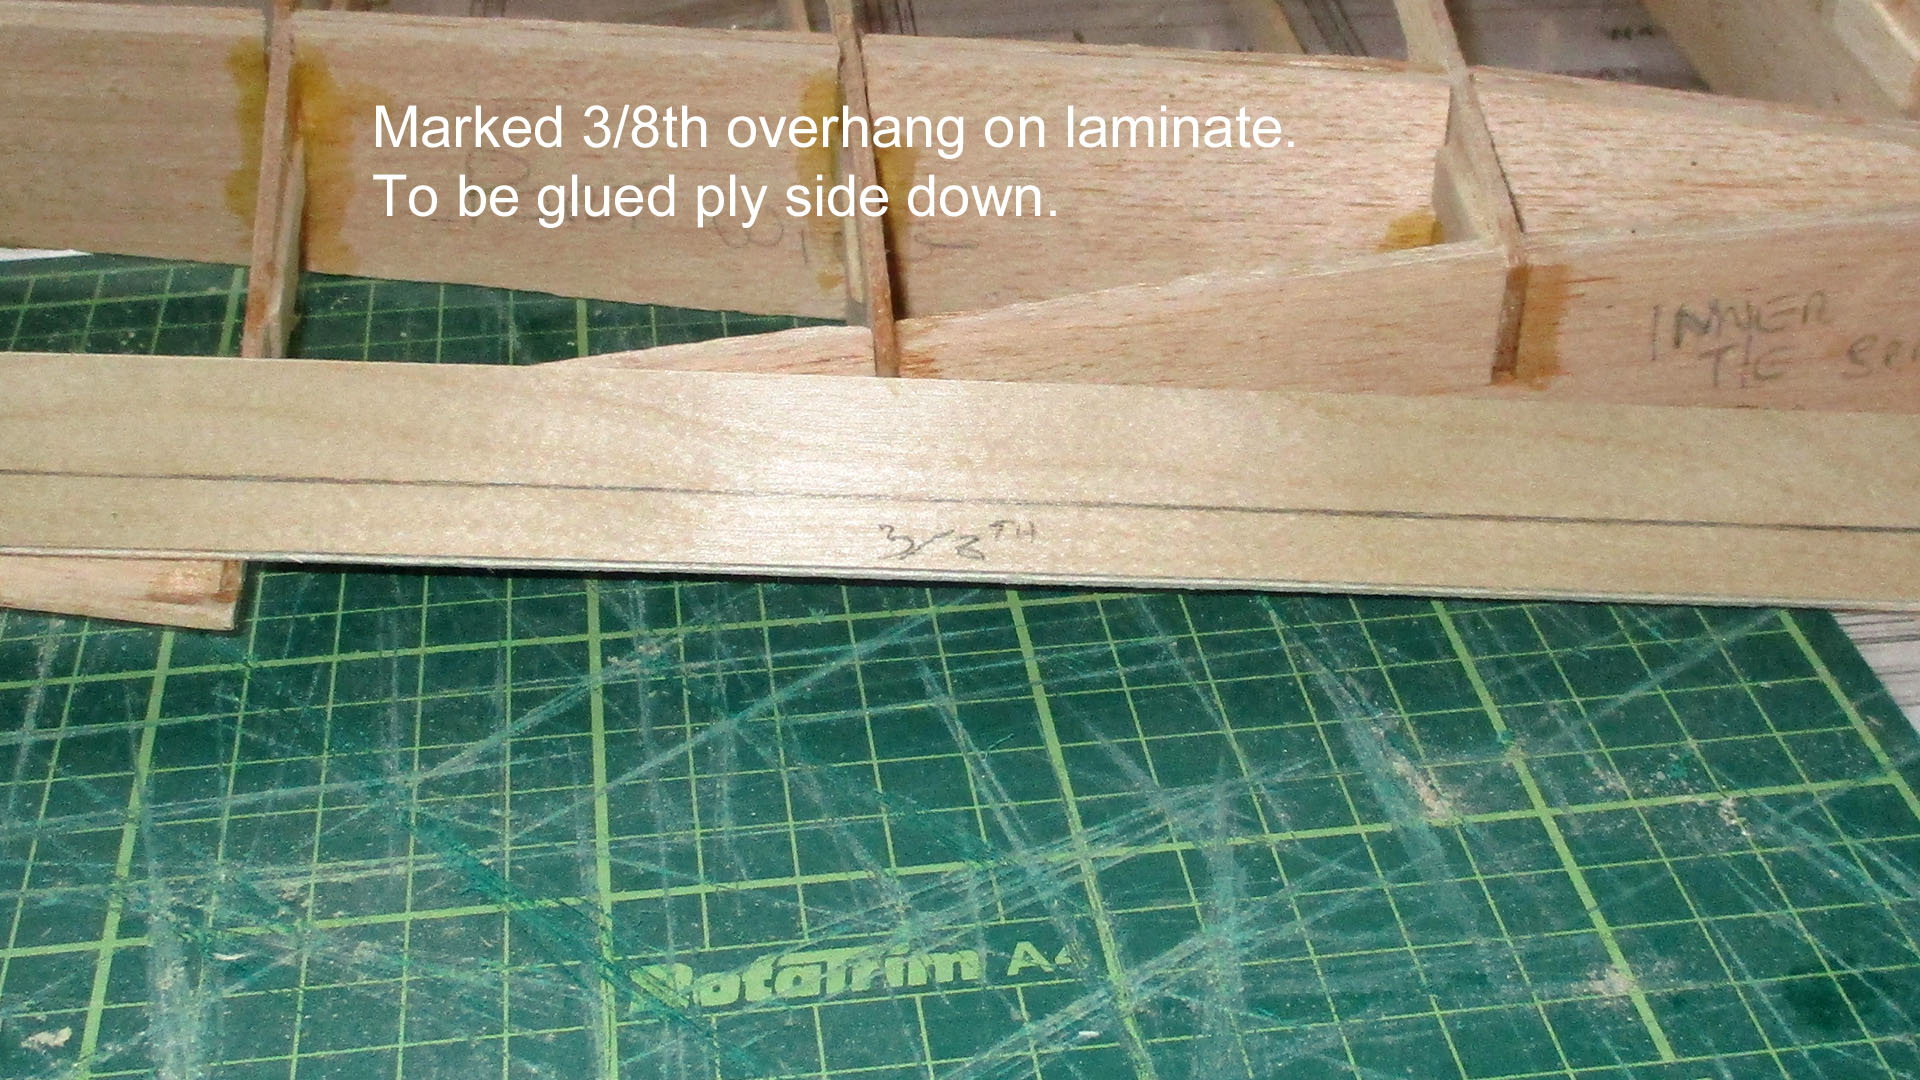
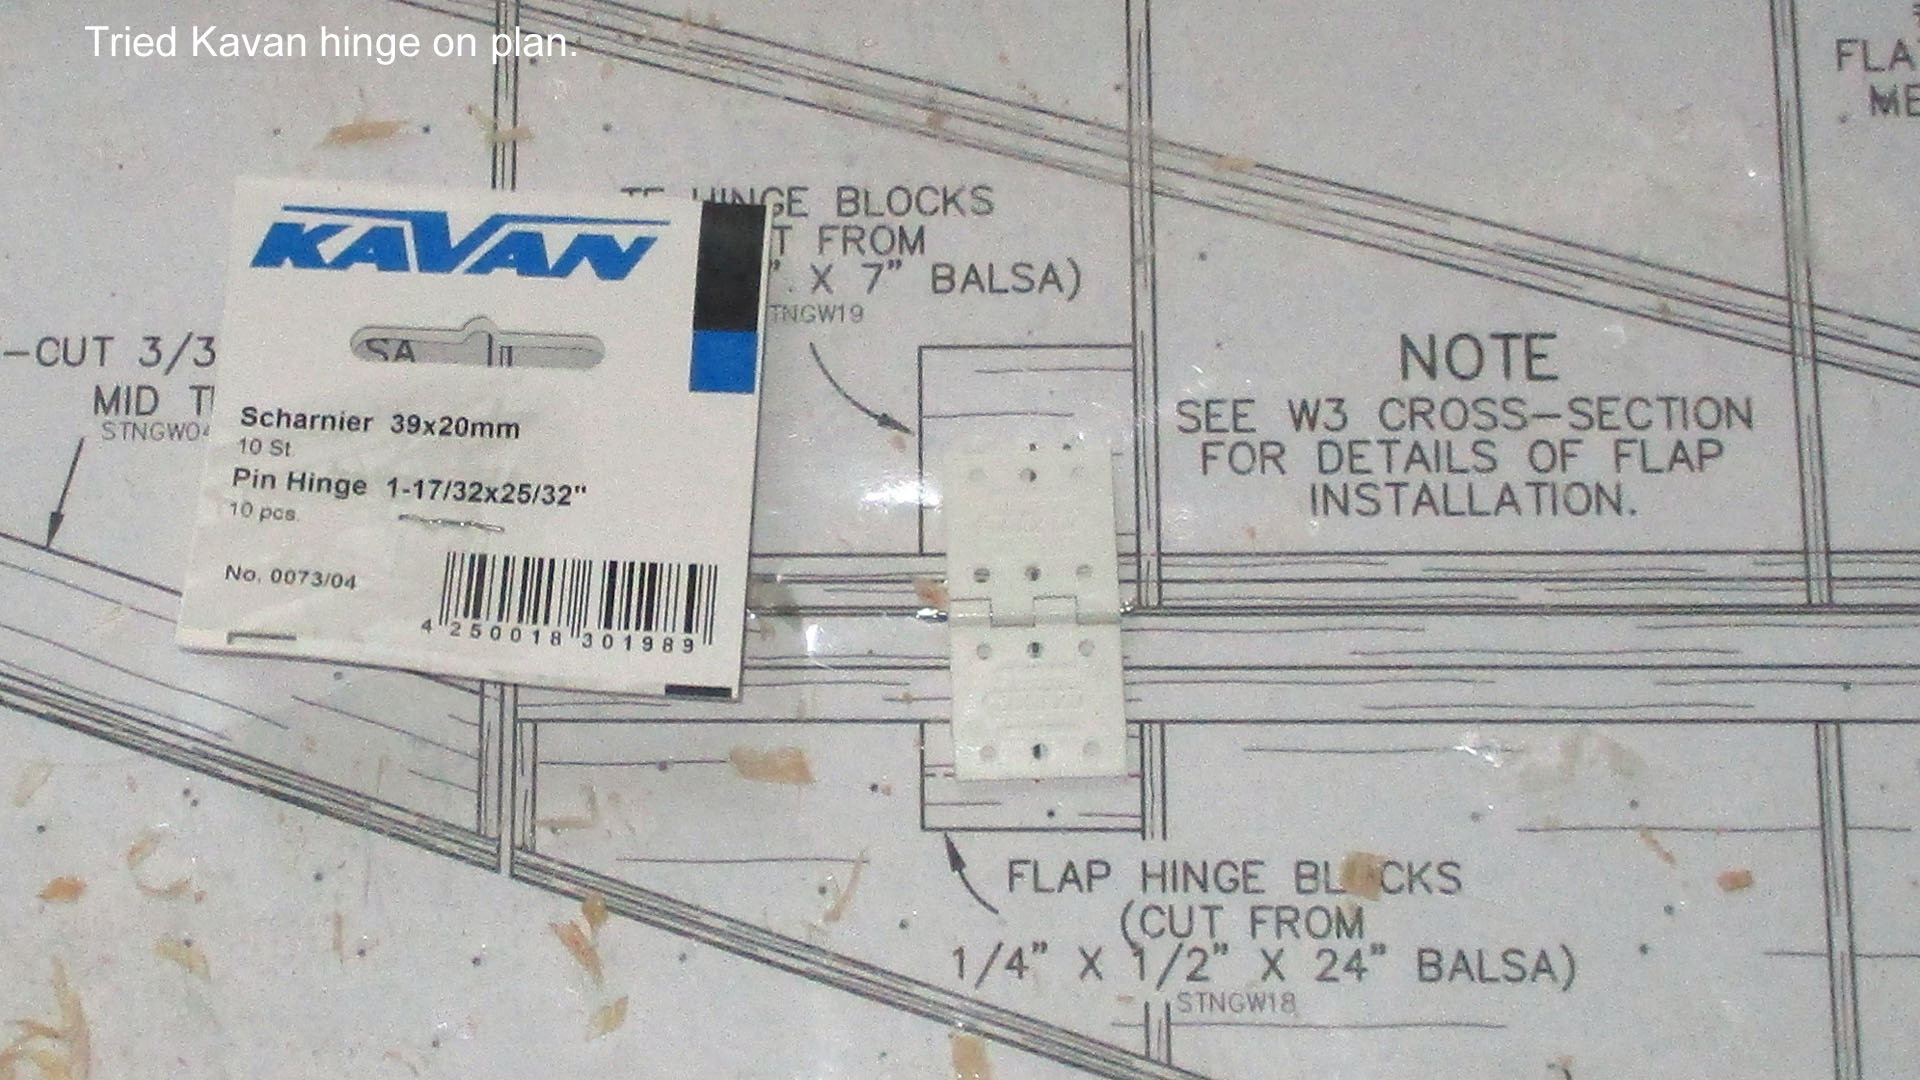
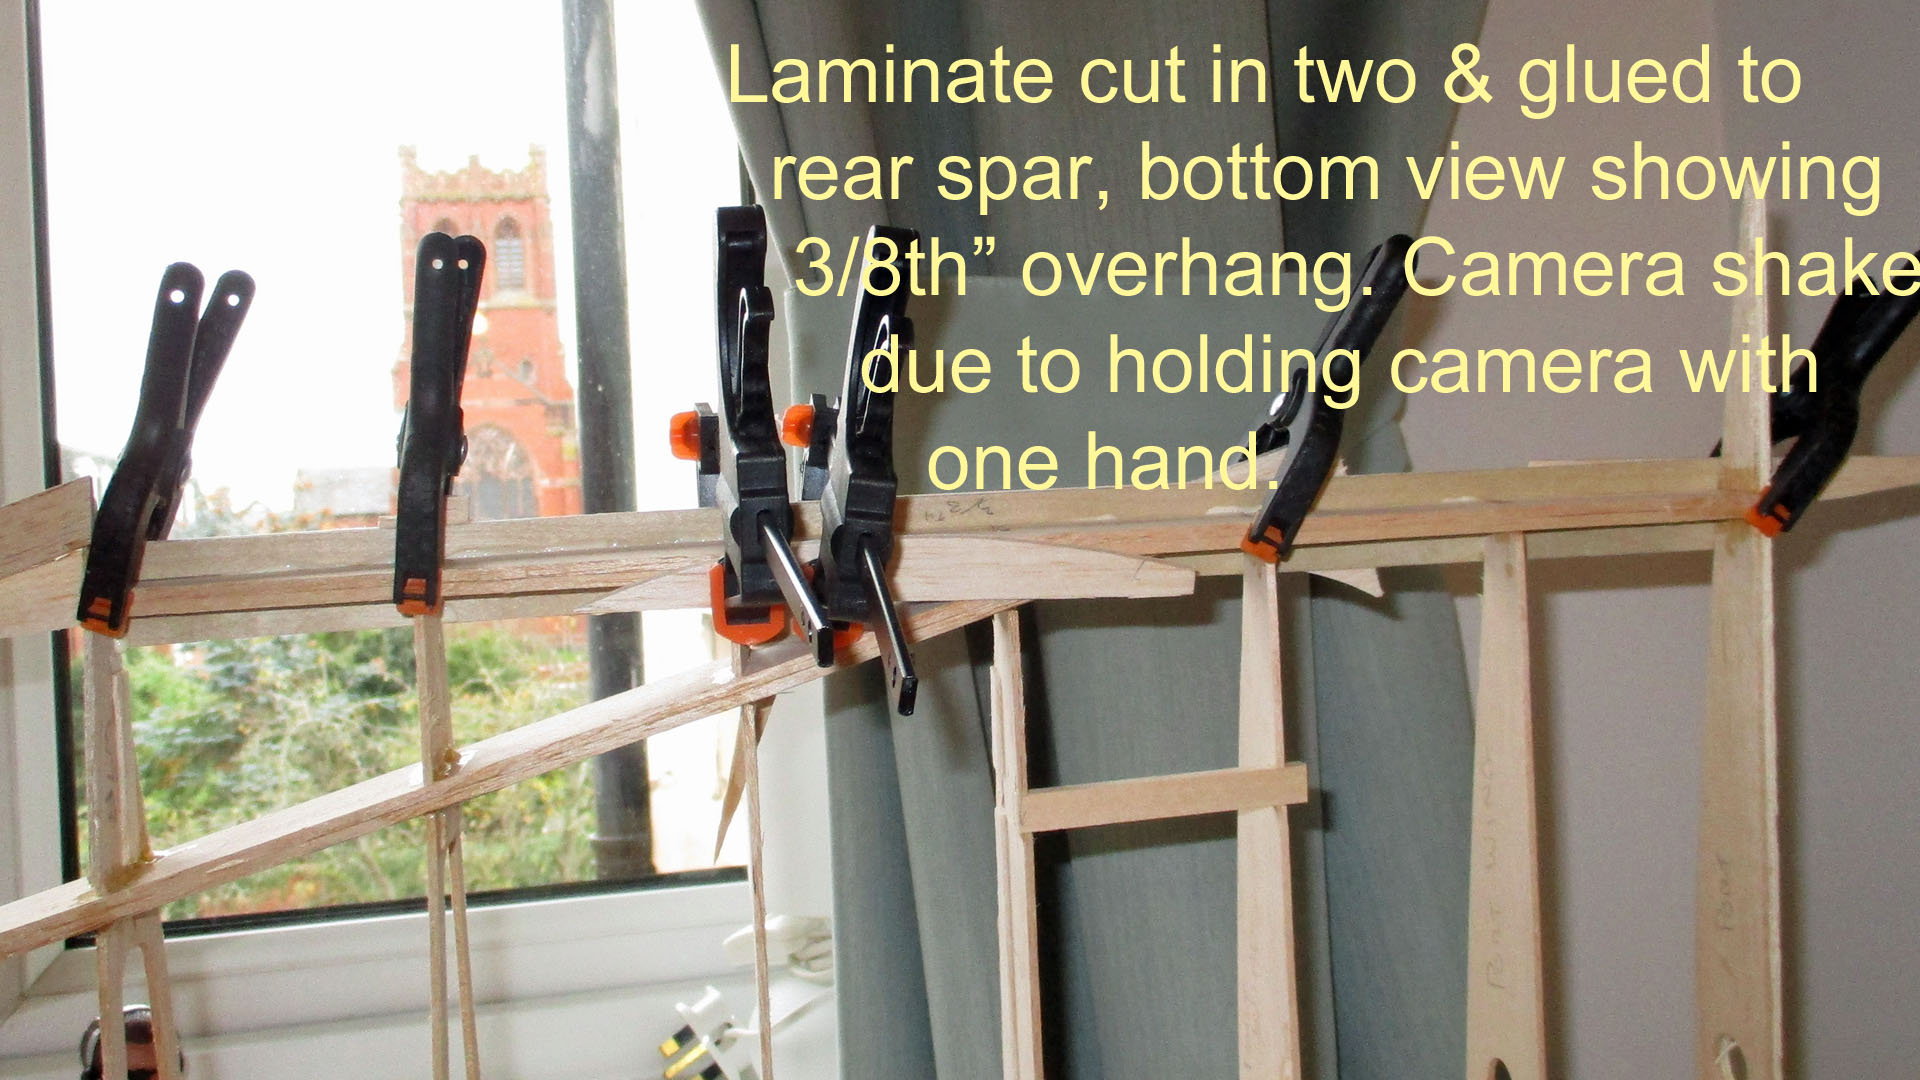
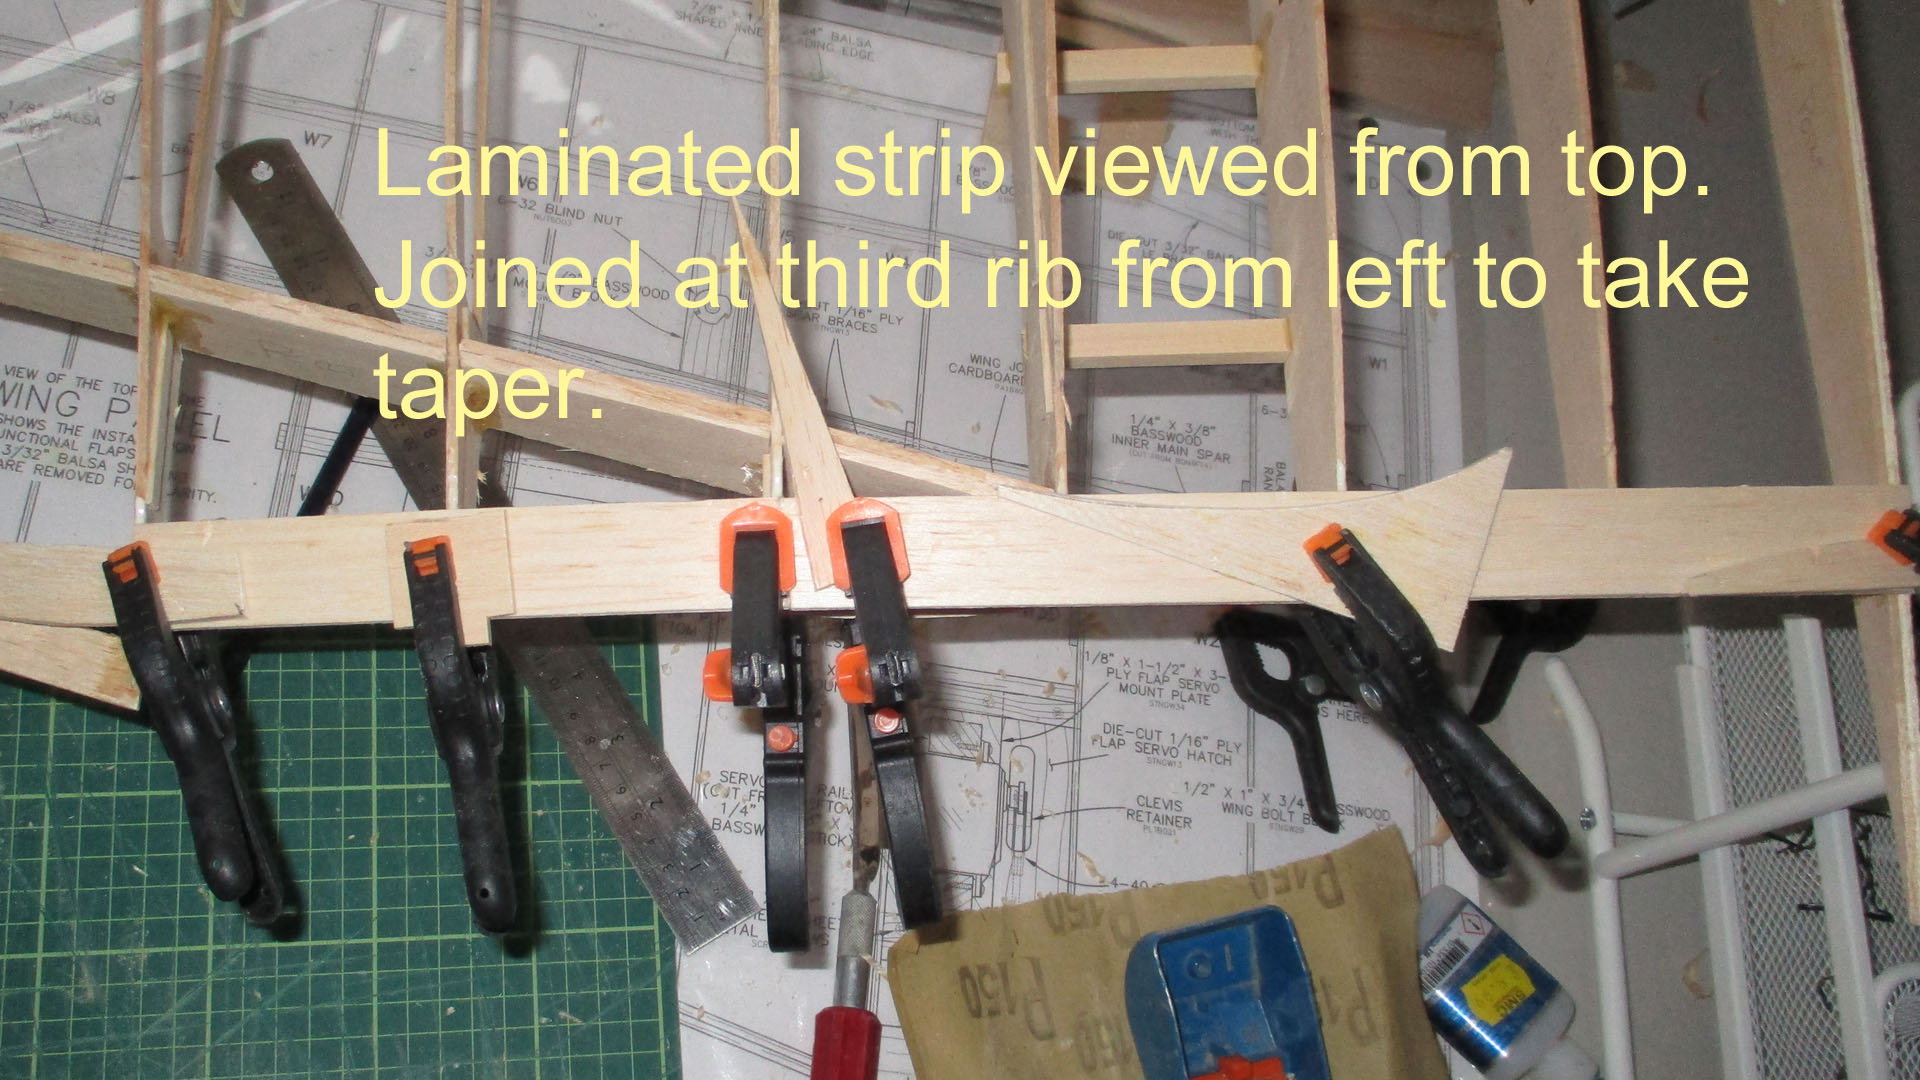
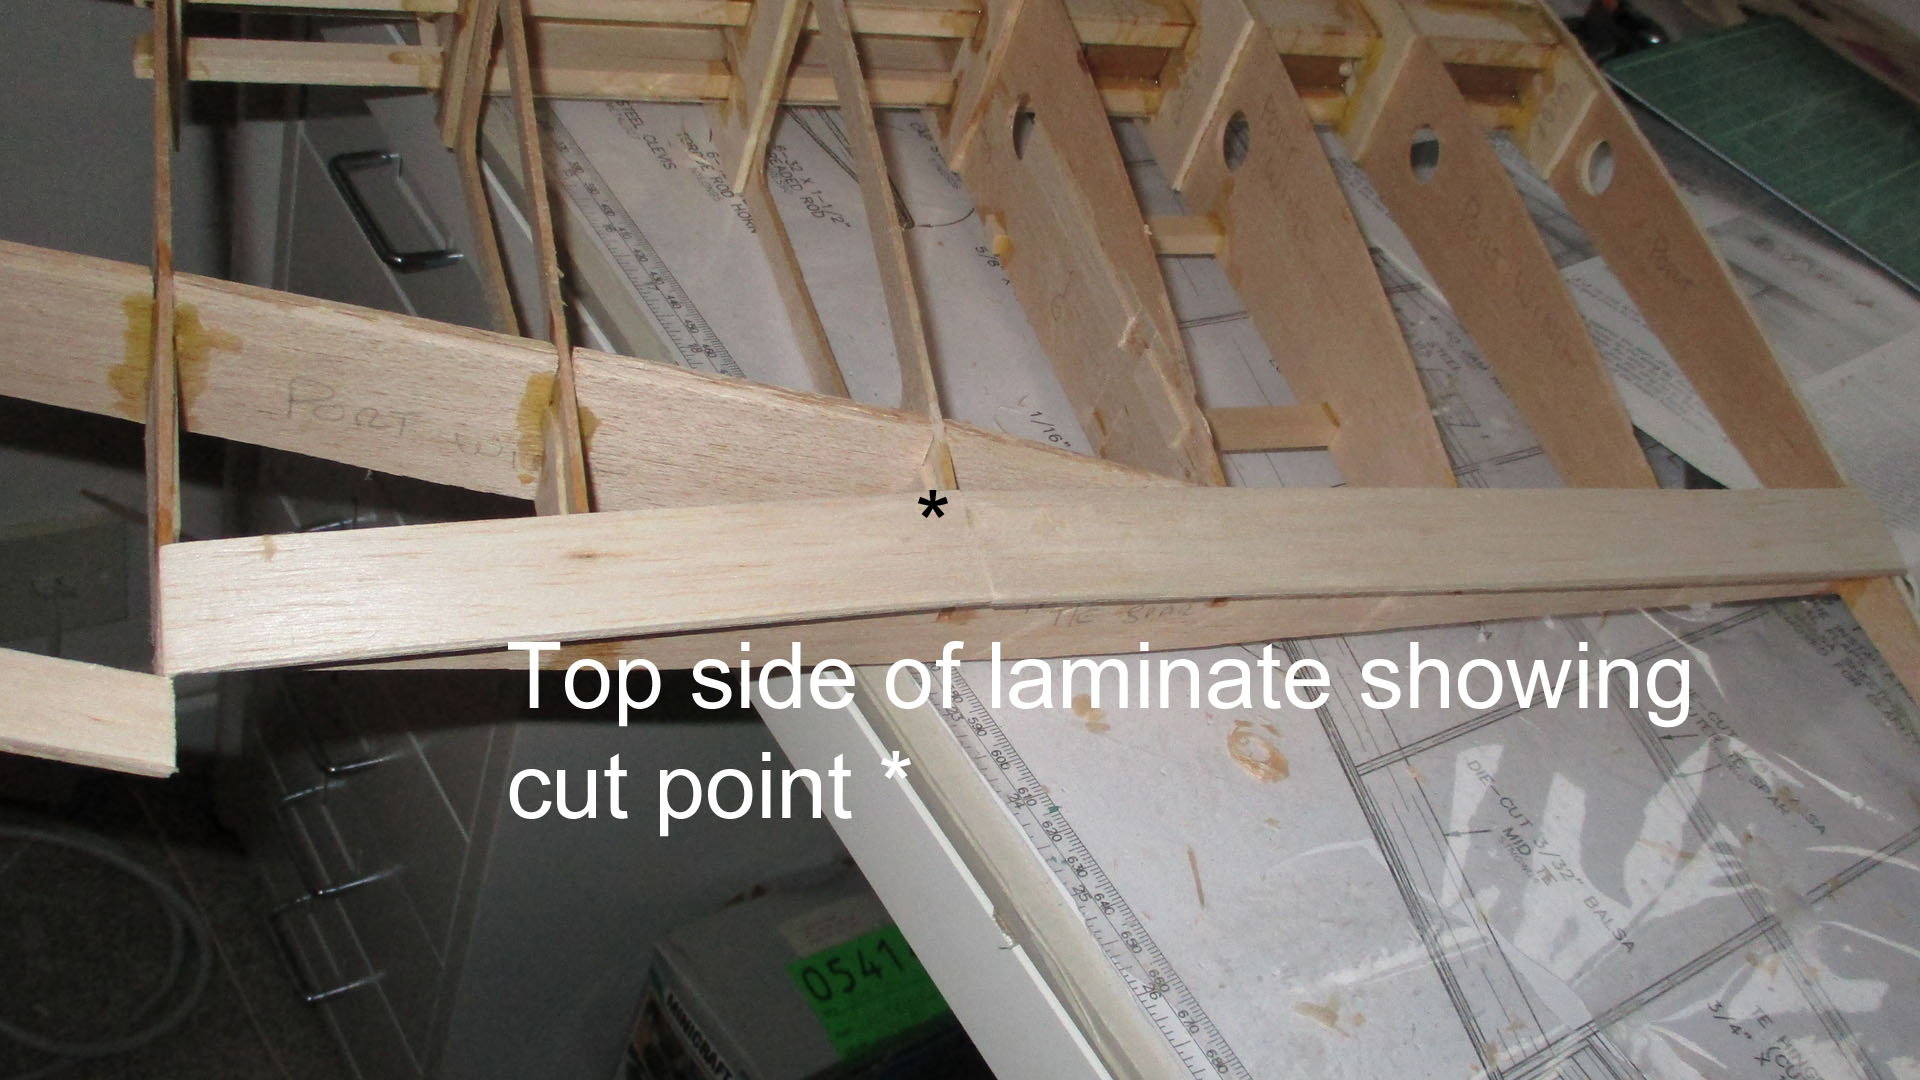
Late start & early finish today. Kavan hinges arrived after ordering Sunday, good service from Nexus. Checked the laminated rear spar/flap cover, marked setting line & cut in two as per instructions, & glued in position. That's it for today.
11-05-2018, 07:24 AM
#78
Thread Starter
Join Date: Mar 2006
Location: Southport UK
Posts: 187
Likes: 0
Received 0 Likes
on
0 Posts

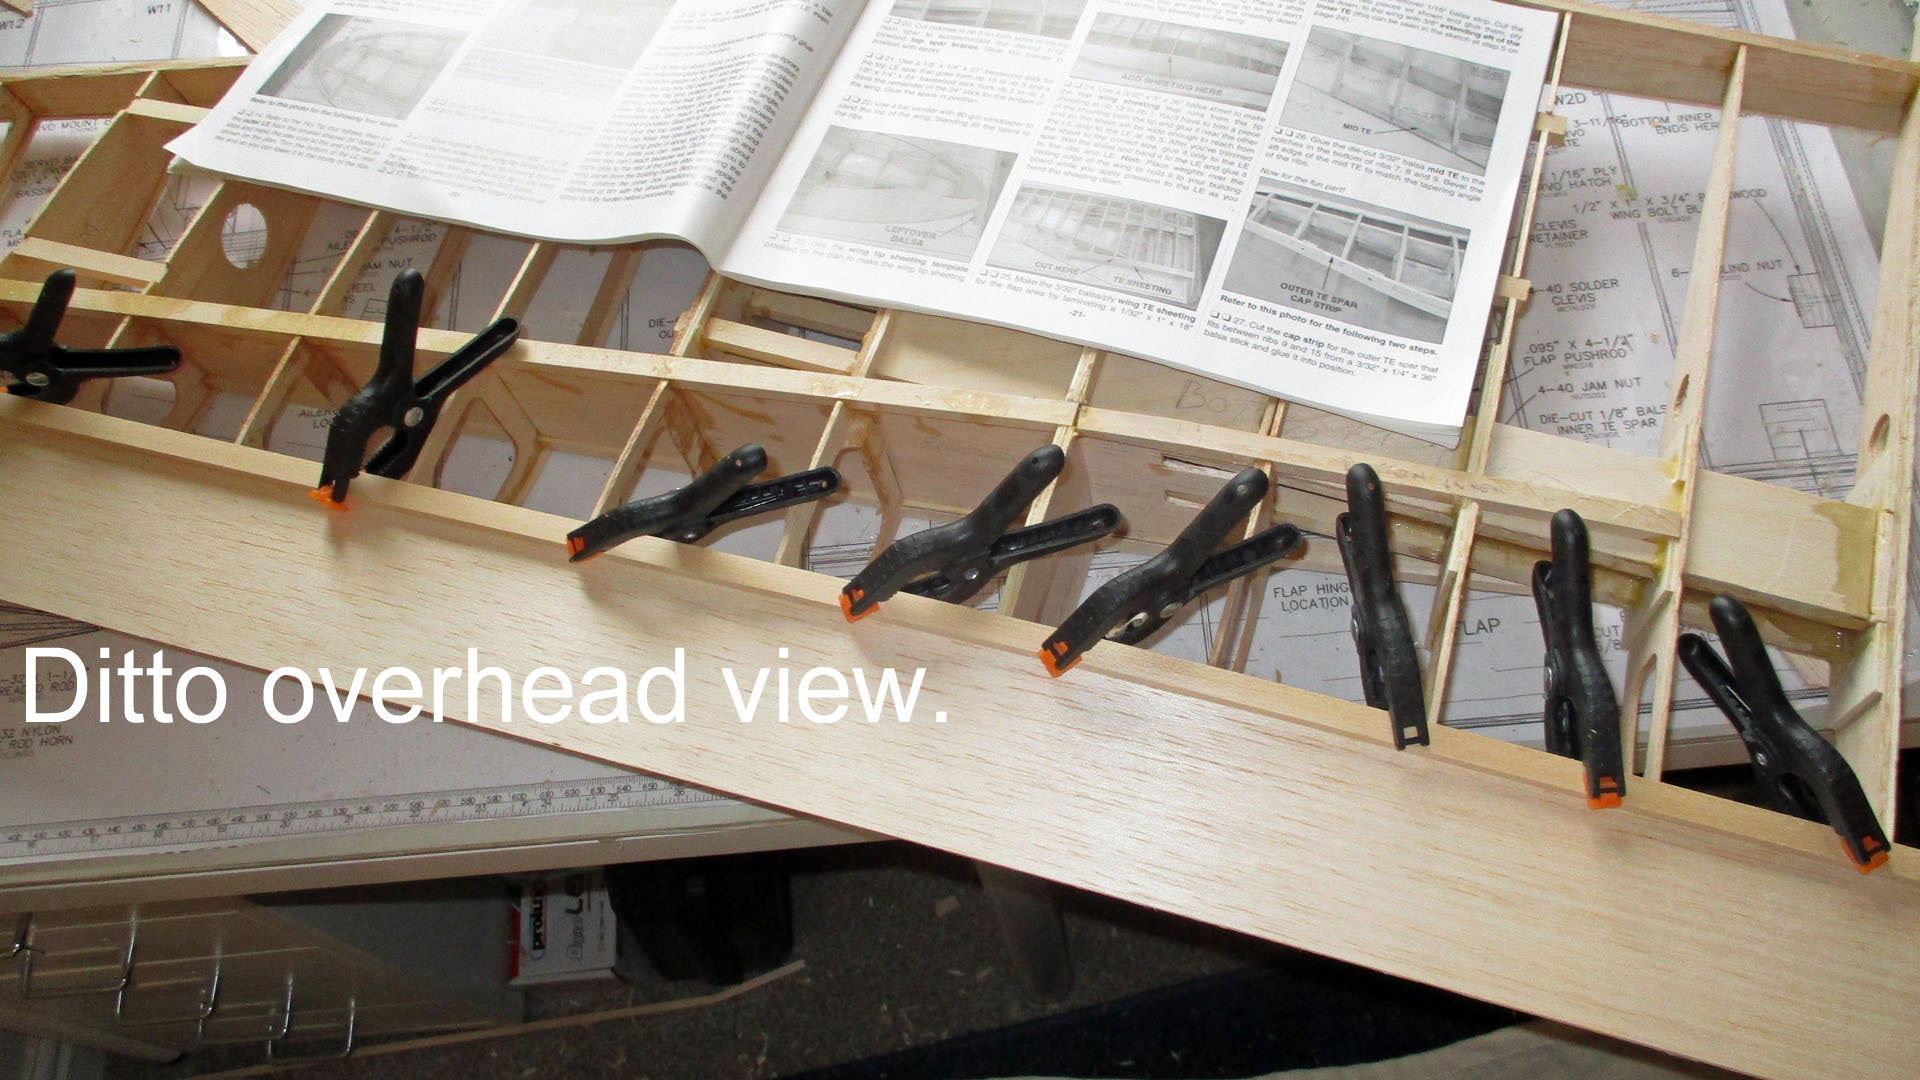
After much soul searching, I have decided to curtail the build on the Stinson. After almost completing the port wing, now it's off the board, I've just run out of space to continue. I may complete the flaps & aileron & I'm doing the underside leading edge sheeting today. So shortly it will be for sale. To keep me in the groove & get me back to flying I've ordered a powered glider from TopModels CZ the Challenger. So when that arrives, the Stinson will go up for sale.
11-05-2018, 08:08 PM
#79

After much soul searching, I have decided to curtail the build on the Stinson. After almost completing the port wing, now it's off the board, I've just run out of space to continue. I may complete the flaps & aileron & I'm doing the underside leading edge sheeting today. So shortly it will be for sale. To keep me in the groove & get me back to flying I've ordered a powered glider from TopModels CZ the Challenger. So when that arrives, the Stinson will go up for sale.
 You were making such great progress and it was really looking like a beautiful build. The TF Stinson is a beast of a plane though.
Al
11-07-2018, 09:32 AM
#80
Thread Starter
Join Date: Mar 2006
Location: Southport UK
Posts: 187
Likes: 0
Received 0 Likes
on
0 Posts
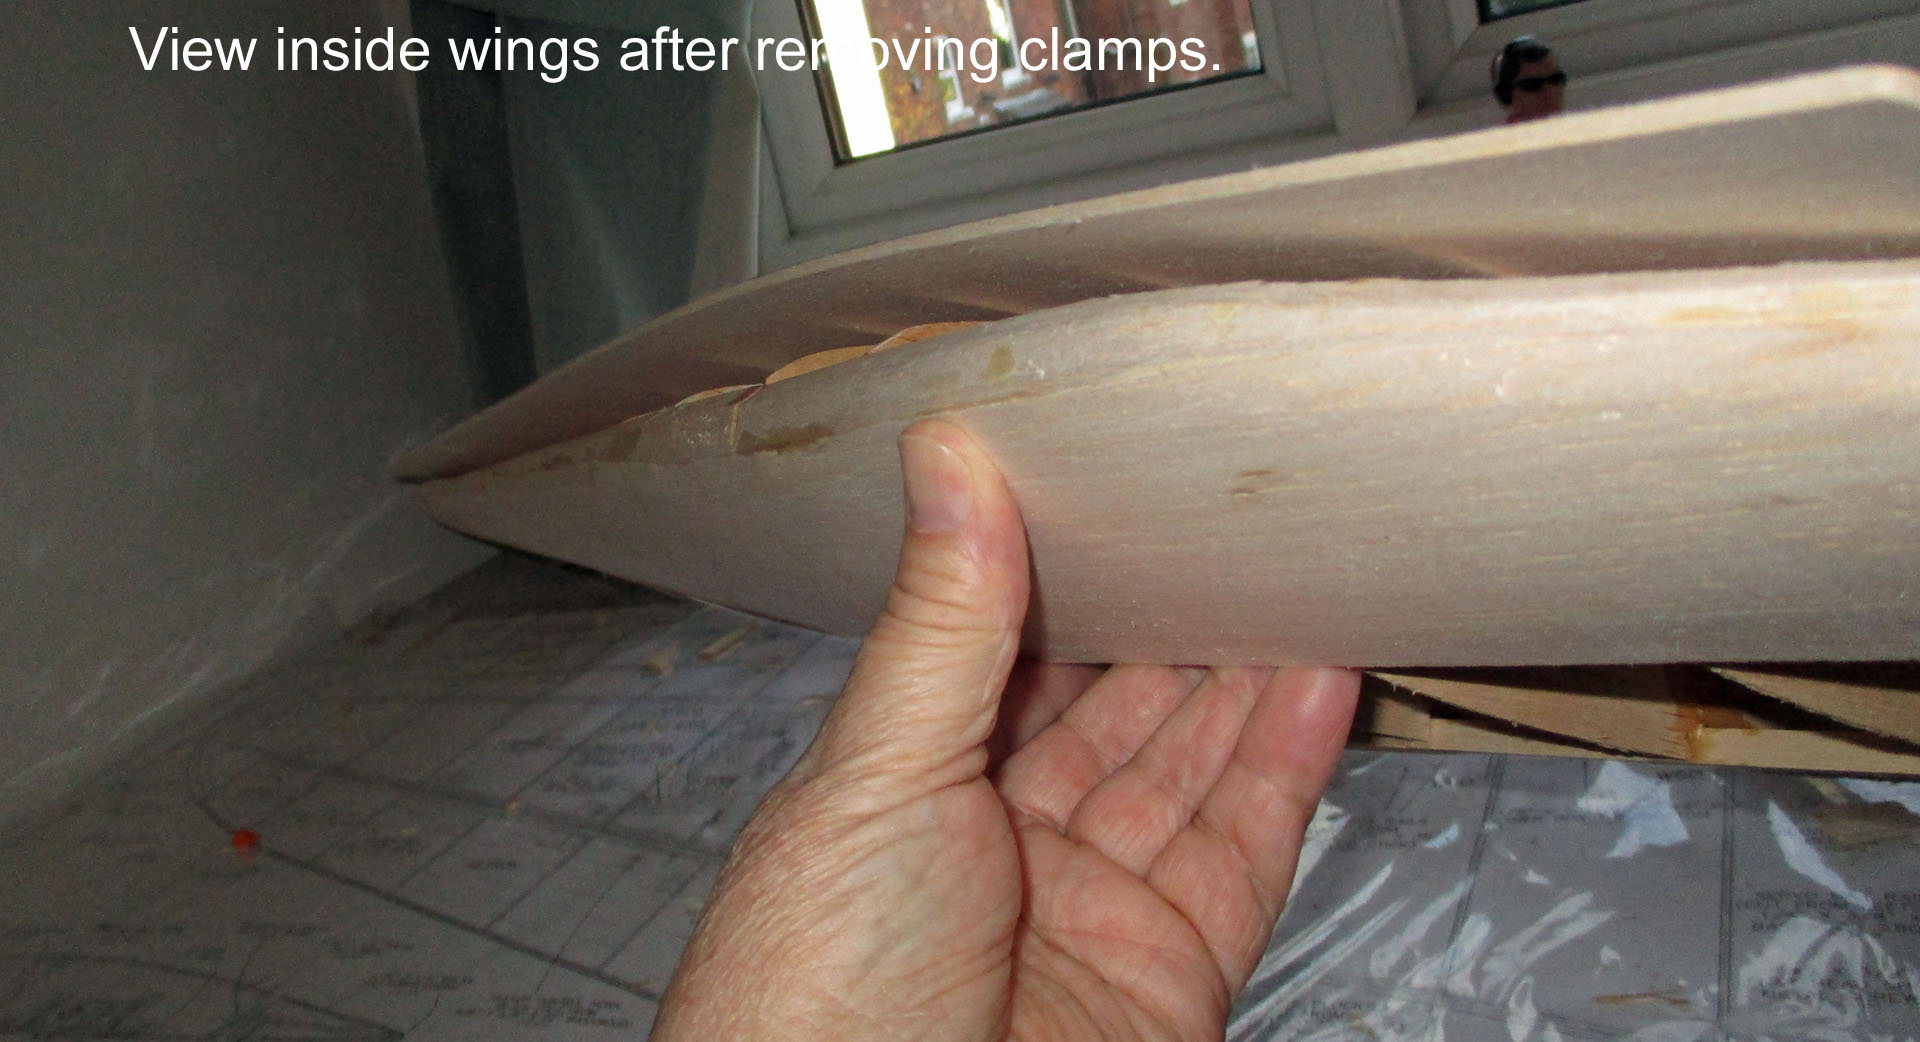
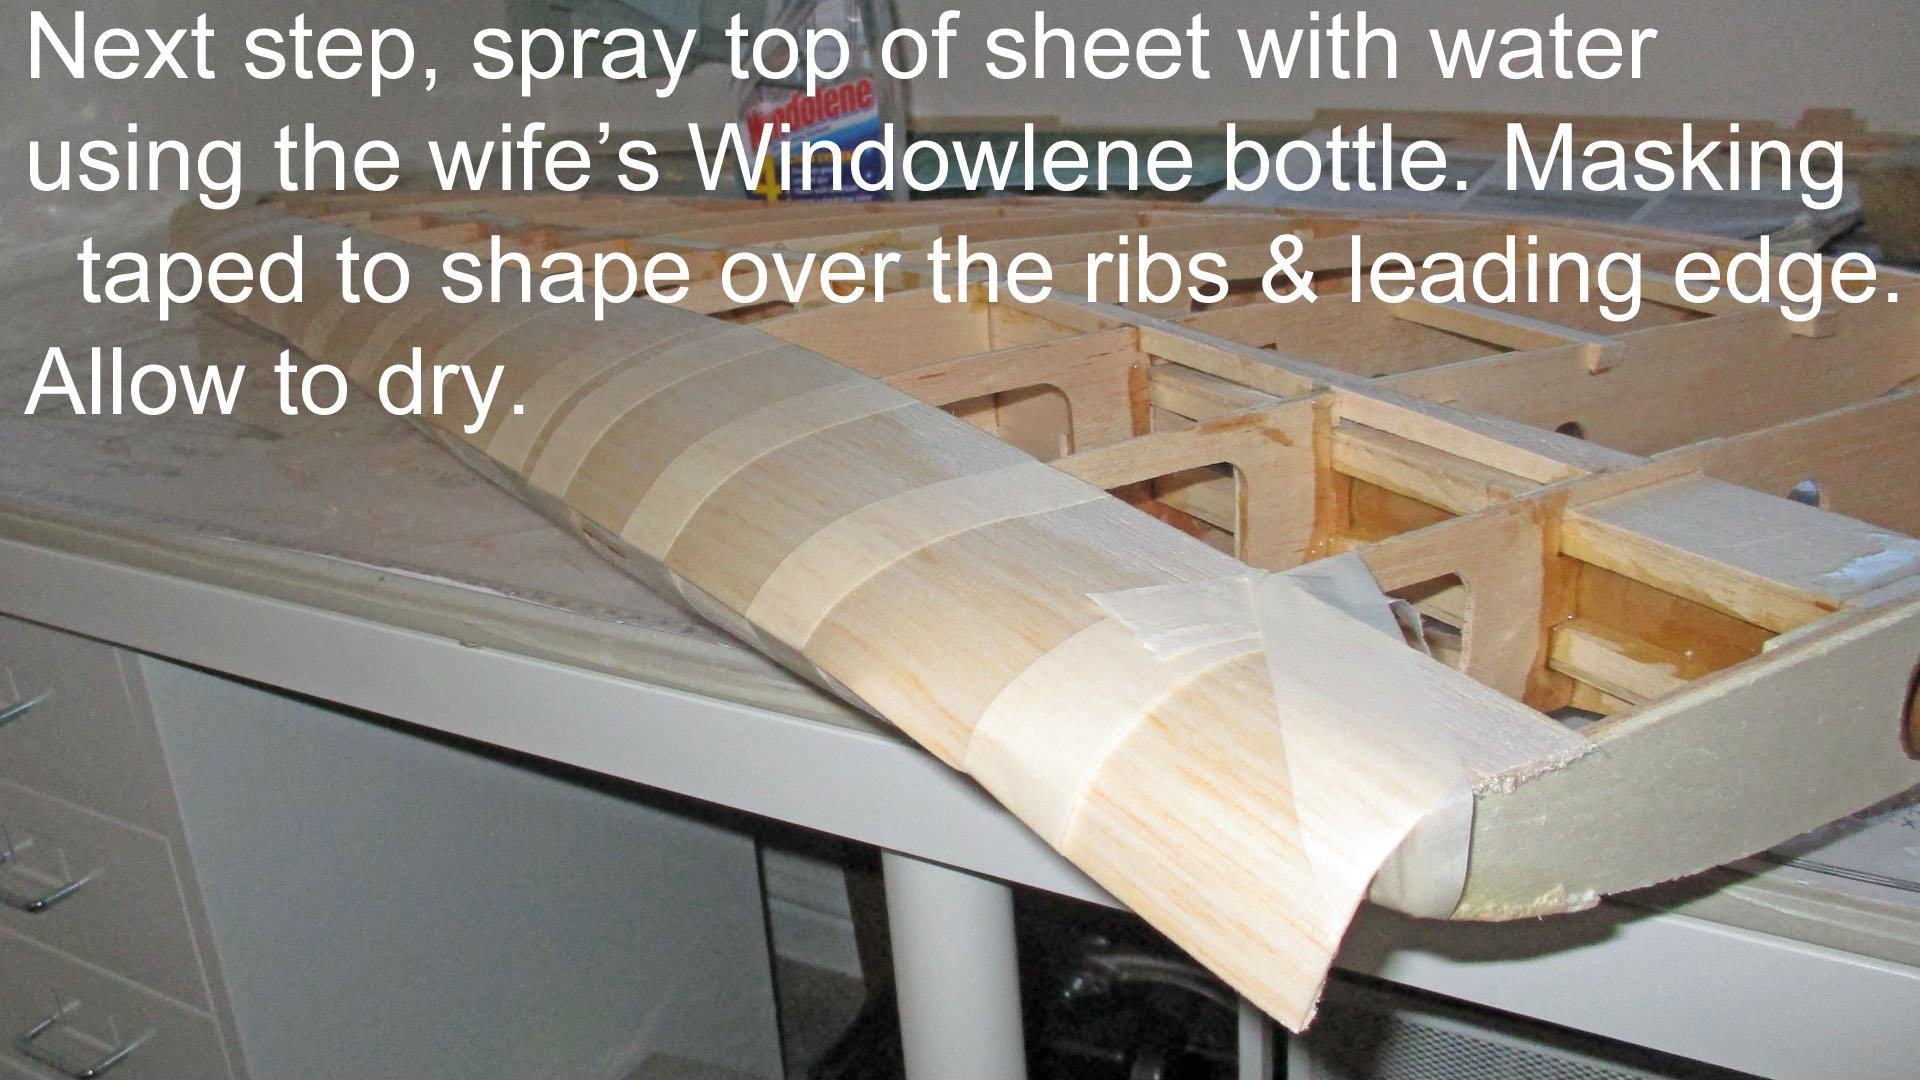

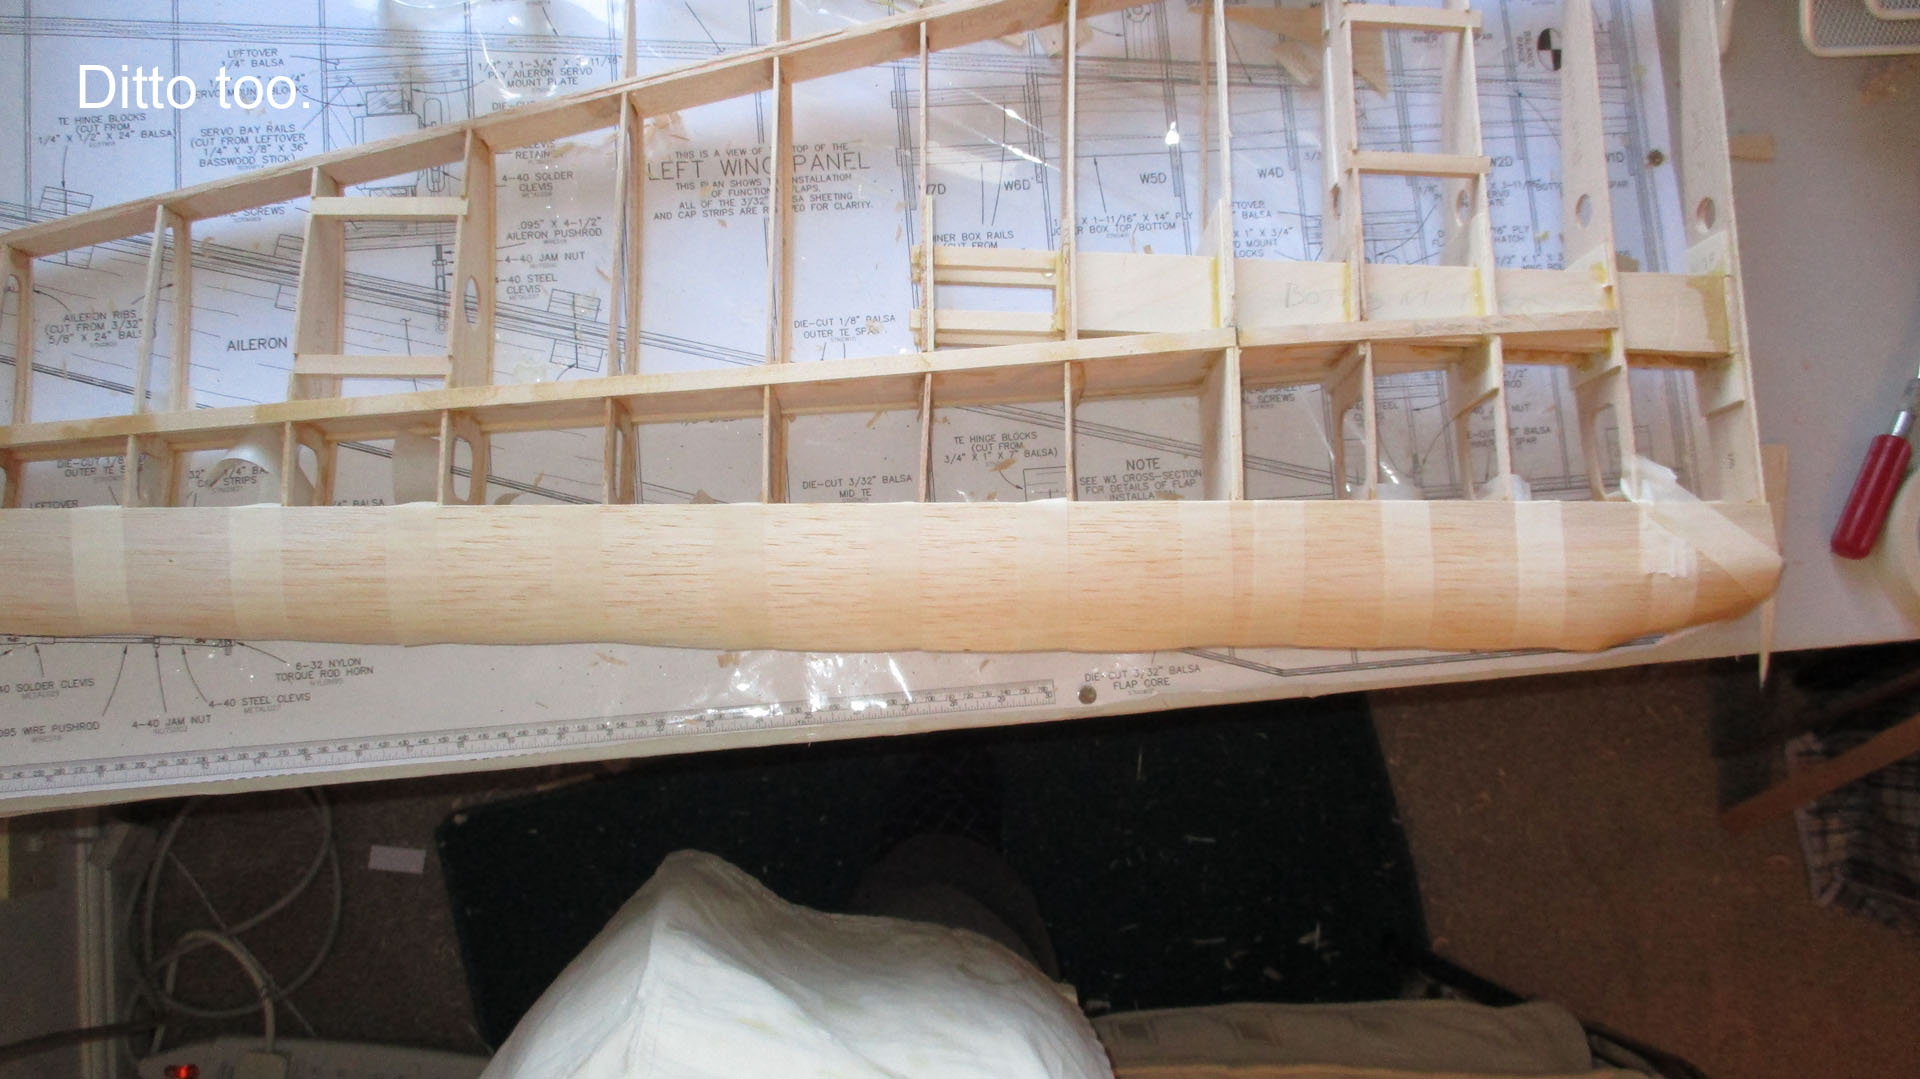
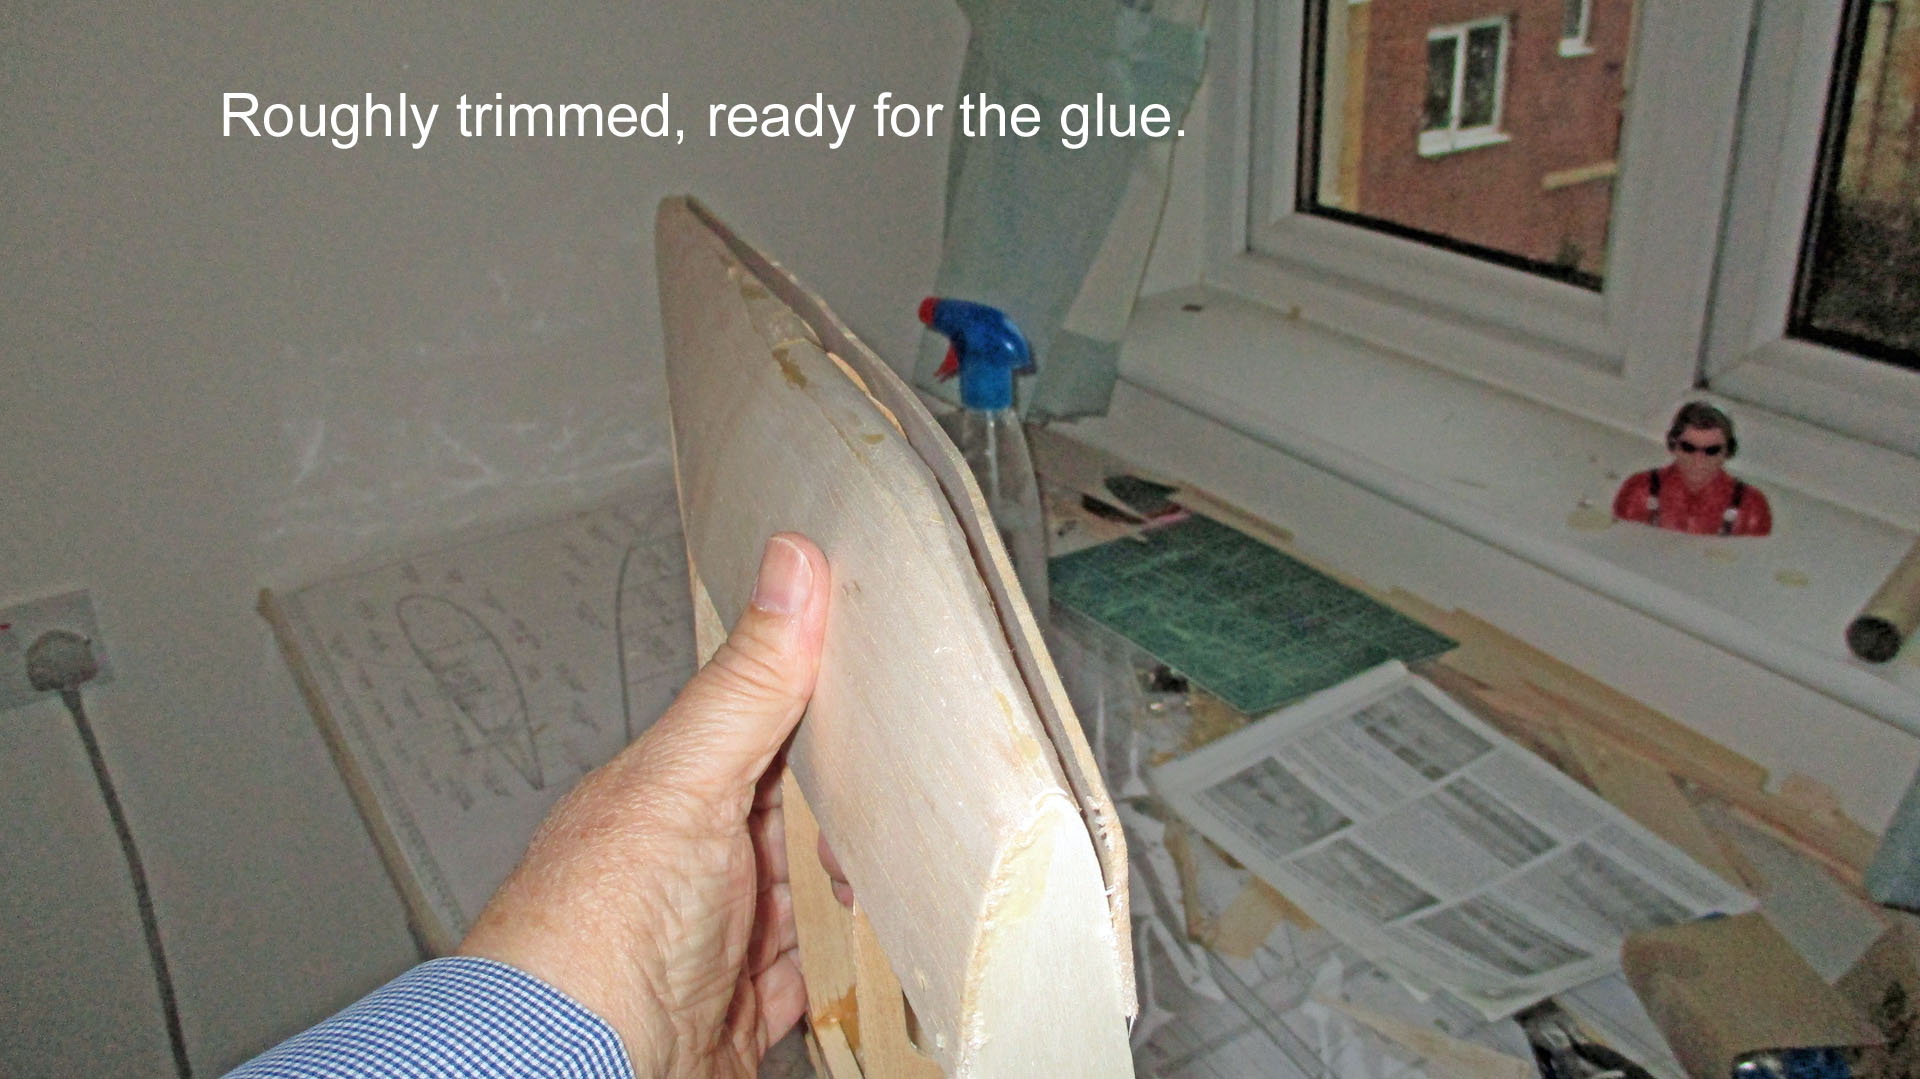
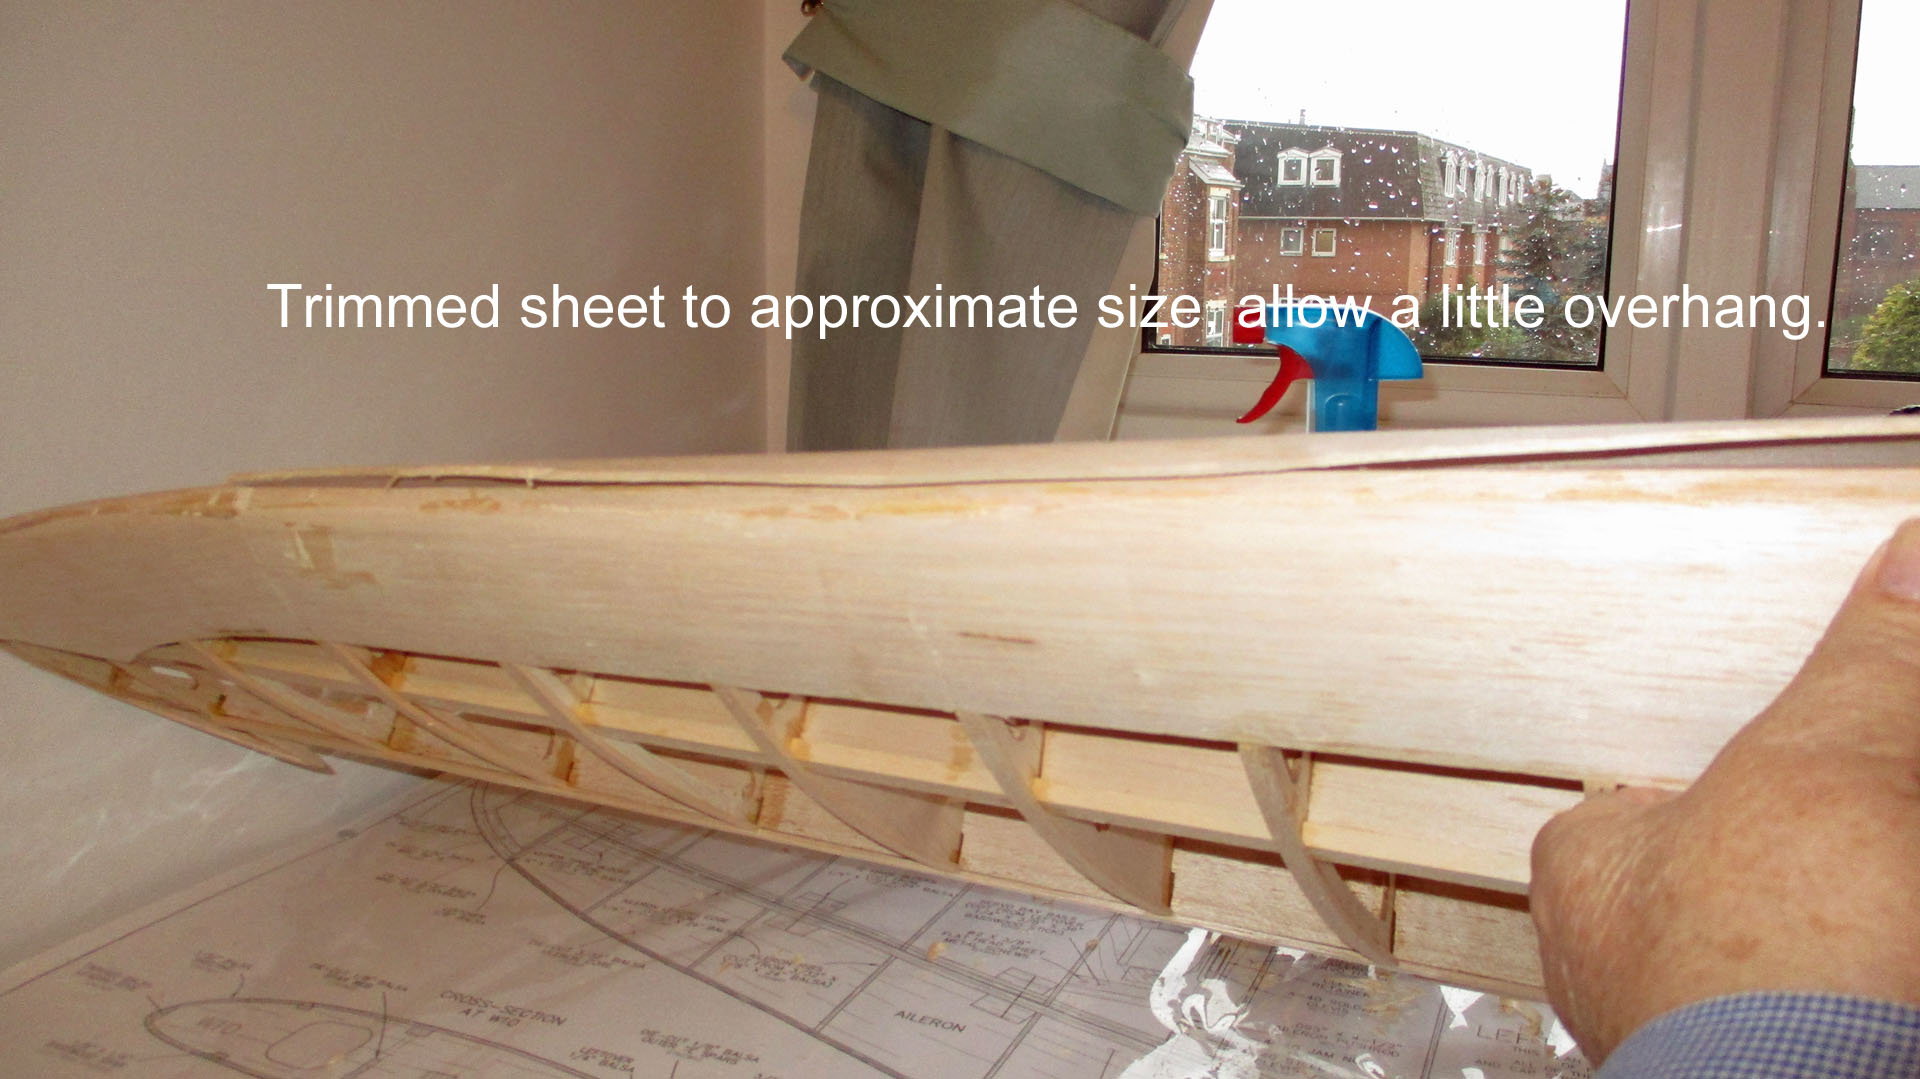
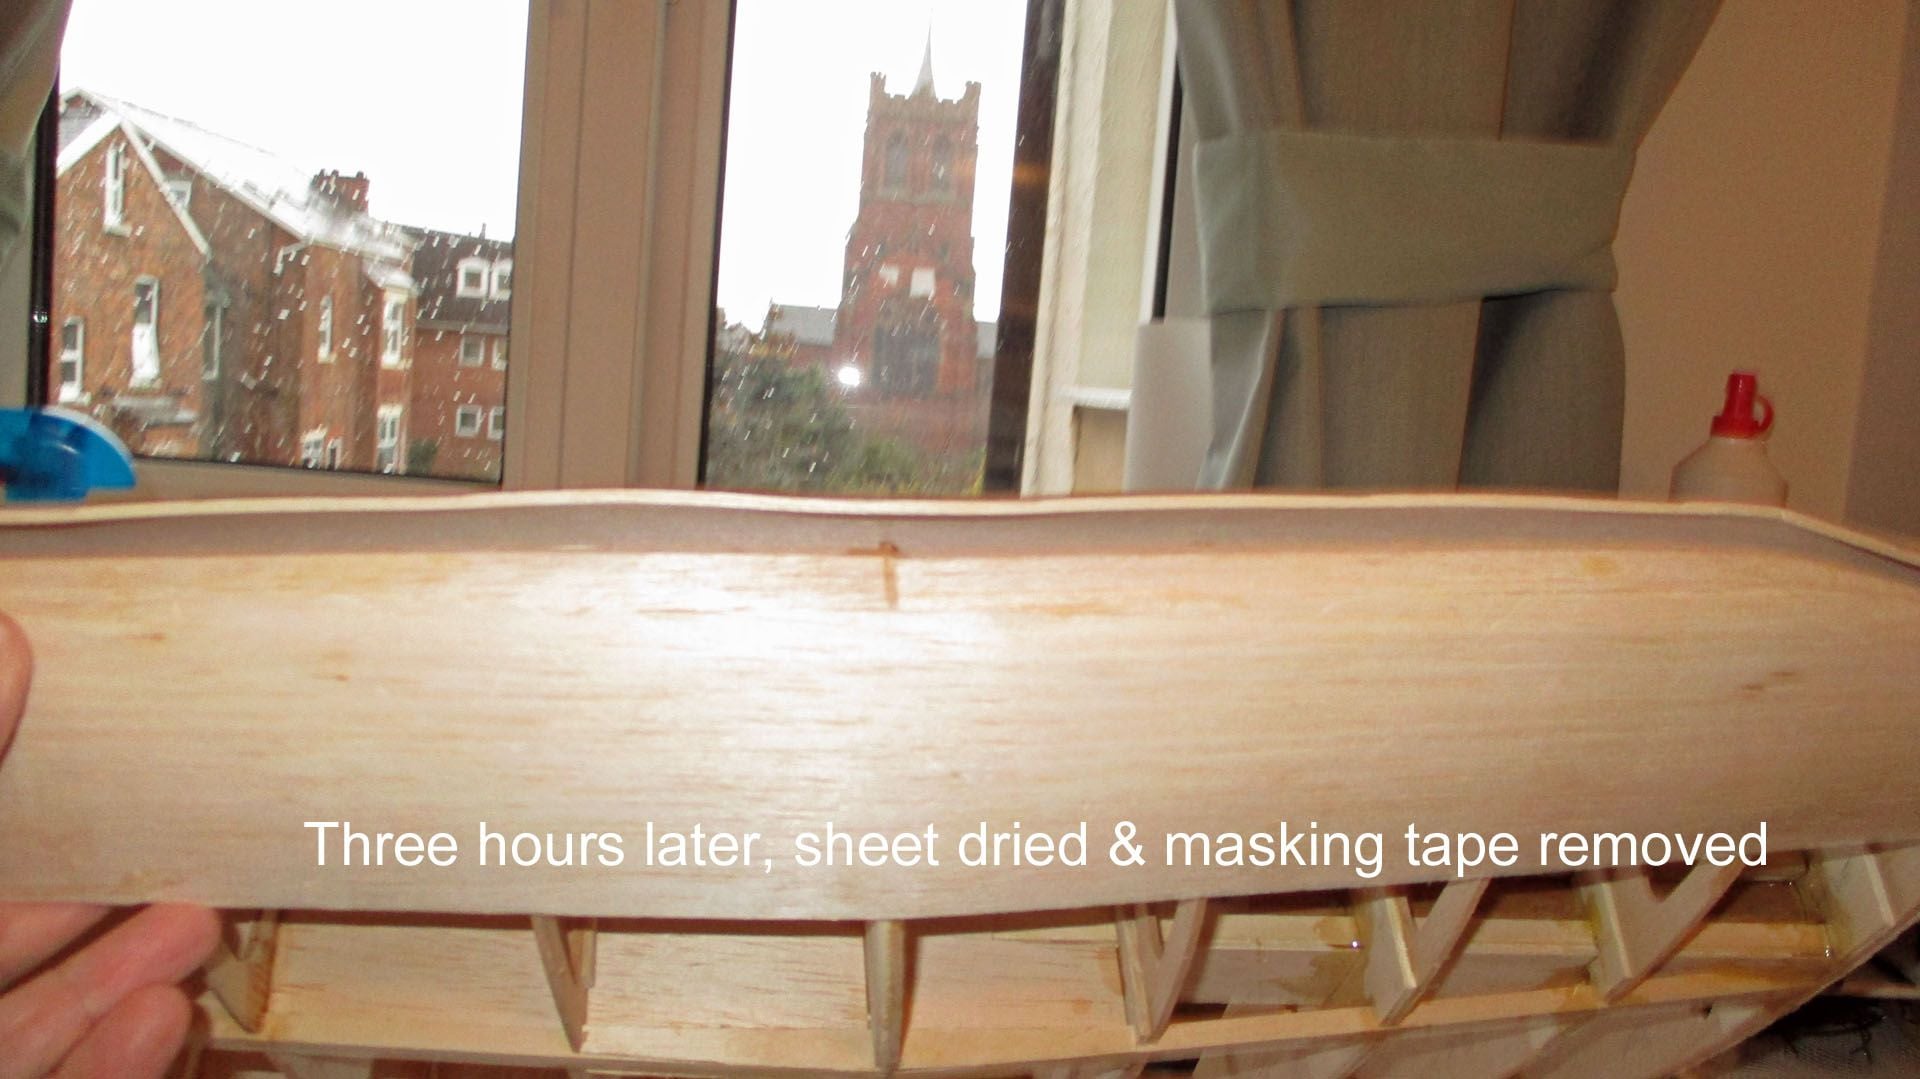
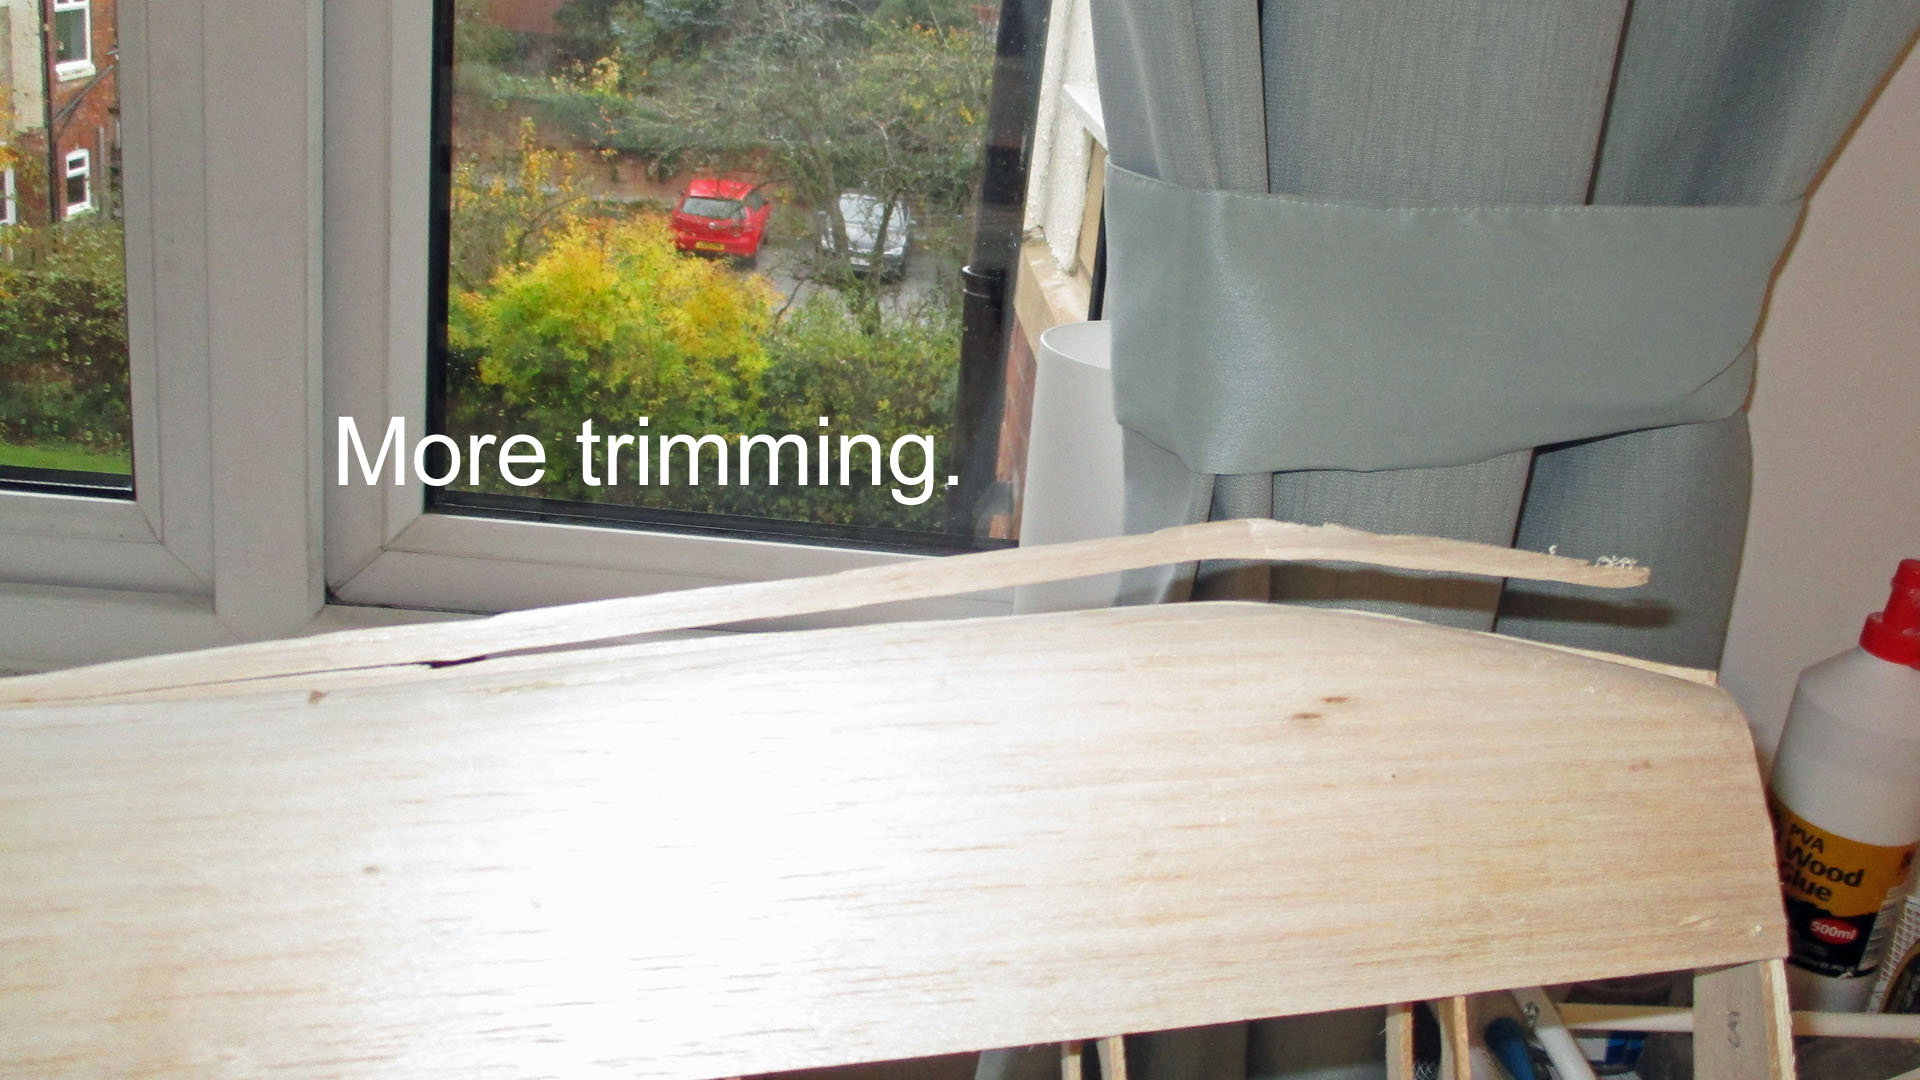
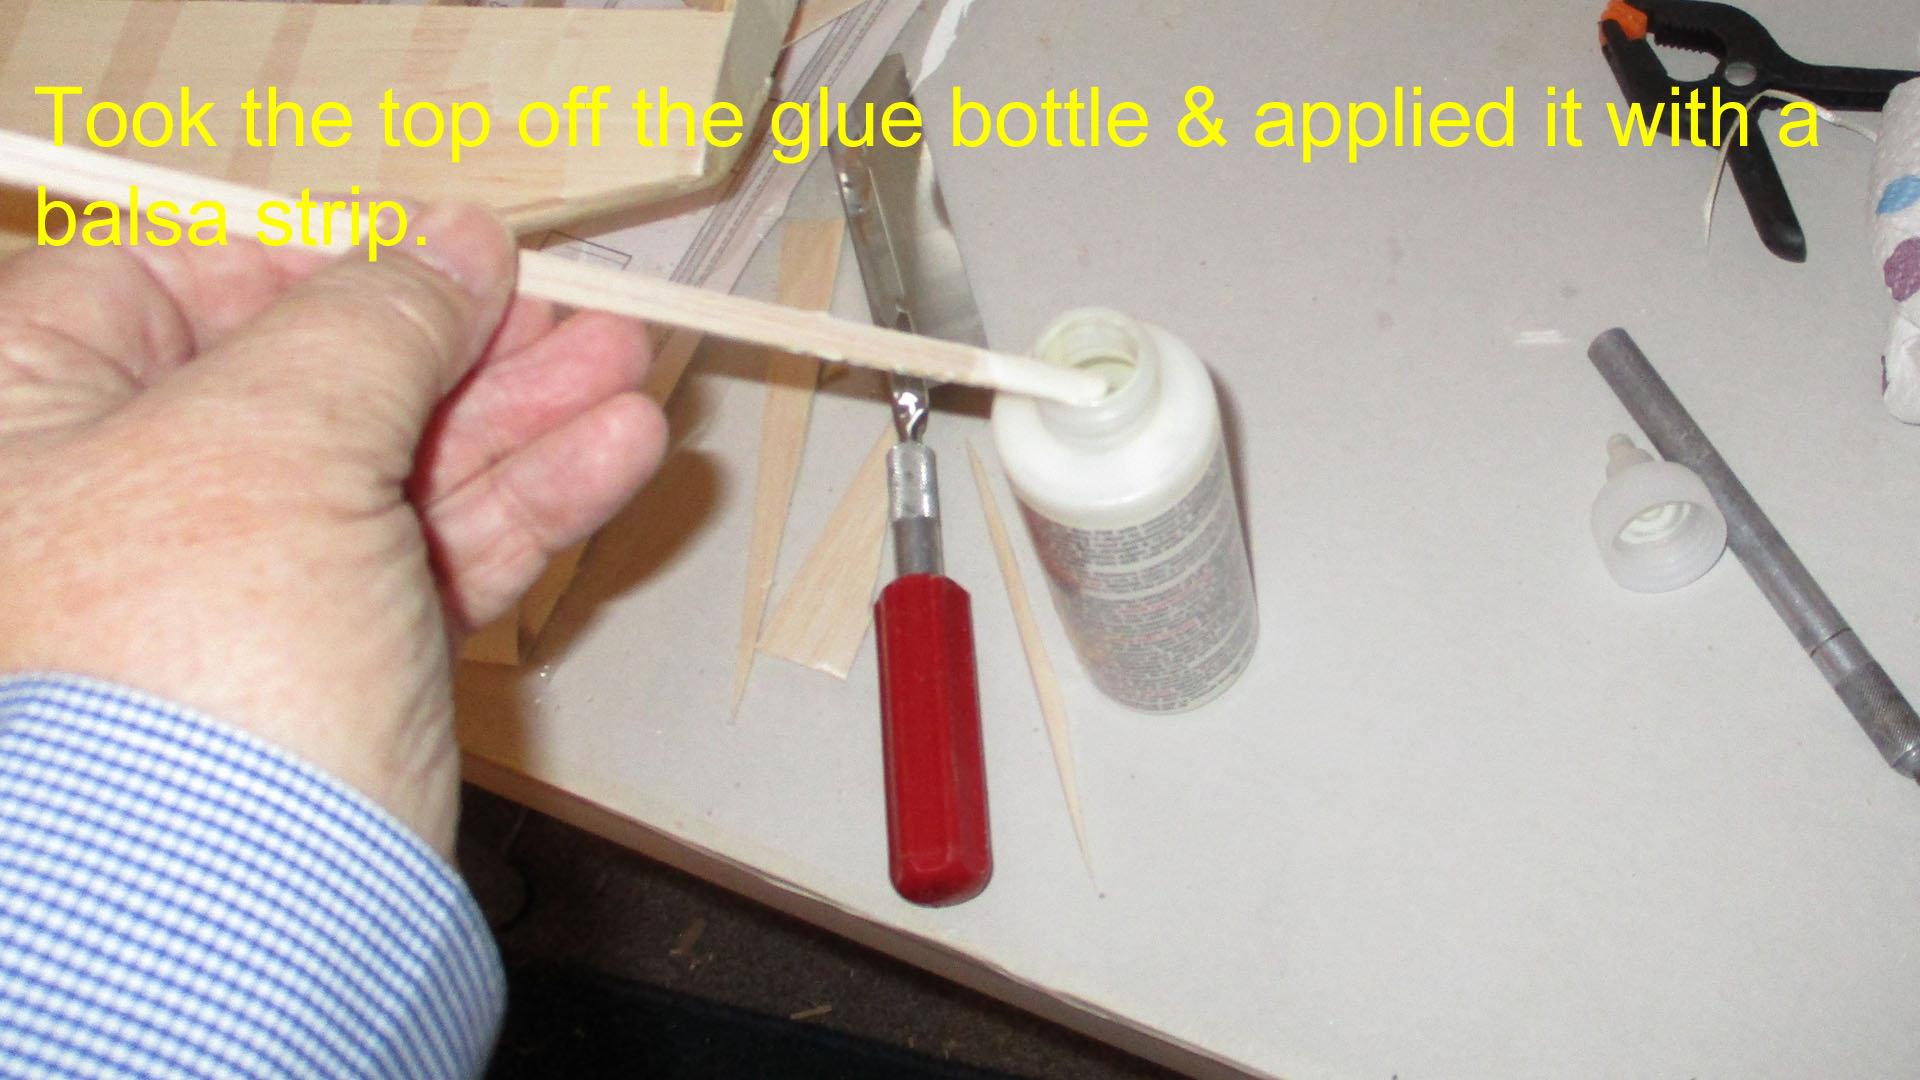
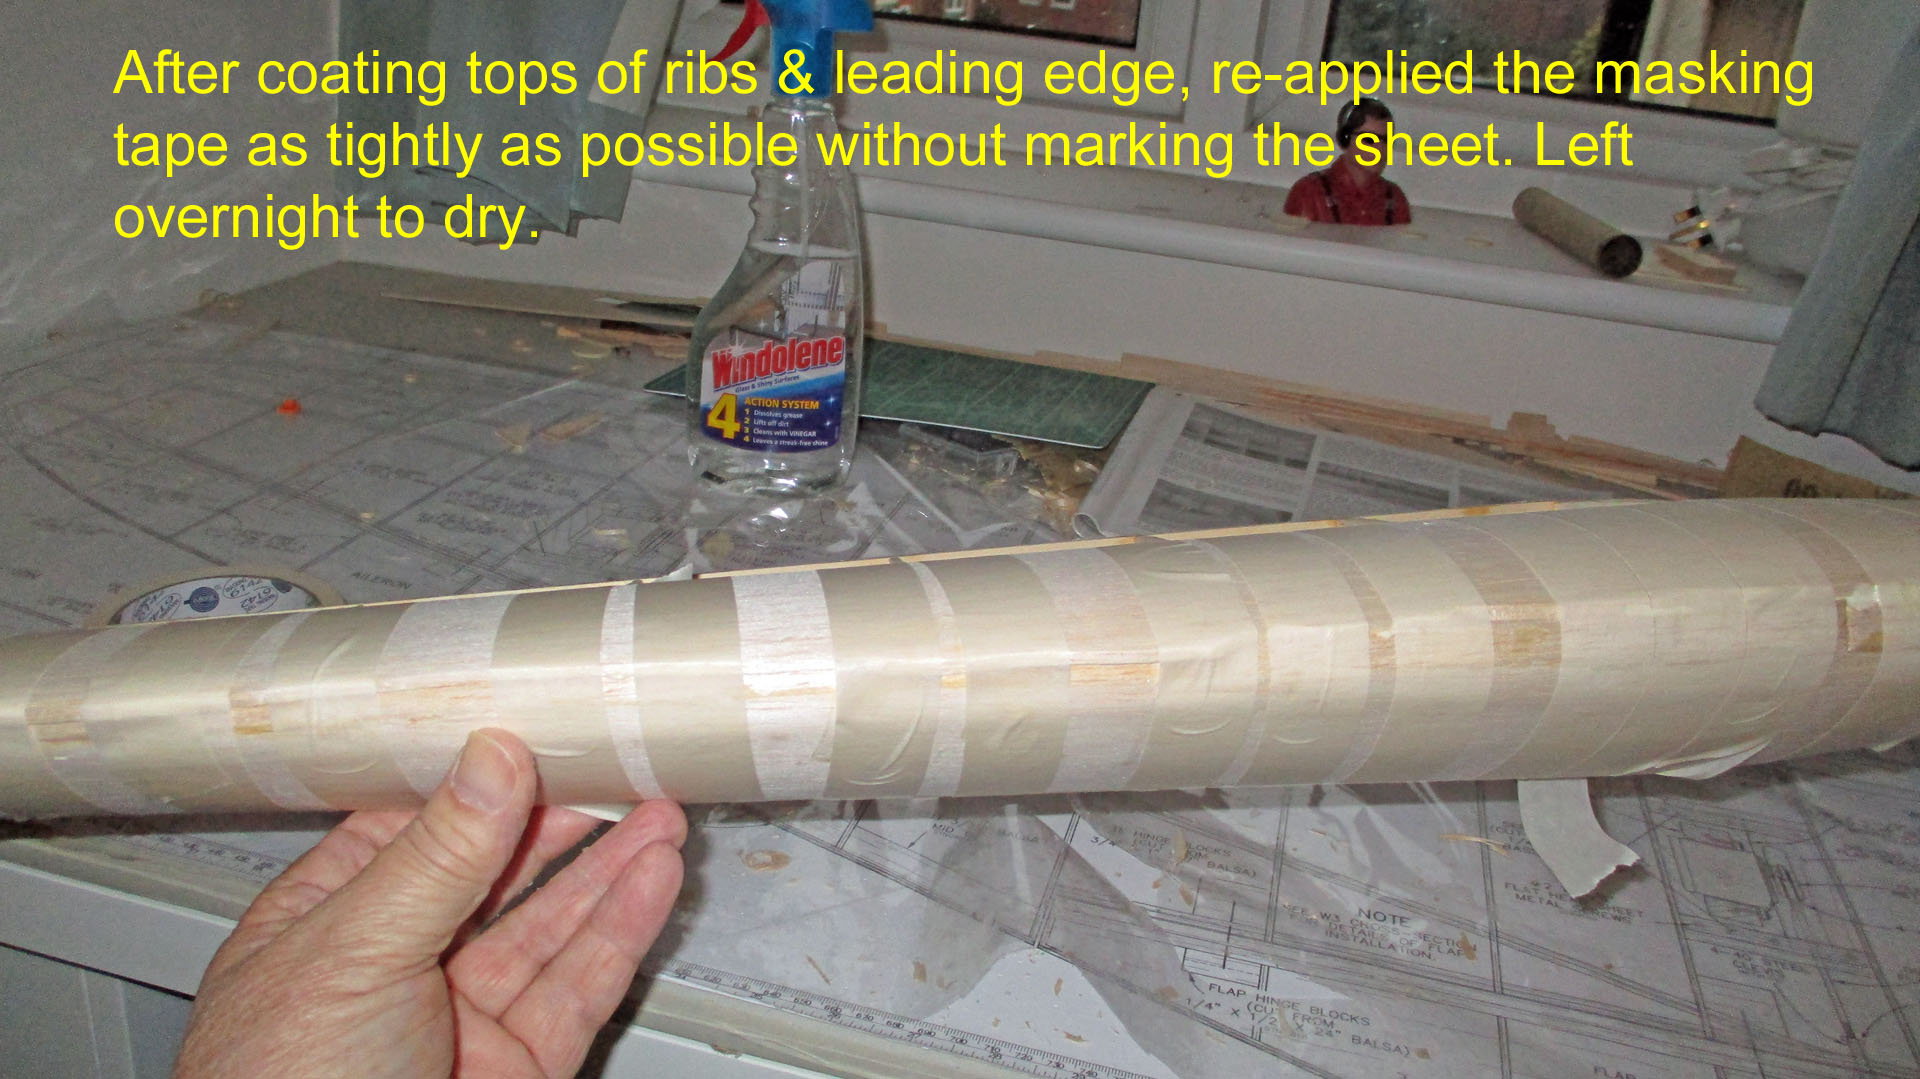
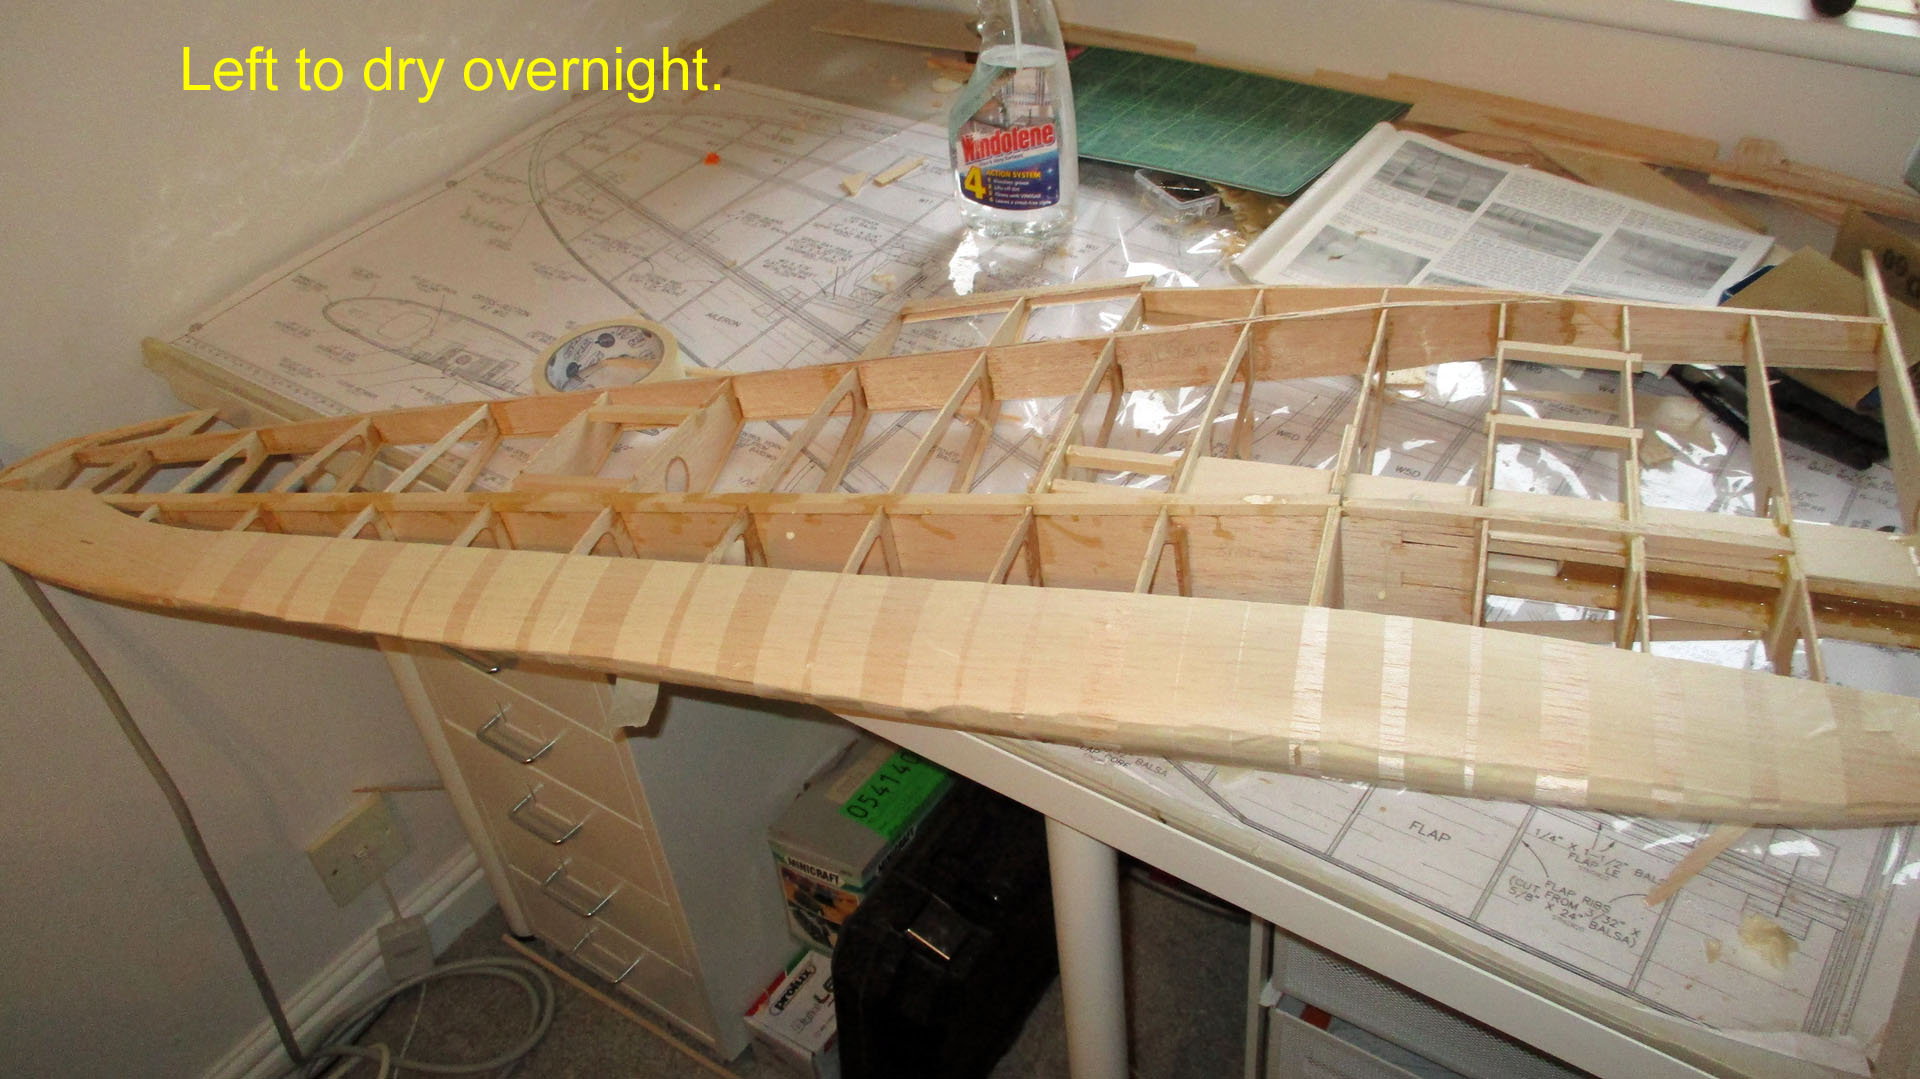
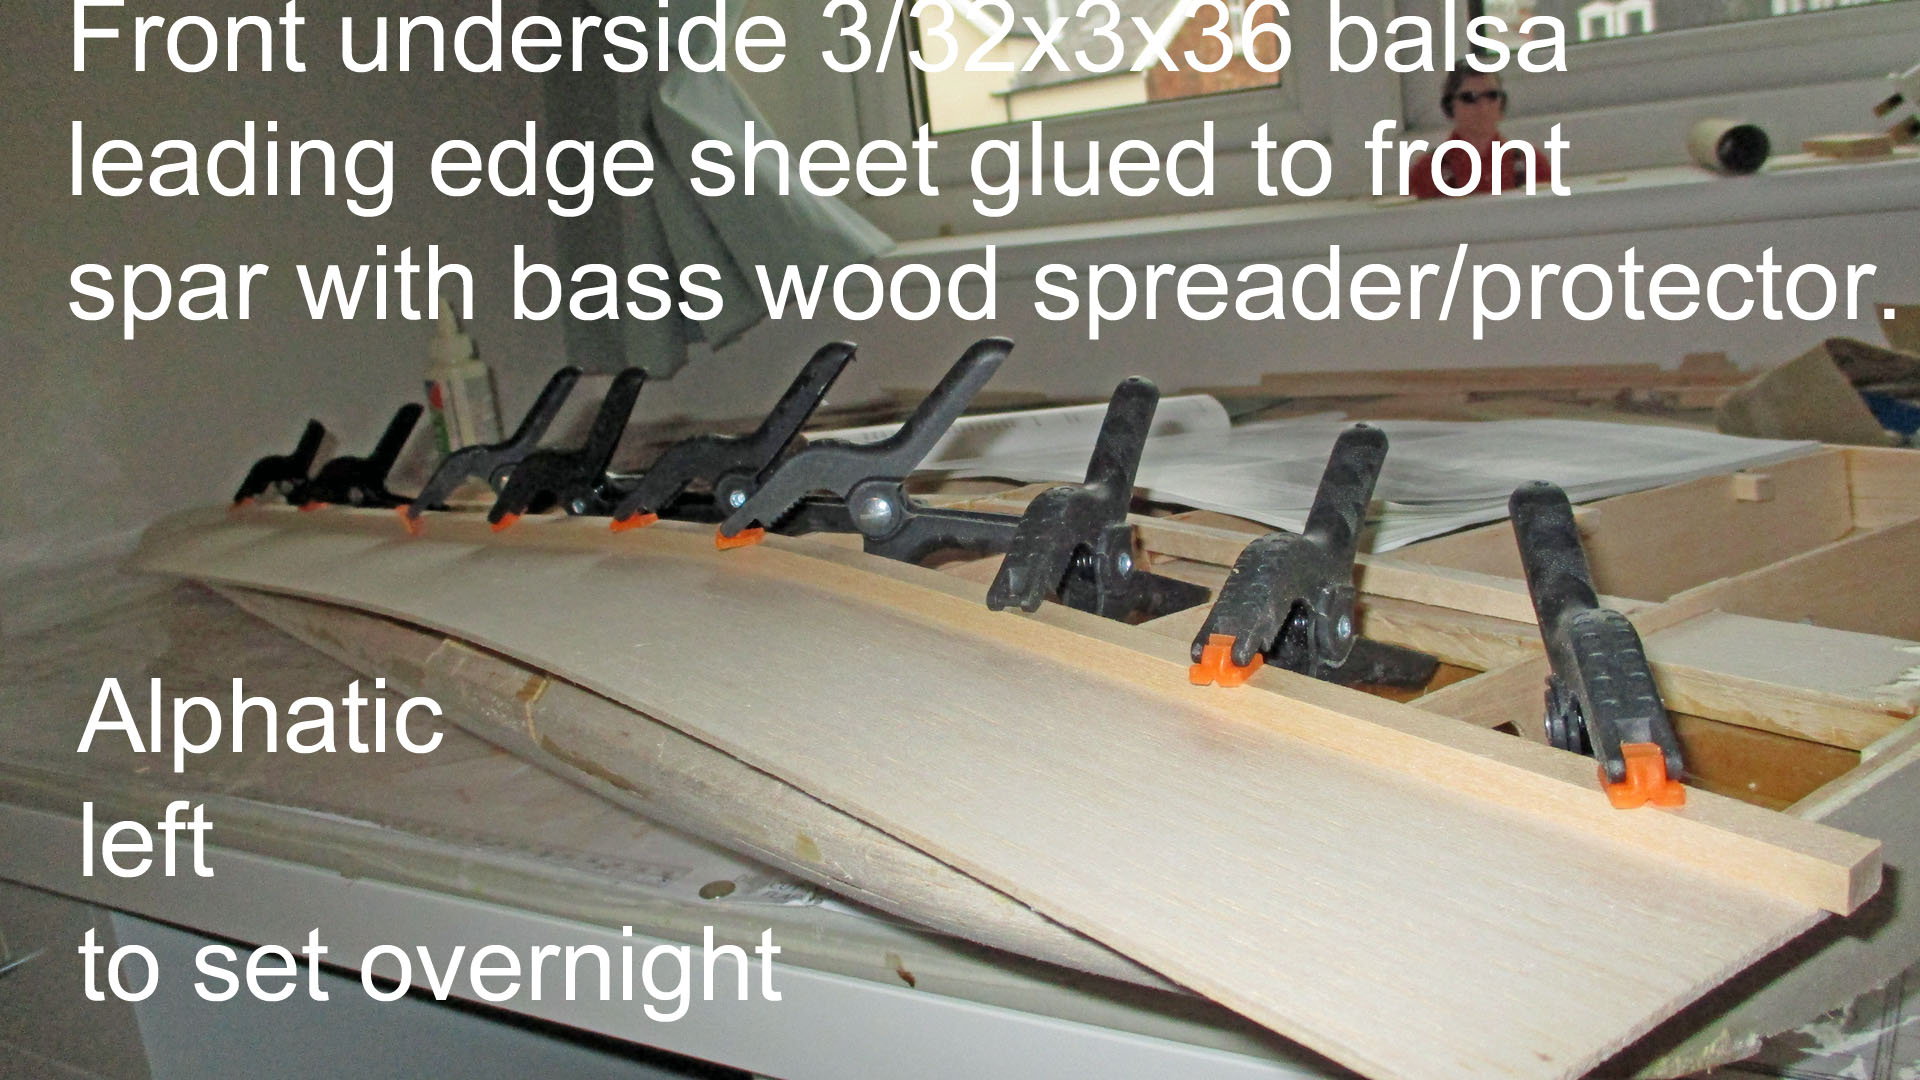
After removing the clamps on the underside leading edge sheeting, it was time to form it over the ribs, then glue it into position. My method was to spray water on the balsa sheet, when it had soaked in & softened the balsa, I used masking tape to curve it into position over the ribs & leading edge. Then I put it on one side to dry. Three hours later, I removed the masking tape, & although it sprang back slightly, it now had a distinctive curve, matching the rib shape. Next I roughly trimmed the sheet to match the leading edge shape, making it easier to insert the glue. I obviously couldn't get the spout on the glue bottle between the sheet & leading edge, so I took the top off the bottle & used a sliver of balsa to paint the rib tops with aliphatic glue. Then I coated the leading edge & used masking tape again to pull it down tightly, taking care not to damage the sheet.. Then I set the wing aside to dry overnight.
11-10-2018, 07:38 AM
#81
Thread Starter
Join Date: Mar 2006
Location: Southport UK
Posts: 187
Likes: 0
Received 0 Likes
on
0 Posts
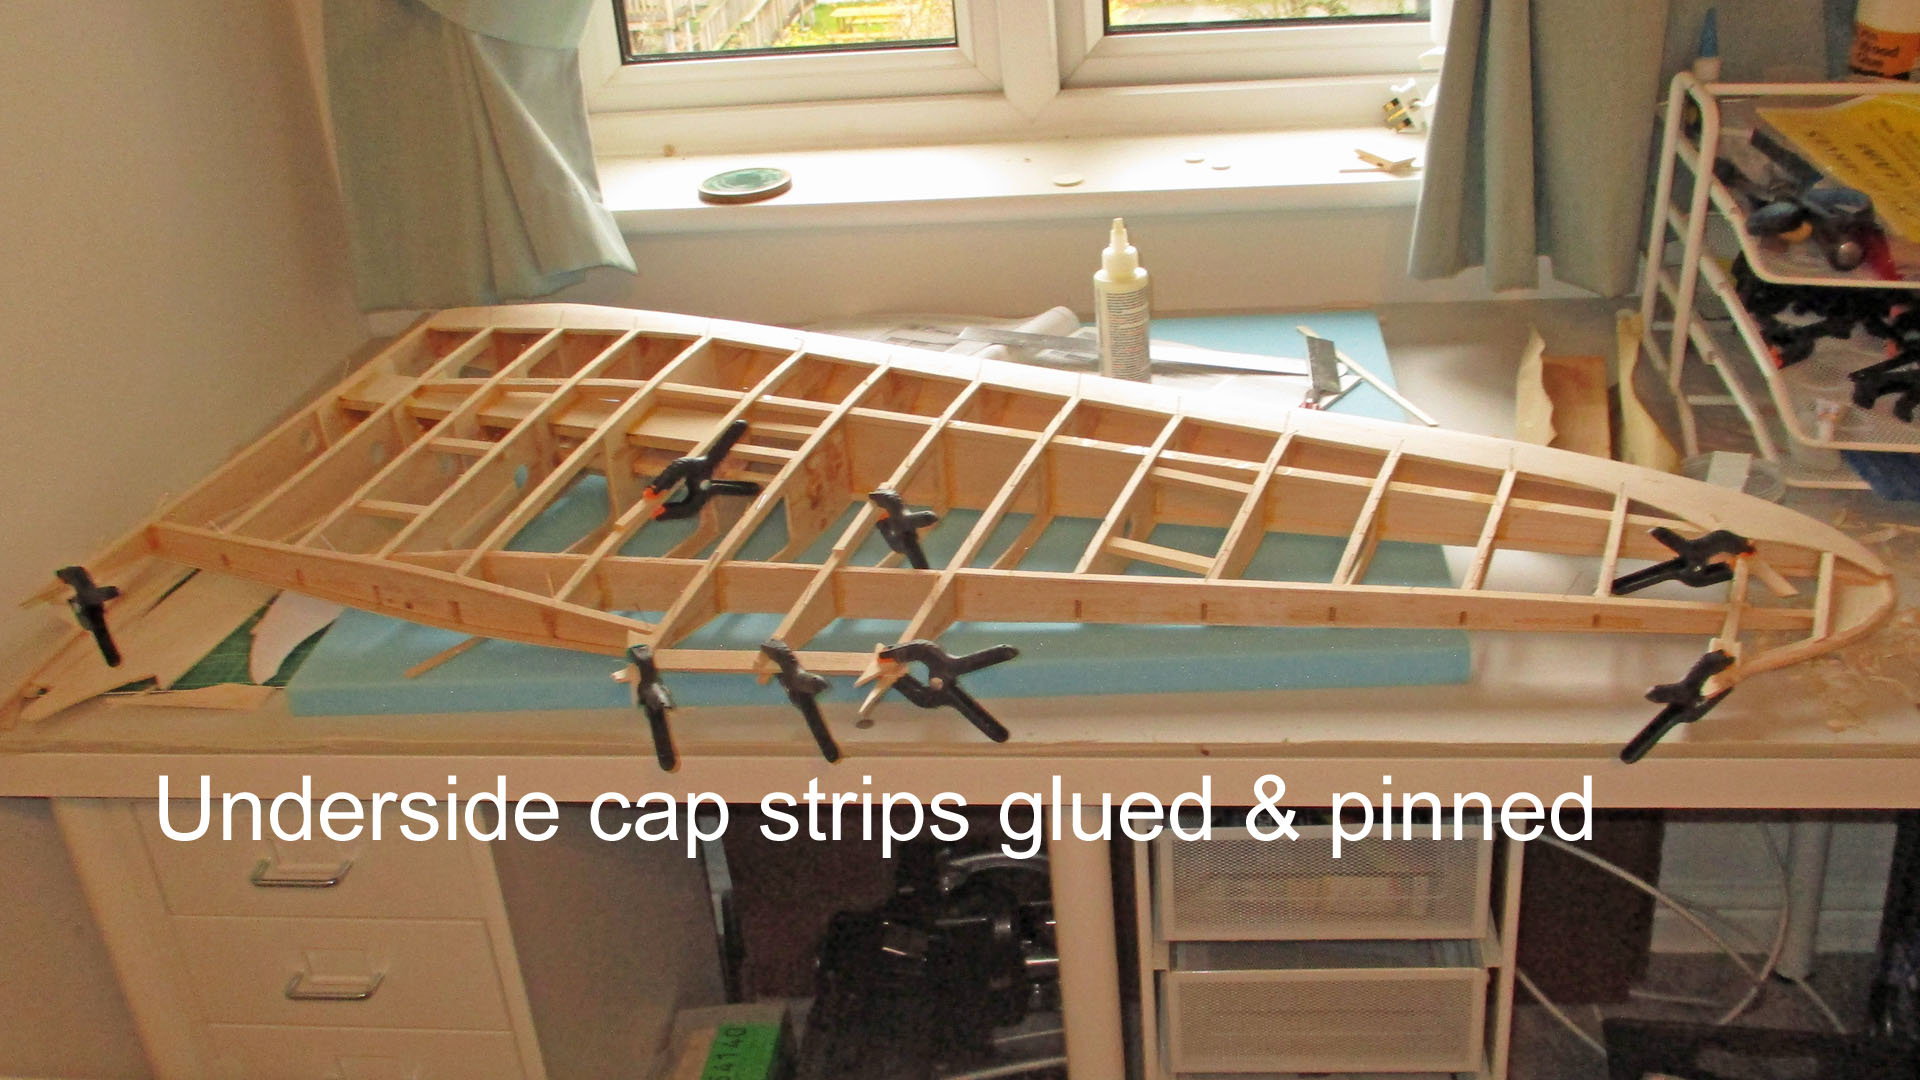


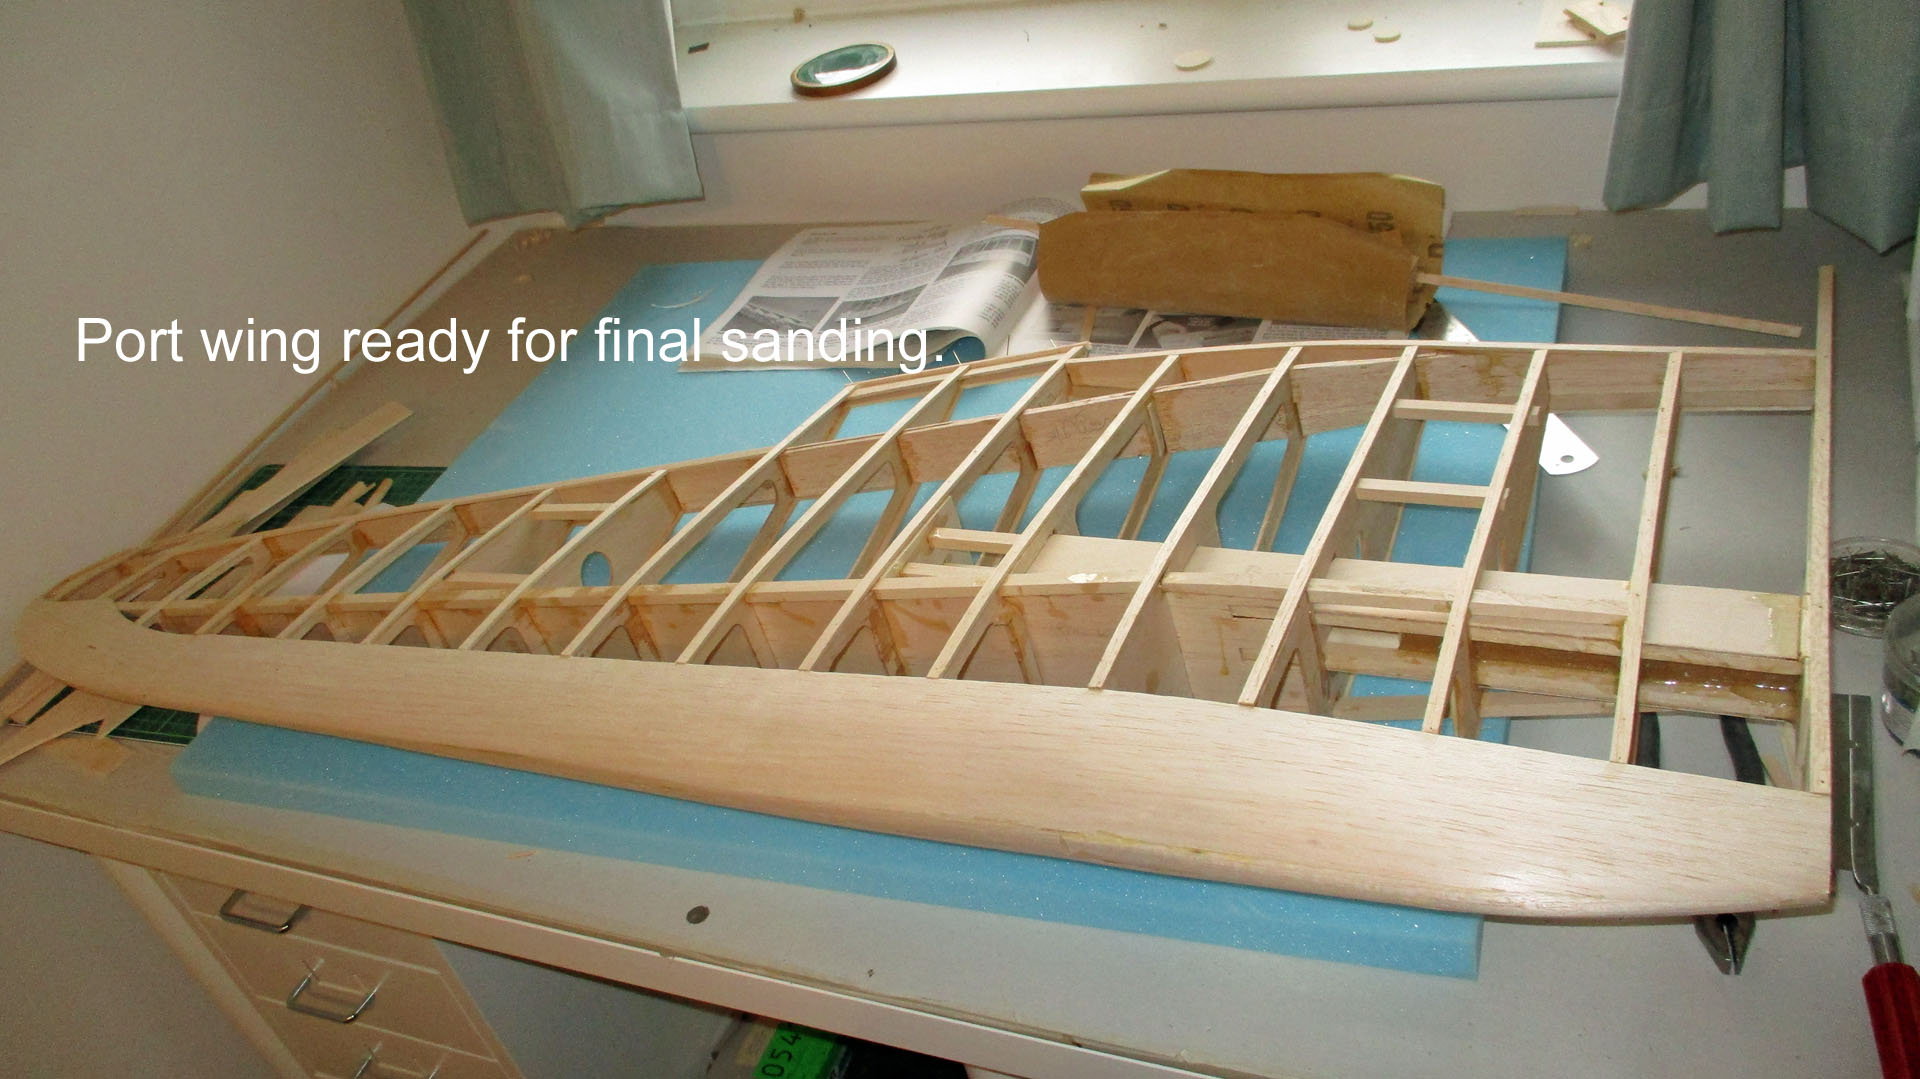
Completed the cap strips on the underside of the port wing. Added the first of the two trailing edge strips between the aileron & flap. One more strip tomorrow & a final sand & it will be going up for sale.
11-12-2018, 11:29 PM
#83
Thread Starter
Join Date: Mar 2006
Location: Southport UK
Posts: 187
Likes: 0
Received 0 Likes
on
0 Posts
On Sunday, I glued the final strip of balsa to the port wing of my Stinson Reliant. Then sanded the wing to its final shape & set it to one side. I then placed adds on the UK RCM&E & Large Model Association web sites. The add containing various links including 2 Youtube videos of the build to date is copied below.Reluctantly For SaleTOP FLITE GIANT �GOLD� SERIES MODELS
STINSON RELIANT SR9 KIT (PART BUILT)This kit has been discontinued recently by Top Flite as it has been manufactured since 2008. I obtained the kit �new� from a local model shop at a cost of �399.00. I believe they may have another in stock as it is still advertised at that price.I bought the kit in late August 2018 with the intention of converting it to an electric motor power. To date I have completed the tailplane elevator fin & rudder & port wing, minus aileron & flap. I have also prepared a number of components for the starboard wing. Picture Album linkhttps://www.modelflying.co.uk/albums...um.asp?a=48991Build Log Link. https://www.modelflying.co.uk/forums....asp?th=137555YouTube Links
https://www.youtube.com/watch?v=h3KB...ature=youtu.beUnfortunately, after much soul searching, I have reached the stage where I have run out of space, see pics for my build area. So, either the kit or my wife has to go, as I want to hang onto the wife, the part built kit has to go. Since I bought the kit, I have also purchased the Top Flite Cockpit kit at a cost of �45.72, plus UK tax & import duty of �40.00 The fiberglass components to replace the ABS ones in the kit, including cowl with rocker cover blisters moulded in, spats, tail wheel shroud, wing strut fairings from Fiberglass Specialities USA at a cost of �162.19. A pair of 5 inch wheels cost around �20.1/5th scale civil pilot bust cost �10.00. Phenolic tube assembly to replace the paper tube supplied in the kit, cost�30. A set of Robart hinges, enough to fully complete the model. �20,A set of 10 large scale Kavan hinges cost �12, as I thought the Robarts were not suitable for the flaps, neither have been fitted in the wing so the buyer can choose which he prefers. Also a dummy 7inch diameter 9 cylinder dummy radial engine from the Czech Republic at a cost of �28.36A four sheet copy of the plans in top quality paper, rolled in a tube. I've built the components using the original plans, as the ones I had printed were far superior & wanted to keep them. cost �40.00So, to date it stands me at just over-�800.00 Plus a couple of hundred hours building time, plus ancillaries, glue knives & saw blades etc. The fuselage hasn't been started so the buyer can decide if he wants to use electric or I/C. All the empty balsa & ply die cut sheets for the built components are available. I have also completed a comprehensive photographic build log for the parts I've completed, of over 300 pictures, this can be included on a memory stick if required. I also have a set of original pictures & videos of full sized versions & the full model build log of an American builder, this is also included. You can download a PDF version of the plans & manual from the links at the end of this add, check it out before making an offer as it isn't an easy build. Suitable for experienced builders only, with plenty of building space, & time, which I haven't.I'm open to offers, but will not ship or split, it all has to be collected from Merseyside UK. PR99SG, Open to offers?TOP FLITE Description.Rewards craftsman builders' investments of time, talent and TLC with a sport scale masterpiece that flies as good as it looks
Stock Number: TOPA0310
Wingspan: 100.5 in (2550 mm)
Wing Area: 1487 in� (95.9 dm�)
Weight: 16-25 lb (7.26-11.34 kg)
Wing Loading: 24.8-38.7 oz/ft� (76-118 g/dm�)
Fuselage Length: 67.8 in (1720 mm)
Requires: 4-5 channel radio with 6-8 servos, 2-stroke 1.08-1.99 cu in, 4-stroke 1.2-1.6 cu in (19.5-26), or 25-35 cc (1.5-2.0 cu in) gasoline engine, glow fuel, glow starter and support equipment
Suggested MonoKote Colors: Dark Red & Black
Recommended Scale Option: Cabin Interior Kit (TOPQ8409)

Product Manual - Technical Data - Stinson Reliant FAQ - Parts Listing - Accessories Needed https://www.top-flite.com/airplanes/topa0310.html
Reviews.
https://www.top-flite.com/reviews/topa0310-rcsi.html
https://www.top-flite.com/reviews/topa0310-rcm.htmlhttps://www.top-flite.com/reviews/topa0310-man.html Now discontinued.As they say in the USA! �BRING OFFERS�
P.S. Thanks to Al for his help in obtaining the parts from Fiberglass Specialities
STINSON RELIANT SR9 KIT (PART BUILT)This kit has been discontinued recently by Top Flite as it has been manufactured since 2008. I obtained the kit �new� from a local model shop at a cost of �399.00. I believe they may have another in stock as it is still advertised at that price.I bought the kit in late August 2018 with the intention of converting it to an electric motor power. To date I have completed the tailplane elevator fin & rudder & port wing, minus aileron & flap. I have also prepared a number of components for the starboard wing. Picture Album linkhttps://www.modelflying.co.uk/albums...um.asp?a=48991Build Log Link. https://www.modelflying.co.uk/forums....asp?th=137555YouTube Links
- Ideal for detailing! Created with plans scaled from exacting 3-views
- Includes preformed ABS parts: a radial cowl; gear, strut and tailwheel fairings; wheel pants; and inspection plates
- Features all-wood parts, Gold Edition-engineered for

better fit, greater strength and simpler structures - Eases transportation problems with a 2-piece wing design�and access to hidden wing bolts in the cabin with cabin doors that open!
- Provides servo mounts in each wing panel to shorten and tighten linkages, and speed and strengthen control response
- Compatible with a wide range of finishing methods for authentic Golden Age good looks
- Wing blends from a "Clark Y" airfoil at the root to a Selig 8036 airfoil to provide comforting stability and graceful aerobatics
- Adapts to a wide range of 2-stroke, 4-stroke and gasoline engines for customized performance.
Stock Number: TOPA0310
Wingspan: 100.5 in (2550 mm)
Wing Area: 1487 in� (95.9 dm�)
Weight: 16-25 lb (7.26-11.34 kg)
Wing Loading: 24.8-38.7 oz/ft� (76-118 g/dm�)
Fuselage Length: 67.8 in (1720 mm)
Requires: 4-5 channel radio with 6-8 servos, 2-stroke 1.08-1.99 cu in, 4-stroke 1.2-1.6 cu in (19.5-26), or 25-35 cc (1.5-2.0 cu in) gasoline engine, glow fuel, glow starter and support equipment
Suggested MonoKote Colors: Dark Red & Black
Recommended Scale Option: Cabin Interior Kit (TOPQ8409)
Product Manual - Technical Data - Stinson Reliant FAQ - Parts Listing - Accessories Needed https://www.top-flite.com/airplanes/topa0310.html
Reviews.
https://www.top-flite.com/reviews/topa0310-rcsi.html
https://www.top-flite.com/reviews/topa0310-rcm.htmlhttps://www.top-flite.com/reviews/topa0310-man.html Now discontinued.As they say in the USA! �BRING OFFERS�
P.S. Thanks to Al for his help in obtaining the parts from Fiberglass Specialities
