


Electriflying Top Flite Stinson Reliant
 09-09-2018, 11:51 PM
#26

Thread Starter

Join Date: Mar 2006
Location: Southport UK
Posts: 187
Likes: 0
Received 0 Likes
on
0 Posts
Hi Al Hope you sort things out OK.
Your story brought back another memory, back in the late sixties I made my building board from 1" block board, which I mentioned previously, I made sure it was dead flat by screwing two 4"x2" PAR timber rails to the long edges, it weighed a ton but stay flat through many builds, including a Dave Platt 65" Spitfire kit which was my first eliptical wing with washout. I also used it to decorate ceilings between two home made trestles.
Your story brought back another memory, back in the late sixties I made my building board from 1" block board, which I mentioned previously, I made sure it was dead flat by screwing two 4"x2" PAR timber rails to the long edges, it weighed a ton but stay flat through many builds, including a Dave Platt 65" Spitfire kit which was my first eliptical wing with washout. I also used it to decorate ceilings between two home made trestles.
 09-10-2018, 09:01 AM
#27
Thread Starter
Join Date: Mar 2006
Location: Southport UK
Posts: 187
Likes: 0
Received 0 Likes
on
0 Posts
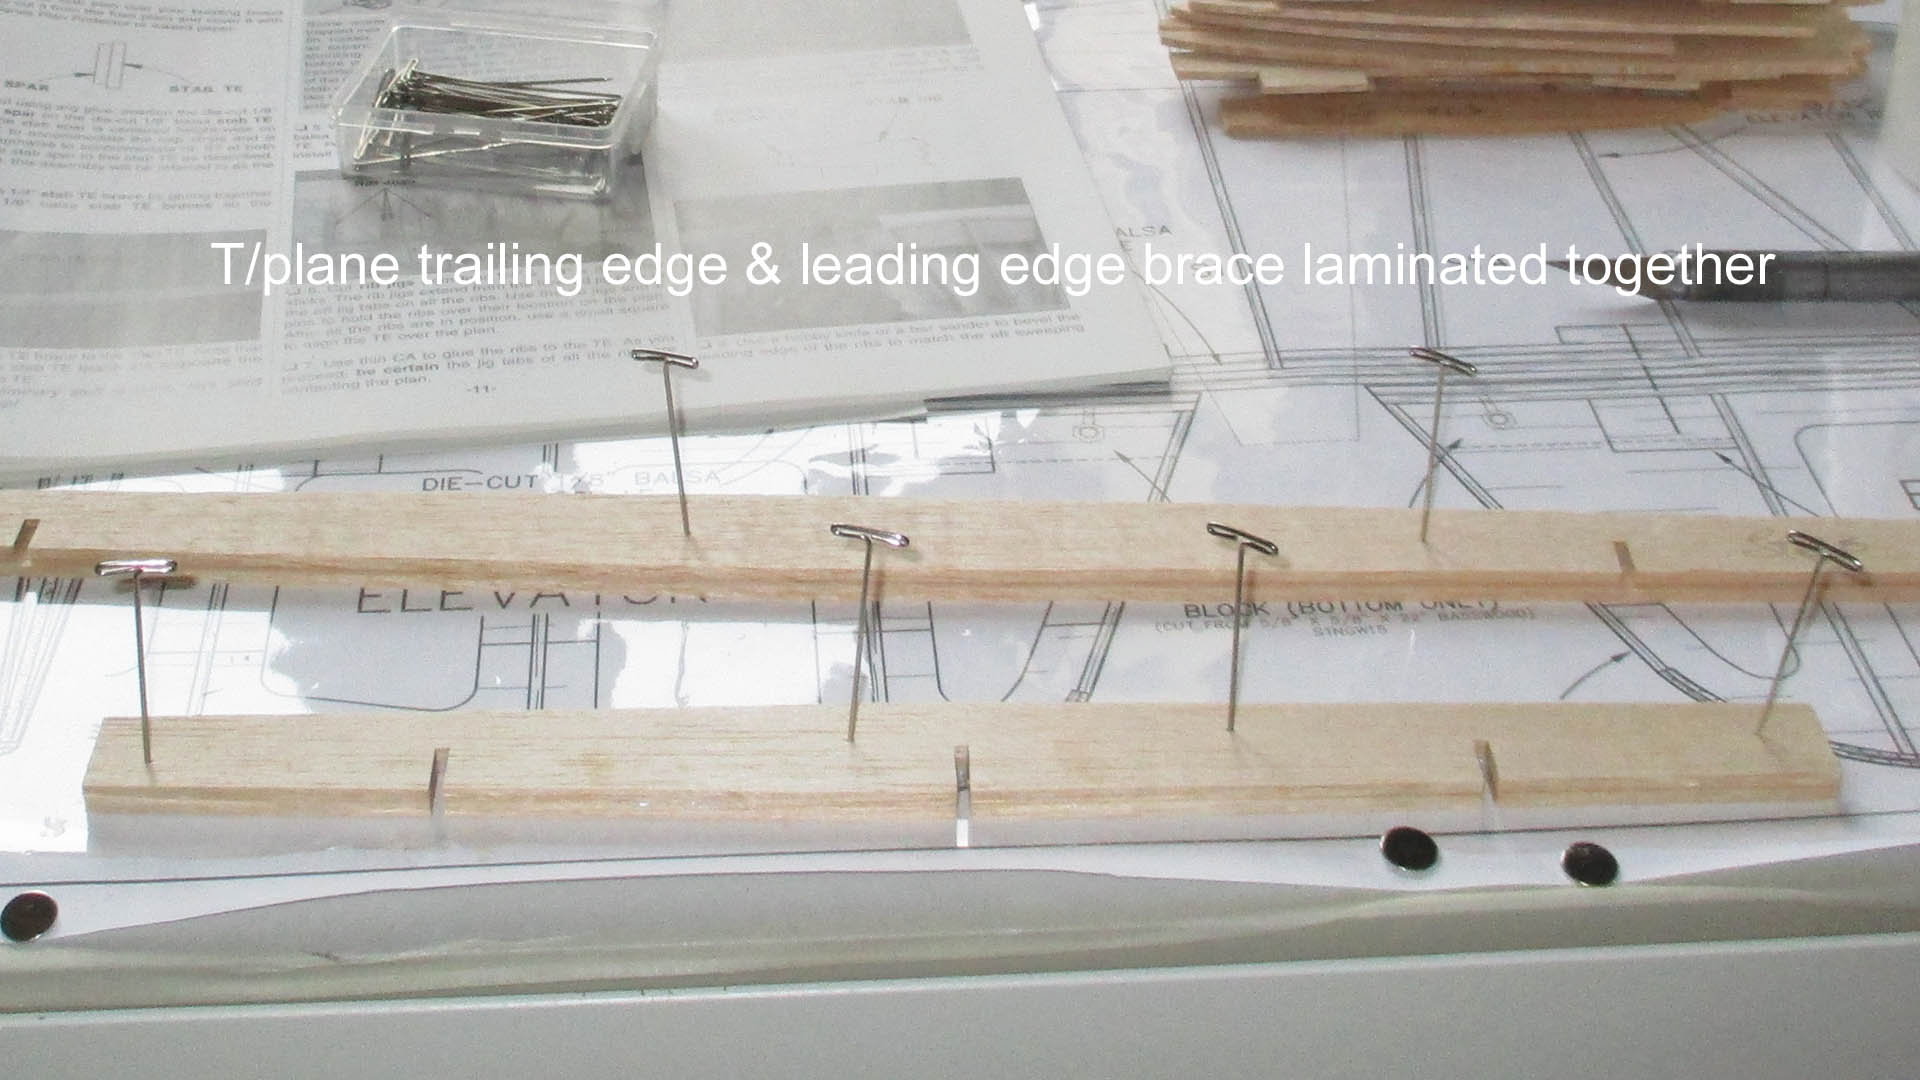
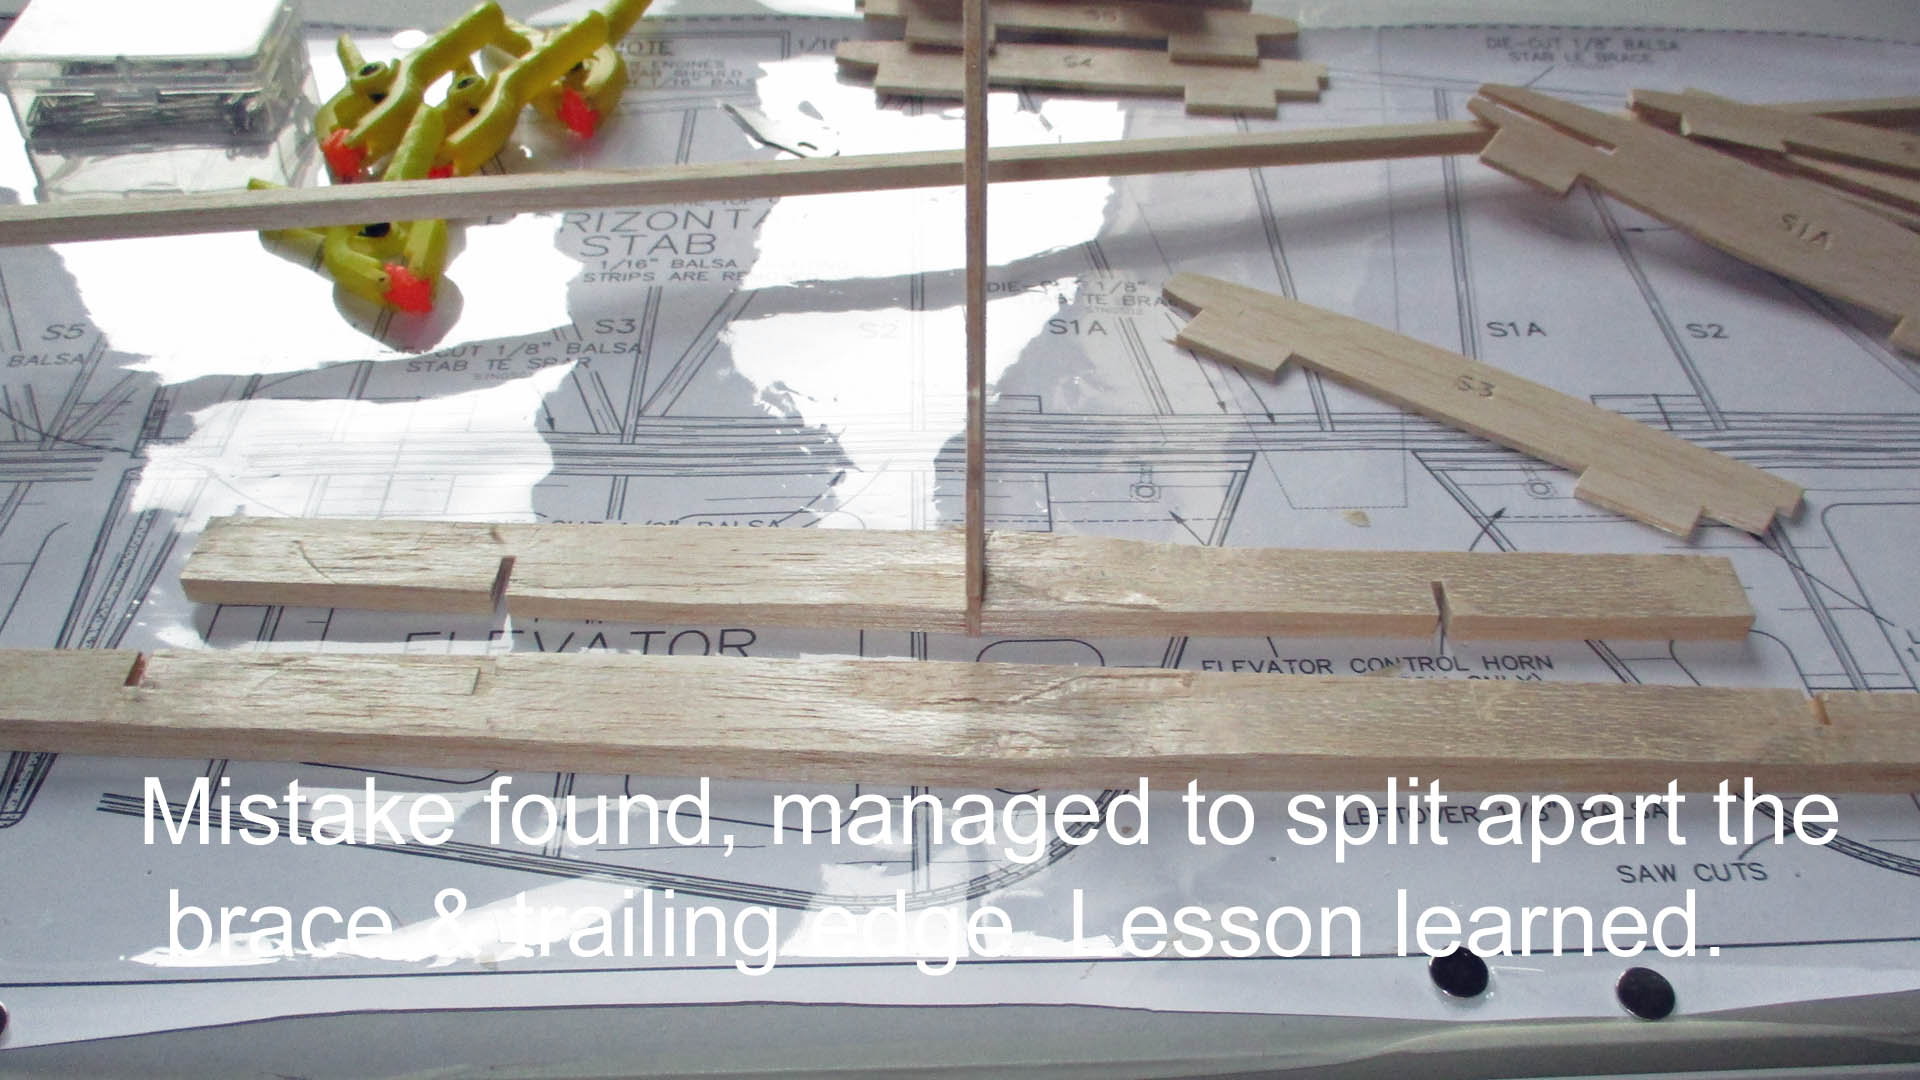
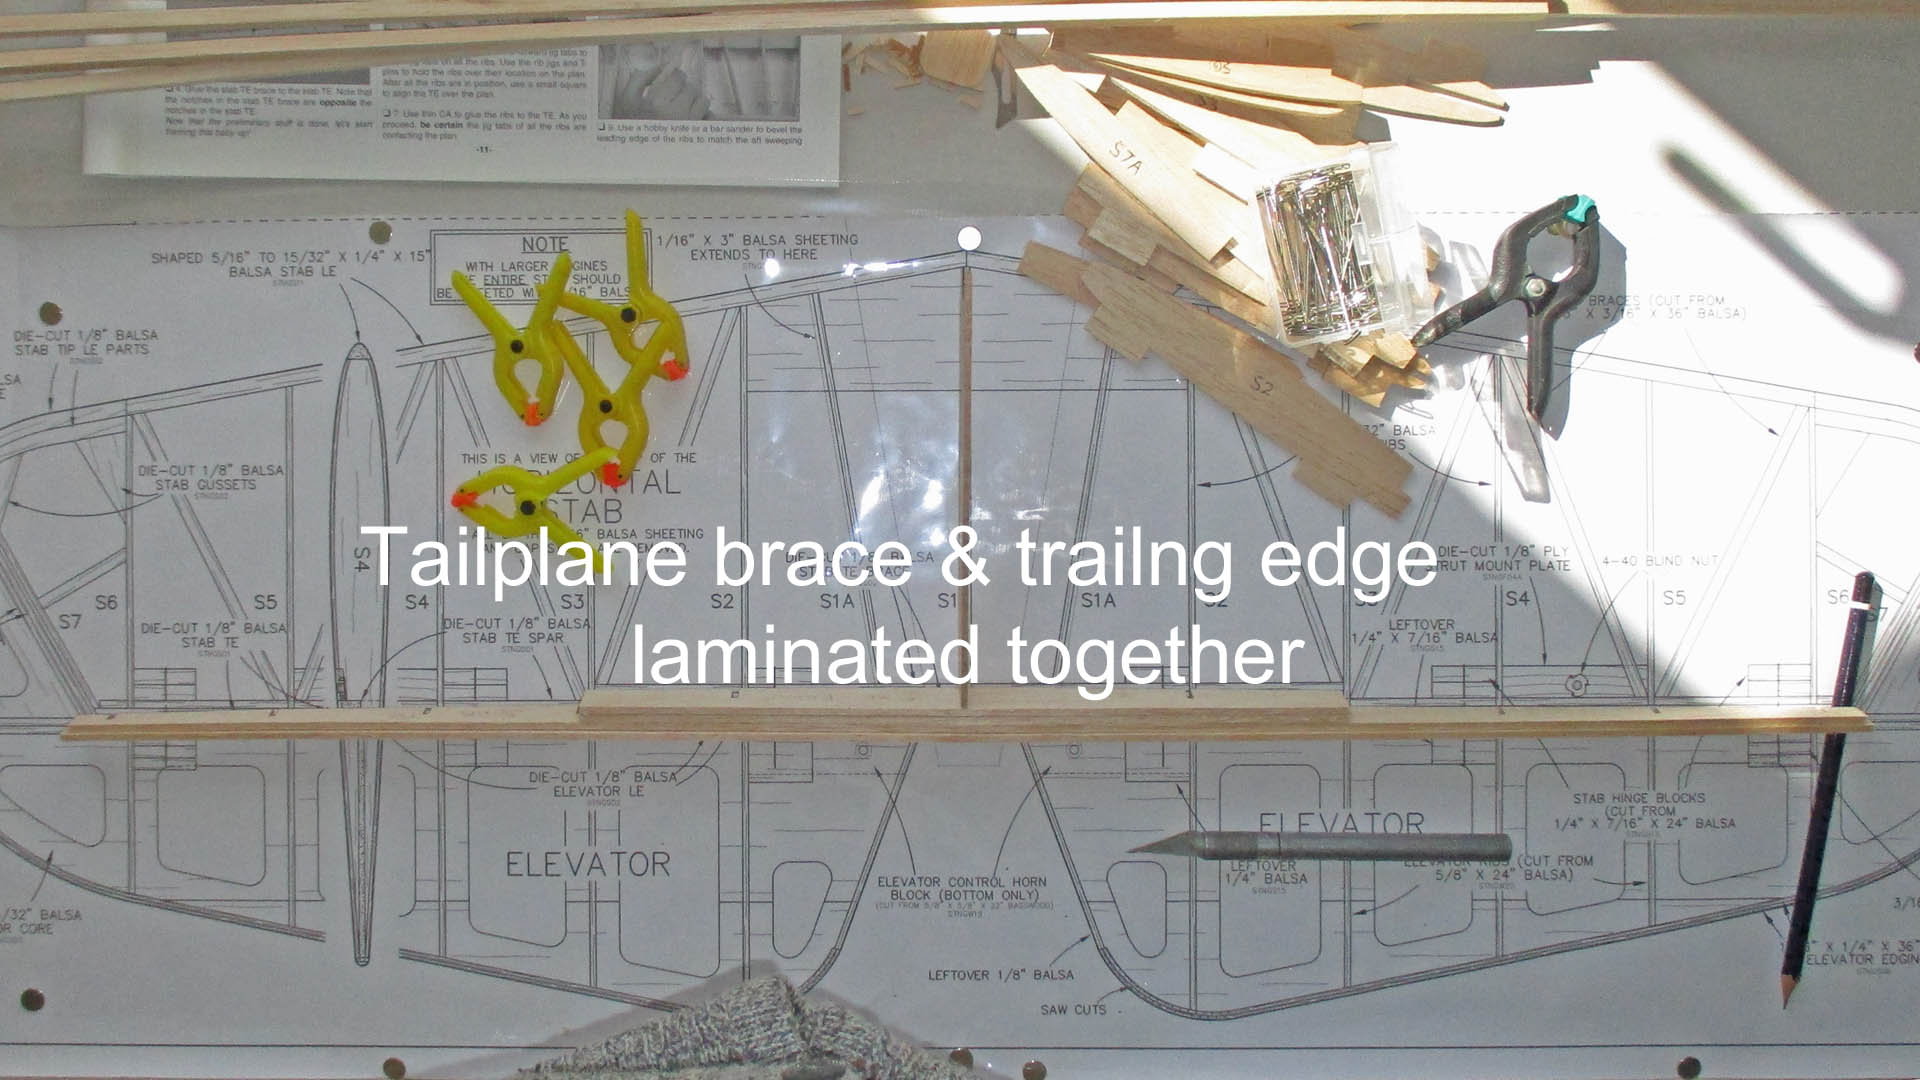
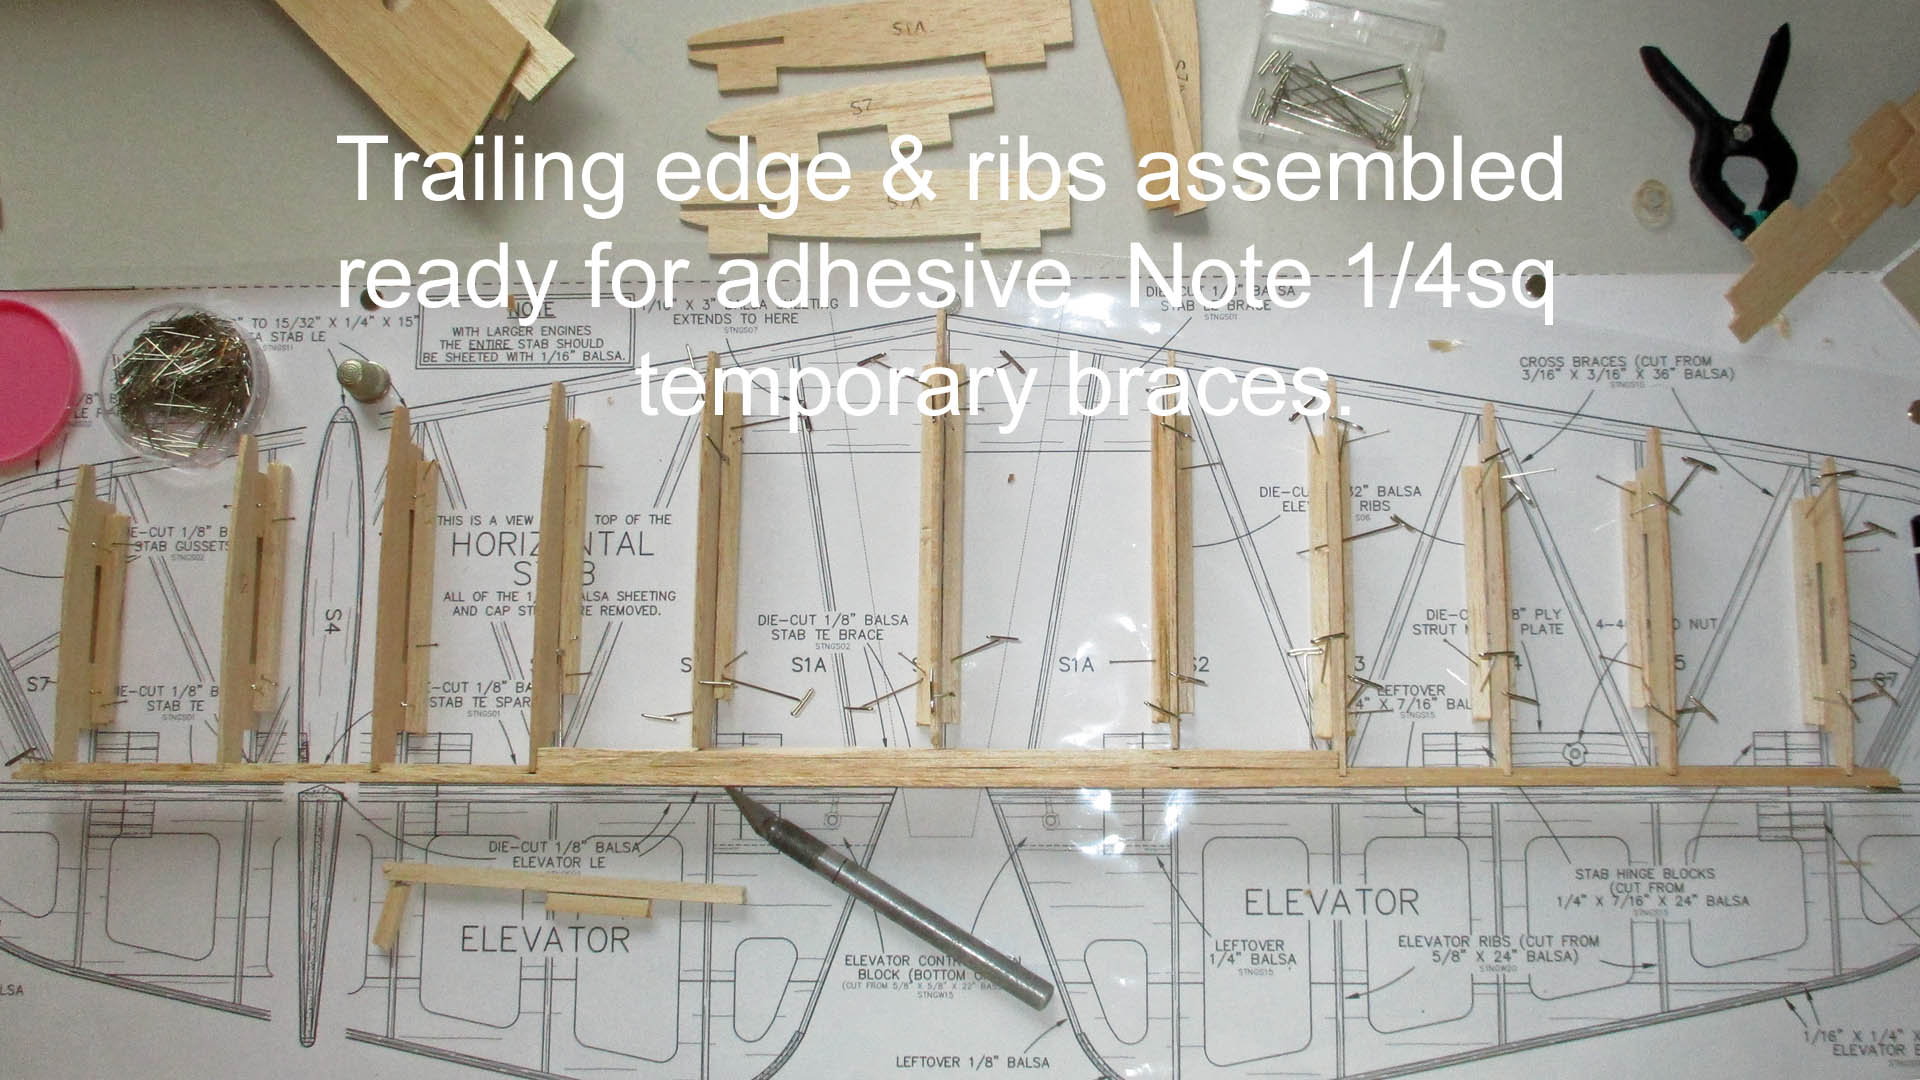
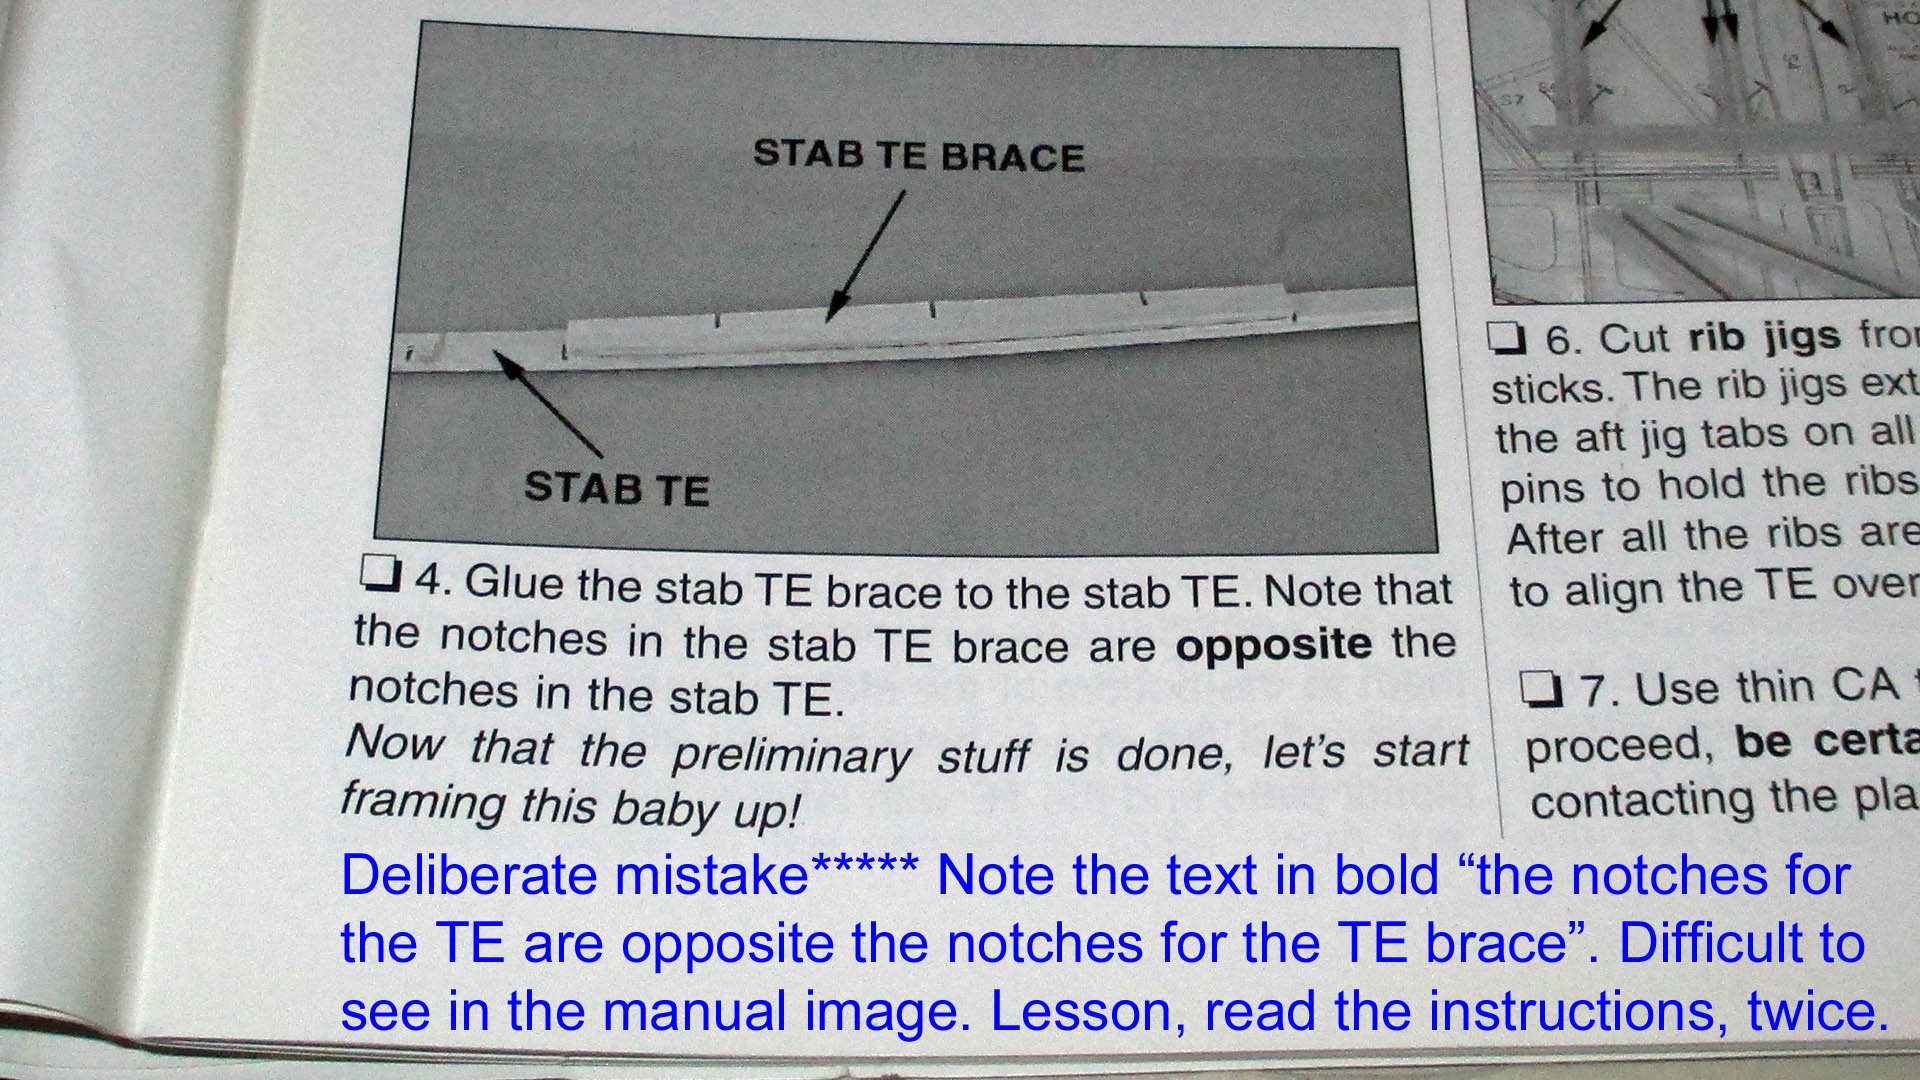
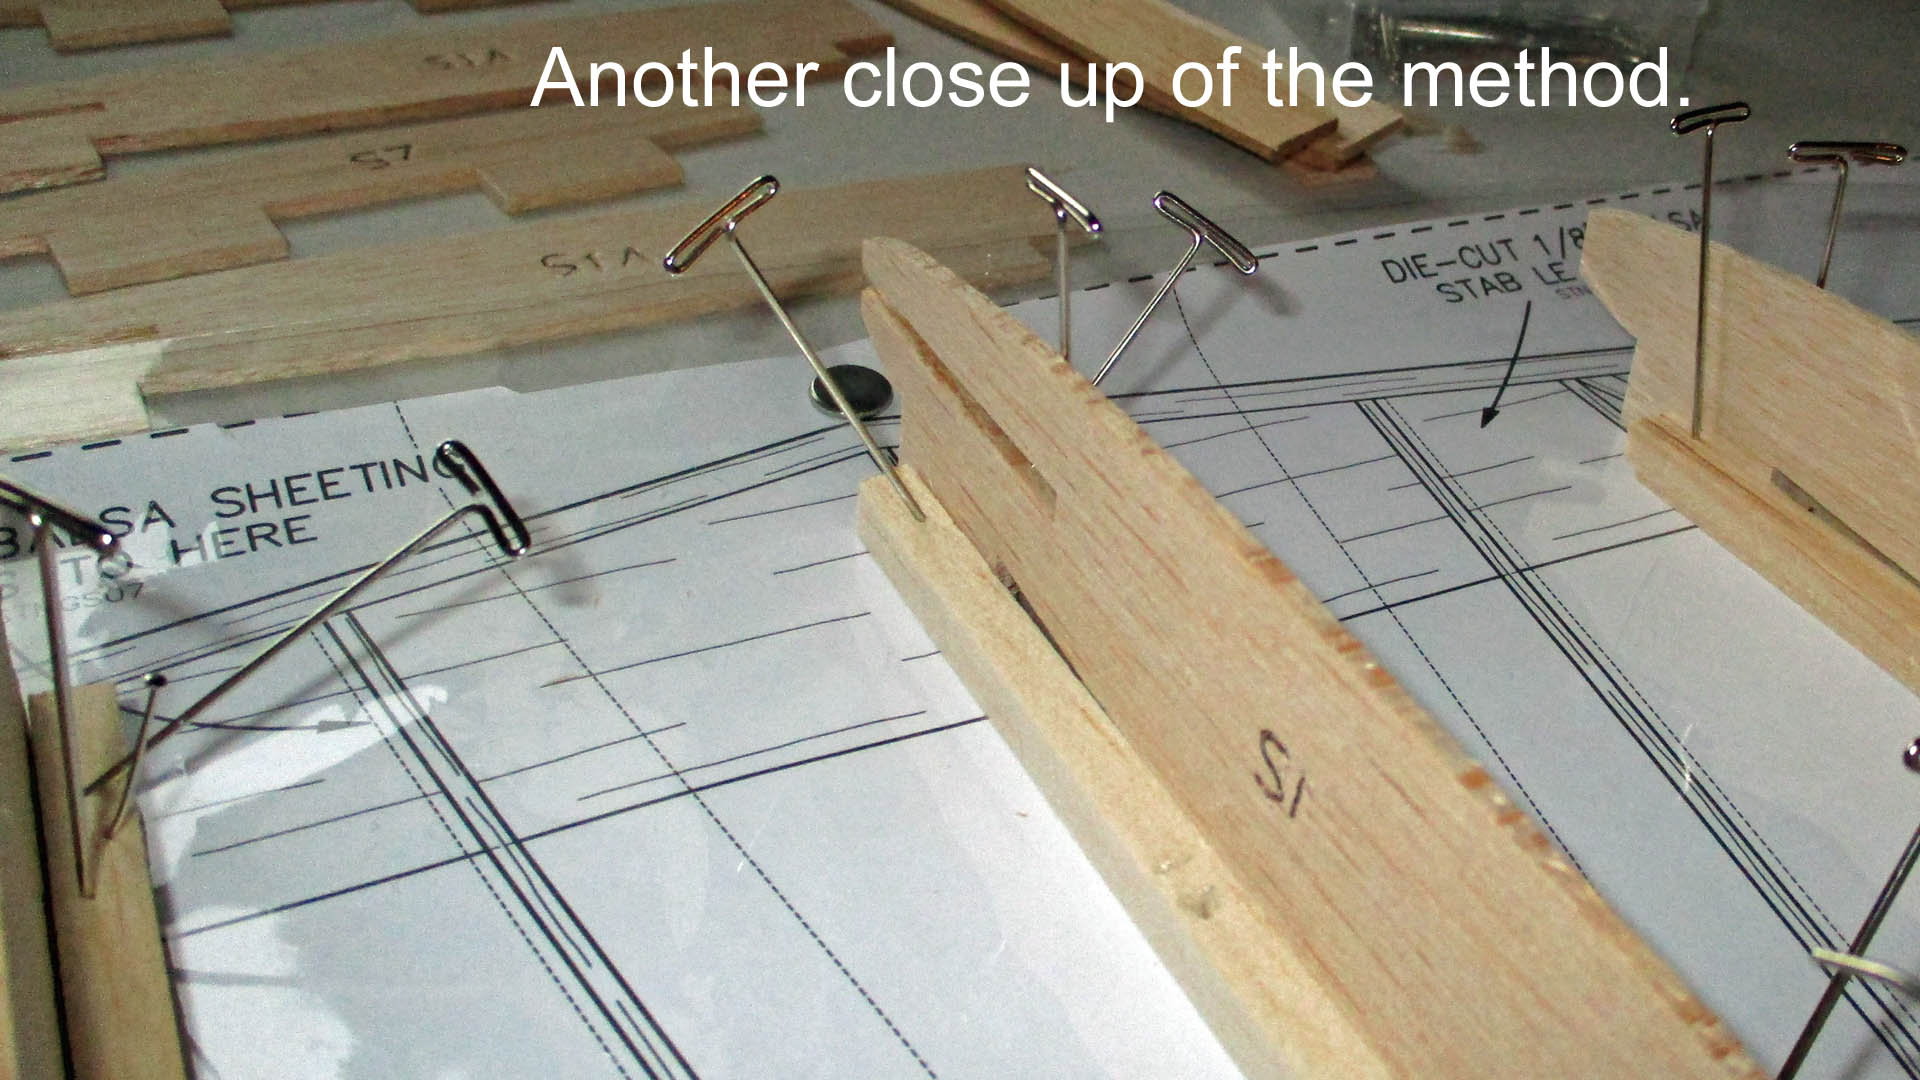
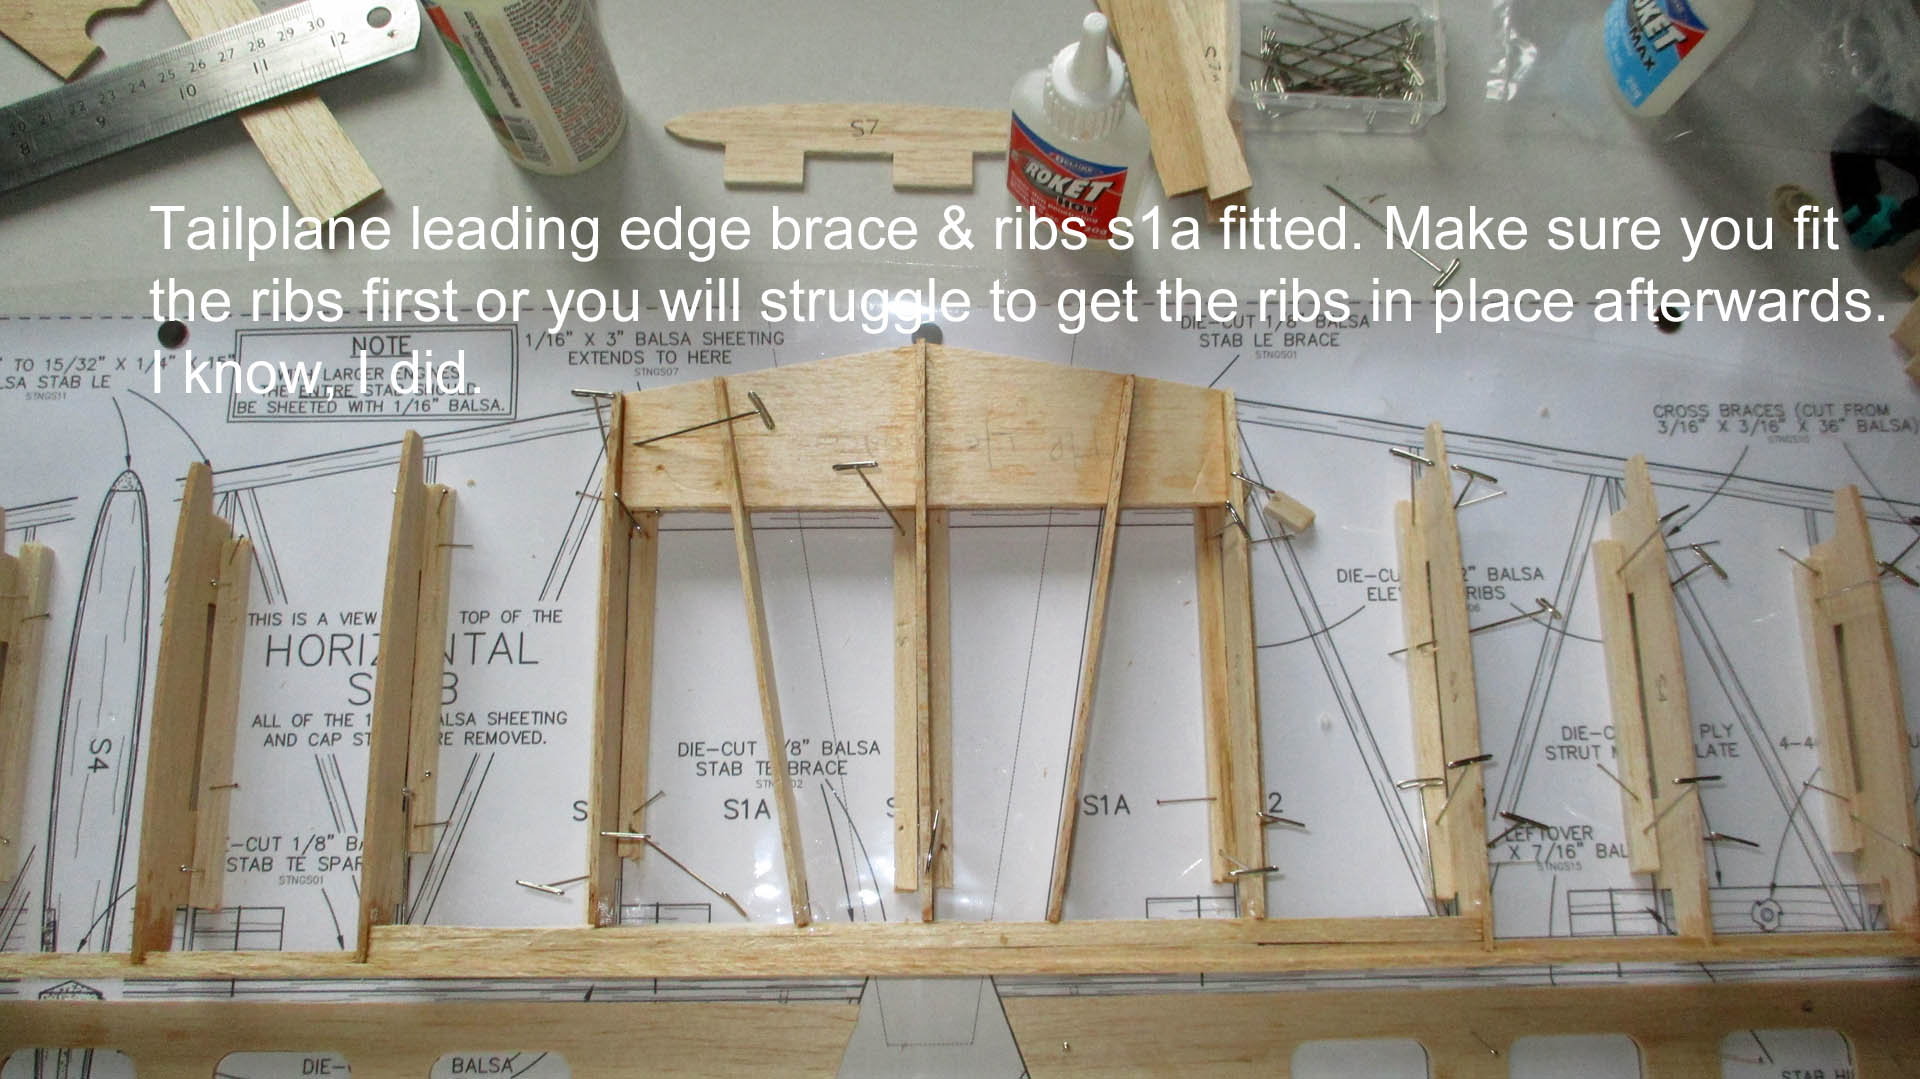
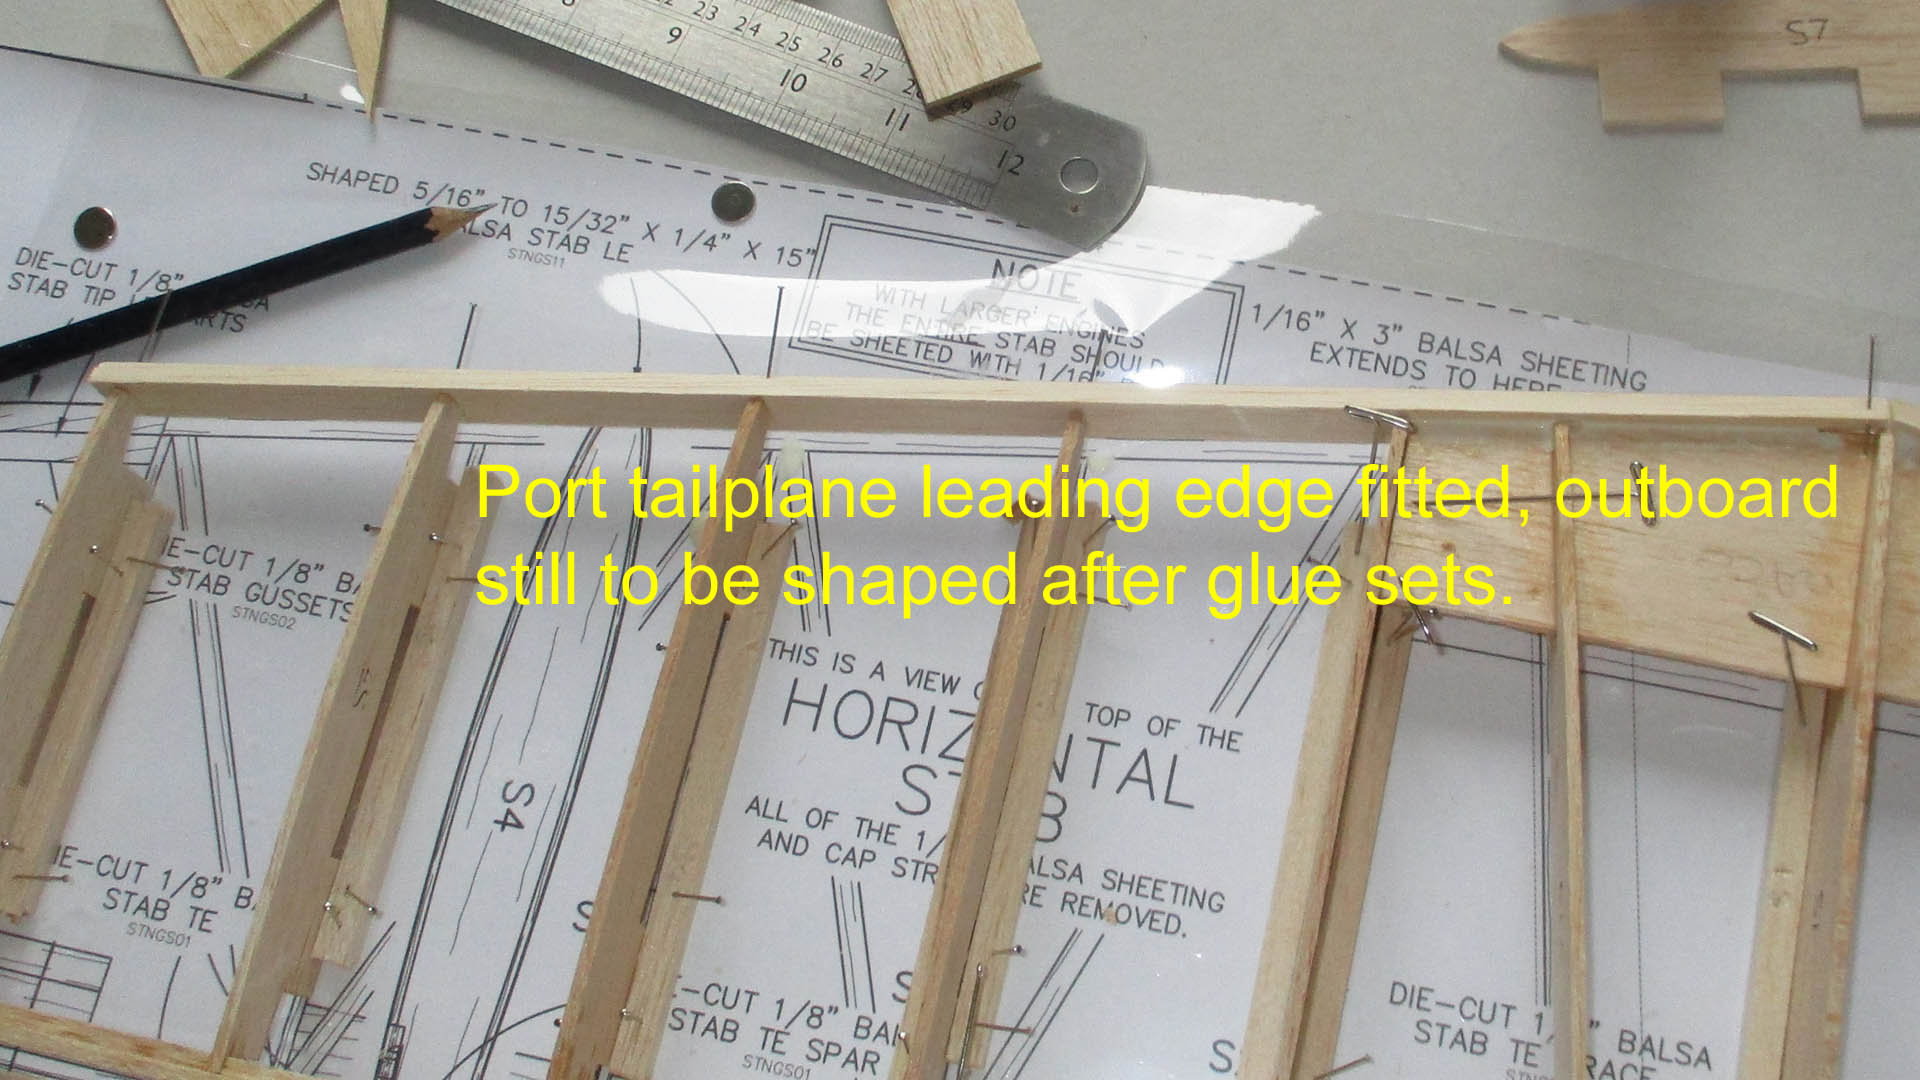
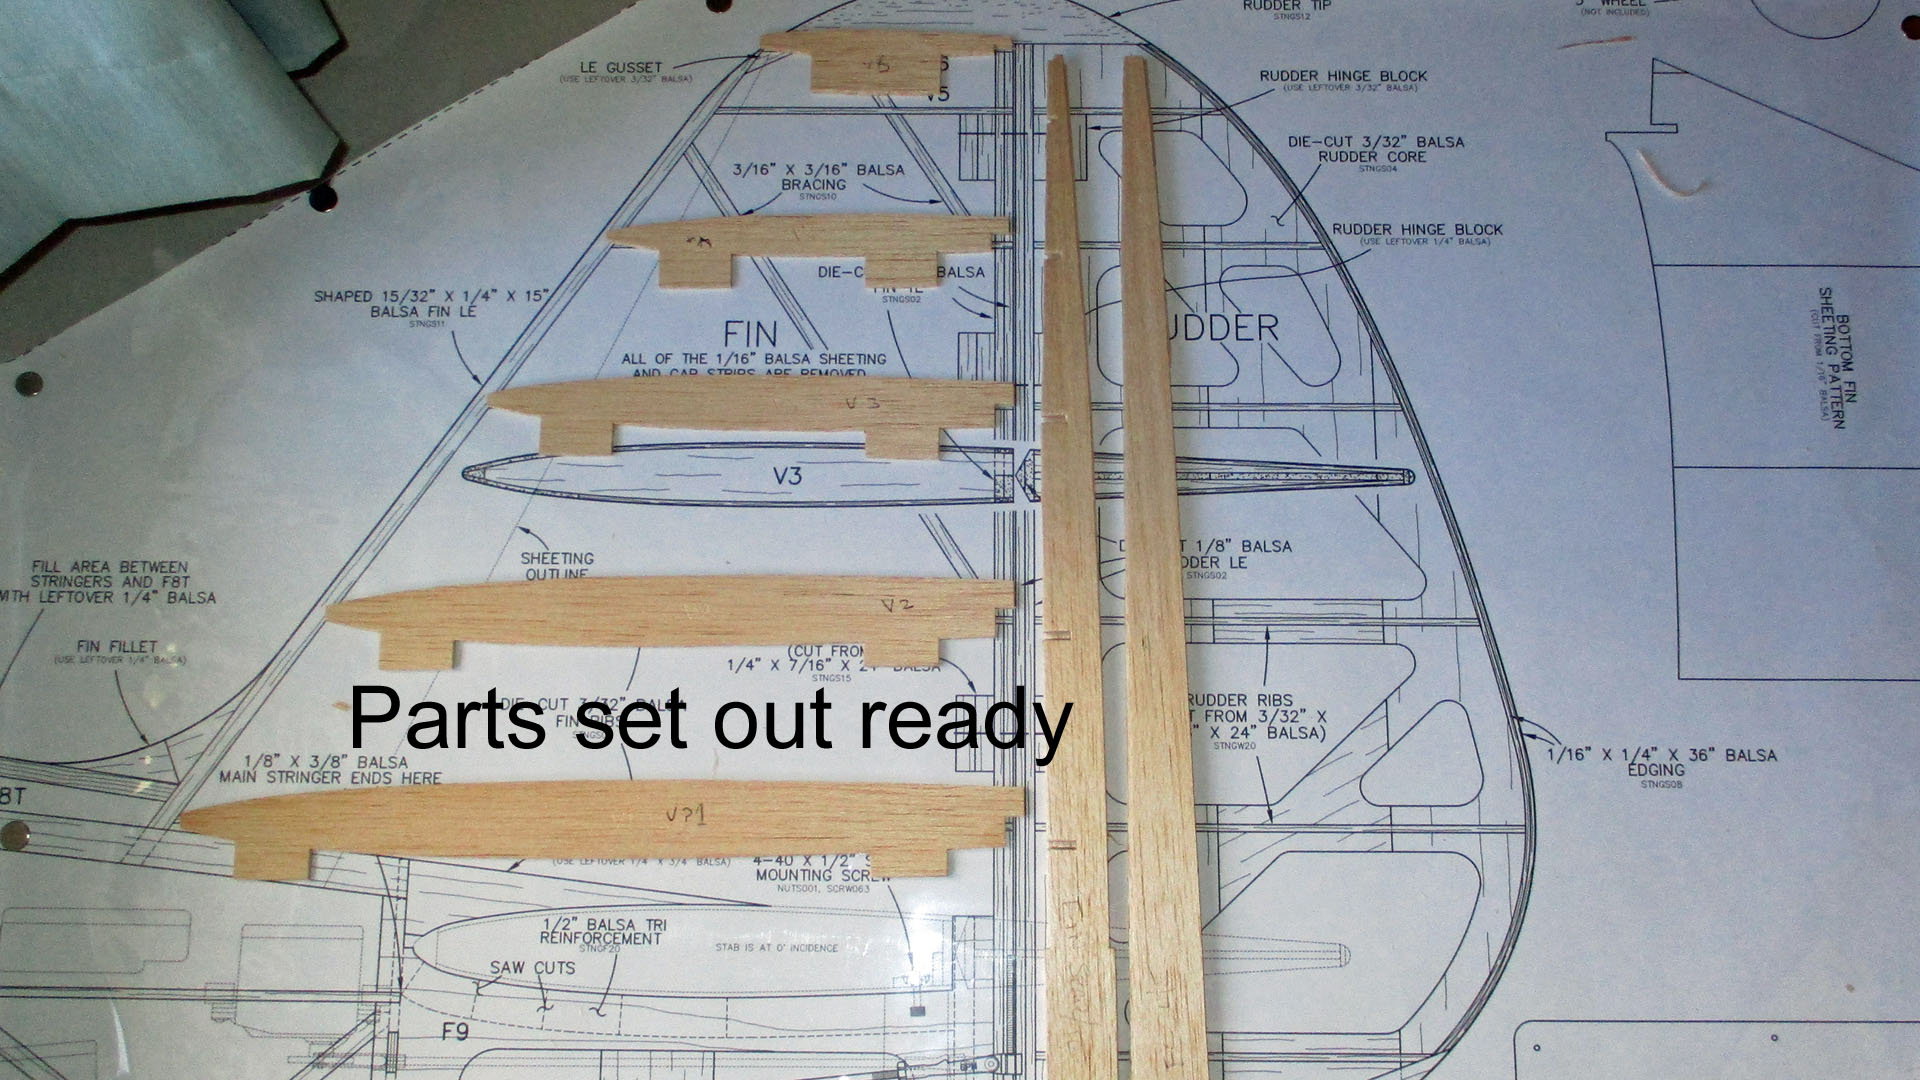
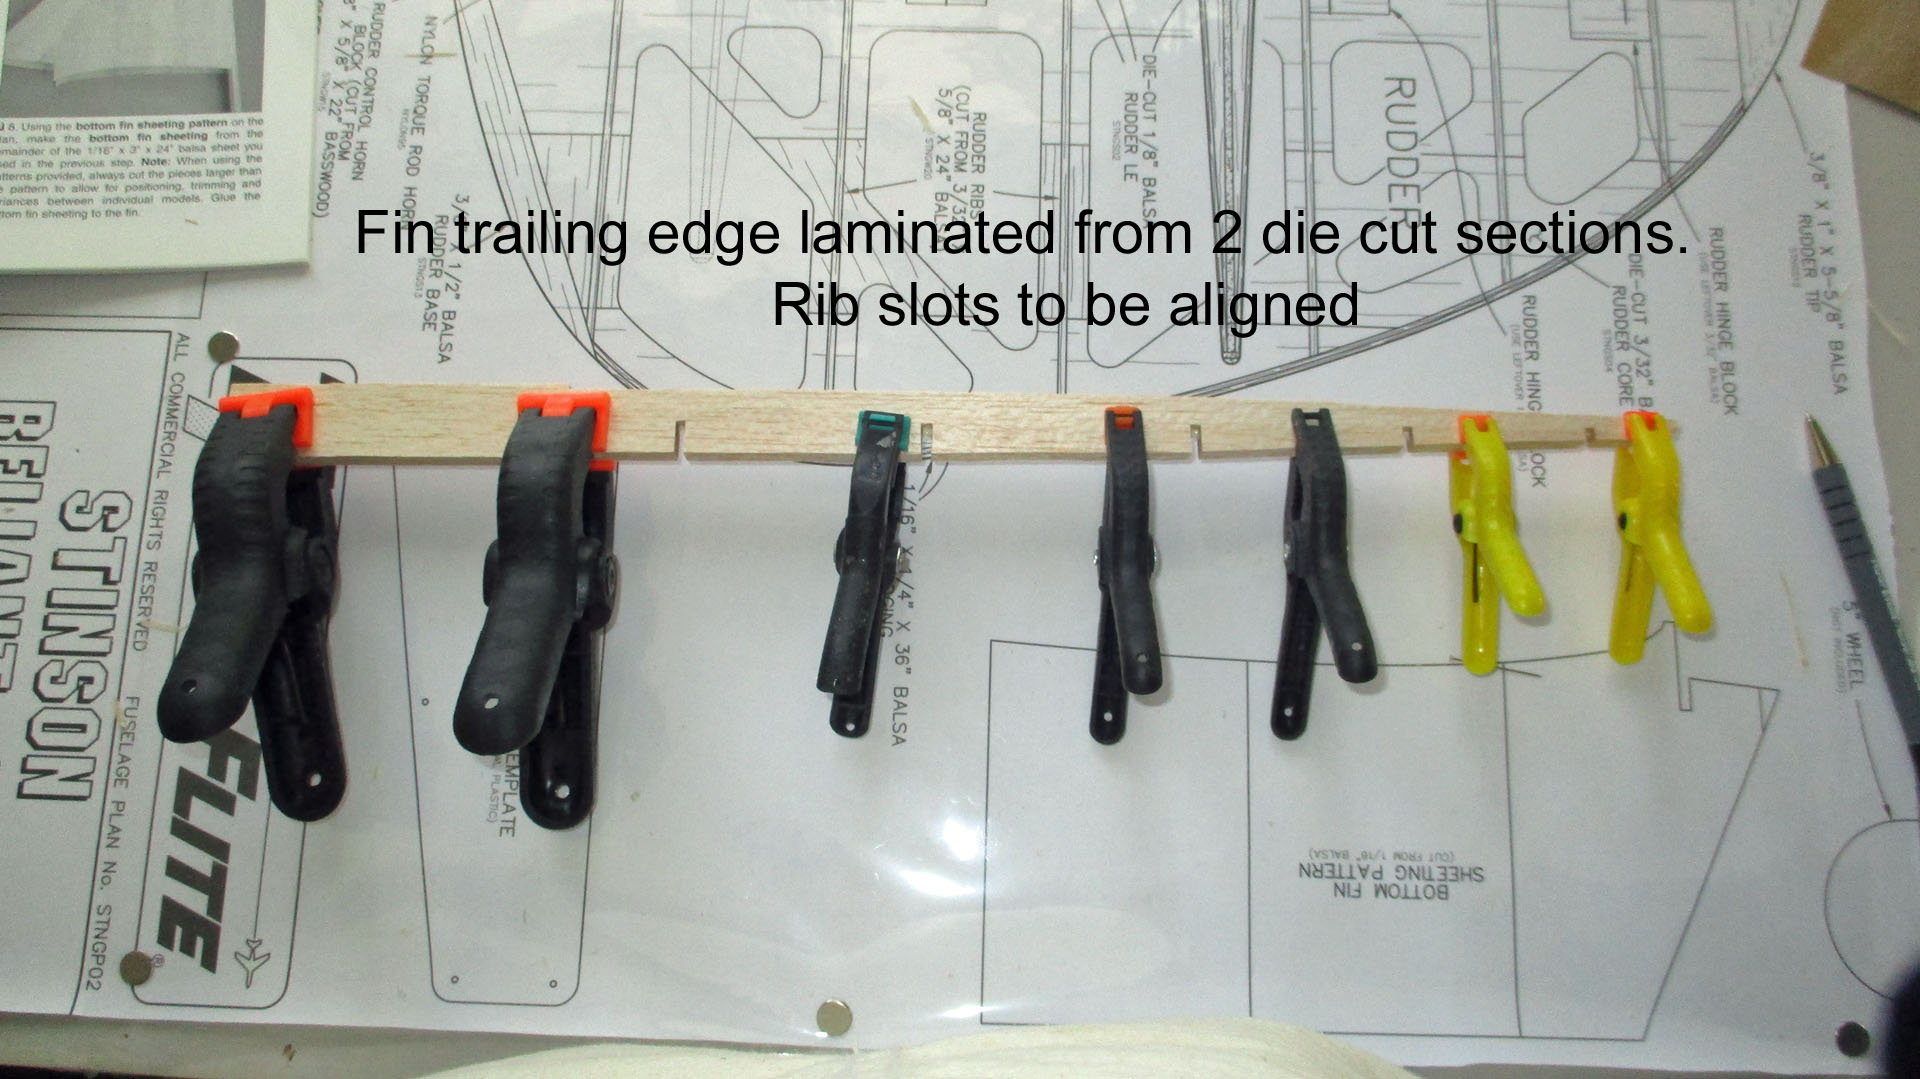
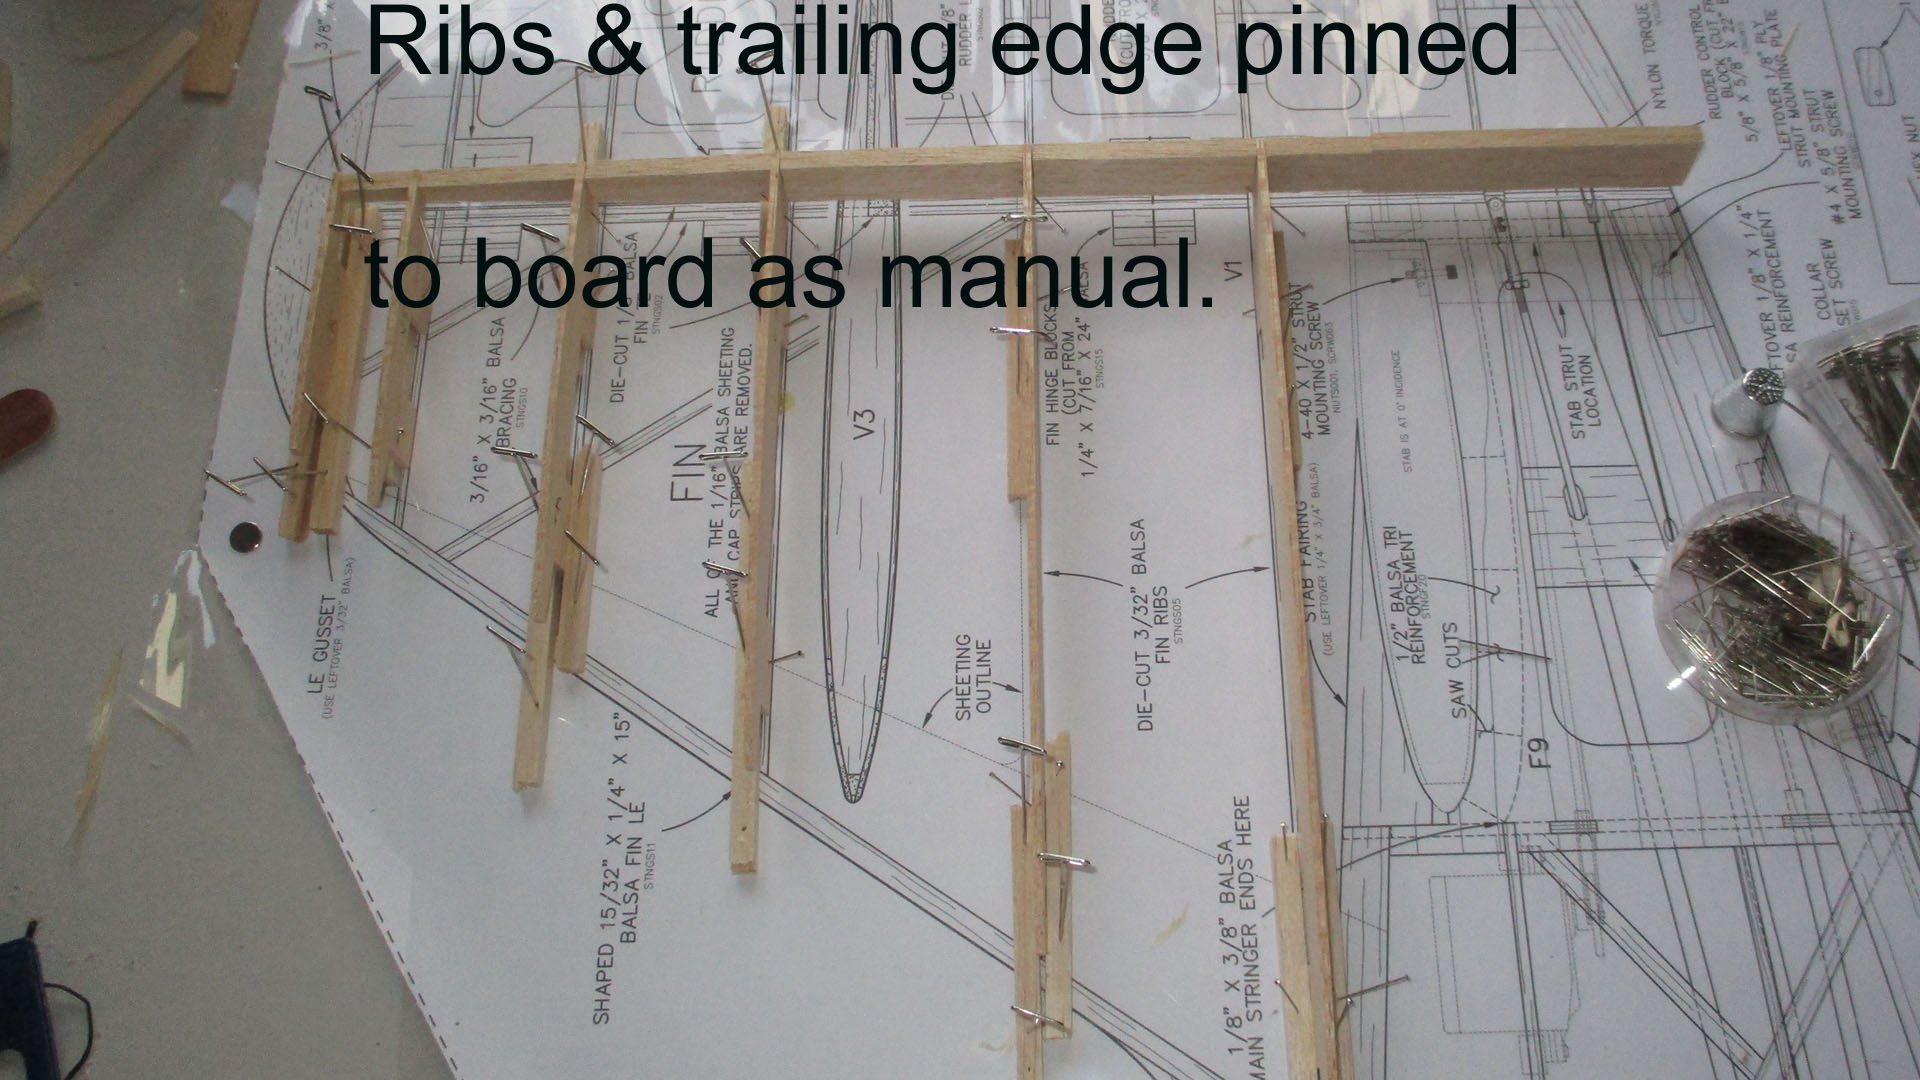
I glued the tailplane trailing ege to the brace & left it to set overnight. This morning I dry fitted the ribs as per the manual, DONG!!!, they didn't fit after much head scratching, plan & manual perusing I discovered I had glues the TP brace upside down The manual states in bold the rib notches are opposite not inline, however the picture is dark & hard to distinguish the correct way, Dry fitting everything would have highlighted the mistake, however, I had committed the balsa to glue. I spent a fraught 1/2 hour separating the parts, then glued them together correctly. Luckily it was my turn for the laundry, this gave time for the PVA to set. I then followed the manual meticulously & pinned the ribs & tailplane trailing edge, tweaking here & there to ensure correct alignment. Tomorrow the cyno is supposed to arrive, so I can proceed. The pictures tell the story.

09-11-2018, 08:31 AM
#28
Thread Starter
Join Date: Mar 2006
Location: Southport UK
Posts: 187
Likes: 0
Received 0 Likes
on
0 Posts
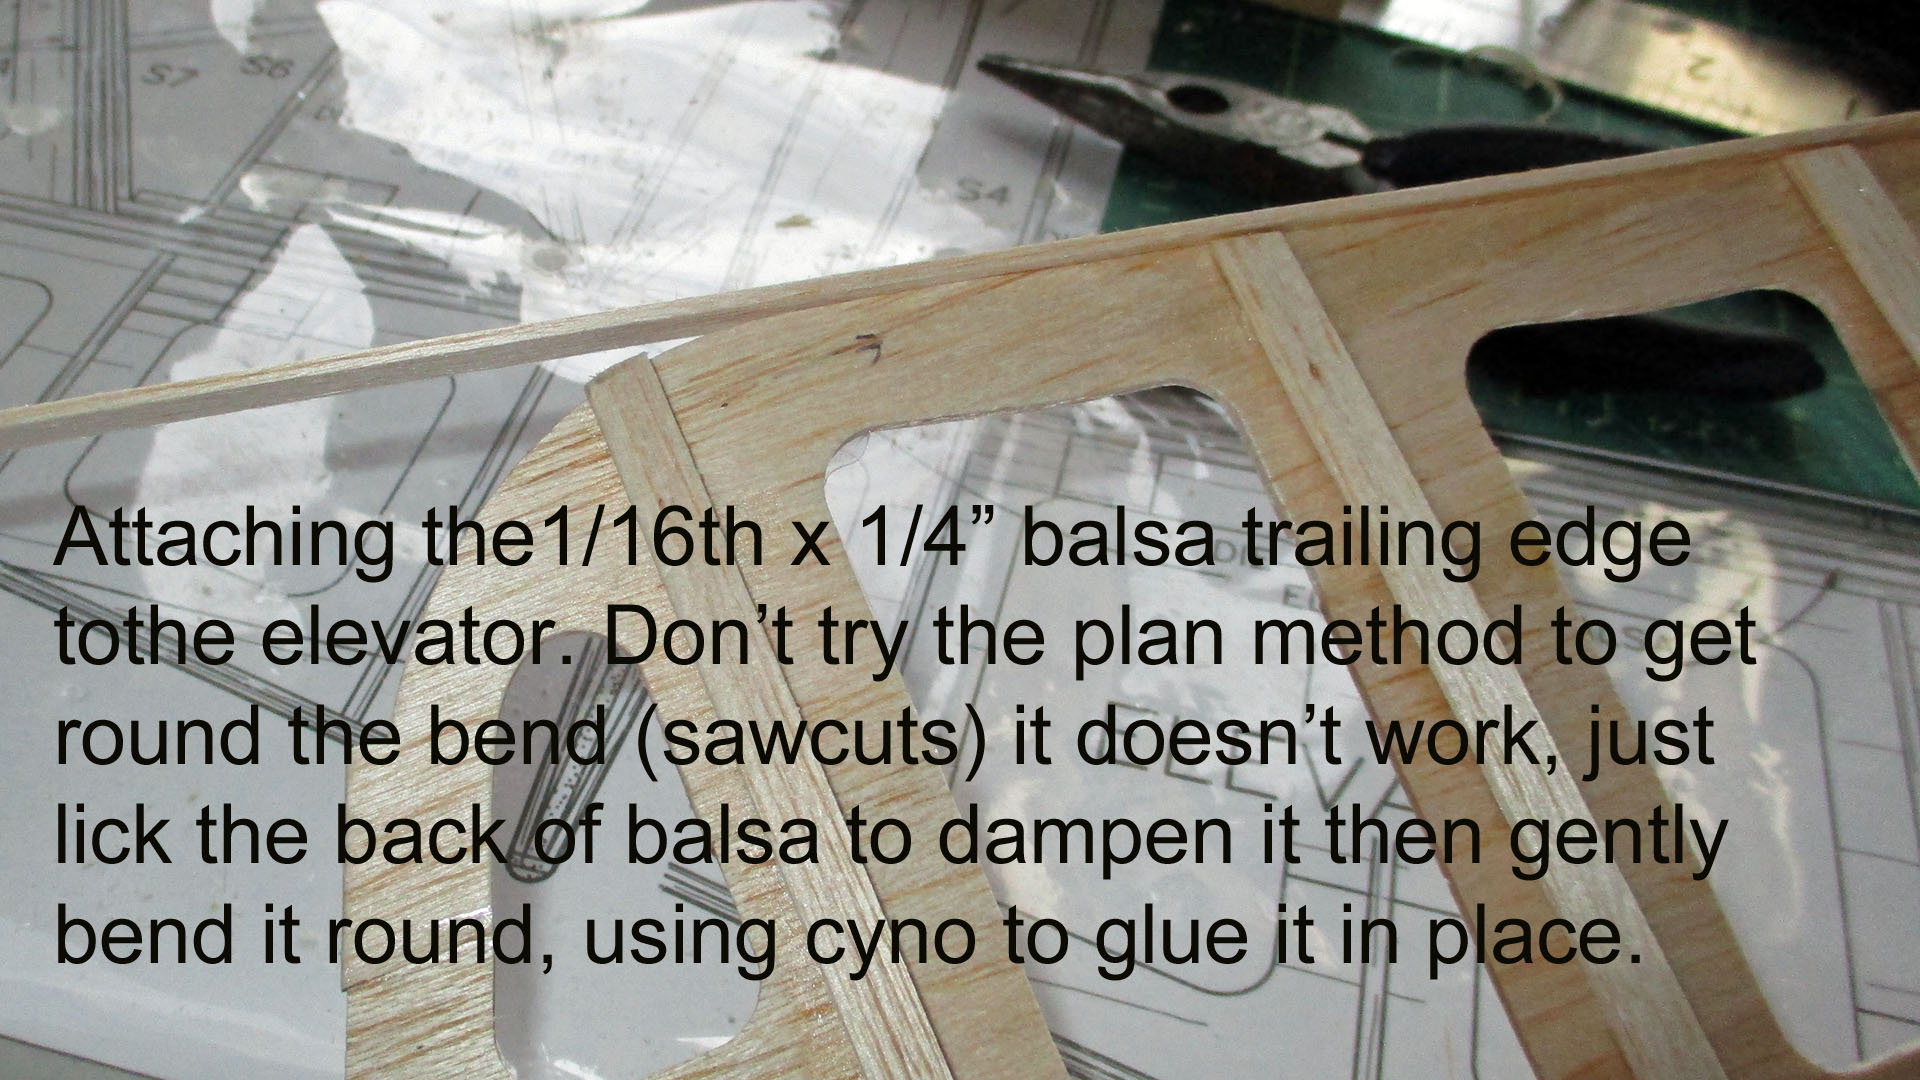
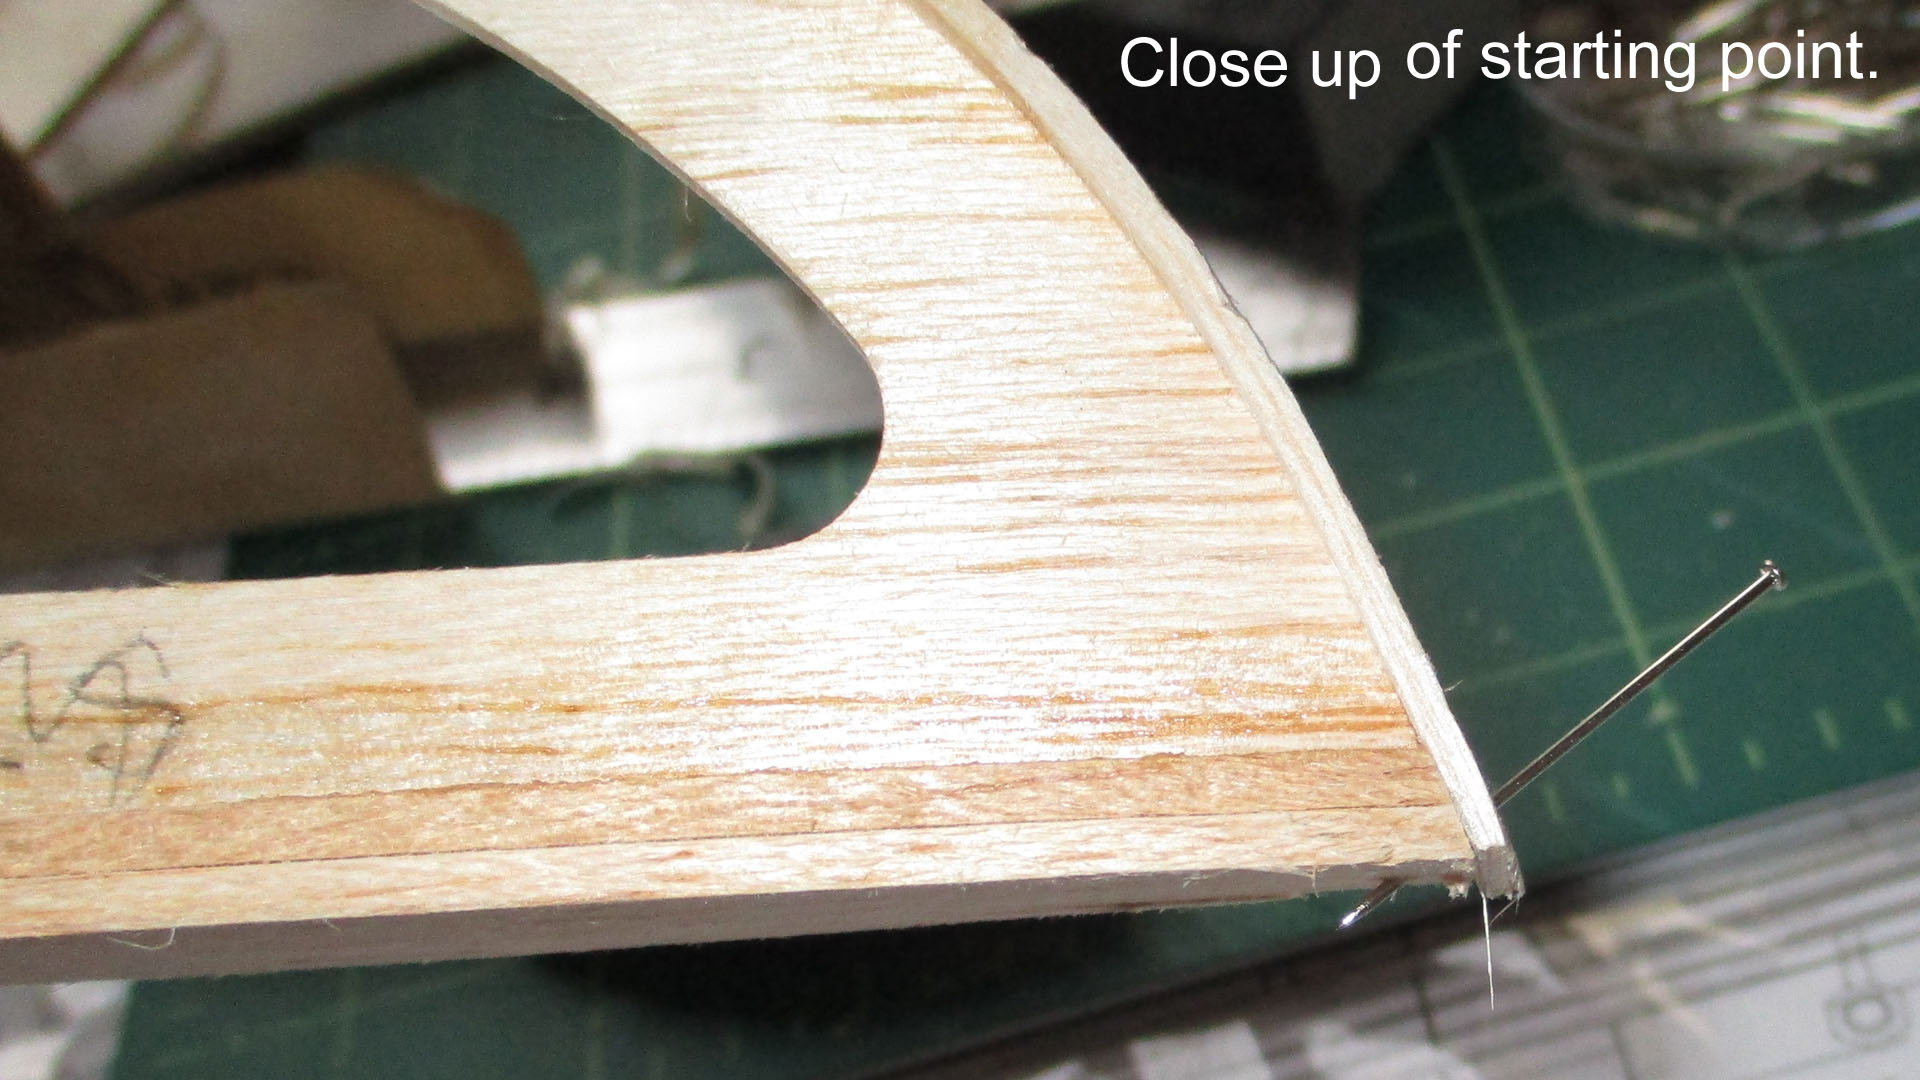
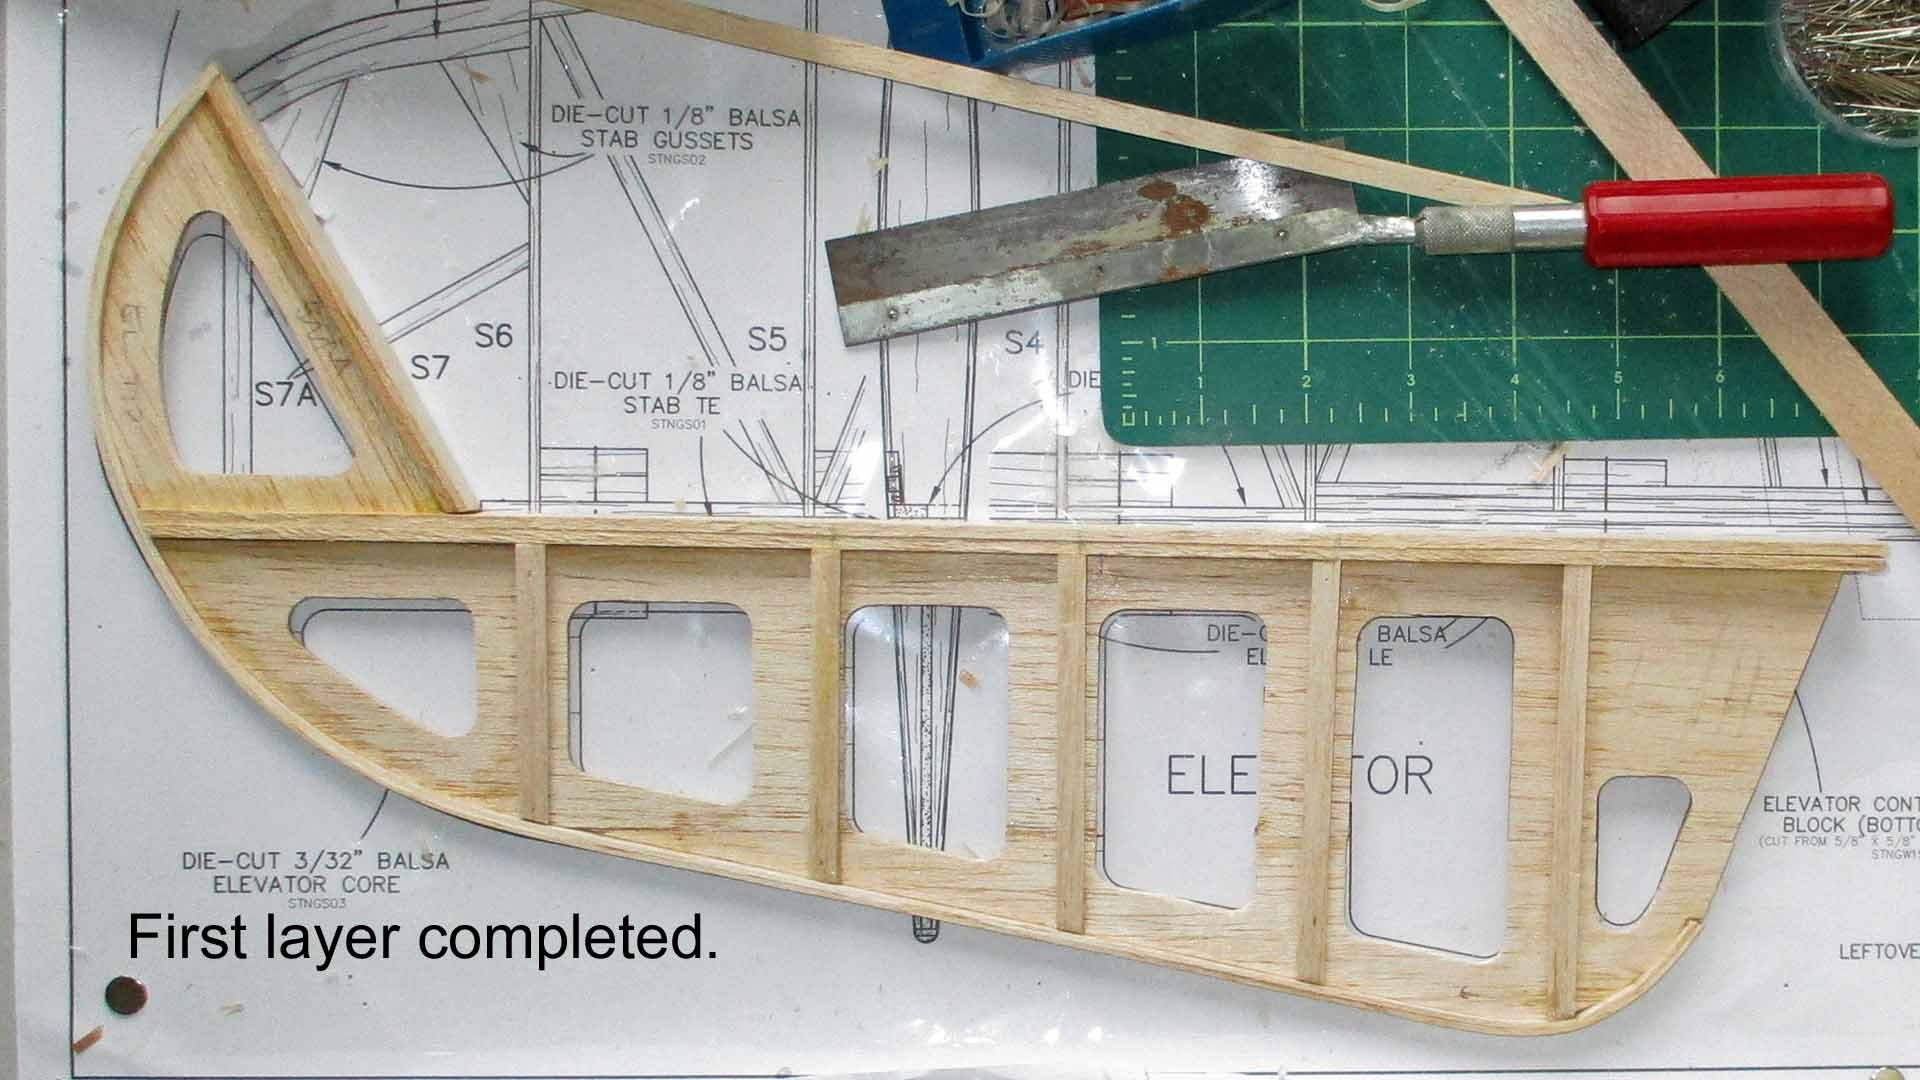
The words are in the pictures.
The words are in the pictures.
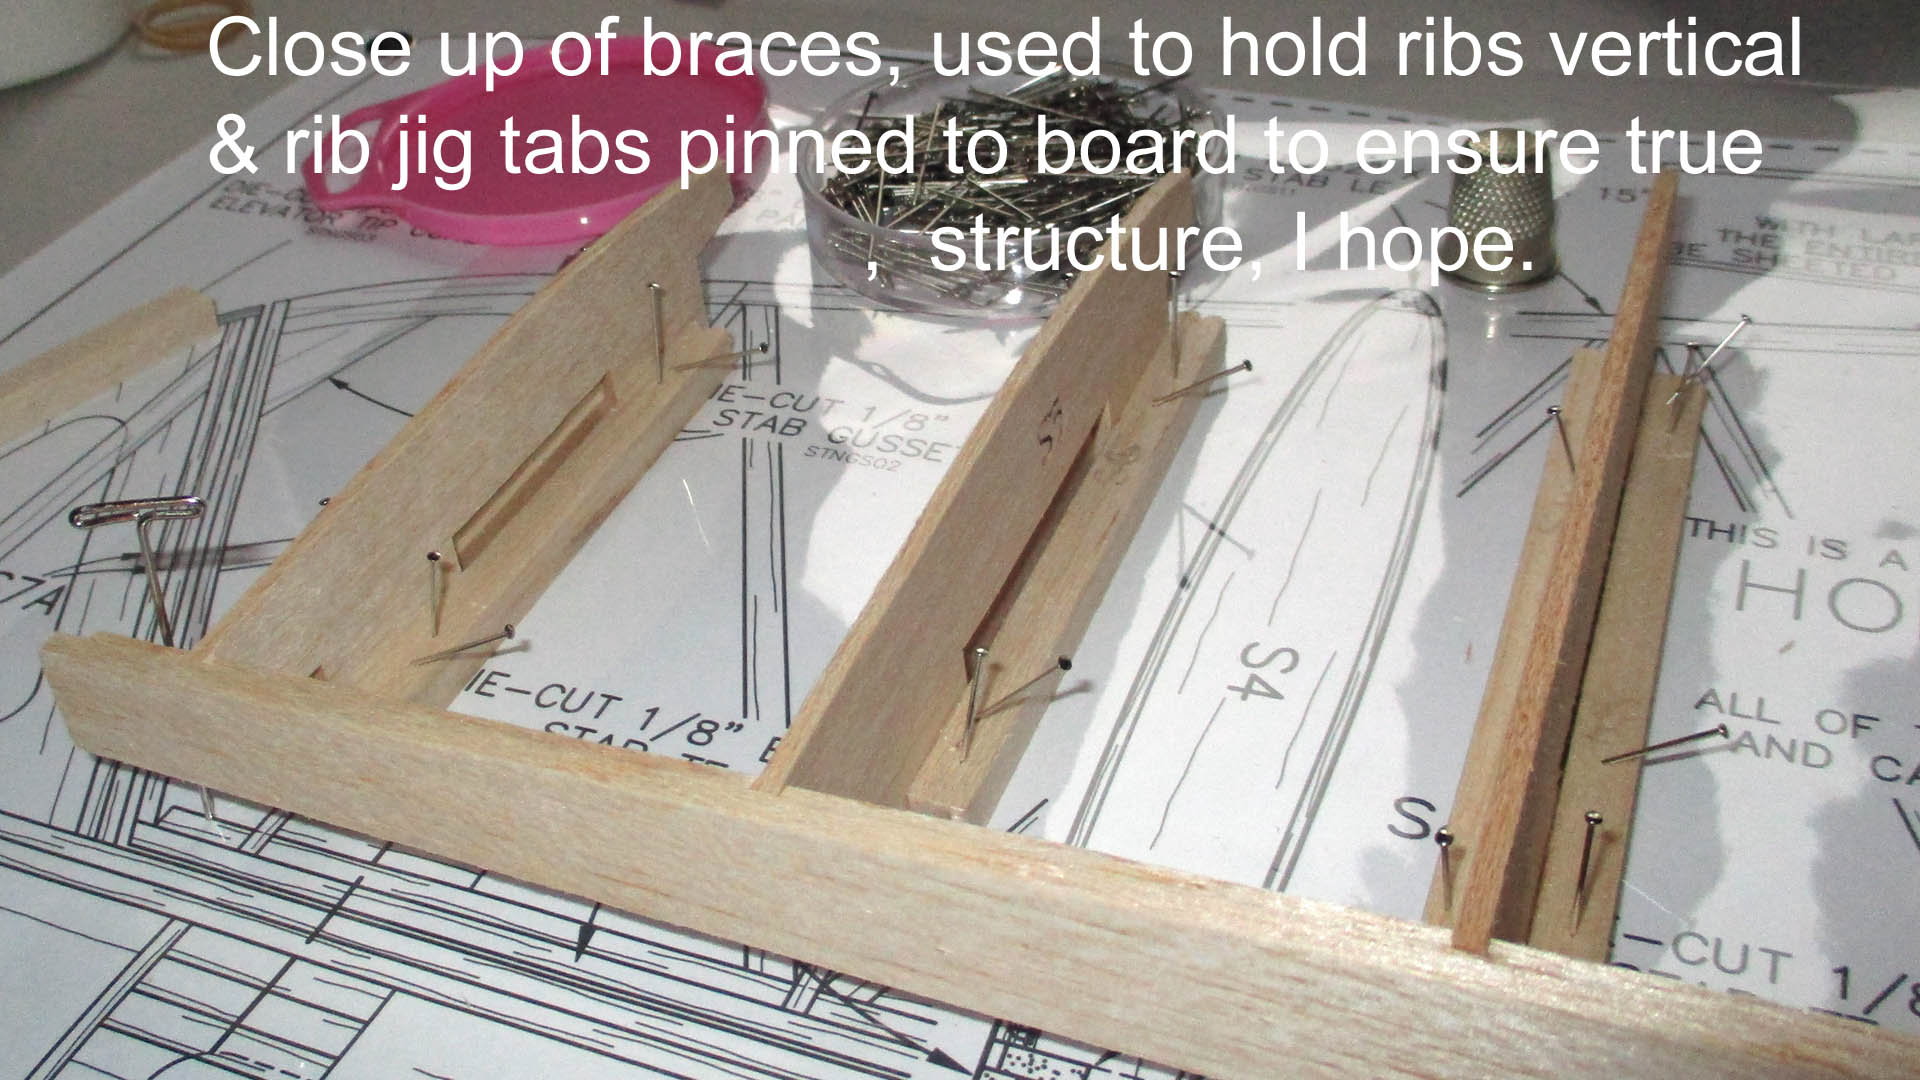
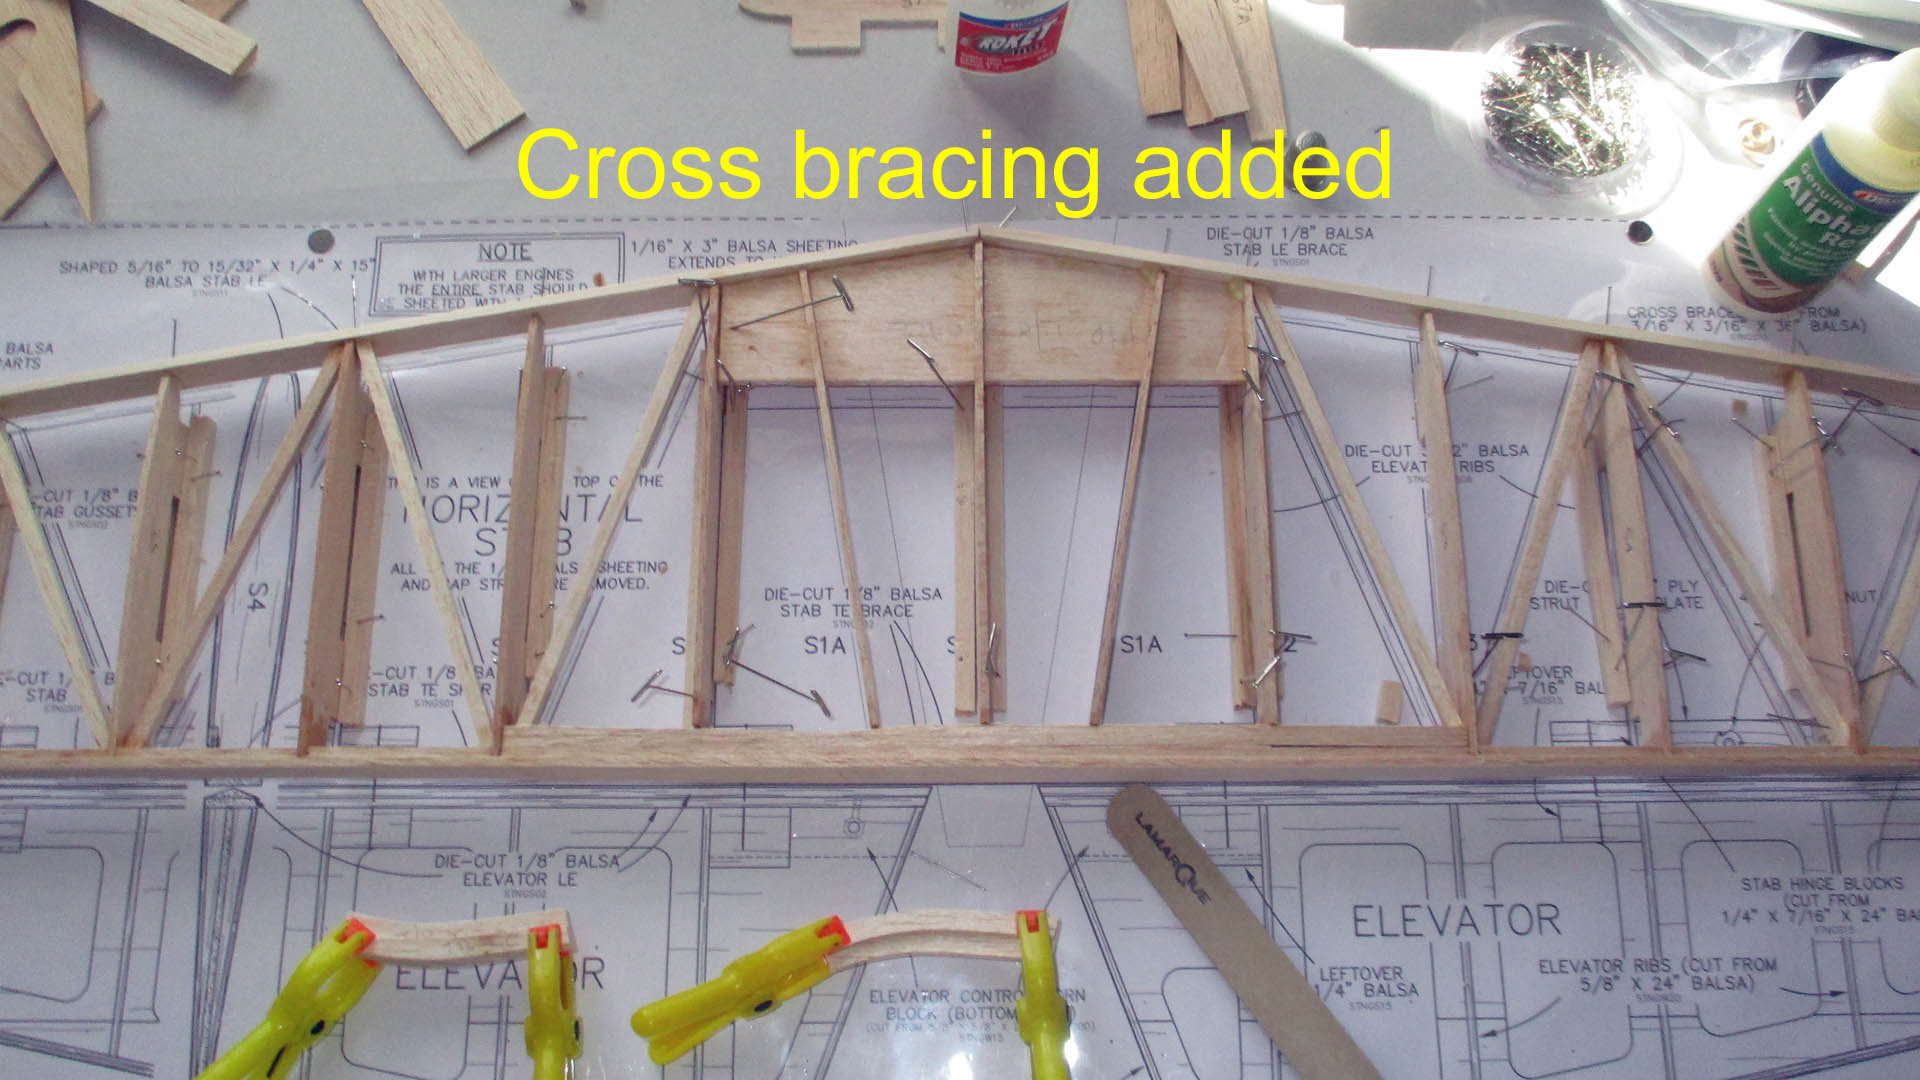
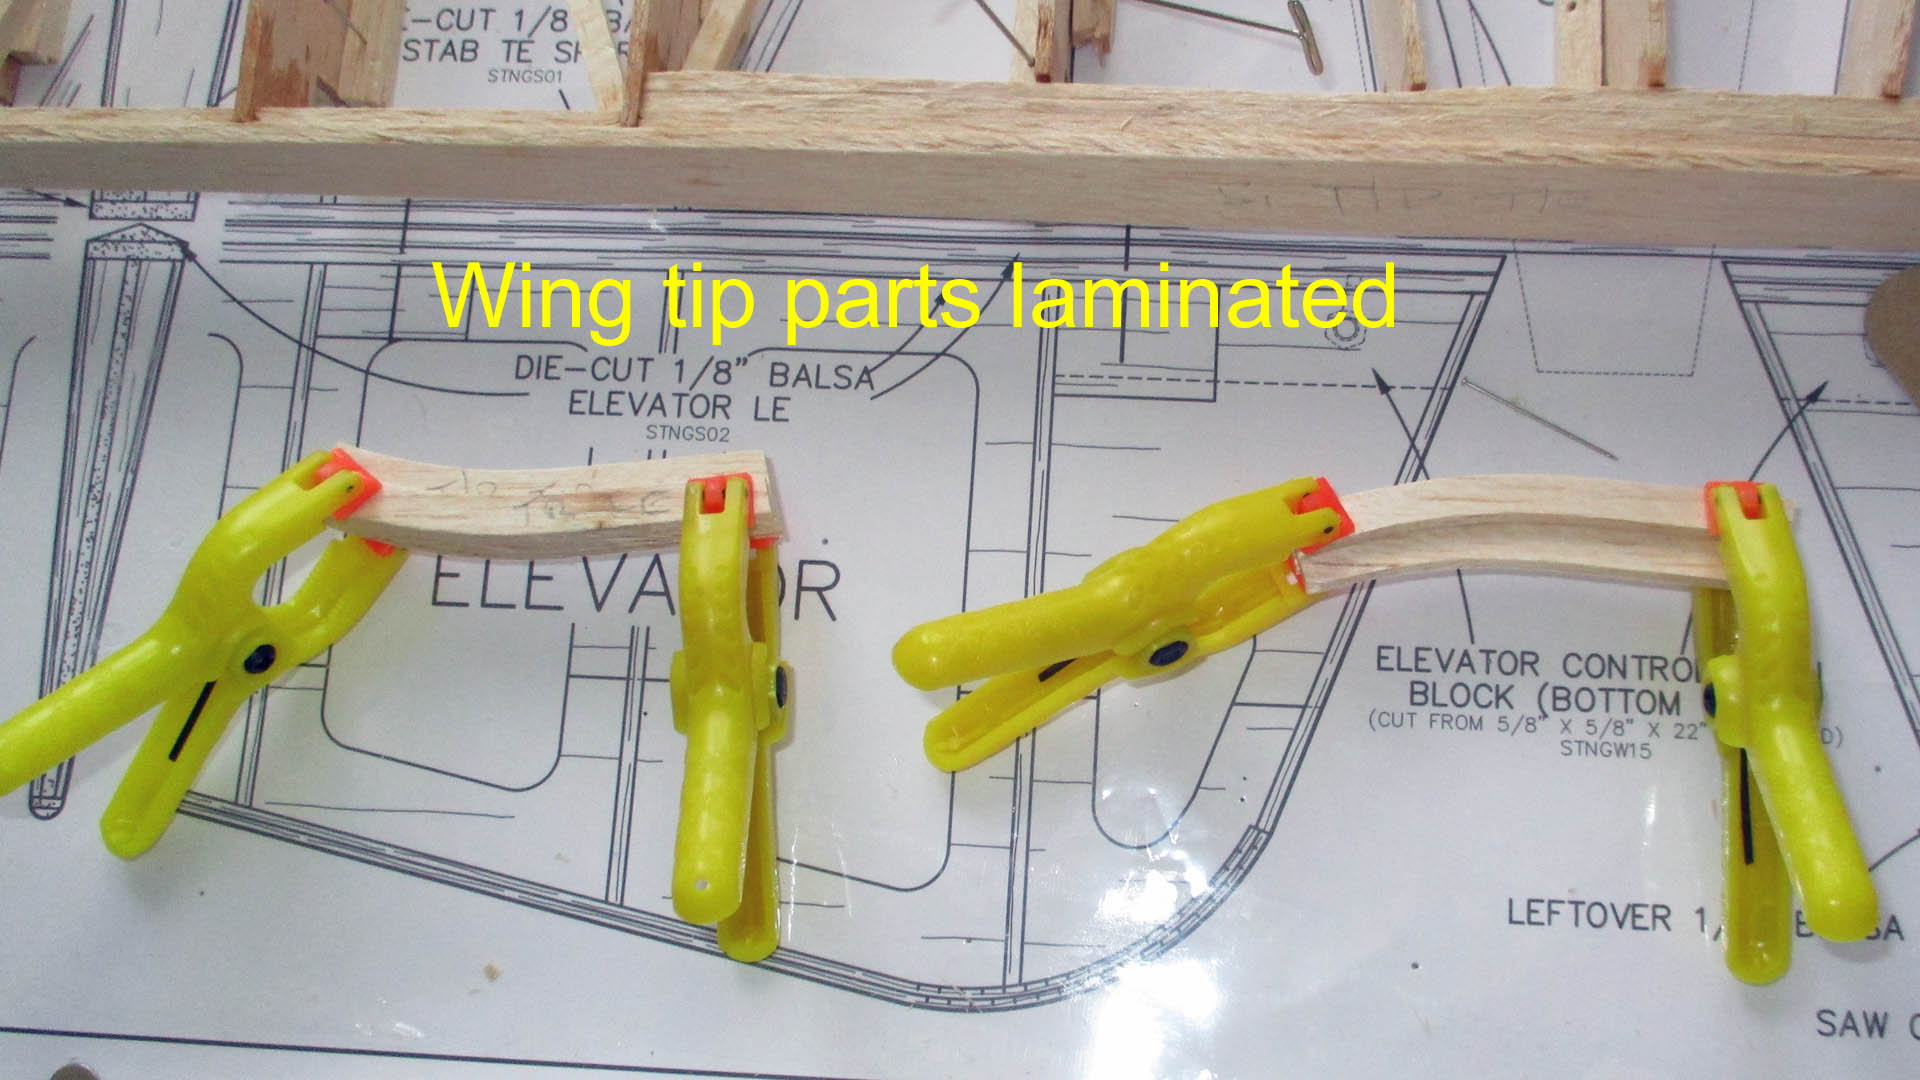
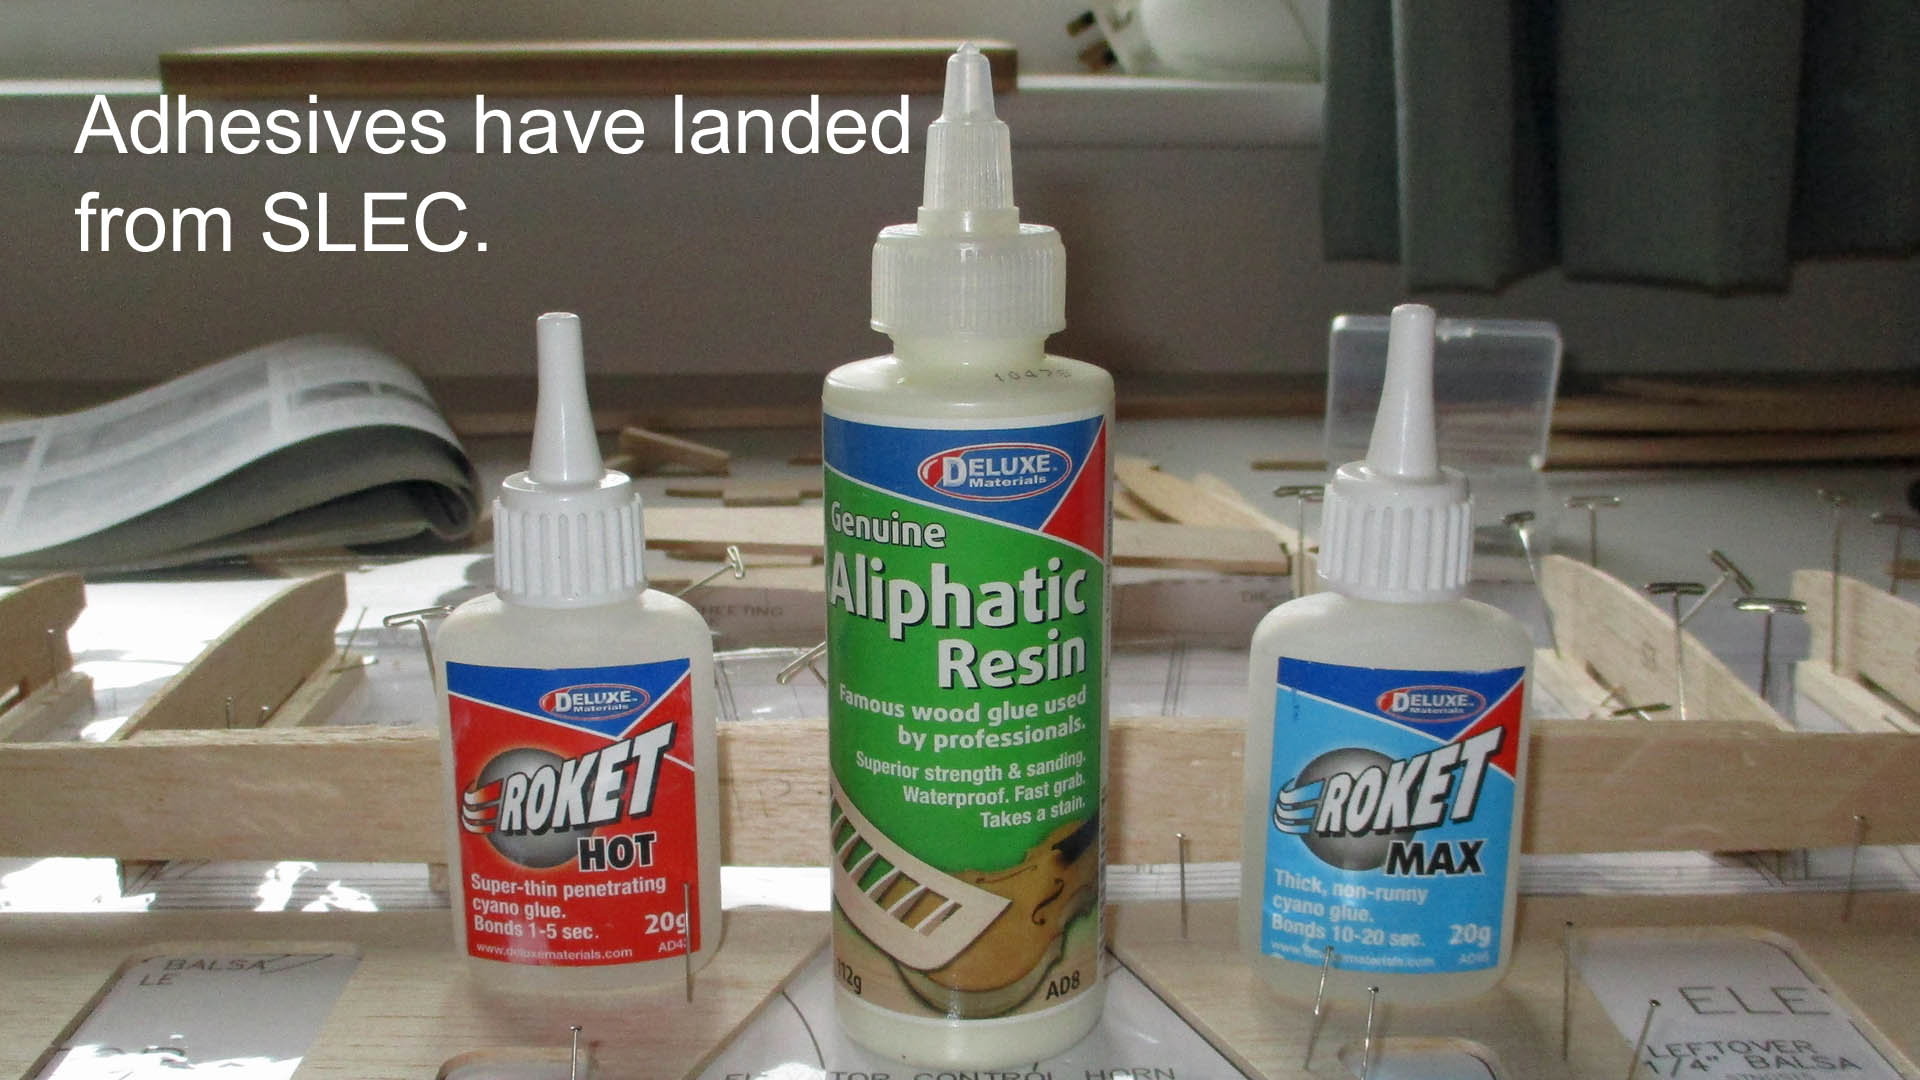
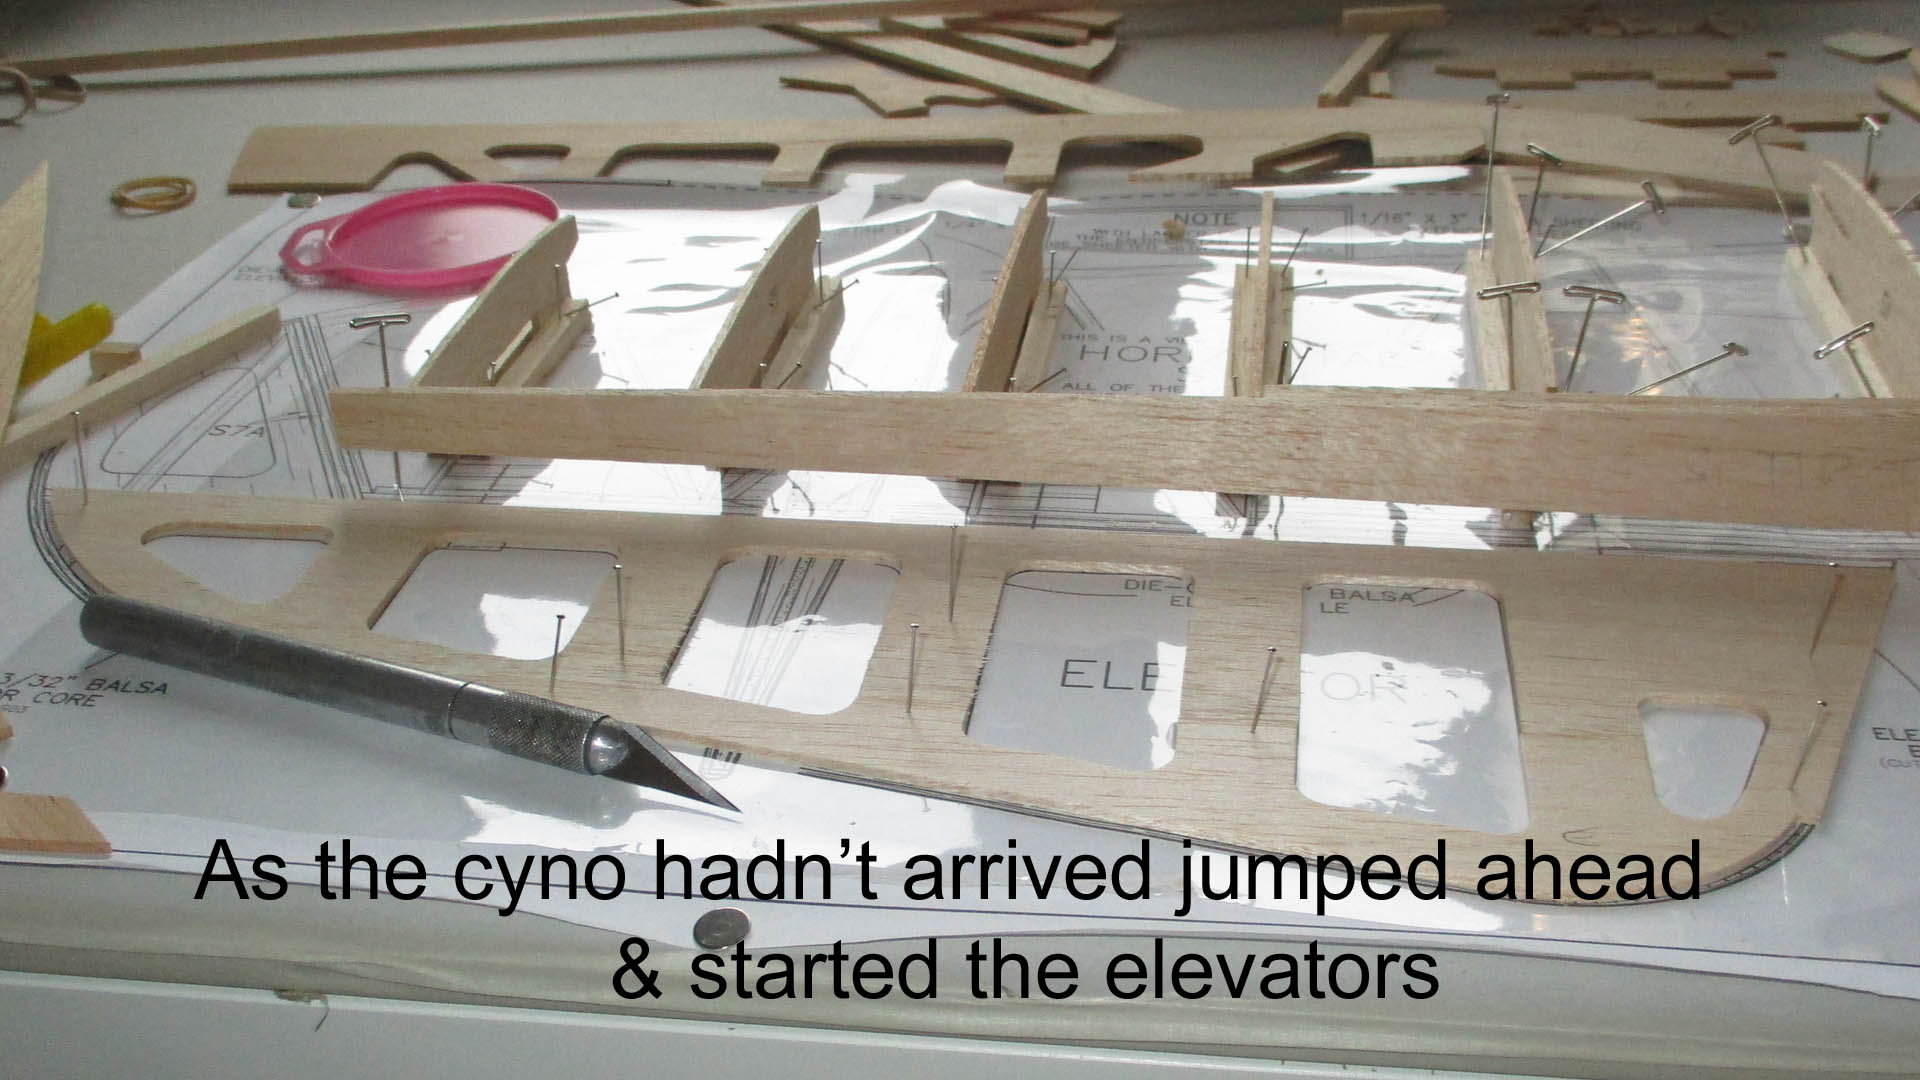
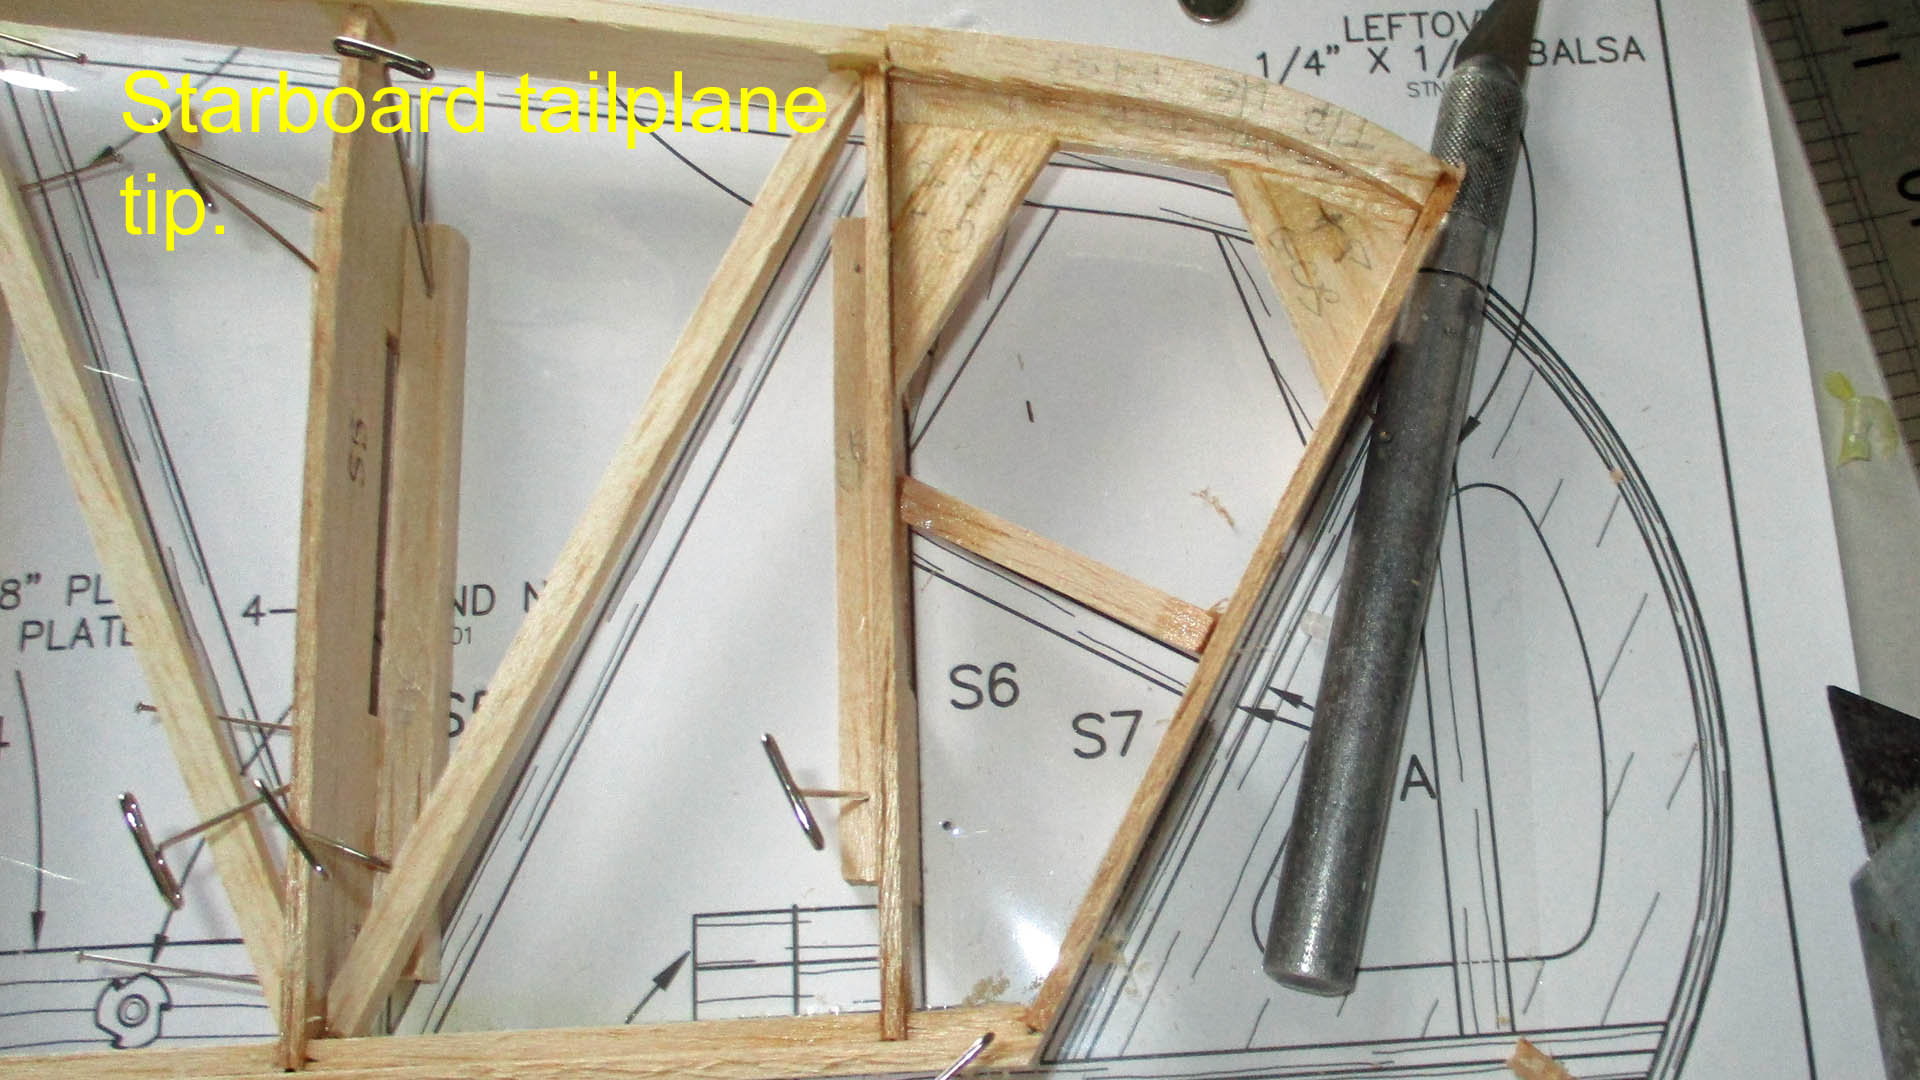
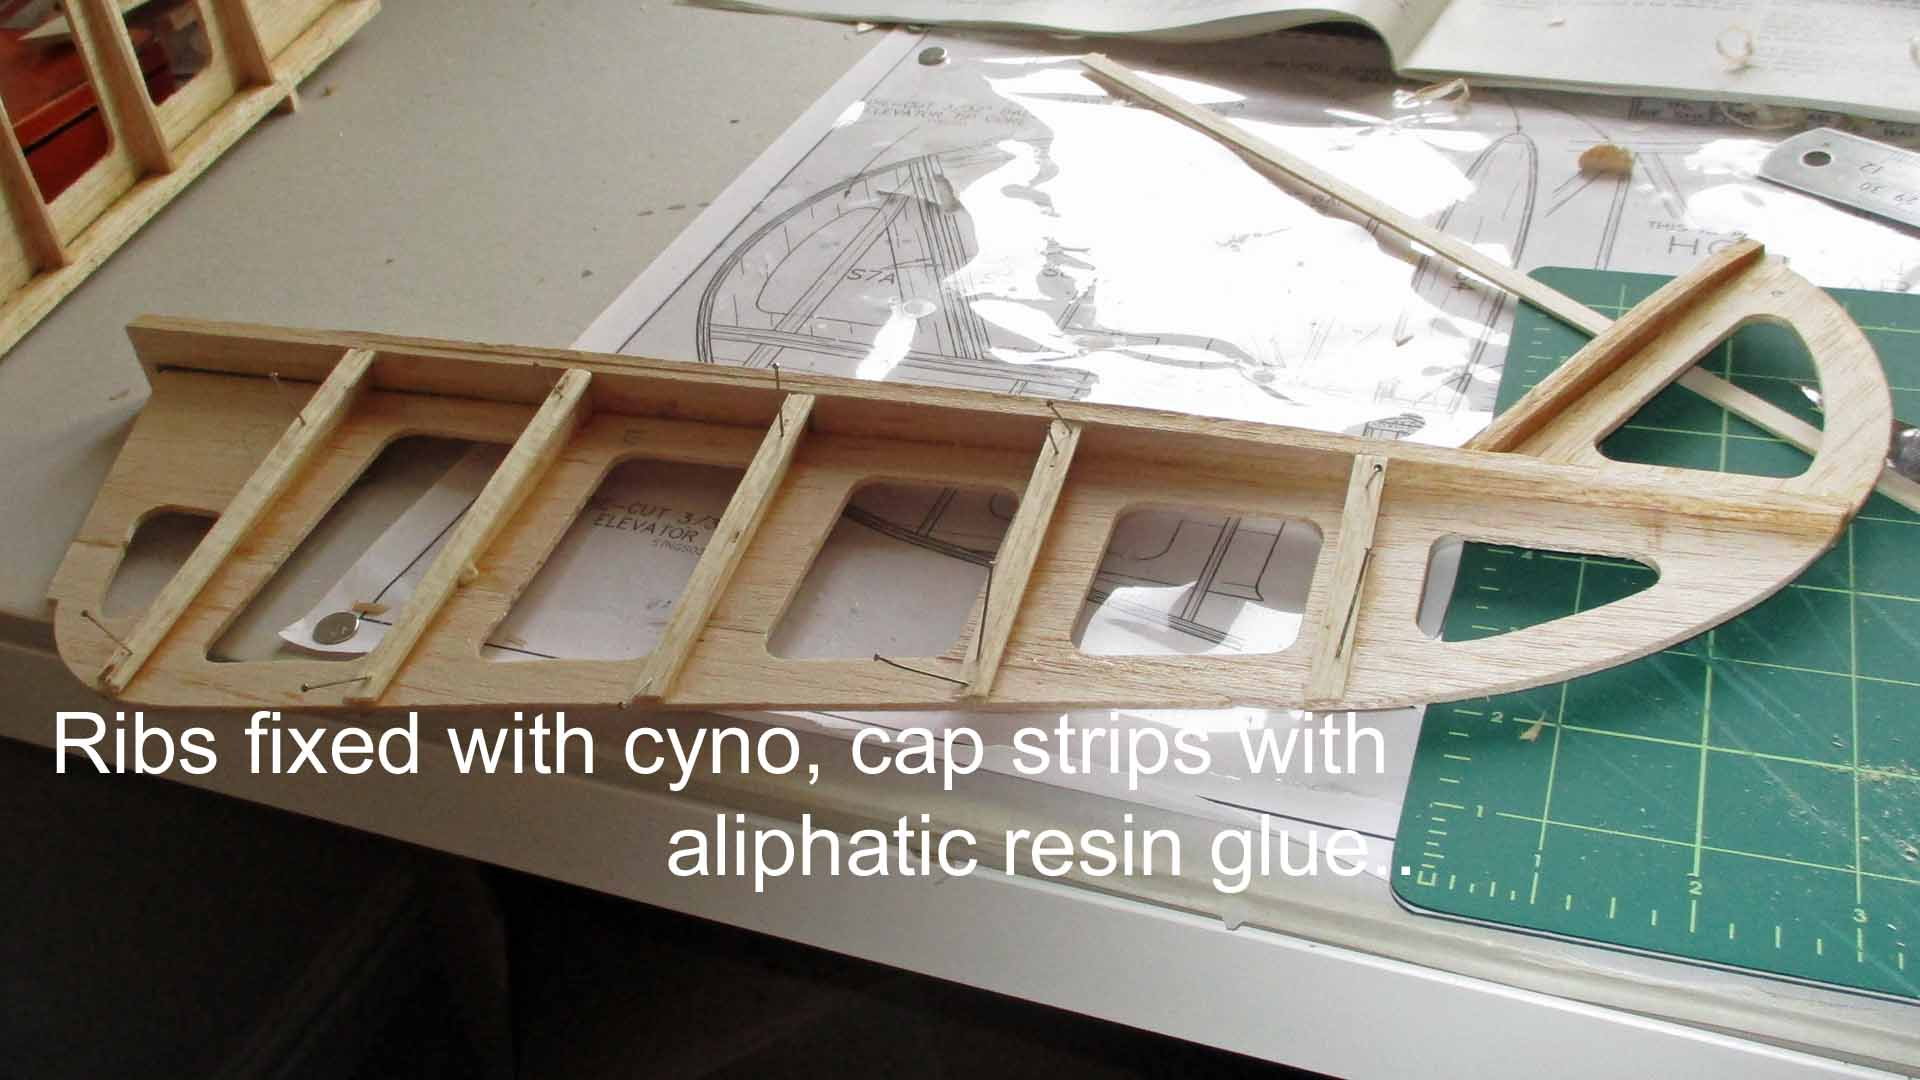
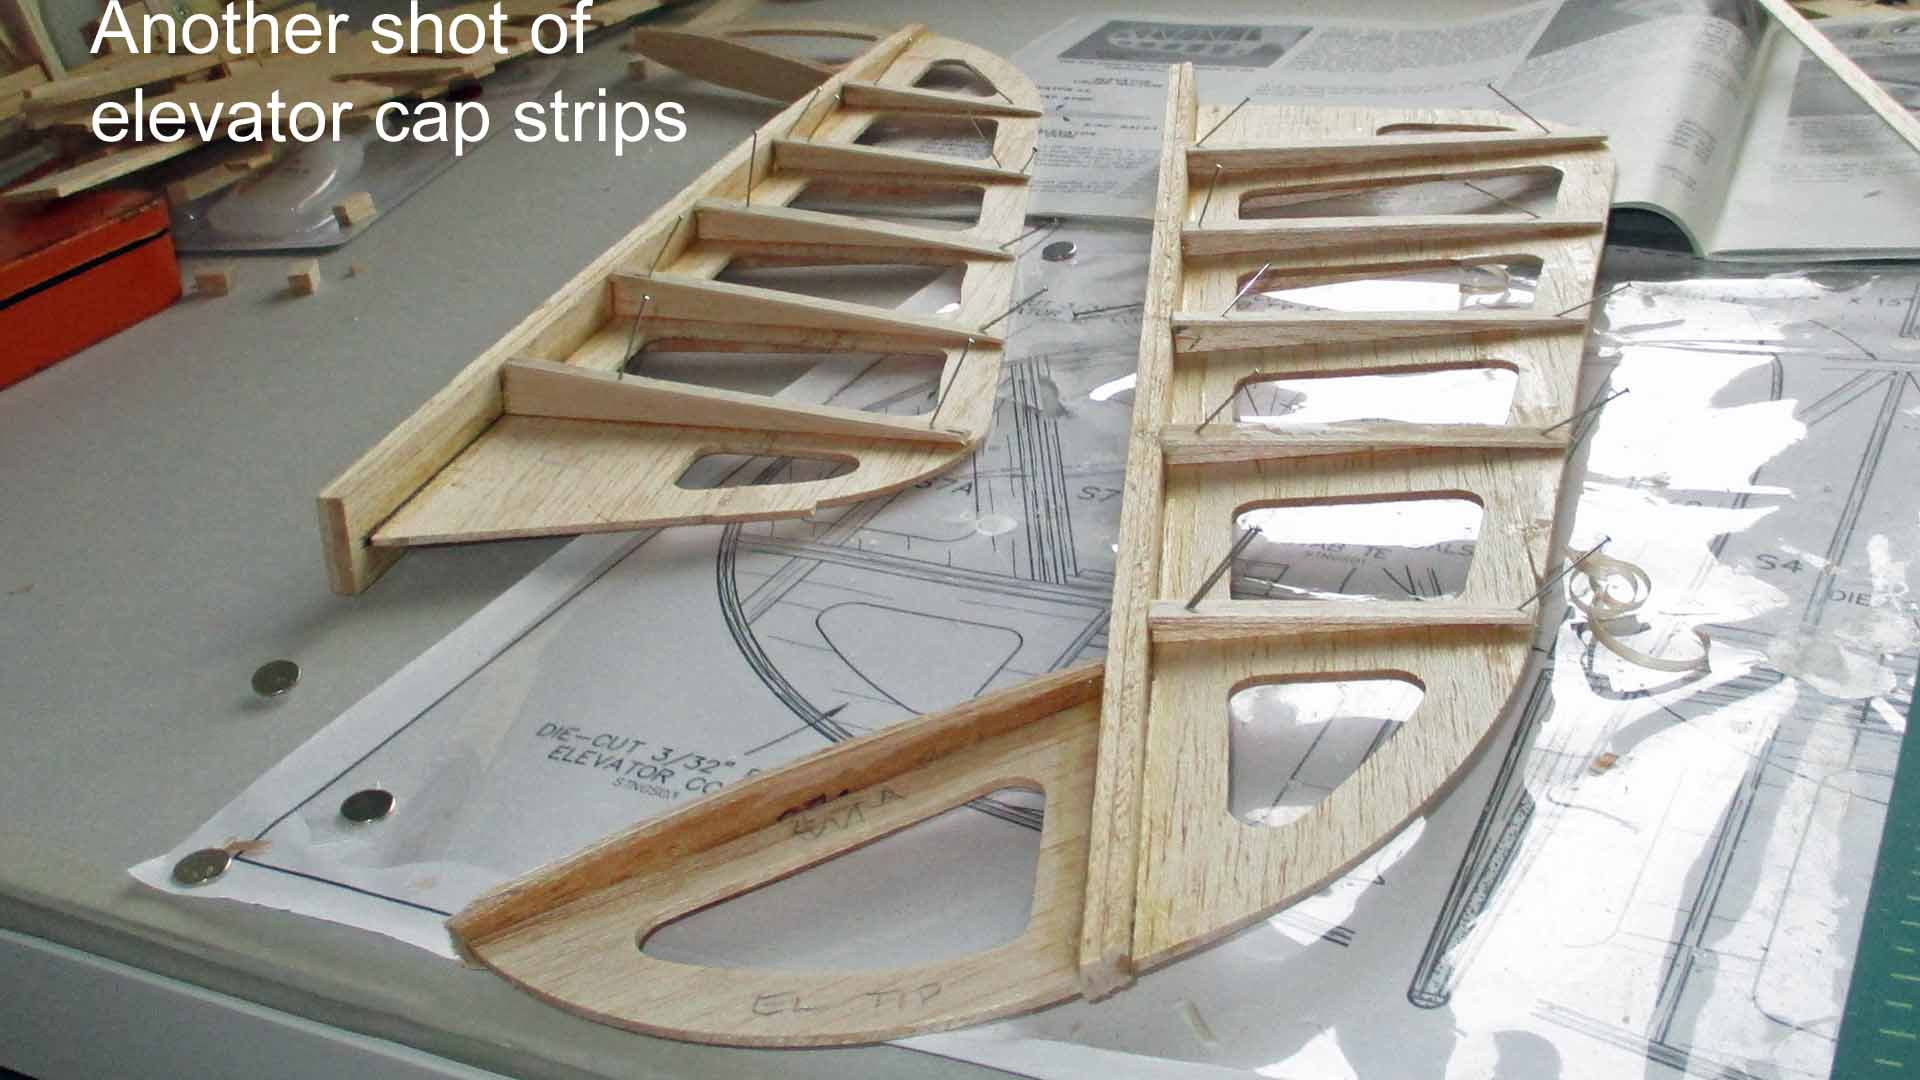
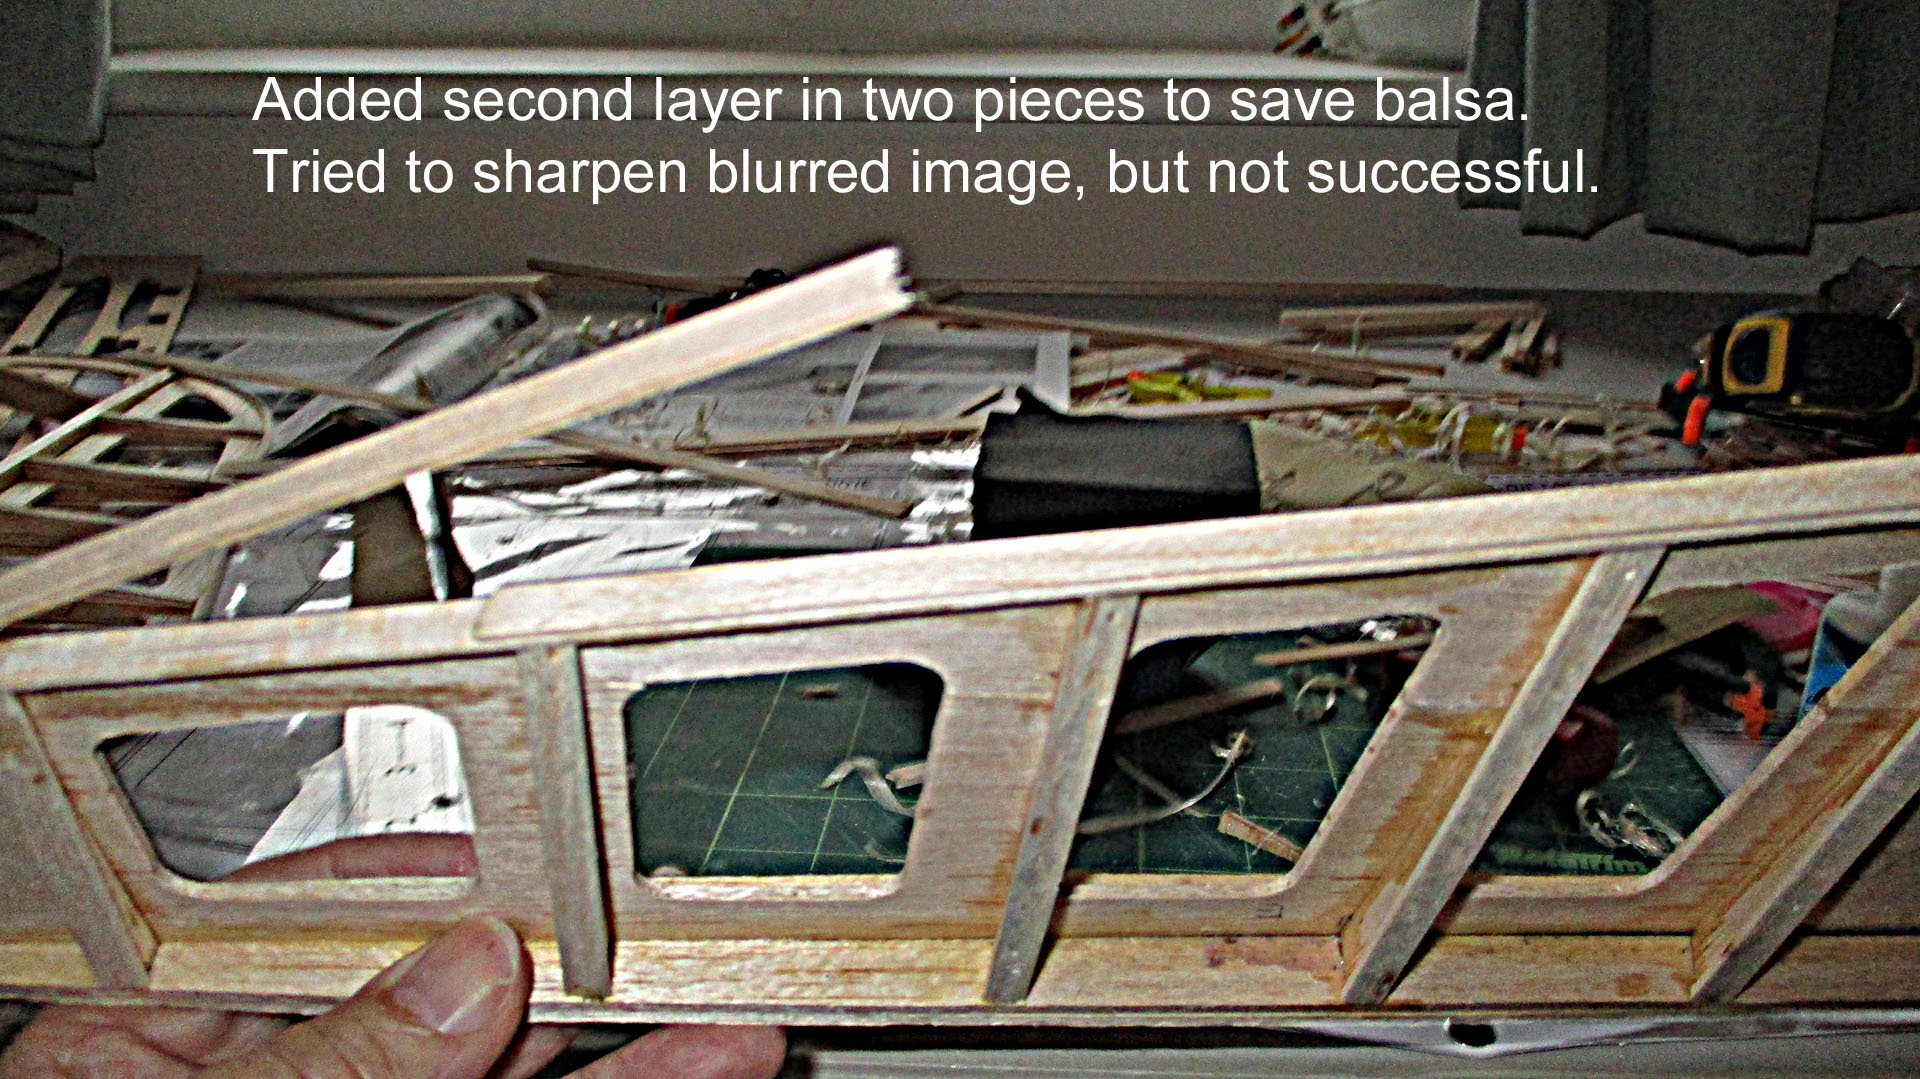
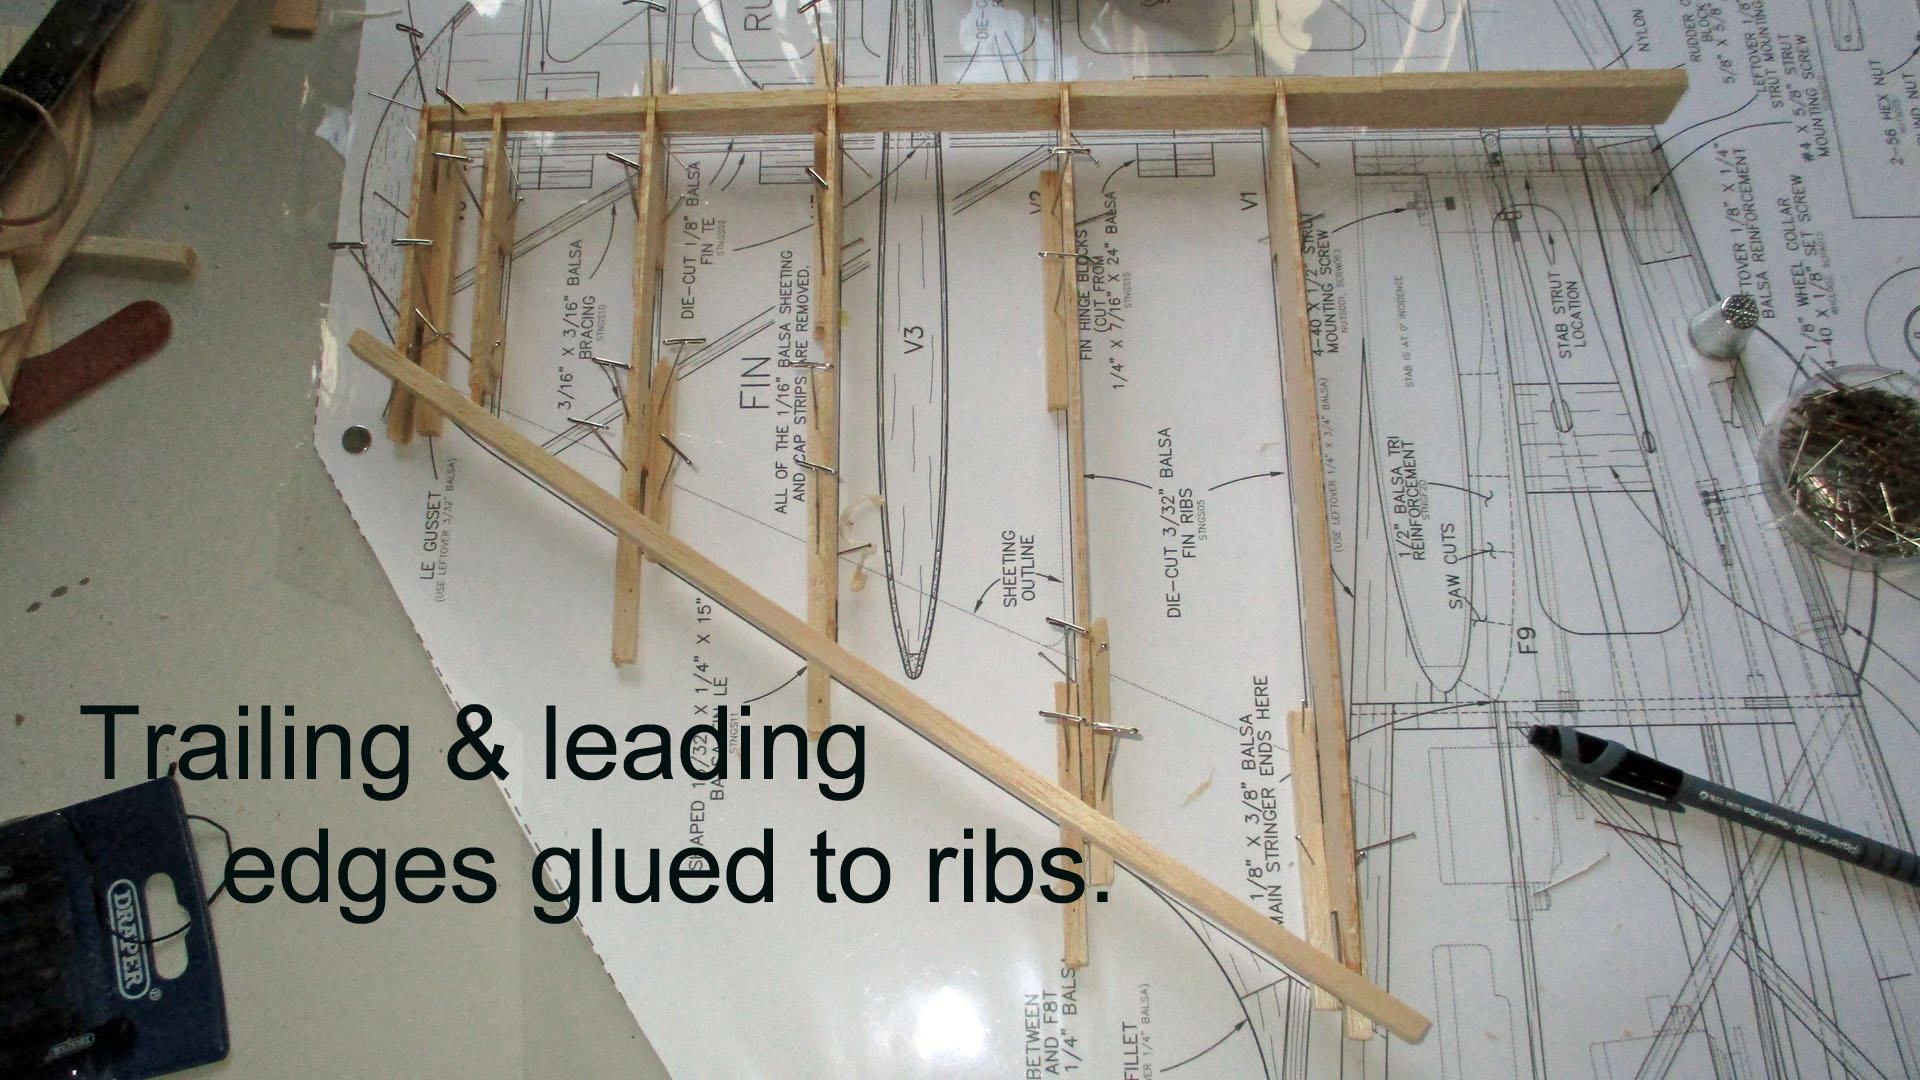
Woke early, so took advantage & checked progress. As the adhesives hadn't arrived I had to jump to the next stage, the elevators, so after joining the cores, the adhesives arrived, so I was able to proceed with the tailplane. I used a combo of cyno & aliphatic glue to glue the ribs, tailplane leading edge brace, angled ribs, leading edges & the cross bracing. I also laminated the two set of 3 parts of the tip leading edge. I must be getting old but this is the most complicated rear end I can remember, so many pieces & to ensure the tip is square, in my opinion I will have to remo

The words are in the pictures.
The words are in the pictures.

The words are in the pictures.

The words are in the pictures.
The words are in the pictures.
The words are in the pictures.
The words are in the pictures.
ve the tailplane from the board & eyeball it.
09-11-2018, 08:34 AM
#29
Thread Starter
Join Date: Mar 2006
Location: Southport UK
Posts: 187
Likes: 0
Received 0 Likes
on
0 Posts
Seem to have missed some of the text & the picture order didn't come out as expected, sorry senior moment, will try to do better.
Last edited by stearman65; 09-11-2018 at 11:09 PM. Reason: Typo
09-12-2018, 07:34 AM
#30
Thread Starter
Join Date: Mar 2006
Location: Southport UK
Posts: 187
Likes: 0
Received 0 Likes
on
0 Posts
Text is in the pics

Text is in the pics
Text is in the pics
Text is in the pics
Text is in the pics
Started lated today, combination of visit to the docs & receiving our online food shop. Things did not go well, I received an email from UPS to say the UK shipper had tried to deliver the TF cockpit kit I ordered ages ago. They said they had called at 8.30am, which they hadn't, Checked the UK shippers web site "Parcelforce" their tracking said the kit was in the local depot awaiting payment of custom dues & vat. I rang them & they said I could pay online, cost �27 on a 54 dollar order, I nearly fell on the floor. It was no use complaining, I will try later with HMRC (Her Majesties Revenue & Customs) No wonder Prince Charles can afford the new electric Jag' to add to his 100 car collection
 .
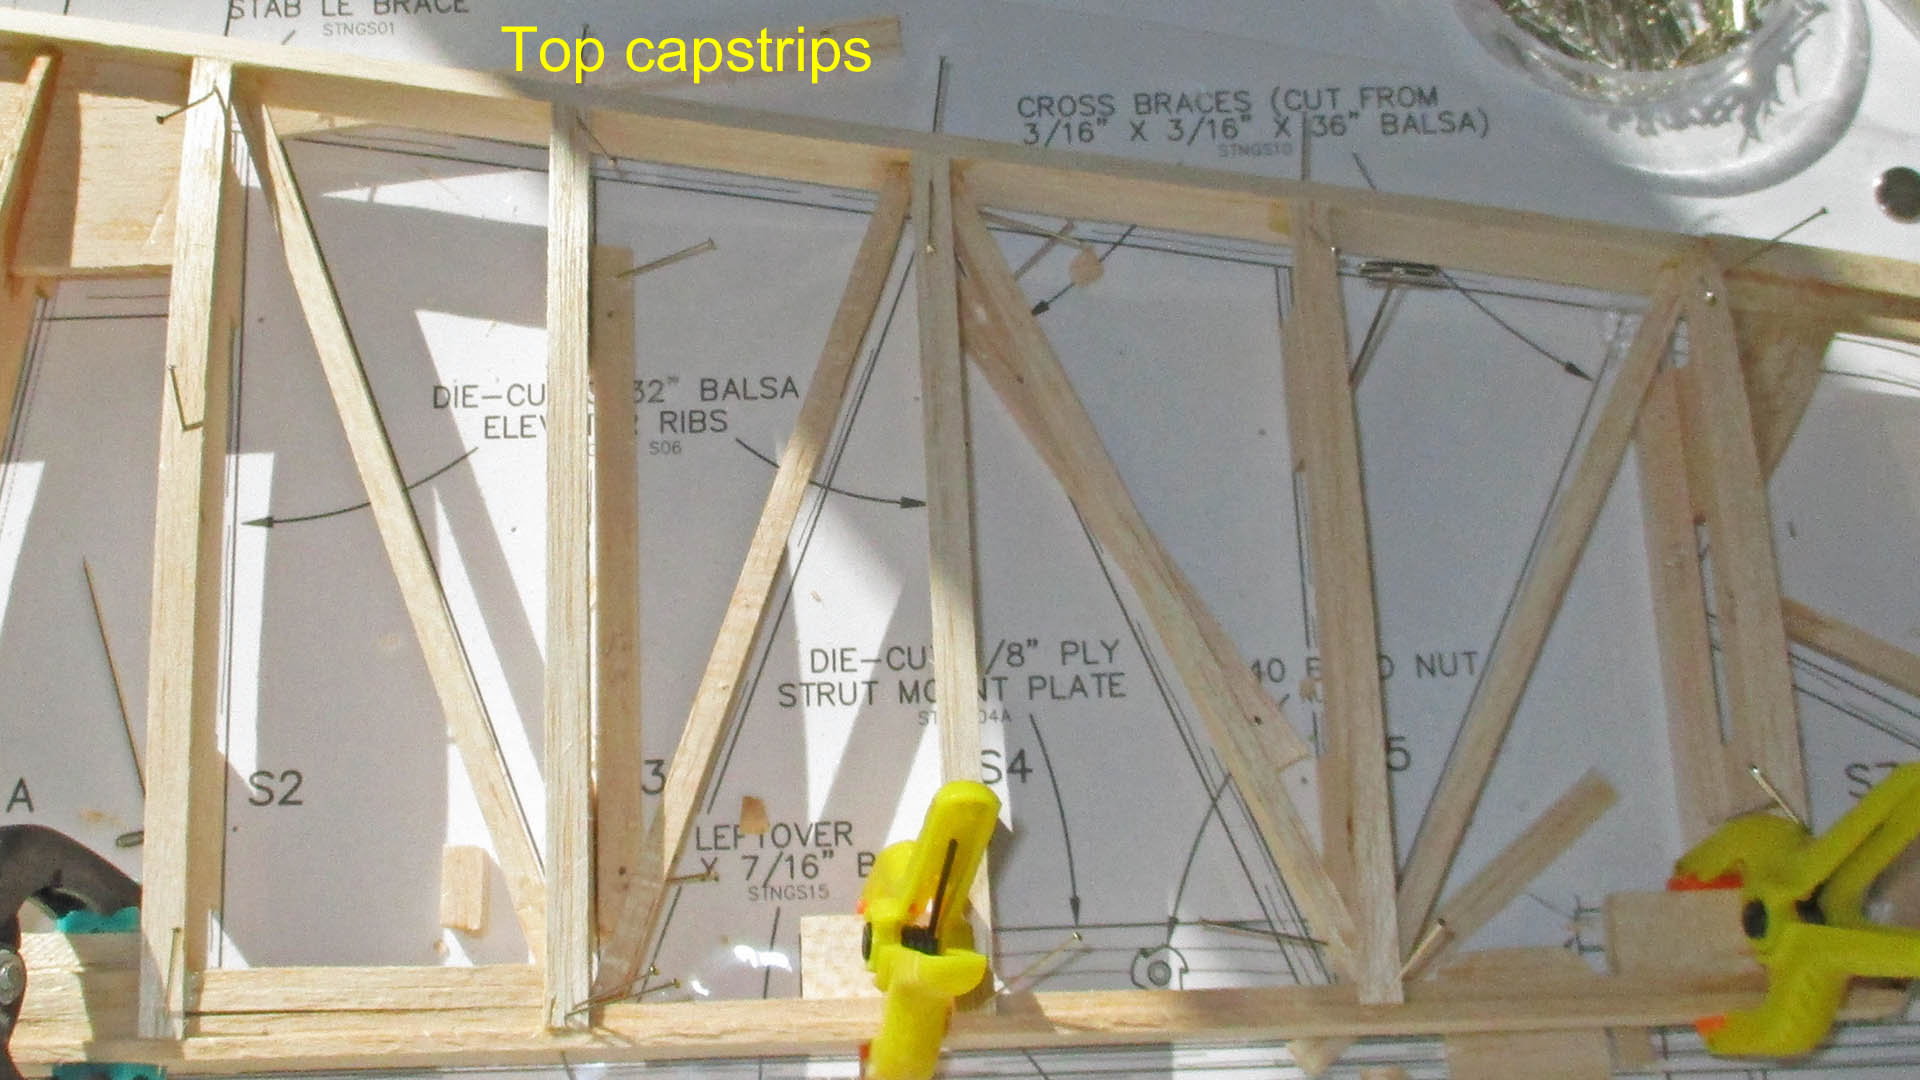
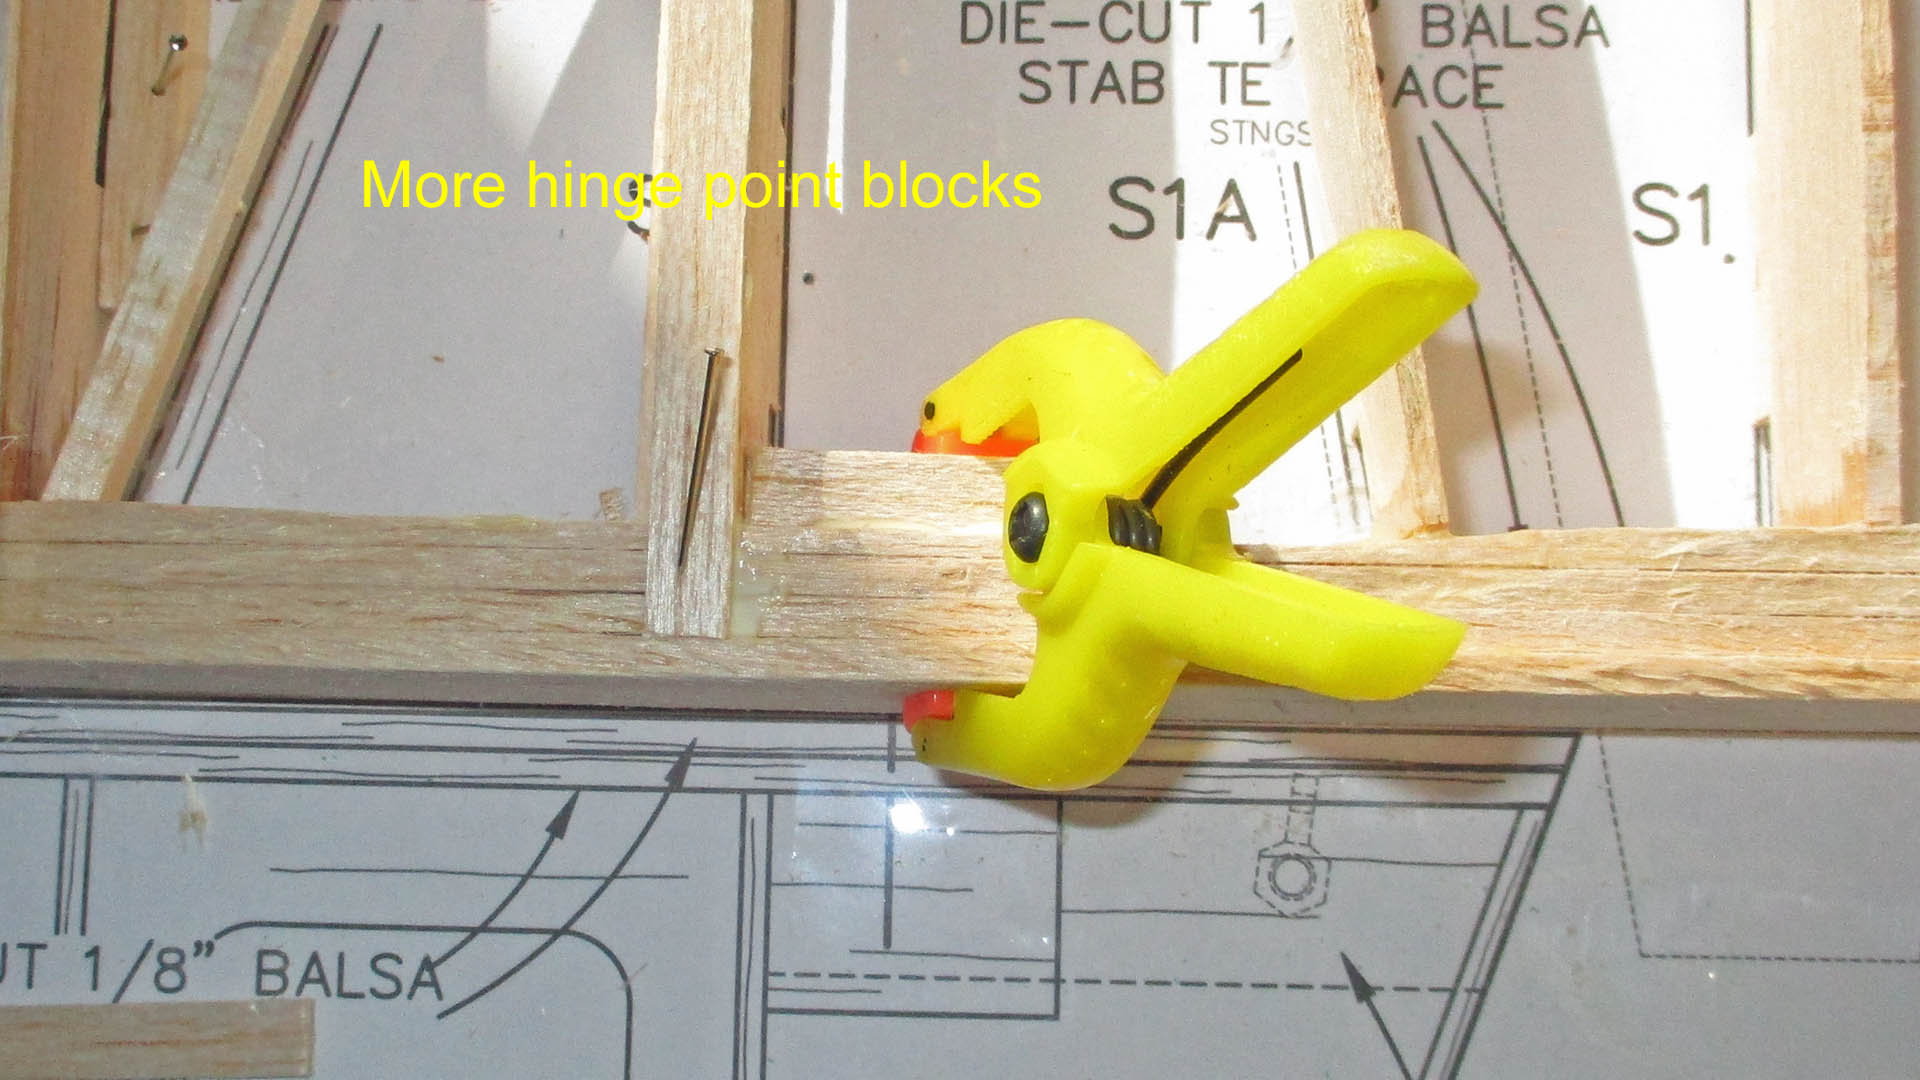
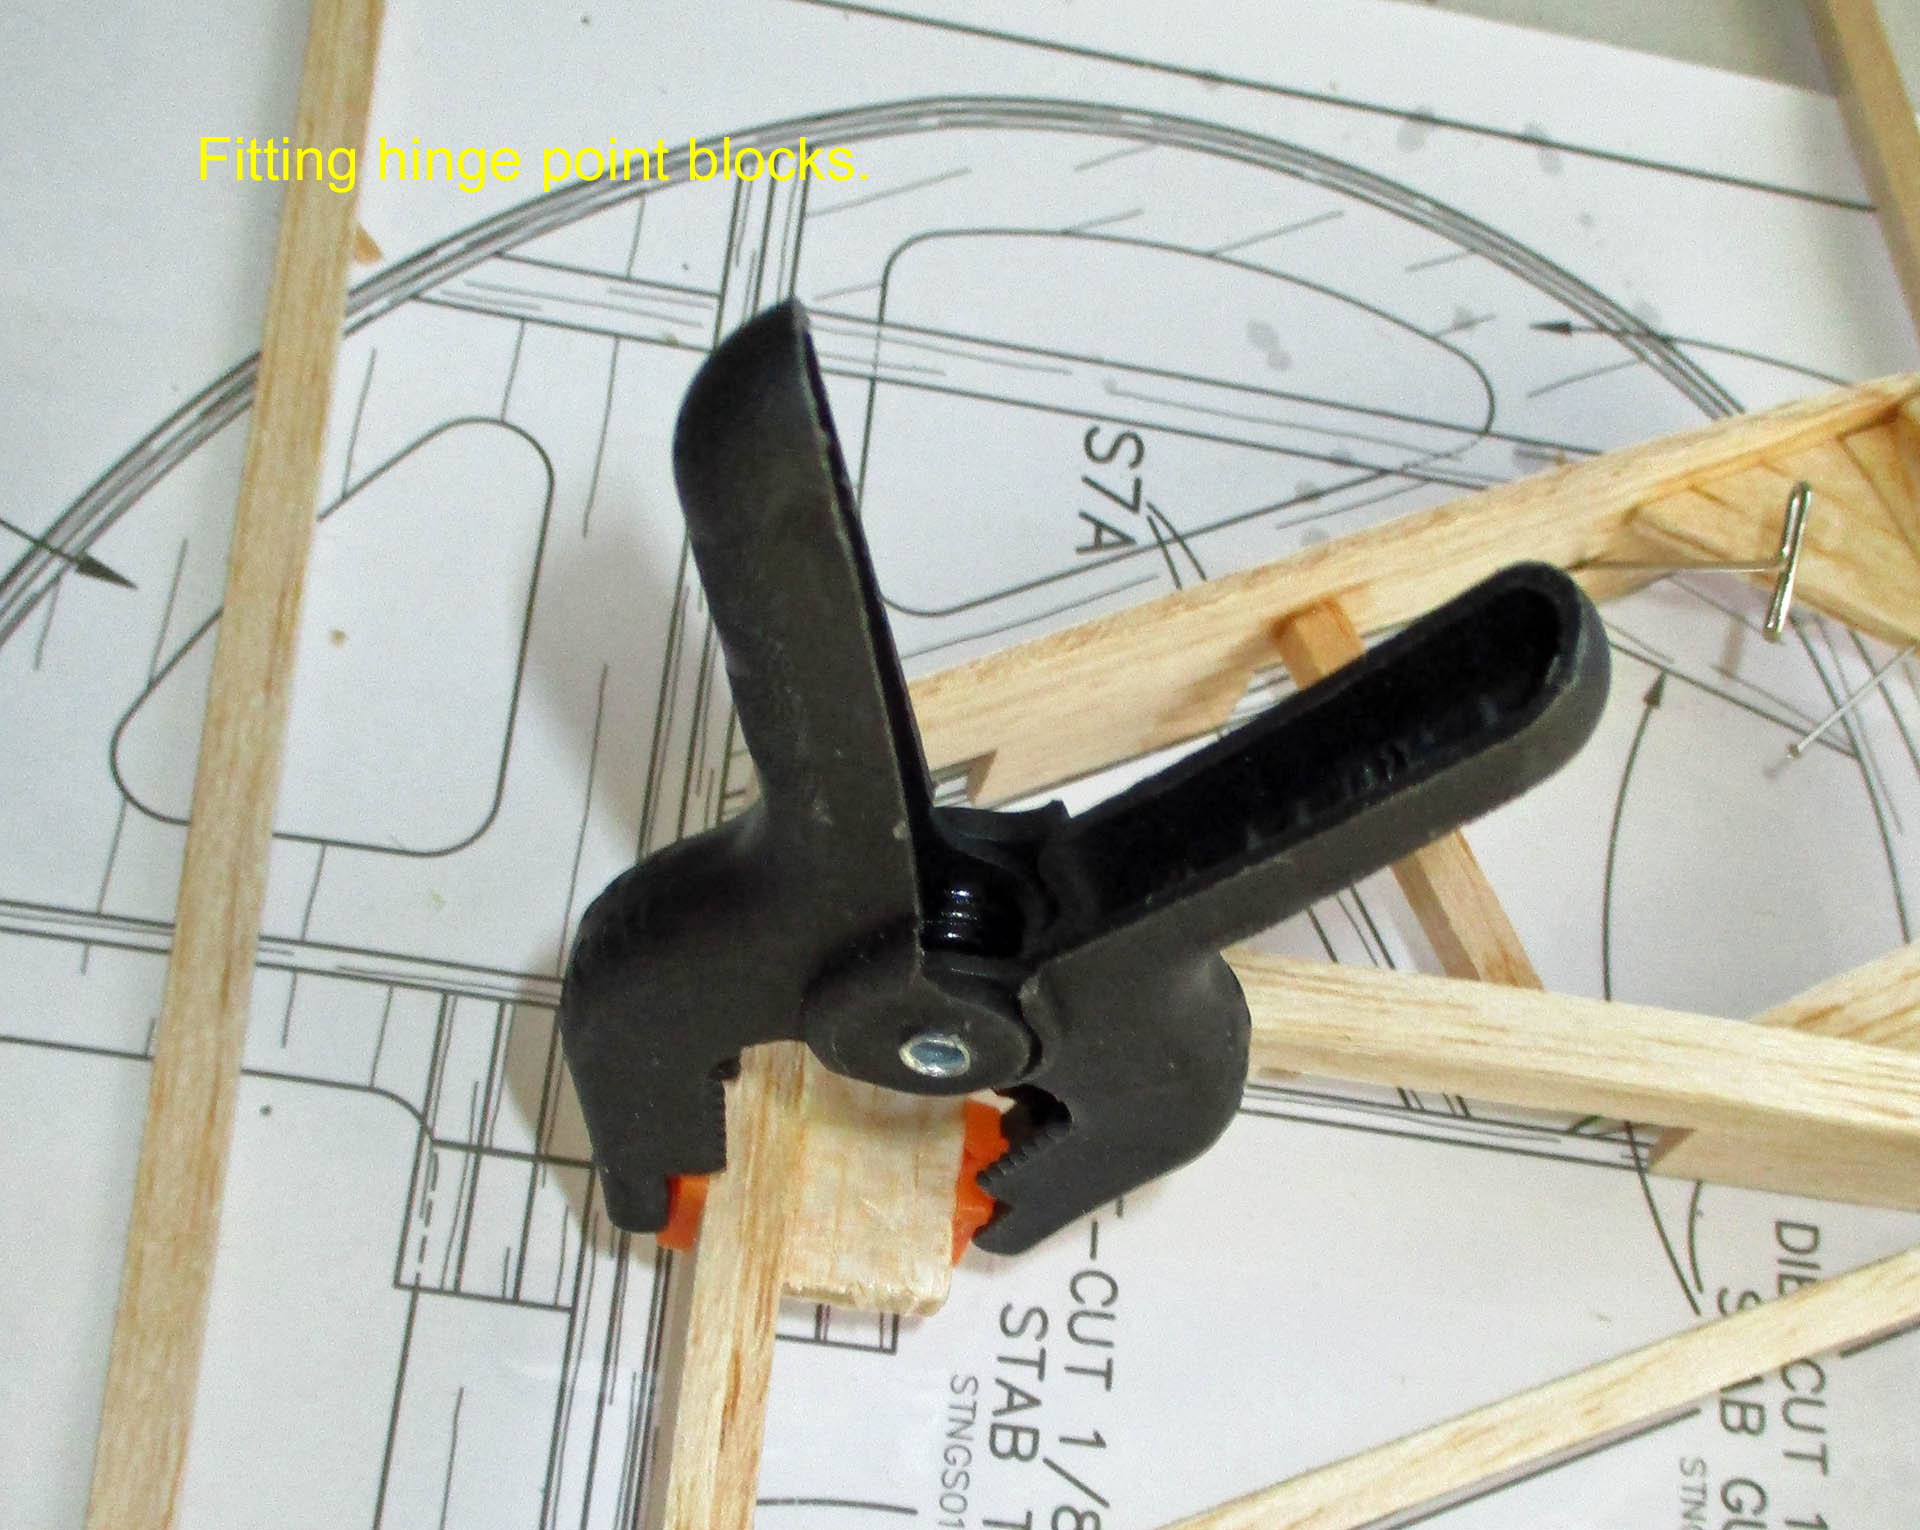
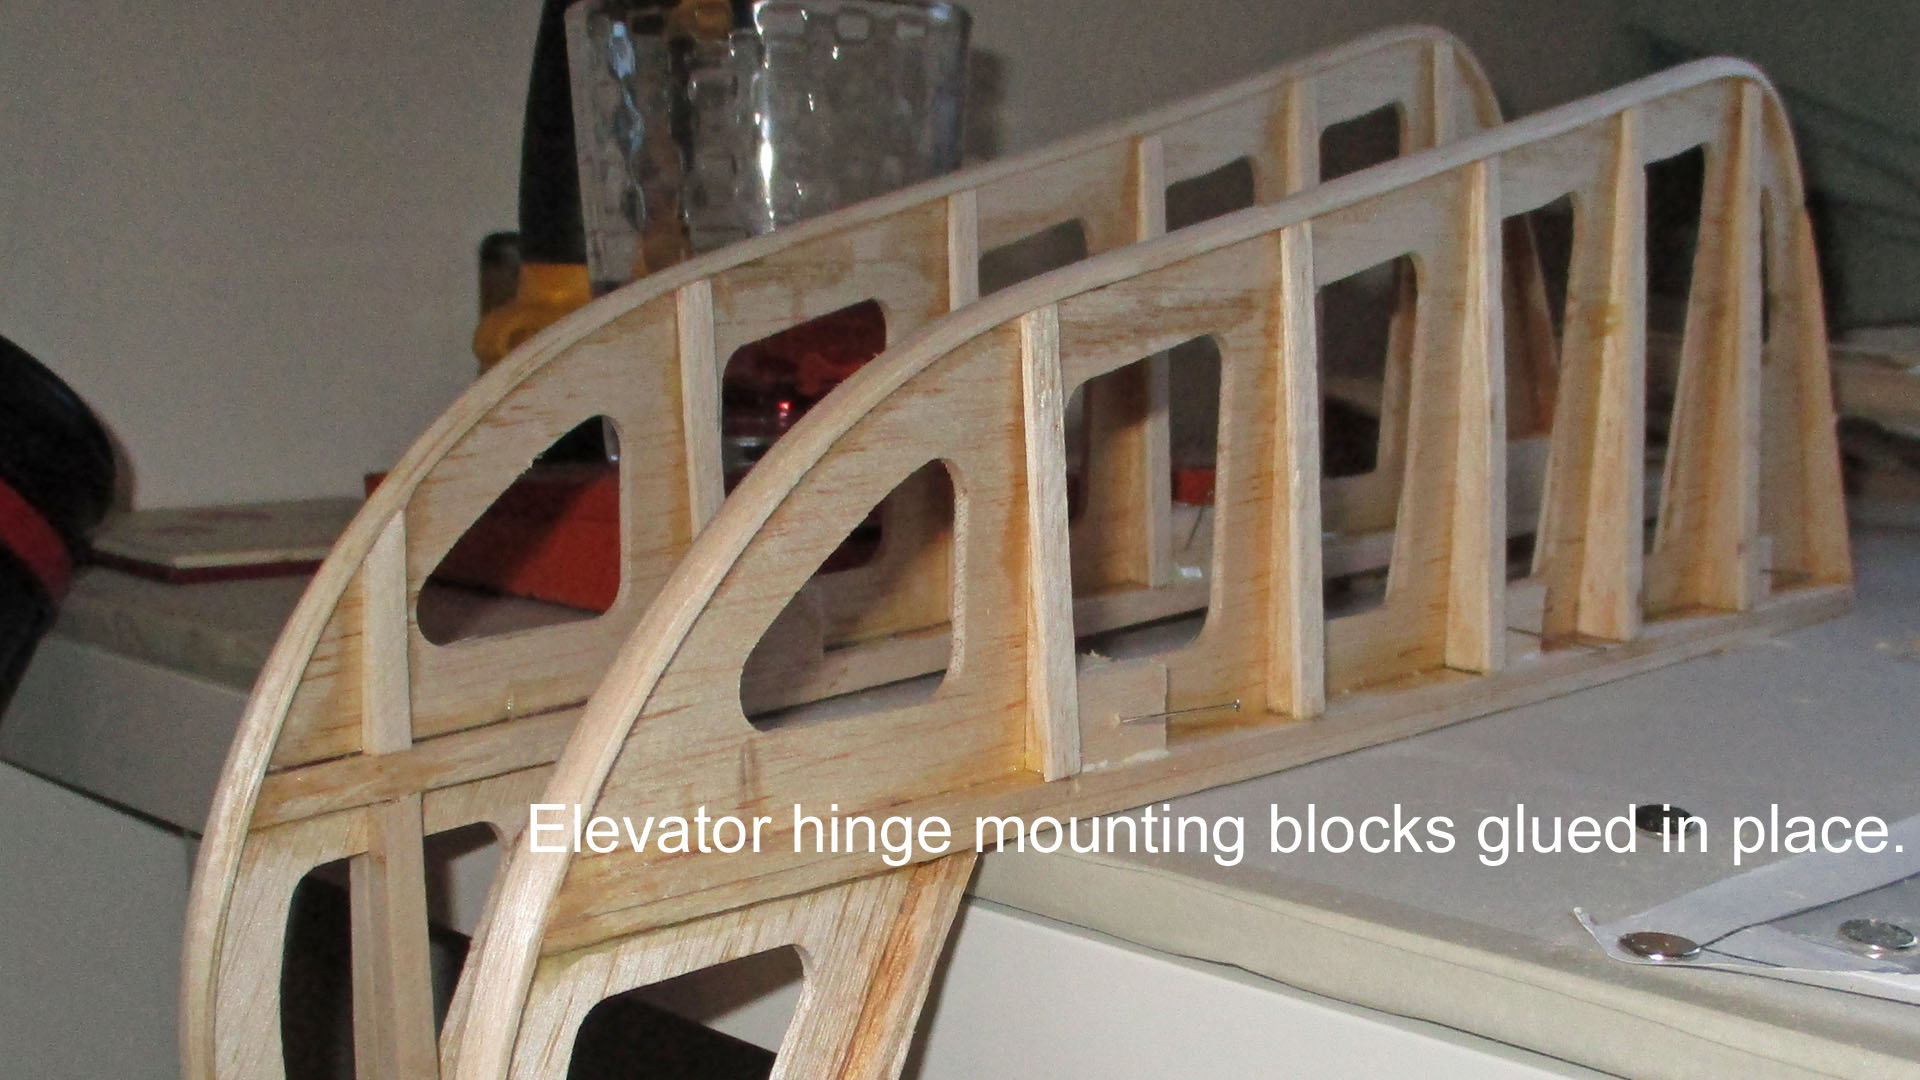
.After lunch I set to with the build, I had received some spring clamps & ratchet clamps, so had nothing to hold me back, other than the fumes from the cyno, which I haven't got used to yet. I managed to build the tailplane tips with the TP still fixed to the board. Next the topside cap strips & the hinge blocks, then called it a draw & edited the pics.

 09-12-2018, 11:54 PM
#32
Thread Starter
Join Date: Mar 2006
Location: Southport UK
Posts: 187
Likes: 0
Received 0 Likes
on
0 Posts
Hi Al
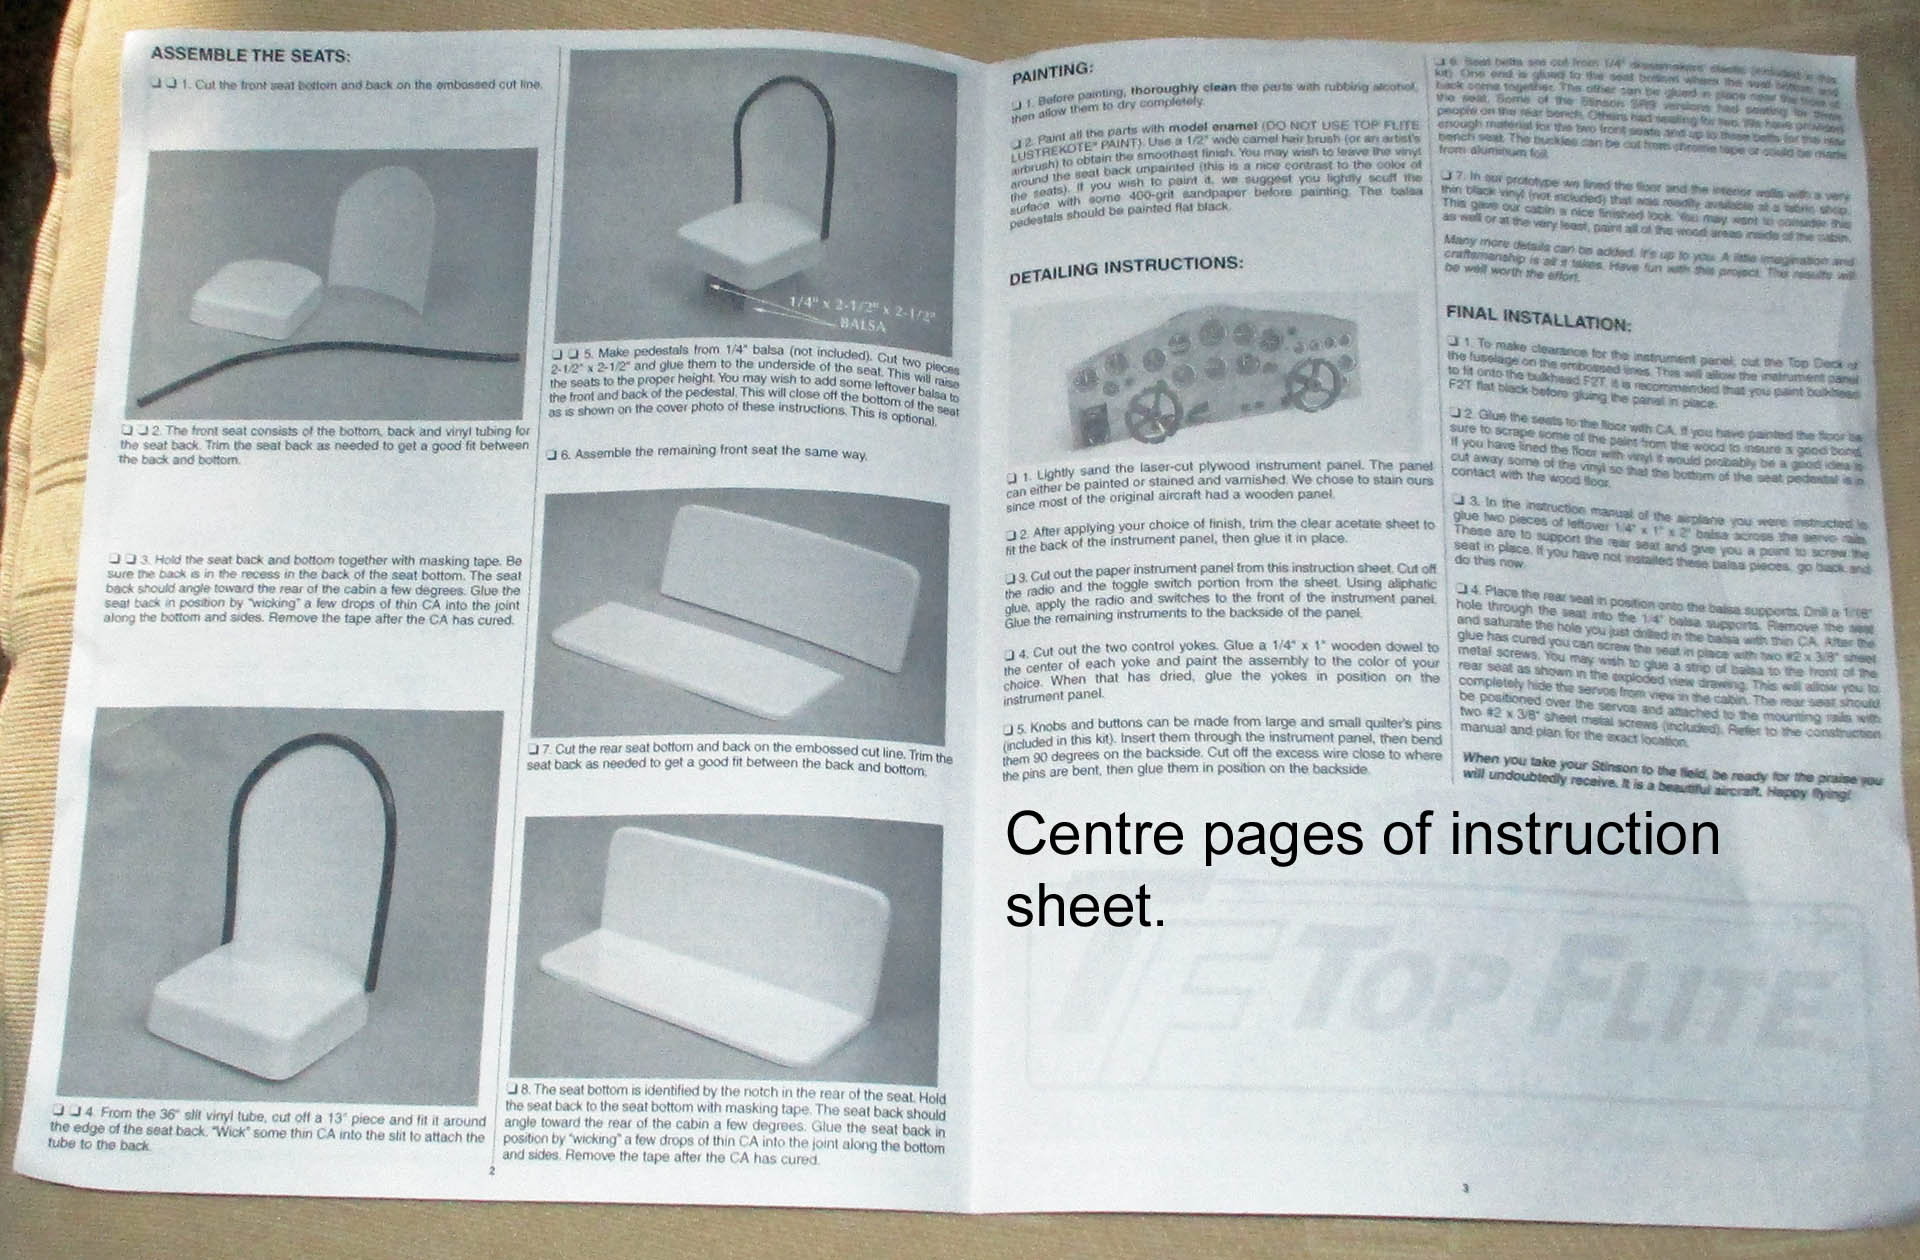
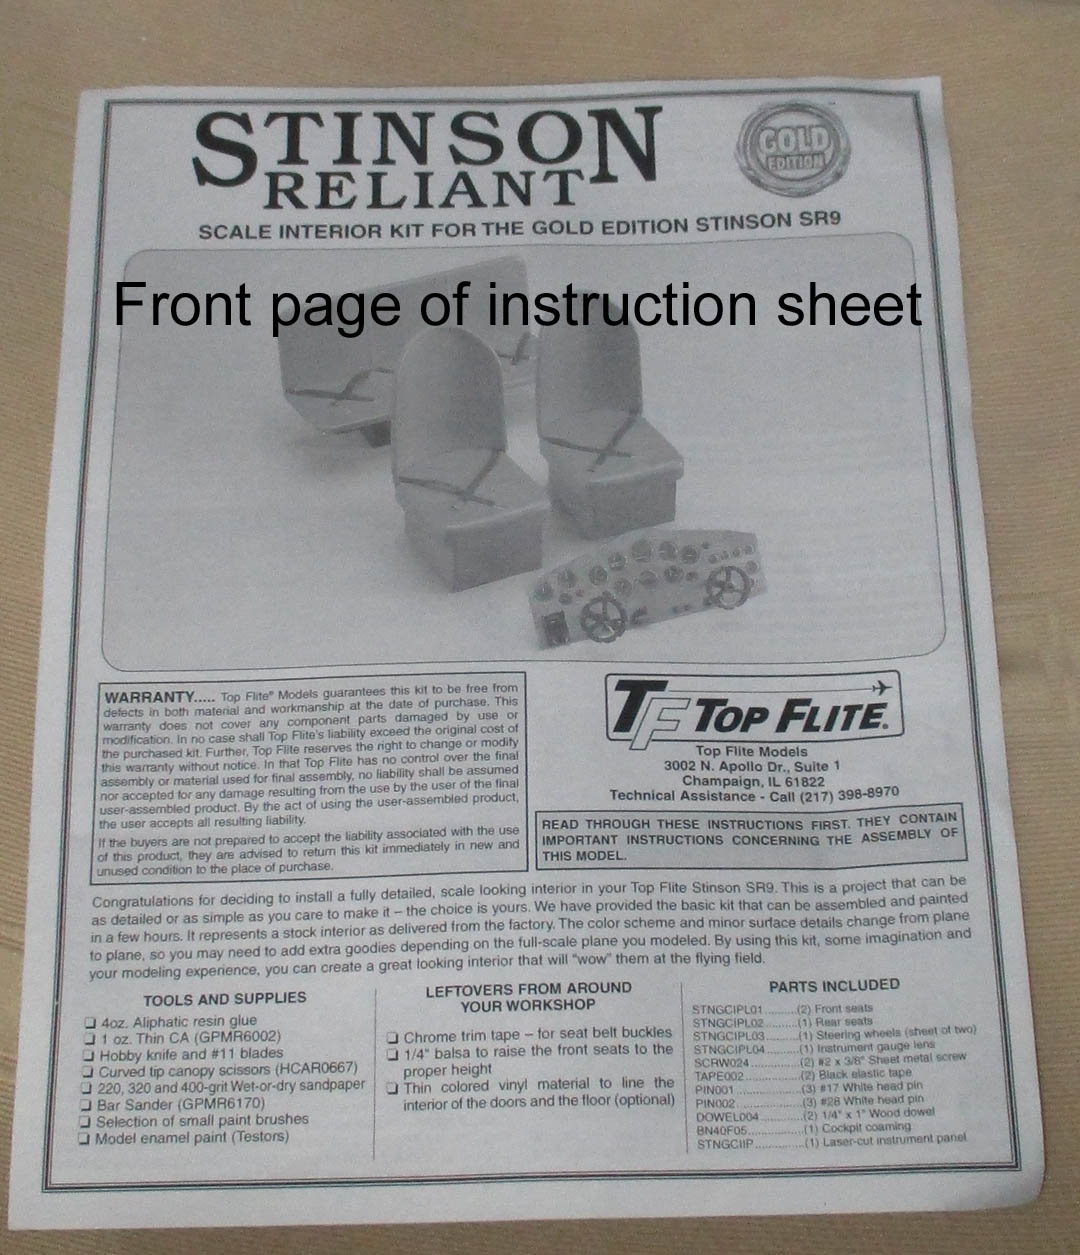
Still waiting for the cockpit kit, It's been in a depot 10 miles from me for 3 days, very frustrating. Hope the pictures & full explanation (warts & all) help. Best advice I can give anyone contemplating this kit is download the PDF file from the Top Flite site, blow it up on your computer & study the text & images, they aren't brilliant but better that the printed book that comes with the kit. if you have some photographic software, blow up a picture, screen shoot it & import it into your photo software & enhance it.
Only got half the day to build, house party this afternoon, the manager's leaving.
Regs Eric
09-13-2018, 10:20 AM
#33
Thread Starter
Join Date: Mar 2006
Location: Southport UK
Posts: 187
Likes: 0
Received 0 Likes
on
0 Posts
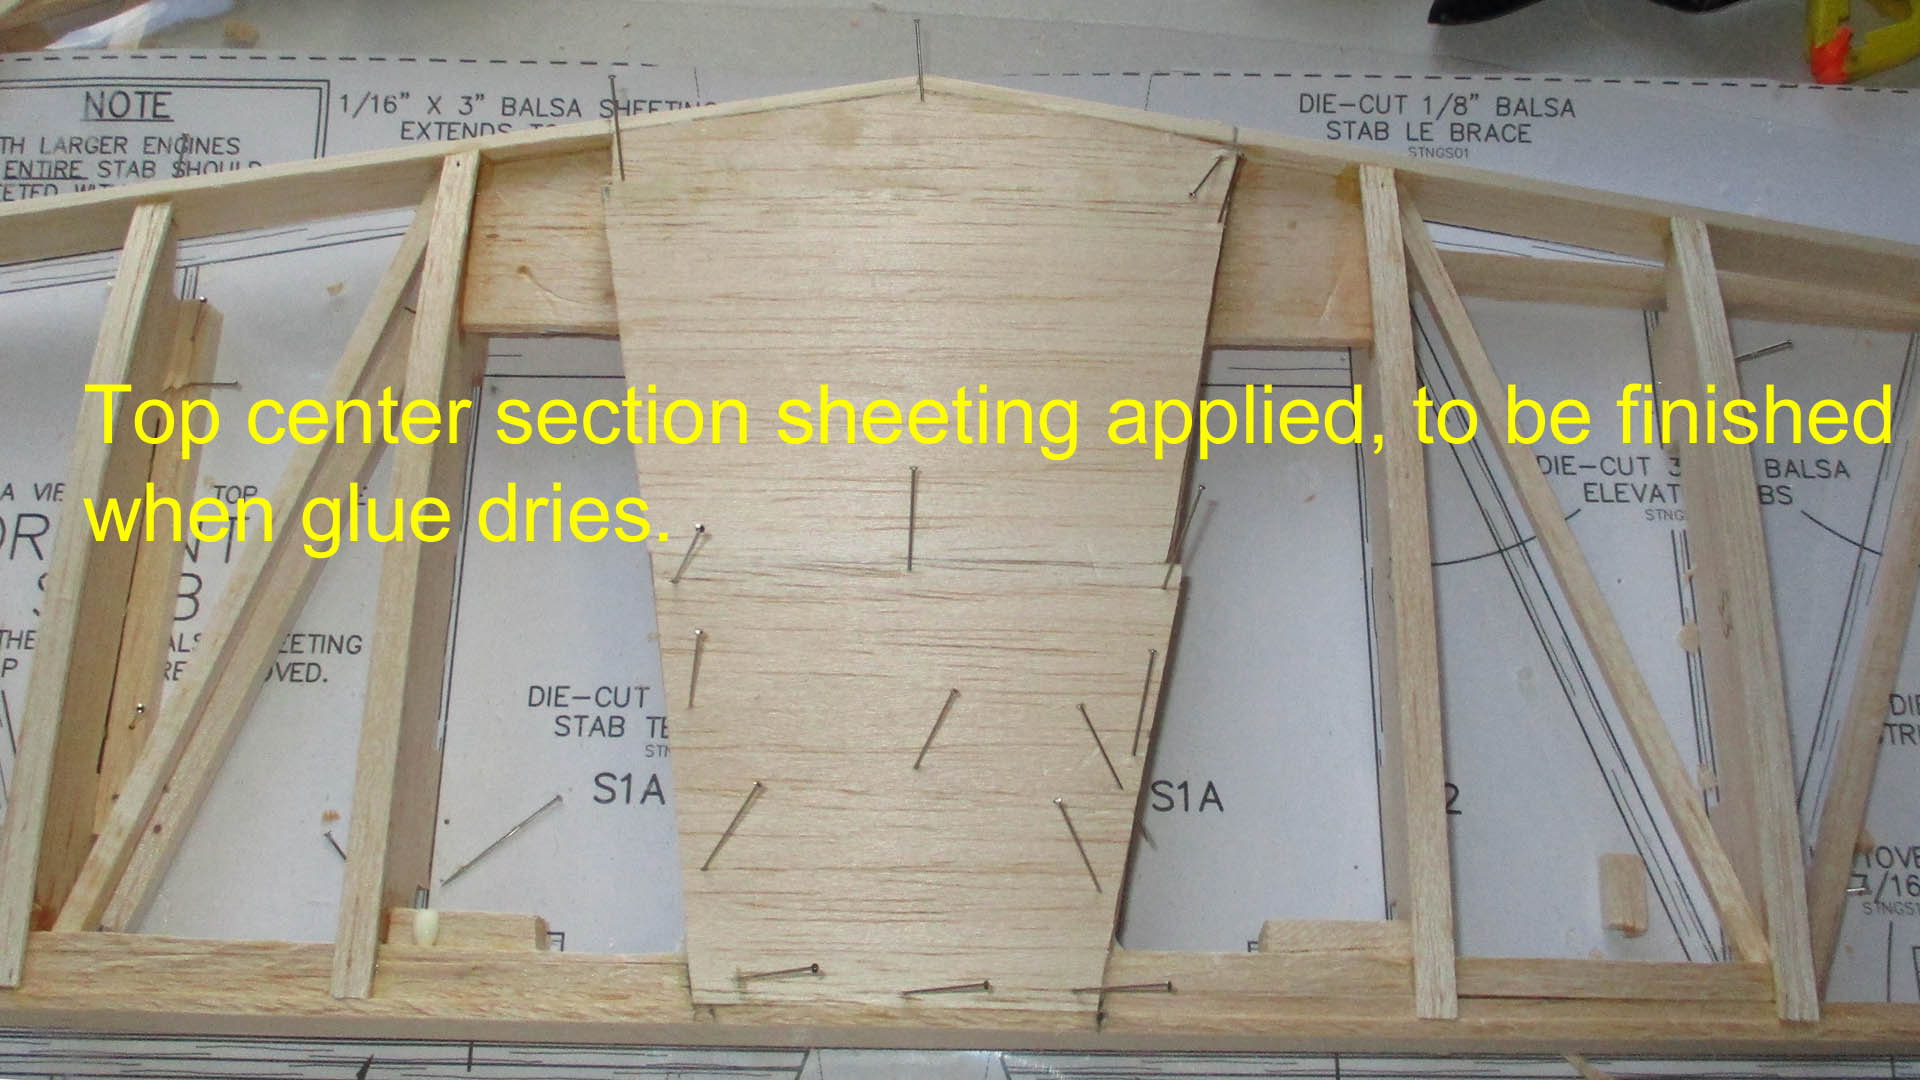
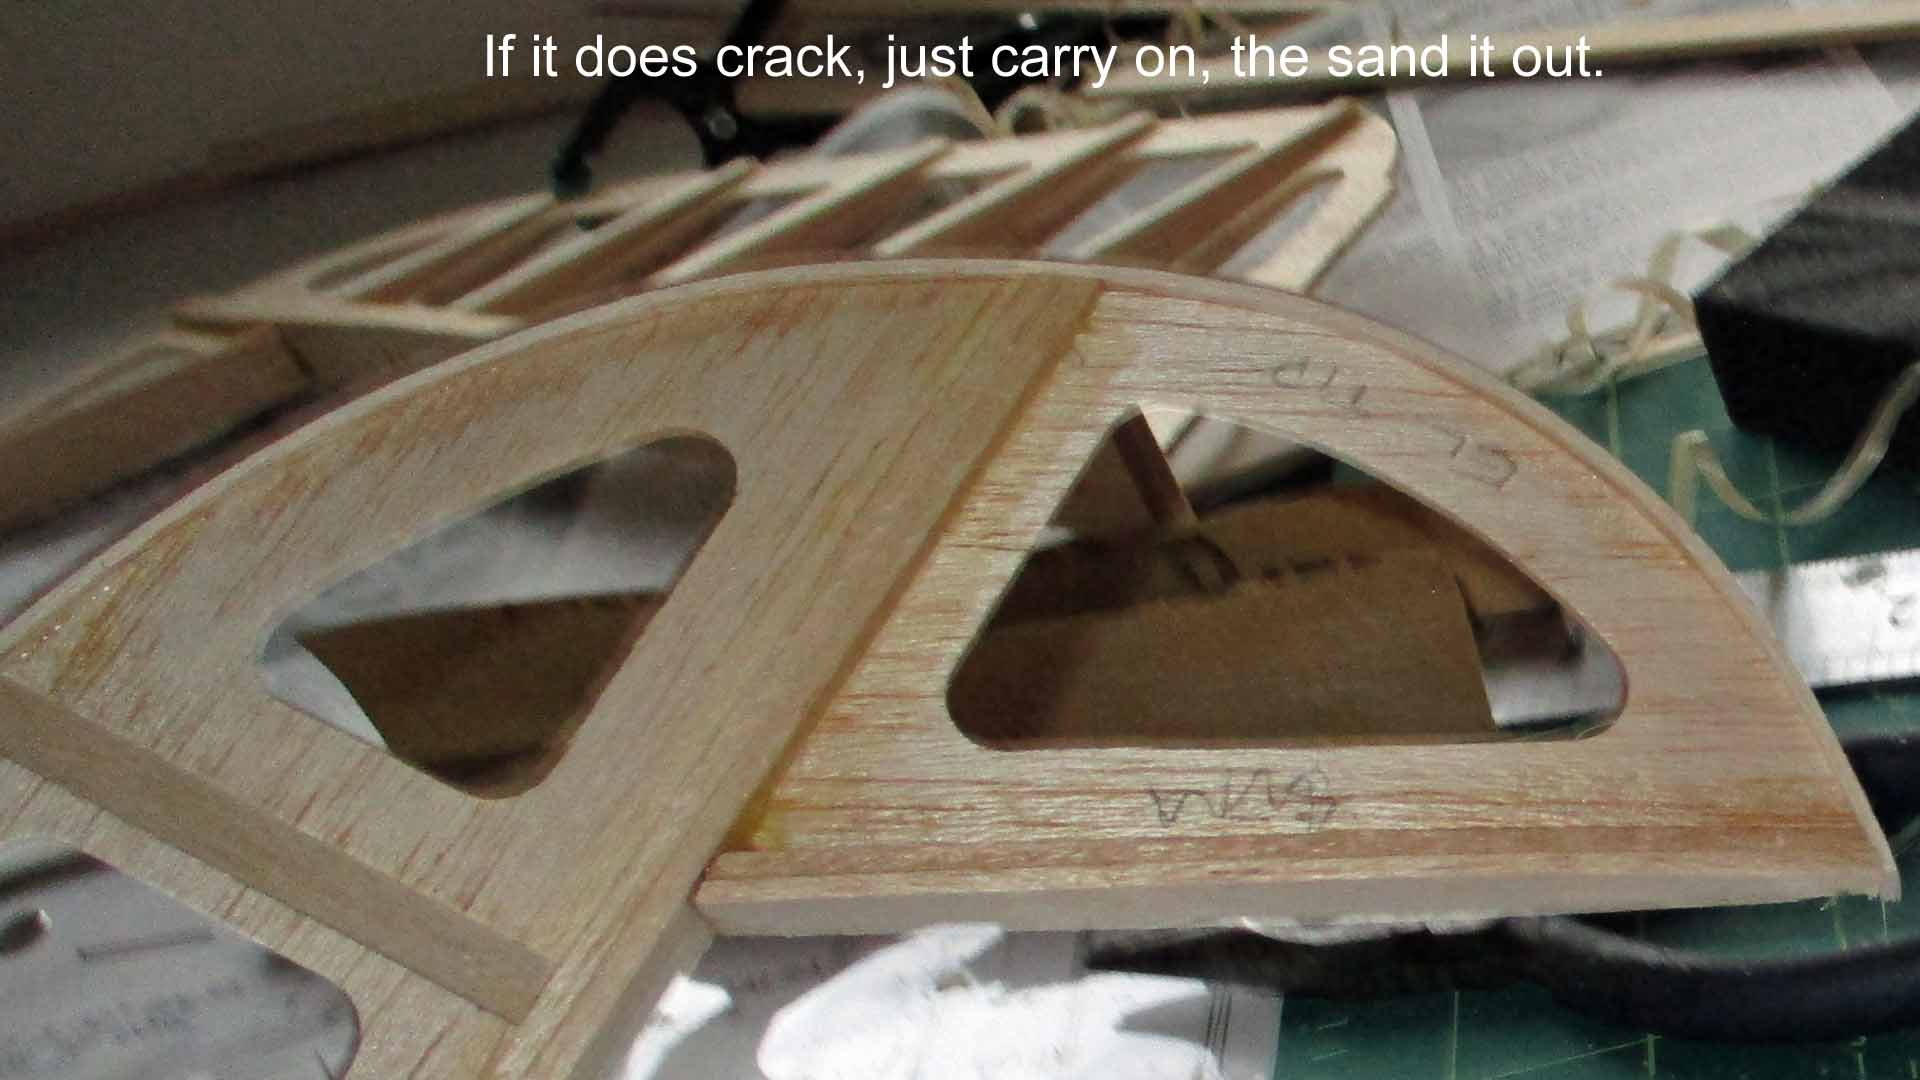
Managed to get a couple of hours building this morning before a house party for the leaving manager. First I sheeted the top centre section of the tailplane. Then removed the pins holding it to the building board. The manual says ❏ 17. Use a hobby knife to carefully trim the jig tabs from the bottom of the stab ribs. Simple statement, took me 21/2 hours. The ribs are quite hard & you have to be careful not to split off too much balsa. During this time, the bell rang, it was the courier with the cockpit kit. Had a quick look then dressed for the party.
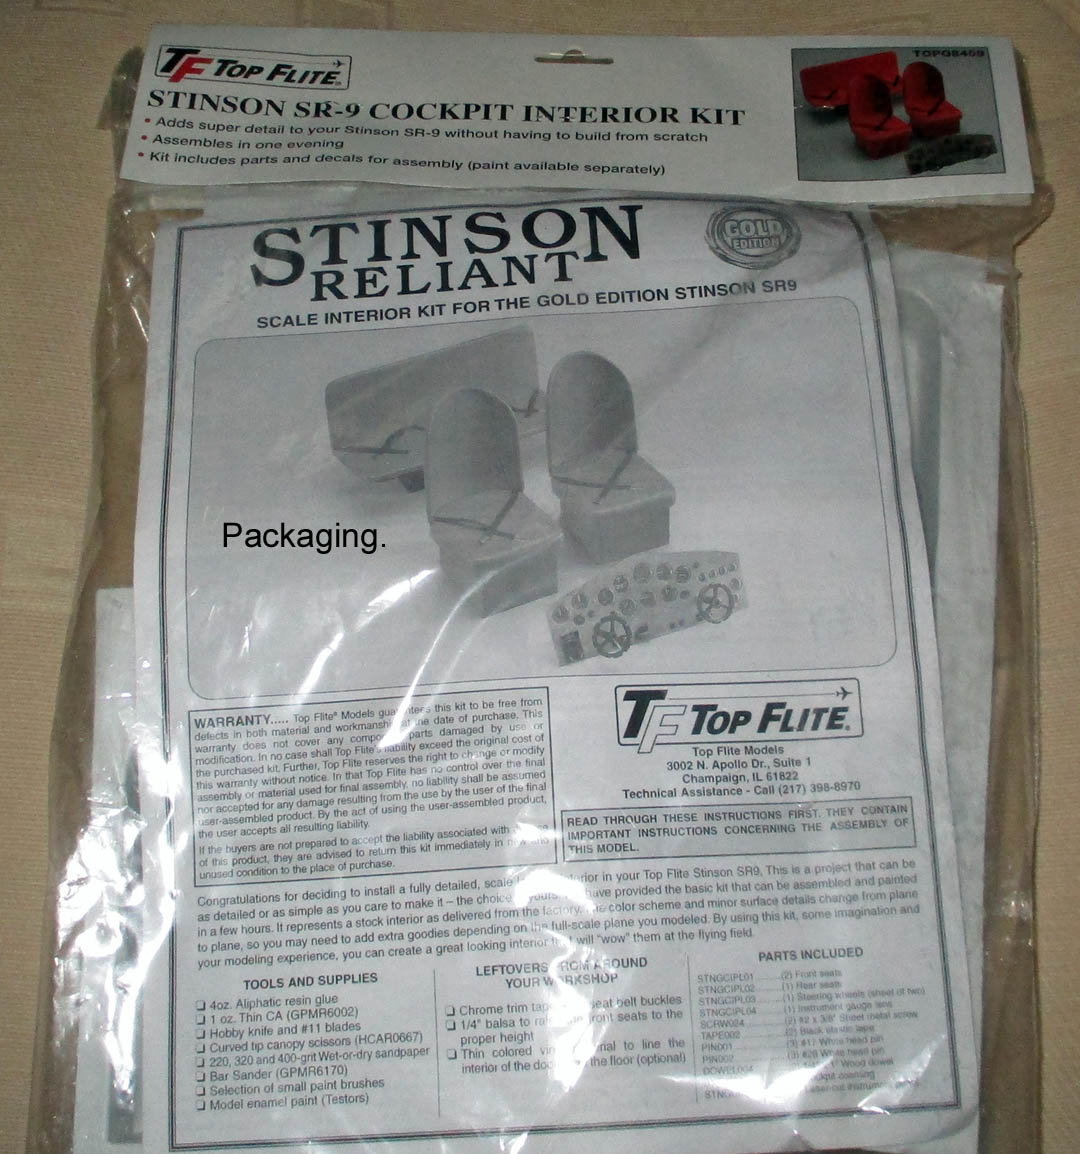
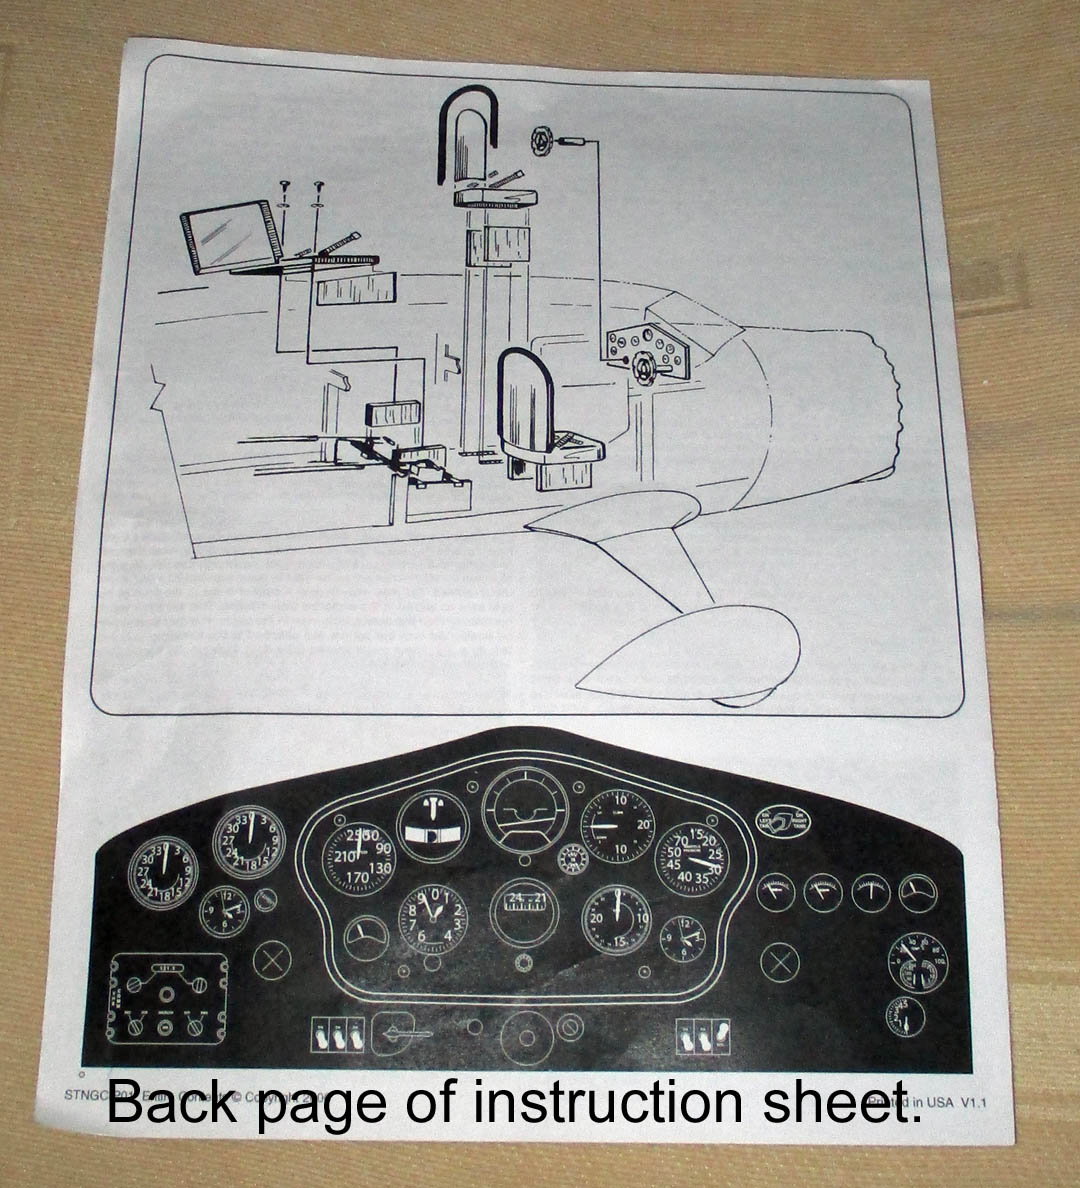
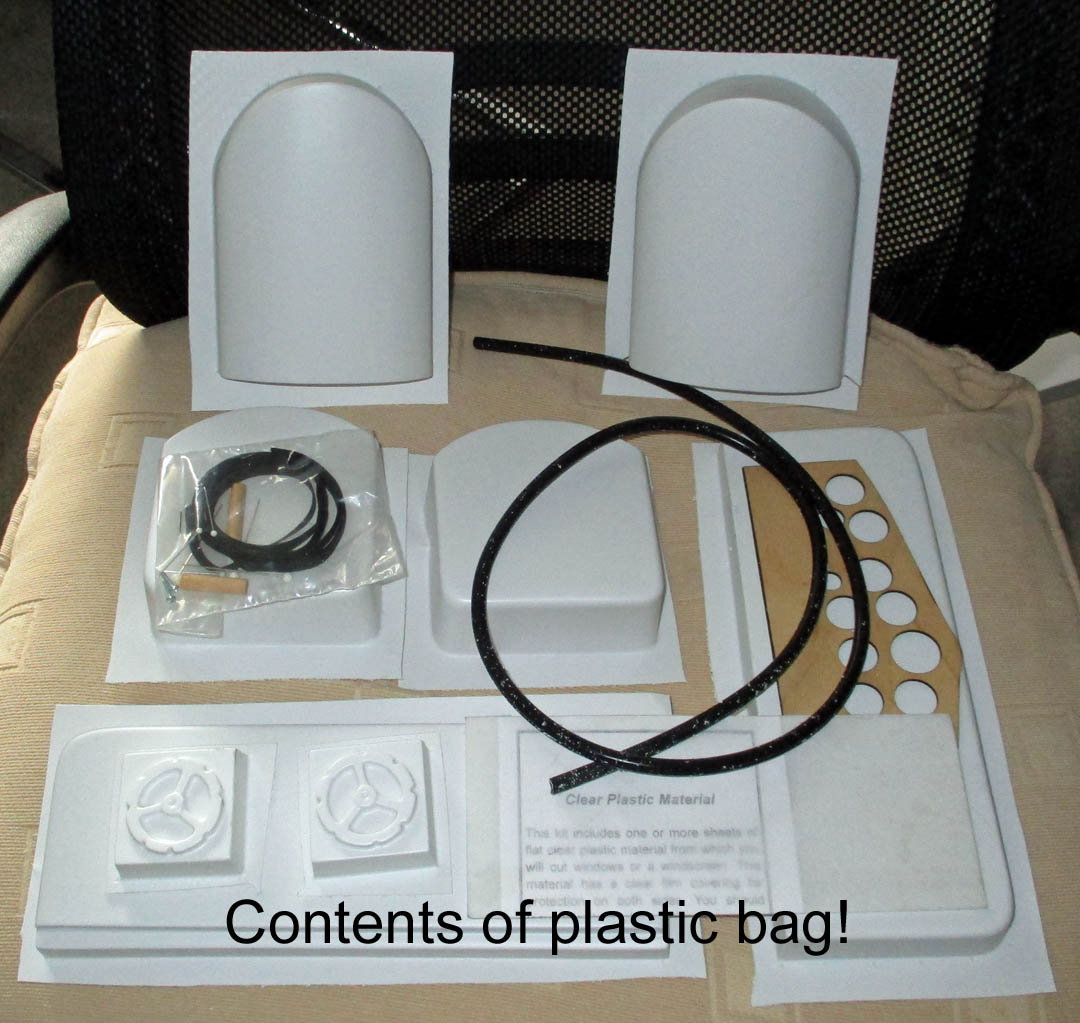
Back home, I unpacked the cockpit kit, what a cheap nasty effort TF have made of it. The ABS mouldings are so thin, I've seen better quality mouldings in throw away food packaging. One of them was split, not surprising as they are packed in a polythene bag, inside a cardboard shipping carton.
That's my lot for today, hopefully things will look better in the morning?
pictures below.
Words in the pics.

Words in the pics.
Words in the pics.
Words in the pics.
Words in the pics.

Words in the pics.
Words in the pics.
Words in the pics.
Back home, I unpacked the cockpit kit, what a cheap nasty effort TF have made of it. The ABS mouldings are so thin, I've seen better quality mouldings in throw away food packaging. One of them was split, not surprising as they are packed in a polythene bag, inside a cardboard shipping carton.
That's my lot for today, hopefully things will look better in the morning?
pictures below.
Words in the pics.
Words in the pics.
Words in the pics.
Words in the pics.
Words in the pics.
Words in the pics.
Words in the pics.
Words in the pics.
09-14-2018, 07:49 AM
#34
Thread Starter
Join Date: Mar 2006
Location: Southport UK
Posts: 187
Likes: 0
Received 0 Likes
on
0 Posts
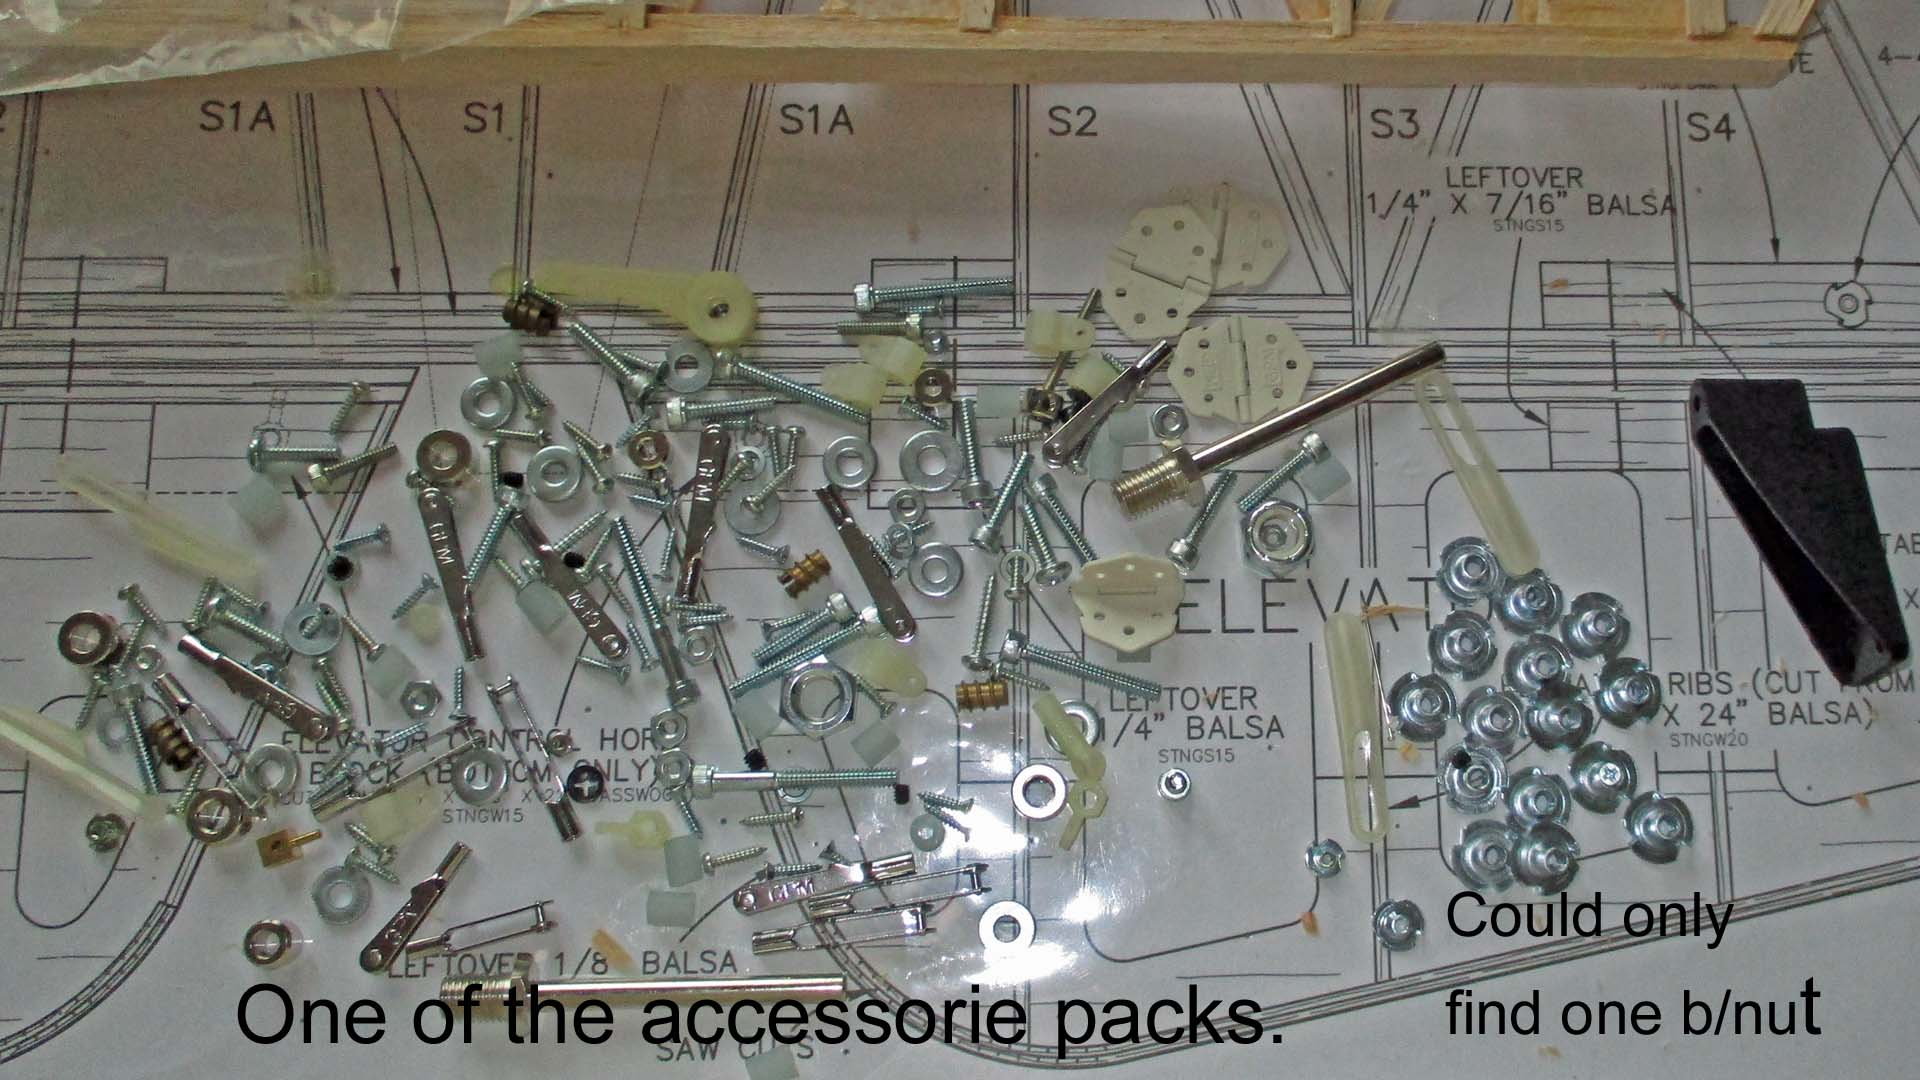
After a short day yesterday I wanted to finish the tailplane, nothing more boring than fitting cap strips, especially on a tapered flying surface. Finished the underside of the tailplane & sheeted the centre section before lunch, then realised the ply support strut anchors had to be fitted. After lunch rifled through the ply parts, eventually found them. Then began an hours hunt for the blind nuts & bolts. Emptied the bag of accessories on the building board & located one of them & the bolt, an hour later I had found the second bolt but not the blind nut. So I replaced each item one by one in the bag, I was about to drop the last quick link in the bag when I spied something trapped in the fork, the missing blind nut****. By this time it was almost 3pm & I had promised a neighbour I would take pictures of her furniture for an add on Gumtree & Preloved. So that ended my building for the day, still have to watch today's practice for the Singapore GP which I recorded.
Pictures below.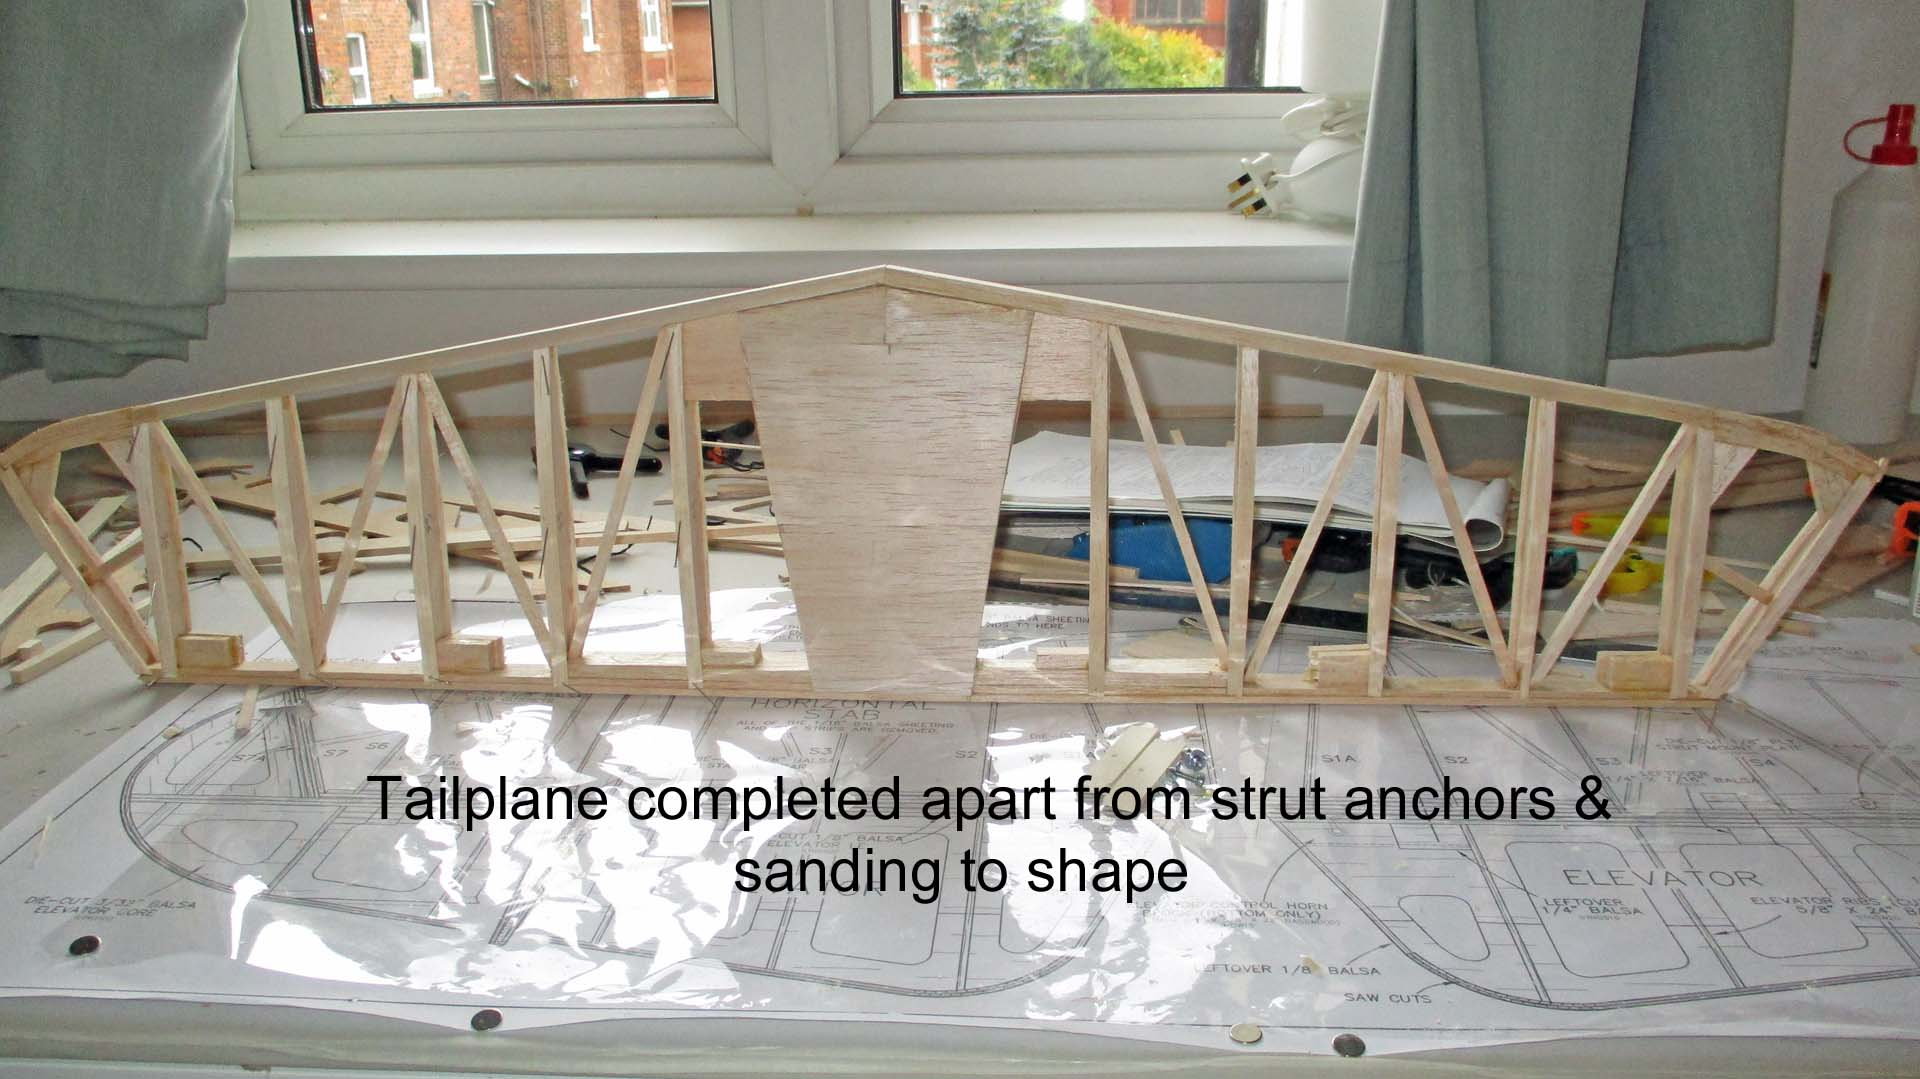
Text in the pics
Text in the pics

Text in the pics
Pictures below.
Text in the pics
Text in the pics
Text in the pics
09-15-2018, 07:21 AM
#35
Thread Starter
Join Date: Mar 2006
Location: Southport UK
Posts: 187
Likes: 0
Received 0 Likes
on
0 Posts
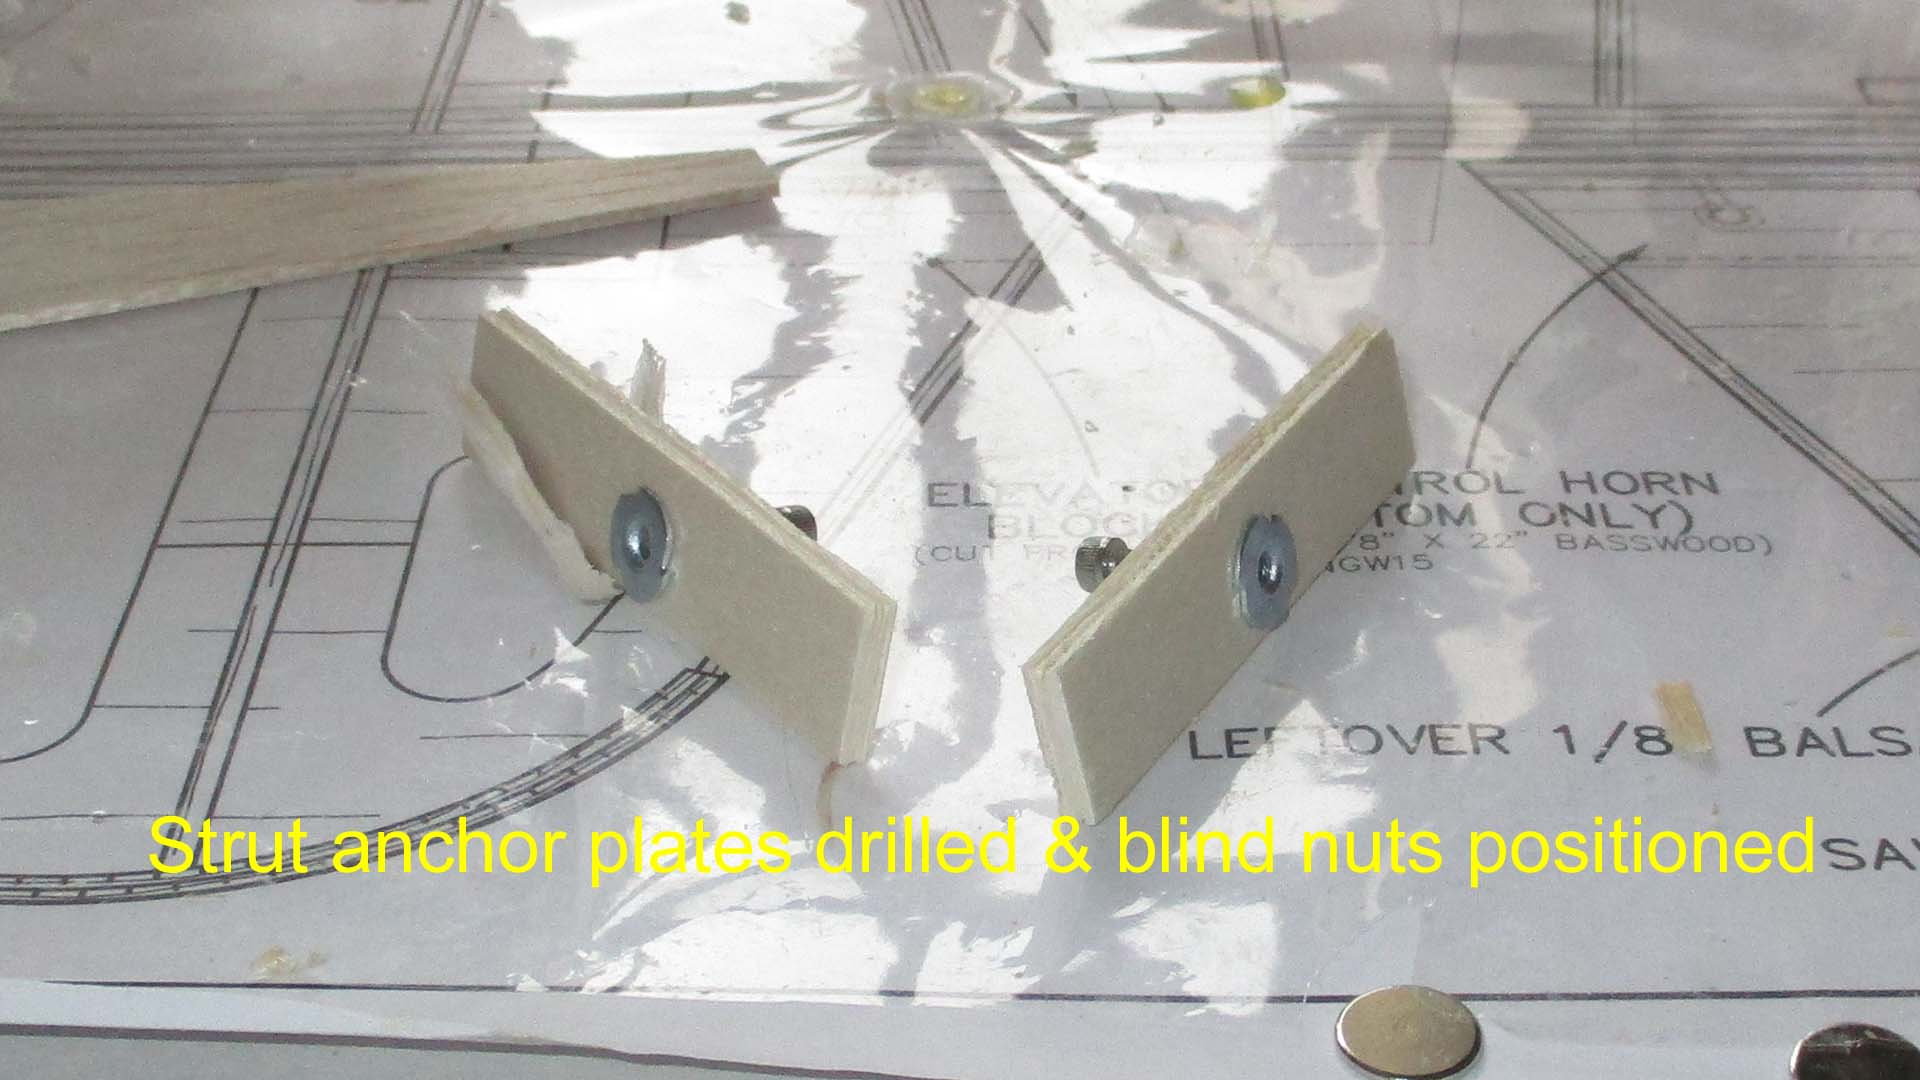
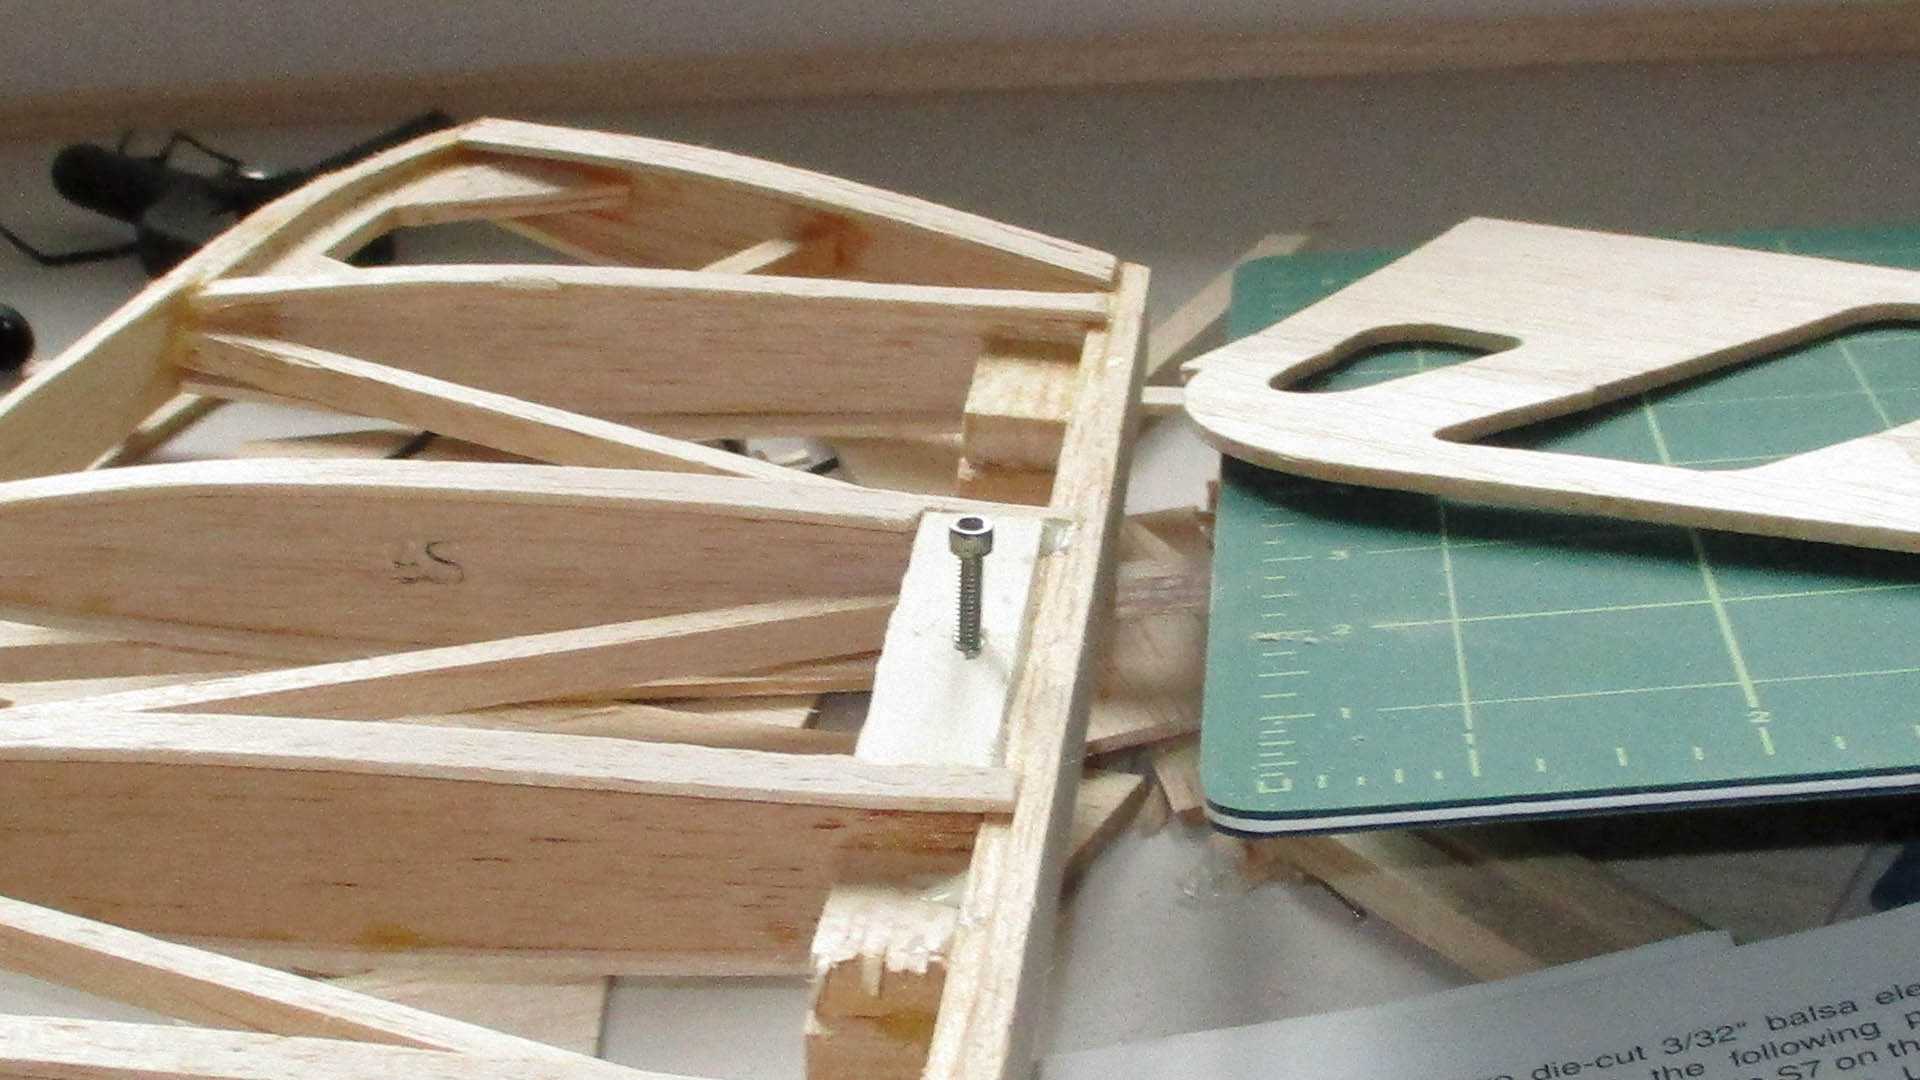
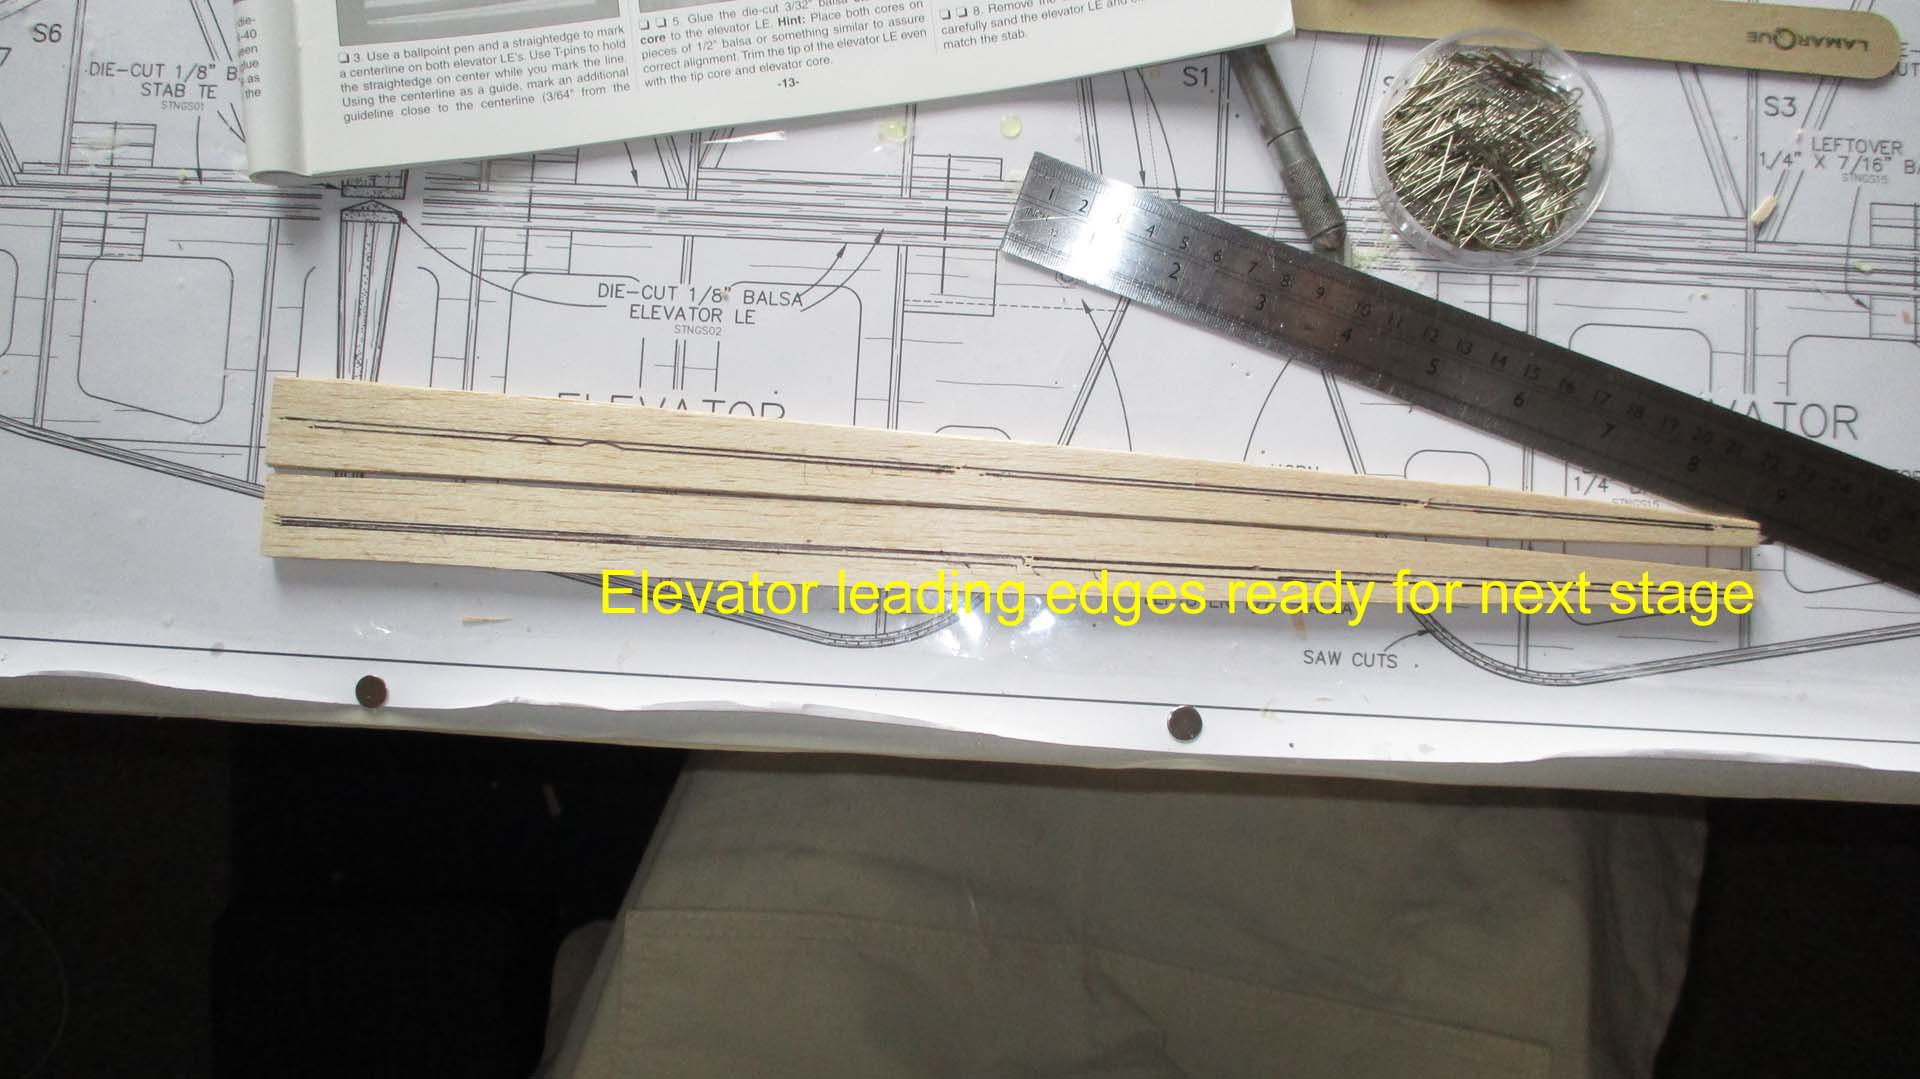
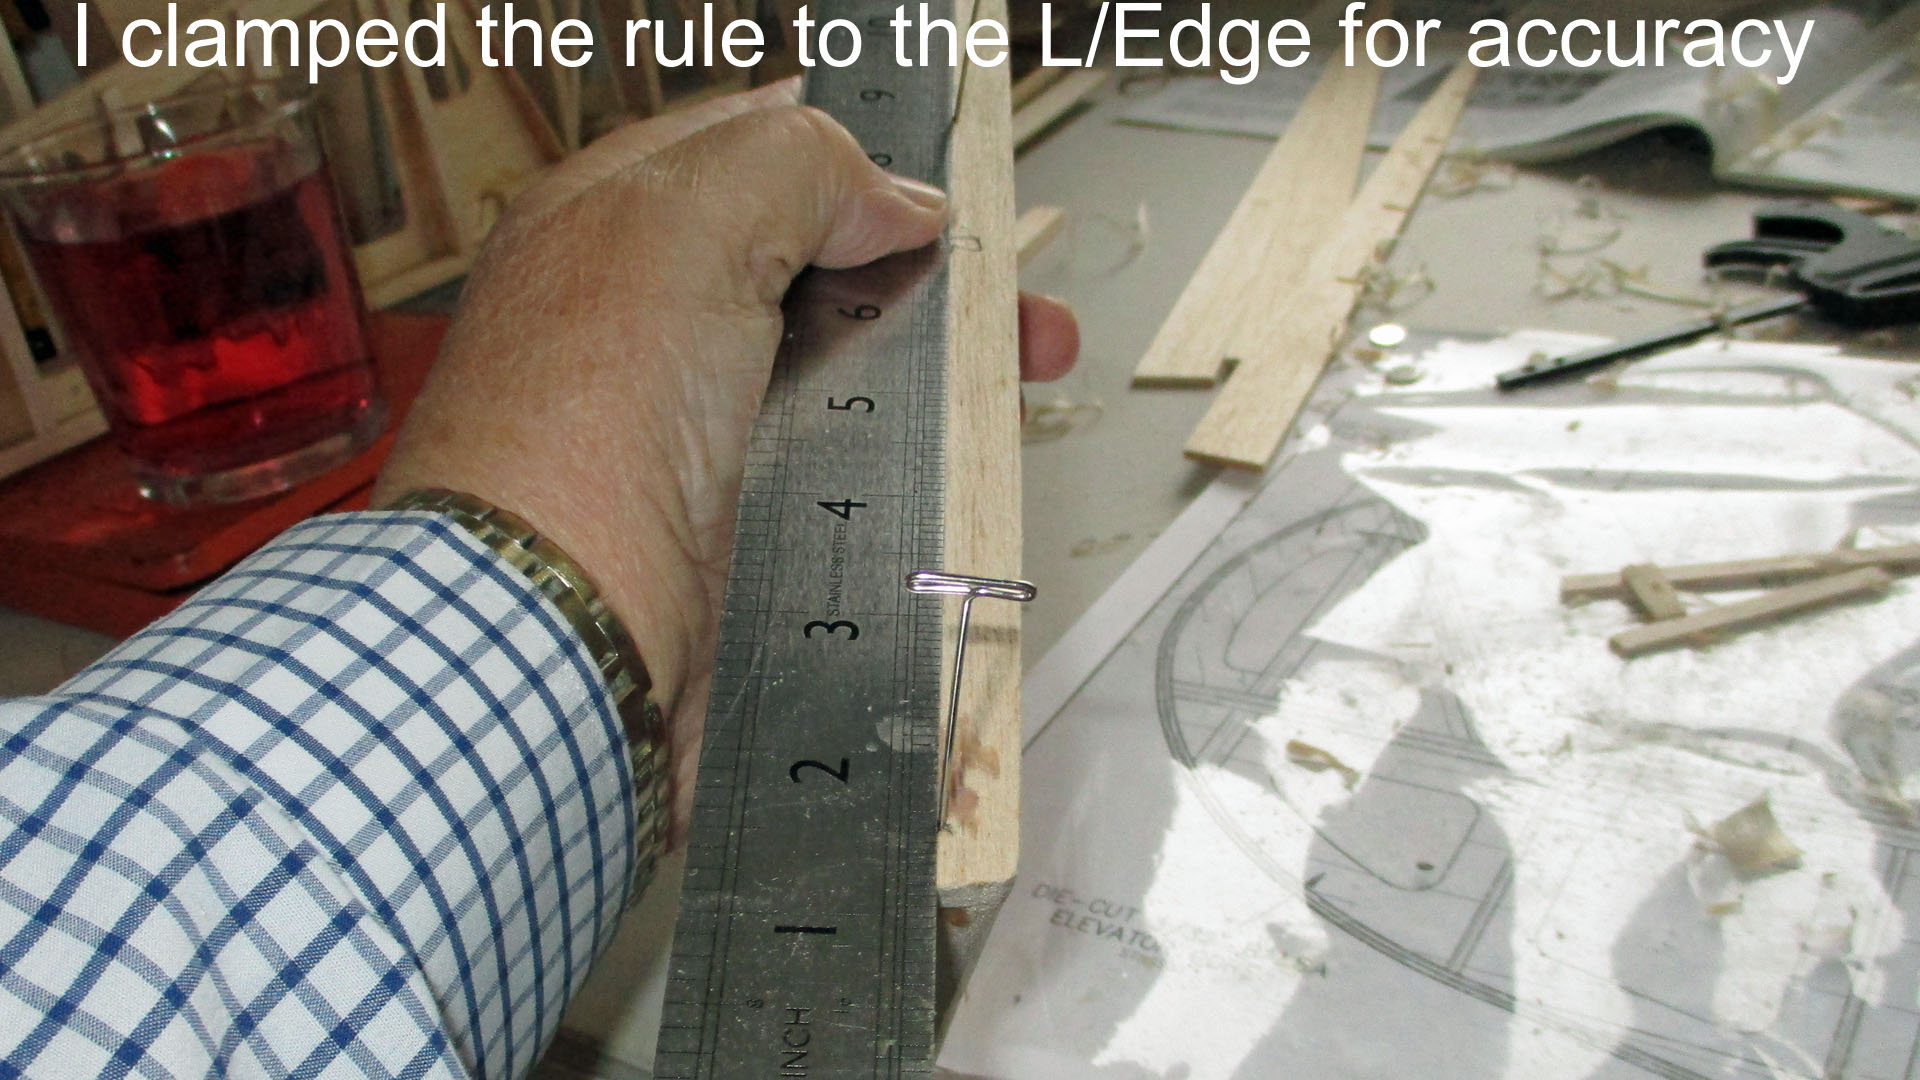
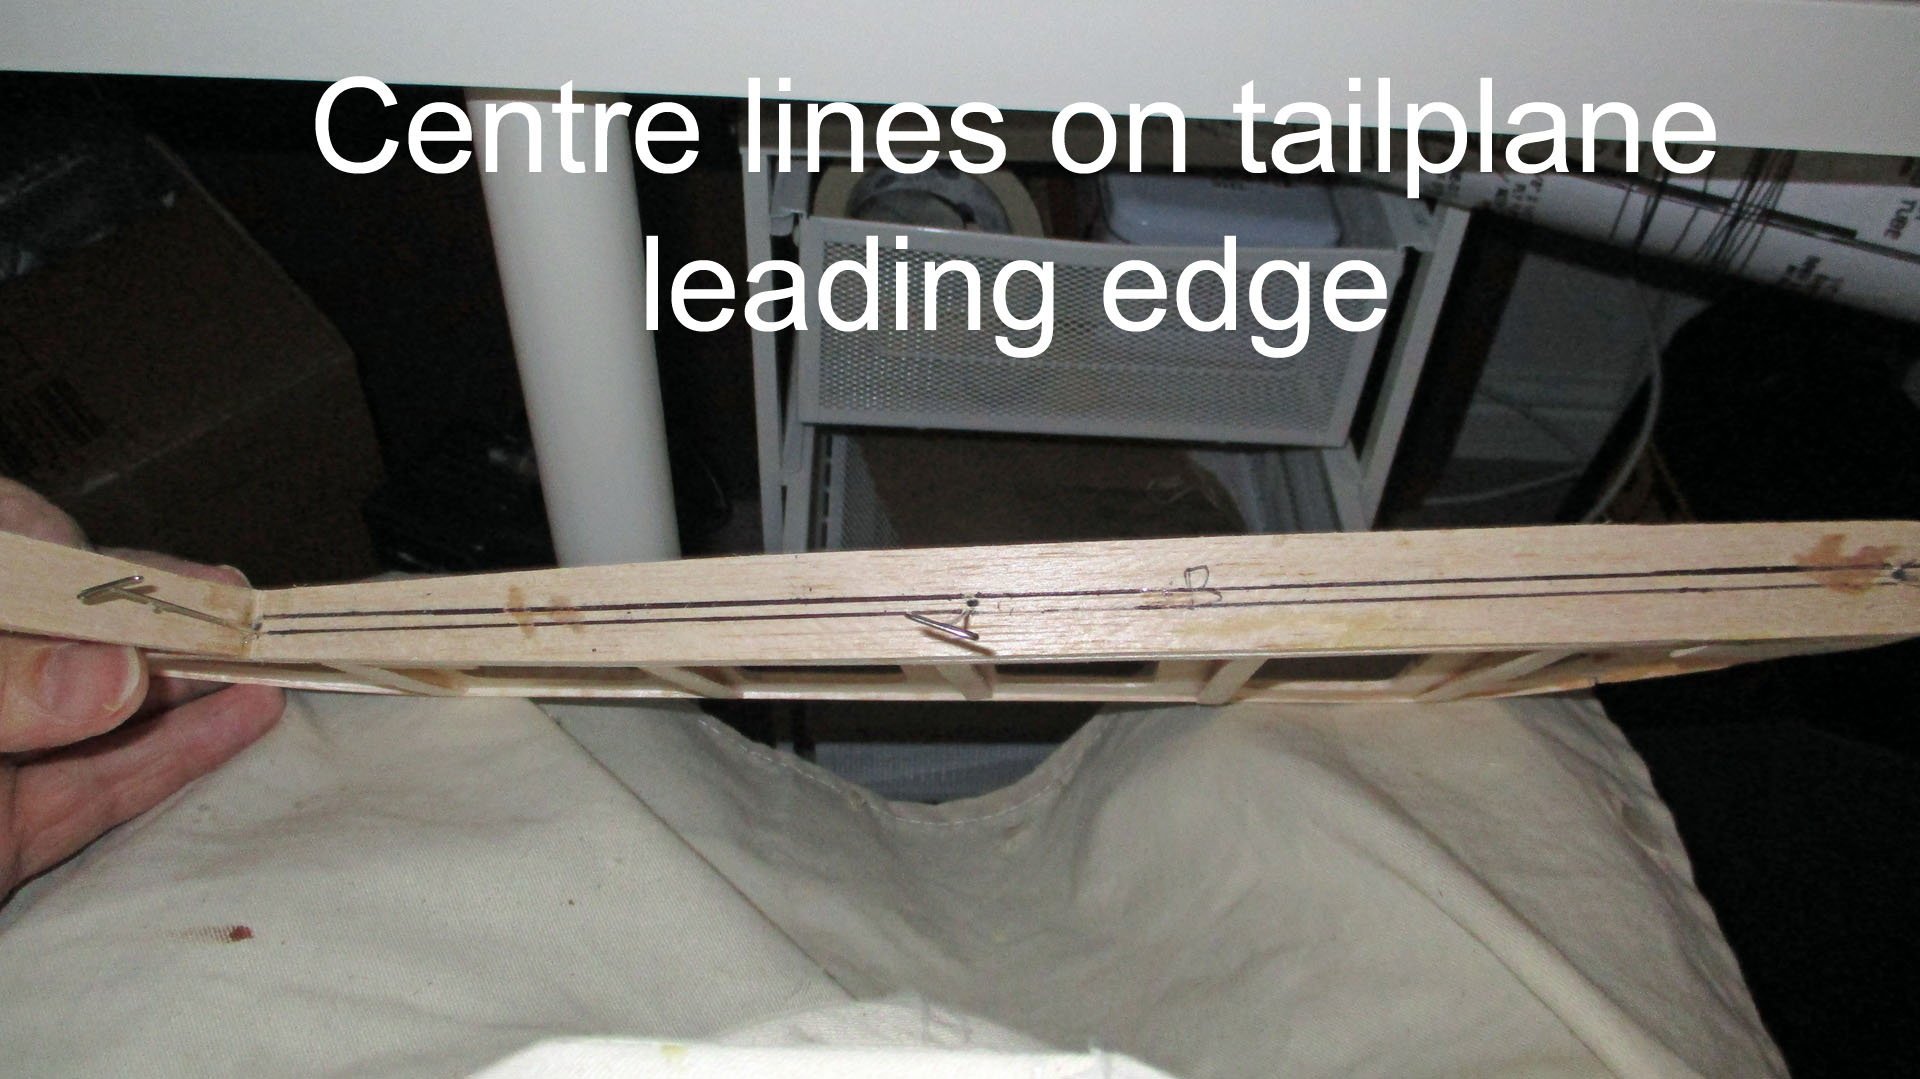
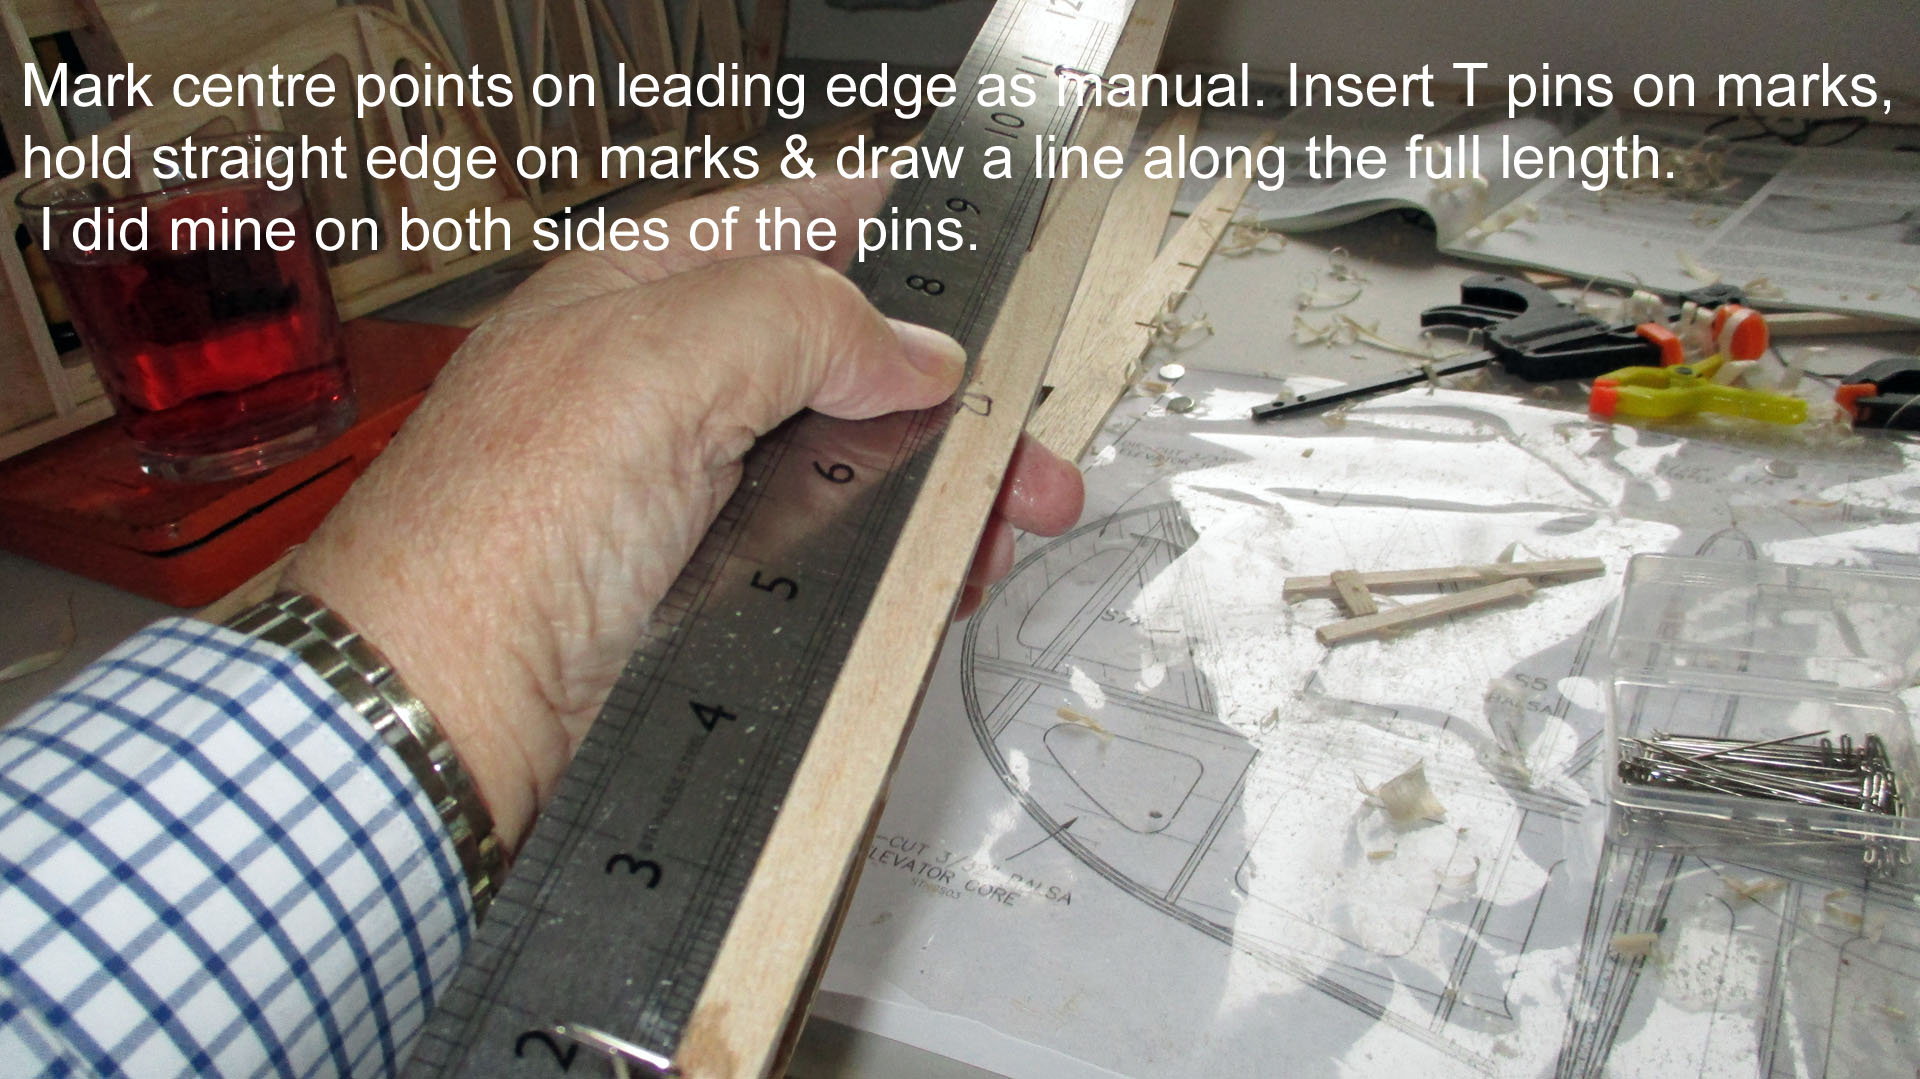
Just squeezed a couple of hours building between practice & qualifying for the Singapore F1 GP. Fitted the tailplane support strut fixings, laminated the elevator leading edges & marked the center & alignment lines. Lewis on pole.
Pictures below.
Every picture tells a story!

Every picture tells a story!
Every picture tells a story!
Every picture tells a story!
Pictures below.
Every picture tells a story!
Every picture tells a story!
Every picture tells a story!
Every picture tells a story!
09-16-2018, 08:55 AM
#36
Thread Starter
Join Date: Mar 2006
Location: Southport UK
Posts: 187
Likes: 0
Received 0 Likes
on
0 Posts
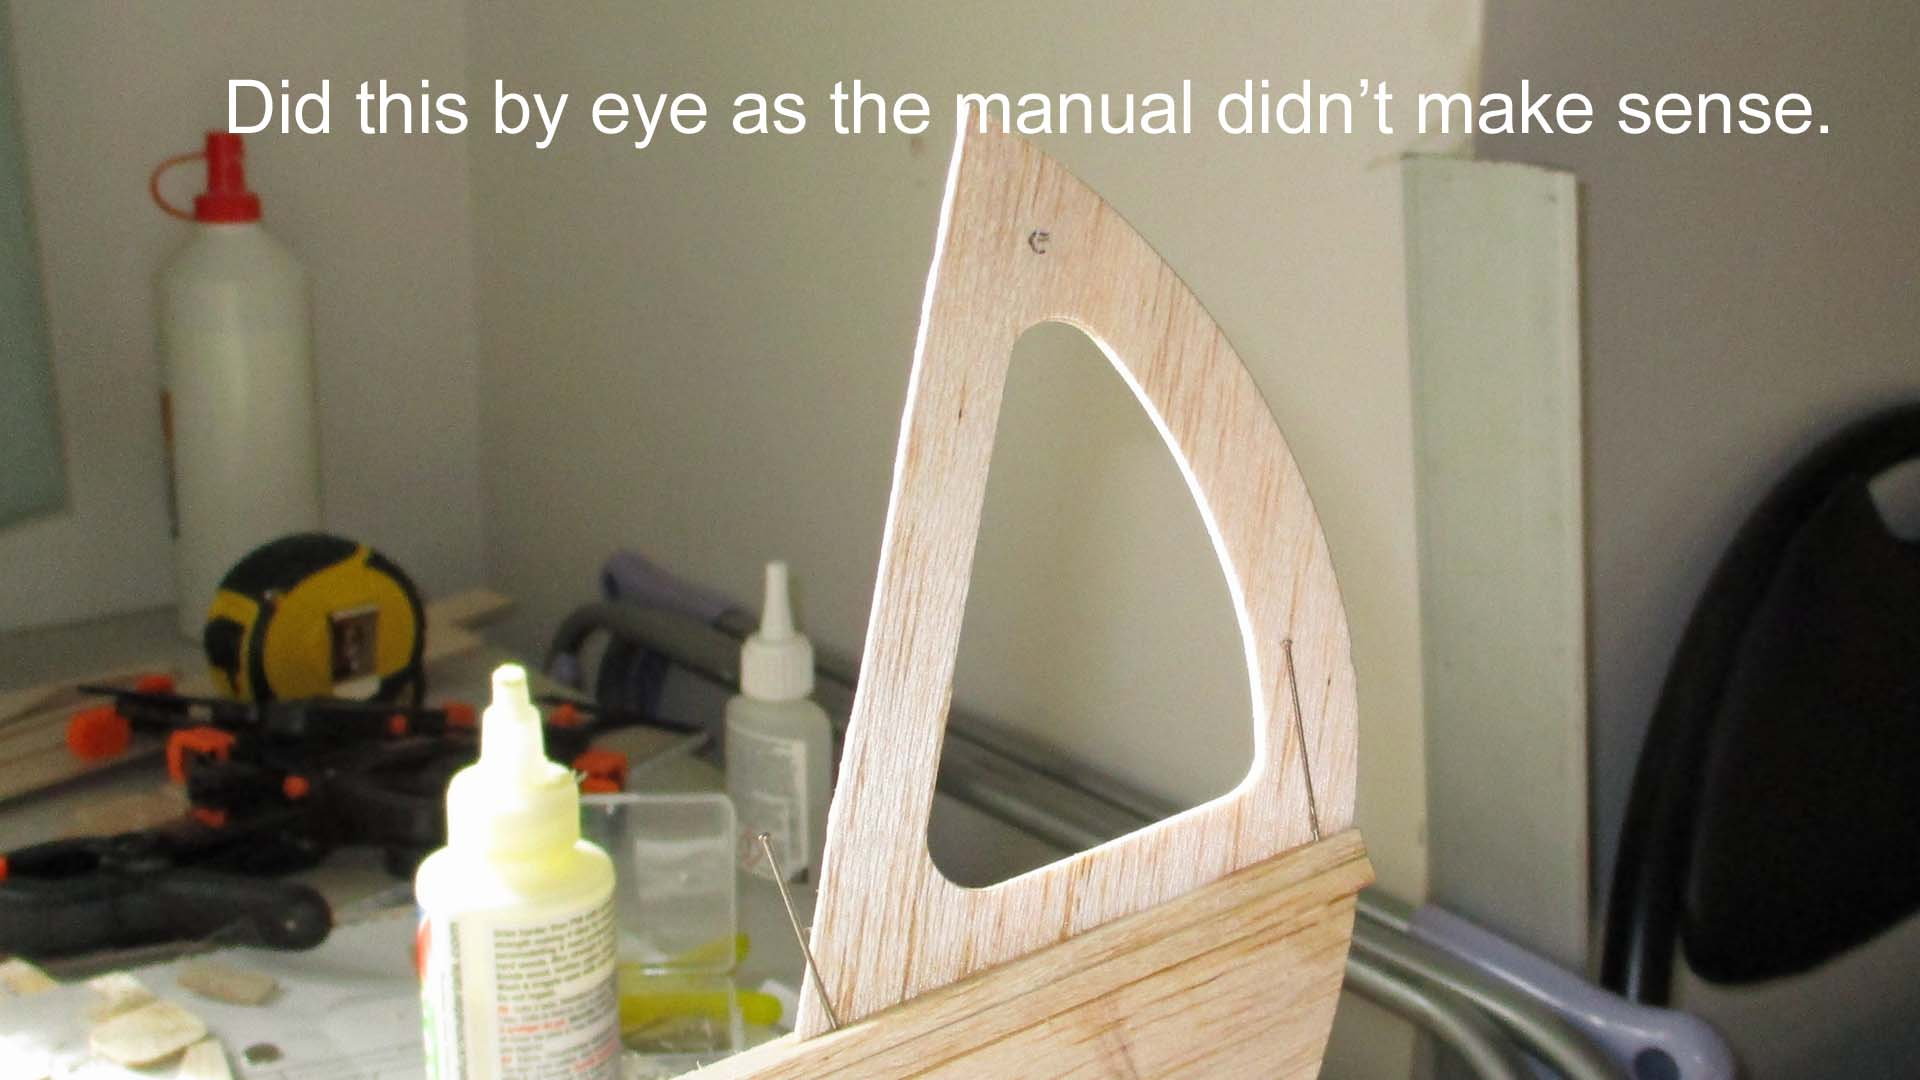
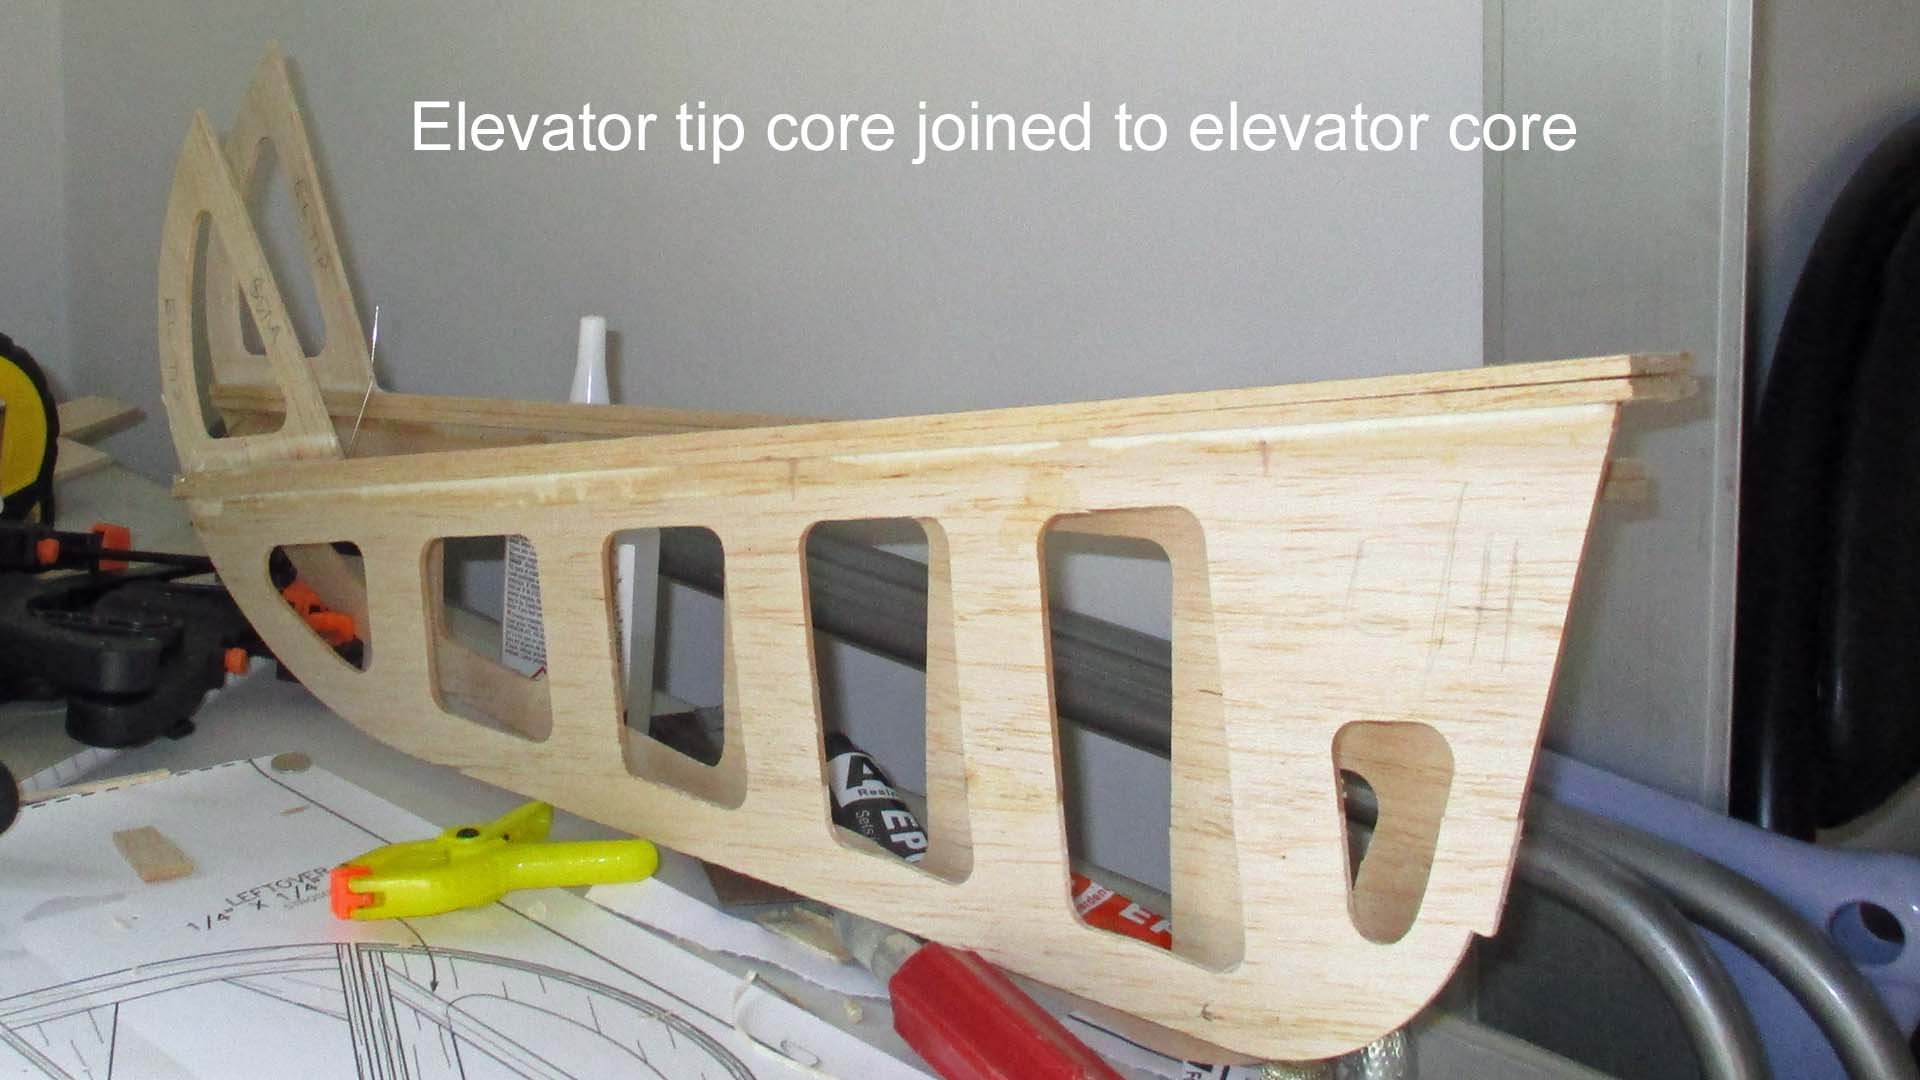
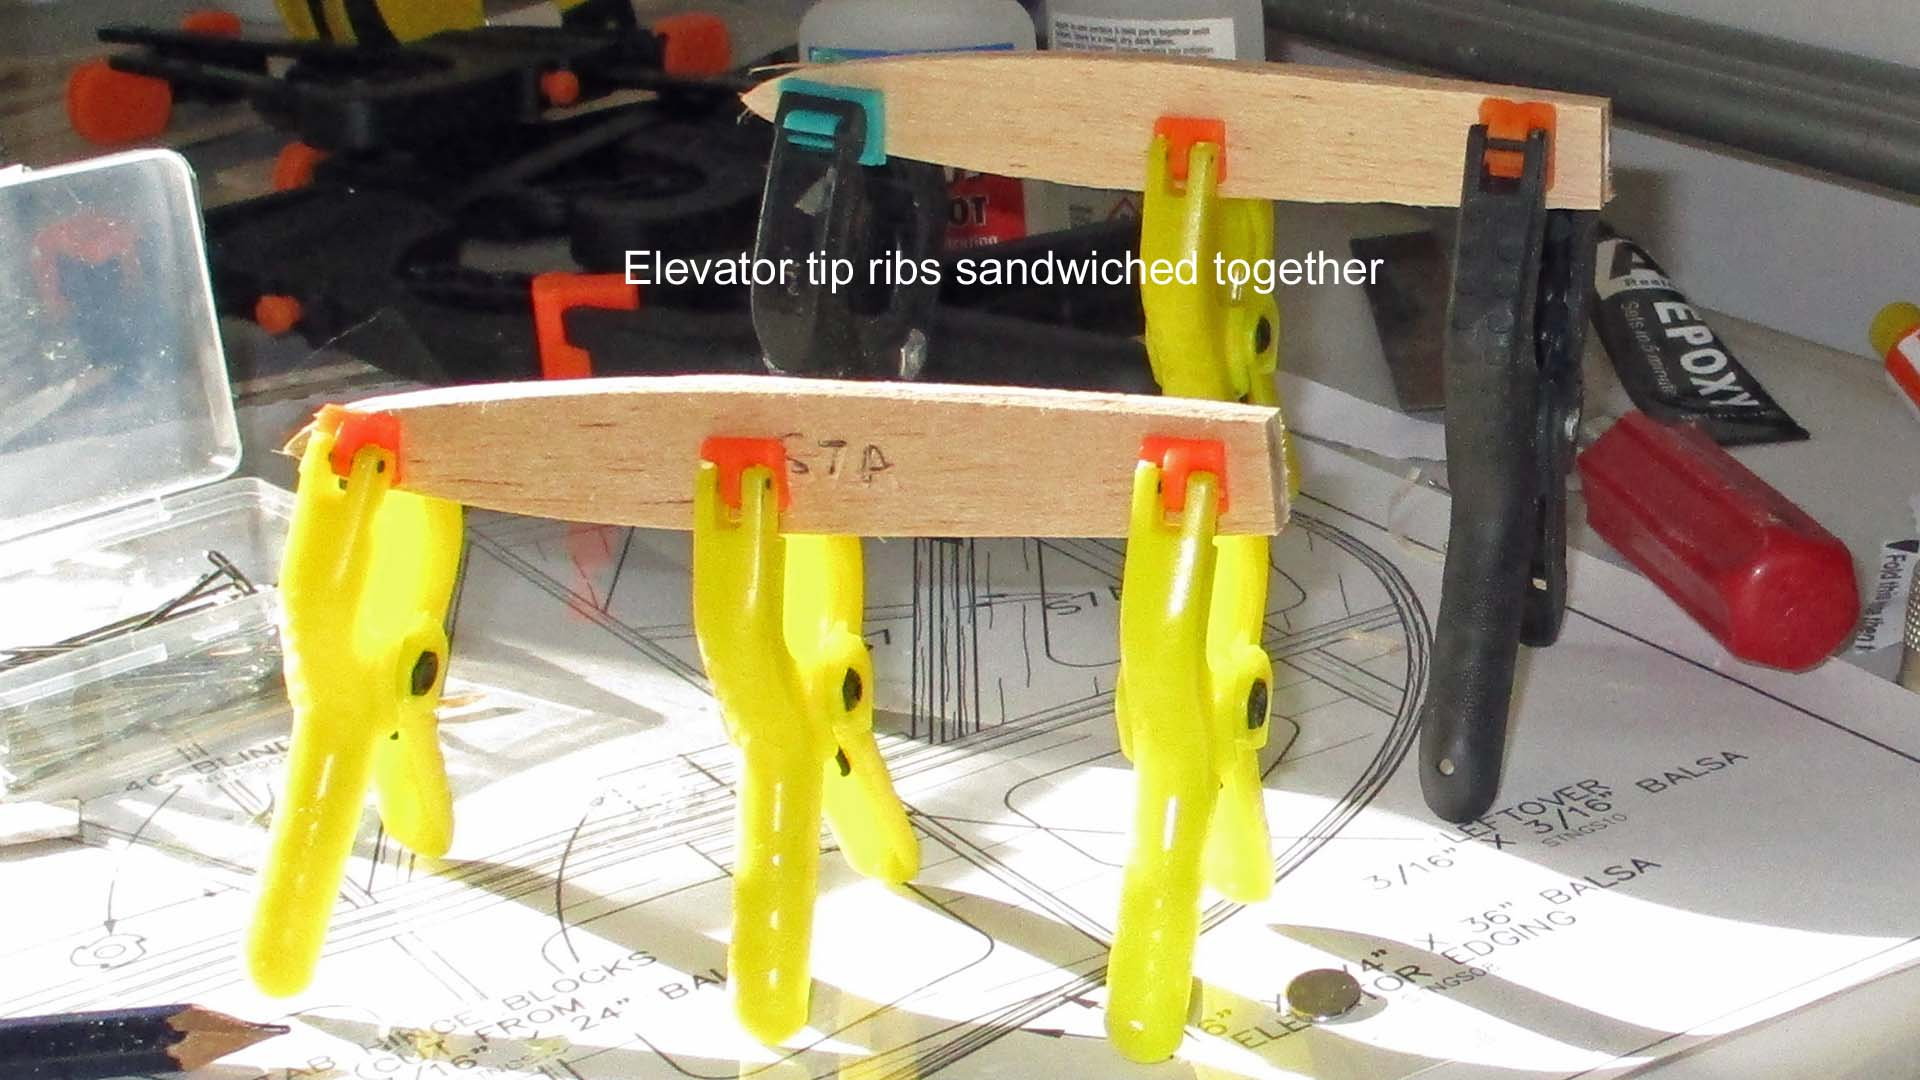
Watched Lewis drive to a magnificent win in the Singapore GP, then managed an hours build. pictures attached. Glued the elevator cores to the elevator leading edges, glued the elevator tip cores to the elevator leading edges & finally sandwiched the elevator tip ribs. 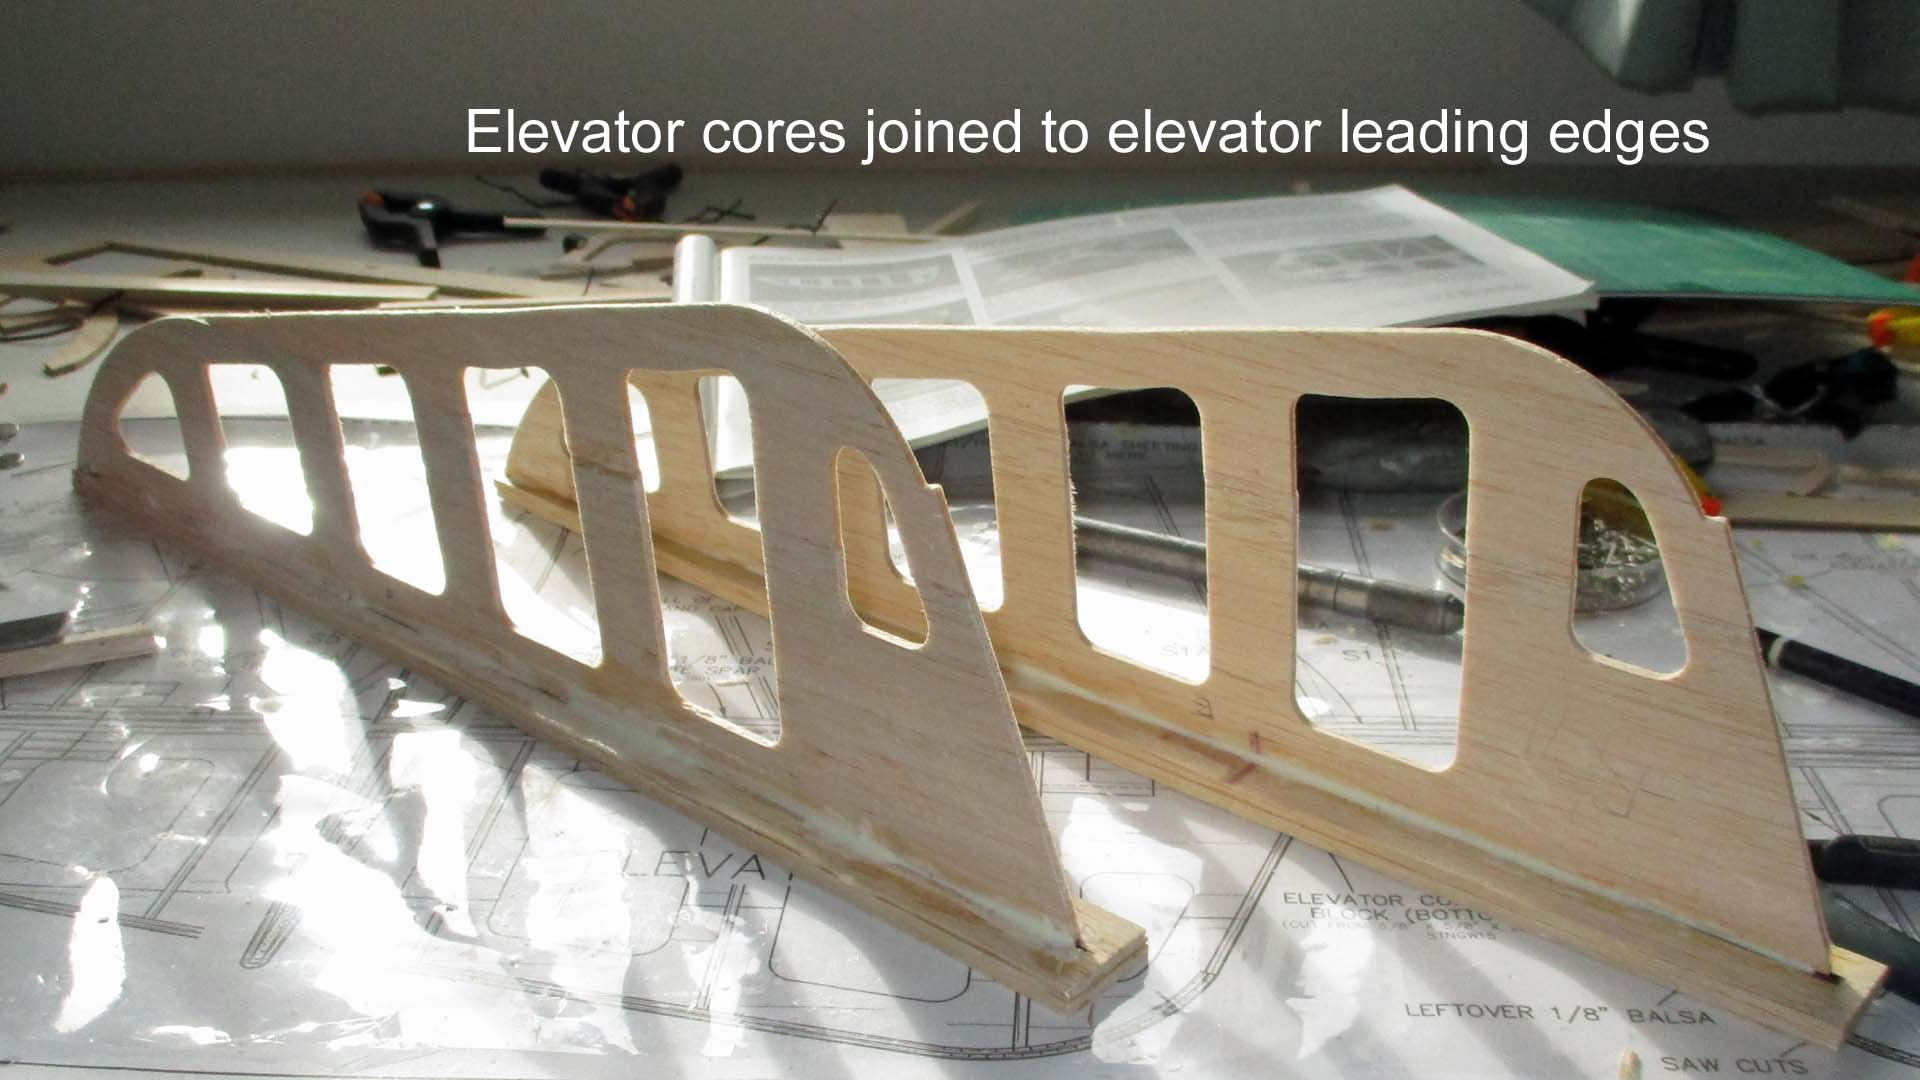
Words in the pics
Words in the pics
Words in the pics
Words in the pics
Words in the pics
Words in the pics
Words in the pics
Words in the pics
09-18-2018, 04:22 AM
#37
Thread Starter
Join Date: Mar 2006
Location: Southport UK
Posts: 187
Likes: 0
Received 0 Likes
on
0 Posts
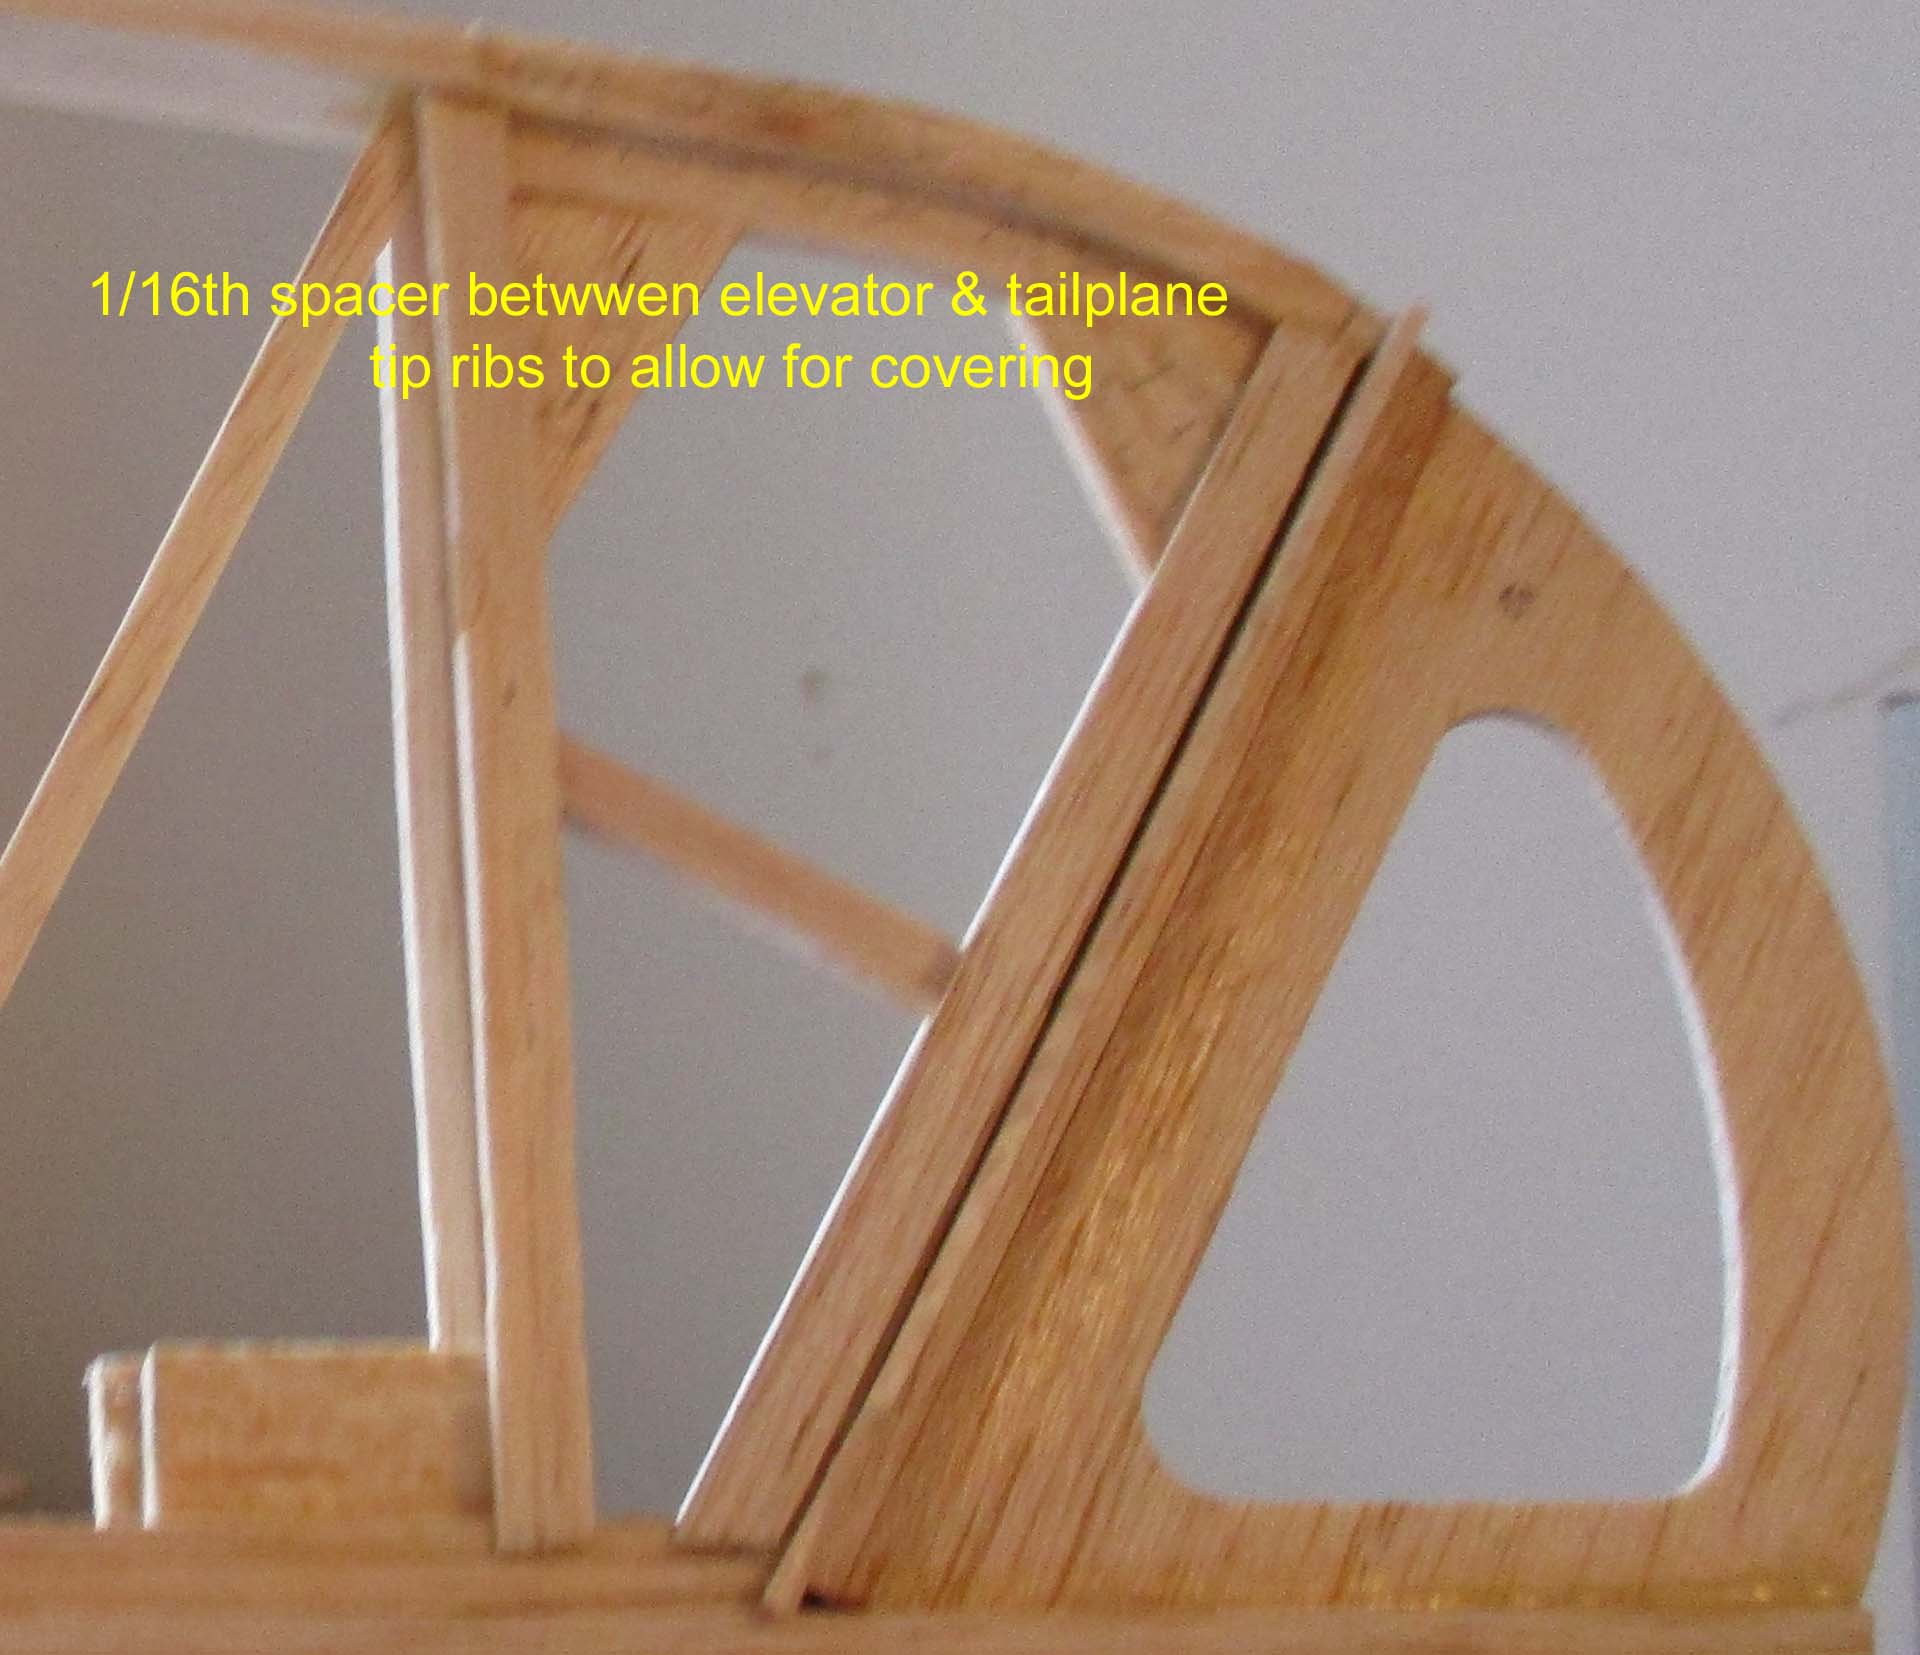
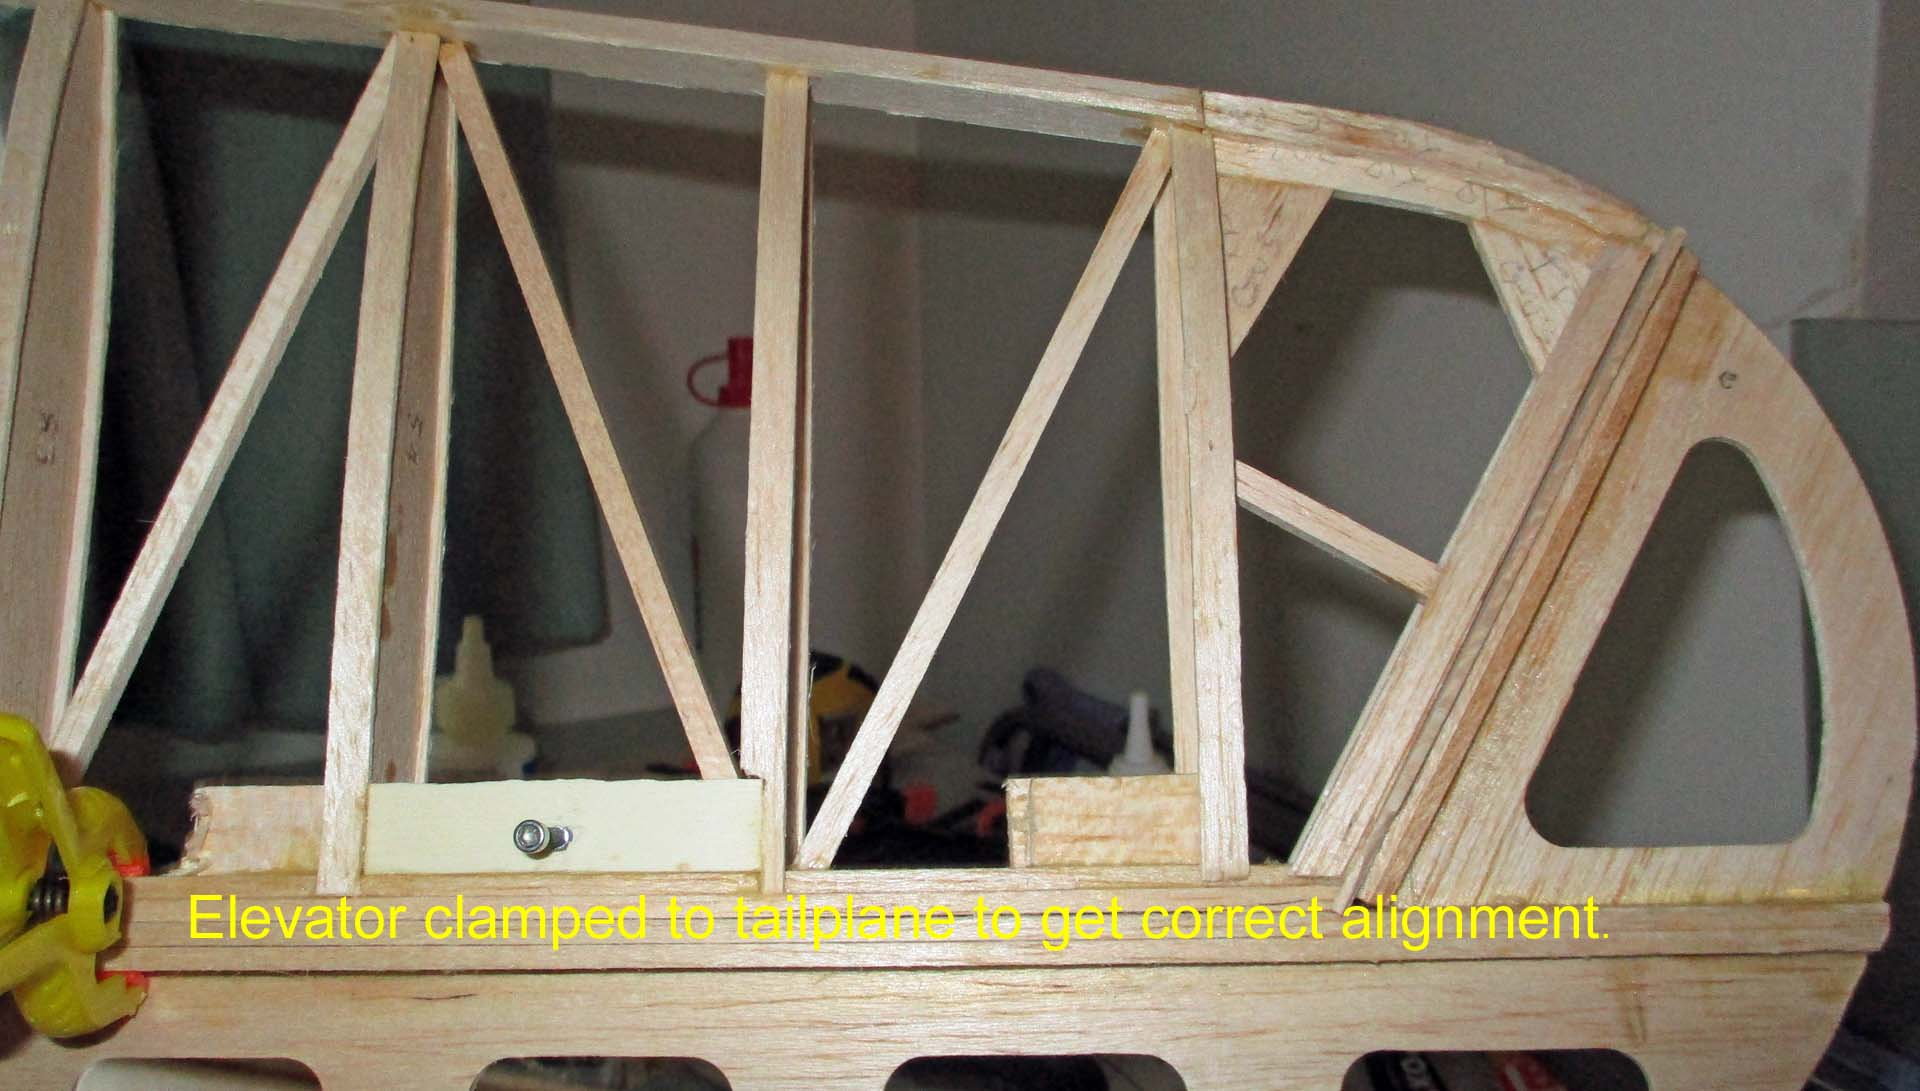
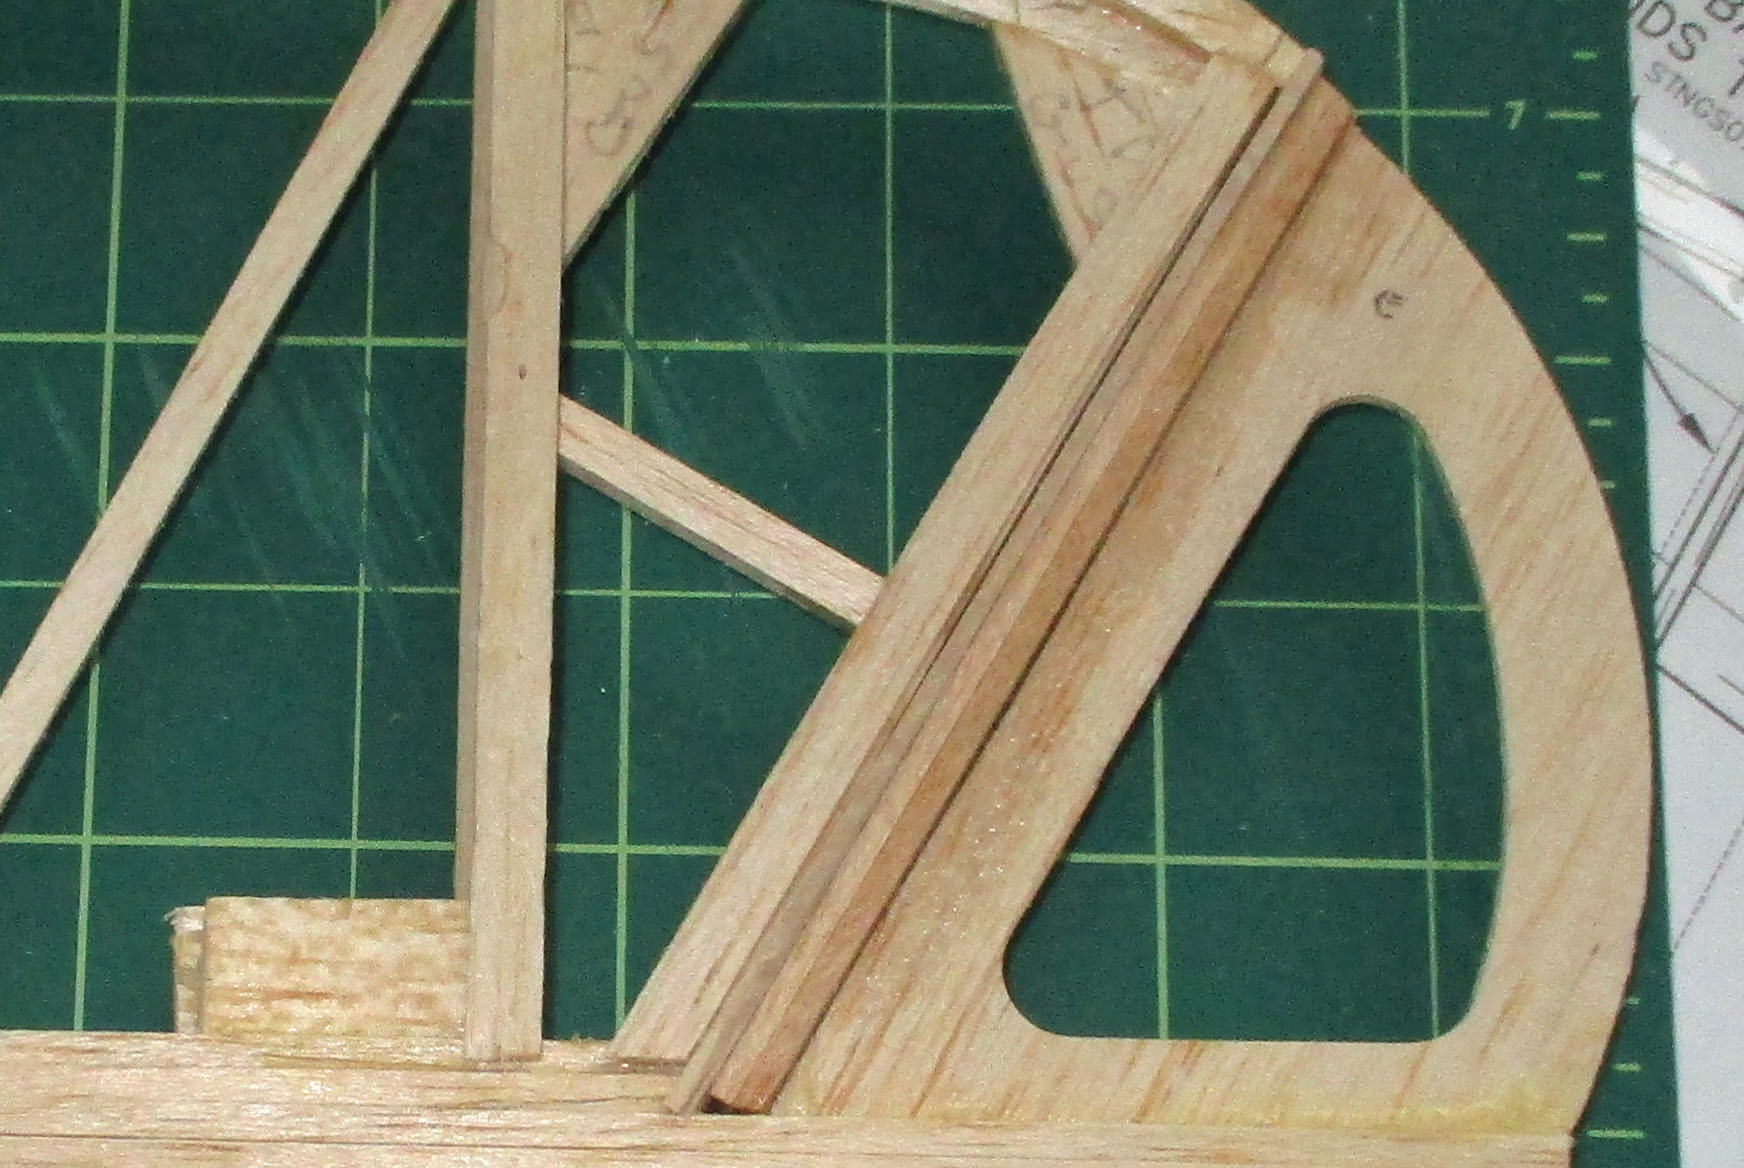
Didn't get a chance for any building yesterday & don't really feel up to it today. However, I sat at the building board with the intention of cleaning the decks & a general tidy. But, the tailplane & elevators were sat awaiting finishing so I progressed a bit further by clamping the elevators to the tailplane & glueing the tip ribs into place & a little shaping. Then I re-read the next stage in the manual & cursed the designer for the protracted method of construction. The next stage involves constructing 24 elevator ribs of different sizes, then adding cap strips to them. No wonder people are moving to ARTF's or RTF's, you really have to be dedicated to build this so called kit. Rant over, a couple of pictures follow, might leave the elevator ribs until tomorrow..

Last edited by stearman65; 09-18-2018 at 04:26 AM. Reason: text under pics
09-18-2018, 07:34 AM
#38
Thread Starter
Join Date: Mar 2006
Location: Southport UK
Posts: 187
Likes: 0
Received 0 Likes
on
0 Posts
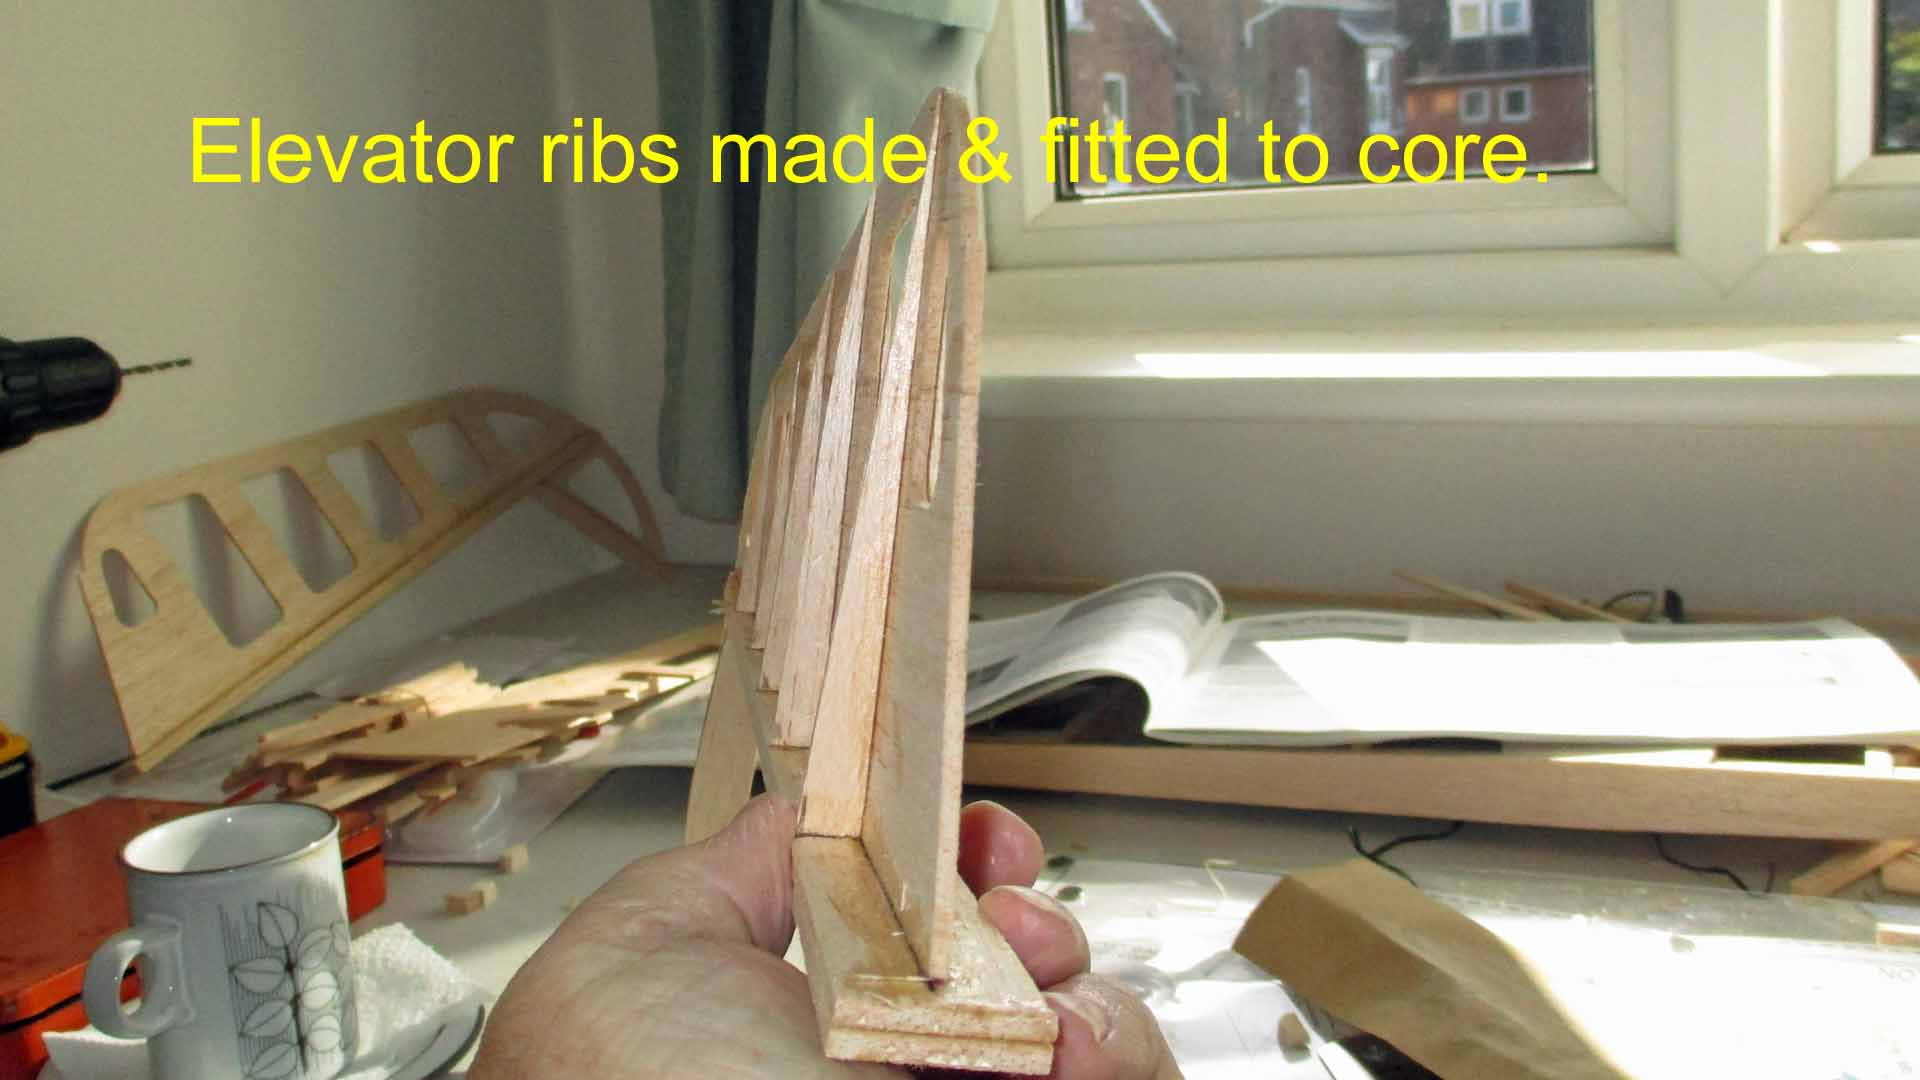
Went for a haircut, then set to making elevator ribs & fitting them. Not as bad as I predicted, took 1 hour for 1 elevator, still has to be cap stripped. 
Text in the pics.
Text in the pics.
Text in the pics.
Text in the pics.


 09-21-2018, 04:11 AM
#41
Hi Eric,
I just got back from vacation and it looks like you are moving right along!!! Your build looks nice and clean so far.
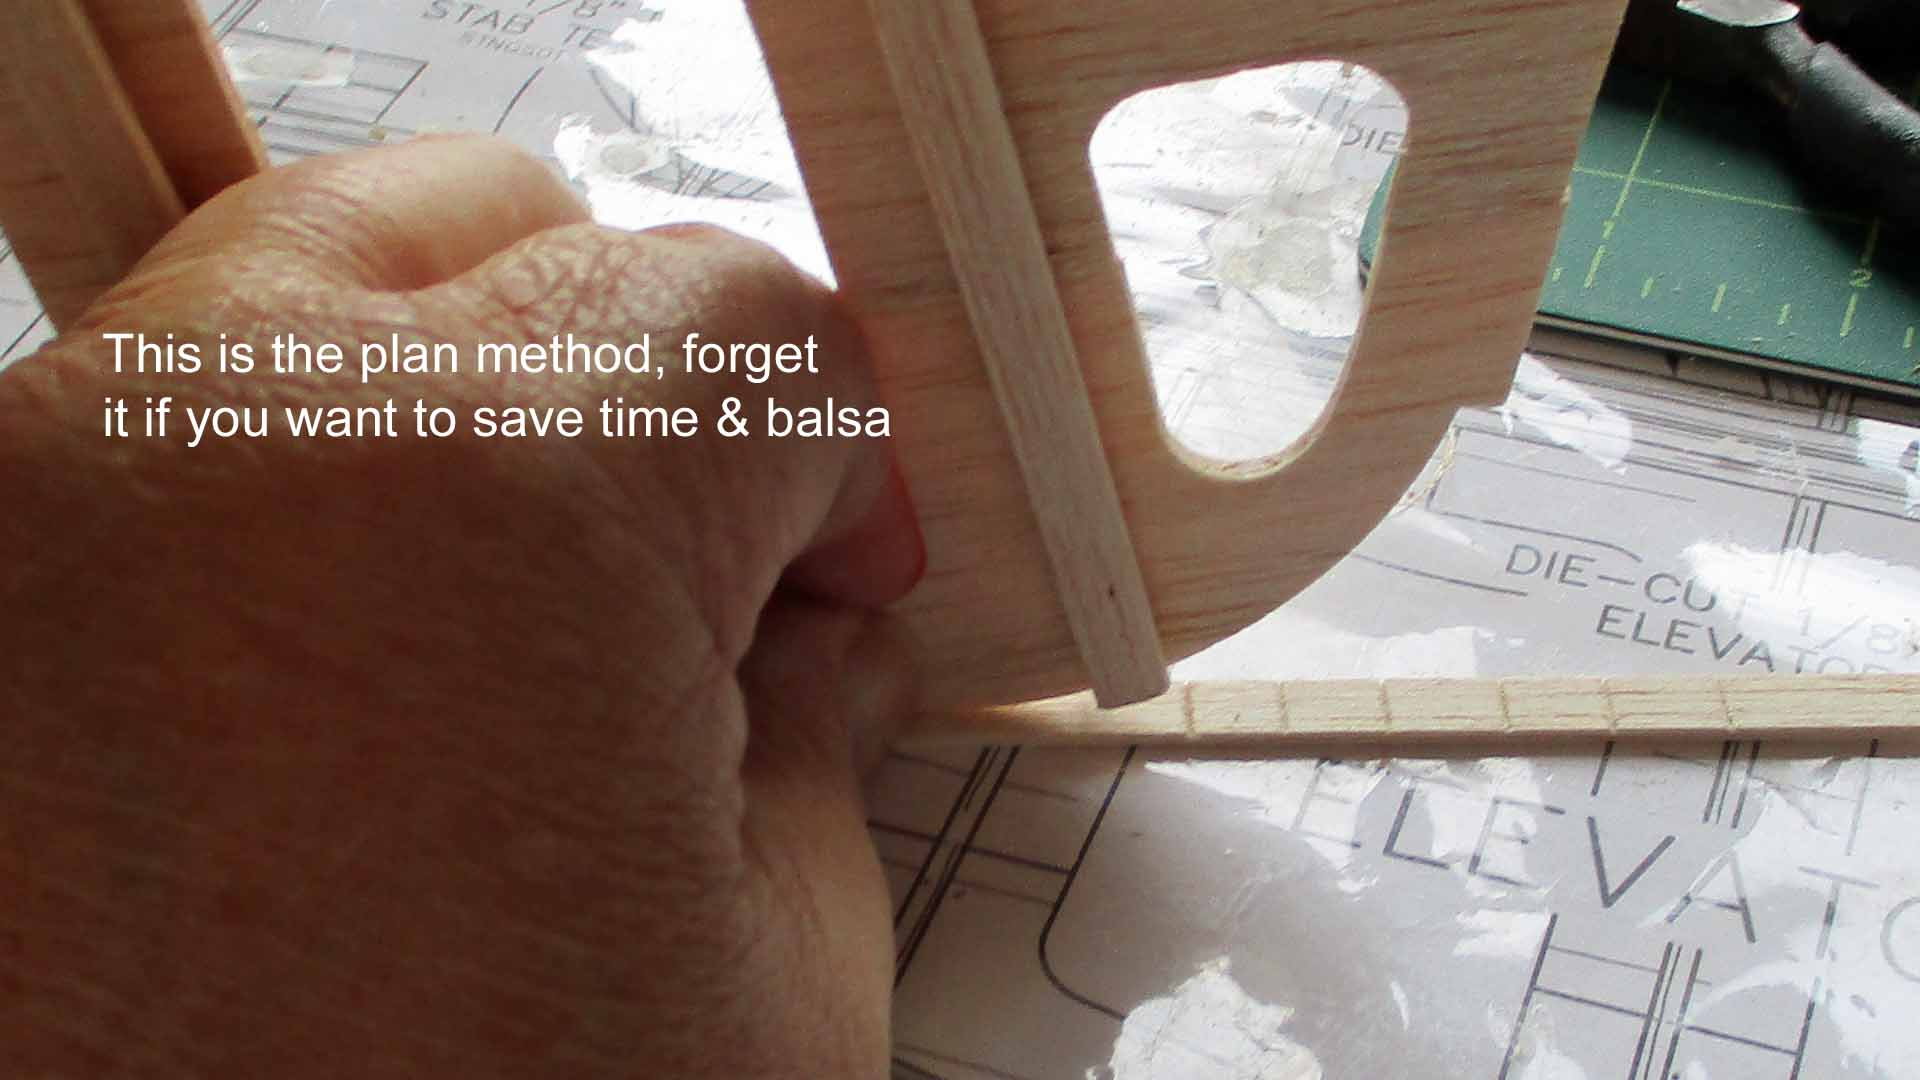
I like your "lick it" method for bending the balsa. I keep an old spray bottle filled with water on my bench and make regular use of it when coaxing balsa into shape. I also find ammonia based glass cleaner (like Windex) to work well too, especially on tight bends. The ammonia loosens the wood fibers and really makes it pliable. On a shape like this, I will often pre-form the part by soaking it in water then bending it around a can or a jar that is roughly the right size, using tape or rubber bands to hold it in place while the water dries.
If I recall correctly, my Stinson interior kit came in a box, not a bag like you have. I will dig it out later today and see if it looks any different from what you show in your pictures (it may be just different packaging).
I have to say that all of the woodworking is actually my favorite part of a build, so I am really looking forward to starting my own Stinson project. I am already committed to the Cessna first though, and knowing my build pace, it will be a (very) long while before getting the Stinson started. Now that I am back home, I hope to get started in earnest on my Cessna this weekend.
Al
I just got back from vacation and it looks like you are moving right along!!! Your build looks nice and clean so far.
I like your "lick it" method for bending the balsa. I keep an old spray bottle filled with water on my bench and make regular use of it when coaxing balsa into shape. I also find ammonia based glass cleaner (like Windex) to work well too, especially on tight bends. The ammonia loosens the wood fibers and really makes it pliable. On a shape like this, I will often pre-form the part by soaking it in water then bending it around a can or a jar that is roughly the right size, using tape or rubber bands to hold it in place while the water dries.
If I recall correctly, my Stinson interior kit came in a box, not a bag like you have. I will dig it out later today and see if it looks any different from what you show in your pictures (it may be just different packaging).
I have to say that all of the woodworking is actually my favorite part of a build, so I am really looking forward to starting my own Stinson project. I am already committed to the Cessna first though, and knowing my build pace, it will be a (very) long while before getting the Stinson started. Now that I am back home, I hope to get started in earnest on my Cessna this weekend.
Al
09-21-2018, 08:28 AM
#42
Thread Starter
Join Date: Mar 2006
Location: Southport UK
Posts: 187
Likes: 0
Received 0 Likes
on
0 Posts
Hi Eric,
I just got back from vacation and it looks like you are moving right along!!! Your build looks nice and clean so far.
I like your "lick it" method for bending the balsa. I keep an old spray bottle filled with water on my bench and make regular use of it when coaxing balsa into shape. I also find ammonia based glass cleaner (like Windex) to work well too, especially on tight bends. The ammonia loosens the wood fibers and really makes it pliable. On a shape like this, I will often pre-form the part by soaking it in water then bending it around a can or a jar that is roughly the right size, using tape or rubber bands to hold it in place while the water dries.
If I recall correctly, my Stinson interior kit came in a box, not a bag like you have. I will dig it out later today and see if it looks any different from what you show in your pictures (it may be just different packaging).
I have to say that all of the woodworking is actually my favorite part of a build, so I am really looking forward to starting my own Stinson project. I am already committed to the Cessna first though, and knowing my build pace, it will be a (very) long while before getting the Stinson started. Now that I am back home, I hope to get started in earnest on my Cessna this weekend.
Al
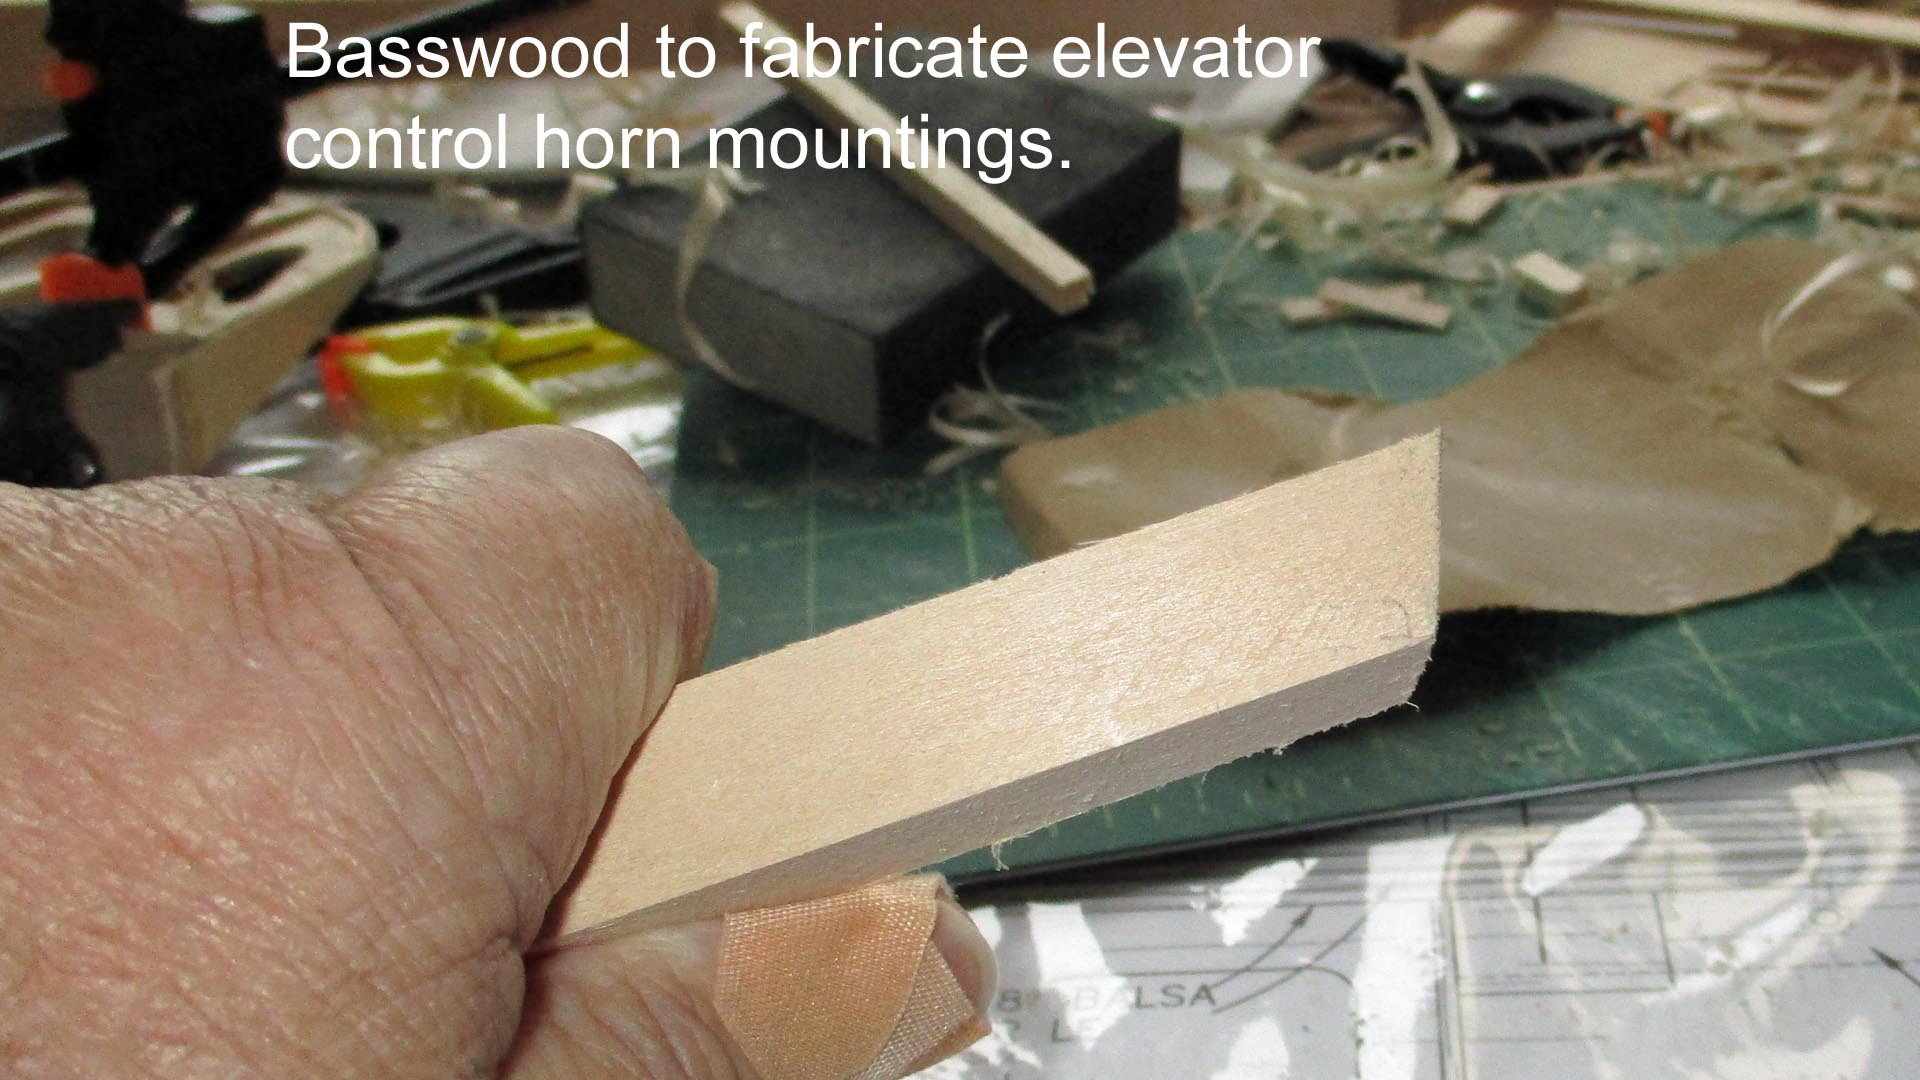
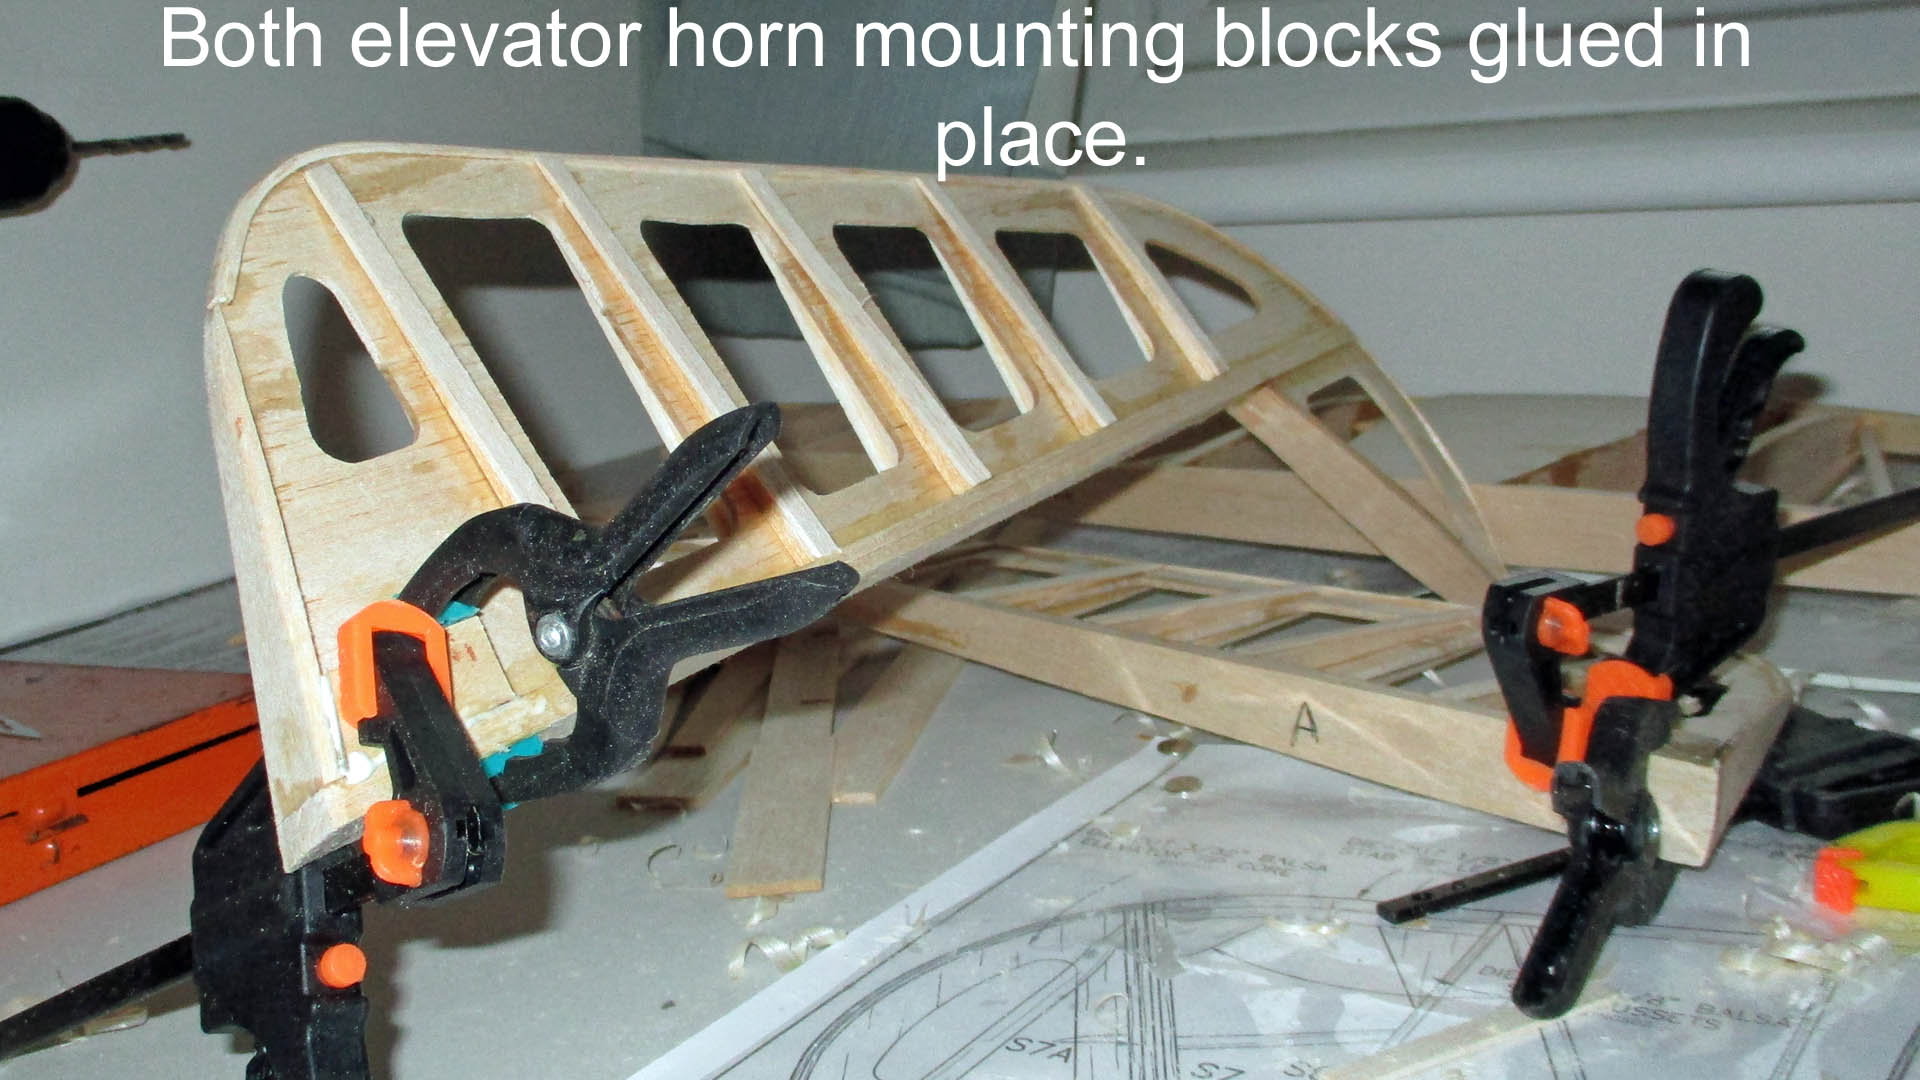
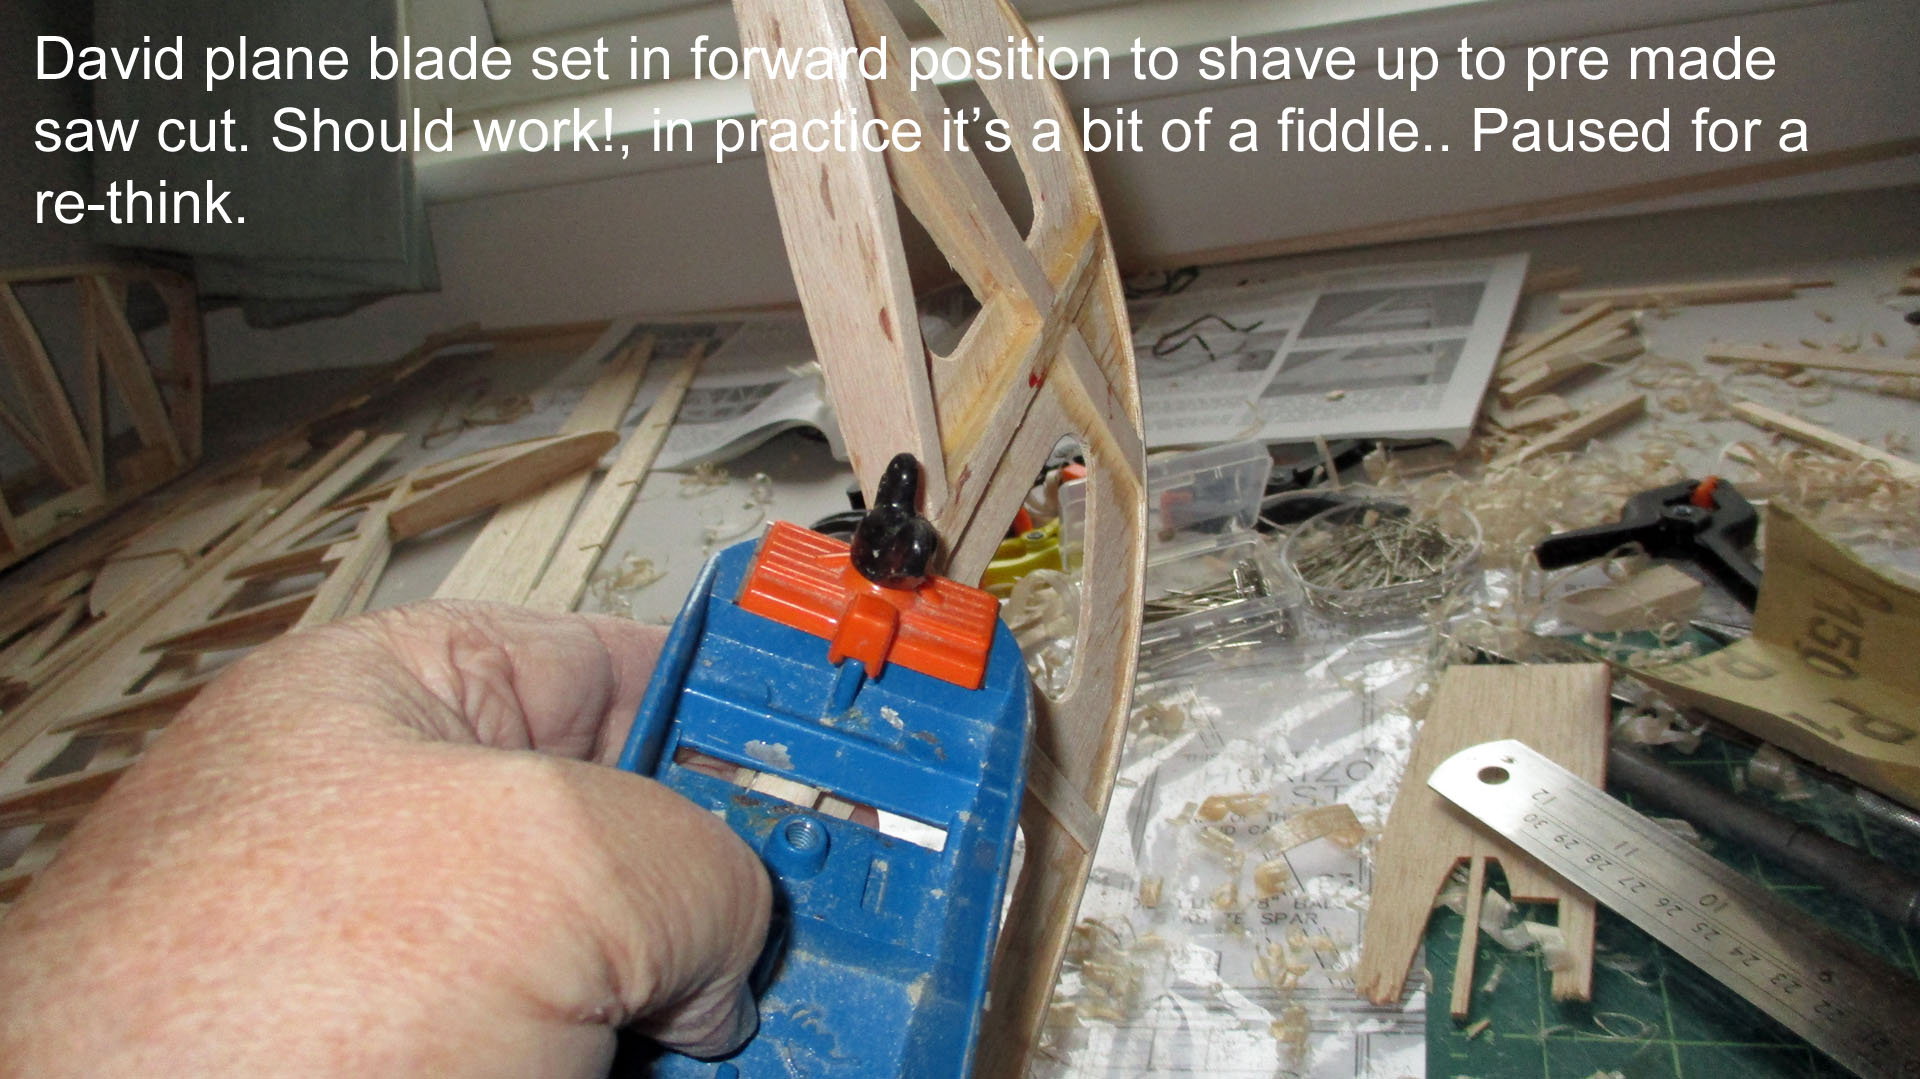
The wood for the elevator trailing edges is really poor quality (don't know how old your kit is?) fitting them the way I described is quickest using cyno, so long as you don't lick the cyno bottle. The Tailplane & elevators are 95% completed, just need final shaping & hinging, got some Robart hinges from a UK stockist. Fitted the control horn & hinge blocks to the elevators. Been looking around for fibreglass parts to replace the ABS & ply parts in the kit, (over 40 parts). Fibreglass Specialities in the USA can supply them, but after my experience with the add on costs on the cockpit kit, I'm a little wary, 200+ dollars is a lot to pay out, almost half the kit cost. Haven't found anyone in the UK to do the work. The title in today's post refers to cutting my finger on a new David plane blade, twice would you believe. So now I've bled for this model. Keep posting, Fin & rudder next part on the board.
Regs Eric.

Text in the pics.
Text in the pics.
Text in the pics.
Text in the pics.
09-22-2018, 09:02 AM
#44
Thread Starter
Join Date: Mar 2006
Location: Southport UK
Posts: 187
Likes: 0
Received 0 Likes
on
0 Posts
Maybe a rest day tomorrow.
Regs Eric
 09-23-2018, 06:06 AM
#45
Thread Starter
Join Date: Mar 2006
Location: Southport UK
Posts: 187
Likes: 0
Received 0 Likes
on
0 Posts
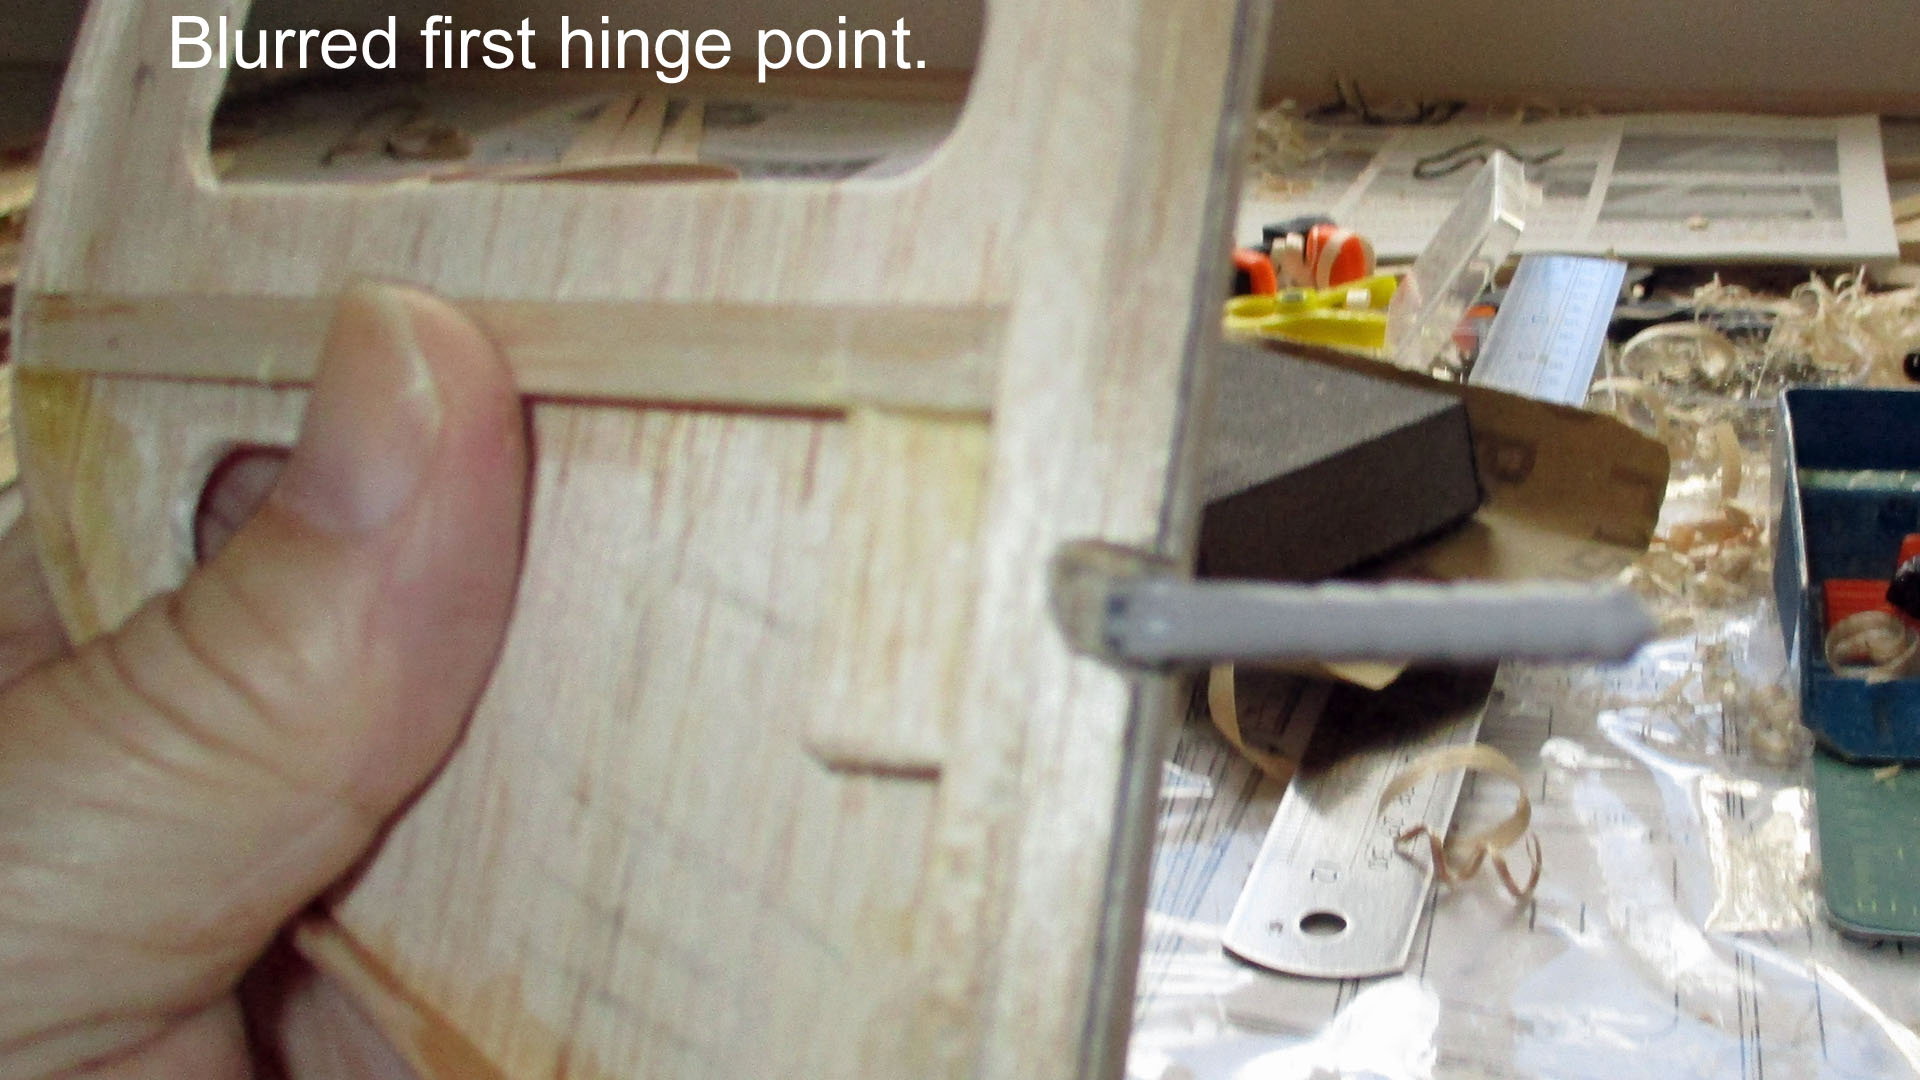
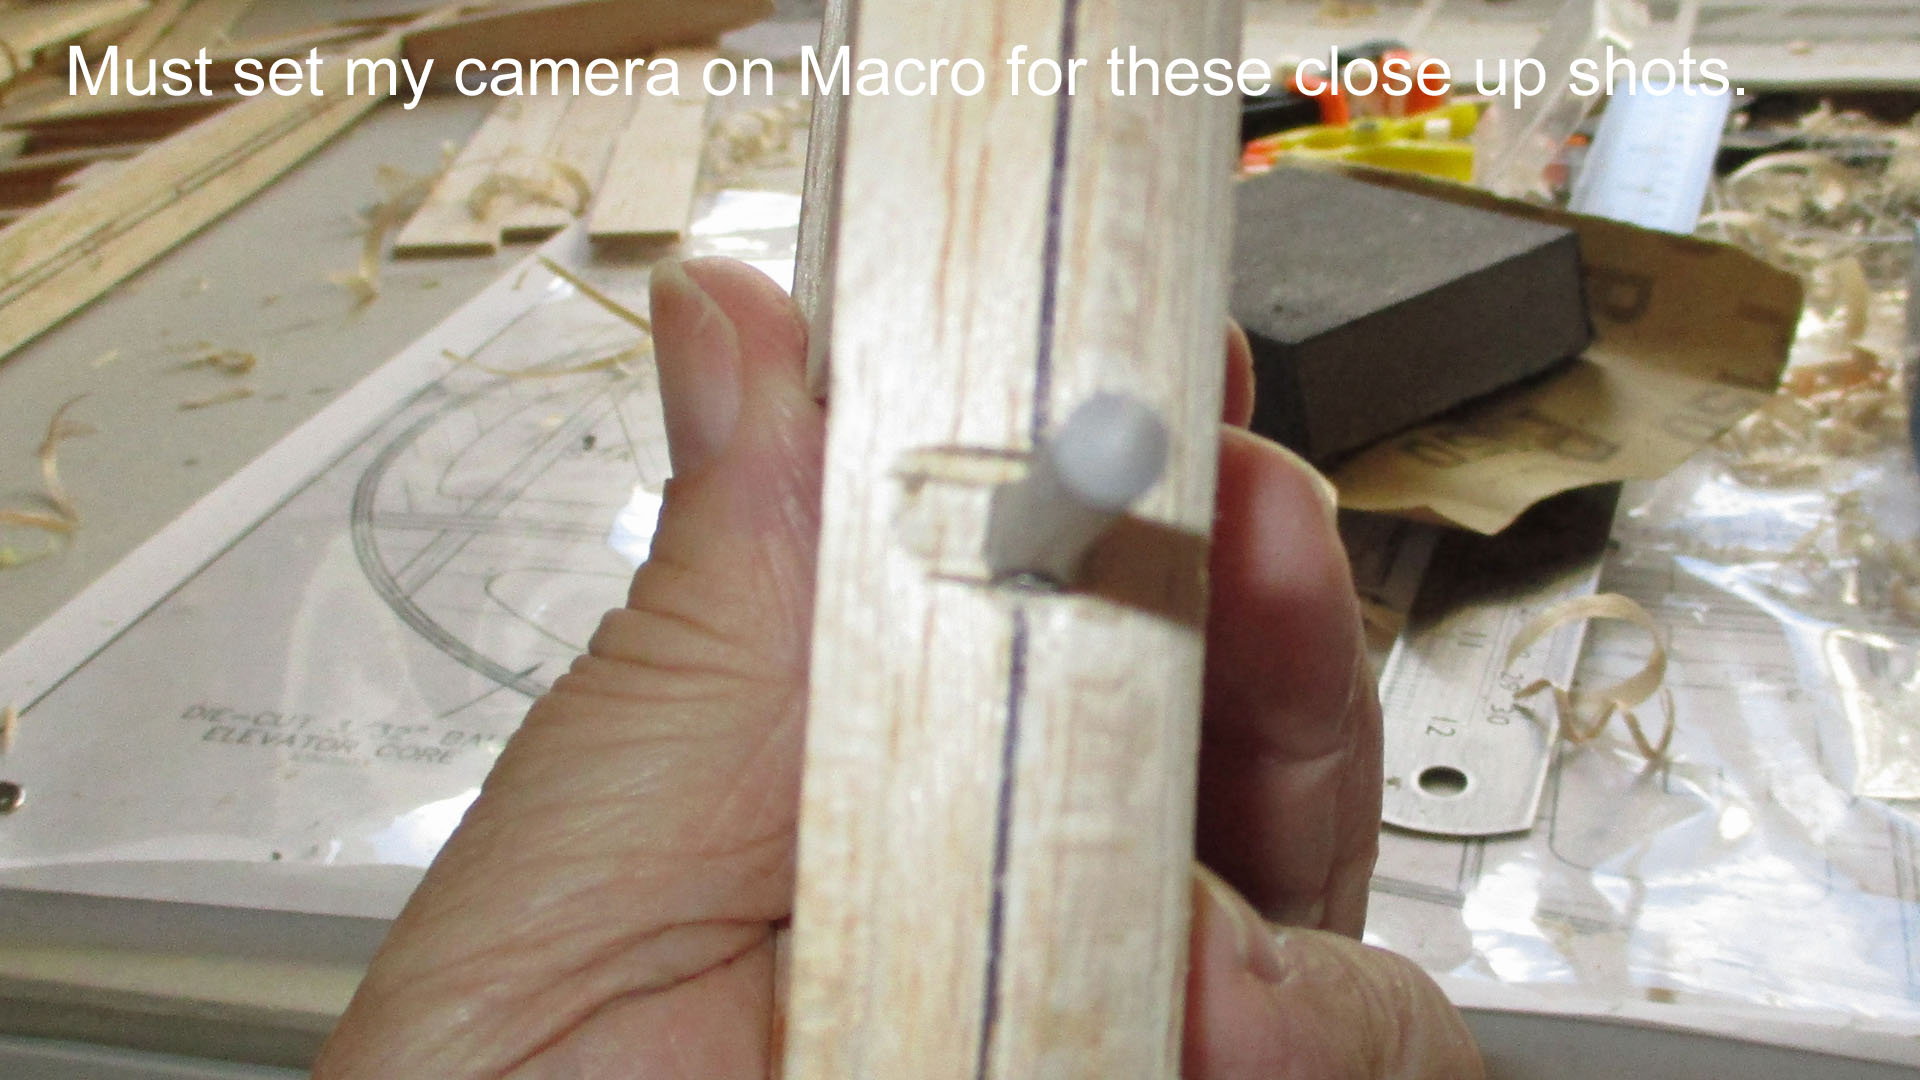
Called at Tool Station to collect the drills & needle file set. On returning I fitted the three hinge points to one side of the tailplane & elevator. The pictures tell the story. 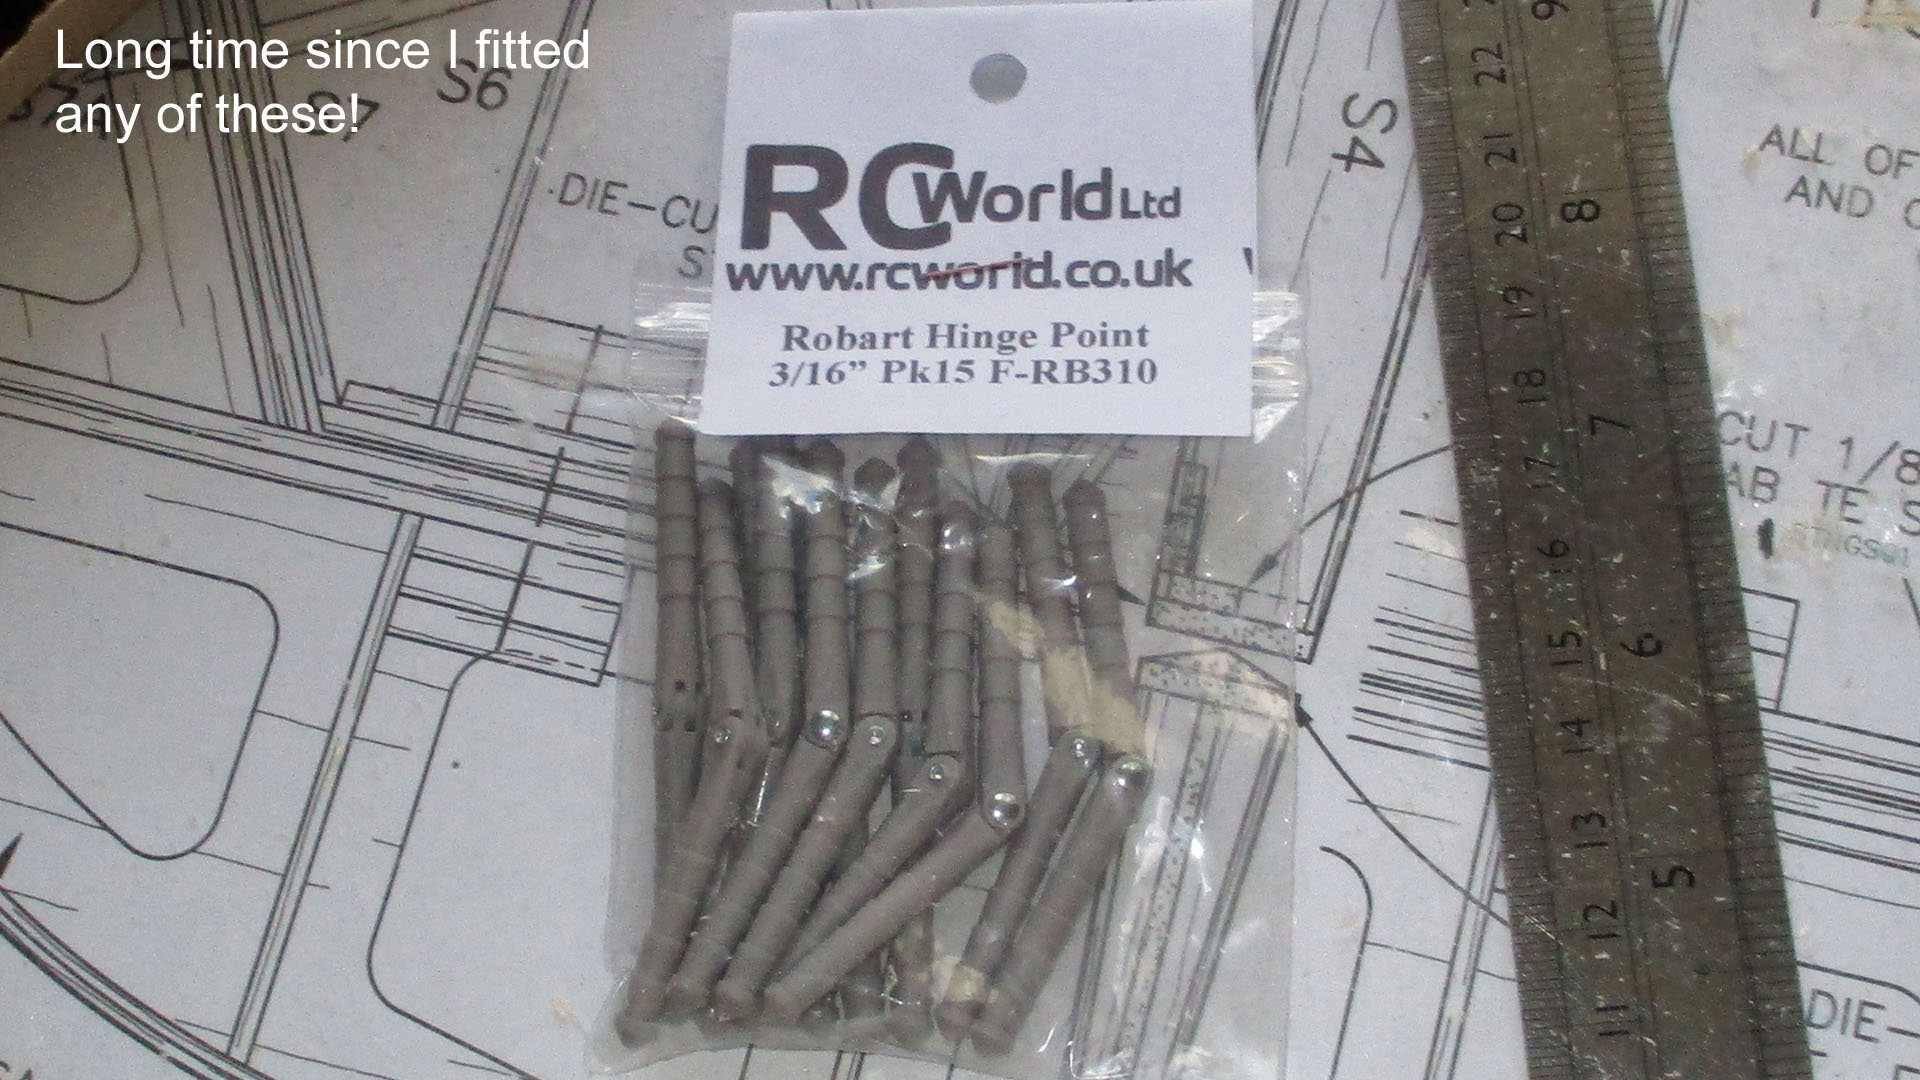


09-24-2018, 06:08 AM
#46
Thread Starter
Join Date: Mar 2006
Location: Southport UK
Posts: 187
Likes: 0
Received 0 Likes
on
0 Posts
Text in the pictures
Text in the pictures

Text in the pictures
Text in the pictures
Text in the pictures

Text in the pictures
Text in the pictures
Text in the pictures

Text in the pictures
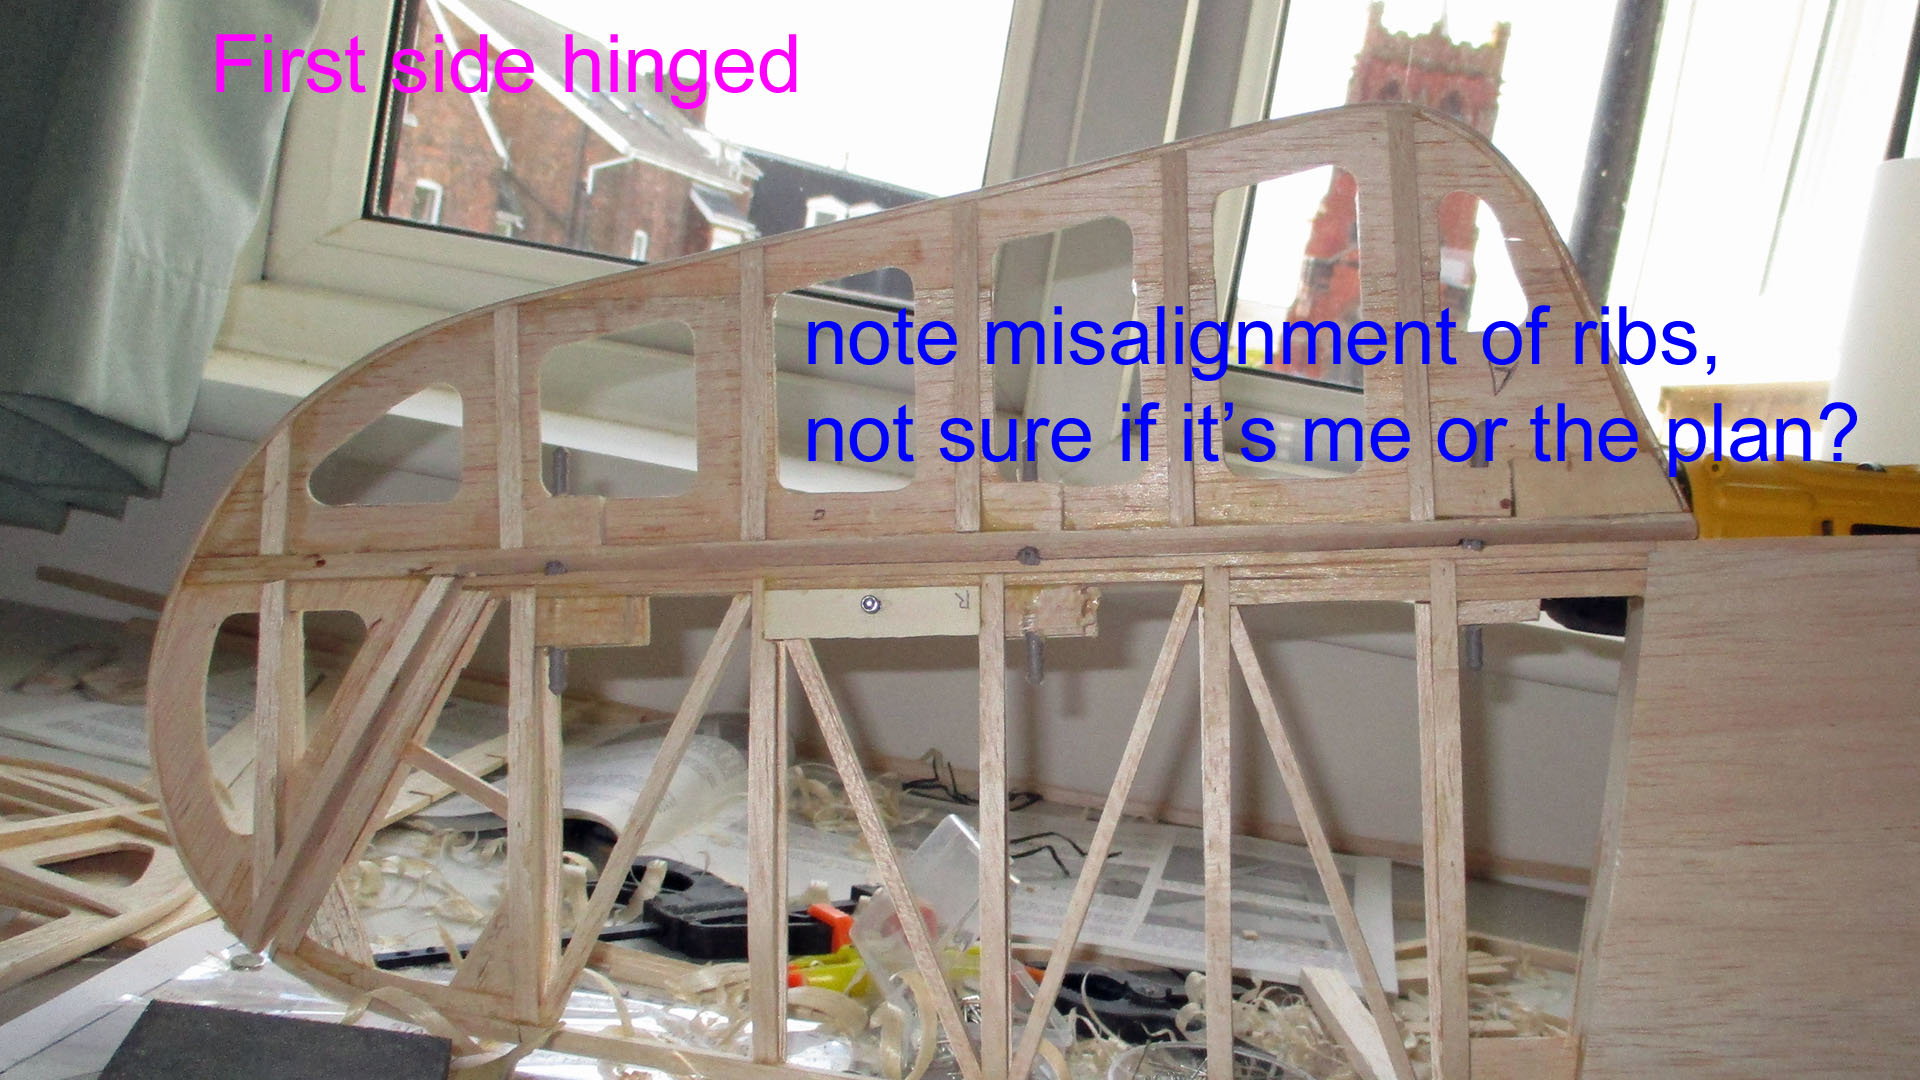
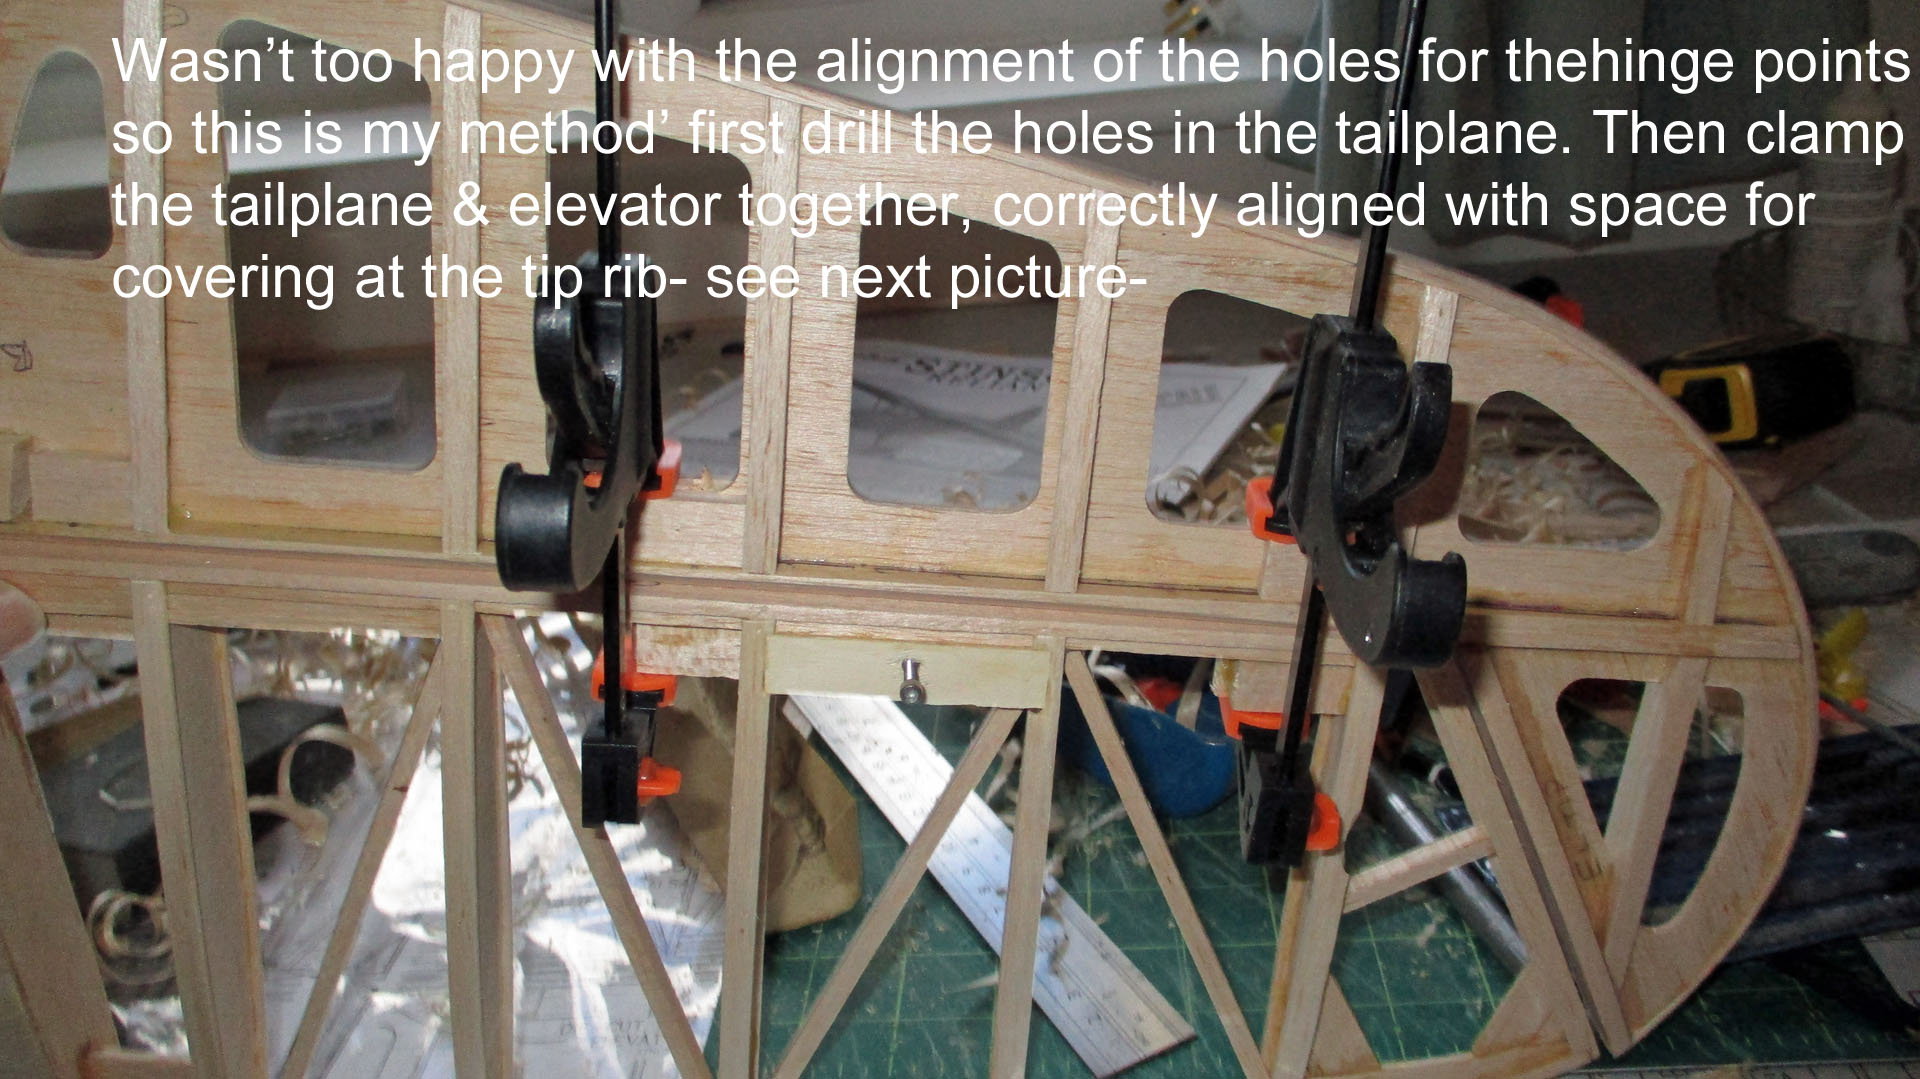
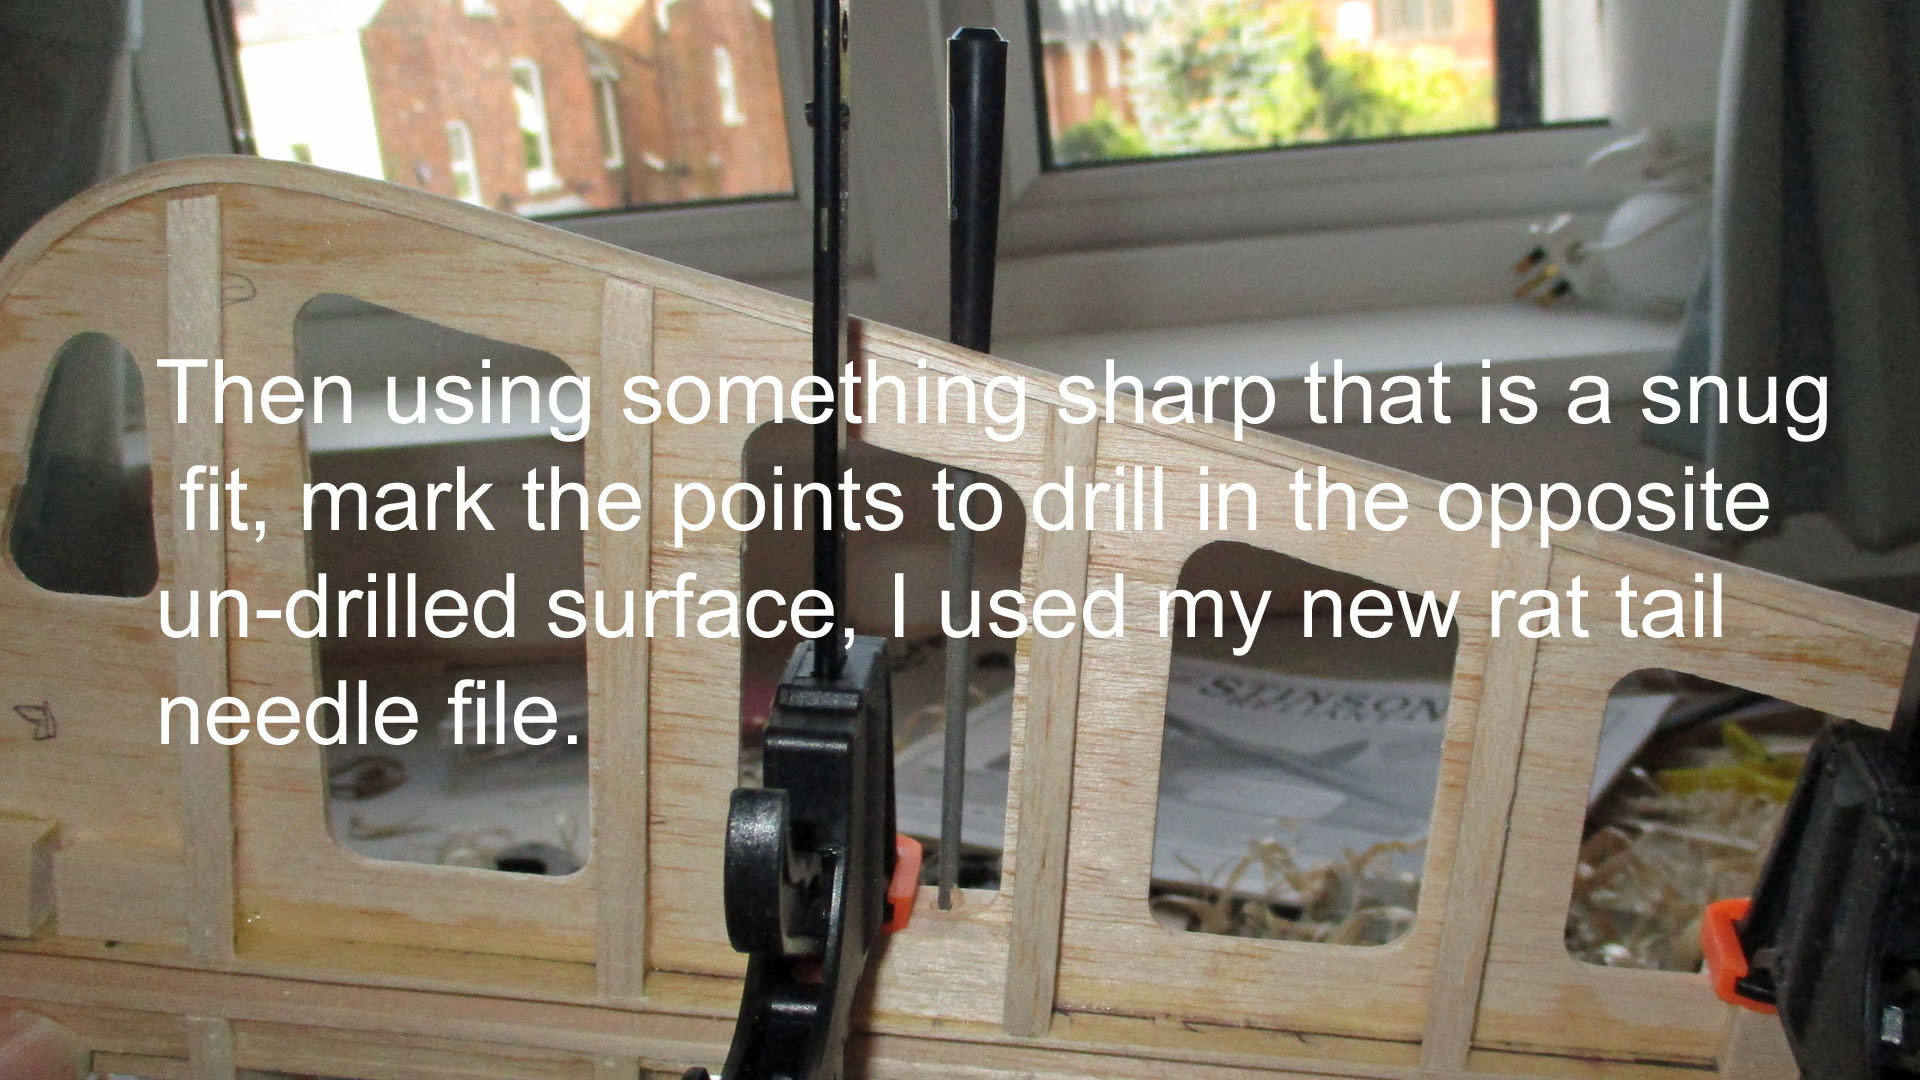
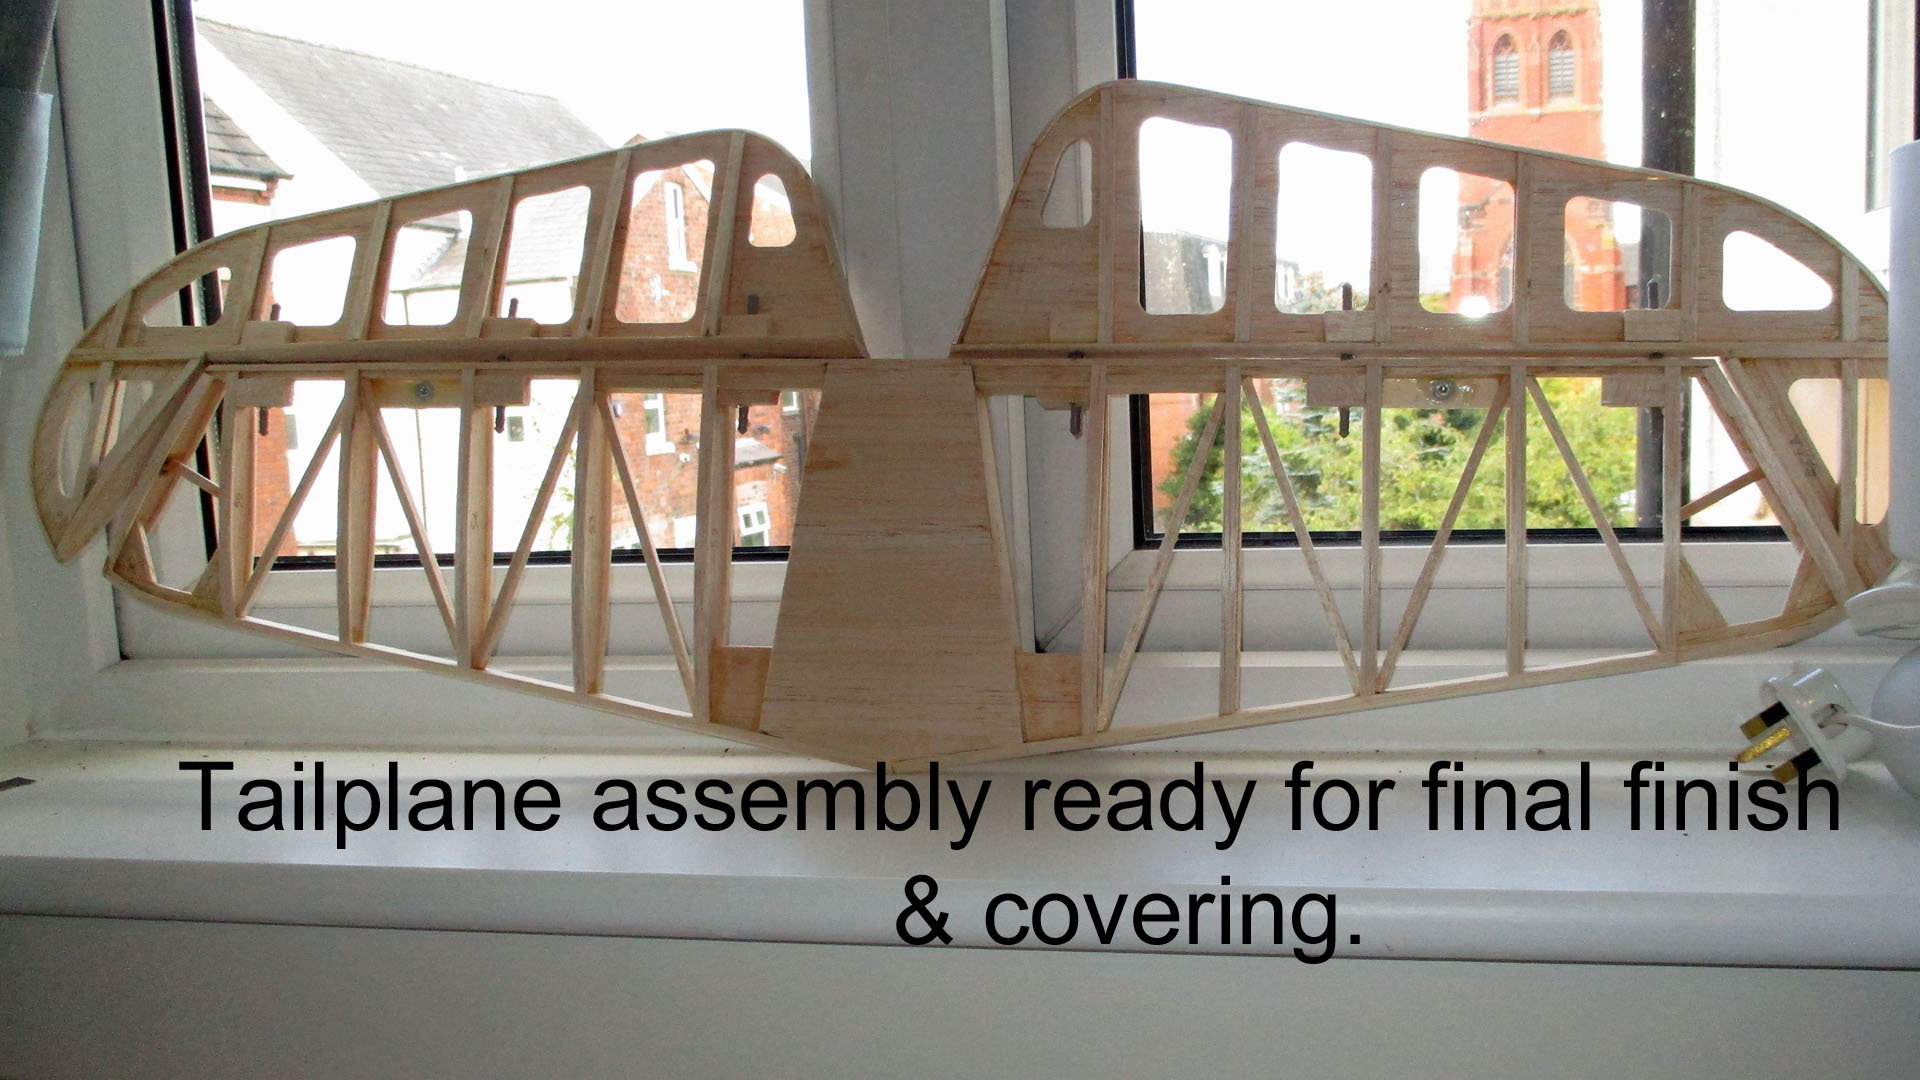
Finally got the tailplane off the board. I wasn't happy with my method of aligning the Robart hinge points on one side if the elevator. So this time what I did was to clamp the undrilled side of the tailplane, make sure the alignment was perfect, including a gap for the covering between the tip ribs. Then using my new rat tail needle file, I inserted it into the pre drilled elevator & marked the points on the pre drawn centre line of the tailplane, simple
, why didn't I think of that before. In case my explanation sounds complicated, the pictures tell the tail (no pun intended).
09-25-2018, 07:35 AM
#47
Thread Starter
Join Date: Mar 2006
Location: Southport UK
Posts: 187
Likes: 0
Received 0 Likes
on
0 Posts
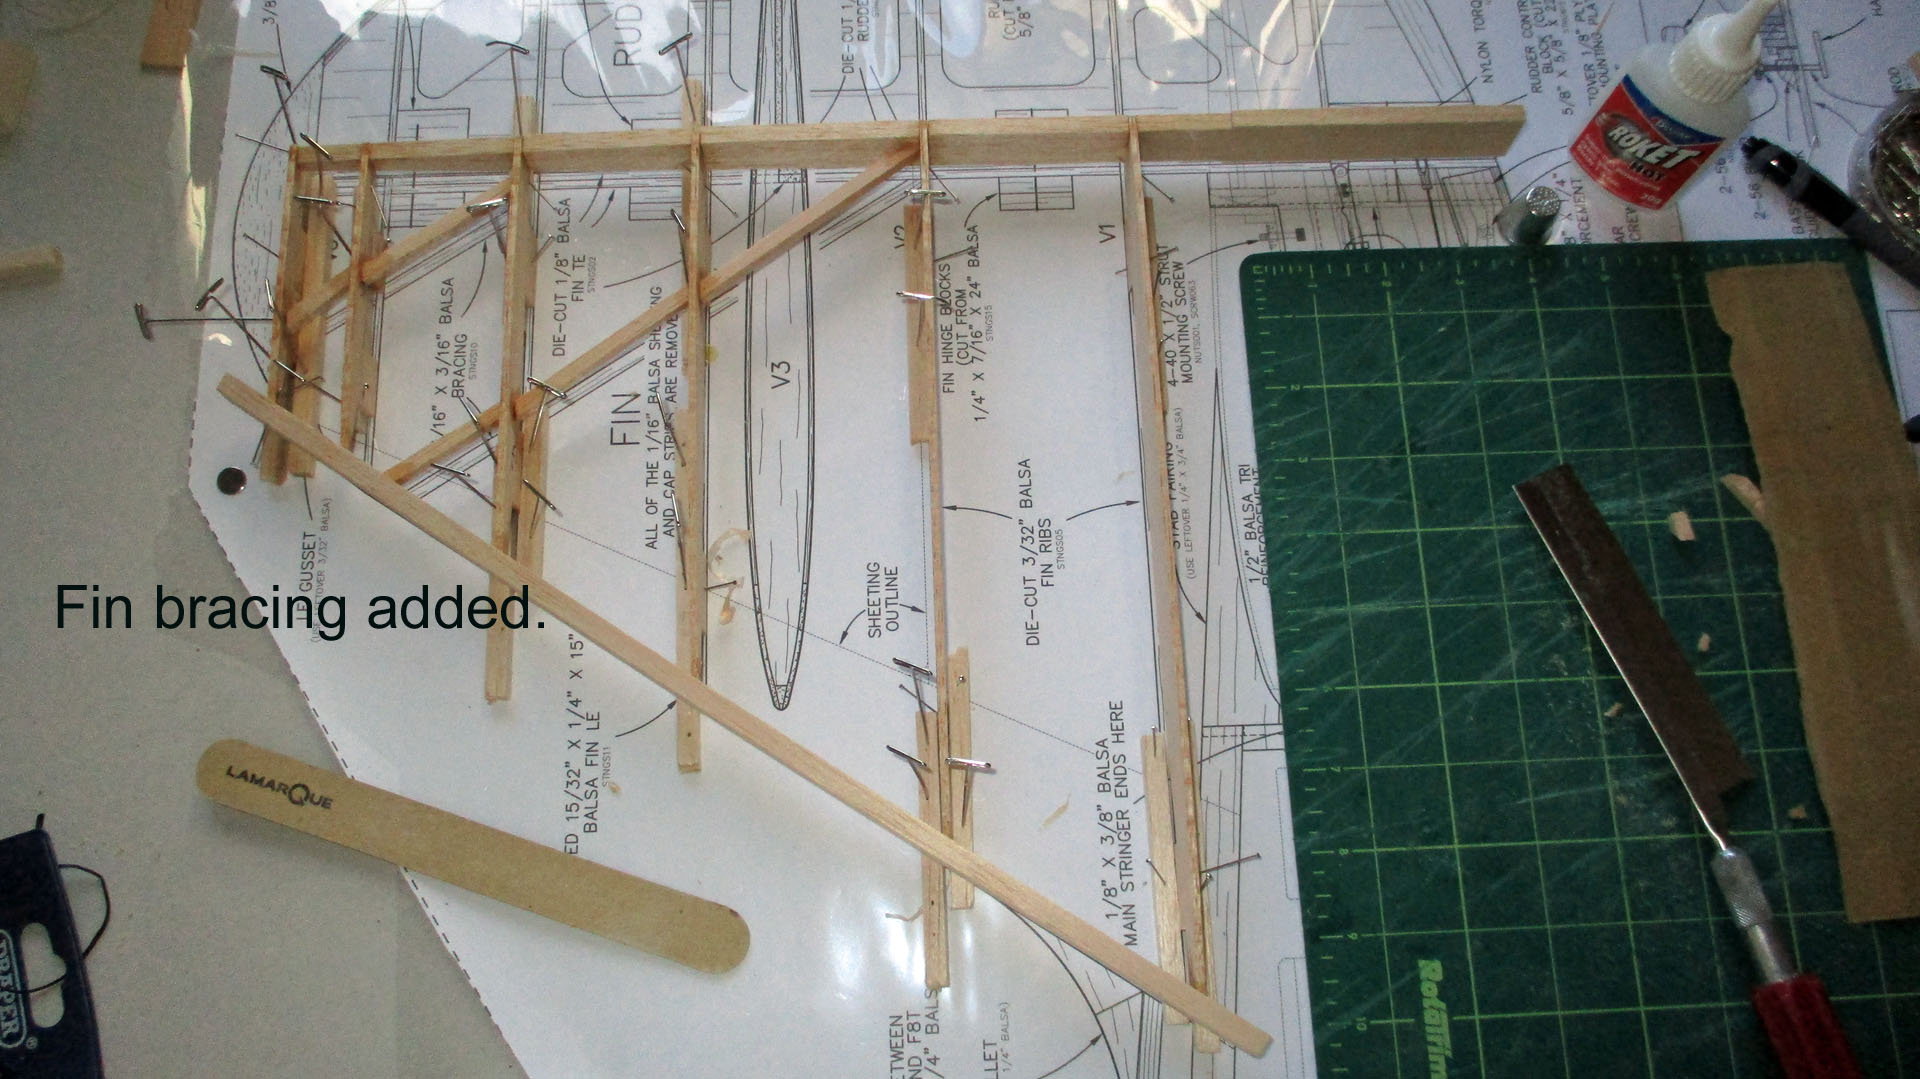
Pinned the fin t/edge to the board, then dry fitted the ribs with the jig tabs pinned to 1/4 square to hold them vertical as per the manual. once set square, zapped the joints with cyno. Then sanded the rib noses to match the angle of the leading edge, pinned the part shaped leading edge to the ribs & zapped it in place.. Added the 3/16 square rib braces. Then shaped the leading edge skin, TIP do this first before laying the fin parts on the plan. Some odd angles, doing this first would have been easiest. Added the leading edge sheet & glued in place with aliphhatic. (Lunch break) Cut the template for the fin skins from the plan & made up 2 skins, the balsa quality was really ropey, will need some work later. Left setting until tomorrow if my preventative shingles jab allows.


Last edited by stearman65; 09-25-2018 at 07:38 AM. Reason: didn't know if posted
09-26-2018, 10:23 PM
#48
Thread Starter
Join Date: Mar 2006
Location: Southport UK
Posts: 187
Likes: 0
Received 0 Likes
on
0 Posts
First job was a visit to the Doctors for my preventative shingles jab. I was sat in the chair discussing with the nurse that my wife had received a letter for her flu jab but I hadn't. She said she could do my flu jab at the same time as the shingles jab, so I came home with two sore arms. keep my mouth shut in future. 
Back home to wrestle with the Stinson fin, unfortunately the wood quality for the sheeting was really poor, I've seen better quality blotting paper. I suppose TF were trying to keep the back end light. Eventually I got one side sheeted & off the board & it was lunch time. I checked my emails during lunch & there was one from Ebay, I'd sold the camcorder that I'd decided to sell to help fund the build.
In between packing the camcorder for shipping & booking the shipping, I managed to sheet the remainder of the fin & some of the shaping. So the pictures are a bit sparse.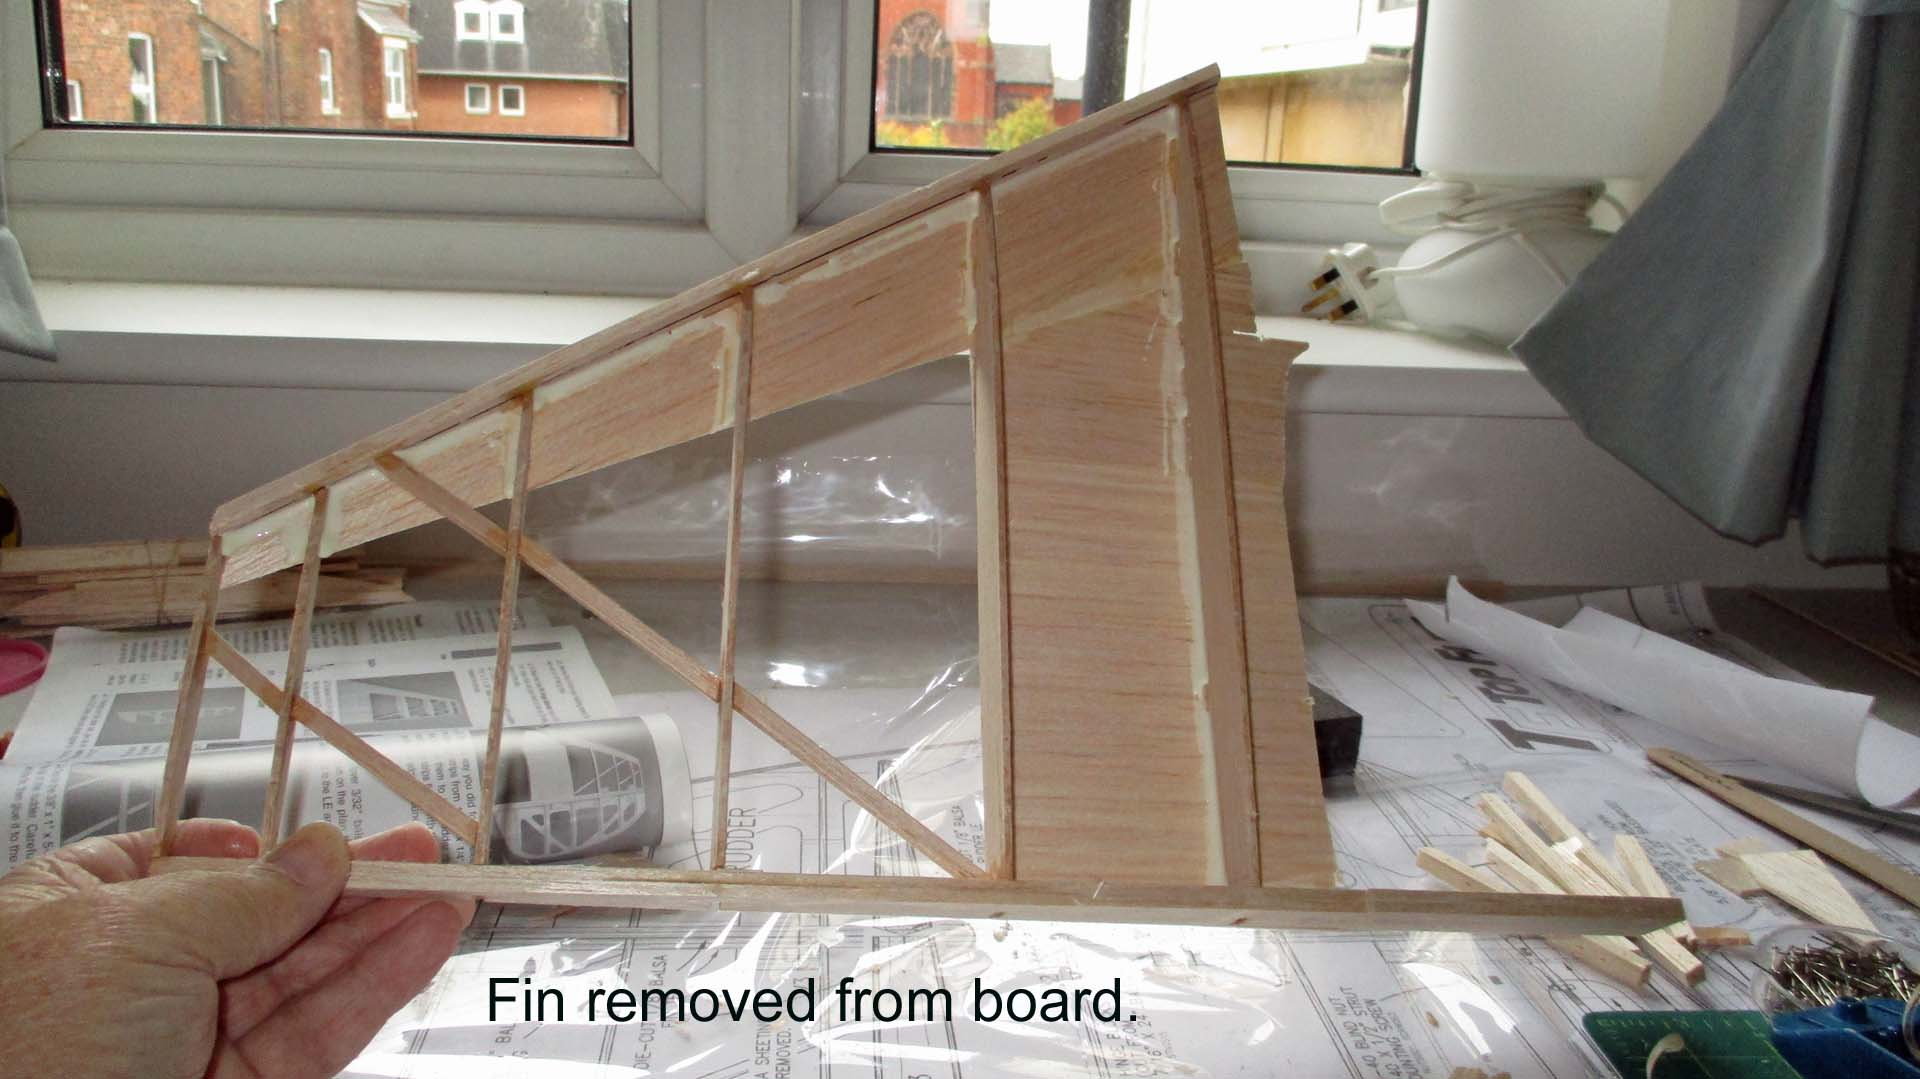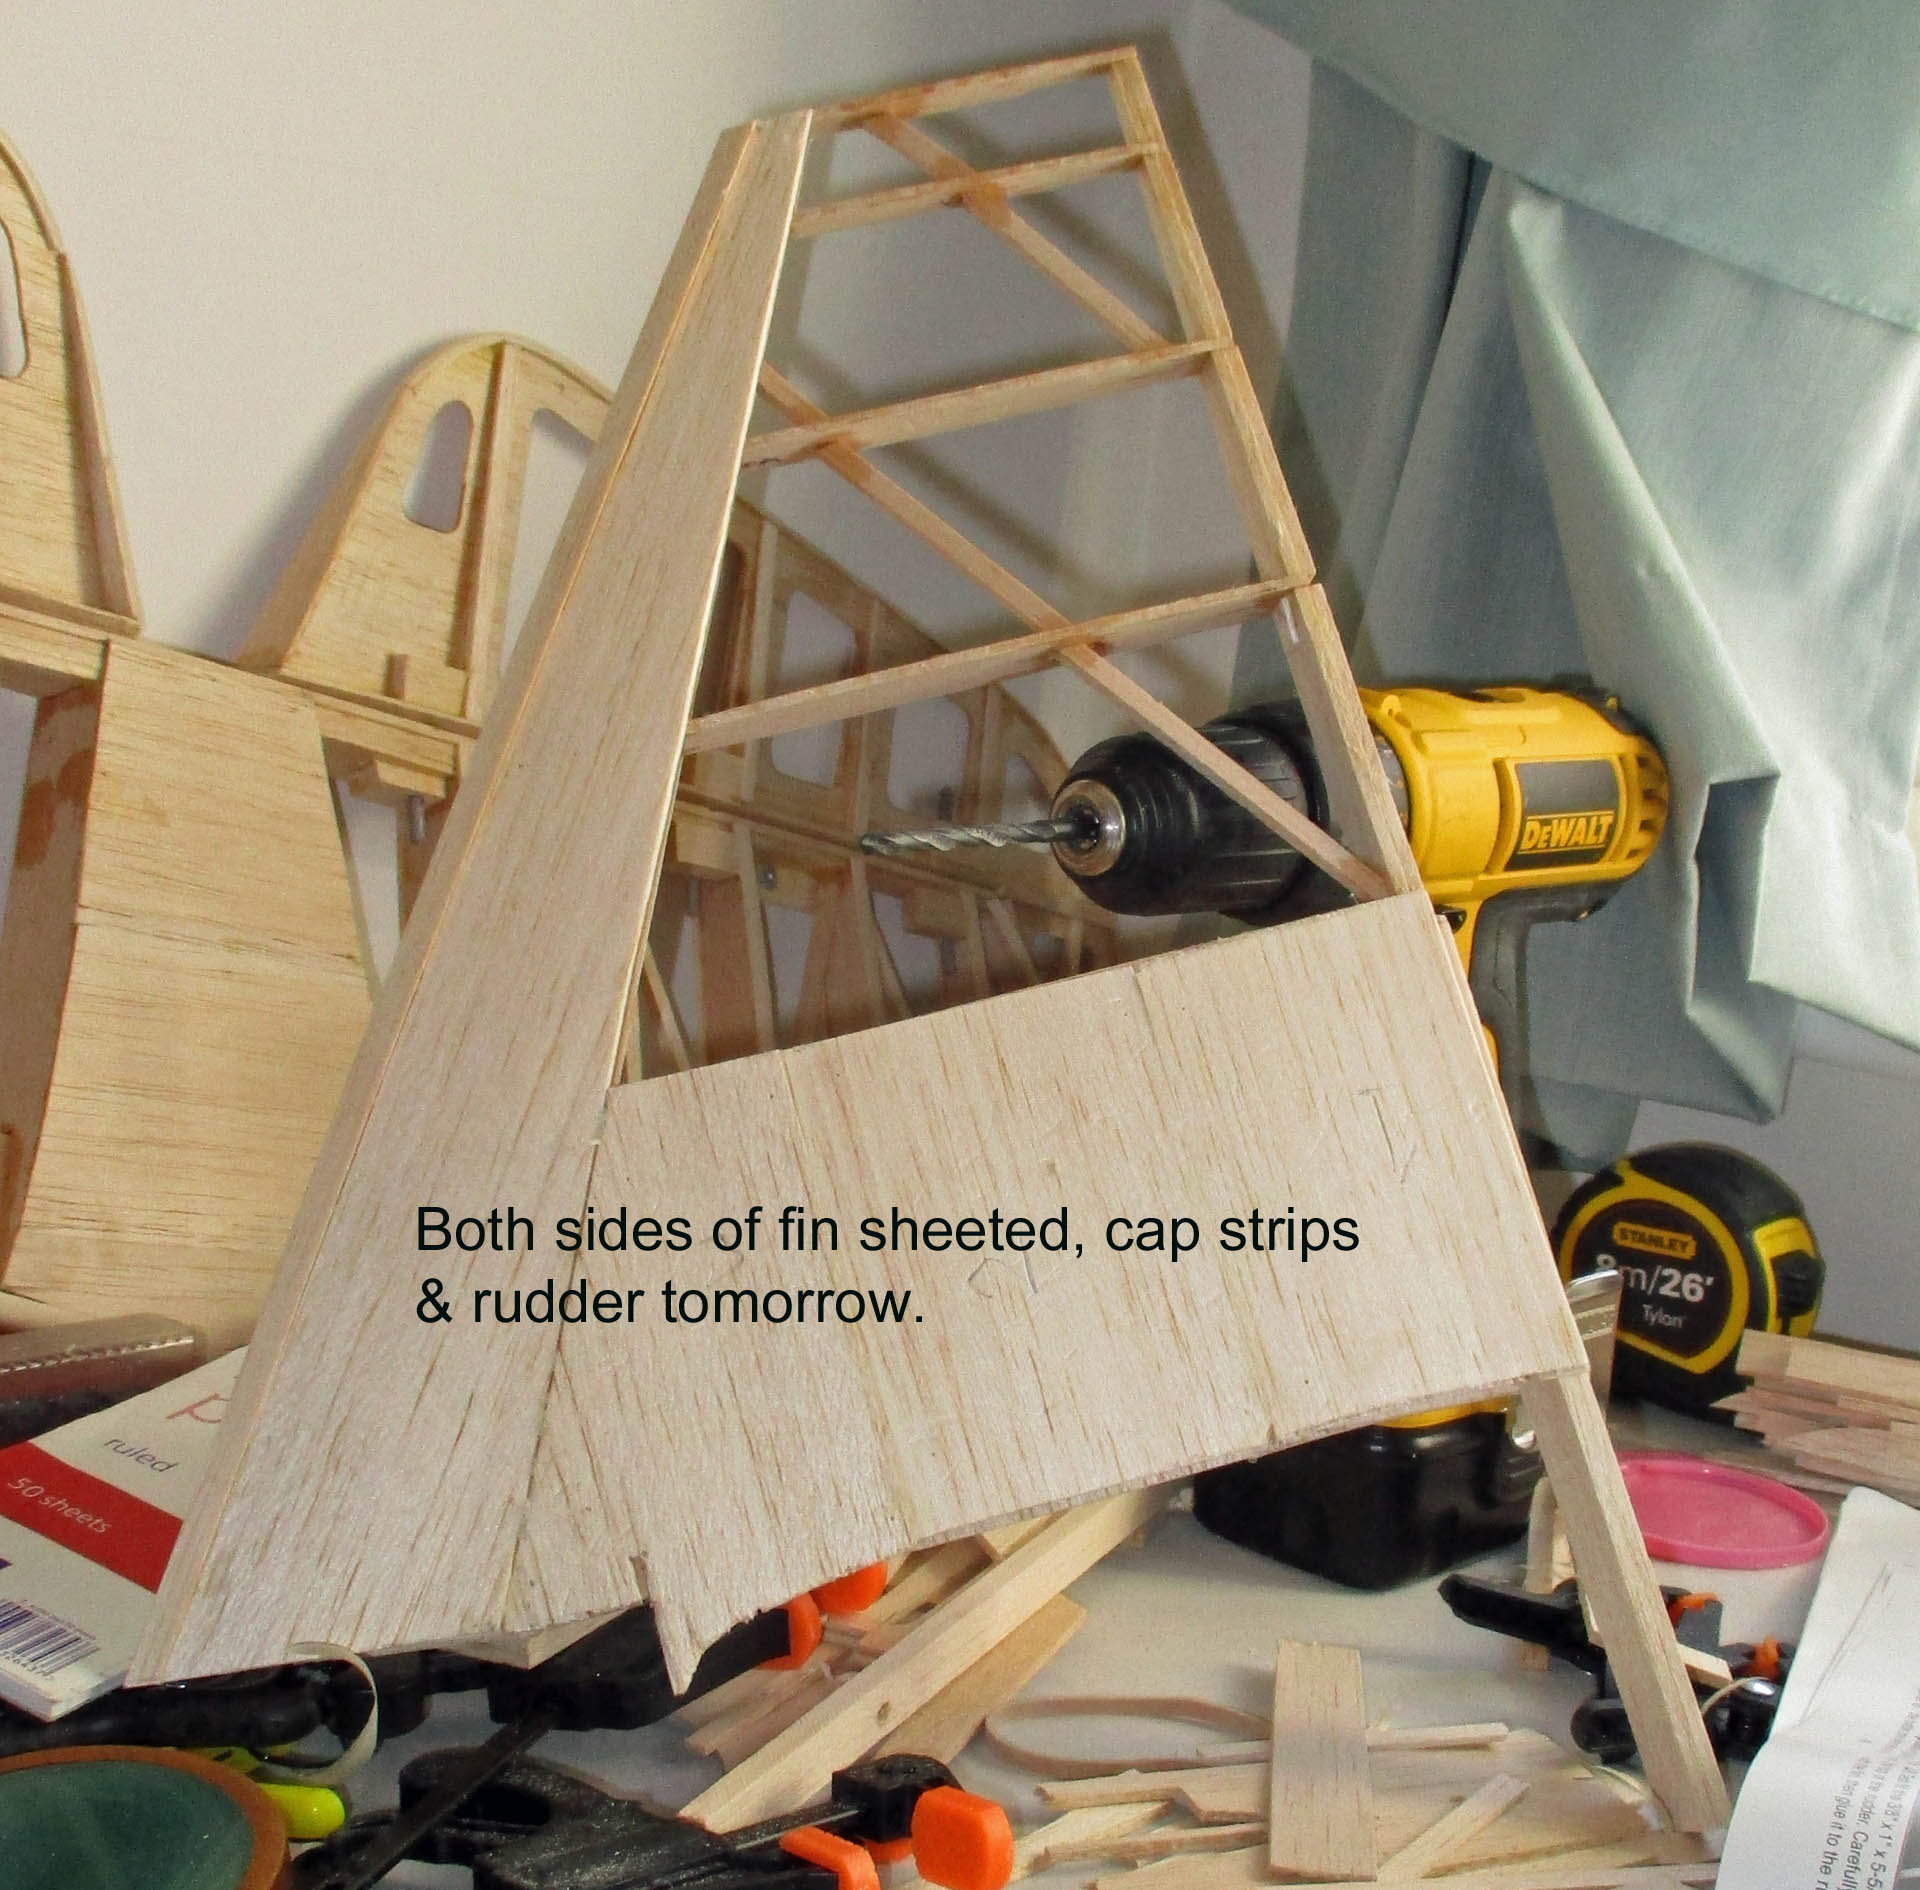
09-27-2018, 07:46 AM
#49
Thread Starter
Join Date: Mar 2006
Location: Southport UK
Posts: 187
Likes: 0
Received 0 Likes
on
0 Posts
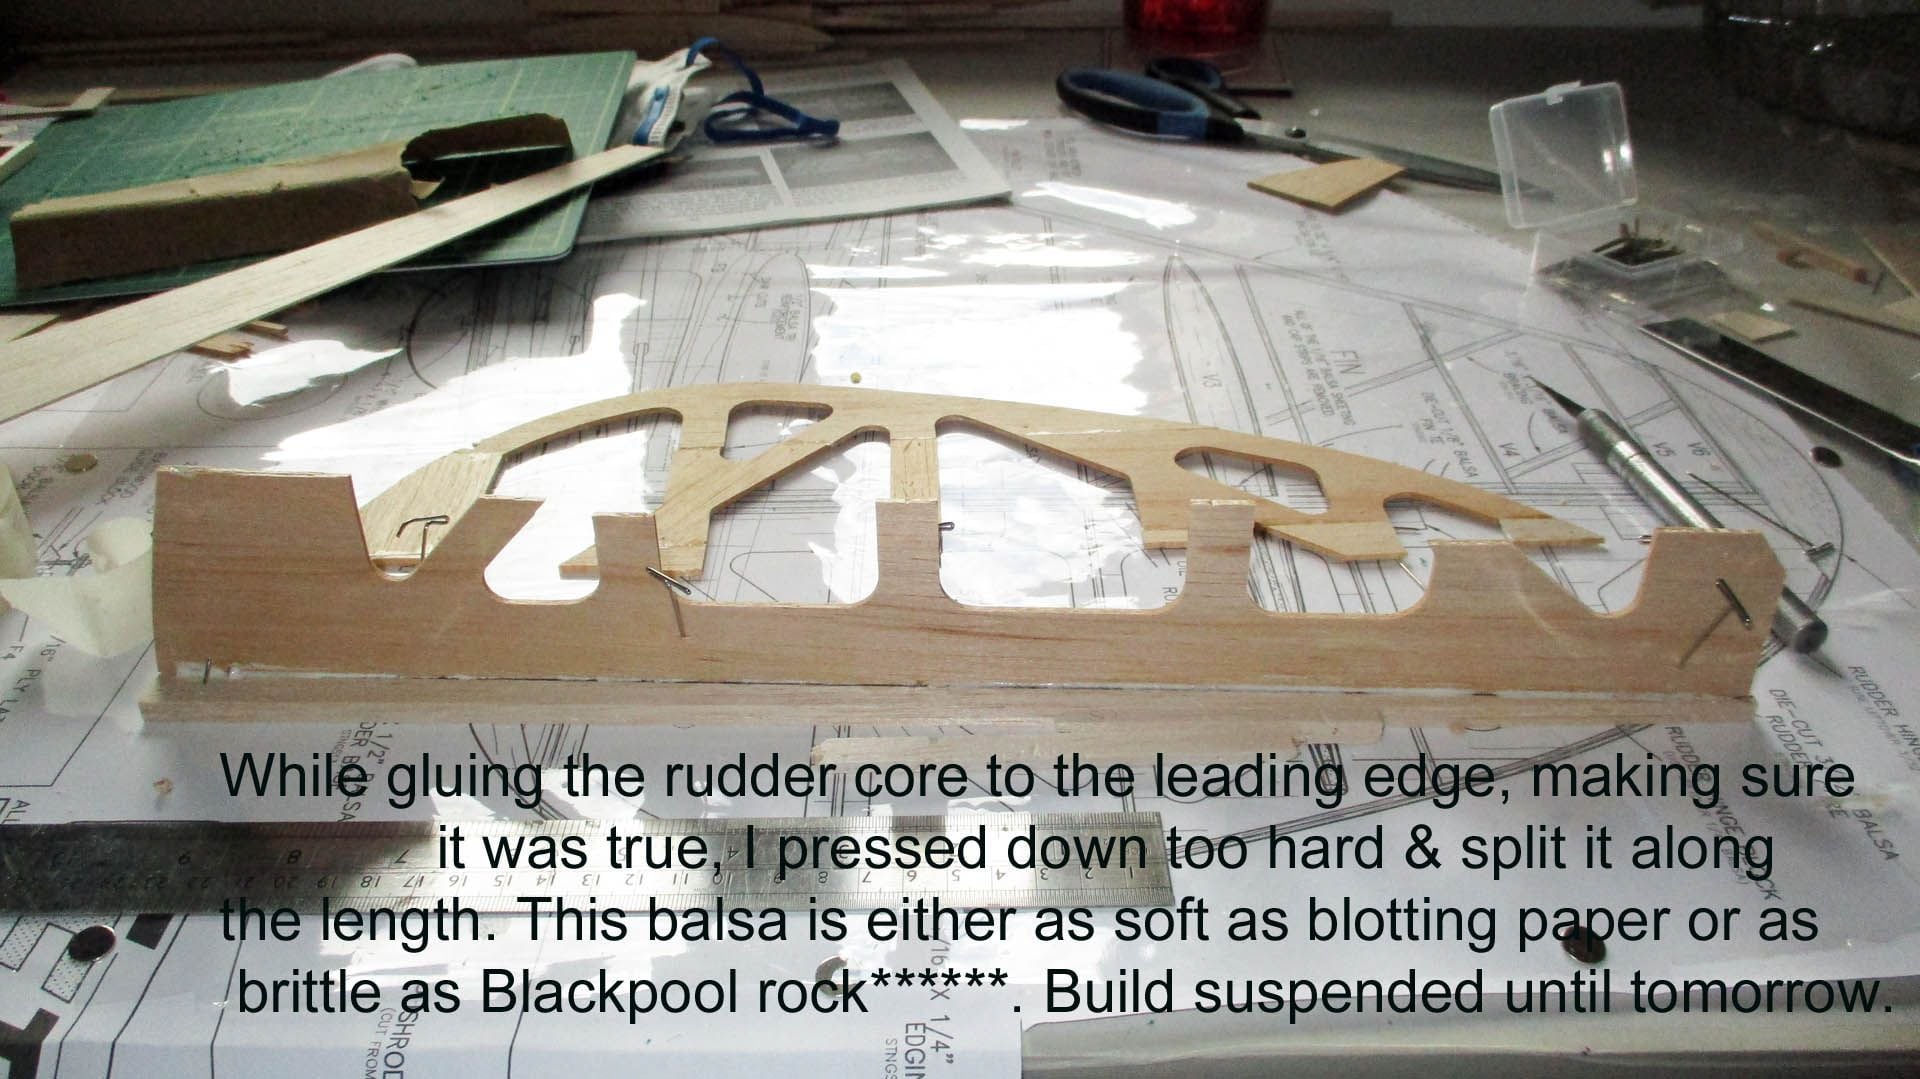
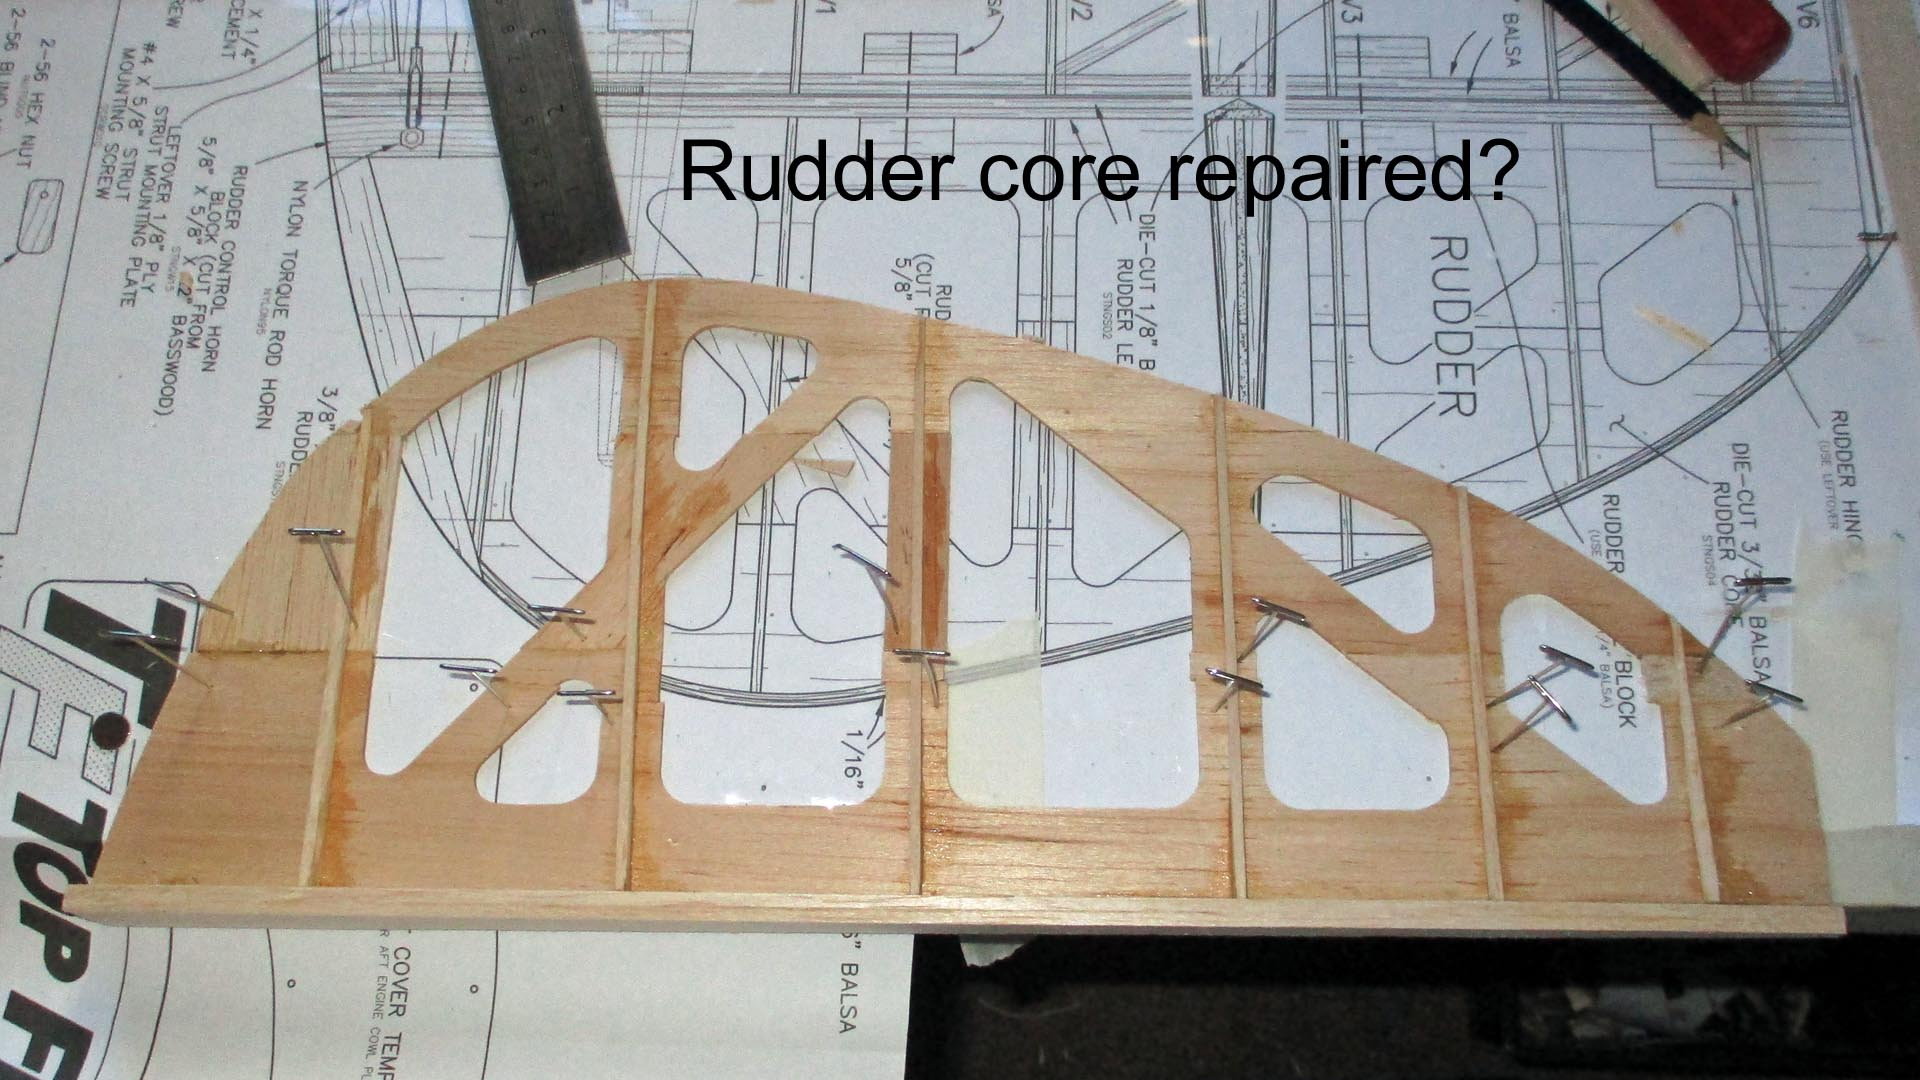
Took the camcorder to the post office this morning, then spent an hour at the building board. The rudder core is a jigsaw of 6 pieces, two of which had gone walkabout so had to be fabricated. Left it drying over lunch then removed it from the board, (aliphatic doesn't stick to florists cellophane). Delay while I gossiped with a neighbour & gave him a copy of the AV show we did of the managers leaving party. I then pinned the rudder leading edge to the board, laid a glue line & fitted the rudder core. Unfortunately I pressed a little hard on the brittle core & it snapped along the length. That terminated the build for the day.


09-28-2018, 10:46 PM
#50
Thread Starter
Join Date: Mar 2006
Location: Southport UK
Posts: 187
Likes: 0
Received 0 Likes
on
0 Posts
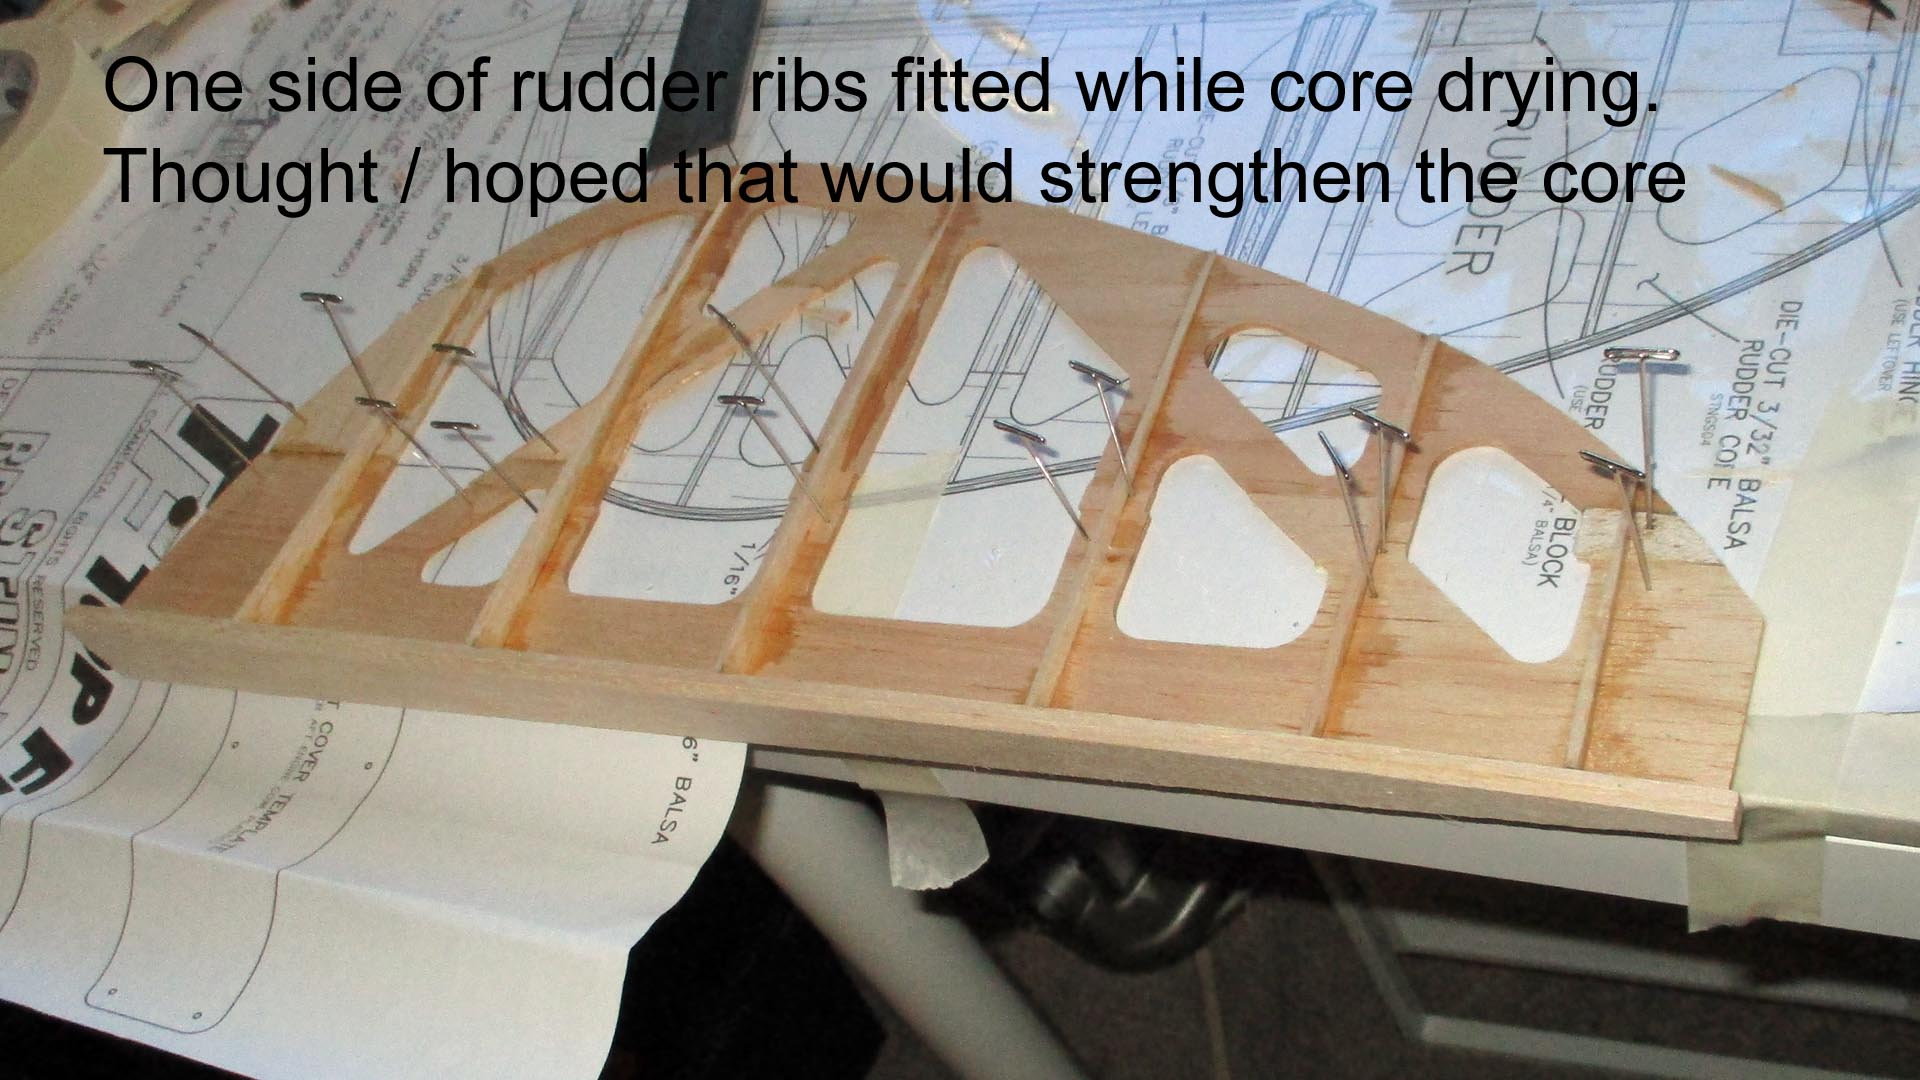
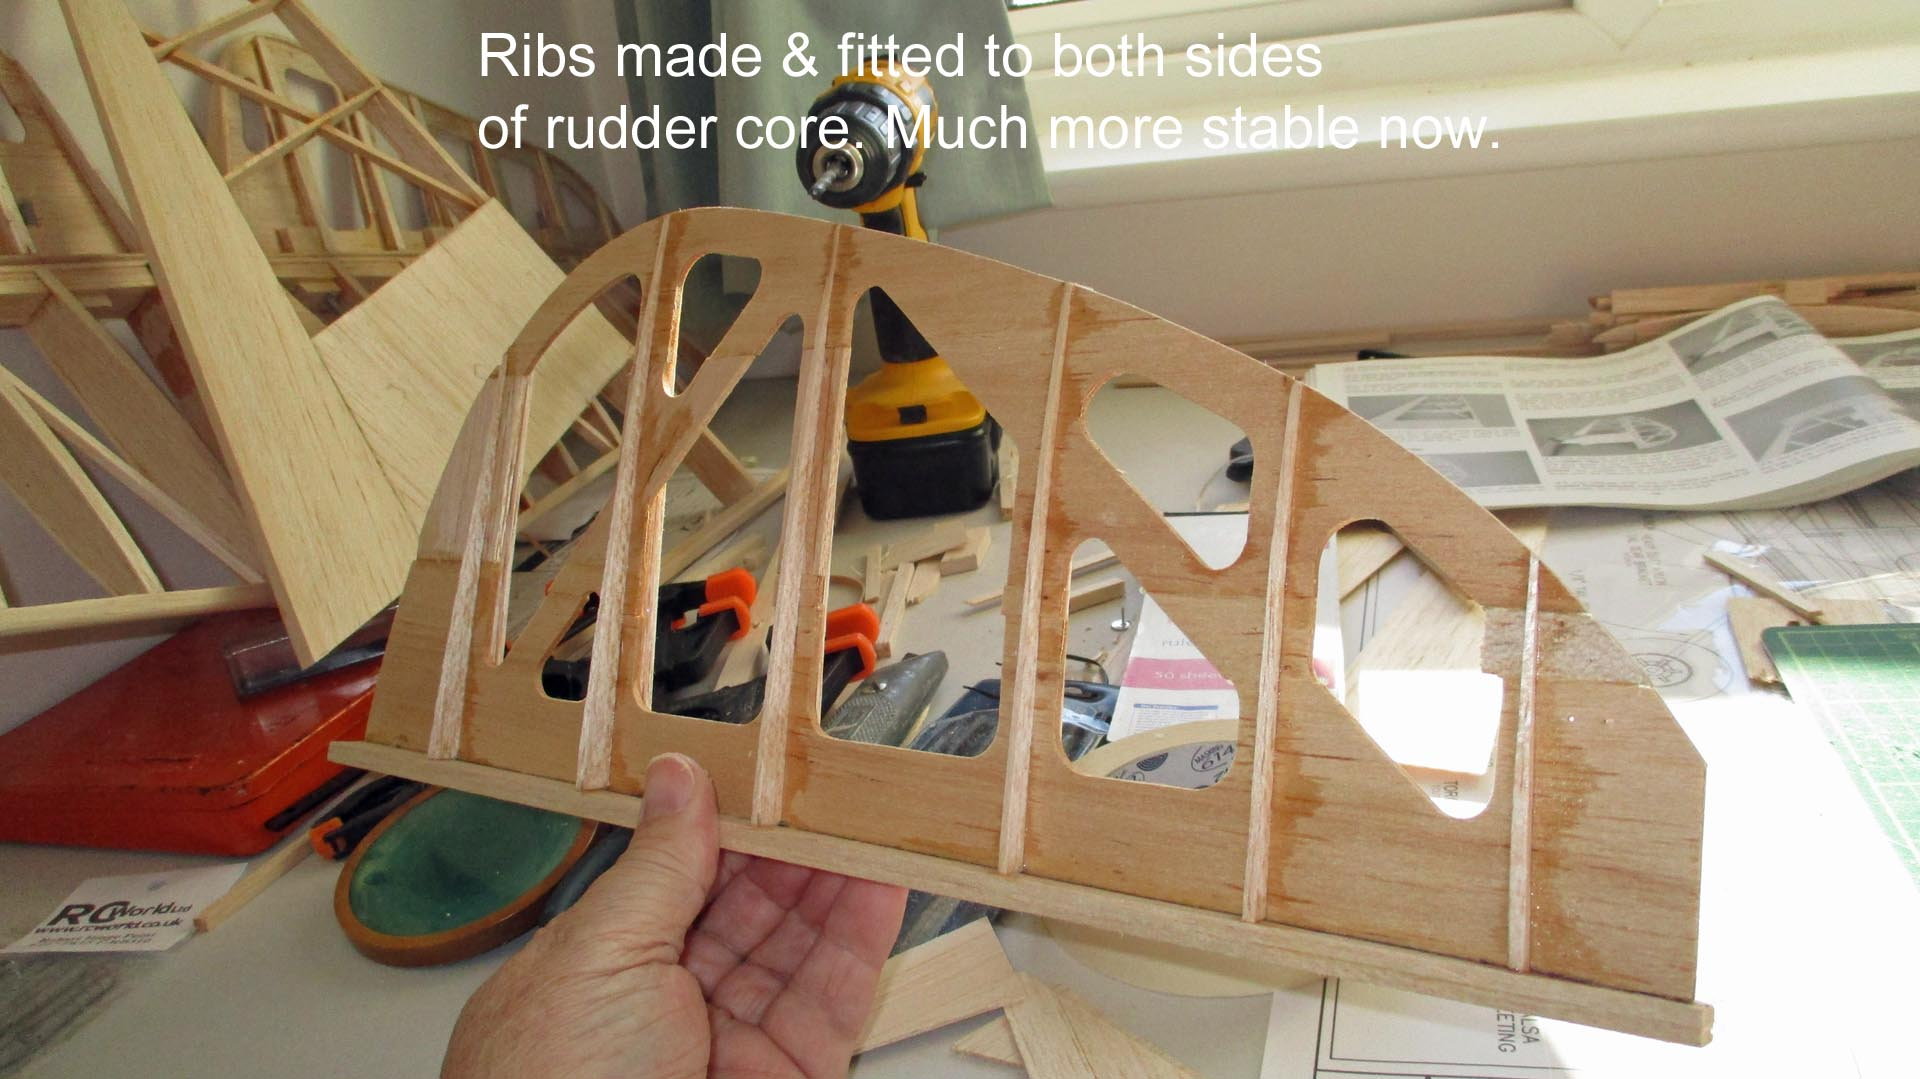
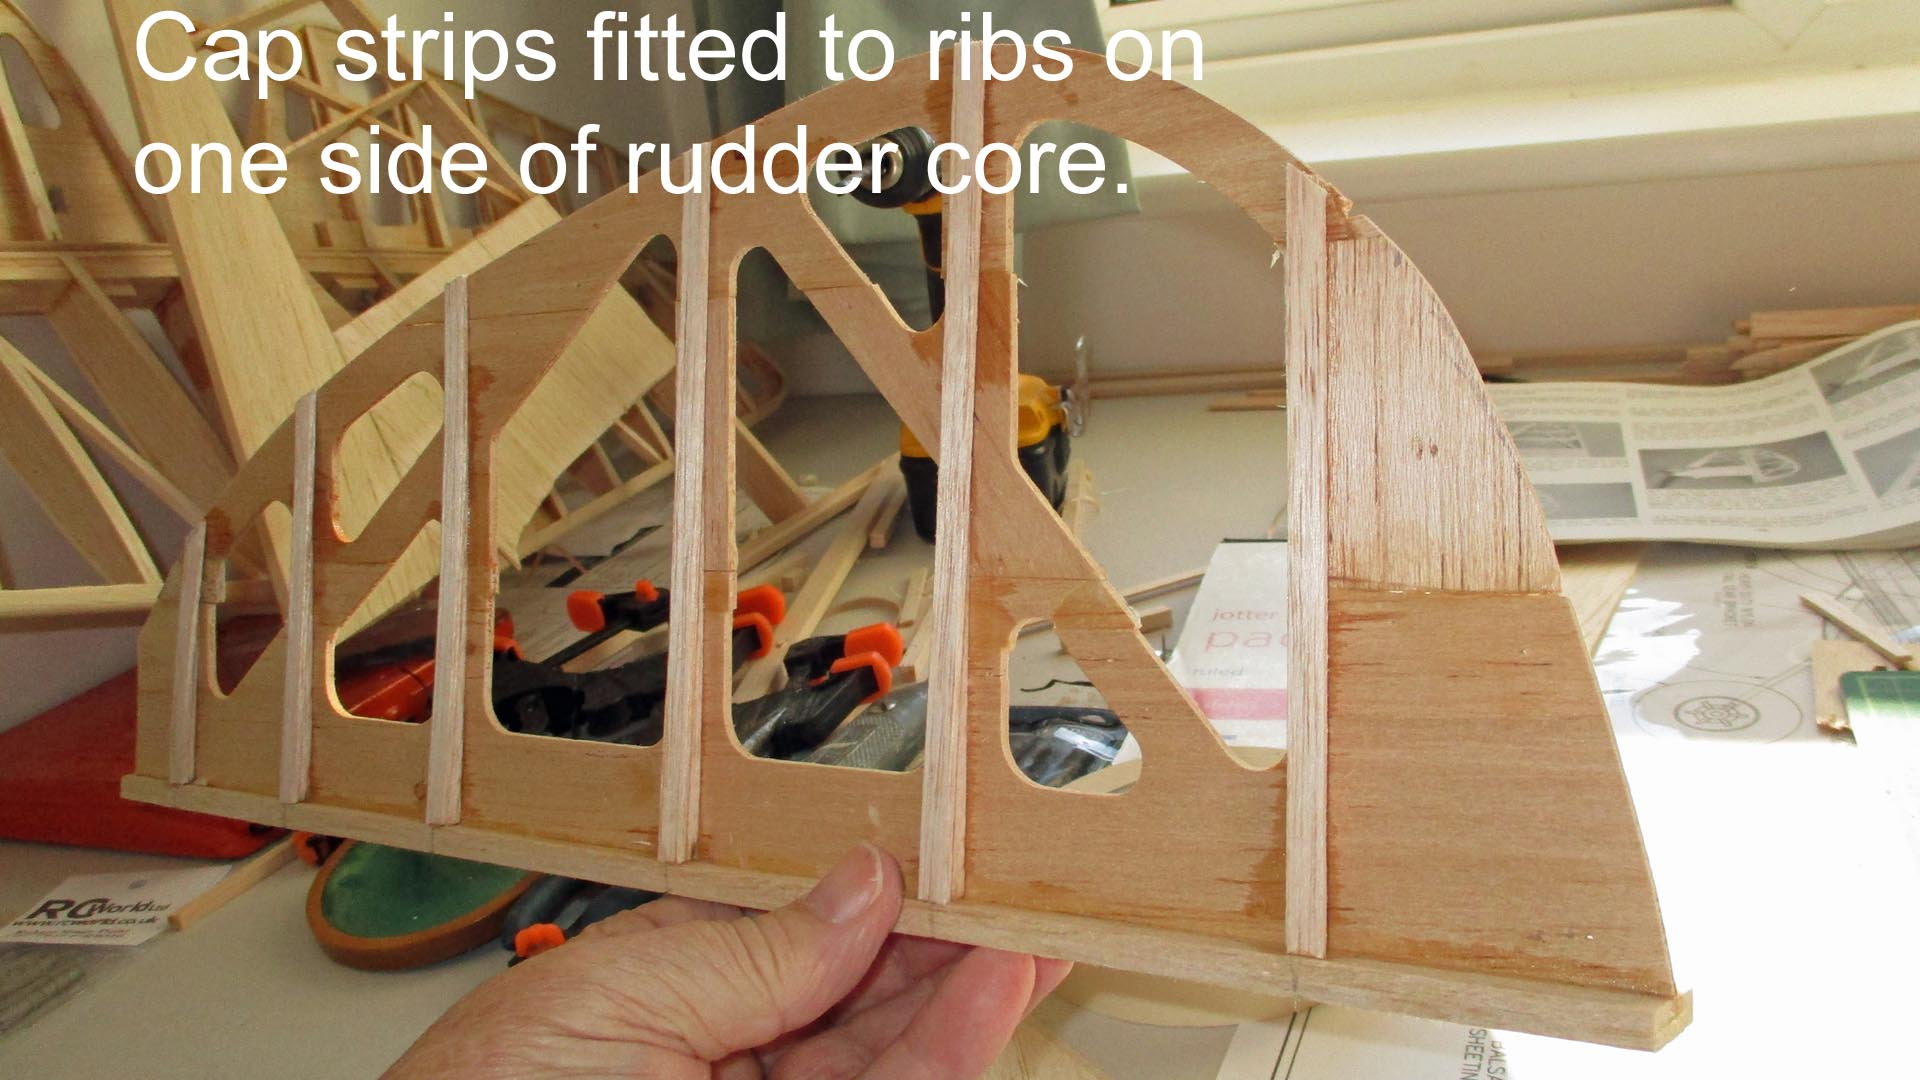
Joined the broken sections of the rudder core, made & added the ribs while it was setting. This afternoon removed the broken core from the board & made & added the ribs to the other side. Finally for today, added the rudder cap strips to one side. That's it for today. For some reason my pictures are getting a "Bad Gateway" error message??? will try later.
Phew, works now

