


Blade 400 - Tips, tricks, and mods
 02-14-2008, 02:25 PM
#101
Member
Join Date: Jul 2005
Location: Weston,
FL
Posts: 48
Likes: 0
Received 0 Likes
on
0 Posts
ORIGINAL: george2005
Zeeb, Danny has apparently not attempted to charge a DX6i through it's own charge circuit. If you look over on the JR/Spektrum support forum you will not that I presented this question there for Danny, and he gave me an erroneous answer. I am an engineer and have a General Class ham radio ticket, so I normally enjoy electronics, except when the circuit does not work as it should! As I mentioned in my original blurb above, there has been at least one JR radio that required modification in order to make it charge through it's jack. There was only that one long, long ago, but maybe another has now come to be.
At any rate, because Danny did not have a correct answer I presented the same question here to see if anyone using the forum had figured out the circuitry problem. Either it is that, or I received two defective DX6i radios from different sources, and I really do not think them to be defective, per se.
While I am here scribbling this out, I may as well mention as a word of caution to all that decide to go with NiMHs in lieu of NiCDs as a replacement to the Alkalines that came with the Blade 400 3D for the DX6i, be sure to charge your NiMHs each morning before you go to fly. The NiMHs do self discharge, to the point of loosing up to 225 mAh overnight max loss. Do NOT charge them the night before and assume they are fine, unless you really pay attention to the voltage readout on your transmitter. NiCDs do not self discharge overnight to any amount to be concerned about. Radio Shack #23-449 4-pack NiCDs are 1,000 mAh cells and should quite a blessing over alkaline or NiMHs. But, to each his own - - -
Other than not being able to charge without removing the batteries from the transmitter, the DX6i is a very nice transmitter. I have been able to adjust the sticks and the programming to make everything feel just like my JR transmitters. I like a certain feel about the sticks especially, so that I really feel the pressure of the sticks for accuracy in flying (I fly thumbs only in order to achieve the greater accuracy).
As to the Blade 400 3D, I also like its responsiveness, yet it can be flown very smoothly. For those that feel it is too sensitive, you can add small wheel collars, or the Flybar Paddle Mount/Adapters EFLH1427, just inside the ones that the paddles are now mounted to. Move them in little by little as you develop your muscle-memory and ability to fly the machine instead of it being way ahead of you. Just be sure that each collar or mount/adapter is equidistant from the main shaft so that the head stays balanced. The training gear is another option, of course, but they both can be utilitized at the same time. In the early 1980s we installed really big brass round weights on the flybars because we were flying bigger machines than these mini and micro helis. So just experiment, but be sure to use the set screws on the collars or mount/adpaters.
In closing I will say that if any of us have an answer to the charging problem we should make Danny aware of it so that he can not only give a better answer in the future but have the manufacturing process changed to allow charging through the circuit without us out here having to fix it.
I hope that some of this information helps some others, but I still need an answer to my question about charging the DX6i. But thanks to all for such interest in this sport/hobby that promote taking the time to get on the forum(s) to help others - - -
Do you really think thumbs only is a more precise flying technique. There was a good debate in another thread. I'm not trying to hijack this one to this subject but I'm curious. My experience, and that of most others that have tried both, convinces me that pinch is by far the more precise method of control. Your thoughts?
 02-14-2008, 04:01 PM
#102
Junior Member
Join Date: Jan 2004
Location: El Paso,
TX
Posts: 15
Likes: 0
Received 0 Likes
on
0 Posts
Bluercpilot,
I have a plaque "Instructor Of The Year 2007" on our library wall and I was told it came down from the AMA as well as our club. So I am quite active in teaching people to fly. Those that I teach learn to fly do fly thumbs typically, and I note that the thumbs flyers land much sooner and better typically than those that don't as well as learning to fly more quickly in general. I am usually too busy focusing on a student to watch in-the-air maneuvers, but I try to watch the landings because they tell me a lot more than anything else as to one's understanding of the controls. That applies to all aircraft.
Most of the NATS heli winners in the 1980s and early 1990s flew thumbs only. That includes, if I recall correctly, Hubert Bitner and Robert Gorham. I don't remember if Curtis Youngblood flew/flies thumbs only. I was taught by Bo Hinch to fly helis thumbs only for the reason that much better control and accuracy would be experienced. So in 1980 is when I switched from the "pinch" method and experienced much better control of airplanes as well as helis. After I realized how much more precisely I could maneuver any aircraft (and most specifically the tail rotor and throttle of helis) I naughtily began to call the "pinch" method the "death grip" method. Yeah, that is naughty - - -
So my experience is based on years of observation of others as well as my own personal flying experience of 50 years now ( I started in 1956 or 1957 ). My opinion is mine. If someone wants to learn to fly and just does not want to fly thumbs only I am ok with that. I really don't care as long as we enjoy ourselves doing what we do. How we do it become inconsequential if we achieve our goal of flying well. Not everyone at the field is practicing to win the NATS or World Championships.
One last thought about thumbs only - that technique leaves more fingers free for flipping switches (and without snagging a stick on the way up or down the transmitter) if one is into flipping all the switches.
The discussion about which is better will never end, really. So we might as well move on and let others argue? Nah! Let's keep it up!!!!!!!!!!
But seriously, to shed some light on how I adjust the sticks and programming for those interested, I make them as short as possible to maximize the spring pressure without actually going to the inside of the transmitter and physically changing or replacing the springs. When you go inside - well, that can be a never-ending attempt to get them adjusted "just so" in that method. To compensate for the shorter sticks I dial in about 15% average (depends on the model, of course) exponential to keep the original relation between stick movement and control response. From there I adjust to my liking, but that is pretty close for a reasonable good start. On a heli, the tail rotor takes more time to adjust to perfection, of course - maybe about 20 flights to get it just so, especially with the new Spektrum feel.
Well, gotta go fly - later all - - - and best of luck.
02-14-2008, 05:30 PM
#103
Member
Join Date: Jul 2005
Location: Weston,
FL
Posts: 48
Likes: 0
Received 0 Likes
on
0 Posts
George,
Thanks for the interesting perspective and thoughtful post. I've flown thumbs only for nearly 35 years and just made the switch. I like pinch better and feel I have more control, not less.
I agree with you completely though that this is clearly an area of "to each his own." There is no best way. Many very successful (competitive and otherwise) pilots fly with both techniques. It is, after all a hobby and the last thing we need is somebody telling us how we have to do it!
Thanks again!
03-01-2008, 11:52 PM
#104
Junior Member
Join Date: Nov 2007
Location: MIAMI, FL
Posts: 7
Likes: 0
Received 0 Likes
on
0 Posts
LOOKING TO PUT A SCALE FUSELAGE ON MY BLADE BUT HAVING TROUBBLE LOCATING THE ONE I WANT. IF ANYBODY COULD HELP, I WOULD REALLY APPRECIATE IT. I WANT THE AGUSTA A109 ON THE HELIARTIST.COM WEBSITE. THANKS!
03-02-2008, 11:51 AM
#106
Member
Join Date: Jan 2008
Location: Portland, OR
Posts: 31
Likes: 0
Received 0 Likes
on
0 Posts
FYI for everyone.
The Align tail shaft DOES NOT fit on the B400. They are to short and the holes for mounting the tail hub are to small and there is only 1 hole.
The Align tail shaft DOES NOT fit on the B400. They are to short and the holes for mounting the tail hub are to small and there is only 1 hole.
03-02-2008, 10:25 PM
#107
Senior Member
Join Date: May 2004
Location: , GA
Posts: 209
Likes: 0
Received 0 Likes
on
0 Posts
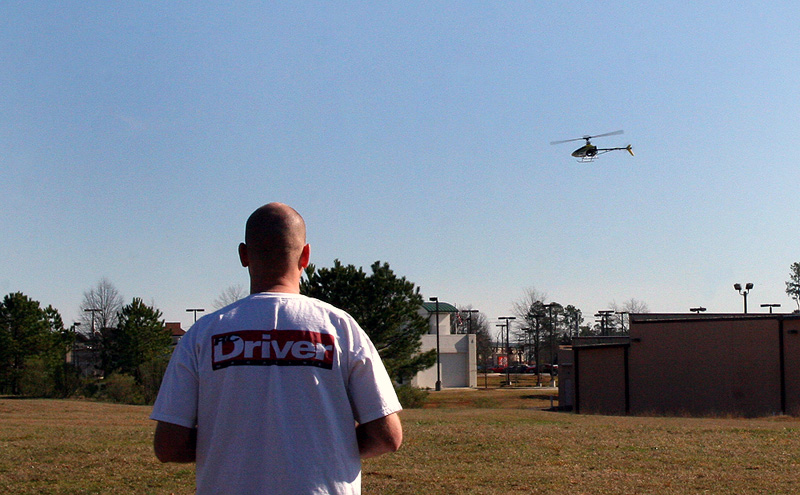
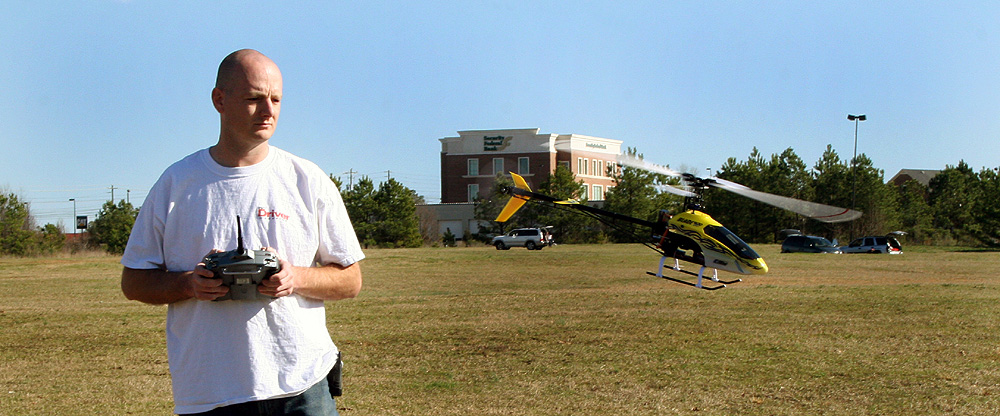
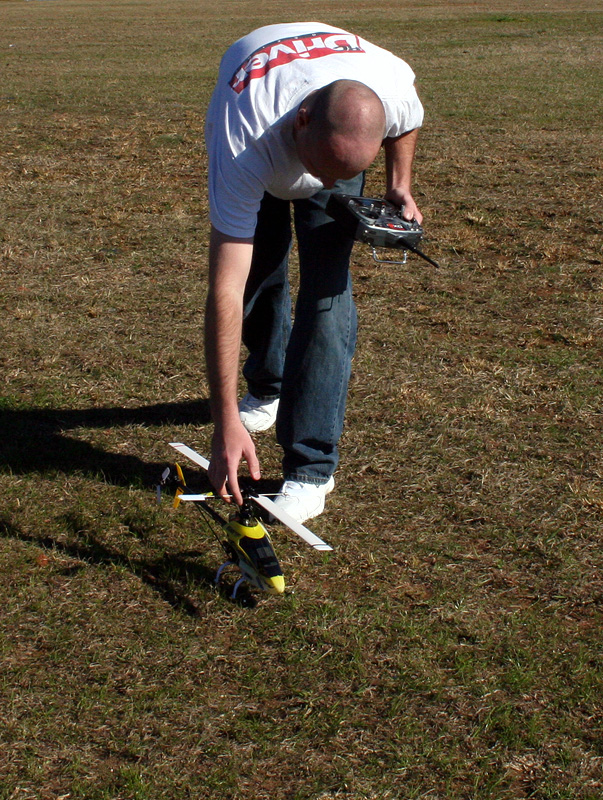
Been flying the Blade 400 a good bit over the past few days.
Installing the canopy is just as bothersome as the other E-flite helis, the CX and CP series.
A trick I used on CX and CP was to use extra body mount grommets on the carbon rod...just slide the extra grommets against the sides of the airframe. This keeps the rod in place and centered.
Additional flybar weights a the paddles will help those that find the B400 too touchy.
I'll be upgrading my B400 to Align blades before I go 3D with it.
Since my wife is in Afghanistan she asked for pics and a video.
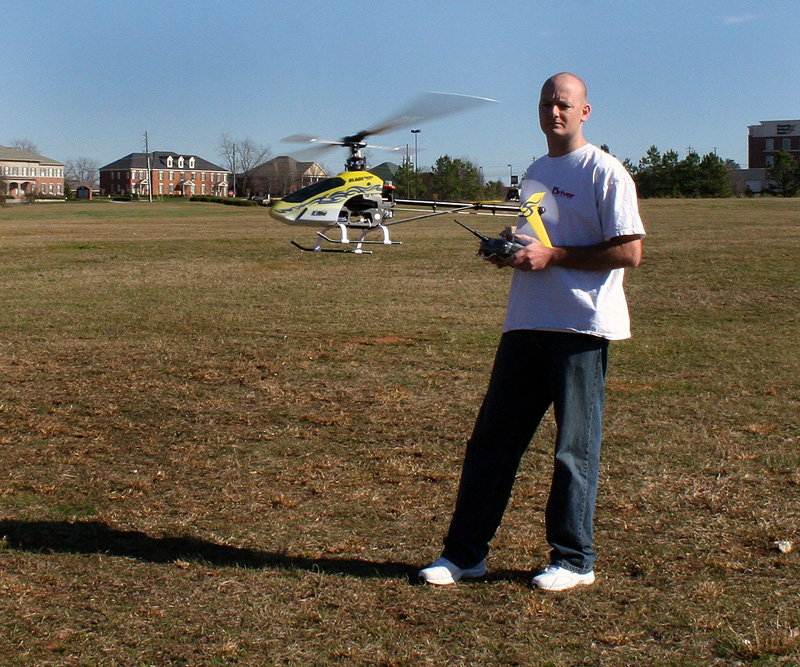
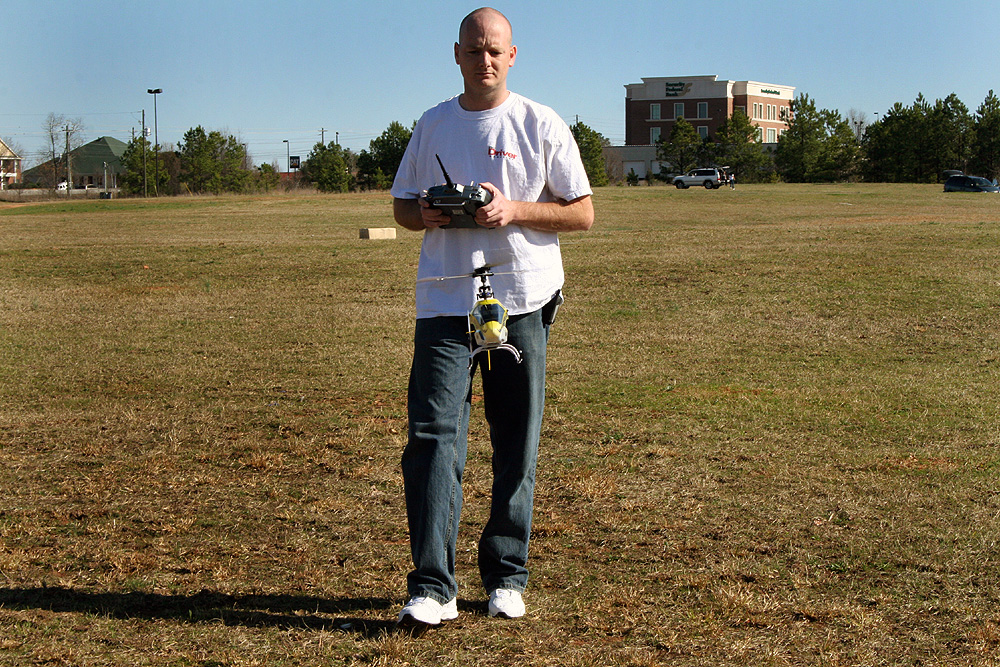
I think Roy had to take this shot just to show me how bald I really am. [X(]
Installing the canopy is just as bothersome as the other E-flite helis, the CX and CP series.
A trick I used on CX and CP was to use extra body mount grommets on the carbon rod...just slide the extra grommets against the sides of the airframe. This keeps the rod in place and centered.
Additional flybar weights a the paddles will help those that find the B400 too touchy.
I'll be upgrading my B400 to Align blades before I go 3D with it.
Since my wife is in Afghanistan she asked for pics and a video.
I think Roy had to take this shot just to show me how bald I really am. [X(]
03-04-2008, 03:03 PM
#109
Junior Member
Join Date: Feb 2008
Location: BrightonSussex, UNITED KINGDOM
Posts: 8
Likes: 0
Received 0 Likes
on
0 Posts
I am looking at this heli as a transition from my v3 lama (counter-rotating) to ccpm, electric, conventional design helicopters. This one has good reviews, is all pre set up (i was looking at a hirobo shuttle at first- decided to go for this instead mostly due to setting it up - i dont have a clue for helis!) has a nice radio, and, with a bit of tweaking, it good for 3D (as far as im concerned!) This is a brill price, £269!! (im in the UK). im only 11, but i can handle a Panic great, and am competent with my heli co-ordination.
Thanks!
Sheldon
(i was looking at a hirobo shuttle at first- decided to go for this instead mostly due to setting it up - i dont have a clue for helis!) has a nice radio, and, with a bit of tweaking, it good for 3D (as far as im concerned!) This is a brill price, £269!! (im in the UK). im only 11, but i can handle a Panic great, and am competent with my heli co-ordination.Thanks!
Sheldon
03-04-2008, 04:00 PM
#110

Join Date: Aug 2007
Location: Lincoln,
NE
Posts: 6,441
Likes: 0
Received 0 Likes
on
0 Posts
I think it would be a good next step. Tail motor helicopters are a little more difficult to fly. With time people can fly them, but it gets frustrating at times. When I got my belt driven helicopter my abilites to fly increased dramatically. If you take your time and use RADD's method to learn to fly it you should be fine. No RTF is truely ready to fly. I am sure the people at E-Flite set them up ok to fly, but I prefer to redue everything and set it up my self. In this link it has videos on how to set up a T-Rex, but I used almost everything to set up my other helicopters. I think it would help you out a lot. http://www.helifreak.com/showthread.php?t=11373
03-05-2008, 12:01 PM
#111
George,
The DX6i has a diode in-line with the charging jack to prevent accidental discharge. This also prevents "smart" chargers from working because they can't detect the battery voltage, all they see is an open circuit. However, a basic "dumb" trickle charger will work fine, just use the 4.8v rx battery lead (swap the plug or make an adapter). If you are feeling really brave with a soldering iron, you can remove the diode and jumper the connection. Just keep in mind that the diode is close to two connectors on the PCB (bottom right corner with the TX back off), and is surface mount, not through-hole so there's very little room for error. You could also jumper the charge jack leads directly to the back side of the battery connector.
If you do decide to take a look, there are 6 screws on the PCB, ONLY remove the 4 in the corners. The 2 in the middle are the LCD mounts. Save yourself a major headache and leave those alone. You can still remove the PCB with them in place.
Also keep in mind that the charge leads are reversed from what most people consider normal. The center pin is ground and the outer ring is hot. You can verify this in the documentation and by looking at the diagram imprinted on the case.
I would not recommend this as a "learning" project. The compactness of surface mount traces and components means that heat for soldering must be carefully controlled to avoid damage. A temperature-controlled soldering iron is highly recommended.
Good luck!
03-06-2008, 07:35 PM
#112
Senior Member
Join Date: May 2004
Location: , GA
Posts: 209
Likes: 0
Received 0 Likes
on
0 Posts
After flying my B400 today I found a weak link.
I've never crashed my B400, never struck the ground with it, etc...and I have over 20 flights on it.
Today I was doing some hard 180 stuff, full positive pitch, yank back on the elevator, go into inverted hover, full negative pitch and a bunch of elevator to pitch it back upright. Basically a tic-toc, but I was going 9 to 3 instead of 10 to 2.
Did this 4 or 5 times and saw a tail boom support hanging. [X(]
Due to the position of the tail boom support (it was hanging straight down, perpendicular to the tail boom) I had to get it near the ground and slowly ease the heli backwards and lose altitude to land.
If I had tried to move forward to land the tail boom support would have gotten into the tail rotor.
I inspected the heli and noticed that BOTH tail boom supports had come loose at the gear...rods came out of the ball ends.
I'll sand the old adhesive off the carbon rod and re-glue the rods into the ball ends, but figured I'd let you guys know of something to keep an eye on.
Take the supports off and give'm a tug test and a bit of twist to see if they're snug. If not, break out the adhesive.
03-13-2008, 04:12 PM
#113
Join Date: Mar 2008
Location: kaukauna,
WI
Posts: 17
Likes: 0
Received 0 Likes
on
0 Posts
Hello fellow pilots.....I have the blade 400 it's a great heli! I'm had it for a month I bought the carbon blades from align they make a difference. I also had help from an experience Heli pilot from the local hobby shop. The radio is alittle intimidating but I'm learning. He also set up all the digitals for me in the radio...A BIG help.
Ok here's my question; After mastering the hover....I'm finding it really hard just to do circles or figure 8's I've been hovering on the ground and have been tipping over at times, even have the training gear on....It would be nice to see what actuaaly takes place on the sticks (radio controls) but I never saw any? a visual would be great, I'm getting closer....to do just a circle would make me really happy! I haven't crashed yet...just tip overs.
any other tips or websites would be great...thanks,
scott
03-13-2008, 04:53 PM
#114
Join Date: Aug 2007
Location: Lincoln,
NE
Posts: 6,441
Likes: 0
Received 0 Likes
on
0 Posts
What helped me to do figure 8 is to practice hovering sideways. That is basically all a figure 8 is with a little nose in hover. I find it easier to make the turn away from me than towards me. I just started hovering on one side then move foward, then slow down, then make a 180 turn. Then I would go the other way and repeat. Once I felt comfortable doing that I made the turns more wide to look more like a figure 8. For a circle I would recommend practicing all four hovering positions. I haven't tried a circle yet because my backyard isn't big enough for mistakes.
03-14-2008, 12:22 AM
#115
Member
Join Date: Mar 2008
Location: none, SINGAPORE
Posts: 30
Likes: 0
Received 0 Likes
on
0 Posts
JUst did it, flew out three packs and did not crash,well a heck of alot in the sim but that's ok. Anyway I am wondering how this sounds to the people who know
Start with a 400
1) Hummingbird 5a BEC
2) 30a ESC
3) 65HB on the top
4) Standard servo for the tail yep I know get rid of it.
5) Align 325 pro's
6) Align Trex paddles, not cf
7) Weights out at the end of the fly bar
I have not as yet started with the radio set up other then to figure out the reverse of the servo's and change the swash mix for the servos.
Just learning so no bother for Idele up numbers yet
Throttle curve 0,45, 60, 75, 90
Pitch curve 25, 40, 50, 75, 100
Gyro Gain on the gyro full CCW as I undertsand that is Rate mode not counting the TX, 0=79 and 1=20. I think that this makes it possible to adjust the gyro for the mech. side of it in rate mode then use switch position 0 for the HH mode?
So now the results, I can hover in a 5 ft. cube, tail seems to hold pretty well considering the servo and gyro. Seems a bit had to pull off the ground smothly, some seem to say just get it up to the 3-4 foot hover and start from there?
Sub-trim, as usual with helis they need constant rt aeilron to compensate fro all the aerodynamic and mech magic, is it better to trim it out using the sub's or just keep using the trim swithces, I'll assume (dangerous) that the rudder needs to be subs so as to not send conflictin comands to the gyro.
I don't fully understand the "expo" thing yet so I figure the weights on the fly bar are doing the same thing?
Well thats alot, and probably forgot some important info so just let me know so I can fill in the blanks, aside from that any 400 drivers in Singapore? Slightly off the map for the blades as of now. Jeff
03-16-2008, 07:50 PM
#118
Junior Member
Join Date: Nov 2007
Location: MIAMI, FL
Posts: 7
Likes: 0
Received 0 Likes
on
0 Posts
THANKS FOR THE HELP BUT I JUST PURCHASED A T REX 600 AND THERE ARE SO MANY DIFFERENT CHOICES FOR FUSELAGES AVAILABLE FOR THIS BIRD. I'M SELLING THE BLADE 400. IT'S A MONTH OLD, I PURCHASED THE WHITE CANOPY, AND WHITE FINS FOR IT. AND I WILL THROW IN THE WALL CHARGER ADAPTER FROM E-FLIGHT. IF ANYBODY IS INTERESTED FEEL FREE TO CALL ME. I'M IN MIAMI, FL. (786)316-8747 JOSE. I NEED $400 FIRM FOR IT. THE STOCK CANOPY AND FINS ARE ALSO INCLUDED.
04-01-2008, 09:48 AM
#119
Senior Member
My Feedback: (1)

Join Date: Feb 2008
Location: Fountain,
CO
Posts: 343
Likes: 0
Received 0 Likes
on
0 Posts
Hi all,
Is there a larger vertical fin I can put on my B400? I want something that gives a little more clearance to save the T/R. On our real helicopters, we have tail stingers to help protect the T/R in the evnt of a tail low landing. I wonder if there's such an animal? Also, has anyone ever mounted a high gorilla skid on their 400 or any other heli?
Thanks,
Kenn
04-02-2008, 06:22 PM
#120
Senior Member

Join Date: Oct 2003
Location: ile-Bizard, Montreal,
QC, CANADA
Posts: 611
Likes: 0
Received 0 Likes
on
0 Posts
This is what I did to my brothers Blade 400.
I had spare parts from my T-Rex 450 and he wanted his blade to look like one so here it is.
I had spare parts from my T-Rex 450 and he wanted his blade to look like one so here it is.
04-03-2008, 03:08 PM
#121
Senior Member
Join Date: Dec 2005
Location: Riverhead,
NY
Posts: 249
Likes: 0
Received 0 Likes
on
0 Posts
In response to protecting the tail rotor in a landing:
I have flown helis for just over 2 years. When I was learning to fly, I took a small wood dowl and taped it the the vertical fin so it would extend past the bottom of the vertical fin and save my tail rotor for my accidental tail first landings. This worked really well until I finally got control of how I landed when I got my hover down and then I took it off.
I have flown helis for just over 2 years. When I was learning to fly, I took a small wood dowl and taped it the the vertical fin so it would extend past the bottom of the vertical fin and save my tail rotor for my accidental tail first landings. This worked really well until I finally got control of how I landed when I got my hover down and then I took it off.
04-03-2008, 09:43 PM
#122
Senior Member
My Feedback: (1)
Join Date: Feb 2008
Location: Fountain,
CO
Posts: 343
Likes: 0
Received 0 Likes
on
0 Posts
ORIGINAL: Tow Cobra
In response to protecting the tail rotor in a landing:
I have flown helis for just over 2 years. When I was learning to fly, I took a small wood dowl and taped it the the vertical fin so it would extend past the bottom of the vertical fin and save my tail rotor for my accidental tail first landings. This worked really well until I finally got control of how I landed when I got my hover down and then I took it off.
04-03-2008, 09:52 PM
#123

Join Date: May 2006
Location: Greenwood,
IN
Posts: 5,238
Likes: 0
Received 0 Likes
on
0 Posts
Crusader23,
Tall Gorilla Skids will keep the the tail much higher on lift off. Hmmm, just hang in there.. I do pay attention.
Dave / Choppersrule
Tall Gorilla Skids will keep the the tail much higher on lift off. Hmmm, just hang in there.. I do pay attention.
Dave / Choppersrule
04-03-2008, 11:25 PM
#124
Senior Member

Join Date: Jun 2007
Location: Avon,
CO
Posts: 1,075
Likes: 0
Received 0 Likes
on
0 Posts
I've also seen some use a CNC tail fin for the TREX.
The hole positions are a little different but a little filing will get you there.
Only adds about 1/2" of clearance though.
The hole positions are a little different but a little filing will get you there.
Only adds about 1/2" of clearance though.
05-08-2008, 12:43 AM
#125
Senior Member
Join Date: Jun 2007
Location: Avon,
CO
Posts: 1,075
Likes: 0
Received 0 Likes
on
0 Posts
we have tail stinger s to help protect the T/R in the evnt of a tail low landing
Here's my version of a tail stinger.
It's working great and holding up (no pun intended) so far.