


E-Flite Advance 25e using E-Flite 480 (1020Kv)!
 10-23-2011, 07:30 AM
#1

Thread Starter

Hi guys!
Here it is again of me using the capable E-Flite 480 (1020Kv) in yet another model that is pretty heavy and large.
 opcorn:
I just had to do it because I like my models light and like being different.
Picked up this nice looking model and most especially light wing loading at HOBBY-TOWN USA in Central Florida and got 10% off plus I will have a $15.00 coupon next time I come back!
I am certainly going to keep my model on the light side and I already have the E-Flite 480 (1020Kv) waiting for it. Yes, I do realize it is half the weight of the recommended E-Flite Power 25 and the Center-Of-Gravity will be paid attention by using some 3-Cell, 3650's that I have lying around.
Here is the E-Flite 480 (1020Kv):
http://www.e-fliterc.com/Products/De...505#quickSpecs
6.7(E-Flite Power 25) - 3.1 (E-Flite 480) = 3.6 oz is the delta weight comparison between the recommended and what I will be using.
Well,
Seems like a good power system setup as it provides very good Airspeed and keeping the model light as possible.
This model has a very slick airframe but, lets give it some drag and so, I would estimate a top speed of 65MPH instead of the Calculated.

Just in case anyone doubts the power of the E-Flite 480 (1020Kv) power system then, I would point you all to one RC Model that I still have and fly using this same power system
Right here on the Video you can see a larger and heavier World Models (Airborne-Models is the distributor) P-51D Mustang EP-40.
http://www.youtube.com/watch?v=aNYa77UHBfE
================================================== ==
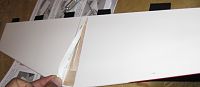
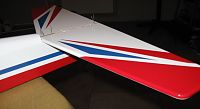
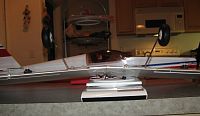
Took out my Advance out of the box and out from plastic liners to say TOP Quality is an understatement!
The balsa and light plywood and especially the firewall assembly is just First Rate. The covering is incredible, without any bubbles, wrinkles or any other type of covering imperfection! The model is super light and I will keep it that way.
Hi guys!
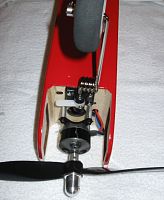
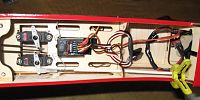
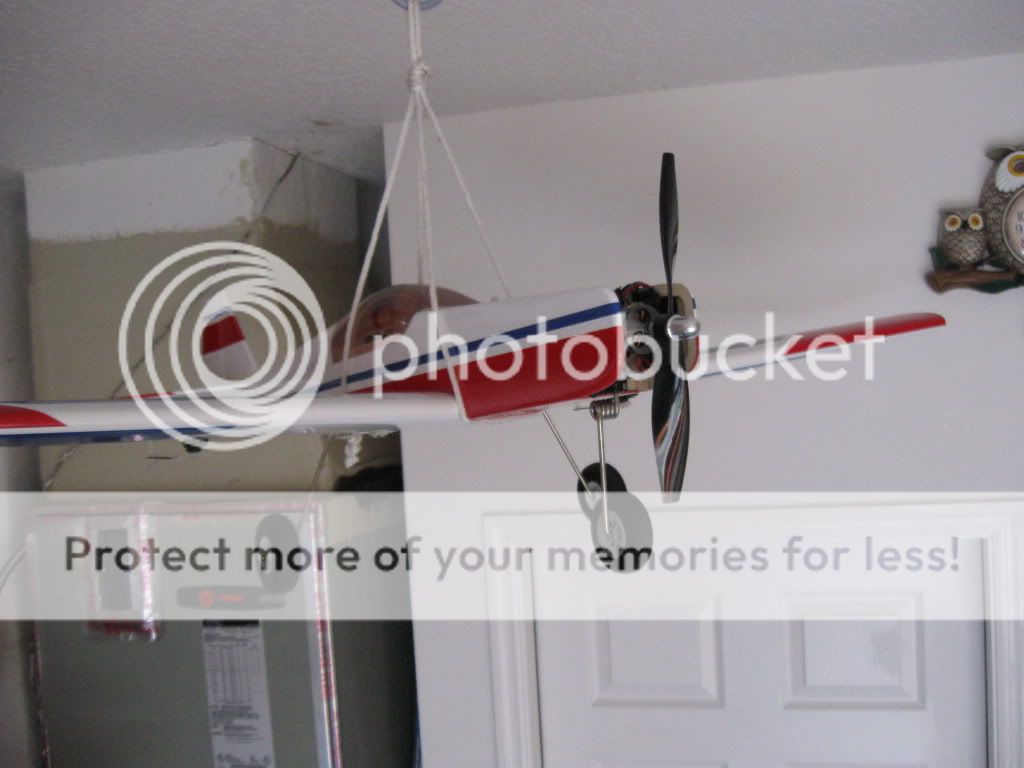
For those that "are" interested in following an alternative power system than what is recommended (I did this for several models in the past) then, feast your eyes on what I was able to accomplished last night with respect to installing the lighter but, capable E-Flite 480 (1020Kv) with the ParkZone 2-Blade 9.75 X 7.5 using ParkZone Propeller adapter.
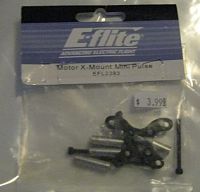
The spacer hardware were a mix of some E-Flite spacer hardware for the mini-Pulse and the rest was standard Dubro Hardware. Notice that I did not use that Hex Bolts from the mini-Pulse as I needed them longer so, I used some Du-Bro 4-40 X 1 1/2 Bolts
A few pictures:


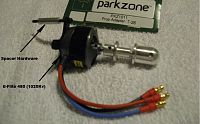
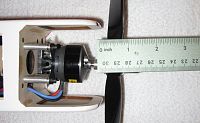
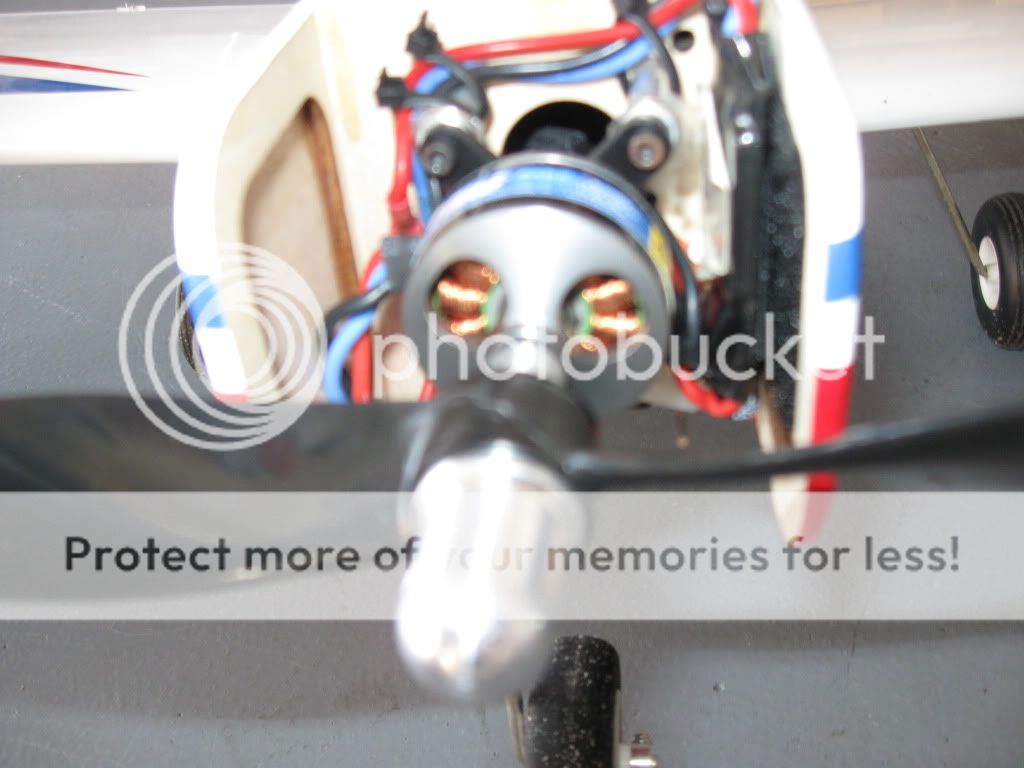
This is an earlier Picture showing the E-Flite 480 (1020Kv) with the wires in the down position but, notice that I did not have to use the additional Motor Mount - Spacer!

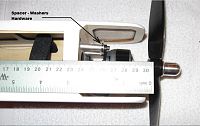
For correct down and right thrust, I used washers at the top:
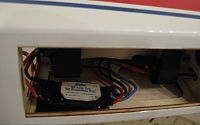
Using the proven E-Flite 30-AMP Switch mode ESC it was perfect and does not get in the way of installing my plan of using the smaller 3-Cell, 2200mAH, 25C discharge, Li-POLYs
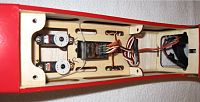
Also, decided on using a rock solid AR500 that I have been using with a retired ParkZone T-28 "Navy" that finally had an issue with the Stock Motor and the model needs some down time for needed repairs.
Could not use those STOCK wheels provided by the model as I like to have a better command of the model while TAXI operations on my RC Club with lumpy Grass field so, I went with some super light "FOAM" wheels (they look for Glow, right!) and they fit perfect with the provided STOCK heavy duty Landing Gear Hardware!

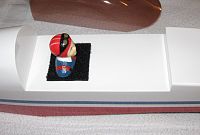
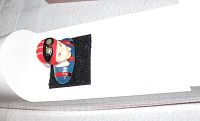
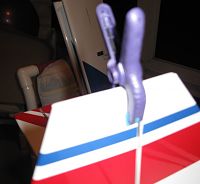
I like a true believer of recommendations with regard to Pilot Figure for this model, I paid $9.99 plus tax on the recommended Pilot Figure at my local hobby store and to my horror, the instructions say to CUT AWAY a portion of the bottom section in order for the Canopy to clear!!!
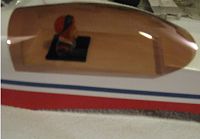
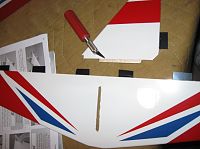
Nope, I selected a nice Pilot Figure that did not need "Any" modifications (World Models Pilot Figure) and it matches the color scheme of this model to the T.
The Pilot Figure that I paid $9.99 will be going back to the Hobby Store!
I selected the one on the LEFT!

One major deviation that I took was not using the CA Hinges that the model came with because I do not use CA. What I normally use is Computer Floppy material for Hinges and it is a personal preference and nothing more so, I am not recommending it to anyone here as I just do not think it is a good enough reason to deviate from the the normal instructions within the manual.
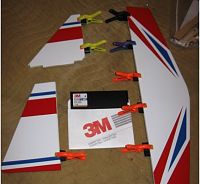
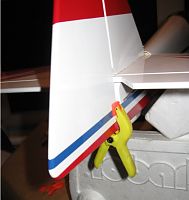
Preparing the tail feathers (Horizontal Stab and Vertical Stab):
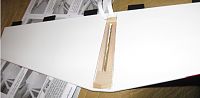
More hinging for Ailerons:
Installing the Horizontal Stab:
Installing the Vertical Stab:


Installing the Rudder:
Installing the Elevator:
Installing Aileron Servos:

Installing the Nose Wheel Push Rod Tube:
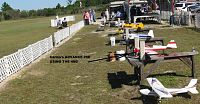
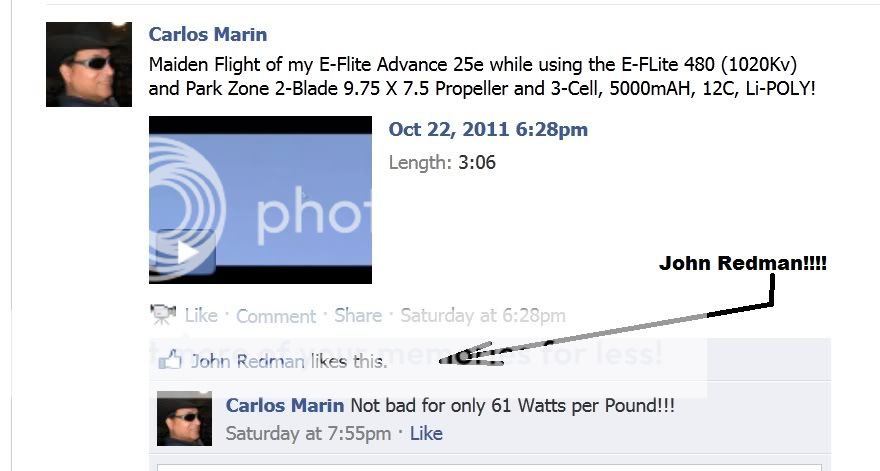
At the FUN FLY on Saturday morning (10-22-2011) at Moon Port Modelers RC CLub, Titusville, Florida and thanks to Mark (Marked) who captured my Maiden Flight of my Advance!


Summary:
This model comes with Spectacular Quality. The Sheeting "Foam Core" wings look terrific and covering is JOB NUMBER #1! The build is not your typical Park Zone Warbird model like putting the tail feathers and control rods as it is much more involved and you need to have much more patience than those PNP / BNF models. For example, the plastic hardware for the Control surfaces such as the Control horns and plastic horn anchors are flexible such that you will spend much more time trying to screw all those securing bolts threw the control surfaces and a little thought process is required before you proceed to the next step.
I used a lower powered (Wattage) power system (E-Flite 480, 1020Kv) and it flew the model delightfully in 12 MPH gusts during today's FUN-FLY event and I was just a few who dared to fly.
I was hoping to use the smaller 3-Cell, 2200mAH, Li-POLYs but, in order to have the correct Center-Of-Gravity and avoid a nasty AFT C-of-G, I was forced to use the larger and heaver, 5000mAH pack which resulted in a perfect Center-Of-Gravity. I learned that this model was built very strong and the tail boom just does not allow for any weight savings while using a lighter power system, nevertheless, it flew great with the E-Flite 480 (1020Kv).
Okay, in conclusion....here is the Video:
[youtube]http://www.youtube.com/watch?v=_oLzWnzkAWU[/youtube]
Okay,
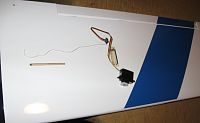
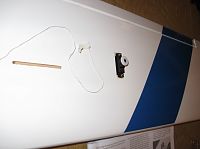
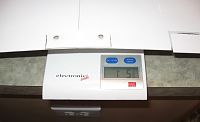
First a few pictures of my weigh-in setup using a digital scale and my kitchen area.


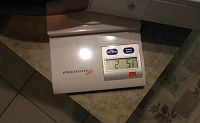
FUSE without Battery:

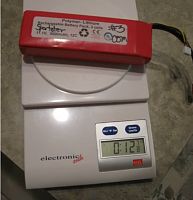
FUSE with Battery (3-Cell, 5000mAH, 12C, Li-POLY):
Battery:
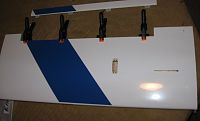
Wing assembly:
Therefore,
Wing Assembly: 21 3/8oz.
FUSE w/o Batt: 24 3/4oz. (Yes, the picture shows 1lbs. - 9oz. but, I did get a more steady reading of 1lbs. - 8 3/4oz.)
Battery: 12 7/8oz.
Since 3/8 + 3/4 + 7/8 = 2oz.
Thereby, the total FULL UP WEIGHT of my Advance "is"
59oz. "Or" 3.68lbs.
Since I measured 223 Watts steady,
223 / 3.68 = 60.6 Watts/Lbs.
Certainly, this low Watts did not prevent the model to perform loops, rolls and good airspeed considering the high gusty conditions we had today at the RC Club.
The landing was completely DEAD STICK!
Here it is again of me using the capable E-Flite 480 (1020Kv) in yet another model that is pretty heavy and large.
opcorn:I just had to do it because I like my models light and like being different.
Picked up this nice looking model and most especially light wing loading at HOBBY-TOWN USA in Central Florida and got 10% off plus I will have a $15.00 coupon next time I come back!
I am certainly going to keep my model on the light side and I already have the E-Flite 480 (1020Kv) waiting for it.
Yes, I do realize it is half the weight of the recommended E-Flite Power 25 and the Center-Of-Gravity will be paid attention by using some 3-Cell, 3650's that I have lying around.Here is the E-Flite 480 (1020Kv):
http://www.e-fliterc.com/Products/De...505#quickSpecs
6.7(E-Flite Power 25) - 3.1 (E-Flite 480) = 3.6 oz is the delta weight comparison between the recommended and what I will be using.
Well,
Seems like a good power system setup as it provides very good Airspeed and keeping the model light as possible.
This model has a very slick airframe but, lets give it some drag and so, I would estimate a top speed of 65MPH instead of the Calculated.
Just in case anyone doubts the power of the E-Flite 480 (1020Kv) power system then, I would point you all to one RC Model that I still have and fly using this same power system
Right here on the Video you can see a larger and heavier World Models (Airborne-Models is the distributor) P-51D Mustang EP-40.
http://www.youtube.com/watch?v=aNYa77UHBfE
================================================== ==
Took out my Advance out of the box and out from plastic liners to say TOP Quality is an understatement!
The balsa and light plywood and especially the firewall assembly is just First Rate. The covering is incredible, without any bubbles, wrinkles or any other type of covering imperfection! The model is super light and I will keep it that way.
Hi guys!
For those that "are" interested in following an alternative power system than what is recommended (I did this for several models in the past) then, feast your eyes on what I was able to accomplished last night with respect to installing the lighter but, capable E-Flite 480 (1020Kv) with the ParkZone 2-Blade 9.75 X 7.5 using ParkZone Propeller adapter.
The spacer hardware were a mix of some E-Flite spacer hardware for the mini-Pulse and the rest was standard Dubro Hardware. Notice that I did not use that Hex Bolts from the mini-Pulse as I needed them longer so, I used some Du-Bro 4-40 X 1 1/2 Bolts
A few pictures:
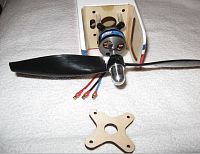
This is an earlier Picture showing the E-Flite 480 (1020Kv) with the wires in the down position but, notice that I did not have to use the additional Motor Mount - Spacer!
For correct down and right thrust, I used washers at the top:
Using the proven E-Flite 30-AMP Switch mode ESC it was perfect and does not get in the way of installing my plan of using the smaller 3-Cell, 2200mAH, 25C discharge, Li-POLYs
Also, decided on using a rock solid AR500 that I have been using with a retired ParkZone T-28 "Navy" that finally had an issue with the Stock Motor and the model needs some down time for needed repairs.
Could not use those STOCK wheels provided by the model as I like to have a better command of the model while TAXI operations on my RC Club with lumpy Grass field so, I went with some super light "FOAM" wheels (they look for Glow, right!) and they fit perfect with the provided STOCK heavy duty Landing Gear Hardware!
I like a true believer of recommendations with regard to Pilot Figure for this model, I paid $9.99 plus tax on the recommended Pilot Figure at my local hobby store and to my horror, the instructions say to CUT AWAY a portion of the bottom section in order for the Canopy to clear!!!
Nope, I selected a nice Pilot Figure that did not need "Any" modifications (World Models Pilot Figure) and it matches the color scheme of this model to the T.
The Pilot Figure that I paid $9.99 will be going back to the Hobby Store!
I selected the one on the LEFT!
One major deviation that I took was not using the CA Hinges that the model came with because I do not use CA. What I normally use is Computer Floppy material for Hinges and it is a personal preference and nothing more so, I am not recommending it to anyone here as I just do not think it is a good enough reason to deviate from the the normal instructions within the manual.
Preparing the tail feathers (Horizontal Stab and Vertical Stab):
More hinging for Ailerons:
Installing the Horizontal Stab:
Installing the Vertical Stab:
Installing the Rudder:
Installing the Elevator:
Installing Aileron Servos:
Installing the Nose Wheel Push Rod Tube:
At the FUN FLY on Saturday morning (10-22-2011) at Moon Port Modelers RC CLub, Titusville, Florida and thanks to Mark (Marked) who captured my Maiden Flight of my Advance!
Summary:
This model comes with Spectacular Quality. The Sheeting "Foam Core" wings look terrific and covering is JOB NUMBER #1!
The build is not your typical Park Zone Warbird model like putting the tail feathers and control rods as it is much more involved and you need to have much more patience than those PNP / BNF models. For example, the plastic hardware for the Control surfaces such as the Control horns and plastic horn anchors are flexible such that you will spend much more time trying to screw all those securing bolts threw the control surfaces and a little thought process is required before you proceed to the next step.I used a lower powered (Wattage) power system (E-Flite 480, 1020Kv) and it flew the model delightfully in 12 MPH gusts during today's FUN-FLY event and I was just a few who dared to fly.
I was hoping to use the smaller 3-Cell, 2200mAH, Li-POLYs but, in order to have the correct Center-Of-Gravity and avoid a nasty AFT C-of-G, I was forced to use the larger and heaver, 5000mAH pack which resulted in a perfect Center-Of-Gravity. I learned that this model was built very strong and the tail boom just does not allow for any weight savings while using a lighter power system, nevertheless, it flew great with the E-Flite 480 (1020Kv).
Okay, in conclusion....here is the Video:
[youtube]http://www.youtube.com/watch?v=_oLzWnzkAWU[/youtube]
Okay,
First a few pictures of my weigh-in setup using a digital scale and my kitchen area.
FUSE without Battery:
FUSE with Battery (3-Cell, 5000mAH, 12C, Li-POLY):
Battery:
Wing assembly:
Therefore,
Wing Assembly: 21 3/8oz.
FUSE w/o Batt: 24 3/4oz. (Yes, the picture shows 1lbs. - 9oz. but, I did get a more steady reading of 1lbs. - 8 3/4oz.)
Battery: 12 7/8oz.
Since 3/8 + 3/4 + 7/8 = 2oz.
Thereby, the total FULL UP WEIGHT of my Advance "is"
59oz. "Or" 3.68lbs.
Since I measured 223 Watts steady,
223 / 3.68 = 60.6 Watts/Lbs.
Certainly, this low Watts did not prevent the model to perform loops, rolls and good airspeed considering the high gusty conditions we had today at the RC Club.
The landing was completely DEAD STICK!
 10-24-2011, 09:07 PM
#2
Thread Starter
Again, I am just someone trying to fly a nice looking Sport Model with what I had in my Hobby Drawer and nothing more.
For those that want to go the recommended, more power to them.
I am sharing what I did in case anyone might be interested and the Major Distributors, especially HORIZON HOBBY is okay with my Power System setup results.
Thank you!


For those that want to go the recommended, more power to them.
I am sharing what I did in case anyone might be interested and the Major Distributors, especially HORIZON HOBBY is okay with my Power System setup results.
Thank you!
10-26-2011, 08:09 AM
#3
Thread Starter
Wednesday, October 26th, 2011 (@ Moon Port Modelers RC Club)
Oh my lord! This model is such a great flyer!!!
I was successful with the model's Official 2nd and 3rd Flights as Saturday, Oct. 22nd, 2011, the maiden was successful in 12 MPH gusts.
Wednesday early morning was completely Dead Calm and cloudy but, the Sun did break through some clouds to allow for good visibility.
I placed my flight timer for 9 minutes for each flight and used a Generic 3-Cell, 5,000mAH, 12C, Li-POLY and perform well and measured 11.5 Volts after the 2nd flight.
The 3rd flight I inserted a slightly larger Turnigy 3-Cell, 5,000mAH, 25C discharge, Li-POLY (relatively new pack) and my goodness the model performed much more lively in all commanding for loops, inverted flight, rolls, and it did hold knife edge for a short period. The best were the Hammer Heads as the model exhibited very good up line and topped out about 20 feet up before I kicked in Right or Left Rudder for some spectacular Hammer Heads. The Turnigy Battery pack exhibited 11.78 Volts measurement after the 3rd flight.
At the end of the 2nd flight, the landing was done with Dead Stick and it glided in very well and kissed the grass field with much graceful manner. At the end of the 3rd and last flight for today, I purposely came in with some slight power (1/5 throttle) and it came in with great response from Rudder inputs and I was able to touch down right at the targeted Construction material used for a make-shift runway at this club.
The best results were using the recently acquired Turnigy 3-Cell, 5,000mAH, 25C discharge, Li-POLYs as this brought the model a slight step up with additional punch and airspeed.
Everyone at the Club estimates the top speed at level flight of 55 - 60 MPH as I expected.
11-09-2011, 03:28 AM
#4
Thread Starter
Completed 7th & 8th Flights on my E-Flite Advance (E-Flite 480, 1020Kv) and swinging the ParkZone 2-Blade 9.5 X 7.5 propeller.
This time, with the 7th and 8th flights I used the Enerland PolyQuest 3-Cell, PQ-3700XP, Li-POLYs that tips the digital scale at 10.5oz. as oppose to using the heavier Turnigy 3-Cell, 5,000mAH, Li-POLYs that comes in right at 15oz.
Shedding off 4.5oz. made a Big difference in handling and I was able to Slow the model down to a crawl like it had flaps.
I was able to command the model for some neat inverted flat spins from up high and noticed it was very graceful and gentle that I performed them even lower without any ill effects.
I was concern over the Center-Of-Gravity but, a careful balance check revealed no issues and once the model took off from ground it must have been right on the mark!
Here are two packs of each (Enerlands and Turnigy's):


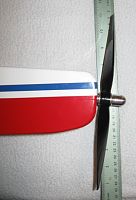
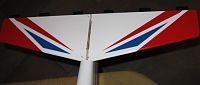
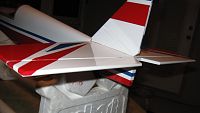
Post Flight Pictures of my Advance with E-Flite 480 (1020Kv) and ParkZone 2-Blade 9.5 X 7.5 prop.


This time, with the 7th and 8th flights I used the Enerland PolyQuest 3-Cell, PQ-3700XP, Li-POLYs that tips the digital scale at 10.5oz. as oppose to using the heavier Turnigy 3-Cell, 5,000mAH, Li-POLYs that comes in right at 15oz.
Shedding off 4.5oz. made a Big difference in handling and I was able to Slow the model down to a crawl like it had flaps.
I was able to command the model for some neat inverted flat spins from up high and noticed it was very graceful and gentle that I performed them even lower without any ill effects.
I was concern over the Center-Of-Gravity but, a careful balance check revealed no issues and once the model took off from ground it must have been right on the mark!
Here are two packs of each (Enerlands and Turnigy's):
Post Flight Pictures of my Advance with E-Flite 480 (1020Kv) and ParkZone 2-Blade 9.5 X 7.5 prop.
12-24-2011, 07:43 PM
#5
Thread Starter
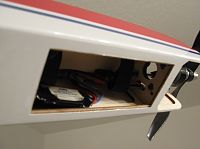
I relocated the E-Flite 30-AMP ESC from the inside of the E-Flite Advance and placed it right outside and next to the motor using industrial velcro and small but effective tie-wraps and it comes down Ice Cold!!
The first time I flew it in this configuration was last Saturday at the OIA site (An old retired NAVY Training site with Asphalt Parking lot) and again for several flight this past week at Moon Port Modelers RC Club (Grass Field) and all systems performed rock solid.
The relocation of the ESC was a must as there is no cooling exit holes on this model and I just do not have the heart to cut away at perfectly built model like this one!
The E-Flite 30-AMP ESC and Motor comes down ICE COLD.
That is one reason I opted for the T-28 Spinner and Prop Adapter for maximum cooling.
Here are the pictures!
05-03-2012, 07:18 PM
#6
Senior Member
Well, a Power 25 870KV motor can develop up to 600W, so it should provide "spirited" performance with this plane.
At 60W per pound with the 480, I'd expect the plane to behave a bit more like a full size sport aircraft.
Personally, I like higher watt per pound numbers (100-150w per pound) This shortens the takeoff run on our grass field, and allows fair aerobatics.
I do have an ALPHA 40 trainer powered by a 25 870KV. It's a "floater" with a 3S 3200mah battery, and somewhat better with a 4S 3300mah battery.
Instead of addig weight to the nose to compensate for the lighter weight of the 25, I relocated the wing to the rear about one inch.
