Yellow Aircraft Sting Ray Build EDF
 04-05-2011, 11:10 AM
#1


Building has already started.
This plane was bought here at the buy and sell forum for a very good price. The work at the wing had been started but nothing that canot be fixed.
Description:
Plane:
This plane was bought here at the buy and sell forum for a very good price. The work at the wing had been started but nothing that canot be fixed.
Description:
Plane:
Designed for 10-12 pound thrust turbines.
Specs:
Length:...................58"
Wingspan:...................52"
Weight:...................12lbs.(dry)
Motor configuration.
Fan: 90mm extreme alloy with wemotec rotor.
Motor ARC 35mmX70MM 1.5
Battery considered: 10S-12s 4000-5000 mah
Expecting power: 3000+ watts (10+lb force)
ESC: Hobby Wing 120 amp opto
Gear:
wheels:BVM wheels with brake
Struts: Robart 3/8 straight
Retracts: Funkey oposed action
Radio accesories  All proven in other planes with no problems for the moment)
2 hobbico CS-140 digital for ailevons
2 Hitec hs-225 mg for rudders
2 hitec hs -82MG for retrac valve and brake valve
1 HD 150mg air brake
Reciever Hitec optima 9
Battery: 2s A123 1100 mah
 04-08-2011, 09:47 AM
#2
First of all the instructions of the kit are really good, they don´t leave anything to your imagination. Build a Savex L-39 and the only instruction was how to place the thrust tube.
Assembled the BVM wheels to the struts. The Struts were cut to the dimensions the instructions said.
BEWARE
If using the fork type strut from Robart you will cut into the spring area of the strut, and force to modify the strut to work. I had to cut 1/2 inch of inner tube and spring to allow 70% of the original compresion movement and to allow the placement of the 3/16 wire adapter in the front strut. Probably thats why they use a straight strut with double wheels in the pictures of the manual.
Glued all the playwood reinforcements in the fuselage with 5 min epoxy and milled fiber glass.
Installed the front wheel bulk head with Hysol and reinforced the glue joint of the rear bulkheads.
Build the steering servo tray, and assembled the airbrake. For moving the airbrake I used the same offset arm as it has the best angle for it purpose. Used a 2-56 wire with wheel collars to hold it in place.
The tail feathers were assembled as per isntructions.
The ESC to be used is very big so decided to put it on the buttom behind the the wheels.
04-09-2011, 09:24 AM
#5
POWER SYTEM PICTURES
A wemotec ducting was glued to the aft part of the extrem alloy housing. The final diameter was to big so the wemotec composite ducting was a nice solution.
Did the first ruder last night.
A wemotec ducting was glued to the aft part of the extrem alloy housing. The final diameter was to big so the wemotec composite ducting was a nice solution.
Did the first ruder last night.
04-25-2011, 09:20 AM
#6
A lot of sanding and filling went t along in fixing the already build ailevons.
The spar in the wing for the ailevon hinge was barelly glued in one wing after removing the filler. Had to open the glue joints with dremel tool, and fill the glue joint with a mix of epoxy and microballons.
The ailevons needed balsa inserts to reduce the gapand align the ailevon in their pocket wings. The extra work is over, and now the ailevons and wings are waiting for their hinge holes and rounding of the ailevon.
The servo pocket in each wing was enlarged to acomodate the bigger Hobbicos cs-140 digital servos. They fit like a hand in a glove.


 05-16-2011, 02:51 PM
#11
Got more work done , got demoralized after all the extra work that went into fixing the ailevons that s toped for a few weeks.
Did the sanding and hinging of the ailevons, worked on gluing the spar to the wings and the anti rotation pins.
Whille the spars cured worked on the retract valve and servor tray.
Getting near to do the glassing of the wings.
cheers
Juan
Did the sanding and hinging of the ailevons, worked on gluing the spar to the wings and the anti rotation pins.
Whille the spars cured worked on the retract valve and servor tray.
Getting near to do the glassing of the wings.
cheers
Juan
05-20-2011, 06:25 AM
#12
Senior Member
Join Date: Jan 2006
Location: bishop Auckland, UNITED KINGDOM
Posts: 236
Likes: 0
Received 0 Likes
on
0 Posts
Juan,
Finally managed to get logged in, your Stingray looks very nice so far.I have being doing a build log on that other forum?? and hope to get mine flown soon,
cheers Euan.
Finally managed to get logged in, your Stingray looks very nice so far.I have being doing a build log on that other forum?? and hope to get mine flown soon,
cheers Euan.
05-20-2011, 08:35 AM
#13
Euan:
Very fast builder, nice looking plane.
How did you manage tohold the fan pod to the plane?
Where did you placed the ESC?
What power measures are you getting with your fan configuration? # cells, amps, volts, watts.
Will apreciate pictures of your equipment and battery placement.
Please inform how it flies.
Cheers,
Juan
05-22-2011, 10:09 AM
#14
Senior Member
Join Date: Jan 2006
Location: bishop Auckland, UNITED KINGDOM
Posts: 236
Likes: 0
Received 0 Likes
on
0 Posts
Juan,
sorry but i have not had a chance to run the fan up, estimated 3000 watts at around 85 amps from 10s 5000 mah cells.Esc will be in the nacelle if i use a cc110 or mounted behind the main undercarriage mounts if i use a turnigy 120.The nacelle<pod> is from Tamjets and has two 3mm threaded bolts from the underside of the fuselarge .As for the flight batteries they will be just infront of the retract mounts simply velcro,d to the skin,i will take a few photos and post them for you,
cheers Euan.
05-22-2011, 07:39 PM
#15
Today I´m happy managed to fit the fan to the plane.
Laminated a ring arround the fan with 1/32 plywoow 3 layers of 1/16 balsa and a final layer of 1/32 plywood, cut two pieces and gluedthem to the motor base plate to acomodate my Extreme Alloy fan housing.
To hold the fan in place bought two pipe straps, and build some plywood and aluminum bases to hold the straps and tight them.Very happy with the final result.
It is starting to look like a mean machine.
Cheers
Juan
managed to fit the fan to the plane.Laminated a ring arround the fan with 1/32 plywoow 3 layers of 1/16 balsa and a final layer of 1/32 plywood, cut two pieces and gluedthem to the motor base plate to acomodate my Extreme Alloy fan housing.
To hold the fan in place bought two pipe straps, and build some plywood and aluminum bases to hold the straps and tight them.Very happy with the final result.
It is starting to look like a mean machine.
Cheers
Juan
05-24-2011, 07:06 AM
#16
Yesterday tedted the fan setup and very happy with it.
The test was not 100% acurate but gave me an idea of what to expect.
Recently came my batteries from Hobby king Turnigy 4000 ·3s 45-50c dicharge. Probably not the best qualitybut the price sure it is RIGHT
In 2007 paid $ 120 just for onE 3S 3200 electricfly 25 C and recently paid aprox $ 160 for 4 batteries of the above.
So probably this explains why so many people is entering into Electric, very happy in how much technology is ri ght know to our use in the hobby at very fari prices.
TEST
Batteries were use as they came from Hobby king ant aprox 40% of their charge the final volt per cel was 3.75, and the sustained voltage at max throtle was 44-45 volts.
Configuration: 12s 4000mah
Max power: 2400 watts
Voltage: 44-45 volts
Currents: 56 amps
At this power measures think can have a 7-8 minutes flight time with throtle managment,
My Esc is a over kill being 120 amp opto, at least wont over heat and hopefully have a long life.
05-24-2011, 07:49 AM
#17
Senior Member
Join Date: Jan 2006
Location: bishop Auckland, UNITED KINGDOM
Posts: 236
Likes: 0
Received 0 Likes
on
0 Posts
Juan,
Hello your fan mount looks like it should work fine, i also managed to run up my fan and got 2650 watts at 70 amps also using Turnigy 20c cells,<10s 5000mah> i thinkthey will both fly very well on the power we are using,i had a small problem with the esc mounting as its too big to go into the nacelle and the motor wires are not long enough to reach if i stick it inside the plane,may have to extend the motor wires?.My nacelle is bolted on using two 3mm rods and nylock nuts,
keep up the good works,
cheers Euan.
ps Juan i used oracover on my wings rather than glassed , also did the same on my turbine version .
05-24-2011, 07:42 PM
#18
EUAN
Thanks for the pictures.
This is my solution to the esc placement see pirctures.
Will extend the esc wires to reach the motor from the back of the plane.
Was wondering how fast you glassed, sanded, primed, sanded and painted your wings and tails in just a weekend. I will glass the wings and increase my build time.
cheers,
Juan
02-16-2012, 02:53 PM
#20
Have to accept I´m a slow builder, how is it that other guys do it in a fraction of the the time it takes me?
For sure have more spare time,and comitment to the prject.
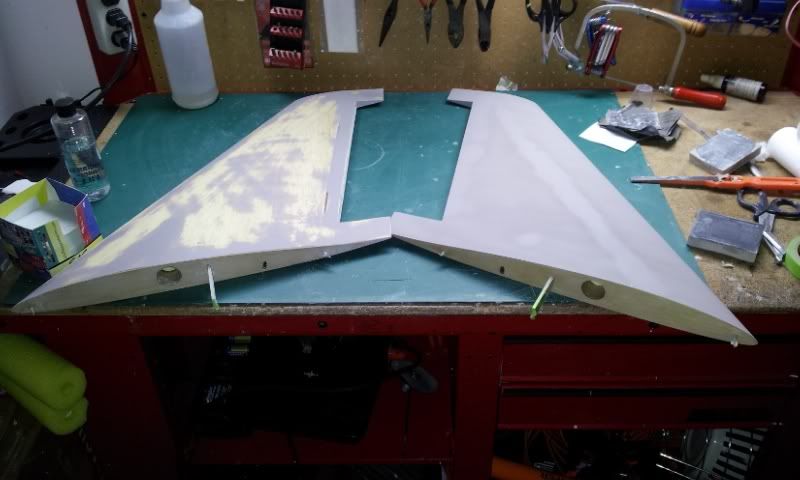
After to mucht thinking, comitted into the glassing of wings and rudders.
Using west system epoxy for the first time. Still lots of sanding which I don´t like. Hoper to find the joy in the results.
Cheers,
Juan
For sure have more spare time,and comitment to the prject.
After to mucht thinking, comitted into the glassing of wings and rudders.
Using west system epoxy for the first time. Still lots of sanding which I don´t like. Hoper to find the joy in the results.
Cheers,
Juan
05-15-2012, 03:57 PM
#22
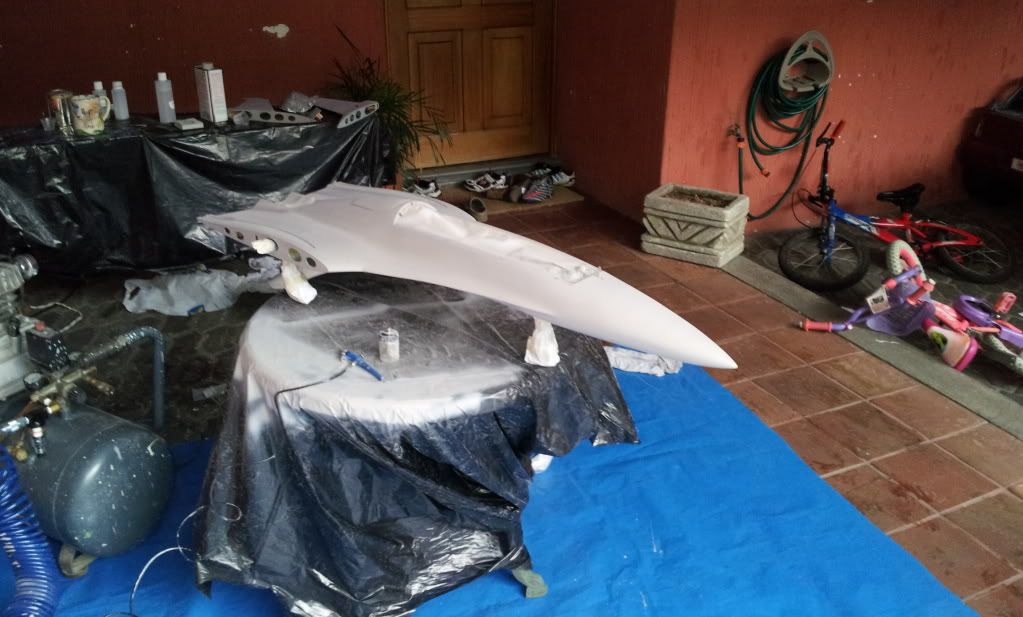
Ready for priming , no more building for this baby only a painting job.
The fallowing work was recently acomplished.
1. Plumbing for rertracts and brake valve.
2. Servo´s harness, fried my new optic 9 rx by soldering incorrectly a deans plug.
3. Battery tray.
4. Transformed my 4 3S batttery to 2 6s batteries.
5.Tray for equipment.
6. Filled gap on hatch-
The fallowing work was recently acomplished.
1. Plumbing for rertracts and brake valve.
2. Servo´s harness, fried my new optic 9 rx by soldering incorrectly a deans plug.
3. Battery tray.
4. Transformed my 4 3S batttery to 2 6s batteries.
5.Tray for equipment.
6. Filled gap on hatch-
05-18-2012, 09:57 AM
#23
Juan:
I build slow, too. Fewer mistakes that way. You are doing very nice work on this bird. I can't wait to hear about test flights. (Maybe some video?)
Euan: that was a real help seeing how your EDF was mounted in the TJ nacelle. That's what I plan on using for the EDF Mikulasko Arrow that I'll be starting soon.
06-04-2012, 05:59 AM
#24
Already aplied primer to wings and tail surfaces.
Ppg omni mp 182 Primer
It is a nice thick primer that fills weave easily, but needs a big needle spray gun or airbrush.
The first sanding of primer is taking place.
Ppg omni mp 182 Primer
It is a nice thick primer that fills weave easily, but needs a big needle spray gun or airbrush.
The first sanding of primer is taking place.