


Ultimate 42CC Wildthing Conversion
 12-30-2016, 10:42 AM
#1
Member
Thread Starter
Join Date: Feb 2014
Posts: 87
Likes: 0
Received 0 Likes
on
0 Posts
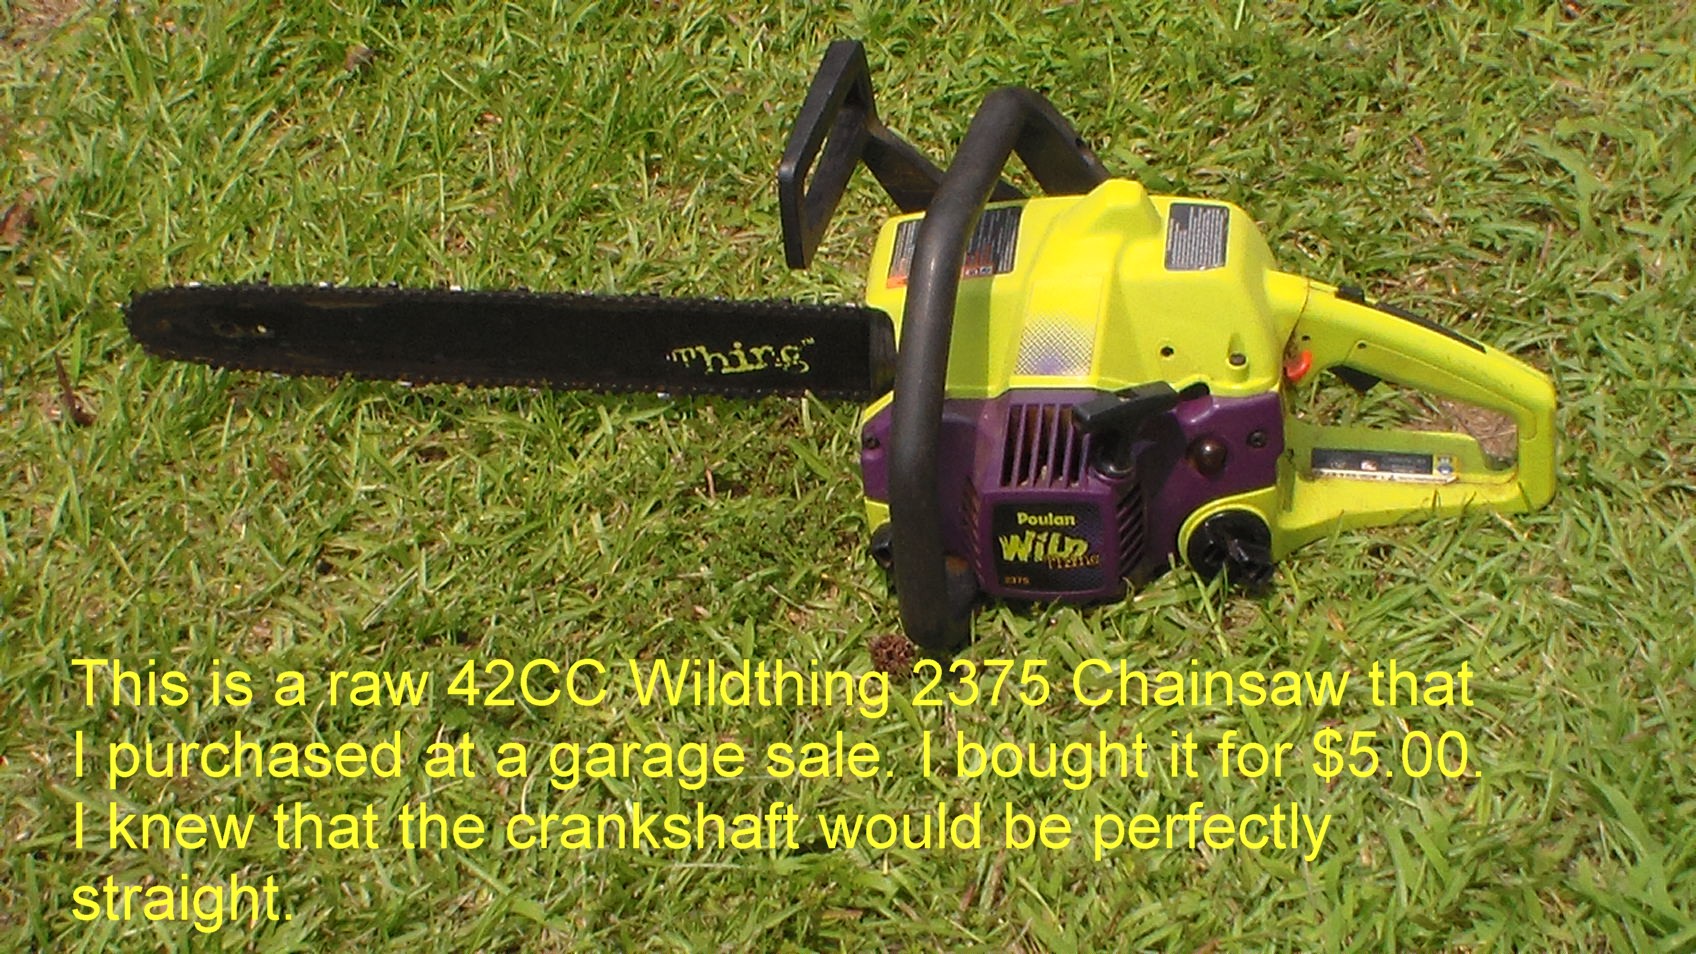
This thread shows all the steps and setups needed to convert a Pouland 42 CC engine for Rc use. I'm pretty sure that this information can be used on a 33 and a 46 also. I have also don a Stihl 64 CC the same way.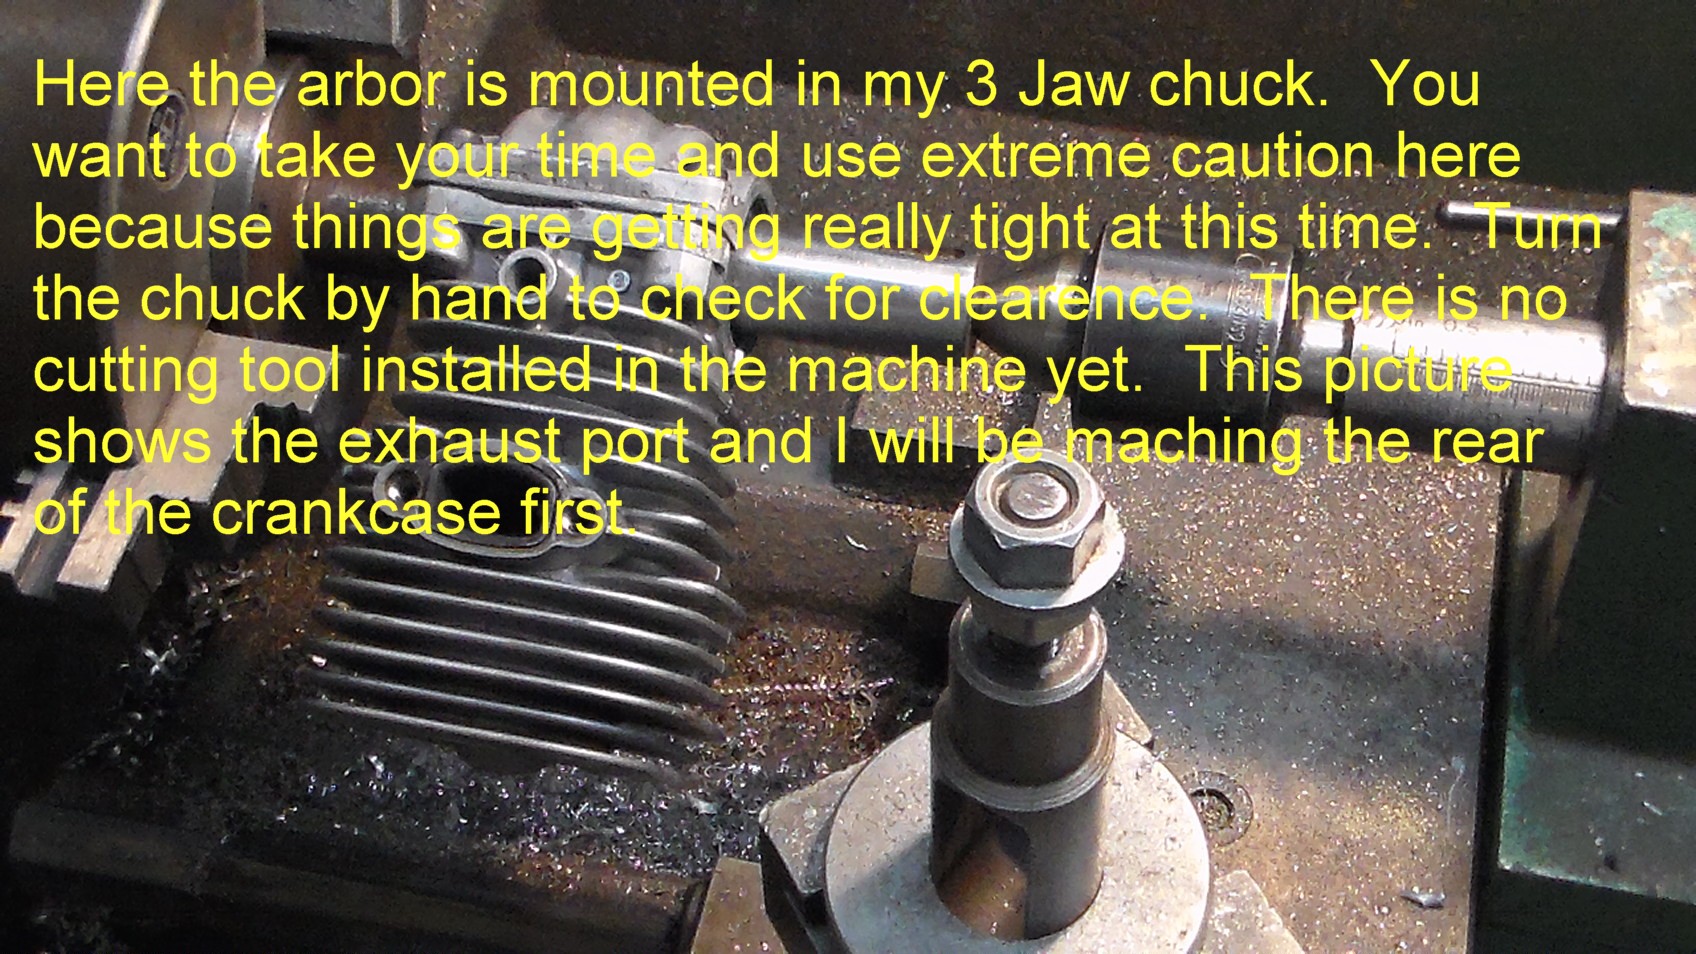

 12-30-2016, 11:20 AM
#2
Member
Thread Starter
Join Date: Feb 2014
Posts: 87
Likes: 0
Received 0 Likes
on
0 Posts
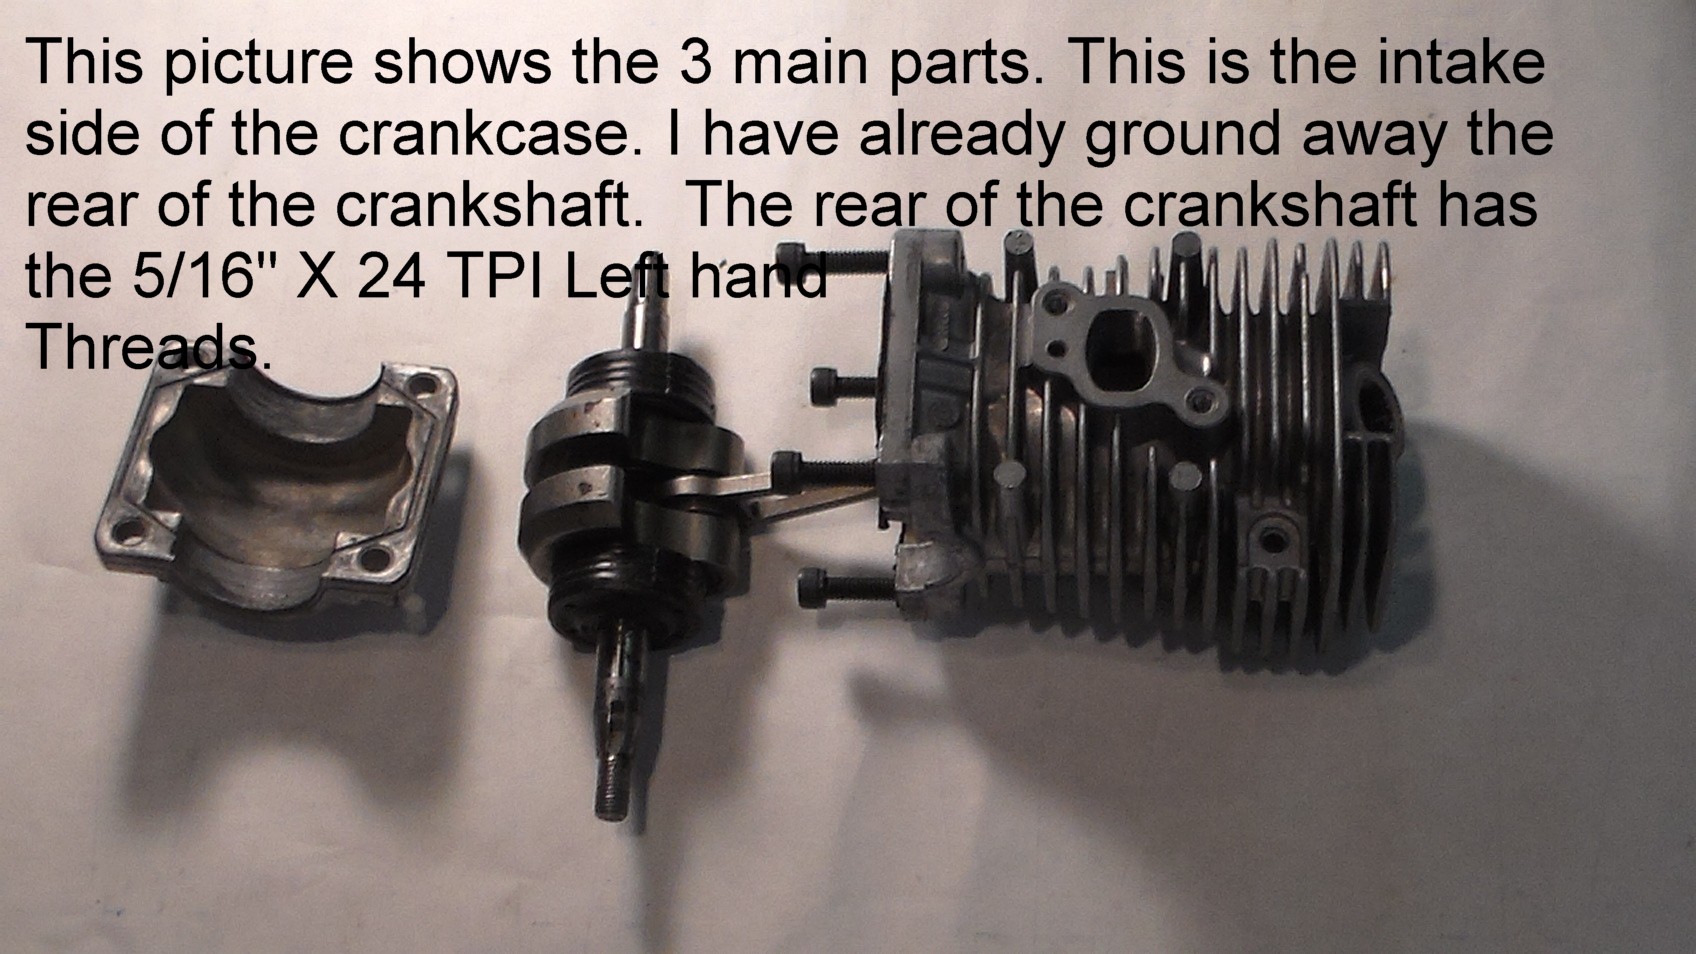
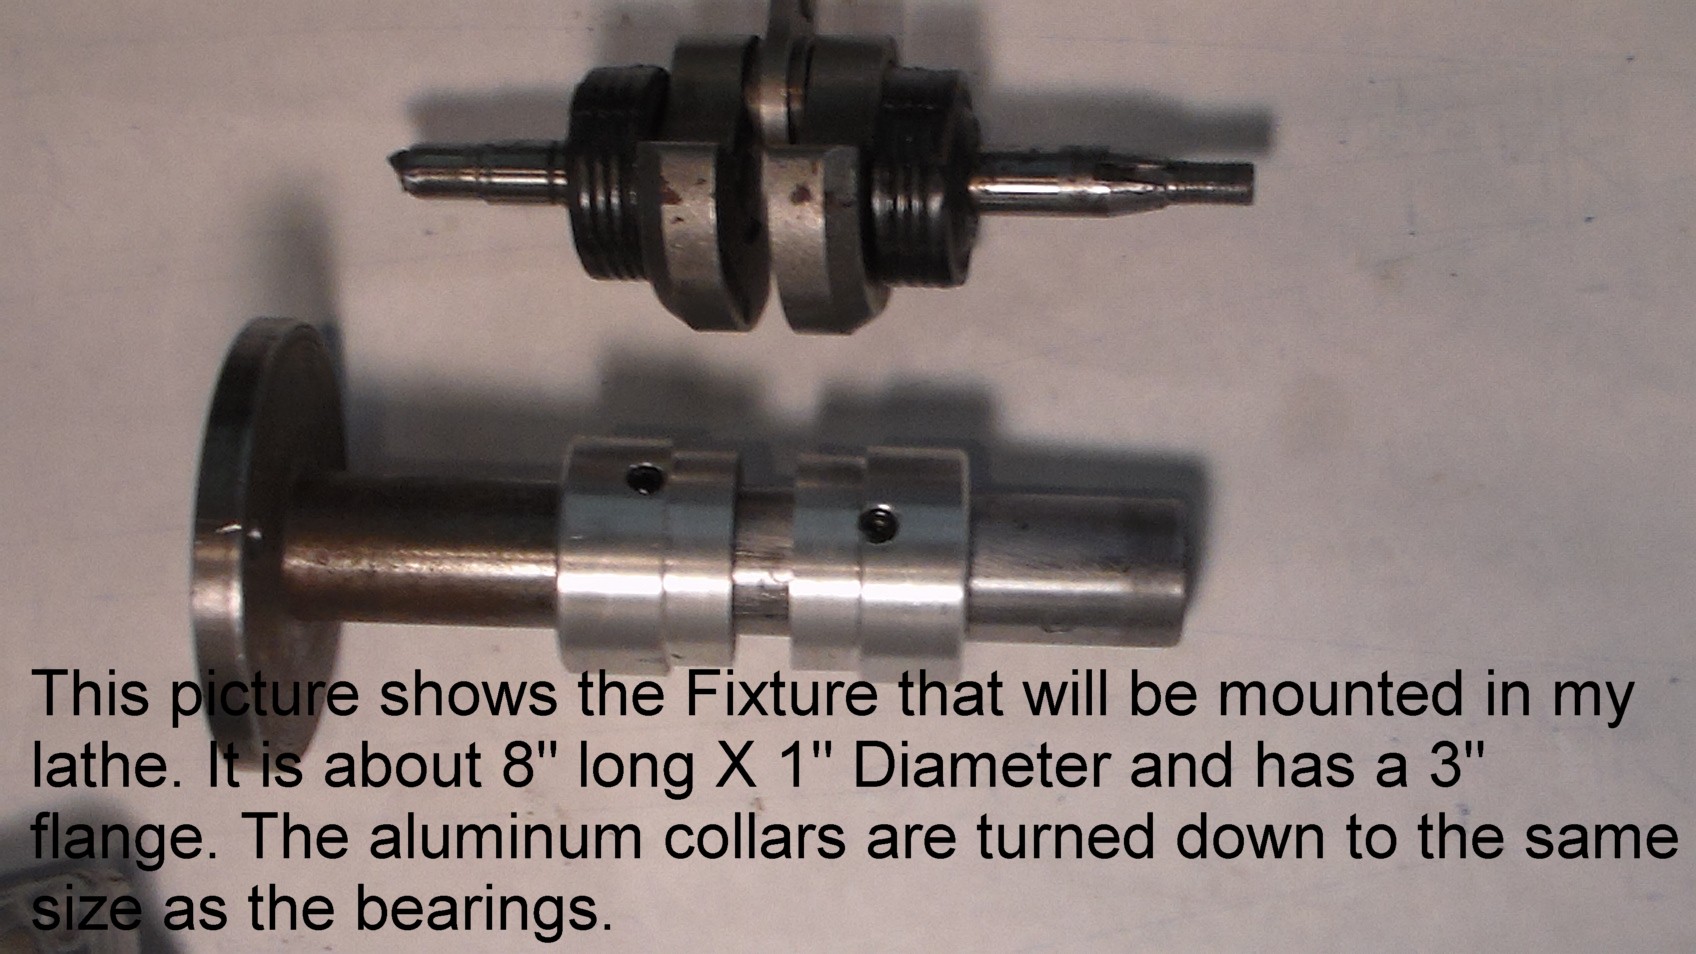
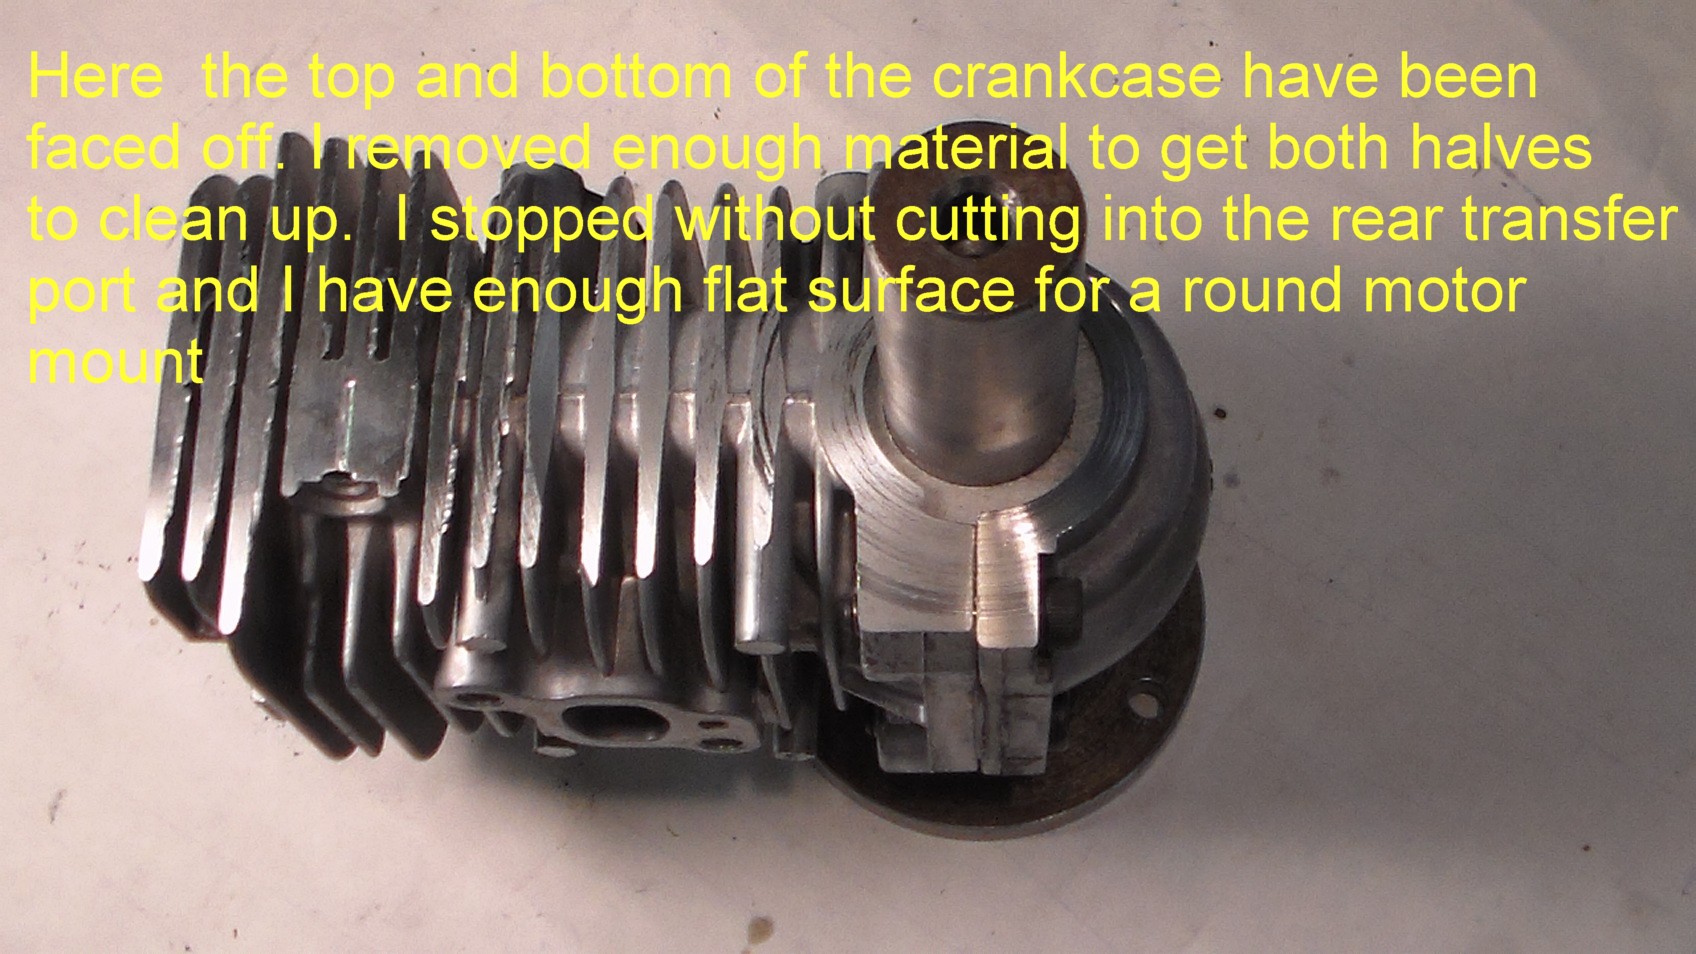
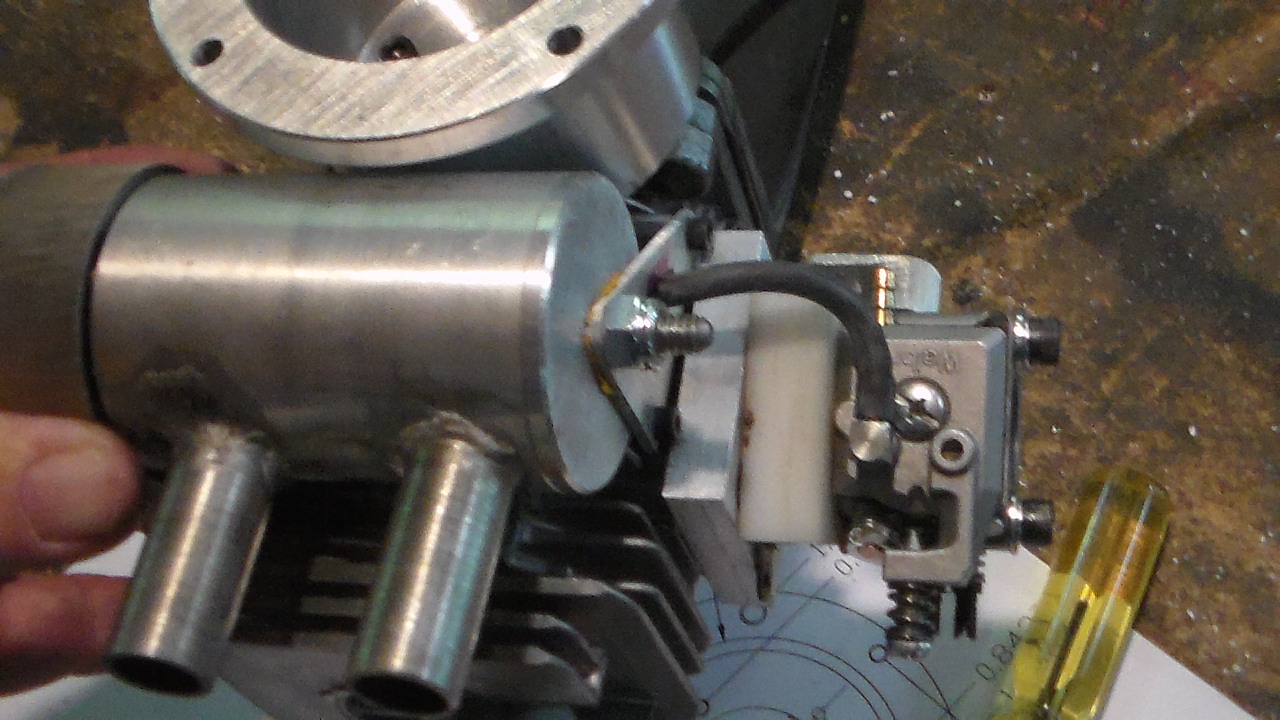
Never started a thread before so I really had no idea what was going to happen. I'm going to start by facing off the front and rear of the crankcase. This will provide a smooth machined surface to mount your motor mount and hall effect switch to. Your going to need a small engine lathe and some fixtures to be able to do this. I have a Auto-Cad drawing of all the parts that your going to need and I'll be happy to send anyone a copy of it for free. I'm not trying to make any money from this. This drawing will open in Draftsight or Auto-Cad. [email protected]
01-05-2017, 11:44 AM
#4
Member
Thread Starter
Join Date: Feb 2014
Posts: 87
Likes: 0
Received 0 Likes
on
0 Posts
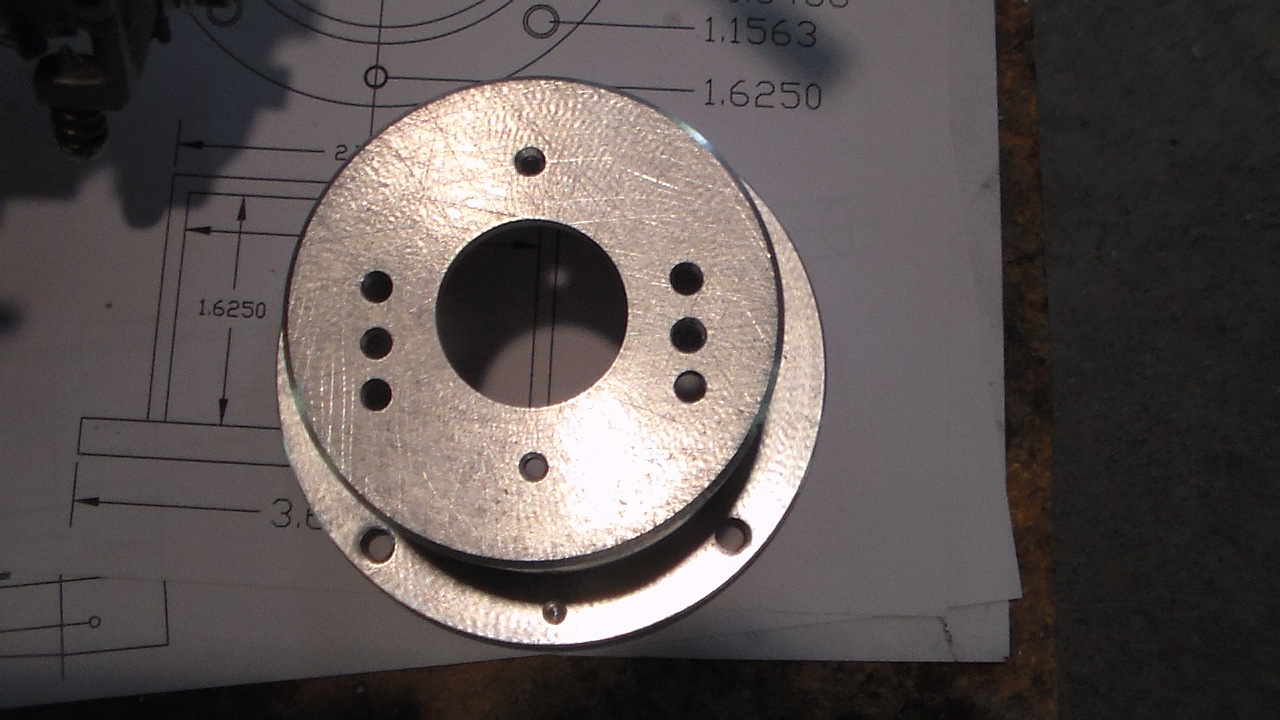
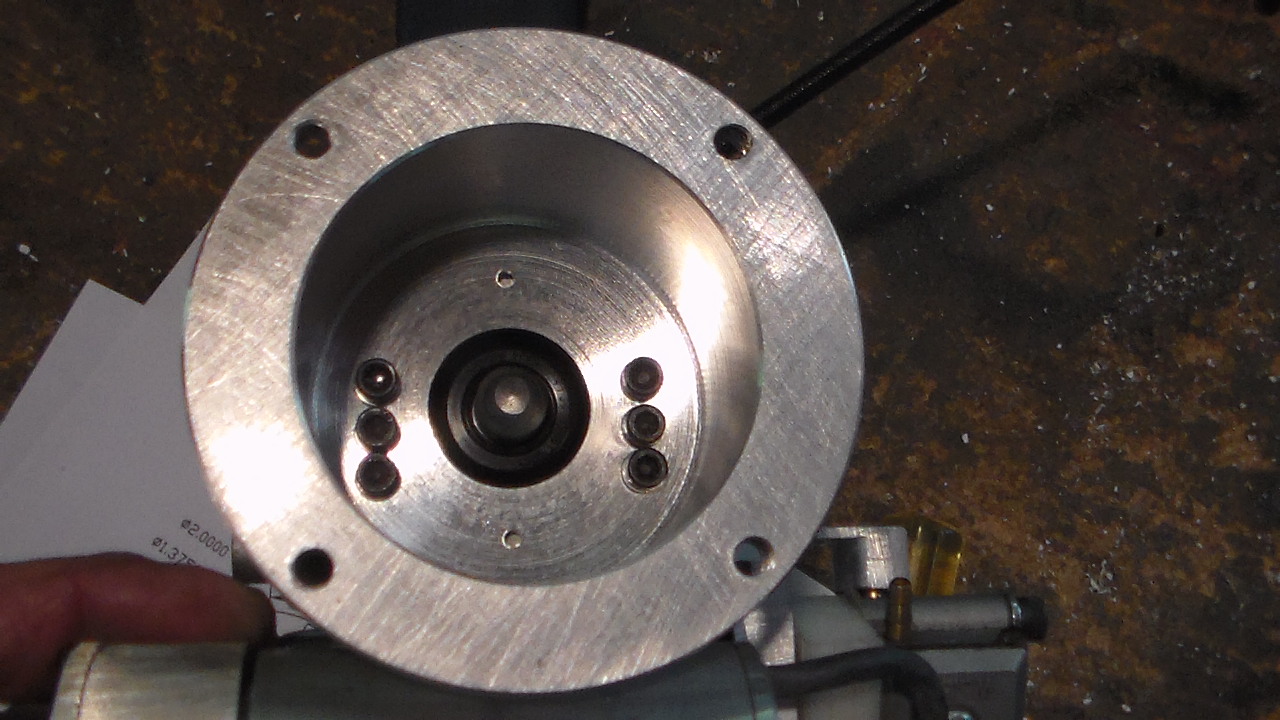
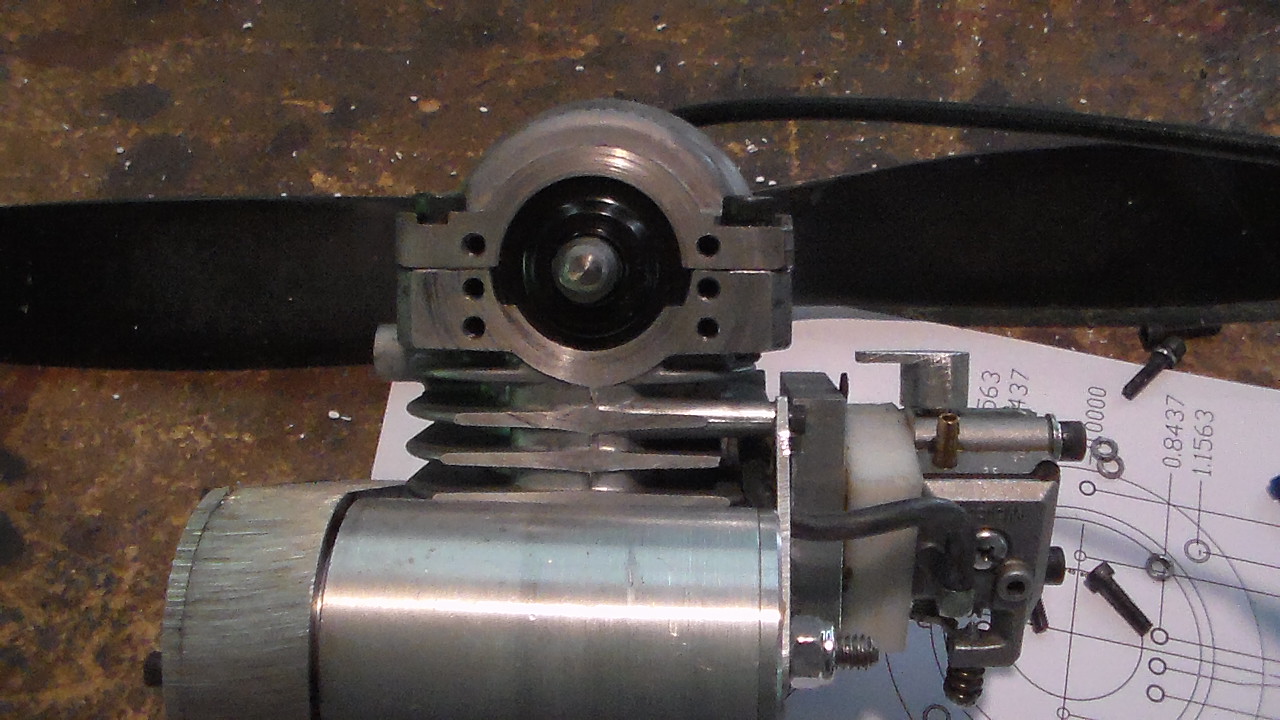
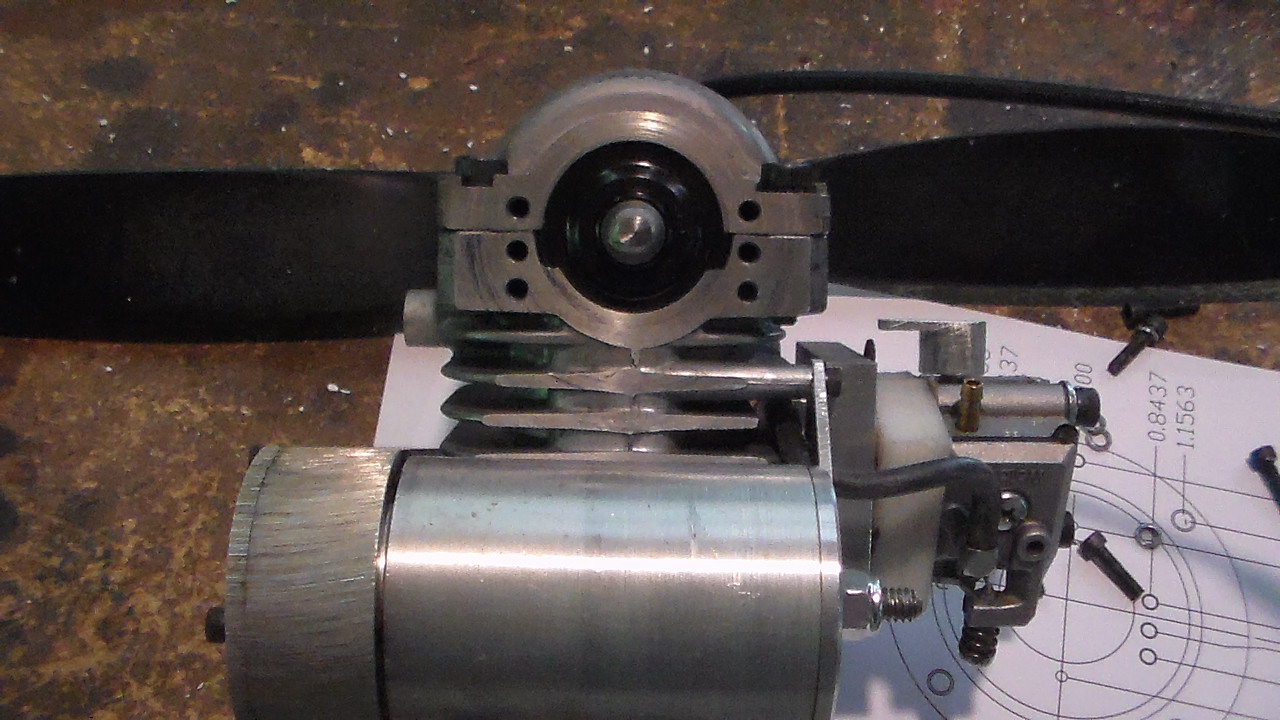
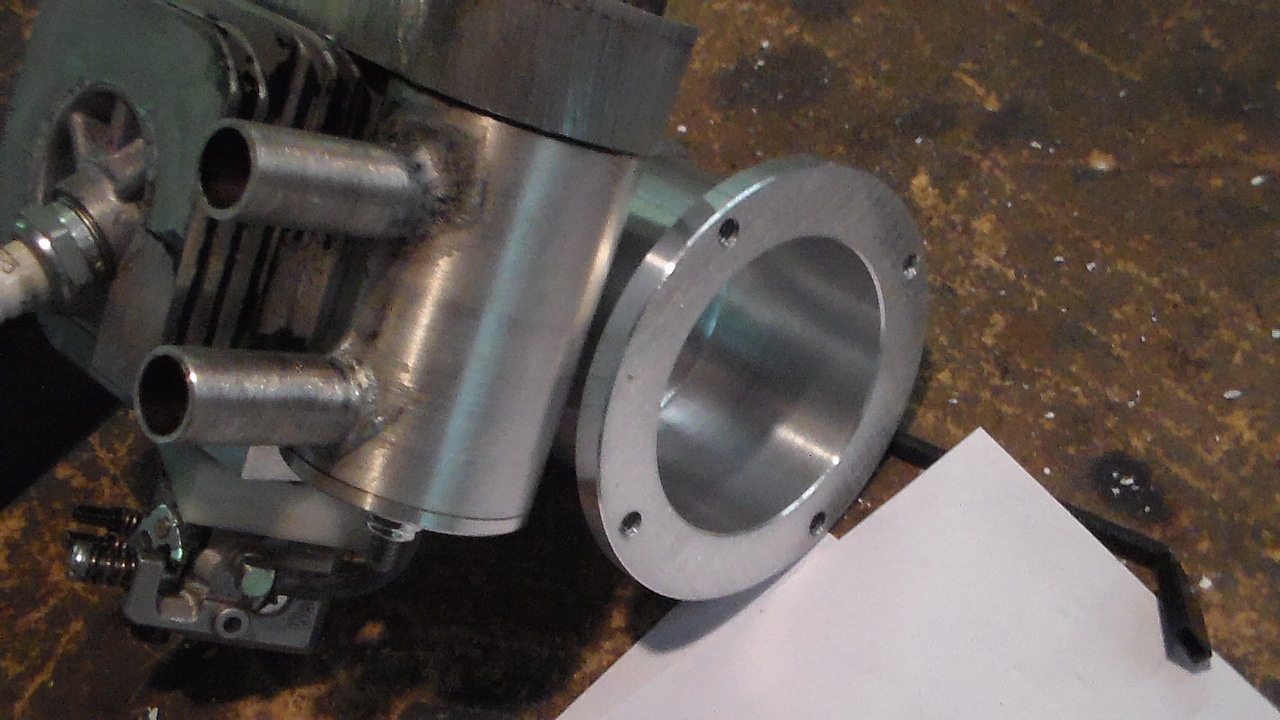
Now we start getting the motor mount on the motor. I'm using 6 8/32 X 5/8" long socket head cap screws to bolt it in place. The mount is turned from a 2" thick piece of 2024 aluminum. It is 3.812" in diameter. It needs to be 2" thick because the muffler is mounted directly below it. The mount has 4 1/4"-20TPI screw threads for the firewall. 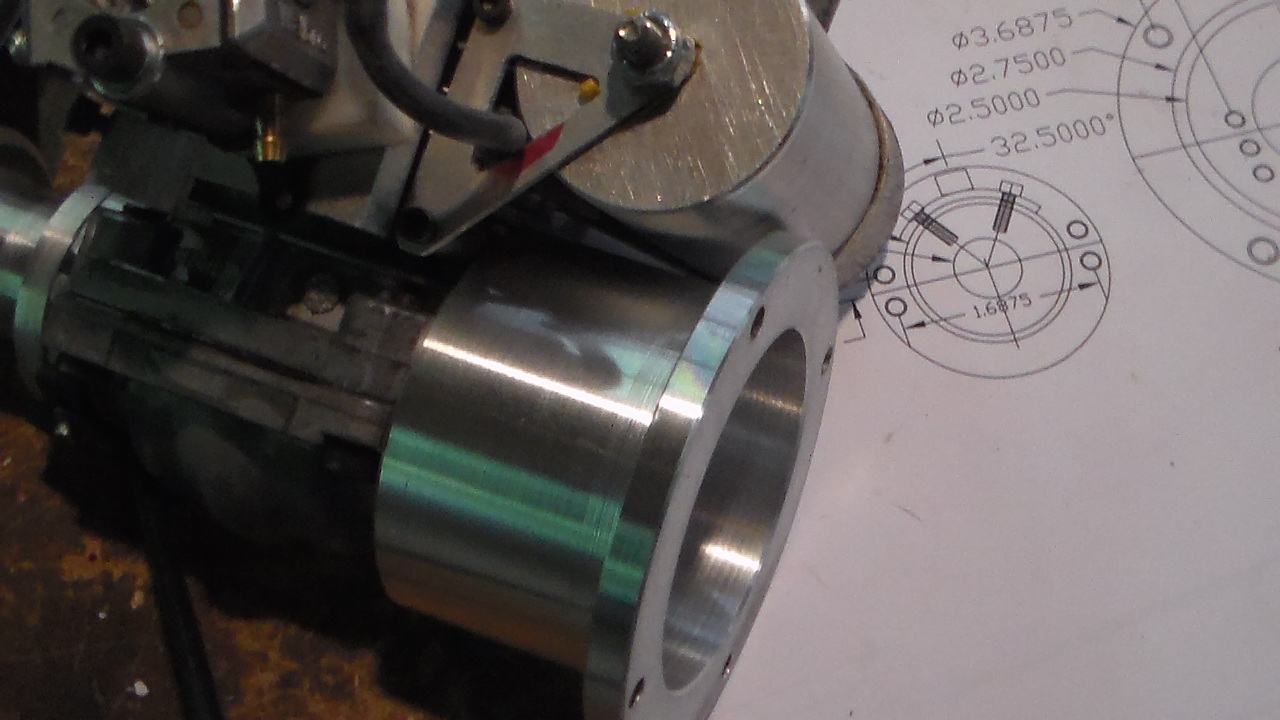

01-21-2017, 05:54 PM
#5


Hey "Pardner",
Very nice post, and nice work. I know you went to a lot of work to present it as you have, and I for one appreciate it. I "feel your pain". I too have posted things I thought were pretty cool that took a lot of work to present, and got very little to no response sometimes. Don't feel bad. It's not you, it is just that some of the work we do is well beyond the capabilities of the average engine converter, and also the fact that this forum is "dying" anyway because the influx of cheap Chinese engines has all but killed the will and desire of the average person to bother with a conversion. It's a shame because now that the price of CDI ignitions has come down so much, these engines are more viable than ever, and will definitely outlast any Chinese engine. Oh well...
Anyway, once again, excellent post. I have some more to say about it, but I want to find some pics of the same conversion that I have done myself to add. Mine was considerably simpler, but it worked well on several conversions of these engines. As a matter of fact, I have one on the workbench to convert right this moment. The Poulan 42cc is a good engine, and you are correct in that the 33cc is almost identical, at least from a conversion standpoint. However, the Poulan 46cc is a completely different engine. It has been popular in the past with the conversion crowd, because it is a bit lighter, and it does not require using electronic ignition as the mag coil is mounted on the engine instead of on the saw body as the Poulan 33/42cc engines are.
So, more pics later on when I have time to search for my pics. I've changed computers a couple of times since I last did one.
Enjoy your hard efforts, I've had many, many good flights with Poulan engines. Ah, one caveat for prospective converters of the Poulan engines though. Be sure to check what you are getting before you buy. The later Poulan engines had the smog, two barrel carb setup, and I have seen MANY of these burnt up because they are set to run so lean. As always with a two stroke engine, it is best to take two minutes and pull the muffler off and have a look inside before buying....
Meanwhile, to me at least, it would be interesting to see some pics of your muffler fabrication.
AV8TOR
01-22-2017, 03:29 AM
#6
Member
Thread Starter
Join Date: Feb 2014
Posts: 87
Likes: 0
Received 0 Likes
on
0 Posts
Thanks for your comments. I have been waiting for somebody to comment before I posted anymore information. I can see lots of people looking but nobody questioning anything. This week I'm going to tackle the Hall Effect switch mounting. It's returning back to winter this week so there will be no flying.
Thanks,
Larry
Thanks,
Larry
01-22-2017, 01:59 PM
#7
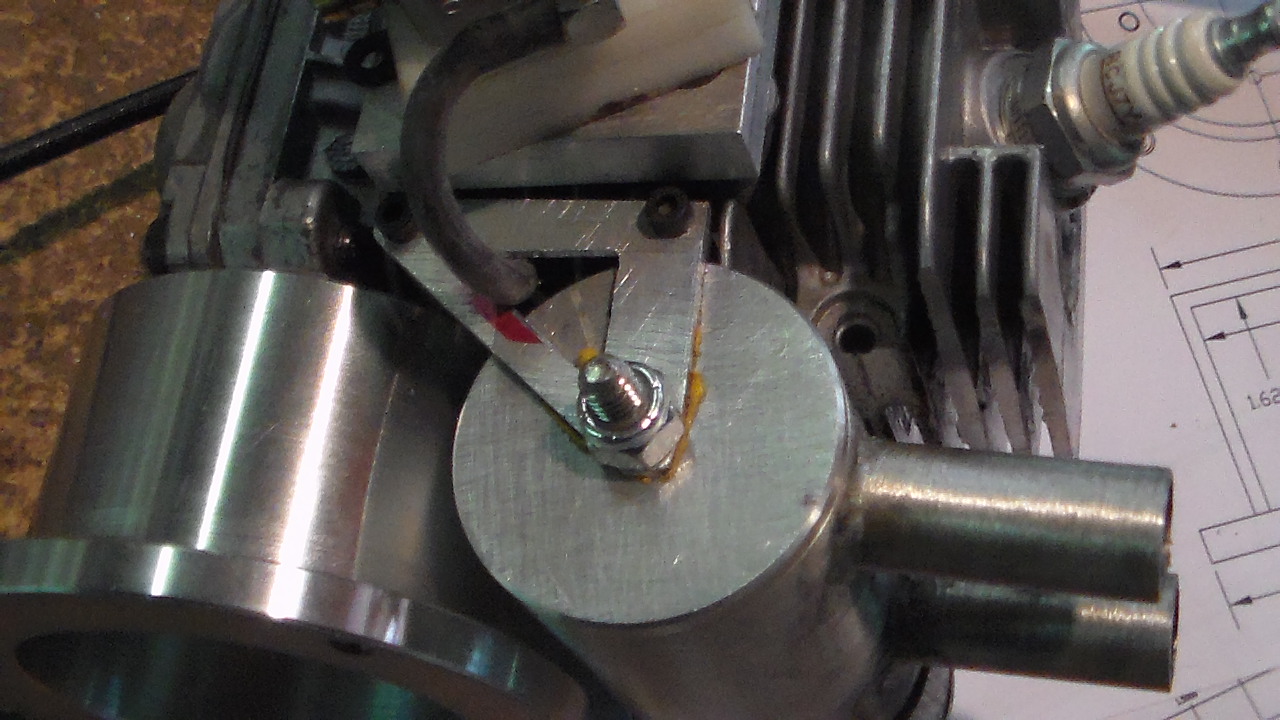
On many conversions, I use a round sensor. You can buy round sensors made up by Adrian at www.ch-ignitions.com. Sometimes l buy them ready made, but I also have a stock of bulk hall effect sensors and I make up my own sensor unit by soldering the wires and then gluing the sensor and wires into a short length of aluminum tube. I then hand form a bracket that looks like an Adel clamp, and mount it to the front of the engine using a single 8-32 serrated, socket head screw and Loctite. Works very well. Then I machine up a collar which is a sliding fit onto the prop hub. This collar has the magnet for triggering the sensor, and a set screw to secure it. This is used to set the ignition timing. I have this setup on dozens of engines and it is fairly easy to do, reliable, and durable.
Once again, I will try to find some pics to post. Keep up the nice work!
AV8TOR
Once again, I will try to find some pics to post. Keep up the nice work!
AV8TOR
01-22-2017, 02:15 PM
#8
The commercial kits they used to sell for converting the Poulan 33/42cc engines just used a piece of aluminum flat stock that bolted to one of the crankcase half screws. (Along with a spacer). It had a hole in it to glue the round type sensor into, then once again, a sliding collar with the magnet that fitted onto the prop hub.
AV8TOR
AV8TOR
Last edited by av8tor1977; 01-22-2017 at 02:21 PM.
01-24-2017, 04:12 AM
#9
Member
Thread Starter
Join Date: Feb 2014
Posts: 87
Likes: 0
Received 0 Likes
on
0 Posts
To anybody reading this thread. I'm having a problem with my computer because of a virus that I must of picked up from a video that I must have got from Facebook. All my files have been backed up on a backup drive, I'm good about that but new stuff is in jeopardy. I'm currently running on the original 60 gig hard drive that this computer shipped with and need to format and clone the virus infected hard drive. I let a friend borrow my hard drive caddy and need to get it back before I can do that. I will restart later this week.
Thanks,
Larry
Thanks,
Larry
01-24-2017, 03:00 PM
#10
Hi, sorry about your virus. Have you identified the exact source of the virus so that the rest of us can avoid getting the same? Unless, of course, you would rather not divulge the source.
") Thanks.
02-06-2017, 03:39 AM
Thanks.
02-06-2017, 03:39 AM
#16
Member
Thread Starter
Join Date: Feb 2014
Posts: 87
Likes: 0
Received 0 Likes
on
0 Posts
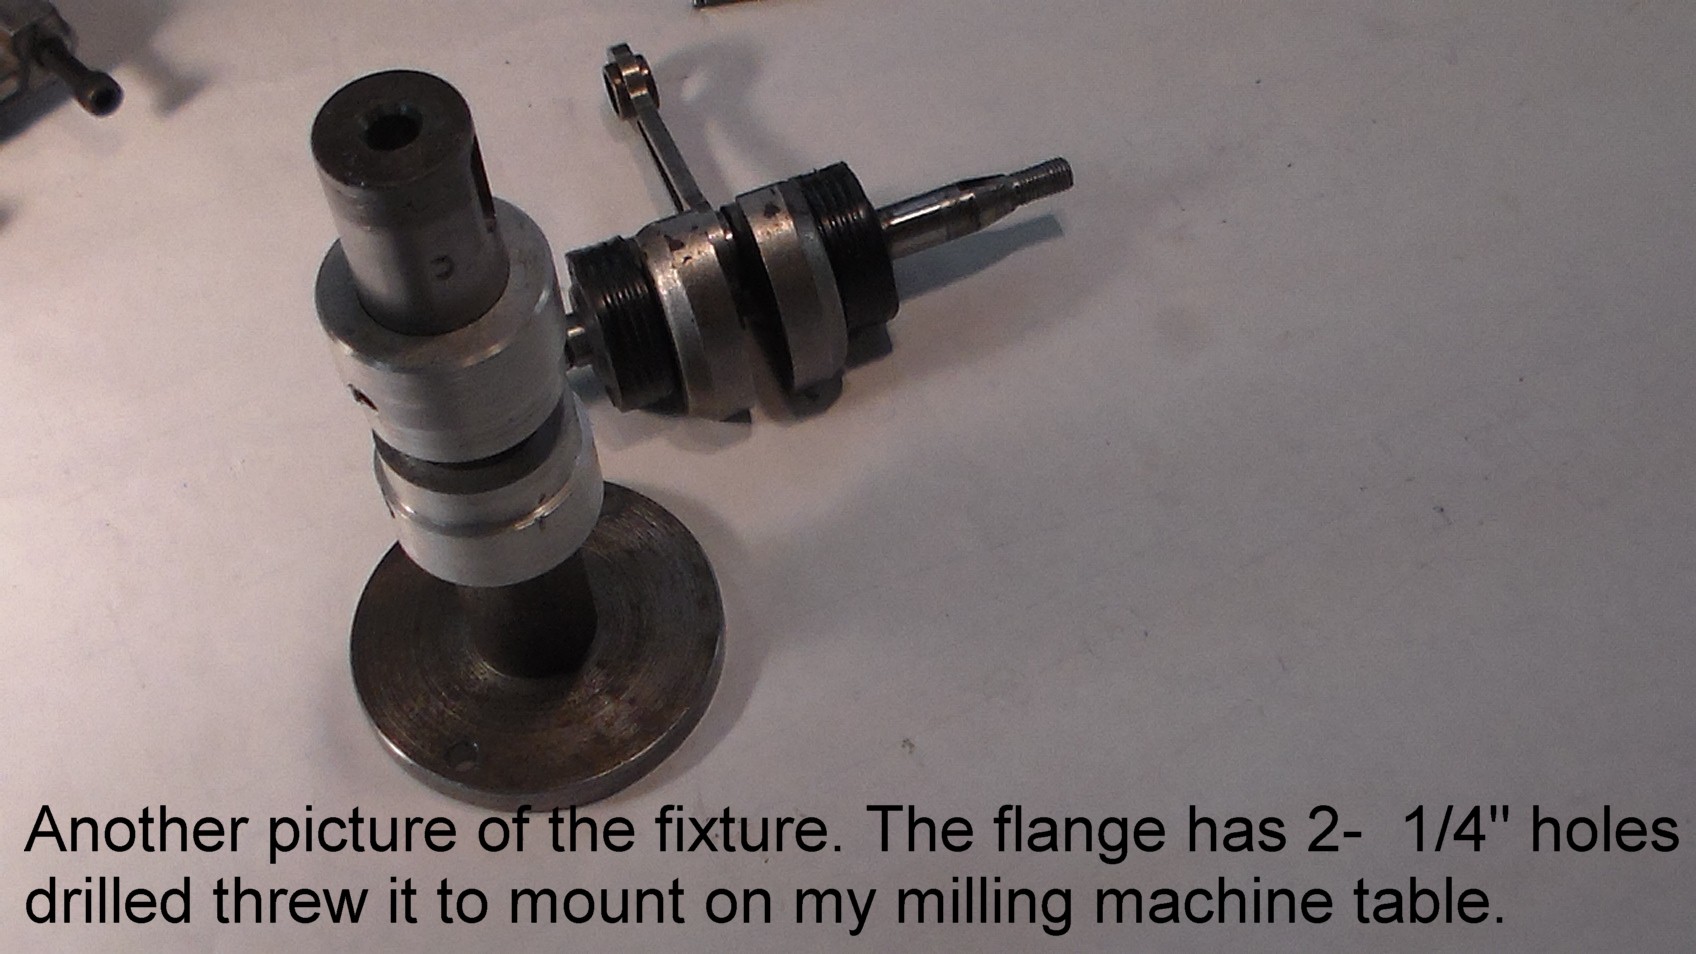
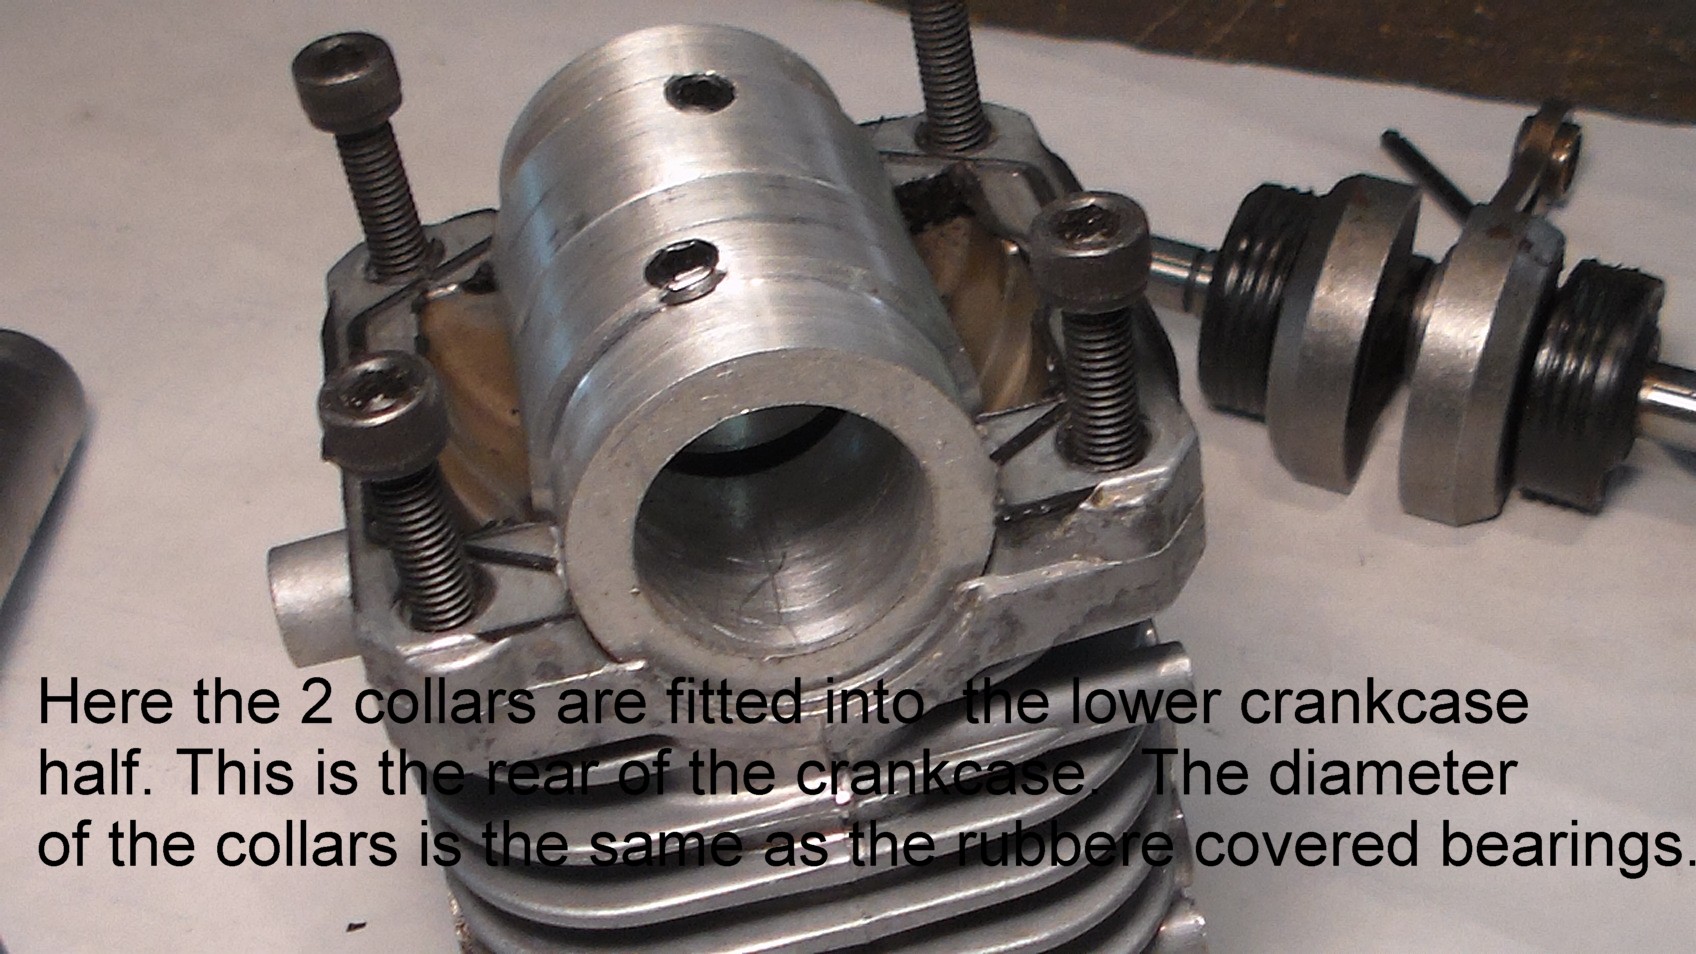
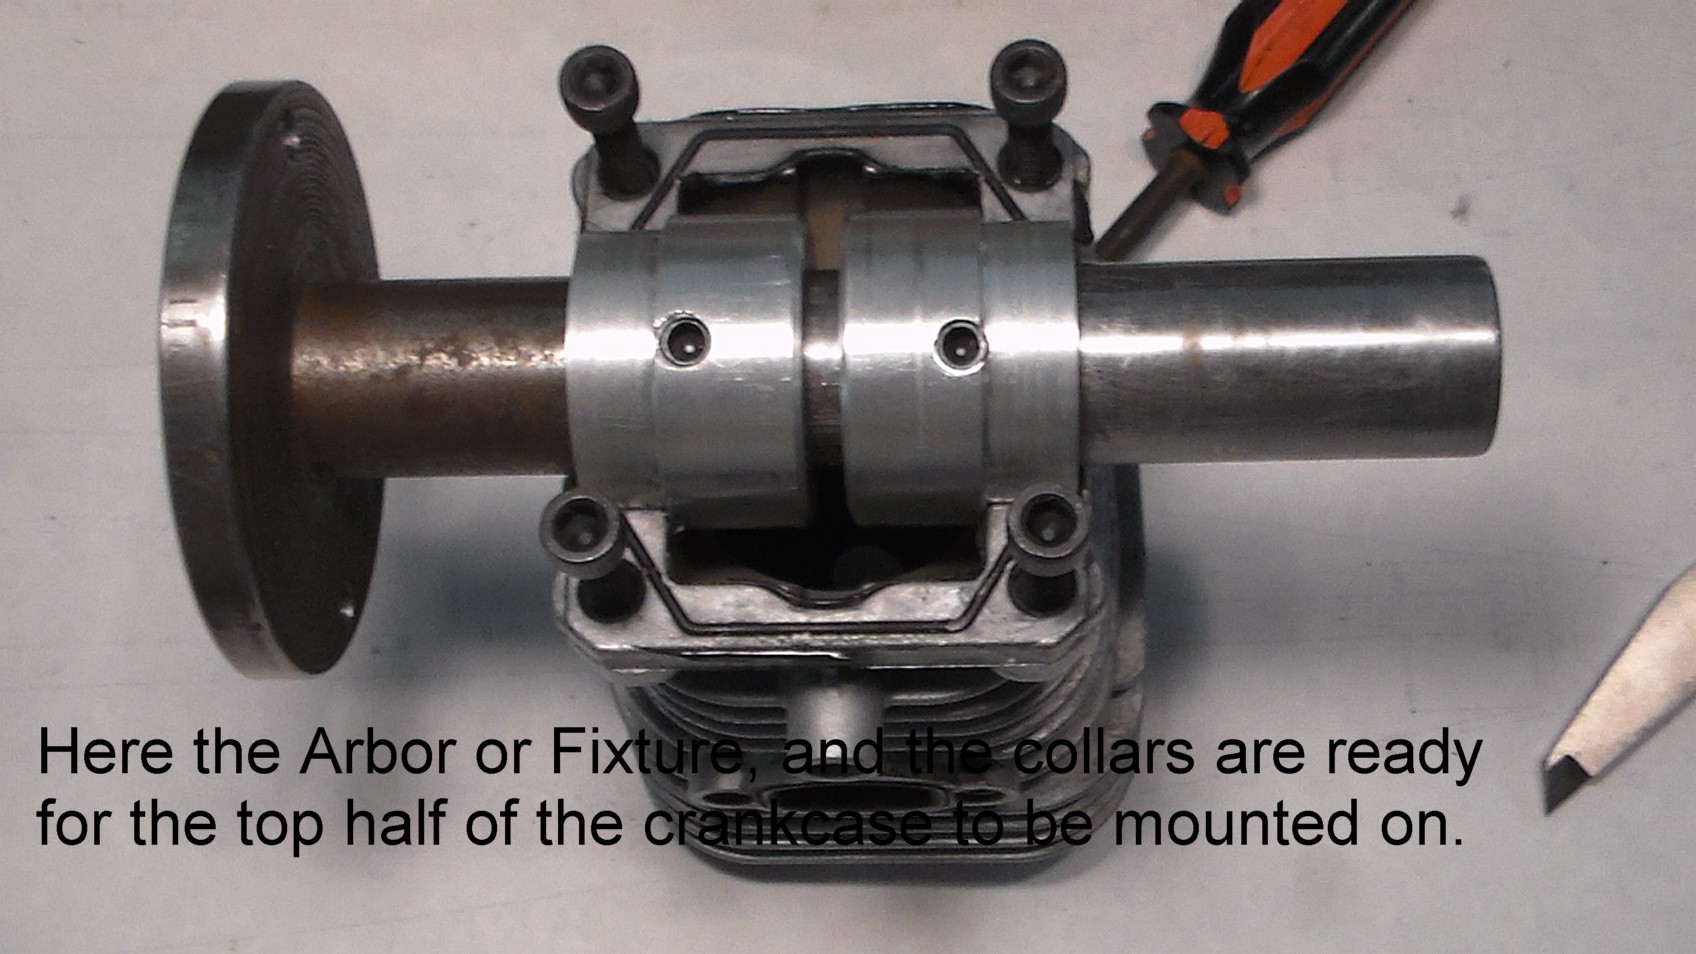
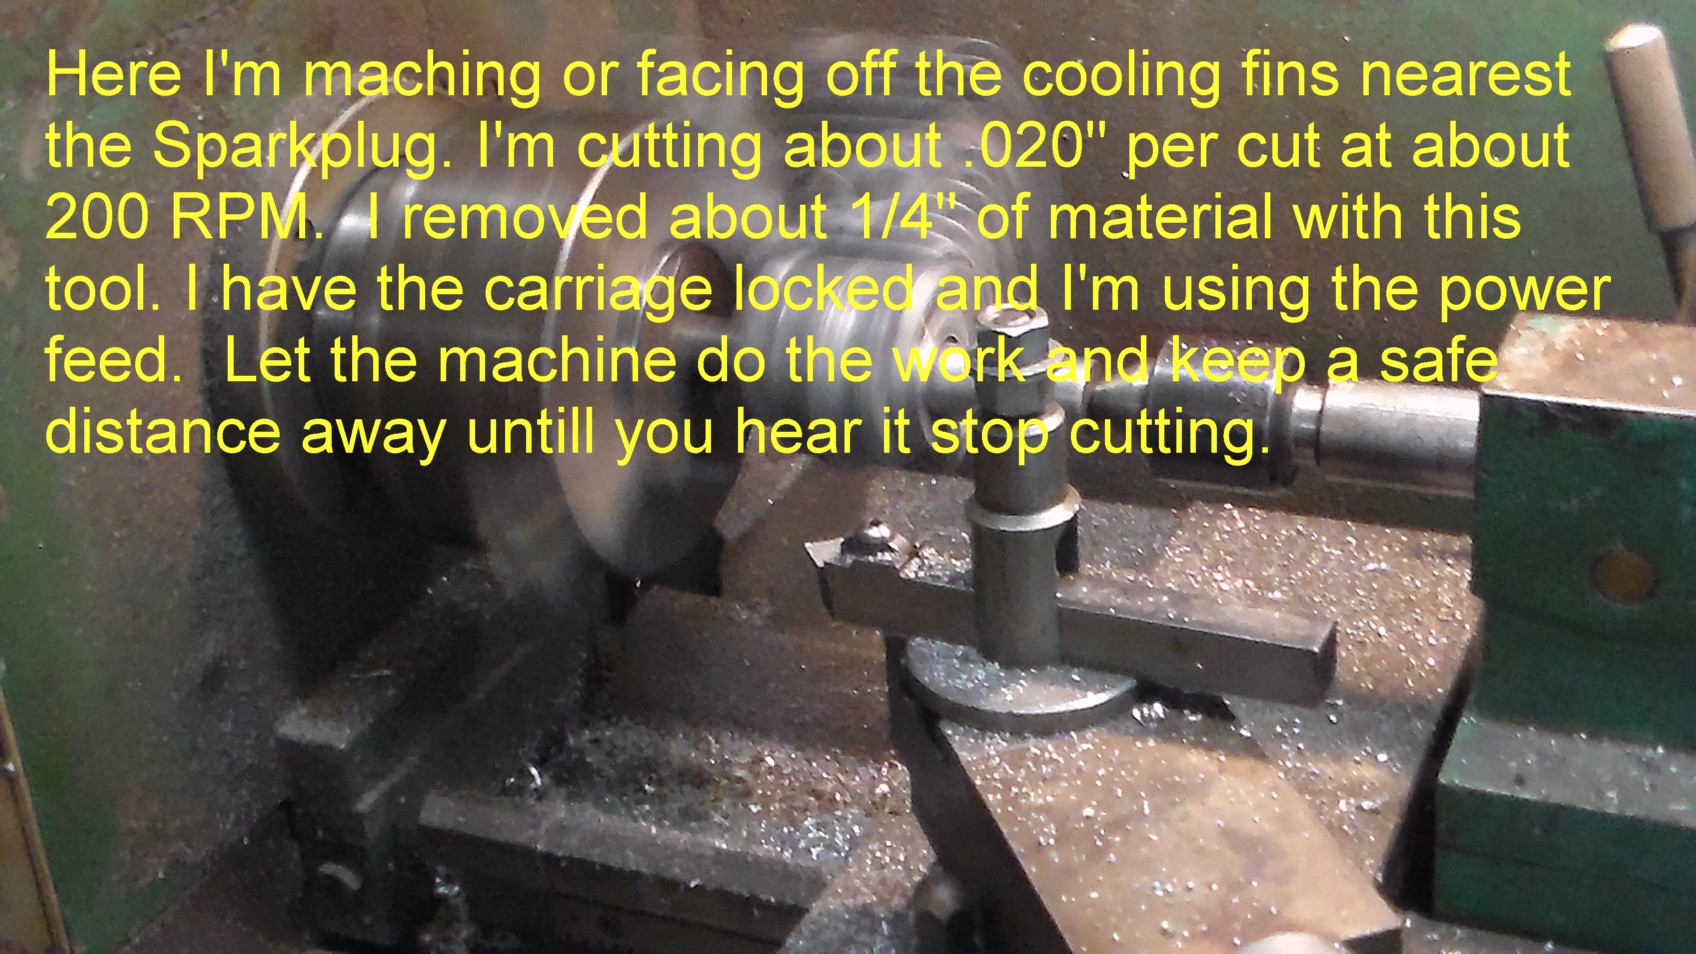
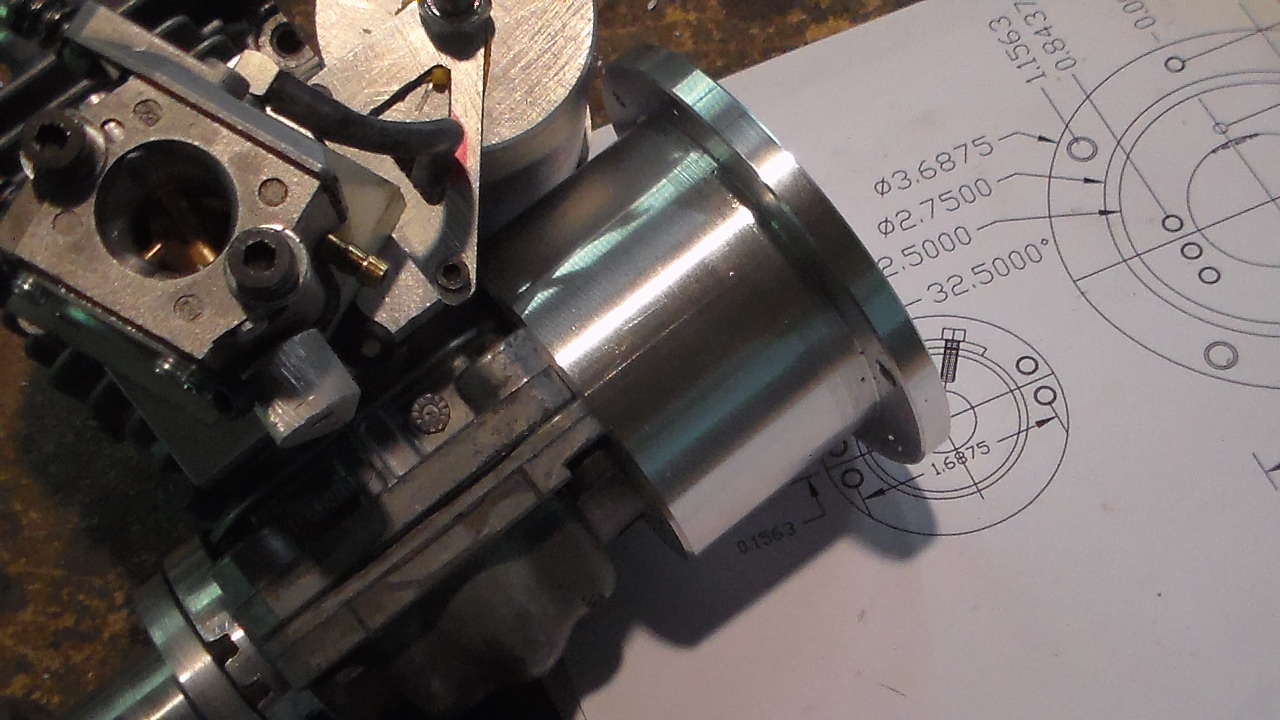
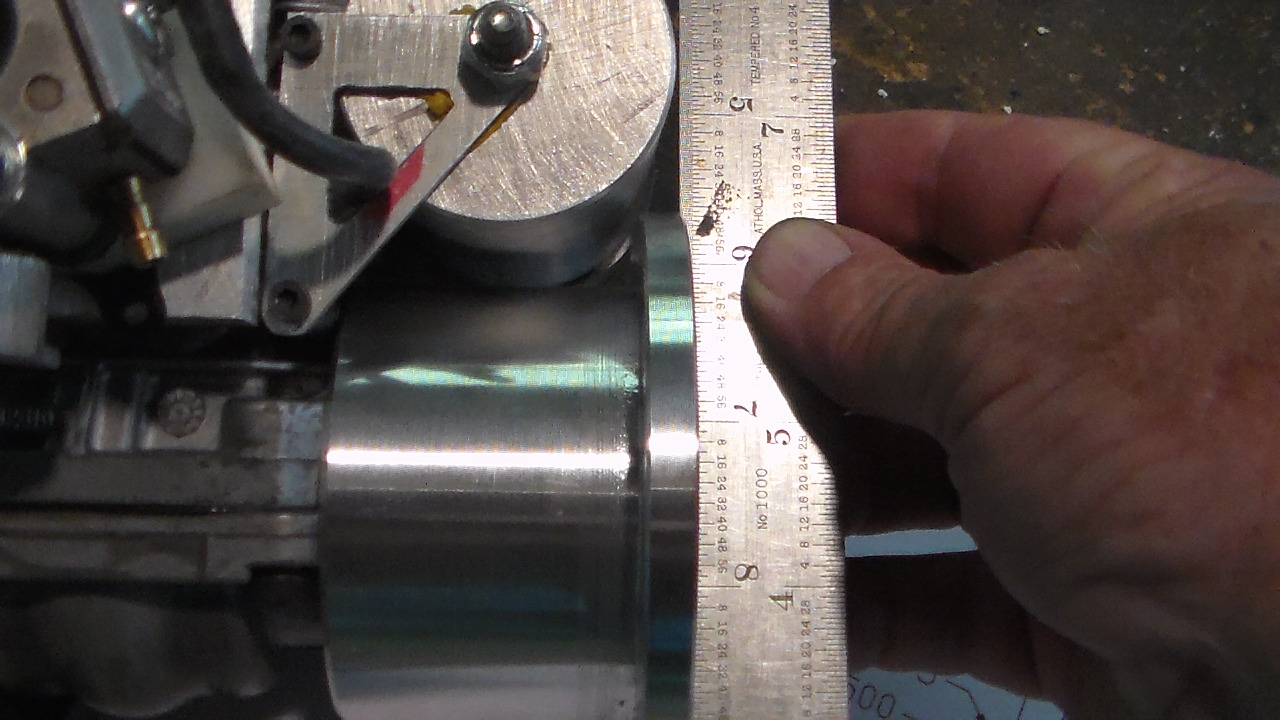
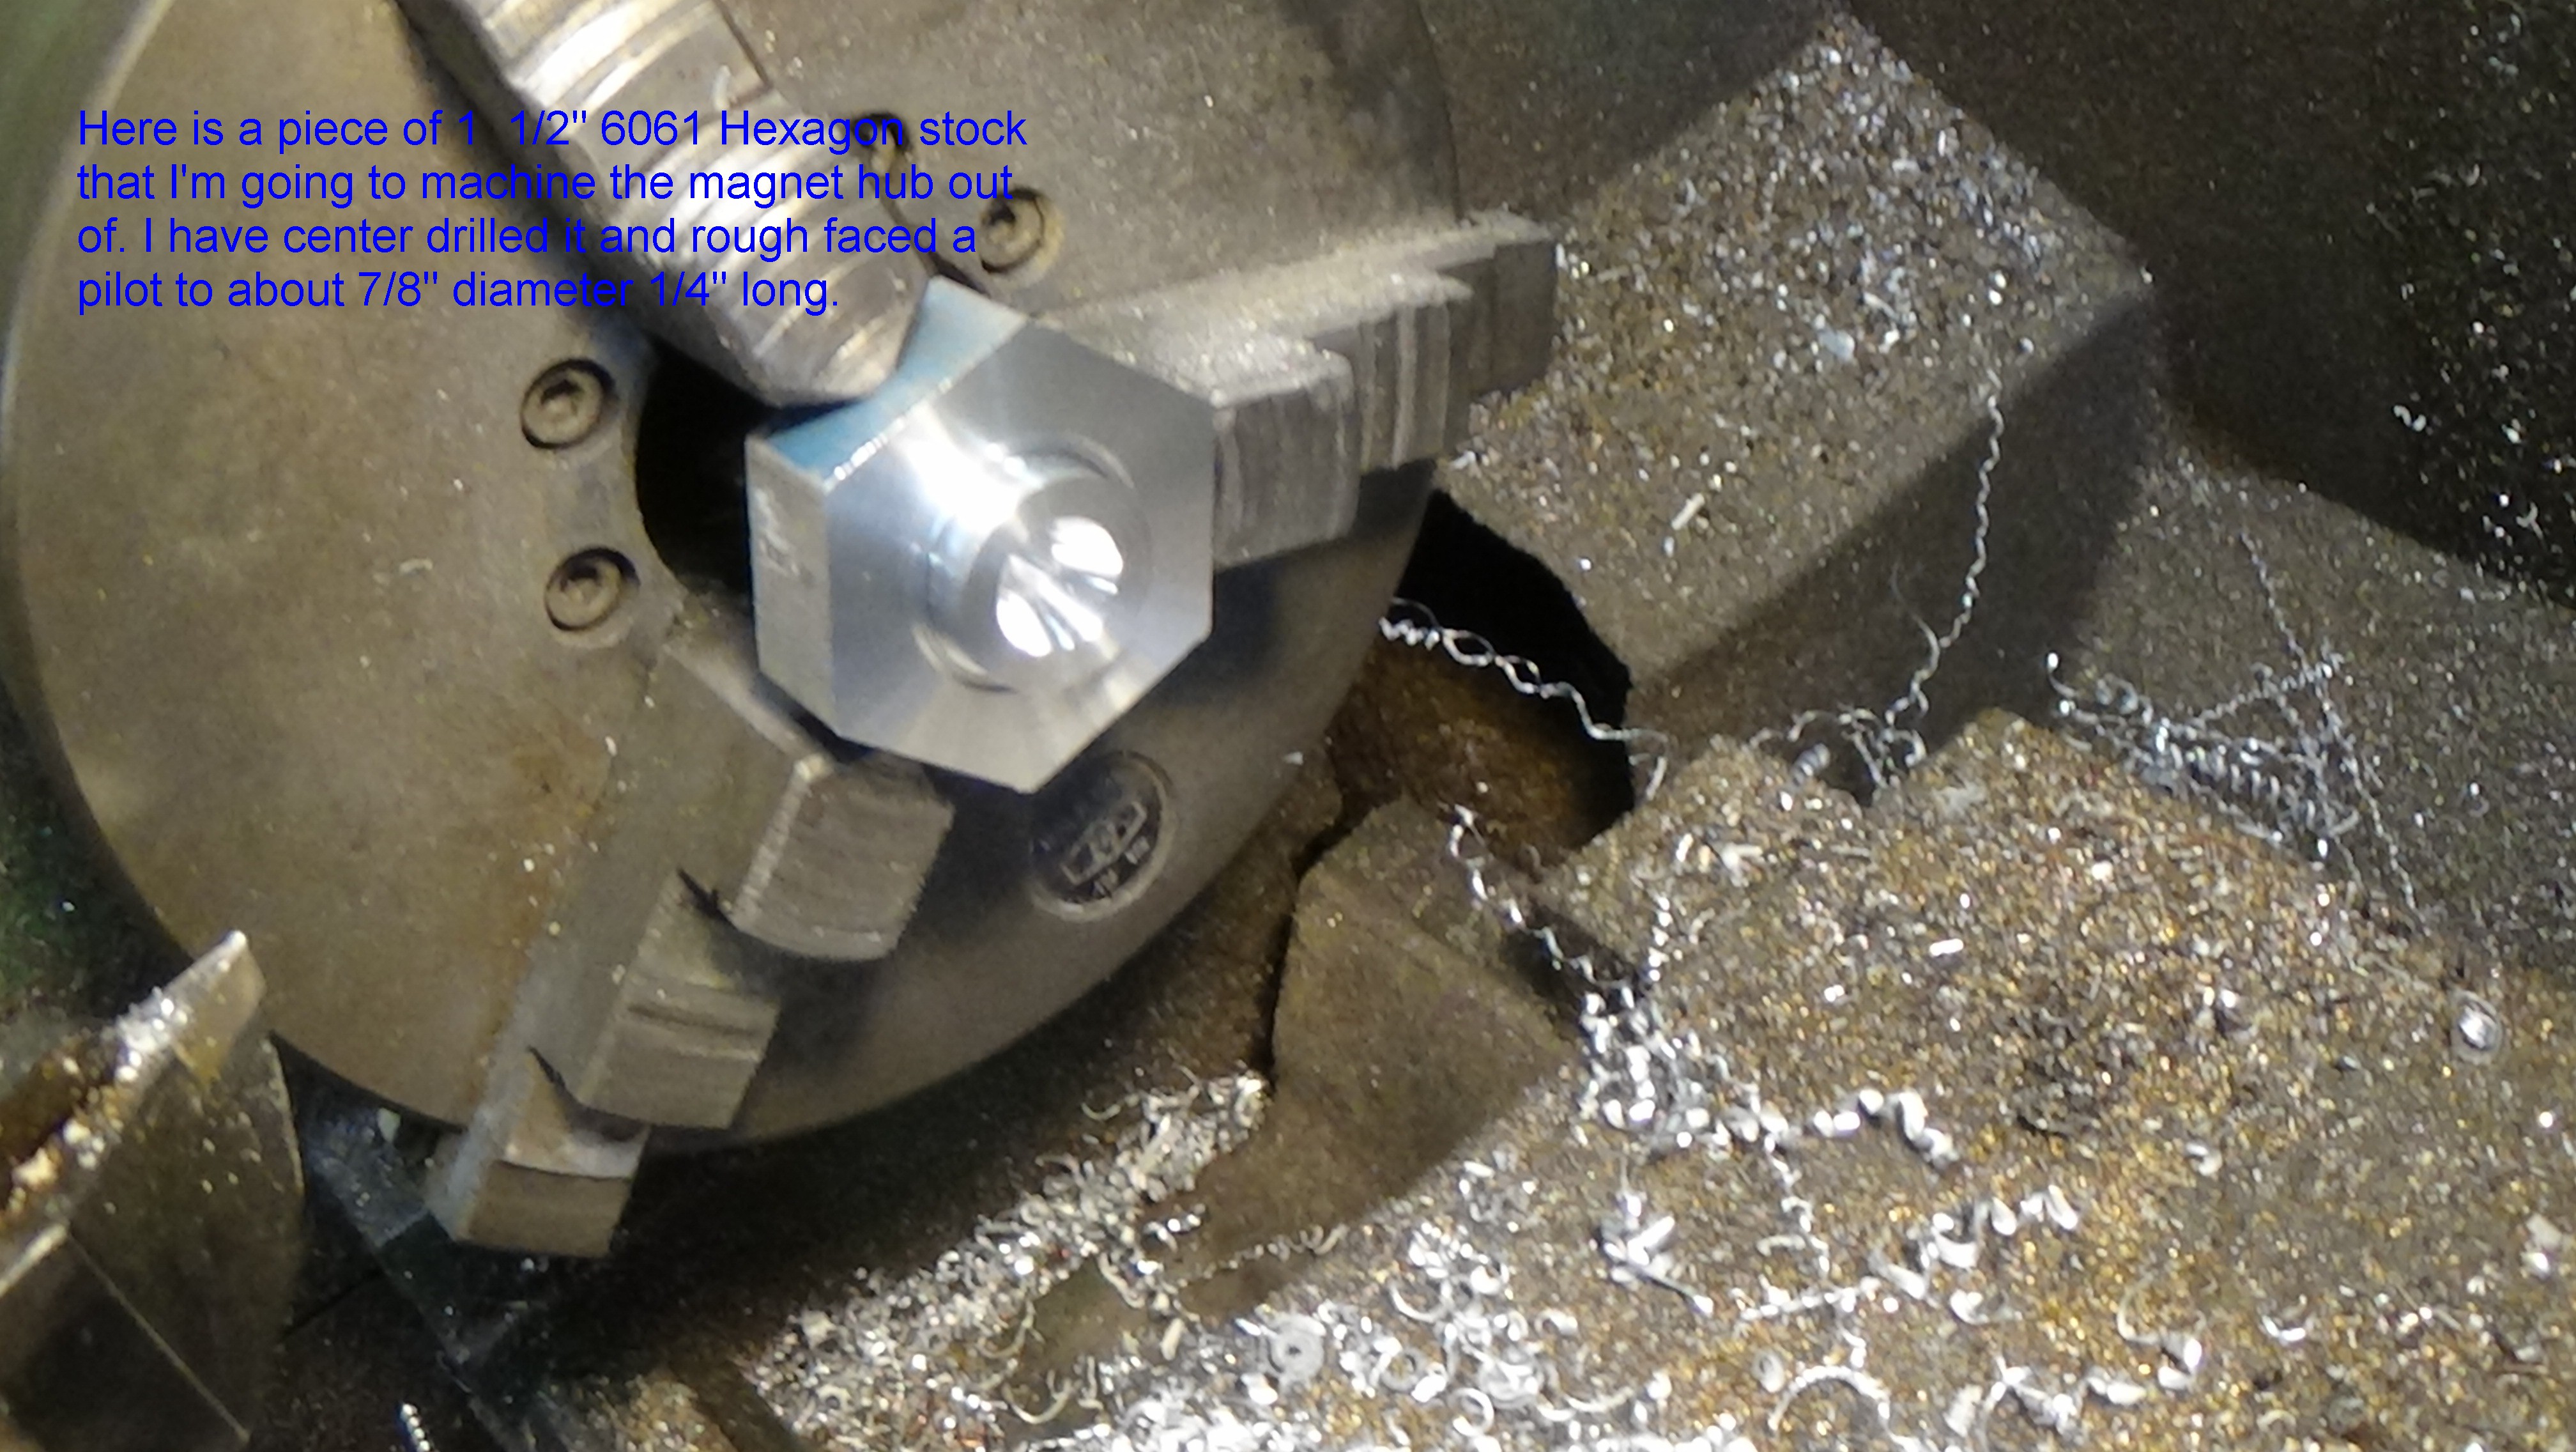
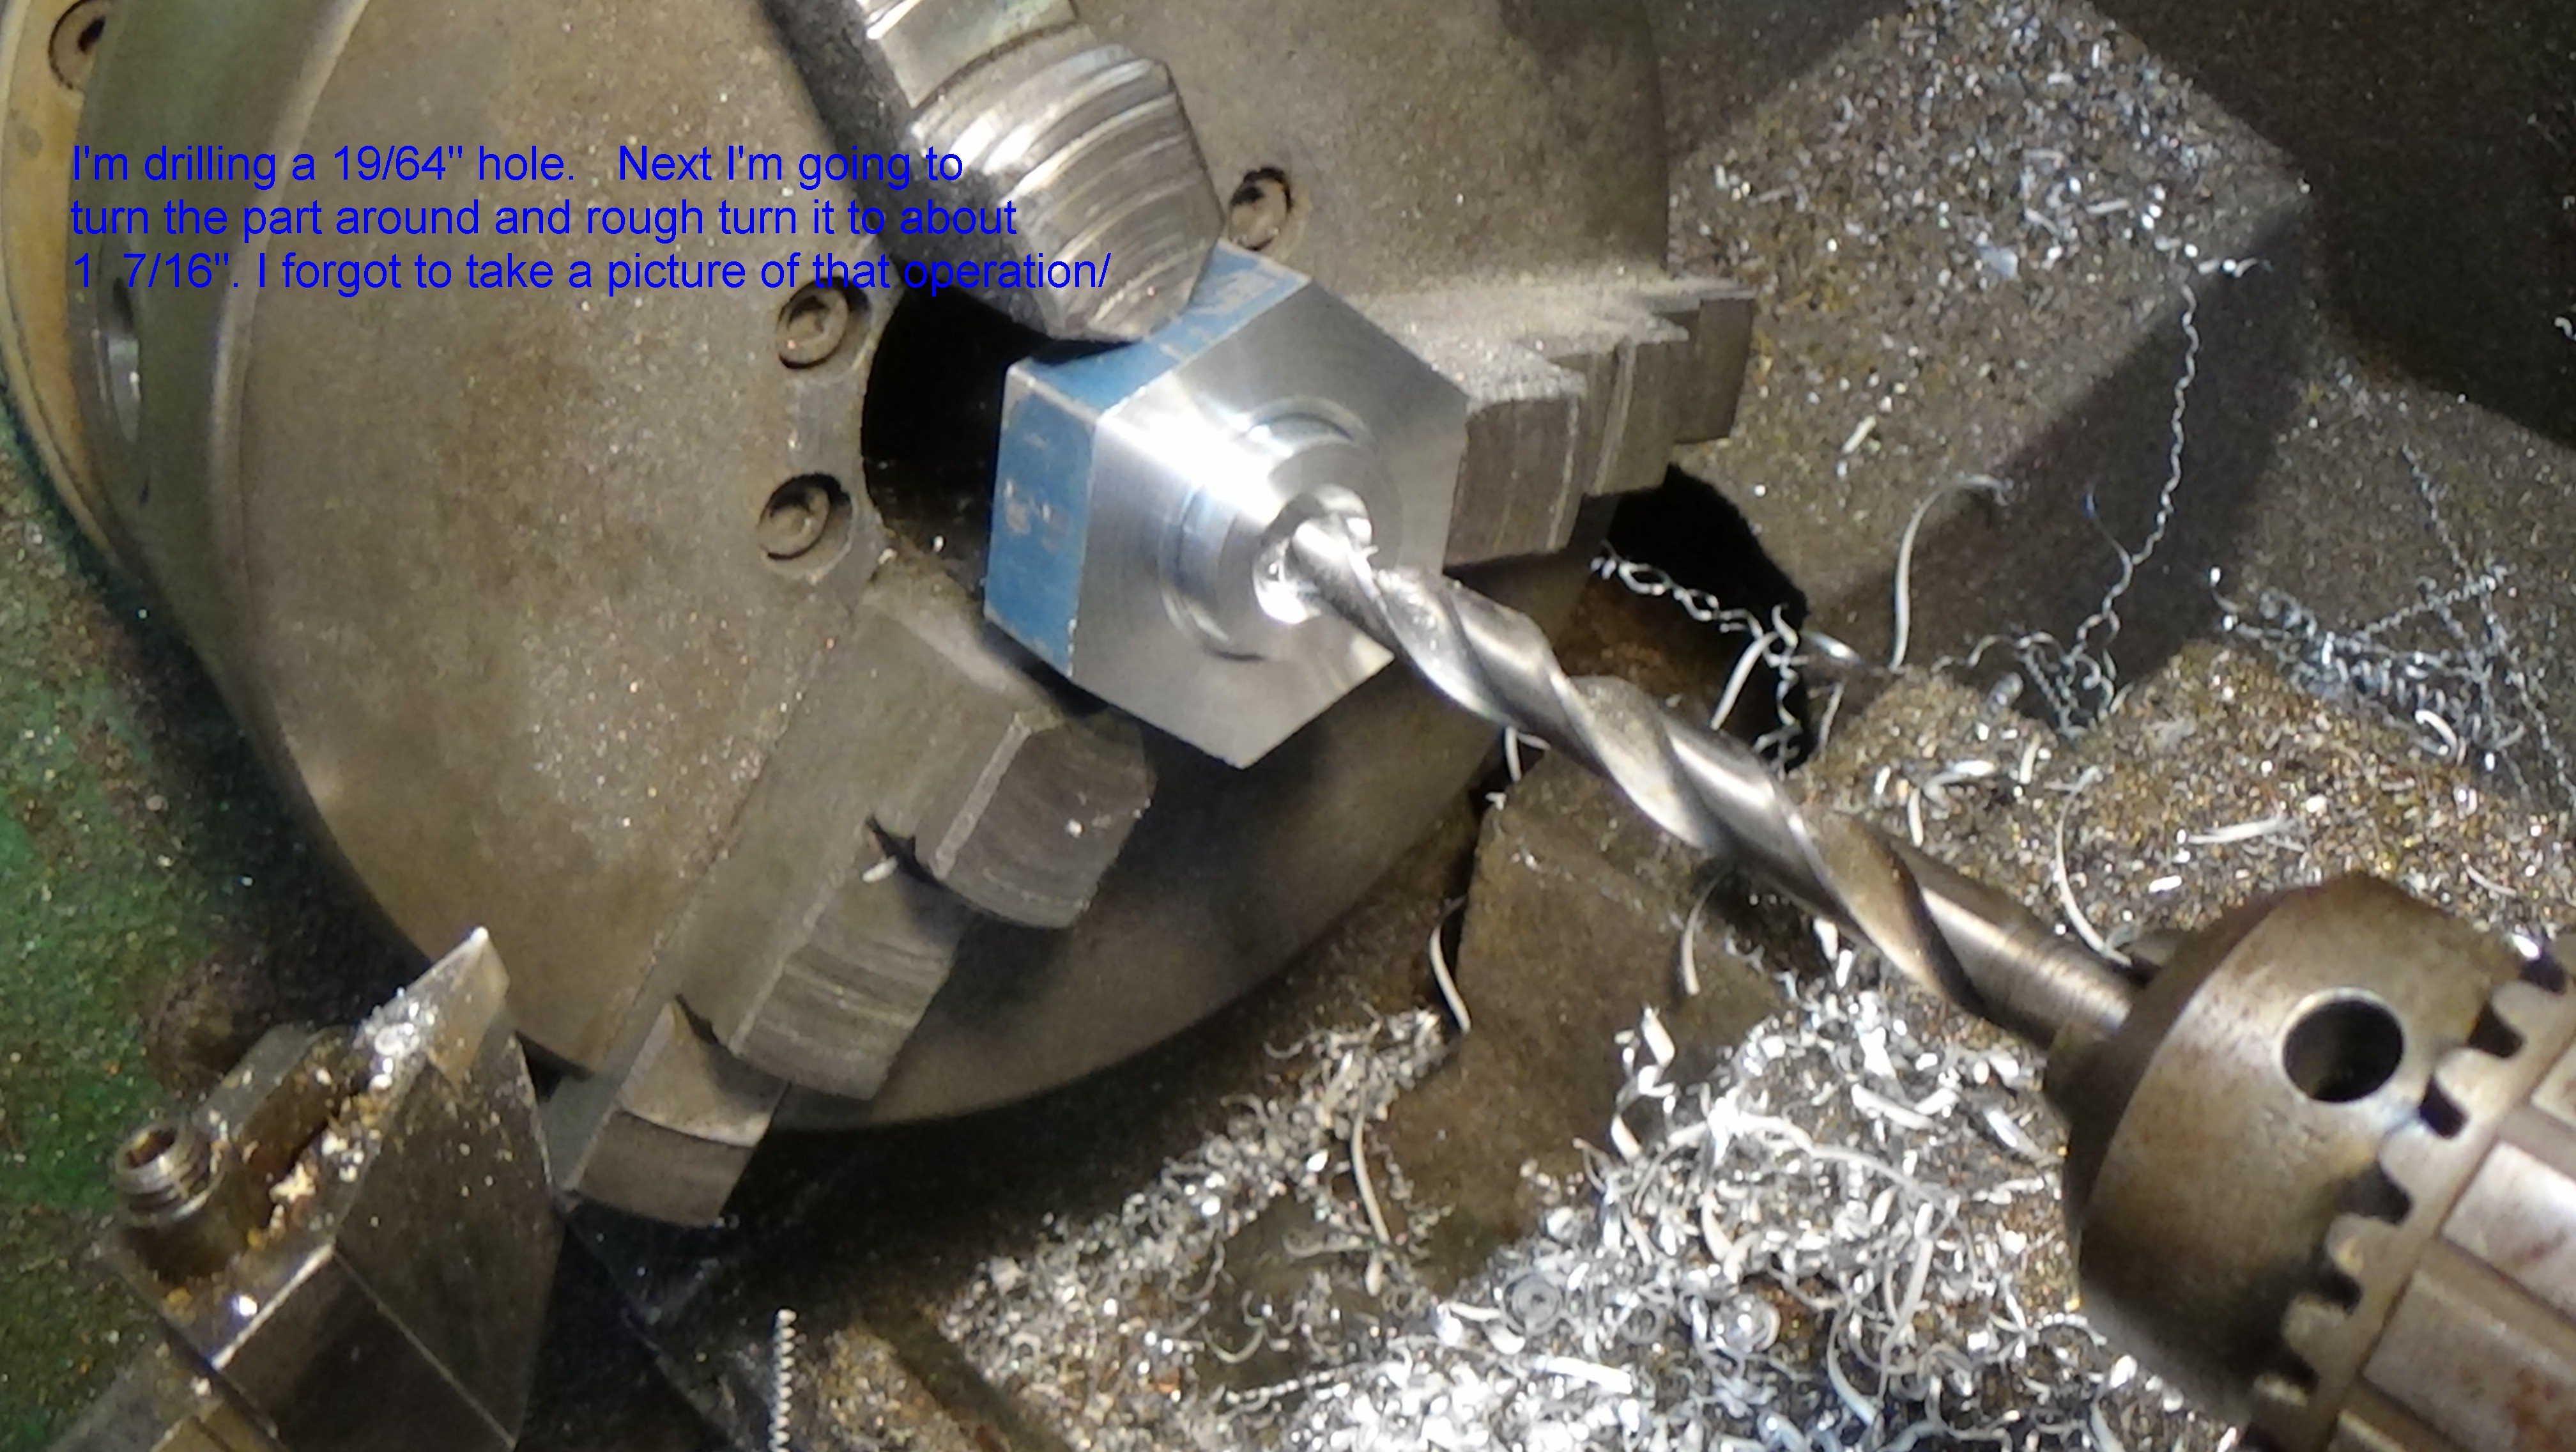
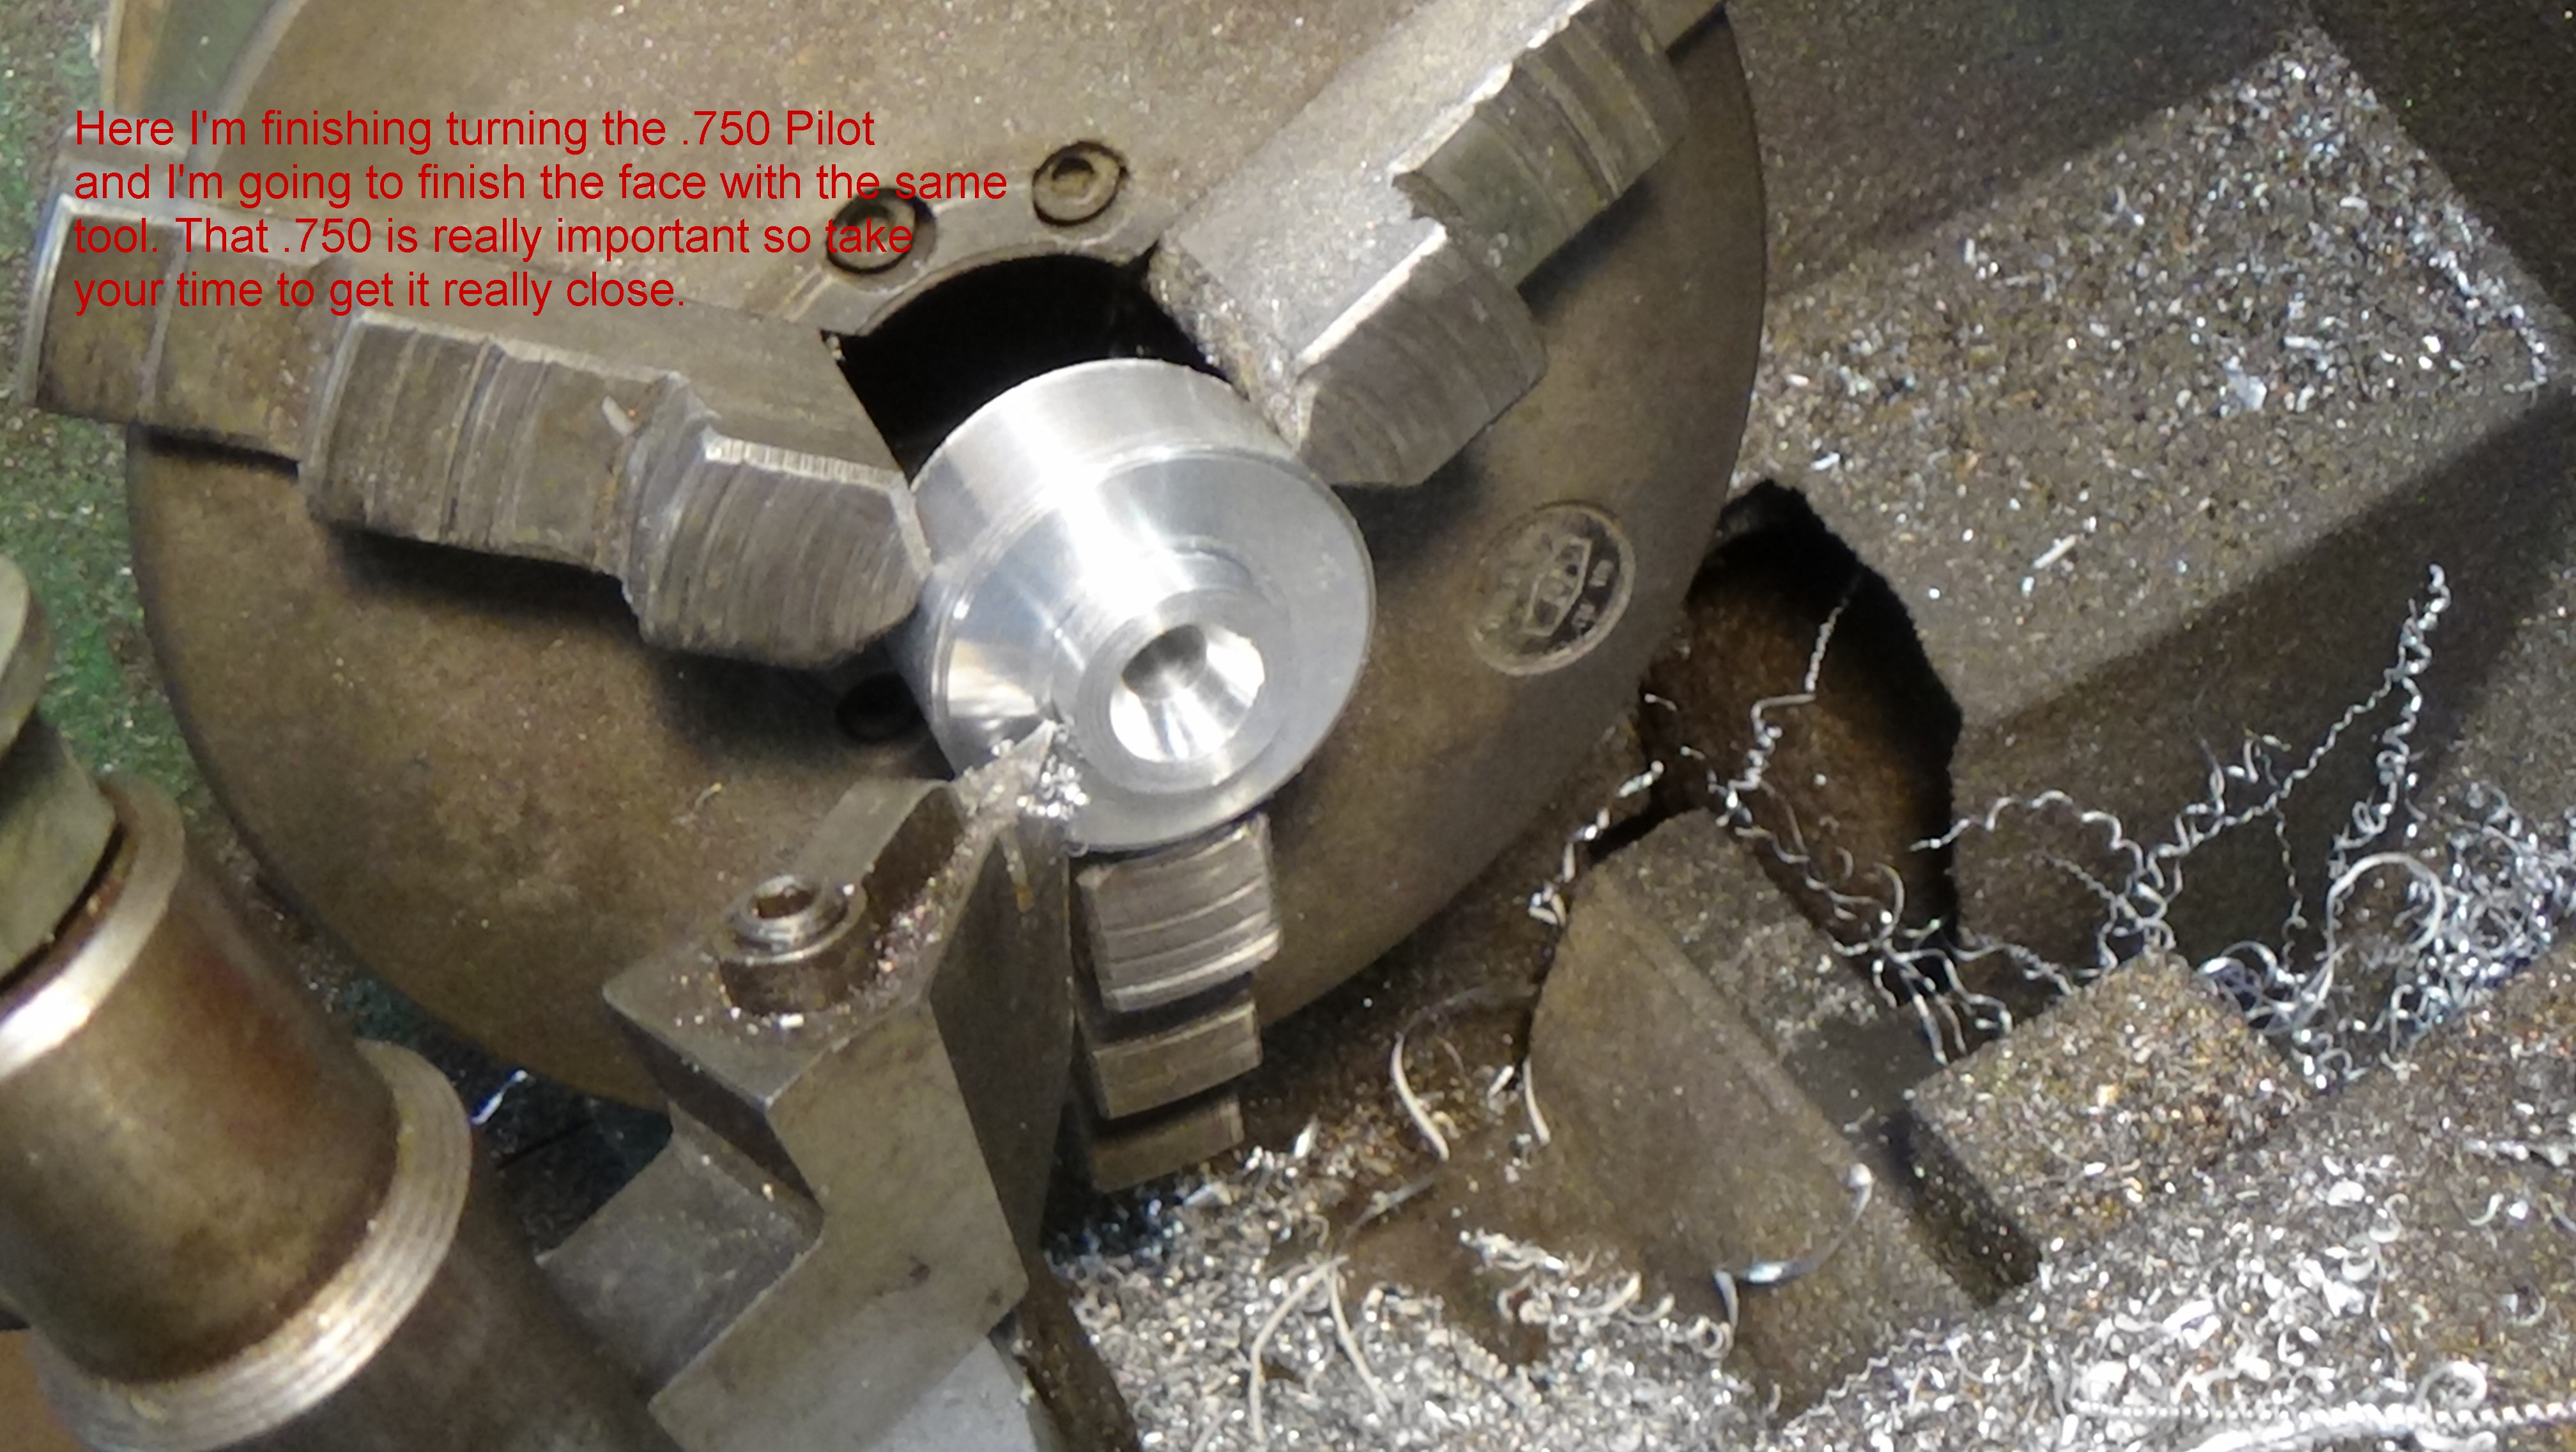
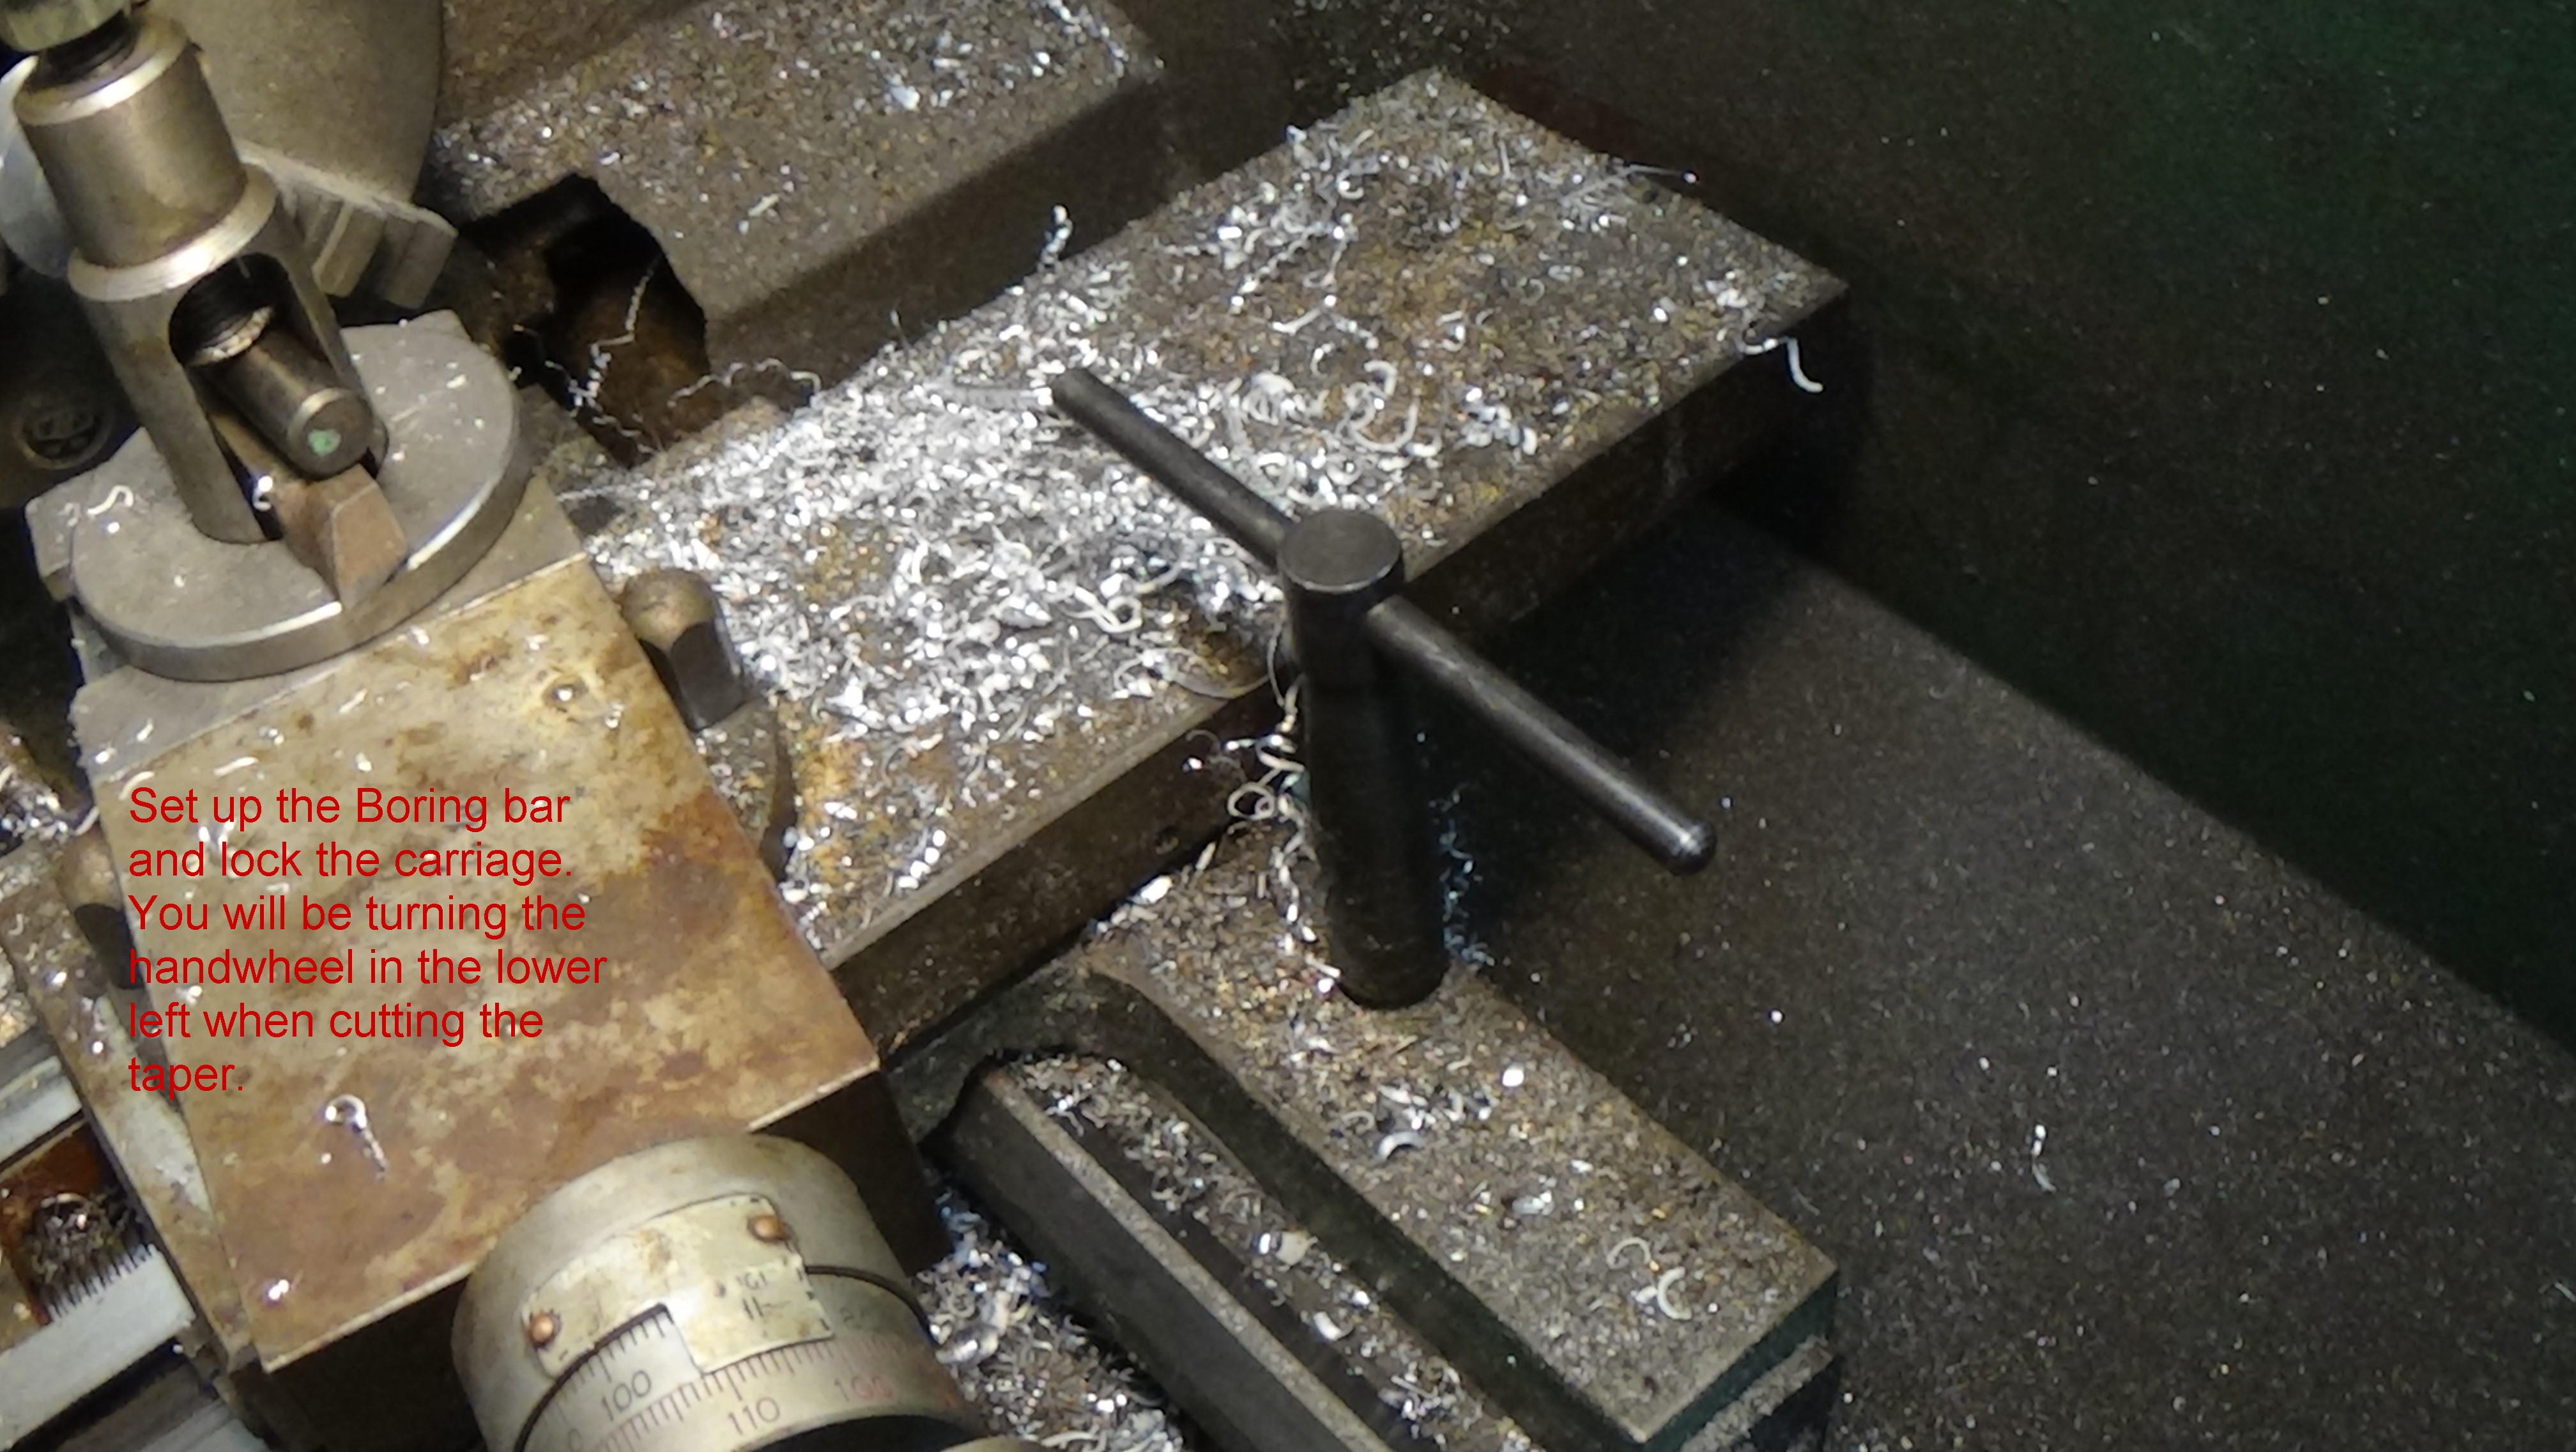
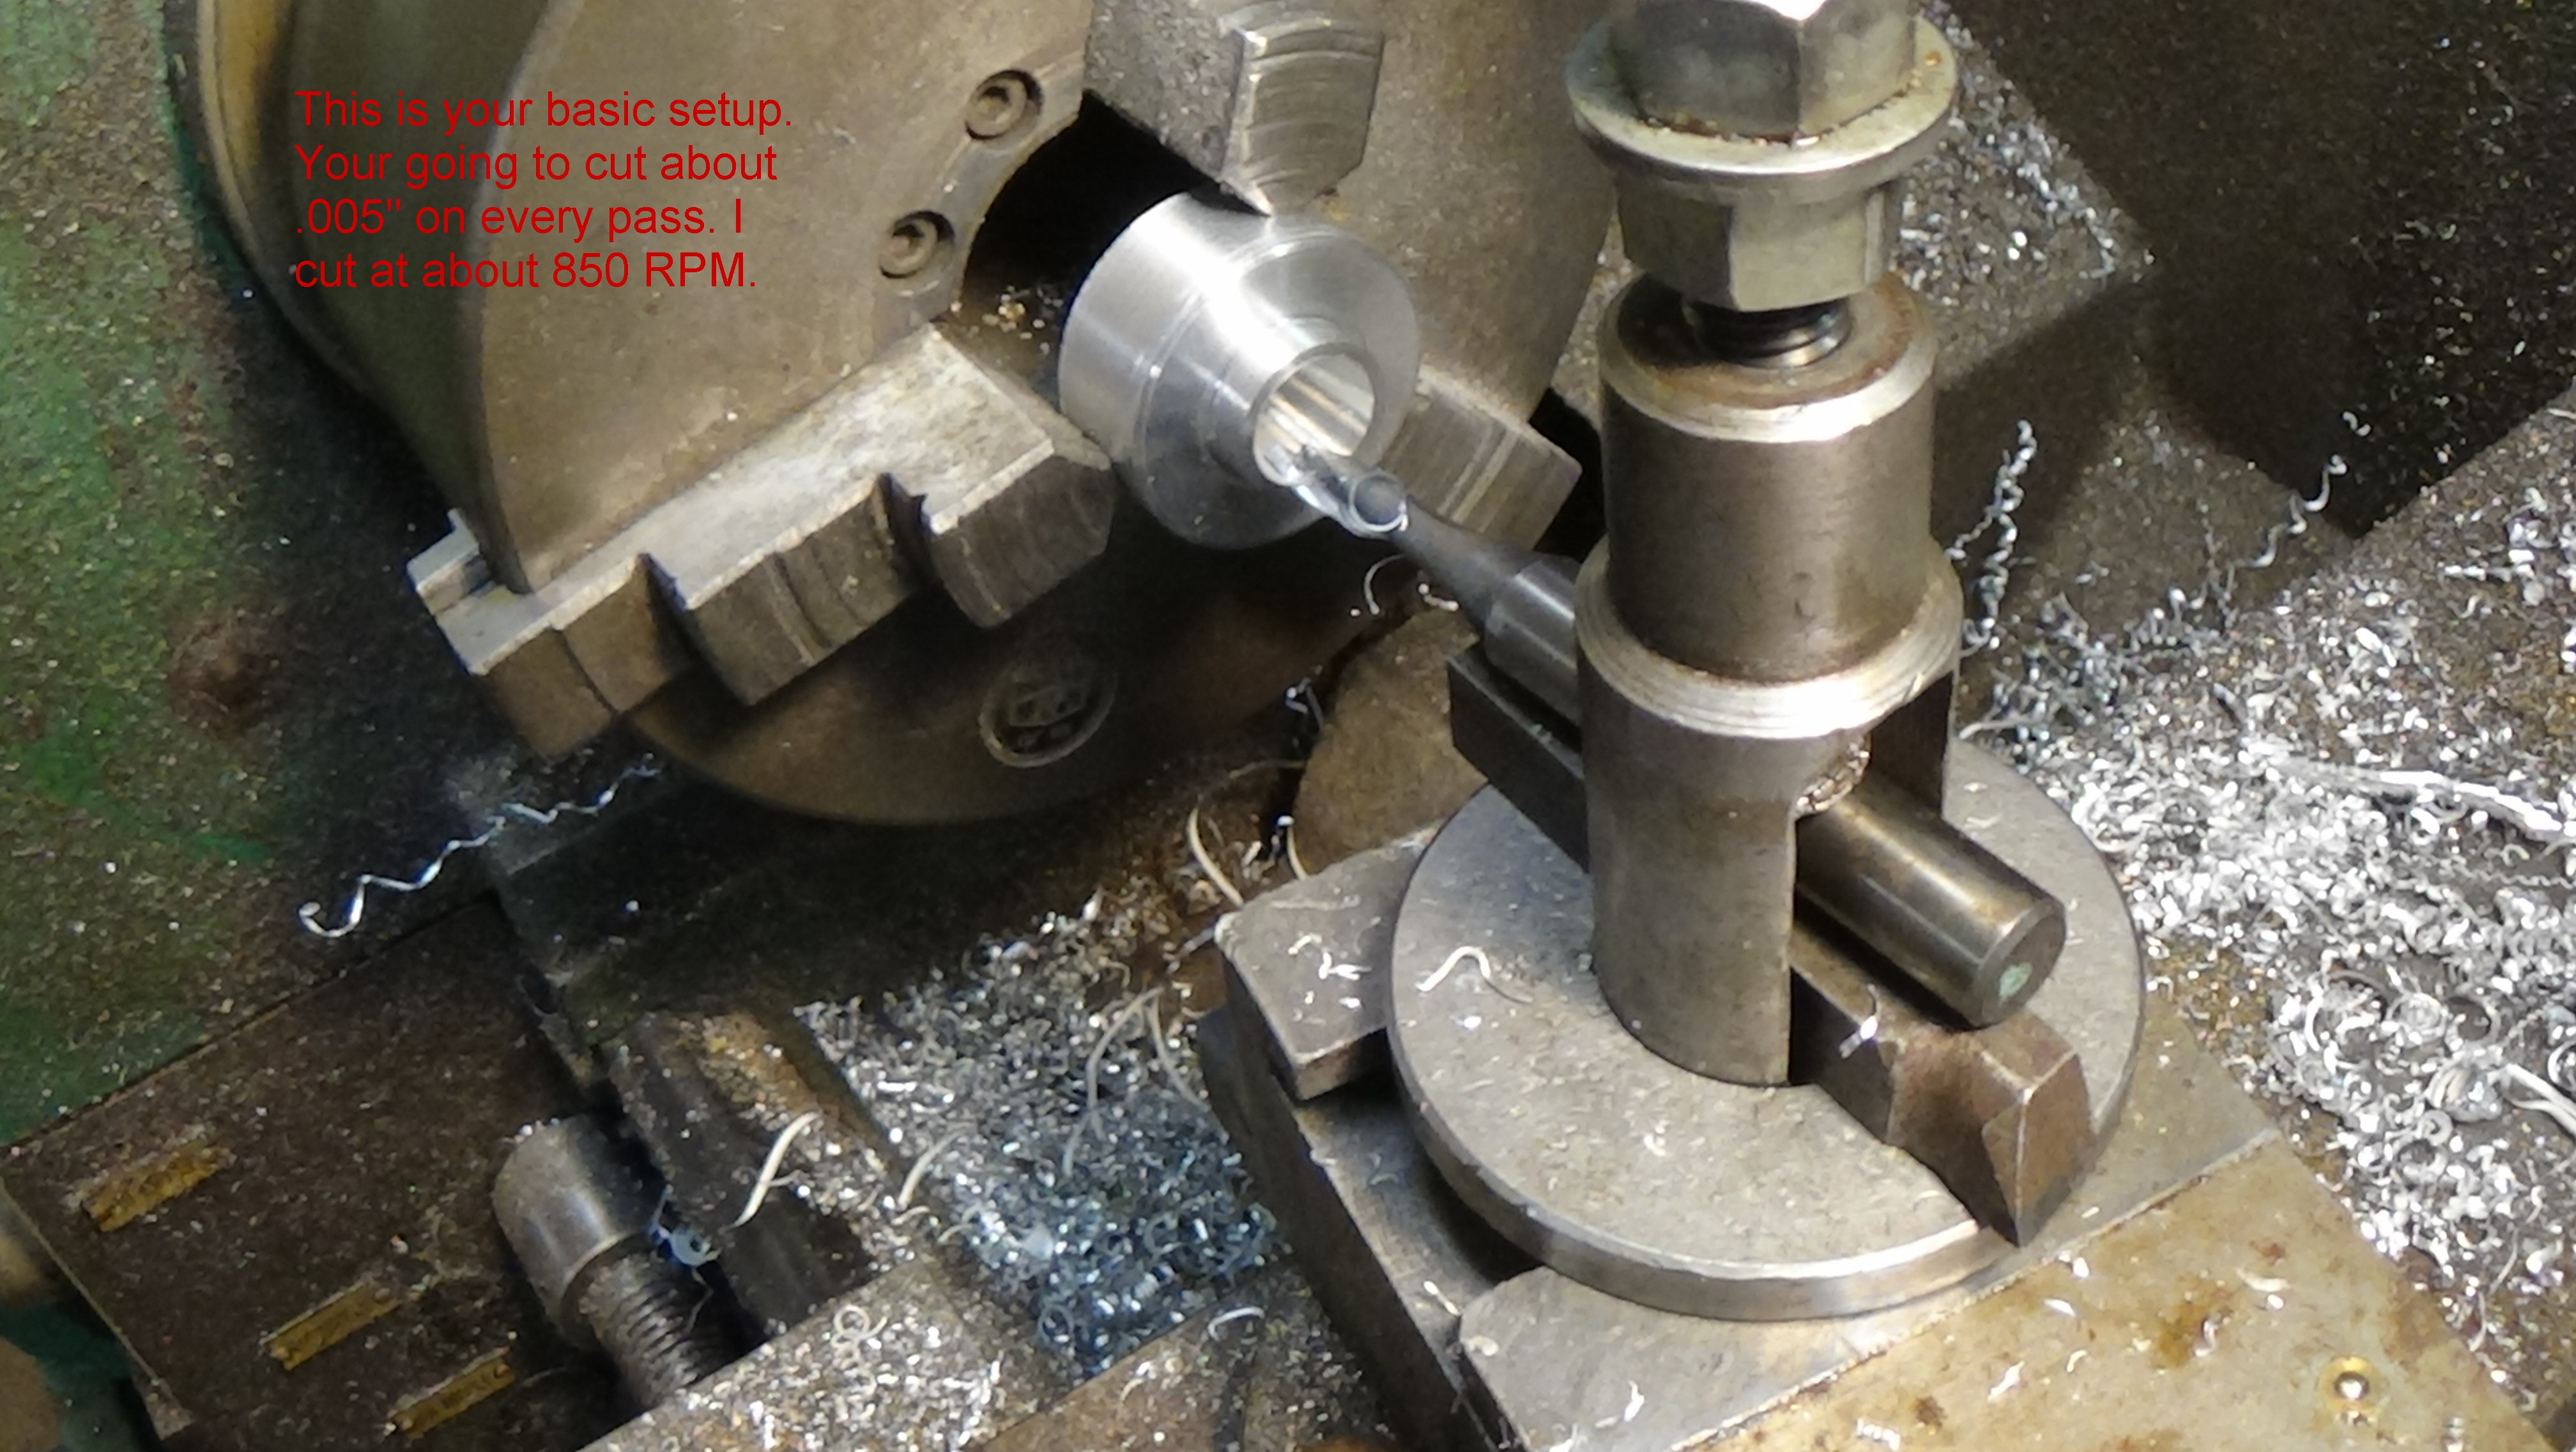
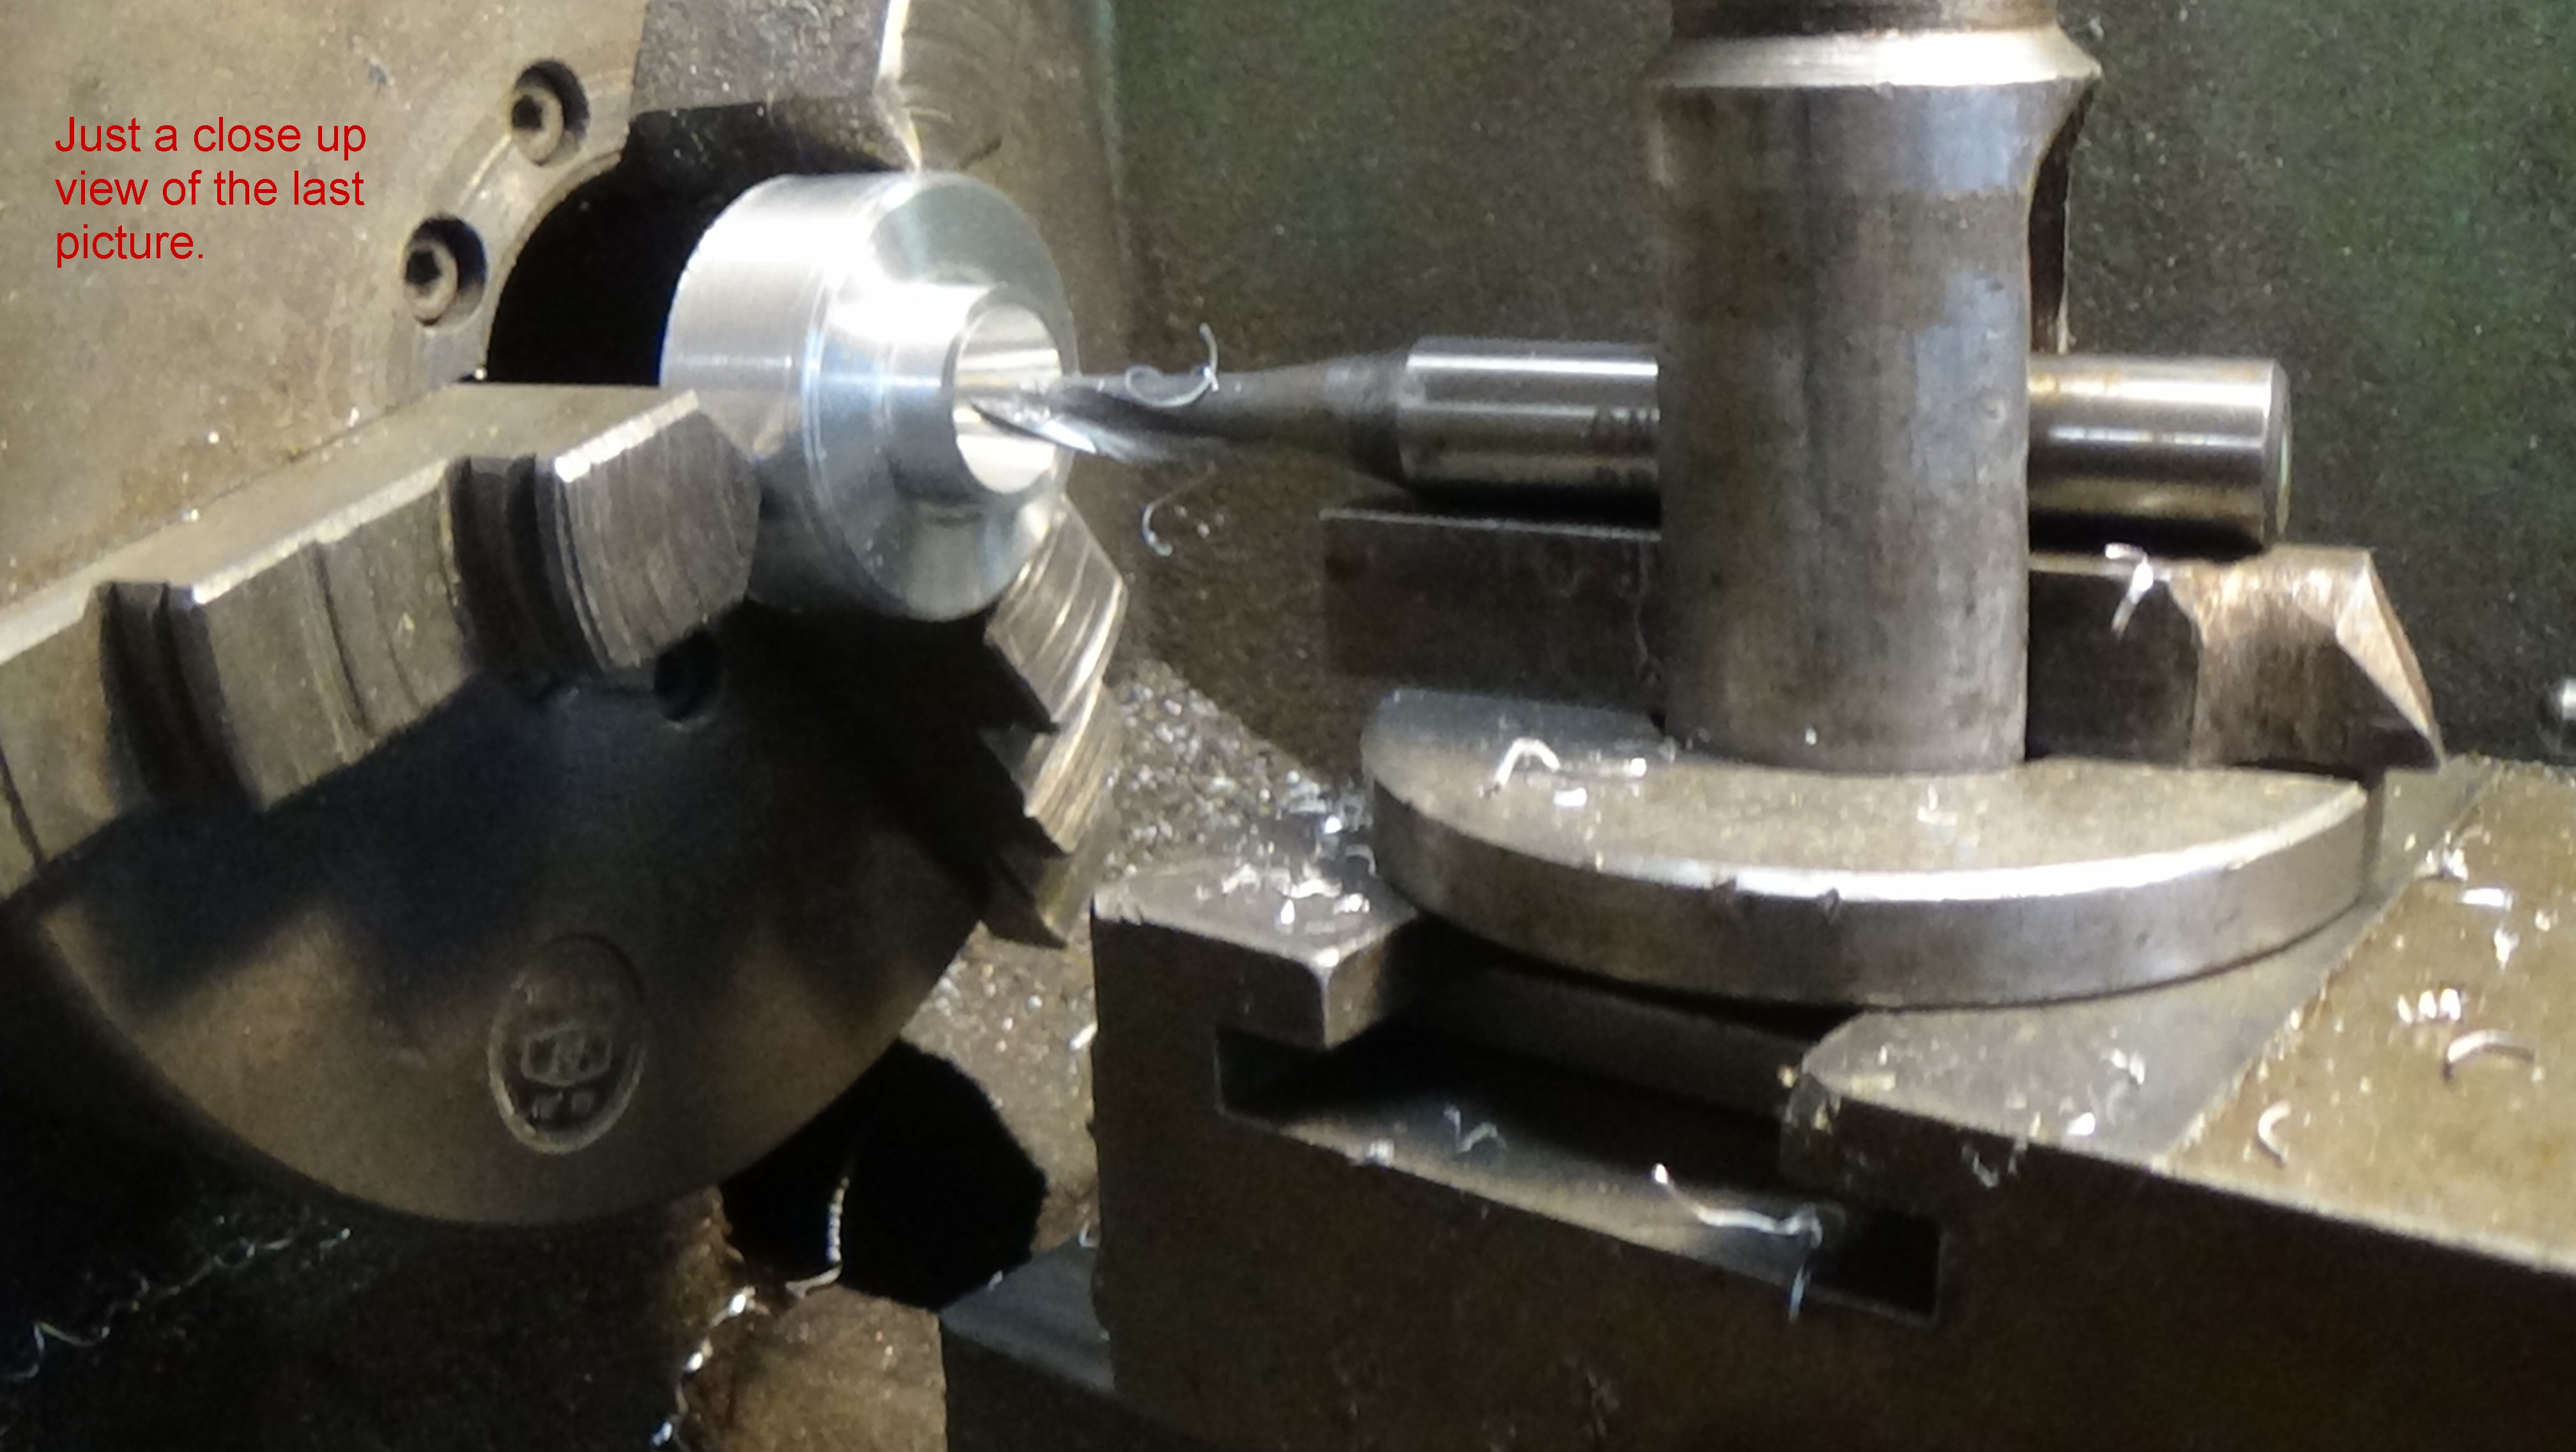
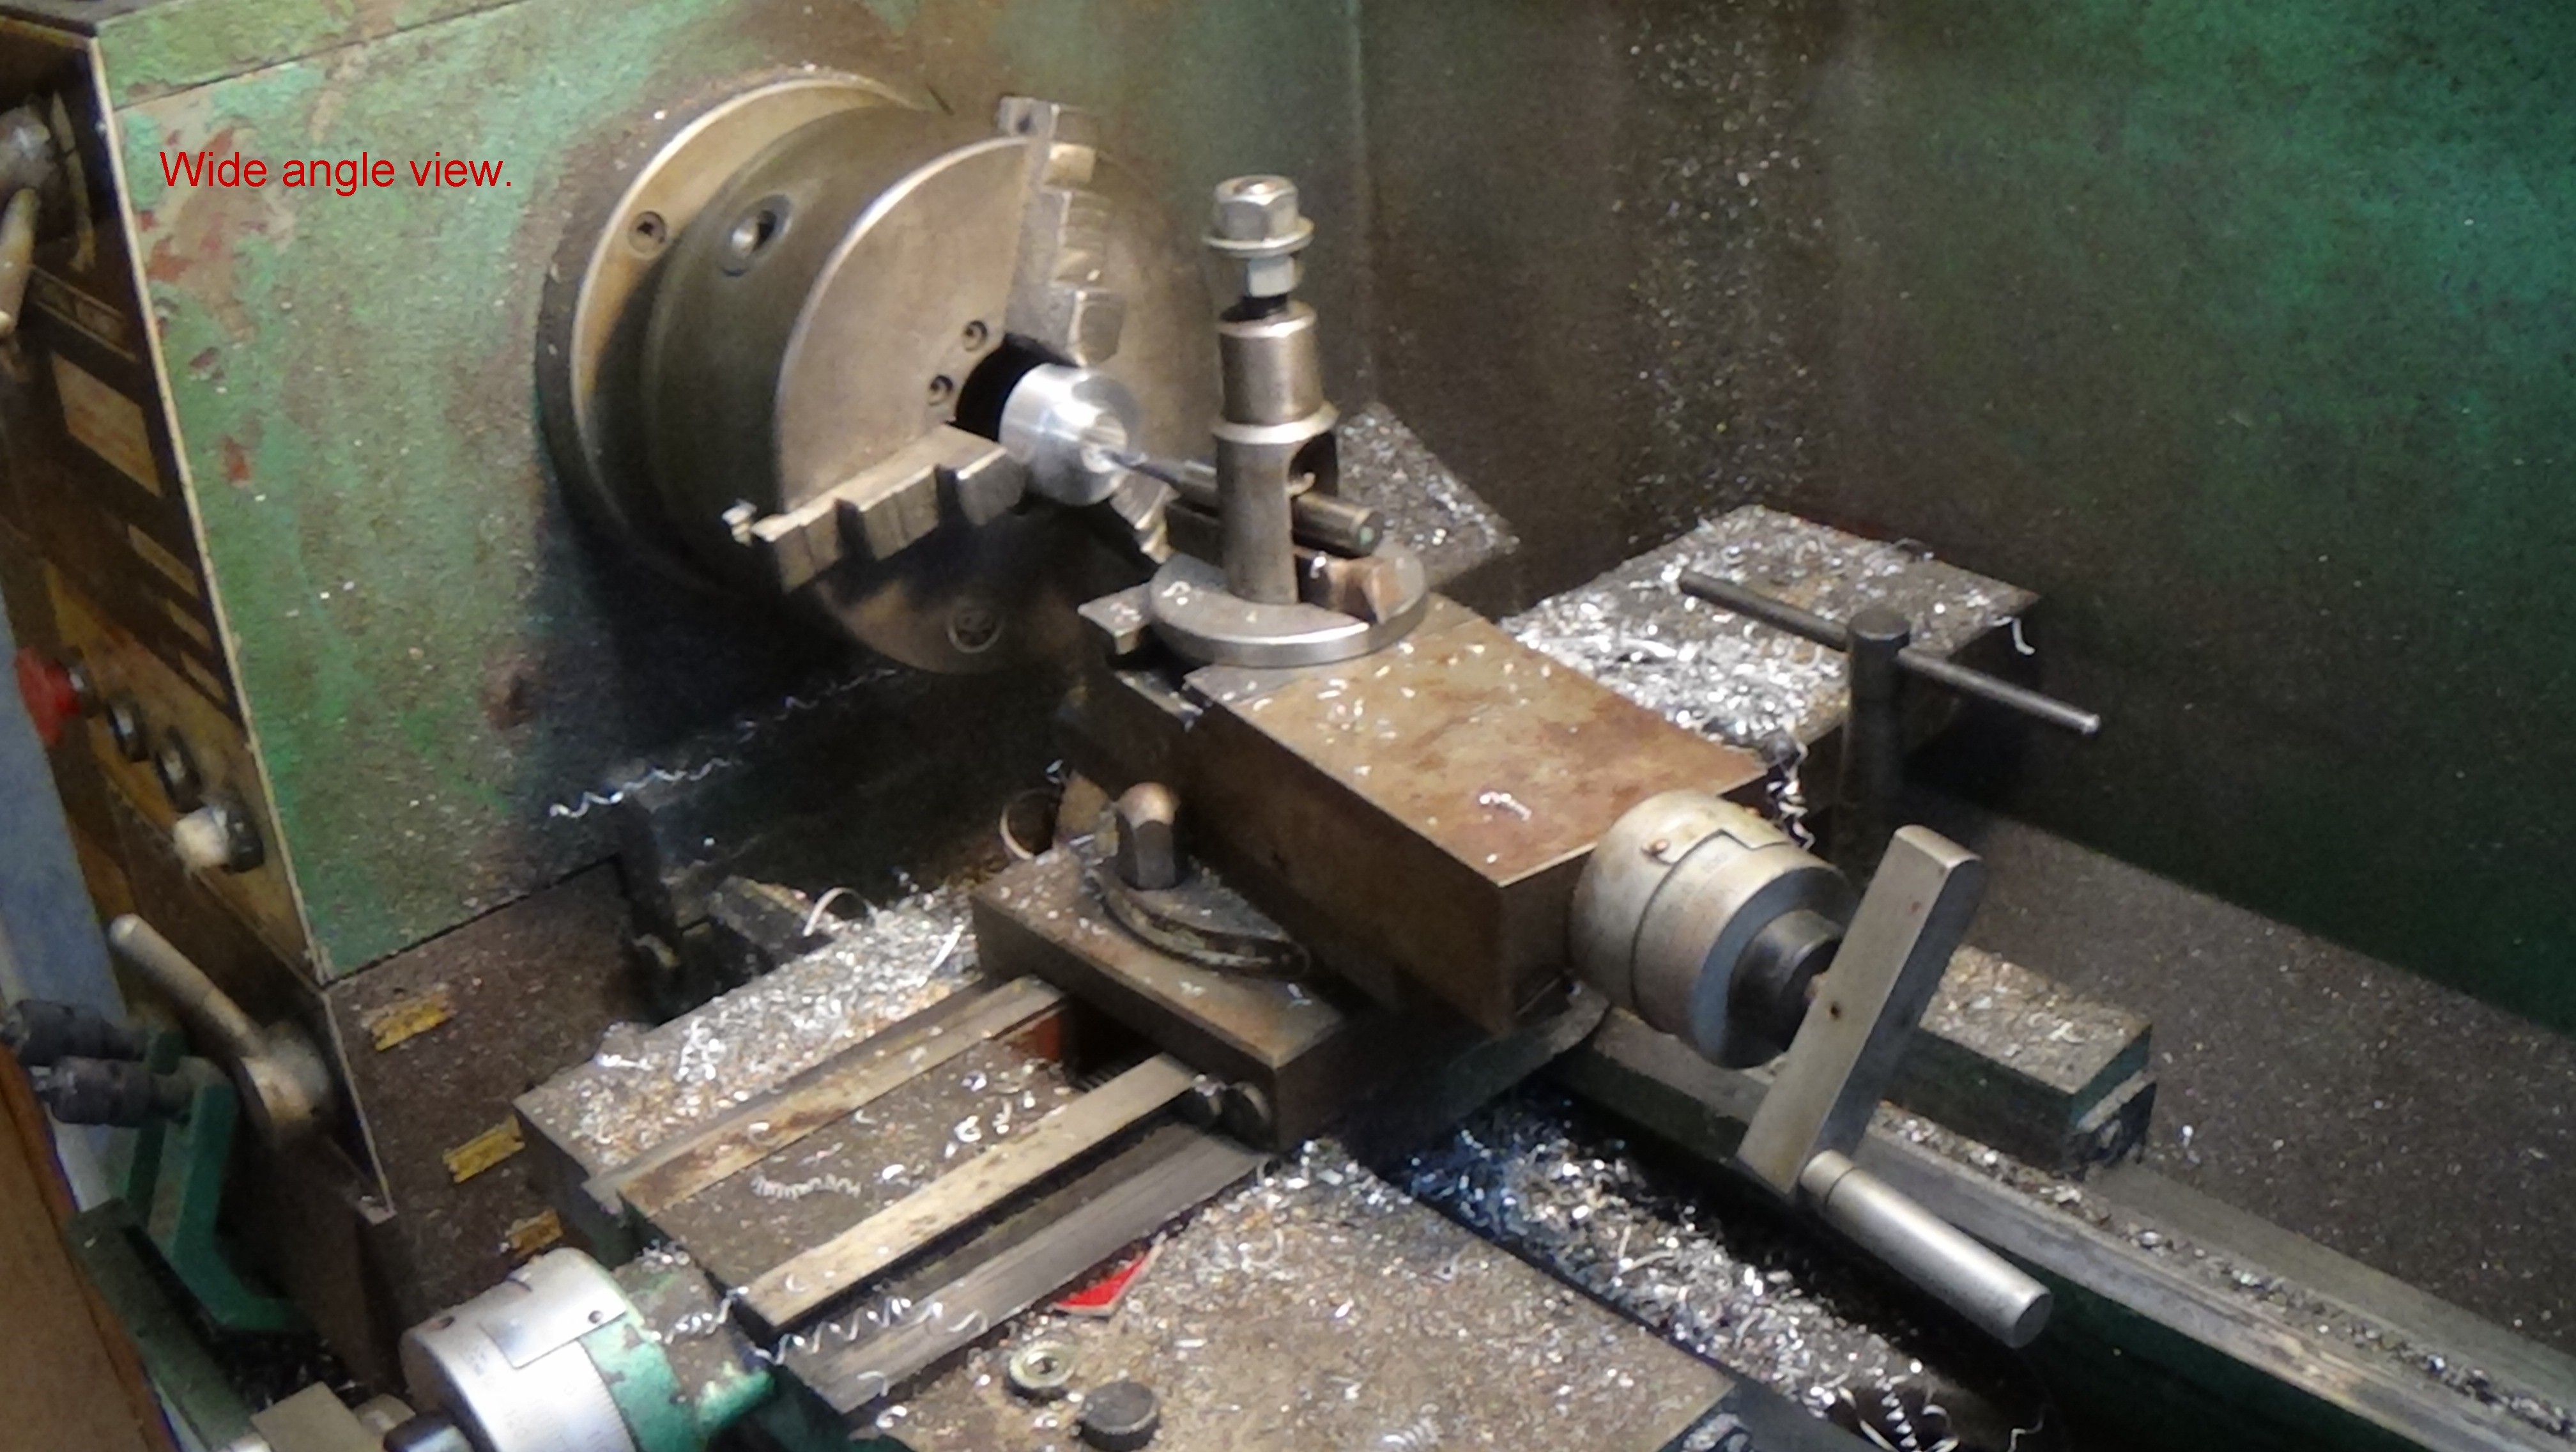
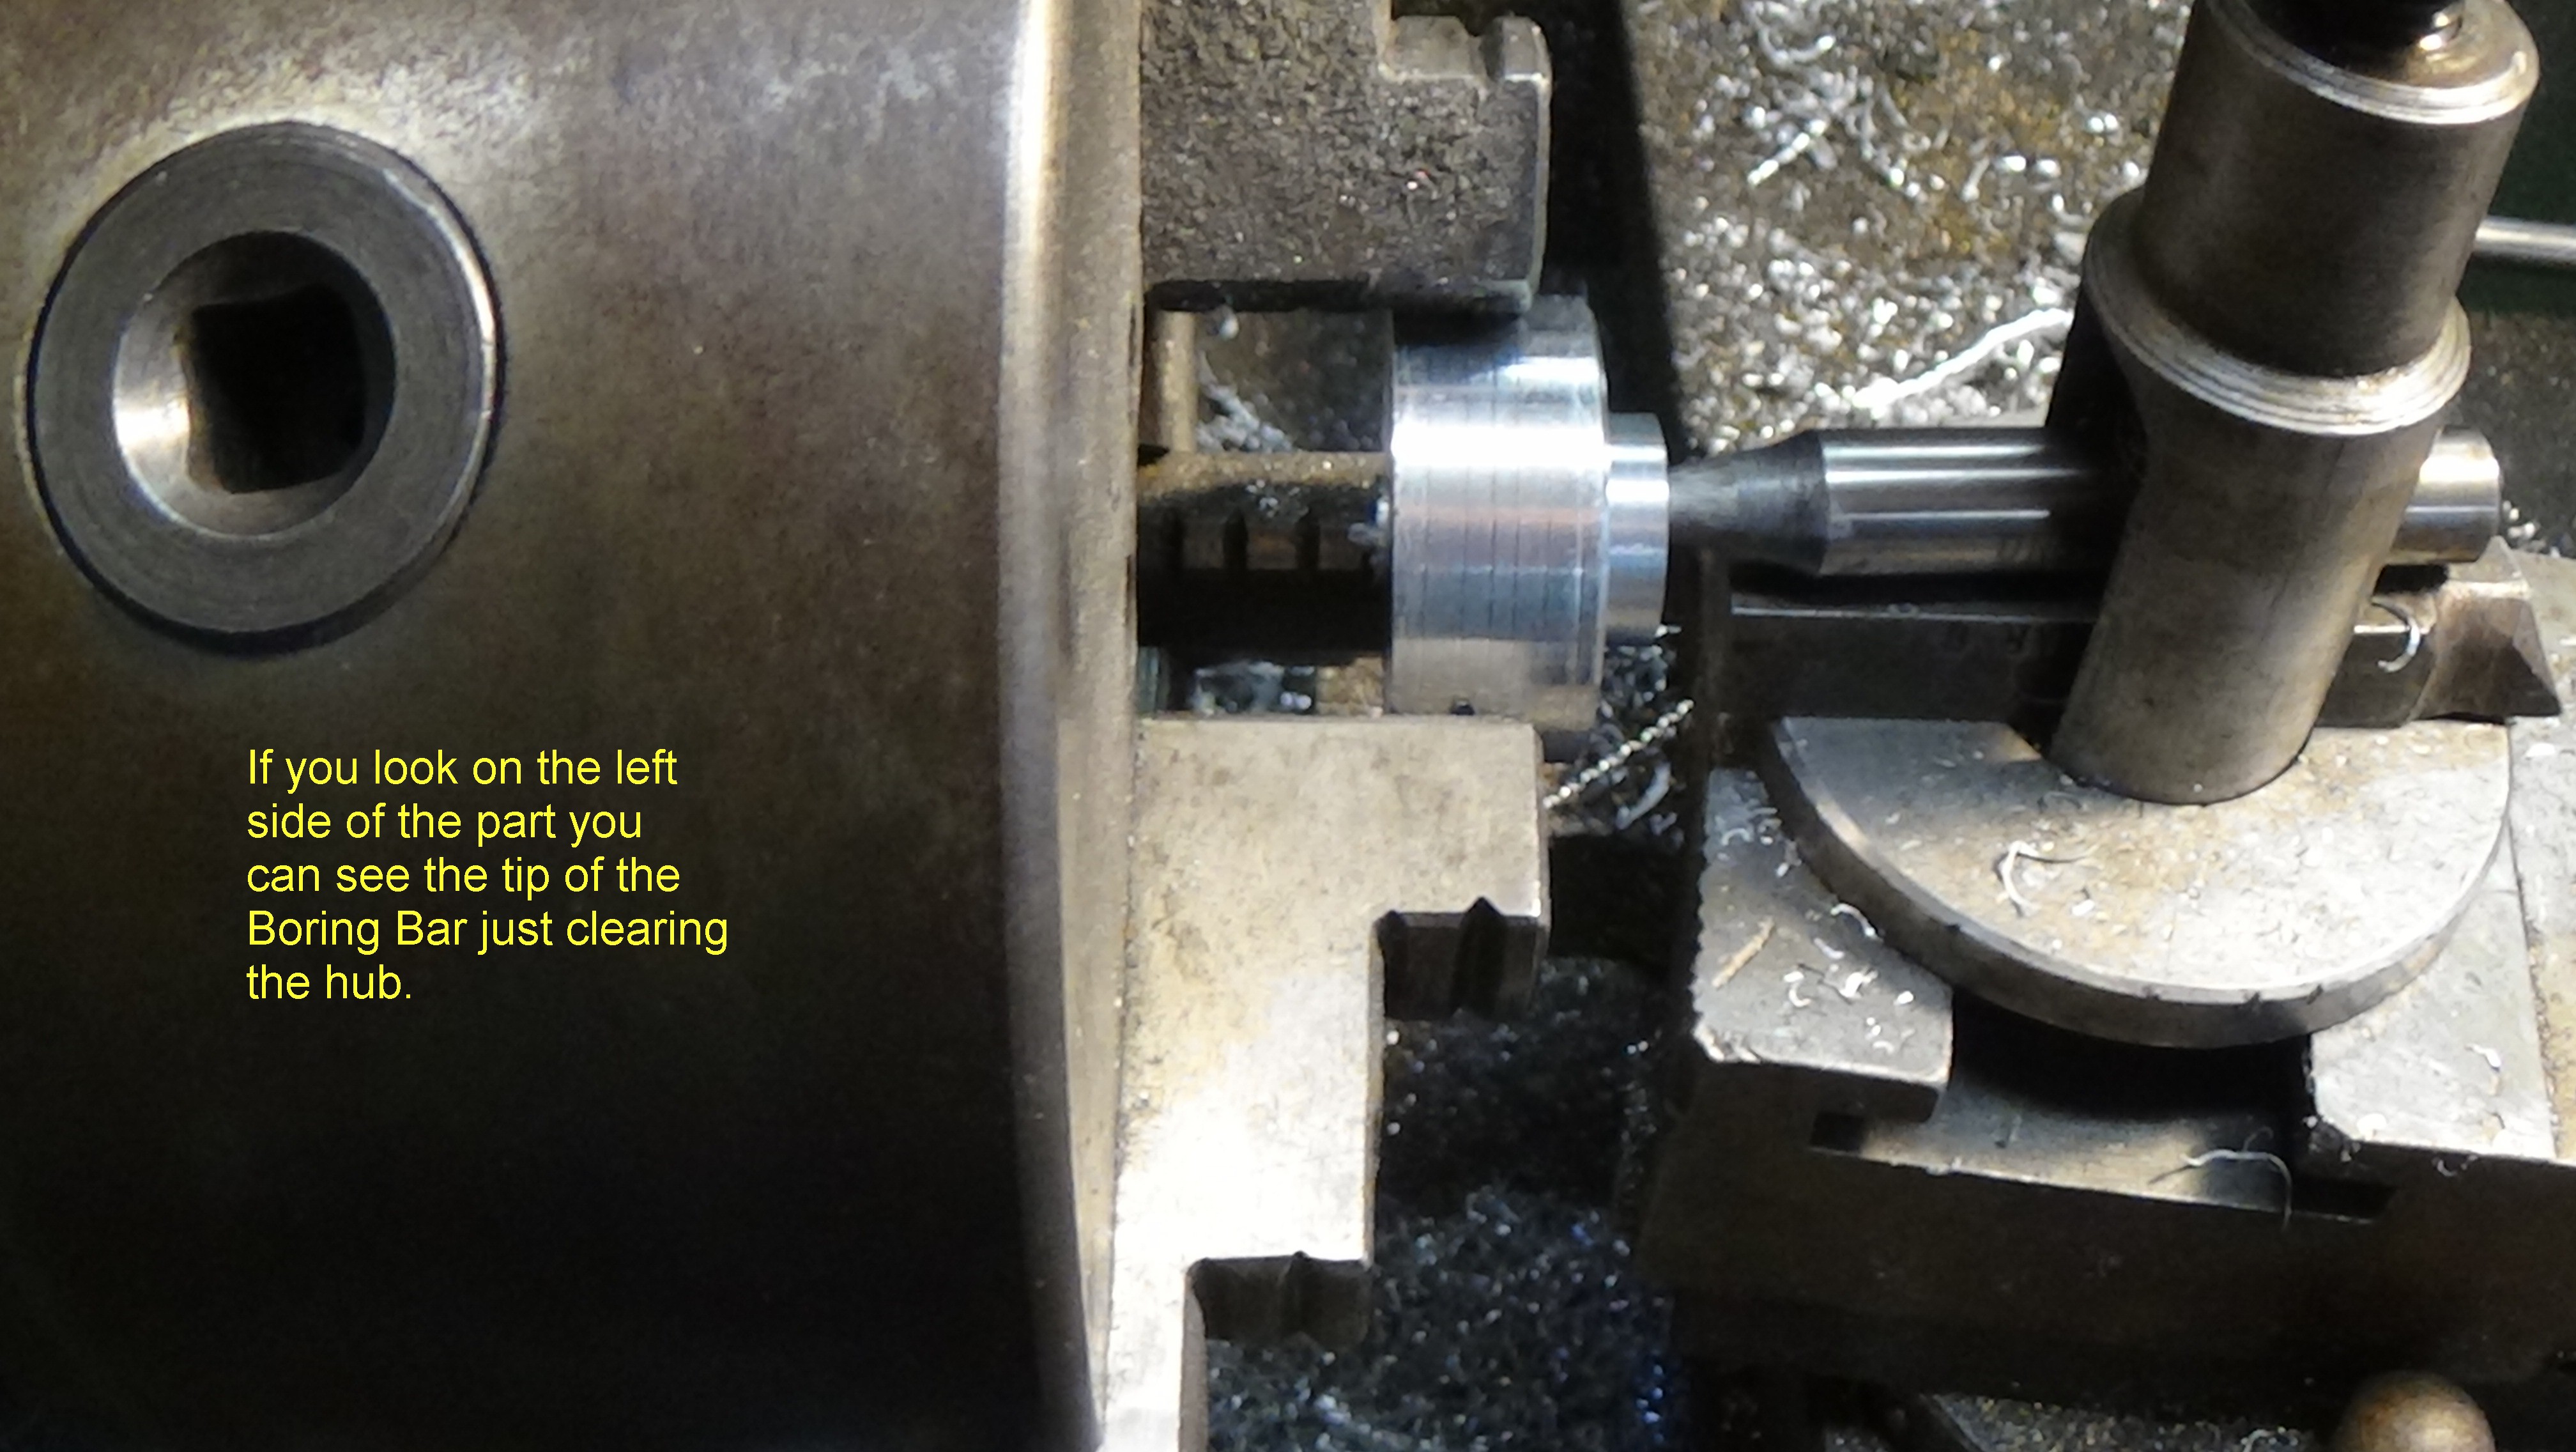
This next group of pictures are all about machining the Tapered bore hub that the trigger magnet is mounted to. For
the guys that have never done anything like this I suggest you get several pieces of 1 1/2" diameter X 7/8" long 6061
aluminum because your going to need them to get the angle set on your compound rest. It's about 10 degrees and
you just need to keep adjusting it until you get it set right.

the guys that have never done anything like this I suggest you get several pieces of 1 1/2" diameter X 7/8" long 6061
aluminum because your going to need them to get the angle set on your compound rest. It's about 10 degrees and
you just need to keep adjusting it until you get it set right.
02-14-2017, 03:28 AM
#17
Member
Thread Starter
Join Date: Feb 2014
Posts: 87
Likes: 0
Received 0 Likes
on
0 Posts
Hey guys. Having some really nice weather so we are still flying. I haven't forgot about this thread but have found other things to do. Going to Florida Wednesday and will resume this thread when I get back.
Larry
Larry
02-21-2017, 09:36 PM
#18

I jump in and follow. I have the same engine myself. Hoping someday (eventually) to get around to converting it as well as another engine.
Will have to spend more time studying what you have done, kind flew by me. But that is not your fault.
Ken
Will have to spend more time studying what you have done, kind flew by me. But that is not your fault.
Ken
03-16-2017, 09:18 PM
#19
Senior Member
My Feedback: (13)
Join Date: Jul 2005
Location: Salem,
OR
Posts: 1,686
Likes: 0
Received 0 Likes
on
0 Posts
I try to check in every now and then but since I bought a house almost 3 years ago my time has bee short... I have the area for a landing strip at the house but have to get the ground flat and the voles taken care of... Still have all of my spare engines and plan to get back into it in the future but too many projects in the way... I just gave a conversion engine to a coworker to get him excited about flying again to hopefully in turn get me going again 
I appreciate your efforts, you are definitely going a different route than most people do, and definitely beyond my current machinery, some day I'll have a bigger lathe and a mill...
I appreciate your efforts, you are definitely going a different route than most people do, and definitely beyond my current machinery, some day I'll have a bigger lathe and a mill...
