


Monokote over Monokote
 04-11-2012, 02:51 PM
#1

Thread Starter
Join Date: May 2010
Location: WatsonACT, AUSTRALIA
Posts: 226
Likes: 0
Received 0 Likes
on
0 Posts
Hello
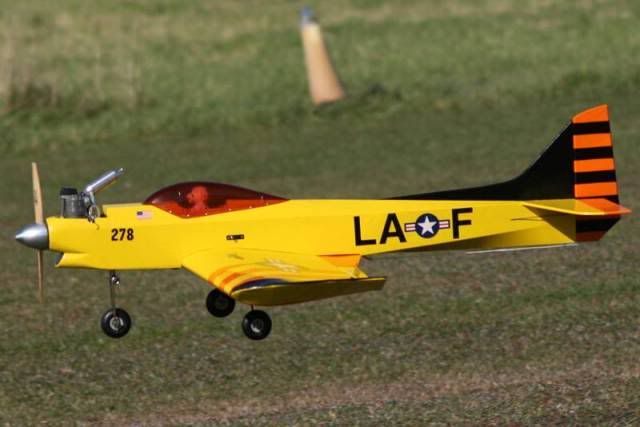
Am wanting to put 3' bands at an angle, over my Phaeton 90 wings using Monokote. The wings are allready covered in Monokote. The wings are of rib construction. Have tried the windex method with poor results as the space between the ribs are hollow and have no support (Bubbles and creases occour!) Have also tried very low heat with the iron (200) and still with poor results.
Is there another method that has been used sucsessfully using Monokote over Monokote???
Have placed a picture of the plane in question!
Any feedback would be greatly appreciated.
dutchy50
 04-11-2012, 06:39 PM
#2

My Feedback: (10)
That's a good-looking plane.
I would try the windex method method again, but tweak my technique a bit. Use lots of windex, and squeegee from the lowest part of the covering between the ribs, working towards the rib from the center. You mit want to start at one end, and work toward the other. Treat each section as a single project, so to speak, and don't be too agressive with the squeegee.
Hope this helps.
04-11-2012, 08:05 PM
#3
Senior Member

Thinkin' that it's the ammonia in the Windex that activates the Monokote adhesive. If you squeegee out most of the liquid - there's nothing left to activate the adhesive.
04-12-2012, 04:28 AM
#4


I am not sure what activates the sticky stuff, but I agree. Really make the spot where the trim is going to lay extremly wet with Windex and then start from the lowest point and squezze out all the windex coming up to the high point. Hope this helps and good luck, Dave
04-12-2012, 11:31 AM
#6
My Feedback: (1)
Join Date: Apr 2009
Location: washington twp.,
MI
Posts: 890
Likes: 0
Received 0 Likes
on
0 Posts
Acetone will work but it is much more aggressive than ammonia. Acetone can soften some of the coloring and it will squeeze out at the edges. I use alcohol with good results.
But the best method I have found is to pin hole the base mono where the trim panel is to go. It is time consuming but works very well because it allows the air to be expelled between the layers of mono. Also once you are done and later need to do touch ups you can use a covering iron without producing bubbles.
Lay your trim on the base mono and position it where you want it. Mark the area with some dots from a sharpie pen close to the edge. Then with a "sewing needle" start punching holes. It can take awhile but if you want the trim to go down without problems, it's worth the time. By the way some will say to use a "woodpecker" tool which punches holes as you roll it across the surface. I don't like doing the Woodpecker because it punches to big a hole and sometimes shows thru the covering. I punch holes about every 1/8 th. inch. Then use the alcohol or Windex method.
It's allot of work but well worth the results. My first covering jobs without the holes turned out very well for awhile, but as soon as the sun hit the surface the bubbles started showing up. If this happens and you try and correct it with heat it just creates more bubbles. If you have used the hole punch method you can heat the areas with a covering iron and you will not get bubbles.
Tom
04-12-2012, 12:36 PM
#7
My Feedback: (3)
I have tried the Windex thing but have never had good results. I used the right Windex, applied it correctly, left it a couple of days but in the end, I could still peel up some of the edges with a finger nail. Some areas were well stuck but others weren't. So I stick with the tried and true iron it down method.
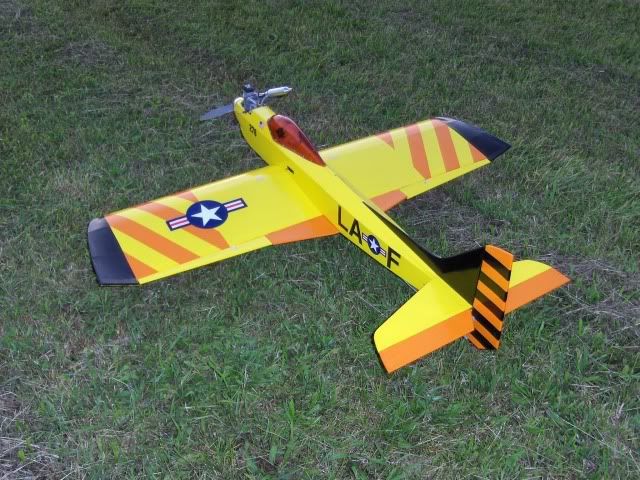
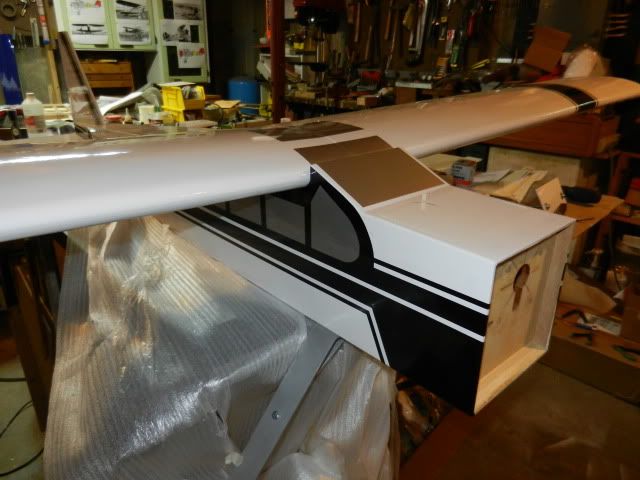
Here's a picture of my latest project. It is all MonoKote over MonoKote, all done with an iron. This plane also has unsheeted areas with rib construction so the covering does pull down a bit between the ribs but you can still get good results. If you look very closely at the surface, there are very small bubbles but if you stand next to the plane you can't see them, I consider that good enough for a sport plane. There are several important points to doing it this way.
I use a Sharpie and mark exactly where the trim will go. Lay the trim in place and smooth it out with your thumb. You want to get it stuck down well with its natural plastic to plastic adhesion. Work all the bubbles out to the edges now, before you ever touch it with an iron. You may have to lift it up and start over to get things right but keep trying and get it flat before you go on. If there are any bubbles now, there will be bubbles when you're finished.
When the covering is smooth and bubble free, heat your iron but set it as low as you can use and still get the MonoKote to stick. Low temperature is very important to reducing bubbles. Start ironing in the center of the trim area and work out to the edges. If you start from one end and work to the other it will be more prone to lift an edge and twist, getting a wrinkle. If you see a bubble forming, stop and work it out with your thumb again. Slow and steady is the answer.
When you get the piece down, you will still have trapped a few bubbles. Go back with a brand new X-acto blade and puncture only the top covering right on one edge of the bubble. Now iron the bubble from the other side, working all the air out of the puncture.
When you're finished, a quick wipe with acetone will remove all the Sharpie guide marks. Just don't use the sharpie where it will be under yellow or white covering or it will show through.
One problem is that if the covering sags too deeply between the ribs and you are trying to go over too large an area you will never be able to get it to lay down smooth in the first place. The thing to do at this point is to do the trim in smaller, overlapping pieces that will lay flat.
With practice and patience the results you can get with this method are really surprising.
Dave
The following users liked this post:
Cycotravlr (04-30-2020)
04-12-2012, 03:18 PM
#8
Instead of using a sewing needle to punch holes in your covering, you can use the Woodpecker tool. One of the most useless tools ever invented, but it does work at poking holes in covering to put trim pieces on top. As mentioned, mark where the trim piece is going and then run the woodpecker all over the area. Good Luck, once again, Dave
04-12-2012, 10:28 PM
#9
My Feedback: (8)
Join Date: May 2005
Location: san diego,
CA
Posts: 174
Likes: 0
Received 0 Likes
on
0 Posts
I have tried every technique as well and still come up with small airbubbles. The best method I have found is poking holes in the base covering. ARF makers cover with Monokote over Monokote and they don't puncture holes and I never see airbubbles, it would be nice to know what techniques they are using.
04-13-2012, 06:40 AM
#10

Clean the base color Monokote really well with alcohol or Windex, then mist the covering with the original formual amonia based Windex. Lay your trim piece on and gently squeege the Windex out from under the trim color, there should be no bubbles or wrinkles. Come back to it an hour later and squeege again. I use a scrap piece of soft balsa and a microfiber cloth as a squeege. Check it again in an hour or two and squeege agian if needed. If you can't get the wrinkles out, peel it up and mist the covering again with Windex. If no more bubbles or wrinkles appear, leave it alone for 24 hours or longer before touching it. Then go over the trim piece with a cloth covered iron on LOW. Then I wipe down the covering with acetone - that seals the edges.
04-13-2012, 07:08 AM
#11

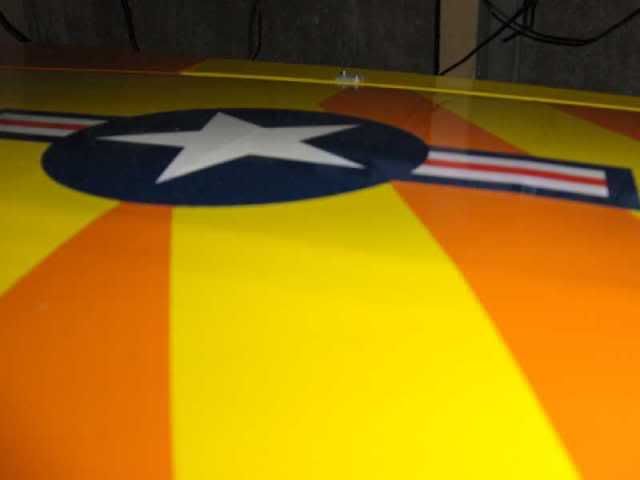
Great job on the stars and stripes!!
Just to touch on a few thing mentioned. Poking the holes does help but is not 100%. Plus on some colors your holes will show through. On the windex method, it will work with some practice but still needs low heat around the edges to stick it down. You can also run a little trim solvent around the edges, but the heat is easier to control.
Finally, I already miss Mike. This thread is in his wheel house for sure.[ ]
]
david
Just to touch on a few thing mentioned. Poking the holes does help but is not 100%. Plus on some colors your holes will show through. On the windex method, it will work with some practice but still needs low heat around the edges to stick it down. You can also run a little trim solvent around the edges, but the heat is easier to control.
Finally, I already miss Mike. This thread is in his wheel house for sure.[
]david
The following users liked this post:
Cycotravlr (04-30-2020)
04-13-2012, 10:21 AM
#14
My Feedback: (8)
Join Date: May 2005
Location: san diego,
CA
Posts: 174
Likes: 0
Received 0 Likes
on
0 Posts
Dang it, then how do the ARF makers do it? I have pulled up Monokote on an ARF and the top Monokote is applied right over the base Monokote on complex curved surfaces. We must get inside one of those ARF factories.
04-13-2012, 01:15 PM
#16
My Feedback: (8)
Join Date: May 2005
Location: san diego,
CA
Posts: 174
Likes: 0
Received 0 Likes
on
0 Posts
I agree some are done that way, But to be able to apply them on the plane exactly were you want them after stretching around compound curves would be difficult.
04-13-2012, 06:21 PM
#17
I'll bet they are preformed sheets made just for the arf, and are laid in place and then ironed on. They may also have a form to preshrink it. Considering how many hours it takes to cover a plane, they have to have some way to speed it up.
05-31-2012, 06:57 PM
#18
Senior Member
My Feedback: (1)
Join Date: Feb 2011
Location: Burlington,
WA
Posts: 114
Likes: 0
Received 0 Likes
on
0 Posts
I have used the monokote trim solvent to put monokote over monokote. This works very well. You have to be very careful to get out the air bubbles.
It works as well over open frame or balsa sheeting.
It works as well over open frame or balsa sheeting.
 [:@][&:]

 06-02-2012, 06:29 PM
#23
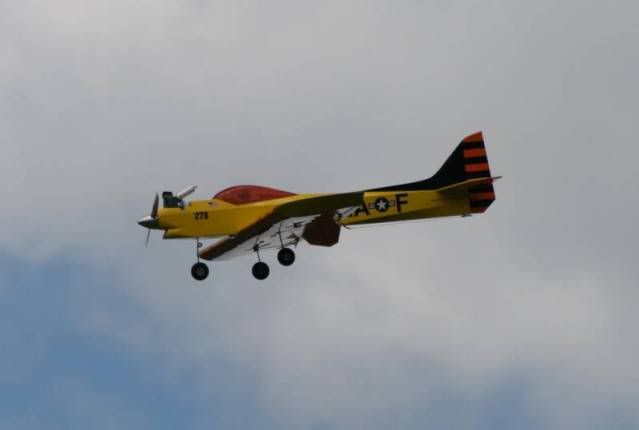
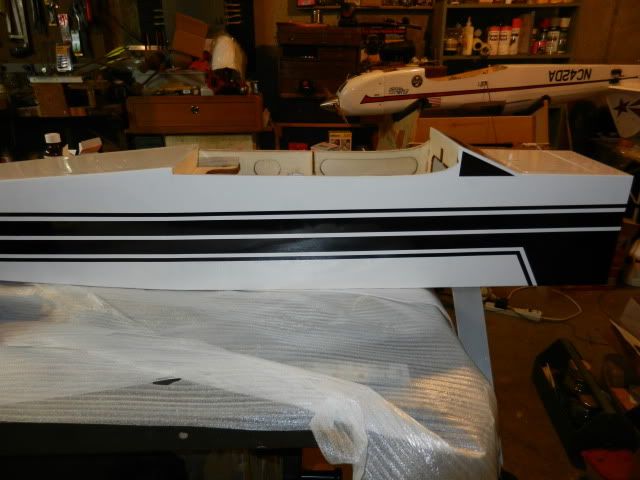
That's a Top Flight Contender 60 with a bit more rudder than the plans called for. First plane I fly off grass every year and my "fall back" model for many years. It's a super rugged design. It has an apron flap that is kind of fun to play with. Sort of a "retracts trainer" and a very good low-wing warbird trainer. The design dates to 1964.
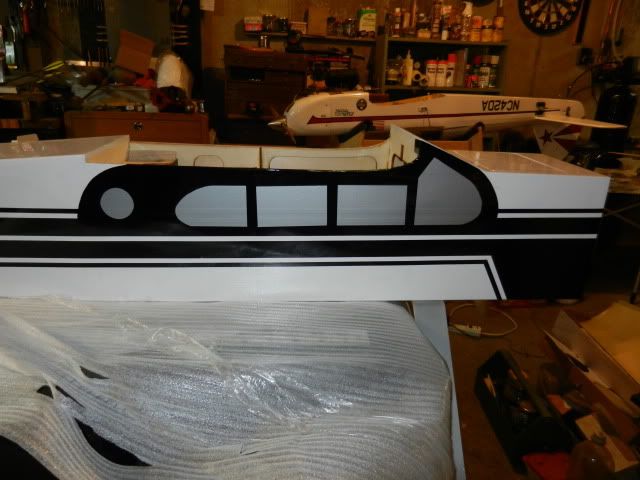
I just did some Monokote with Trim Solvent(may not have been over Monokote) to add windows and features to a Mentor-G ARF. One comment to add about the solvent method: once it's down it's down. Plan ahead and, better still, have a sheet of paper or save a piece of the plastic backingto allow you to position the top piece and graduallyslide out as the two surfaces make contact. I didn't and had a mess (correctable with heat and a lot of tugging after the solvent dried off in an hour).
Before:
After:
06-04-2012, 06:25 PM
#24
My Feedback: (22)

Join Date: Oct 2002
Location: Houston, TX
Posts: 2,972
Likes: 0
Received 0 Likes
on
0 Posts
I tape them off, scuff them up, then shoot them with Red Rustoleum, (which is one of the few fuel proof colors). I started 8 years ago when I built my Chipmunk, I didn't want all of those little red pieces coming up. 8 years old and still looks new. The Cap10 is brand new, hasn't yet flown.