


Meister Scale Zero - step by step
 09-05-2012, 03:24 PM
#26

Thread Starter
He, he, who know, maybe it will be before Christmas, but more realistic is in spring next year, May maybe...
As you all know, I'm working on my projects, every day, so results are apparent...
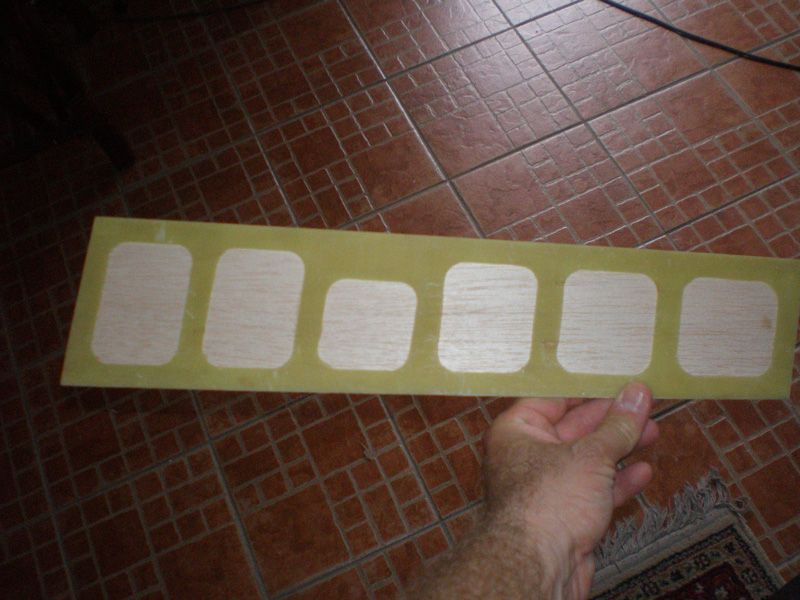
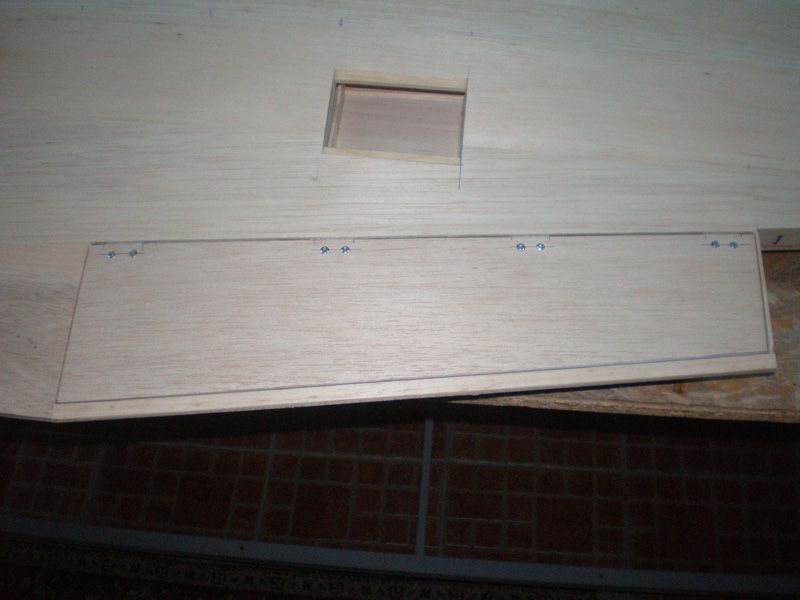
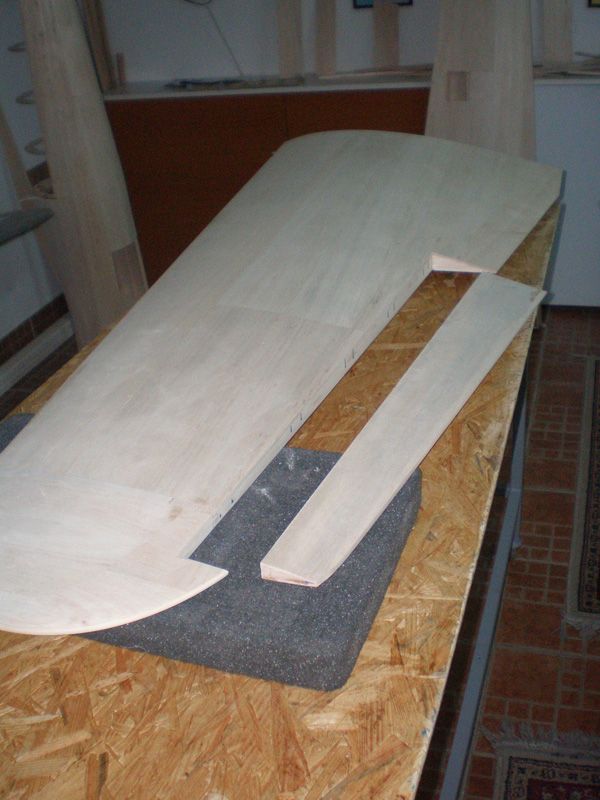
Two days ago I draw two parts for wing, first was flaps basis, made from 1,5 mm thin G 10...
I send this drawing to my friends firm and wait for parts...
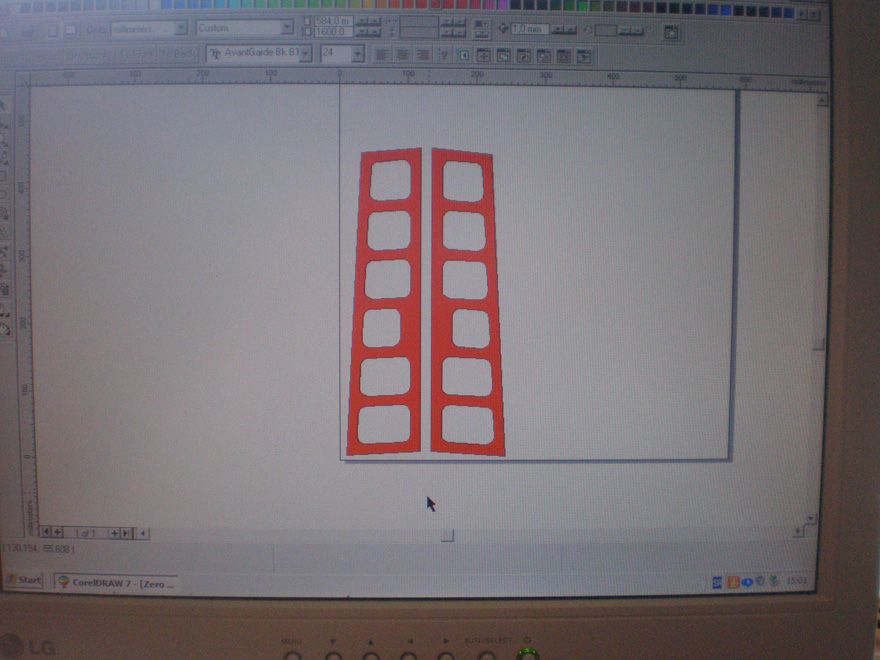
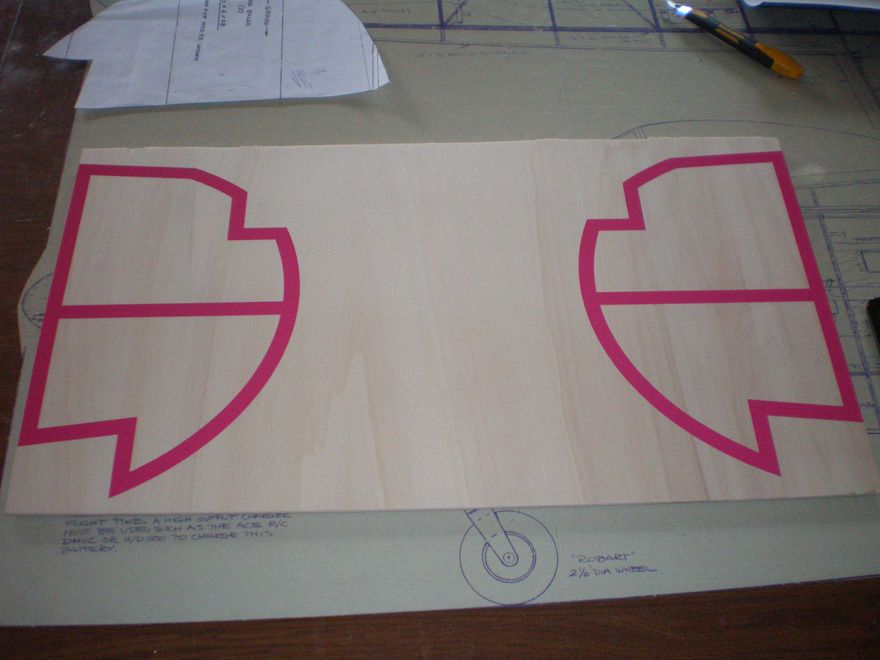
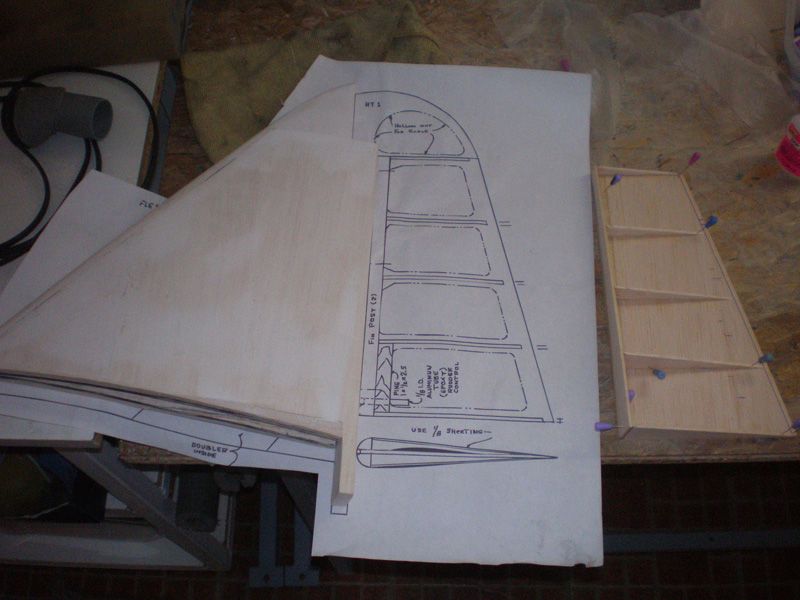
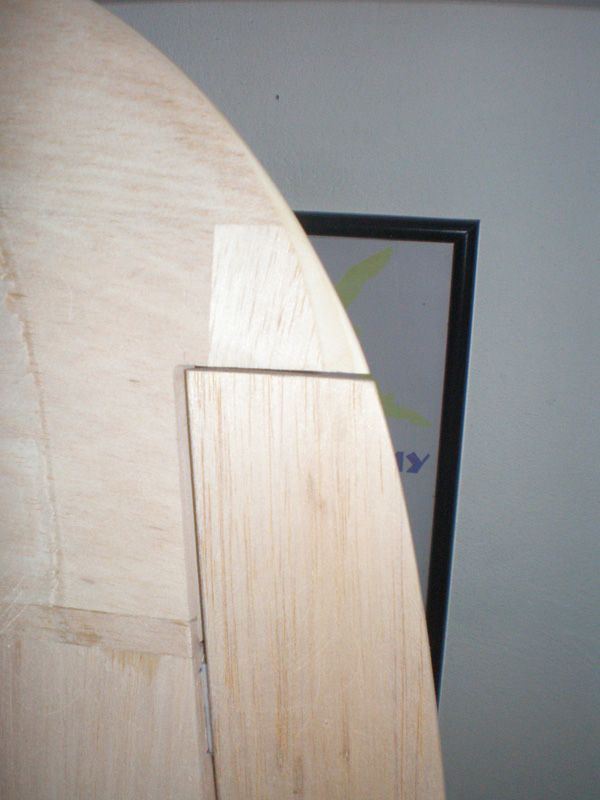
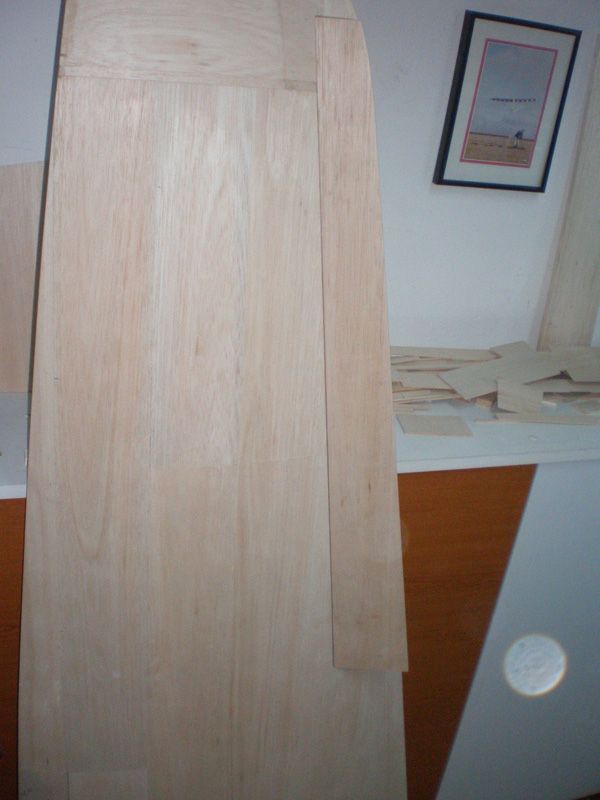
Second was template from ply, for wing tip. I scanned wing tip from the plan, and made template on my vinyl cutter, for each wing side...
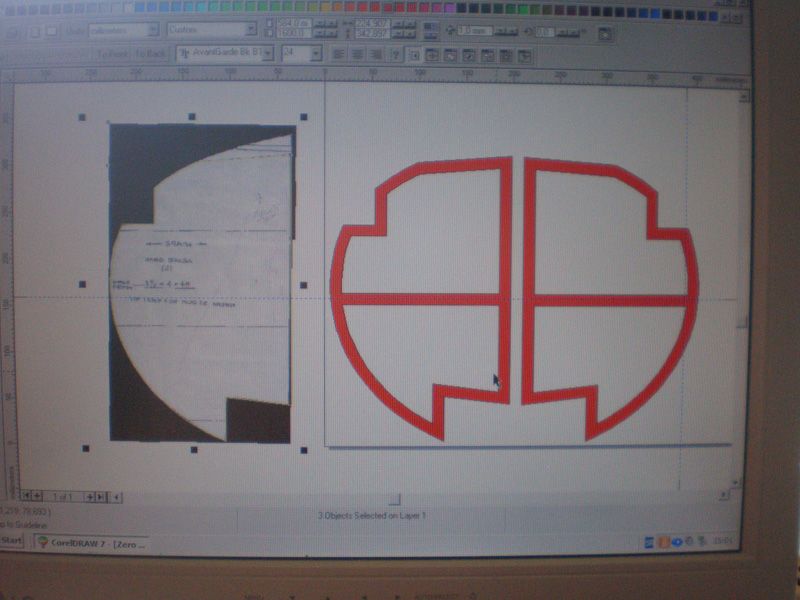
Than I used MNC ( Mirce Numeric Control ) machine and cut both parts...

As you can see, I made all parts very precise, no mater will not see later.
Yesterday I got G 10 parts for flaps...
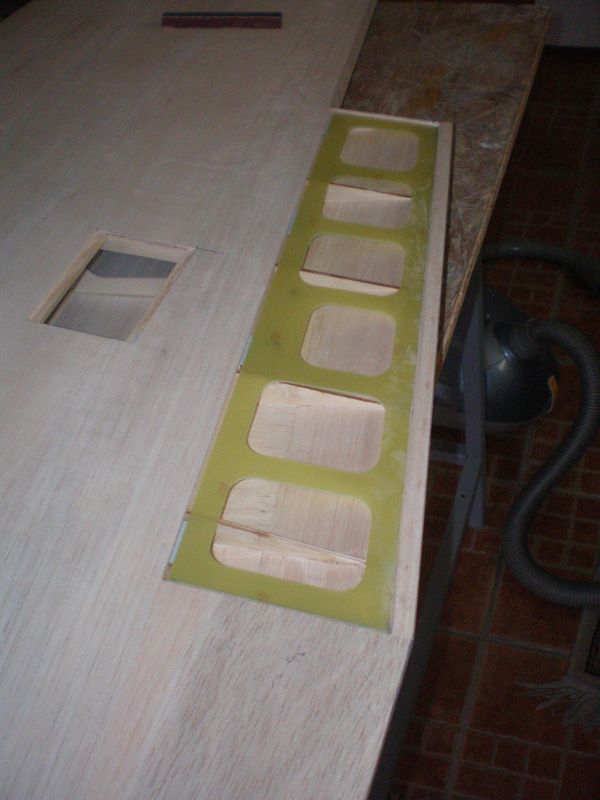
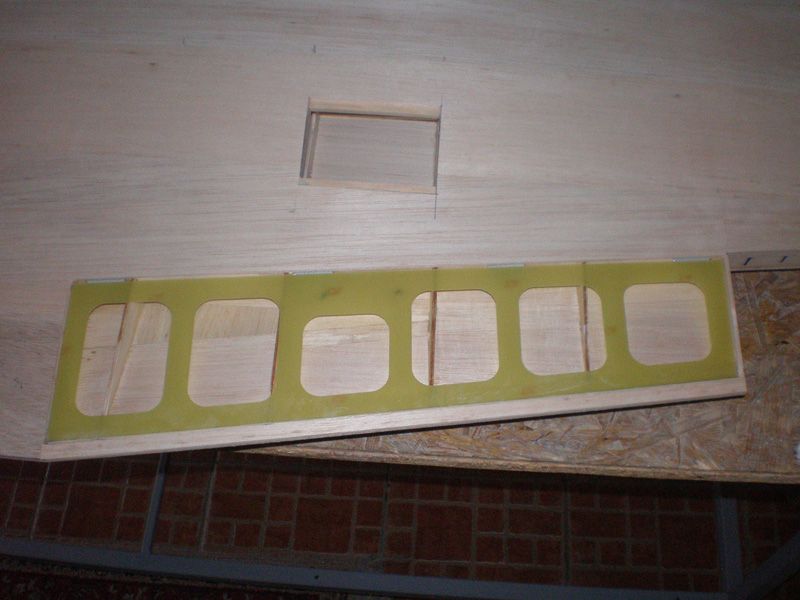
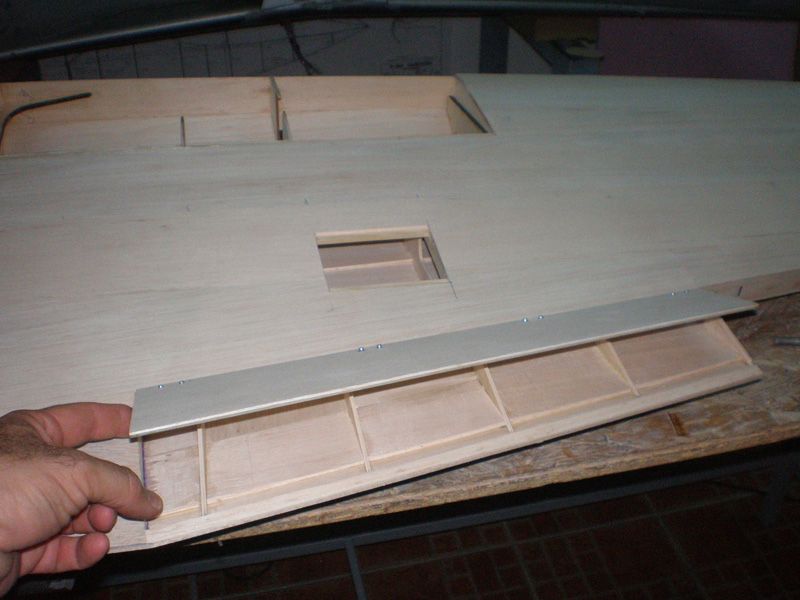
They fit very well in the wing. I glued hard 1,5 mm thin balsa plate, and get very strong and straight flap...
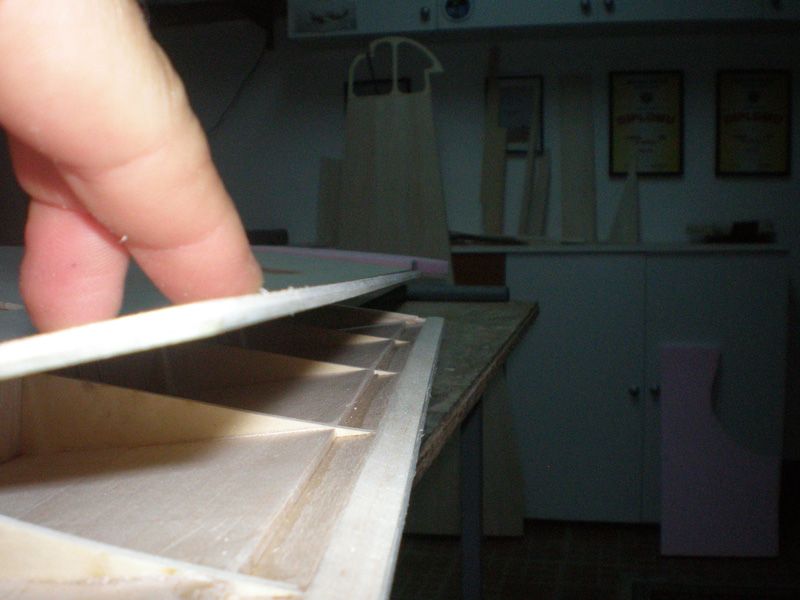
Indeed, that is more air brake than flap. I was reading on net, that flaps don't need to be lowered to much on landing, so I think angle like this will be more than enough...

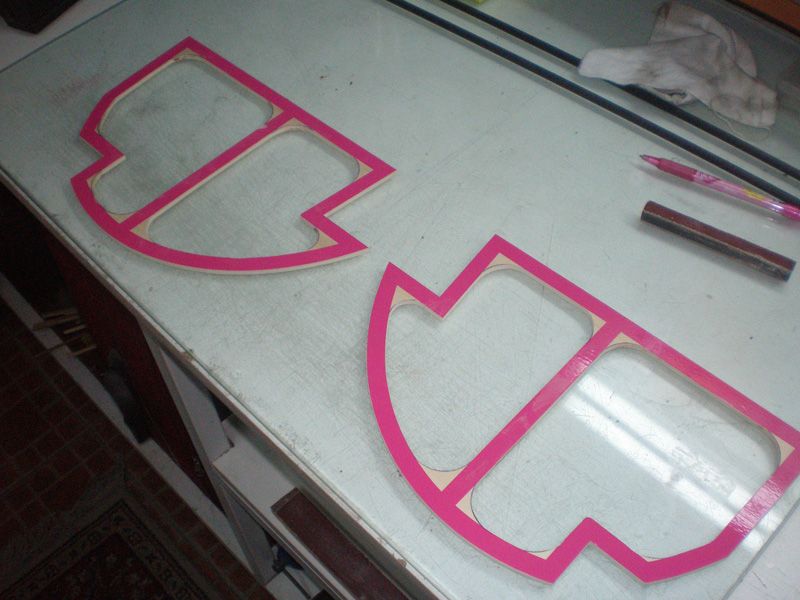
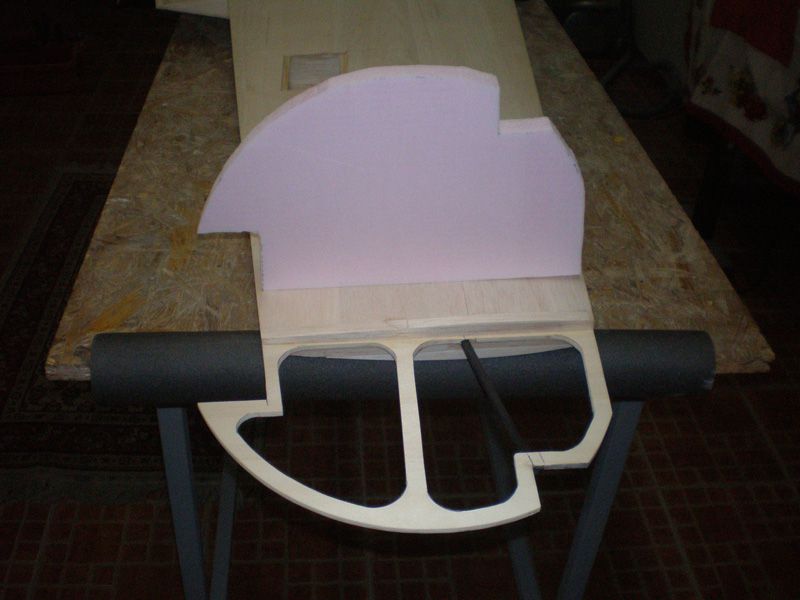
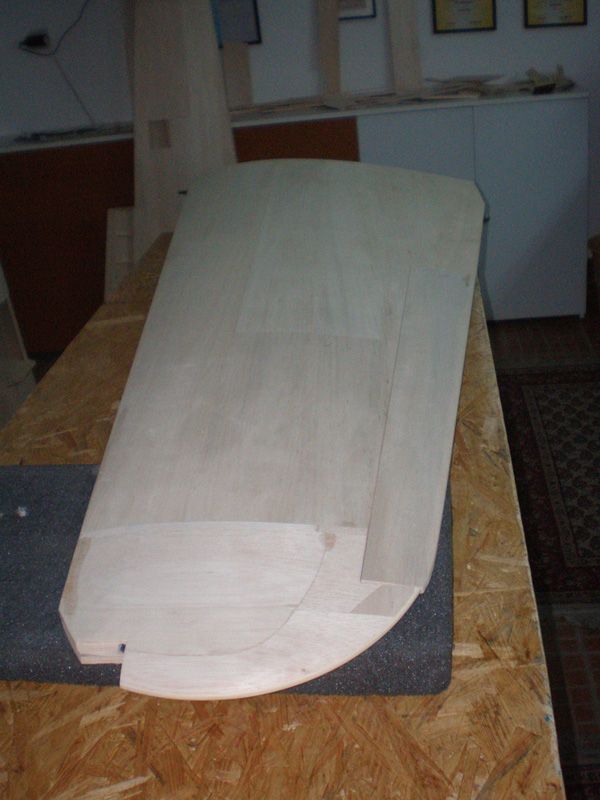
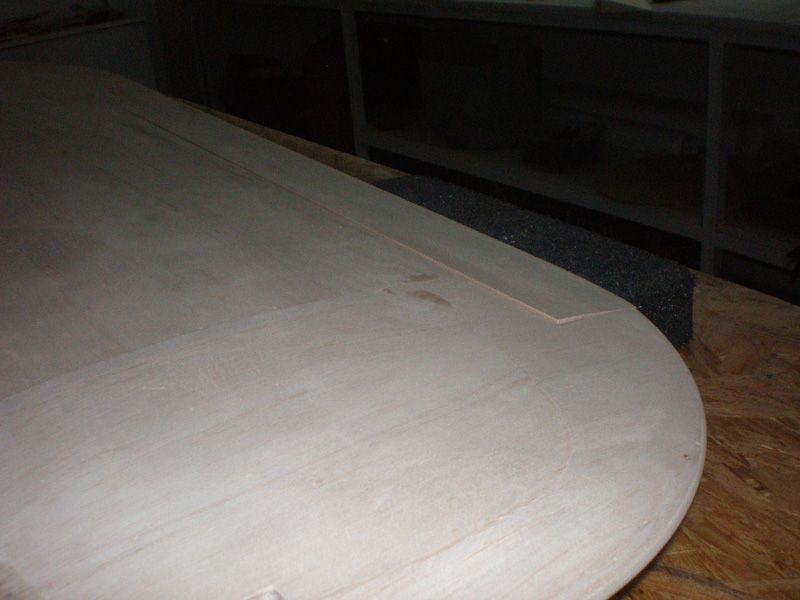
Back to the wing tip, for my ply template I made gutter for fixing. I add carbon tube for wing tip lights wires...
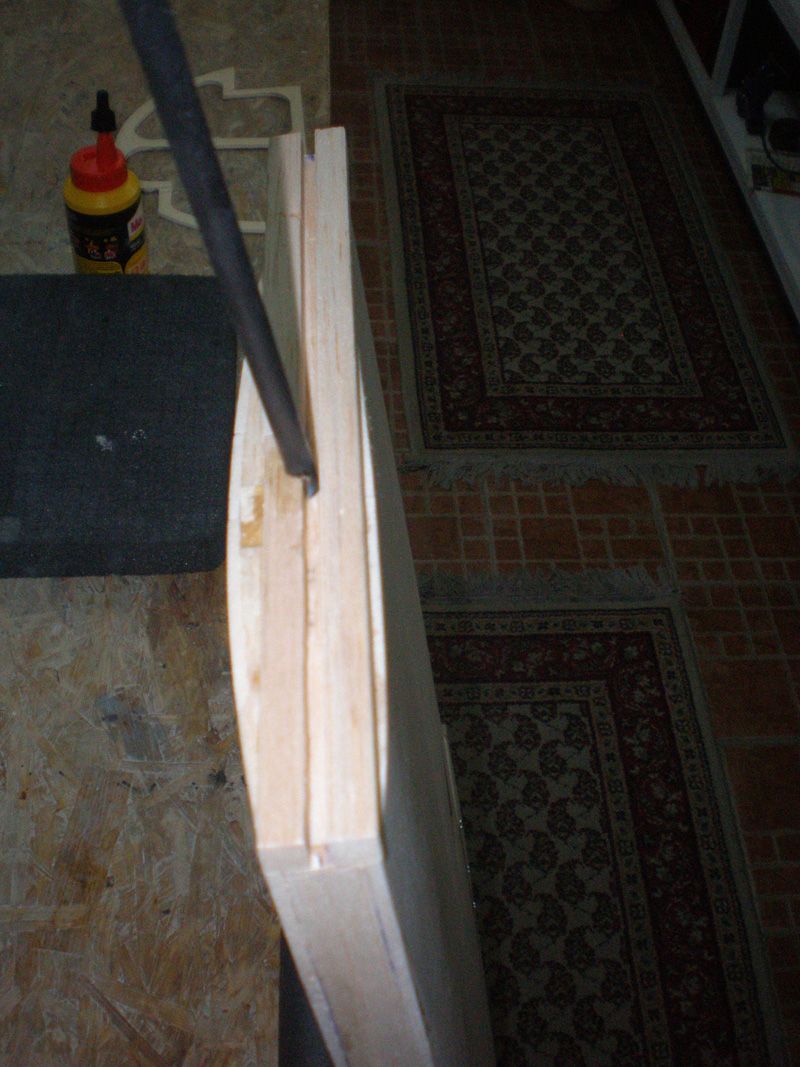
Than I glued ply...
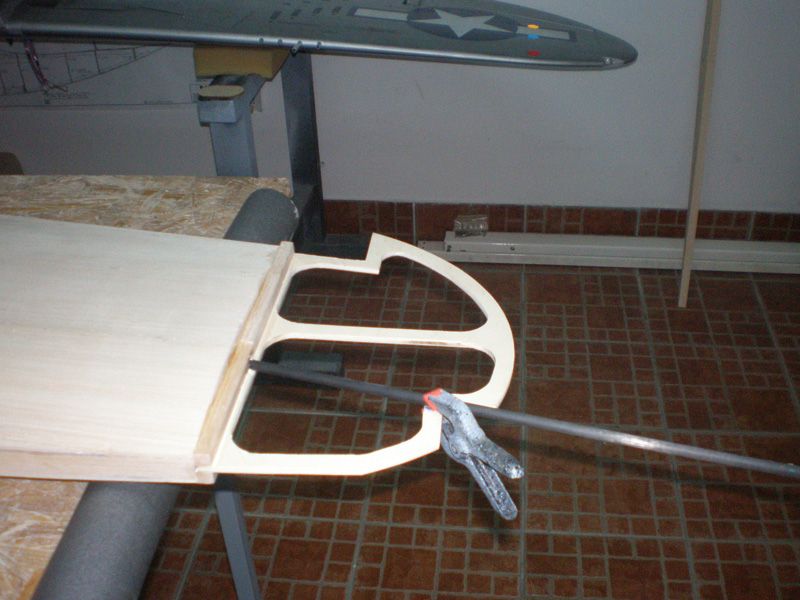
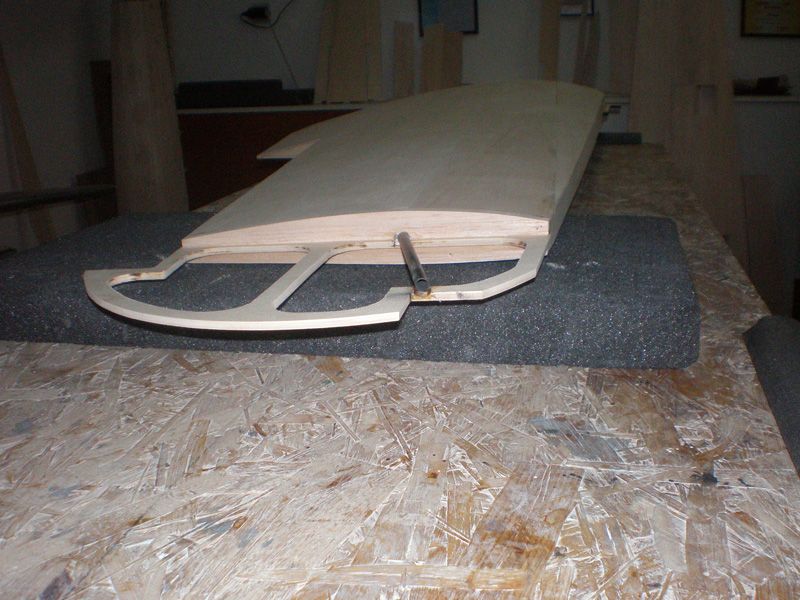
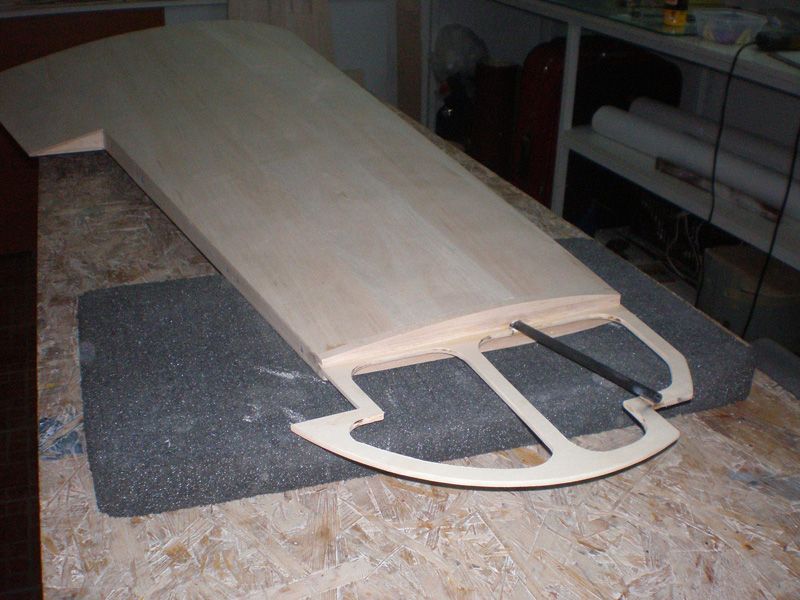
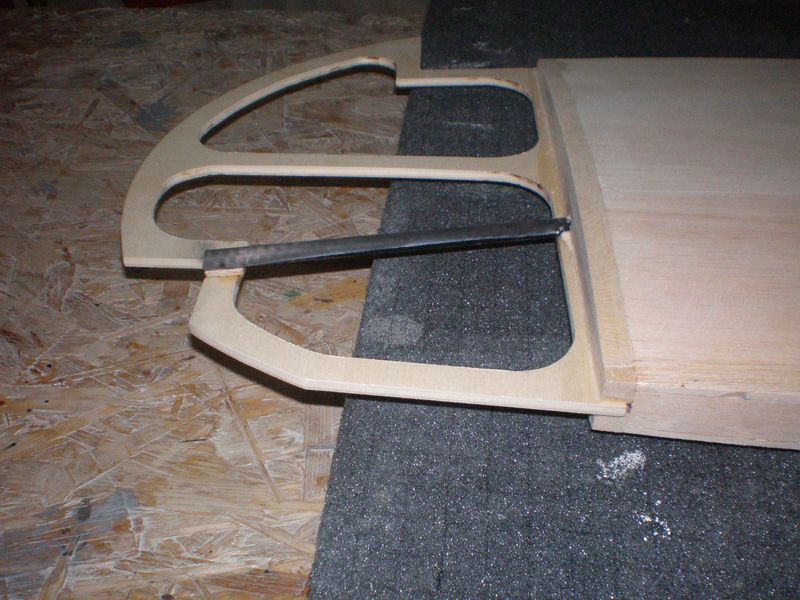
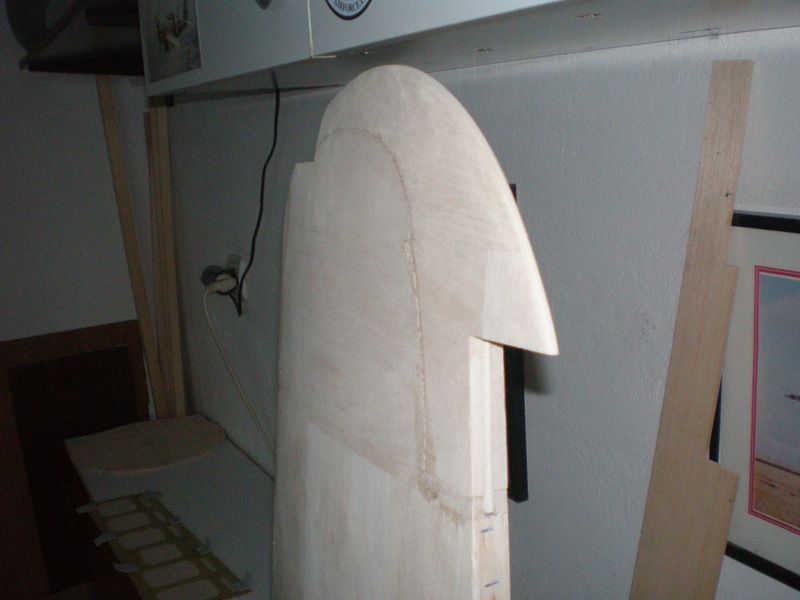
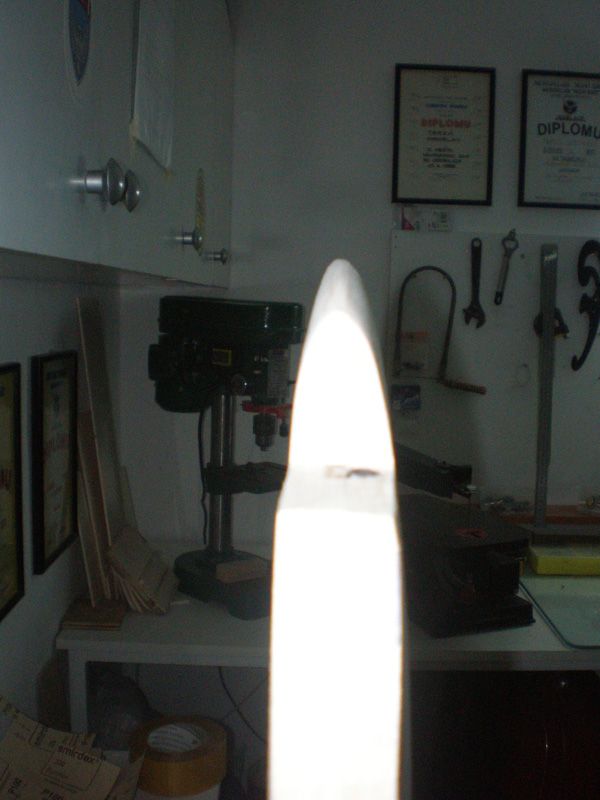
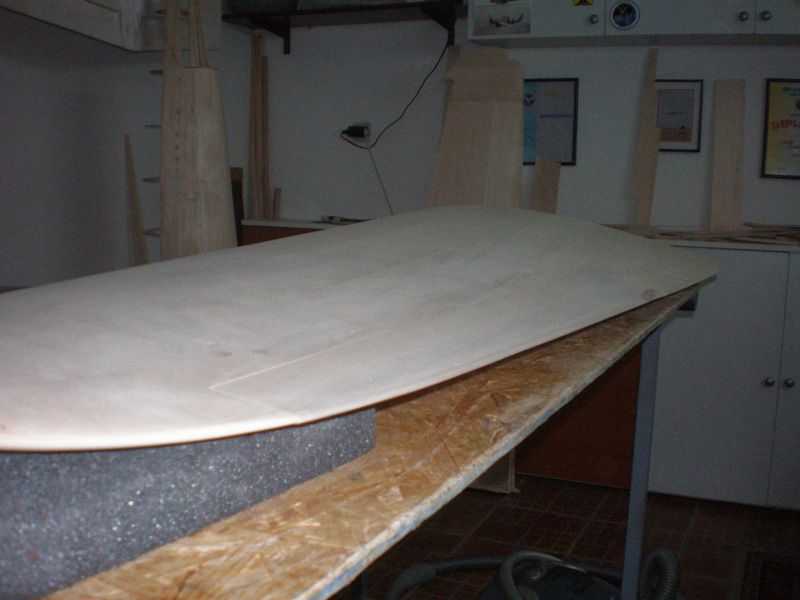
I want to made wing tip from hard foam, and cut one piece for probe...
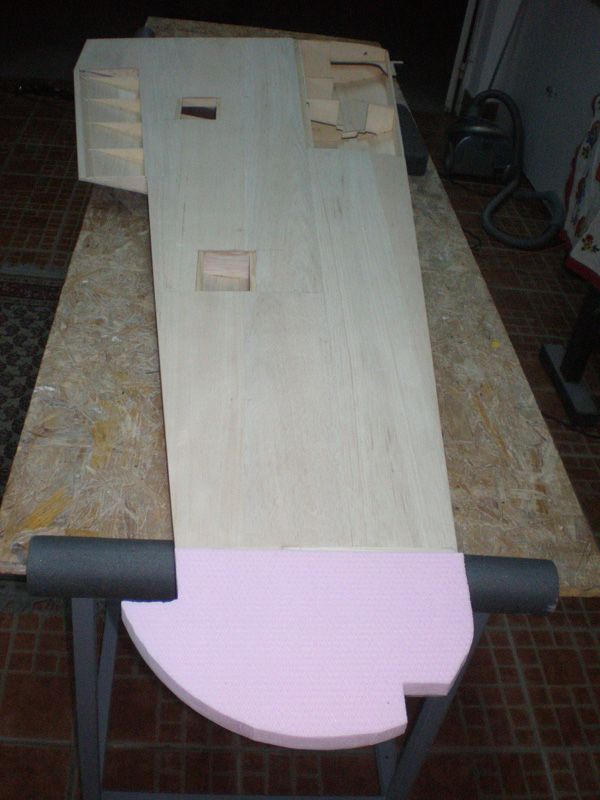
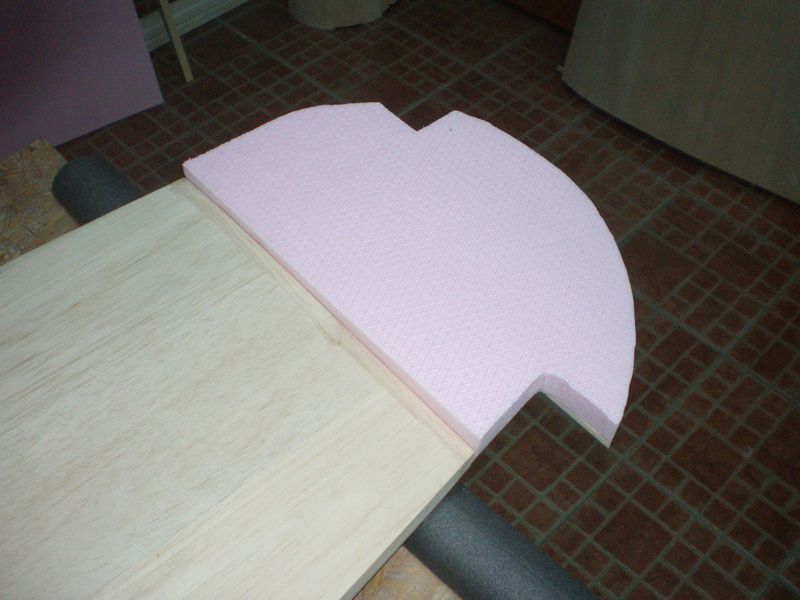
That piece is not small but it's light and easy for processing...
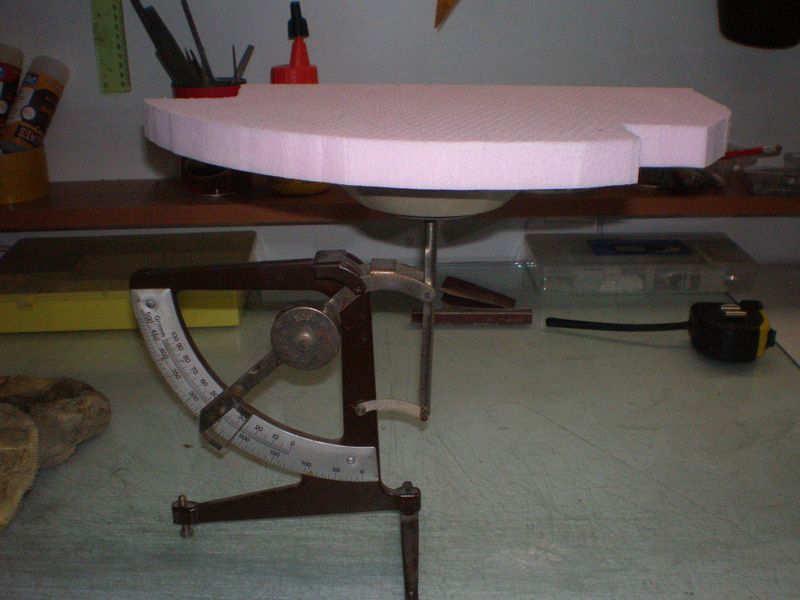
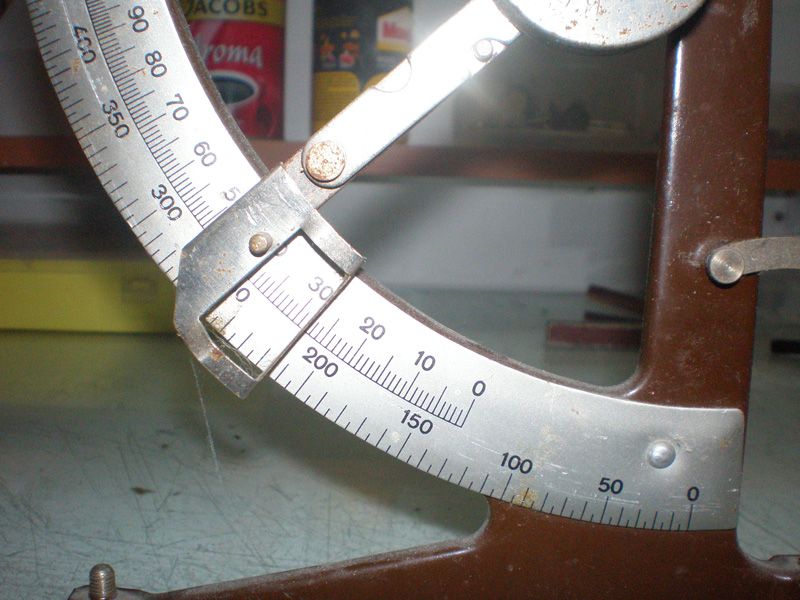
It's just 28 gr, but don't forget, most of foam will be sand down...
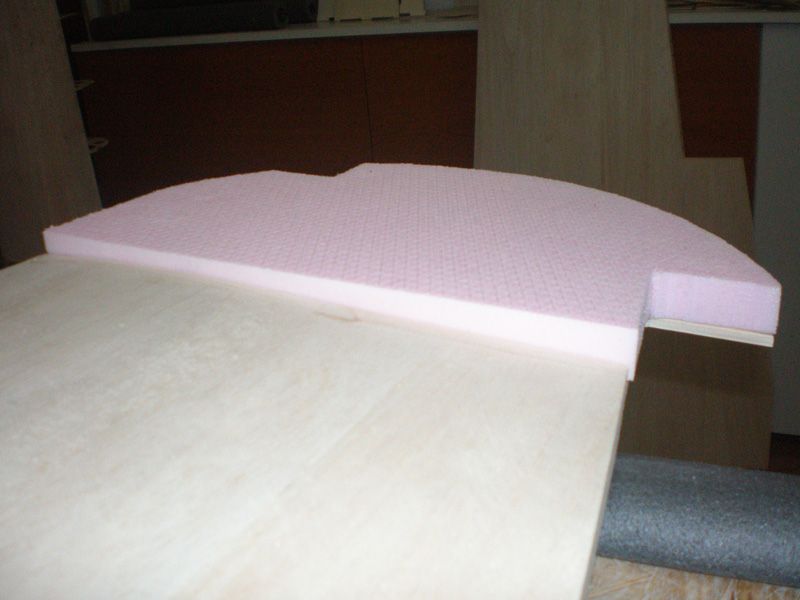
But, I was not glued that foam yet. I was never working with that kind of material, always used balsa, so maybe some one can me give advice what to do, to use foam or good traditional balsa?
Thanks...
Mirce
As you all know, I'm working on my projects, every day, so results are apparent...
Two days ago I draw two parts for wing, first was flaps basis, made from 1,5 mm thin G 10...
I send this drawing to my friends firm and wait for parts...
Second was template from ply, for wing tip. I scanned wing tip from the plan, and made template on my vinyl cutter, for each wing side...
Than I used MNC ( Mirce Numeric Control ) machine and cut both parts...
As you can see, I made all parts very precise, no mater will not see later.
Yesterday I got G 10 parts for flaps...
They fit very well in the wing. I glued hard 1,5 mm thin balsa plate, and get very strong and straight flap...
Indeed, that is more air brake than flap. I was reading on net, that flaps don't need to be lowered to much on landing, so I think angle like this will be more than enough...
Back to the wing tip, for my ply template I made gutter for fixing. I add carbon tube for wing tip lights wires...
Than I glued ply...
I want to made wing tip from hard foam, and cut one piece for probe...
That piece is not small but it's light and easy for processing...
It's just 28 gr, but don't forget, most of foam will be sand down...
But, I was not glued that foam yet. I was never working with that kind of material, always used balsa, so maybe some one can me give advice what to do, to use foam or good traditional balsa?
Thanks...
Mirce
 09-05-2012, 03:59 PM
#27

My Feedback: (4)
Join Date: Mar 2002
Location: Scottsdale,
AZ
Posts: 278
Likes: 0
Received 0 Likes
on
0 Posts
Mirce,
Glassing will not help, the foam will always dent. The Zero can take the weight. I would use balsa and just possibly sand the inside a little.
Very best regards
Greg Anixter
Scottsdale AZ
Glassing will not help, the foam will always dent. The Zero can take the weight. I would use balsa and just possibly sand the inside a little.
Very best regards
Greg Anixter
Scottsdale AZ
09-08-2012, 02:00 PM
#28
Thread Starter
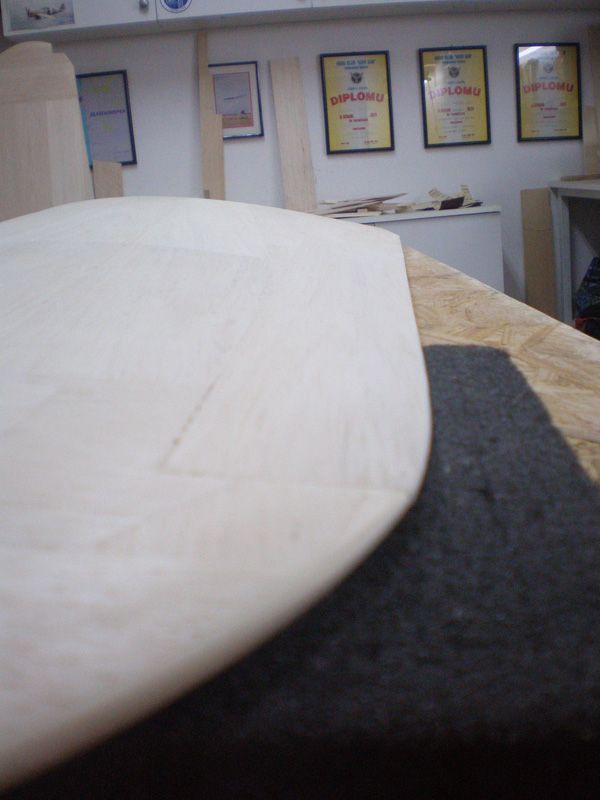
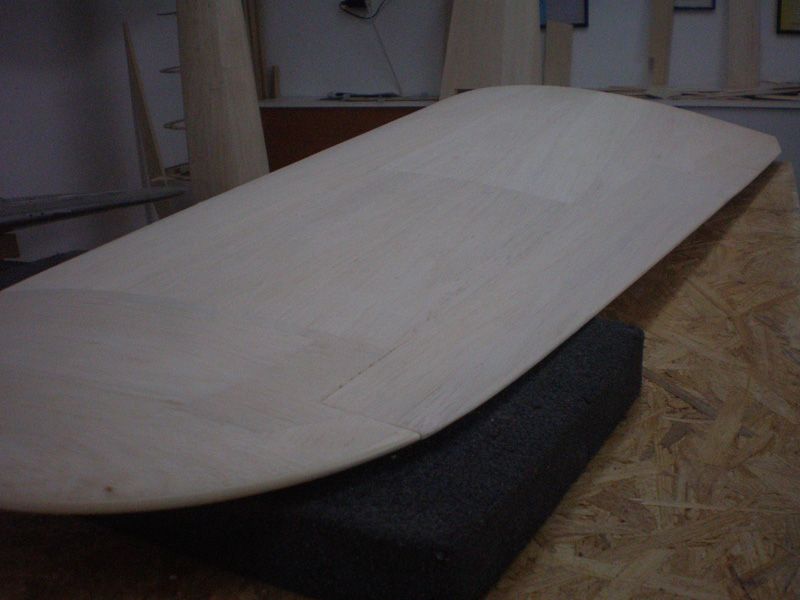
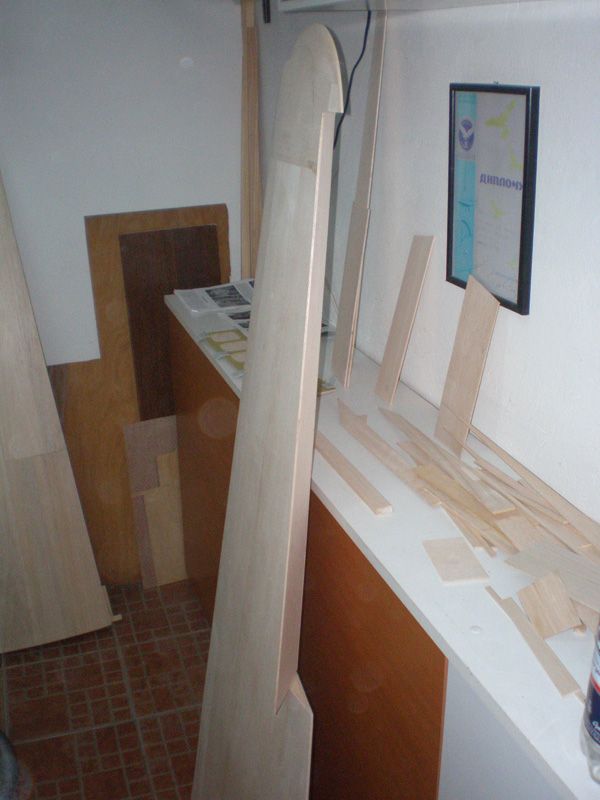
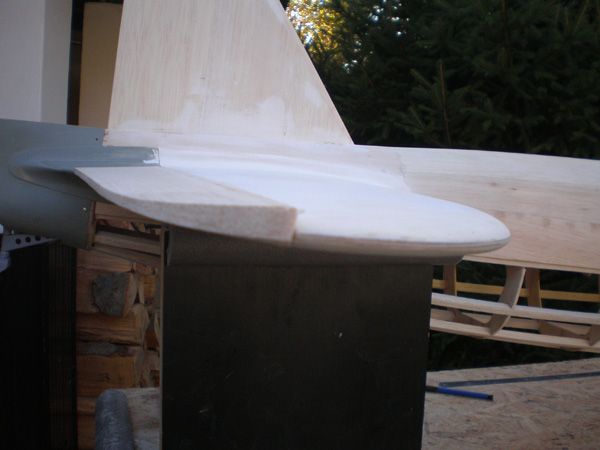
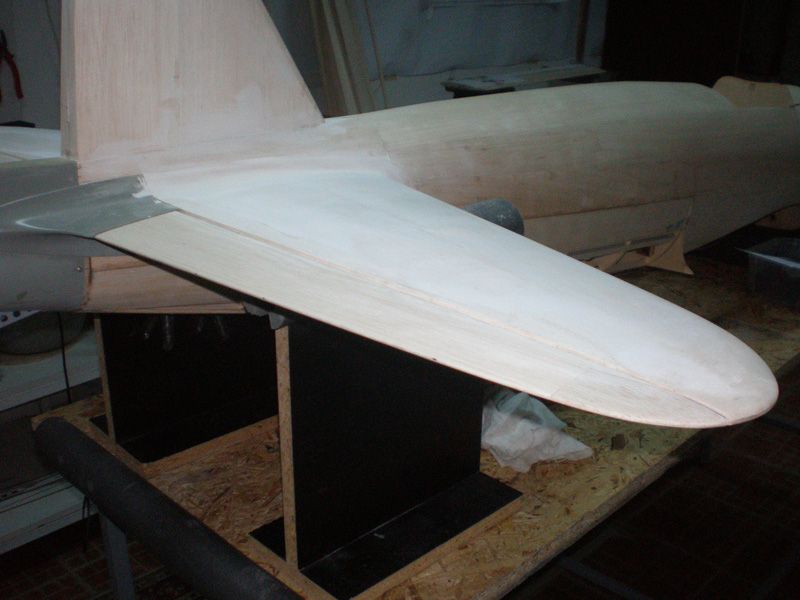
Thanks Greg, that's truth, so I decided to use traditional method and made wing tips from 10 mm thick balsa.
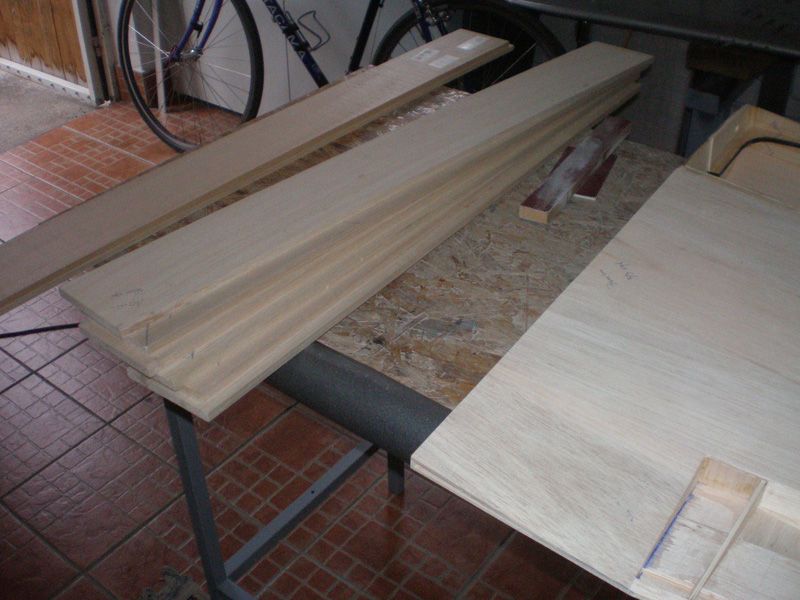
For that process I need just 2,5 balsa plates, just 80 gr per plank.
First I used grater...
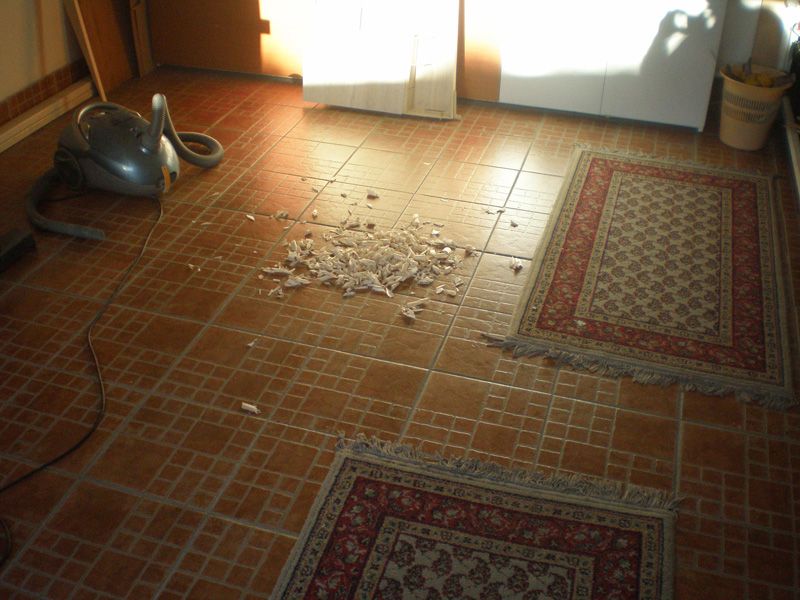
... and after sand paper...
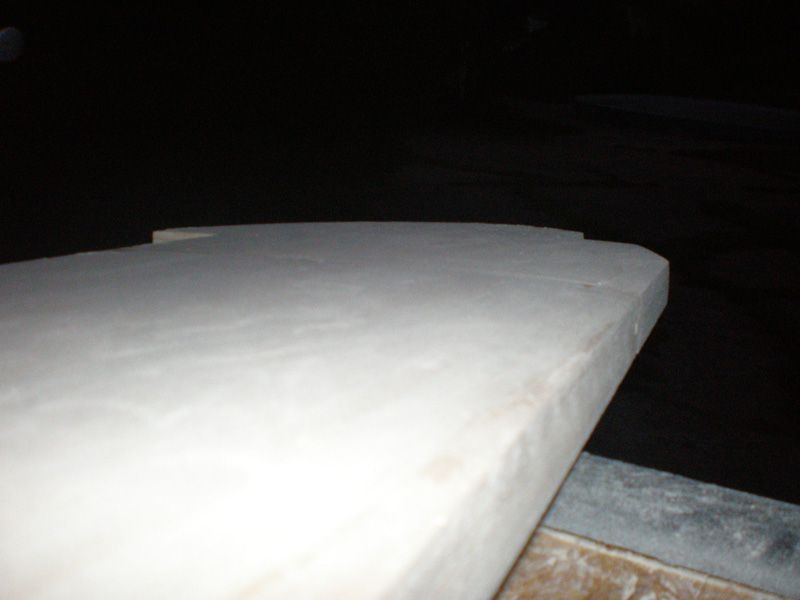
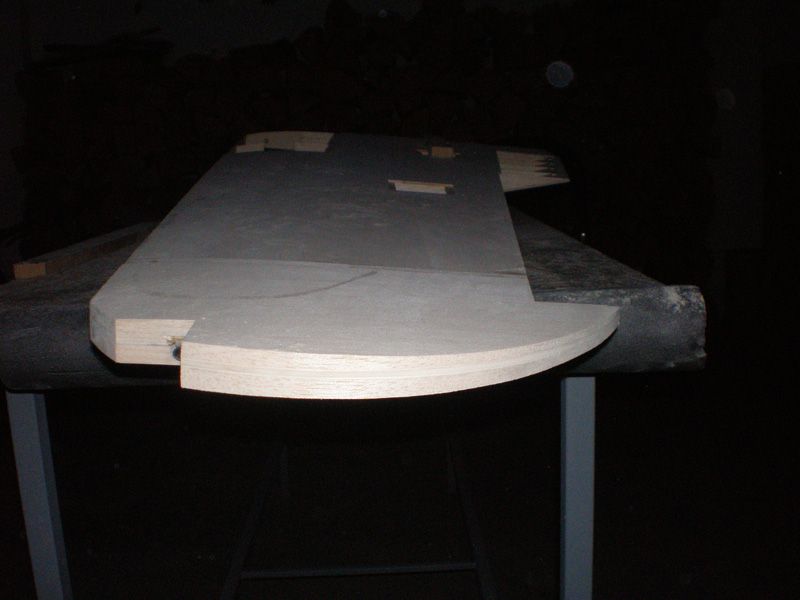
Job is not finish yet, but it will be in next day - two...
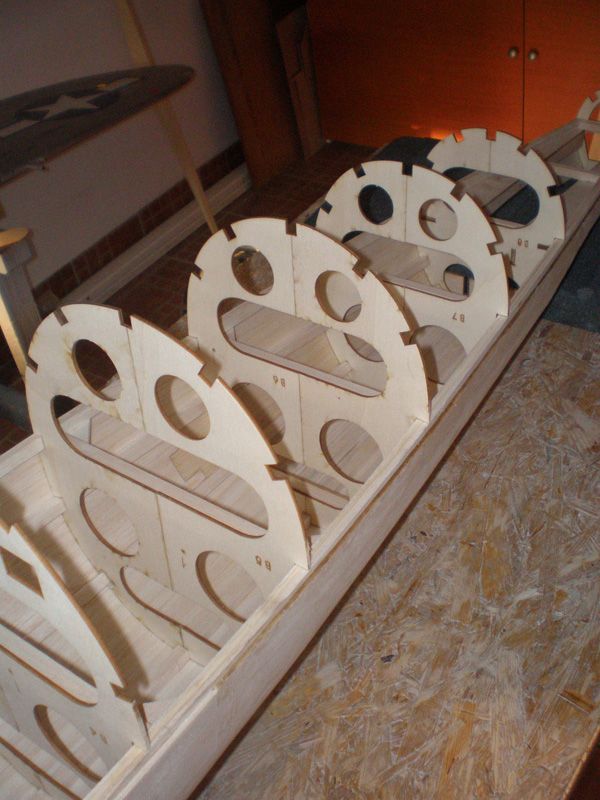
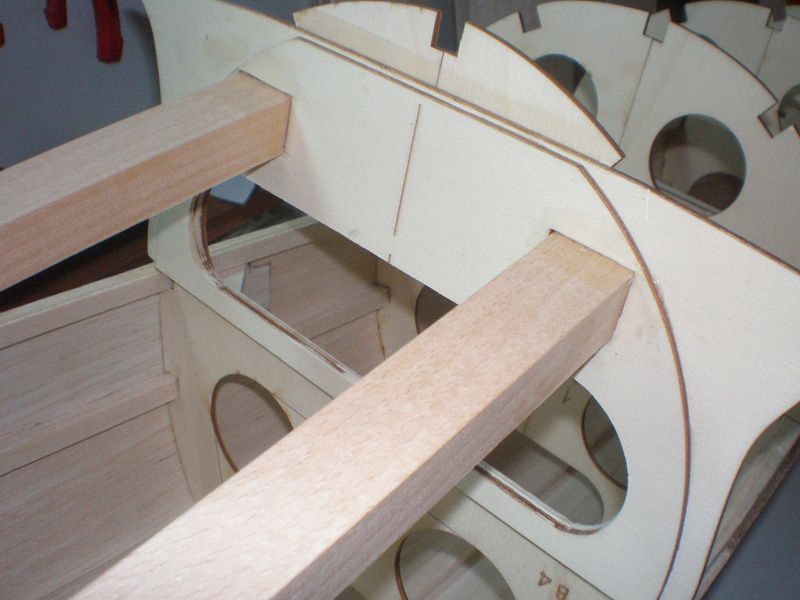
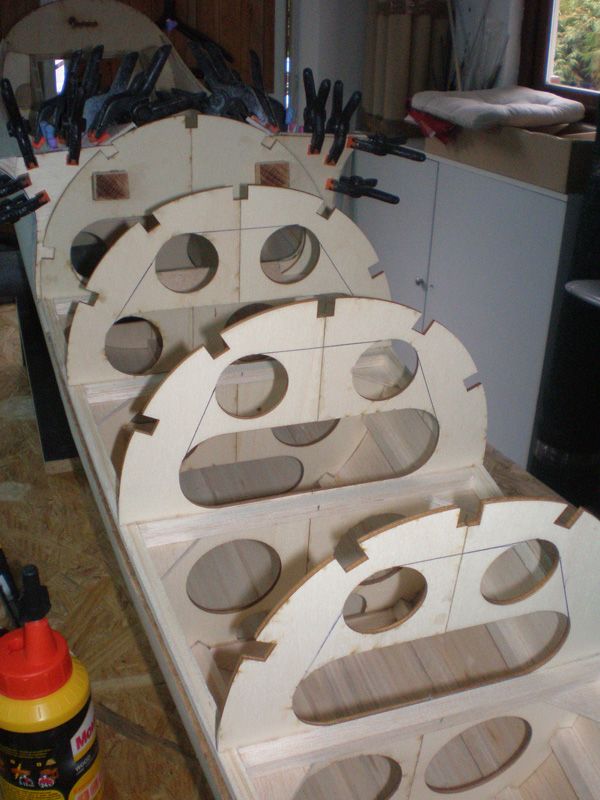
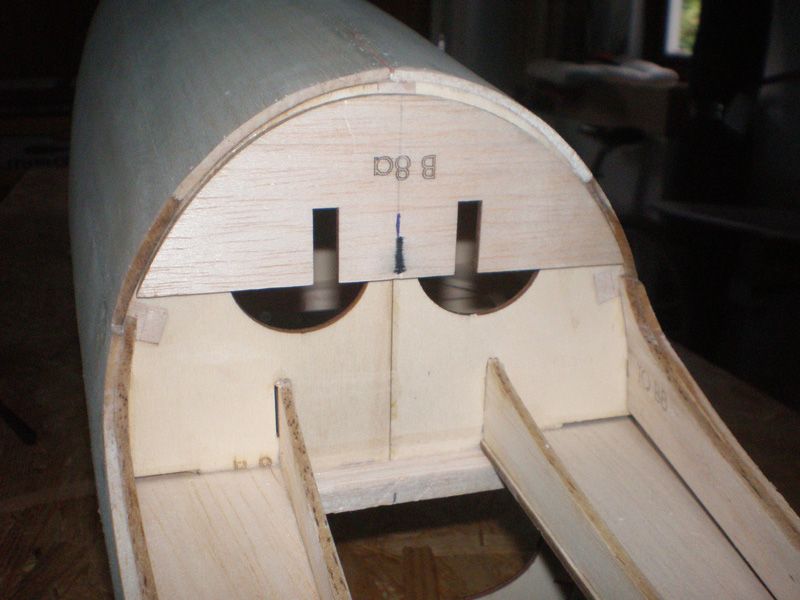
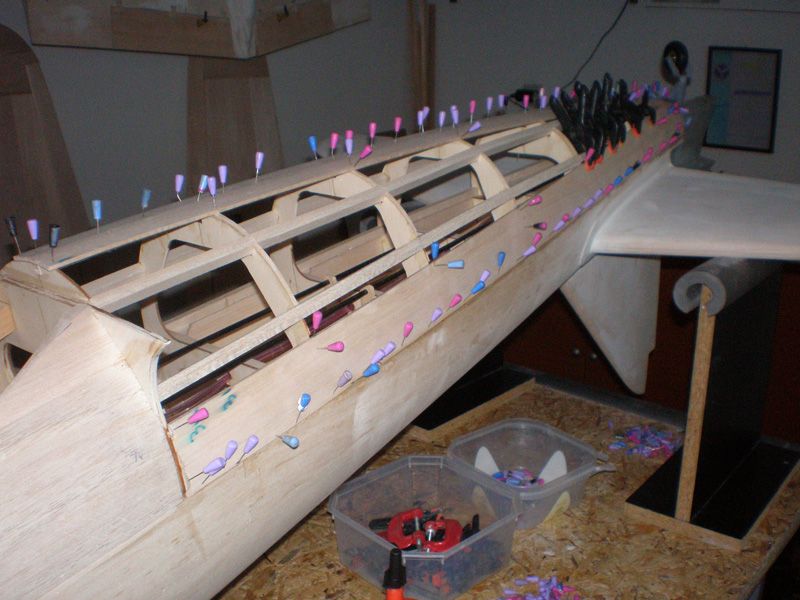
Few days ago I start working on fuselage. First added few half ribs...
Rib one - firewall...
Rib three...
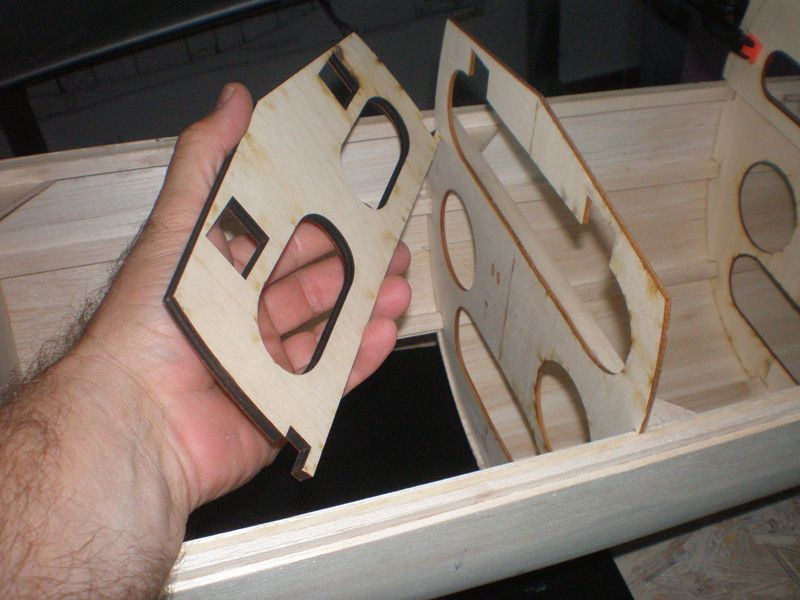
Rib four...
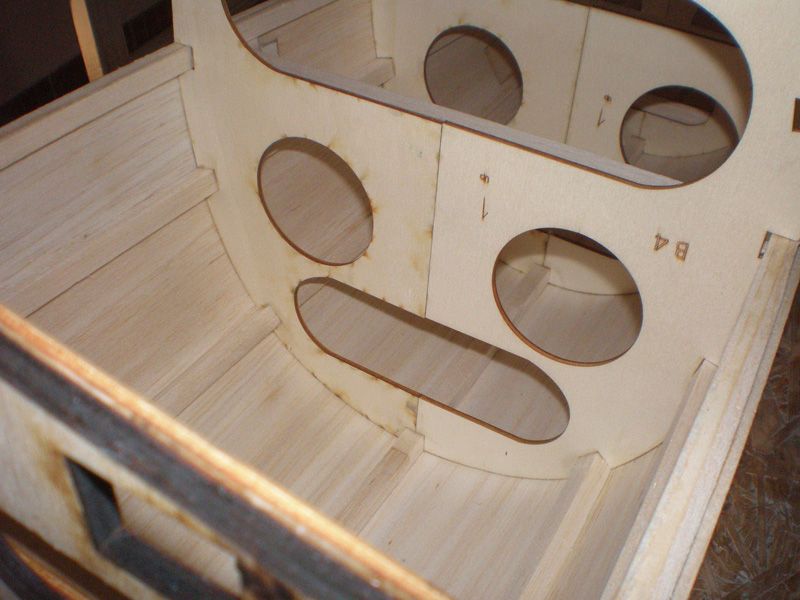
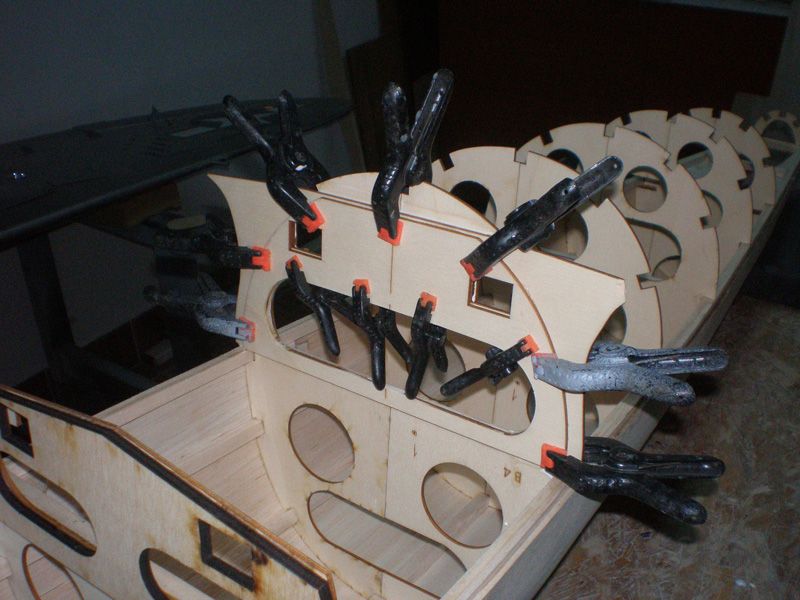
Latter I will on all ribs behind of the wing made more bigger holes...
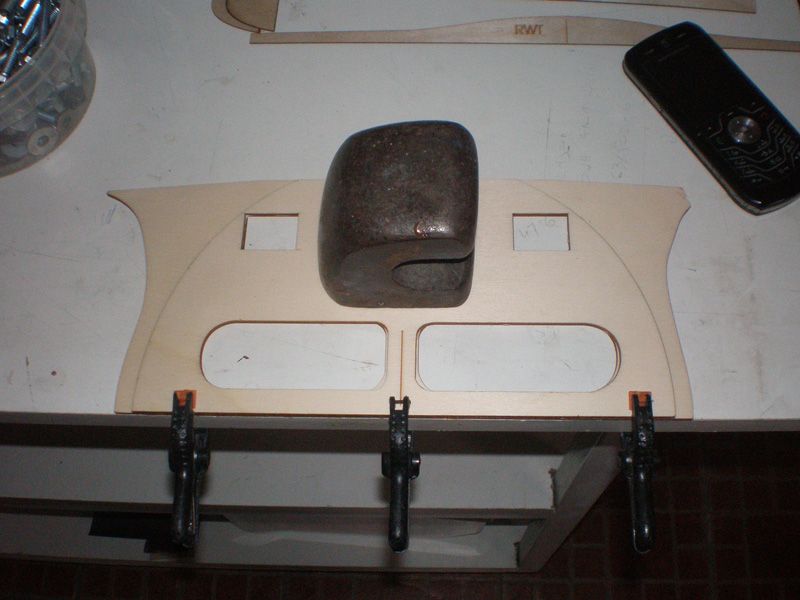
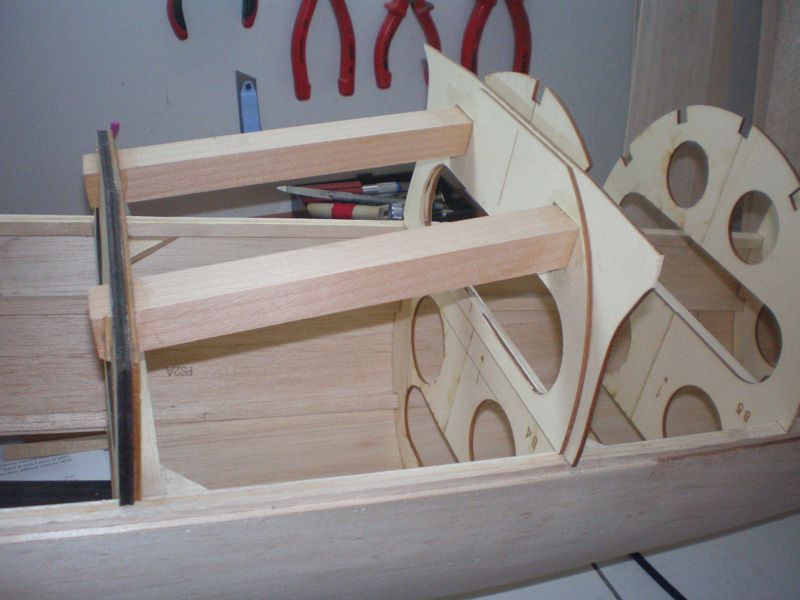
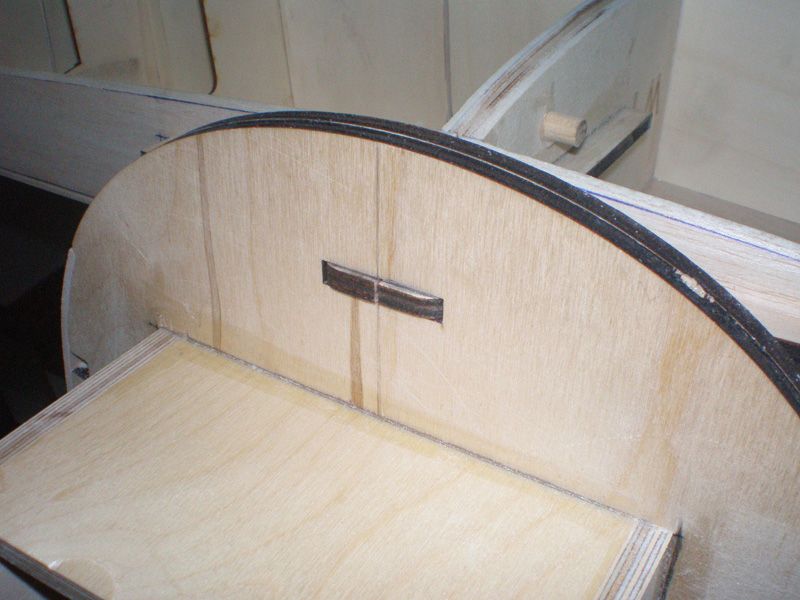
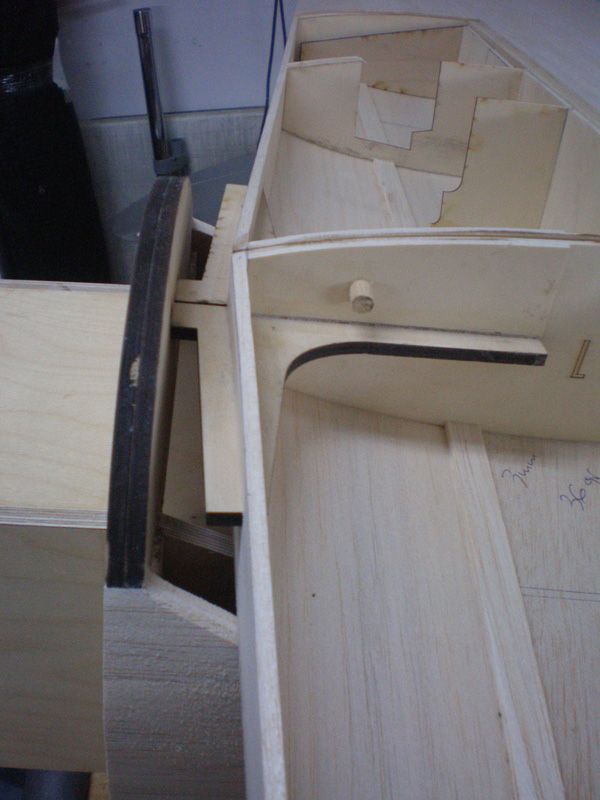
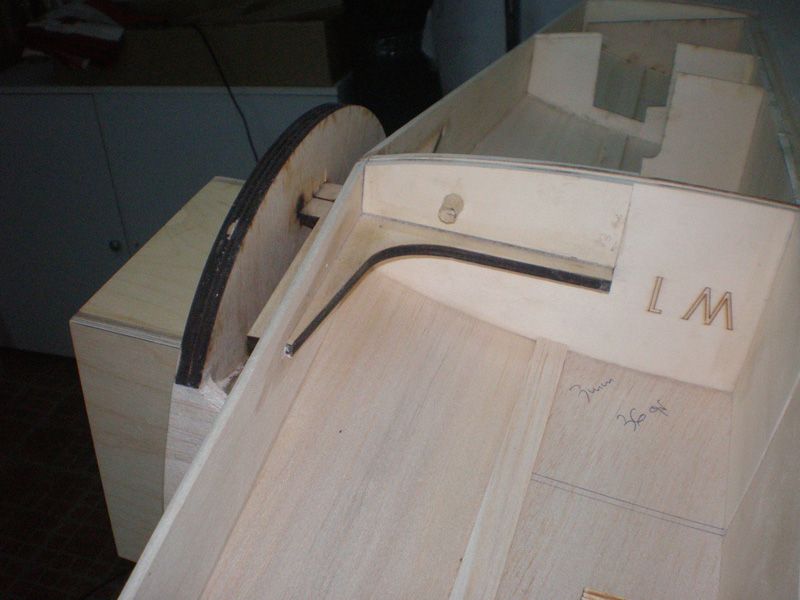
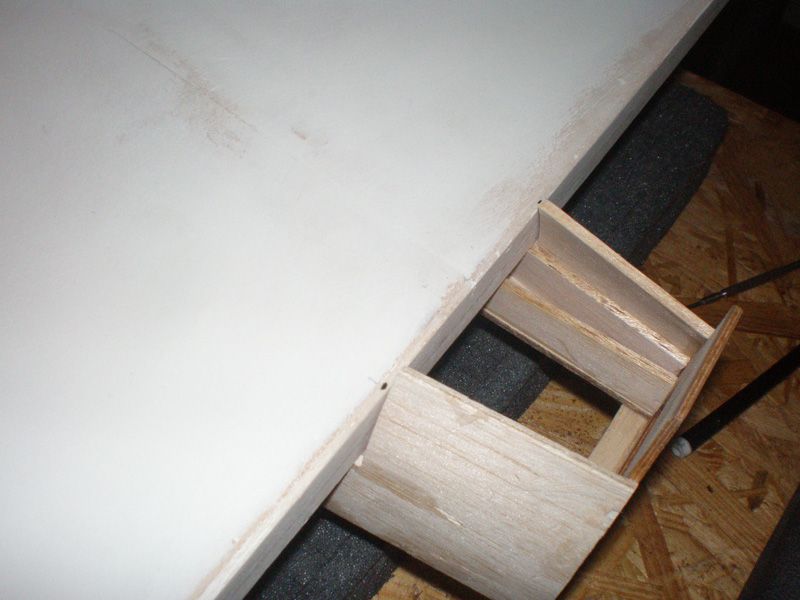
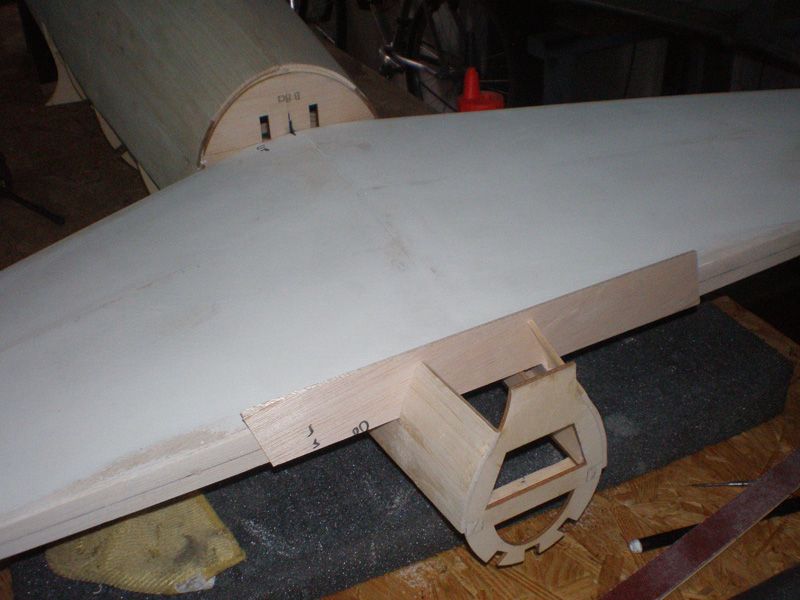
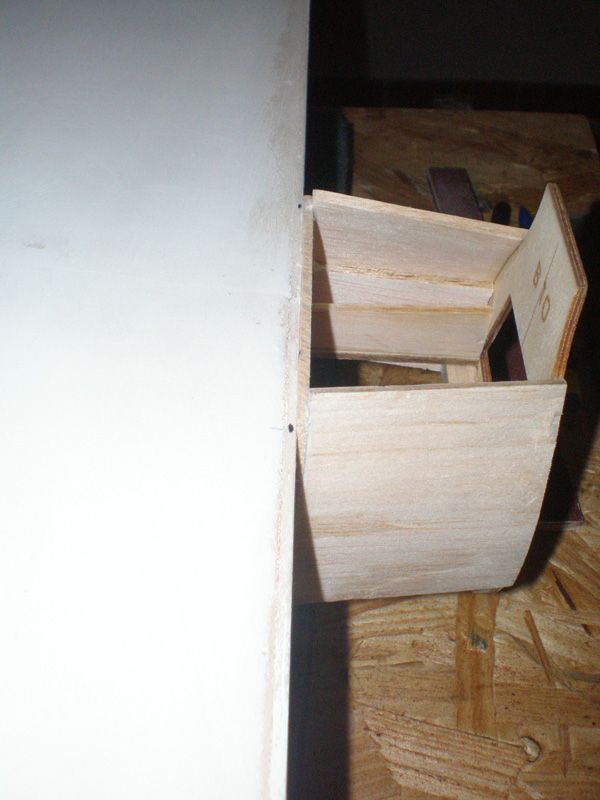
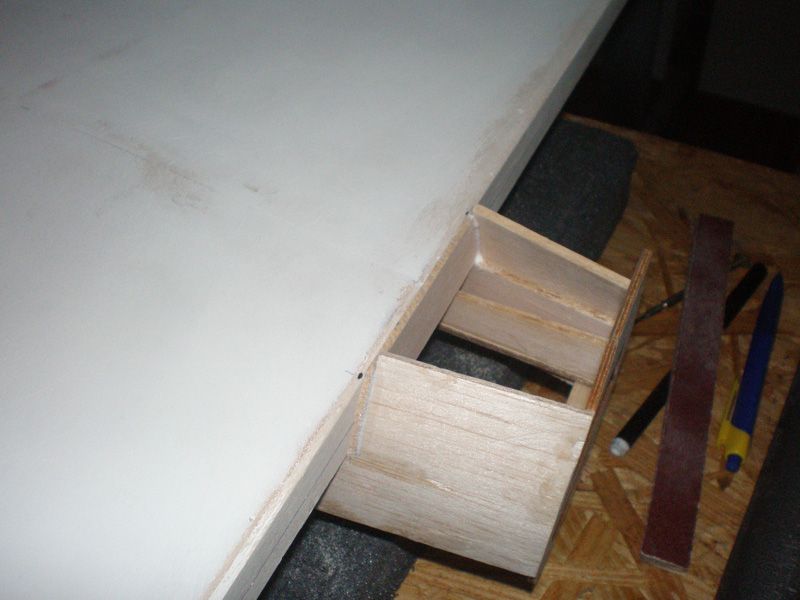
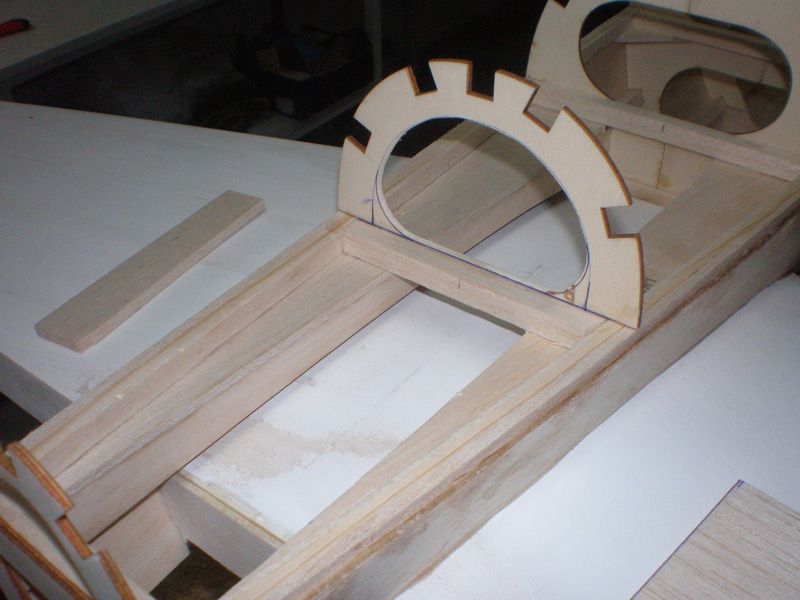
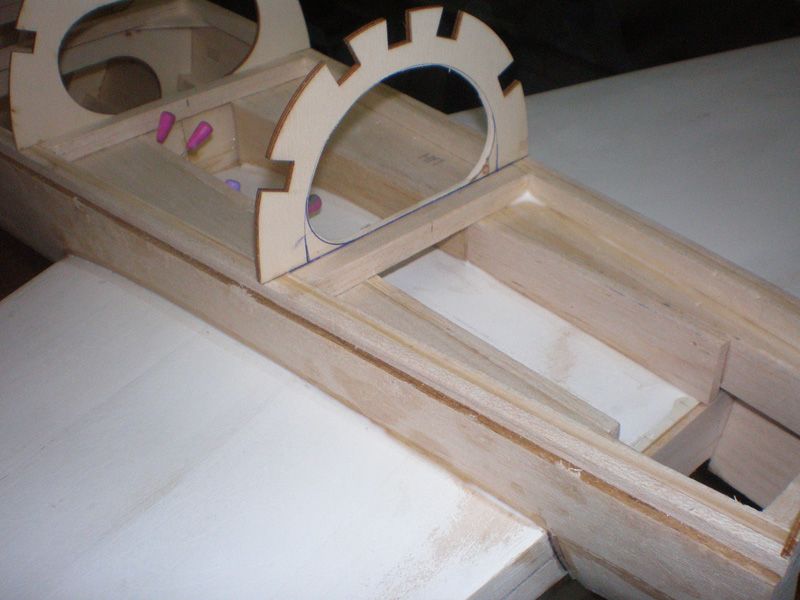
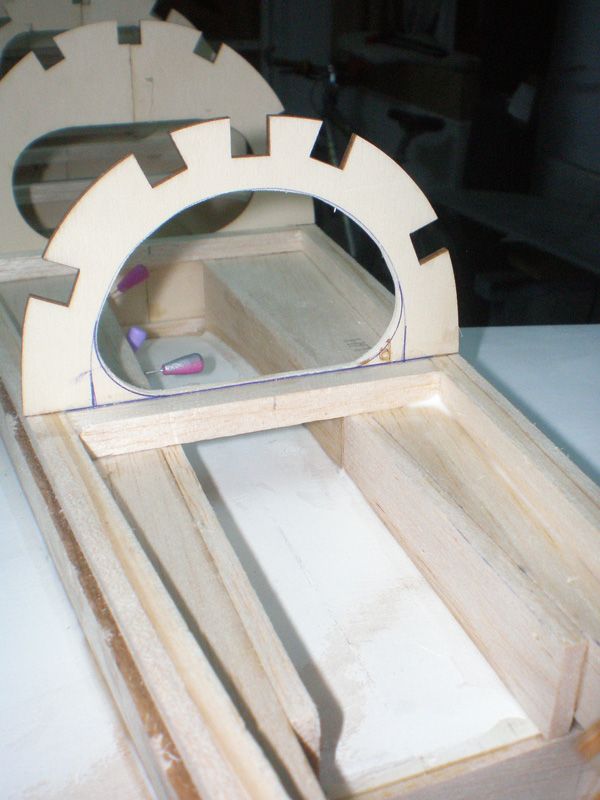
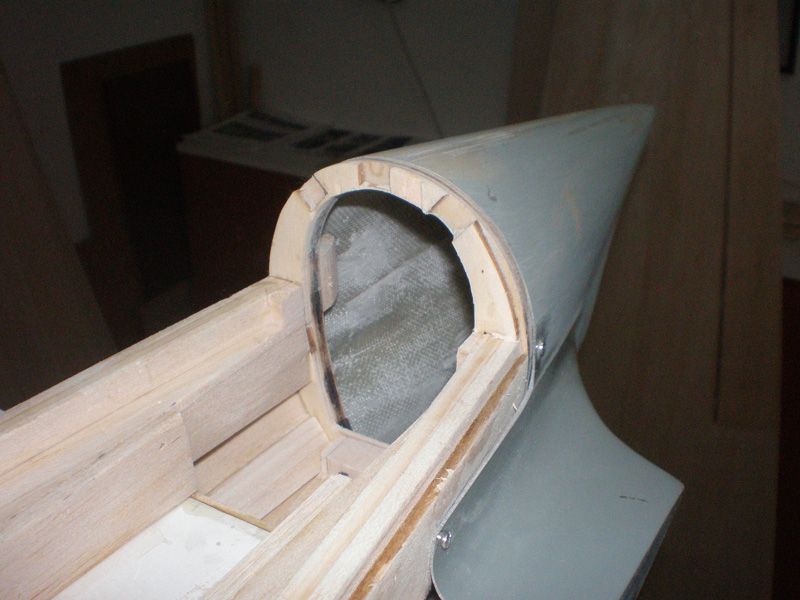
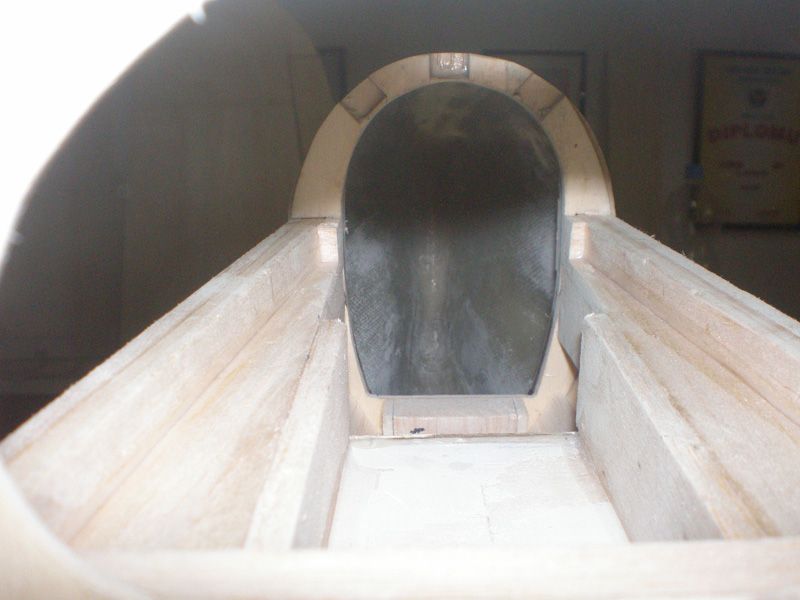
I start working on engine box. For this model I hope I will use Moki 150, so all measure are making around that engine.
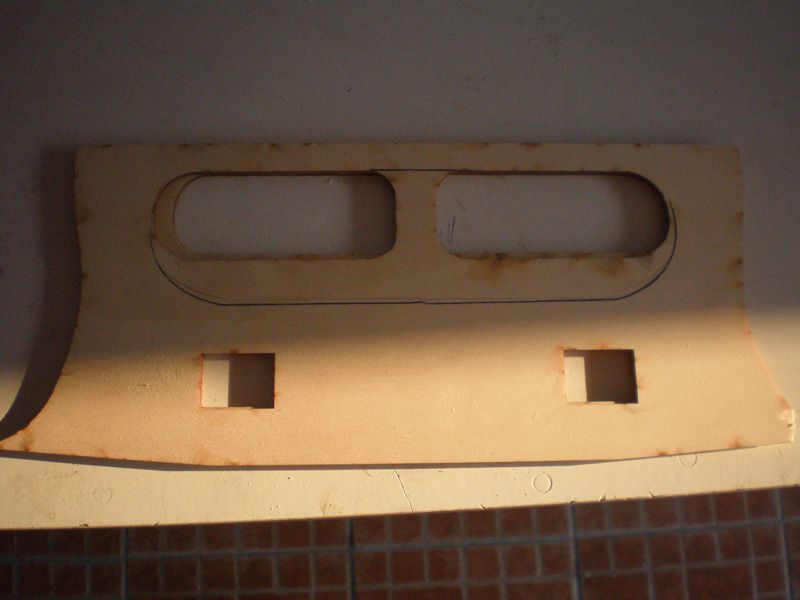
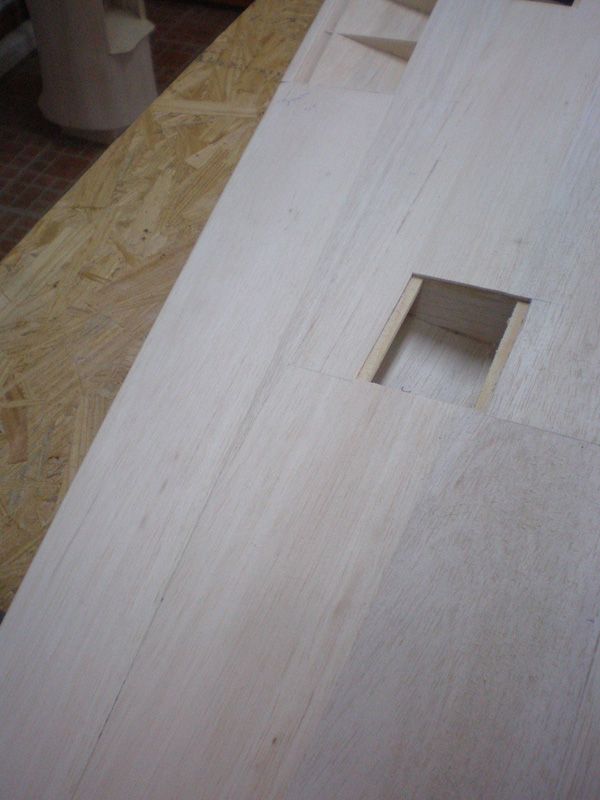
In firewall I made hole for engine box. But before that I make draw on computer, with all measures and distance. I add 2 degree engine angle on right side.
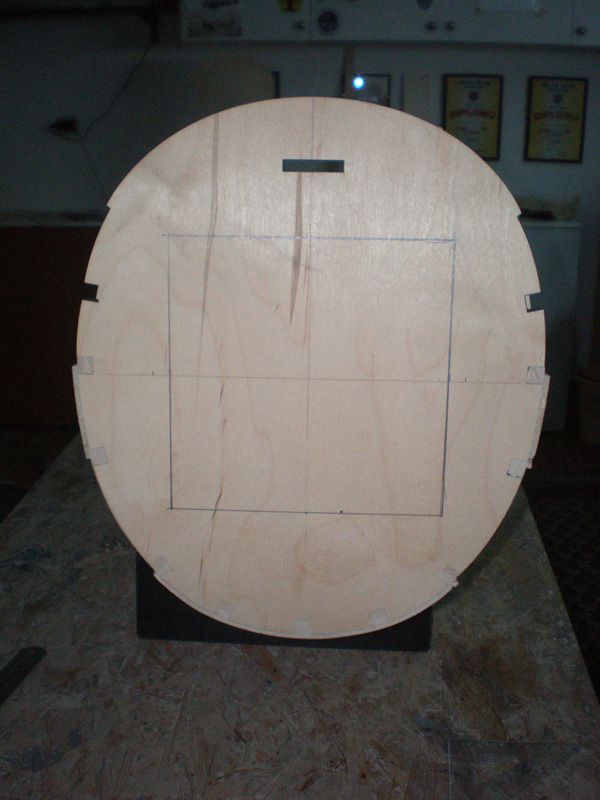
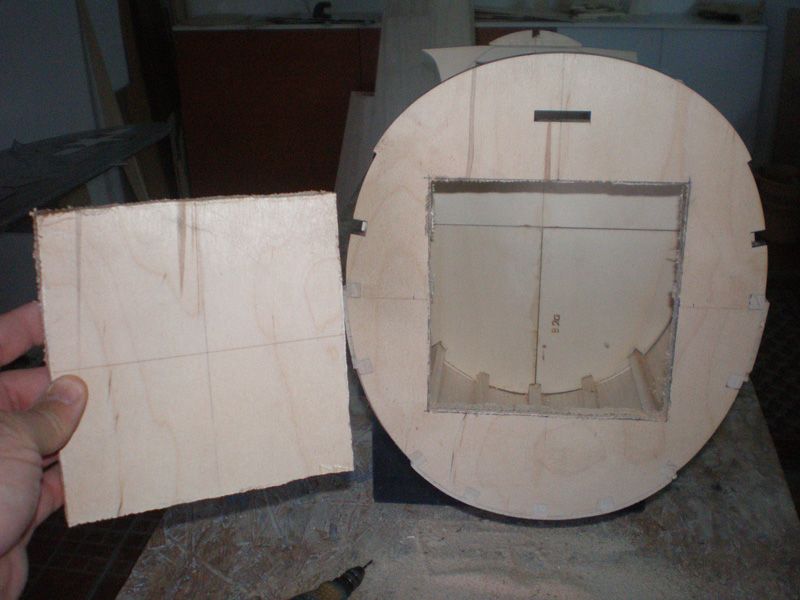
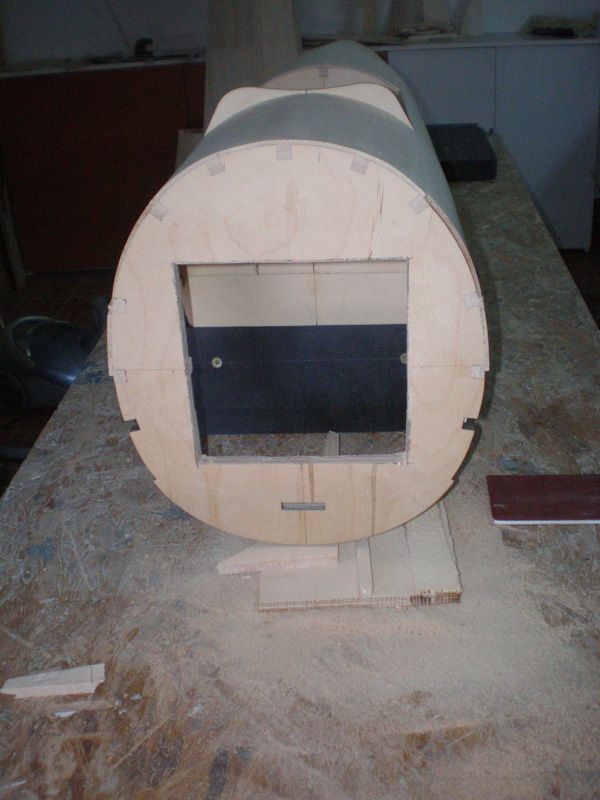
Hole is 16 x 16 cm...
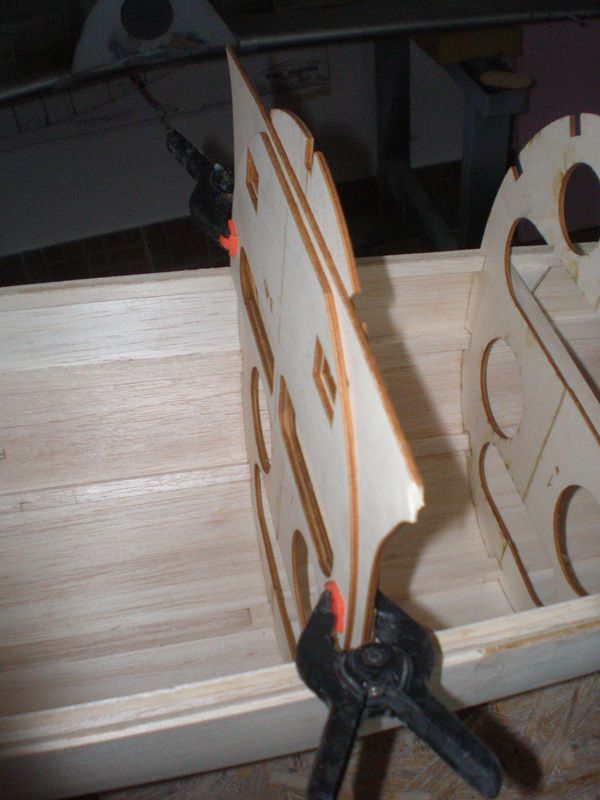
Nothing without friends help, so I want to thanks Petar for 8 mm ply for box, and Milan for help in making that box. I must went to Milan's work shop, where he cut ply, and made box.
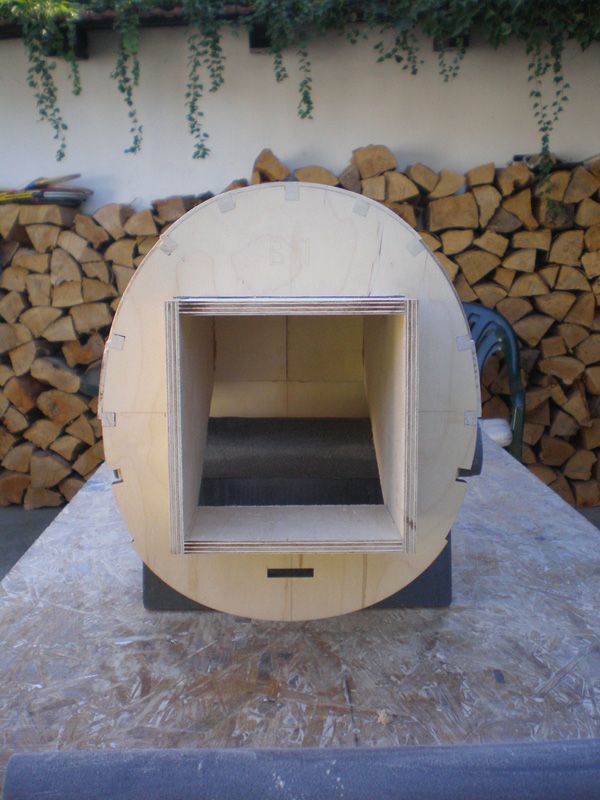
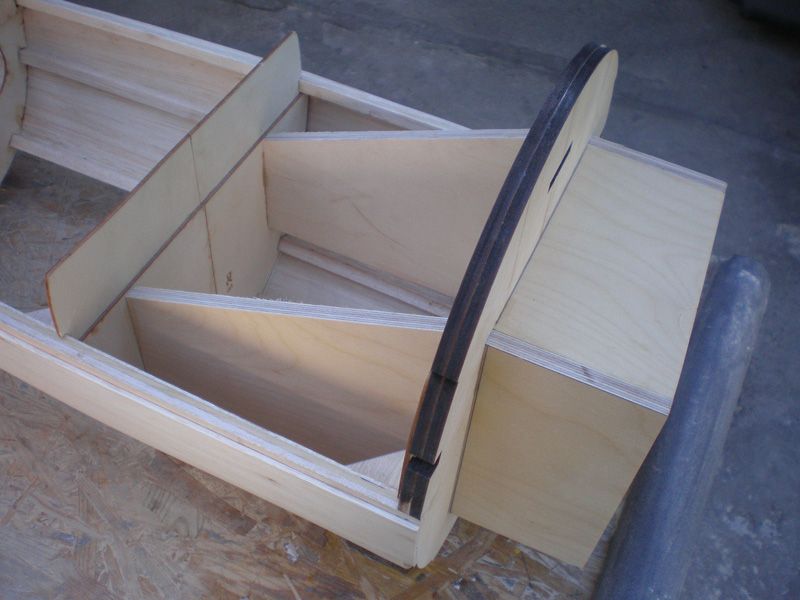
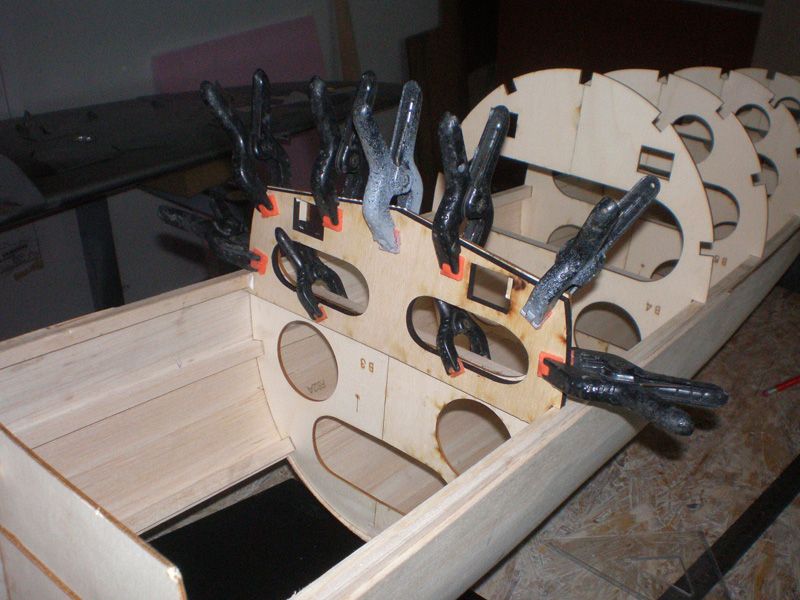
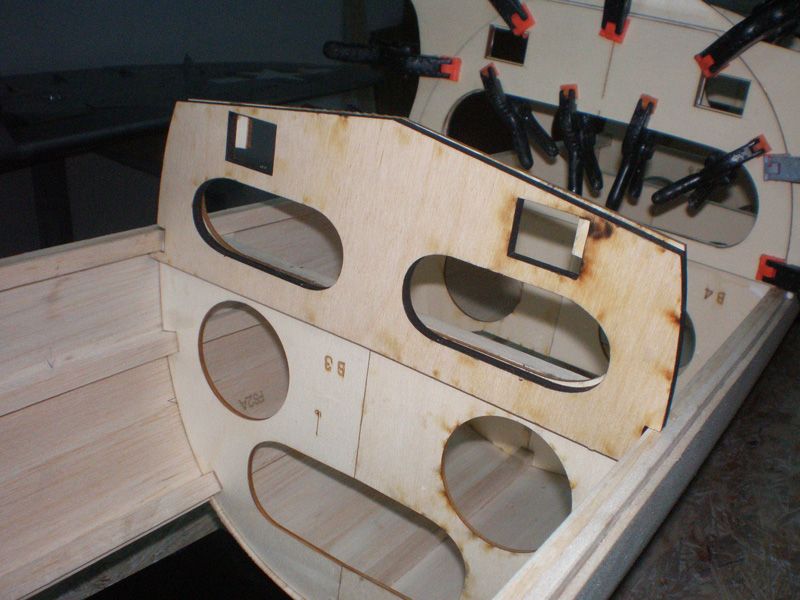
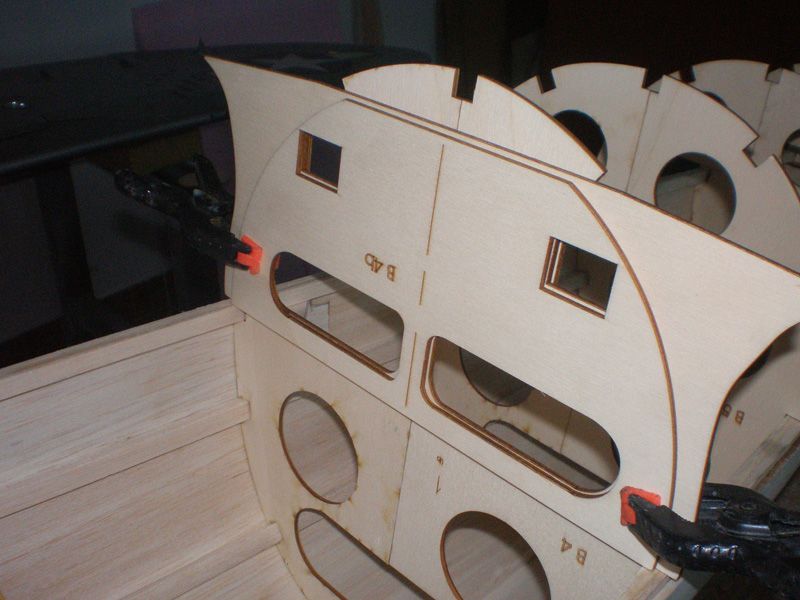
As you can see, I connect firewall wit second rib with two sides. This process is not finish yet, I want to add few triangles, screws, and need to made firewall...
That's all for today, regards
Mirce
For that process I need just 2,5 balsa plates, just 80 gr per plank.
First I used grater...
... and after sand paper...
Job is not finish yet, but it will be in next day - two...
Few days ago I start working on fuselage. First added few half ribs...
Rib one - firewall...
Rib three...
Rib four...
Latter I will on all ribs behind of the wing made more bigger holes...
I start working on engine box. For this model I hope I will use Moki 150, so all measure are making around that engine.
In firewall I made hole for engine box. But before that I make draw on computer, with all measures and distance. I add 2 degree engine angle on right side.
Hole is 16 x 16 cm...
Nothing without friends help, so I want to thanks Petar for 8 mm ply for box, and Milan for help in making that box. I must went to Milan's work shop, where he cut ply, and made box.
As you can see, I connect firewall wit second rib with two sides. This process is not finish yet, I want to add few triangles, screws, and need to made firewall...
That's all for today, regards
Mirce
 09-09-2012, 04:57 PM
#30
Join Date: Dec 2010
Location: Regina, SK, CANADA
Posts: 48
Likes: 0
Received 0 Likes
on
0 Posts
Looking Good Mirce.
I can't wait to see the finished project.
With the work you did on your P47.
The Zero should be Beautiful as well!!
I can't wait to see the finished project.
With the work you did on your P47.
The Zero should be Beautiful as well!!
09-09-2012, 10:19 PM
#31
Thread Starter
Thank you guys...
I can't wait to see this project finished too...
Few days ago my friend Disljenko send me two books about Zero, and in one is very detail drawing about panel lines, rivets and other details on airplane.That will be good source for finishing Zero, and for my new sets for this model.
For now I think this will be paint scheme...
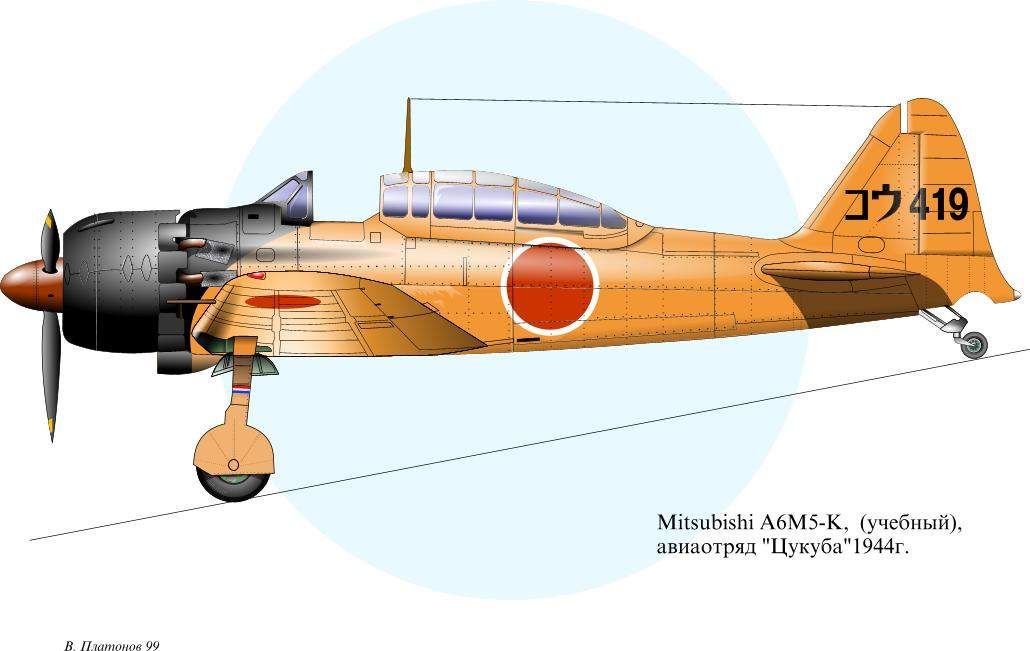
... but this is good also...
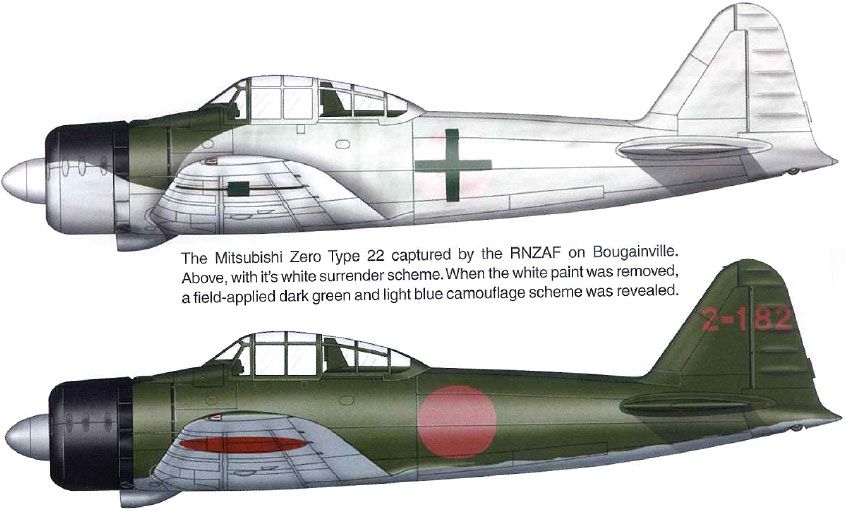
I'm sure just it will not be green...
Regards
Mirce
I can't wait to see this project finished too...
Few days ago my friend Disljenko send me two books about Zero, and in one is very detail drawing about panel lines, rivets and other details on airplane.That will be good source for finishing Zero, and for my new sets for this model.
For now I think this will be paint scheme...
... but this is good also...
I'm sure just it will not be green...
Regards
Mirce
09-12-2012, 12:32 AM
#32
Thread Starter
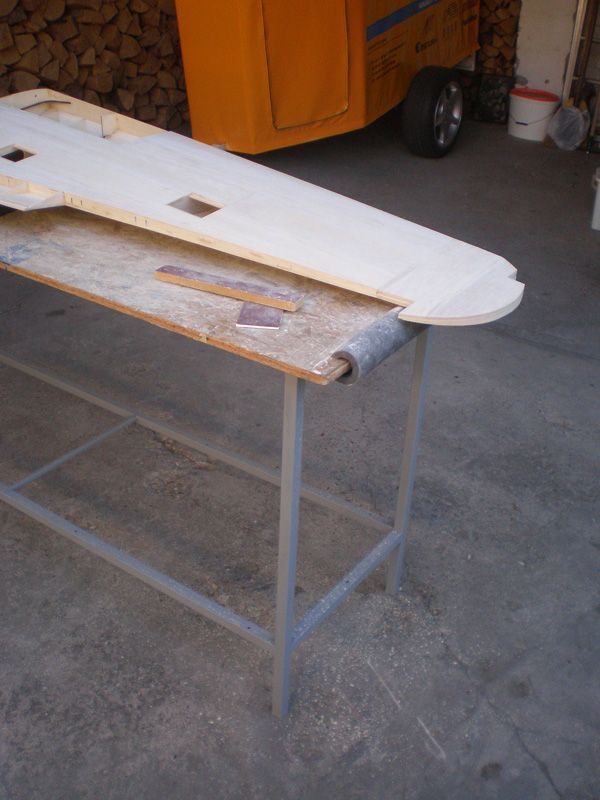
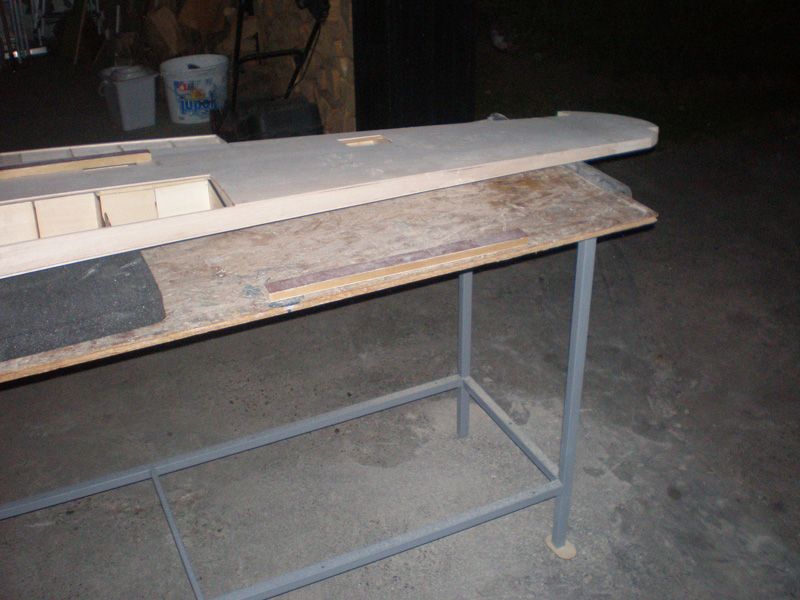
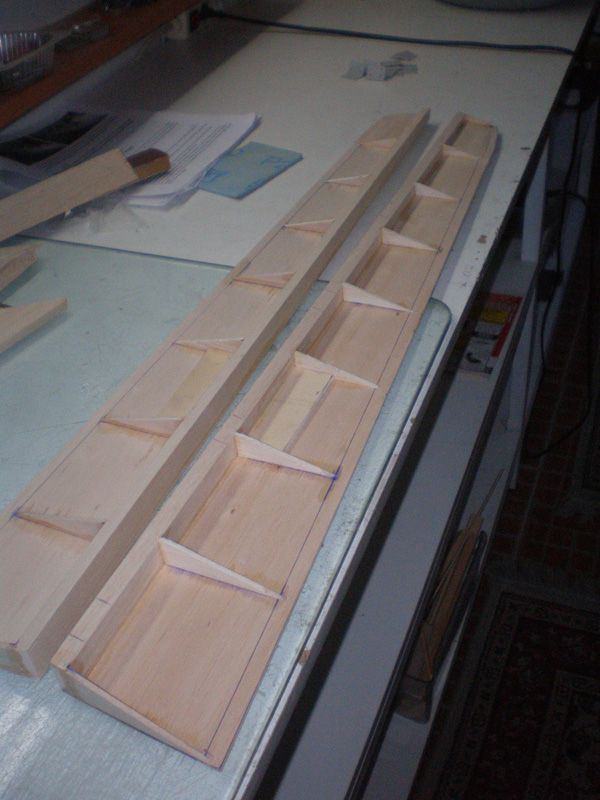
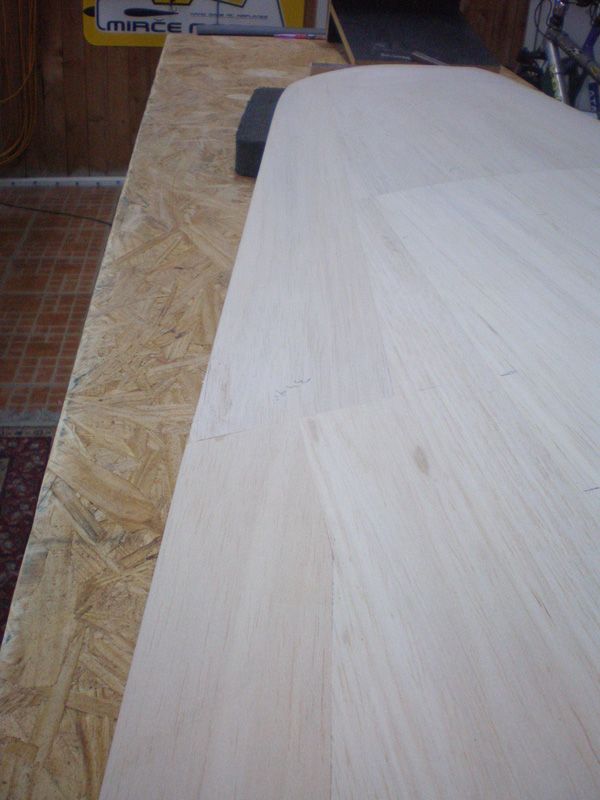
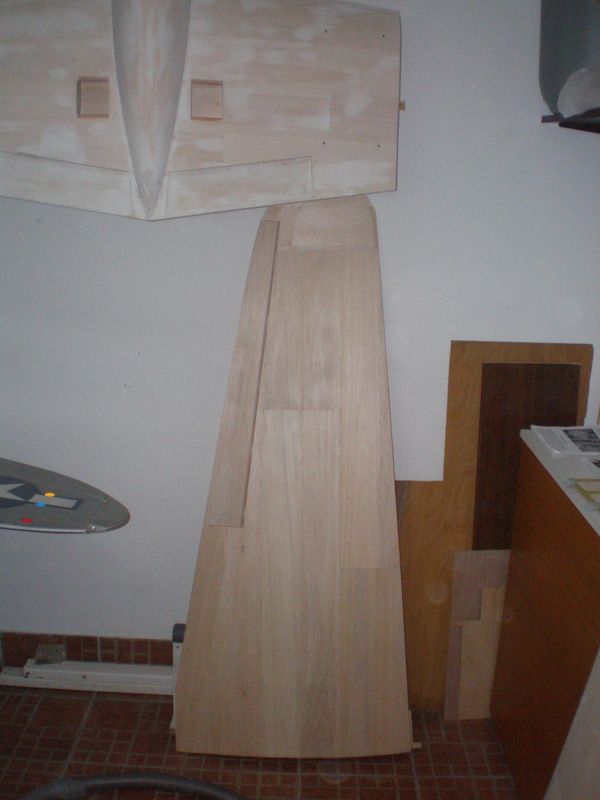
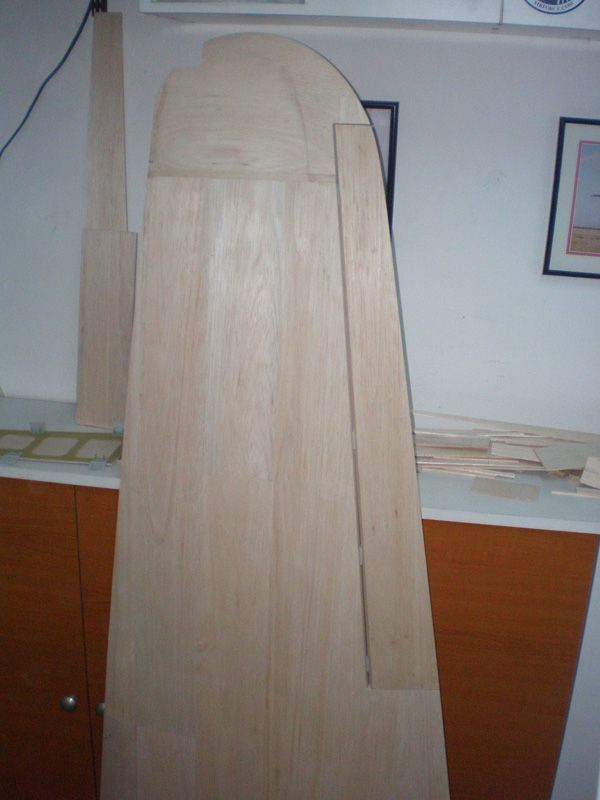
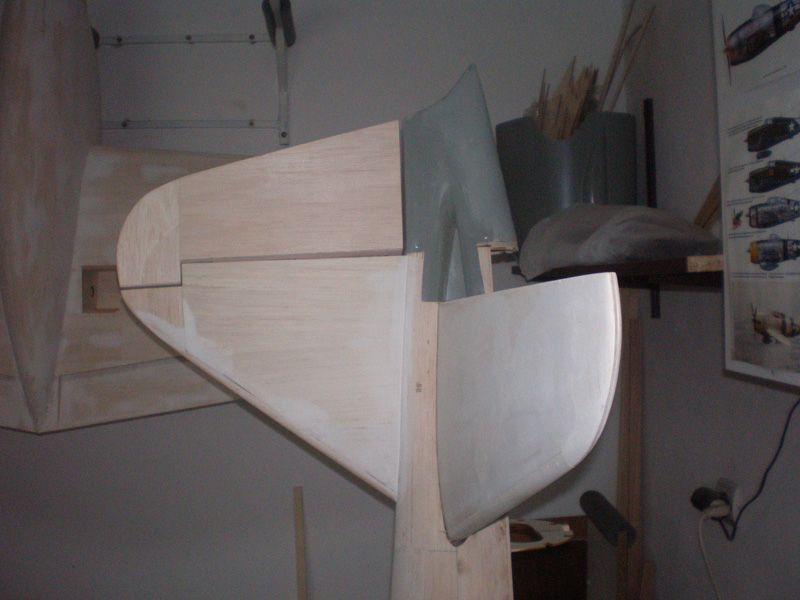
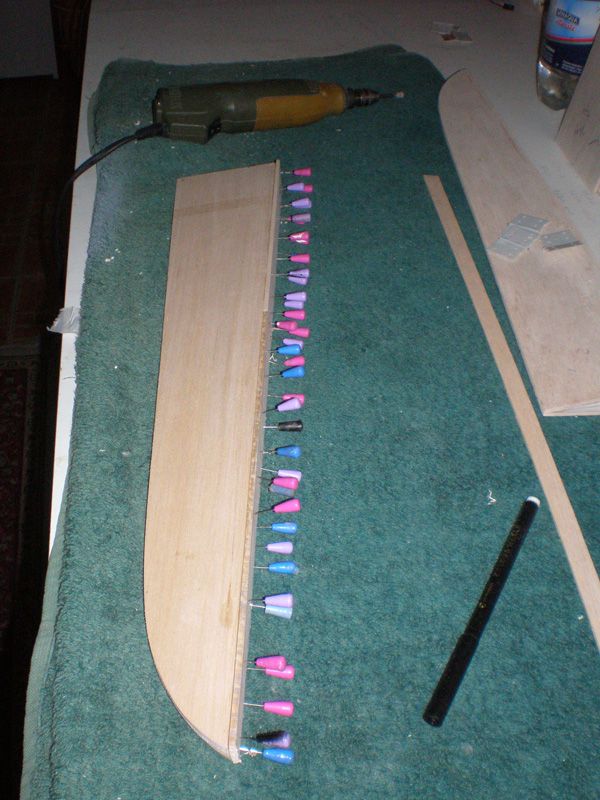
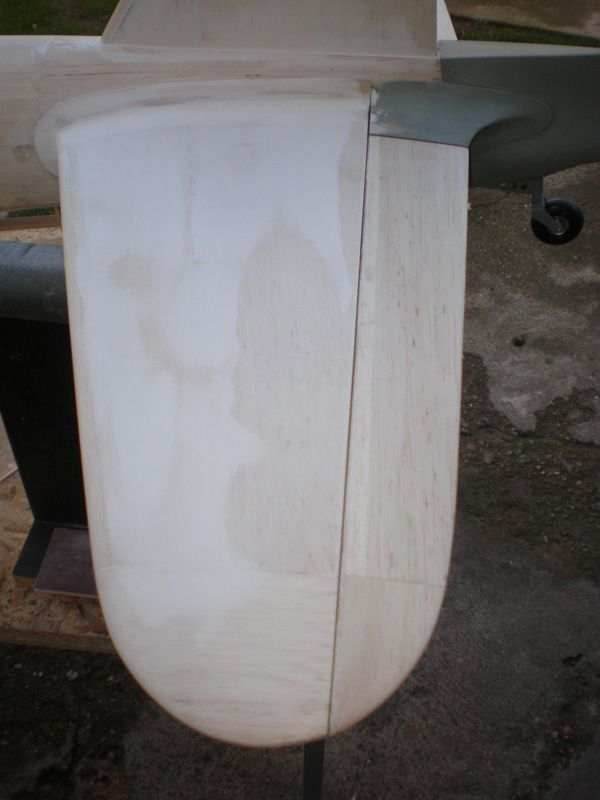
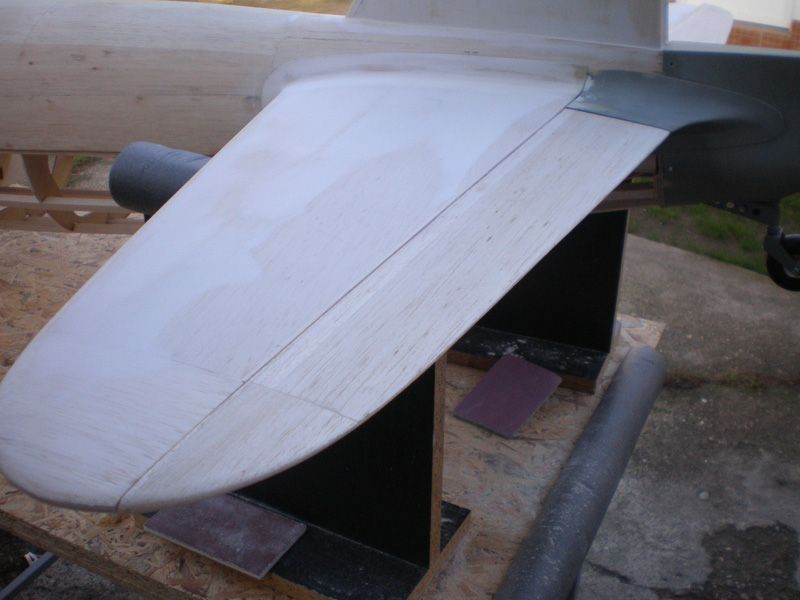
Work on Zero is continuing with sanding wing tips, which is almost finished...
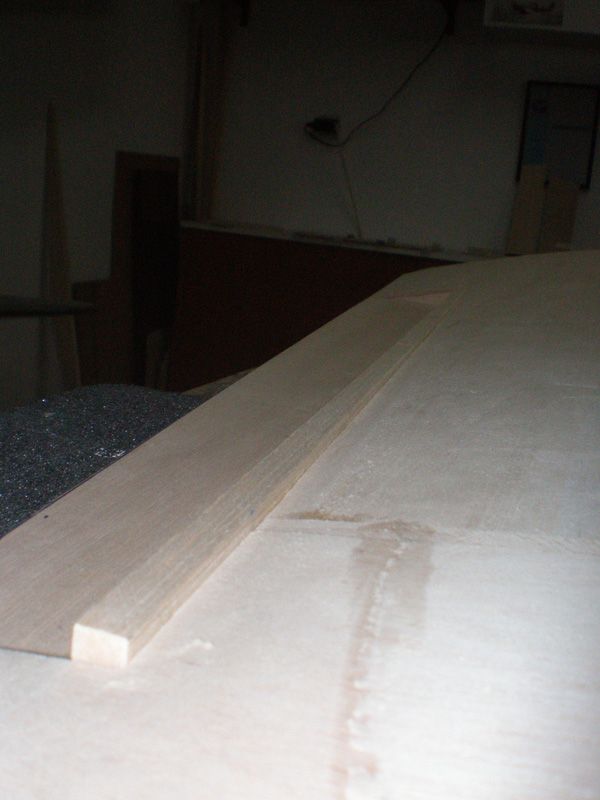
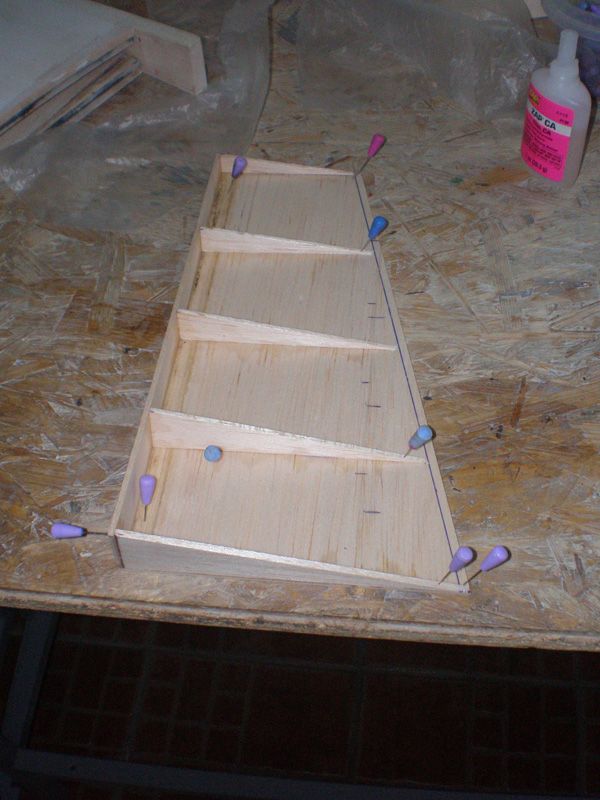
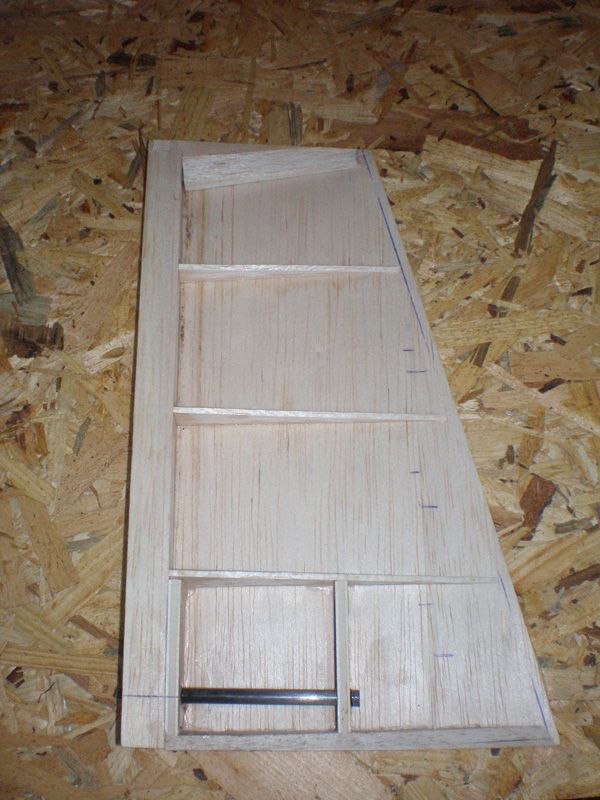
Ailerons was next on the list...
Because I wasn't get balsa parts for ailerons (same like for any control surface on tail) I must made it myself. To be honest, I will made it this way in case to get all that parts too...
So, first I made aileron bottom balsa plate. It is exactly measure how it need to be.
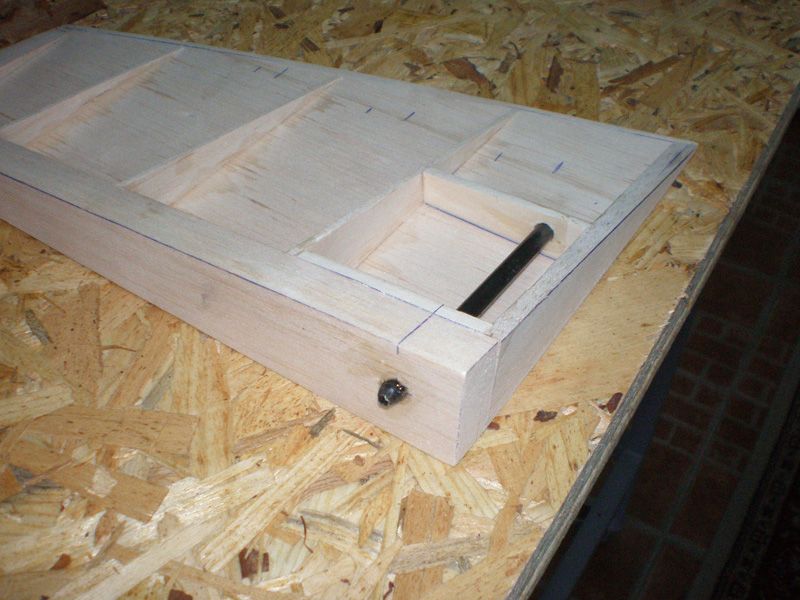
Than I glued 10 mm wide balsa for leading edge.
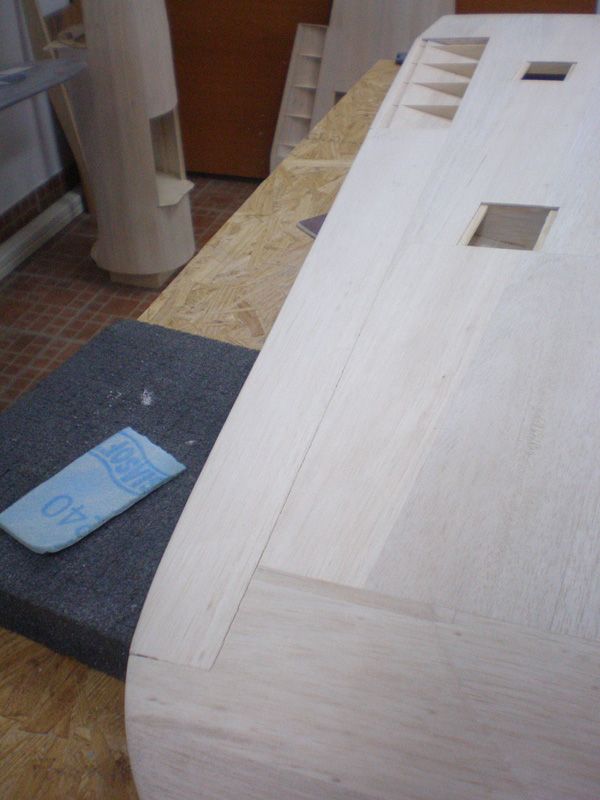
After that with double side self adhesive tape aileron was glued on the wing. It was glued 2 mm higher than bottom wing side, because in that case I can made exactly angle for aileron upper balsa plate...
After sanding...
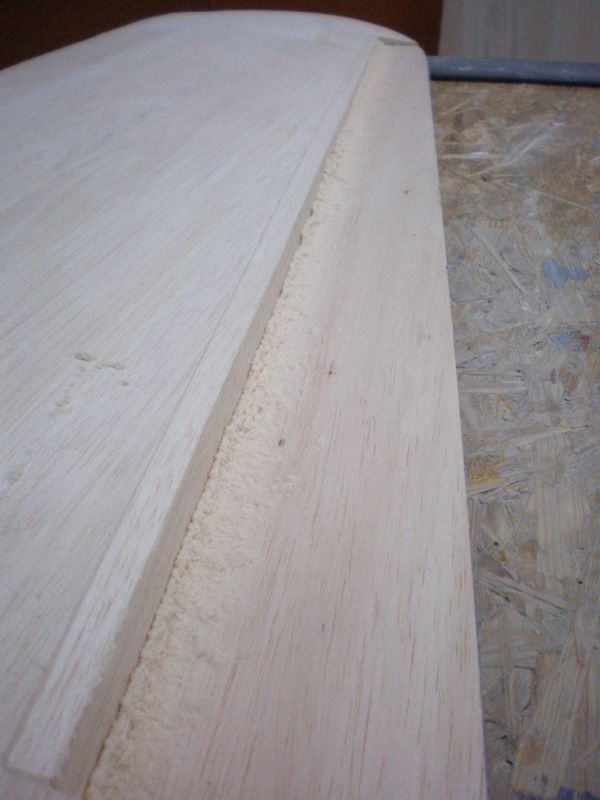
... it was just right as it need to be...
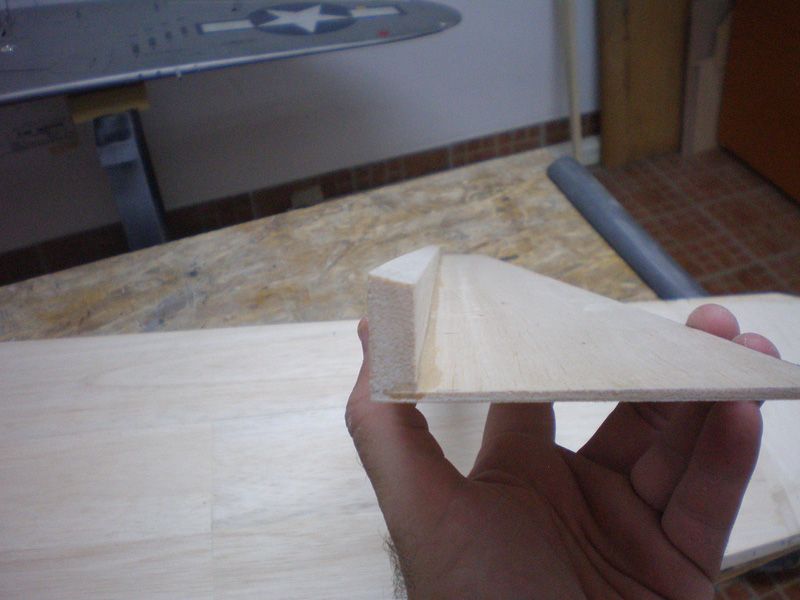
Than ribs, ply for horn screws and one more 3 mm balsa layer on the tip of the aileron...


Today I will add 5 pieces small balsa blocks for hinges and finally upper plate.
On fuselage was worked also.
Two hard woods are glued. That are wood plates for wing screws...
Than I add first from three layers of the inner fuselage side, on which will come wing...
When glue was dry, next 3 mm wide balsa plate was added...
I wet balsa wit hot water, and use white (carpenter) glue...
Hope that today will add last third balsa layer.
I cut off cooling flaps on the cowl. It will be made from thin aluminum in more wide open position.
And finally for today, I need advice.
I want to use Moki 150 on this model, which is 4300 gr heavy. What do you think about idea to put elevator servos on the rear part of the fuselage, under elevator which is fixed on the fuselage.
Reason for that are few: personally I don't like system with still wire for connection left and right elevator moving side.
Second, in the middle of that wire I must weld piece for connecting elevator with servo. If that weld broke, everything will be lost...
Third, I always use one servo for each tail surface. If connection is inside of the fuselage, I must to put or one very strong servo, or connect two servos to get bigger torque.
Finally my question, will I have problem with CG if put two servos in the rear of the fuselage in combination with Moki 150 in front.
If I use some other (lighter) engine, i will not ask this question...
Thanks in advance...
MIrce
Ailerons was next on the list...
Because I wasn't get balsa parts for ailerons (same like for any control surface on tail) I must made it myself. To be honest, I will made it this way in case to get all that parts too...
So, first I made aileron bottom balsa plate. It is exactly measure how it need to be.
Than I glued 10 mm wide balsa for leading edge.
After that with double side self adhesive tape aileron was glued on the wing. It was glued 2 mm higher than bottom wing side, because in that case I can made exactly angle for aileron upper balsa plate...
After sanding...
... it was just right as it need to be...
Than ribs, ply for horn screws and one more 3 mm balsa layer on the tip of the aileron...
Today I will add 5 pieces small balsa blocks for hinges and finally upper plate.
On fuselage was worked also.
Two hard woods are glued. That are wood plates for wing screws...
Than I add first from three layers of the inner fuselage side, on which will come wing...
When glue was dry, next 3 mm wide balsa plate was added...
I wet balsa wit hot water, and use white (carpenter) glue...
Hope that today will add last third balsa layer.
I cut off cooling flaps on the cowl. It will be made from thin aluminum in more wide open position.
And finally for today, I need advice.
I want to use Moki 150 on this model, which is 4300 gr heavy. What do you think about idea to put elevator servos on the rear part of the fuselage, under elevator which is fixed on the fuselage.
Reason for that are few: personally I don't like system with still wire for connection left and right elevator moving side.
Second, in the middle of that wire I must weld piece for connecting elevator with servo. If that weld broke, everything will be lost...
Third, I always use one servo for each tail surface. If connection is inside of the fuselage, I must to put or one very strong servo, or connect two servos to get bigger torque.
Finally my question, will I have problem with CG if put two servos in the rear of the fuselage in combination with Moki 150 in front.
If I use some other (lighter) engine, i will not ask this question...
Thanks in advance...
MIrce
09-12-2012, 01:49 AM
#33
Senior Member
Join Date: Jul 2007
Location: Wetumpka,
AL
Posts: 177
Likes: 0
Received 0 Likes
on
0 Posts
The Moki will nullify the normal amount of lead you would need if you chose a traditional engine. I put two each JR 8711 servos inside the fuselage under the stabs for a direct connection to the elevators. I added one 1/8th inch ply plates for the servo mounts under each stab to help spread the load, amd it has worked perfectly. You will want to use the short metal servo arms to get the maximum torque from the servos and I used two each 4-40 threaded rods covered by a carbon fiber tube with ball links to get a slop free connection, but it wil be very strong. You should also use heavier gage wire (at least 22 or 20) to carry the extra current these servos draw. This location gives you instant access to the linkages and servos for PM and service. I add a small loop of servowire by the servo just in case it should ever be replaced. If you choose to move the servos forward, you will just have to add lead for balance, and an unreliable linkage to join the elevator halves.
Good kuck with you build, I always enjoy it.
Jerry
Good kuck with you build, I always enjoy it.
Jerry
09-12-2012, 08:07 AM
#35
Senior Member
Join Date: Jul 2007
Location: Wetumpka,
AL
Posts: 177
Likes: 0
Received 0 Likes
on
0 Posts
Hello Mirce,
No, not on that plane. I have a couple of the 250ccm engines on other planes though. On my two Zeros I had to add significant lead to the firewall to get them to balance. I have the Y/A Zero and a Ziroli. They just build tail heavy. I think I had to add about 5 pounds of lead to the Ziroli with a Sach's 4.2 with electronic ignition (extra battery, etc).
No, not on that plane. I have a couple of the 250ccm engines on other planes though. On my two Zeros I had to add significant lead to the firewall to get them to balance. I have the Y/A Zero and a Ziroli. They just build tail heavy. I think I had to add about 5 pounds of lead to the Ziroli with a Sach's 4.2 with electronic ignition (extra battery, etc).
09-14-2012, 02:38 PM
#37
Thread Starter
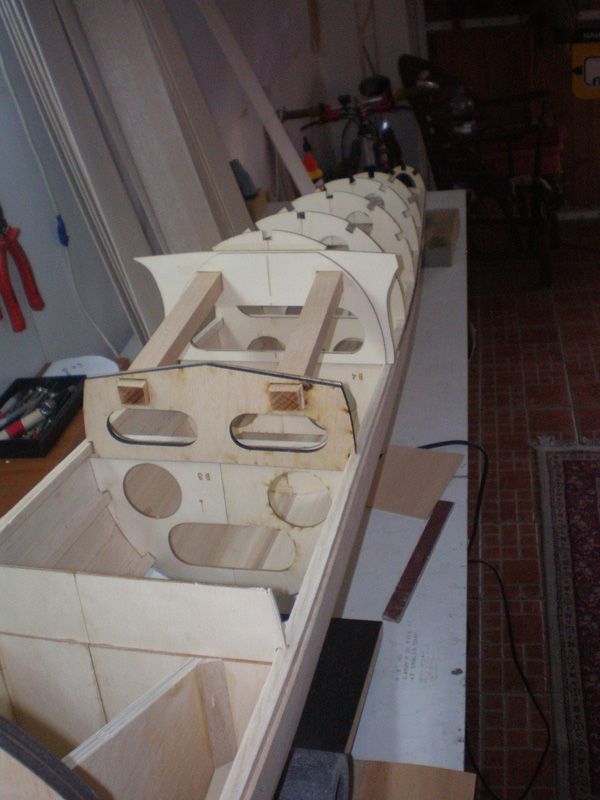
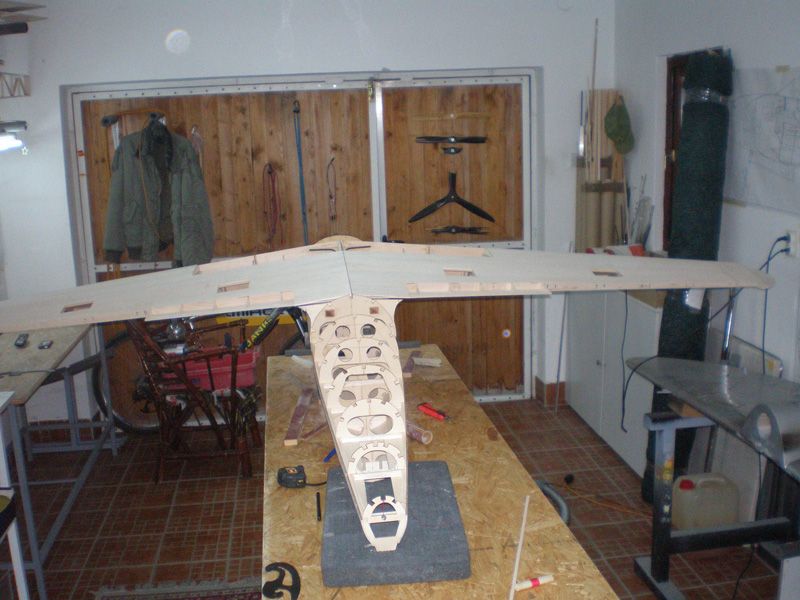
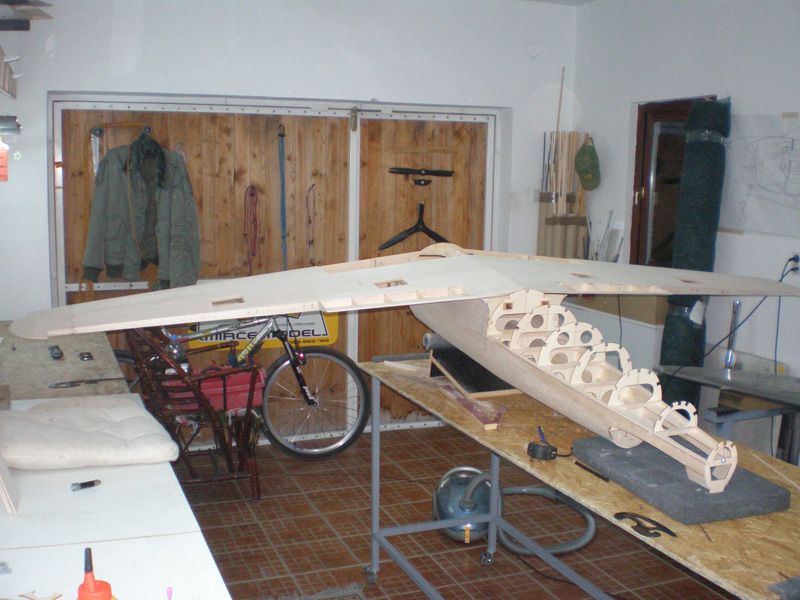
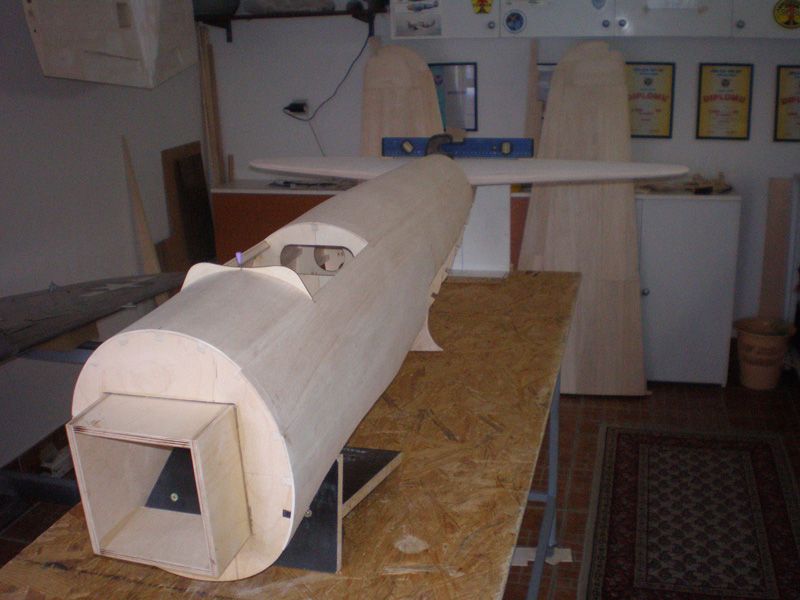
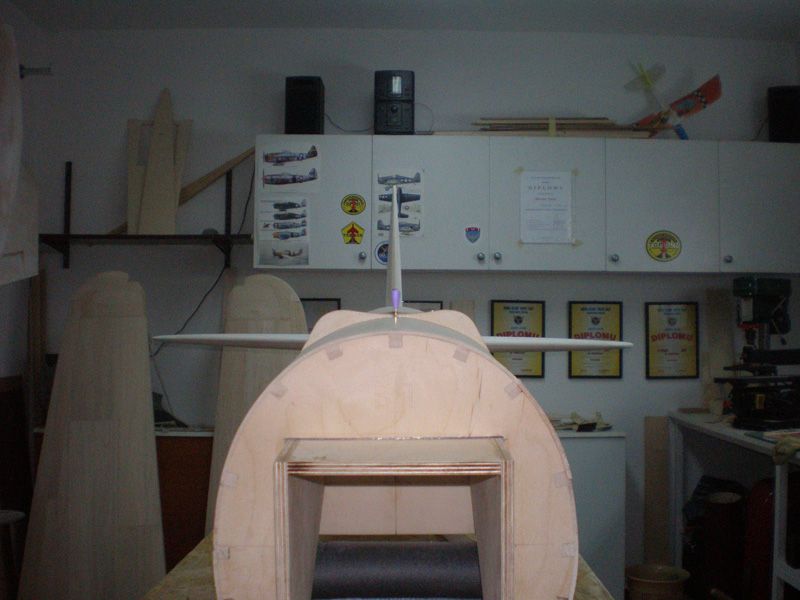
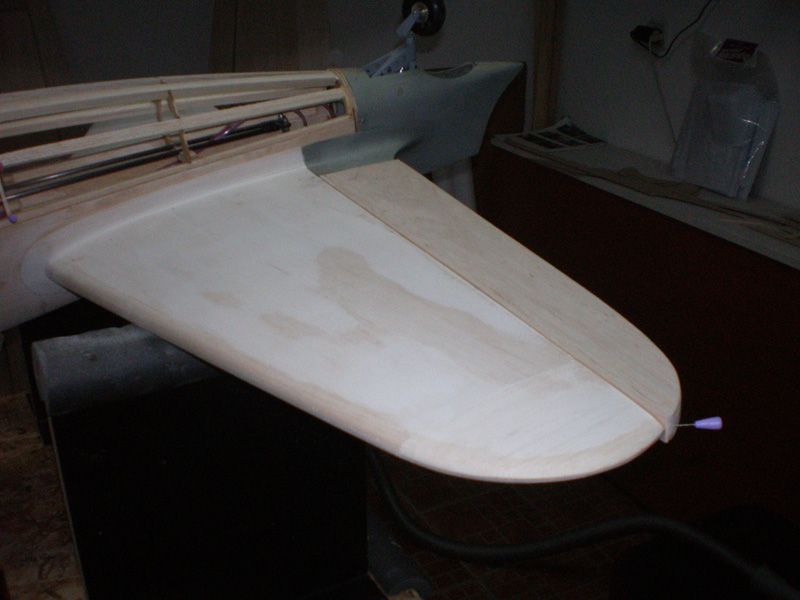
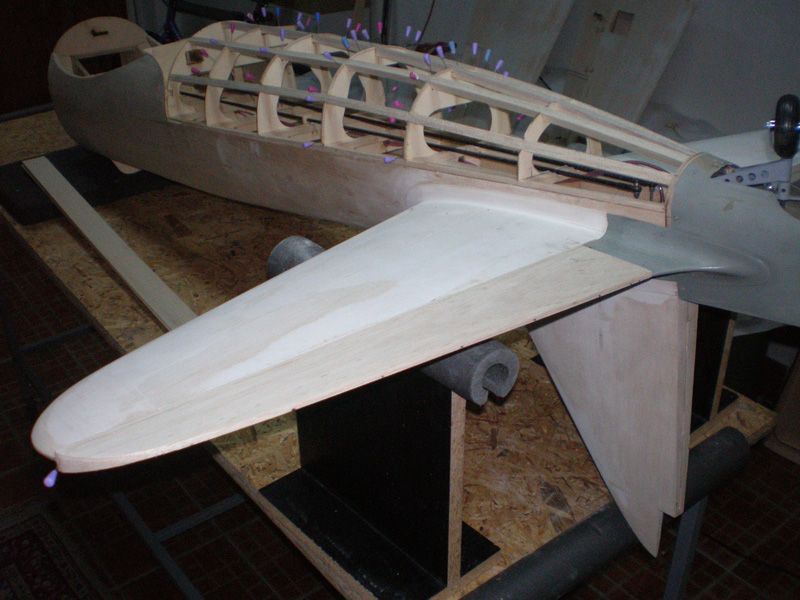
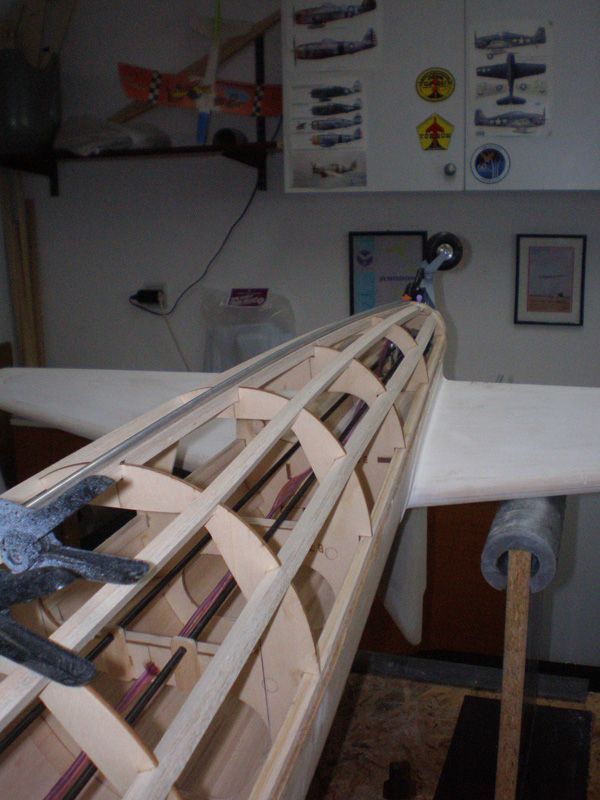
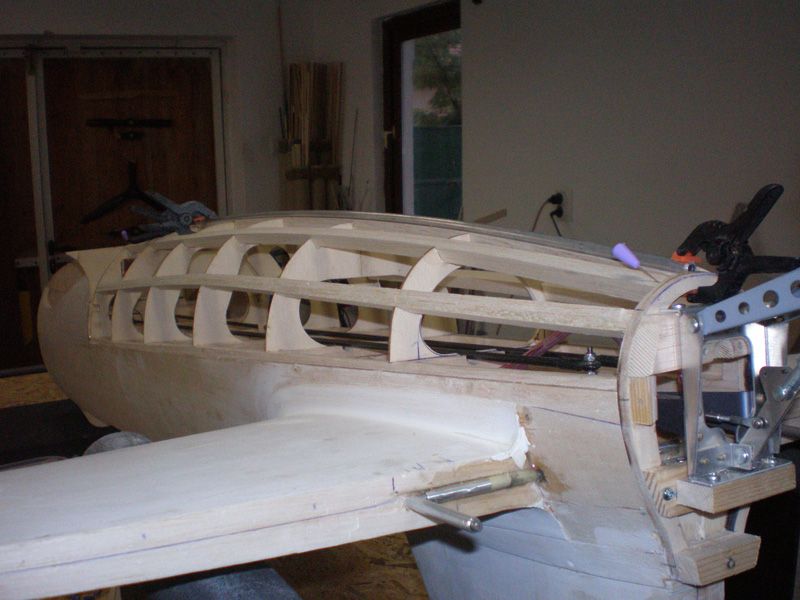
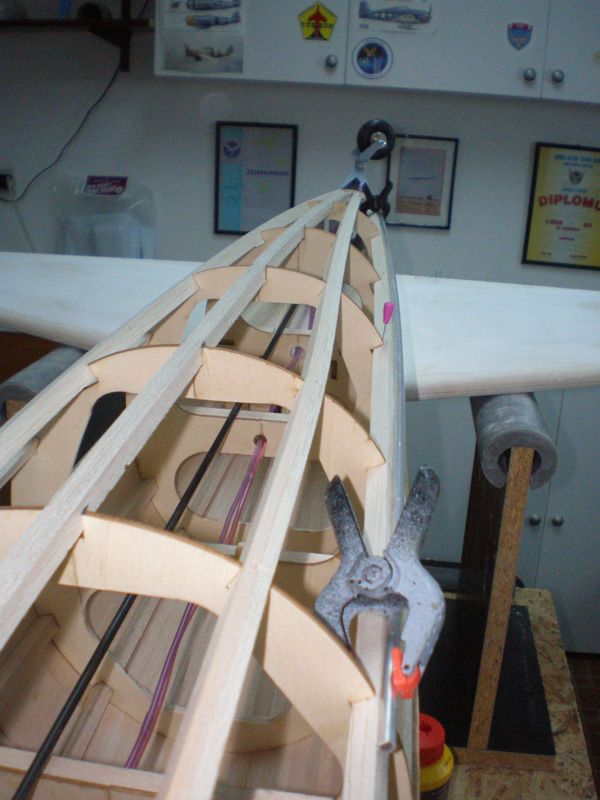
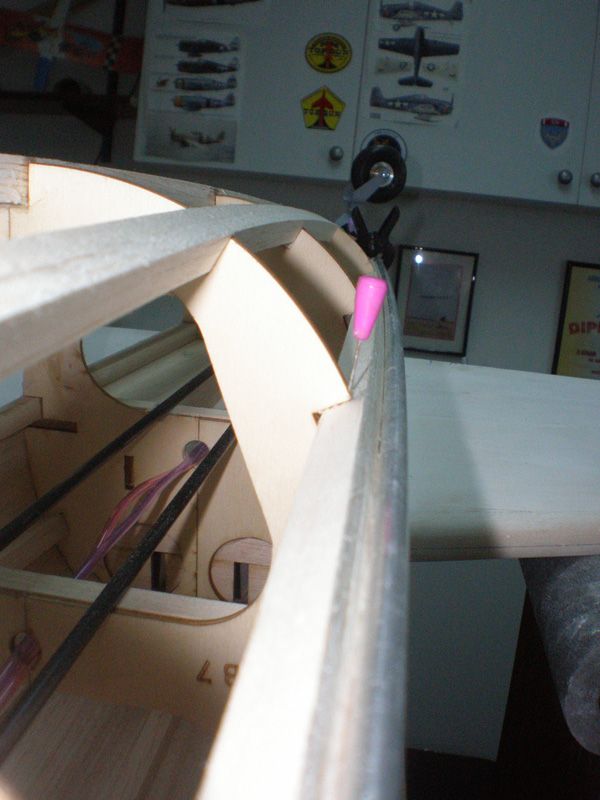
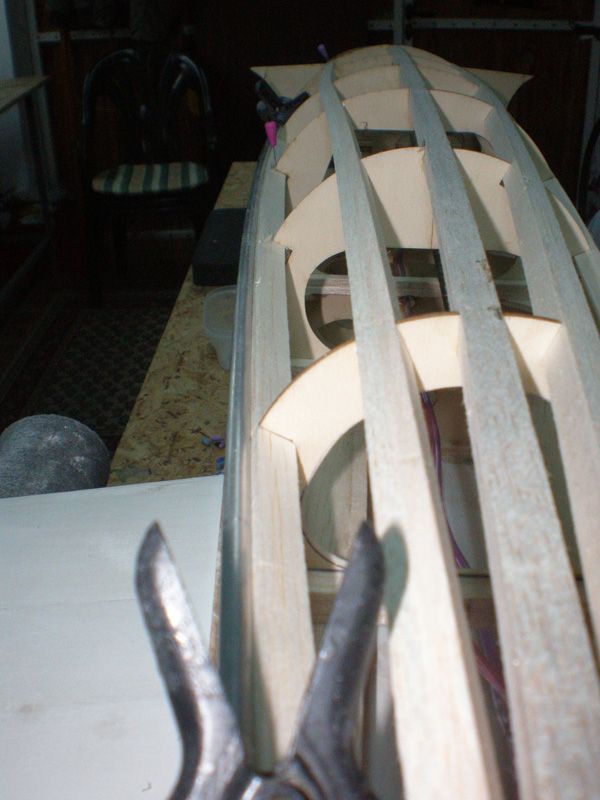
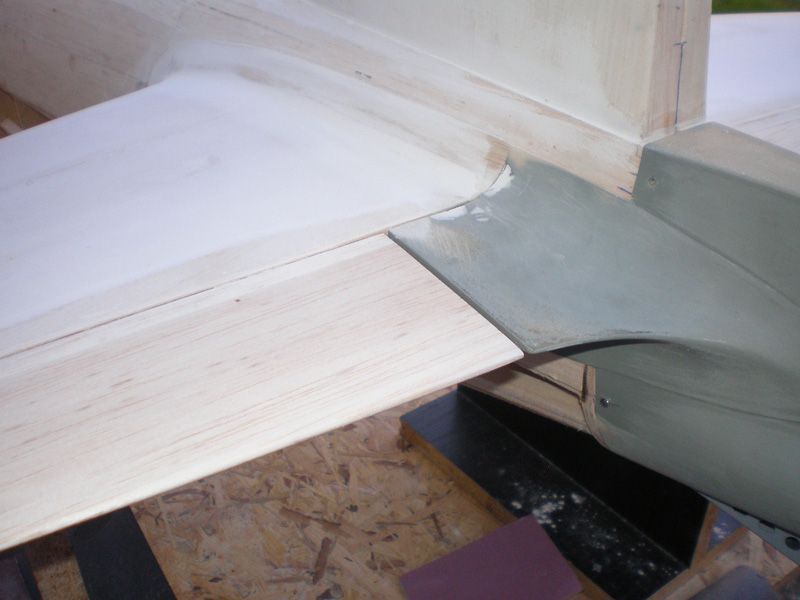
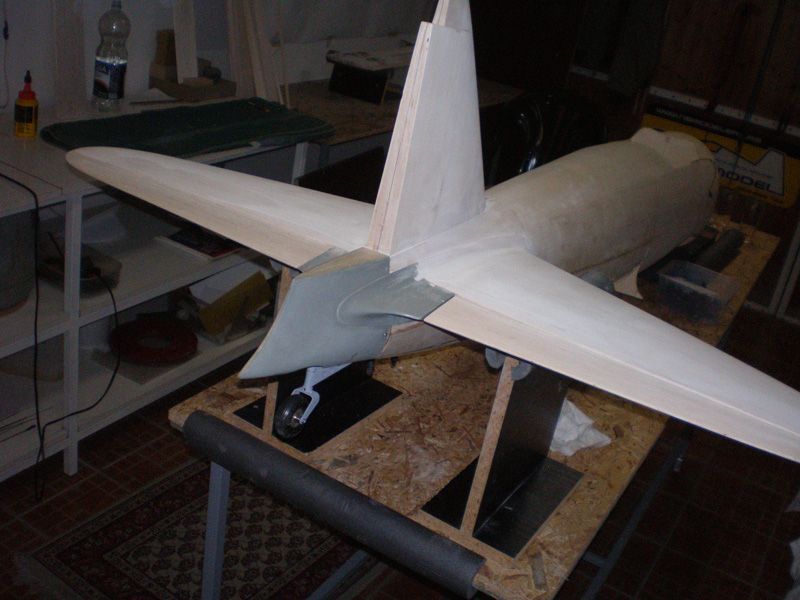
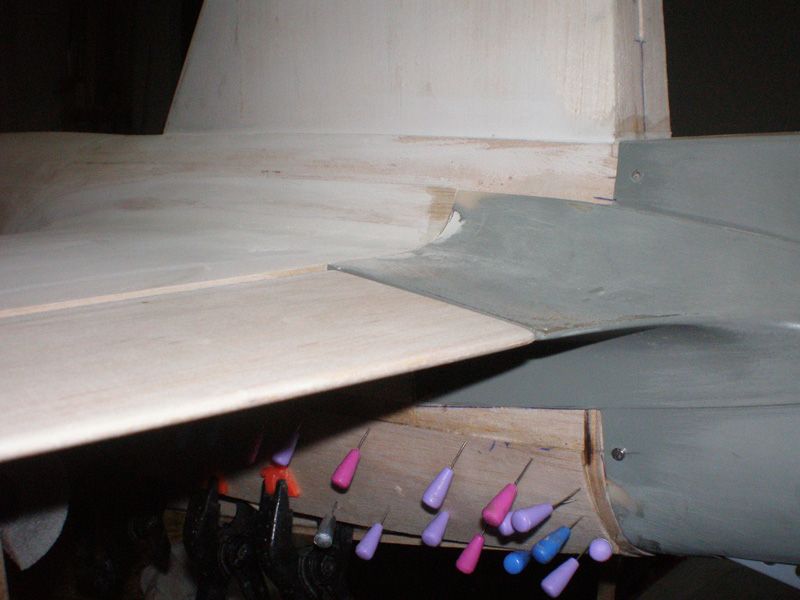
Yesterday I have gymnastic in my workshop, because at least 25 times put and remove wing on fuselage... But, never mind, results of "fine tuning" between wing and fuselage is obvious...
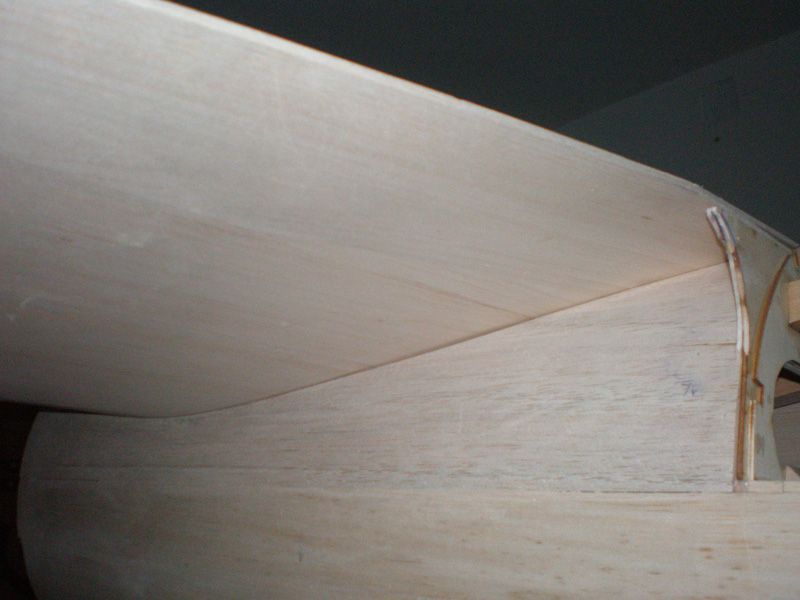
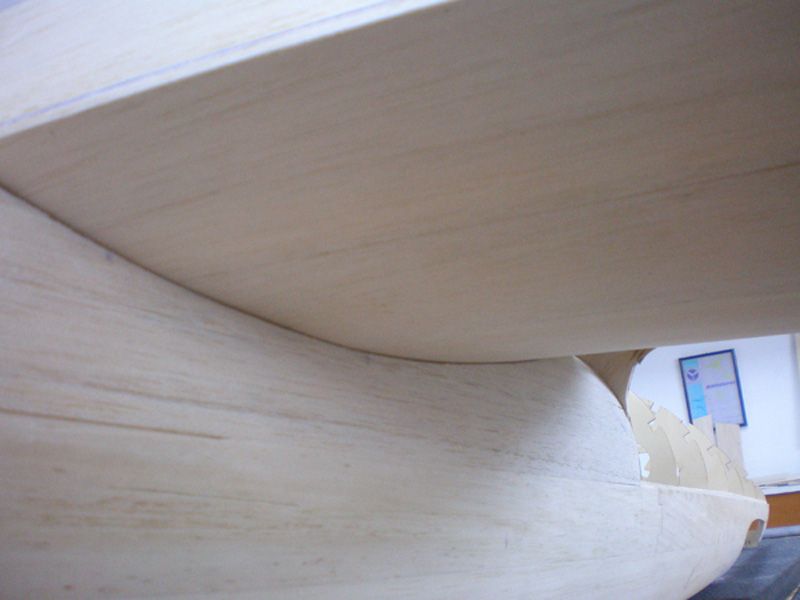
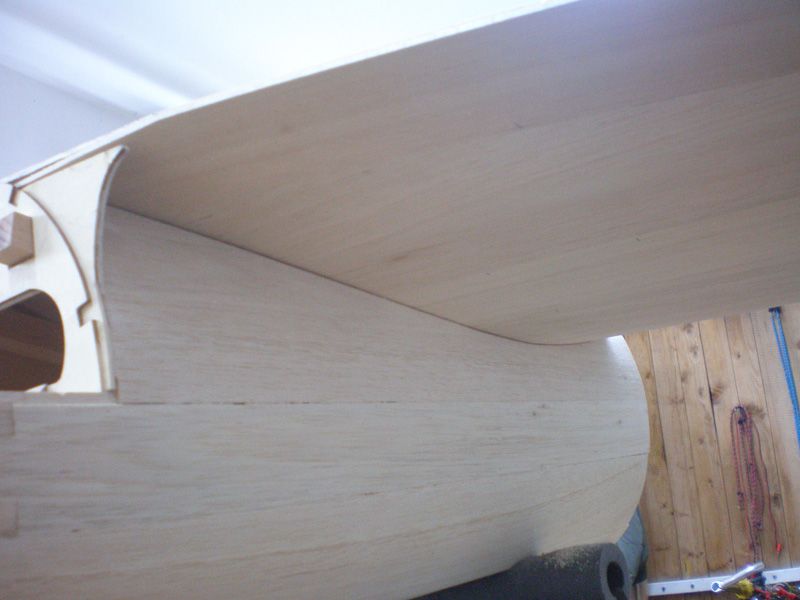

I love this Meister Scale models...
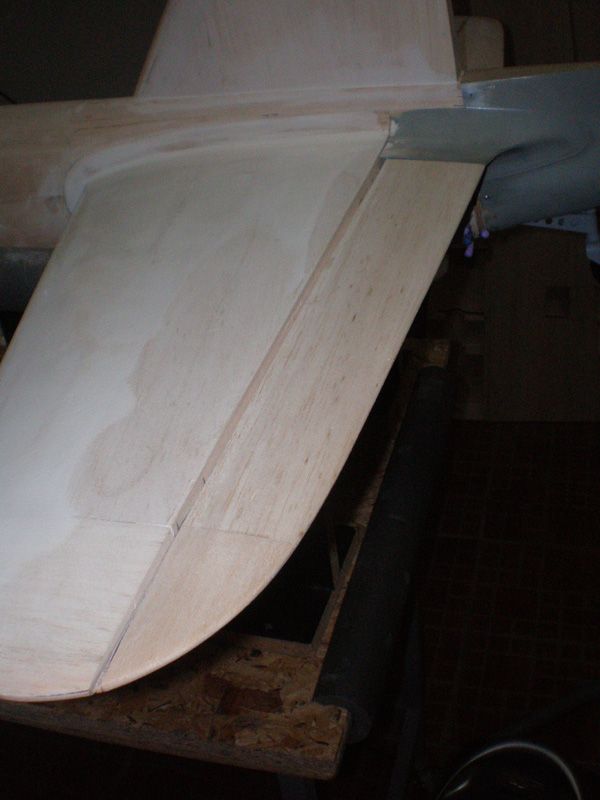
Leading edge is not glued yet, but everything is parallel...
Same is on trailing side of the wing...
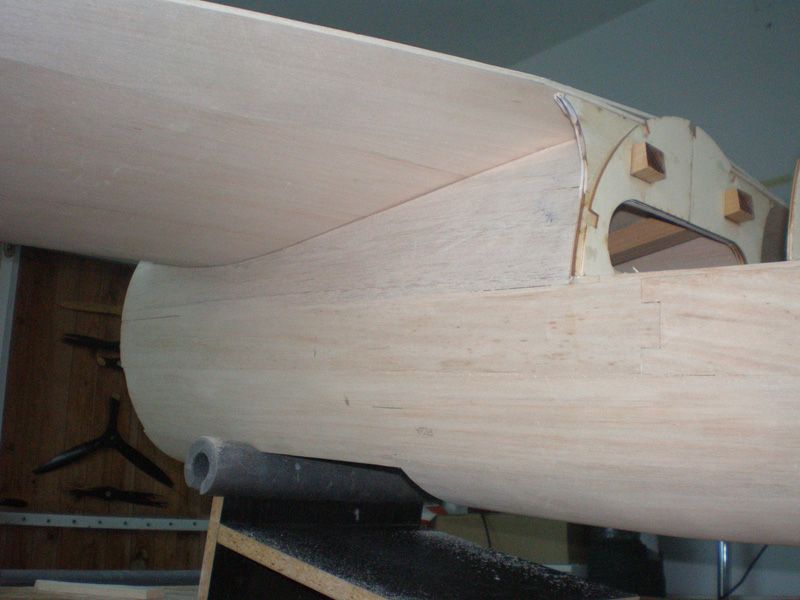
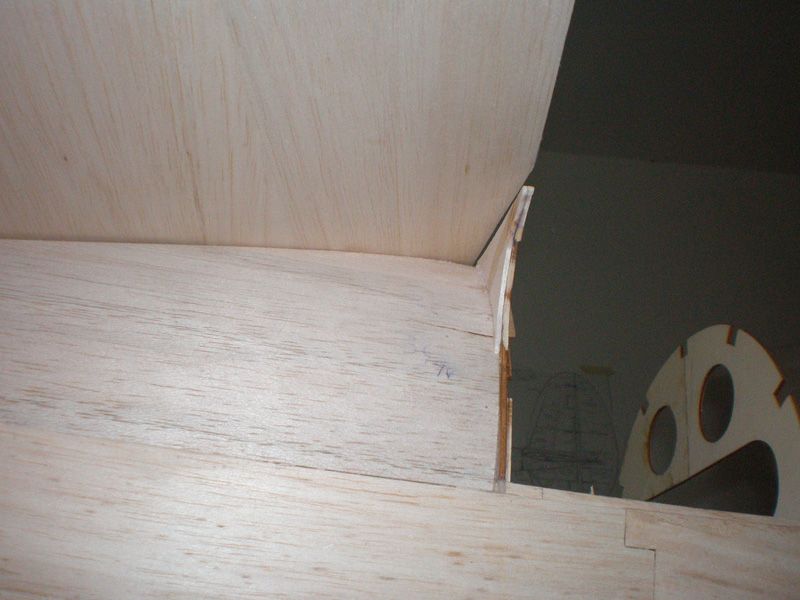
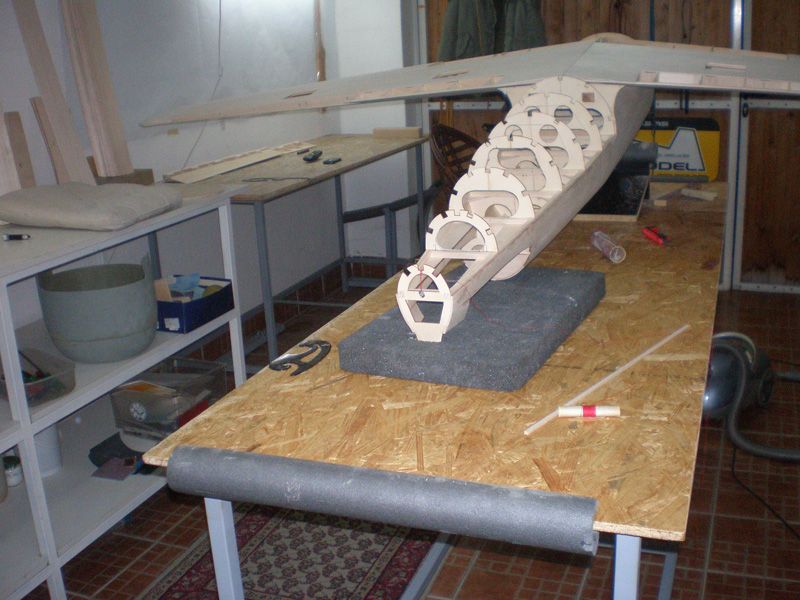
On uselage ribs behind the wing I made bigger holes... Before...
After...


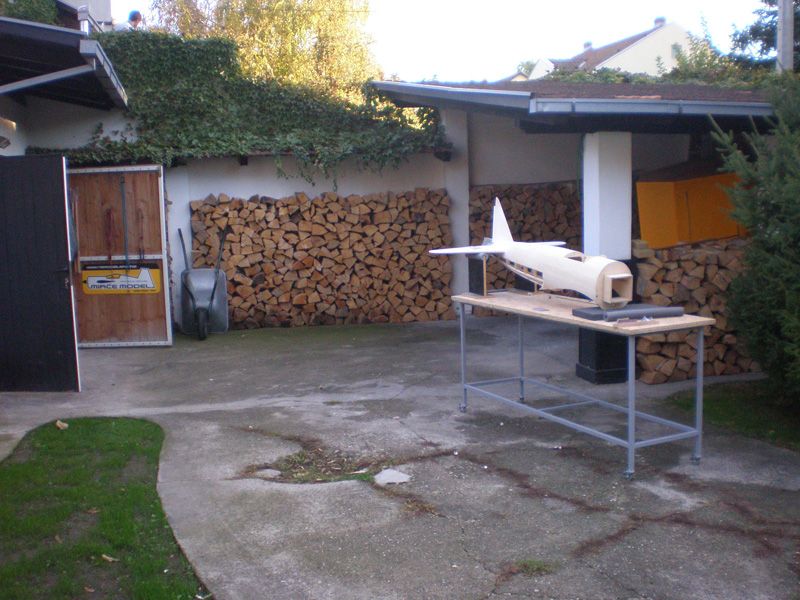
Zero is so huge, wingspan is almost like my garage...
I cut flaps from the cowl. It will be made from thin aluminum in more open position...
Few day ago I ordered all required parts. Hope it will come in next two - three weeks...
Until than I must finish elevator, rudder, ailerons, add acrylic filler on the wing...
I told this so many times, Meister Scale models are very easy to build...
Best regards
Mirce
I love this Meister Scale models...
Leading edge is not glued yet, but everything is parallel...
Same is on trailing side of the wing...
On uselage ribs behind the wing I made bigger holes... Before...
After...
Zero is so huge, wingspan is almost like my garage...
I cut flaps from the cowl. It will be made from thin aluminum in more open position...
Few day ago I ordered all required parts. Hope it will come in next two - three weeks...
Until than I must finish elevator, rudder, ailerons, add acrylic filler on the wing...
I told this so many times, Meister Scale models are very easy to build...
Best regards
Mirce
09-14-2012, 03:16 PM
#38

Join Date: Jul 2012
Location: Missouri
Posts: 1,127
Likes: 0
Received 0 Likes
on
0 Posts
Mirce,
Cocerning your gymnastics.
I have a favorite saying.
"it looks like it grew there"
Your wing to fuselage fit,
looks like it grew there !!!
Your craftsmanship is exceptional !
Kevin
Cocerning your gymnastics.
I have a favorite saying.
"it looks like it grew there"
Your wing to fuselage fit,
looks like it grew there !!!
Your craftsmanship is exceptional !
Kevin
09-17-2012, 03:45 PM
#40
Thread Starter
Thank you for kind words...
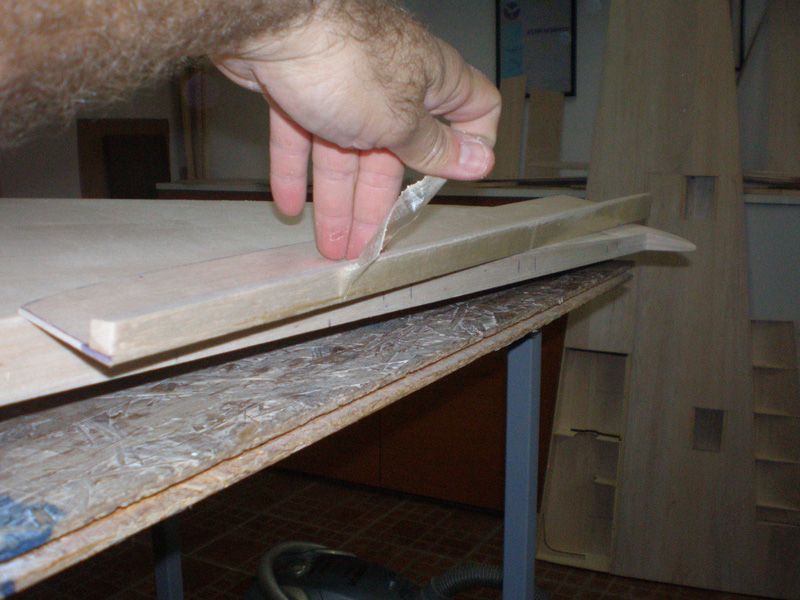
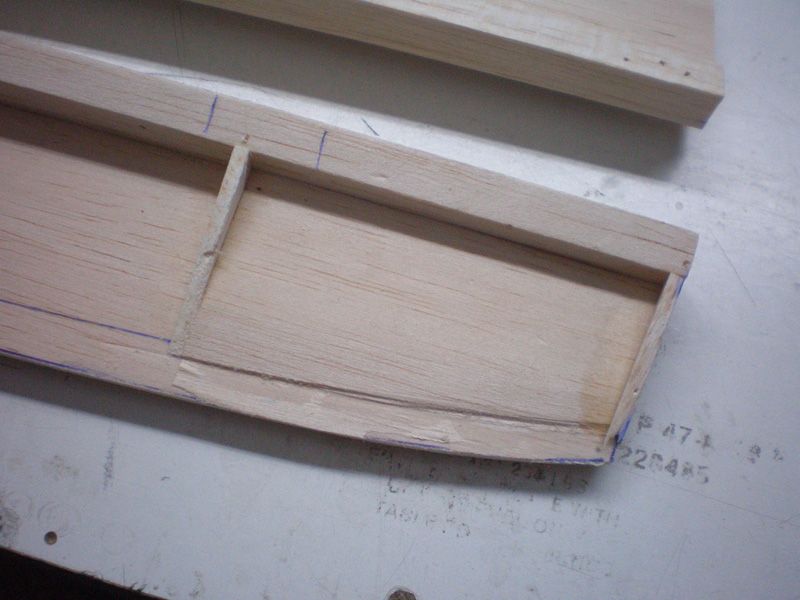
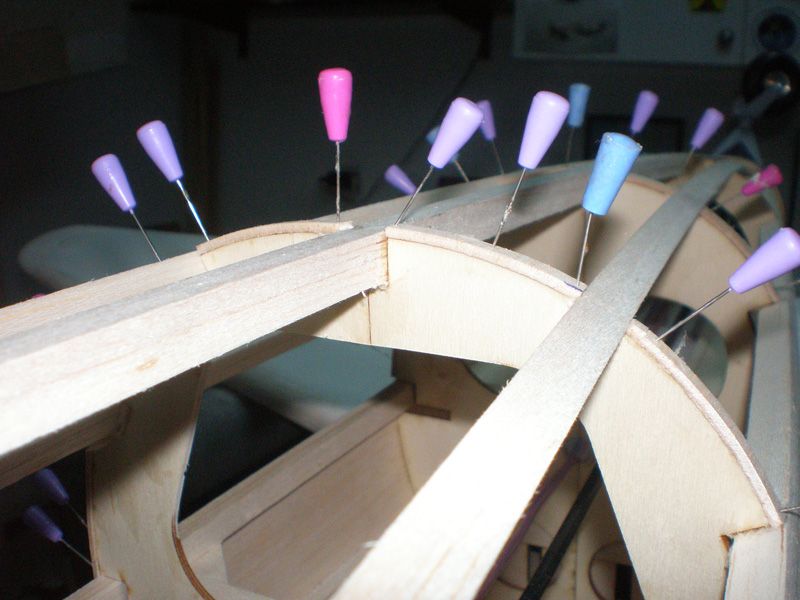
After very successful adjusting wing on the fuselage, next was to adjust ailerons on the wing.
Who read my topics, know that for this operation I use double side adhesive foil, and with it fix aileron on the wing.
Some spots are higher, and with sand paper I can sand everything to be perfect... Look...
Now just to made leading edge on the aileron, and slots for the hinges, and this is finish...
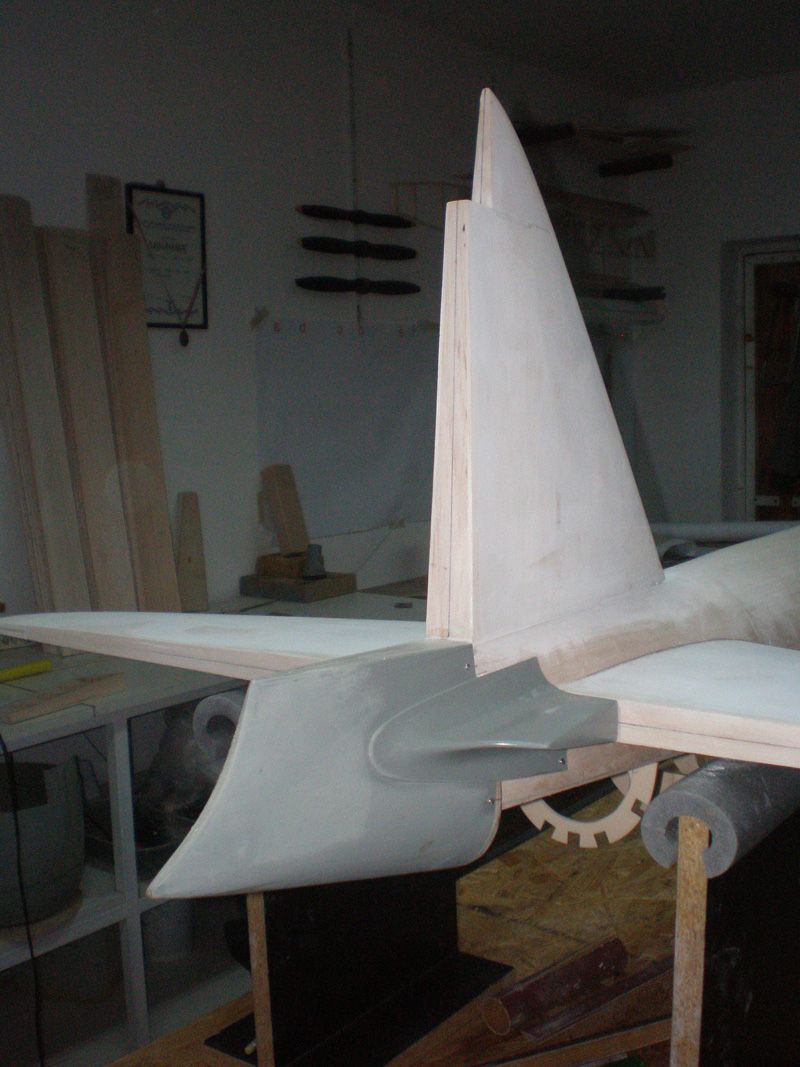
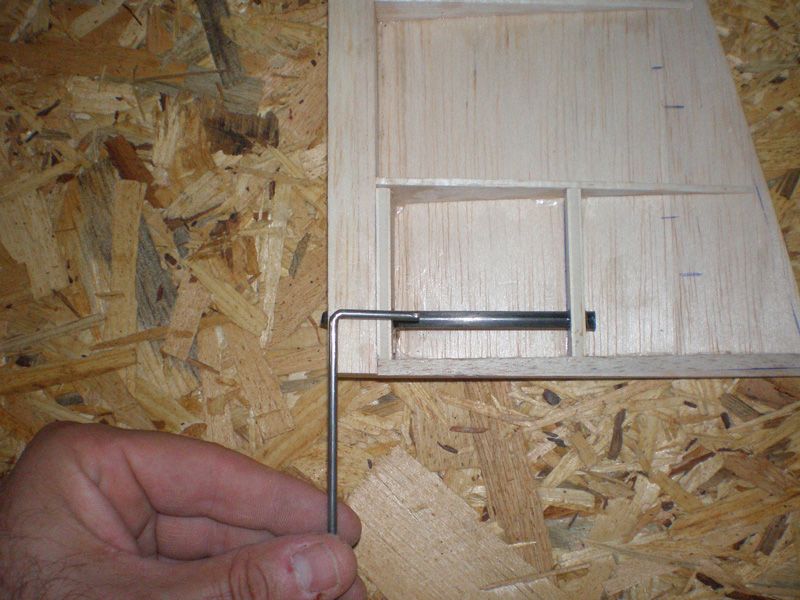
I start working on tail surfaces. First I want to made rudder moving part...

... but then I saw that I must fix elevator and rudder on the model if I want to made everything perfect.
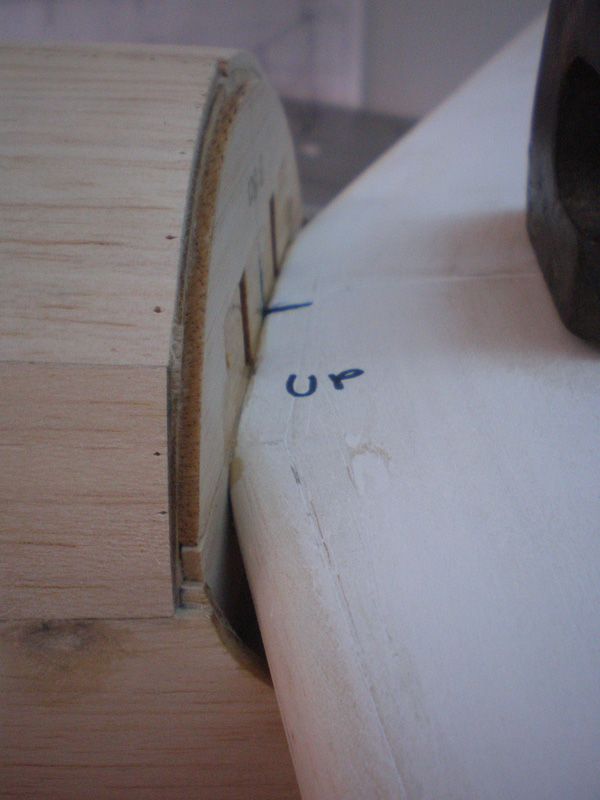
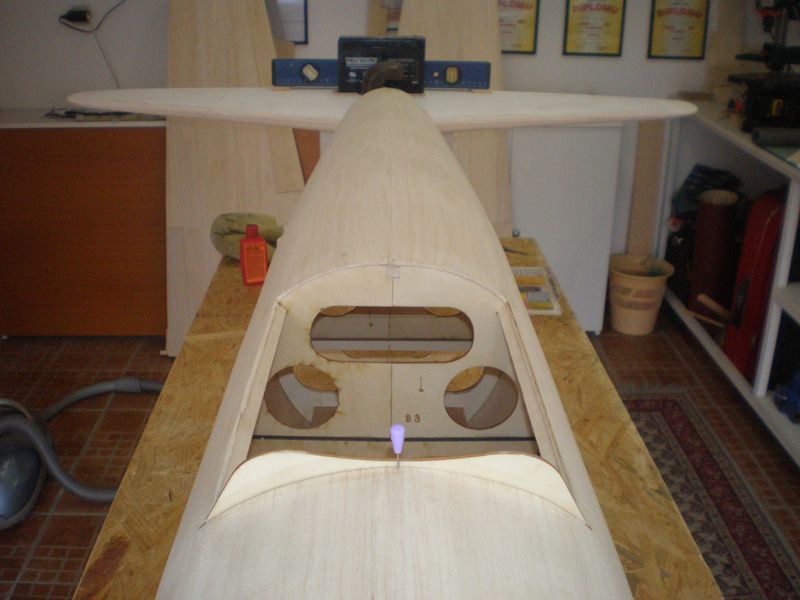
As you know, those parts was made earlier, so I bring it and put elevator on fuselage. It was lying very nice on the fuselage.
But I add balsa plates in front and rear of the elevator, to made it slide exactly on the right place.

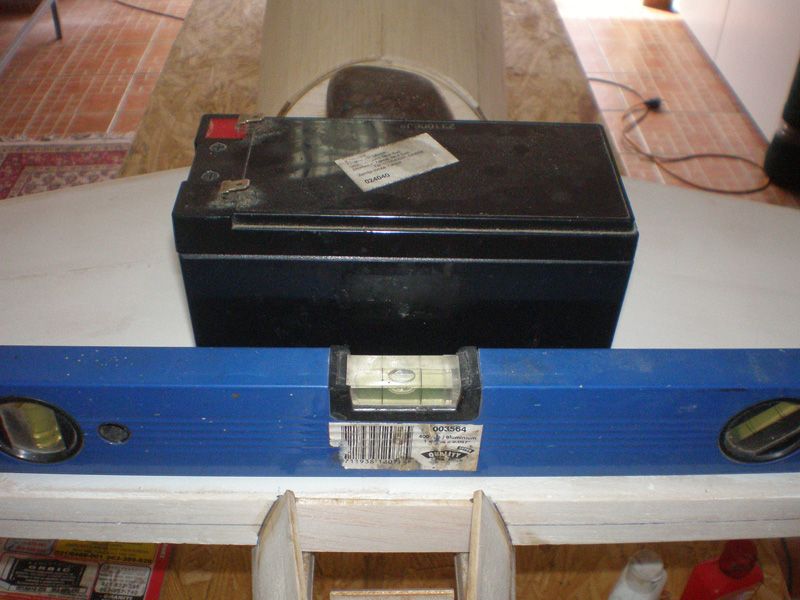
Before gluing, I measure everything 100 times to be sure that all is correct. I used level (hope Google Translator translate this right) to measure angle between elevator and wing saddle...
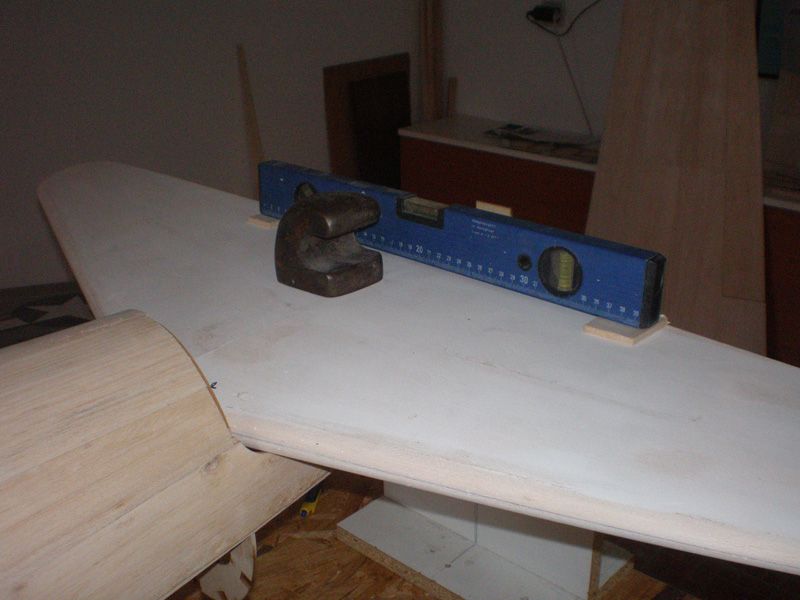
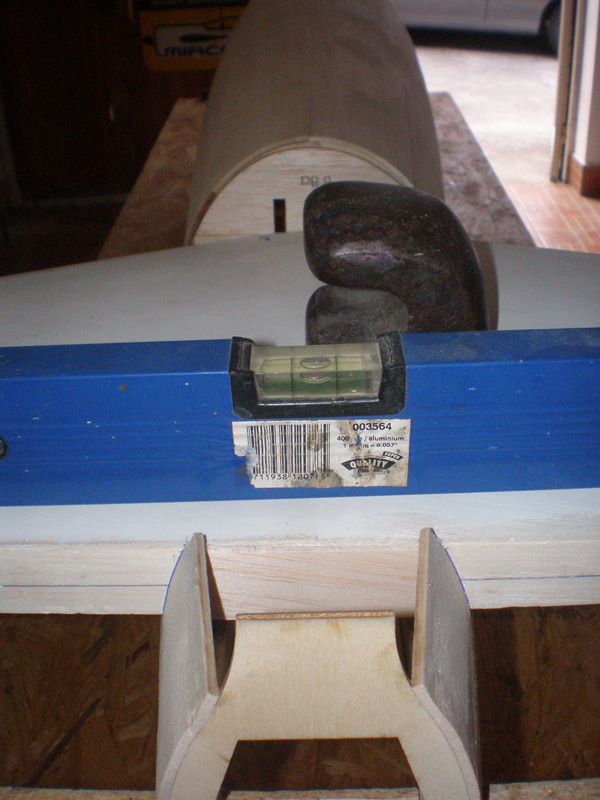
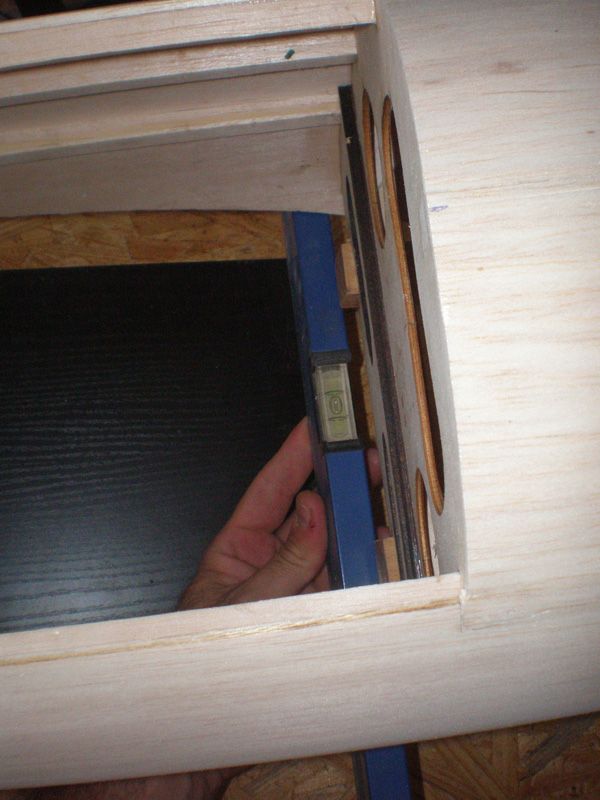
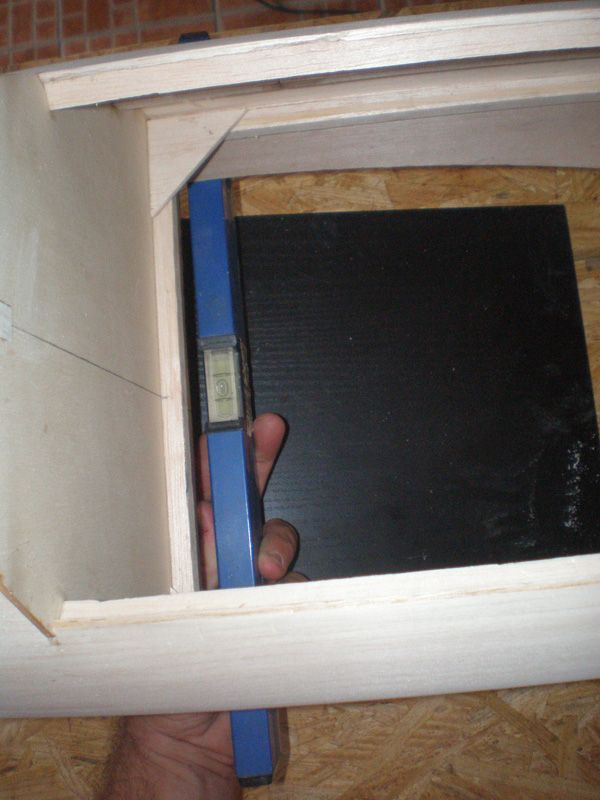
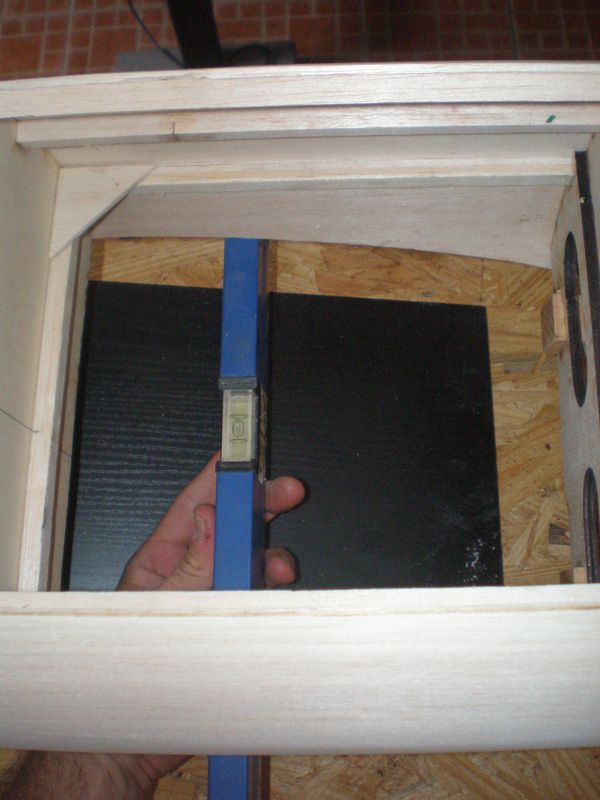
Must I tell that on every spot it was perfect... I love Meister Scale models...
Than I glued elevator... Of course, I measured it one more time, and after that leave it until epoxy glue was dry...
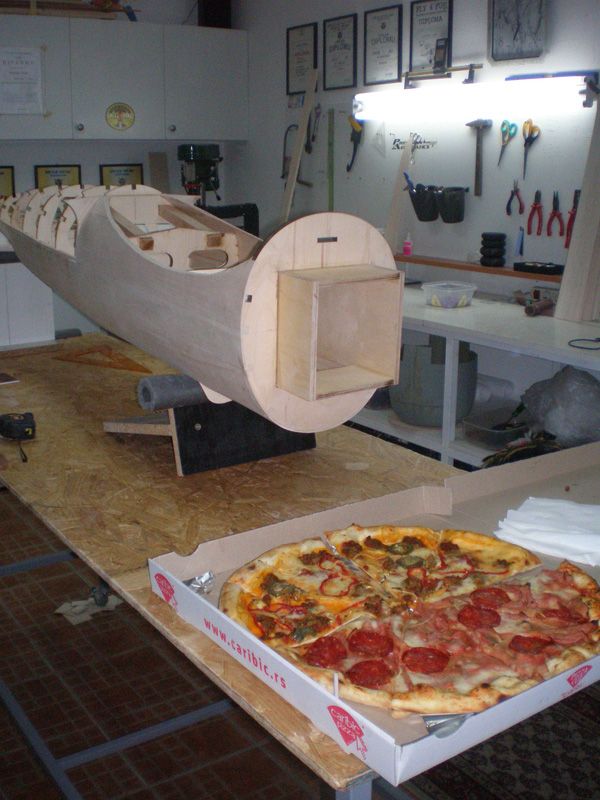
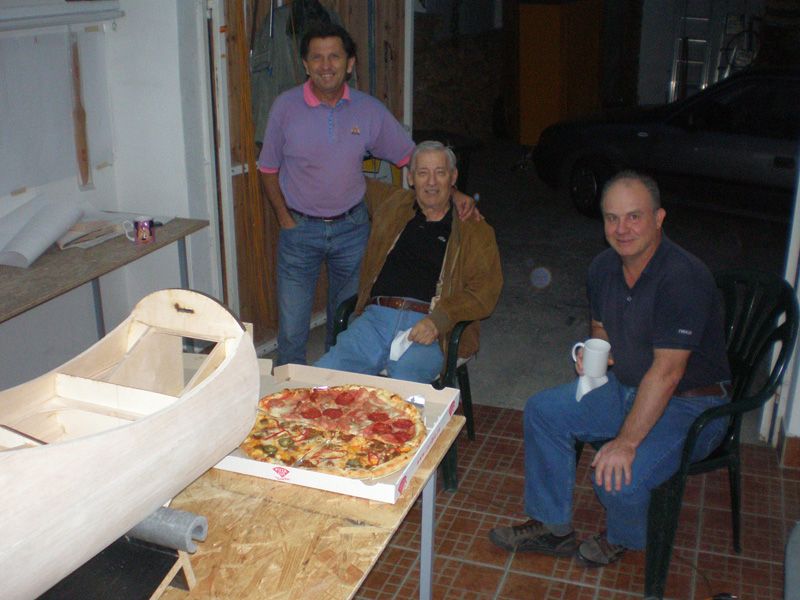
At the evening, my friends come to check work. They bring pizza, so we enjoyed very much...
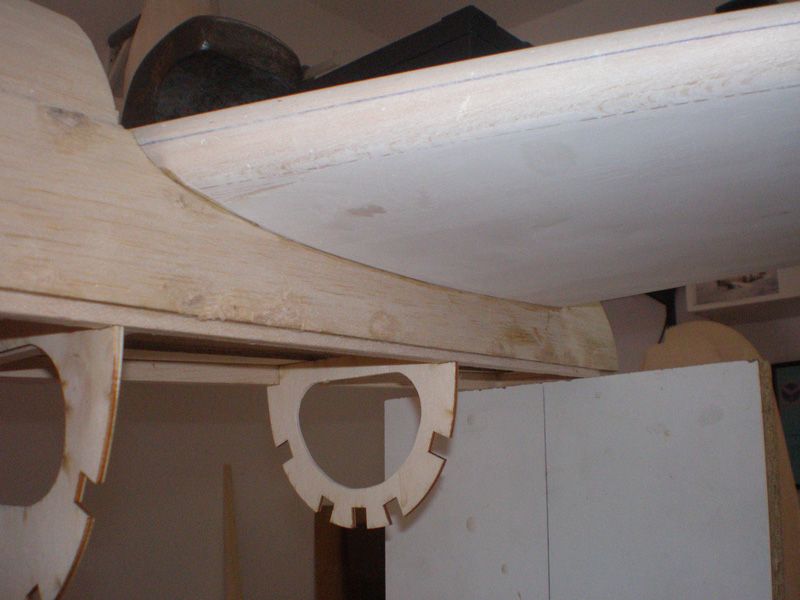
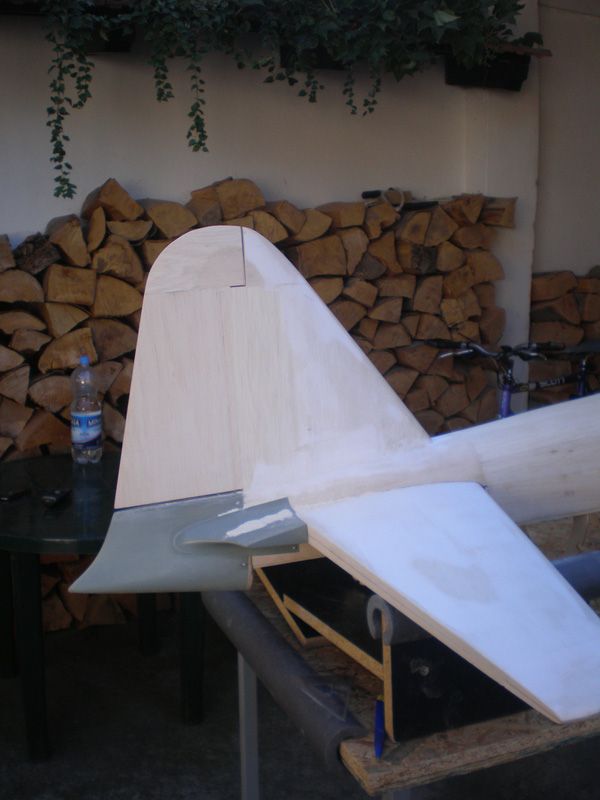
Before gluing rudder, I add few 5 mm balsa half ribs to connect elevator and fuselage on one more spot...
Than epoxy again, and rudder was glued...
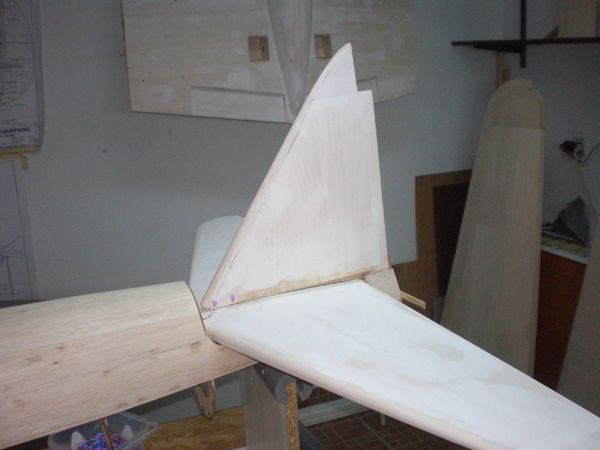
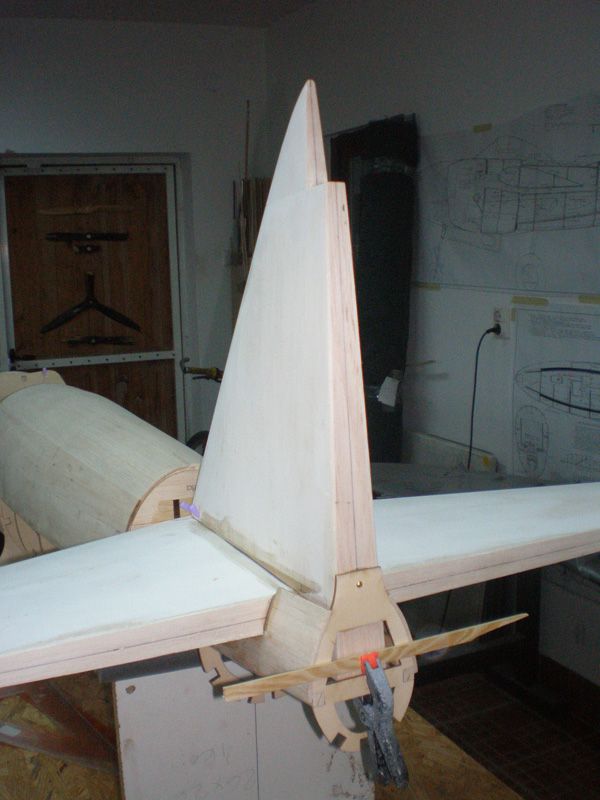
Now I'll leave everything until morning, and then continue with works...
Regards
Mirce
After very successful adjusting wing on the fuselage, next was to adjust ailerons on the wing.
Who read my topics, know that for this operation I use double side adhesive foil, and with it fix aileron on the wing.
Some spots are higher, and with sand paper I can sand everything to be perfect... Look...
Now just to made leading edge on the aileron, and slots for the hinges, and this is finish...
I start working on tail surfaces. First I want to made rudder moving part...
... but then I saw that I must fix elevator and rudder on the model if I want to made everything perfect.
As you know, those parts was made earlier, so I bring it and put elevator on fuselage. It was lying very nice on the fuselage.
But I add balsa plates in front and rear of the elevator, to made it slide exactly on the right place.
Before gluing, I measure everything 100 times to be sure that all is correct. I used level (hope Google Translator translate this right) to measure angle between elevator and wing saddle...
Must I tell that on every spot it was perfect... I love Meister Scale models...
Than I glued elevator... Of course, I measured it one more time, and after that leave it until epoxy glue was dry...
At the evening, my friends come to check work. They bring pizza, so we enjoyed very much...
Before gluing rudder, I add few 5 mm balsa half ribs to connect elevator and fuselage on one more spot...
Than epoxy again, and rudder was glued...
Now I'll leave everything until morning, and then continue with works...
Regards
Mirce
09-18-2012, 07:39 AM
#41
Join Date: Apr 2006
Location: Carrollton
Posts: 1,698
Likes: 0
Received 0 Likes
on
0 Posts
Well,
It's great to see the MASTER back at work. Mirce, your skills continue to be an inspiration. You say that the Meister Scale kit makes it easy for you, but the kit is only half of the story. I cannot wait to see your Zero finished, but I've learned that building a kit of this quality takes time.........
I also cannot wait for you to start your FW-190 because it is my favorite Axis fighter and only second to the P-38 Lightning as being my favorite warbird.
Keep up the GREAT work ................
David
It's great to see the MASTER back at work. Mirce, your skills continue to be an inspiration. You say that the Meister Scale kit makes it easy for you, but the kit is only half of the story. I cannot wait to see your Zero finished, but I've learned that building a kit of this quality takes time........
.I also cannot wait for you to start your FW-190 because it is my favorite Axis fighter and only second to the P-38 Lightning as being my favorite warbird.
Keep up the GREAT work ................
David
09-18-2012, 09:06 AM
#42
Senior Member
Join Date: Jun 2003
Location: coral springs,
FL
Posts: 167
Likes: 0
Received 0 Likes
on
0 Posts
Mirce.......incredible !!!!.....keep it up......we would expect nothing less.......Doug...Meisterland South....P.S. Deans wedding is Sunday...wish you could be there.......take care
09-18-2012, 09:39 AM
#43
Thread Starter
Thank you my friends...
I heard from Steve, from Bobs Hobby Center, that Dino will have wedding this weekend, so I use this topic to congratulate him and his wife and wish them all the best...
David, I can't wait also to finish this model.
My friend (that in purple shirt on picture with pizza) promise that he will buy Moki 150 for this model. So, this will be "our" model, but never mind, we will enjoy in Zero on airfield...
As I told, hope maiden flight will be at spring next year...
There is real chance to soon start working on Meister Scale Foke Wulf also. I'm in negotiations with one my friend to made for him that model. Hope at this weekend will know result...
Best regards
Mirce
09-23-2012, 03:01 PM
#45
Thread Starter
He, he, Redbiscuits...
In meantime, I was working on Zero. First I finally finish all on both ailerons...
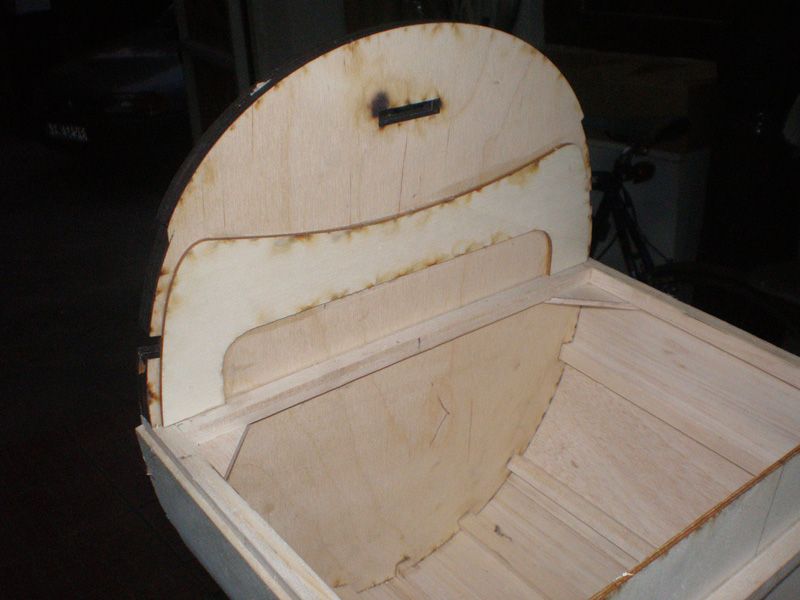
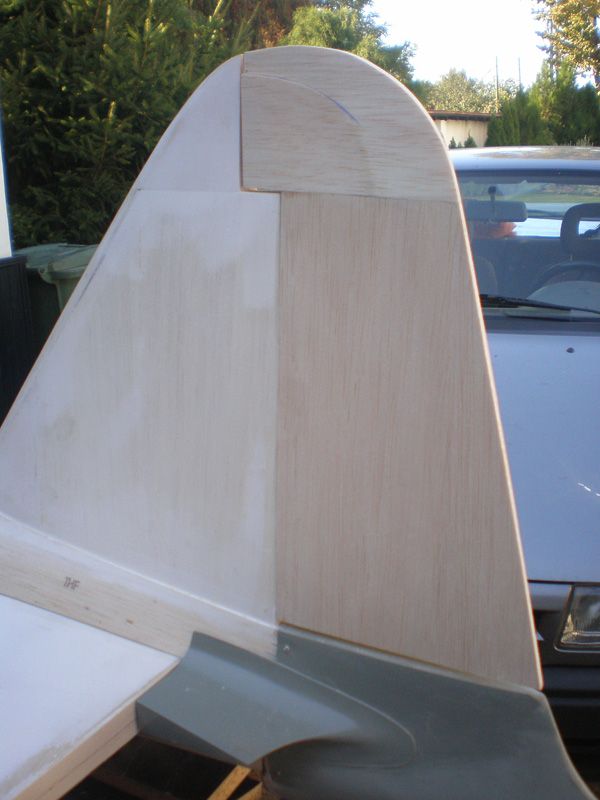
Than I start working on Zero tail part of the fuselage. First I glued balsa between rudder and elevator.
Then, plastic tail part. Here was a lot to work until I was satisfied. Though it could be better, but that is best I can made...
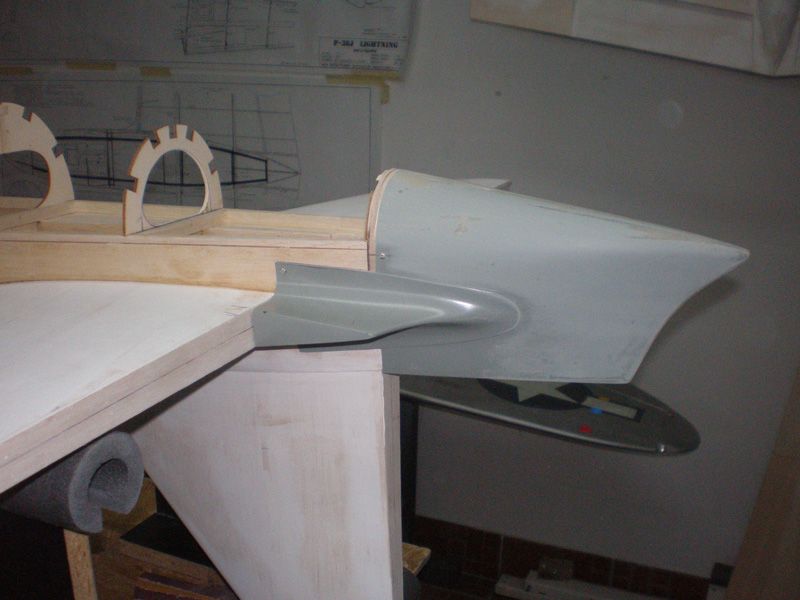
This part I'll can remove when unscrew 6 small screws. For that I need to made little parts for screws made from ply...
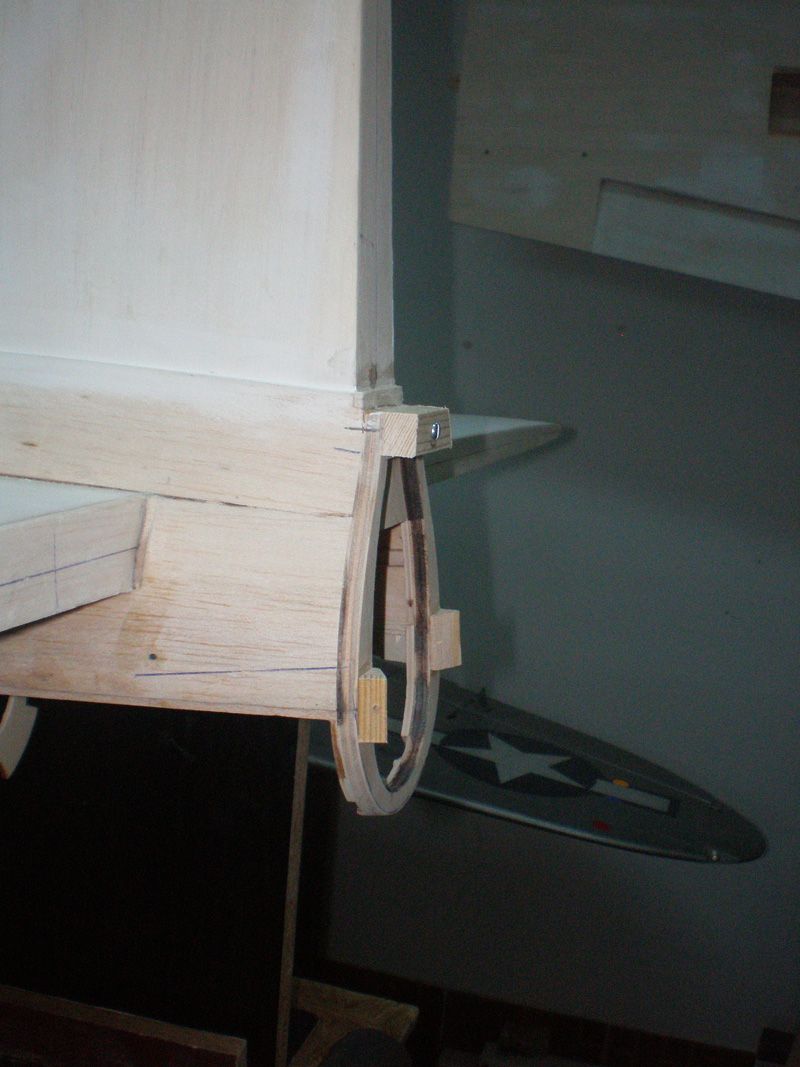
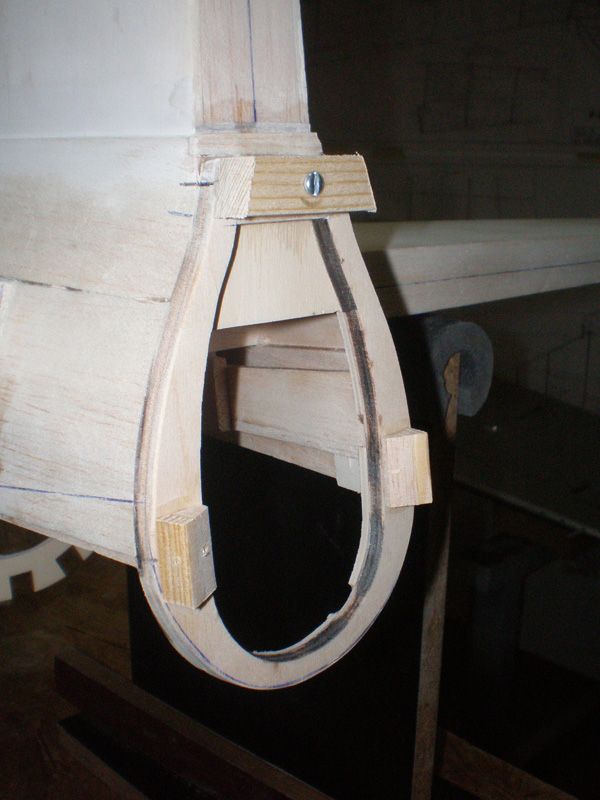
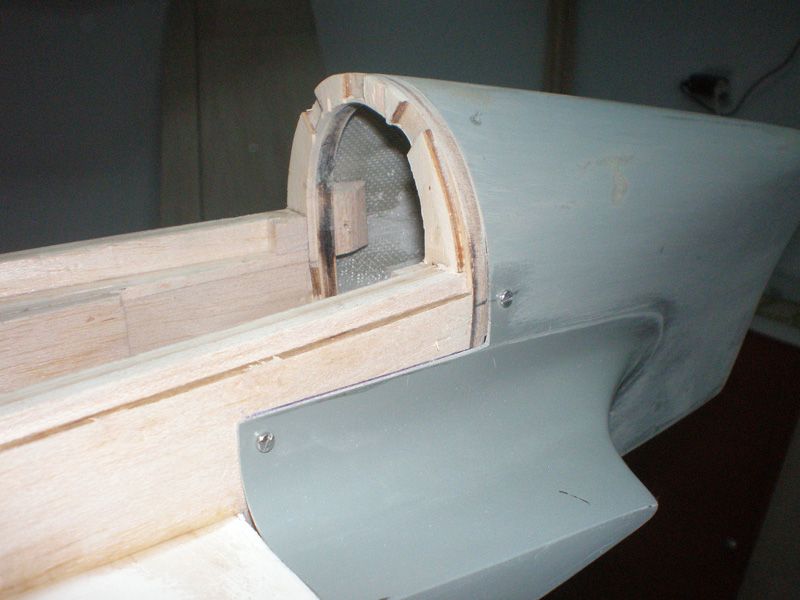
As you can see, I made big opening on last rib.
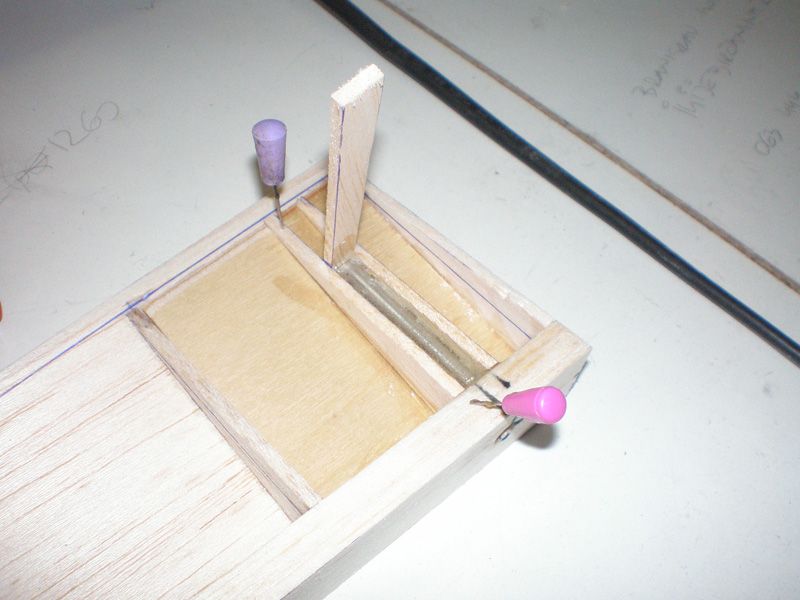
Than I start working on rudder. For rudder moving part I will use steel wire, which will come inside of the fuselage. Because that, first I glued one carbon tube with inner diameter same like diameter of steel wire...
Than I cover moving rudder part with balsa, and after adding top part I glued everything on rudder on fuselage. Sandind, sanding, sandin, and finally...
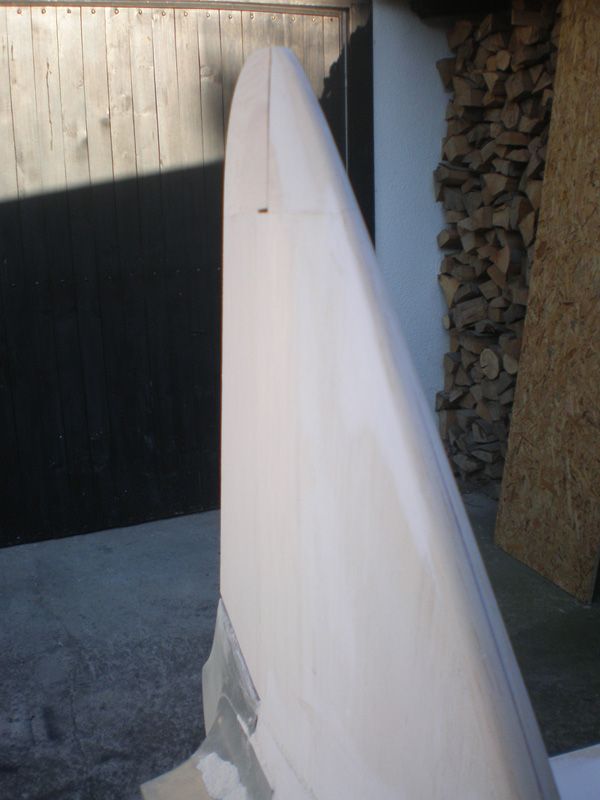
Last was to made leading edge and hinges. So, this part is finish also...
Regards
Mirce
In meantime, I was working on Zero. First I finally finish all on both ailerons...
Than I start working on Zero tail part of the fuselage. First I glued balsa between rudder and elevator.
Then, plastic tail part. Here was a lot to work until I was satisfied. Though it could be better, but that is best I can made...
This part I'll can remove when unscrew 6 small screws. For that I need to made little parts for screws made from ply...
As you can see, I made big opening on last rib.
Than I start working on rudder. For rudder moving part I will use steel wire, which will come inside of the fuselage. Because that, first I glued one carbon tube with inner diameter same like diameter of steel wire...
Than I cover moving rudder part with balsa, and after adding top part I glued everything on rudder on fuselage. Sandind, sanding, sandin, and finally...
Last was to made leading edge and hinges. So, this part is finish also...
Regards
Mirce
10-01-2012, 12:57 AM
#46
Thread Starter
Little up date...
In last seven - eight days I was working on Zero every day. Now this is a phase when you have a lot to work, but no much to show.
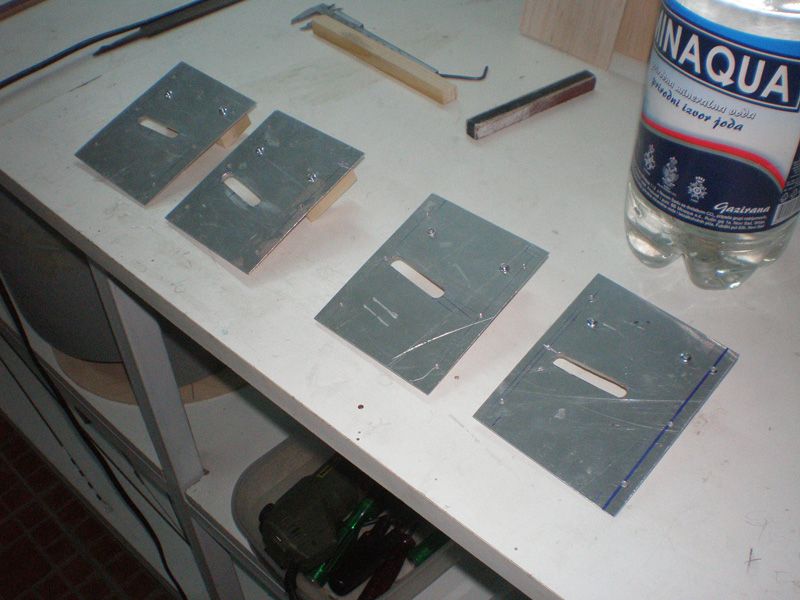
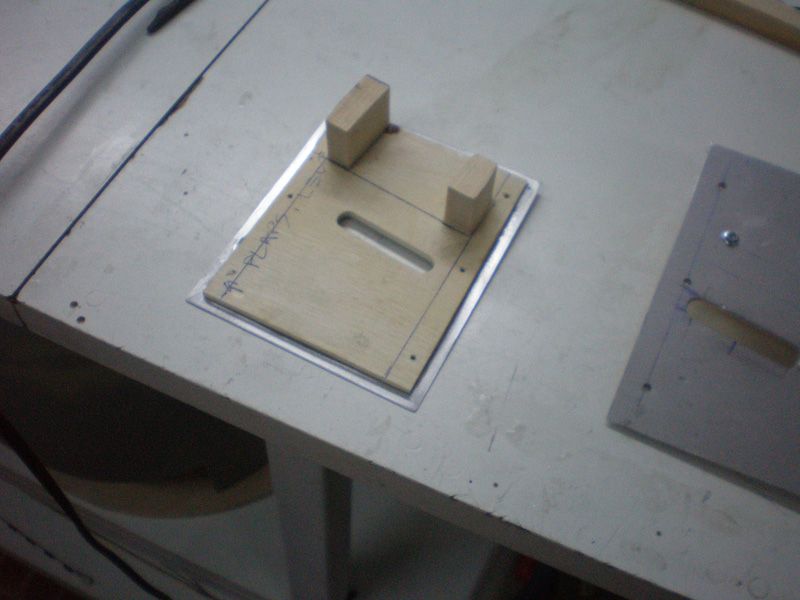
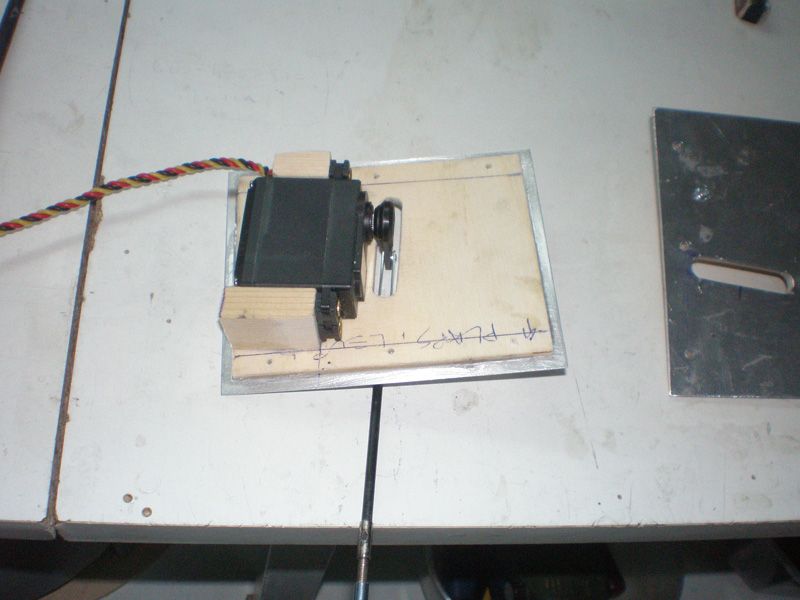
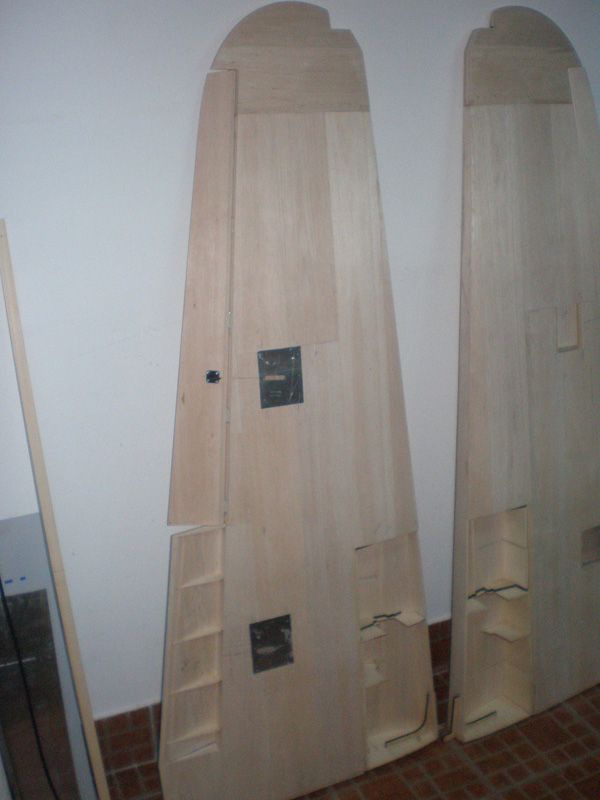
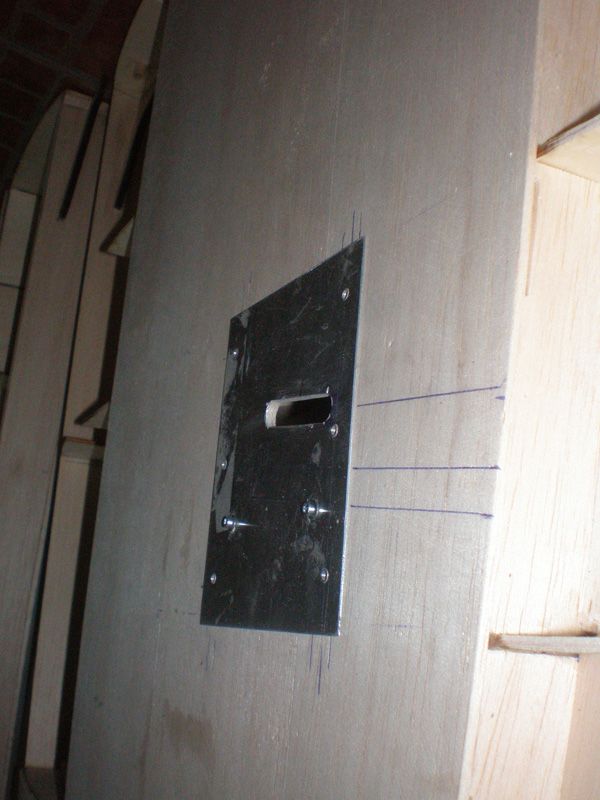
I made all servo cover for the wings. System is same like on all my planes...
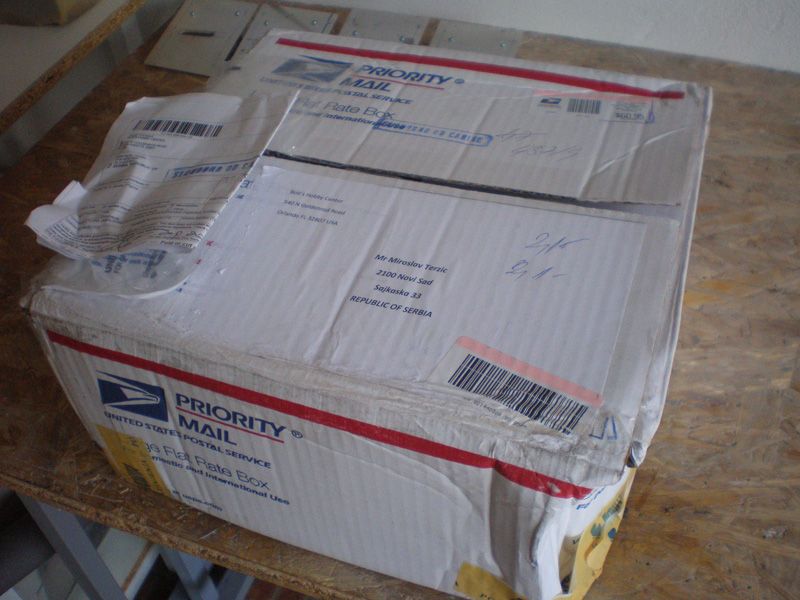
Few days ago from Steve from Bobs Hobby Center in Orlando, I received first box with parts for Zero.
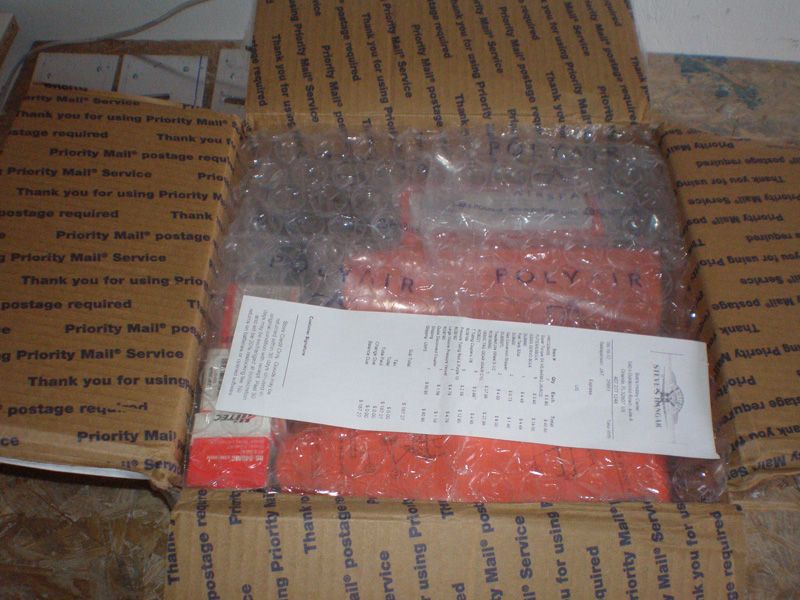

I hope this week I'll get landing gears, spinner, cockpit and few more plastic parts for fuselage.
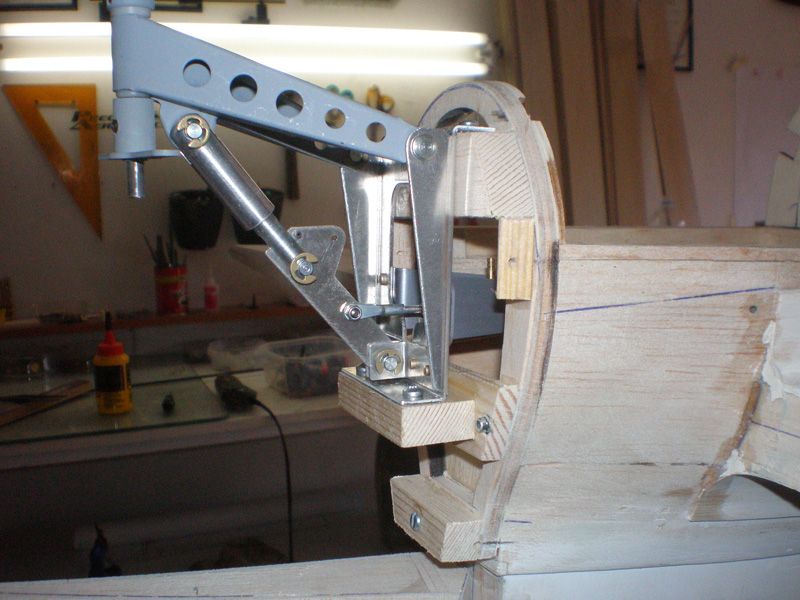
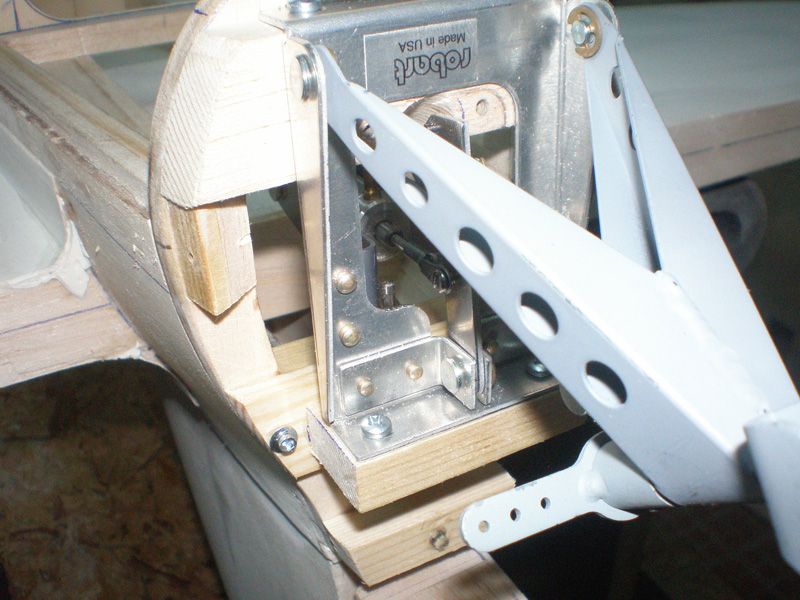
Because I get tail wheel mechanism first I start to put it on the model. That was simple operation...
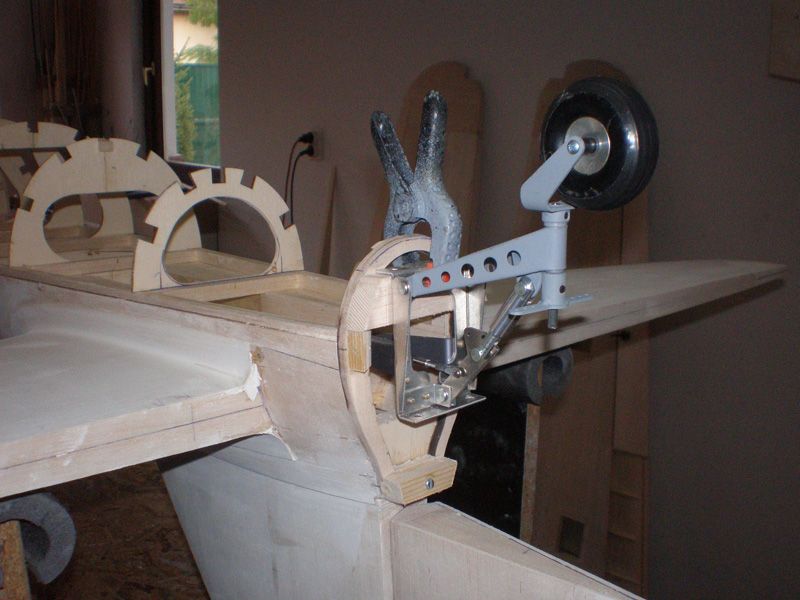
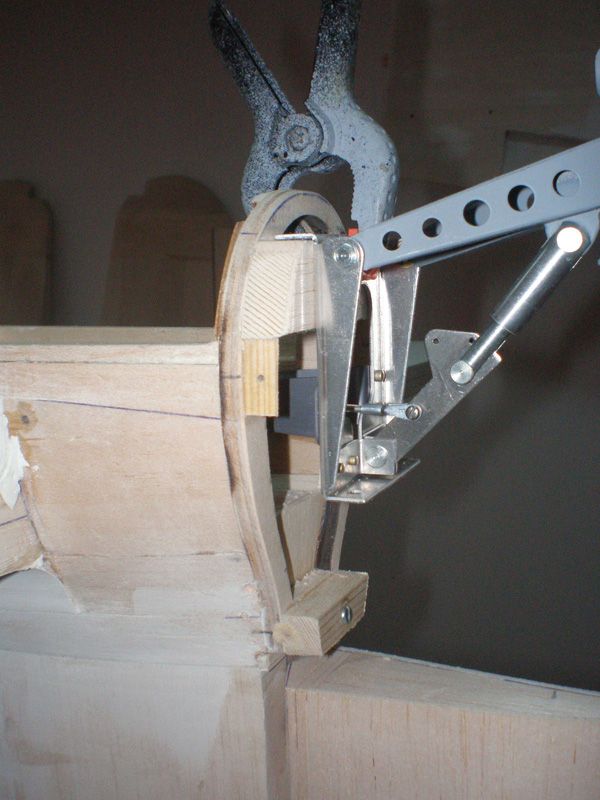
Parallel with this, I add 3 mm steel wire for rudder command...
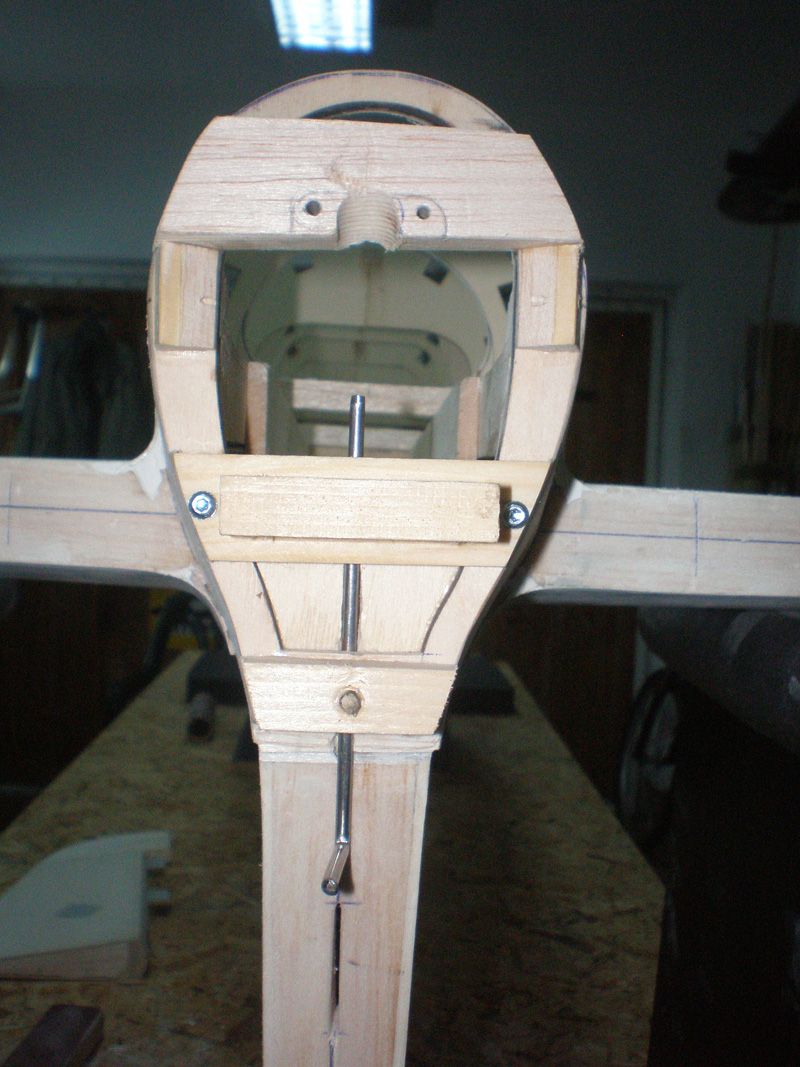
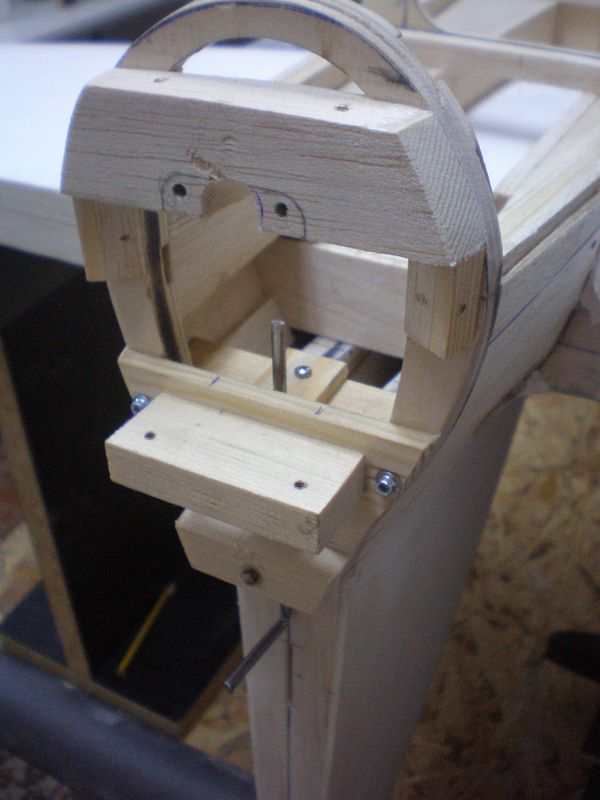
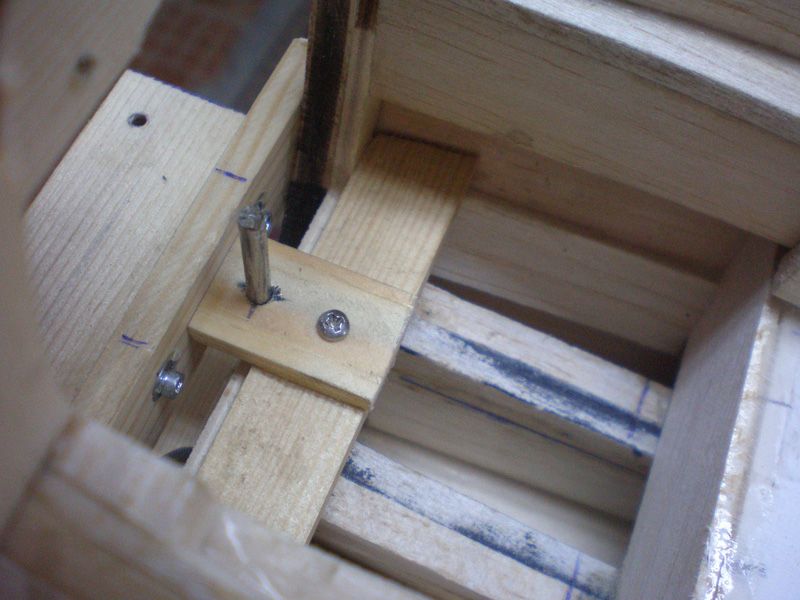
All together it look like this...

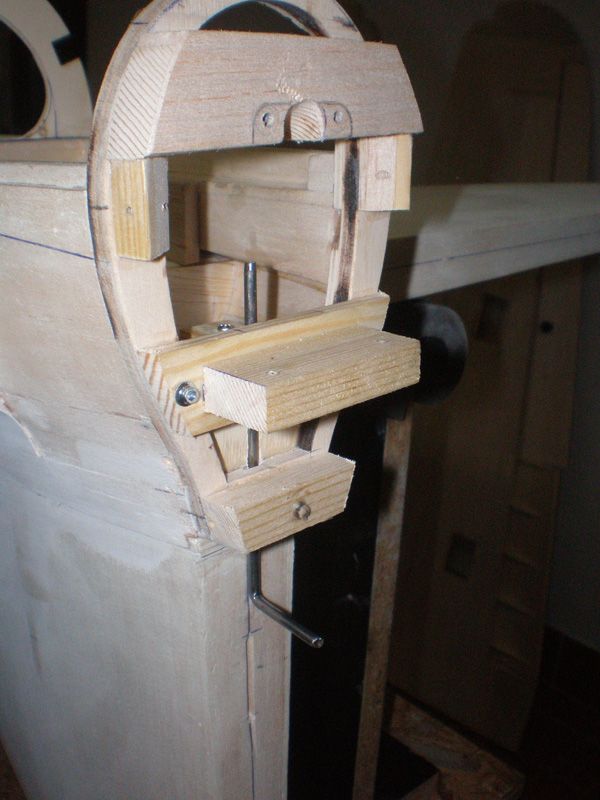
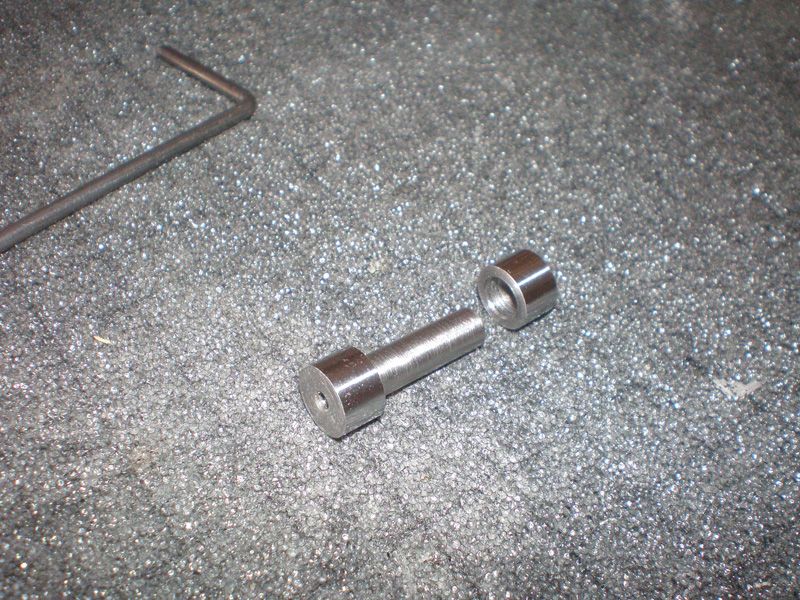
For tail wheel my friend in his machine work shop made new axle...
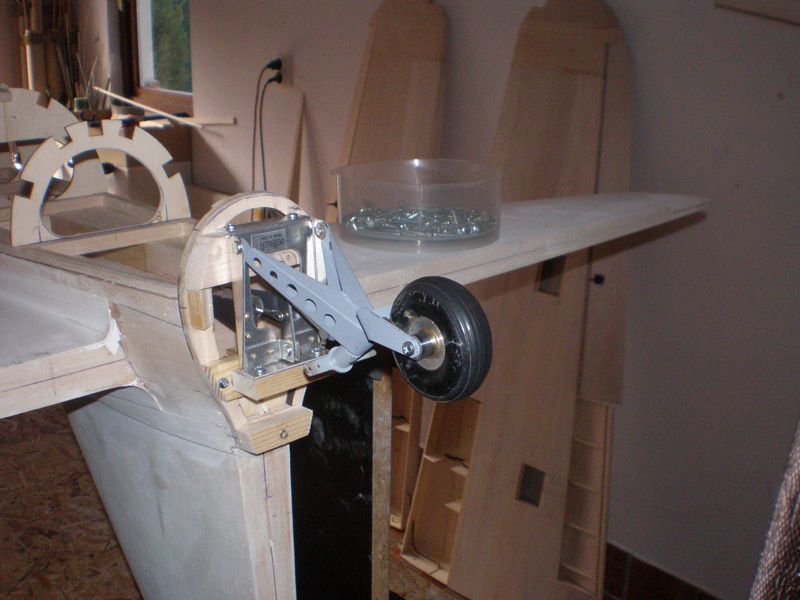
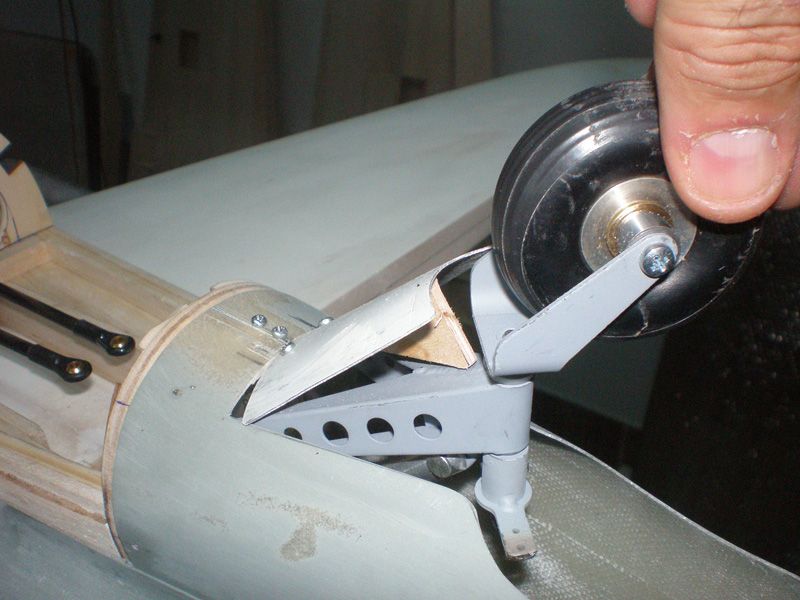
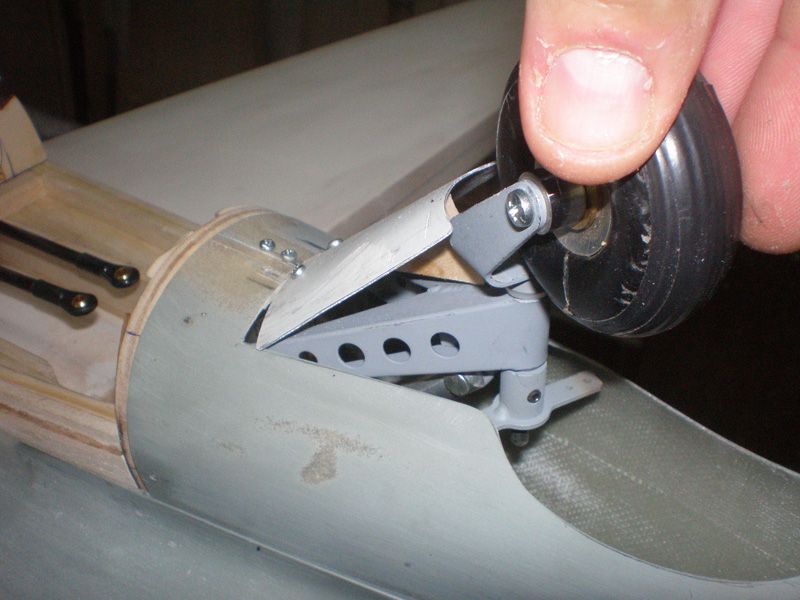
On rear plastic part I made hole for tail wheel. I put it on and off many times before I was satisfied.. Little door are made too...
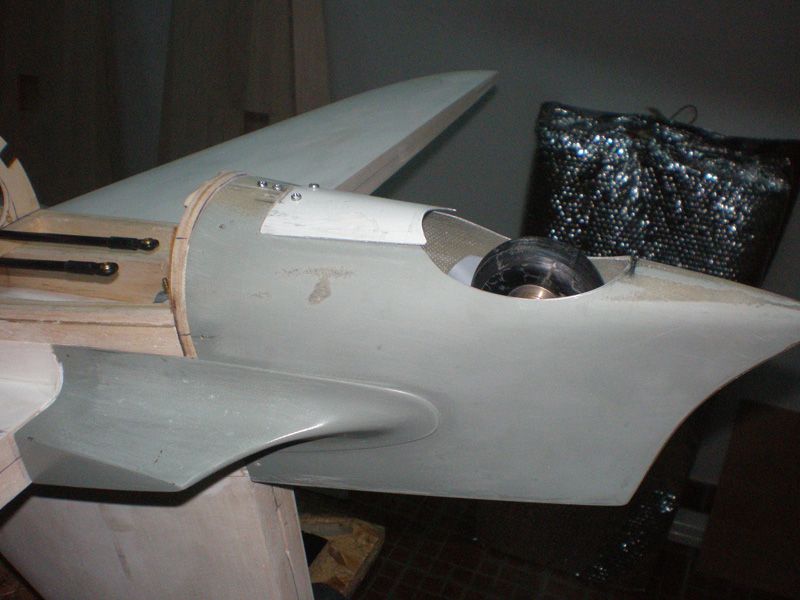
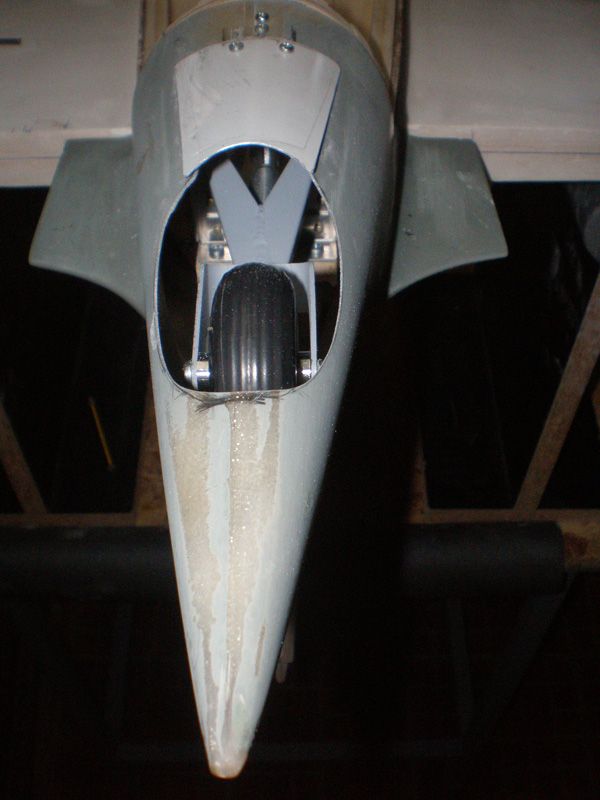
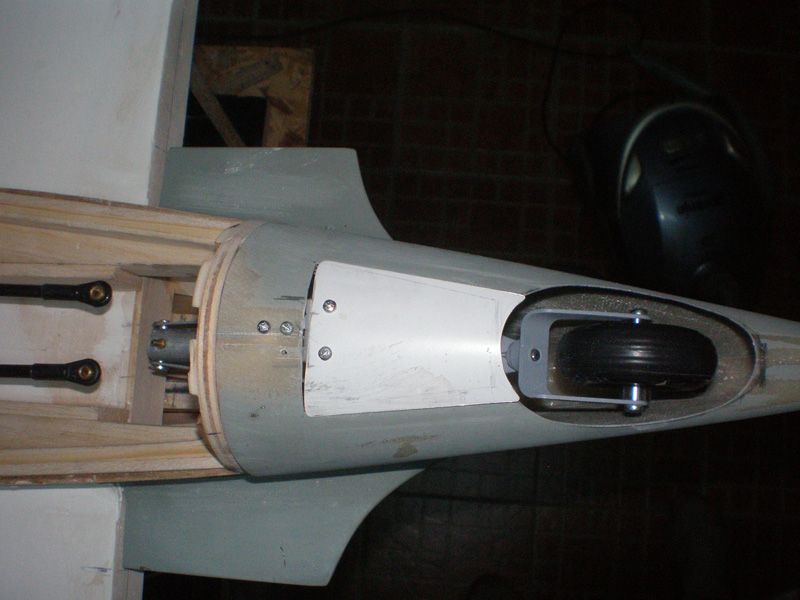
Door opening is very simple, on inner side I glued ply triangle and retract when going out push it and open the door. Spring will close door...
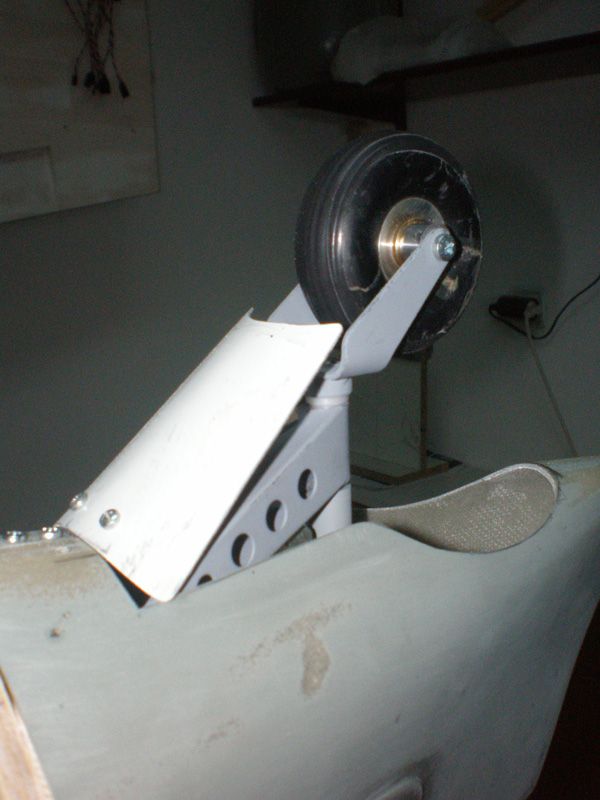
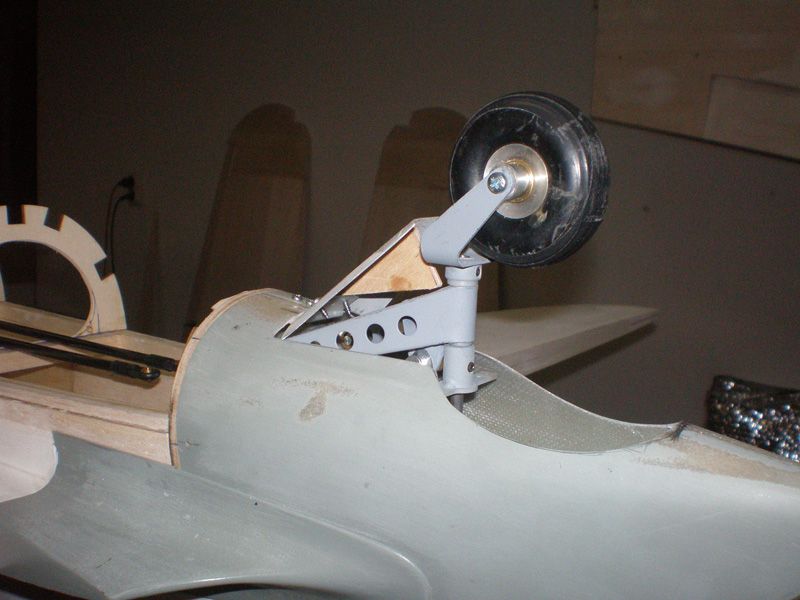
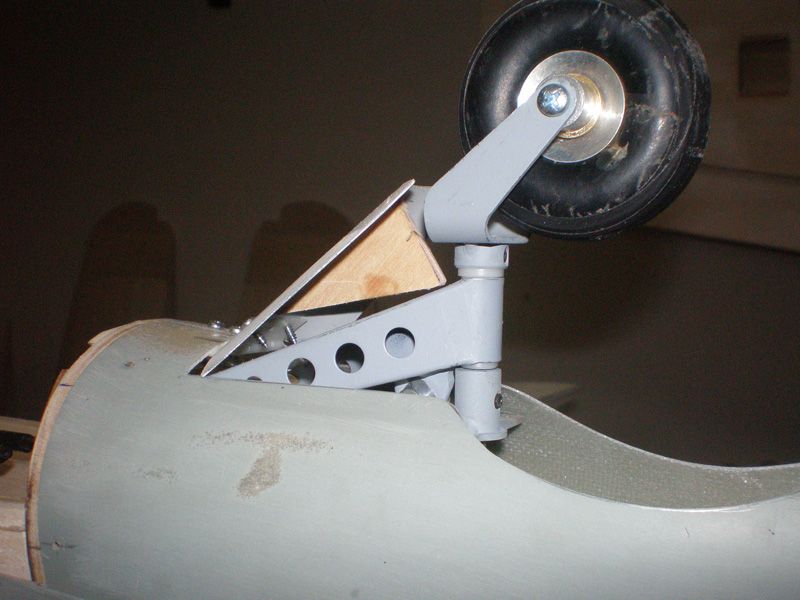
Rear wheel have enough space for turning left and right...
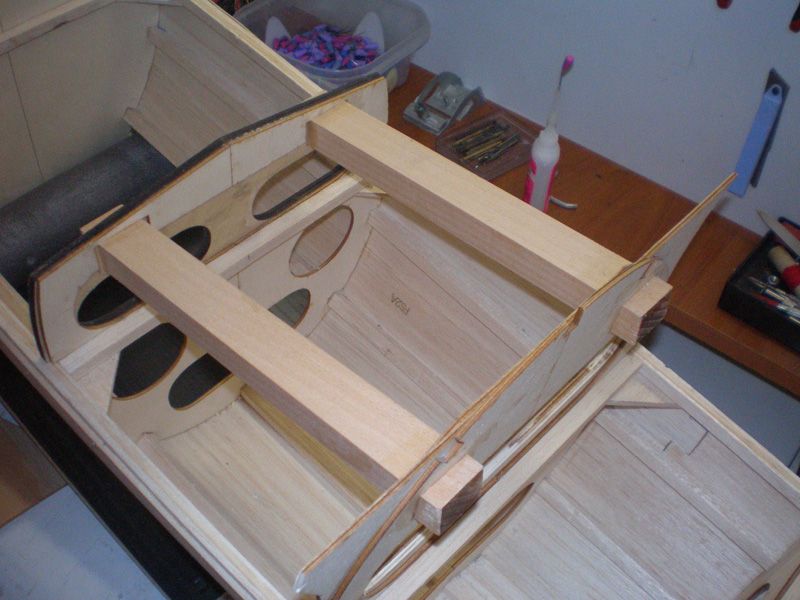
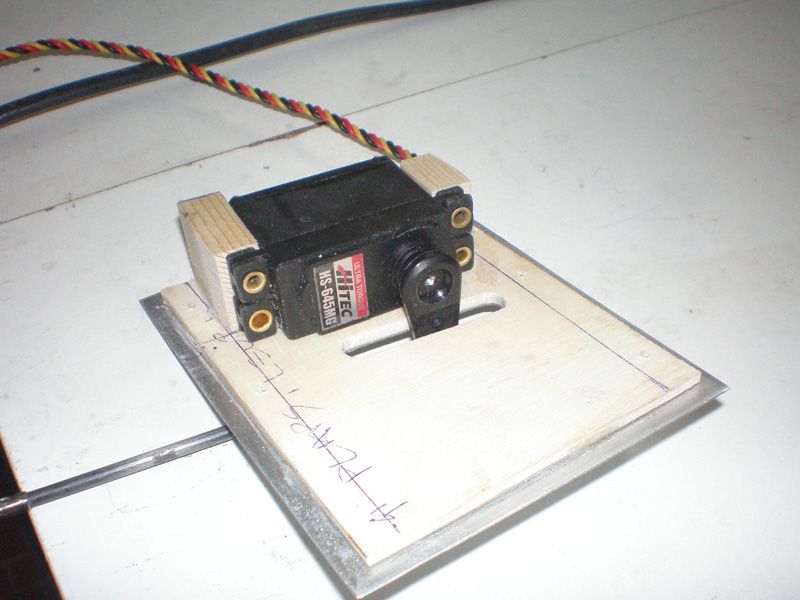
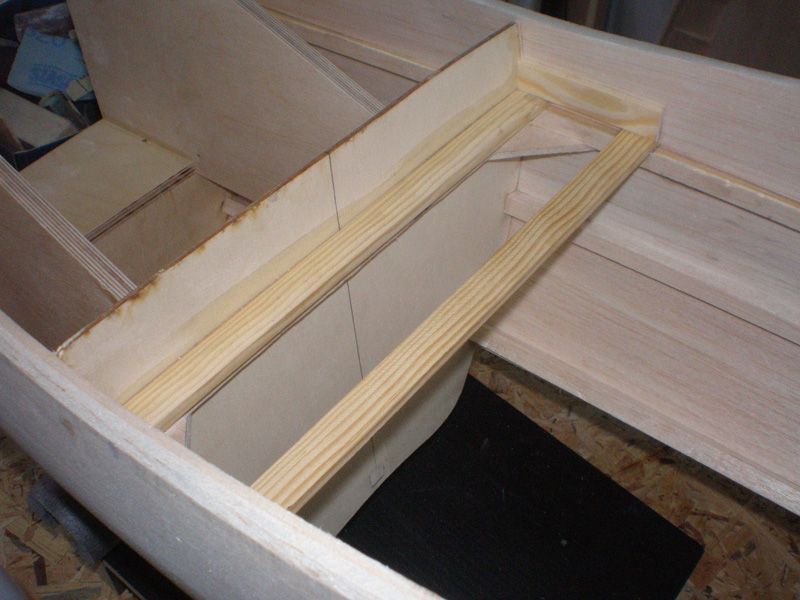
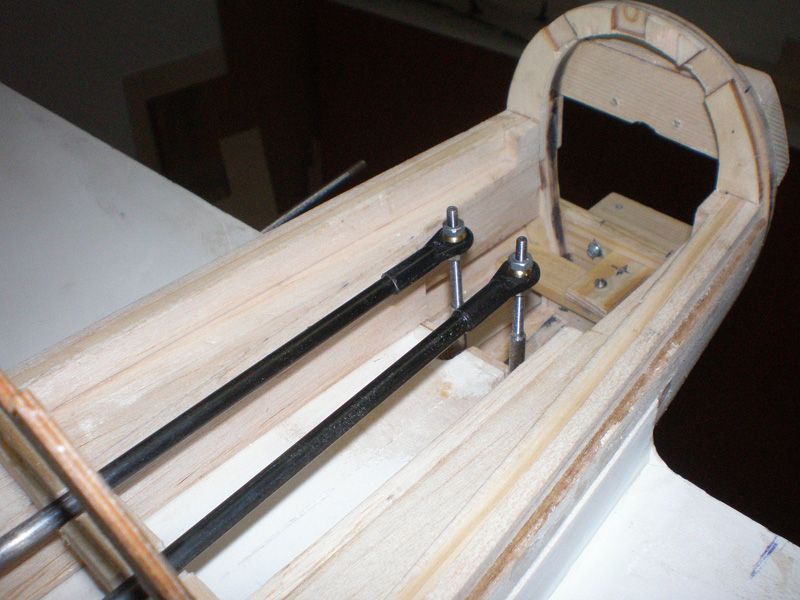
I was thinking to put elevator servos on the rear of the fuselage, but later I change my decision and put it in front. First I glued two ply for servo screws....
Than I add servos...
All servos are Hitec HS 645 MG, which give 10 kg of torque on 6 V. Servo in the middle is for rudder, and servos on left and right are for left and right elevator control surfaces.
Connection between servo and elevator will be with carbon tube. On one side it have ball link, and on other classic clevis.
Steel wires between ball link and elevators aren't finish yet. It will be in next day or two...
Because Zero is short in front, and CG is always a problem with this model, my idea is to putt all parts as front as possibly.
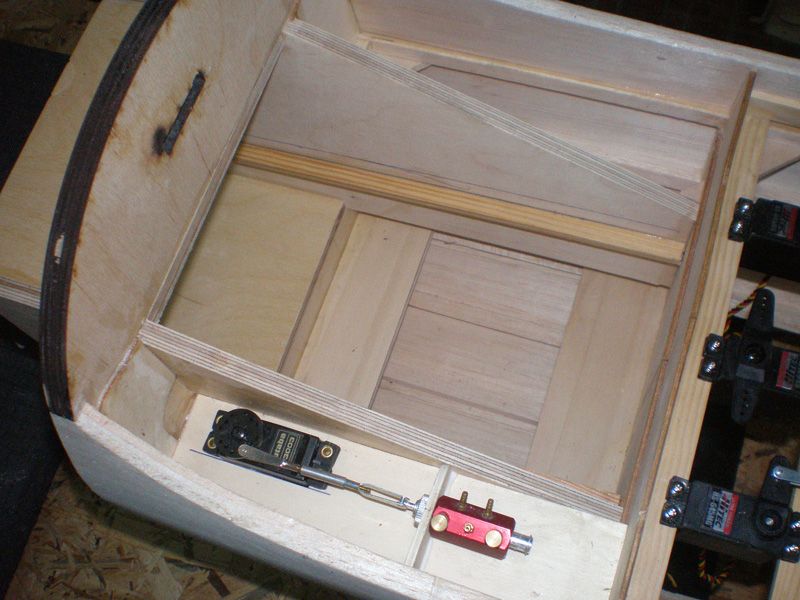
So, on the upper part of the fuselage I glued two ply parts, for top tank support (picture you see here is with up side down fuselage)...
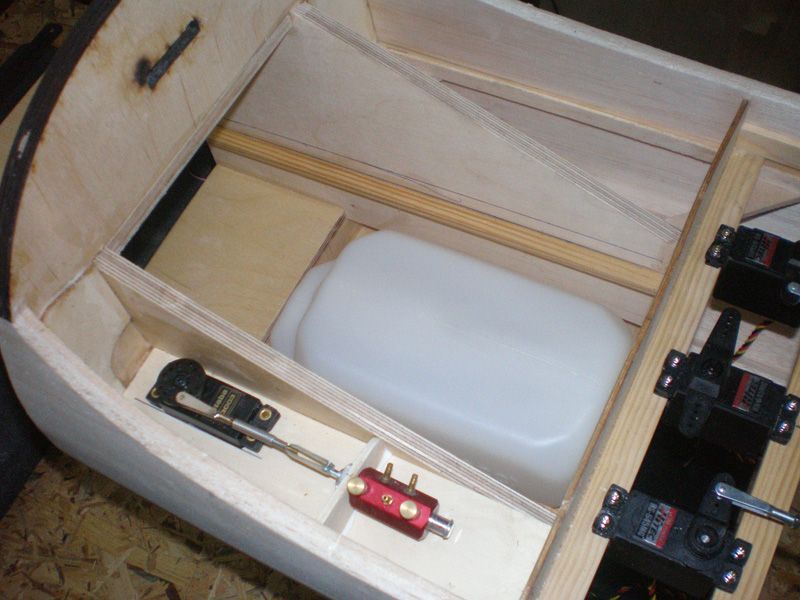
Tank is right like space in fuselage. I used Dubro 32 oz fuel tank...
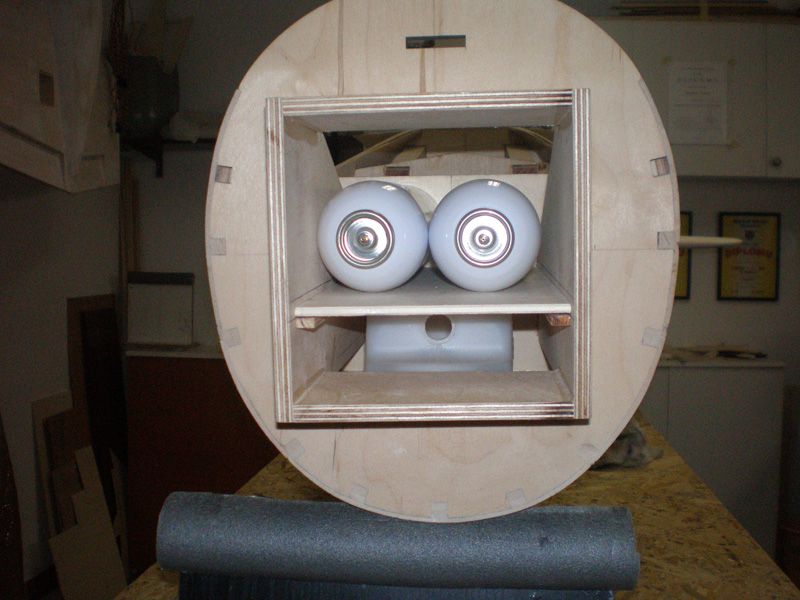
Big ply plate carry tank, and on it will be set two Robart big air tanks. This part must be removable, so i glued two firs for screws...
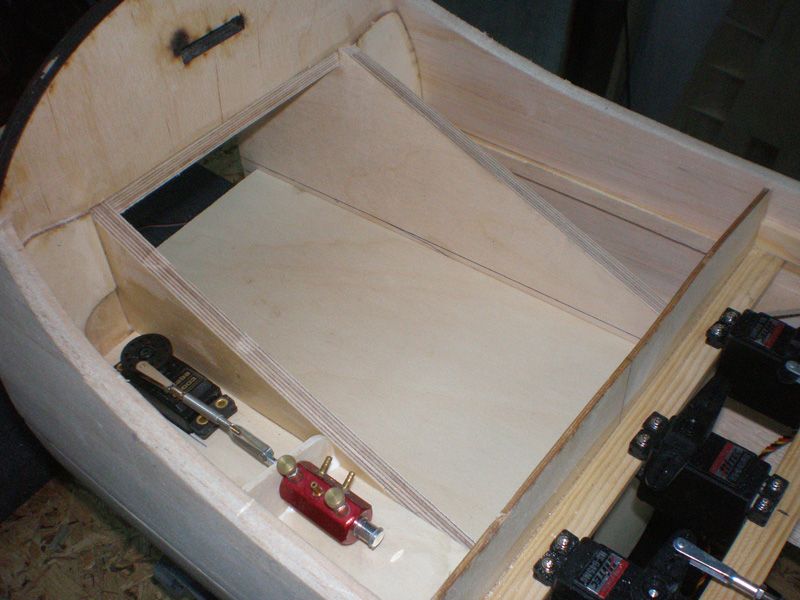
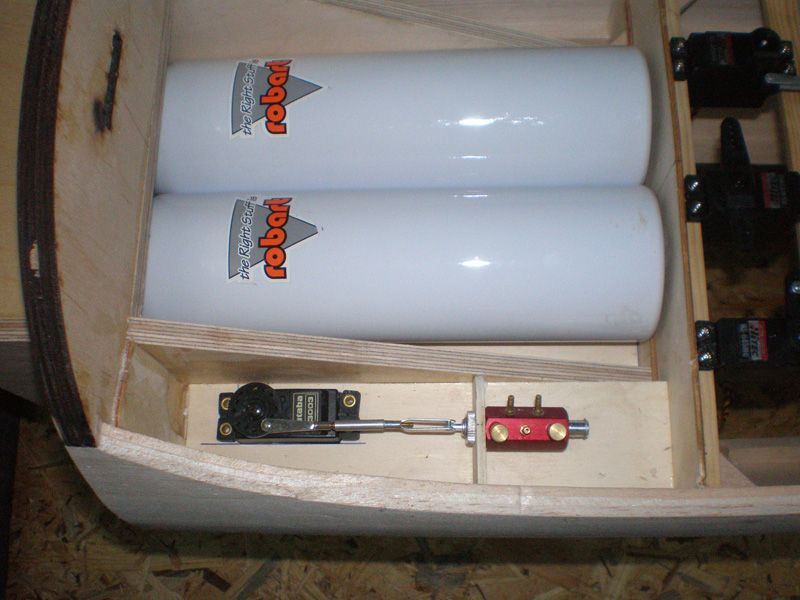
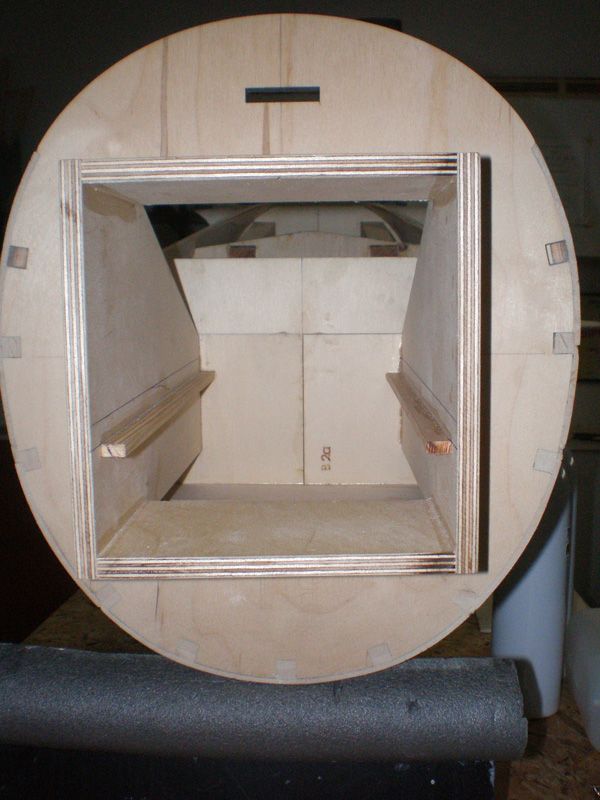
From the front it look like this...
In front of gas tank will be mount two servos for throttle and choke, but because I haven't engine yet, I wasn't install it. As you can see fire wall isn't install also...
And finally, on the pictures you can see servo and air valve for retracts and tail wheel. Those two parts are, again, as front as possibly...
That's all for now...
Best regards
Mirce
In last seven - eight days I was working on Zero every day. Now this is a phase when you have a lot to work, but no much to show.
I made all servo cover for the wings. System is same like on all my planes...
Few days ago from Steve from Bobs Hobby Center in Orlando, I received first box with parts for Zero.
I hope this week I'll get landing gears, spinner, cockpit and few more plastic parts for fuselage.
Because I get tail wheel mechanism first I start to put it on the model. That was simple operation...
Parallel with this, I add 3 mm steel wire for rudder command...
All together it look like this...
For tail wheel my friend in his machine work shop made new axle...
On rear plastic part I made hole for tail wheel. I put it on and off many times before I was satisfied.. Little door are made too...
Door opening is very simple, on inner side I glued ply triangle and retract when going out push it and open the door. Spring will close door...
Rear wheel have enough space for turning left and right...
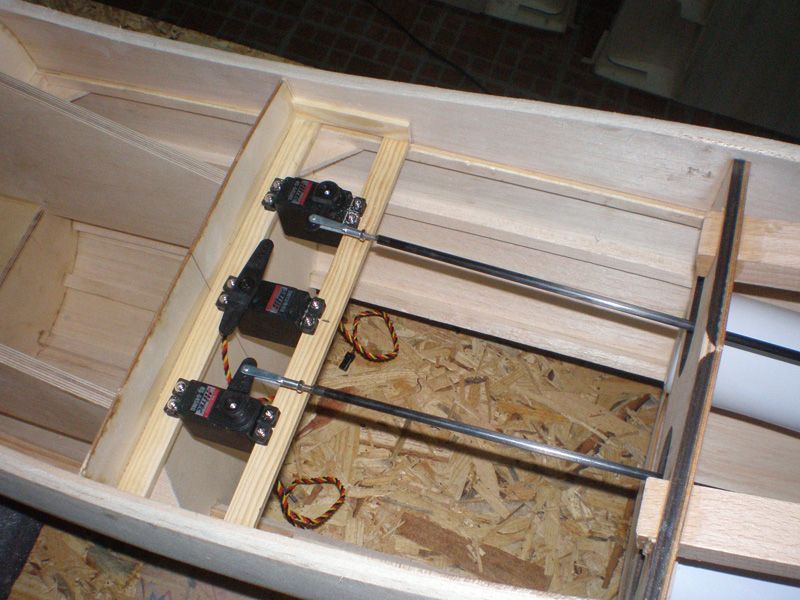
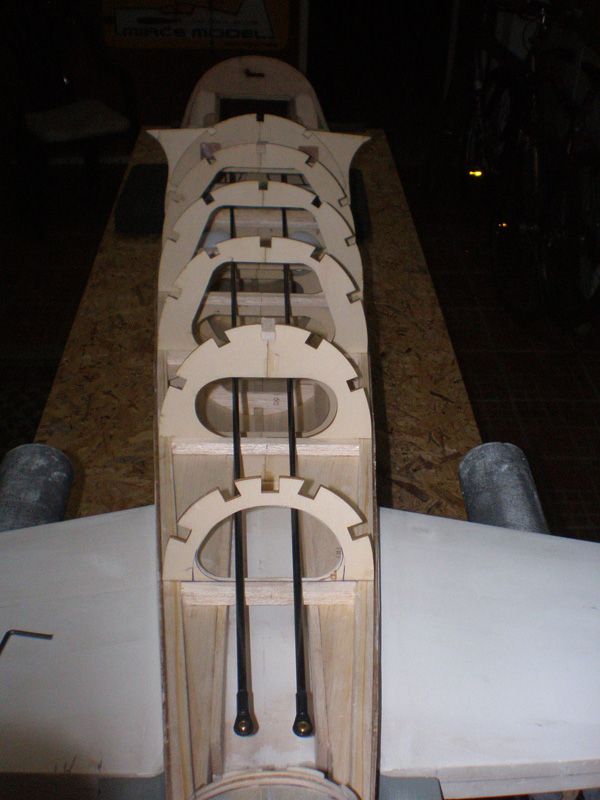
I was thinking to put elevator servos on the rear of the fuselage, but later I change my decision and put it in front. First I glued two ply for servo screws....
Than I add servos...
All servos are Hitec HS 645 MG, which give 10 kg of torque on 6 V. Servo in the middle is for rudder, and servos on left and right are for left and right elevator control surfaces.
Connection between servo and elevator will be with carbon tube. On one side it have ball link, and on other classic clevis.
Steel wires between ball link and elevators aren't finish yet. It will be in next day or two...
Because Zero is short in front, and CG is always a problem with this model, my idea is to putt all parts as front as possibly.
So, on the upper part of the fuselage I glued two ply parts, for top tank support (picture you see here is with up side down fuselage)...
Tank is right like space in fuselage. I used Dubro 32 oz fuel tank...
Big ply plate carry tank, and on it will be set two Robart big air tanks. This part must be removable, so i glued two firs for screws...
From the front it look like this...
In front of gas tank will be mount two servos for throttle and choke, but because I haven't engine yet, I wasn't install it. As you can see fire wall isn't install also...
And finally, on the pictures you can see servo and air valve for retracts and tail wheel. Those two parts are, again, as front as possibly...
That's all for now...
Best regards
Mirce
10-14-2012, 10:32 PM
#47
Thread Starter
I saw that I wasn't write two weeks nothing about my Meister Scale Zero project.
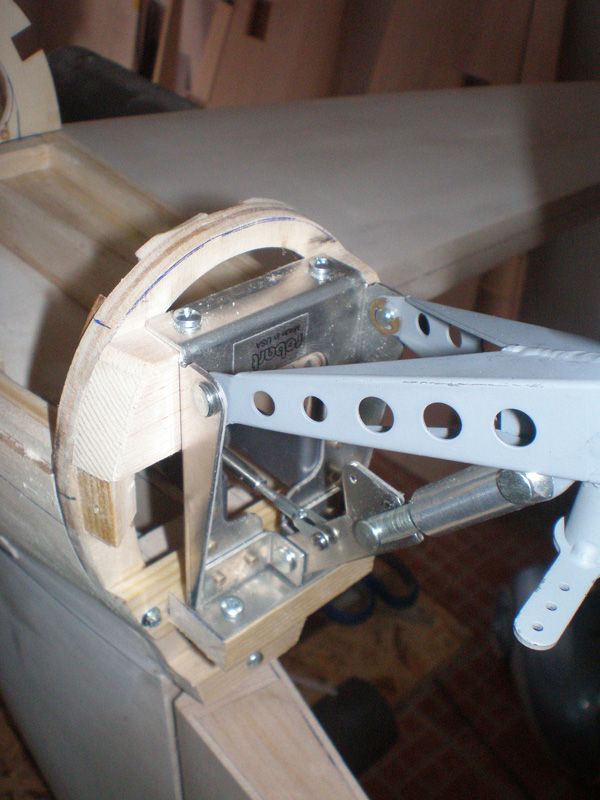
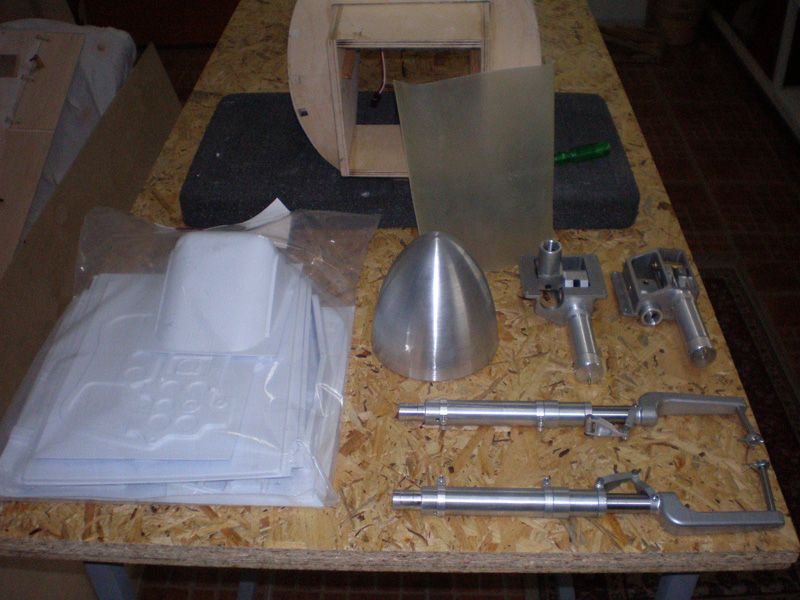
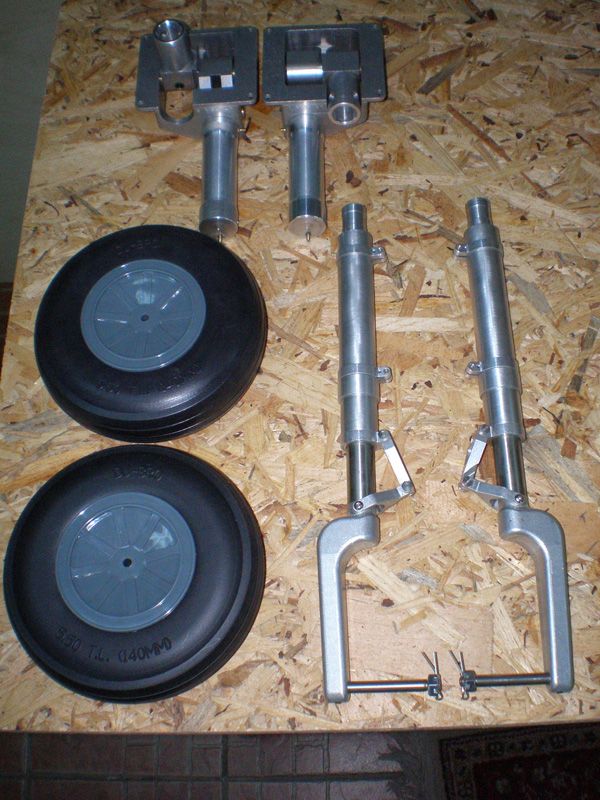
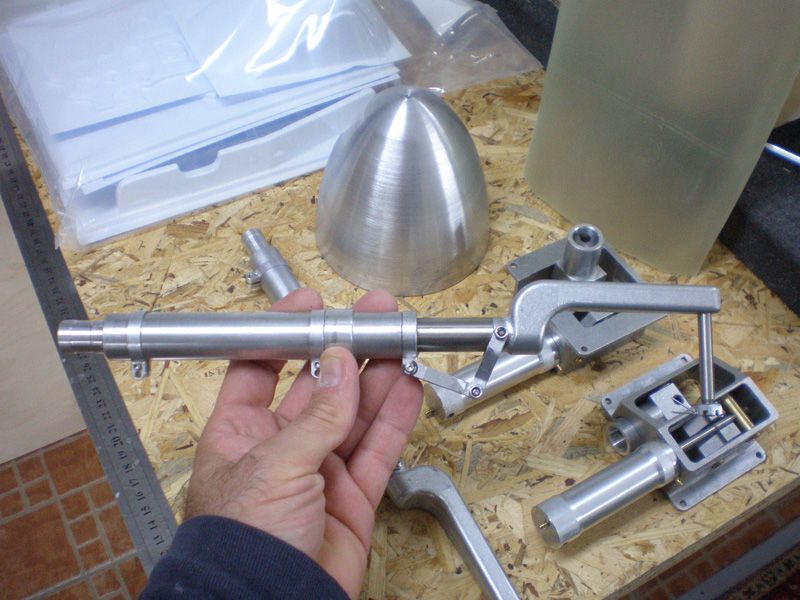
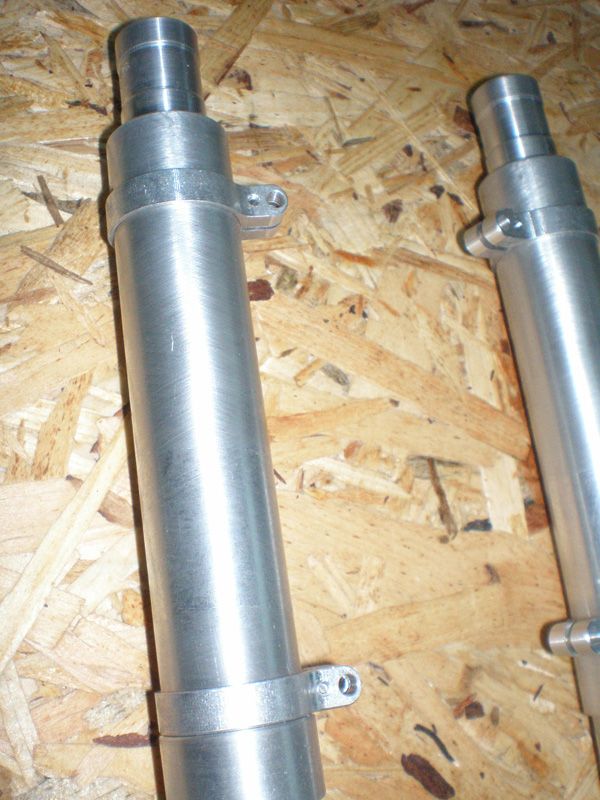
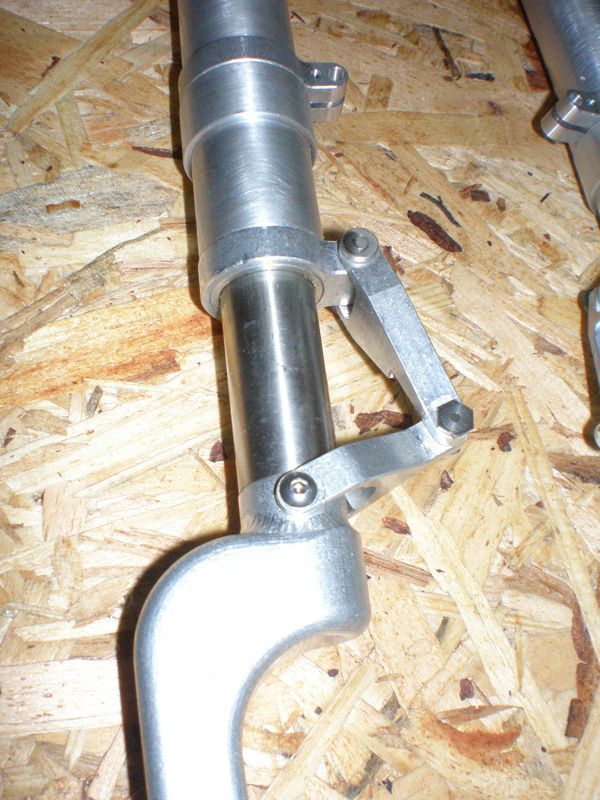
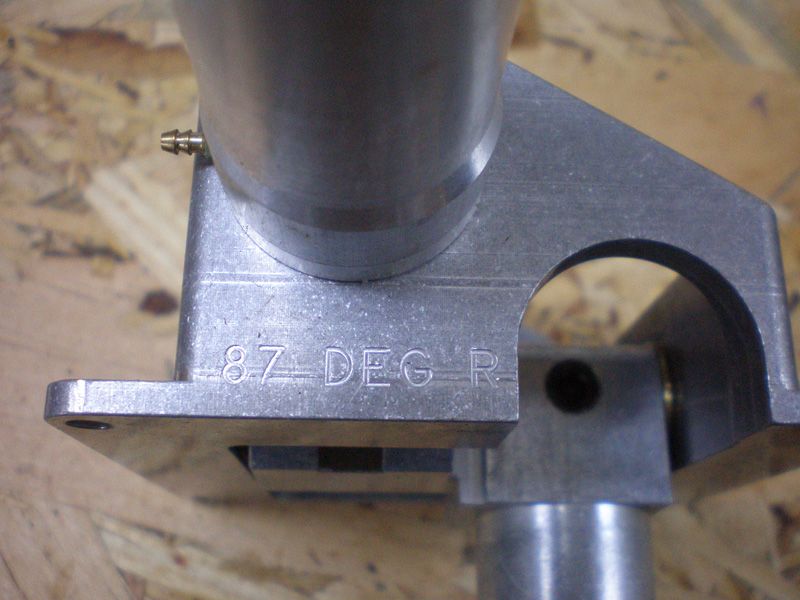
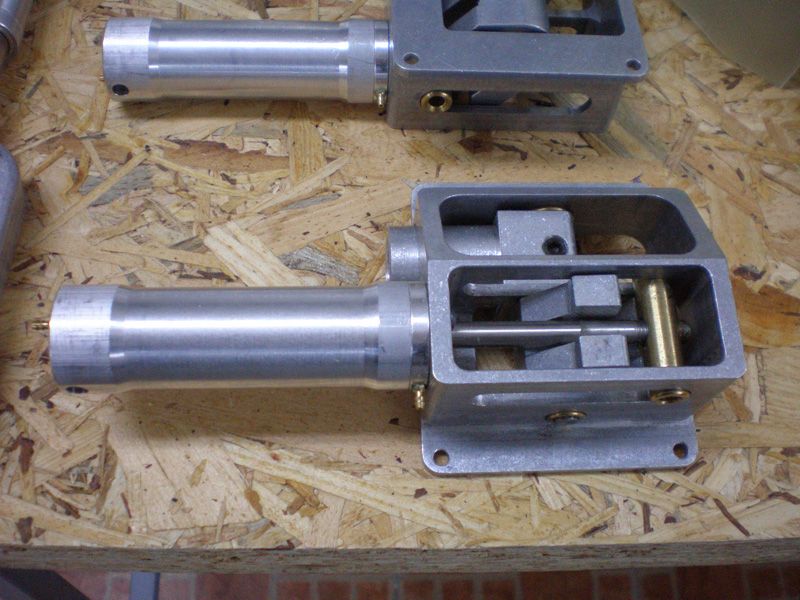
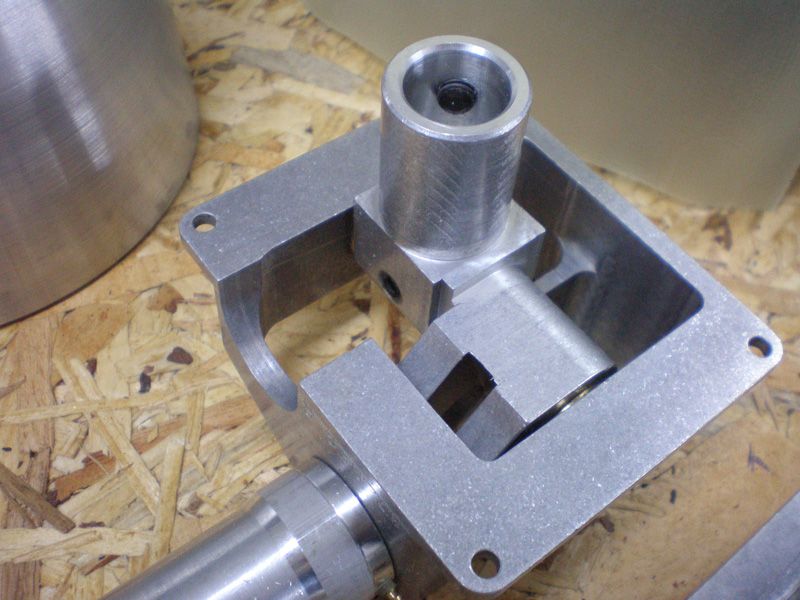
Few days ago I got package with few parts I need for finishing my plane. Most interesting are landing gear, which come from Siera Giants, same firm where I bought retracts for my Meister P-47.
Landing gears are pretty big and very quality. On Zero will be instal 5,5" wheels.


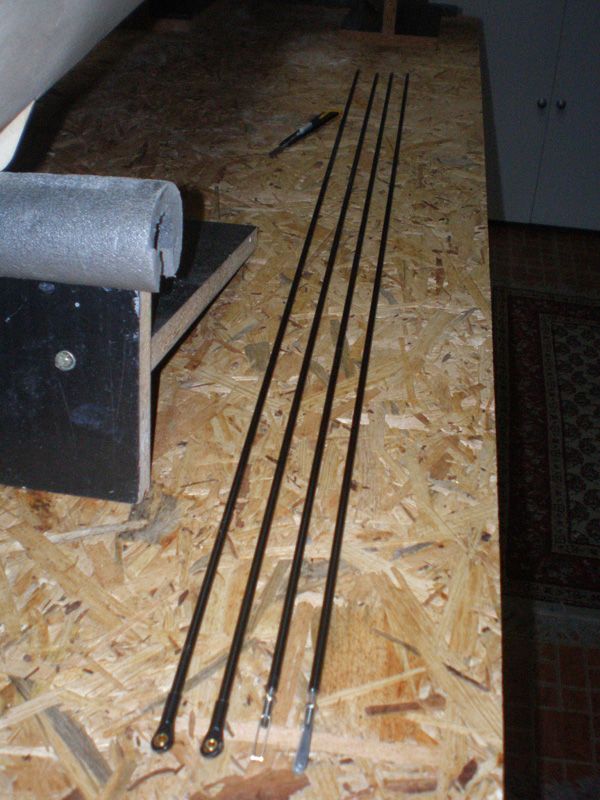
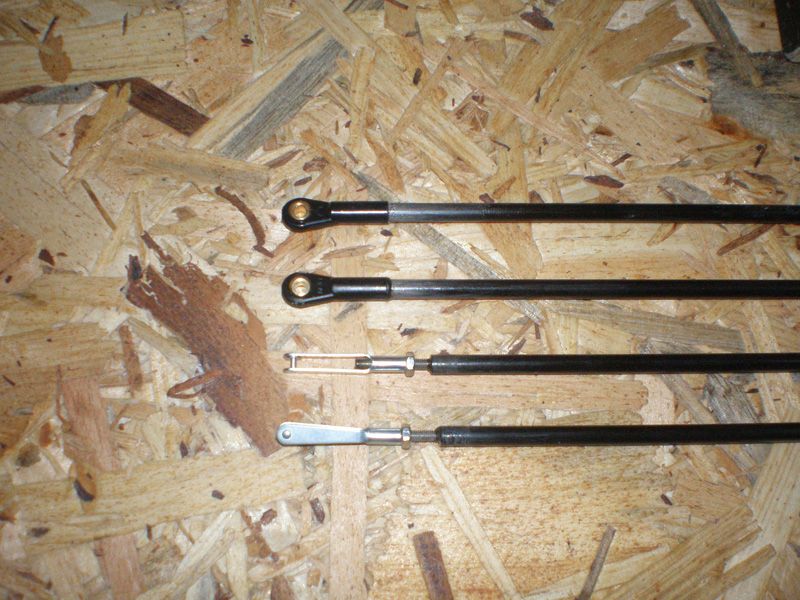
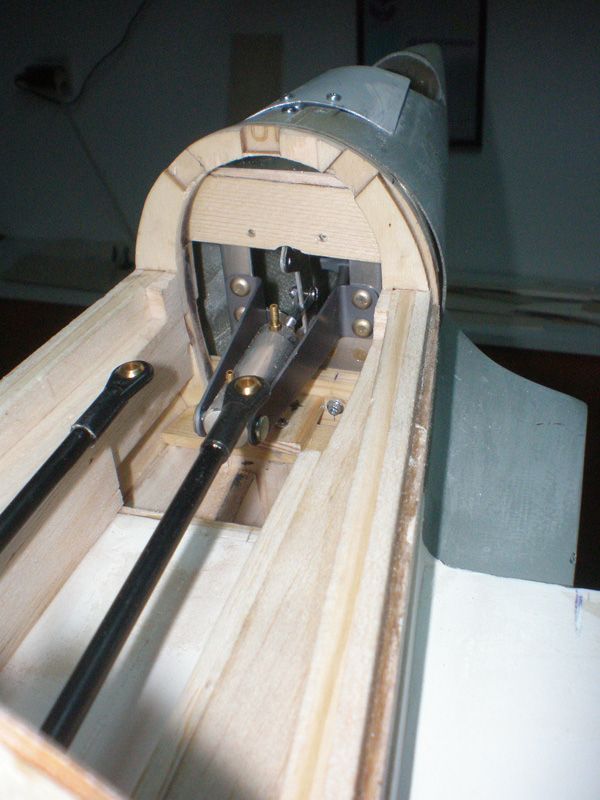
My friend made wires for moving elevator parts. It's made from 4 mm steel wire...
On side which come in fuselage he made 3 mm thread for ball link. He also put wires in aluminum tubes. Installation was pretty simple, I glued aluminum tubes in the middle of the elevators, in slots I prepare earlier...
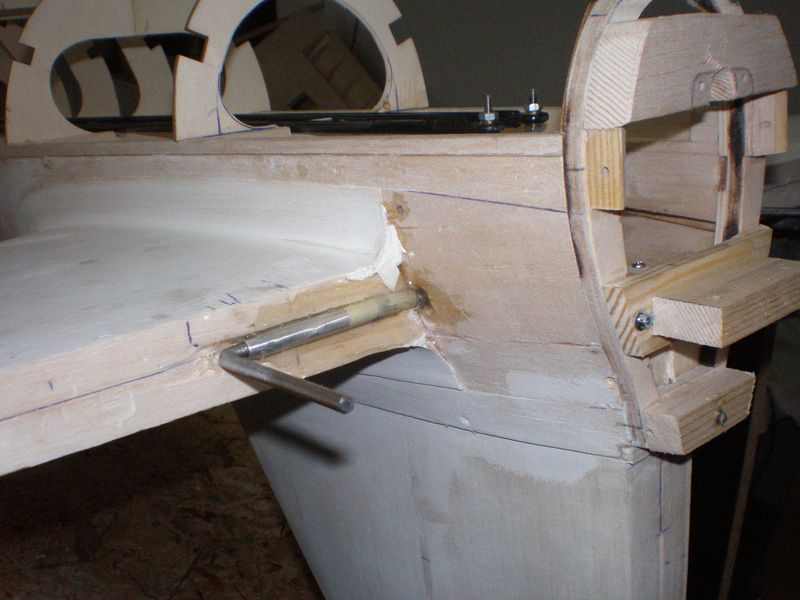
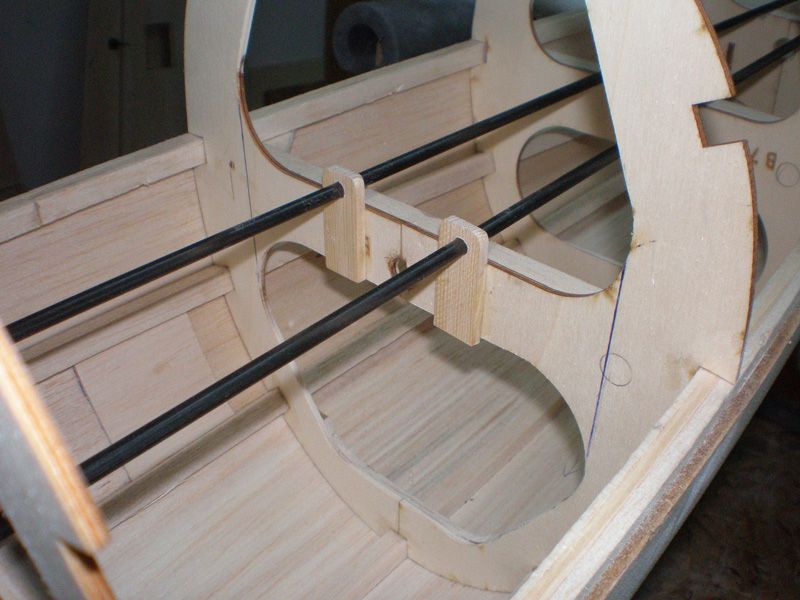
In fuselage it look like this...
Because carbon tubes are long I made one stiffening in the middle...
In the moving elevator parts I glued aluminum tubes in which will come steel wire...
Than balsa plank and leading edge...
Now, everything is ready for sanding...
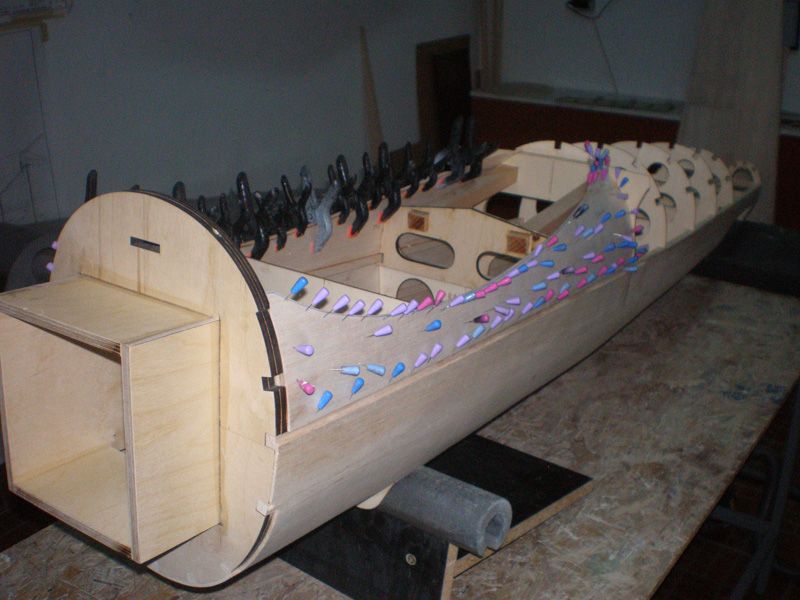
Bottom fuselage side was ready for adding balsa slats. But, when you put slats in the holes on the ribs, they haven't right shape and become wavy, so for right shape I used aluminum tubes...
Now I need to add, here and there, balsa "fillers"...
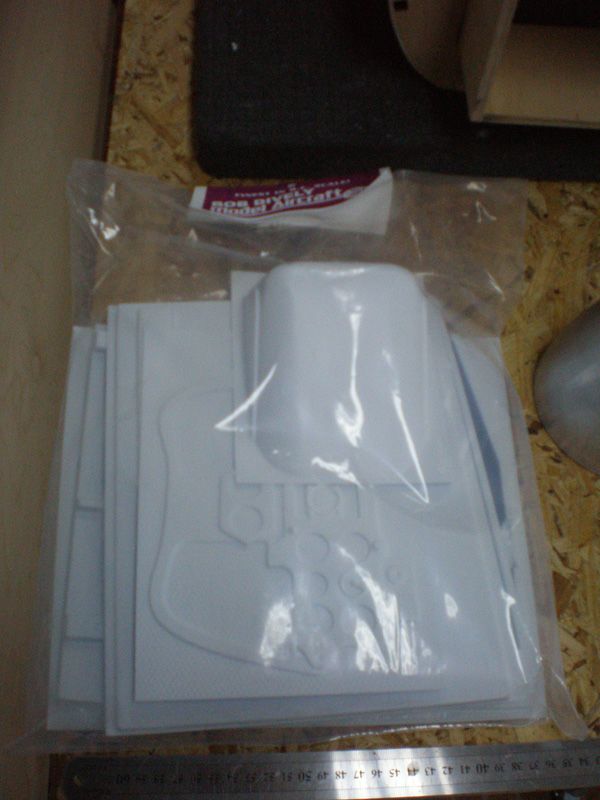
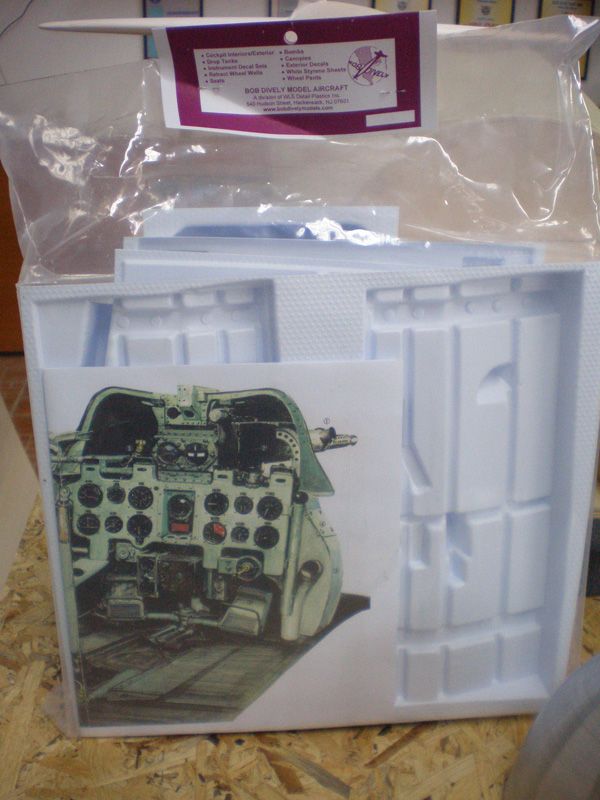
From Meister Scale I bought cockpit set, which come from same firm like for my Meister P 47.
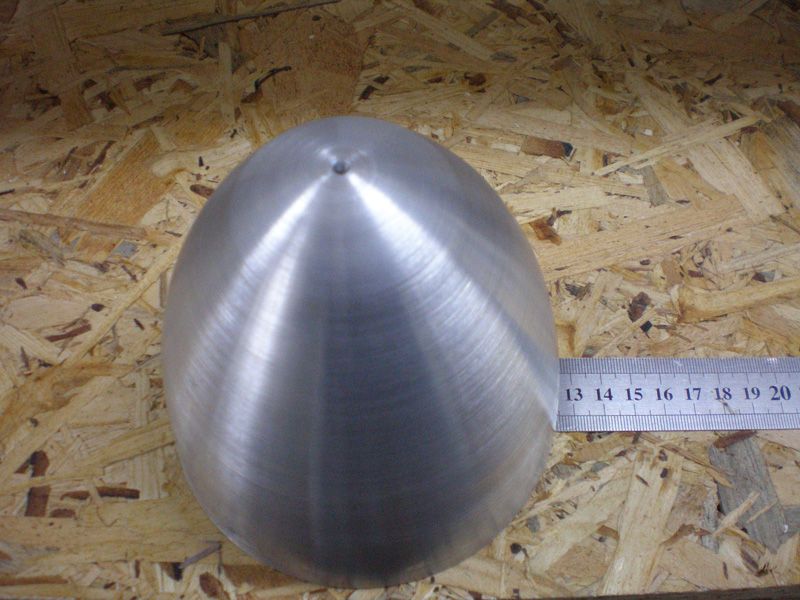
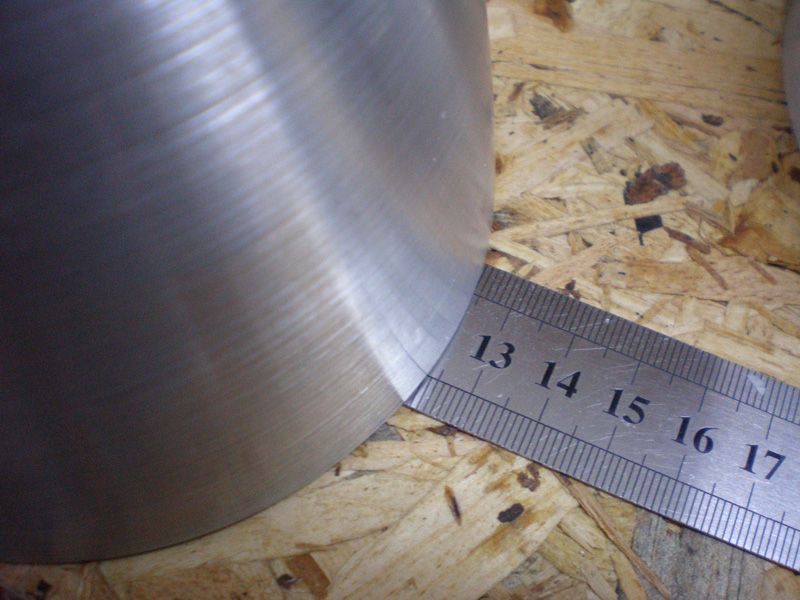
Spinner is come from Dino also...
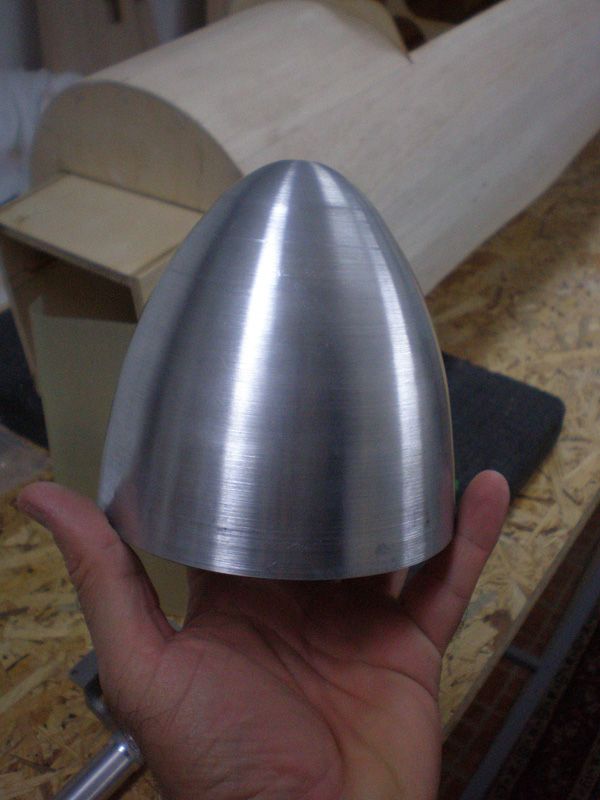
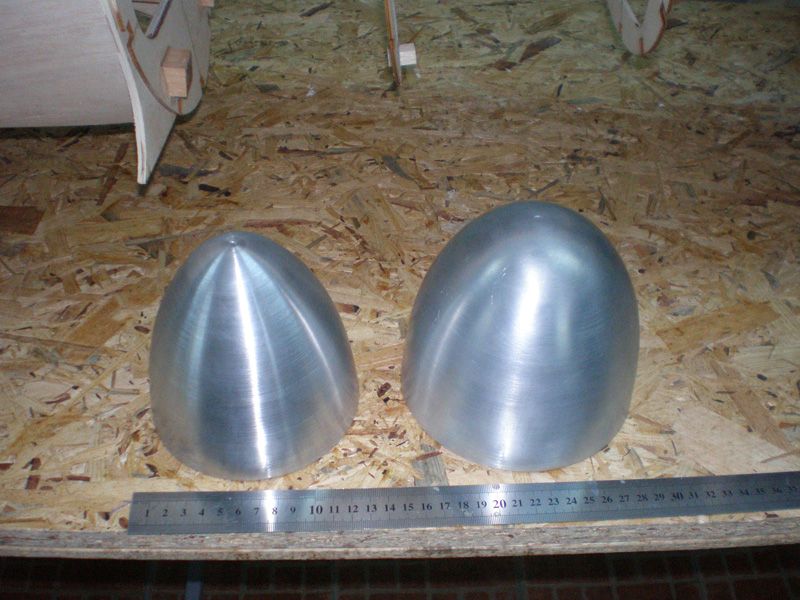
It's huge...
... but smaller than spinner for Meister Scale's Focke Wulf...
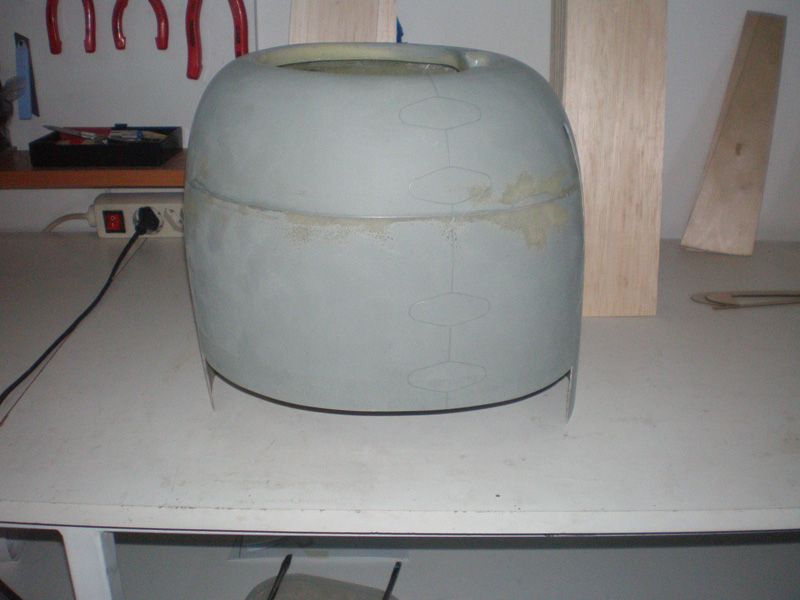
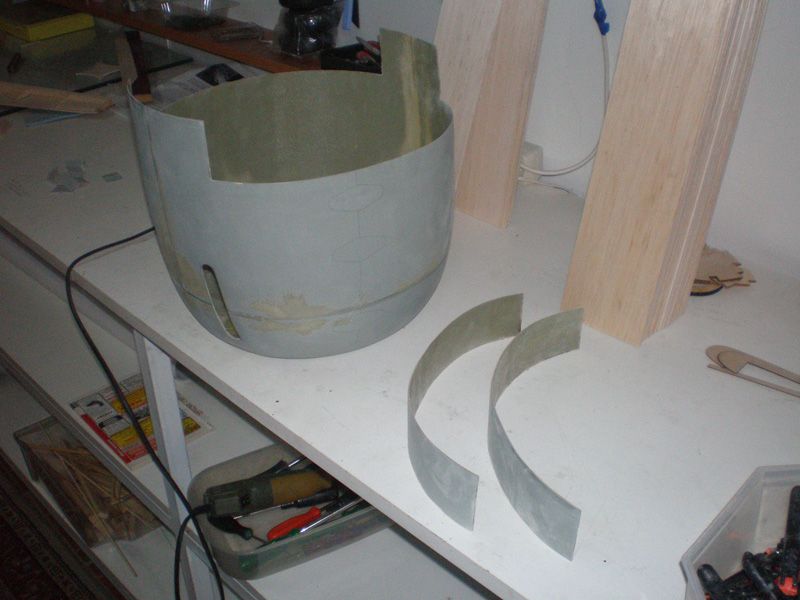
From Meister Scale come plastic part for front part of the fuselage...
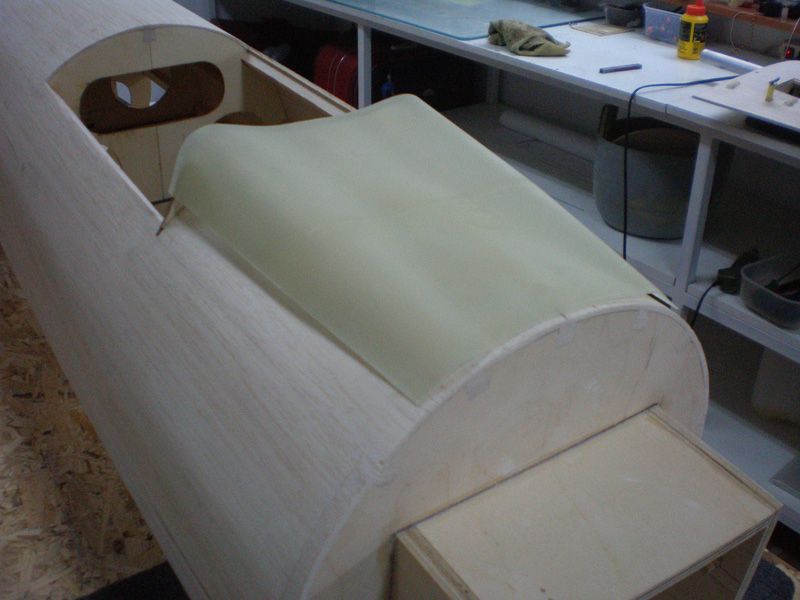
It's not lie down perfect, so I will think what to do, to install this part, or to made it from balsa stripes...
Now I prepare balsa strips for planking fuselage and that is next step in this building...
Regards
Mirce
Few days ago I got package with few parts I need for finishing my plane. Most interesting are landing gear, which come from Siera Giants, same firm where I bought retracts for my Meister P-47.
Landing gears are pretty big and very quality. On Zero will be instal 5,5" wheels.
My friend made wires for moving elevator parts. It's made from 4 mm steel wire...
On side which come in fuselage he made 3 mm thread for ball link. He also put wires in aluminum tubes. Installation was pretty simple, I glued aluminum tubes in the middle of the elevators, in slots I prepare earlier...
In fuselage it look like this...
Because carbon tubes are long I made one stiffening in the middle...
In the moving elevator parts I glued aluminum tubes in which will come steel wire...
Than balsa plank and leading edge...
Now, everything is ready for sanding...
Bottom fuselage side was ready for adding balsa slats. But, when you put slats in the holes on the ribs, they haven't right shape and become wavy, so for right shape I used aluminum tubes...
Now I need to add, here and there, balsa "fillers"...
From Meister Scale I bought cockpit set, which come from same firm like for my Meister P 47.
Spinner is come from Dino also...
It's huge...
... but smaller than spinner for Meister Scale's Focke Wulf...
From Meister Scale come plastic part for front part of the fuselage...
It's not lie down perfect, so I will think what to do, to install this part, or to made it from balsa stripes...
Now I prepare balsa strips for planking fuselage and that is next step in this building...
Regards
Mirce
10-16-2012, 10:28 PM
#48
Thread Starter
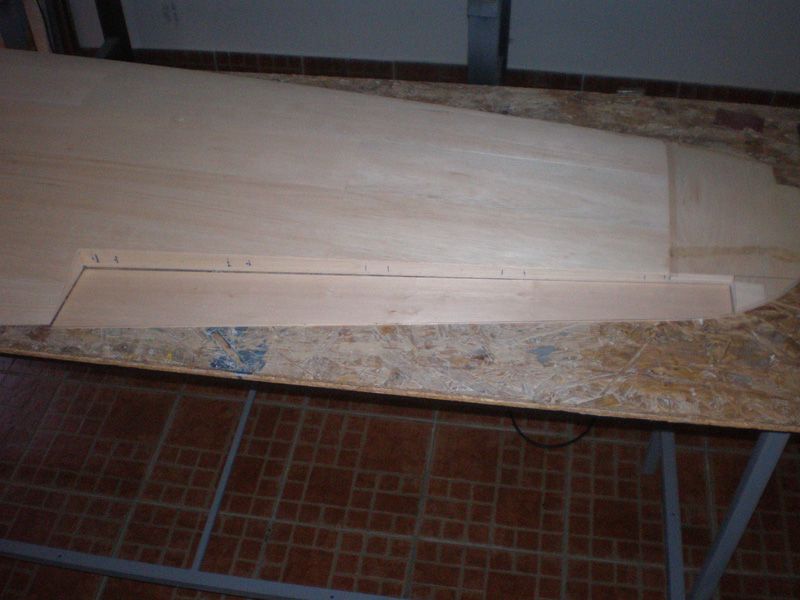
Few days ago here was like in summer time, sunny, hot, nice, so I use that day to made sanding on moving elevator parts.
As you know, I'm using double adhesive tape for fixing moving part to elevator. That give me option to made perfect transition from one to another part...
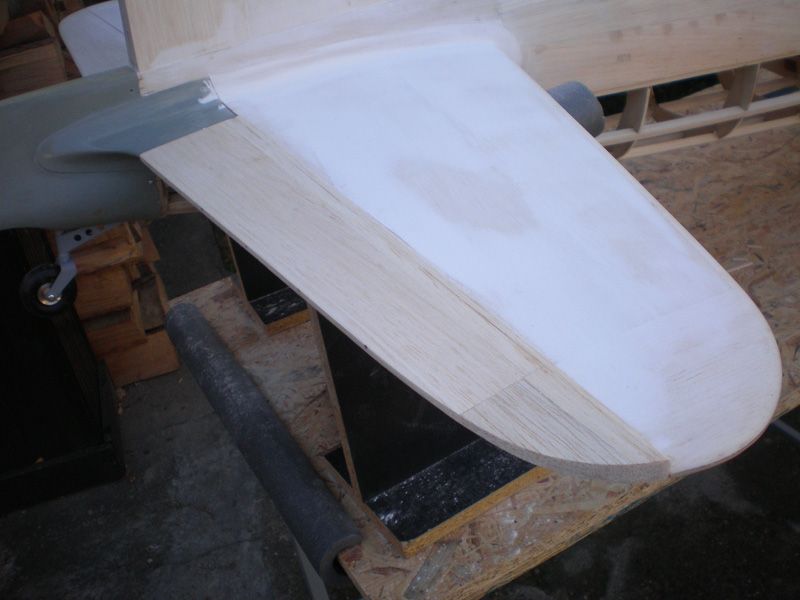

After working about for one hour work table look like this...
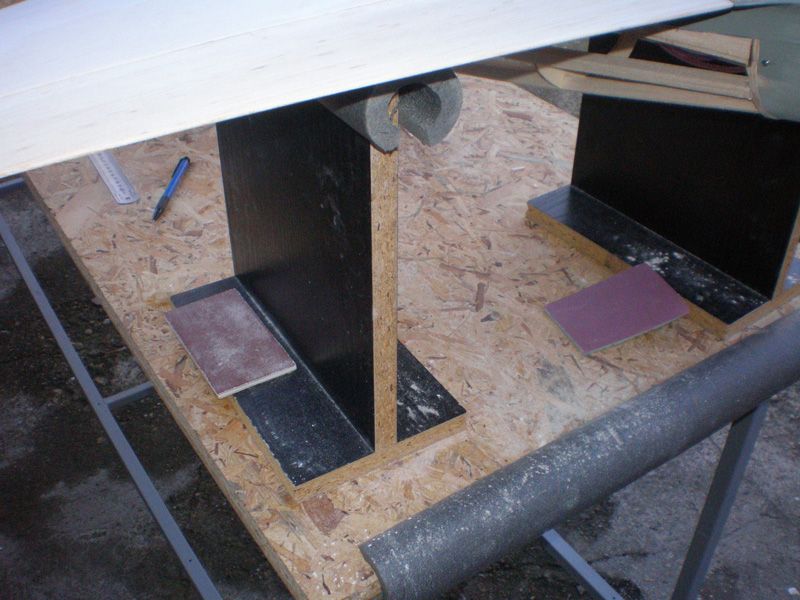
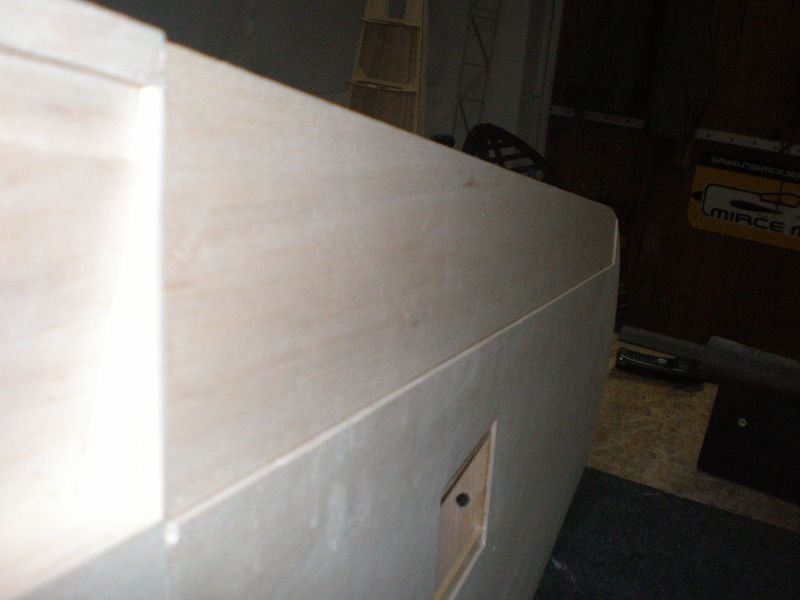
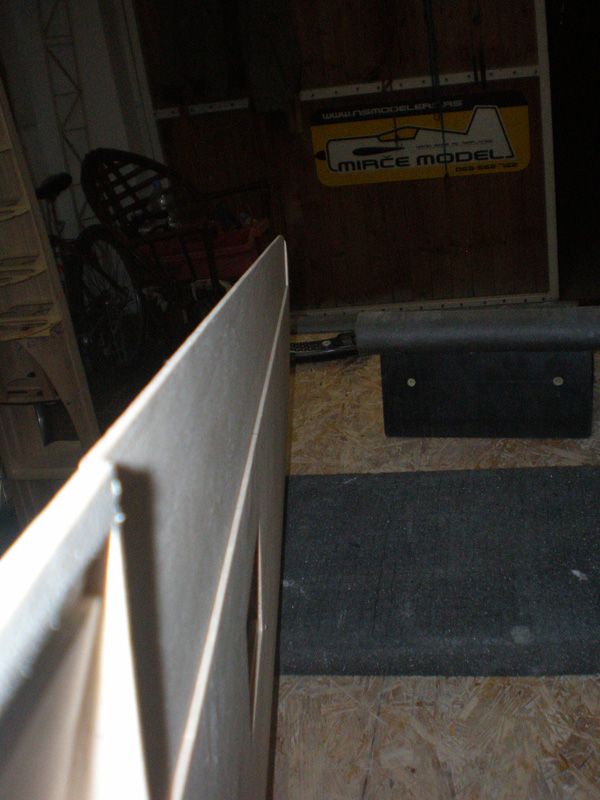
... and elevators like this...
Next was to made hinges slots, put hinges inside and fine tune moving elevators parts...
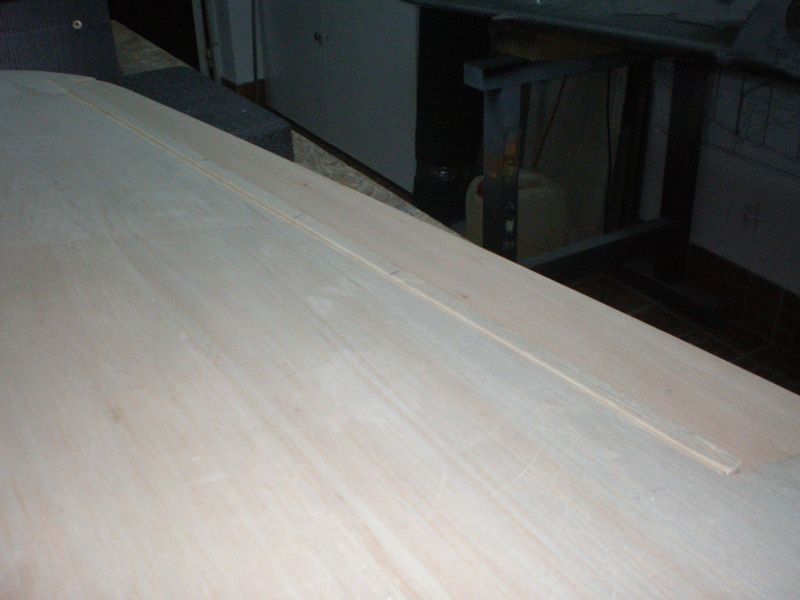
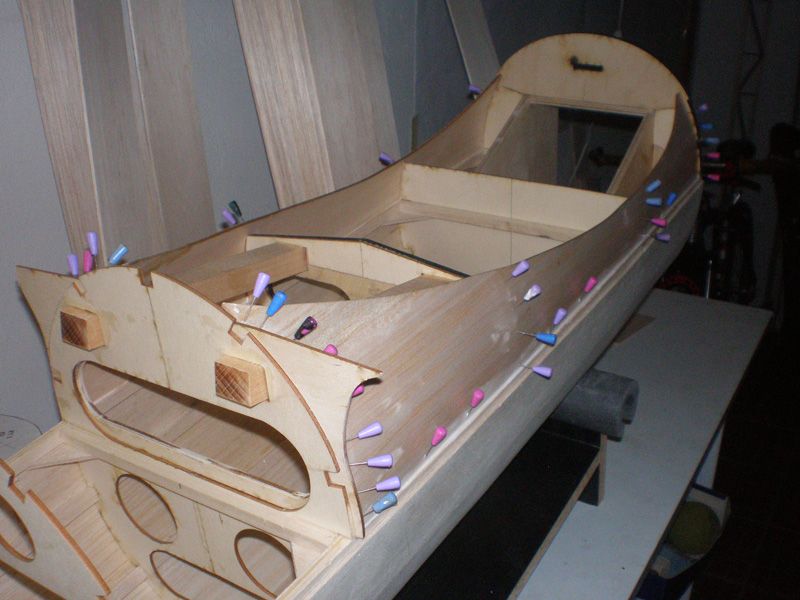
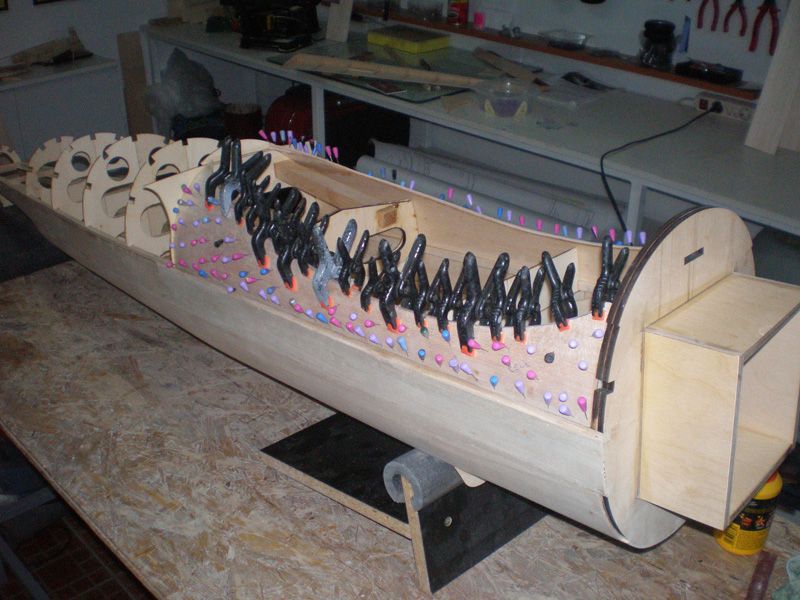
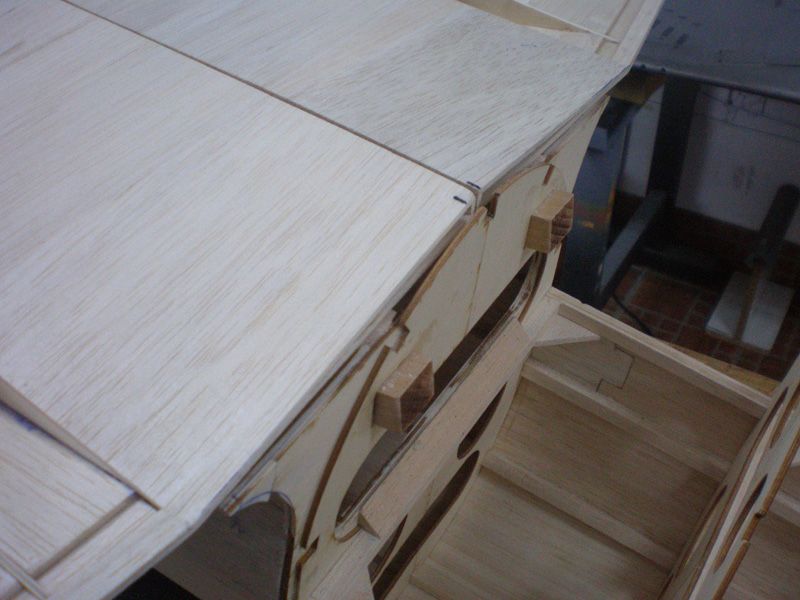
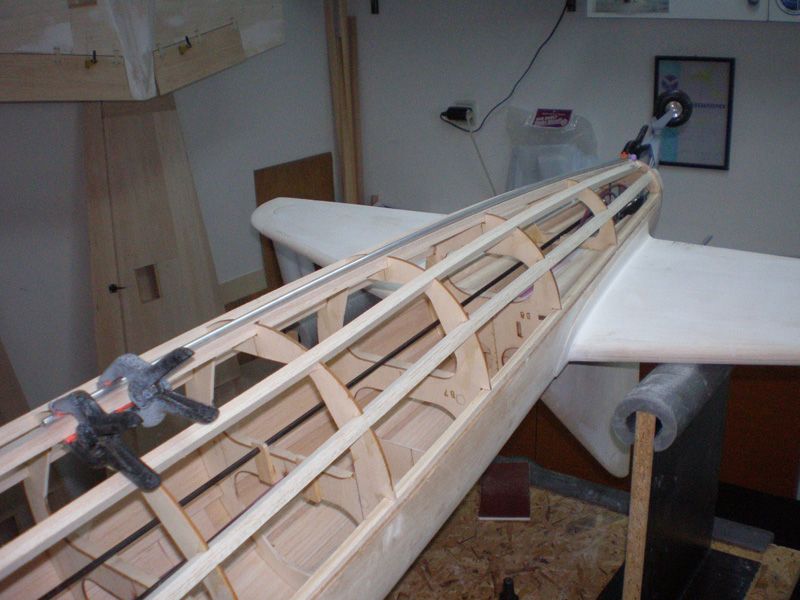
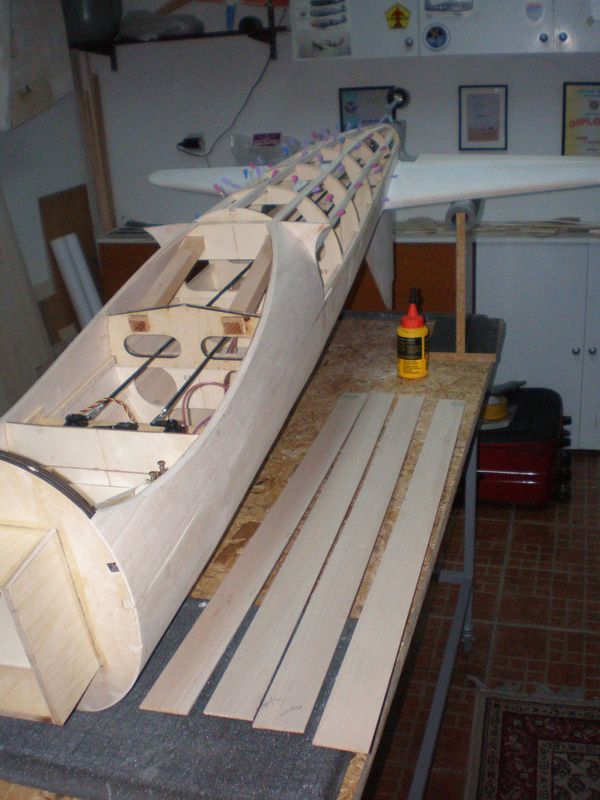
I start planking bottom fuselage part...
Hope this will be end in next few days. In meantime I'll start work on cockpit.
Regards from Serbia
Mirce
As you know, I'm using double adhesive tape for fixing moving part to elevator. That give me option to made perfect transition from one to another part...
After working about for one hour work table look like this...
... and elevators like this...
Next was to made hinges slots, put hinges inside and fine tune moving elevators parts...
I start planking bottom fuselage part...
Hope this will be end in next few days. In meantime I'll start work on cockpit.
Regards from Serbia
Mirce
 10-16-2012, 11:47 PM
#50
Thread Starter
Yes, main reason is price for shipping from USA to Serbia. Because box is very big, shipping will cost two to three time more then fuselage, so that is very expensive...
Other reason is, I like to made models, I love it...
My opinion is that wooden fuselage is better... Why? First, it's lighter, second it's stronger, and finally it's cheaper.
My friend have Ziroli F6F Hellcat with fiberglass fuselage, and I made my with wooden fuselage. In same stage, before panel lines and adding details, wooden fuselage was about 1,2 kilogram lighter than fiberglass.
Left and right sides of fuselage on wooden one you can't pres in, but on fiberglass they are soft and with hand you can push it inside. Of course, they are coming back, but it is not so hard like wooden.
And finally, when you need to made CG, because fiberglass fuselage is weights, you must add more lead in front...
Don't forget more complicated setting wing and elevator on fiberglass fuselage...
Only better thing is less time you need to invest in building...
Regards
Mirce