


Scratch Designed/Built Sailplane Fuselage
 11-11-2012, 06:16 PM
#51

Thread Starter

Join Date: Feb 2012
Location: Fairfield, CT
Posts: 416
Likes: 0
Received 0 Likes
on
0 Posts
Thanks, yeap good to still be here *smile*
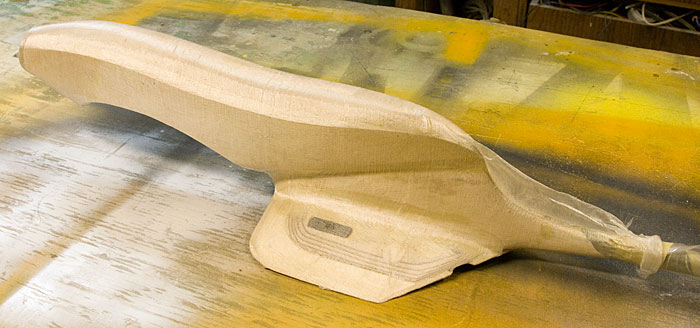
Hairy sticky mess
Ahh how we love working with fiber-glass. Here's a second layer of 2oz glass ready for the epoxy. I'm using 3M contact spray to tack it in place, makes life a lot easier...
After a little more glassing & maybe some triangle stock, I'm planning to add balsa fairings either side of the pylon to hide all this ugliness. Before I can do that I need to attach the pylon to the pod...
Yeap that's one unusual looking fuselage, I'm liking it...
I also glued the tail-boom on there, no turning back now...
I used slow set epoxy for most of today's assembly so I'm going to let this setup good & solid. That's a wrap for today.
 11-11-2012, 08:13 PM
#52

My Feedback: (98)

Join Date: Feb 2002
Location: The Villages, Florida NJ
Posts: 4,677
Likes: 0
Received 0 Likes
on
0 Posts
Looks great!
One of the nice things about rolling your on is no one is going to say "I have one of those." Unique is a good thing.
One of the nice things about rolling your on is no one is going to say "I have one of those." Unique is a good thing.
11-11-2012, 09:40 PM
#53

Hey there!
I am glad you came out of Hurricane Sandy with minimal damage!
Glider looks great!
Just a small note:
It is best to avoid square angles in support structure joints. I am sure stress load on your structure will be much less than structure could hold.
Making stress points with arches (rounded corners) evens-out the load and saves weight.
That's the reason why I'd use a molding approach with proper load spread and directional fiber layers in this particular situation. But that's me.
Looking forward for some thrilling flight videos!
cheers,
Mark
11-12-2012, 10:43 PM
#54
Thread Starter
Join Date: Feb 2012
Location: Fairfield, CT
Posts: 416
Likes: 0
Received 0 Likes
on
0 Posts
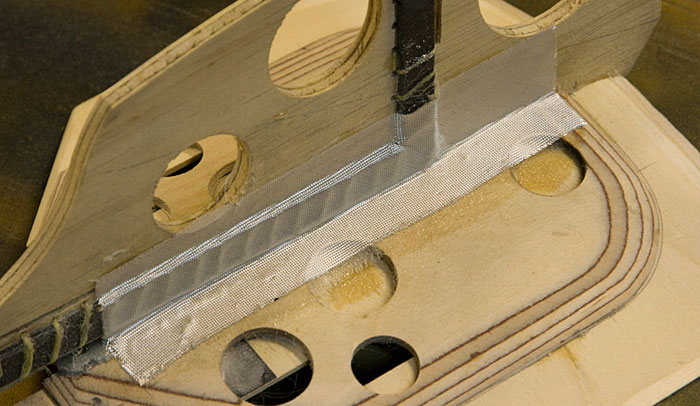
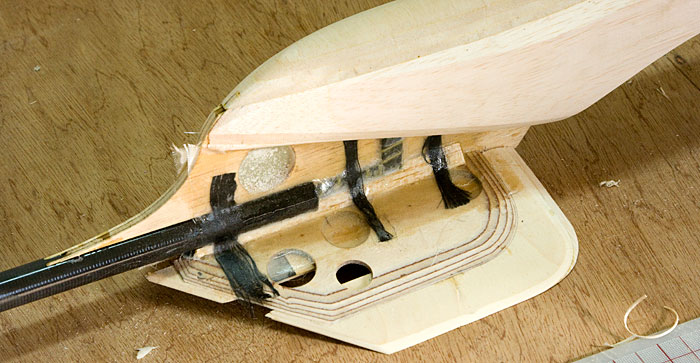
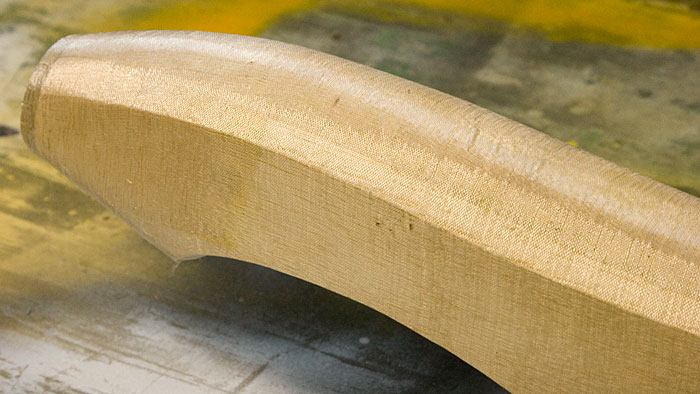
Yeah my initial fiber-glass reinforcements are at 90°. As you'll see below I also incorporated some angled glass work for just the reasons you mentioned. Thanks for the tip.
Trimming some triangle stock...
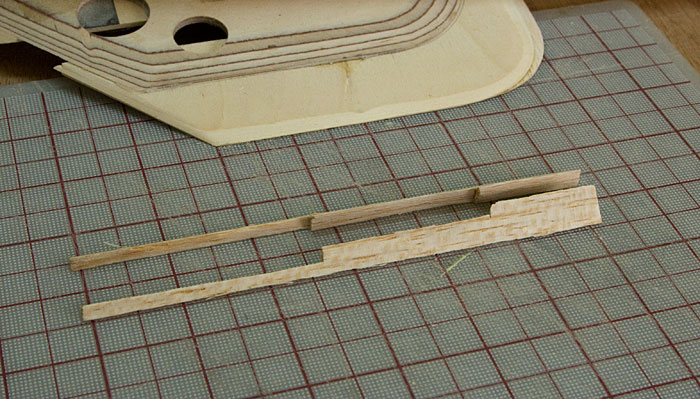
On its own, the triangle balsa doesn't add much strength...
What it does do however is angle the fiberglass at 45° which should add a lot of strength...
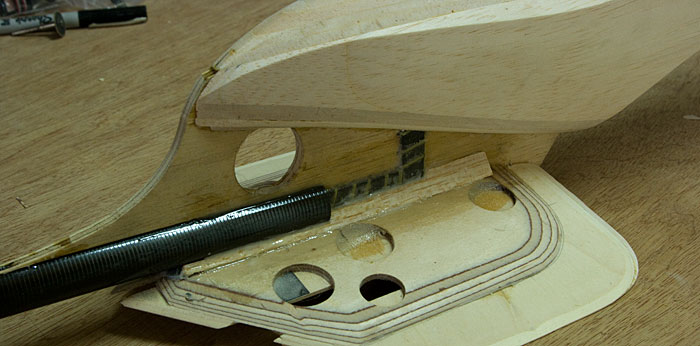
I had some carbon-fiber thread I've been itching to use on something...
I placed three strips of it under the glass cloth. Man & I thought fiber-glass was difficult to work with, major pain in the butt trying to get the CF thread to lay down neatly. As you can see I wasn't too successful but it doesn't need to look pretty to do its job...
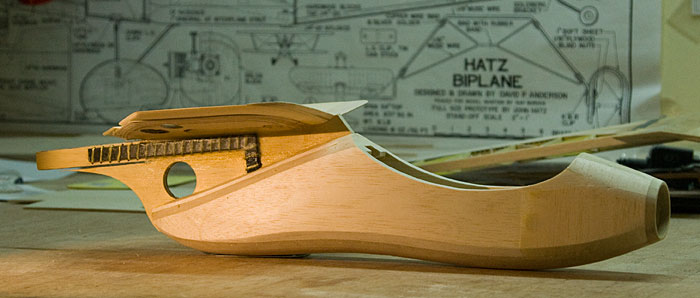
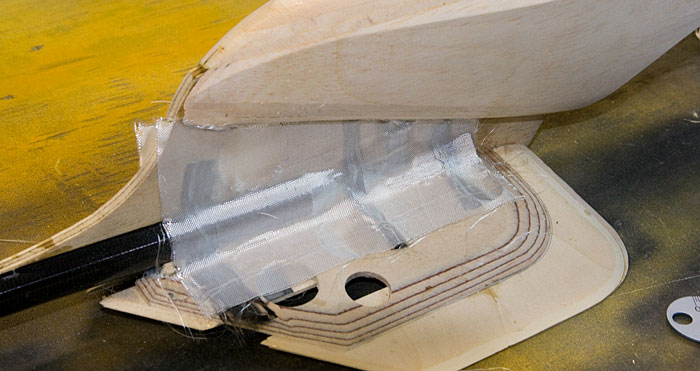
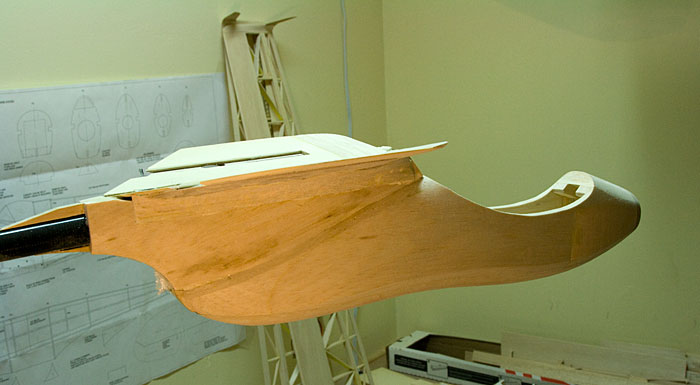
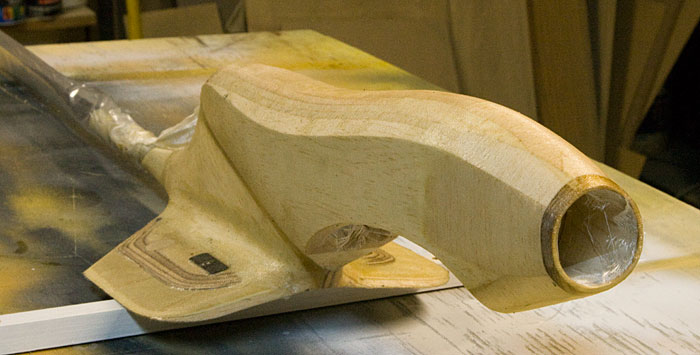
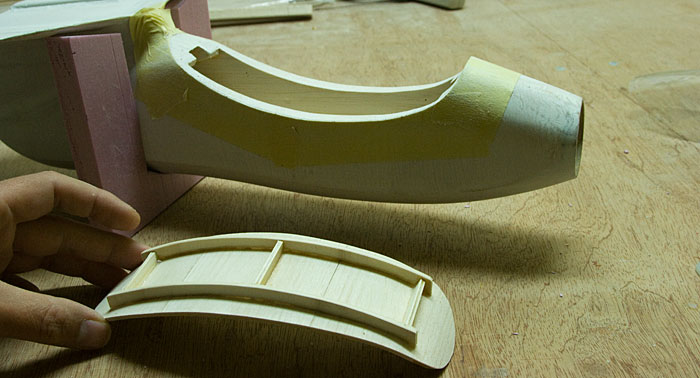
Time to hide all this structural stuff & make her pretty again...
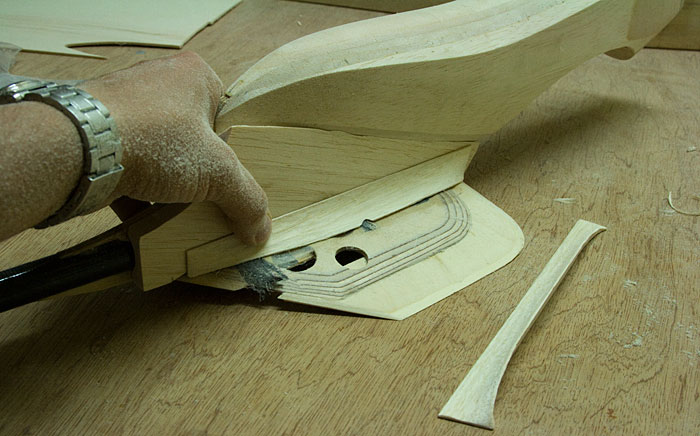
I thought carving the turtle-deck on the first version of this sailplane was a challenge. I don't even what to think about how many hours I spent today whittling, sanding & test fitting these pieces...

The pylon balsa sidings are just roughly shaped at this point but she's starting to look like something, pretty pleased with how she's looking...
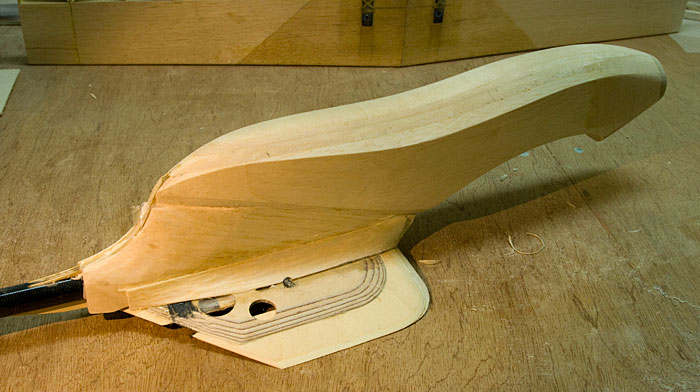
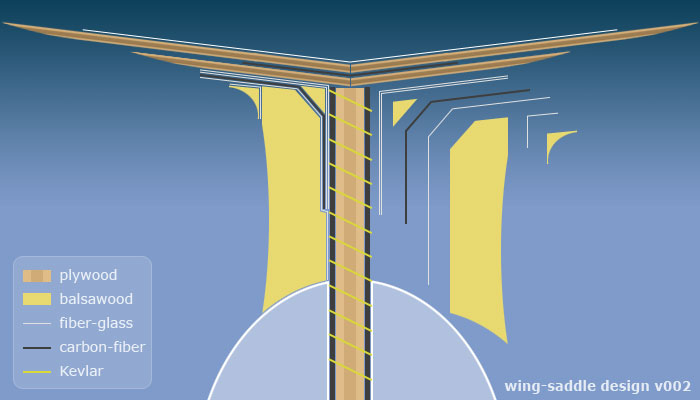
So just to recap here's how the new wing-saddle was put together...
Tomorrow I hope to finish shaping the pylon...
Trimming some triangle stock...
On its own, the triangle balsa doesn't add much strength...
What it does do however is angle the fiberglass at 45° which should add a lot of strength...
I had some carbon-fiber thread I've been itching to use on something...
I placed three strips of it under the glass cloth. Man & I thought fiber-glass was difficult to work with, major pain in the butt trying to get the CF thread to lay down neatly. As you can see I wasn't too successful but it doesn't need to look pretty to do its job...
Time to hide all this structural stuff & make her pretty again...
I thought carving the turtle-deck on the first version of this sailplane was a challenge. I don't even what to think about how many hours I spent today whittling, sanding & test fitting these pieces...
The pylon balsa sidings are just roughly shaped at this point but she's starting to look like something, pretty pleased with how she's looking...
So just to recap here's how the new wing-saddle was put together...
Tomorrow I hope to finish shaping the pylon...
11-13-2012, 08:05 AM
#55
My Feedback: (12)
Join Date: Mar 2011
Location: Agawam, MA
Posts: 145
Likes: 0
Received 0 Likes
on
0 Posts
Hi! Been following since you started glueing the Cub pieces together, and it's been great. What are you figuring as far as boom/stab angle of incidence and also angle of incidence for the wing?
11-13-2012, 10:52 AM
#56
Thread Starter
Join Date: Feb 2012
Location: Fairfield, CT
Posts: 416
Likes: 0
Received 0 Likes
on
0 Posts
Glad you've been enjoying my nutty workshop exploits. The first version of this sailplane (rest in peaces) had the tail-boom angled up at 1° which in turn set the v-tail at +1° to the wing. After watching a few of Paul Naton's Radio Carbon Art videos I've decided to set everything to 0° this time. He seems to favor that setup, we'll see how things workout. Either way I can likely tweak the wing's angle of incidence with spacers if necessary.
11-13-2012, 08:24 PM
#57


Join Date: Oct 2002
Location: Chilliwack, BC, CANADA
Posts: 12,425
Likes: 0
Received 22 Likes
on
19 Posts
Frankly I think you just enjoy carving off long shavings of nice balsa with a good ol' fashioned wittlin' knife..... 
I really like the new look. And for a "design as I go" project this one is working out well.
I really like the new look. And for a "design as I go" project this one is working out well.
11-15-2012, 10:23 AM
#59
Thread Starter
Join Date: Feb 2012
Location: Fairfield, CT
Posts: 416
Likes: 0
Received 0 Likes
on
0 Posts
Color sceme? That's top-secret *smile*. We'll not really. I'm still pondering my options but there's a good chance I'll be using colored transparent Ultracote on the open structures & gray opaque Ultracote over the rest. Either that or I may go for a retro beige & something sceme.
Sculpture & wittling have always been an interest of mine. I love working directly with a material, carving away the excess to reviel the shape hidden inside or something like that. All I need is a rocking chair, some banjo music & a sunny front porch. *grin*
Sculpture & wittling have always been an interest of mine. I love working directly with a material, carving away the excess to reviel the shape hidden inside or something like that. All I need is a rocking chair, some banjo music & a sunny front porch. *grin*
11-16-2012, 02:14 PM
#60
Senior Member
My Feedback: (7)

Join Date: Mar 2002
Location: Indianapolis,
IN
Posts: 169
Likes: 0
Received 0 Likes
on
0 Posts
Very nice. I have been following your build threads for a while.
There was an ancient artist, that liked aircraft too, that would simple remove or carve material from a slab of to reveal what was really there.
Jared
There was an ancient artist, that liked aircraft too, that would simple remove or carve material from a slab of to reveal what was really there.
Jared
11-16-2012, 05:29 PM
#61
Thread Starter
Join Date: Feb 2012
Location: Fairfield, CT
Posts: 416
Likes: 0
Received 0 Likes
on
0 Posts
Putty? That's cheating!
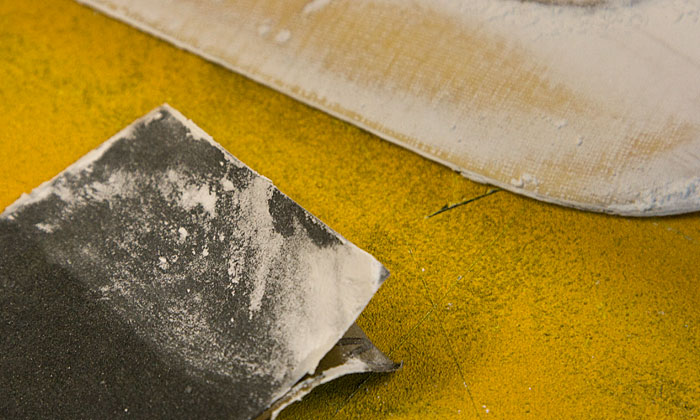
Filling the less than perfect areas with HobbyLite wood putty...
After sanding...
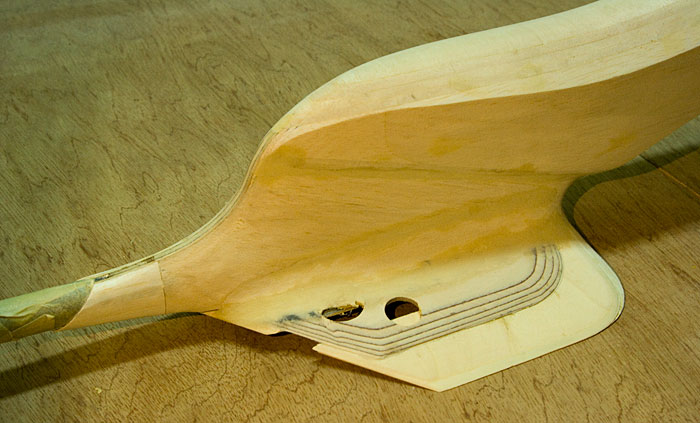
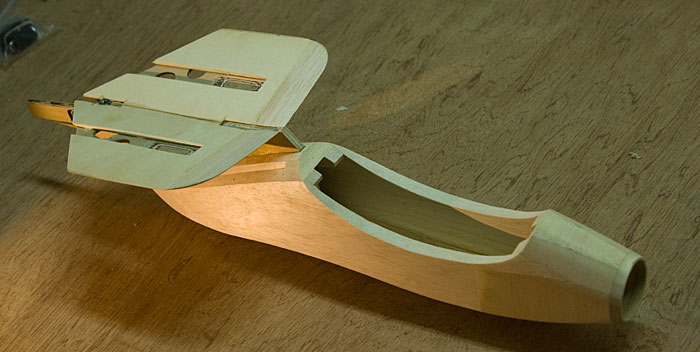
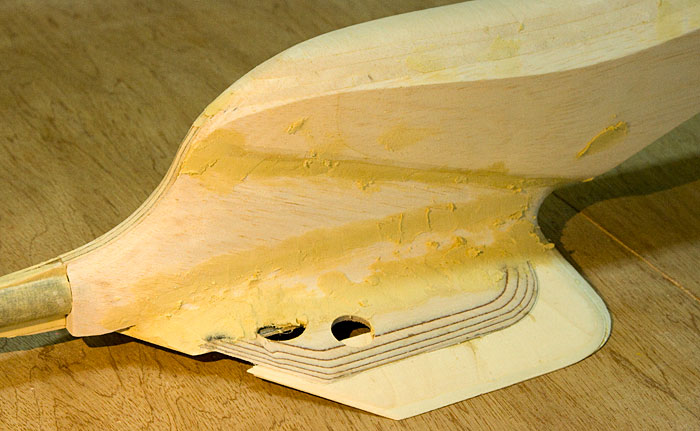
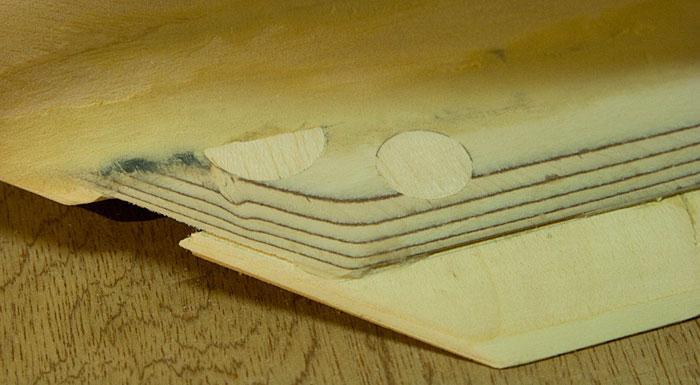
I'm probably going to paint the fuselage rather than cover it so these lightening holes need to go away...
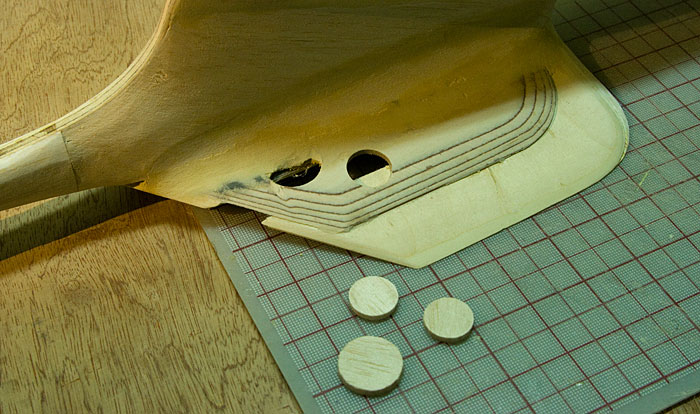
The balsa plugs are lighter than the hardwood ply so I suppose they're still lightening holes...
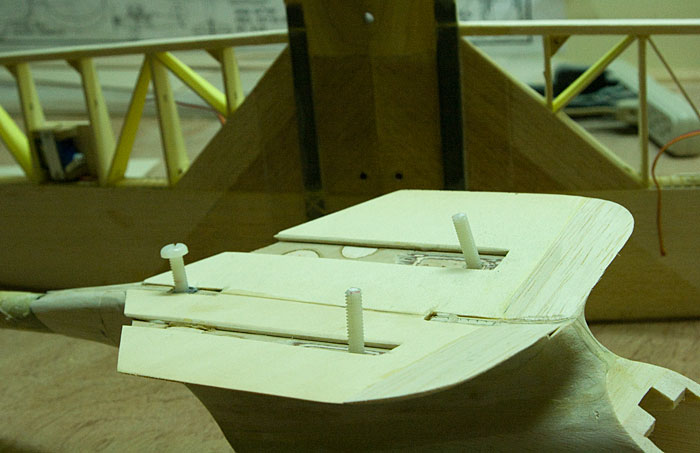
Finished up the wing-bolt system, that's good to go...
Next step is to glass the entire thing with some lightweight cloth. Looks like I don't have enough so will head out tomorrow & get some more...
Filling the less than perfect areas with HobbyLite wood putty...
After sanding...
I'm probably going to paint the fuselage rather than cover it so these lightening holes need to go away...
The balsa plugs are lighter than the hardwood ply so I suppose they're still lightening holes...
Finished up the wing-bolt system, that's good to go...
Next step is to glass the entire thing with some lightweight cloth. Looks like I don't have enough so will head out tomorrow & get some more...
 ][8D][
11-17-2012, 07:38 PM
][8D][
11-17-2012, 07:38 PM
#64
Thread Starter
Join Date: Feb 2012
Location: Fairfield, CT
Posts: 416
Likes: 0
Received 0 Likes
on
0 Posts
Blue & yellow always looks good together, that's a possibility. I'll probably try out a bunch of color scheme's in Photoshop before I commit to a design.
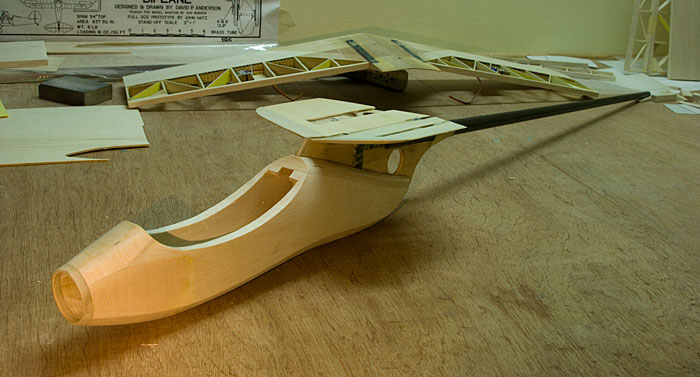
3/4oz glass
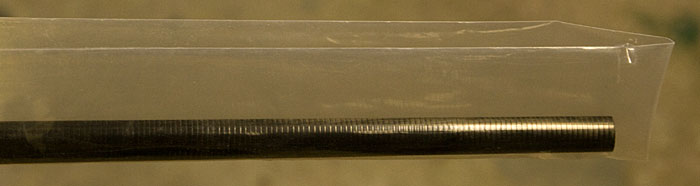
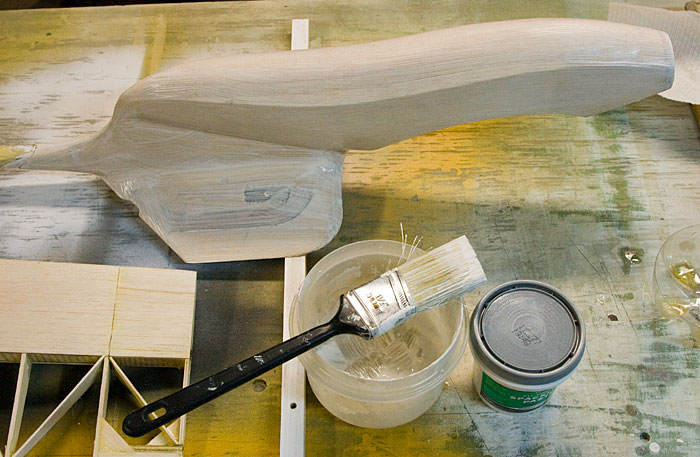
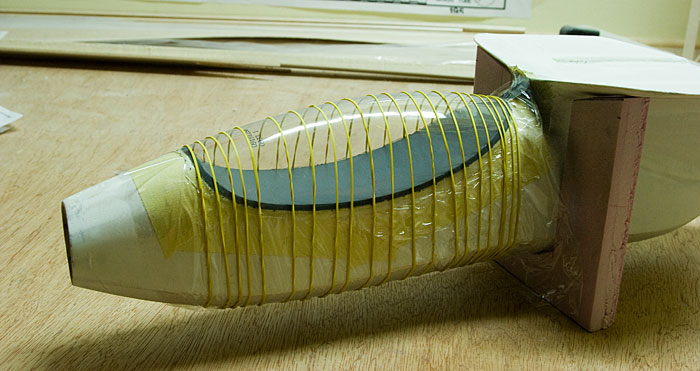
From experience I've learned, no matter how careful you are with fiber-glass, the epoxy just ends up getting everywhere. So first things first, I covered my spiffy Bubble Dancer tail-boom in plastic to protect it...
I sprayed the fuselage with 3M contact cement then laid down the glass...
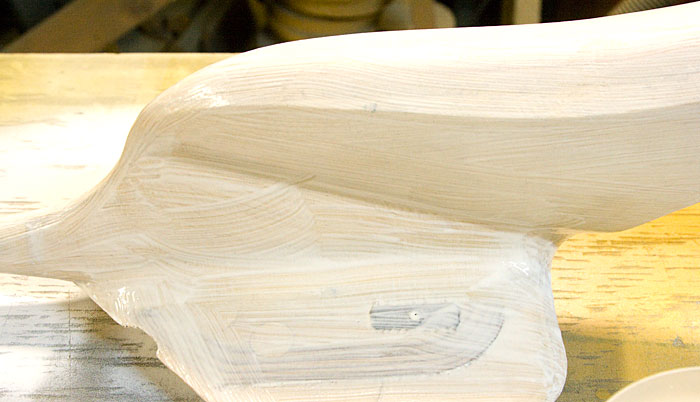
I'd always thought fiber-glass was heavy stuff until I tried working with 3/4oz glass. This stuff is like silk, its virtually weightless...
Much of the weight however comes from the epoxy finishing resin but daub most of it off with paper towels & you're left with a nice lightweight fiber-glass covering...
This'll setup overnight then tomorrow I'll see about producing a nice paintable finish...
From experience I've learned, no matter how careful you are with fiber-glass, the epoxy just ends up getting everywhere. So first things first, I covered my spiffy Bubble Dancer tail-boom in plastic to protect it...
I sprayed the fuselage with 3M contact cement then laid down the glass...
I'd always thought fiber-glass was heavy stuff until I tried working with 3/4oz glass. This stuff is like silk, its virtually weightless...
Much of the weight however comes from the epoxy finishing resin but daub most of it off with paper towels & you're left with a nice lightweight fiber-glass covering...
This'll setup overnight then tomorrow I'll see about producing a nice paintable finish...
11-18-2012, 03:51 AM
#65
Senior Member
There are a couple of brands of cloth we run into in the LHSs. Next time you see 7/8oz or even 1oz, give them a test. They provide a much more servicable surface. I've got a number of gliders built in the 70s that're still flying. They are balsa bodied. They've flown a lot of contests, where landings are measured.
I wish they'd print the cloth thickness on the packages, because the weight really doesn't seem to be an honest indication. Truth is, even the numbers I've suggested aren't perfectly reliable. You've just got to buy and try to be sure.
I've got some "1 ounce" that is magic. Years of contest flying taught me to weight almost everything before and after. That one ounce finishes lighter and handles easier than any of the light stuff I've tried over the years. It actually looks like 1.5 ounce until it goes on. I found it in a boat shop and bought their 'almost finished roll'. Only got maybe a couple more fuselages worth. I'll cry when it's gone.
Sopping up the applied epoxy certainly is the trick to get a good finish. It is a good way to keep the resin from being too thick. The paper towel quality also affects how easy and effective the job goes. It's funny to suggest, but you've probably already discovered that cheap paper towels can cost you time and job quality. We used to buy the cheapest for the kitchen and house. My wife would swipe my Bounty every so often. Turns out she discovered it worked better. And she used less. Now I don't have to buy good stuff for my models as we buy 8 roll packs of the good stuff. And..........
When glassing next time, get some absorbent toilet paper and try it out. The stuff is easier to handle than paper towels and seems to pull the applied glass less. The size seems to suit better too. Funny thing is that it's not replaced what we use in the house. I won't go into why that is..........
11-18-2012, 04:06 AM
#66
Senior Member
Oh, btw..... it's nice to hear another serious modeler mention using surfacing resin. It seems to handle a lot better for me than 30 minute, even when the 30 minute is thinned. It also appears to puddle less.... make that: go on more uniformly. That seems to be the real trick to doing a light job.
It also seems to have the best flex to strength. OK.... seems I can't come up with the perfectly appropriate word 1st try..... It seems to stand up to scraping along the ground better. It has never shown any cracking. My old OlyII body should have cracked sometime during the year I though spear landings was the way to always get zero-feet landings. It was the first fuselage that got the surfacing resin. (You can actually see where the underside is worn, btw. That old bird has seen a lot of landings... a lot.)
It also seems to have the best flex to strength. OK.... seems I can't come up with the perfectly appropriate word 1st try..... It seems to stand up to scraping along the ground better. It has never shown any cracking. My old OlyII body should have cracked sometime during the year I though spear landings was the way to always get zero-feet landings. It was the first fuselage that got the surfacing resin. (You can actually see where the underside is worn, btw. That old bird has seen a lot of landings... a lot.)
11-18-2012, 05:45 PM
#67
Thread Starter
Join Date: Feb 2012
Location: Fairfield, CT
Posts: 416
Likes: 0
Received 0 Likes
on
0 Posts
I can see how 1oz would be pretty nice to work with. I do like this 3/4oz uber light stuff but it tends to curl up when you cut it. Also its easily pulled out of shape, as in it stretches diagonally & is almost impossible to get the fibers back to 90° of each other. The heavier weight stuff tends holds its shape better & is therefor a lot easier to work with.
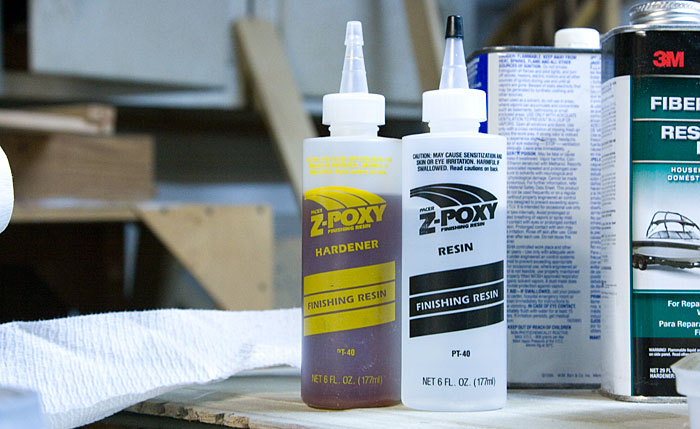
Finishing resin (or surfacing resin as you put it) is nice, I agree. I played around with thinning regular 30 minute epoxy & while the results were okay, this stuff is just so much easier. Takes all the guesswork out it...
Smells like a wall
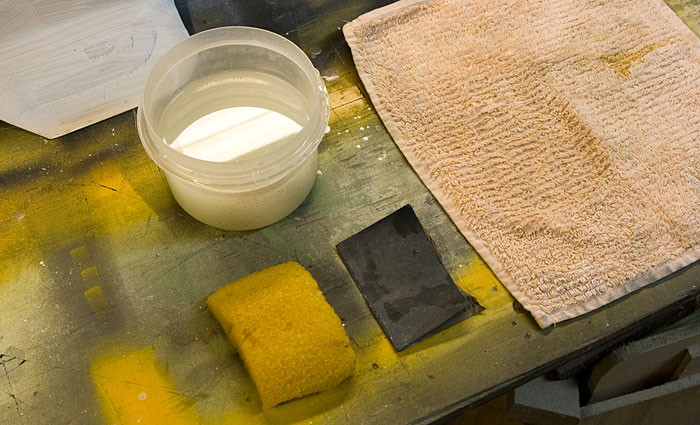
Well the fiber-glassing is cured & looking good. After a light sanding it was time to fill the weave so I can paint her. As I've mentioned before, I'm somewhat new to the glassing scene, so I did some reading up on the subject. Apparently there's no shortage of ways to produce a smooth finish, the one that grabbed me involved dry-wall spackling...

Right out of the tub this stuff is really thick. I mixed in some water until I had a creamy consistency somewhere between milk & yogurt. Then I slapped on a couple of coats...
I ended up with brush strokes in the finish but those should sand right out. I just need enough spackle on there to fill the glass' weave. Any more is just dead weight...
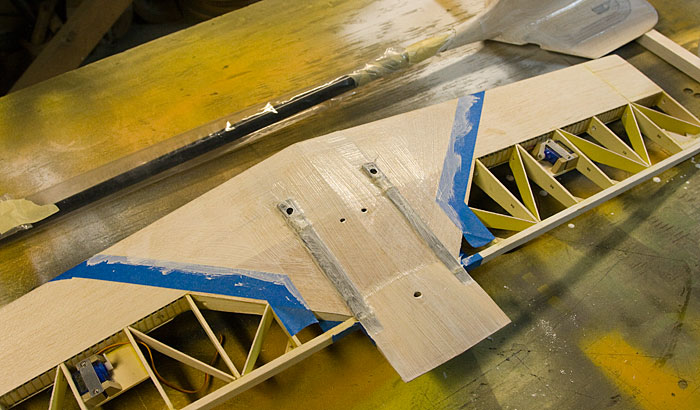
While I was at it I also did the glassed areas of the wing...
Well once again I need to let this dry. That's all for today.
Finishing resin (or surfacing resin as you put it) is nice, I agree. I played around with thinning regular 30 minute epoxy & while the results were okay, this stuff is just so much easier. Takes all the guesswork out it...
Smells like a wall
Well the fiber-glassing is cured & looking good. After a light sanding it was time to fill the weave so I can paint her. As I've mentioned before, I'm somewhat new to the glassing scene, so I did some reading up on the subject. Apparently there's no shortage of ways to produce a smooth finish, the one that grabbed me involved dry-wall spackling...
Right out of the tub this stuff is really thick. I mixed in some water until I had a creamy consistency somewhere between milk & yogurt. Then I slapped on a couple of coats...
I ended up with brush strokes in the finish but those should sand right out. I just need enough spackle on there to fill the glass' weave. Any more is just dead weight...
While I was at it I also did the glassed areas of the wing...
Well once again I need to let this dry. That's all for today.
11-19-2012, 05:57 PM
#68
Thread Starter
Join Date: Feb 2012
Location: Fairfield, CT
Posts: 416
Likes: 0
Received 0 Likes
on
0 Posts
Both Wet & Dry?
This should look familiar if you've ever tried using fine sandpaper. It clogs quickly & then bad things happen to your finish...
Ordinarily I'd wet-sand but this spackling seems to be water soluble even after its dried. The wet sandpaper was producing a big white mess & seemed to be dissolving the spackling rather than sanding it. So I did some head-scratching & came up with a wet & dry system. I'd sand dry & then every few minutes I'd wash the paper with water & a sponge to unclog it. Then using an old hand-towel I dried the paper, then back to sanding. That seemed to work well...
The thin layer of spackling once sanded did exactly what I'd hoped. It filled the fiber-glass' weave beautifully without adding any real weight at all...
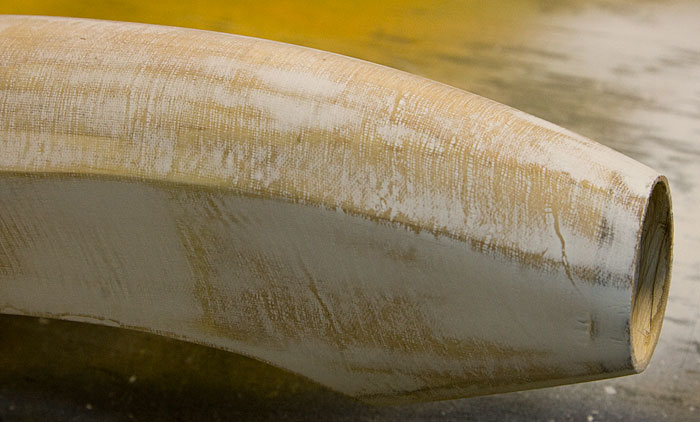
This may look rough but the surface is actually silky smooth. Spackling is my new best friend...
Paint Time
Next went on a dusting of primer...
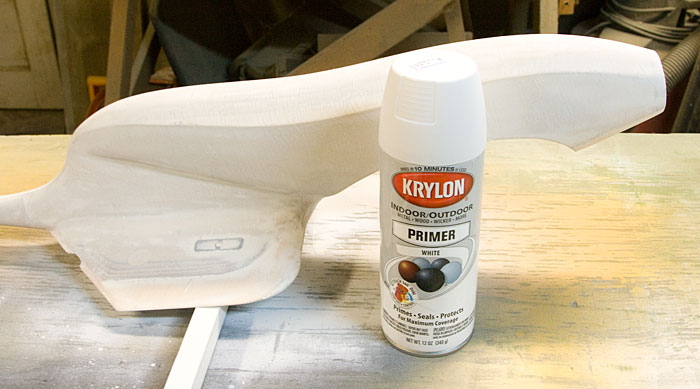
Light sanding between coats & I'm blown away with how nice & smooth this is coming out, couldn't be happier...

Tomorrow I'll get back to construction, need to get the canopy mounted, maybe install the electronics. I also need to start thinking about the tail-feathers. Fun Fun.
This should look familiar if you've ever tried using fine sandpaper. It clogs quickly & then bad things happen to your finish...
Ordinarily I'd wet-sand but this spackling seems to be water soluble even after its dried. The wet sandpaper was producing a big white mess & seemed to be dissolving the spackling rather than sanding it. So I did some head-scratching & came up with a wet & dry system. I'd sand dry & then every few minutes I'd wash the paper with water & a sponge to unclog it. Then using an old hand-towel I dried the paper, then back to sanding. That seemed to work well...
The thin layer of spackling once sanded did exactly what I'd hoped. It filled the fiber-glass' weave beautifully without adding any real weight at all...
This may look rough but the surface is actually silky smooth. Spackling is my new best friend...
Paint Time
Next went on a dusting of primer...
Light sanding between coats & I'm blown away with how nice & smooth this is coming out, couldn't be happier...
Tomorrow I'll get back to construction, need to get the canopy mounted, maybe install the electronics. I also need to start thinking about the tail-feathers. Fun Fun.
11-22-2012, 03:37 PM
#70
Thread Starter
Join Date: Feb 2012
Location: Fairfield, CT
Posts: 416
Likes: 0
Received 0 Likes
on
0 Posts
Thanks!
Look what RCAerotowing posted today...

This sure looks familiar...
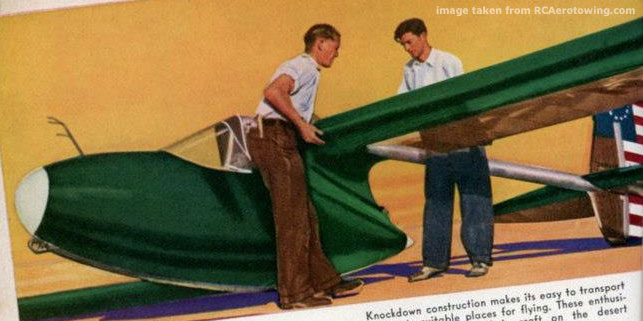
Someone stole my design, went back in time & built a full-scale!
I swear I've never seen this airplane but it sure does look a lot like what I'm building here. I'm digging what they did with the tail, may have to copy that look. Especially like the way the v-stab protrudes down below the boom. As we figured out earlier in this build, some form of tail-skid maybe necessary to keep the fuselage level during landing. Its interesting they came up with more or less the same solution. I like it!
Anyway for those in the US, happy Turkey day! Lots of flying this weekend so not sure how much I'll get done, will post more soon.
Look what RCAerotowing posted today...
This sure looks familiar...
Someone stole my design, went back in time & built a full-scale!
I swear I've never seen this airplane but it sure does look a lot like what I'm building here. I'm digging what they did with the tail, may have to copy that look. Especially like the way the v-stab protrudes down below the boom. As we figured out earlier in this build, some form of tail-skid maybe necessary to keep the fuselage level during landing. Its interesting they came up with more or less the same solution. I like it!
Anyway for those in the US, happy Turkey day! Lots of flying this weekend so not sure how much I'll get done, will post more soon.
11-26-2012, 03:34 PM
#71
Senior Member

Join Date: May 2012
Location: Grand Junction,
CO
Posts: 131
Likes: 0
Received 0 Likes
on
0 Posts
That one looks neat, I think I will like yours better, as a "Fun fly" glider. I like your You Tube videos too, I subscribed.
11-26-2012, 07:27 PM
#72
Thread Starter
Join Date: Feb 2012
Location: Fairfield, CT
Posts: 416
Likes: 0
Received 0 Likes
on
0 Posts
I think it was the configuration that caught my eye mostly, stubby dropped pod with the boom attached at the wing. Yeah other than that, mine looks different. Glad you're enjoying my Nodd RC videos.
Canopy
Not feeling like reinventing the wheel I set about installing the canopy in my usual way. First I built a simple frame, used kitchen wrap to keep the glue from sticking to the fuselage...
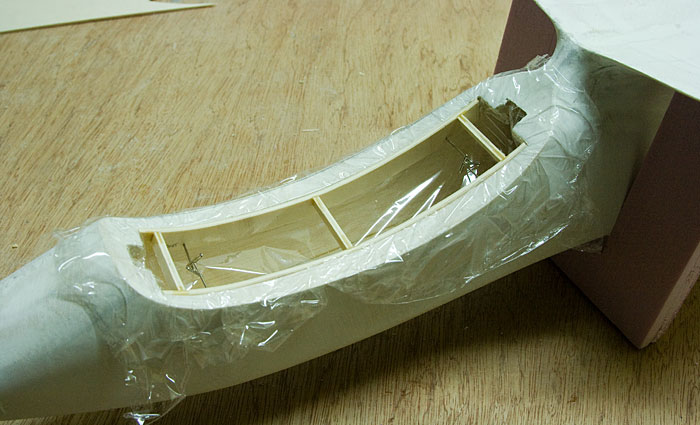
Sheeting is glued to the frame...

Second layer of sheeting, the lamination should help maintain the curved shape...

Sanded flush...
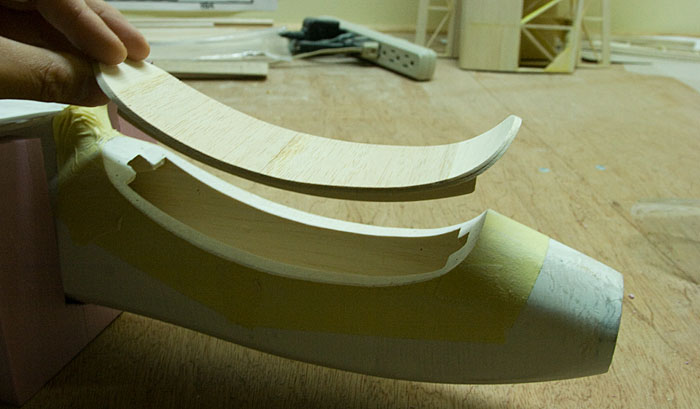
A clearer view of the sub-frame...
A coat of gray paint & on goes the soda-bottle canopy...
She's looking kinda sexy...

Time once again to let the glue dry.
Canopy
Not feeling like reinventing the wheel I set about installing the canopy in my usual way. First I built a simple frame, used kitchen wrap to keep the glue from sticking to the fuselage...
Sheeting is glued to the frame...
Second layer of sheeting, the lamination should help maintain the curved shape...
Sanded flush...
A clearer view of the sub-frame...
A coat of gray paint & on goes the soda-bottle canopy...
She's looking kinda sexy...
Time once again to let the glue dry.
11-27-2012, 06:42 PM
#73
Thread Starter
Join Date: Feb 2012
Location: Fairfield, CT
Posts: 416
Likes: 0
Received 0 Likes
on
0 Posts
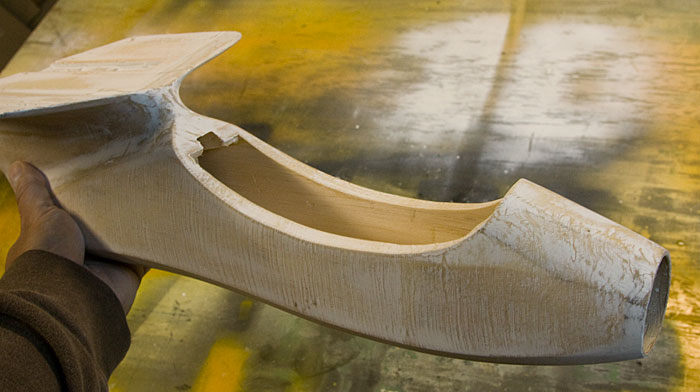
I got a few odds & ends done today... Trimmed the excess plastic from the canopy. Scared myself silly drilling a hole up through the pod to the wing-saddle for the wing's servo wires, turned out okay. Performed a balance test to see how much weight I have to play with for the tail.
Y-Tail
After some thought I think I'm going to stick with a V-tail for this bird but I'll be adding a small sub-fin effectively making this a Y-tail, fun fun...
Once again I used the sailplane V-tail calculator from tailwindgliders.com to figure out the tail sizing & geometry. And before anyone starts worrying about the V-tail angle, that'll be set at the usual 110°.
I thought about adding a small rudder to the sub-fin but that'd take another servo & require an extra channel which my DX7s doesn't have. Would have been cool & an interesting mix with the V-tail's ruddervators but there's really no need for a rudder. I'll get to designing the tail's structure tomorrow.
11-30-2012, 10:47 PM
#74
Thread Starter
Join Date: Feb 2012
Location: Fairfield, CT
Posts: 416
Likes: 0
Received 0 Likes
on
0 Posts
After some more CAD work I printed up a set of ribs for the tail...
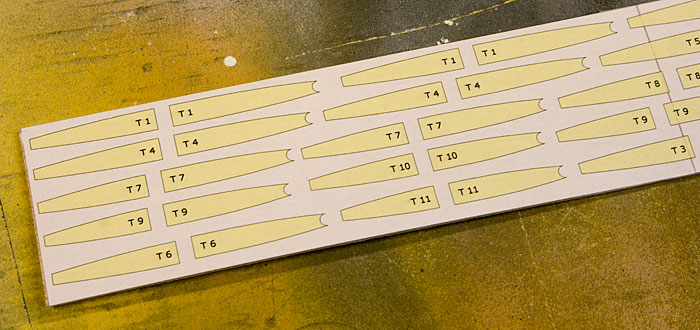
I plan to use dowel for the tail's leading edge hence the curvy bits...
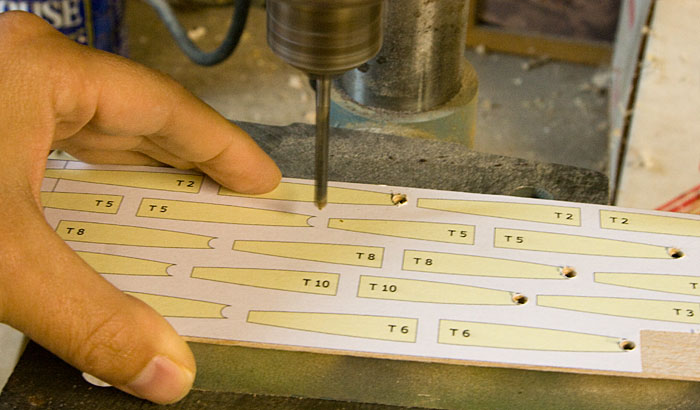
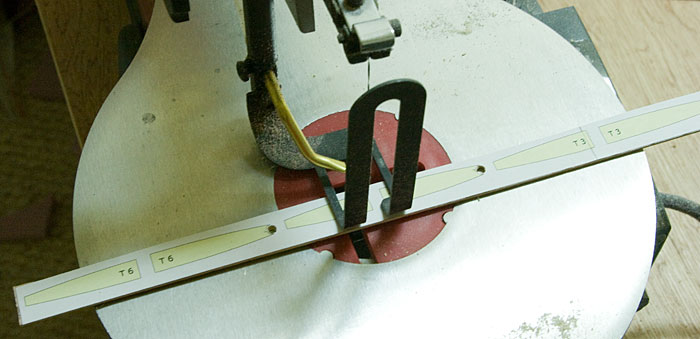
Rough cutting using the scroll-saw...
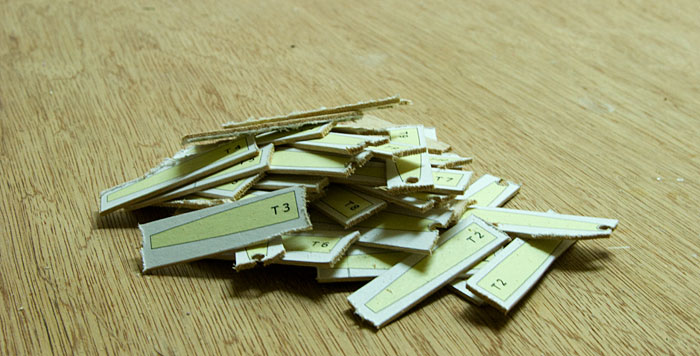
Pile-o-riblets...
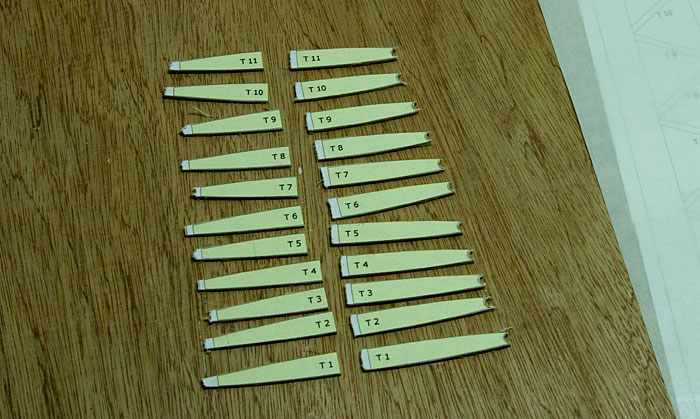
Sanded to shape using the belt-sander...
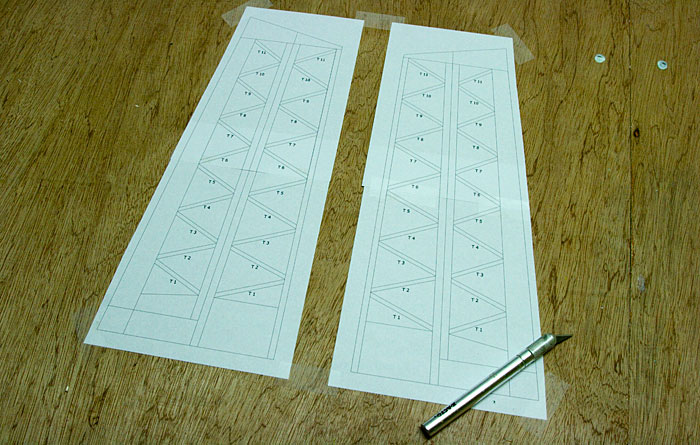
Printed up a set of plans...
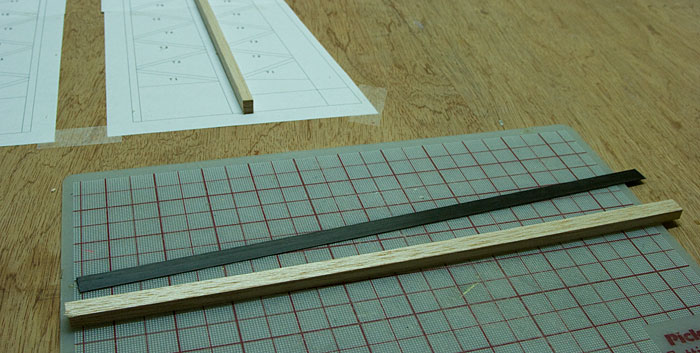
I'm using a thin strip of carbon-fiber to stiffen up the tail's main-spar...
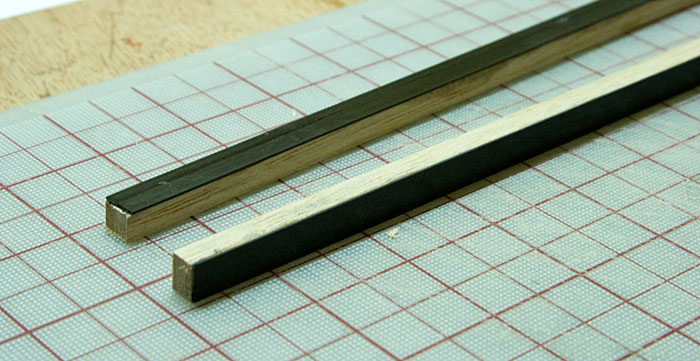
Glued the carbon-fiber to the spars...
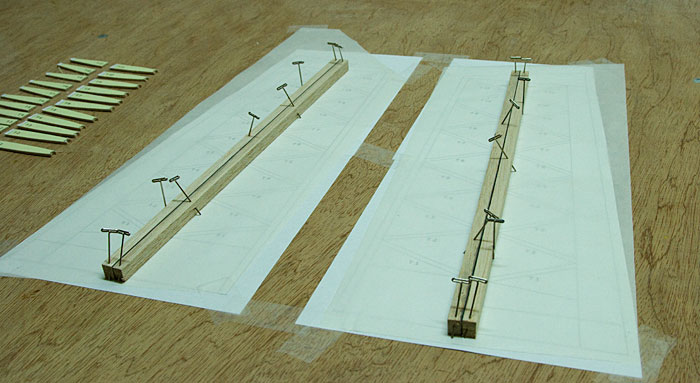
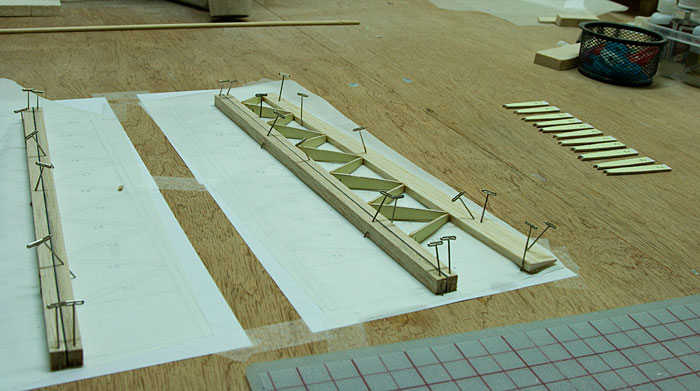
Time to start putting this together...
Everything was going great until I looked up at the clock. Doh' it's 1am, time to call it a day...
I expect I'll get these finished up tomorrow, I'm off to bed Zzzzzz...
I plan to use dowel for the tail's leading edge hence the curvy bits...
Rough cutting using the scroll-saw...
Pile-o-riblets...
Sanded to shape using the belt-sander...
Printed up a set of plans...
I'm using a thin strip of carbon-fiber to stiffen up the tail's main-spar...
Glued the carbon-fiber to the spars...
Time to start putting this together...
Everything was going great until I looked up at the clock. Doh' it's 1am, time to call it a day...
I expect I'll get these finished up tomorrow, I'm off to bed Zzzzzz...
