


Meister Scale Zero - step by step


 10-21-2012, 04:28 PM
#52

Thread Starter
Thanks Bubbasan John...
In last few day I was working on three point in Zero building.
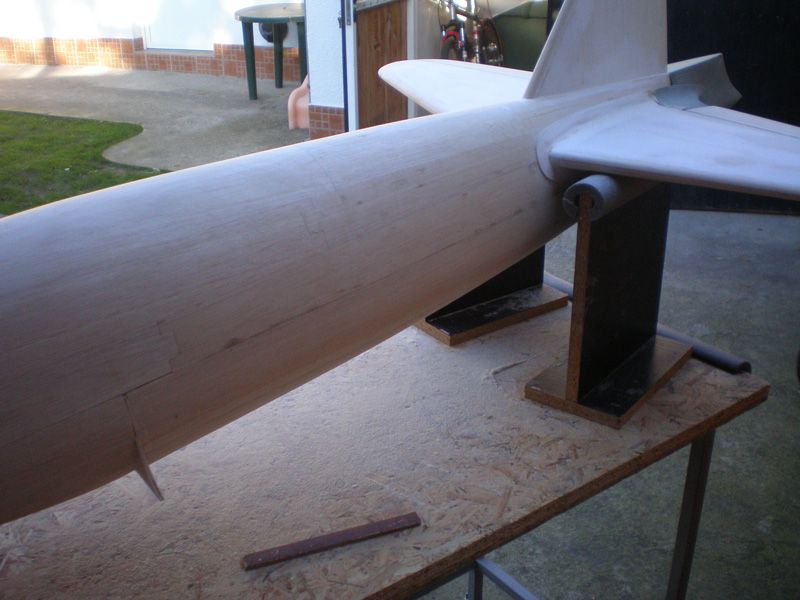
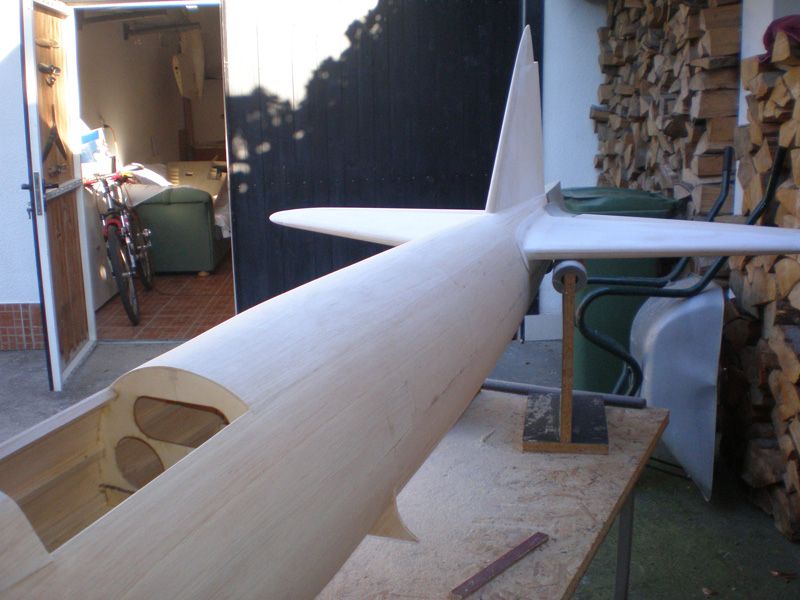
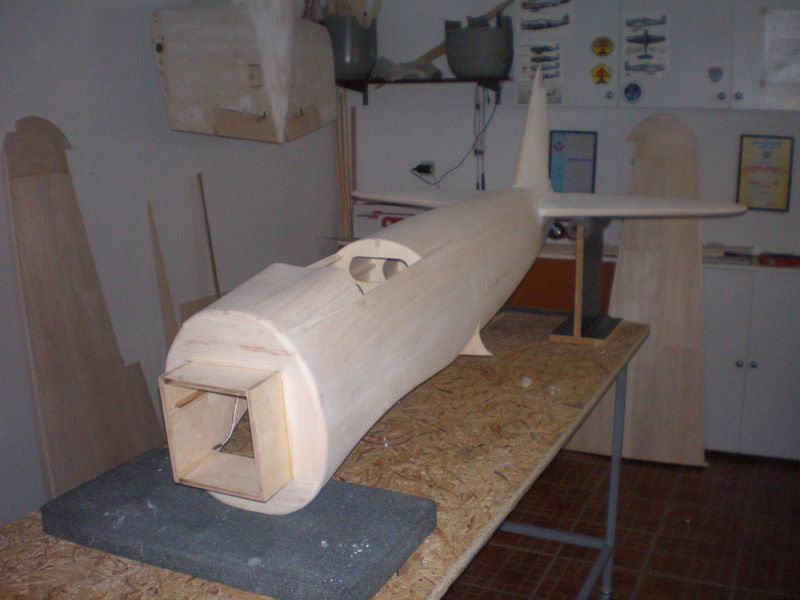
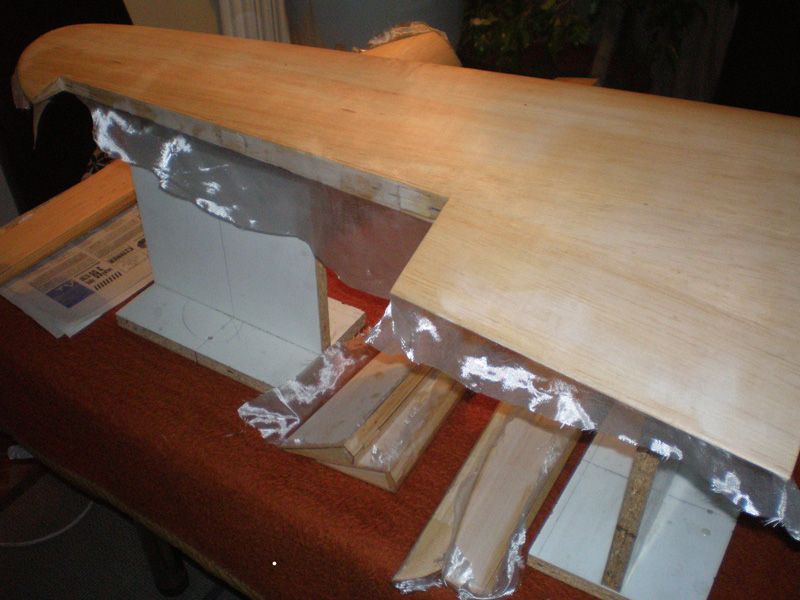
Fuselage is finally close with balsa strips on the bottom side...
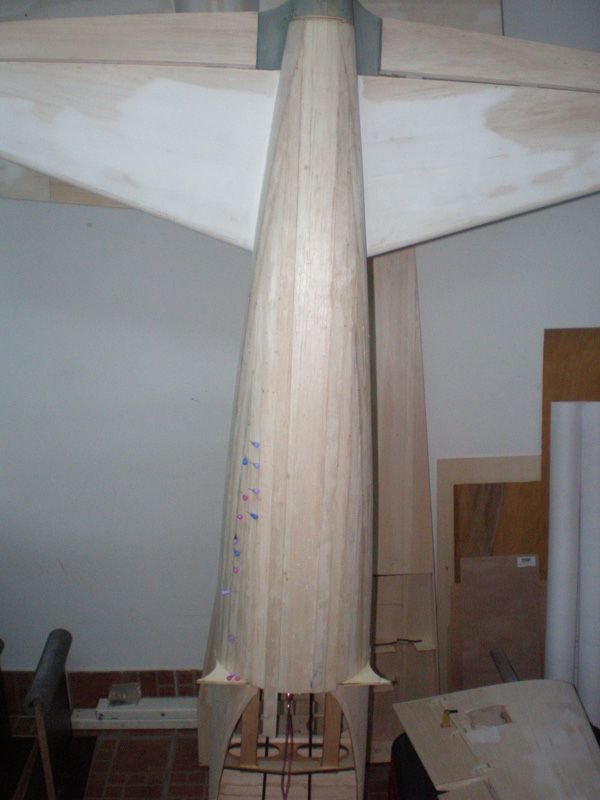
Yesterday afternoon I spent in sanding it...
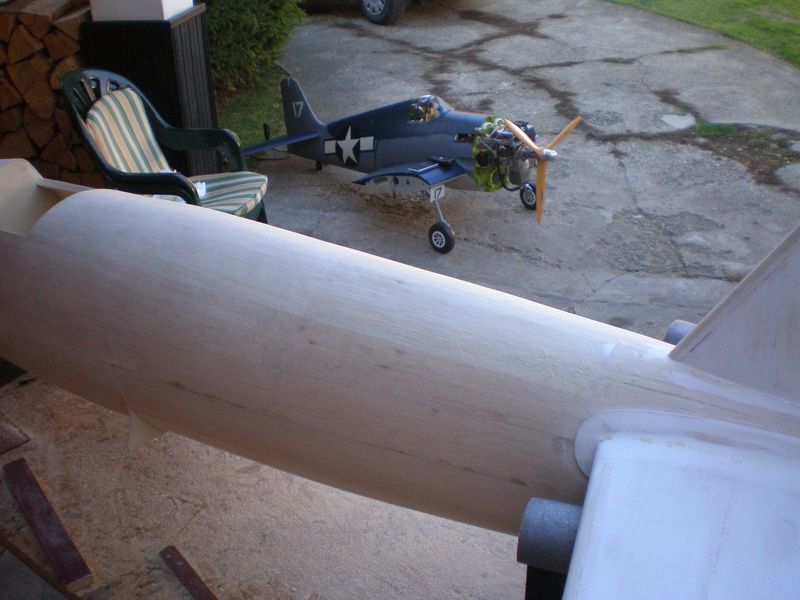
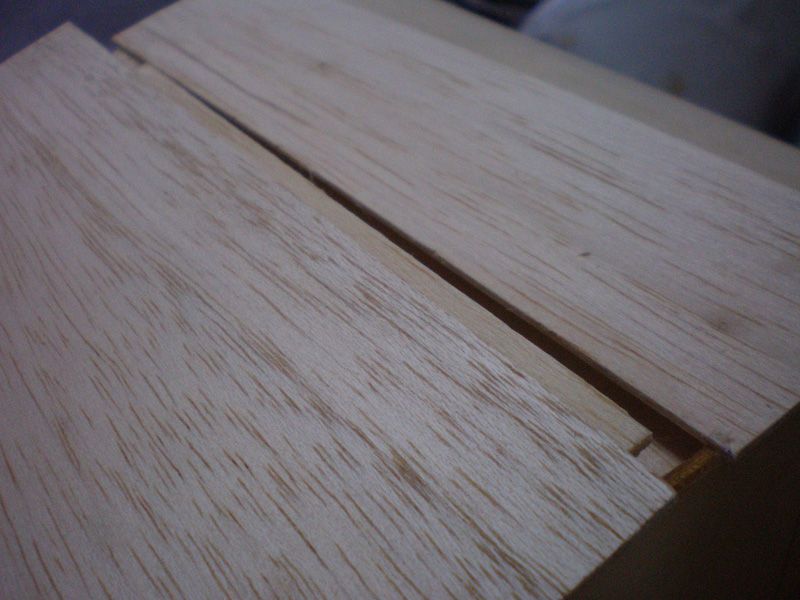
In front of the canopy Meister sale plastic part which should be same like fuselage shape. But, it's not...
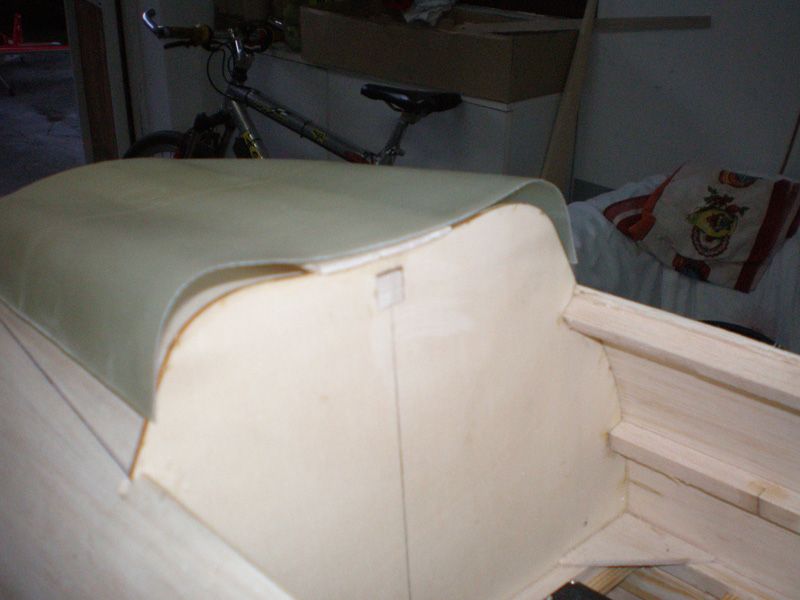
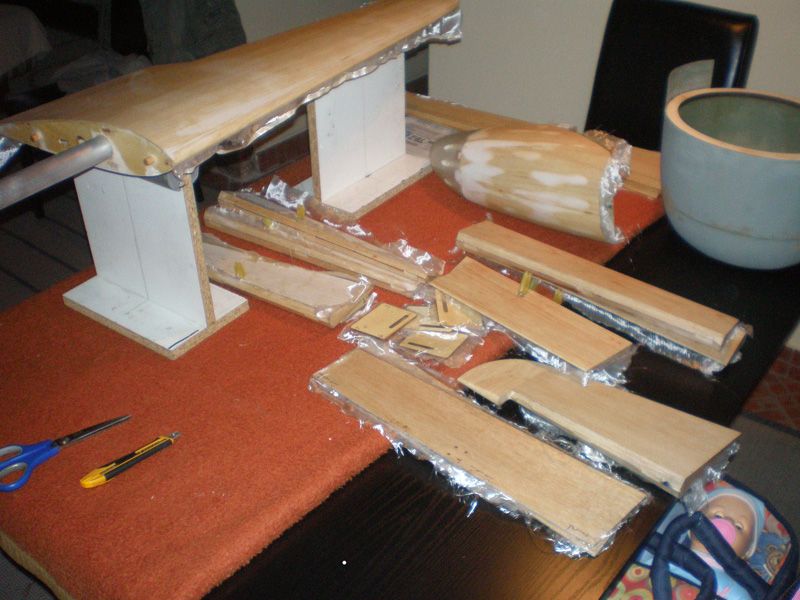
OK, if you push it, you can glue that part, but it is not long and wide enough, so I decided to made that from balsa plates.
First I glued balsa in the middle...
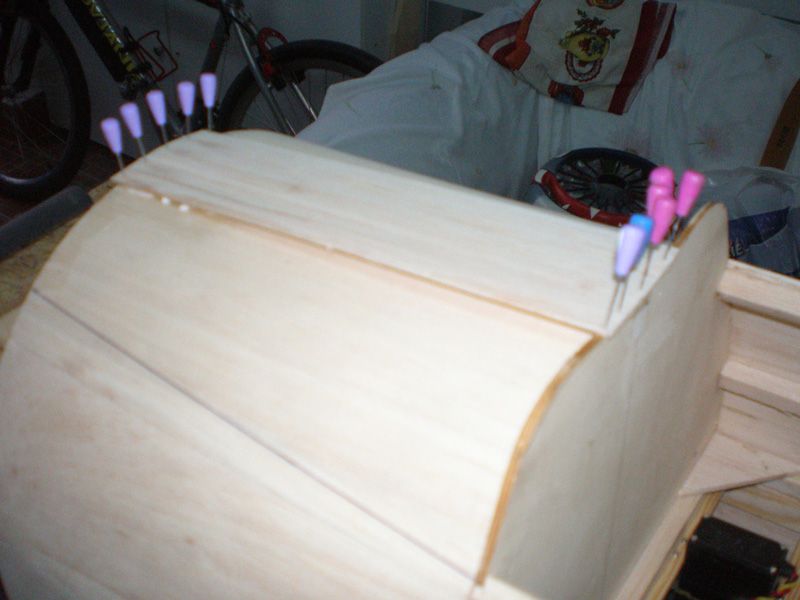
Than I made left and right side. On the bottom I glued small balsa plate for better seating.
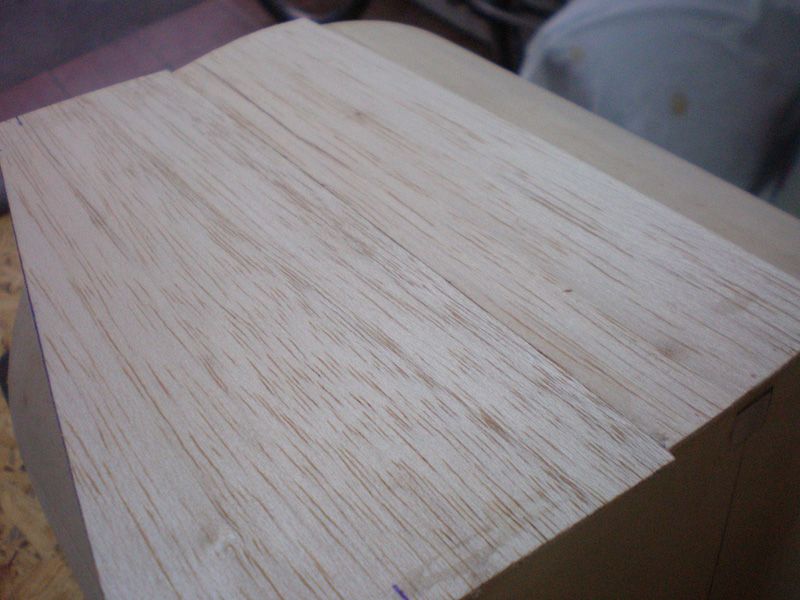
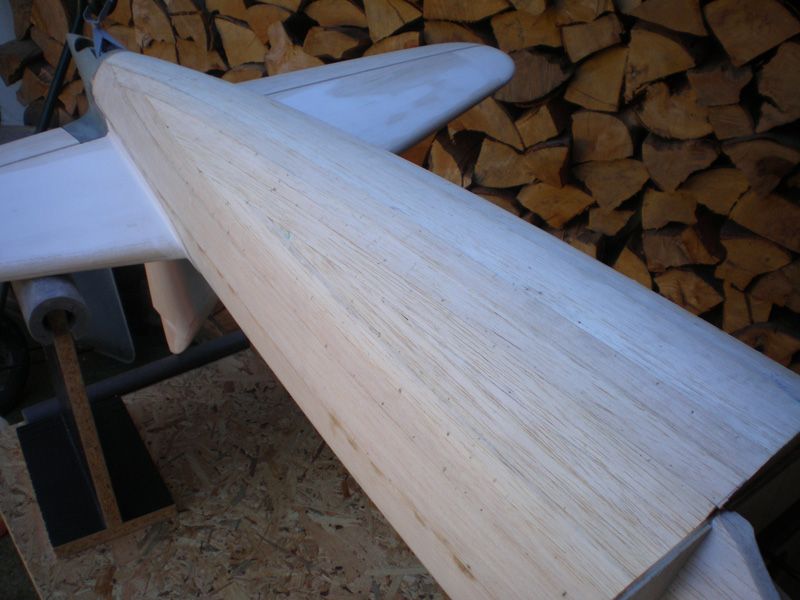
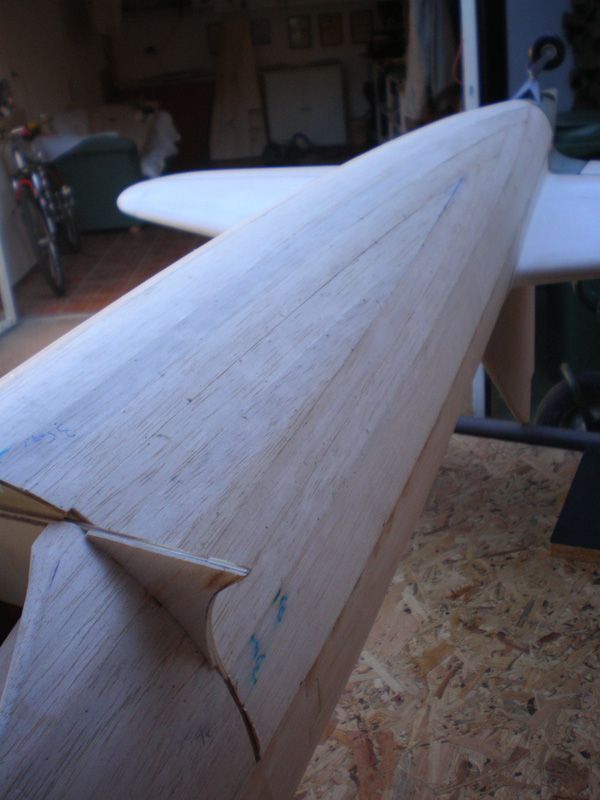
Next, hot water and white glue...

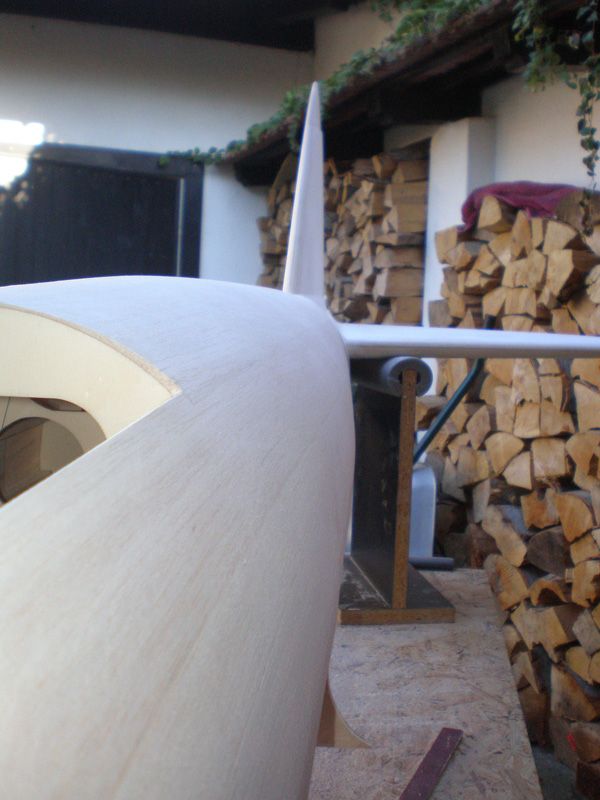
Within sanding fuselage I sand that part too...
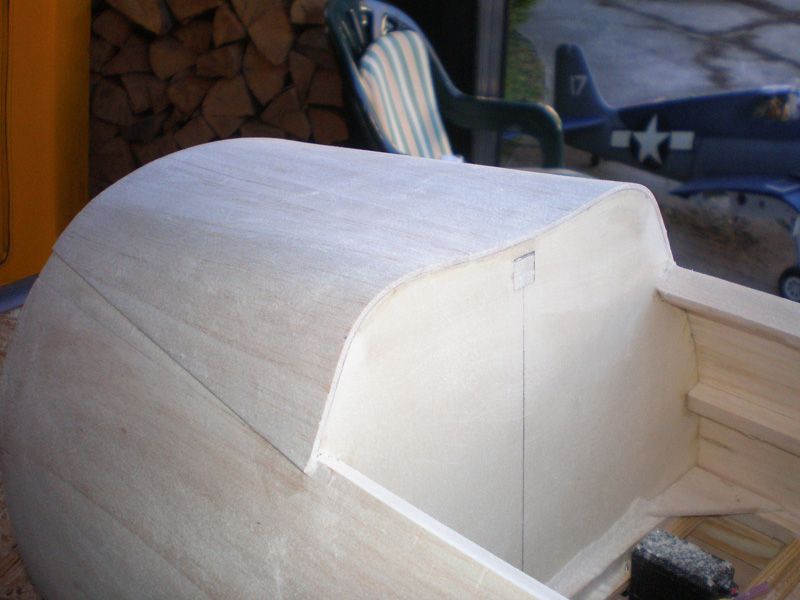
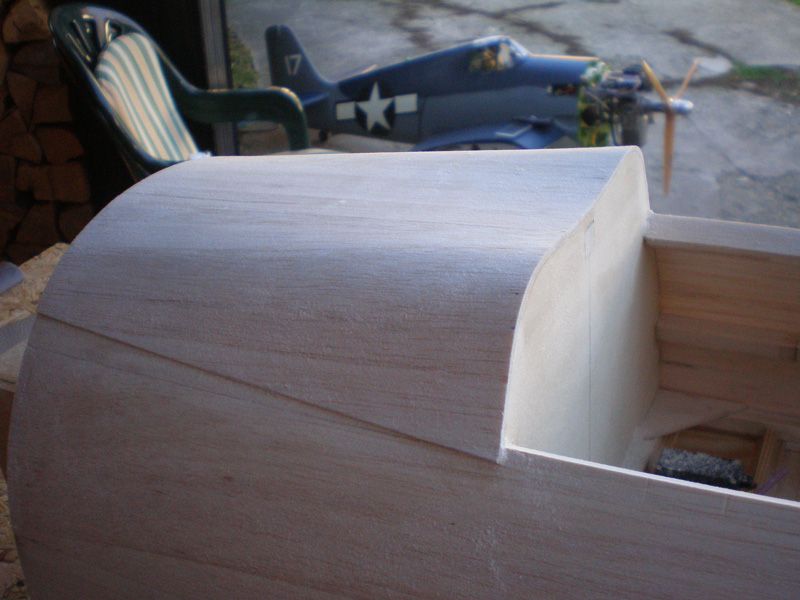
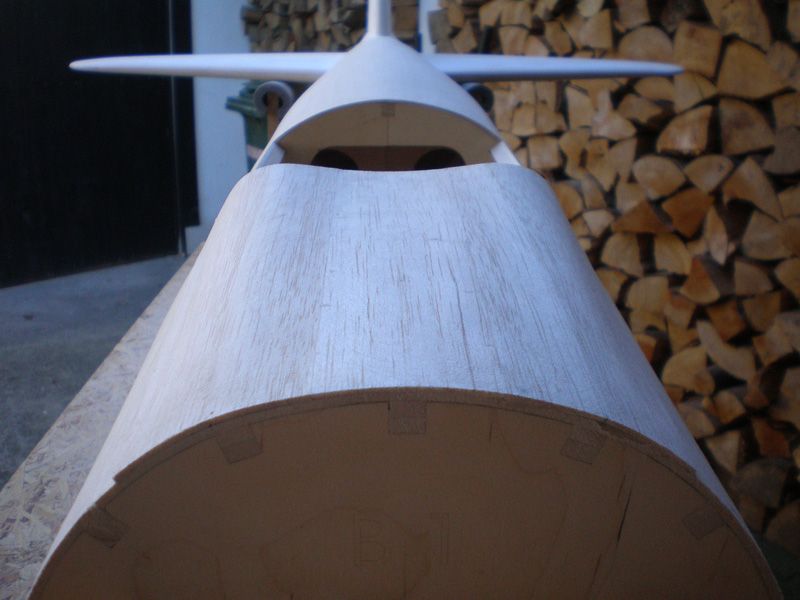
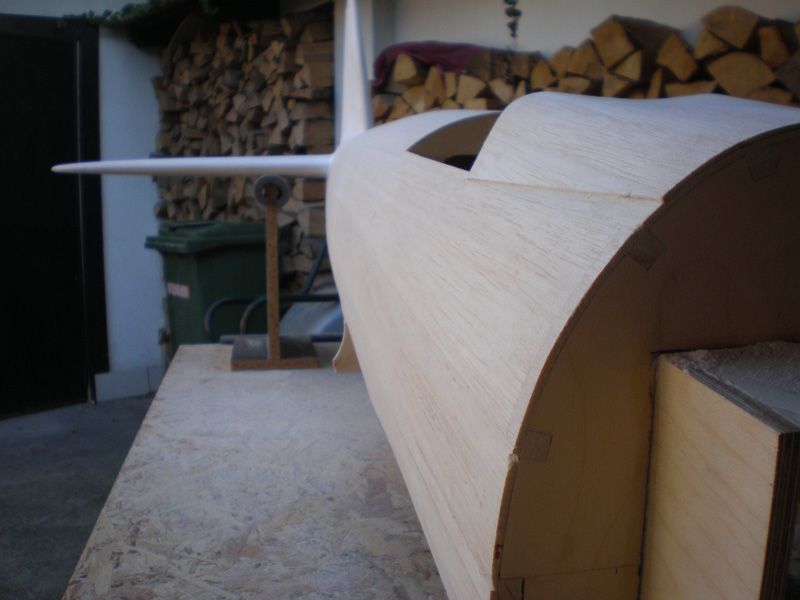
I'm very satisfied how it look...
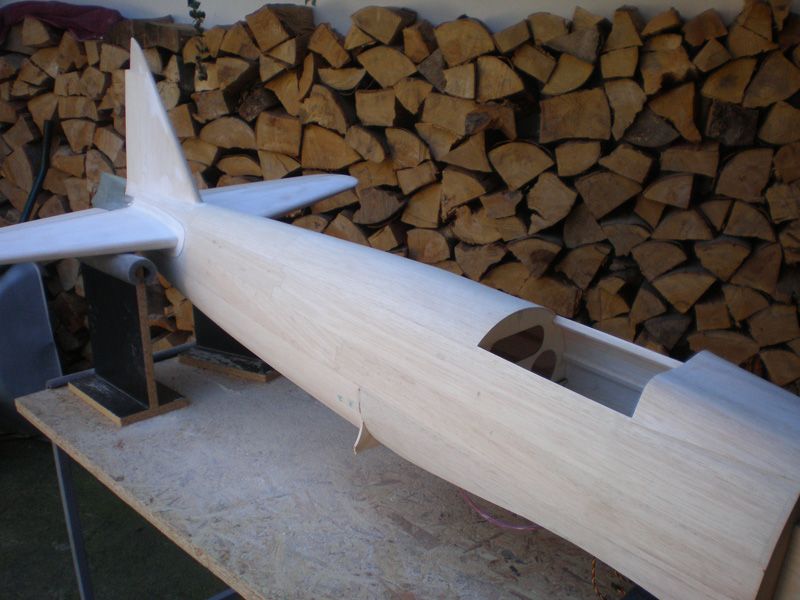
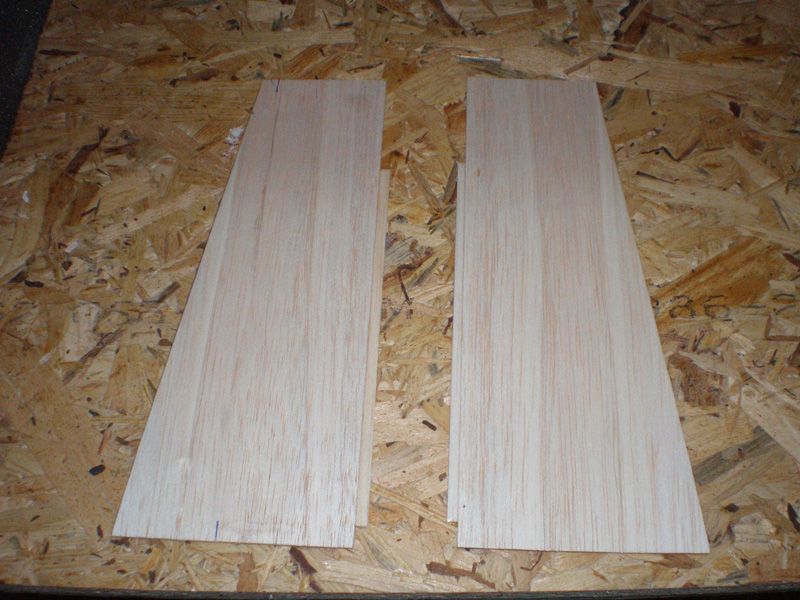
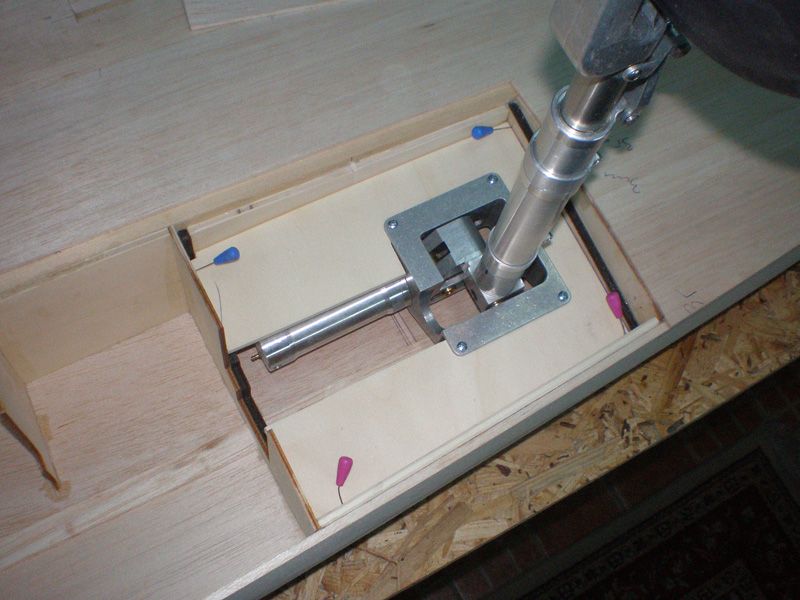
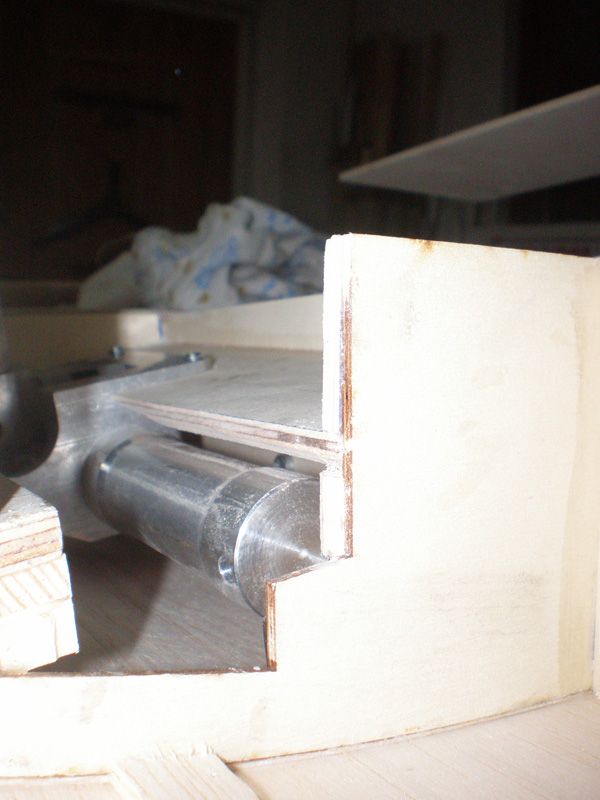
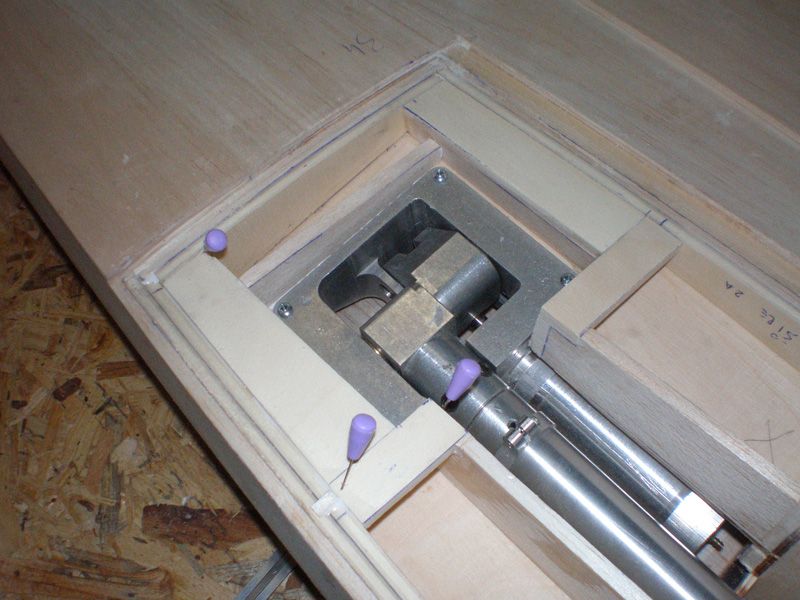
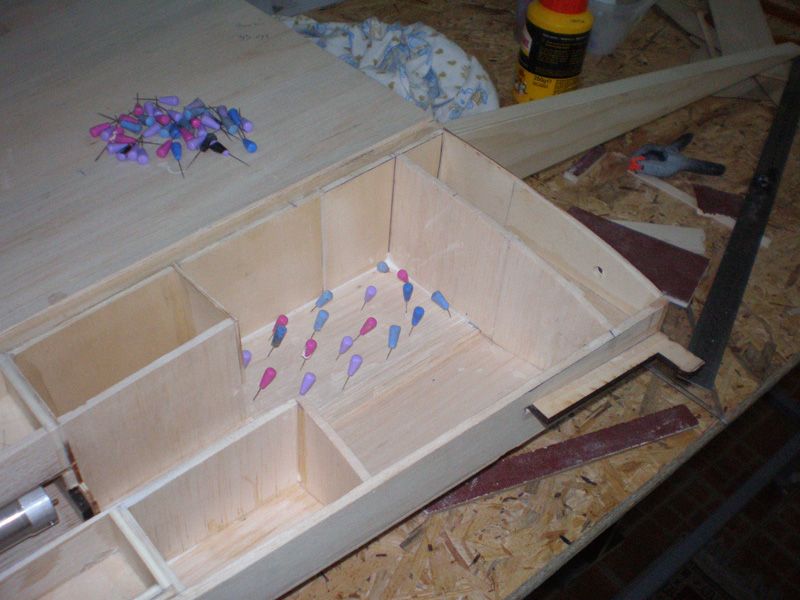
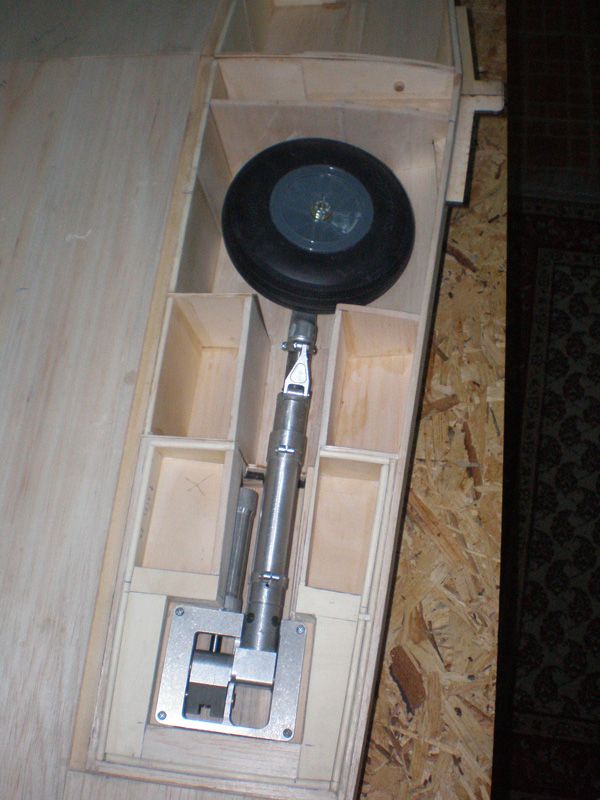
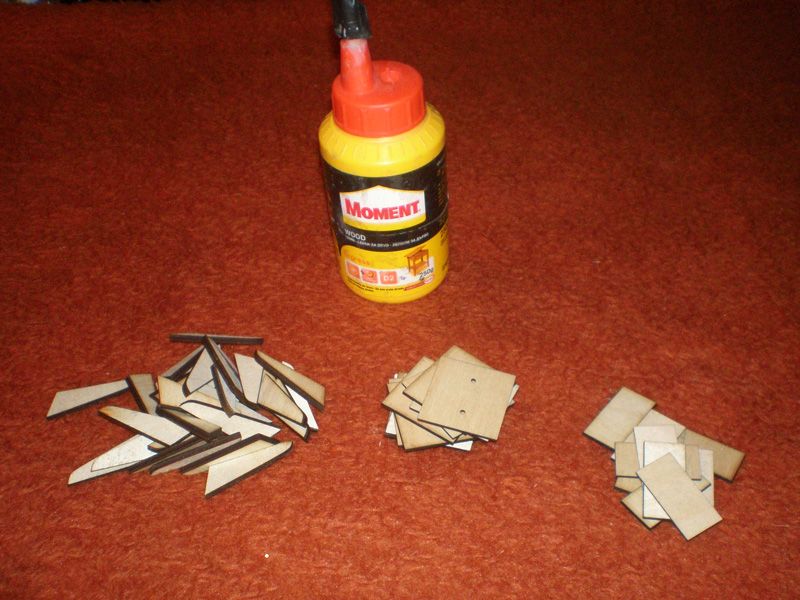
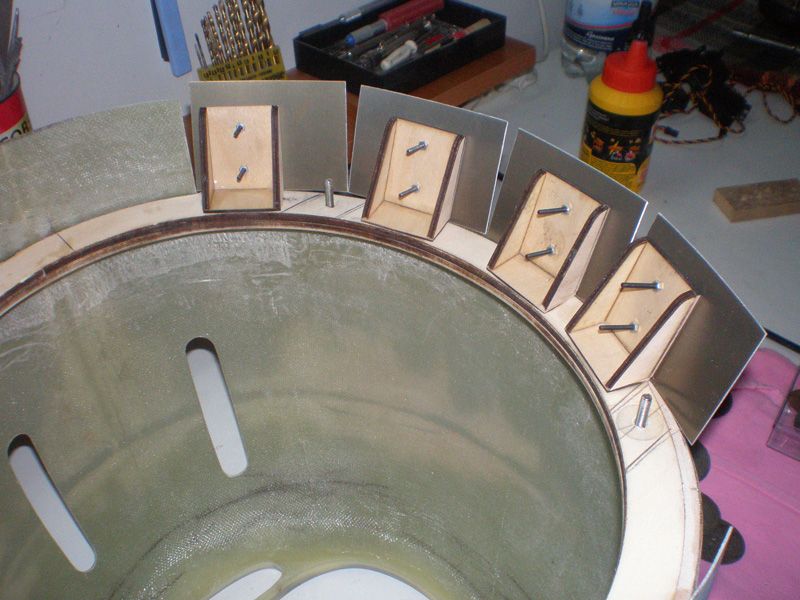
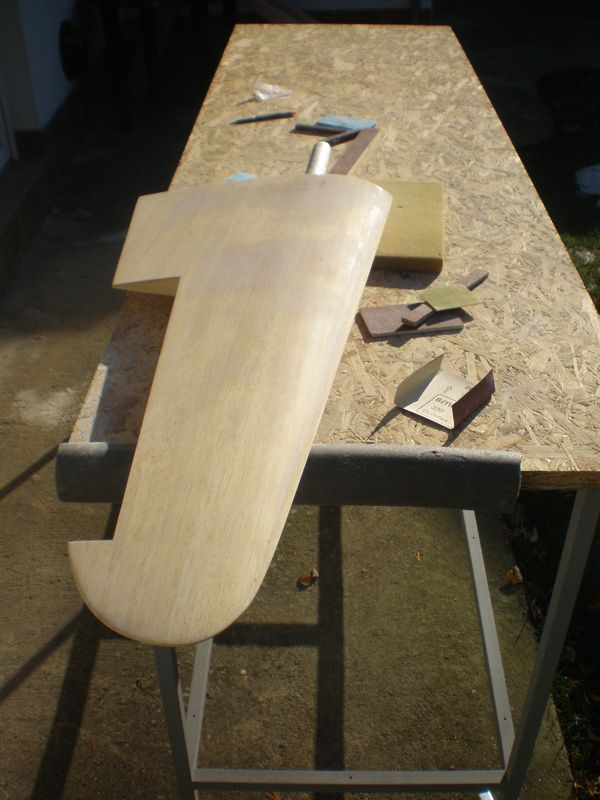
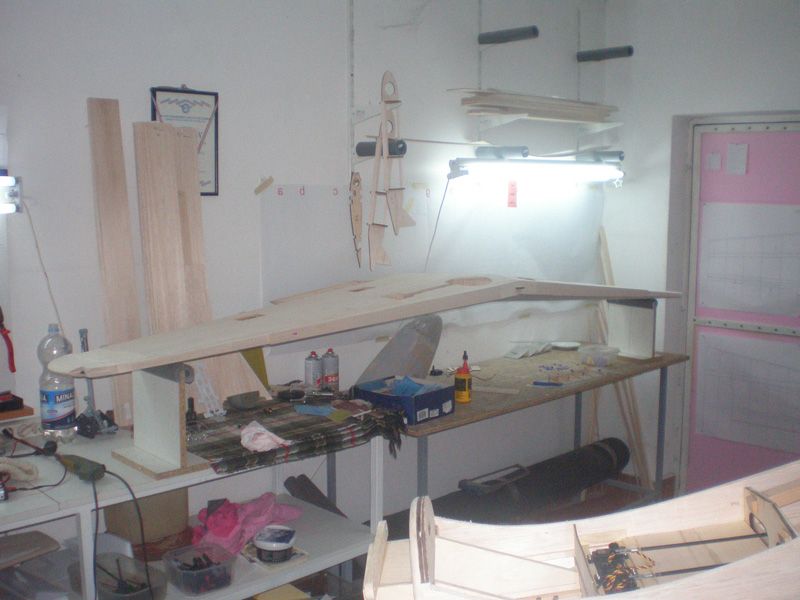
My biggest work on this model in last few days was on plates for landing gears. Original plates, which I got with kit wasn't good...
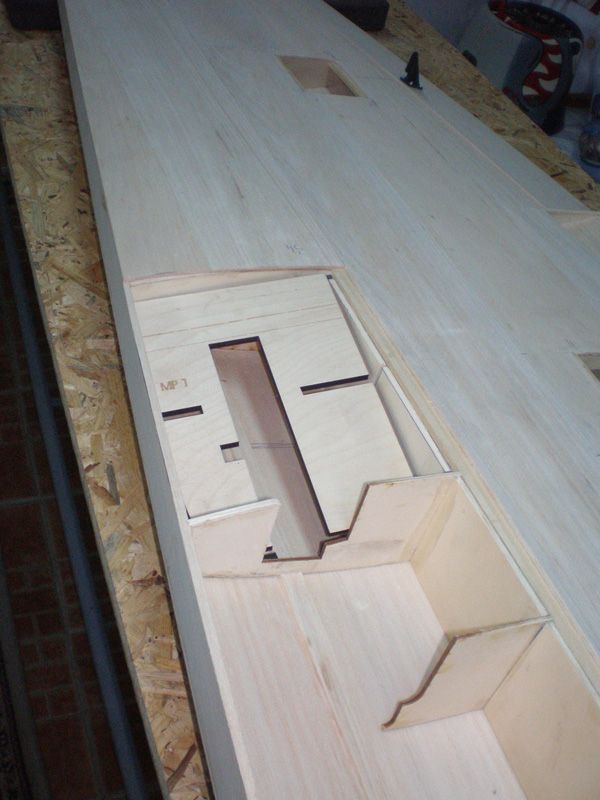
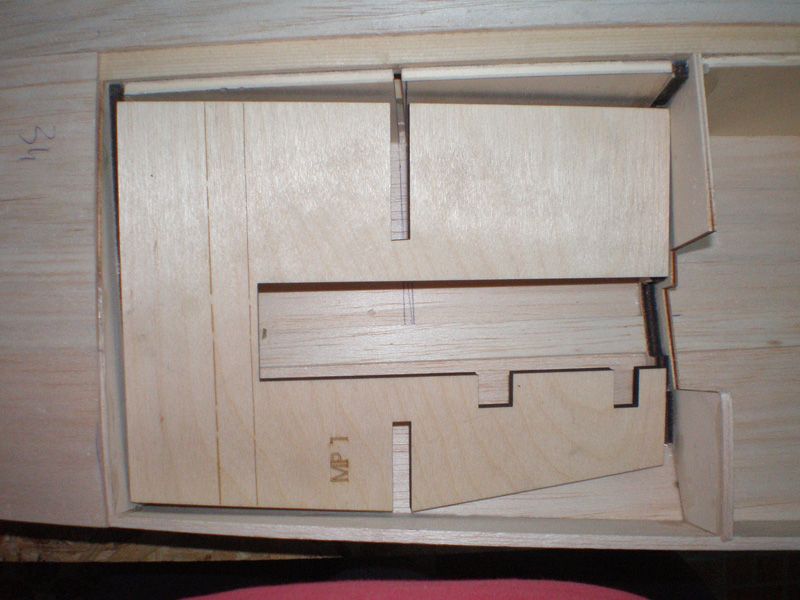
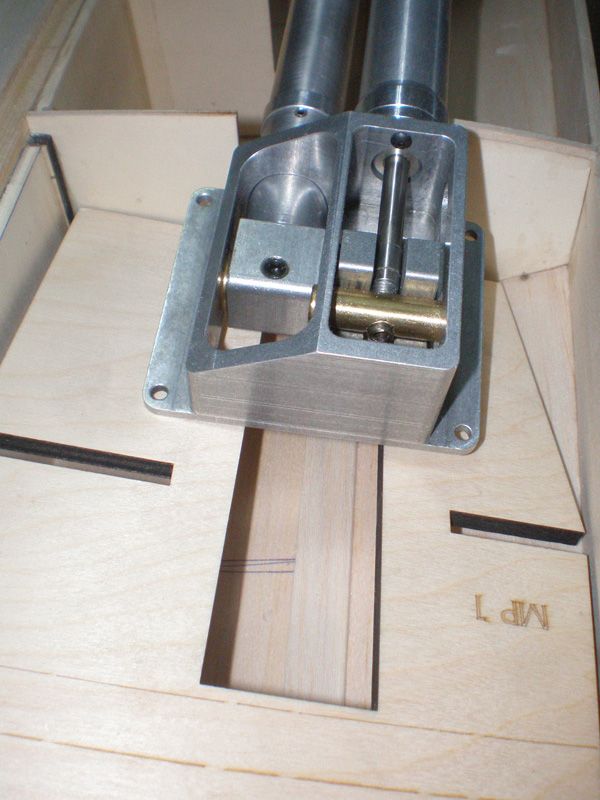
Half ribs on rib 5 and 7 have bad angle too... I don0t know for which retracts was that made, but for Siera Giants are not for sure.
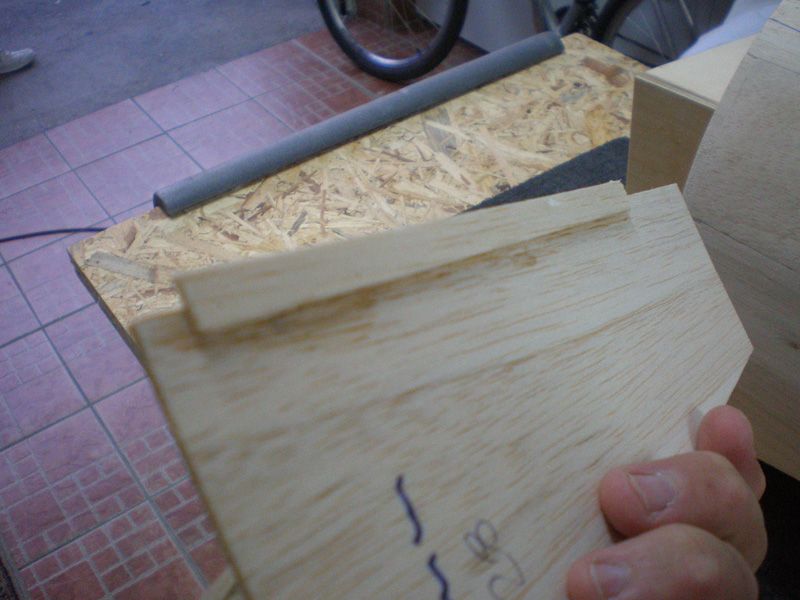
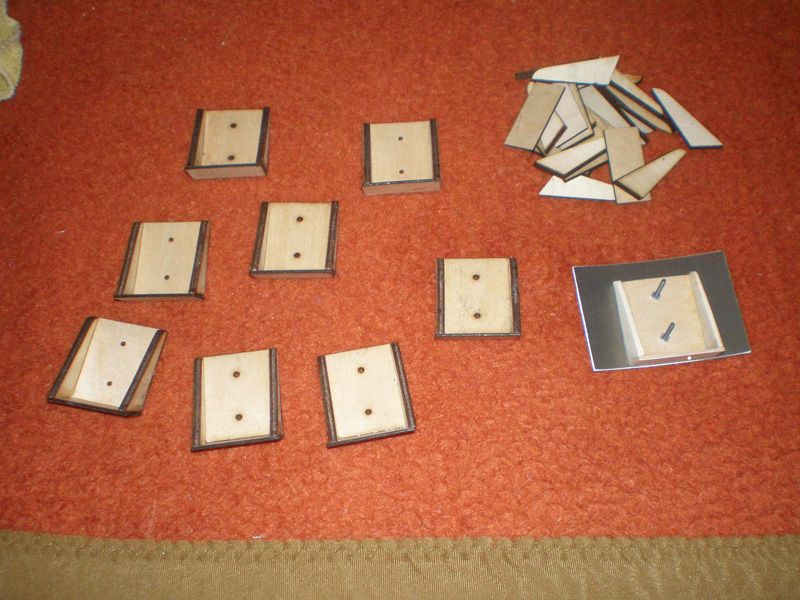
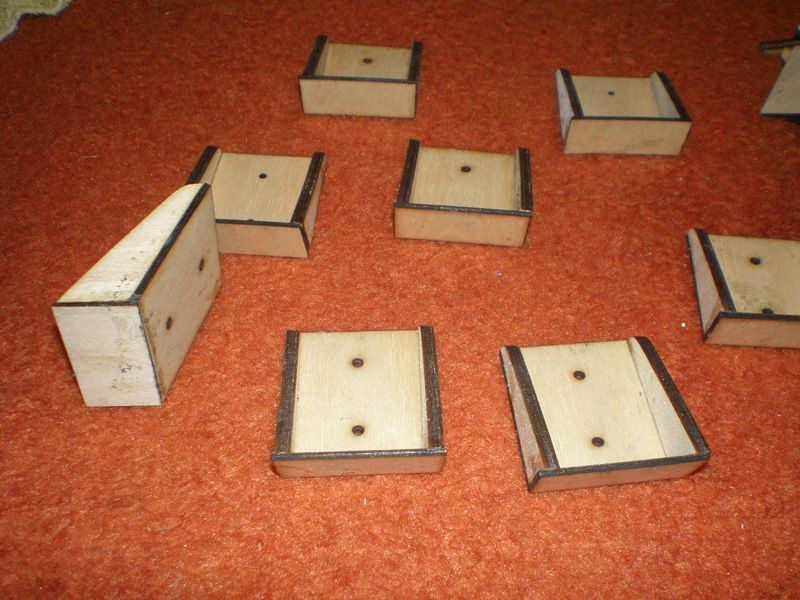
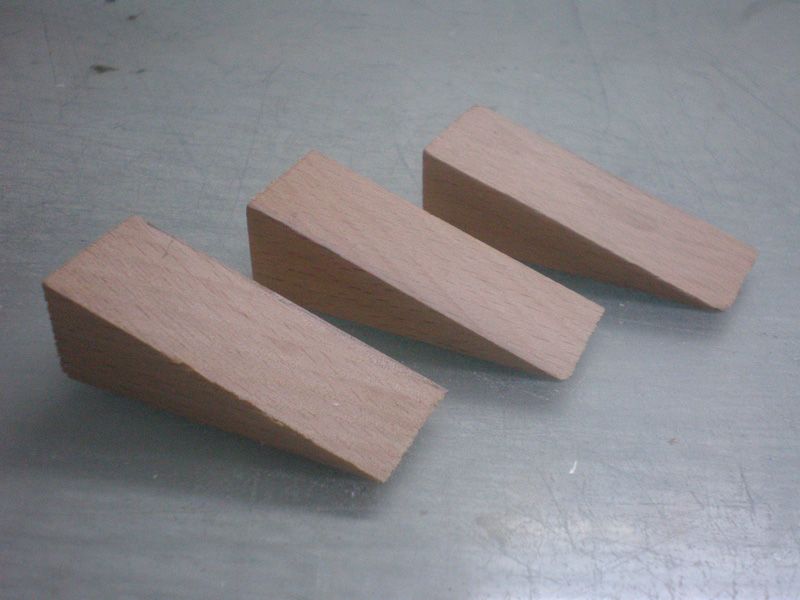
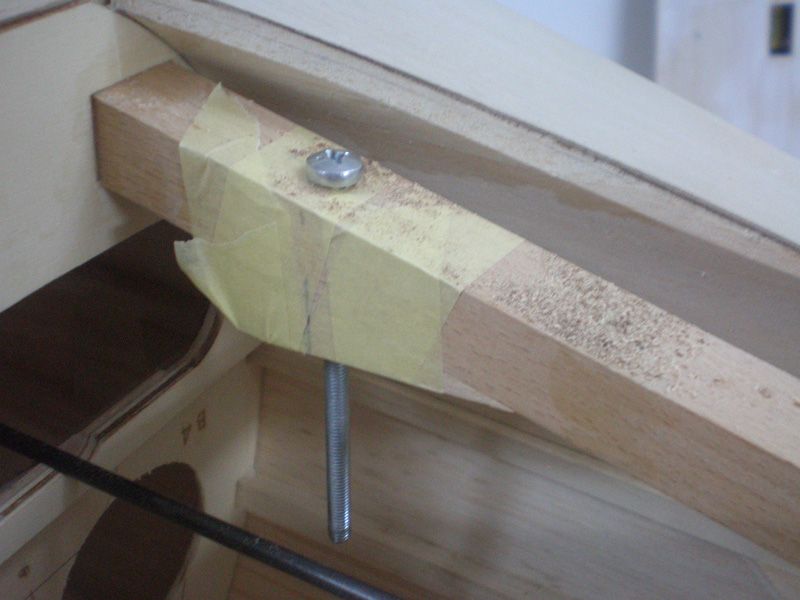
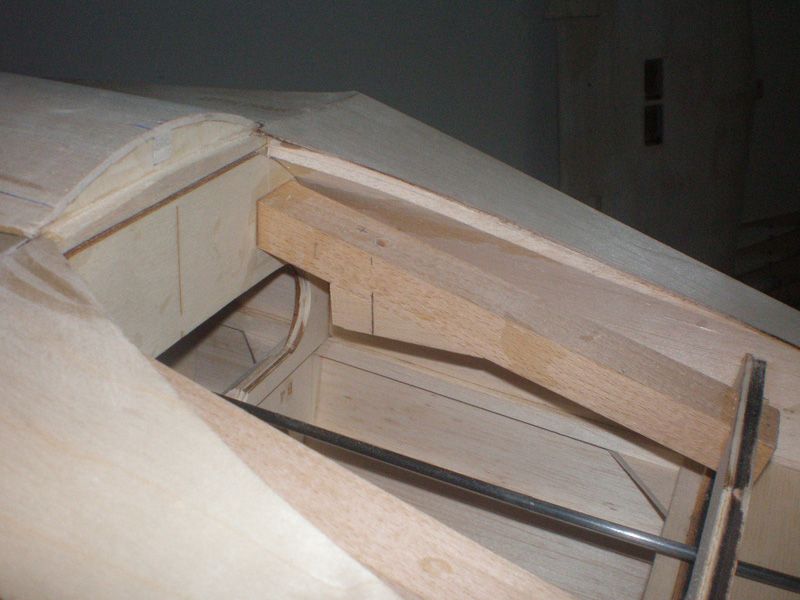
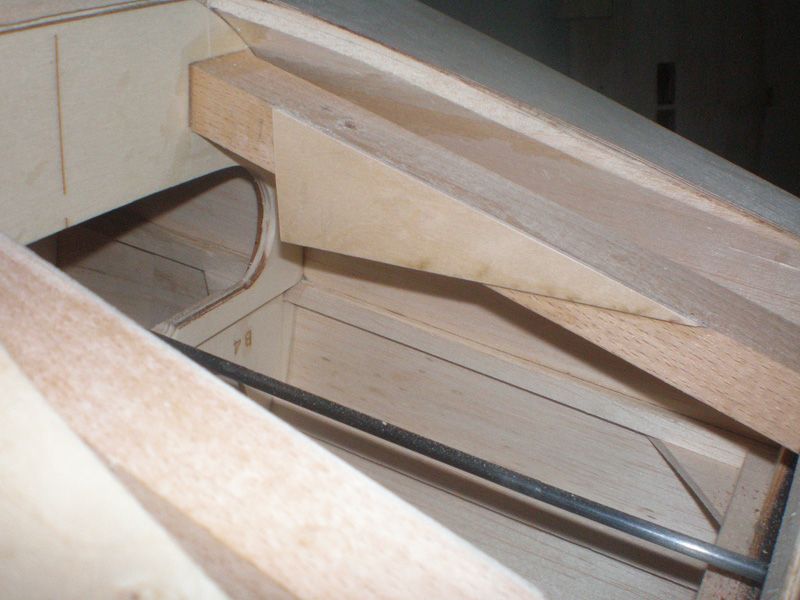
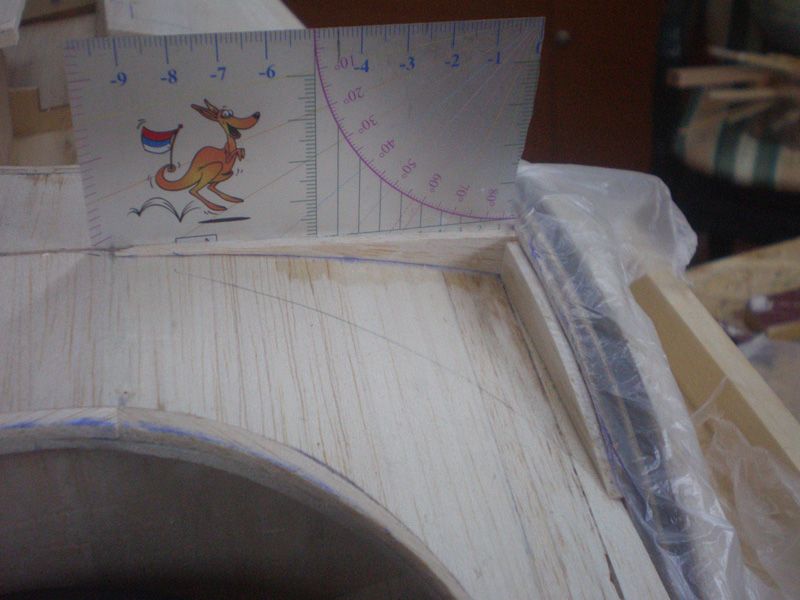
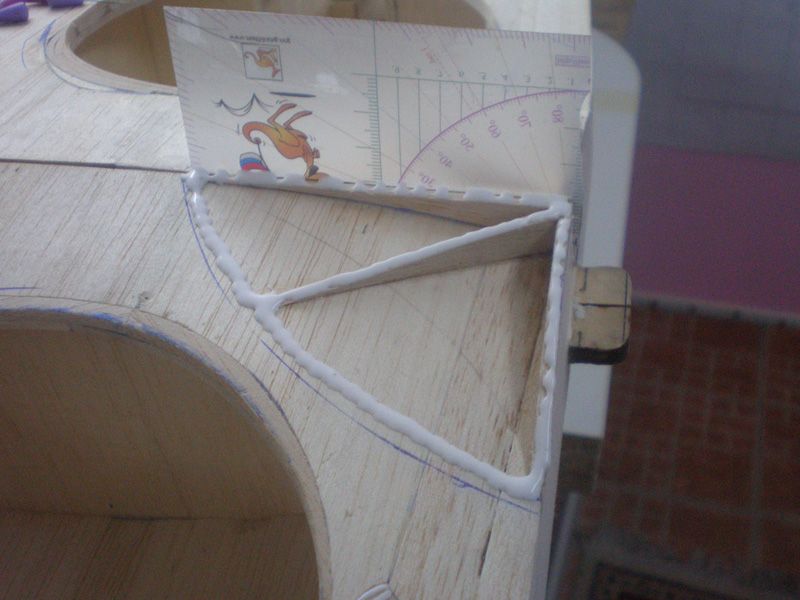
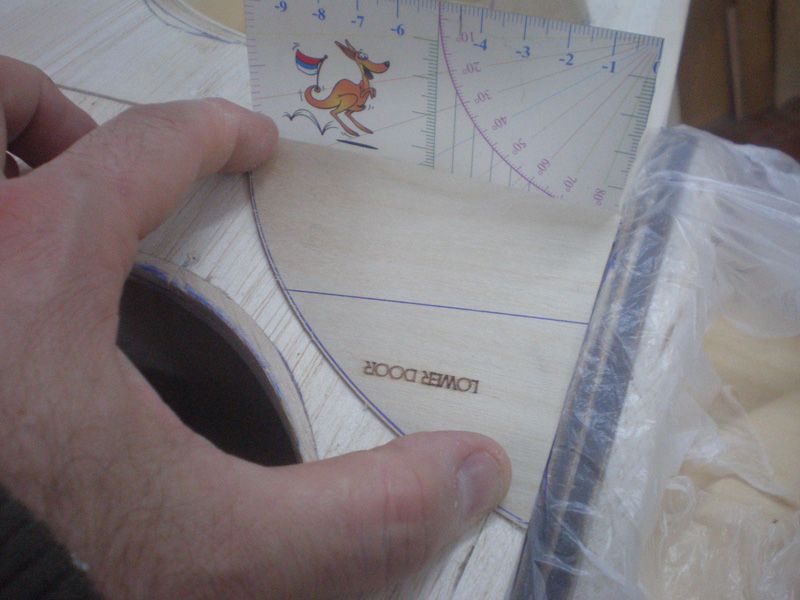
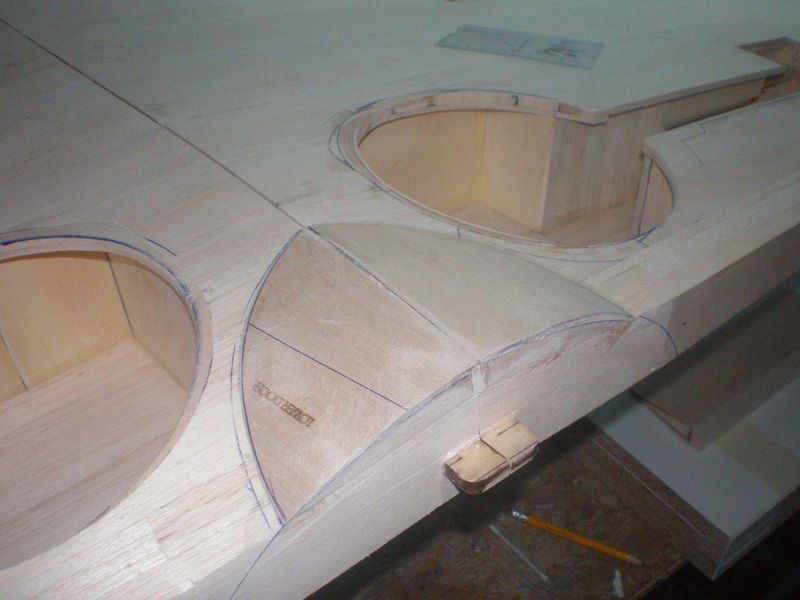
So, I must made everything from beginning. My plates are made from 3 mm ply, but this I will use just for templates for real one made from 6 mm ply. I must many times put plates up and down until I made it to lie down perfect in the wing...
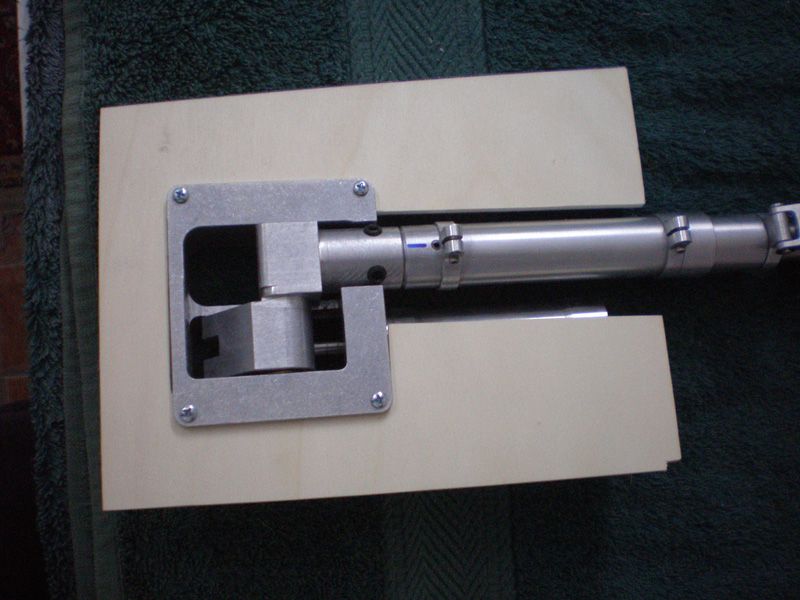
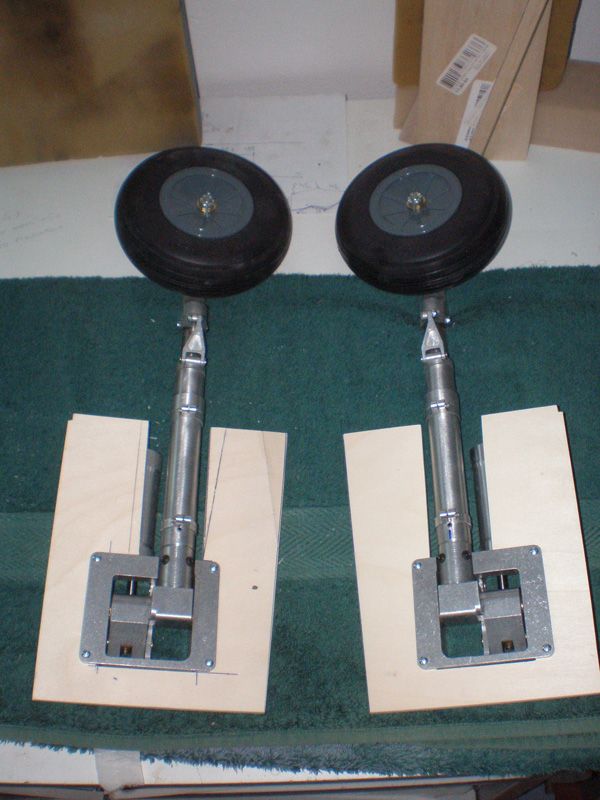
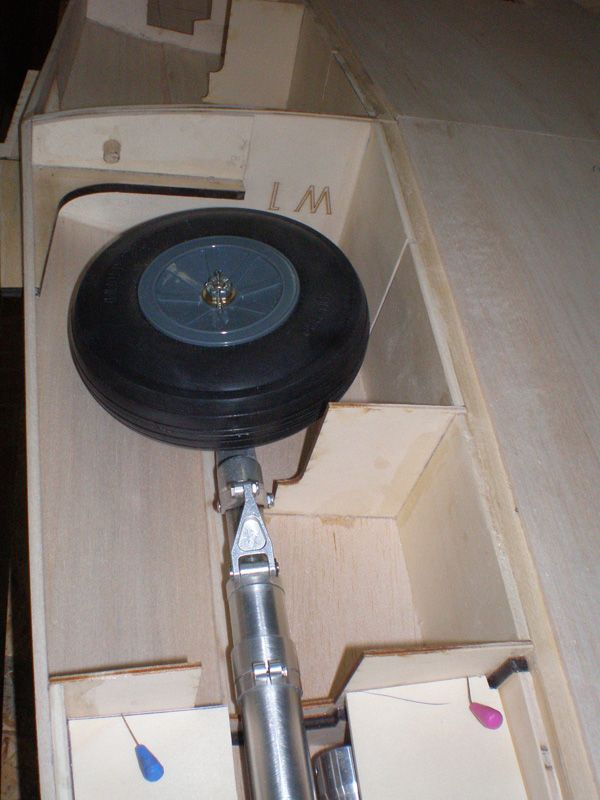
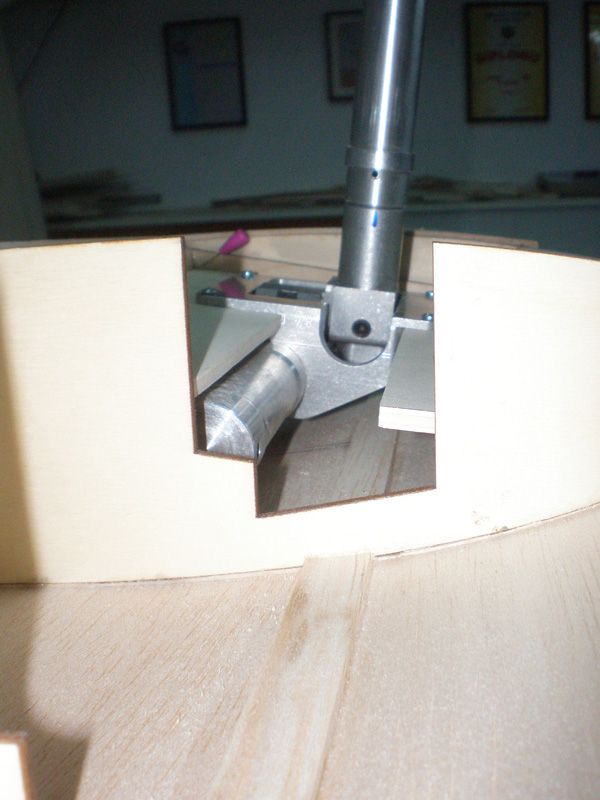
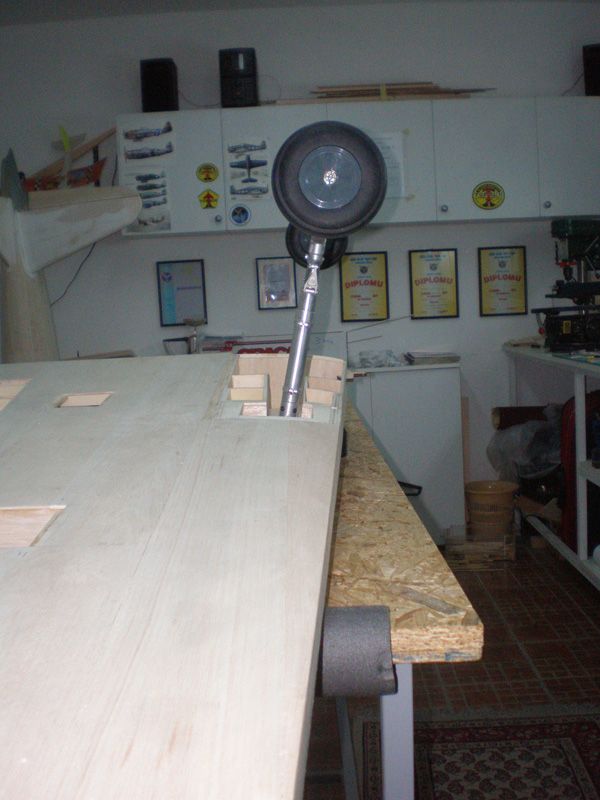
Under plate in front and rear, I must made two plates on which will retract plate lie down. This front and rear plate are important for two angles, one for 90 degree angle between landing gear and ground, and second for angle of wheel.

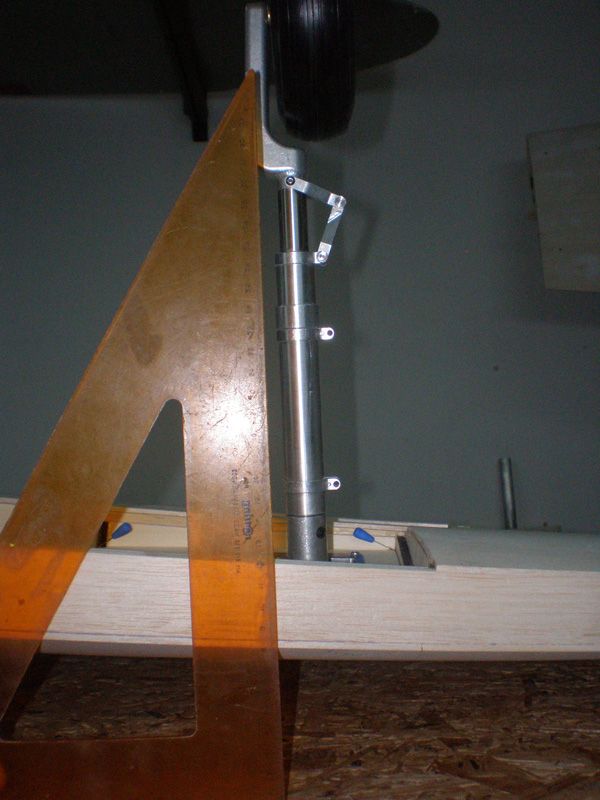
If you put wheel more forward, model will be more stable on the ground...
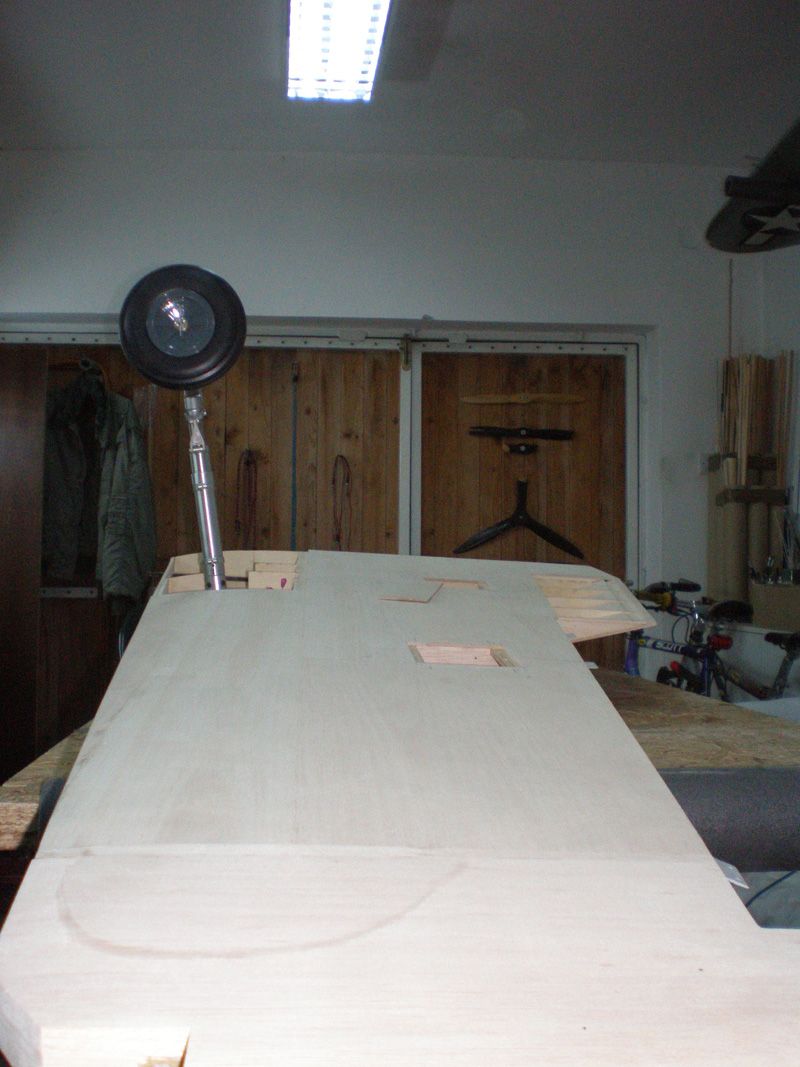
In wing landing gear and wheel have enough space...
Regards
Mirce
In last few day I was working on three point in Zero building.
Fuselage is finally close with balsa strips on the bottom side...
Yesterday afternoon I spent in sanding it...
In front of the canopy Meister sale plastic part which should be same like fuselage shape. But, it's not...
OK, if you push it, you can glue that part, but it is not long and wide enough, so I decided to made that from balsa plates.
First I glued balsa in the middle...
Than I made left and right side. On the bottom I glued small balsa plate for better seating.
Next, hot water and white glue...
Within sanding fuselage I sand that part too...
I'm very satisfied how it look...
My biggest work on this model in last few days was on plates for landing gears. Original plates, which I got with kit wasn't good...
Half ribs on rib 5 and 7 have bad angle too... I don0t know for which retracts was that made, but for Siera Giants are not for sure.
So, I must made everything from beginning. My plates are made from 3 mm ply, but this I will use just for templates for real one made from 6 mm ply. I must many times put plates up and down until I made it to lie down perfect in the wing...
Under plate in front and rear, I must made two plates on which will retract plate lie down. This front and rear plate are important for two angles, one for 90 degree angle between landing gear and ground, and second for angle of wheel.
If you put wheel more forward, model will be more stable on the ground...
In wing landing gear and wheel have enough space...
Regards
Mirce
11-03-2012, 01:04 PM
#53
Thread Starter
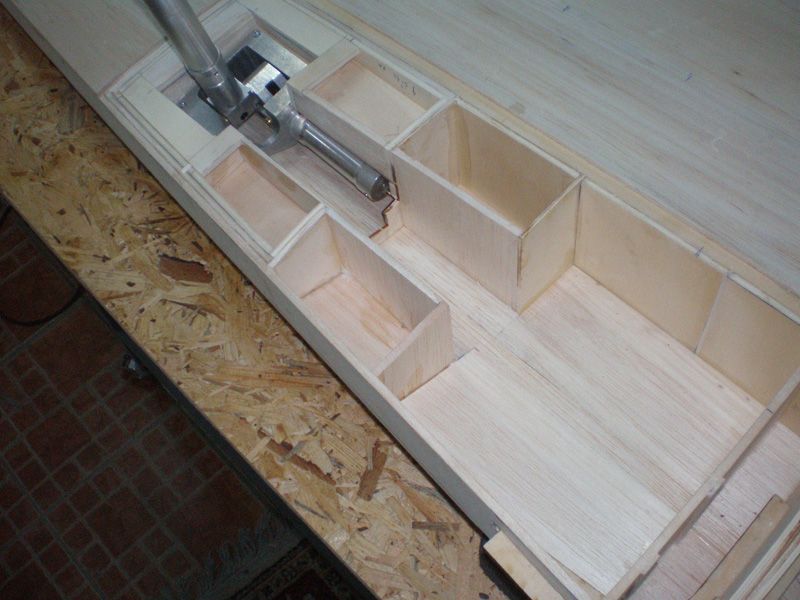
Landing gear plate in last topic was template for 1/4" ply plate which for me made my friend Milan in his carpenter work shop...
I add two more tiles for little more strength...
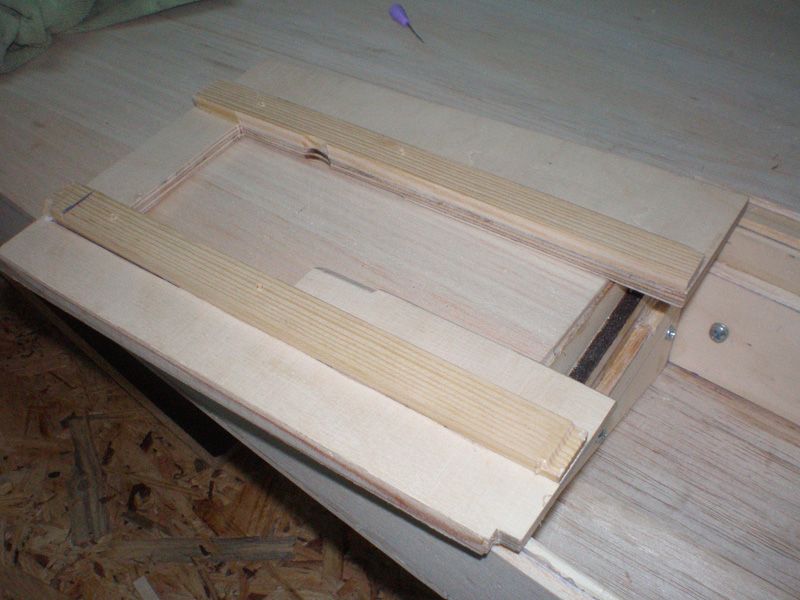
Inside landing gear box I add 4 mm ply on which LG plate will lay...
Than I glued LG plate...
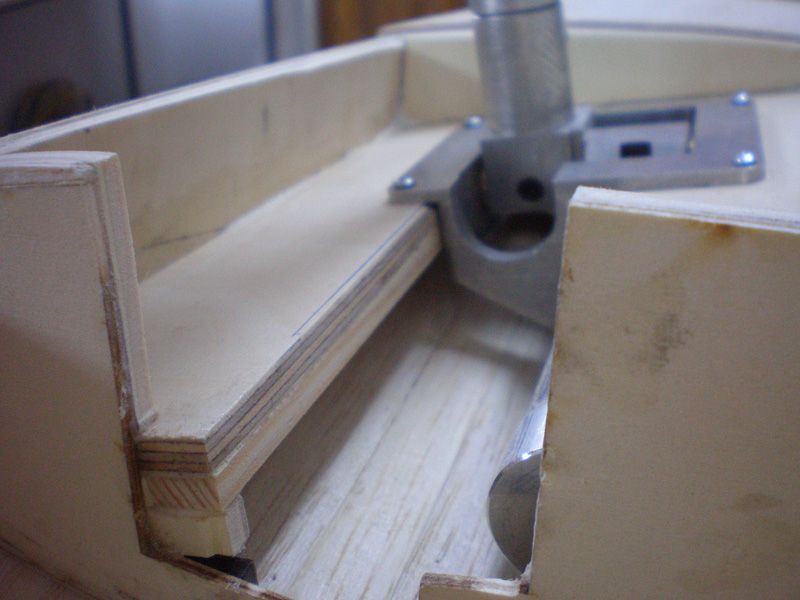
Next step was to made construction around landing gear...
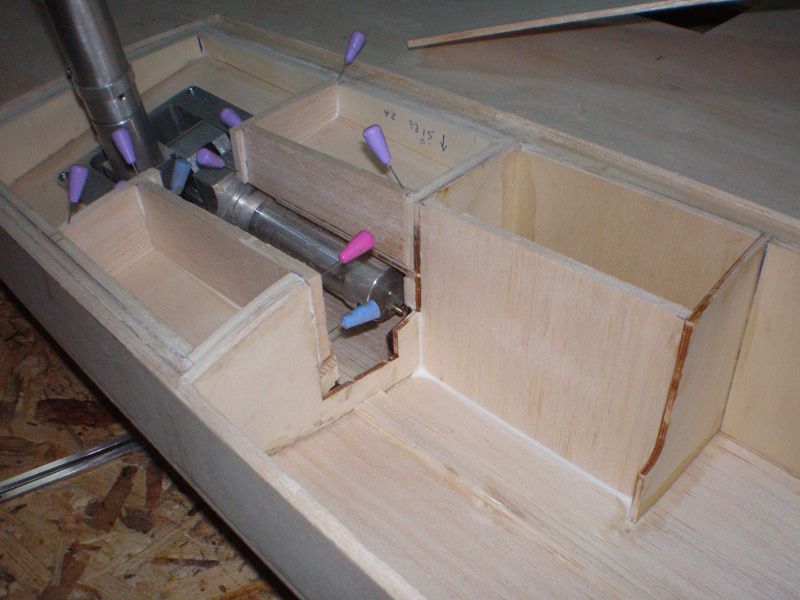
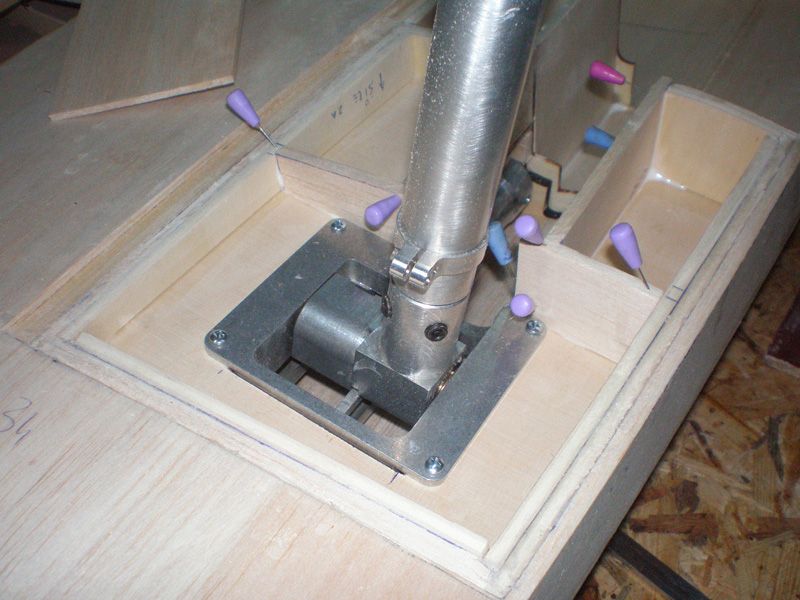
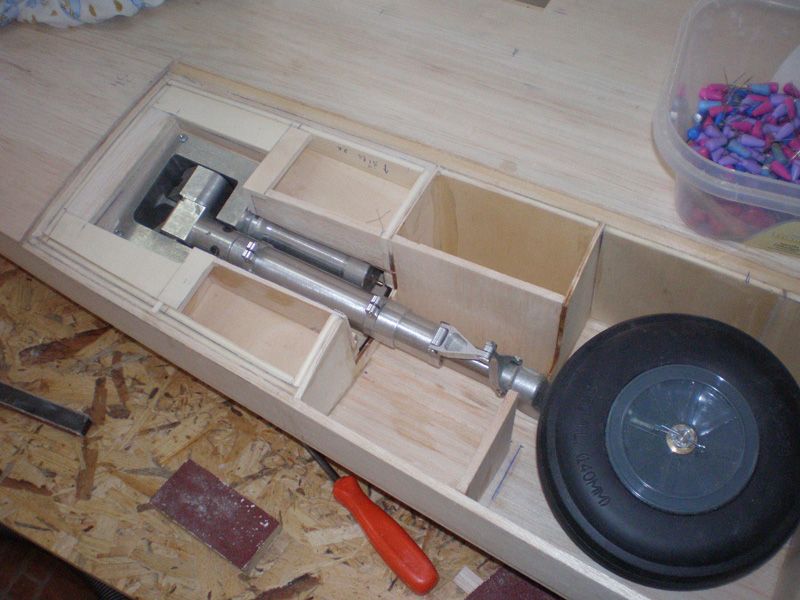
Ply plates aroung LG are for screws for fixing LG cover...
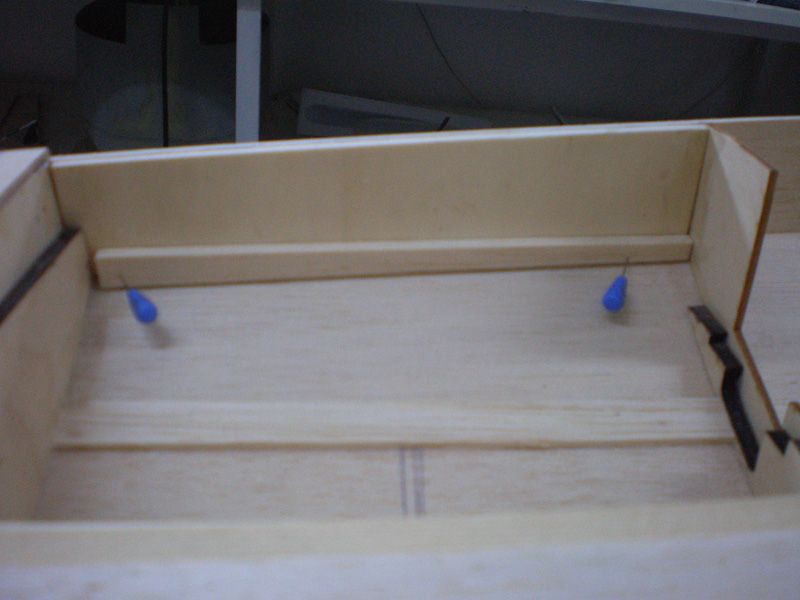
In area where come wheel, I add on more layer of 3 mm balsa...
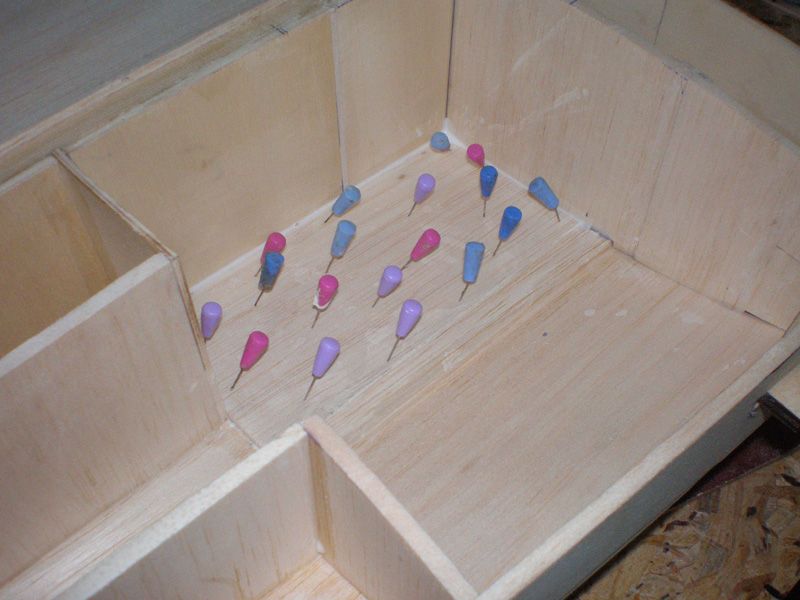
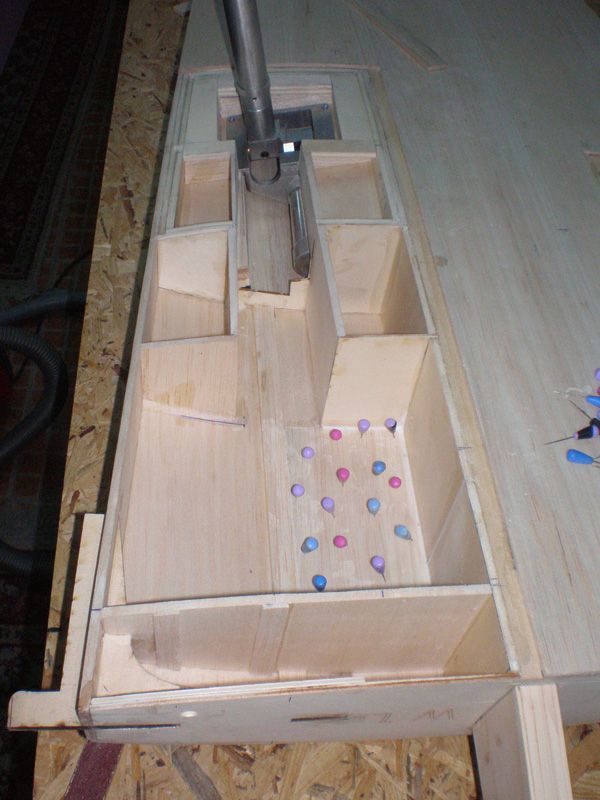
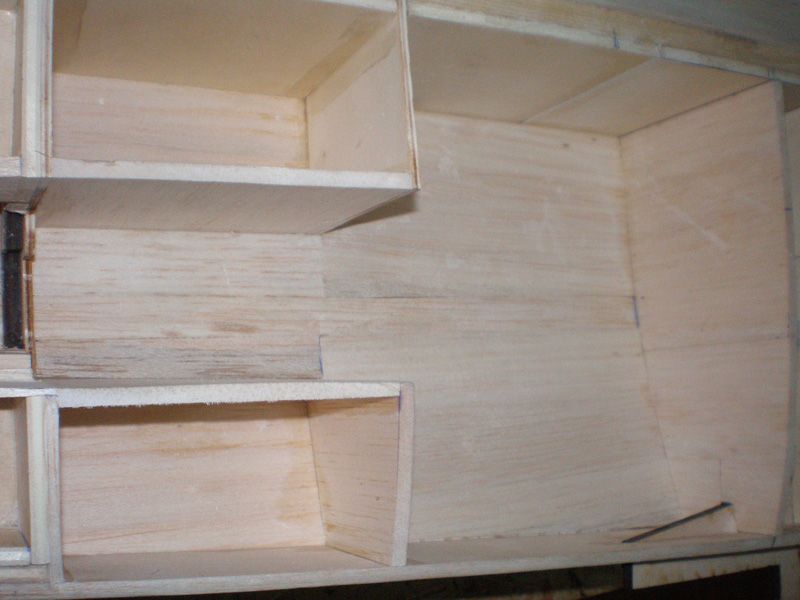
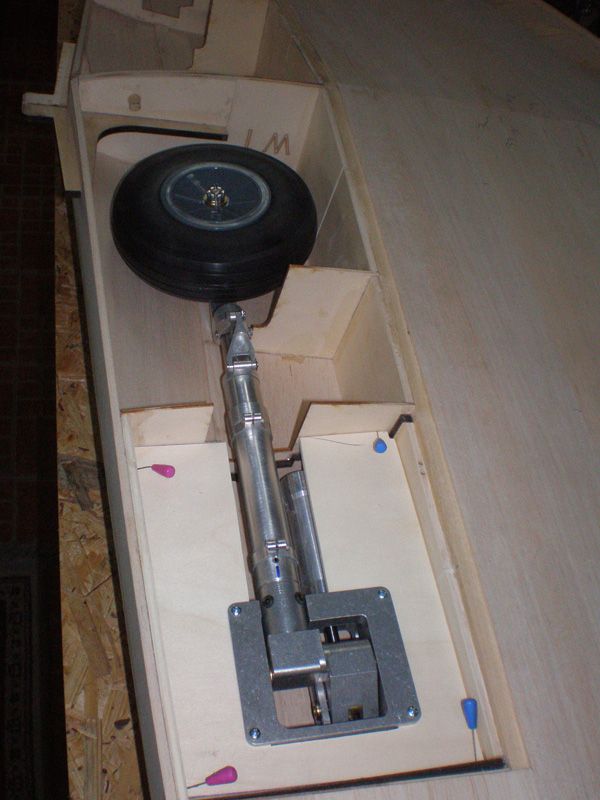
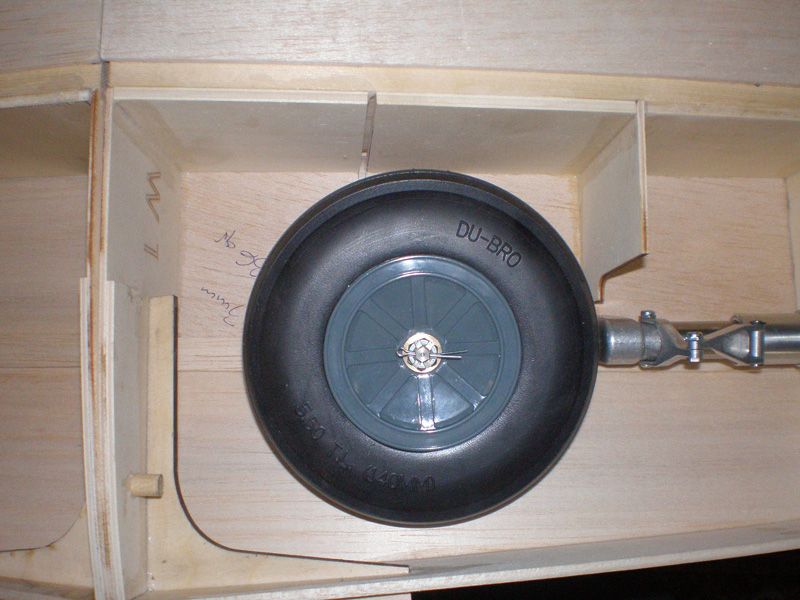
One more rib was add near rib one. This rib made box in which come wheel little smaller...
Finally everything look like this...
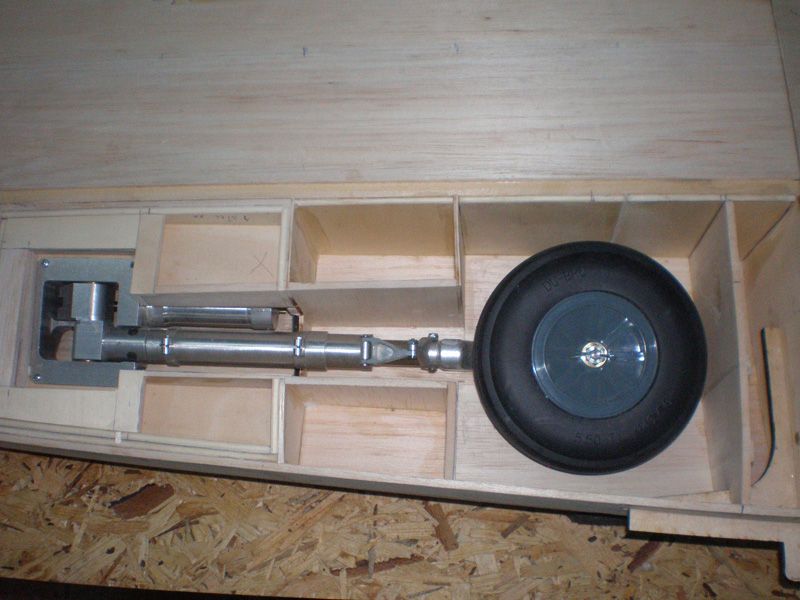
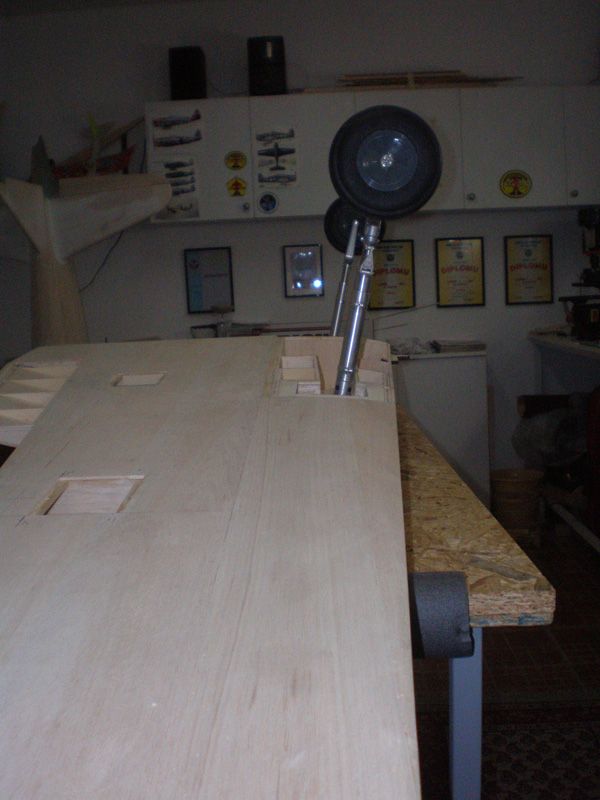
When retract come in open position, wheel come forward and that angle will give better handling on the ground on take off and landing...
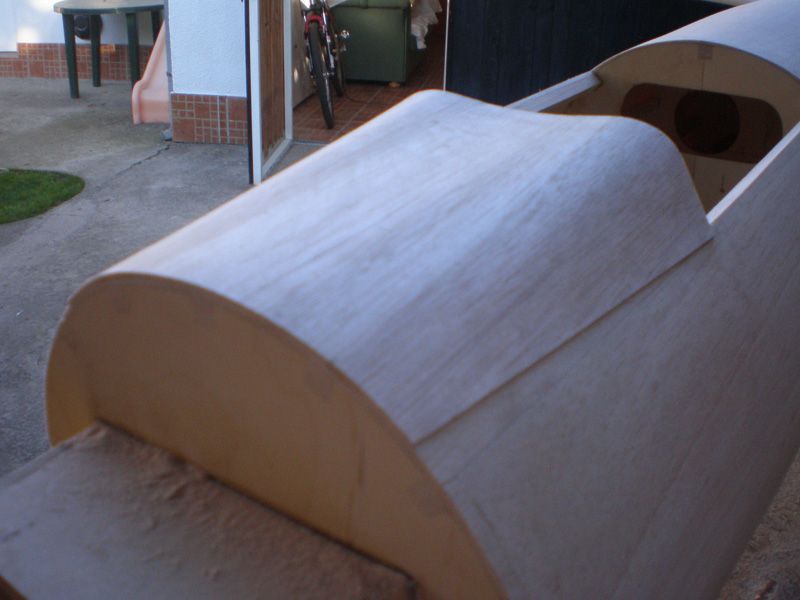
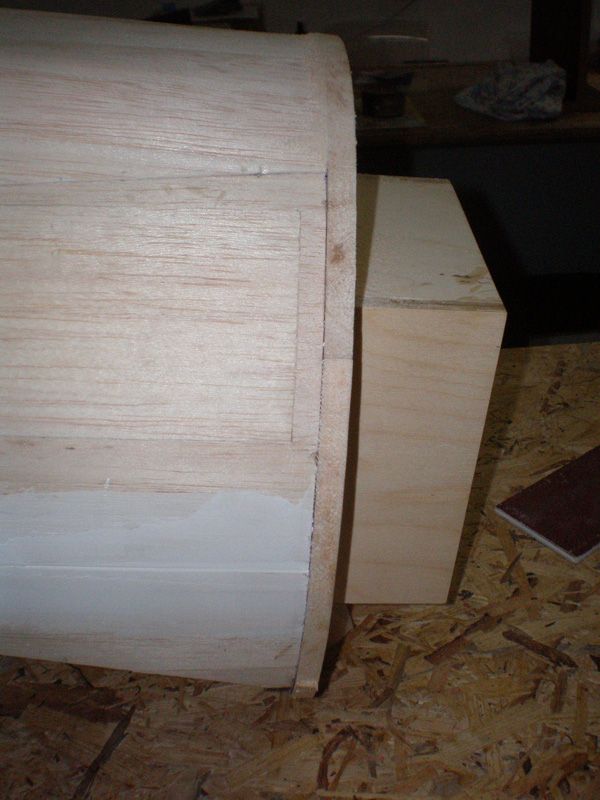
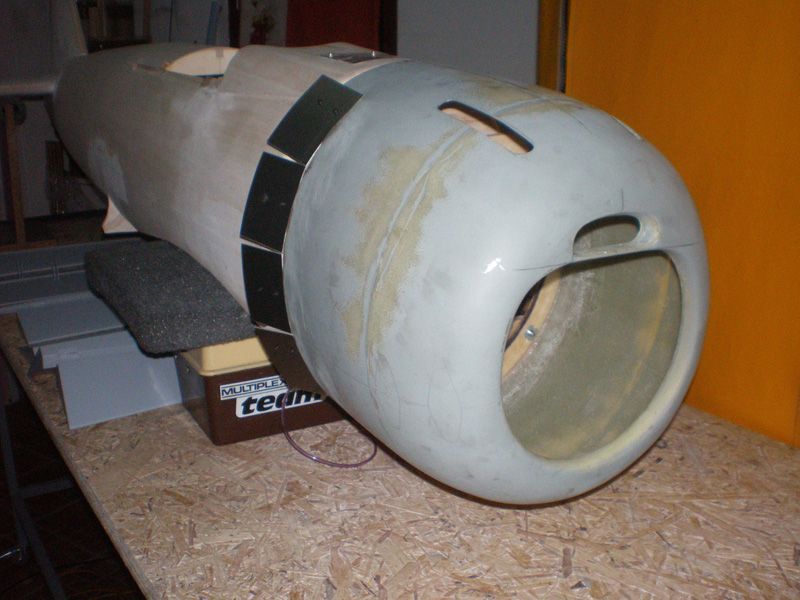
On fire wall I add 10 mm balsa which give me space to made round finish on the front of the fuselage...

Regards
Mirce
I add two more tiles for little more strength...
Inside landing gear box I add 4 mm ply on which LG plate will lay...
Than I glued LG plate...
Next step was to made construction around landing gear...
Ply plates aroung LG are for screws for fixing LG cover...
In area where come wheel, I add on more layer of 3 mm balsa...
One more rib was add near rib one. This rib made box in which come wheel little smaller...
Finally everything look like this...
When retract come in open position, wheel come forward and that angle will give better handling on the ground on take off and landing...
On fire wall I add 10 mm balsa which give me space to made round finish on the front of the fuselage...
Regards
Mirce
 11-20-2012, 02:49 AM
#55

Join Date: Jan 2007
Location: HOUDANCOURT, FRANCE
Posts: 20
Likes: 0
Received 0 Likes
on
0 Posts
Hello Mirce;
There is no news of your building that you pass it.
I hope everything is ok for your health?
In the hope you read and follow your great work.
Frédéric
There is no news of your building that you pass it.
I hope everything is ok for your health?
In the hope you read and follow your great work.
Frédéric
 11-20-2012, 08:28 AM
#57
Thread Starter
Thank you Frederic...
Ha, ha... 20 model, nooooooooo.... I'm working just on three projects...
Right now most interesting for me is my own project of Galeb G2 in 1/5 scale (91,5") of ex Yugoslavia jet airplane. As Shanec told, on RC Universe, in jet thread are complete story...
I'm working on Zero too, but not so much like before. Zero will be one day replacement for Meister P 47, but Thunderbolt is brand new, 15 - 20 flight, so I'm not in hurry with Zero.
Besides, I want to put Moki 150 on that machine, and made one more step forward with my warbirds...
My longest ever project is Ziroli P 38. I bought retracts, few weeks ago, and wait to get them. Without retracts, I can't finish booms.
I will be very happy if someone want to buy this model, in this stage of building, or when I finish it.
On shelf siting Meister Foke Wulf, and for sure my next project will be again my own project, bigger jet model Galeb G2 - 1/4 scale wooden kit ( 114,5")...
So, as we see Foke Wulf will not be ready soon, same like P 38...
Zero will have maiden flight next year...
I'll be write about Zero, here, soon... I promise...
Regards from Serbia...
Mirce
11-20-2012, 08:54 AM
#58
Join Date: Jan 2007
Location: HOUDANCOURT, FRANCE
Posts: 20
Likes: 0
Received 0 Likes
on
0 Posts
Hi Mirce;
Thank you for the news ..........
I discovered your project is wonderful .........
I look forward to following all this and soon RCUNIVERS ...
Frédéric
Thank you for the news ..........
I discovered your project is wonderful .........
I look forward to following all this and soon RCUNIVERS ...
Frédéric
11-24-2012, 05:51 AM
#59
Thread Starter
Thank you Frederic on kind words...
I have a couple of projects that I'm proud (Meister P 47, Ziroli Panther...).
Every project is new challenge, so now I put my model skill on next level, making jet model from ground up - Galeb G2.
Of course, it can't be done without great team and without their work and help...
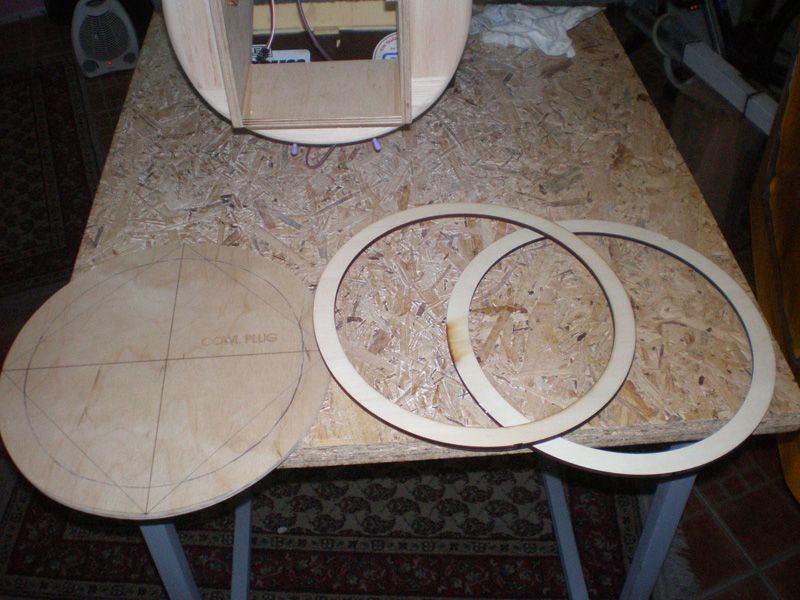
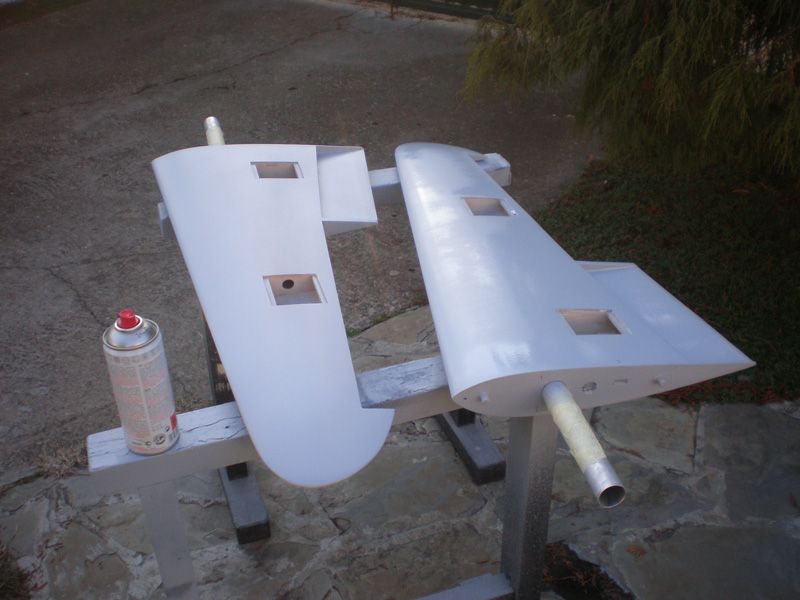
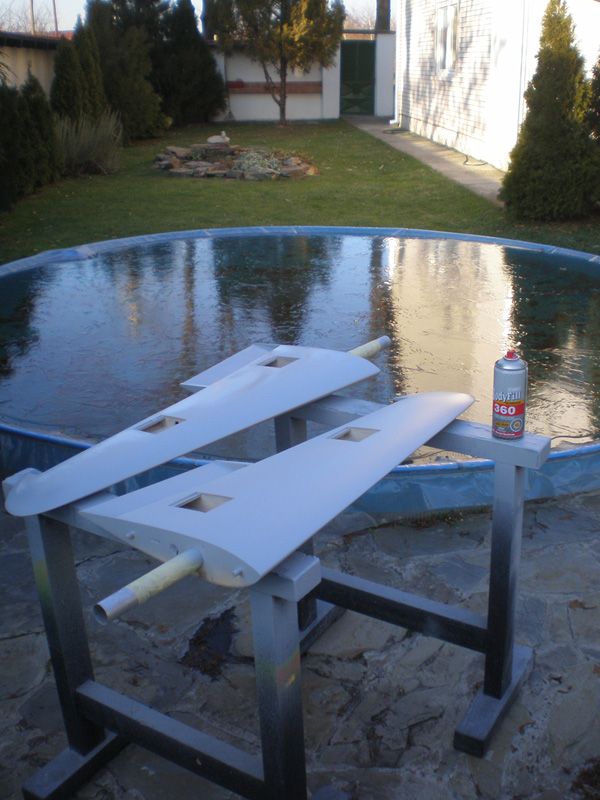
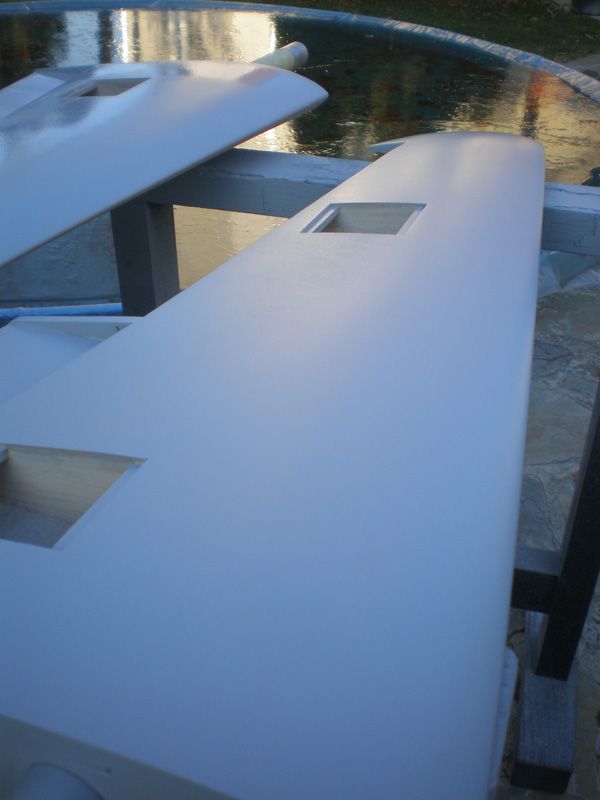
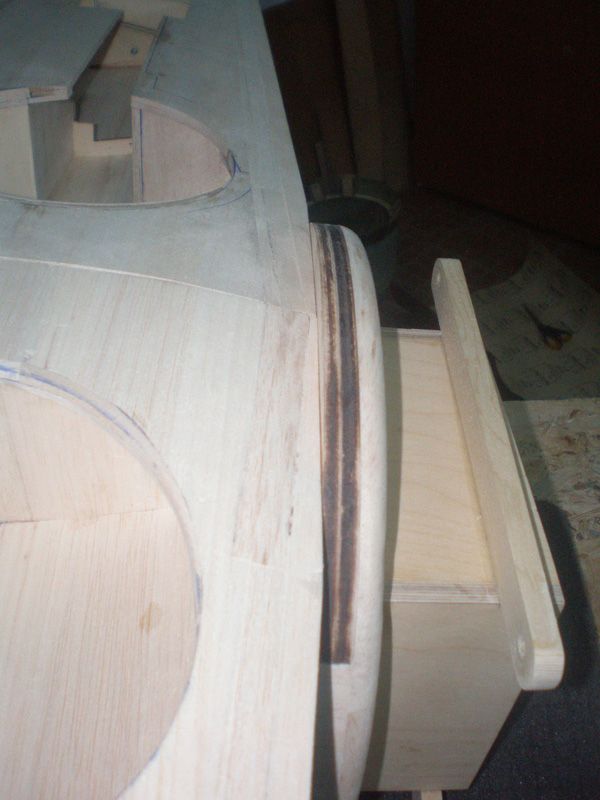
OK, back to Zero, in meantime I was working on area around landing gears.

Meister give templates for Zero's landing gear covers...
For perfect circles I used "special tool"...
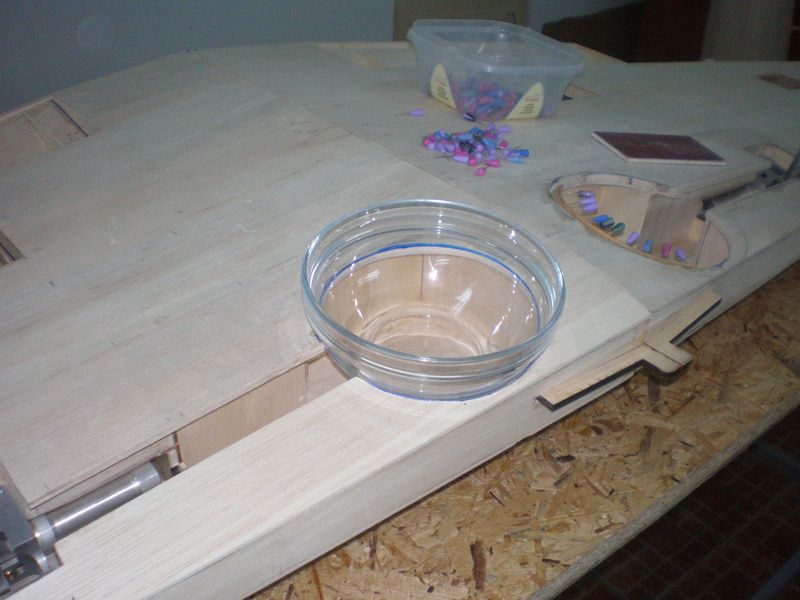
Finally everything was finished...


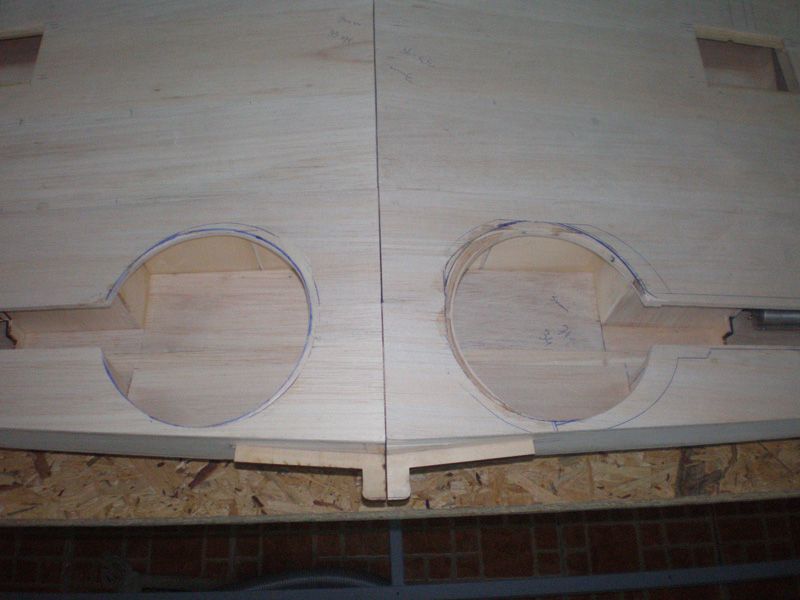
Next step will be work on leading edge. After that wing will be ready for glassing...
Regards
Mirce
I have a couple of projects that I'm proud (Meister P 47, Ziroli Panther...).
Every project is new challenge, so now I put my model skill on next level, making jet model from ground up - Galeb G2.
Of course, it can't be done without great team and without their work and help...
OK, back to Zero, in meantime I was working on area around landing gears.
Meister give templates for Zero's landing gear covers...
For perfect circles I used "special tool"...
Finally everything was finished...
Next step will be work on leading edge. After that wing will be ready for glassing...
Regards
Mirce
12-07-2012, 11:52 AM
#60
Thread Starter
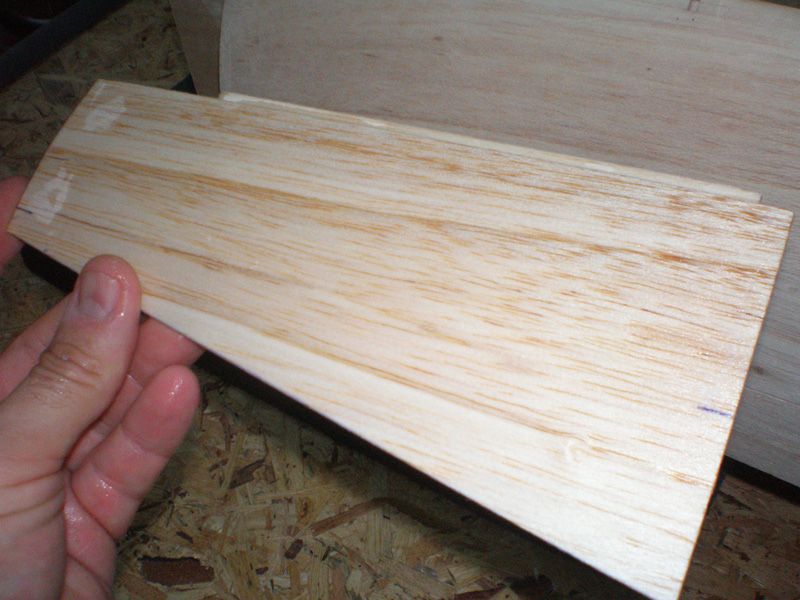
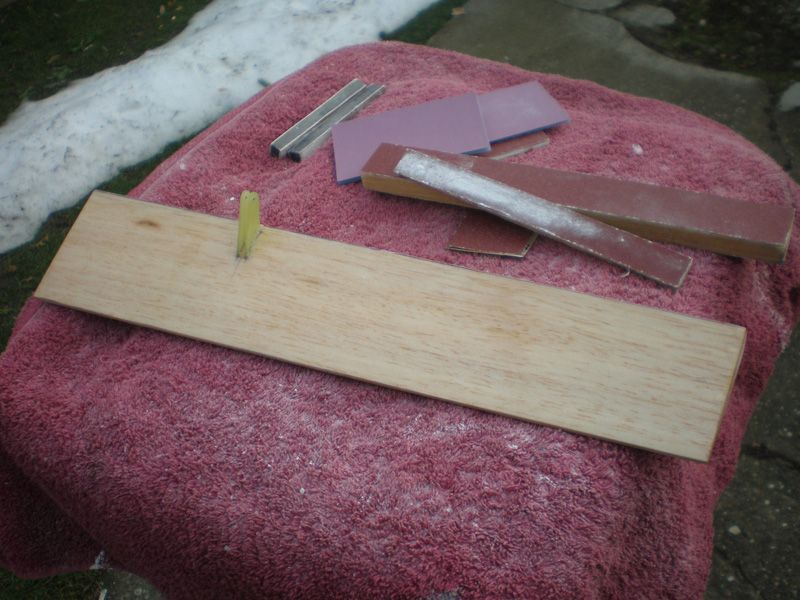
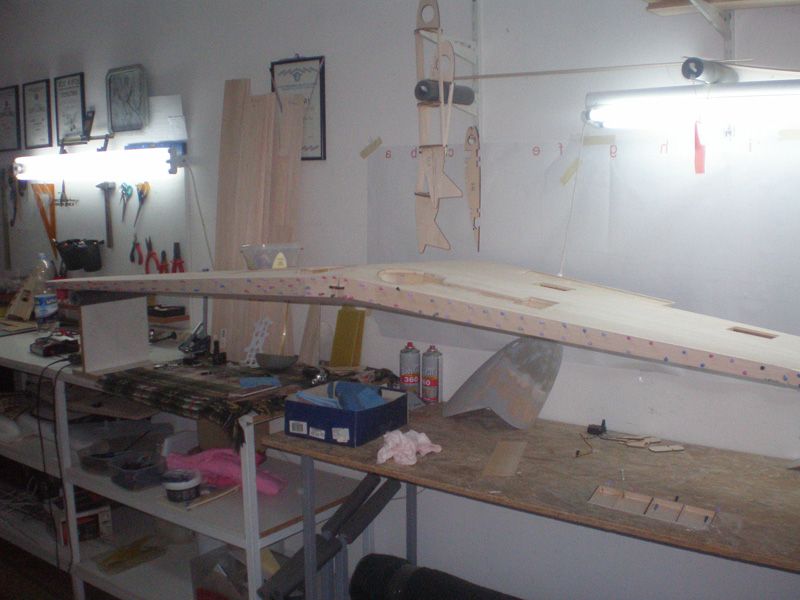
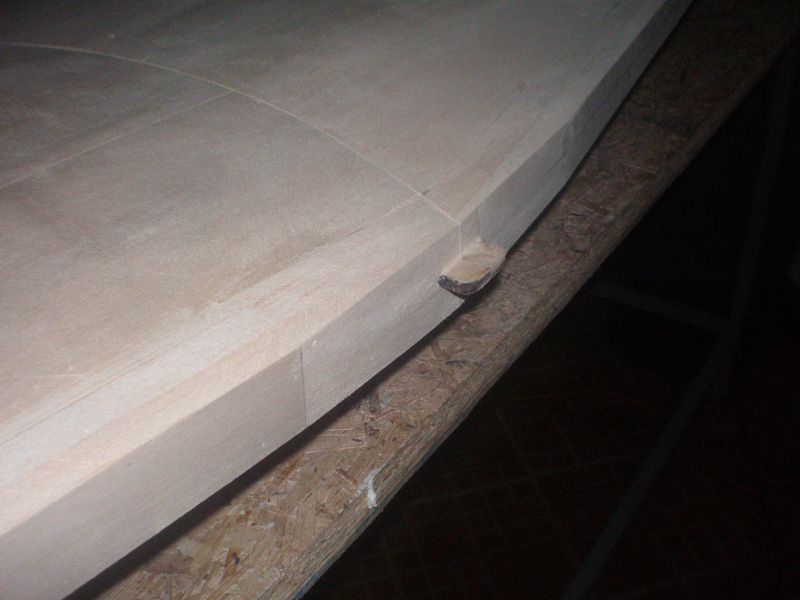
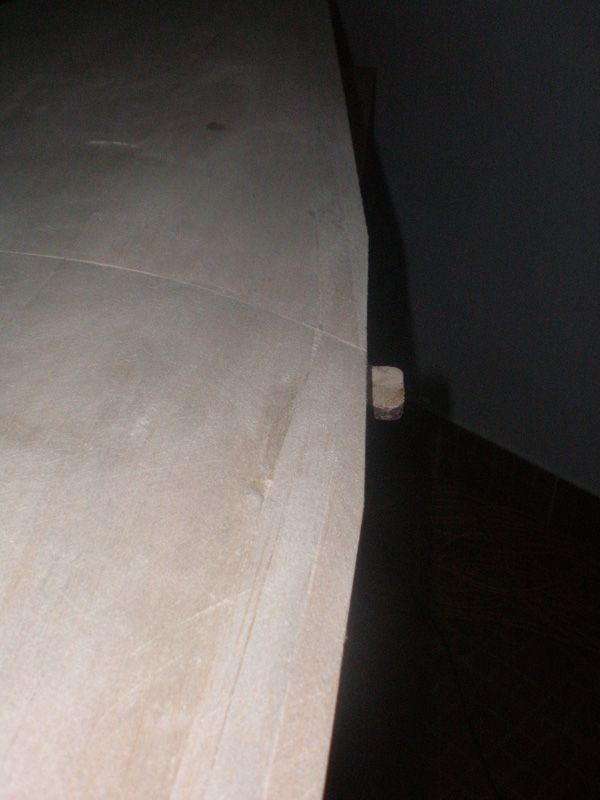
As I told in last topic I worked on leading edges. Leading edge is 25 mm wide, so I need to made it from three parts.
First I glued 5 mm wide balsa plate...

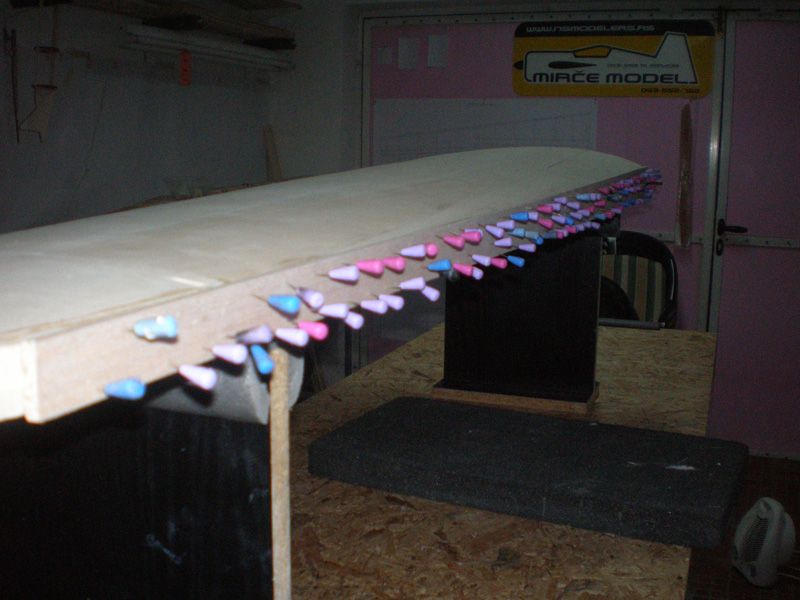
Weather was nice and I used it to sand down surplus...

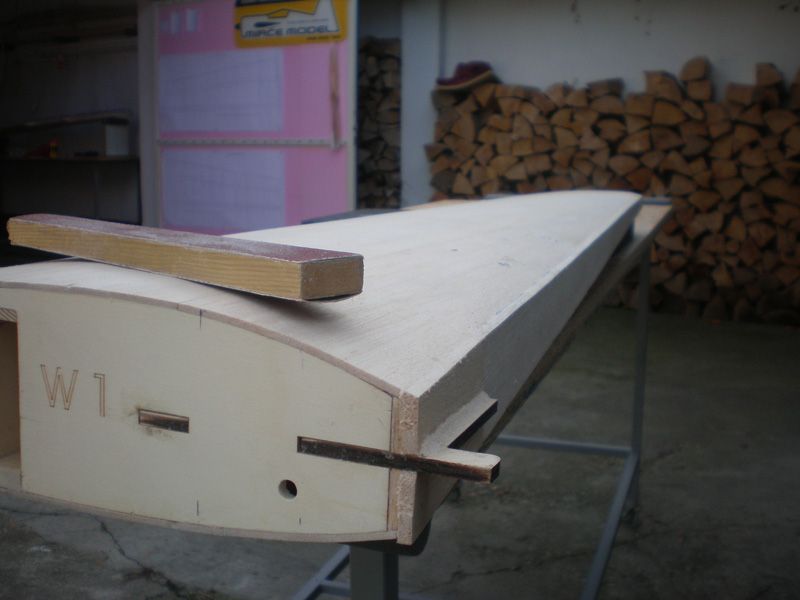
Next I add first of two 10 mm wide balsa plates...
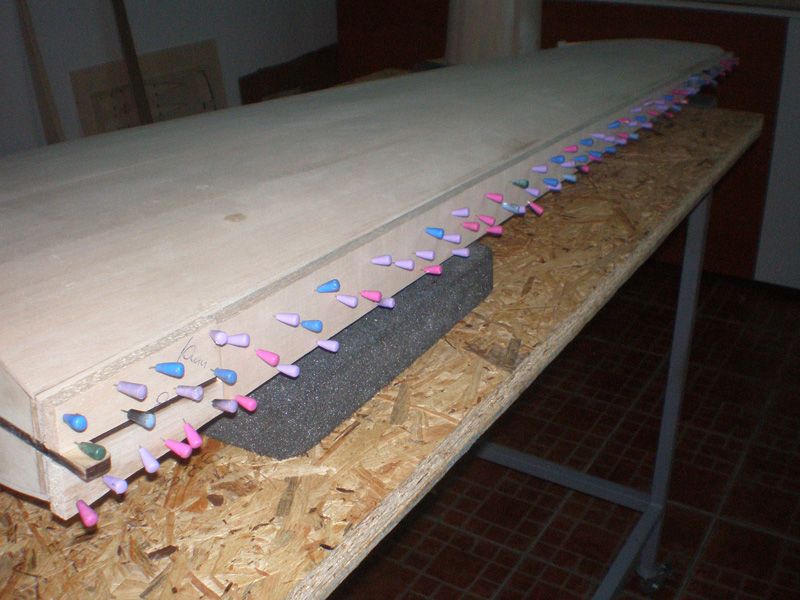
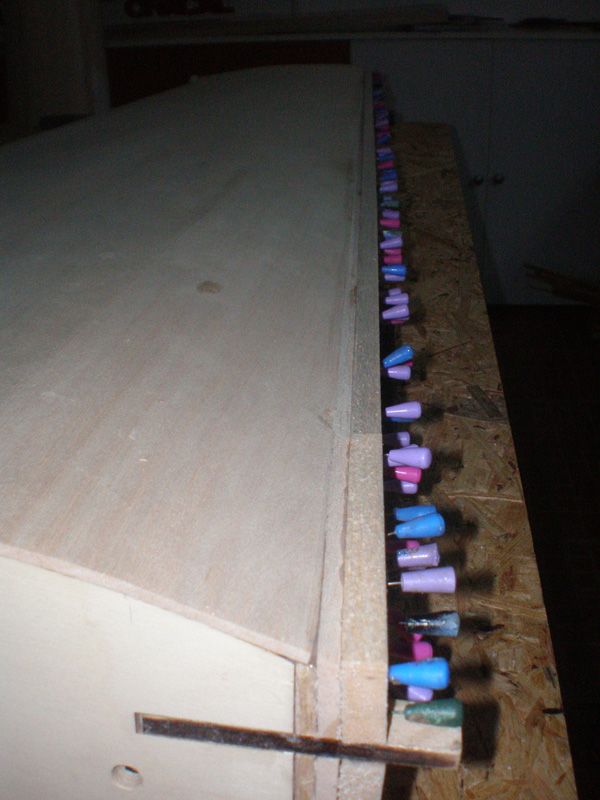
Sanding again...
Last layer I wasn't made, because I ran out of 10 mm balsa. So, now wait to get it, and hoše at Monday I will continue with working on leading edge...
When I finish it wings are ready for glassing...
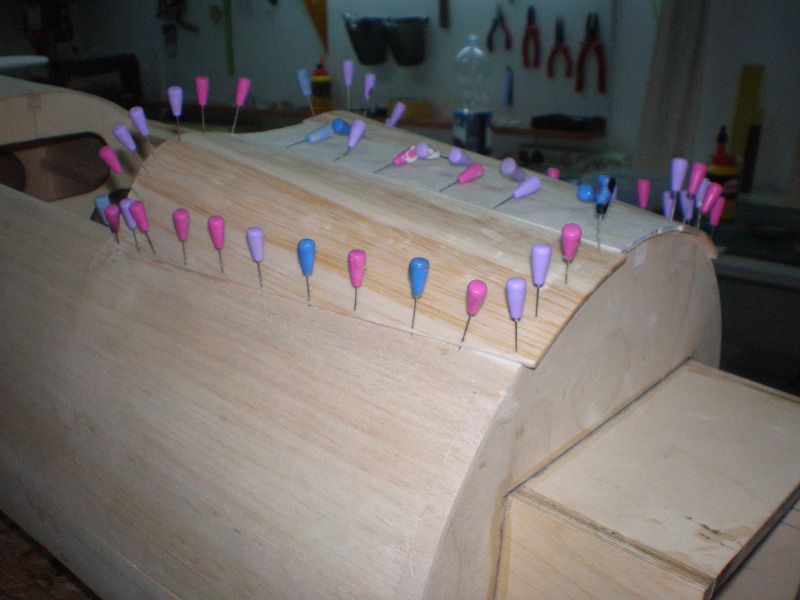
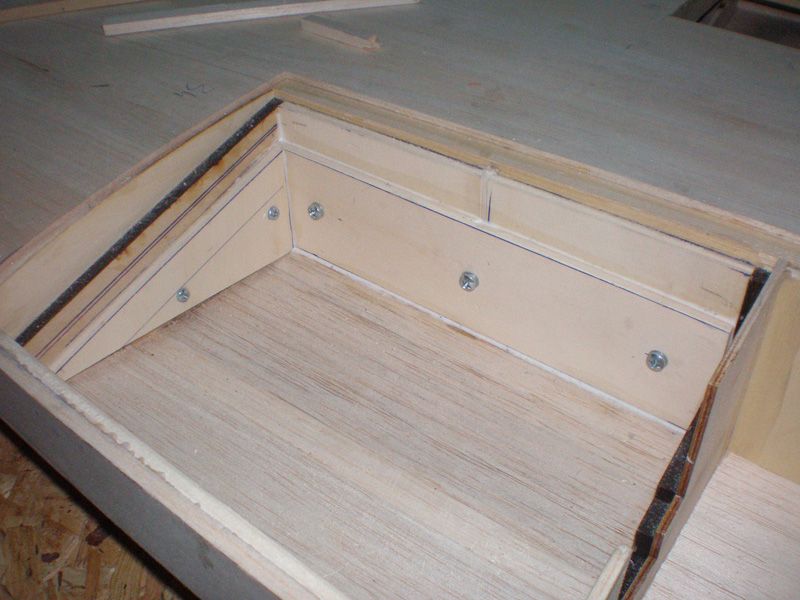
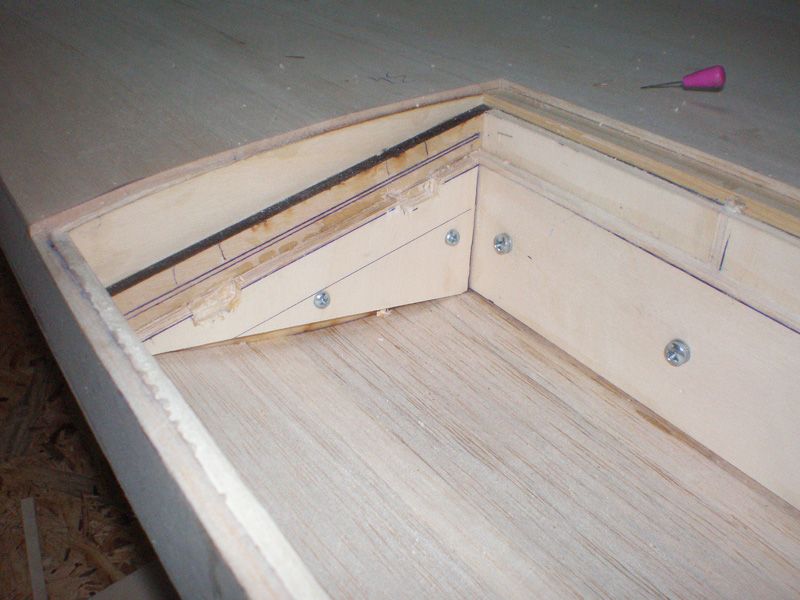
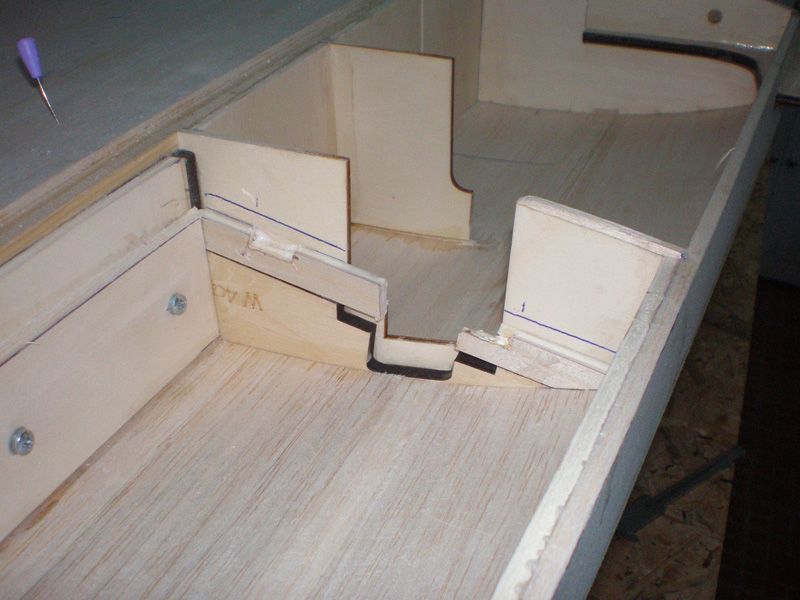
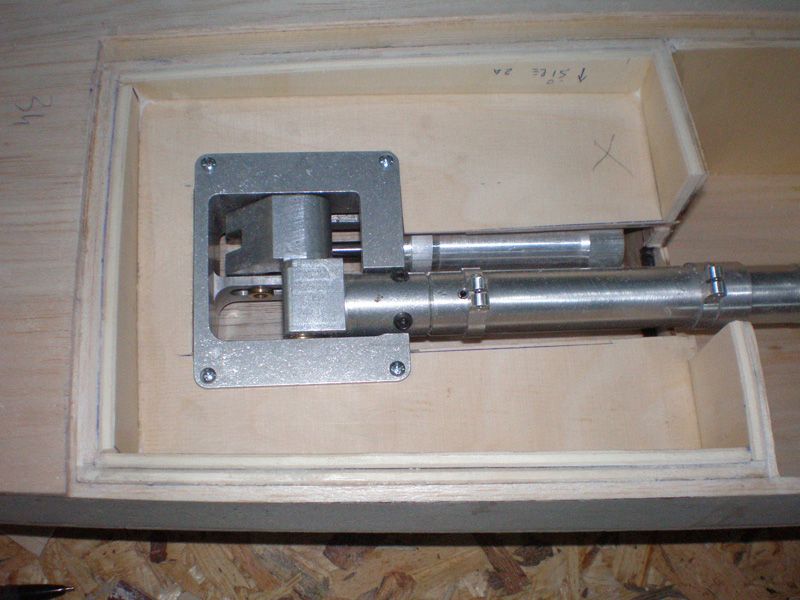
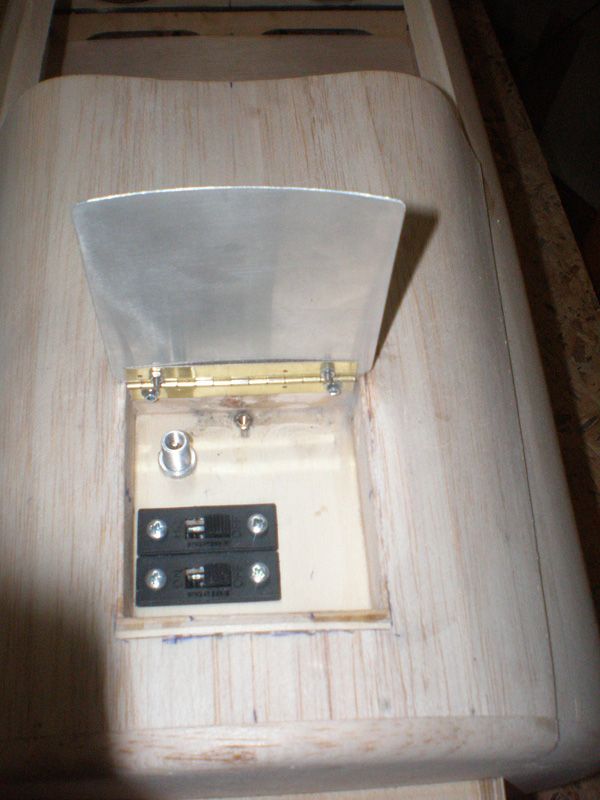
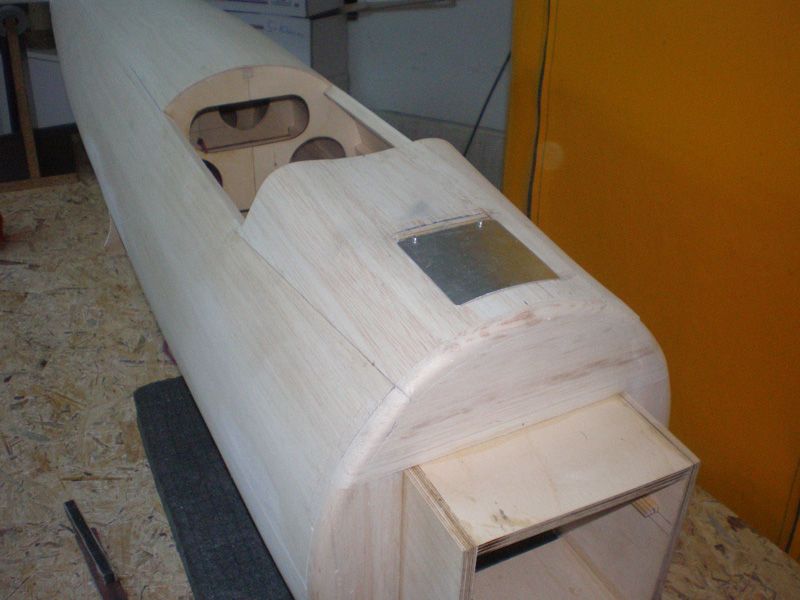
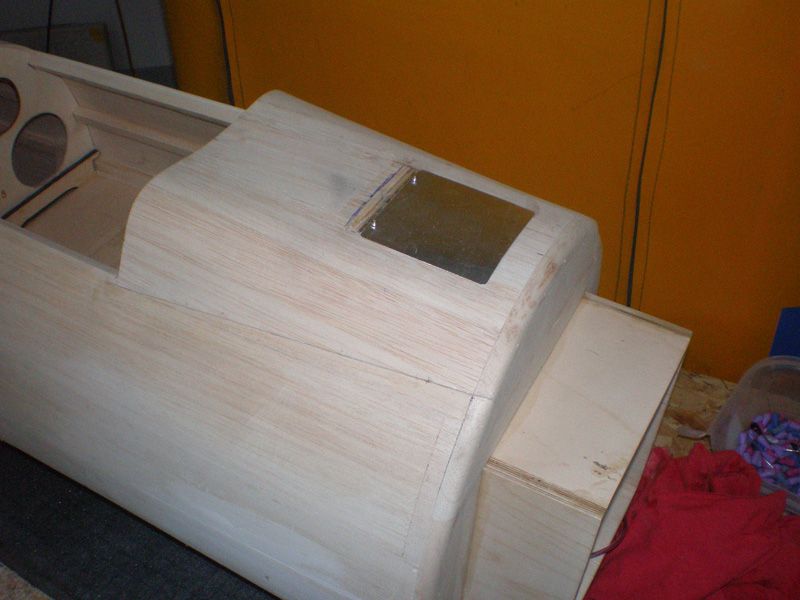
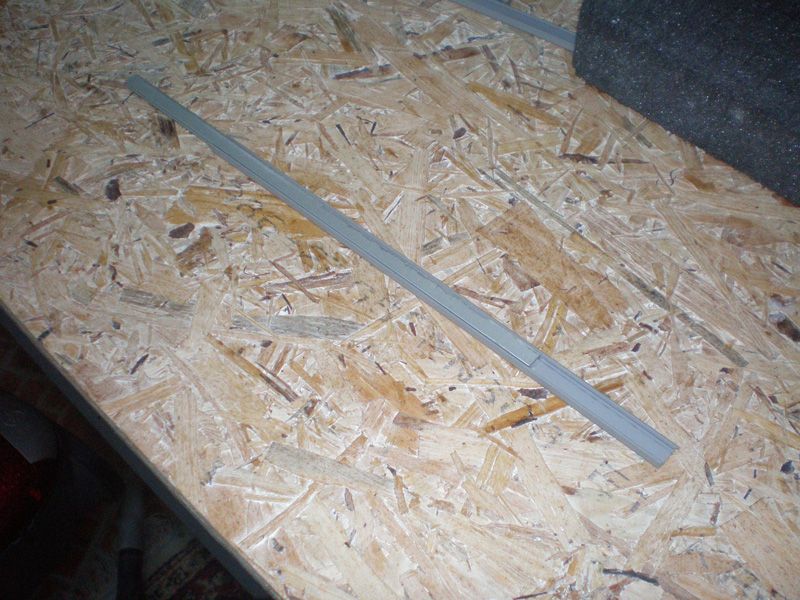
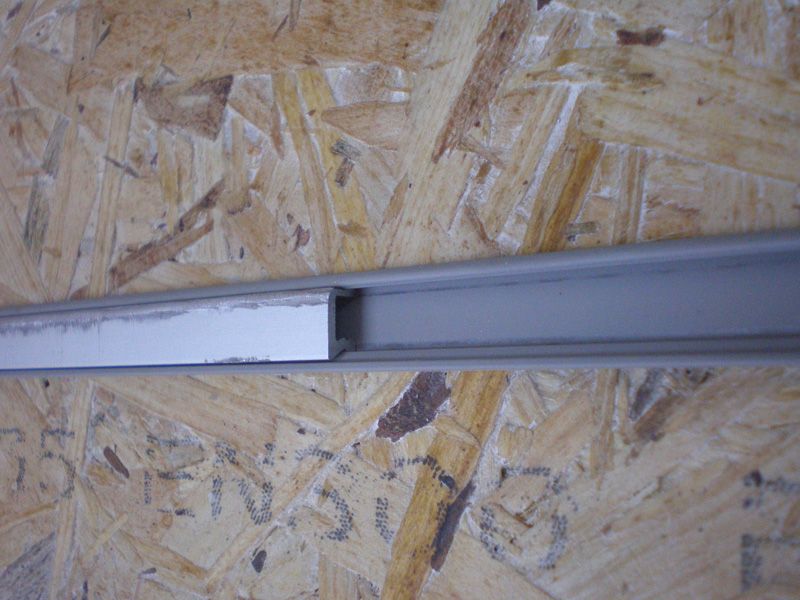
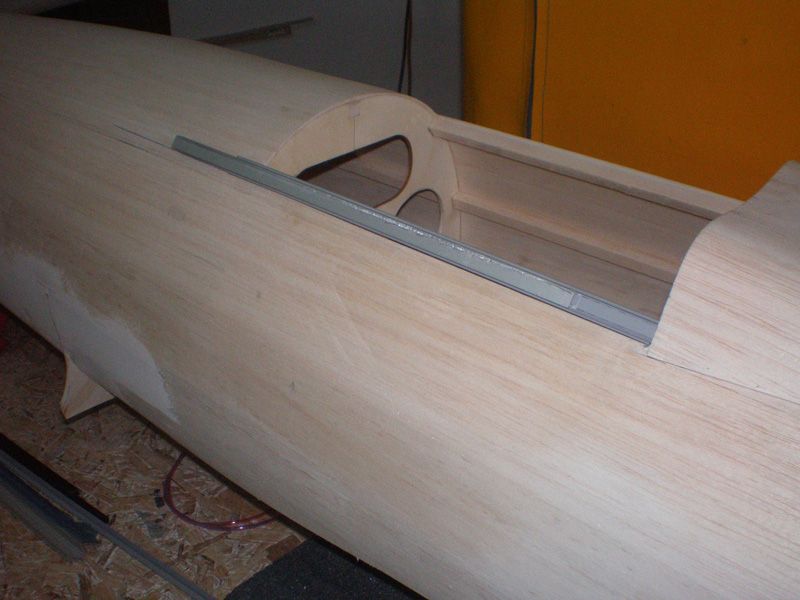
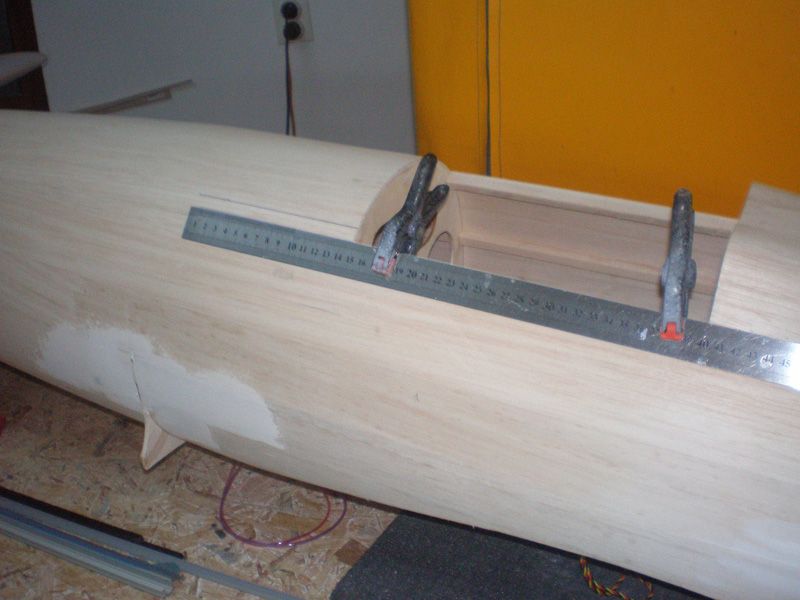
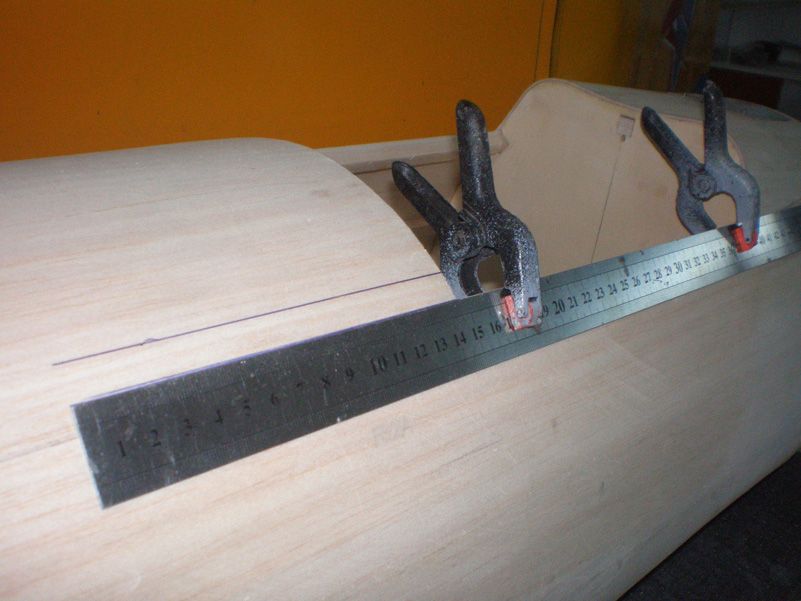
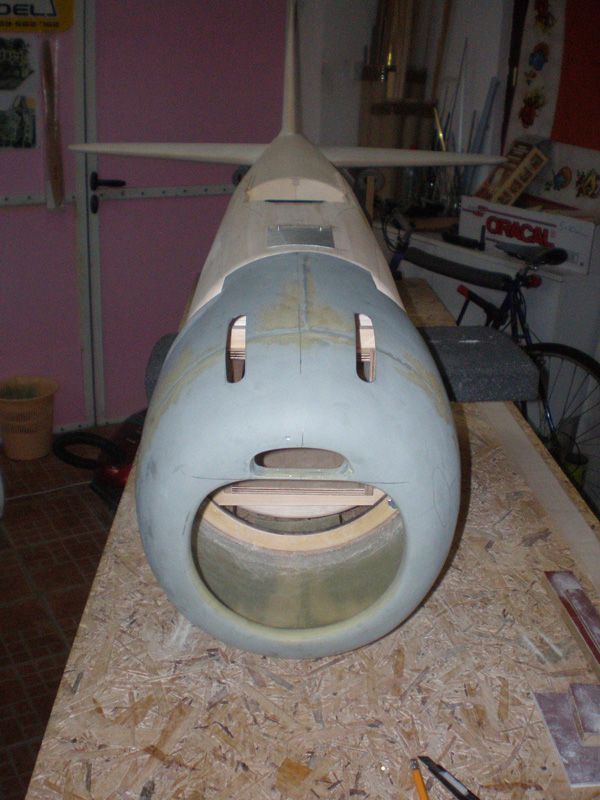
In meantime I made box on fuselage for switches and pneumatic valve. For this I want to use some cover same like on real Zero airplane, but I was looking in books and can't find any so big or on some good position. So I decided to put my switchers in front of the cockpit, on the top of the fuselage.

Box is not to big, just enough for all parts. On picture is not install all what it need to be inside...
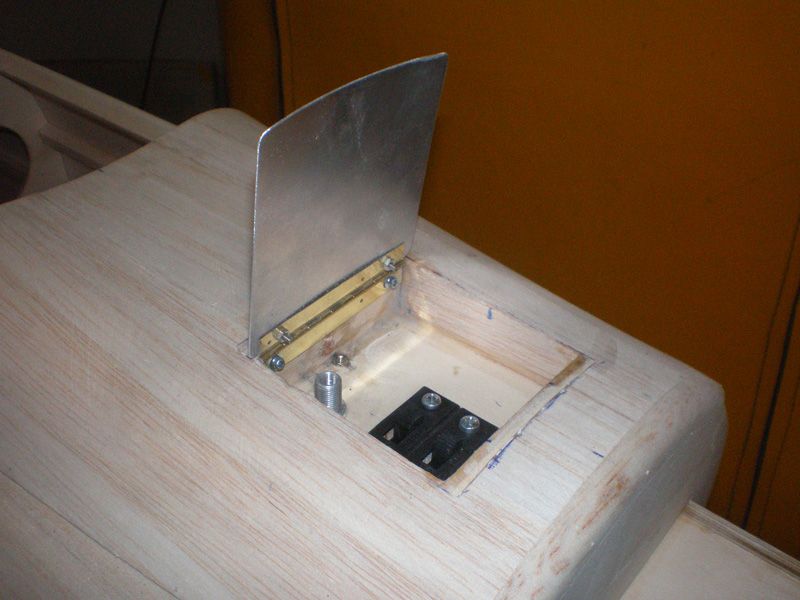
I used thin aluminum plate for cover and piano wire for hinges...
Regards
Mirce
First I glued 5 mm wide balsa plate...
Weather was nice and I used it to sand down surplus...
Next I add first of two 10 mm wide balsa plates...
Sanding again...
Last layer I wasn't made, because I ran out of 10 mm balsa. So, now wait to get it, and hoše at Monday I will continue with working on leading edge...
When I finish it wings are ready for glassing...
In meantime I made box on fuselage for switches and pneumatic valve. For this I want to use some cover same like on real Zero airplane, but I was looking in books and can't find any so big or on some good position. So I decided to put my switchers in front of the cockpit, on the top of the fuselage.
Box is not to big, just enough for all parts. On picture is not install all what it need to be inside...
I used thin aluminum plate for cover and piano wire for hinges...
Regards
Mirce
12-28-2012, 05:41 AM
#61
Thread Starter
In mean time I was working on Zero. To be frank, more time I spent on my new jet project Galeb G2, but on Zero I made few things also...
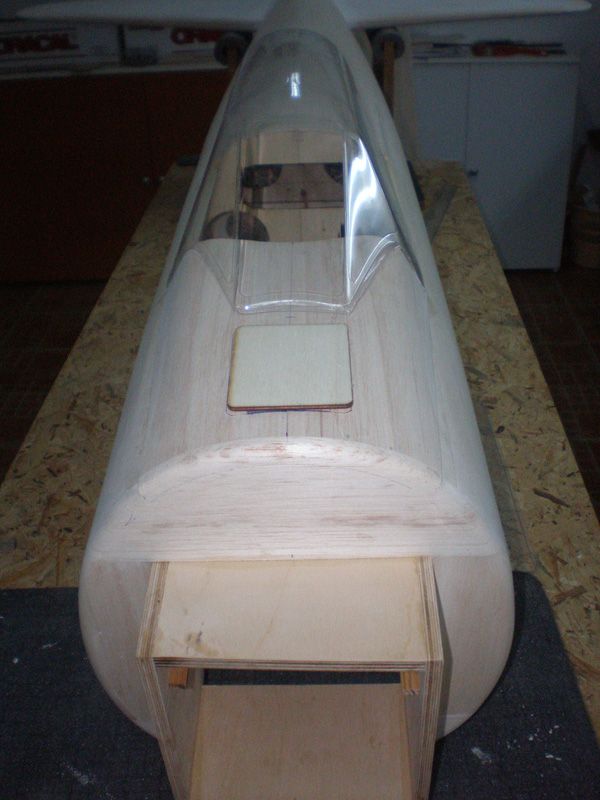
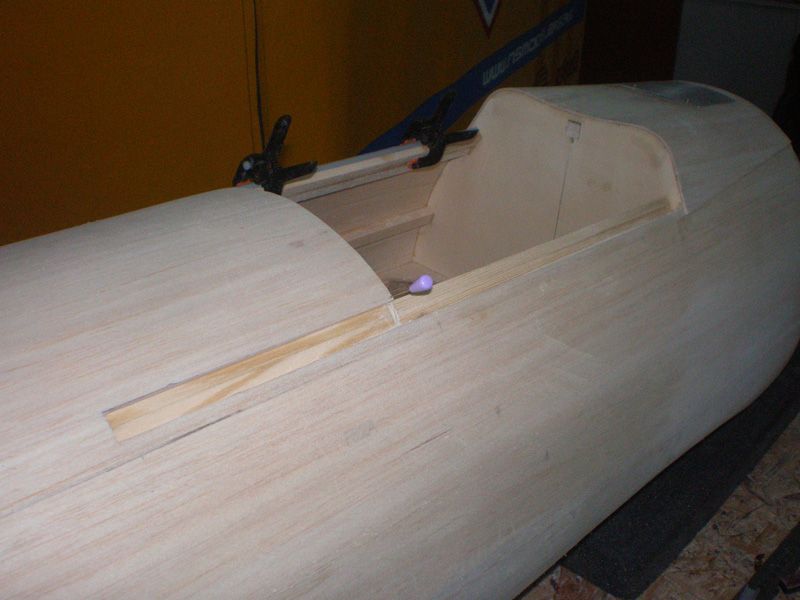
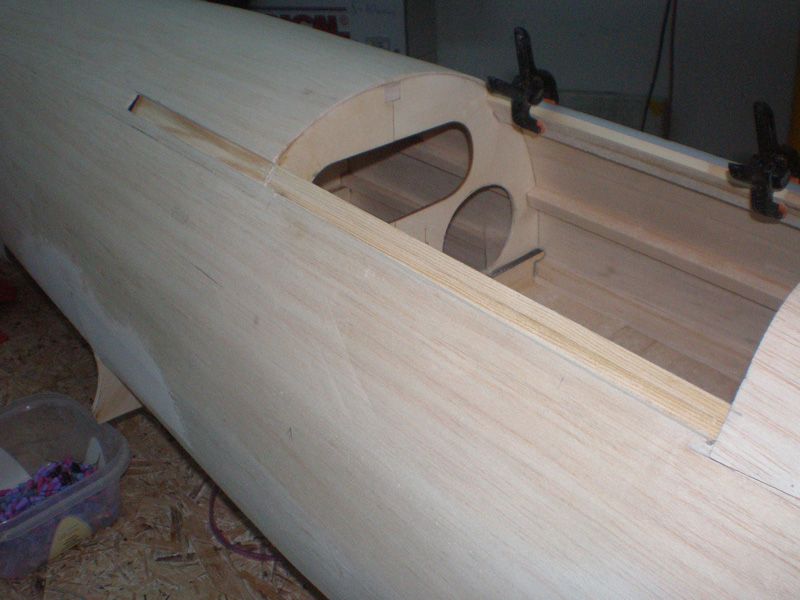
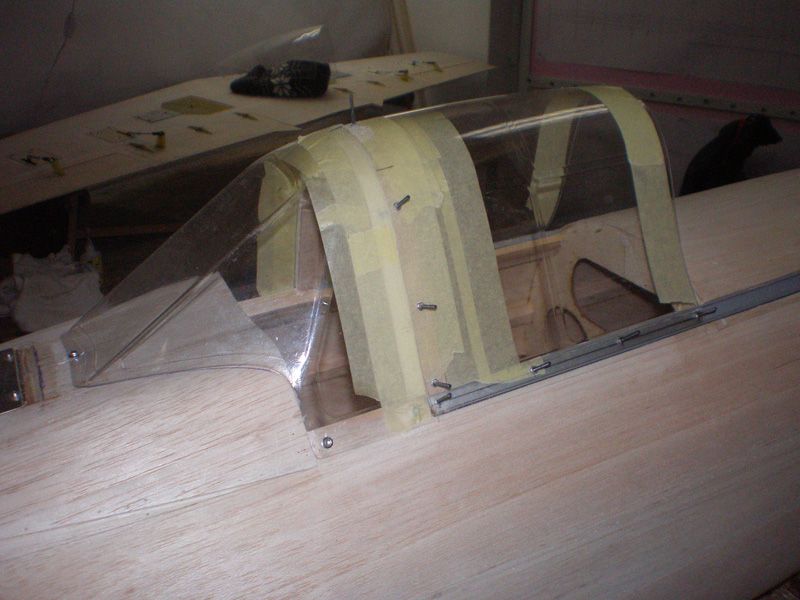
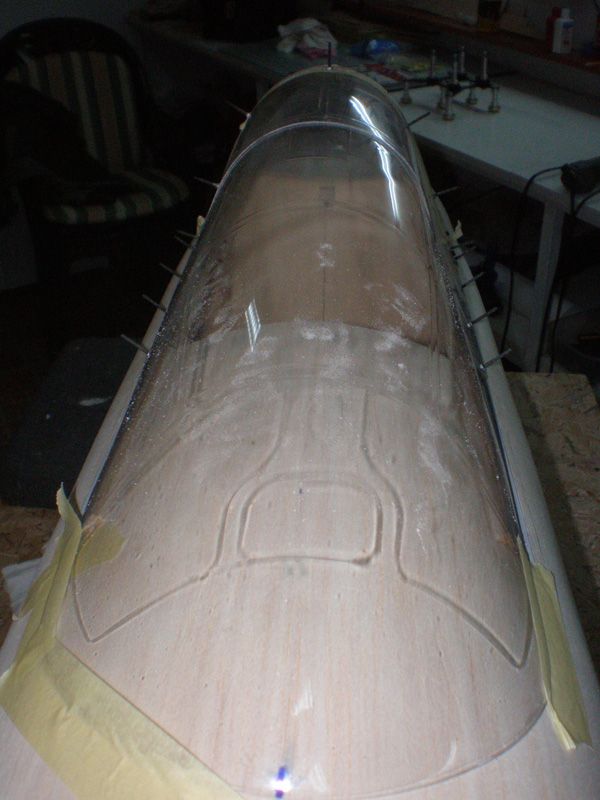
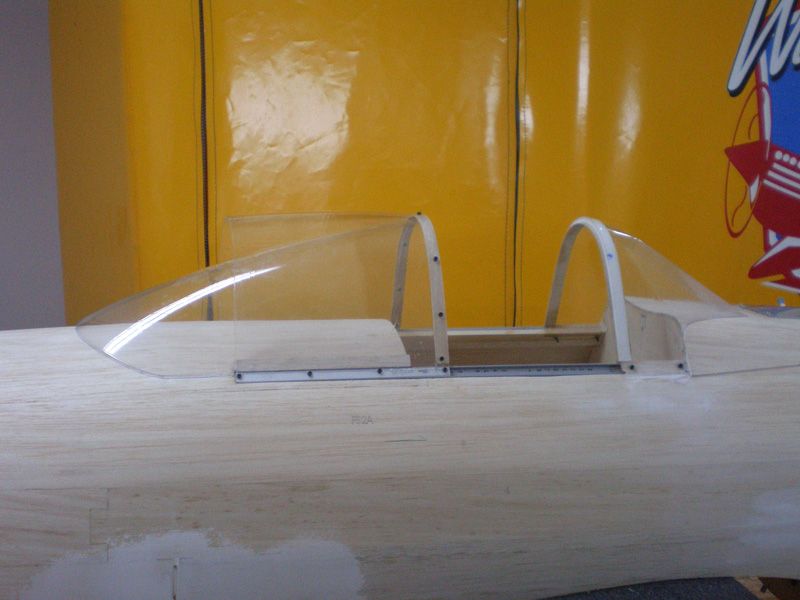
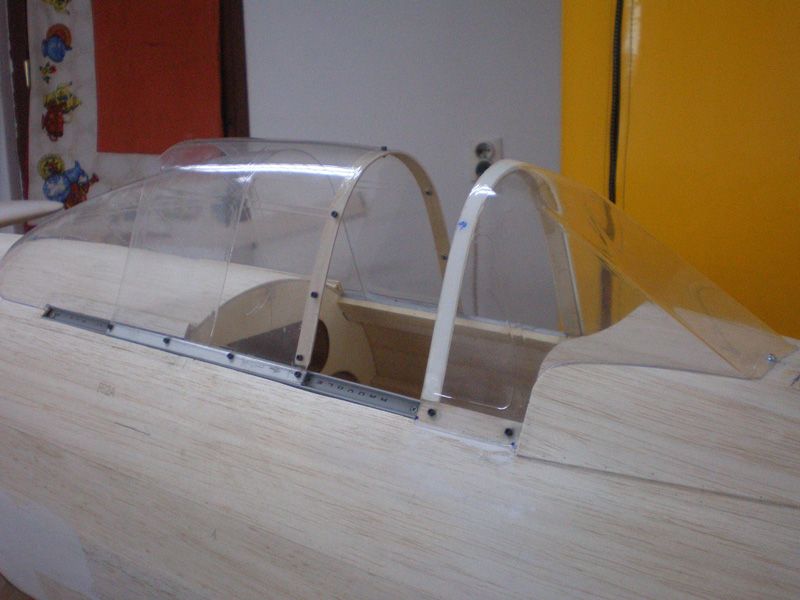
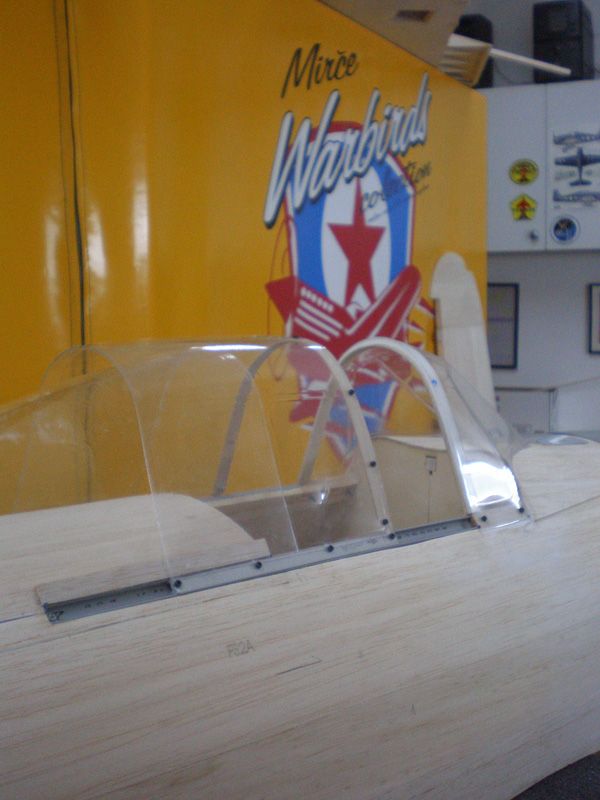
This is the first model in which I made the cabin openable.
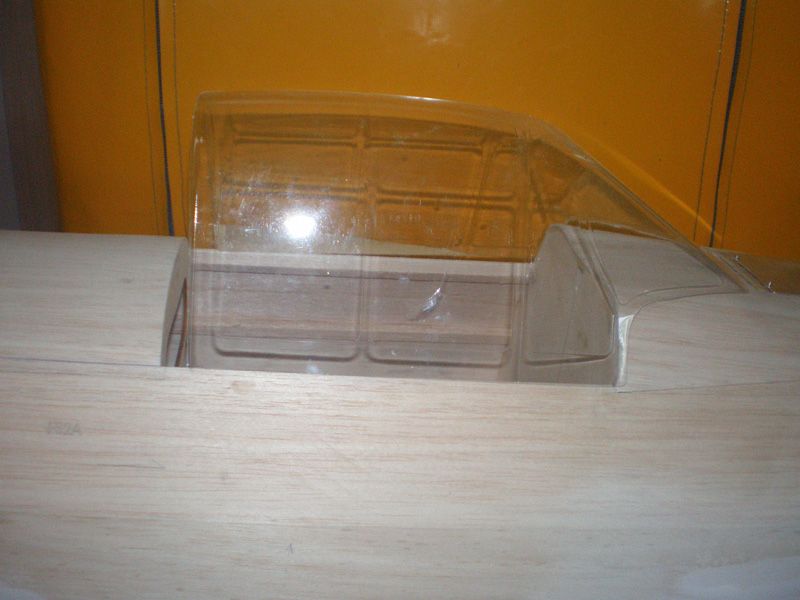
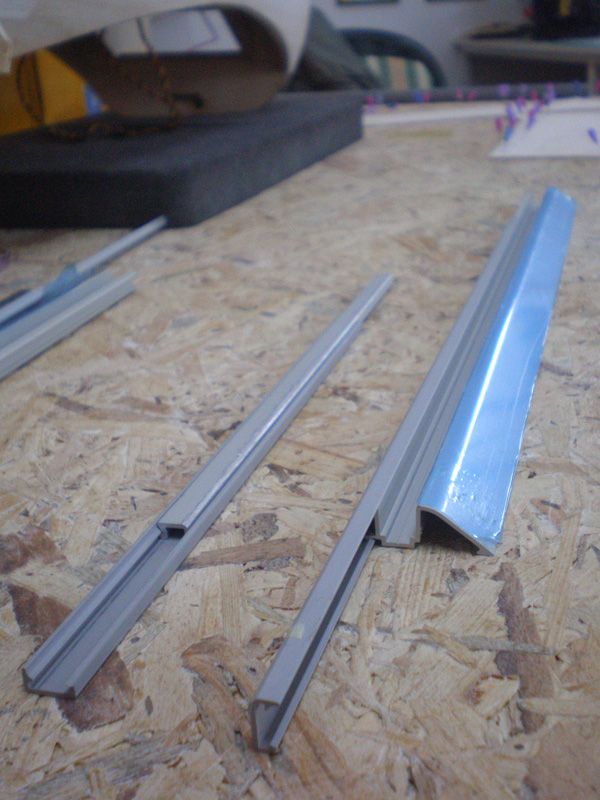
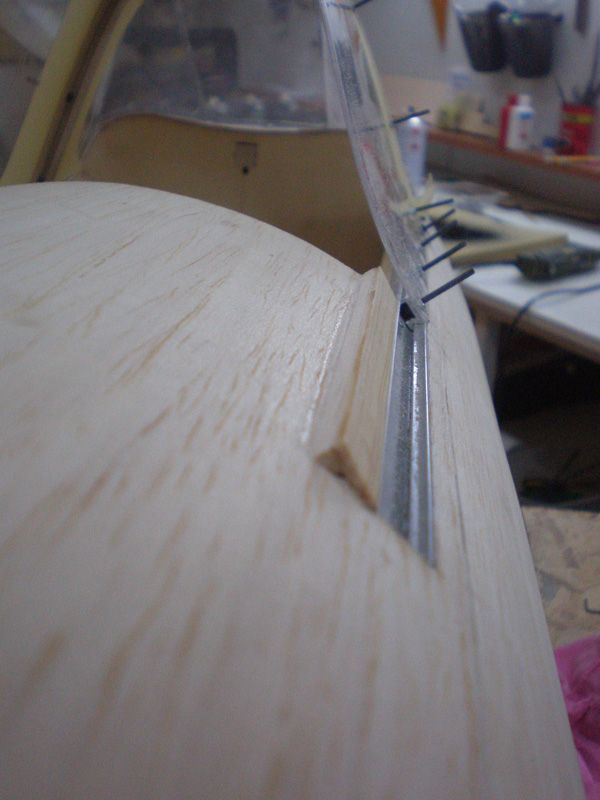
Biggest problem was to find good slider mechanism. Finally I find something from furniture industry...
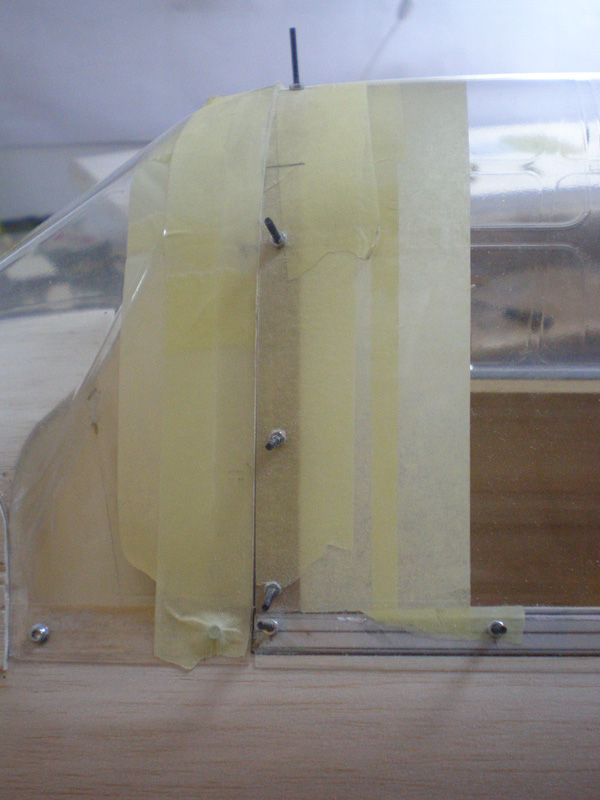
On fuselage I install plastic part... First I made slot...
...than add hard wood support for plastic part...
I cut plastic canopy and add reinforcement...
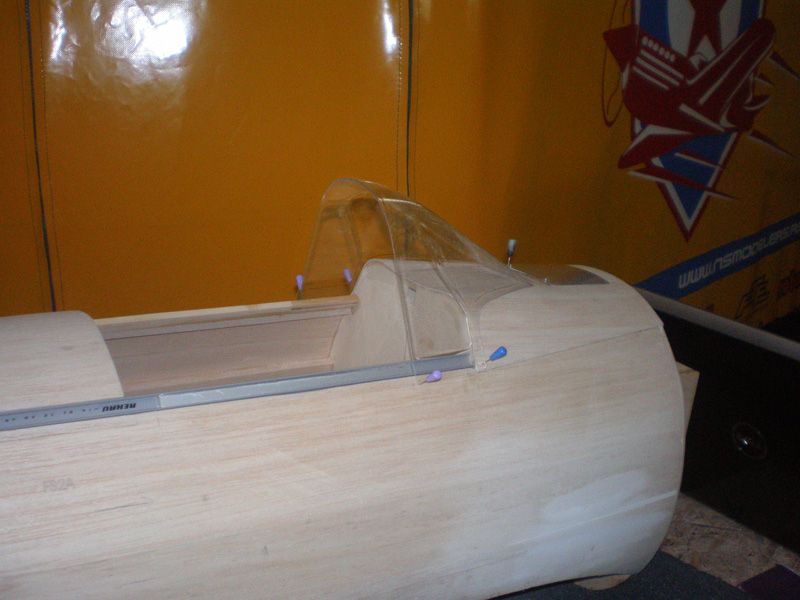
One small lap was added too...

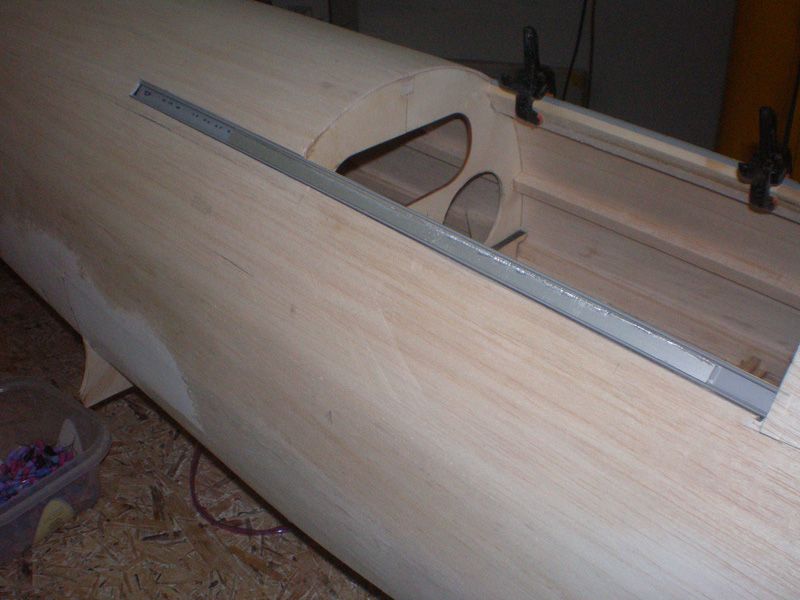
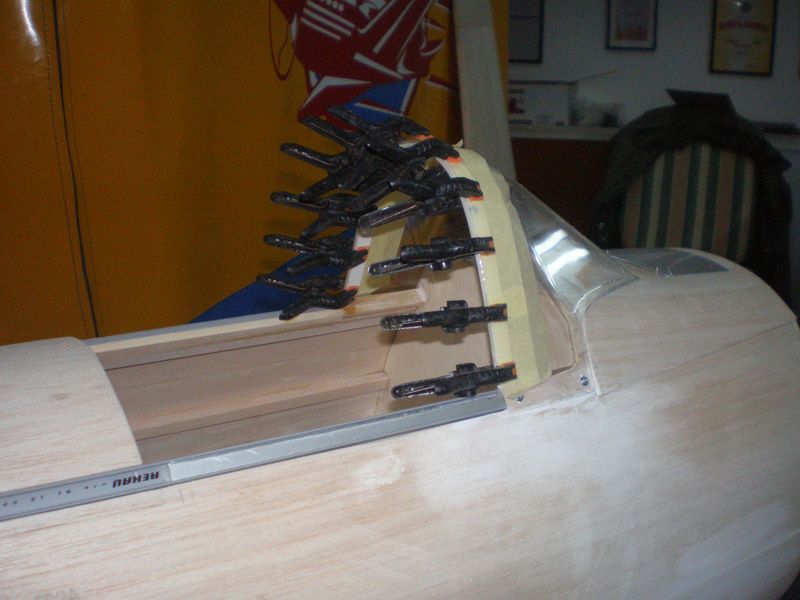
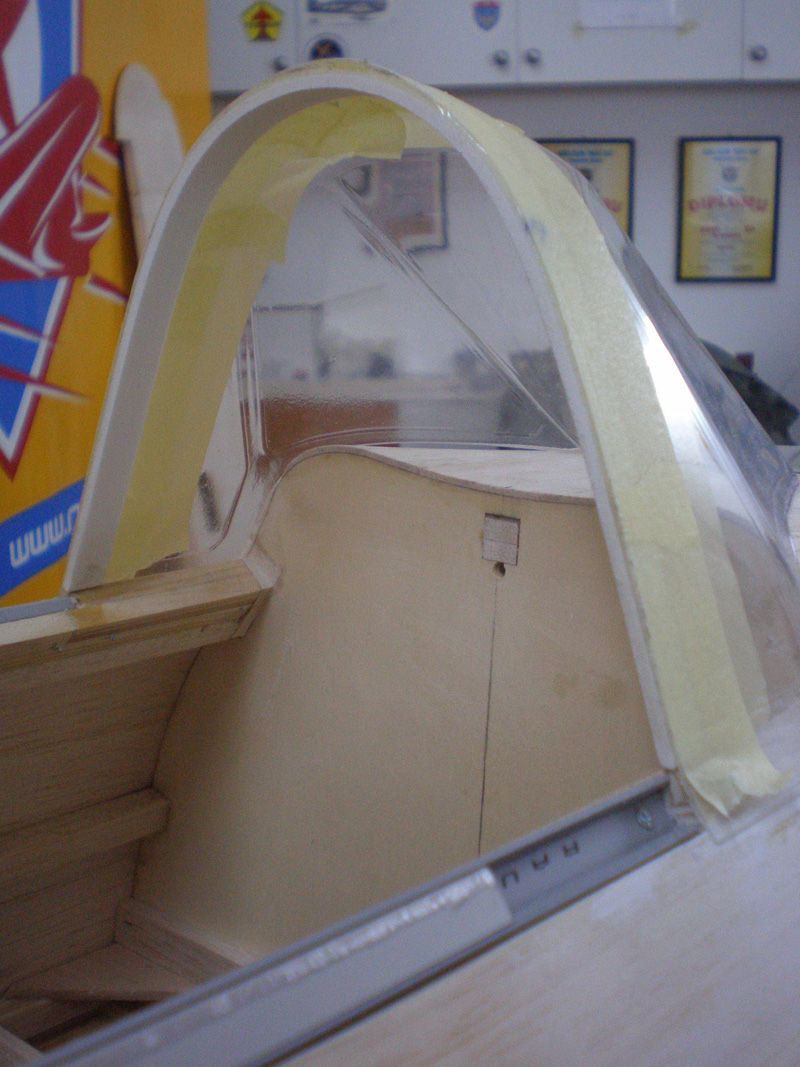
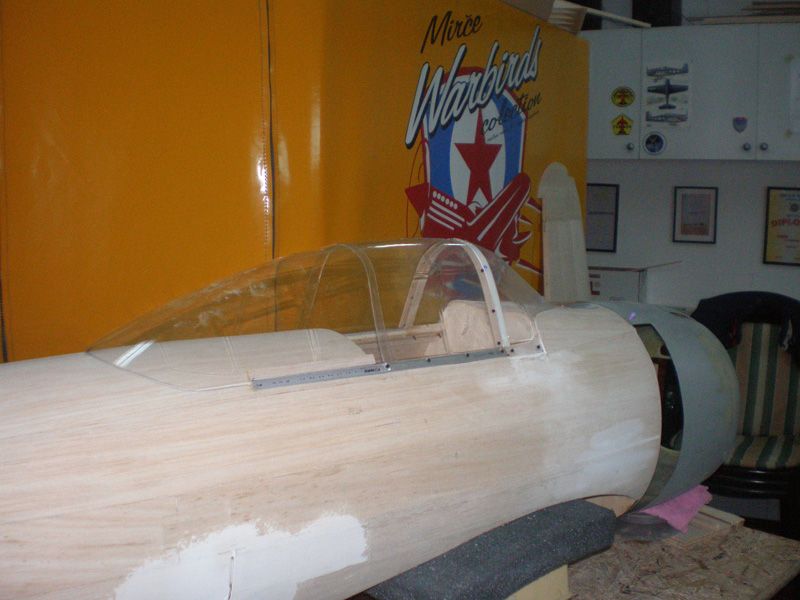
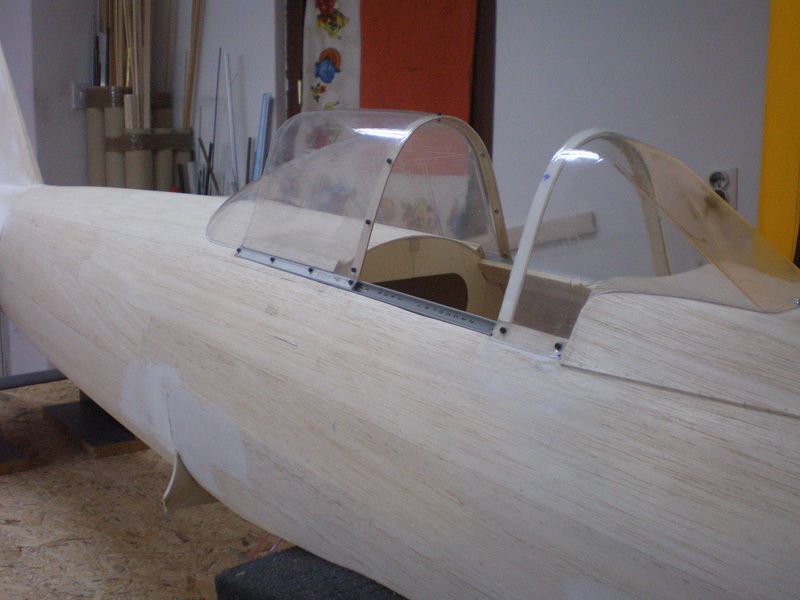
Next step was to made moveable part of the canopy. I add reinforce on that part also...

With few screws plastic part was fixed on aluminum slider...

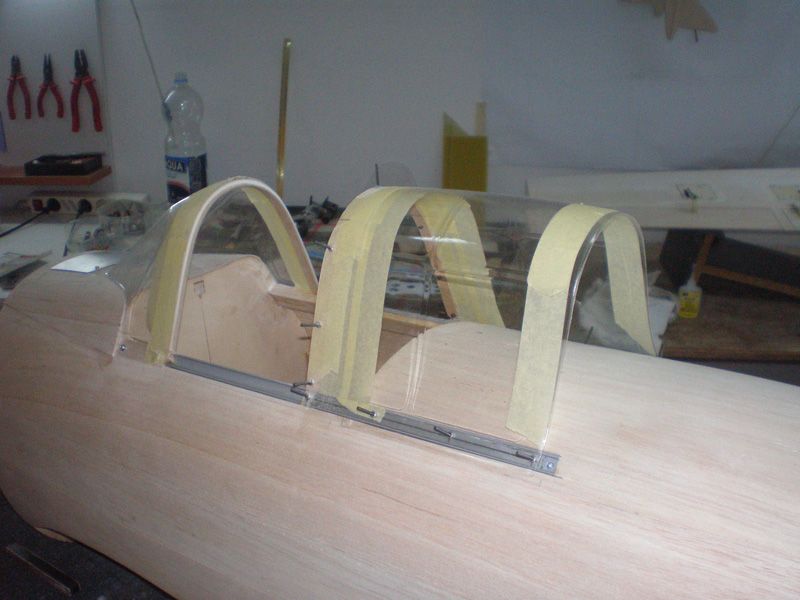

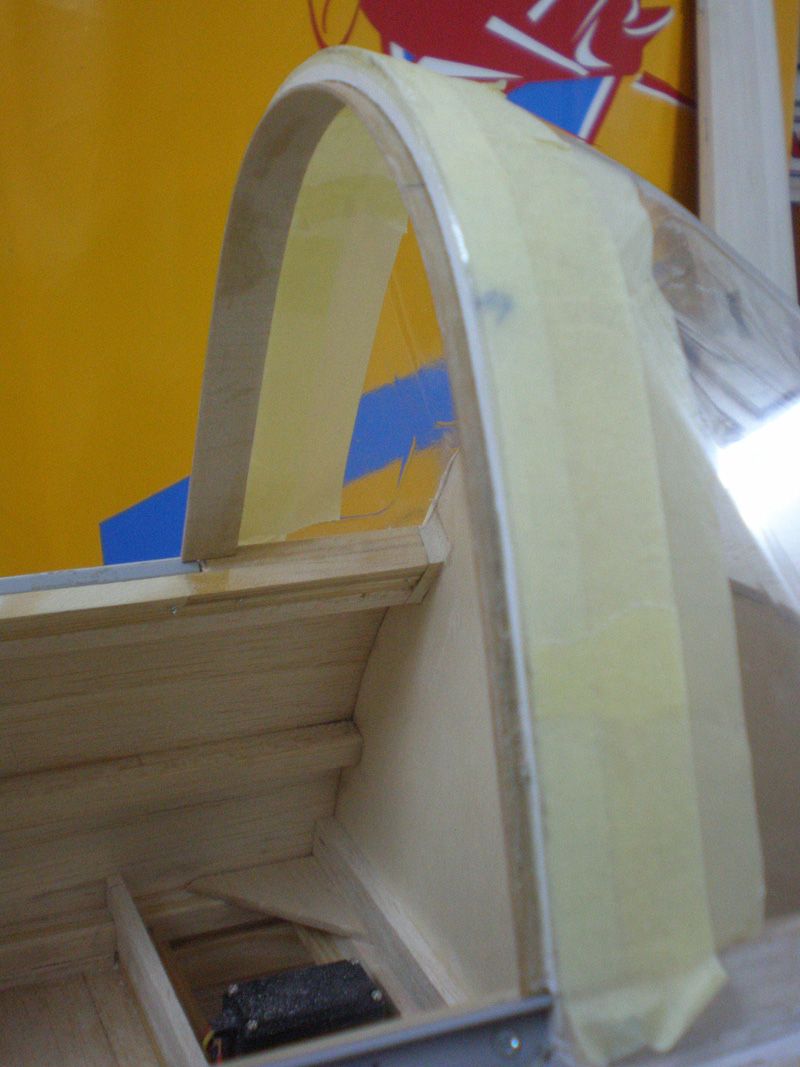
For rear canopy part I must add wood which give better angle for alignment...


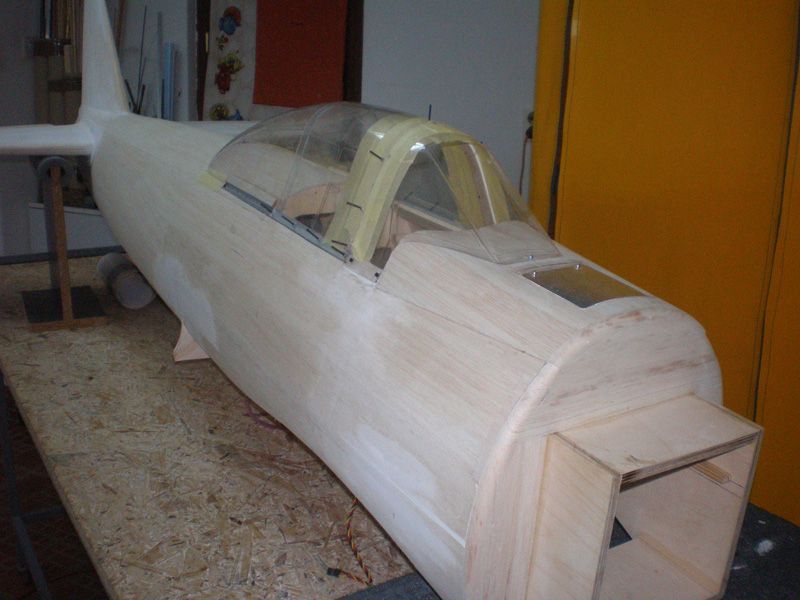
When I cut all screws canopy look like this...

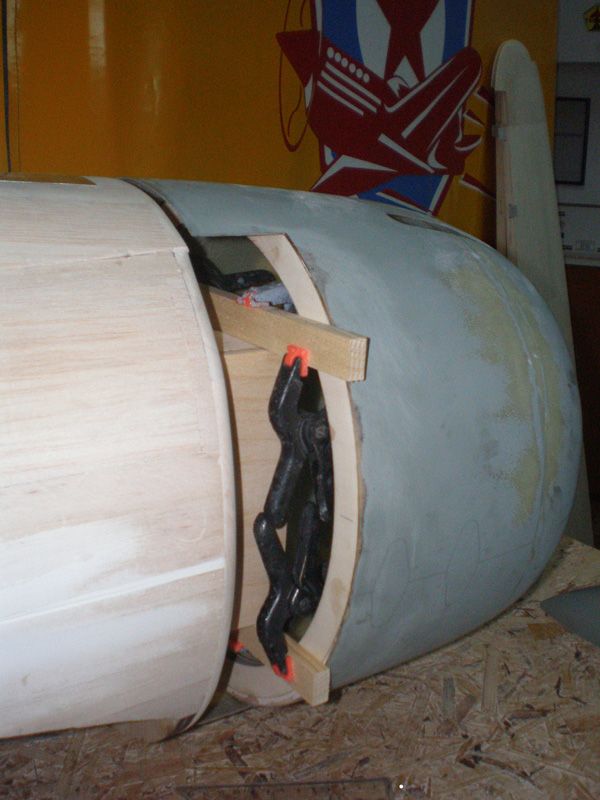
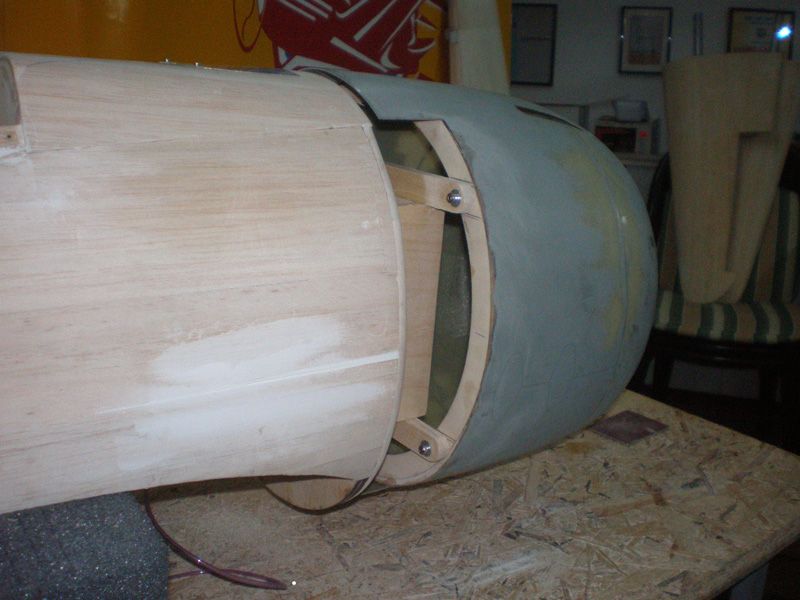
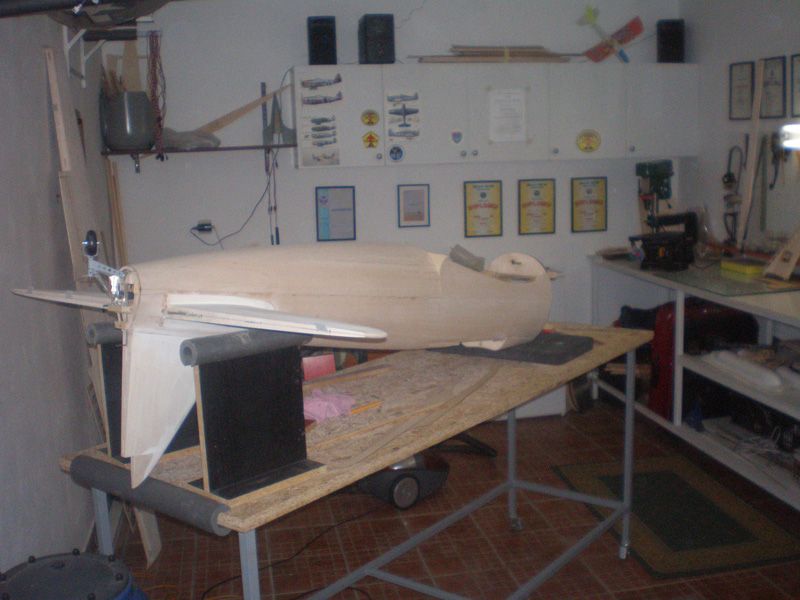
With cowl Zero start to look on real one...
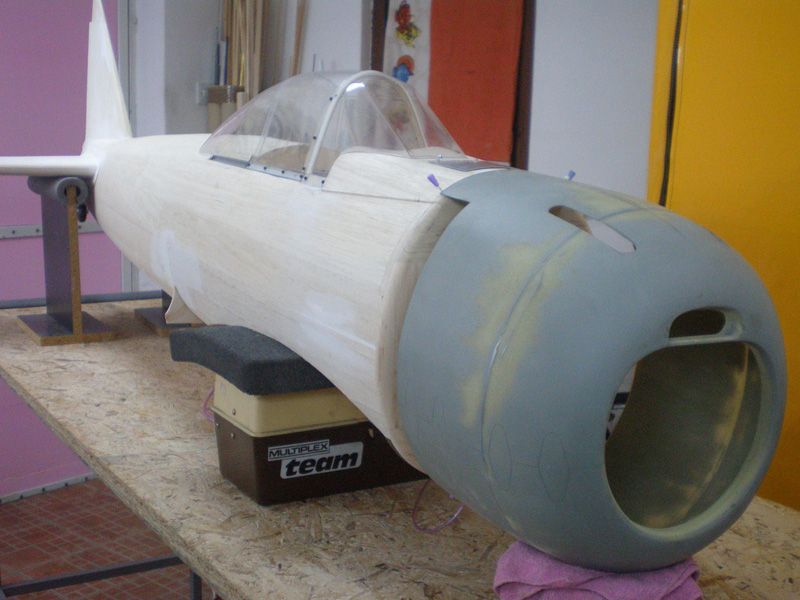
So, I decided to start work on cowl. Original cowl plate I change with two 4 mm ply rings, which my friend Dragan cut for me on his laser cut machine.
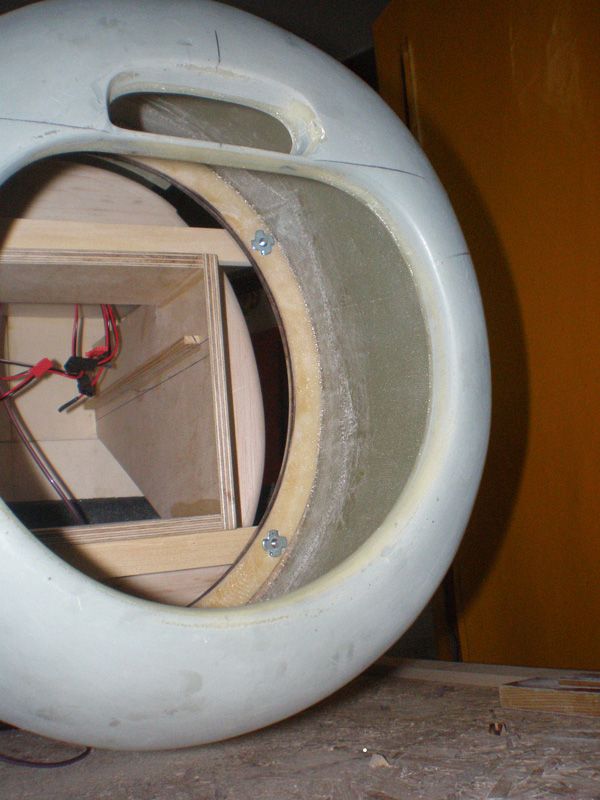
Rings was glued together, and after that I glued it in the cowl...

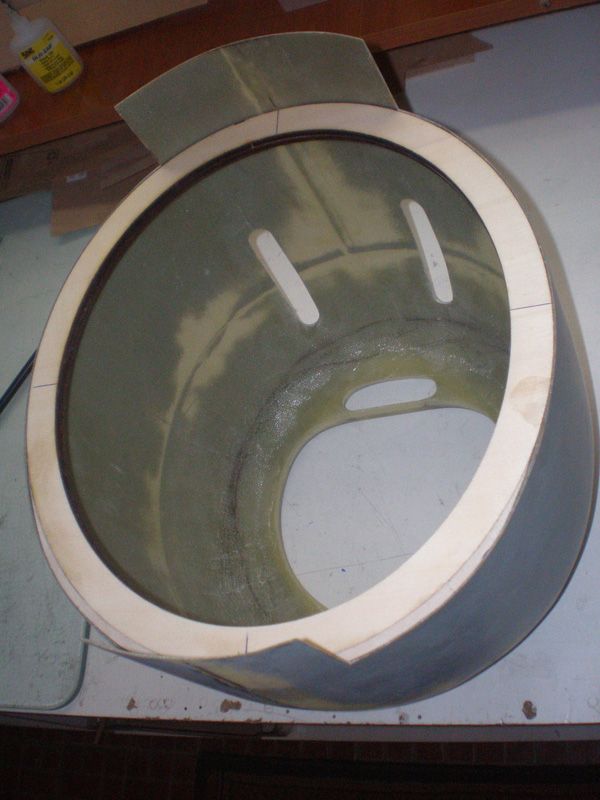
For gluing I used epoxy glue and after that connect was reinforced with two layer of the 160 gr glass cloth. For stronger connection cowl was put on my "autoklav"...
I was thinking how to fix cowl on the fuselage. I don't want to see screws from out of the cowl, so first I glued two hard wood plates on engine box.

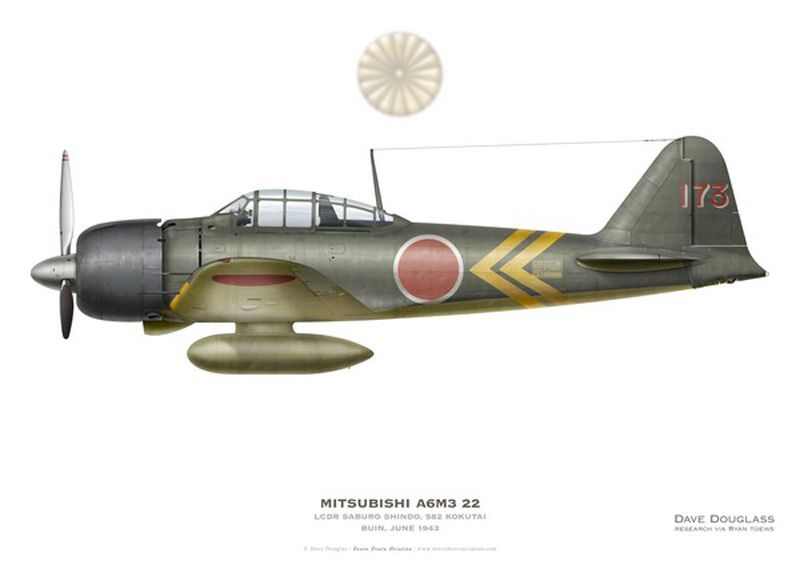
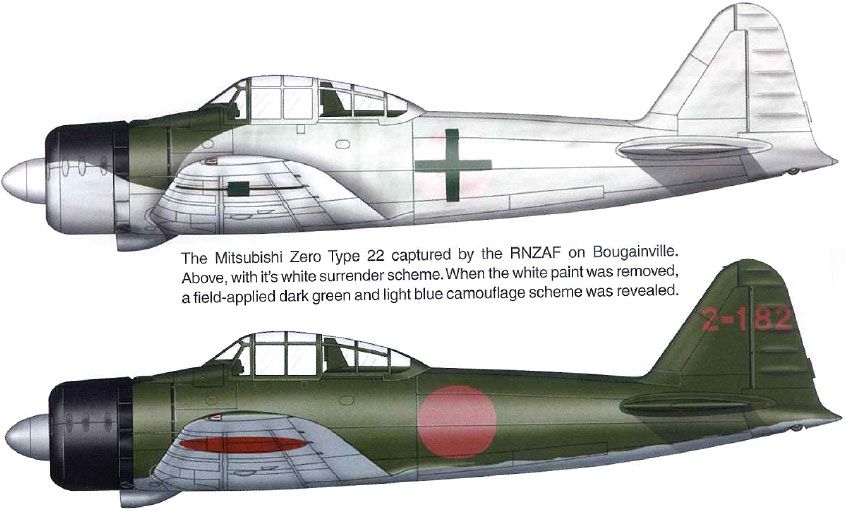
On Real Zero A6 M3 - 22 cowl was little offset from the fuselage...

Cowl wasn't made perfect and I have "gymnastics" that instead of properly...

Zero A6 M3 - 22 have exhaust on the bottom of the cowl flaps. That model have five flaps on every side of the cowl. I want to made that flaps on more opened position, so I start to made my flaps from thin aluminum plates. Aluminum allowed me to made right curve, same like cowl...


On my last model I made flap carrier from aluminum plate also, but vibration made that one plate broke and I lost that flap on last flight. So, I decided to made flap carrier from ply...

Again, my friend Dragan, turn on his laser cut machine and made parts for my new ply carriers...
OK, that's all for today...
Best regards
Mirce
This is the first model in which I made the cabin openable.
Biggest problem was to find good slider mechanism. Finally I find something from furniture industry...
On fuselage I install plastic part... First I made slot...
...than add hard wood support for plastic part...
I cut plastic canopy and add reinforcement...
One small lap was added too...
Next step was to made moveable part of the canopy. I add reinforce on that part also...
With few screws plastic part was fixed on aluminum slider...
For rear canopy part I must add wood which give better angle for alignment...
When I cut all screws canopy look like this...
With cowl Zero start to look on real one...
So, I decided to start work on cowl. Original cowl plate I change with two 4 mm ply rings, which my friend Dragan cut for me on his laser cut machine.
Rings was glued together, and after that I glued it in the cowl...
For gluing I used epoxy glue and after that connect was reinforced with two layer of the 160 gr glass cloth. For stronger connection cowl was put on my "autoklav"...
I was thinking how to fix cowl on the fuselage. I don't want to see screws from out of the cowl, so first I glued two hard wood plates on engine box.
On Real Zero A6 M3 - 22 cowl was little offset from the fuselage...
Cowl wasn't made perfect and I have "gymnastics" that instead of properly...
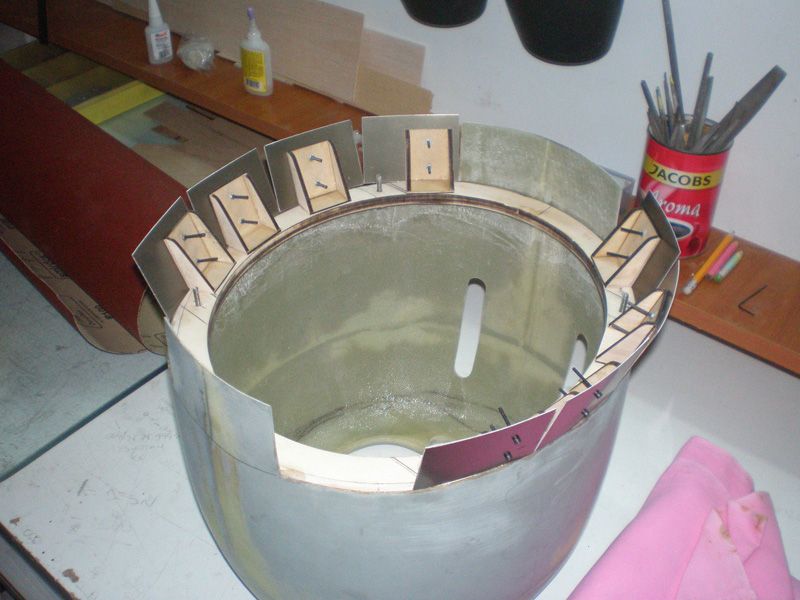
Zero A6 M3 - 22 have exhaust on the bottom of the cowl flaps. That model have five flaps on every side of the cowl. I want to made that flaps on more opened position, so I start to made my flaps from thin aluminum plates. Aluminum allowed me to made right curve, same like cowl...
On my last model I made flap carrier from aluminum plate also, but vibration made that one plate broke and I lost that flap on last flight. So, I decided to made flap carrier from ply...
Again, my friend Dragan, turn on his laser cut machine and made parts for my new ply carriers...
OK, that's all for today...
Best regards
Mirce
12-30-2012, 11:19 AM
#62
Thread Starter
I continued work on cowl flaps, and made four of five flaps. Through last flaps come pipe of the exhaust system. I'm not sure are those flaps was open when all other flaps was in open position...
So, for now I wasn't made it...
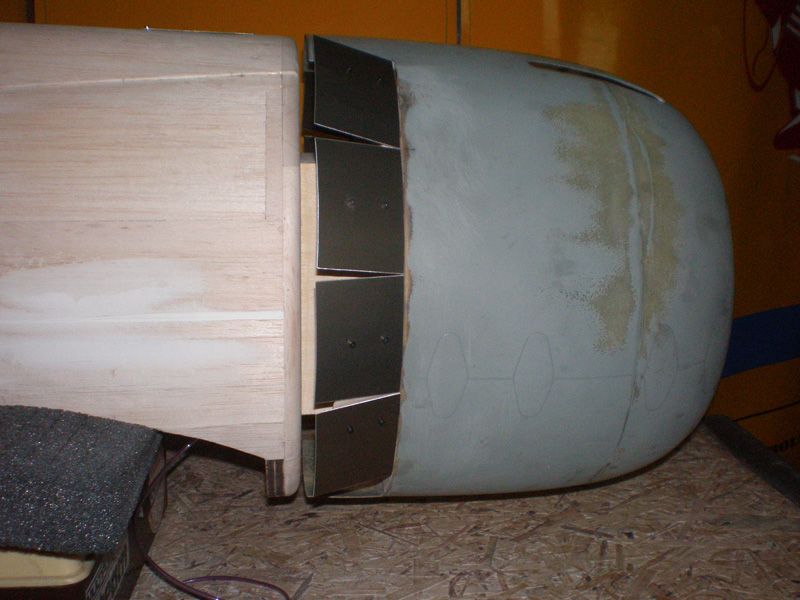
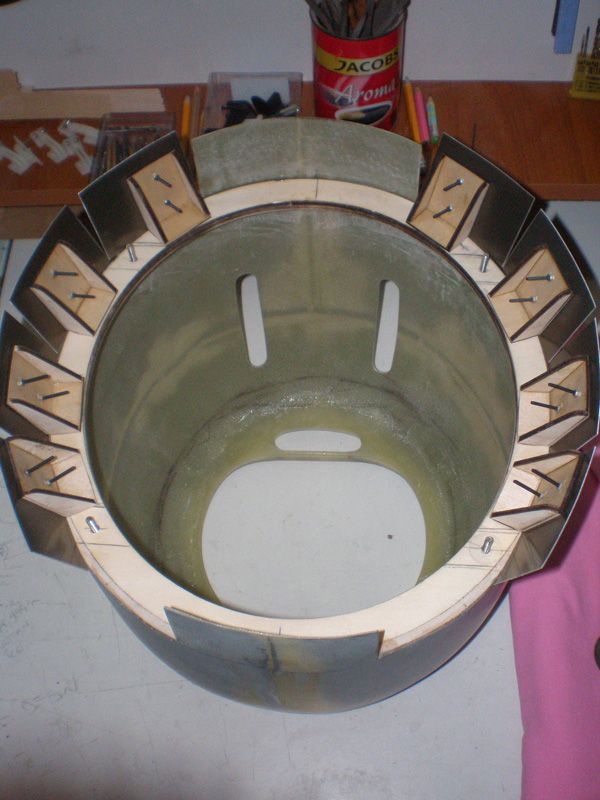
Wooden carriers are glued on cowl ring and flaps are very solid...
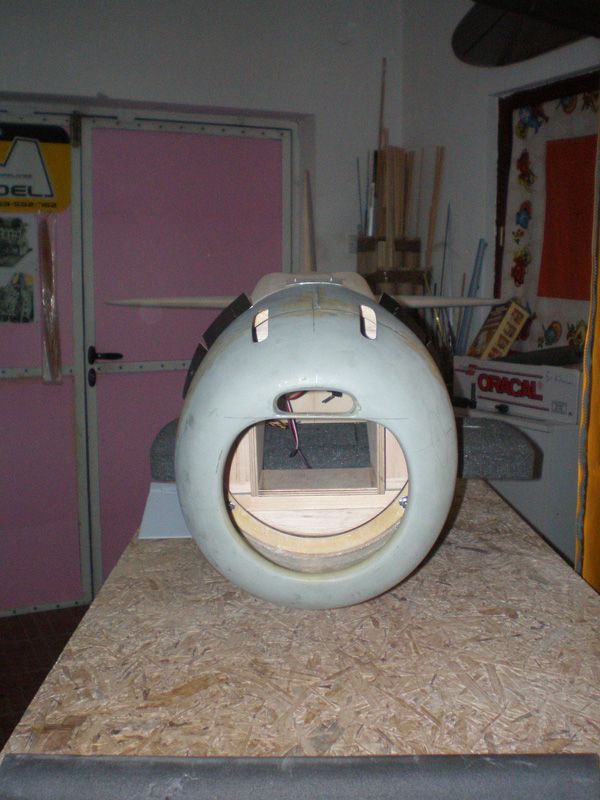
From rear side hole is big, so there will not be problem with engine overheat...


In last two weeks I was glassing parts from all my projects. There was parts from Ziroli P 38 Lightning, from Zero and from my new jet model Galeb G2.
I used 25 gr glass cloth and German R&G epoxy resin. For better drying I used my famous "autoklav"...
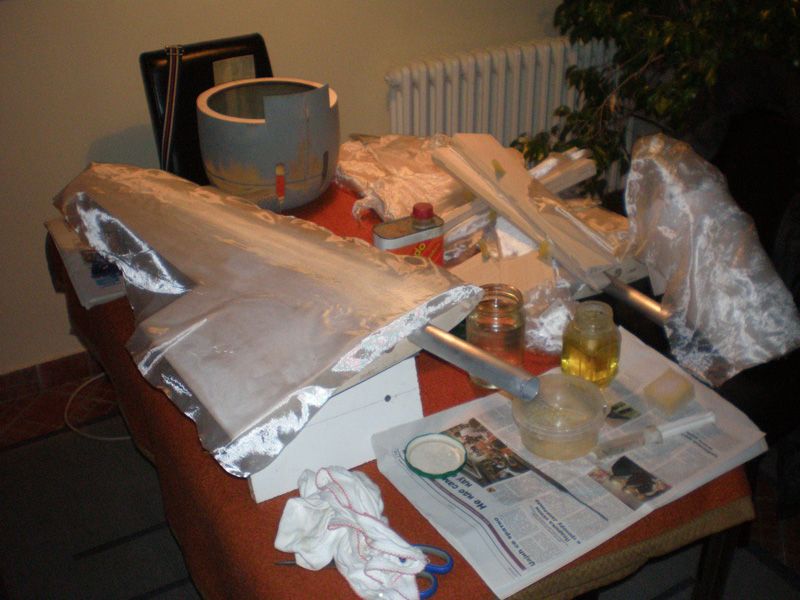

For complete process I need 4 days. First day I add glass on first side of the part, tomorrow glass on other side, third day I put one thin layer of just epoxy resin on first, and finally at forth day epoxy is apply on other side of the part.
Of course, in mean time I sand slightly every surface...
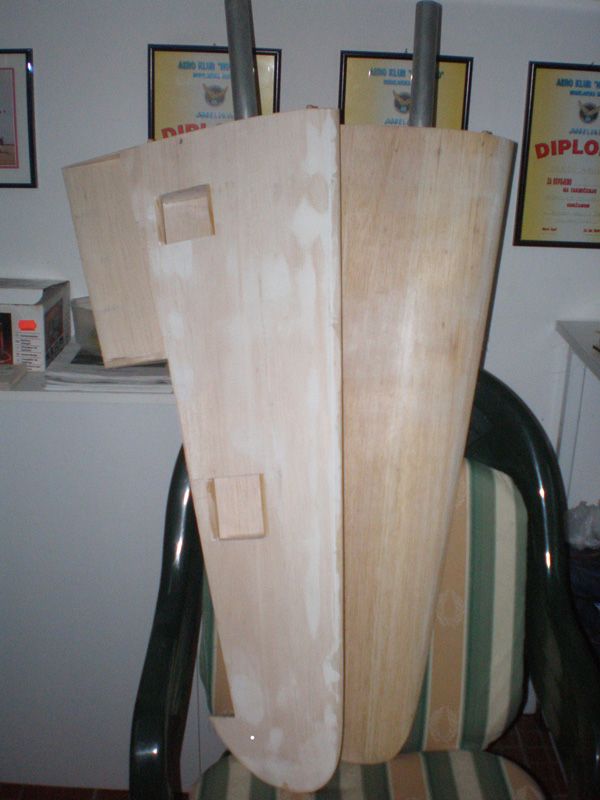
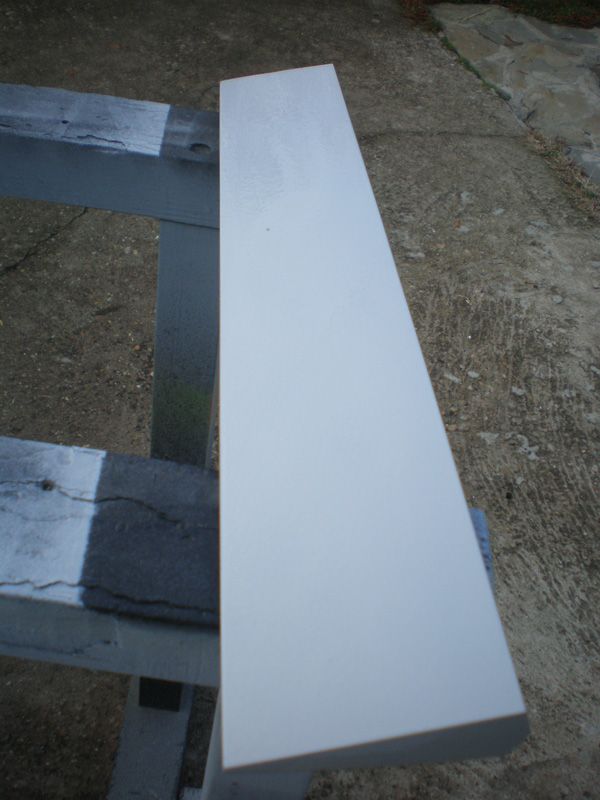
Final sanding was made with sand paper grade 100 and 240... After that I add acrylic filler.
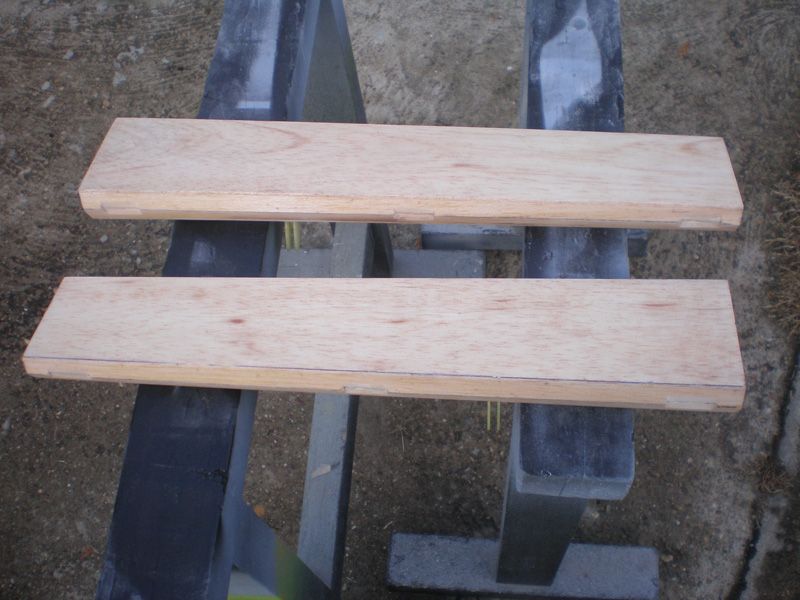
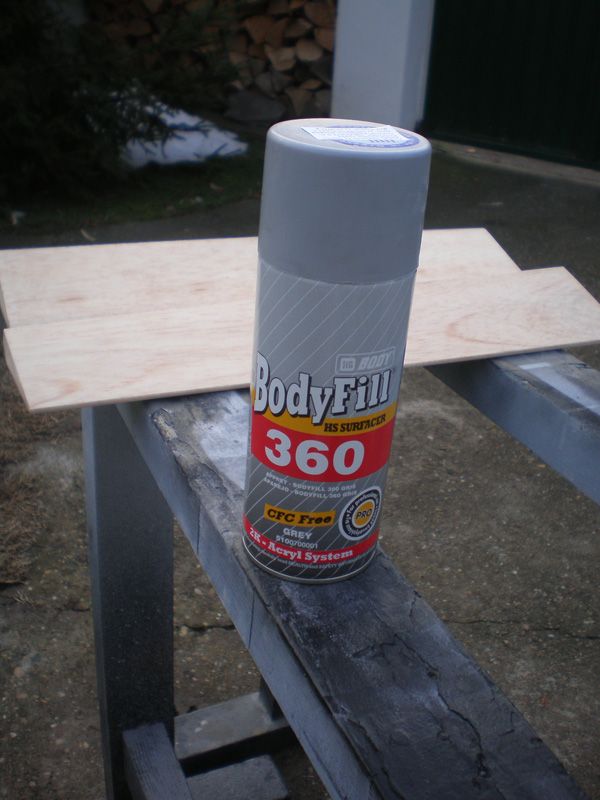
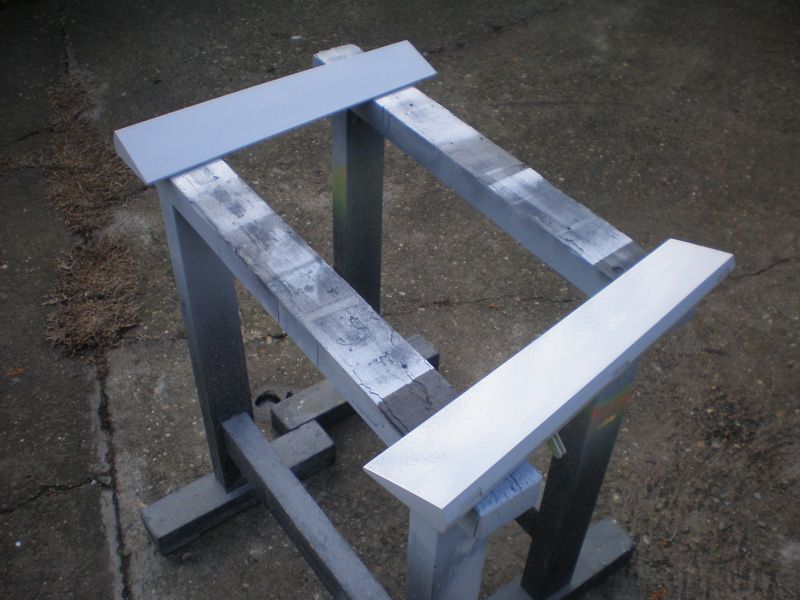
Today was sunny, but cold day. Sanding warmed me...
Make no mistake, this are wing tips from P 38 - Lightning...
OK, that's all for this year...
Happy New Year and all the best in 2013 wish to you
Mirce
So, for now I wasn't made it...
Wooden carriers are glued on cowl ring and flaps are very solid...
From rear side hole is big, so there will not be problem with engine overheat...
In last two weeks I was glassing parts from all my projects. There was parts from Ziroli P 38 Lightning, from Zero and from my new jet model Galeb G2.
I used 25 gr glass cloth and German R&G epoxy resin. For better drying I used my famous "autoklav"...
For complete process I need 4 days. First day I add glass on first side of the part, tomorrow glass on other side, third day I put one thin layer of just epoxy resin on first, and finally at forth day epoxy is apply on other side of the part.
Of course, in mean time I sand slightly every surface...
Final sanding was made with sand paper grade 100 and 240... After that I add acrylic filler.
Today was sunny, but cold day. Sanding warmed me...
Make no mistake, this are wing tips from P 38 - Lightning...
OK, that's all for this year...
Happy New Year and all the best in 2013 wish to you
Mirce
02-13-2013, 07:51 AM
#63
Thread Starter
I saw that almost one and the half months wasn't write nothing about my Zero project. Here in Serbia winter is in full swing, so I'm get a little lazy. I was working on Zero, but not so much. Here is "report"...
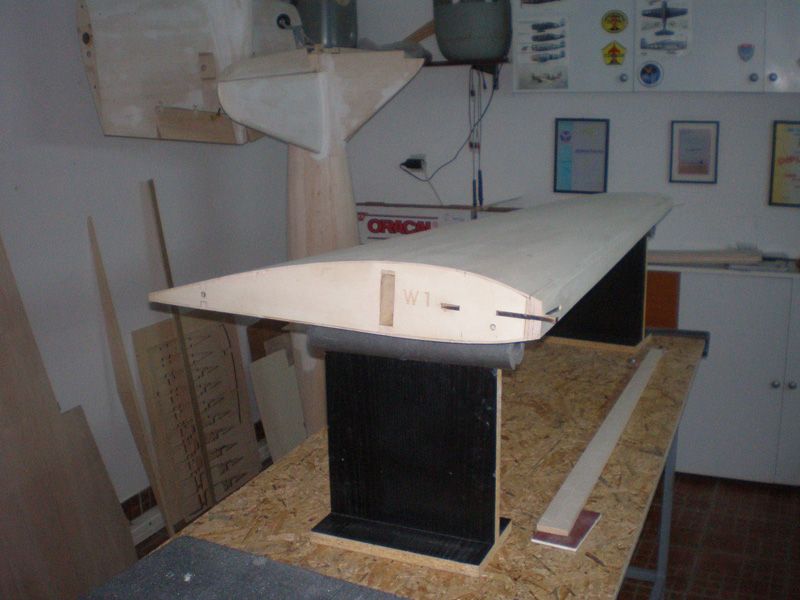
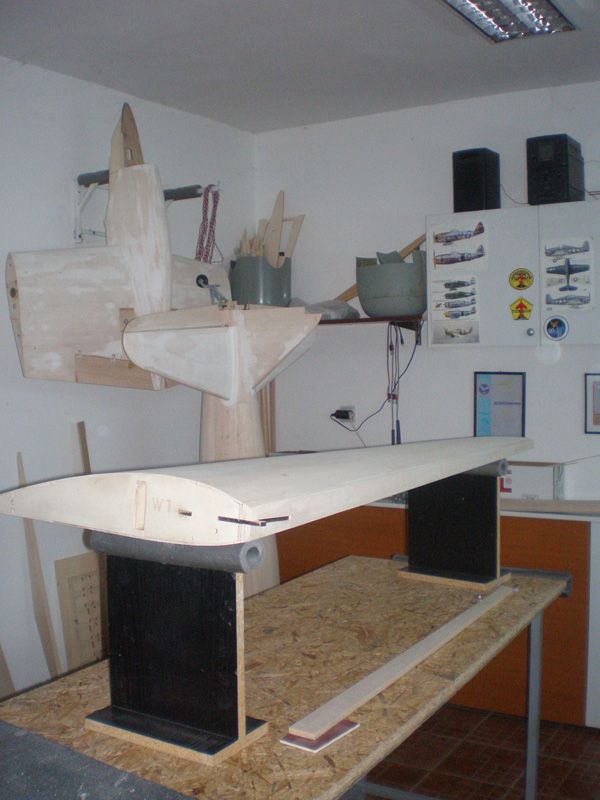
Meister Scale Zero is a huge model. In some steps you need many times to put wing on fuselage, or just to go around of it and you will get tired from walking...
When you working on model some steps in building are fast, but from time to time you work many days and almost nothing have to show.
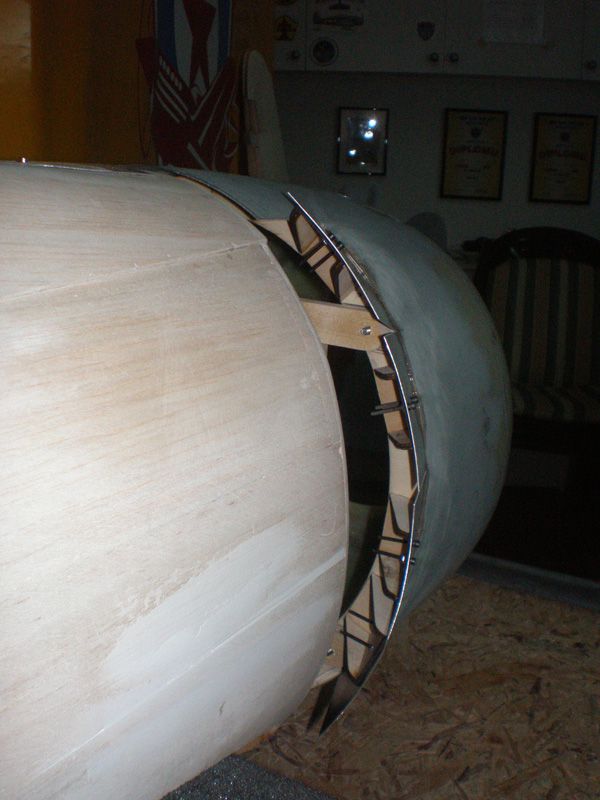
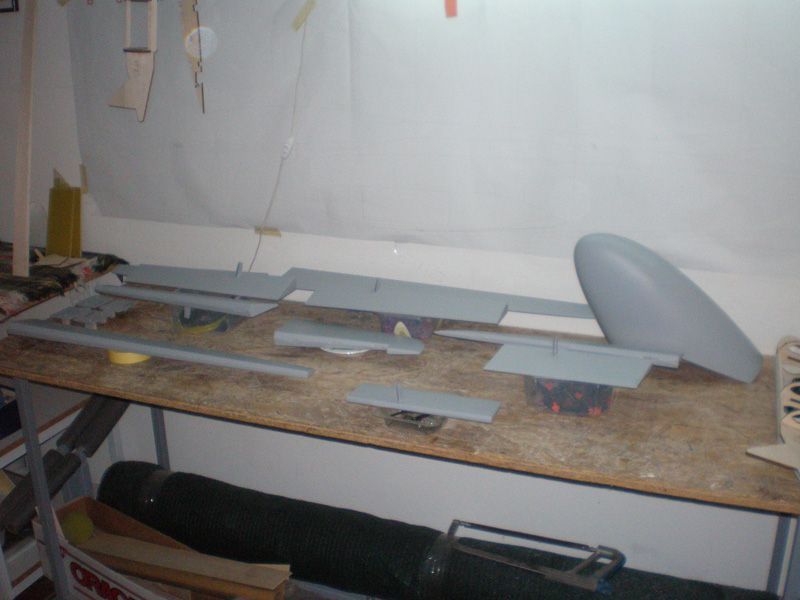
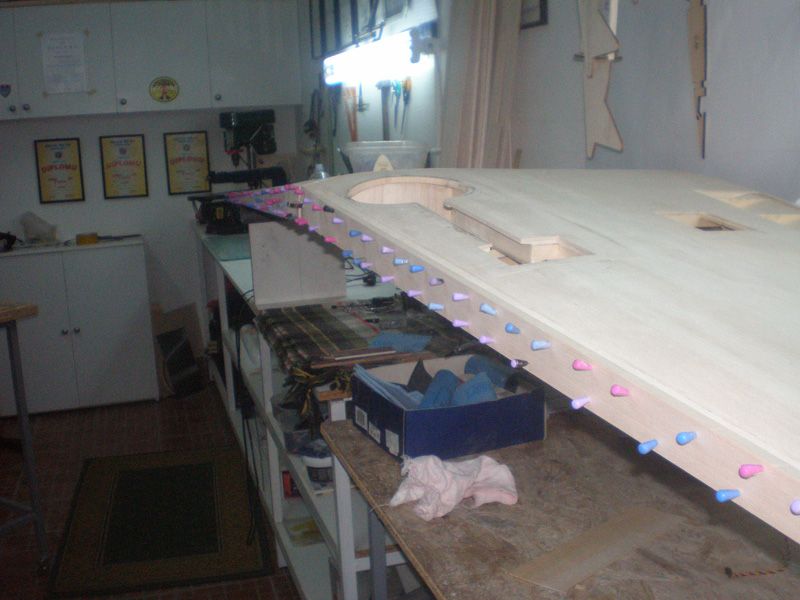
After New Year I put wing on fuselage and start finishing leading edge. LE is 25 mm thick, and I glued one 5 mm balsa plate, after that 10 mm balsa and finally one more 10 mm. This last I must glued with wing on the fuselage. That is because I must made connection between wing and fuselage...
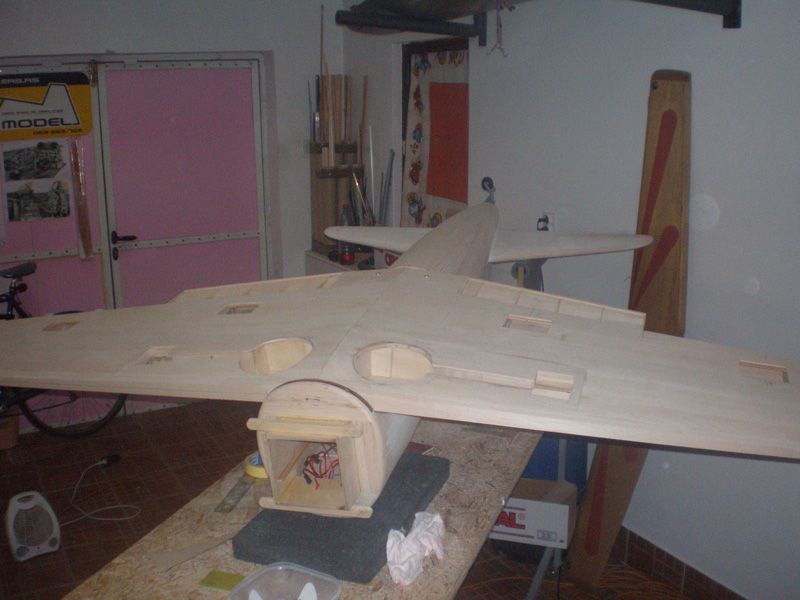
Same at the rear of the wing...
Next step was to glue ply for the bottom side of the fuselage transition...
Trough wing and big wooden part inside of the fuselage I made hole for screws. Because hard wood blocks in fuselage are with angle I must made two parts for blind nuts...
For more security I add one ply triangle...
From the bottom wing side I made transit from cowl to the wing...

Similar procedure was on the rear side of the wing. But here I have more to work with filler and sand paper...


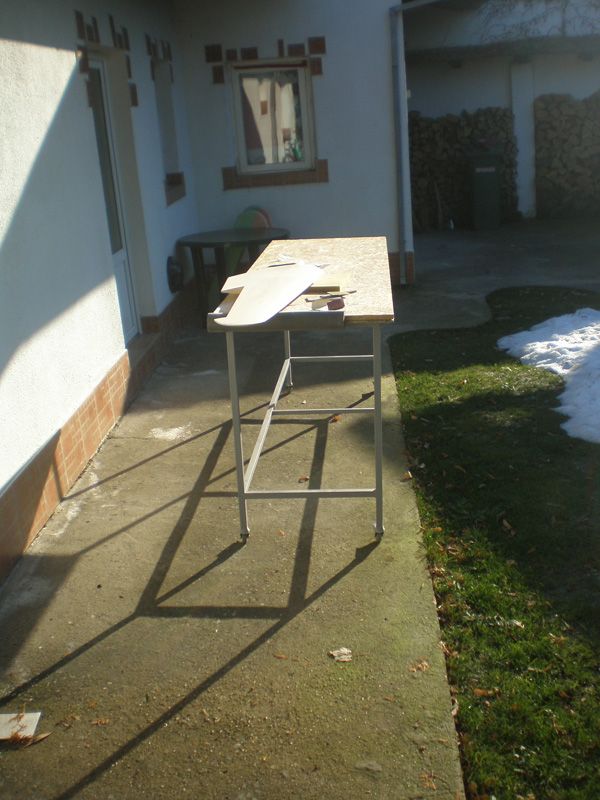
After this I turn around model. It's not easy, Zero is huge and you need help. I can't turn it in the workshop, so I must take model outside, turn it and bring it back inside on the worktable...
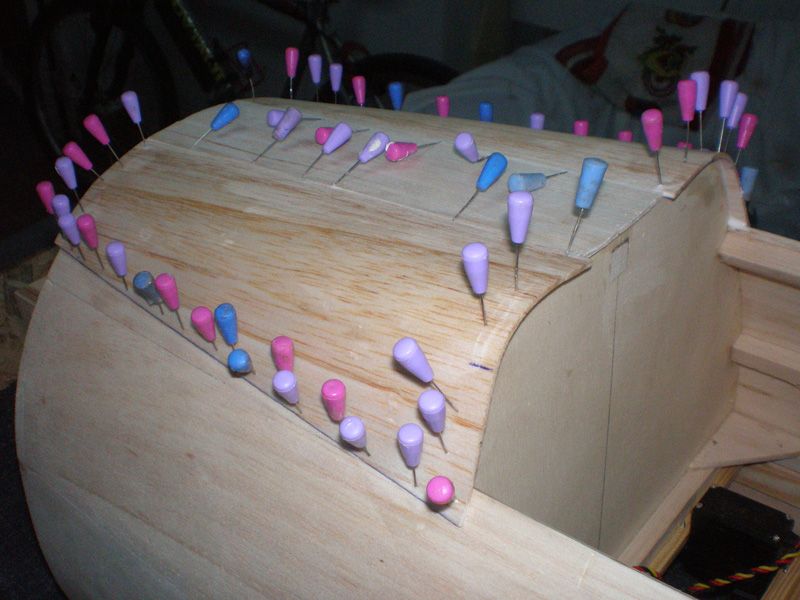
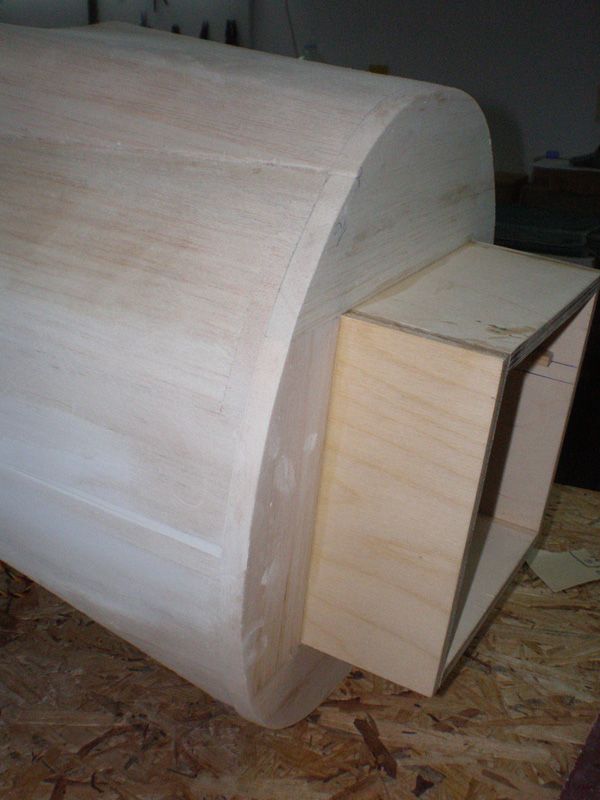
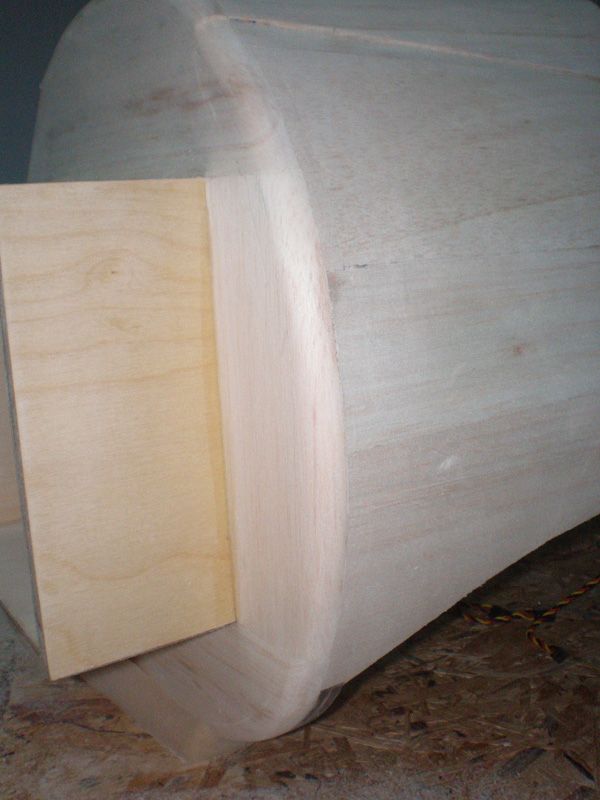
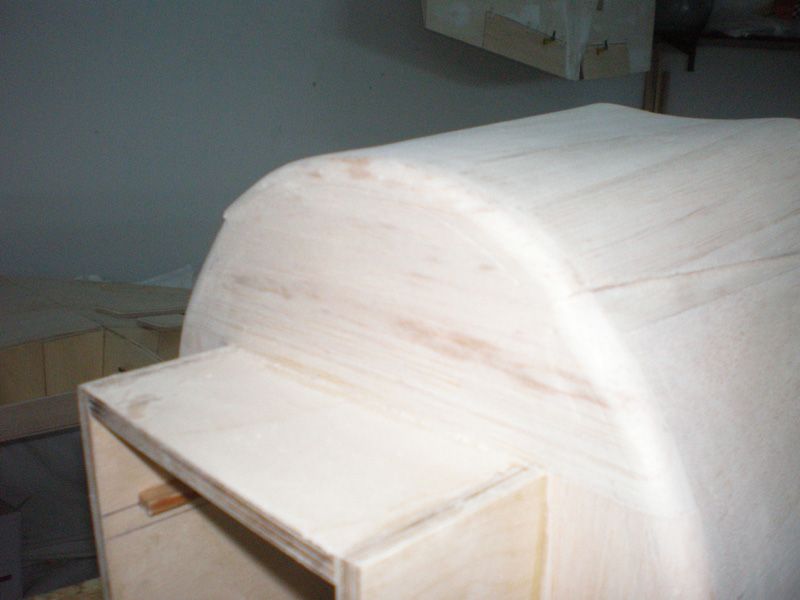
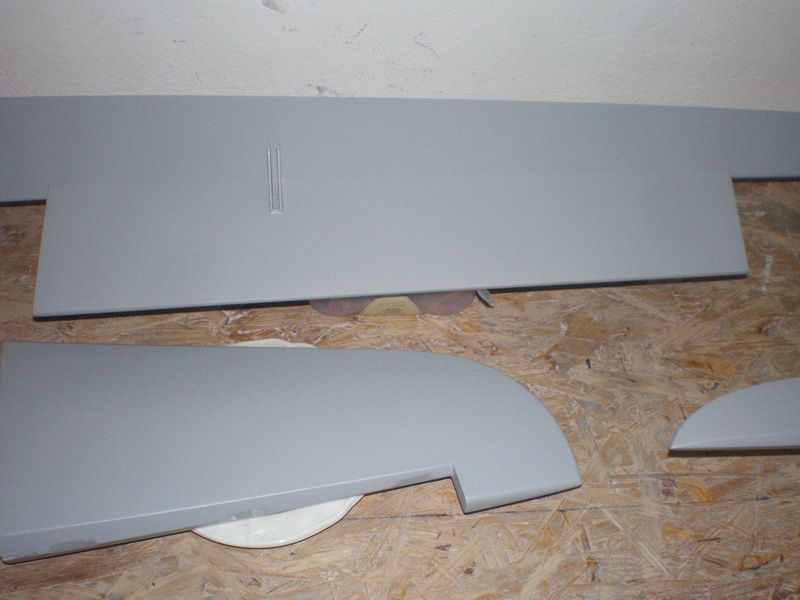
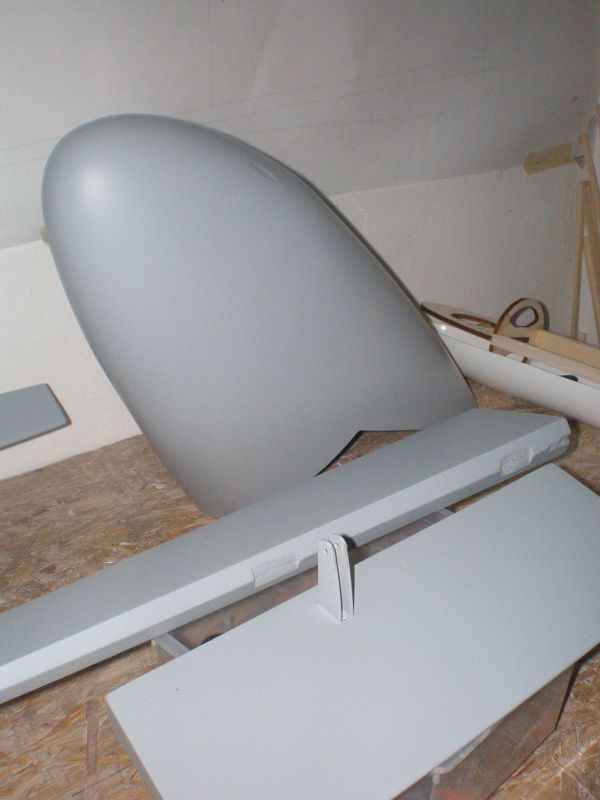
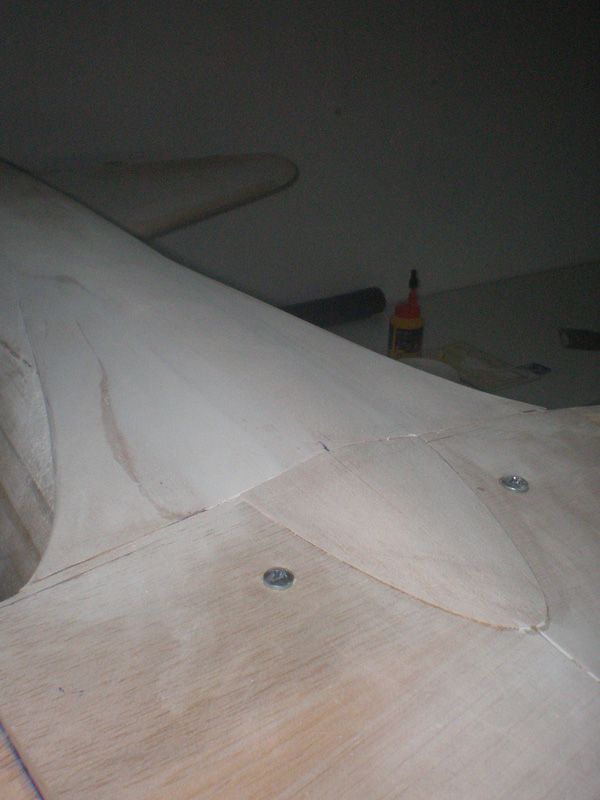
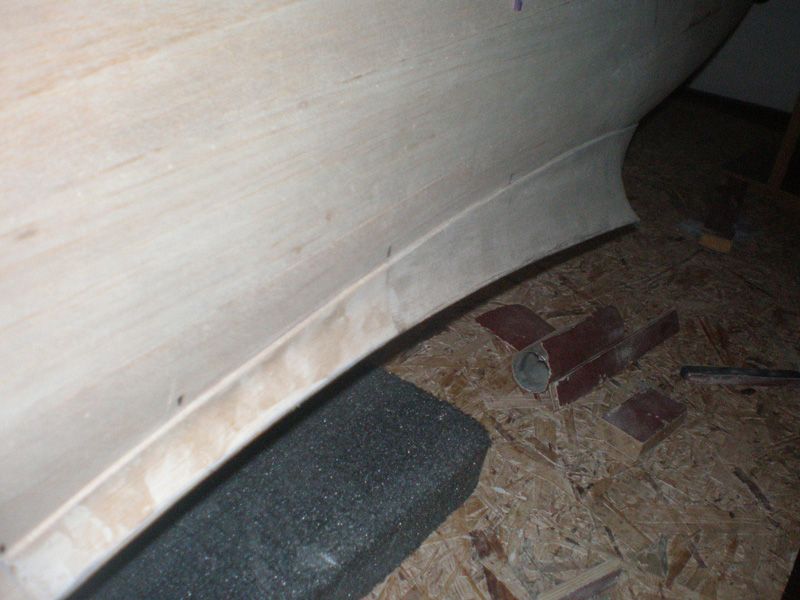
Then I start my work on fuselage - wing transit...
First I glue rear part. It's specific shape, so I need to put balsa parts in the hot water for easier molding. All parts are made from 2 mm balsa...
For getting better shape I used balsa stripe and cardboard template...

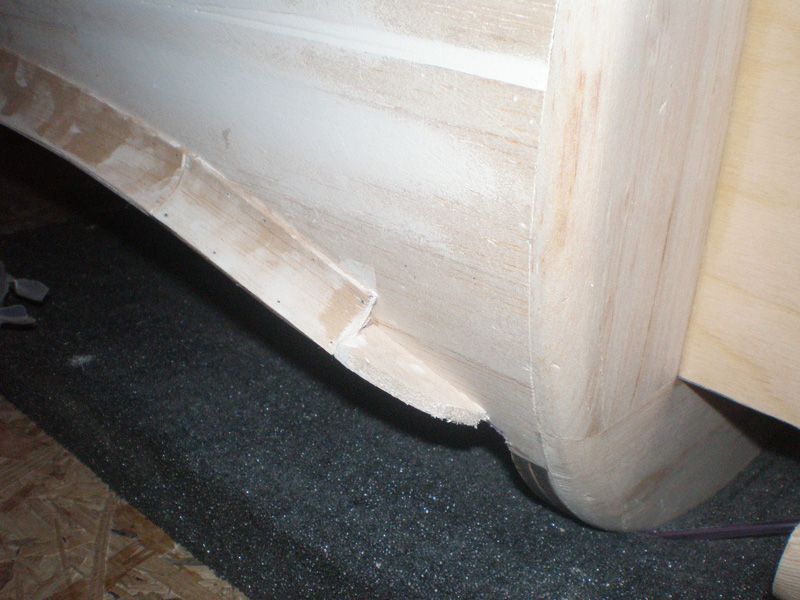
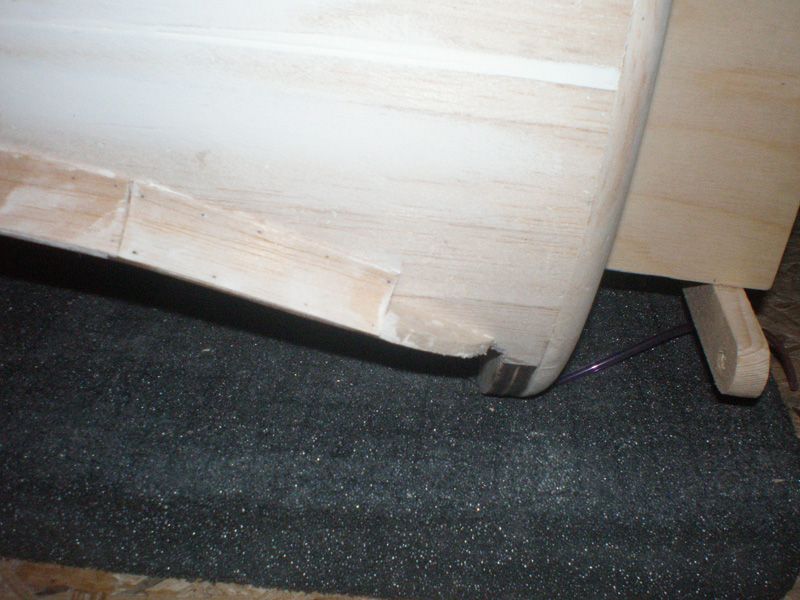
Then I made few small ribs and finally start to made and glued balsa parts...

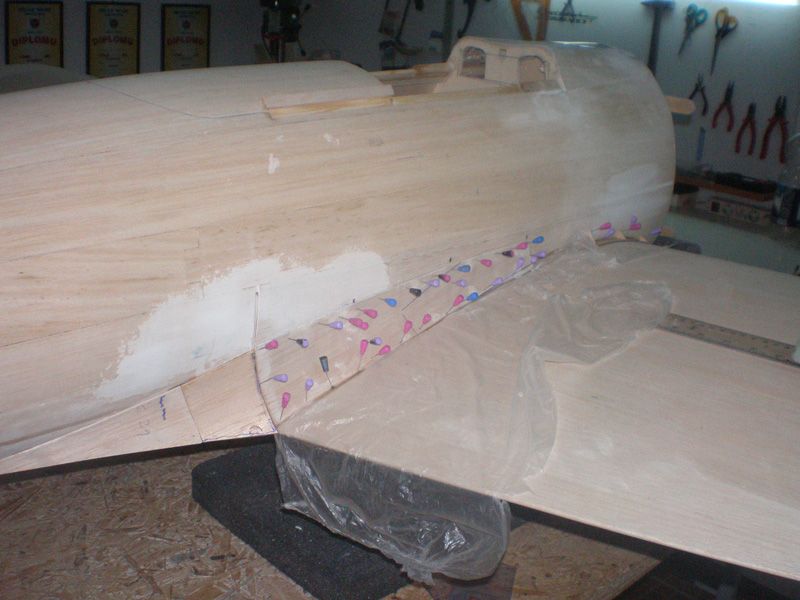
I was working parallel on both side...
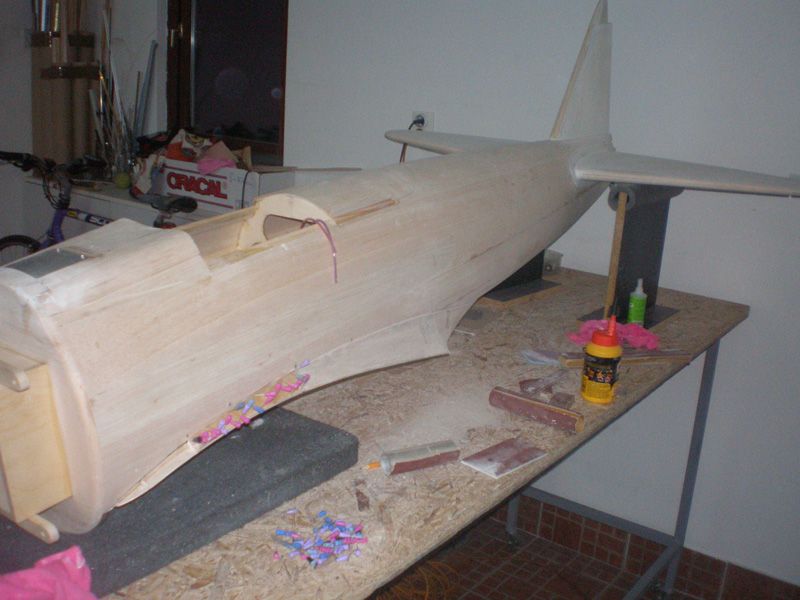
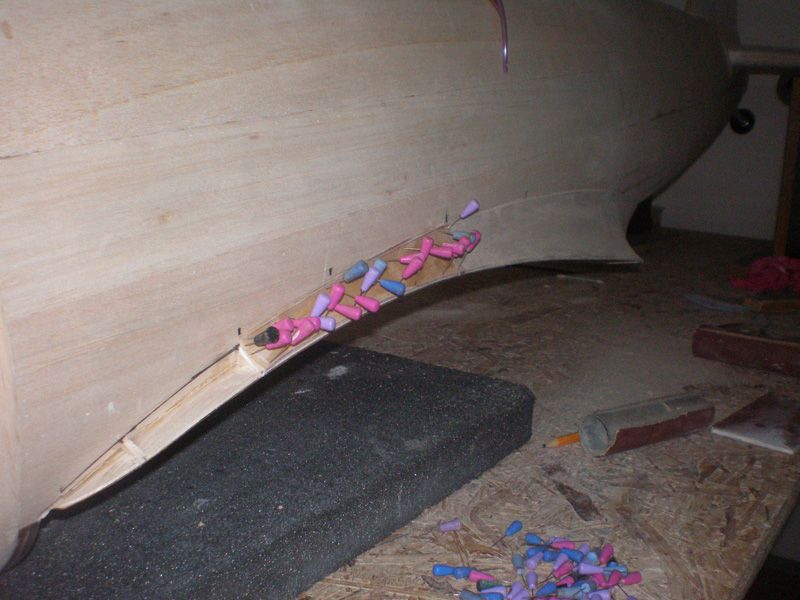
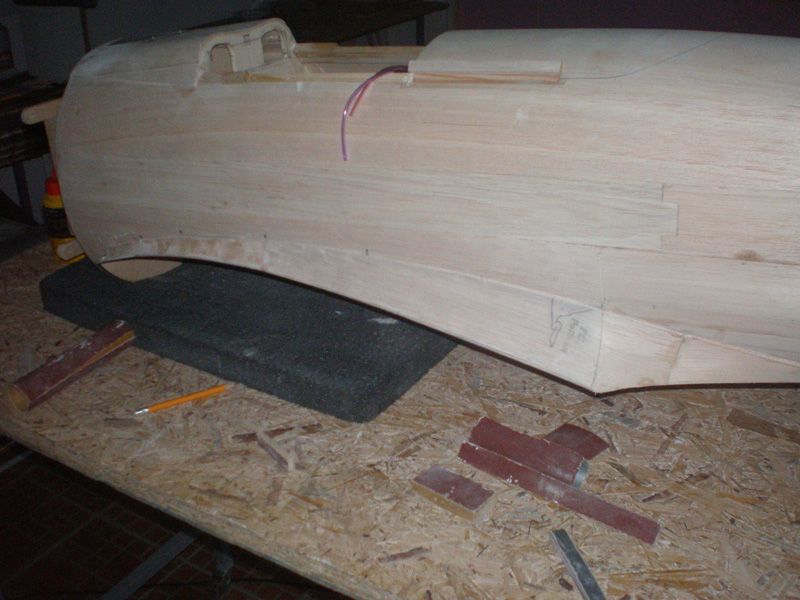
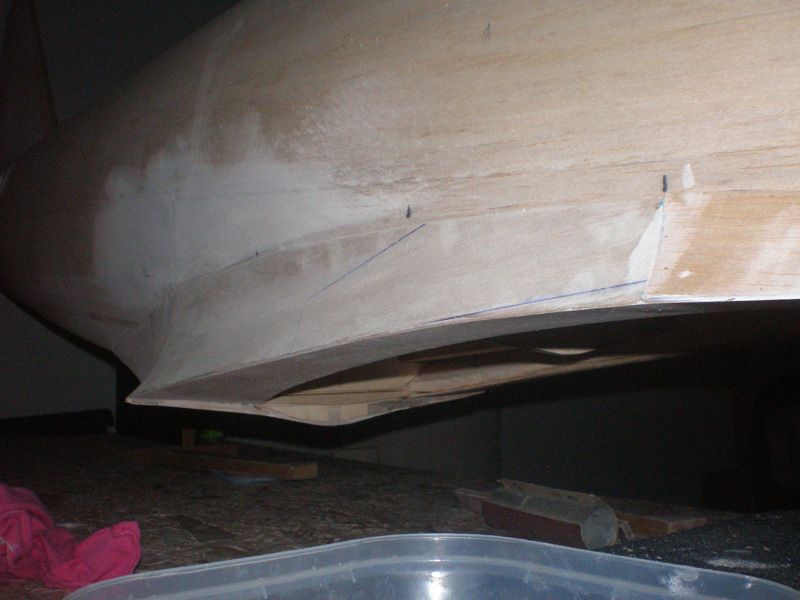
In front I used balsa piece, which will be shaped latter...
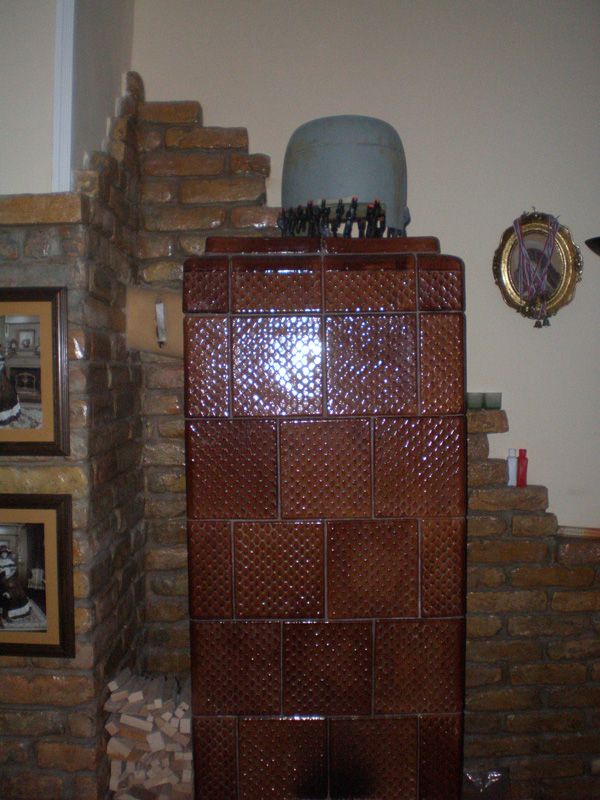
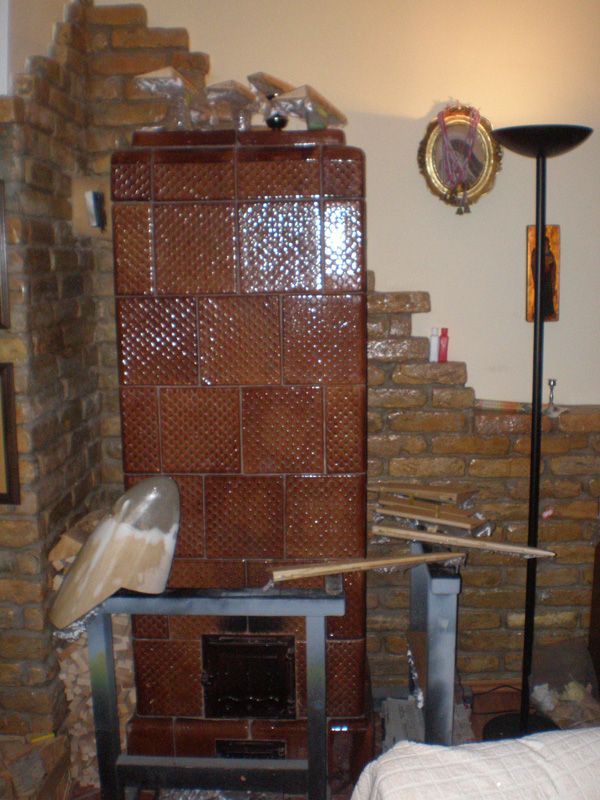
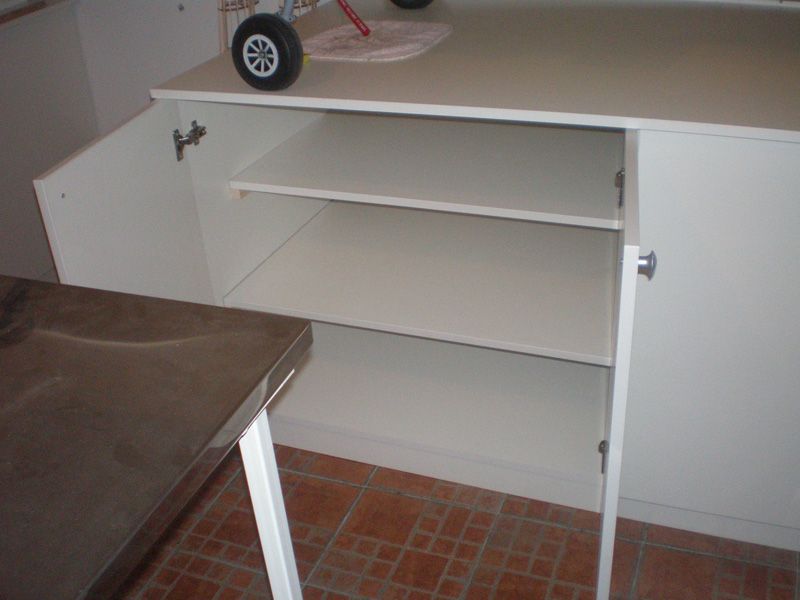
In mean time I made new look for my room in which I hold my models. My friend made me new stands with a lot of space in it...

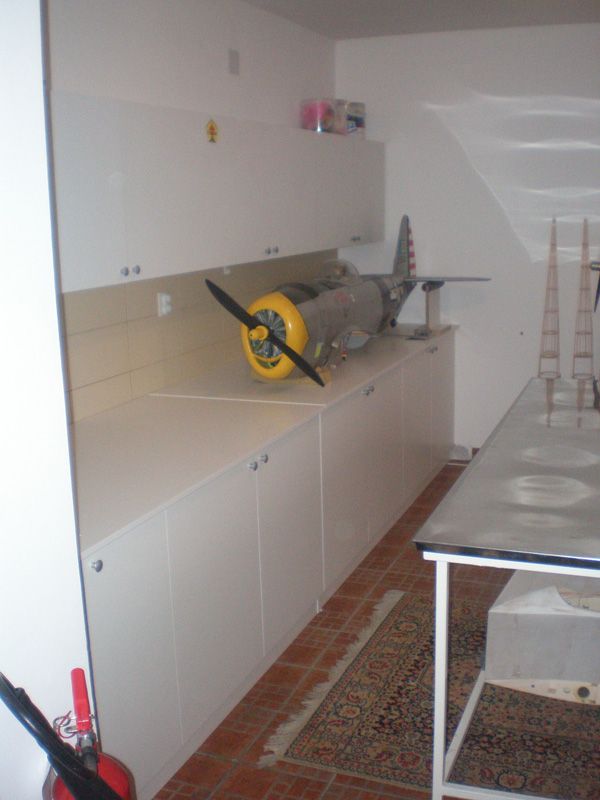

Jet is on old place...
e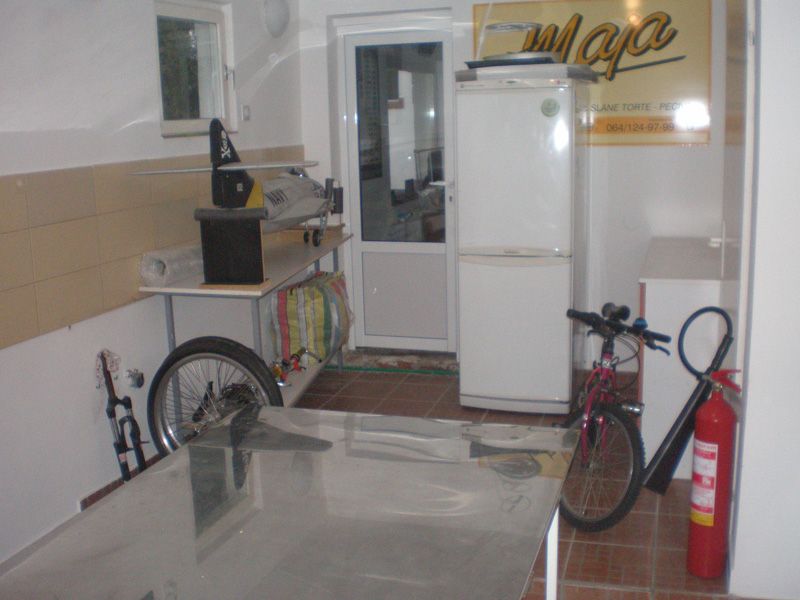
Inside of stand I have now a lot of place for all parts and other things...
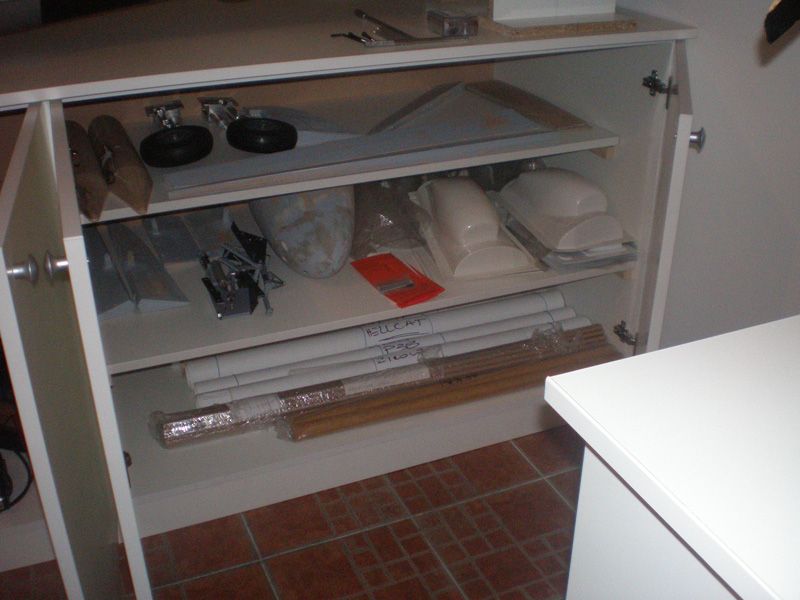
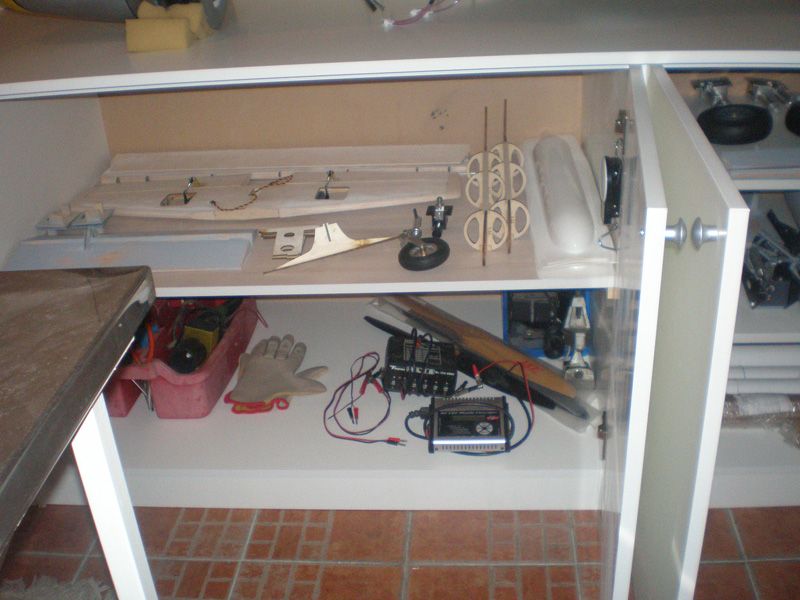
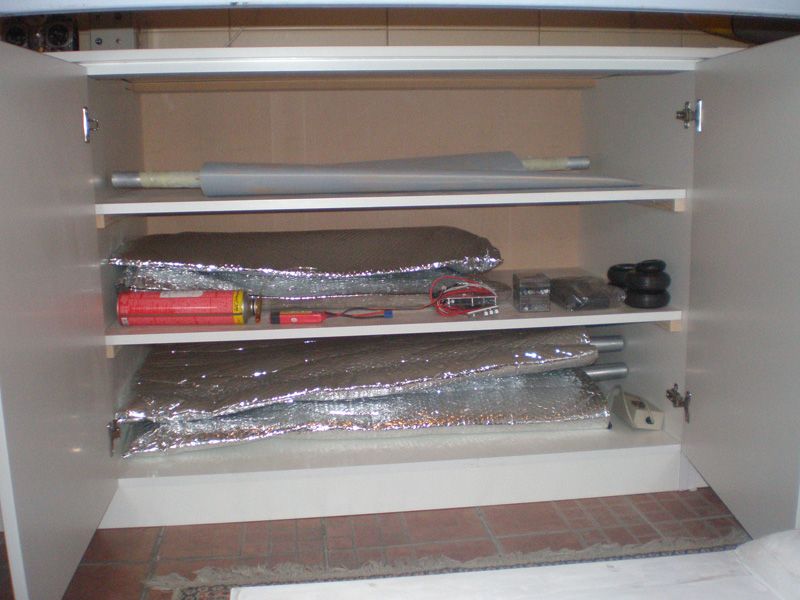

My products are also inside...

And some are empty for now...
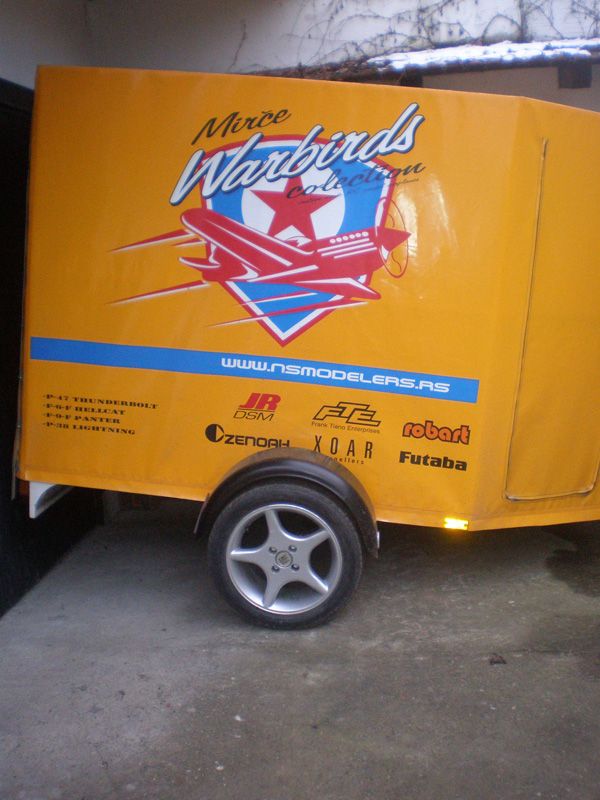
Preparing for new seasons started, my friend put fenders on my trailer. I want to visit few scale meetings in neighboring countries and now my trailer ready for travel...

That's all for now my friends...
Best regards
Mirce
Meister Scale Zero is a huge model. In some steps you need many times to put wing on fuselage, or just to go around of it and you will get tired from walking...
When you working on model some steps in building are fast, but from time to time you work many days and almost nothing have to show.
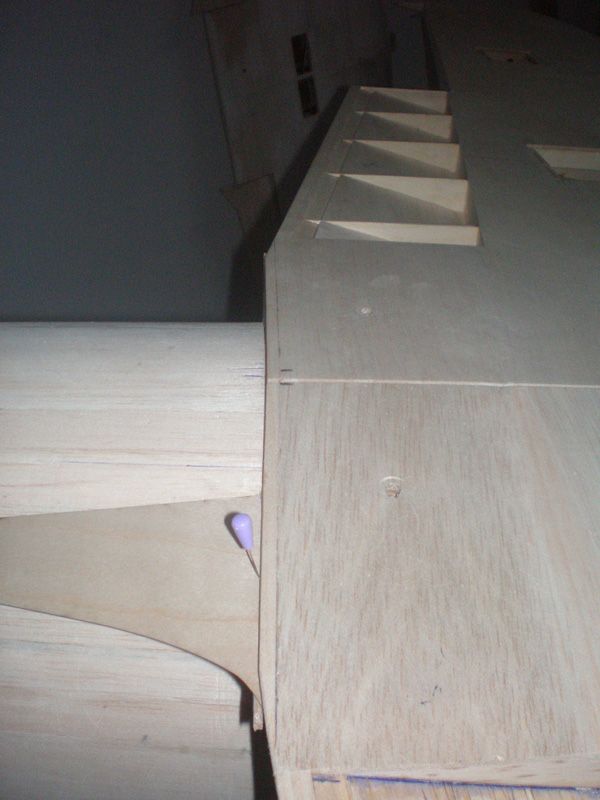
After New Year I put wing on fuselage and start finishing leading edge. LE is 25 mm thick, and I glued one 5 mm balsa plate, after that 10 mm balsa and finally one more 10 mm. This last I must glued with wing on the fuselage. That is because I must made connection between wing and fuselage...
Same at the rear of the wing...
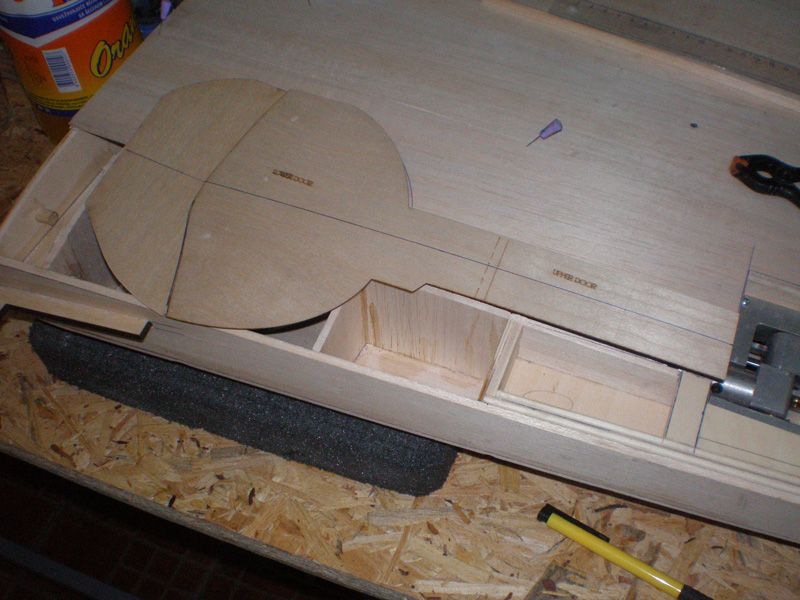
Next step was to glue ply for the bottom side of the fuselage transition...
Trough wing and big wooden part inside of the fuselage I made hole for screws. Because hard wood blocks in fuselage are with angle I must made two parts for blind nuts...
For more security I add one ply triangle...
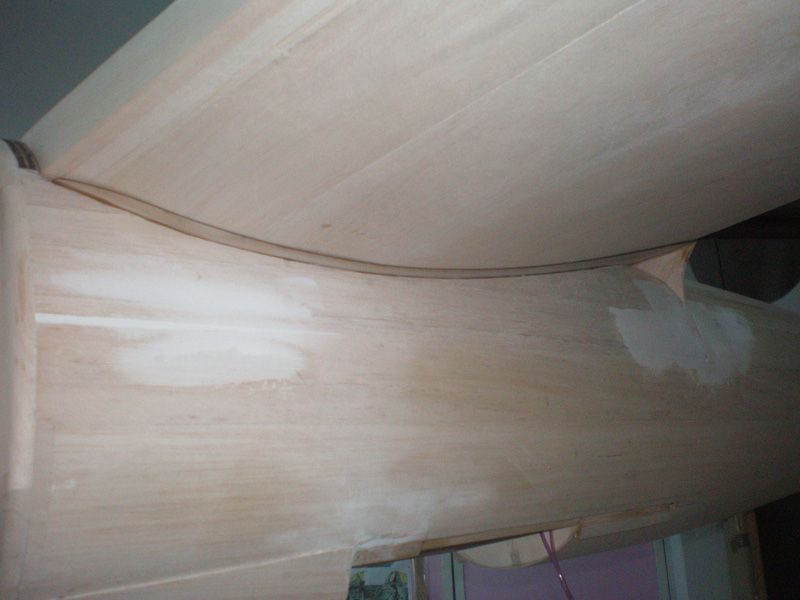
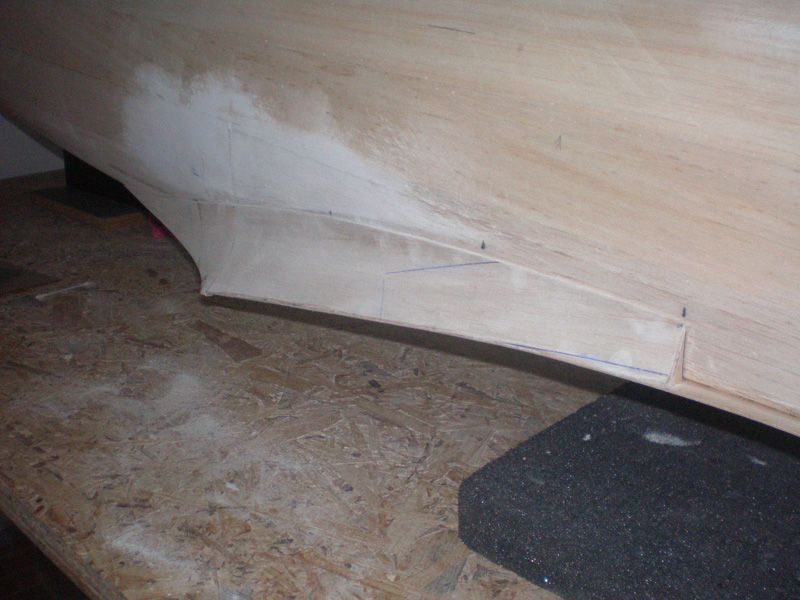
From the bottom wing side I made transit from cowl to the wing...
Similar procedure was on the rear side of the wing. But here I have more to work with filler and sand paper...
After this I turn around model. It's not easy, Zero is huge and you need help. I can't turn it in the workshop, so I must take model outside, turn it and bring it back inside on the worktable...
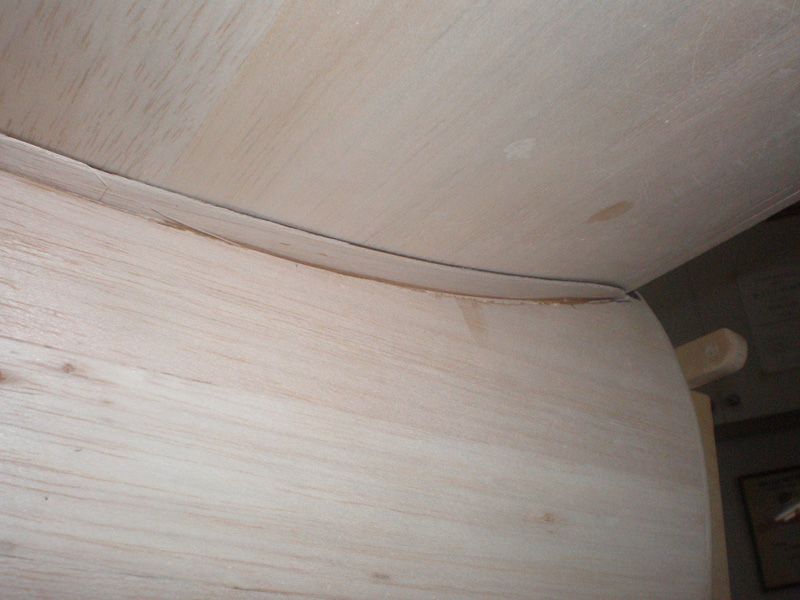
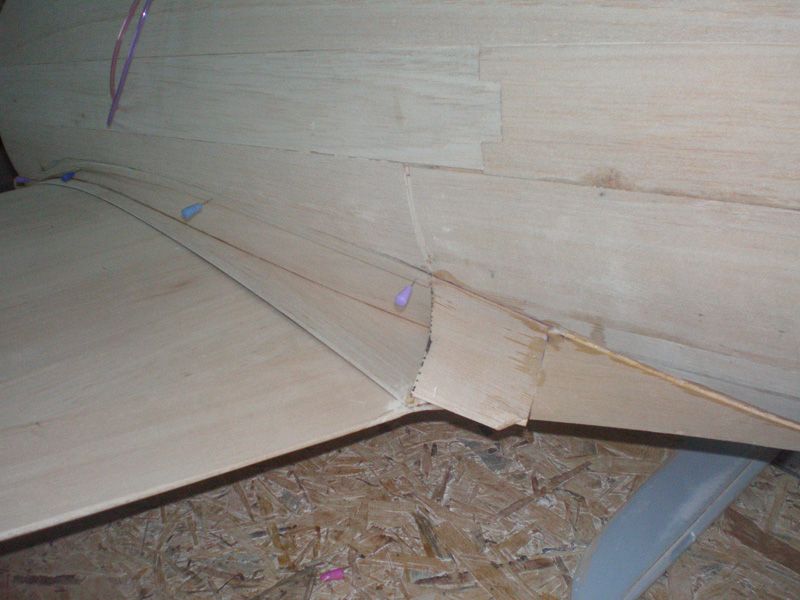
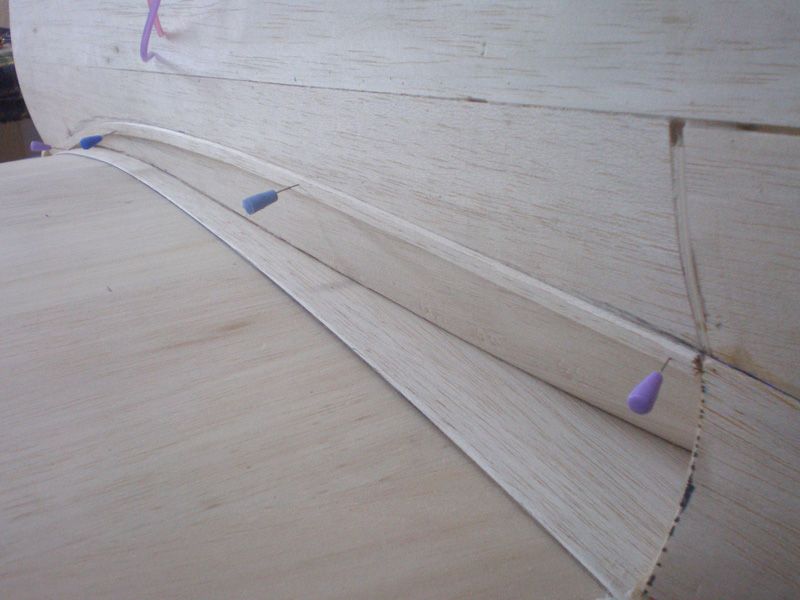
Then I start my work on fuselage - wing transit...
First I glue rear part. It's specific shape, so I need to put balsa parts in the hot water for easier molding. All parts are made from 2 mm balsa...
For getting better shape I used balsa stripe and cardboard template...
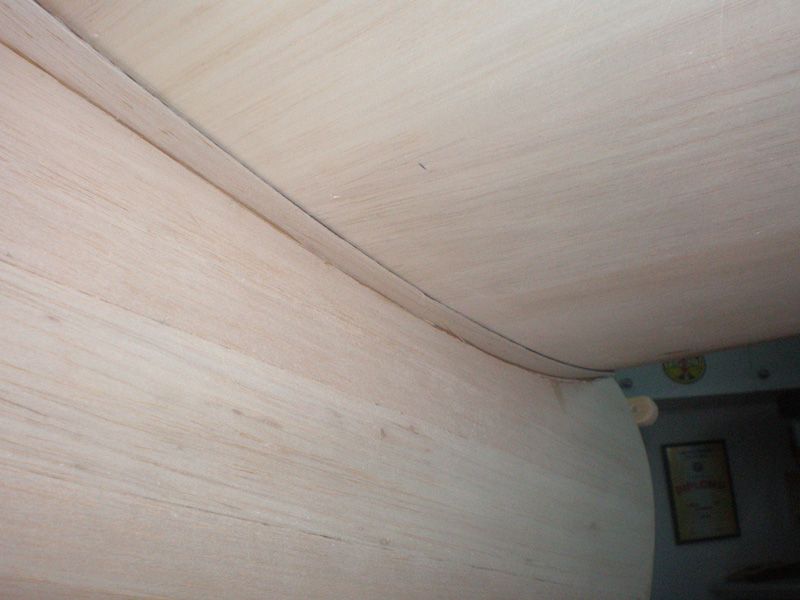
Then I made few small ribs and finally start to made and glued balsa parts...
I was working parallel on both side...
In front I used balsa piece, which will be shaped latter...
In mean time I made new look for my room in which I hold my models. My friend made me new stands with a lot of space in it...
Jet is on old place...
e
Inside of stand I have now a lot of place for all parts and other things...
My products are also inside...
And some are empty for now...
Preparing for new seasons started, my friend put fenders on my trailer. I want to visit few scale meetings in neighboring countries and now my trailer ready for travel...
That's all for now my friends...
Best regards
Mirce
02-13-2013, 08:29 AM
#64
Great to hear from you Mirce. Good looking work on the Zero. Looking forward to seeing you soon I hope. Keep the fire burning.....stay warm my friend.
Best wishes from USA
Best wishes from USA
02-13-2013, 08:42 AM
#66
Thread Starter
Thanks Scott...
Unfortunately this year I'll not come on Top Gun.
My plan is that this year start my new project: 1/4 scale of Galeb G2 jet model. Because size, fuselage will be from two pieces, and wing will be center panel with two wing tips. Elevators will be removable also. All that is for easier transportation.
I hope that to the end of this year 3D drawings will be made, at next winter to made model, fly it trough 2014, and maybe at 2015 come on Top Gun , but now with model...
Plan is ambitious, we will see...
Glad to hear you my friend
Mirce
02-13-2013, 08:48 AM
#67
Thread Starter
Dino... Where are you all this months... Glad to hear you, thanks for reply...
You know me, I'll give my best, so this model will be at same level like all my I made before. I want to put Moki 150 on it. That will be next level for me in warbird story.
Paint scheme will be as always something unusual...
Regards
Mirce
You know me, I'll give my best, so this model will be at same level like all my I made before. I want to put Moki 150 on it. That will be next level for me in warbird story.
Paint scheme will be as always something unusual...
Regards
Mirce
 02-14-2013, 01:14 AM
#71
Thread Starter
Thanks Trevor on kind words...
Gary, canopy rails are from furniture industry...
Dino, you are like Big Brother - nobody see you but you watch on us, he, he...
Right now I'll start to trip to Hungary capital - Budapest.
Tomorrow I'll visit modeler who made this fantastic jet model: http://www.rcuniverse.com/forum/m_11...m.htm#11307834
Can't wait...
Regards
Mirce
02-14-2013, 08:34 AM
#72
Member
Join Date: Aug 2011
Location: Texas TX
Posts: 70
Likes: 0
Received 0 Likes
on
0 Posts
Wow... That's an amazing Mig! Would you please ask him to explain in detail how he was able to make each and every rivet so perfect...
Really enjoying this build and watching your craftsmanship...
Really enjoying this build and watching your craftsmanship...
02-14-2013, 07:26 PM
#73
ORIGINAL: mirce
Thanks Trevor on kind words...
Gary, canopy rails are from furniture industry...
Dino, you are like Big Brother - nobody see you but you watch on us, he, he...
Right now I'll start to trip to Hungary capital - Budapest.
Tomorrow I'll visit modeler who made this fantastic jet model: http://www.rcuniverse.com/forum/m_11...m.htm#11307834
Can't wait...
Regards
Mirce
02-15-2013, 03:02 PM
#74
Thread Starter
BeasleyBunch, I will explain how to made model like that Mig 15...
Many times you have to go airfield or in some museum and made thousands of pictures. On many of them you must use meter for measure. Than, made documentation about every, every, every detail...
Next steps are to use some 2D and 3D programs and draw everything... Than you need to have knowledge how to made first model, than from it take all molds (about 40 different for this jet model)...
All in all, invest cost about 5 years of your life and a lot of thousands $$$$...
Only modeler who made some scale model know how many time is needed to made great model. I have today opportunity to see some pictures of real Mig 15 and that details on the model. Not only position, number and size of every rivet, panel or screw is same like on the photos. This is art...
Other thing, when you see it live, you get real dimension how big is that model... Mig is huge...
This Mig 15 is masterpiece, top level in full composite models. I have opportunity to see many great model on Top Gun and some other meetings, and this Mig is for sure in top 5 I ever see...
Regards
Mirce
02-15-2013, 03:22 PM
#75
Member
Join Date: Aug 2011
Location: Texas TX
Posts: 70
Likes: 0
Received 0 Likes
on
0 Posts
Thanks, Mirce... Top 5 that you have ever seen is pretty impressive! I have looked closely at the photos again and you are correct...it is art work. I guess my question was really about what "technique" he used to actually make each rivet and not necessarily how he made the mold/model. I am building a FW 190 and am new to large scale birds, so I'm always interested in the different techniques out there. I would love to pick his brain regarding how he made each rivet so perfect. Most modelers use a soldering iron with a brass tube to burn a circle in the primer...and this looks nice, but not anything like what he did on this Mig. So, that is really what I was interested in... How he made each rivet so perfect.
Sorry to push your thread in a different direction... What do you think he will charge for one??
Sorry to push your thread in a different direction... What do you think he will charge for one??