Large scale Luftwaffe/Axis forum..
 02-12-2013, 11:47 AM
#126

My Feedback: (10)

Join Date: Sep 2004
Location: Displaced Canadian in Central Texas TX
Posts: 2,601
Likes: 0
Received 0 Likes
on
0 Posts
If you did use a retractable Tail Wheel, which would be lighter: Pnuematic Retract or Mechanical retract with Servo mounted up front?
 02-12-2013, 02:07 PM
#127

The retracting tailwheel really kills the 190's balance!
With the 1/5 sierra unit, getting rid of 2/3 the weight of the tailwheel by going to a non retracting version (essentiall saving 3-4oz of weight) gets rid of nearly 1 pound of necessary nose weight.
I have been thinking of doing another 190 and have been eye balling the meister 190D with the glass fuse...
 02-12-2013, 03:23 PM
#130
Now that I think of it, Lenny over at Shindinmachine.com, makes a really nice non-retracting tail wheel. I actually have it on my Holman FW190. Here is the same version but retracting, they're identical.
02-12-2013, 04:38 PM
#131
It has been stated by David Andersen that as it pertains to the TA 152 H, the tail wheel did not retract on the models delivered for service. It seems they had problems getting them to operate properly. I am not sure where he saw this documented, but he said he has it! So, this may be a saving grace for this aircraft anyway, and now you guys have me thinking that I may omit my retractable tail wheel.
02-12-2013, 05:37 PM
#132
My Feedback: (10)
Join Date: Sep 2004
Location: Displaced Canadian in Central Texas TX
Posts: 2,601
Likes: 0
Received 0 Likes
on
0 Posts
Just need to find a source and method for a Non-retracting Tail Wheel for the FW190 and in particular the TF Model; that one from Shindinmachine looks promising.
02-12-2013, 07:02 PM
#133
I have read it was fairly common practice for the retracting tail-wheel to be disabled late in the war due to the increased complexity and decreased supplies. Unless you just absolutely HAVE to have it (or can lose the weight in the tail during the build to make up for it) i would highly recommend to do away with the retracting tail-wheel. that said though, it is pretty cool!
02-12-2013, 07:54 PM
#134
Senior Member
Join Date: Jul 2006
Location: Lima,
OH
Posts: 110
Likes: 0
Received 0 Likes
on
0 Posts
One thing to remember on the 152 vs. the 190's, the 152 tailwheel was hydraulically operated and not in the old cable and pulley sytem of the A/D/F. I am guessing that there were lots of issues all around with this stuff on the 152, in reading it sounded like lots of things never quite worked as advertised, at least in what Willie Riesh (sp) wrote in his book.
I must admit that on my current and first 190, I cannot imagine not having the rear retract on board. I will say I bought a wheel from Dino that saved me an ounce off my original, so I will be thankful for that.
Marc
I must admit that on my current and first 190, I cannot imagine not having the rear retract on board. I will say I bought a wheel from Dino that saved me an ounce off my original, so I will be thankful for that.
Marc
02-12-2013, 08:21 PM
#135
Senior Member

ORIGINAL: dasintex
If you did use a retractable Tail Wheel, which would be lighter: Pnuematic Retract or Mechanical retract with Servo mounted up front?
If you did use a retractable Tail Wheel, which would be lighter: Pnuematic Retract or Mechanical retract with Servo mounted up front?
There is also the option of using the electric retract & mounting the acuator up front where the servo would be.
02-13-2013, 10:00 PM
#136
Here is my ESM flip that I pulled out tonight to add more details to from Fighteraces.co.uk. They sell 1/5th scale decals and paint mask which are awesome. It has Sierra retracts all around (I was the first to install them ) and a air opperated canopy. She's painted in latex paints.
I maidened her in her original colors, then went this route.
What are the best weathering techniques used you gents here?
) and a air opperated canopy. She's painted in latex paints.I maidened her in her original colors, then went this route.
What are the best weathering techniques used you gents here?
02-14-2013, 05:55 AM
#137

My Feedback: (1)

Join Date: Oct 2008
Location: Camas, WA
Posts: 312
Likes: 0
Received 0 Likes
on
0 Posts
Ram,
I figured you'd be the expert on weathering etc.... All I can say is what works for me. I use Laytex also and it is great because if you are using gas motors you don't have to have a clear coat to fuel proof. I do sometimes add a clear matte coat just to protect the finish and dull it down.
I typically lay down all my colors first, then darken the main colors one to two shades darker and highlight the panels and rivets with a touch-up gun. This really is hard to tell later after all the other washes etc, but adds that dimention that just adds another realistic factor that sometimes you can't quite put your finger on. Tom pierce I think documents some of this. I know you are familiar with his work. Great reference.
I'll then make a wash with black and some brown. I mix real watery and then wipe it all over. I then go back with a paper towl and wipe off as necessary to get the right "look". I always wipe with the correct flow. Front to back for wings and top down for fuse. Most gets wiped off except in the cracks etc. If it starts drying up, just add more water and keep wiping. I also use the rock salt method for chipping. I'll use some light 300 or 500 grit paper and run it over all the rivets and panels. They will wear and highlight. Looks great if done correctly. Avoid doing this earlier when are riveting when it leaves a little lip. The most I do is just run my hand over the rivets to knock down anything loose and save the rest for sandpaper when weathering. You want this to sand off later to give you the wear that you see with paint coming off. Use pastel chalks for some more grime if you want. Lastly add the exhaust stains. Don't go too black unless the documentation shows black. Most was a greyish white at the hot point darkening to a brownish black as it feathered away on the edges. Lighter is better....Less is more...Blah, Blah, Blah
I think you know all this but it works for me and therre are other methods that work better for other people. If anyone else can benefit from it then I'm glad I could help.
Jason
I figured you'd be the expert on weathering etc....
All I can say is what works for me. I use Laytex also and it is great because if you are using gas motors you don't have to have a clear coat to fuel proof. I do sometimes add a clear matte coat just to protect the finish and dull it down. I typically lay down all my colors first, then darken the main colors one to two shades darker and highlight the panels and rivets with a touch-up gun. This really is hard to tell later after all the other washes etc, but adds that dimention that just adds another realistic factor that sometimes you can't quite put your finger on. Tom pierce I think documents some of this. I know you are familiar with his work. Great reference.
I'll then make a wash with black and some brown. I mix real watery and then wipe it all over. I then go back with a paper towl and wipe off as necessary to get the right "look". I always wipe with the correct flow. Front to back for wings and top down for fuse. Most gets wiped off except in the cracks etc. If it starts drying up, just add more water and keep wiping. I also use the rock salt method for chipping. I'll use some light 300 or 500 grit paper and run it over all the rivets and panels. They will wear and highlight. Looks great if done correctly. Avoid doing this earlier when are riveting when it leaves a little lip. The most I do is just run my hand over the rivets to knock down anything loose and save the rest for sandpaper when weathering. You want this to sand off later to give you the wear that you see with paint coming off. Use pastel chalks for some more grime if you want. Lastly add the exhaust stains. Don't go too black unless the documentation shows black. Most was a greyish white at the hot point darkening to a brownish black as it feathered away on the edges. Lighter is better....Less is more...Blah, Blah, Blah
I think you know all this but it works for me and therre are other methods that work better for other people. If anyone else can benefit from it then I'm glad I could help.
Jason
02-14-2013, 07:25 AM
#139
I think overall, it's a very nice model all around. It looks good and flies great. Quite possible the best looking ARF FW190 I've seen and it has a lot of potential! Let's just say, I see another in my hanger soon more modified.
Thanks for the weathering information. I do the same methods but I met a guy who used a #2 pencil on his details and wiped them off with amazing results. I know there are other methods out there..
Working diligently to get this ready for the RC event were having at the museum on the 23rd.
Thanks for the weathering information. I do the same methods but I met a guy who used a #2 pencil on his details and wiped them off with amazing results. I know there are other methods out there..
Working diligently to get this ready for the RC event were having at the museum on the 23rd.
02-14-2013, 07:34 AM
#140

ORIGINAL: Dowmer
Ram,
How would you rate the ESM D9 ARF for Scaleness and flyability?
Jason
Ram,
How would you rate the ESM D9 ARF for Scaleness and flyability?
Jason
02-17-2013, 07:53 PM
#141

Join Date: Jun 2009
Location: Melbourne, AUSTRALIA
Posts: 1,505
Received 0 Likes
on
0 Posts
Re Weathering...
There's an effect used oin small static scale models - sparingly apply a little silver paint here and there with a small fine brush, particularly around and along on the 'wearing edges' of control surfaces, wings etc. This simulates the paint peeling off and exposing the underlying metal.
Silver and other colours can also be 'dry brushed' onto features like rivets, cockpit gauge screws/switches etc. If you haven't done it before, drybrushing is getting a little paint onto a small brush, then wiping most of it back off again onto a tissue etc. so there's just the barest amount of paint left on the brush hairs, then gently dabbing/stroking the brush against the raised areas you wish to highlight...
BJ
02-18-2013, 12:06 AM
#142

Simple "chipping" method is to use a piece of sponge and have two or three pieces. Tamp the silver paint on with different sponges to make the effect more random looking. Apply more or less paint as needed for effect. Rotate the sponge and change sponges often.
I used different aluminum paints but Tamiya acrylic enamel holds up well and its pretty opaque.
After chipping is applied add a layer of weathering to give the effect age but do the aging last over everything. This will give the model more depth to the finish.
I used different aluminum paints but Tamiya acrylic enamel holds up well and its pretty opaque.
After chipping is applied add a layer of weathering to give the effect age but do the aging last over everything. This will give the model more depth to the finish.
02-18-2013, 03:34 AM
#143
Join Date: Mar 2002
Location: Stockholm, SWEDEN
Posts: 60
Likes: 0
Received 0 Likes
on
0 Posts
Nice thread!! Posting a few photos of my Meister Scale 1/4-scale Fw190D-9 with fiberglass fuselage, Inzpan cockpit, Sierra retracts (but fixed tail wheel) and a Zenoah 80.
Cheers!
Christer
Cheers!
Christer
02-18-2013, 08:56 AM
#144
Really nice!! I know a lot of people here would be interested in you Meisters specifics.. I actually had a deal with one of these recently but it fell through unfortunately.....[&o] I had hoped when Meister announced this glass fuse, there would be a gun hood option for those that wanted to do a later version.
I'm dead set on a D11..
I'm dead set on a D11..
02-18-2013, 02:33 PM
#145
My next project after the 335 is a meister fiberglass fuse Dora, ill probably do a D13 like the flying heritage collection has and convert the wing to a 3 piece (if it isnt already) so it can be transported sitting on its gear.
02-18-2013, 03:07 PM
#146
Just for shi..its and giggles....heres a quick vid clip of a motor test on my ESM dornier-335
http://youtu.be/_0XcOUvccDc
http://youtu.be/_0XcOUvccDc
04-20-2013, 04:31 AM
#149
Join Date: Apr 2006
Location: Carrollton
Posts: 1,698
Likes: 0
Received 0 Likes
on
0 Posts
ORIGINAL: butlern
Pretty quiet here...
How about I spice it up:
P-51!!!
Pretty quiet here...
How about I spice it up:
P-51!!!
You're a funny Guy......
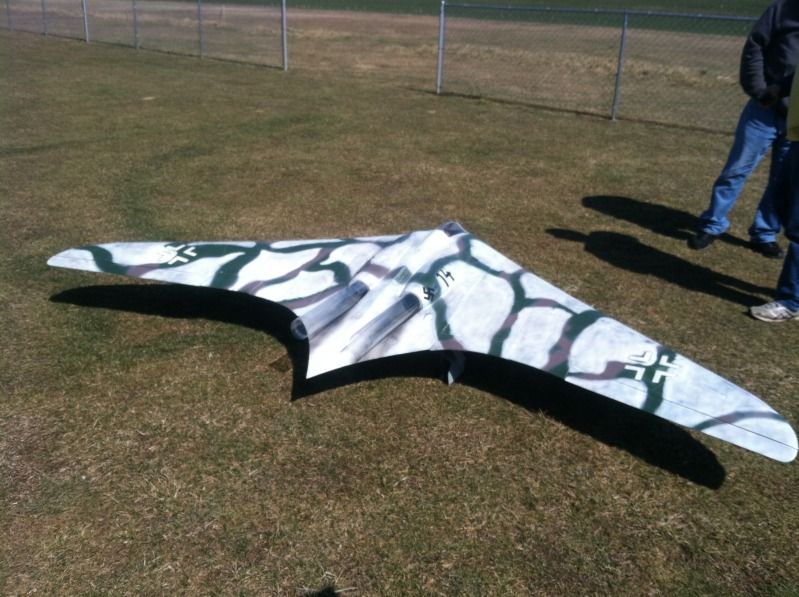
So when are you going to join the Dark Side? Here's another picture of my friends' T/F FW190. It was stripped, glassed and painted.Take care,
David