


Eindecker EIII

 04-13-2013, 06:46 PM
#402


Turtle Report:
The stab is finish sanded and covered as is the fin and rudder.
The rudder has the national markings applied........they are cut from black Solartex and ironed in place. I thought it would be a little easier to cover the tail surfaces and put the markings on before they were glued to the rear of the fuselage.
I think the next step is to permanently glue the fin to the stab and then fit the tail skid assembly.........or bring the wings to a completed state and cover them, too. I have the national markings cut from black Solartex ready and waiting to be applied to the wings.
I had only enough black Solartex to do the upper wing surface markings........and then I had to piece it together. When ironed on the seam will be nearly invisible. The glossy markings are cut from pre-painted Coverite.......I will put these on the bottom surface of the wing because of the high gloss. Maybe a little rub down with some steel wool will dull it down.
Oh, by the way........these markings cut from Coverite & Solartex can be easily ironed on top of most iron on fabrics with no problem. Just use enough heat to activate the adhesive and not enough to cause shrinkage. They can also be ironed onto painted surfaces, too. I use a sock for my iron and place the iron on the covering - DO NOT drag the iron......it will mess with the paint. I am talking about latex house paint. It also works on other types of paint, but always do a test piece before you apply markings to your model.
04-20-2013, 06:43 AM
#403
ORIGINAL: Horsepoweraviation
I cant believe my superhero photo wont post![:@][:@]
HPA
TA DA! You might be a turtle but you still are a Super Hero!
I cant believe my superhero photo wont post![:@][:@]
HPA
TA DA! You might be a turtle but you still are a Super Hero!
04-24-2013, 05:43 PM
#406
Turtle Report:
I finished the tail skid cage and knocked off the edges on the skid - it still needs considerable shaping.
Added the wing tube sockets, final fitted the aileron hinges and the ailerons and gave the wing a final sanding.
Then I added two extra layers of ply to the inside of the root ribs just behind the wing tubes - then drilled the fuse and threaded the wing to accept nylon 4-40 wing bolts. This will provide an added level of security to keep the wings on the tubes even though the flying and landing wires alone will actually hold on the wings. As soon as I test fit the wire attach points on the wing and fare in some balsa for the covering to stick to, the wings will be ready for covering - yippee!
The hatch is nearing completion - I have added the brass pieces where the landing wires will attach as well as the hard points to hold the drag wires for the king post and I will also add wires on the backside of the king post. These are not scale but will keep the king post from breaking in the event of a nose over. It needs the balsa sheeting and final sanding.
It's about time to decide which engine I will mount to the firewall and get it drilled and then glued to the front of the fuselage.
I am waffling between a Zenoah 445 twin or a G62 w/prop drive..........
05-06-2013, 08:41 AM
#407
Turtle Report (or should I say "Snail Report")
It seems like I am getting slower and slower ......... I am making progress even though I haven't posted anything for almost 2 weeks.
I added extra balsa pieces where each of the landing and flying wires will attach - this allows the covering to be secured around these areas.
I have started the covering process on the wings.
This is one large model airplane! Each wing panel will take a 2 meter roll of Solartex on the bottom and the top......that is 2 rolls per wing panel.
I ripped a 2 inch wide strip from the roll and cut off about 12 inches from the end of each roll - the rest was used to cover the wing! Most of the 12 inch cut offs will be used on the ailerons........so really all that is left is the 2 inch by 2 meters long strip!
For reference I have shown what was left over after I covered the stab, fin, elevators and rudder.......about 25 inches of a 2 meter roll of Solartex.
Because of the length or the fuselage, it looks like it will take most of two mores rolls.......that's 7 rolls for the entire plane.
Like I mentioned earlier in the thread - this is a BIG model!
05-06-2013, 06:08 PM
#408

Had a great time Saturday afternoon catching up with Paul and the gang, and got a chance to see the big monoplane up close.
Here's a couple pictures from Saturday
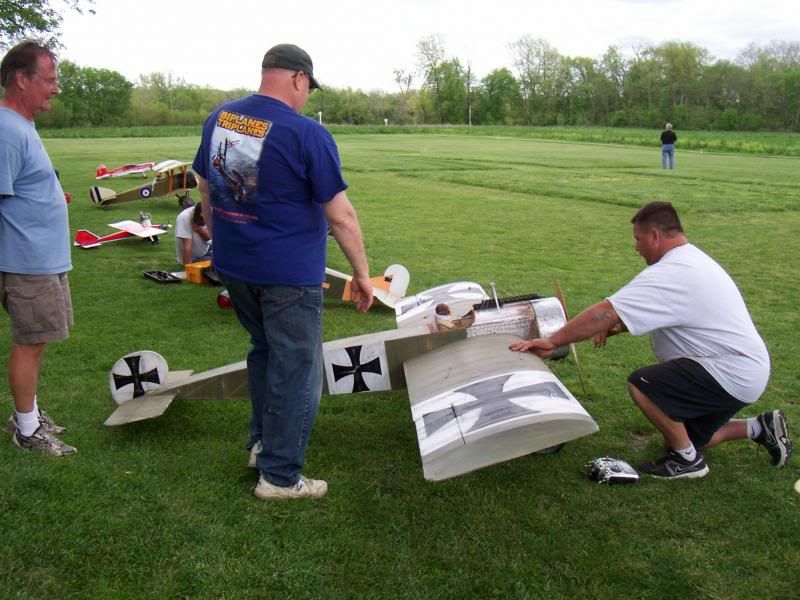
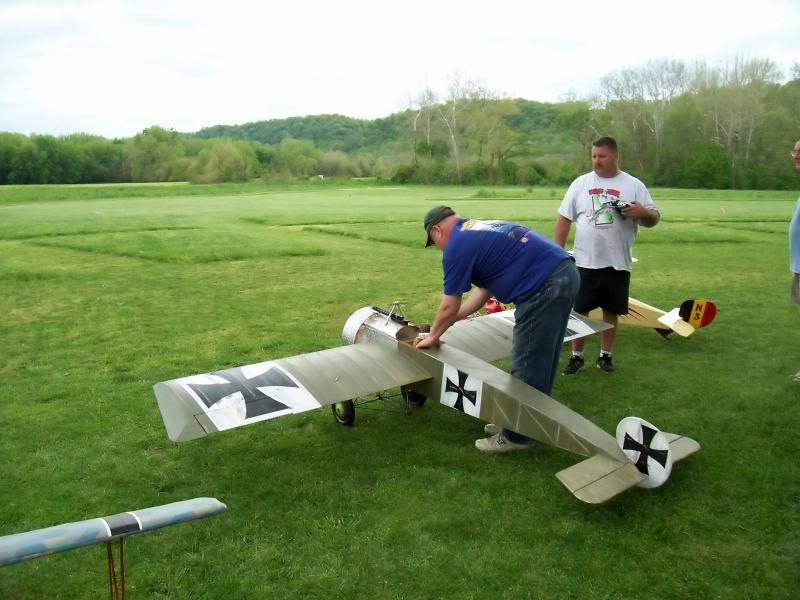
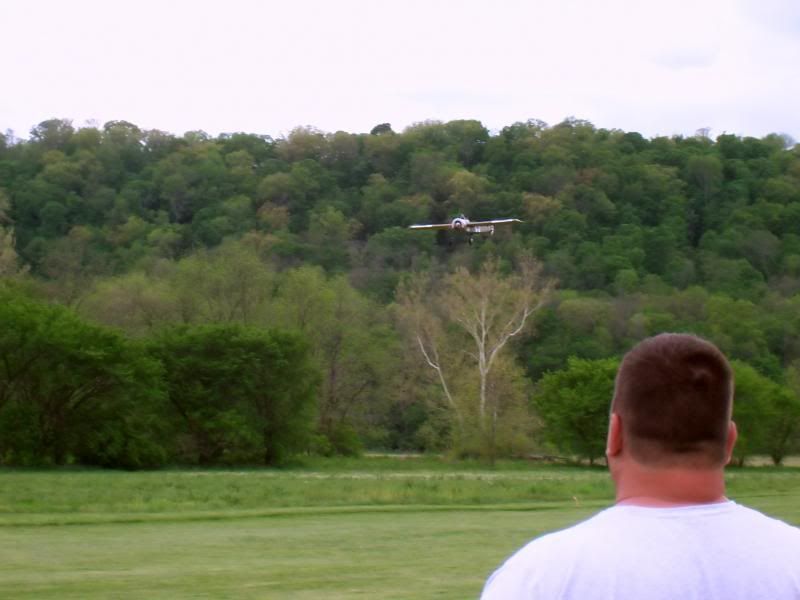
As well as a short video of a couple flypasts:
http://youtu.be/XlDQNOH9-UA
For a big plane, sure was light on it's feet!!
Best regards,
Lee McD
Here's a couple pictures from Saturday
As well as a short video of a couple flypasts:
http://youtu.be/XlDQNOH9-UA
For a big plane, sure was light on it's feet!!
Best regards,
Lee McD
05-07-2013, 04:06 AM
#409

My Feedback: (50)
Join Date: Jun 2004
Location: Cincinnati, OH
Posts: 1,102
Likes: 0
Received 0 Likes
on
0 Posts
Lee it was good to see you again.........
Our "camp and fly" was a lot of fun.
We surely did not get to see Art and Rhonda as much as we would of liked to......."life" got in the way....... (rain..work..etc)[&o]
The "builders proto-type" (I forced Larry to sell me..LOL) is finally COMPLETE..... as far as I am concerned.....
Larry and Art have studied all the Pros and cons of this design and when the final product is released from Larry I feel he has a winner!
The plane is very stable, 15mph+ winds ...no problems......, As Lee said the plane flies light on its feet. (did you hear Art say this was a big wing! LOL!)
This plane ended up balancing at 30% MAC and approx. 44 lbs.
It was very rewarding letting me partake in this adventure........Cheers to the both of you! AND KEEP GLUING!
HPA
05-07-2013, 08:09 AM
#410

That really is a great looking model...a really nice compromise between scale appearance and building practicality. It's an eindecker that actually looks like an eindecker! Well, done, Larry, well done! And hearing that this model with scale proportions balances at about 30% encourages me to think I might be able to move the CG on my EIII back even a bit more...which would have the advantage of removing even more unwanted (nose) weight. Who would have thought an EIII model could be nose-heavy?
05-07-2013, 05:18 PM
#411
Lee, thanks for the pictures and video. Work kept me away Saturday and then the rain crept in early Sunday morning. I did get a flight on Cutter's big Sopwith Pup on Saturday evening just before dark. Thanks Jeff, that was a treat! I also got my N-11 put together and fired up - got the cobwebs blown out of the pipes and managed to put in a 15 or so minute flight just before the rain settled in for the day.
I STILL DIDN'T GET A CHANCE TO FLY PAUL'S EINDECKER [:@][:'(] maybe next time Paul.
I now have two wings covered.....next up are the ailerons.
I STILL DIDN'T GET A CHANCE TO FLY PAUL'S EINDECKER [:@][:'(]
maybe next time Paul.I now have two wings covered.....next up are the ailerons.
05-10-2013, 02:30 PM
#412
ORIGINAL: Horsepoweraviation
Lee it was good to see you again.........
Our ''camp and fly'' was a lot of fun.
We surely did not get to see Art and Rhonda as much as we would of liked to.......''life'' got in the way....... (rain..work..etc)[&o]
The ''builders proto-type'' (I forced Larry to sell me..LOL) is finally COMPLETE..... as far as I am concerned.....
Larry and Art have studied all the Pros and cons of this design and when the final product is released from Larry I feel he has a winner!
The plane is very stable, 15mph+ winds ...no problems......, As Lee said the plane flies light on its feet. (did you hear Art say this was a big wing! LOL!)
This plane ended up balancing at 30% MAC and approx. 44 lbs.
It was very rewarding letting me partake in this adventure........Cheers to the both of you! AND KEEP GLUING!
HPA
Paul, it was a pleasure having you involved in the process......and without you, we still wouldn't have any flight reports[X(] Maybe the next time we get together I'll have mine flying (or is that just wishful thinking?)
Thanks for taking the lead on the flying portion of this project - we have learned a lot from your experiences with Larry's proto-type. Cheers, Art
05-18-2013, 07:14 AM
#413
Turtle Report:
Ailerons are covered. Now comes the hinging[&:][:@][:'(][:'(][:'(] I HATE THIS PART !
Hinging is a process........Vaseline on the hinge joints, then epoxy into the wing trailing edge........then pick out all the oozing epoxy after it sets but before it get too hard to remove........then more Vaseline on the hinge joints, you really can't get too much - just make sure you don't get it on the hinge itself....... butter the hinges with epoxy, fill the slots in the ailerons, slide it onto the hinges and tape upright.......make sure the control surface is aligned properly, then hold or tape into place......again, before the epoxy completely hardens, pick out all that has oozed out of the hinge slots. Since Vaseline was used this process is not too difficult.
Note: as you are placing the parts together, have paper towels and plenty of alcohol available so you can wipe off what oozes onto the covering before it hardens
One down, one to go.......
I have about 2 1/2 inches of travel down and 3 inches of up.......I will use most of the up travel and only about a third of the down travel.
05-18-2013, 11:45 AM
#414
Turtle Report:
Second aileron is now hinged. Pretend that there are pictures here that look like those in the previous post, but in reverse.
Also all the hinges are drilled and then pins glued in place.
I don't know what's next, but I'll think of something.
Our goal for the first public display of both Eindeckers will be the Mint Julep, the second weekend in June in Rosewood, Indiana. Hopefully, Paul will show up with his, too. [8D] They will all be in fun scale - me and Larry will have to enter the advanced fun scale class, but Paul can enter Novice because he has never previously entered in competition. That being said, I know there will be a friendly wager of some kind on the outcome of the contest......you hear that Paul?
(oops [X(] the pressure is really on now! [>:] so get busy, Larry! )
)
Second aileron is now hinged. Pretend that there are pictures here that look like those in the previous post, but in reverse.
Also all the hinges are drilled and then pins glued in place.
I don't know what's next, but I'll think of something.
Our goal for the first public display of both Eindeckers will be the Mint Julep, the second weekend in June in Rosewood, Indiana. Hopefully, Paul will show up with his, too. [8D] They will all be in fun scale - me and Larry will have to enter the advanced fun scale class, but Paul can enter Novice because he has never previously entered in competition. That being said, I know there will be a friendly wager of some kind on the outcome of the contest......you hear that Paul?
(oops [X(] the pressure is really on now! [>:] so get busy, Larry!
)
05-18-2013, 05:48 PM
#415
What do you do when you need to sheet a curved surface......?
"for what it's worth" I cut and fit the balsa sheet, then wet it down with water......when it softens, I form it against a round object (in this case a large cardboard tube) and tape it into place.......in the morning, or when it's dry, I will remove it from the form and then glue it to the hatch.
"for what it's worth" I cut and fit the balsa sheet, then wet it down with water......when it softens, I form it against a round object (in this case a large cardboard tube) and tape it into place.......in the morning, or when it's dry, I will remove it from the form and then glue it to the hatch.
05-19-2013, 11:38 AM
#419
Senior Member
Join Date: Jan 2002
Location: Pickerington, OH,
Posts: 101
Likes: 0
Received 0 Likes
on
0 Posts
How about an update on the Eindecker EIII version 2.0.
It has been coming along but with a business to run time is usually in short supply. I have found a local metal shop where I am having the landing gear made and the alum. pot cut up for the cowl.
I have made a dowel rod mockup and a framing jig for him to make the landing gear fabrication as easy as possible. The gear is going to be made from 1/4" and 3/16" steel and "TIG" welded together. This shop has all of the metal working tools that you could imagine.
When the kits are available the landing gear will be assembled and ready to bolt on out of the box.
There is a plate across the gear that is screwed into the maple mounting block. This plate is welded to the gear which will add to the rigidity.
Two copies of the landing gear will be made by the end of the week along with two cowls.
I have the engine mounted and I am starting to work on the control linkages and by next weekend I want to be covering. It may be flying by the Mint Julep but it will still need some ginger bread added later.
Larry
 05-21-2013, 08:22 AM
#424
My Feedback: (50)
Join Date: Jun 2004
Location: Cincinnati, OH
Posts: 1,102
Likes: 0
Received 0 Likes
on
0 Posts
ORIGINAL: CubCrafter
How about an update on the Eindecker EIII version 2.0.
It has been coming along but with a business to run time is usually in short supply. I have found a local metal shop where I am having the landing gear made and the alum. pot cut up for the cowl.
I have made a dowel rod mockup and a framing jig for him to make the landing gear fabrication as easy as possible. The gear is going to be made from 1/4'' and 3/16'' steel and ''TIG'' welded together. This shop has all of the metal working tools that you could imagine.
When the kits are available the landing gear will be assembled and ready to bolt on out of the box.
There is a plate across the gear that is screwed into the maple mounting block. This plate is welded to the gear which will add to the rigidity.
Two copies of the landing gear will be made by the end of the week along with two cowls.
I have the engine mounted and I am starting to work on the control linkages and by next weekend I want to be covering. It may be flying by the Mint Julep but it will still need some ginger bread added later.
Larry
Man that looks pretty sweet Larry!
Your changes look awesome!
I took the EIII down to Joe Nall and flew it all week and during the 6:15 AM DAWN PATROL
Going to make some small mods on the cable attach points and take it to Wings for Kids in Louisville KY
And Yes ART will be able to fly it all he wants!
HPA
EIII on the flight line
05-21-2013, 06:48 PM
#425
Senior Member
Join Date: Jan 2002
Location: Pickerington, OH,
Posts: 101
Likes: 0
Received 0 Likes
on
0 Posts
Paul,
Thanks for the motivating comments.
It looked good on the flight-line of the big show. It's been a few years since I was there.
Hopefully it drew some interest and comments.
We need you and Barry to come to the Mint Julep this year. Art and I will be there.
One of the best fields that anyone could ever fly at.
They have many different classes to enter.
http://www.sircm.com/Mint-Julep.html
Larry