Ed Kazmirski's Taurus
 05-16-2013, 09:39 AM
#2576

Yes. I have both the PCM and TF/MAN versions, built from the plans and just cutting the sides as drawn there appears to be no problem with wing/tail angles. Both models are superb fun airplanes.
Evan, WB #12.
Evan, WB #12.
 05-17-2013, 02:26 PM
#2577
Senior Member
My Feedback: (1)

Join Date: Nov 2002
Location: Roanoke, VA
Posts: 489
Likes: 0
Received 0 Likes
on
0 Posts
hi pimmnz
if this comes thru here are pix of my progress so far.
tail feathers just pinned on for pix.
thanks and happy flying
pt19 flyer joe
if this comes thru here are pix of my progress so far.
tail feathers just pinned on for pix.
thanks and happy flying
pt19 flyer joe
 05-18-2013, 09:42 AM
#2580
Senior Member
My Feedback: (1)
Join Date: Nov 2002
Location: Roanoke, VA
Posts: 489
Likes: 0
Received 0 Likes
on
0 Posts
hi chris
many thanks for encouragement, been a long time since attempted
this. really enjoyed building back when and I guess slowly coming
back. not looking forward to cutting out wing ribs. on some post of
wing construction it showed small balsa block cut to fit under the
leading edge of the ribs I guess to keep them level. would you need
one for each rib or is there a better way?
thanks for reply
pt19 flyer joe
05-19-2013, 12:23 AM
#2581
Joe, the little block is a tab on the rib to maintain wing alignment while you add the pre-moulded leading edge. If you are ok with it you can leave it off and align the wing with the mainspar and trailing edge spar.
Evan, WB #12.
Evan, WB #12.
05-19-2013, 10:54 AM
#2582
Senior Member
My Feedback: (1)
Join Date: Nov 2002
Location: Roanoke, VA
Posts: 489
Likes: 0
Received 0 Likes
on
0 Posts
thanks evan for reply.
I am currently cutting the ribs with the tab at the trailing edge as indicated on pattern.
my question was in regard to the small balsa blocks shown cut to the pattern of the botton
of the leading edge of the ribs to be placed under each rib at the leading edge
I guess to help keep the wings level.
however, would it be ok to use the tabs on the trailing edge and weigh the wing panel down
with weights at the spar locations to keep it level? looks like the wing should lay level doing this.
do you apply the curved leading edge while the wing is weighted down or can the panel be taken
off the board and the sheet applied without danger of warping the wing panel?
tried to post image here without success, clicked on image button and [img][img] appeared
but did not get paste option, how is this done for future info?
thanks in advance
pt19 flyer
joe
05-21-2013, 01:13 AM
#2583
Both my models were built without the tabs. I used a tapered block under the trailing edge and rested the wing on the lower spar. Cut right the tapered T/E block (1/4 sheet) maintains the rib centreline (chord line) however you want. I added a degree of washout in my wing panels. Mould the leading edge sheet, (full 4" wide) by careful selection (Nice light, bendy stock) and boiling water on one side, then tape to the leading edge ribs. Allow the L/E sheet to dry, remove, and glue to the lower side of the ribs for an inch or so. Allow the glue to dry then block the wing panel with the spar and T/E aligned on a flat surface. Glue the leading edge moulding on over the full width of the sheet, tape in place and add the upper trailing edge sheet. When dry, this is sufficient to lock the wing in place. You can remove from the jig, and do the other half. Complete the rest of the sheeting, you can replace in the jig to be certain of alignment, but with the L/E and upper T/E sheeted you can't really get it wrong. There is a lot of wood in the Taurus wing, follow Ed's instructions for wood selection if you can, it makes a light, immensely strong wing.
Evan, WB #12.
Evan, WB #12.
05-25-2013, 08:44 PM
#2584
Senior Member
My Feedback: (1)
Join Date: Nov 2002
Location: Roanoke, VA
Posts: 489
Likes: 0
Received 0 Likes
on
0 Posts
hi again pimmz
got another question, on the side view of the root of the wing there is a w-20 I believe and I cannot find a pattern for
this on my plans. is this just a filler block for the forward portions of the wing where the servo mounts?
also in this same area the are pictured spars two stacked long side down and one vertical to the rear of these two
long side vertical. none of the ribs on my plan are notched for these, got me stumped. something just hit me on w-20
that is wat W-1A attaches to, getting slow in my old age.ha!ha!
will try to post pictures.
thanks again for all the info and help hou provide.
pt19 flyer
joe
05-25-2013, 10:46 PM
#2585
Joe, the vertical bit of wood alongside the spars is the dihedral brace, top and bottom. You have to notch the centre ribs accordingly. I made mine from ply, and extended them out to the third rib on the top. But I also made the spars up as one piece before adding the ribs....
I also joined the landing gear blocks at the centre with a proper splice...no further reinforcement is needed...keep the glass and epoxy away from this one. You won't need that big hole in the centre either...servos have got smaller. And, if you use a .40 size engine, one servo is more than sufficient for the ailerons...
Evan, WB #12.
05-27-2013, 10:48 AM
#2586
Senior Member
My Feedback: (1)
Join Date: Nov 2002
Location: Roanoke, VA
Posts: 489
Likes: 0
Received 0 Likes
on
0 Posts
ok Evan
thanks for info, do you have a pattern for the dihedral brace? I was wondering ahead
why no dihedral brace was shown. did not think the fiberglass covered center would be enough.
also it looks as if the wings would have to be joined before adding the leading edge and before completing the center at W-1A and installing W-20.
am I right here? been a long time since my first taurus build from kit.
gray matter has lost a lot I'm afraid...ha!ha!
thanks and happy flying
pt19 flyer
joe
05-27-2013, 07:35 PM
#2587
Senior Member
My Feedback: (1)
Join Date: Nov 2002
Location: Roanoke, VA
Posts: 489
Likes: 0
Received 0 Likes
on
0 Posts
hi Evan
in process of building one wing panel, no glue yet just a trial fit of everything.
this is 6th try on this one error <server error problem resource cannot be fount>?????
don't know what is going on here.
thanks and happy flying
pt19 flyer
joe may have to reboot and start anew.
in process of building one wing panel, no glue yet just a trial fit of everything.
this is 6th try on this one error <server error problem resource cannot be fount>?????
don't know what is going on here.
thanks and happy flying
pt19 flyer
joe may have to reboot and start anew.
05-28-2013, 11:08 PM
#2588
Joe, to build it this way you need the trailing edge jig. There is no dihedral brace shown on the plan, if it's a kit copy, cause it was a diecut. The MAN one will show them, but they are balsa and really short. Redraw them from the dimensions shown and the dihedral illustration shown. You will one for the top spar and one for the bottom, they will be slightly different. Otherwise, it looks just like mine at that stage...!
Good luck. Ps, the drawing shown here, in the earlier post, is a redraw of the PCM version, if you wanted to know what it loooked like...
Evan, WB #12.
Good luck. Ps, the drawing shown here, in the earlier post, is a redraw of the PCM version, if you wanted to know what it loooked like...
Evan, WB #12.
05-29-2013, 01:50 PM
#2589
Senior Member
My Feedback: (1)
Join Date: Nov 2002
Location: Roanoke, VA
Posts: 489
Likes: 0
Received 0 Likes
on
0 Posts
ok Evan
thanks for reply. in regard to the trailing edge jig was that something that came
in the kit? please explain. could it not be done with success without it?
have one panel <left> trial fitted, no glue as yet. make sure everything fits as it should.
built it with tabs on ribs at trailing edge per plans.
what method do you use in getting the ends of the spars angled for a good fitting joint
at center of wing. been a while since I did this.
thanks and happy flying
pt19 flyer
joe
05-29-2013, 10:43 PM
#2590
OK, the trailing edge tabs should give you a straight wing, as for the spar joins...well. there's the easy way, and my way...! The easy way is to do a quick top and bottom drawing of the front view of the wing with the correct dihedral. This will show you exactly what angle to sand the spars at the centre. Then there's my way, essentially the same except I use the drawing to splice the spars together to make them one piece, both top and bottom, then build each wing half on to the completed, joined and braced spars...Mostly easy, but you need to take care at the centre to get the middle ribs lined up exactly at 90 deg to the spars. Then I just drop the spliced landing gear block in place, and that acts as a really good dihedral brace...Not everyones cuppa tea, I guess, but my original Taurus, from the TF kit plan, is now 18 years old, the LA.46 is on its' second piston/liner, and it's still a regular performer...
Evan, WB #12.
Evan, WB #12.
05-30-2013, 09:42 AM
#2591
Senior Member
My Feedback: (1)
Join Date: Nov 2002
Location: Roanoke, VA
Posts: 489
Likes: 0
Received 0 Likes
on
0 Posts
ok Evan
again thanks very much for your suggestions and guidance on this build.
your way does sound much simpler than trying to sand a good fit at spars, leading edge and trailing edge.
will give a look see.
thanks and happy flying
pt19 flyer
joe
again thanks very much for your suggestions and guidance on this build.
your way does sound much simpler than trying to sand a good fit at spars, leading edge and trailing edge.
will give a look see.
thanks and happy flying
pt19 flyer
joe
06-04-2013, 06:40 PM
#2592
Senior Member
My Feedback: (1)
Join Date: Nov 2002
Location: Roanoke, VA
Posts: 489
Likes: 0
Received 0 Likes
on
0 Posts
hi pimmnz
to the point now of the leading edge sheeting. at the root lookes like about 7 1/2 inches to
wrap completely and about 5 1/2 at tip to wrap totally.
did you do this with two steps and 2 separage pieces or did you make an 8 inch wide piecie to
wrap in one step?
seems I read somewhere to mark a center line on a 4" wide piece of balse sheeting and center on
rib front glue in place and add additional top and bottom pieces when glue dries.
what is your suggestion here? want your easiest method.
thanks and happy flying
pt19 flyer
joe
06-12-2013, 03:44 PM
#2593
Senior Member
My Feedback: (1)
Join Date: Nov 2002
Location: Roanoke, VA
Posts: 489
Likes: 0
Received 0 Likes
on
0 Posts
hi gang
a little more progress on the taurus build. here is wing with partial wrap around on leading edge.
a little clumsy rough handing during this process and ended up breaking off some to the trailing edge
tabs. tried to keep bottom spar flat on building bench. hope this was enough for a straight wing.
thanks and happy flying
pt19 flyer
06-13-2013, 02:14 PM
#2594
That looks about right Joe. I now add the scabs, i made mine 1/16 sheet about 1/2 inch wide, and the full width between the ribs. Cut the tapered sheeting and glue with a sandable glue (not cyano) to the leading edge sheeting, with a generous amount on the 1/4" bit of scab protruding from the L/E sheet. just be sure that it's well stuck to the scabs and ribs, and is reasonable flush with the L/E skin. Sand it all flush when dry. I made my skins cover half the spar top and bottom, so that I had something to stick the rib caps to. Use the jig again to ensure straightness. After this the wing is not going to move.
Evan, WB #12.
Evan, WB #12.
06-13-2013, 07:32 PM
#2595
Senior Member
My Feedback: (1)
Join Date: Nov 2002
Location: Roanoke, VA
Posts: 489
Likes: 0
Received 0 Likes
on
0 Posts
ok Evan
thanks for reply...this thing would have to fly perfect right?????
I assume the scabs would have the grain running chord-wise...right?
bending the balsa for the leading edge was not that much of a problem...after breaking 2 4" wide strips
I realized I was not getting the strip wet enough, this took longer than I thought it would.
several dumb-dumbs along the way, but a learning process right????
a dumb question what is the wb #12 on your post?
thanks and happy flying
pt19 flyer
joe
06-14-2013, 09:29 PM
#2596
No Joe, as an aerobatic aircraft, it does not 'fly perfect'. That big blunt airfoil is cambered, so inverted need a bit of elevator pushed in, knife edge is not easy, the fin/rudder is less effective than later designs, but it wasn't designed for such things. The wost trait is the reluctance to stall, not a good thing at all for an aerobatic model, won't snap, and as Ed explained, needs an extra 'kick up' on elevator to actually stall the wing. I guess it was really good at the time, but against modern designs it has limitations. Against that it is a very well damped, totally predictable, and basically fool proof really nice 'fun' airplane. As for the scabs, I stripped mine from sheet, grain spanwise. It is there to improve the glueing area, and simplify the wing edge to edge sheeting, so it really does not matter how it's done. And yep, you gotta choose the right wing sheeting, and get it really hot and wet. 2" wide paper tape is really useful to help wrap it around the ribs. The 'WB' in my signature? Well, I am a very humble member of the 'Waco Brotherhood' and proud to be a member of that august body.
Evan, WB #12.
Evan, WB #12.
06-27-2013, 02:08 PM
#2597
Senior Member
My Feedback: (1)
Join Date: Nov 2002
Location: Roanoke, VA
Posts: 489
Likes: 0
Received 0 Likes
on
0 Posts
getting closer guys...
here are latest pix...tail feathers not glued yet
just pinned on temporily.
thanks and happy flying
pt19 flyer
here are latest pix...tail feathers not glued yet
just pinned on temporily.
thanks and happy flying
pt19 flyer
06-27-2013, 02:47 PM
#2598


ORIGINAL: pt19 flyer
getting closer guys...
here are latest pix...tail feathers not glued yet
just pinned on temporily.
thanks and happy flying
pt19 flyer
getting closer guys...
here are latest pix...tail feathers not glued yet
just pinned on temporily.
thanks and happy flying
pt19 flyer
08-12-2013, 09:15 PM
#2599
Junior Member
Join Date: Aug 2013
Posts: 2
Likes: 0
Received 0 Likes
on
0 Posts
Hi guys .
Just recently was given a chance to restore a Taurus that was started in the mid 60's but never finished . It had been in storage for well over 40 years.
It was given to me on the condition it was restored and flown.
Took me a about 4 weeks putting in quite a few hours each day as I had to convert it to electric as I fly at an electric only field.
found the colour scheme in a you tube vid that showed a couple of old magazine covers from back in the day.
Used a Turnigy Aerodrive SK3 - 4240-740kv , Plush 60A esc , 12x6 Apc prop ,a 5S 4000mah lipo and Hitec HS-485HB Deluxe servos.
This model flies great , very easy to make this my favourite plane.
Maiden vid with build pics here http://www.youtube.com/watch?v=xEWrO...s-cGVDxCupqQ1Q
Other flight vid shot with better camera here http://www.youtube.com/watch?v=sHbE0...s-cGVDxCupqQ1Q
08-13-2013, 07:26 AM
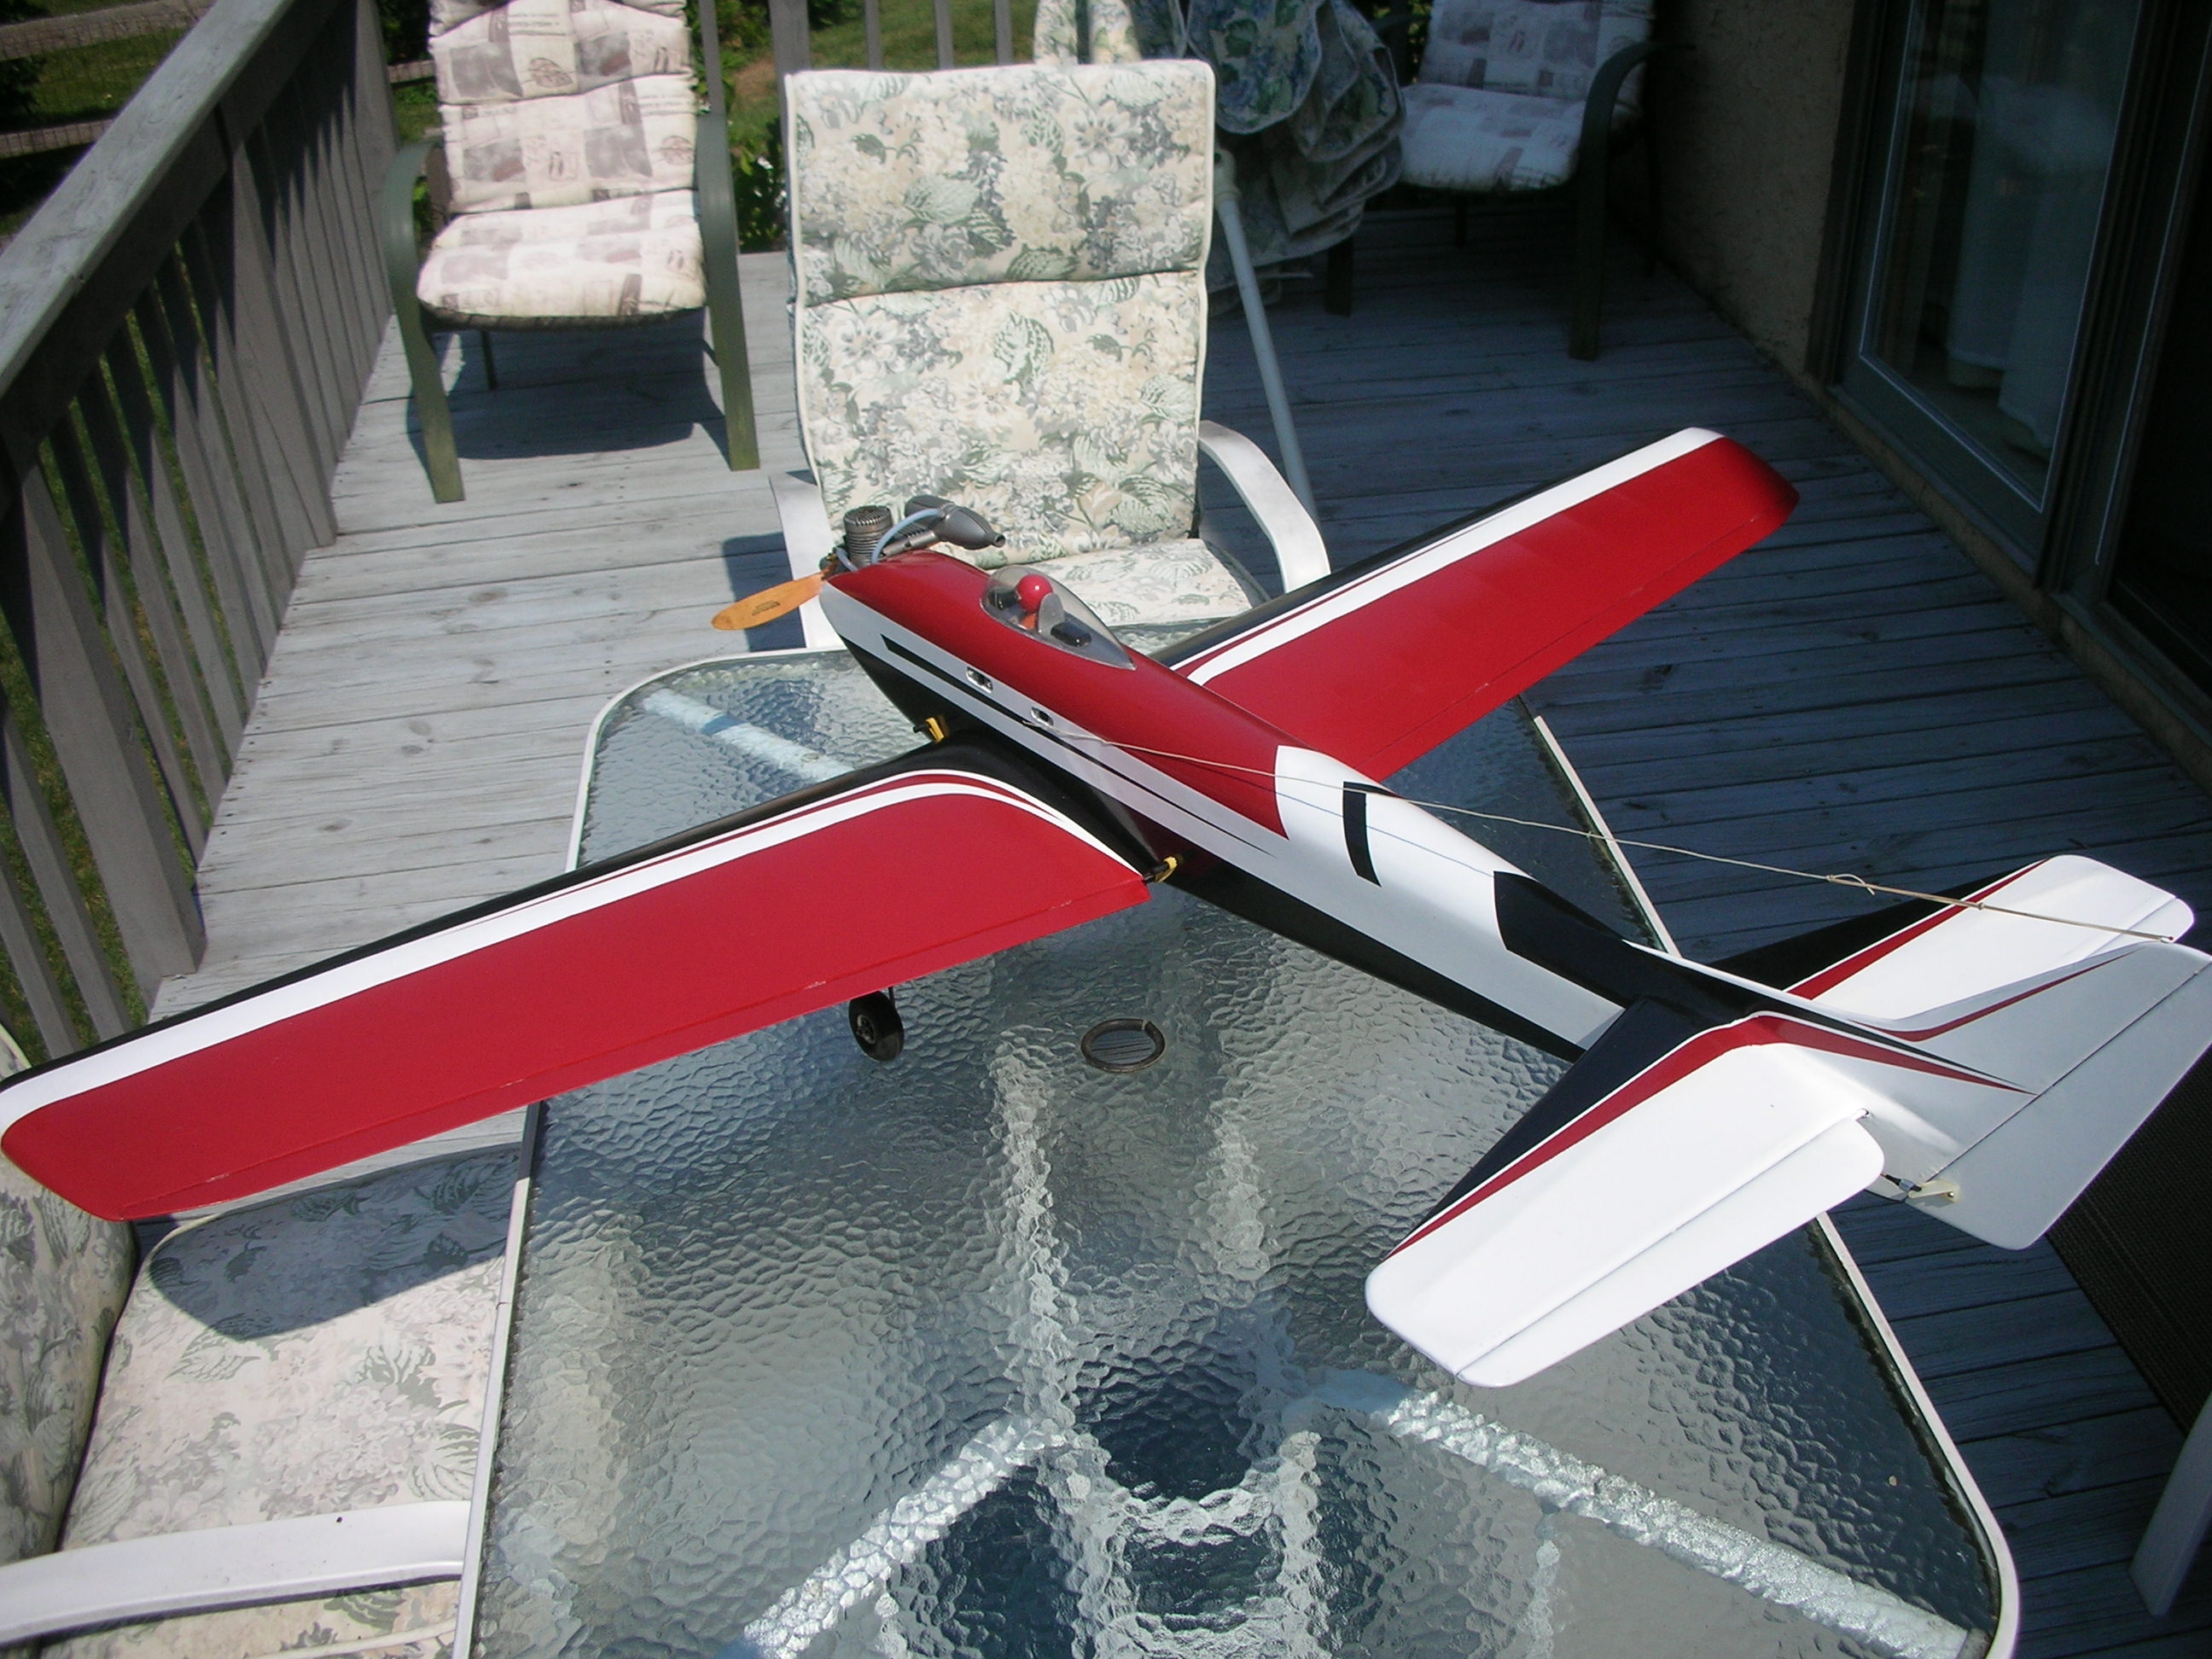
#2600

Here's my Taurus. Like yours, it was built in the mid 1960's then passed around through a few club members. During the revelation of the original Taurus from the Kazmirski estate, I decided to finish the airplane. Veco .61 power, Kraft Series 1979 single stick with four KPS-15 servos. Silk and dope covered, 6.5 lbs. flying weight. It flies great. That Kazmirski paint job was a bear to do but it was worth it.