


ESM 50cc Corsair
 07-31-2013, 11:41 AM
#1776

My Feedback: (49)
More good pics, Chad. Thanks for the updates. I really like the red stripe. Perhaps that was added with some less permanent paint at some point? Anyway, the plane makes a great and colorful subject for an RC model. Although I have seen several painted like "5" was on Youtube and such, still not one you see too often, usually the blue/blue/light grey WWII schemes. I do have a question about the white belly. Does that extend out to where the wings fold too? Thus, all the wing center section is white? You don't happen to have the mil-specs for those colors do ya? I ask because I seriously think you might actually have them! ha. Lane
 07-31-2013, 05:43 PM
#1777
My Feedback: (60)
Join Date: Dec 2001
Location: Litchfield Park,
AZ
Posts: 7,677
Likes: 0
Received 25 Likes
on
23 Posts
ORIGINAL: LBJ
I do have a question about the white belly. Does that extend out to where the wings fold too? Thus, all the wing center section is white? You don't happen to have the mil-specs for those colors do ya? I ask because I seriously think you might actually have them! ha.
I do have a question about the white belly. Does that extend out to where the wings fold too? Thus, all the wing center section is white? You don't happen to have the mil-specs for those colors do ya? I ask because I seriously think you might actually have them! ha.
My understanding is that the colors used would have been Flat Light Gull Grey (FS36440) on the top surfaces and Gloss Insignia White (FS17875) on the bottom surfaces. The tops of all control surfaces were called out in Gloss Insignia White as well. Buno 97286 seems to follow those guidelines except where parts have been swapped out with those from a Corsair which carried the older Glossy Sea Blue scheme. The Gull Grey/White became the standard Naval scheme in 1955 if memory serves and so not too many Corsairs lasted in service long enough to receive it. Regarding the center section the entire bottom would be white while the top is grey with the exception of the tops of the flaps which were also white per Navy specs of the day. Great scheme and will look nice on your bird.
 08-06-2013, 06:27 PM
#1781
My Feedback: (49)
Sorry to be doing all the posts, but have a few things to mention. Robart has a SUMMER SALE going now. Go to their main page. 10 to 20 percent off with FREE Shipping. Read for details.
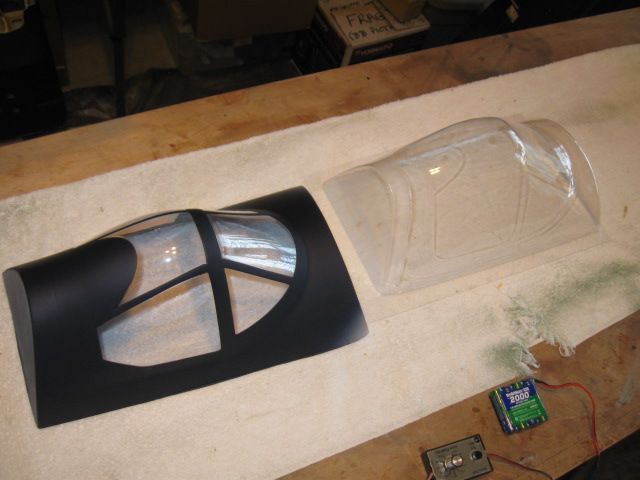
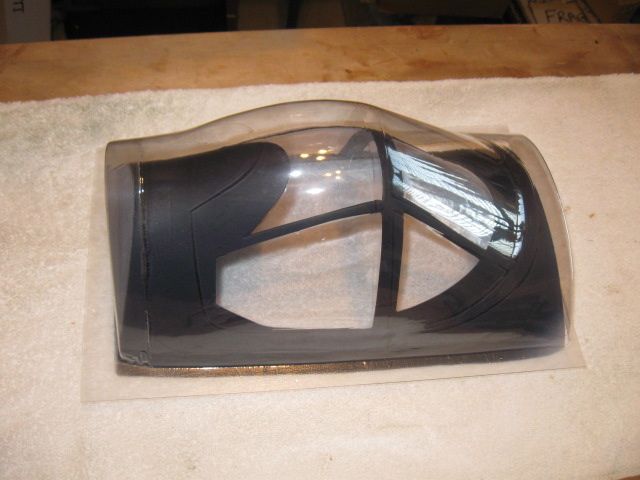
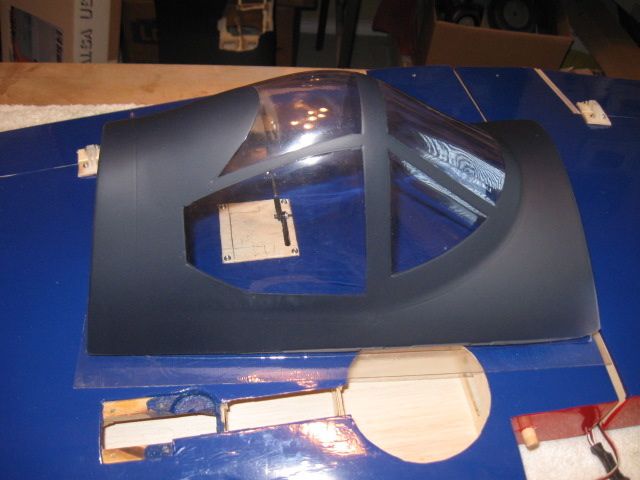
A friend has a spare Ziroli Corsair canopy he loaned me to check fit on the ESM. Looks like it was made for it. Very close to the exact same size. A nice alternative to the brittle ESM canopies.
Also, I will be using the Robart 150 Byron retracts with scale Corsair strut. They look to fit fine based on a spare pair I tested with. Very small mods will be needed. Ordered a pair of Robart 4.5" alum wheels and the pneumatic tailwheel assembly. Saved $155 off their listed prices.

 08-10-2013, 08:45 AM
#1786
My Feedback: (49)
Started a bit of sanding. Those decals are on there pretty tough. I think I will just sand thru the clear coat and feather the edges rather than try to remove them.
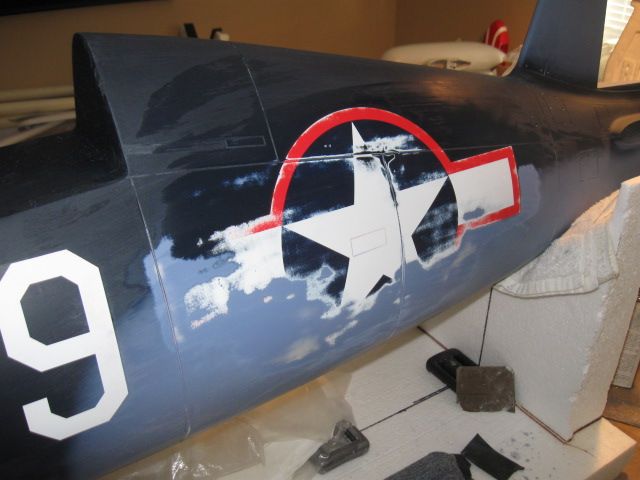
Well, the feathering didn't seem too good, so sanded them off. Took a while and lots of 180 grit wet or dry, but they are gone. One side anyway. I hit it with a small amount of grey primer for effect. Will need to take outside to do the rest of sanding and priming.

Well, the feathering didn't seem too good, so sanded them off. Took a while and lots of 180 grit wet or dry, but they are gone. One side anyway. I hit it with a small amount of grey primer for effect. Will need to take outside to do the rest of sanding and priming.

Last edited by LBJ; 08-11-2013 at 08:37 PM.
08-12-2013, 03:17 PM
#1787
My Feedback: (49)
Here is a You tube video of an ESM Corsair with the Saito FG-57. In almost every roll you can hear the engine miss. At 2:16 you hear what sounds like a REAL double bang. Doesn't happen every time, but most times. Kinda scary. Not sure turning the engine so that the carb metering area is at bottom will help. I will say, this thing sounds and looks great! Other than the miss, it's a winner.
http://www.youtube.com/watch?v=kHmzFtTLenE
http://www.youtube.com/watch?v=kHmzFtTLenE
08-12-2013, 03:41 PM
#1788
Start on page 34 Stout posted lots on a DLE 111 install. To Predman The ESM V3 gear are great. Very strong and work well.
08-13-2013, 12:27 AM
#1789
My Feedback: (27)

Join Date: May 2011
Location: Corona, CA
Posts: 160
Likes: 0
Received 0 Likes
on
0 Posts
Thanks I read through it the past several nights. I'm trying to get use to this new setup here. I can't seem to find the link to just look at the photos. I was located at the top center of the old forum setup. Hopefully I can maiden her tomorrow. I had to build a new cg machine with some materials from the Home Depot. It actually worked better than that flimsy Great Planes one. I picked up a new 24 pin connector from the local electronics store. I was able to clean up all those pesky servo wires dangling everwhere.


08-13-2013, 02:00 AM
#1790
Join Date: Feb 2006
Location: camden, SC
Posts: 1,133
Likes: 0
Received 0 Likes
on
0 Posts
That connector is a good idea for a lot of my planes. More info if you don't mind. I have ESMs smaller corsair but even at 19 pounds mine floats. These planes seem to slow down well with all those big flaps. Good luck on the maiden.
Last edited by skillet92; 08-13-2013 at 02:03 AM.
08-14-2013, 01:50 PM
#1791
My Feedback: (49)
Going to use the Robart 150 Byron/Ziroli scale struts on this one. 8" struts. They fit with a small cut on the structure. Robart 4.5" wheels. the mounting rails are too wide for the Robarts, so an adapter plate will need to be made. Robart has a video on YouTube showing this for their 148 electric's which have the same problem. I haven't made the final install yet, but think they will work like gangbusters.
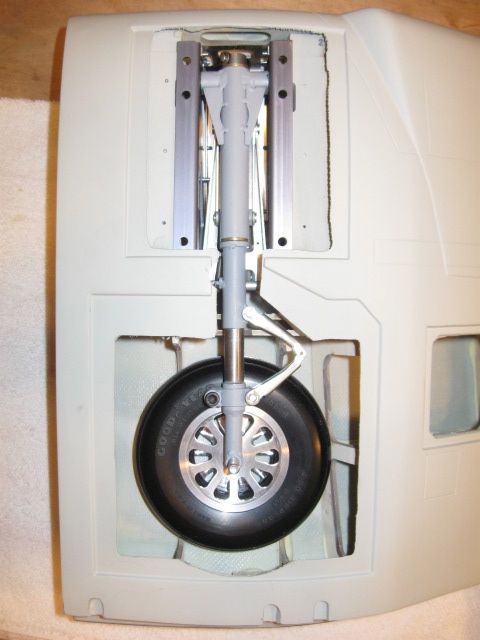
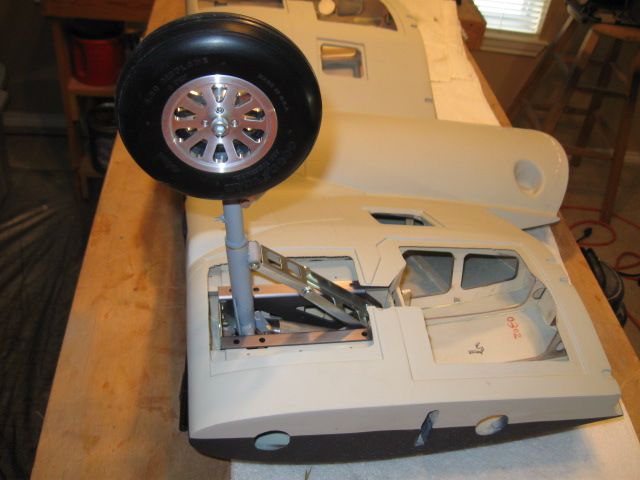


Last edited by LBJ; 08-14-2013 at 01:54 PM.
08-14-2013, 05:43 PM
#1792
My Feedback: (27)
Join Date: May 2011
Location: Corona, CA
Posts: 160
Likes: 0
Received 0 Likes
on
0 Posts
Yeah the connector works out pretty well. I thought it would be a good idea to help with the clutter. Before I started I connected all of my servos and gear door wires to make sure everything was working properly. I then labeled the wires using colored zip ties so I could keep them organized. I cut off the original plugs starting with the fuse wires first. I did them one at a time leaving the zip ties attached. I stripped about a 1/4" of the covering away from the wire, twisted then lightly soldered them. I crimped each metal connector to the soldered wire. I then very lightly soldered the wire and connector together. You must be careful not to add too much solder or else the connector will not fit inside the plastic connector. When soldering the female connectors be sure not to advance the wire too far into the metal connector before crimping and soldering. If it's advanced to far the male connectors won't fully insert into the female connectors securely. Once you've started this will all make sense. I could've simply crimped the wires but I'm all about redundancy and piece of mind...
This pic is of a 12 pin connector. You will need to count your connections and pick the right connector. Here is the link for the electronic company I purchased the connectors from. Feel free to ask any questions if you have any...
http://www.frys.com/product/1651496?...H:MAIN_RSLT_PG

This pic is of a 12 pin connector. You will need to count your connections and pick the right connector. Here is the link for the electronic company I purchased the connectors from. Feel free to ask any questions if you have any...
http://www.frys.com/product/1651496?...H:MAIN_RSLT_PG
08-15-2013, 12:13 AM
#1793


Join Date: Jun 2009
Location: Melbourne, AUSTRALIA
Posts: 1,505
Received 0 Likes
on
0 Posts
Just my 2c on soldering wires onto connectors - it helps heaps if you have a spare female for a male (or male for a female), and plug the two together while you're soldering.
Keeps things in place, allows you to solder right up to the edge, and helps prevent the metal pins inside the plugs from moving skew-iff if you get just that little bit too much heat on them. No more "oh...BUGGER! Now the plugs won't connect together because a pin (or five) ate into the plastic and went sideways when I hit it with too much heat" any more
BJ
08-17-2013, 01:44 PM
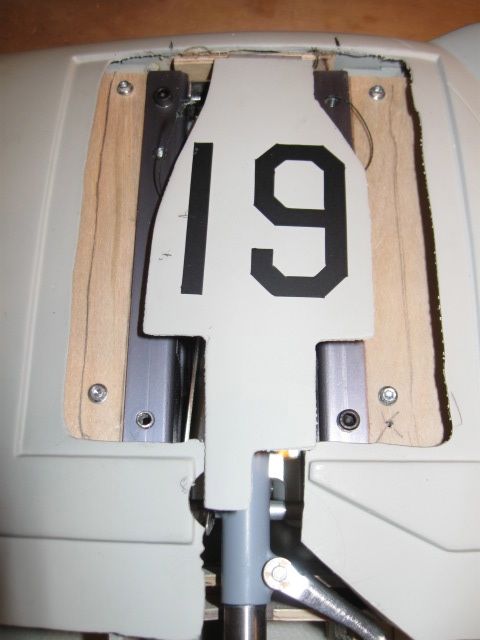
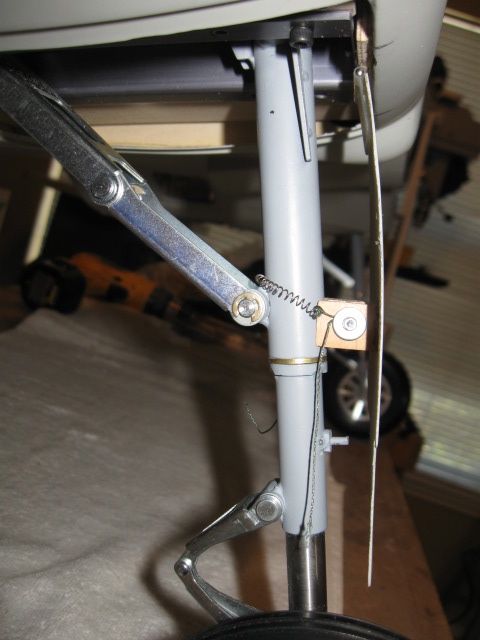
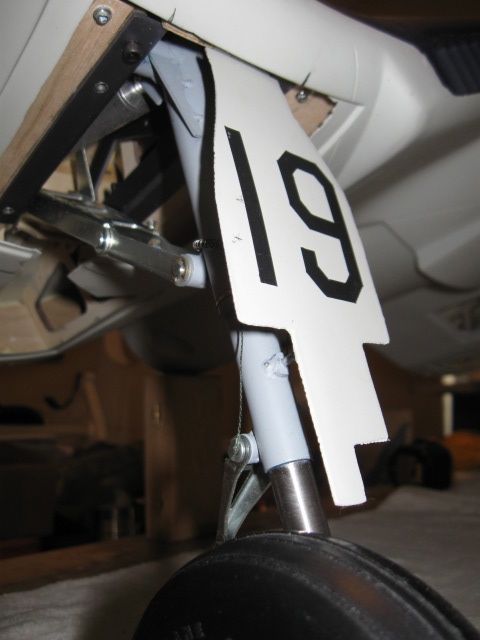
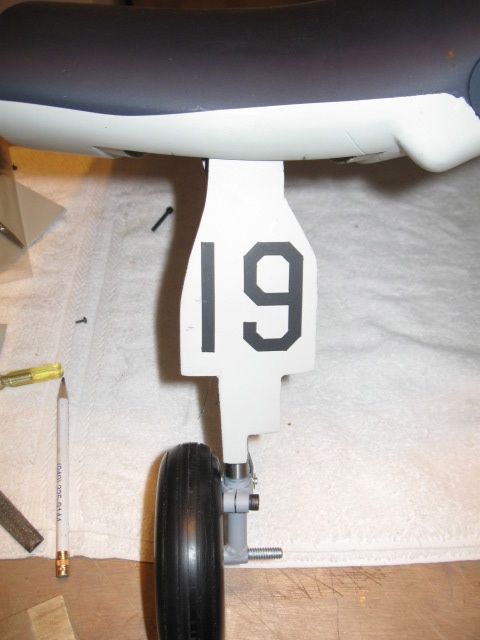
#1794
My Feedback: (49)
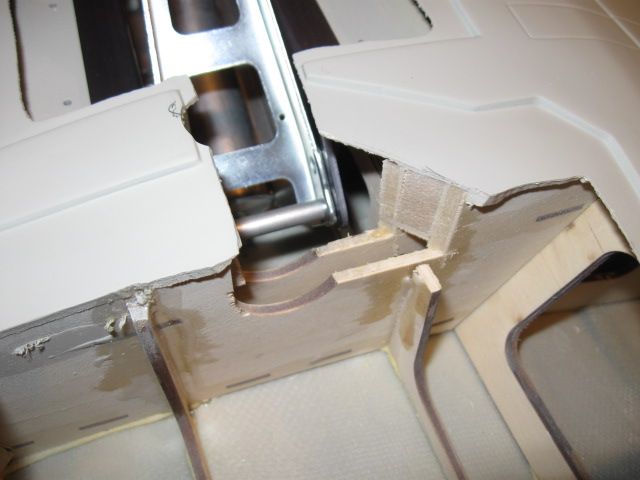
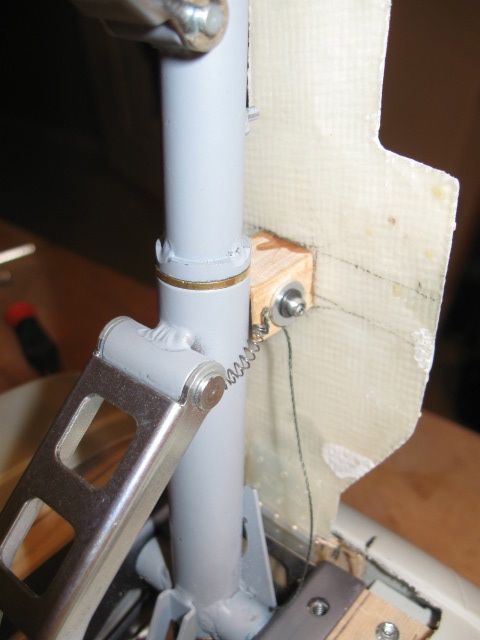
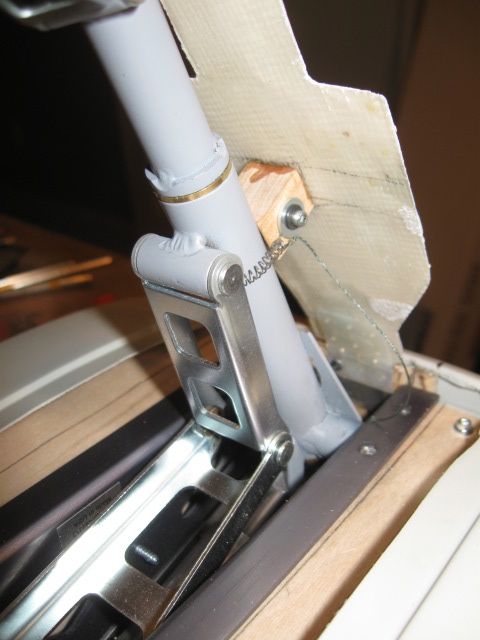
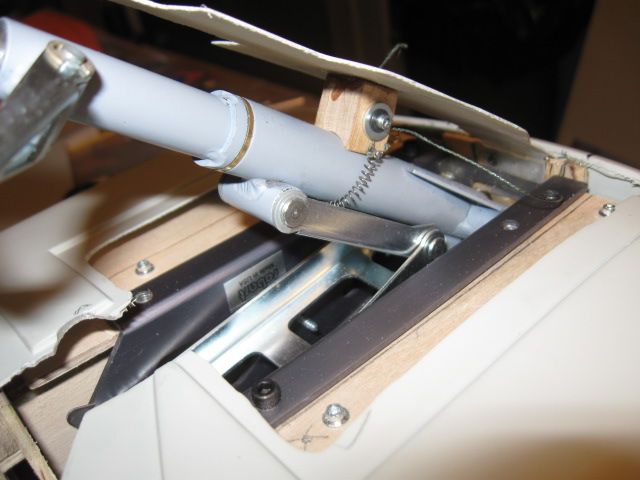
I know most have done the build, but a few may still be getting the 50cc F4U and want a simple way to make the front gear door work. This is how I made it work based on the ESM 74" Corsair. No use making things overly complicated. That's a small spring tied to the hardwood block with Kevlar fishing line and a Klett plastic hinge in front of the gear. This is more of a test setup and will likely remake the door out of some stiffer material like plywood, or just add some 1/16" plywood to the back of the same door. This setup works on the smaller Corsair so I think it will work here.


 08-18-2013, 02:36 AM
#1795

My ESM 50cc Corsair is history now.

This was flight no 78.
One wing was ripped off in flight in the wing root.
IT WAS TOTALLY MY OWN FAULT.
When I received the Corsair, the surface area in the wing root, front area, upper side, was quite ugly.
There was some large bulges there.
Before flight 78 I finally decided to do something about it, since everything else was in perfect order. Well, the plane was starting to look
a bit "used", but, it was a warbird, after all.
I cut away a square area on both sides, and glued new squares made of fiber-glass .
I don't think the glue held towards the inside-surface of the wing.
That's my son, sitting there looking at the carnage.
Reminded us all that every time you send your warbird up in the sky, there are no guaranties it will survive the day.
I might buy another one, but I am also considering the Top Flite ARF. But ripping off all the monokote and glassing it is a huge job.
Last edited by kwik; 08-18-2013 at 02:44 AM.
08-19-2013, 09:17 AM
#1798
My Feedback: (49)
KWIK, sorry to see your problem. Ouch! New wing sections are available, looks like a possible rebuild.
I'm pressing on with the assembly here. Got the gear doors rigged with HS-81's and simple piano wire Z-bends. Seems to work.
Those doors have a mind of their own as to shape, but a shot from the heat gun allows you to shape them easily.
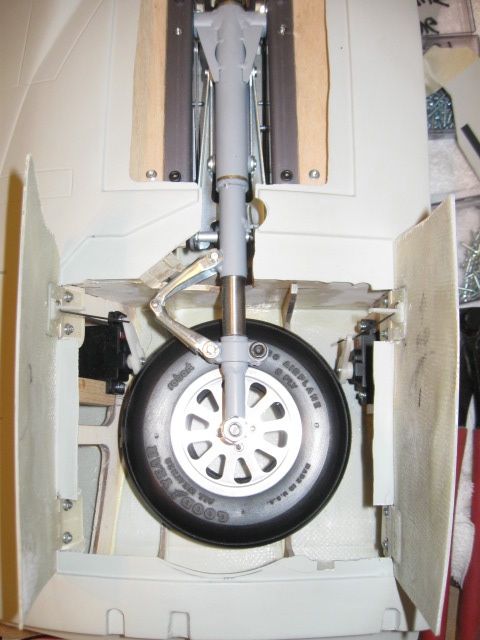
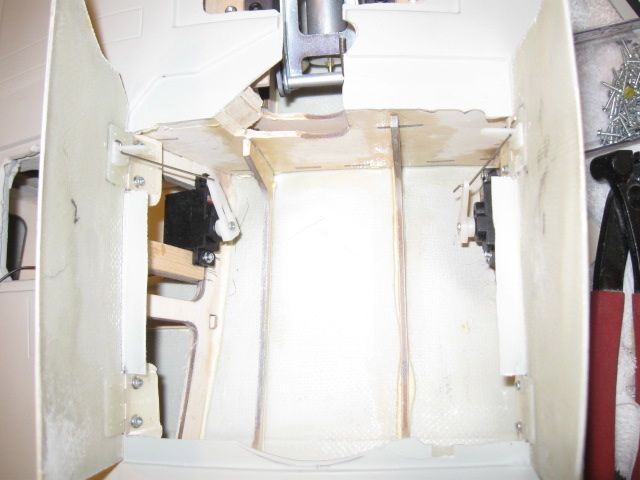
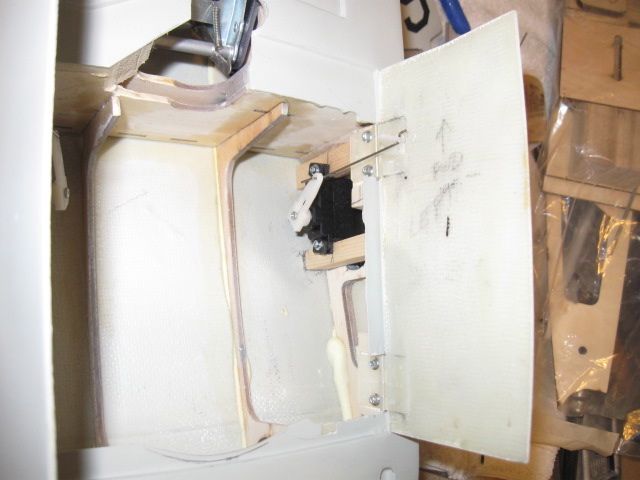
I'm pressing on with the assembly here. Got the gear doors rigged with HS-81's and simple piano wire Z-bends. Seems to work.
Those doors have a mind of their own as to shape, but a shot from the heat gun allows you to shape them easily.


 08-20-2013, 11:49 AM
#1799
My Feedback: (49)
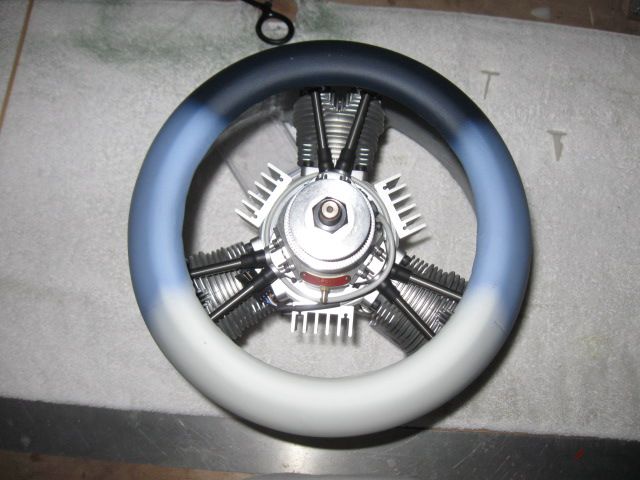
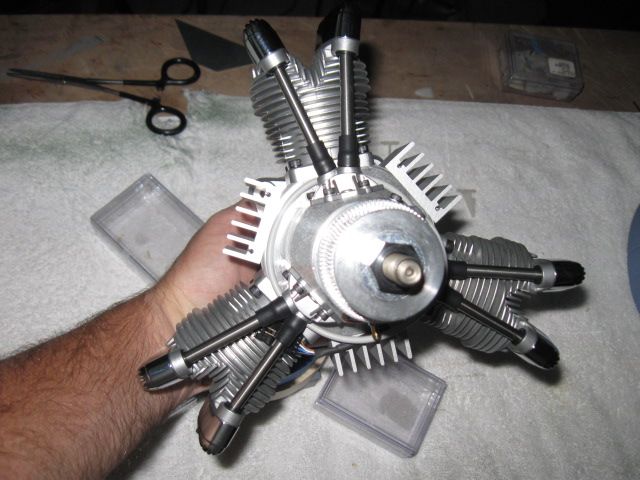
Got a Saito FG-57 engine question. Saito makes TWO models of these engines. Which one is the best? The latest one has the heat sink, new carb, and DLE-style standoff mounts. The older one has a beefier radial mounting system. Not sure of any internal and performance difference between the two models. My FG-84 radial had some shipping damage and now the distributor is not expecting any new ones till mid November. Gotta find a substitute. I see that the FG-57 will fly the Corsair fine. But, which one?
08-20-2013, 11:52 AM
#1800
Thanks folks! I'm more or less over it now. Still got the Sist D-9 and Vailly Fw-190 as flying models.
No rebuild, nope. The fuse was like a broken egg-shell, with all internals in one big heap.
LBJ, the last FG-57 model of course. New carb means no more hesitating when doing rolls, me thinks.
No rebuild, nope. The fuse was like a broken egg-shell, with all internals in one big heap.
LBJ, the last FG-57 model of course. New carb means no more hesitating when doing rolls, me thinks.