


Highly Modified AK Models SU-27 Build Thread
 05-05-2006, 05:02 PM
#1
Senior Member
Thread Starter
My Feedback: (1)

Join Date: Jun 2005
Location: Antelope Valley,
CA
Posts: 825
Likes: 0
Received 0 Likes
on
0 Posts
Summary
Hello SU-27 fans,
I've read and re-read the "AKM SU-27 Does Look Good" thread on RCU several times and it inspired me to build one of my own. I'm a builder at heart who sometimes flies (to test out the build) and like my handle implies, I tend to heavily "mod" every kit I build. Most of the time just for the coolness factor. Since I'm modding the original kit so much, I started my own thread. For this kit I plan to make three main mods*:
1. Full flying stab/ailerators
2. Movable L.E. flaps
3. A Speed brake
* and other scale resembling mods here and there
I understand that these mods are not needed and will/may degrade the performance a little, but the coolness factor far outweighs that[8D]. The engine will be a Jett 90L of course.
The Kit
The kit is sold by [link=http://www.ak-models.com]www.ak-models.com[/link]. It's laser cut (the parts actually fit together) and for $124.00 you can't beat the price!
Covering Design
Lastly, this will be my covering design. It's a MIG-29, but it is absolutely beautiful.
 05-05-2006, 05:24 PM
#2
Senior Member
Thread Starter
My Feedback: (1)
Join Date: Jun 2005
Location: Antelope Valley,
CA
Posts: 825
Likes: 0
Received 0 Likes
on
0 Posts
Full Flying Stab/Airlerators
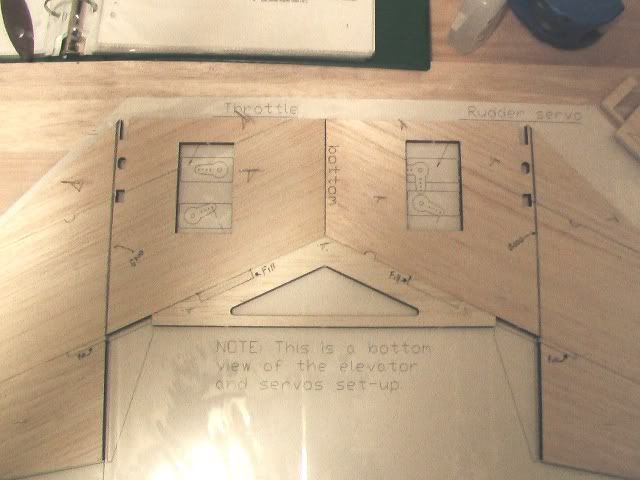
The original kit uses epoxy bearings and control rods to move the elevators (See Figure 1)

Figure 1
My design will use 1/4 dia aluminum torque rod epoxied in the stab itself (See Figure 2). This is the same design as [link=http://www.savagelight.com/]savagelights'[/link] SU-27 ailerators but it's smaller so I scaled up the dimentions. Almost bought that one over the AKM but it's electric and I'm not ready to go there yet. The aluminum torque rods will be enclosed in a 1/4 in ID carbon fiber glide tube epoxied into the fuse.

Figure 2
I'm going to use control horns purchased from Cermark. These are the same milled aluminum control horns used in their F-16. I have not seen nor heard of a better control horn for high speed full flying stabs. Surprised they don't sell them commercially [sm=confused.gif]? Here's a pic of the control horns installed in the F-16.

The original kit uses epoxy bearings and control rods to move the elevators (See Figure 1)
Figure 1
My design will use 1/4 dia aluminum torque rod epoxied in the stab itself (See Figure 2). This is the same design as [link=http://www.savagelight.com/]savagelights'[/link] SU-27 ailerators but it's smaller so I scaled up the dimentions. Almost bought that one over the AKM but it's electric and I'm not ready to go there yet. The aluminum torque rods will be enclosed in a 1/4 in ID carbon fiber glide tube epoxied into the fuse.
Figure 2
I'm going to use control horns purchased from Cermark. These are the same milled aluminum control horns used in their F-16. I have not seen nor heard of a better control horn for high speed full flying stabs. Surprised they don't sell them commercially [sm=confused.gif]? Here's a pic of the control horns installed in the F-16.
05-05-2006, 11:04 PM
#3
Senior Member
Thread Starter
My Feedback: (1)
Join Date: Jun 2005
Location: Antelope Valley,
CA
Posts: 825
Likes: 0
Received 0 Likes
on
0 Posts
Got a chance to crack the kit open and start building.
Began by building the stabilizer per the instructions. Since I'm not using the torque rod method to control the elevator I filled in the open slots with scrap balsa.
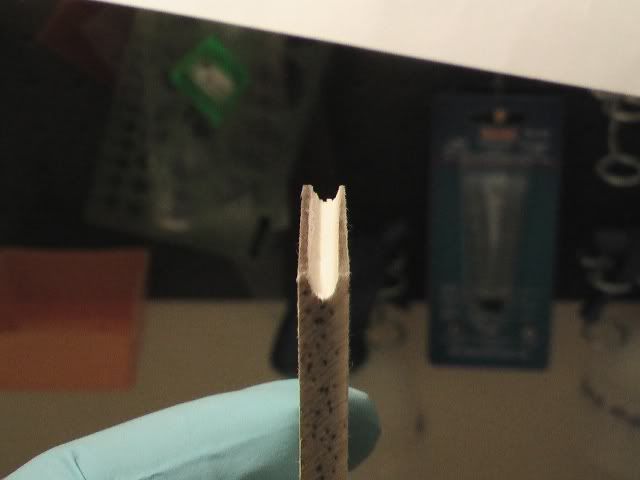
Took me about 2-3 tries building the epoxy bearings for the rudder. Found the best way was to file a grove in the center the aprox. diameter of the torque rod, fill with a mix of 30 min epoxy and milled fiberglass (for added strength).
Began by building the stabilizer per the instructions. Since I'm not using the torque rod method to control the elevator I filled in the open slots with scrap balsa.
Took me about 2-3 tries building the epoxy bearings for the rudder. Found the best way was to file a grove in the center the aprox. diameter of the torque rod, fill with a mix of 30 min epoxy and milled fiberglass (for added strength).
05-05-2006, 11:06 PM
#4
Senior Member
Thread Starter
My Feedback: (1)
Join Date: Jun 2005
Location: Antelope Valley,
CA
Posts: 825
Likes: 0
Received 0 Likes
on
0 Posts
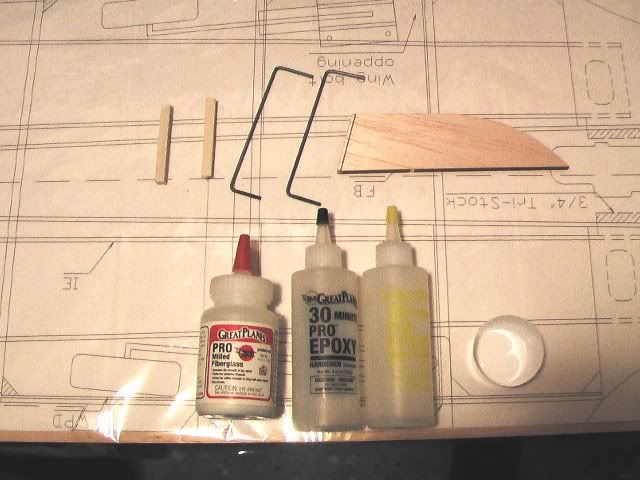
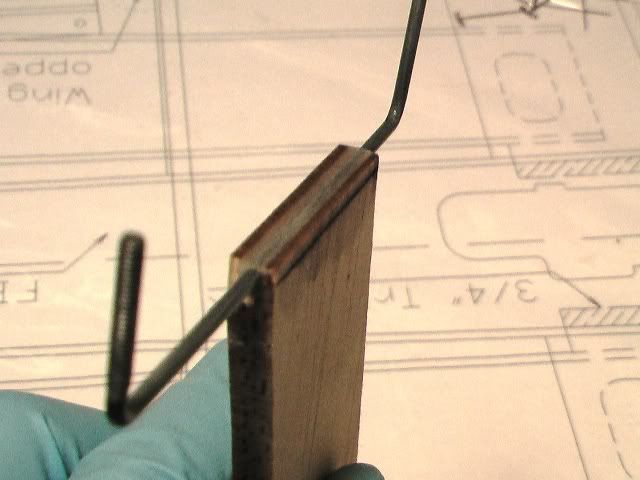
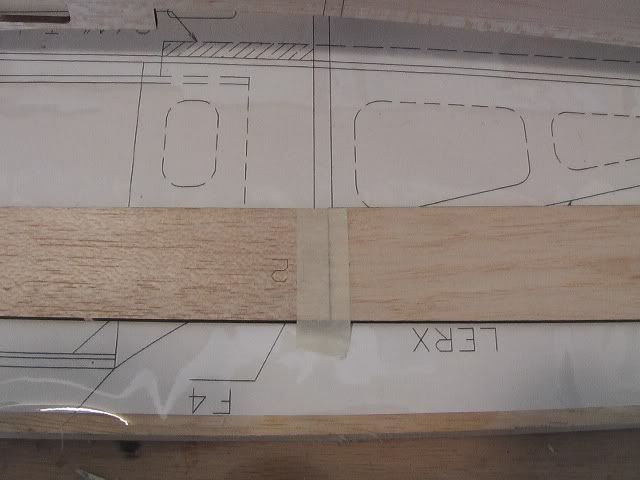
Next, I taped off a scrap peice of balsa and used that as a dam so epoxy would stay where it's supposed to. Then, lubed the torque rods with Vaseline and pinned it to the building board.


Worked like a charm!
Worked like a charm!
05-06-2006, 01:23 PM
#6

My Feedback: (20)
I'll put a link to this thread over at the old thread so all off us can see your progress.
I plan on doing the same stabilators set-up as you so I'm very interested to see how yours works out.
I do have one question, though. You say you're going to use the Cermark aluminum horns but you say they don't sell them. Did you get them out of a crash F-16? Or did I misread what you wrote?
Thanks for the thread
Don
05-06-2006, 04:58 PM
#7
Senior Member
Thread Starter
My Feedback: (1)
Join Date: Jun 2005
Location: Antelope Valley,
CA
Posts: 825
Likes: 0
Received 0 Likes
on
0 Posts
ORIGINAL: hattend
Did you get them out of a crash F-16? Or did I misread what you wrote?
Don
Did you get them out of a crash F-16? Or did I misread what you wrote?
Don
 ].
].Mods
05-06-2006, 09:05 PM
#8
Senior Member

Join Date: Jan 2004
Location: , FL
Posts: 320
Likes: 0
Received 0 Likes
on
0 Posts
How did you come up with the location (foward and aft) of where to place the aluminum shaft? The weight and aerodynamic balance of the surface is important.
Rich
Rich
05-06-2006, 10:08 PM
#9
Senior Member
Thread Starter
My Feedback: (1)
Join Date: Jun 2005
Location: Antelope Valley,
CA
Posts: 825
Likes: 0
Received 0 Likes
on
0 Posts
ORIGINAL: jetpilotrich
How did you come up with the location (forward and aft) of where to place the aluminum shaft? The weight and aerodynamic balance of the surface is important.
Rich
How did you come up with the location (forward and aft) of where to place the aluminum shaft? The weight and aerodynamic balance of the surface is important.
Rich
Here's a screen shot (Figure 1):
Figure 1
The rod must be placed 20%-25% on MAC to be effective. All three methods above yielded a distance of 4.40 in from the tip of the L.E (Figure 2). I shouldn't need to balance it since the rod will be located 25% on the MAC, but I am anyway just for grins
 . What's the point of going to all this trouble to do a half a@#ed job. I then plan to fill in the crevis created by the rod with 30 min epoxy. Lastly, seal the entire stabilator with medium weight fiberglass.
Figure 2
05-06-2006, 10:41 PM
#10
Senior Member
Thread Starter
My Feedback: (1)
Join Date: Jun 2005
Location: Antelope Valley,
CA
Posts: 825
Likes: 0
Received 0 Likes
on
0 Posts
Kit comes together very easily. Completed the fuse and engine sides. I found using the tape & strip planking method worked better to keep the CA from hardening on the outer skin (Figure 1).

Figure 1
Next, installed most the fuse formers with thick CA, except for the landing gear and firewall formers which I used a mix of 30 min epoxy and milled fiberglass (Figure 2).
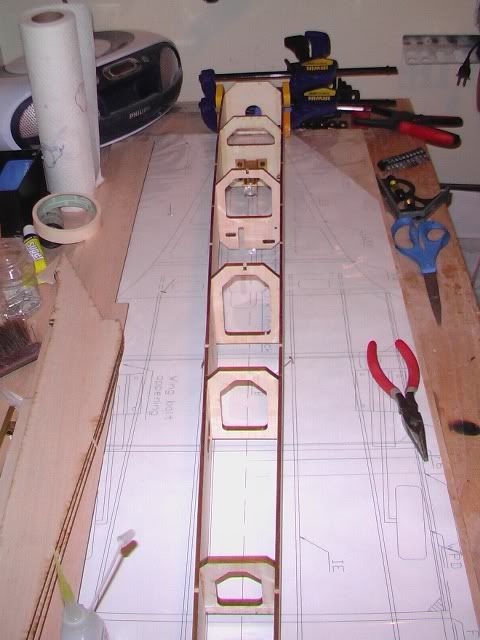
Figure 2
I am constantly reminded how well this kit was designed. Case in point, here is a photo of the fuse sides (Figure 3). In every kit I have put together, you have to use a 90 degree square to install the formers. This kit has the placement and angles of all the formers lasered on the fuse sides themselves!

Figure 3
More to Come,
Mods
Figure 1
Next, installed most the fuse formers with thick CA, except for the landing gear and firewall formers which I used a mix of 30 min epoxy and milled fiberglass (Figure 2).
Figure 2
I am constantly reminded how well this kit was designed. Case in point, here is a photo of the fuse sides (Figure 3). In every kit I have put together, you have to use a 90 degree square to install the formers. This kit has the placement and angles of all the formers lasered on the fuse sides themselves!
Figure 3
More to Come,
Mods
05-06-2006, 11:25 PM
#11
Senior Member
Thread Starter
My Feedback: (1)
Join Date: Jun 2005
Location: Antelope Valley,
CA
Posts: 825
Likes: 0
Received 0 Likes
on
0 Posts
ORIGINAL: HaveBlue
Hi MRM.. thats a very tidy looking torque bearing there[sm=thumbup.gif]
Hi MRM.. thats a very tidy looking torque bearing there[sm=thumbup.gif]
05-07-2006, 05:49 AM
#12

Looking good Mods.
You picked a great scheme to do, but I will warn you that it is a bear to translate from the Mig29 to the '27 planforms. I spent more time converting scaling the scheme on the pc, than in actual covering time. I am not sure what good photos you have, but if you look, the bottom of the right wing has the Mig logo on it, so what I did was cut out the Sukoi log in blue and replaced it. That is the only change to the scheme that I have done.
Keep the pics flowing!
Spar
05-07-2006, 08:51 AM
#13
Senior Member
Thread Starter
My Feedback: (1)
Join Date: Jun 2005
Location: Antelope Valley,
CA
Posts: 825
Likes: 0
Received 0 Likes
on
0 Posts
ORIGINAL: Sparhawk
Looking good Mods.
You picked a great scheme to do, but I will warn you that it is a bear to translate from the Mig29 to the '27 planforms. I spent more time converting scaling the scheme on the pc, than in actual covering time. I am not sure what good photos you have, but if you look, the bottom of the right wing has the Mig logo on it, so what I did was cut out the Sukoi log in blue and replaced it. That is the only change to the scheme that I have done.
Keep the pics flowing!
Spar
I'm glad you approve of the covering scheme. Do you mind posting some pics of the bottom. I've searched the net for hours and can't seem to find any.
Thanks,
Mods
05-07-2006, 01:55 PM
#15
I would if I could, but I am in Norway this week and all my reference stuff is home. It will have to wait until I return. Vic also posted some very good pics, and take notice of the engine bays. If you look at the first picture, notice how the white on the fuse flows down a bit and the blue still creates that 'lightning bolt' look... especially in the front area and where the retracting wheel is shown. Really examine your photos and look for those subtle things that most would overlook (look at the jagged LE of the Stabs!).
Spar
Spar
05-07-2006, 03:36 PM
#16
My Feedback: (6)
Join Date: Aug 2002
Location: Columbia, MD
Posts: 687
Likes: 0
Received 0 Likes
on
0 Posts
For any of you who may want to use this paint scheme, I have uploaded a large video of the Mig at the following address:
http://download.yousendit.com/0422A0E85FAF5360
The file is nearly 39 megs but it is well worth the time to download. There is an interesting dialog at the end of the video where the pilot shows the functionality of one of the engine nozzles. Enjoy ! !
http://download.yousendit.com/0422A0E85FAF5360
The file is nearly 39 megs but it is well worth the time to download. There is an interesting dialog at the end of the video where the pilot shows the functionality of one of the engine nozzles. Enjoy ! !
05-07-2006, 09:57 PM
#17
Senior Member
Thread Starter
My Feedback: (1)
Join Date: Jun 2005
Location: Antelope Valley,
CA
Posts: 825
Likes: 0
Received 0 Likes
on
0 Posts
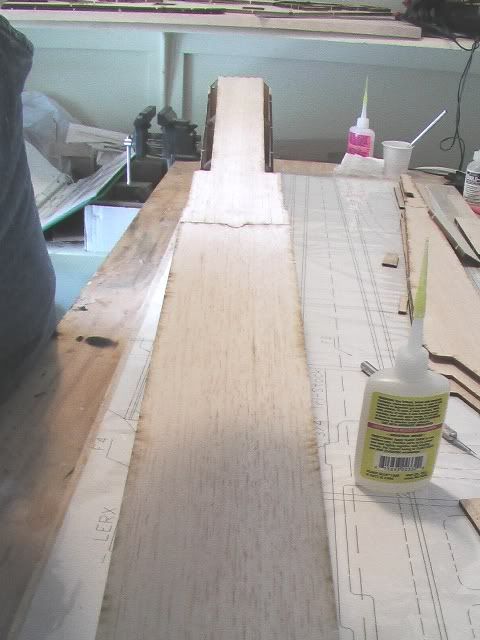
Today I began by strip planking the fuse bottom sections together and attaching it to the formers.
1. Taped two sections together with masking tape. Flipped the section over and spread medium CA in the crack.
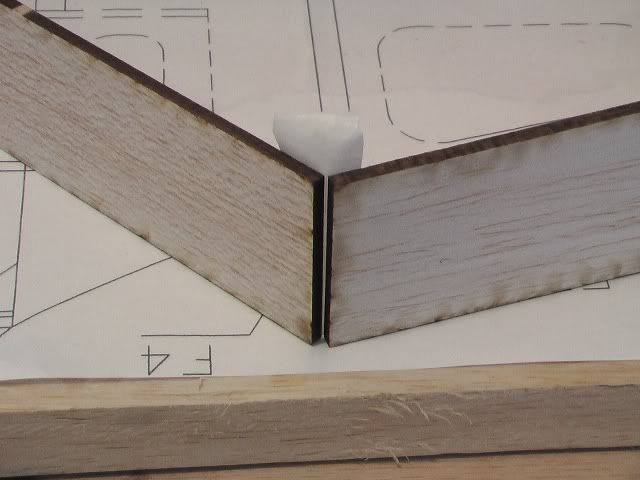
2. Using a paper towel with a few drops of acetone and wiped off the excess. Flipped it over, removed the tape and wiped off the other side.
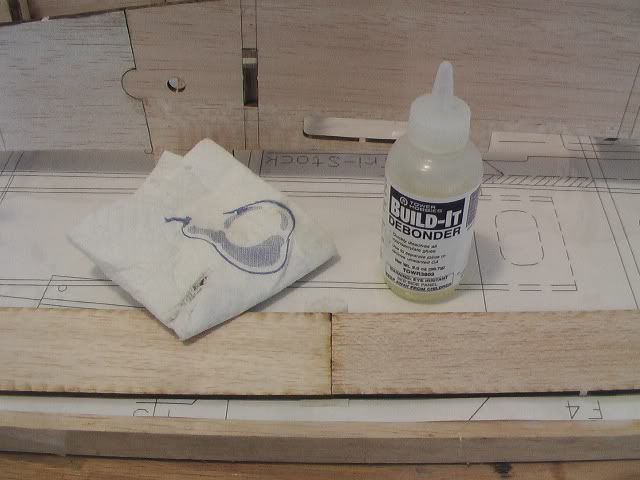
3. Connected all the fuse bottom sections and attached them to the former bottoms with thick CA.
1. Taped two sections together with masking tape. Flipped the section over and spread medium CA in the crack.
2. Using a paper towel with a few drops of acetone and wiped off the excess. Flipped it over, removed the tape and wiped off the other side.
3. Connected all the fuse bottom sections and attached them to the former bottoms with thick CA.
05-07-2006, 10:15 PM
#18
Senior Member
Thread Starter
My Feedback: (1)
Join Date: Jun 2005
Location: Antelope Valley,
CA
Posts: 825
Likes: 0
Received 0 Likes
on
0 Posts
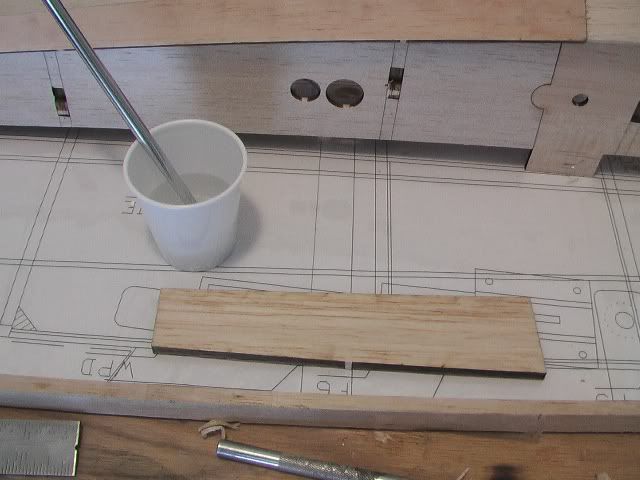
Used a mix of 30 min epoxy & milled fiberglass to attach the firewall and landing gear plate to the bottom.
Next. I wanted to make sure that glue got to all the formers, so I poked holes in the sheeting above the formers and dripped thin CA into the hole.

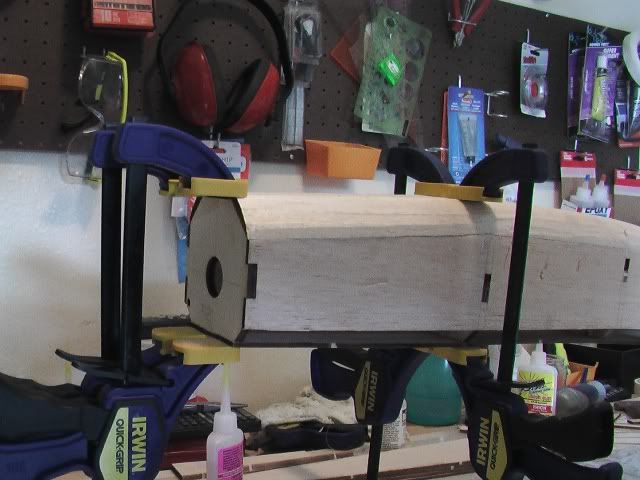
First and foremost, I HATE sanding. That is why I bought and use a razor plane. Using the razor plane, beveled off the corners.
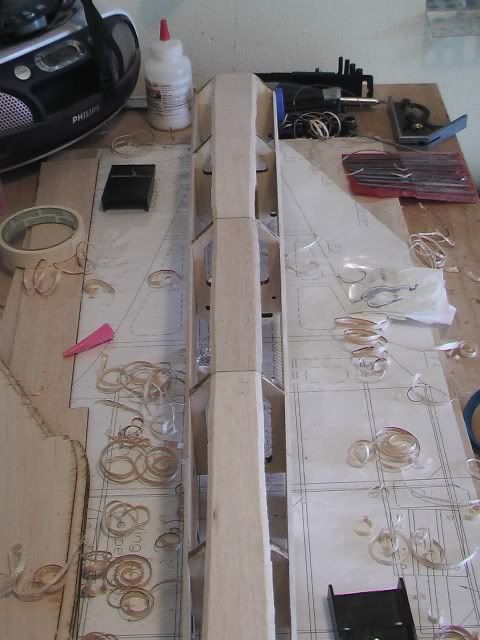
Then, wet down all the corner sheeting with water, waited for 5 min, then razor planed some more until I achieved a rough rounded shape.
Now I can add the side formers and start making it look like an airplane. Should start the ailerator mod this weekend.
More to come,
Mods
Next. I wanted to make sure that glue got to all the formers, so I poked holes in the sheeting above the formers and dripped thin CA into the hole.
First and foremost, I HATE sanding. That is why I bought and use a razor plane
. Using the razor plane, beveled off the corners. Then, wet down all the corner sheeting with water, waited for 5 min, then razor planed some more until I achieved a rough rounded shape.
Now I can add the side formers and start making it look like an airplane. Should start the ailerator mod this weekend.
More to come,
Mods
 05-09-2006, 11:13 PM
#20
Senior Member
Thread Starter
My Feedback: (1)
Join Date: Jun 2005
Location: Antelope Valley,
CA
Posts: 825
Likes: 0
Received 0 Likes
on
0 Posts
Little more progress....
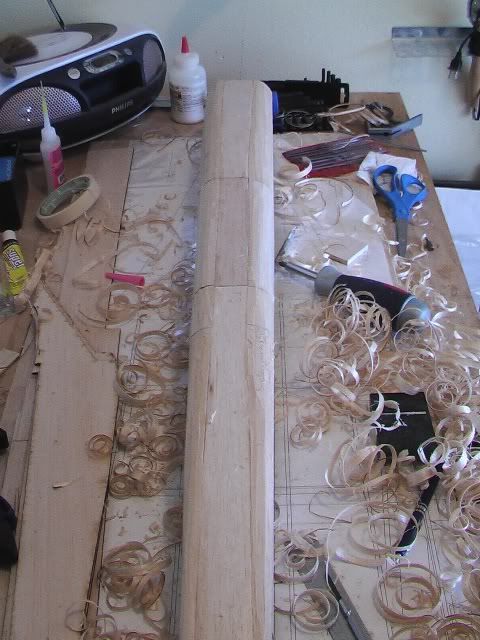
A much as I hate sanding; it is necessary, so I rough sanded the fuse center and prepared it for the side formers (Figures 1 & 2).
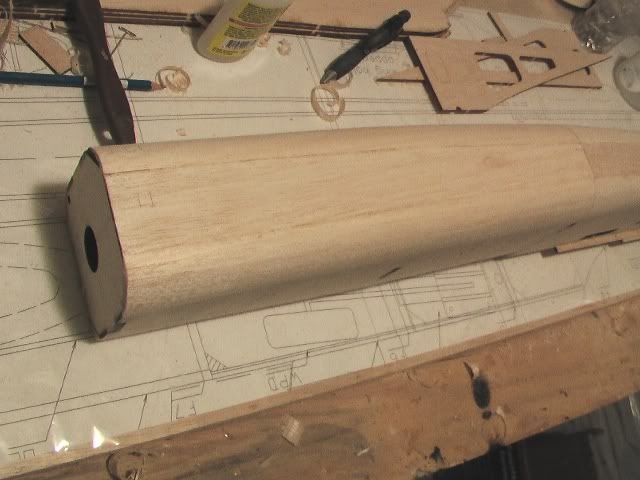
Figure 1
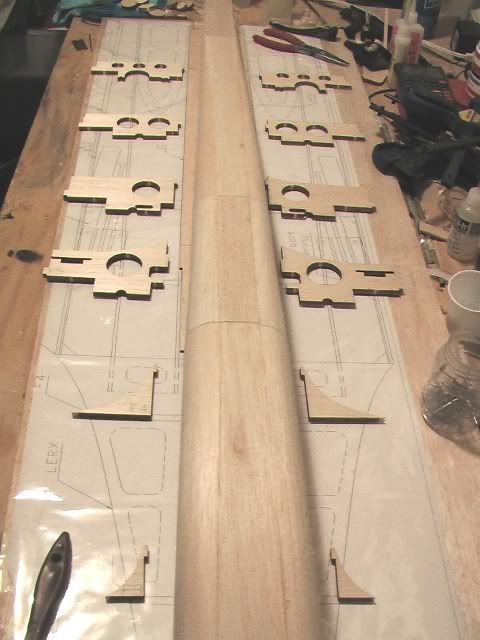
Figure 2
__________________________________________________ _______________________________________
The good news is that my supplies arrived from Tower Hobbies and [link=http://www.acp-composites.com/acp-tube.htm]ACP Composites[/link] via UPS (Figure 3):
1/4" dia Aluminum Rod from KS Metals
9/32" OD Brass tube from KS Metals
1/4" ID Carbon Fiber Rod from ACP
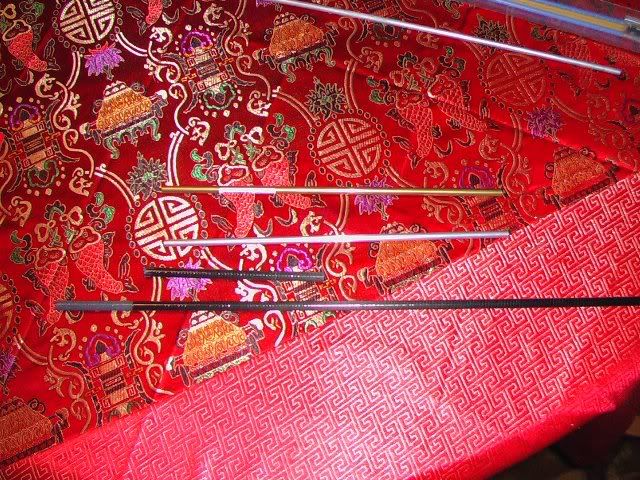
Figure 3
__________________________________________________ _______________________________________
Bad news is that it looked like the UPS staff took an axe to my brand new Carbon Fiber tube (Figure 4) ! The funny thing about it is that they tried to tape it back together and continue shipping it like I would not notice (Figure 5)[sm=lol.gif]. Thanks Brown [sm=thumbdown.gif].
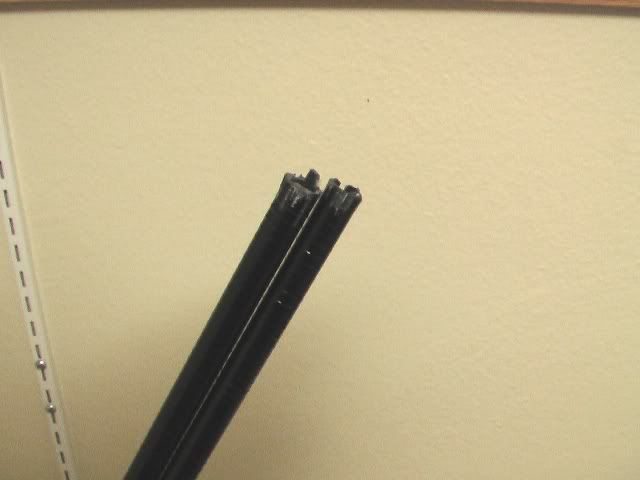
Figure 4
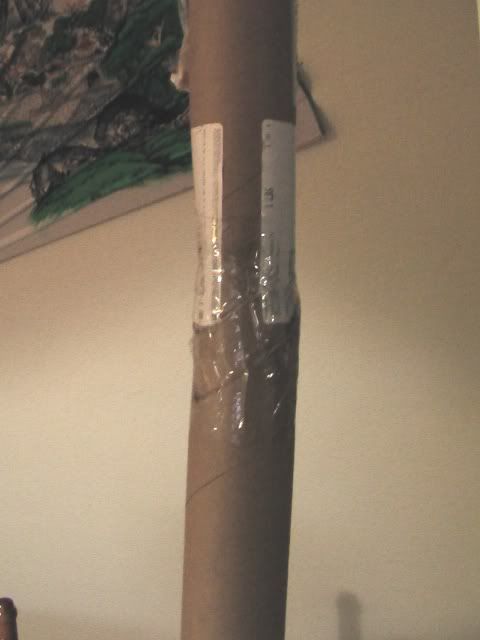
Figure 5
__________________________________________________ _______________________________________
The bad news turned back to good news when I discovered that the aluminum rod did not fit inside the carbon fiber tube anyway, but it did fit perfectly into the 9/32" brass tube with no slop whatsoever (Figure 6). So now I will use the 9/32" OD brass as my glide tube and the 1/4" aluminum as my control horn. All in all, it was a good day.
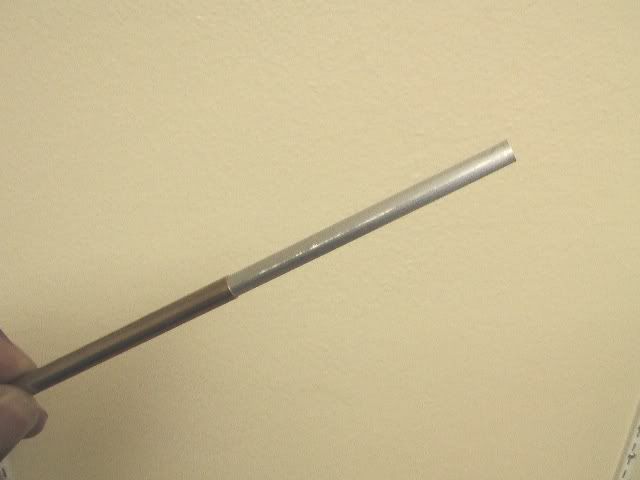
Figure 6
More to Come,
Mods
A much as I hate sanding; it is necessary, so I rough sanded the fuse center and prepared it for the side formers (Figures 1 & 2).
Figure 1
Figure 2
__________________________________________________ _______________________________________
The good news is that my supplies arrived from Tower Hobbies and [link=http://www.acp-composites.com/acp-tube.htm]ACP Composites[/link] via UPS (Figure 3):
1/4" dia Aluminum Rod from KS Metals
9/32" OD Brass tube from KS Metals
1/4" ID Carbon Fiber Rod from ACP
Figure 3
__________________________________________________ _______________________________________
Bad news is that it looked like the UPS staff took an axe to my brand new Carbon Fiber tube (Figure 4)
! The funny thing about it is that they tried to tape it back together and continue shipping it like I would not notice (Figure 5)[sm=lol.gif]. Thanks Brown [sm=thumbdown.gif].Figure 4
Figure 5
__________________________________________________ _______________________________________
The bad news turned back to good news when I discovered that the aluminum rod did not fit inside the carbon fiber tube anyway, but it did fit perfectly into the 9/32" brass tube with no slop whatsoever (Figure 6)
. So now I will use the 9/32" OD brass as my glide tube and the 1/4" aluminum as my control horn. All in all, it was a good day.Figure 6
More to Come,
Mods
05-10-2006, 10:38 AM
#21
Senior Member
Thread Starter
My Feedback: (1)
Join Date: Jun 2005
Location: Antelope Valley,
CA
Posts: 825
Likes: 0
Received 0 Likes
on
0 Posts
All,
I did not know this but AKM is coming out with and F-16 propjet soon! There is a guy who got one of the first prototypes and he set up a thread for it in the kit builders section. For those of you planning to use the full flying stab mod and can't buy the Cermark control horns, his control horn set up is pretty ingenious (and easy). We're on parallel paths so check him out: [link=http://www.rcuniverse.com/forum/m_4157678/anchors_4262031/mpage_1/key_/anchor/tm.htm#4262031]CLICK HERE[/link]
Mods
05-10-2006, 06:12 PM
#22
Senior Member

Join Date: Jan 2005
Location: Sydney, AUSTRALIA
Posts: 852
Likes: 0
Received 0 Likes
on
0 Posts
I hope he gets the it done soon too, Ive been waiting for the F16 along time now .The cermark arf is just to expensive to ship over to Aus..hope this is available soon!!!
05-12-2006, 05:40 AM
#23
Senior Member

Join Date: Mar 2005
Location: Mt Coolum QLD, AUSTRALIA
Posts: 580
Likes: 0
Received 0 Likes
on
0 Posts
I just saw this in a thread about the Jet Legend T45.
www.rcuniverse.com/forum/m_4262306/tm.htm
Tony.
www.rcuniverse.com/forum/m_4262306/tm.htm
Tony.
05-13-2006, 11:03 PM
#24
Senior Member
Thread Starter
My Feedback: (1)
Join Date: Jun 2005
Location: Antelope Valley,
CA
Posts: 825
Likes: 0
Received 0 Likes
on
0 Posts
ORIGINAL: crasharama
I just saw this in a thread about the Jet Legend T45.
www.rcuniverse.com/forum/m_4262306/tm.htm
Tony.
I just saw this in a thread about the Jet Legend T45.
www.rcuniverse.com/forum/m_4262306/tm.htm
Tony.
.
05-13-2006, 11:12 PM
#25
Senior Member
Thread Starter
My Feedback: (1)
Join Date: Jun 2005
Location: Antelope Valley,
CA
Posts: 825
Likes: 0
Received 0 Likes
on
0 Posts
The Stabilator Mod
I've spent the last three days designing the stabilator mod and spent the entire day woirking on it. I think it might work.
Got the tail section assembled.

Once I squared the stab with the fuse, I drew refernece lines on it so I can quickly do it again later (Figure 1).
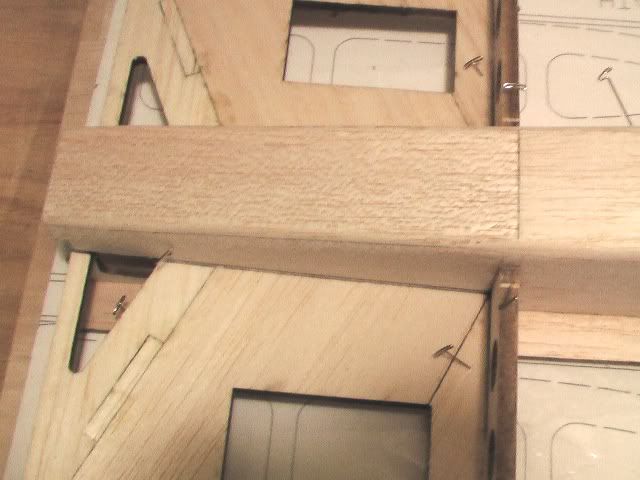
Figure 1
Drew another line where I plan to separate each stabilator from the stab (Figure 2).
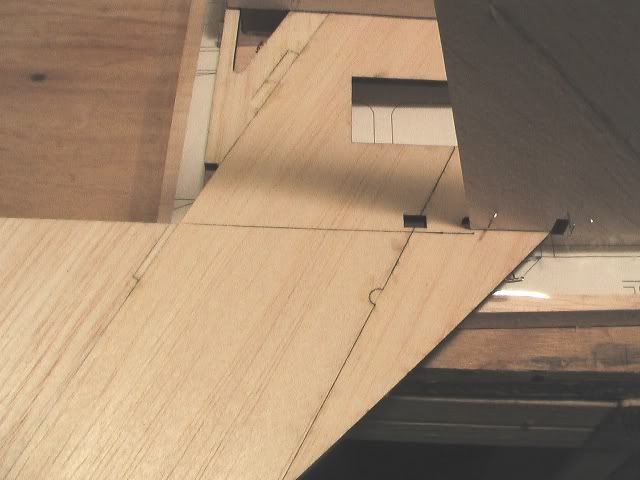
Figure 2
I've spent the last three days designing the stabilator mod and spent the entire day woirking on it. I think it might work.
Got the tail section assembled.
Once I squared the stab with the fuse, I drew refernece lines on it so I can quickly do it again later (Figure 1).
Figure 1
Drew another line where I plan to separate each stabilator from the stab (Figure 2).
Figure 2