


saito rebuild?
 02-11-2009, 04:47 AM
#51
Senior Member
Join Date: Aug 2008
Location: Burtchville,
MI
Posts: 2,158
Likes: 0
Received 0 Likes
on
0 Posts
EEEEEYOOOOW! Yes lose that piston. I think you mentioned in a previous thread that you had decided to replace the cylinder, piston and case? It sounds to me like you may have suffed a defective main bearing. I've never seen it but it sounds like portions of the working surface of the bearing races have flaked off. Very unusual. The annular grooves around the piston circumference are no doubt oil retention grooves - a great design feature. Many high performance aftermarket auto pistons are machined with more pronounced grooves serving the same purpose. I think it will be no time at all before your are dtiving your neighbors nuts bench testing your new baby. Please keep us posted. You have access to hundreds of collective years of experience via your keyboard.
Don't lose that great attitude![sm=thumbs_up.gif]
Bill
Don't lose that great attitude![sm=thumbs_up.gif]
Bill
 02-12-2009, 03:32 PM
#52
Senior Member
Thread Starter
Join Date: Jun 2005
Location: bristolavon, UNITED KINGDOM
Posts: 111
Likes: 0
Received 0 Likes
on
0 Posts
i got my new jug yesterday, wow those 4 bolts are tight! i rounded out the head on one of the bolts, ended up having to drill the head off to remove the jug, anybody know the thread for these 4 bolts? I only intended to do that for the night then my son came over, we ended up stripping the whole lot, piston was like new, so we ended up rebuilding it in an evening! Cant be bad, very do able in an evening with 2 pairs of hands. pics are poor quality, sorry
02-12-2009, 04:28 PM
#53
Senior Member
Join Date: Aug 2007
Location: Farmington hills ,
MI
Posts: 325
Likes: 0
Received 0 Likes
on
0 Posts
Nice Job Brit Bloke,
It's encouraging knowing your job is completed.. I did strip out one of the heads on one of the hex screws holding the jug. I found that a pair of strong pliers was enough to remove the holding torque of the screw. Luckilly I didn't have to drill off the head... But it sounds like you accomplished this no problem and it was no big deal as it was a bad jug, anyhow. Did you find the replacements screws? I couldn't find a part number for these, besides the 6514 # in the user manual. It's confusing to go to Horizon and fine "Cylinder head screws." I was planning to go to my LHS as they can order from a better data base than me. "Your Cylinder looks new!" Keep us posted how the the new jug runs! I'm hoping all my parts will be here by the end of next week. The funny thing is I won't be mounting this motor on a plane for a while as I'm going back to using my 100 on a rebuild of the Revolver that ruined my 125 jug. I will put it on the break in stand just to check. :-)
Ram Jet, "The annular grooves around the piston circumference are no doubt oil retention grooves"...
.... So that's what those things are! [:-] "Having fun and learing tons!"
Peace Out,
Phil
03-09-2009, 10:37 PM
#54
Senior Member
Join Date: Aug 2007
Location: Farmington hills ,
MI
Posts: 325
Likes: 0
Received 0 Likes
on
0 Posts
W8ye,
As promised here’s the report on the cylinder and an update on the repair.
It took a while to get all the parts between, RC-bearing, RougueRC and my LHS. I ended up changing the front and rear bearings, jug, piston and piston ring. I saved my new valve springs and tappets for later. I just couldn’t justify the swap. (If anyone has a periodic maintenance table for these items or suggested hour engine run time to change, please share.) The valves cleaned up and are tarnish free now. I was able to carefully reuse the cam box gasket. I just ran the engine this afternoon and everything went just fine. After running just under an hour in accordance to the manual and a mixture of others techniques, I felt that the new ring was seated pretty well and she’s ready for an airplane. As usual the idle sits nicely and scoots right up on command. “Very satisfying.” I am not anticipating any problems with this engine. This engine ran good before I crashed and with the new innards and jug I’m expecting the same performance from the rebuilt engine as the original.
The jugs were actually quite different. I want to comment about the 115 jug and the “New” 125 jug. Though my 115 went back in for service, as you are probably aware from the other thread, the jugs appear identical. The only difference I could tell between the 115 and the 125 is that the exhaust and intake ports are smaller on the 115 than the 125. They use the same piston and rings. The only difference is a 2mm stroke that must be made up in the crank and case. Now I’m wondering what would happen if someone put a 125 jug on a 115 engine? Bigger ports – more power? (It’d require a modified intake pipe, etc.) Hmm... Or maybe the 115 is designed to be more efficient and you really won’t see much power increase, if any. But from what I can tell, it’s totally possible.
OK… back to the difference in the old and new Saito 125 jugs;
- The exhaust port wall thickness measures 2.34mm from inside thread to outside wall on the old and 3.07mm on the new.
o That is a substantial amount of meat increase for those of us who tend to use our muffler as an auxiliary landing device from time to time…
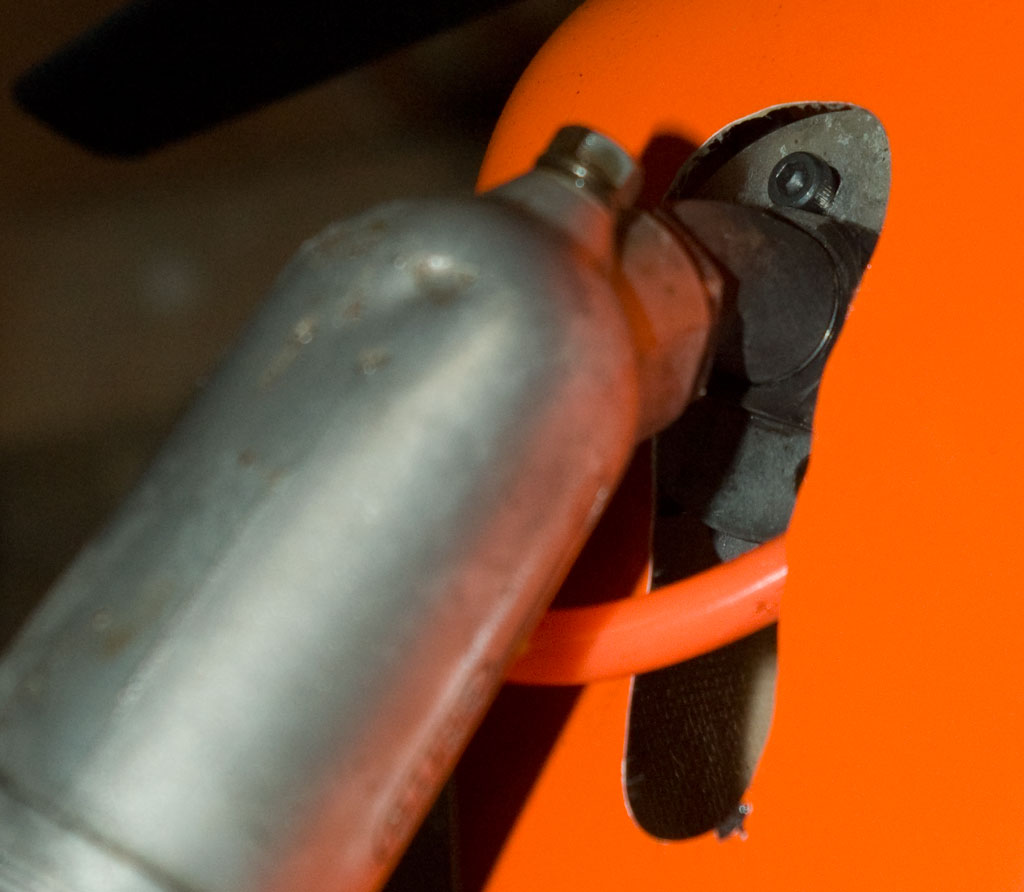
- The intake side of the casting has been cleaned up. There is no longer the extra casting material as you can see this in attached picture.
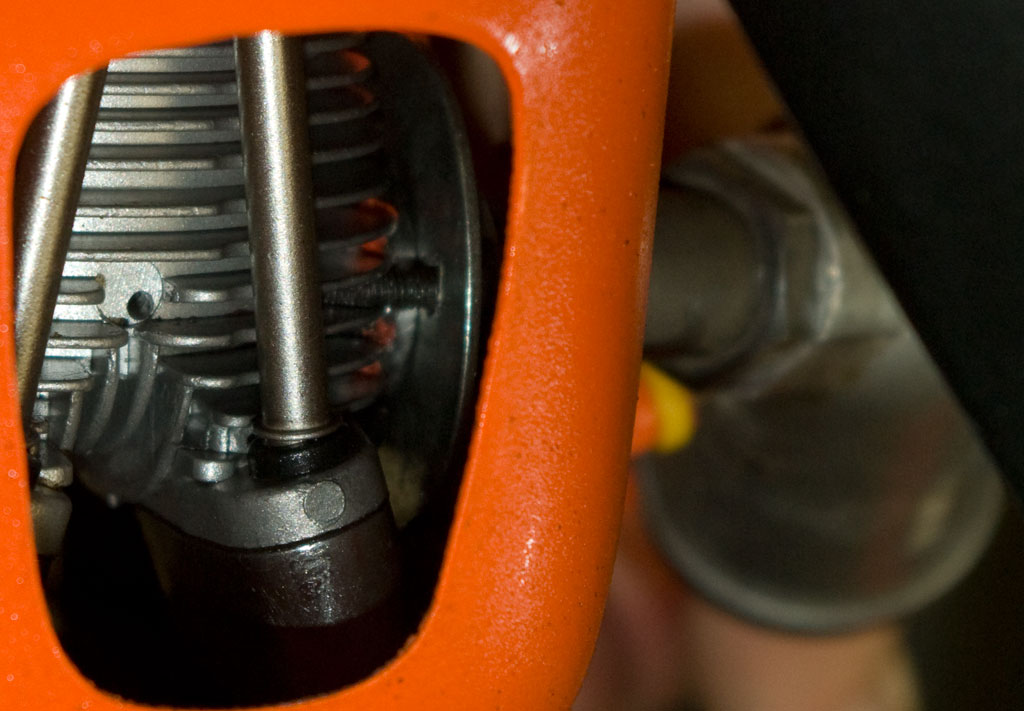
- The fins are larger diameter and have been redesigned all around. There appears to be better cooling and larger fins all around the cylinder. The diameter of the top widest fins is 50.75mm on the new jug and 48.92mm on the old jug.
- Glow plug; the Glow plug on the old casting was offset more to the exhaust side. While on the new jug it is more centered, though not exactly between the valves.
- Internally the valve seats have been redesigned and it appears there is room for more fuel air mixture. However I can only observe and this may be only an illusion, but based on the new cuts in the casting around the valve seat – it’s cleaned up inside compared to the old jug.
- The new jug weighs a tad more.
Sorry to ramble on so much, but this is pretty exciting for 125 owners who may be looking at a new jug in the future. I give the engineers at Saito a lot of credit for cleaning up this casting, big time. I believe part of launching the new Saito 115 was to piggy back the budget to have a new shared jug redesign for the 125. It was a beautiful engine before and the new casting makes it look all that much sexier. Only Saito knows all of their new design features, but again, good job to our buddies in Japan.
A few hobby shops who still have the older jugs and possibly Horizon may not like me publishing this, but if I were to order a new jug and received an older one, I’d send it back and ask for the newer Jug!!!
Thanks again, all, for sharing the knowhow for taking on this job. I’m that much more endeared with these engines after a teardown/overhaul.
Happy Flying!
As promised here’s the report on the cylinder and an update on the repair.
It took a while to get all the parts between, RC-bearing, RougueRC and my LHS. I ended up changing the front and rear bearings, jug, piston and piston ring. I saved my new valve springs and tappets for later. I just couldn’t justify the swap. (If anyone has a periodic maintenance table for these items or suggested hour engine run time to change, please share.) The valves cleaned up and are tarnish free now. I was able to carefully reuse the cam box gasket. I just ran the engine this afternoon and everything went just fine. After running just under an hour in accordance to the manual and a mixture of others techniques, I felt that the new ring was seated pretty well and she’s ready for an airplane. As usual the idle sits nicely and scoots right up on command. “Very satisfying.” I am not anticipating any problems with this engine. This engine ran good before I crashed and with the new innards and jug I’m expecting the same performance from the rebuilt engine as the original.
The jugs were actually quite different. I want to comment about the 115 jug and the “New” 125 jug. Though my 115 went back in for service, as you are probably aware from the other thread, the jugs appear identical. The only difference I could tell between the 115 and the 125 is that the exhaust and intake ports are smaller on the 115 than the 125. They use the same piston and rings. The only difference is a 2mm stroke that must be made up in the crank and case. Now I’m wondering what would happen if someone put a 125 jug on a 115 engine? Bigger ports – more power? (It’d require a modified intake pipe, etc.) Hmm... Or maybe the 115 is designed to be more efficient and you really won’t see much power increase, if any. But from what I can tell, it’s totally possible.
OK… back to the difference in the old and new Saito 125 jugs;
- The exhaust port wall thickness measures 2.34mm from inside thread to outside wall on the old and 3.07mm on the new.
o That is a substantial amount of meat increase for those of us who tend to use our muffler as an auxiliary landing device from time to time…
- The intake side of the casting has been cleaned up. There is no longer the extra casting material as you can see this in attached picture.
- The fins are larger diameter and have been redesigned all around. There appears to be better cooling and larger fins all around the cylinder. The diameter of the top widest fins is 50.75mm on the new jug and 48.92mm on the old jug.
- Glow plug; the Glow plug on the old casting was offset more to the exhaust side. While on the new jug it is more centered, though not exactly between the valves.
- Internally the valve seats have been redesigned and it appears there is room for more fuel air mixture. However I can only observe and this may be only an illusion, but based on the new cuts in the casting around the valve seat – it’s cleaned up inside compared to the old jug.
- The new jug weighs a tad more.
Sorry to ramble on so much, but this is pretty exciting for 125 owners who may be looking at a new jug in the future. I give the engineers at Saito a lot of credit for cleaning up this casting, big time. I believe part of launching the new Saito 115 was to piggy back the budget to have a new shared jug redesign for the 125. It was a beautiful engine before and the new casting makes it look all that much sexier. Only Saito knows all of their new design features, but again, good job to our buddies in Japan.
A few hobby shops who still have the older jugs and possibly Horizon may not like me publishing this, but if I were to order a new jug and received an older one, I’d send it back and ask for the newer Jug!!!
Thanks again, all, for sharing the knowhow for taking on this job. I’m that much more endeared with these engines after a teardown/overhaul.
Happy Flying!


 03-10-2009, 04:16 AM
#57
Senior Member
Thread Starter
Join Date: Jun 2005
Location: bristolavon, UNITED KINGDOM
Posts: 111
Likes: 0
Received 0 Likes
on
0 Posts
hi, reference those cylinder bolts, i spoke to the importer/suplier over here, they tell me the threads are 3.5mm, i assume they are fine pitch, not sure, forgot to ask, doh, still its a starting point, i dont think there are gonna be many choices in that thread size, bb.
03-10-2009, 07:51 AM
#58
Senior Member
Join Date: Aug 2008
Location: Burtchville,
MI
Posts: 2,158
Likes: 0
Received 0 Likes
on
0 Posts
ORIGINAL: Chancho
W8ye,
As promised here’s the report on the cylinder and an update on the repair.
It took a while to get all the parts between, RC-bearing, RougueRC and my LHS. I ended up changing the front and rear bearings, jug, piston and piston ring. I saved my new valve springs and tappets for later. I just couldn’t justify the swap. (If anyone has a periodic maintenance table for these items or suggested hour engine run time to change, please share.) The valves cleaned up and are tarnish free now. I was able to carefully reuse the cam box gasket. I just ran the engine this afternoon and everything went just fine. After running an just under an hour in accordance to the manual and a mixture of others techniques, I felt that the new rig was seated pretty well and she’s ready for an airplane. As usual the idle sits nicely and scoots right up on command. “Very satisfying.” I am not anticipating any problems with this engine. This engine ran good before I crashed and with the new innards and jug I’m expecting the same performance from the rebuilt engine as the original.
The jugs were actually quite different. I want to comment about the 115 jug and the “New” 125 jug. Though my 115 went back in for service, as you are probably aware from the other thread, the jugs appear identical. The only difference I could tell between the 115 and the 125 is that the exhaust and intake ports are smaller on the 115 than the 125. They use the same piston and rings. The only difference is a 2mm stroke that must be made up in the crank and case. Now I’m wondering what would happen if someone put a 125 jug on a 115 engine? Bigger ports – more power? (It’d require a modified intake pipe, etc.) Hmm... Or maybe the 115 is designed to be more efficient and you really won’t see much power increase, if any. But from what I can tell, it’s totally possible.
OK… back to the difference in the old and new Saito 125 jugs;
- The exhaust port wall thickness measures 2.34mm from inside thread to outside wall on the old and 3.07 on the new.
o That is a substantial amount of meat increase for those of us who tend to use our muffler as an auxiliary landing device from time to time…
- The intake side of the casting has been cleaned up. There is no longer the extra casting material as you can see this in attached picture.
- The fins are larger diameter and have been redesigned all around. There appears to be room for better cooling and more airflow around the cylinder. The diameter of the top widest fins is 50.75mm on the new jug and 48.92mm on the old jug.
- Glow plug; the Glow plug on the old casting was offset more to the exhaust side. While on the new jug it is more centered, though not exactly between the valves.
- Internally the valve seats have been redesigned and it appears there is room for more fuel air mixture. However I can only observe and this may be only an illusion, but based on the new cuts in the casting around the valve seat – it’s cleaned up inside compared to the old jug.
- The new jug weighs a tad more. (Sorry I forgot to write it down.)
Sorry to ramble on so much, but this is pretty exciting for 125 owners who may be looking at a new jug in the future. I really give the engineers at Saito a lot of credit for cleaning up this casting, big time. I believe part of launching the new Saito 115 was to piggy back the budget to have a new shared jug design for the 125. It was a beautiful engine before and the new casting makes it look all that much sexier. Only Saito knows all of their new design features, but again, good job to our buddies in Japan.
A few hobby shops who still have the older jugs and possibly Horizon may not like me publishing this, but if I were to order a new jug and received an older one, I’d send it back and ask for the newer Jug!!!
Thanks again, all, for sharing the knowhow for taking on this job. I’m that much more endeared with these engines after a teardown/overhaul.
Happy Flying!
"You da man!" Good job brother.
Bill
03-10-2009, 08:34 AM
#59
Senior Member
Join Date: Aug 2007
Location: Farmington hills ,
MI
Posts: 325
Likes: 0
Received 0 Likes
on
0 Posts
Thanks for the help Ram,
I'll either see you at the Skymaster's, evening with Horizon on the 1st or at the Toledo show a few days later!
See ya!
Phil
I'll either see you at the Skymaster's, evening with Horizon on the 1st or at the Toledo show a few days later!
See ya!
Phil
05-04-2009, 08:15 PM
#60
Senior Member

Join Date: Aug 2007
Location: Fresno,
OH
Posts: 193
Likes: 0
Received 0 Likes
on
0 Posts
OK, I also tore down my first Saito alllllllllllllll the way down. I read somewhere last year to heat the case to get the bearings out and so I did and they did. I wrecked this engine but not straight into the ground so a freind will check the crank for me. Lots of questions come to mind:
1) Wouldn't stainlees bearings be better if everyone is having corosion problems with bearings?
1) Wouldn't stainlees bearings be better if everyone is having corosion problems with bearings?
05-04-2009, 08:22 PM
#61
Senior Member
Join Date: Aug 2007
Location: Fresno,
OH
Posts: 193
Likes: 0
Received 0 Likes
on
0 Posts
OK, I also tore down my first Saito alllllllllllllll the way down. I read somewhere last year to heat the case to get the bearings out and so I did and they did. I wrecked this engine but not straight into the ground so a freind will check the crank for me. Lots of questions come to mind:
1) Wouldn't stainlees bearings be better if everyone is having corosion problems with bearings?
2) What is the best way to get the new bearings in?
3) I noticed the new bearings (Saito's at the LHS) have seals on them, are these to be removed for lubrication.
4) How do I time the engine, (Ithink the book that came with the engine may tell)?
5) Use gaskets with no gasket sealant or use sealant?
6) Any tricks to the pushrod replacement?
Enough for now HELP!!!!
05-04-2009, 08:43 PM
#63

My Feedback: (4)

Join Date: Mar 2004
Location: in,
MN
Posts: 46
Likes: 0
Received 0 Likes
on
0 Posts
I am sorry to see so many people have had the same problem I have with the exhaust threads ripping out of their Saito. I think I have a $1.00 fix for mine. I drilled two holes into the head on either side of the exhaust port, and then used a 3mm tap to make threads into the block. This also makes threads on the fins. I then bought a washer for 19 cents 1/2" inner diameter, and 1 1/2" outer diameter. I drilled holes in the washer to match the holes I made in the block. I had to grind off a little on the outside of the washer to allow for the bolt that holds the rocker arm in place. I added some high temp gasket paste between the head and the broken off part of the threads, and fitted the broken off part into it's original place, and wiped off the access paste off the threads. I then mounted the washer, and used two 3mm bolts and inserted then until they just entered the block. I added red lock tight to each bolt and finished screwing the bolts in tight. Then it was just to thread the muffler manifold back in, and tighten the muffler nut tight against the washer. Add the muffler and it has not had 4 tanks through it, without any problem.
 05-05-2009, 07:52 AM
#65
Senior Member
Join Date: Aug 2007
Location: Farmington hills ,
MI
Posts: 325
Likes: 0
Received 0 Likes
on
0 Posts
Djsdog,
I’m certainly not the authority but with my limited experience here’s what I have to offer you in regards to help…
I’m certainly not the authority but with my limited experience here’s what I have to offer you in regards to help…
ORIGINAL: djsdog
OK, I also tore down my first Saito alllllllllllllll the way down. I read somewhere last year to heat the case to get the bearings out and so I did and they did. I wrecked this engine but not straight into the ground so a freind will check the crank for me. Lots of questions come to mind:
1) Wouldn't stainlees bearings be better if everyone is having corosion problems with bearings?
From what I understand the stainless resist corrosion better than the plain steel bearings. Stainless steel is softer than the plain steel bearing. I and others have had problems with stock Saito bearings. From what I’ve read, pretty much any bearing you put in after stock will be better. My personal tastes are to use the cheep steel bearings at $9 from RC-bearings.com. I plan to change them either on a periodic maintenance schedule or annually.
2) What is the best way to get the new bearings in?
Look up bearing change on youtube. There are a few people who’ve taken some time to put some great videos up on bearing changes and have really helped me thru my first change a few months ago. But specifically, if you heat your case in the oven your bearings should drop in. Some people will put their new bearings in the freezer and then drop them in.
3) I noticed the new bearings (Saito's at the LHS) have seals on them, are these to be removed for lubrication.
The front bearing is sealed and the rear bearing is caged - open. You want the seal so oil doesn’t leak out the front.
4) How do I time the engine, (Ithink the book that came with the engine may tell)?
The manual will show you how to set the timing. There is a dot on the cam that needs to line up with TDC. Some people use a razor blade or something of the sorts to hold the cam in place while to drop it over the crank for alignment. I’ve reassembled and ran the engine just fine after assembly and haven’t had any timing issues a few people have posted. It just feels weird dropping the cam in place and assuming everything lines up when assumedly 1 tooth off will affect timing, etc.
5) Use gaskets with no gasket sealant or use sealant?
It sucks having to buy a new gasket set when you only need a few seals. But the cam case seal is a spacer for the gears to align. If you use no seal or any other method you may be asking for trouble. It is a precision fit. I however have reused a cam box seal that was slightly torn in a few places (as normally is the results when removing the case). I just wiped a small amount of red high temp RTV around the old gasket and reassembled – no leaks – but again, anything out of the manufactures spec and we may be asking for trouble…
6) Any tricks to the pushrod replacement?
I can’t say on this one. I’m surprised no one ripped on me while in a prior post I am showing the pushrod tubes assembled backward. The lip on the tube actually goes on top toward the valve cover. Also the push rods should be pointier side up. I have mixed my rods up during reassembly and haven’t noticed any difference in performance. Obviously you’ll have to retime your engine after reassembly so this should take care of any differences. I don’t think it makes a difference if you mix up the push rods.
Enough for now HELP!!!!
05-05-2009, 10:46 AM
#66
Senior Member
Join Date: Nov 2005
Location: MedellinAntioquia, COLOMBIA
Posts: 778
Likes: 0
Received 0 Likes
on
0 Posts
In a four stroke it is better to leave the seals as not so much oil comes in the crankcase...so the guys here say that they will last more if they keep the grease that comes there.
I just took the backplate of my new TT F-75s and it hast also sealed bearings...it looks so gorgeous inside =)
I just took the backplate of my new TT F-75s and it hast also sealed bearings...it looks so gorgeous inside =)
09-17-2009, 07:02 PM
#69
Senior Member
My Feedback: (52)
Join Date: Oct 2008
Location: Mascoutah, IL
Posts: 338
Likes: 0
Received 0 Likes
on
0 Posts
ORIGINAL: w8ye
What is your current problem?
What is your current problem?
09-17-2009, 08:09 PM
#70
Put the piston to the top with the crankpin at top dead center
Locate the cam cover, cam, cam followers, assembly
Place the indention mark on the front of the cam straight down
Use a razor blade or hobby knife blade to engage a cam gear tooth by the edge of the cam cover to lock the cam in place with the dot straight down.
Set the cam cover on the crankcase with the crankpin at top dead center
Slide the knife blade out
Attach cam cover with the four screws
09-24-2009, 09:26 AM
#71
Senior Member
My Feedback: (52)
Join Date: Oct 2008
Location: Mascoutah, IL
Posts: 338
Likes: 0
Received 0 Likes
on
0 Posts
Ok, I have been rebuilding saitos for sometime now, It is one of the nitro motors I enjoy taking the time to do a thourough rebuild on.
We have a debate going on here at the shop,
Is it possible for a saito 180 to run with one tooth off on the cam gear??
I have never tried running one one tooth off to see. And I really do not want to try.
Thanks for any help you can give me.
We have a debate going on here at the shop,
Is it possible for a saito 180 to run with one tooth off on the cam gear??
I have never tried running one one tooth off to see. And I really do not want to try.
Thanks for any help you can give me.
09-24-2009, 09:30 AM
#72
Senior Member
My Feedback: (52)
Join Date: Oct 2008
Location: Mascoutah, IL
Posts: 338
Likes: 0
Received 0 Likes
on
0 Posts
Oh yes and thanks to, w8ye for the reply on using the razor blade to line up the cam shaft, BUT it does not work on the Saito Fa-180 it has cam followers that have shoulders, and are installed while the cam gear is out of the housing. So it makles it impossible to use the method you described.
But thanks SOOOOOOO much for your time and information.
But thanks SOOOOOOO much for your time and information.
09-24-2009, 10:53 AM
#73
Senior Member
My Feedback: (4)

Join Date: Jan 2004
Location: Blackfoot ,
ID
Posts: 2,251
Likes: 0
Received 0 Likes
on
0 Posts
ORIGINAL: cman_25
Oh yes and thanks to, w8ye for the reply on using the razor blade to line up the cam shaft, BUT it does not work on the Saito Fa-180 it has cam followers that have shoulders, and are installed while the cam gear is out of the housing. So it makles it impossible to use the method you described.
But thanks SOOOOOOO much for your time and information.
(HUH)??????????? I don't think you got the drift of what w8ye was telling you to do, the blade works perfectly when done correctly.
09-24-2009, 11:04 AM
#74
Senior Member
My Feedback: (52)
Join Date: Oct 2008
Location: Mascoutah, IL
Posts: 338
Likes: 0
Received 0 Likes
on
0 Posts
Ok, well maybe someone as smart as you can help me to get the DRIFT, The method he described works great on the smaller saitos, and I use it.
By the way, it seems as though you want to attack me and make it look and sound as though I do not have enough brains to know how to breath. Do you think that this is the way top handle things?
All I have done is ask for help, try to use the help that was given, and was unable to, then thanked the person that tried to help me.
Is that wrong in your world???
09-24-2009, 11:10 AM
#75
Senior Member
My Feedback: (52)
Join Date: Oct 2008
Location: Mascoutah, IL
Posts: 338
Likes: 0
Received 0 Likes
on
0 Posts
w8ye, is there anyway I can contact you directly? I just need a little help, and would GLADLY pay for it. But it seems as though others on here just want to basicly say you are stupid and than offer you no help to resolve a problem you asked for help on.
I thought these threads were here so we could all help each other. Not tear each other down.
I thought these threads were here so we could all help each other. Not tear each other down.