


OS Gemini Twin Rear Walbro Gas Conversion
 03-10-2022, 05:28 AM
#1
I've always loved the Gemini twin but the actual operation of it in a model aircraft has real drawbacks:
1) When run on the factory recommended fuel, methanol with 15% nitro, the combustion byproducts are hideously corrosive to the engine internals.
2) The oil that blows by the rings in the combustion process is needed to lube the internals. As the engine runs, this sludge discharges all over your beautiful aircraft.
3) The glow fuel carb has an amazingly tiny venturi which CANNOT draw fuel in anything but static, level, conditions. Engine dies in even mild aerobatics.
4) Glowplugs are wonderfully simple but for max reliability require heavy onboard glow equipment.
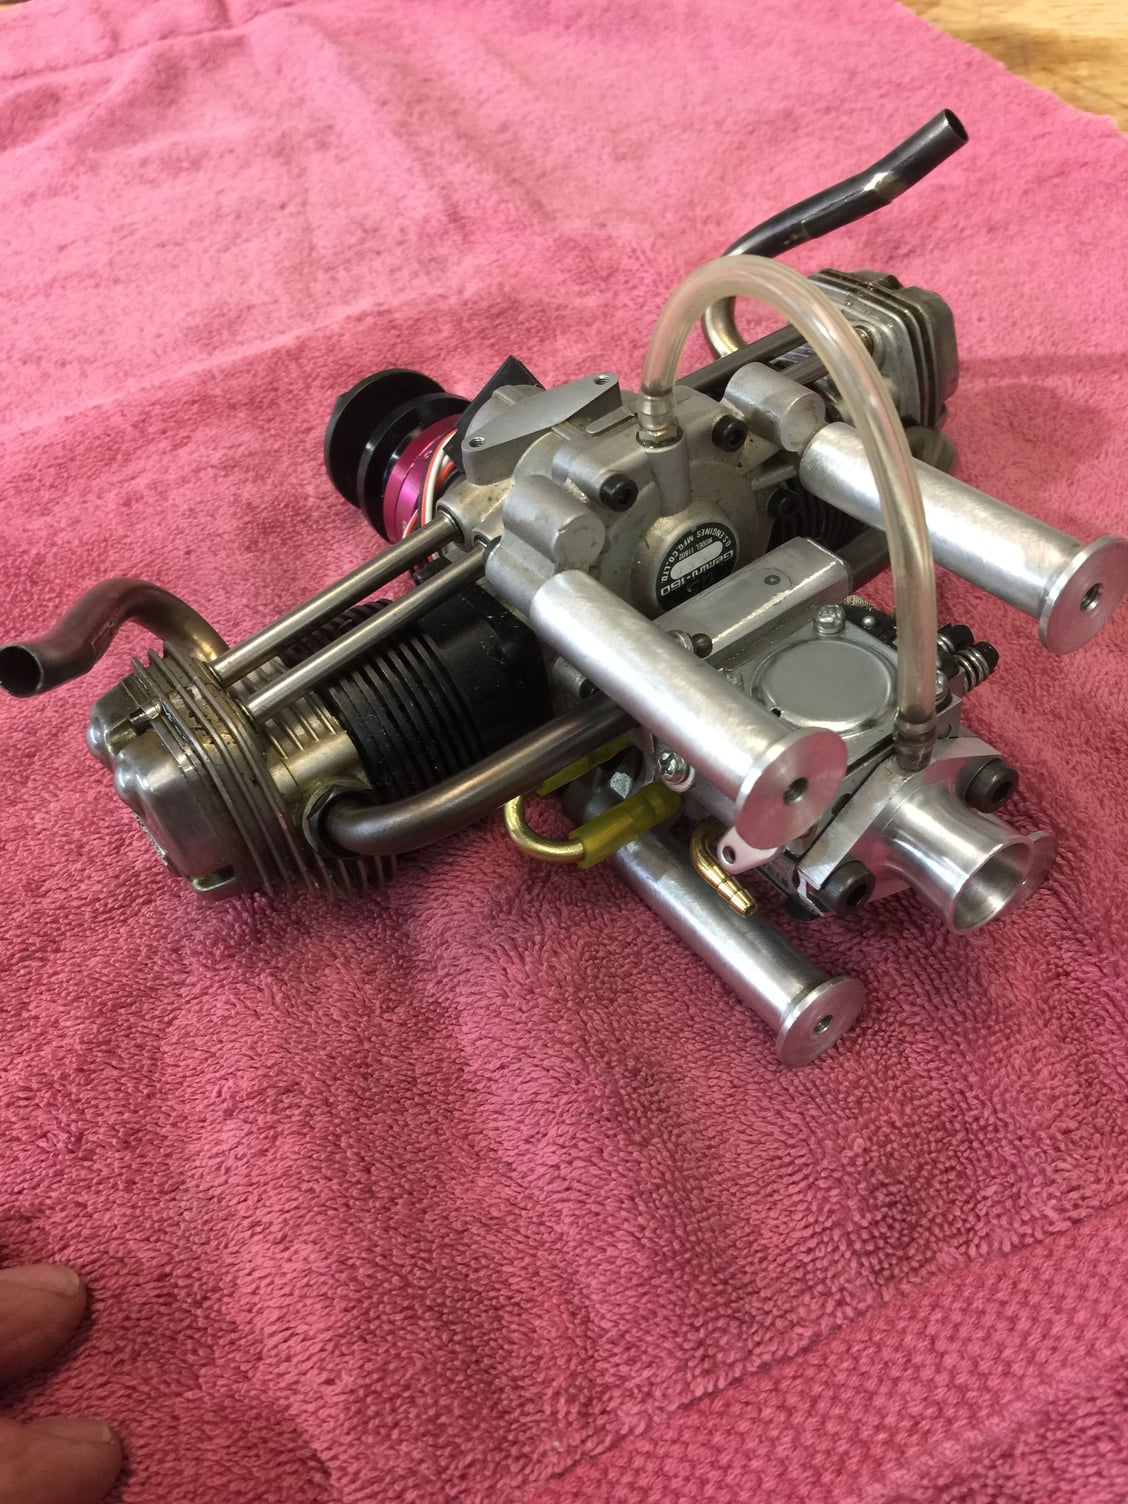
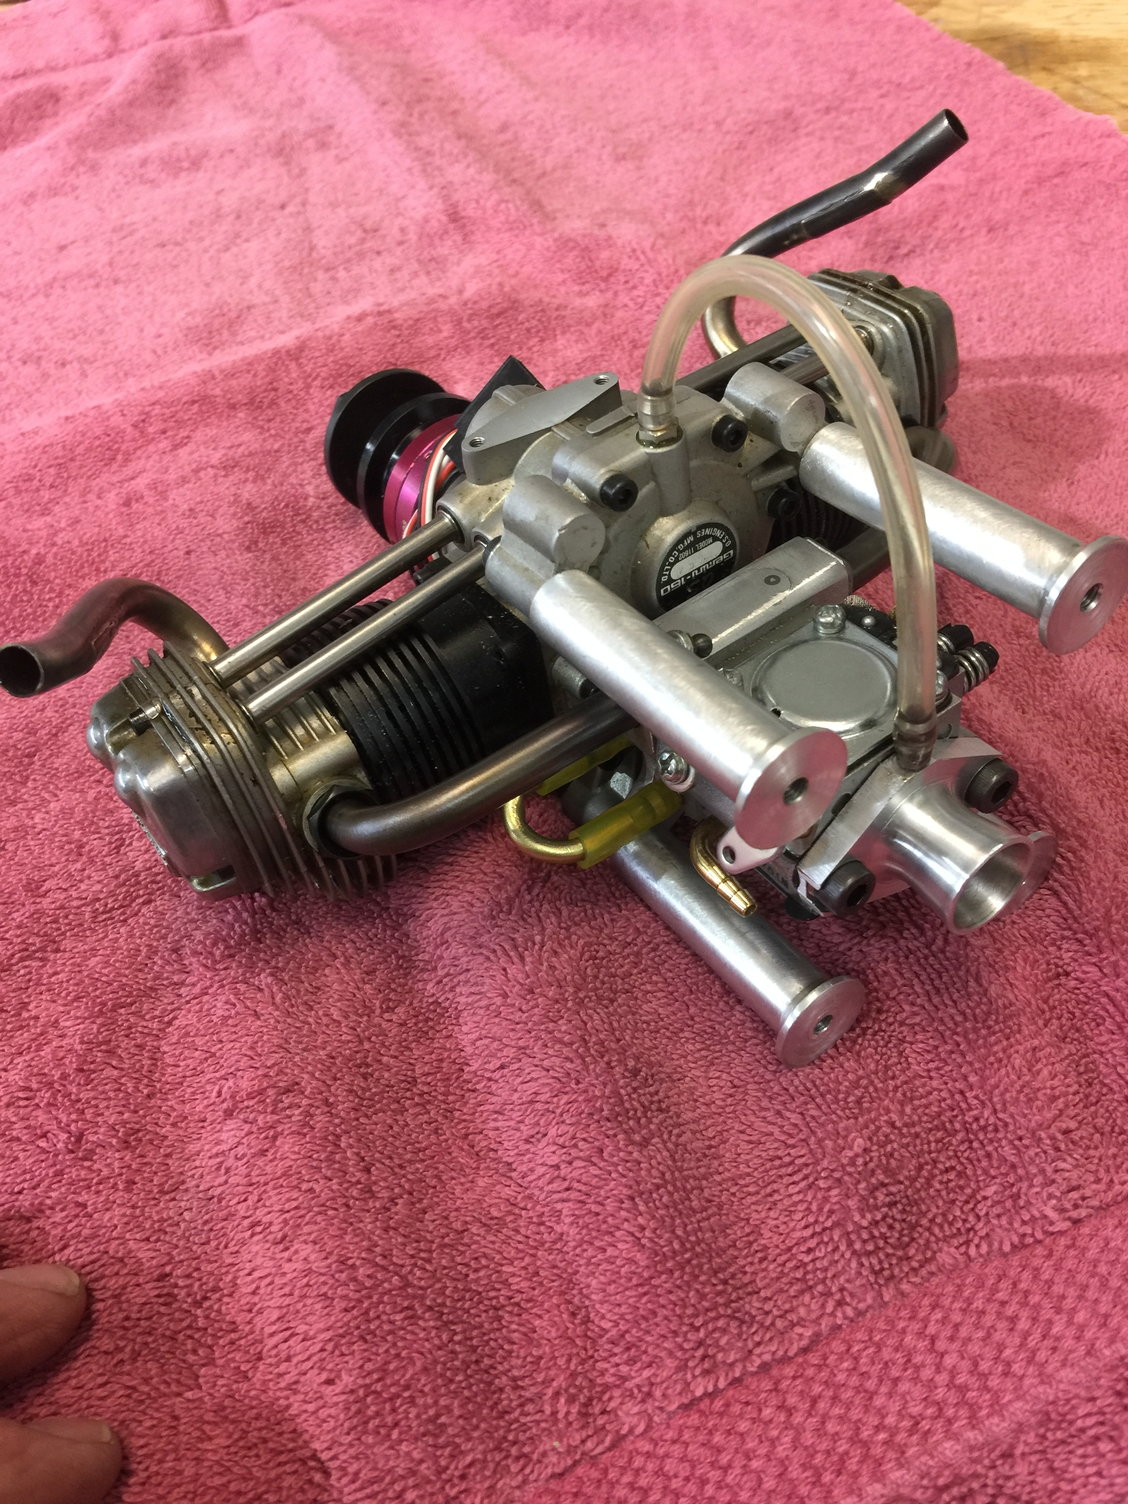
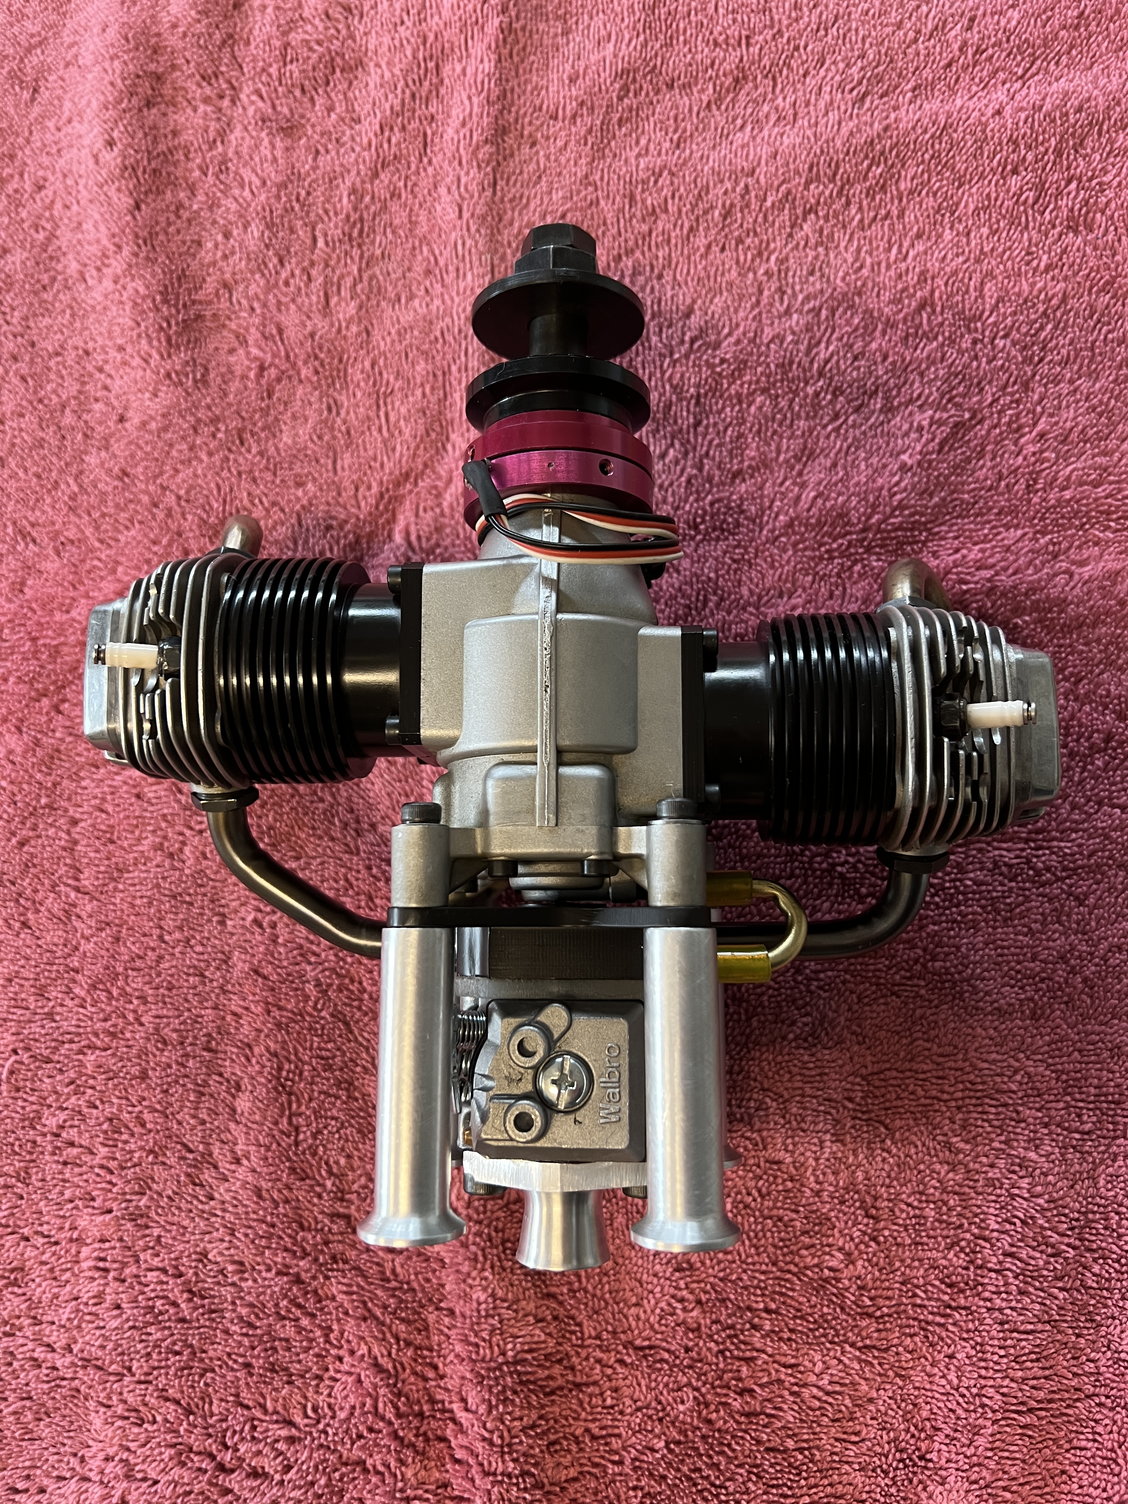
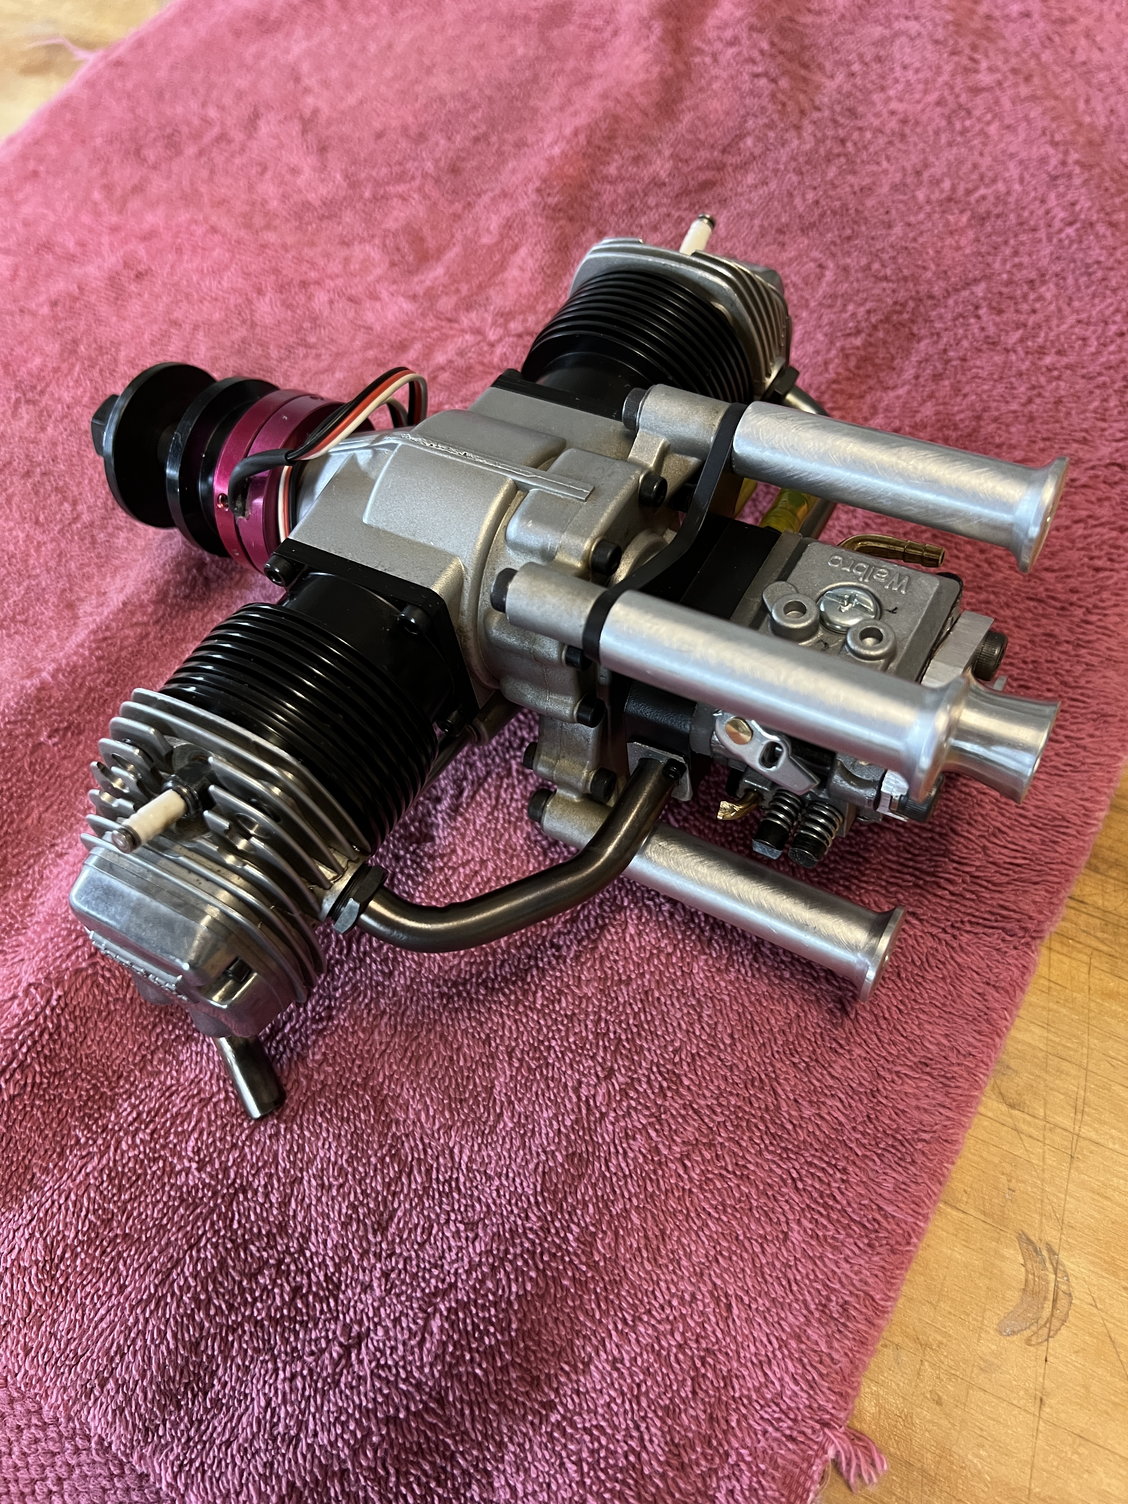
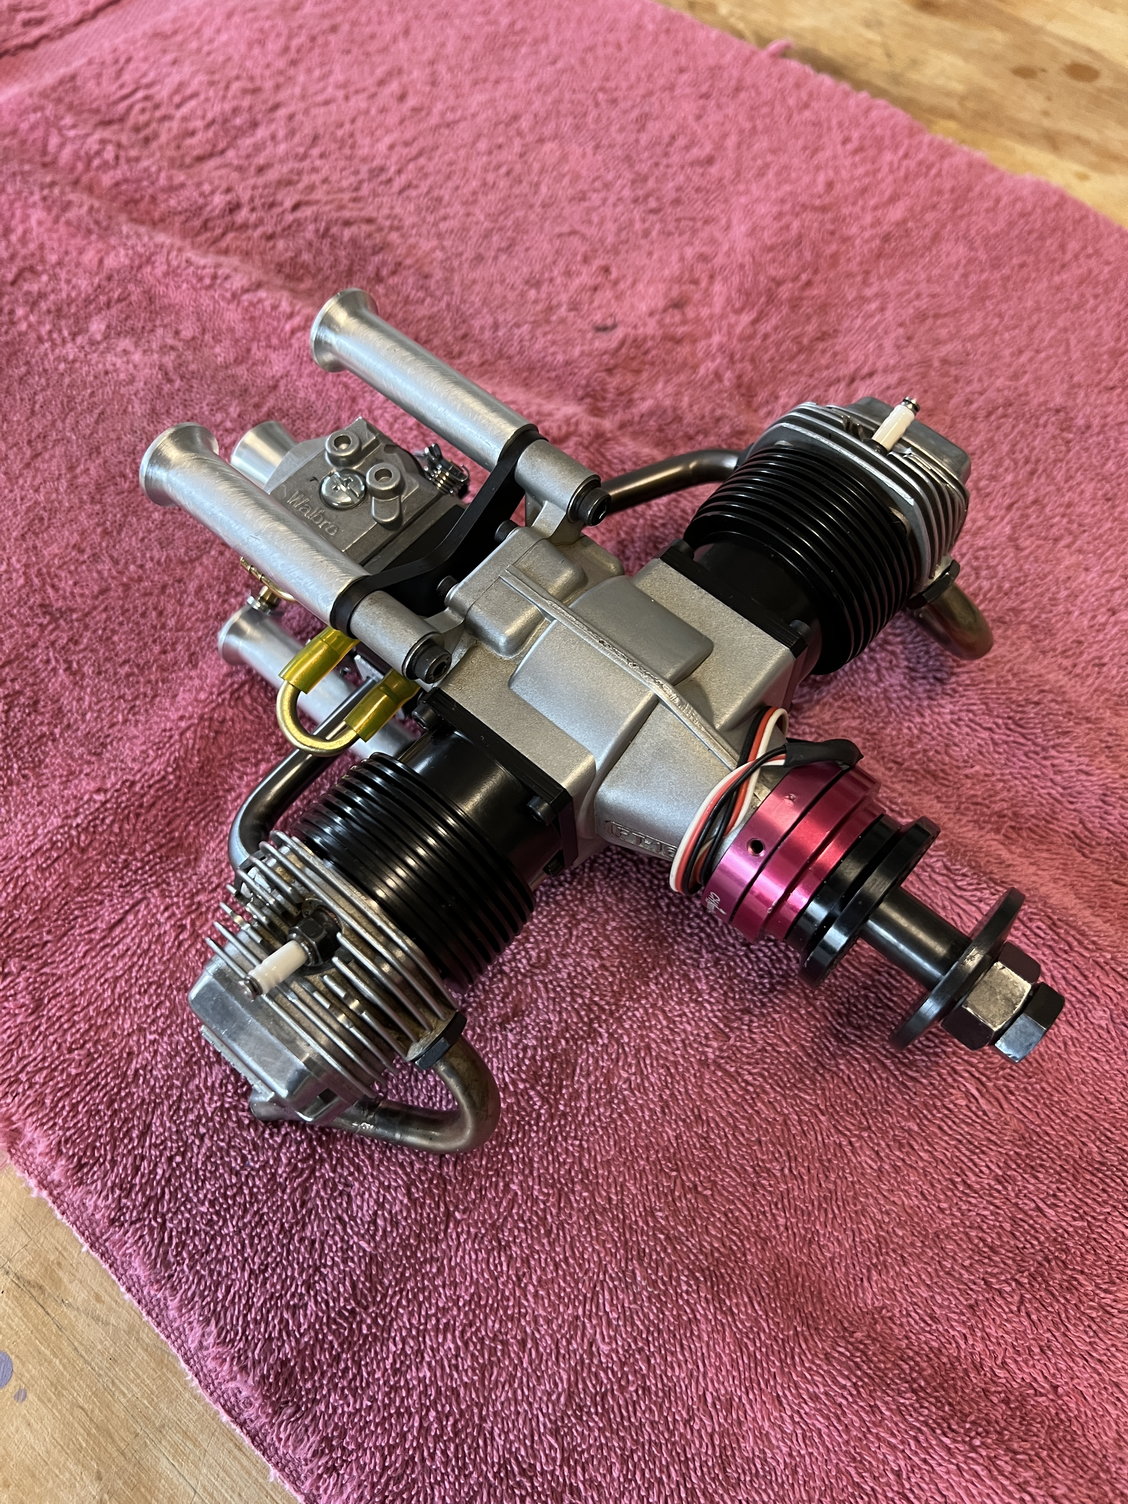
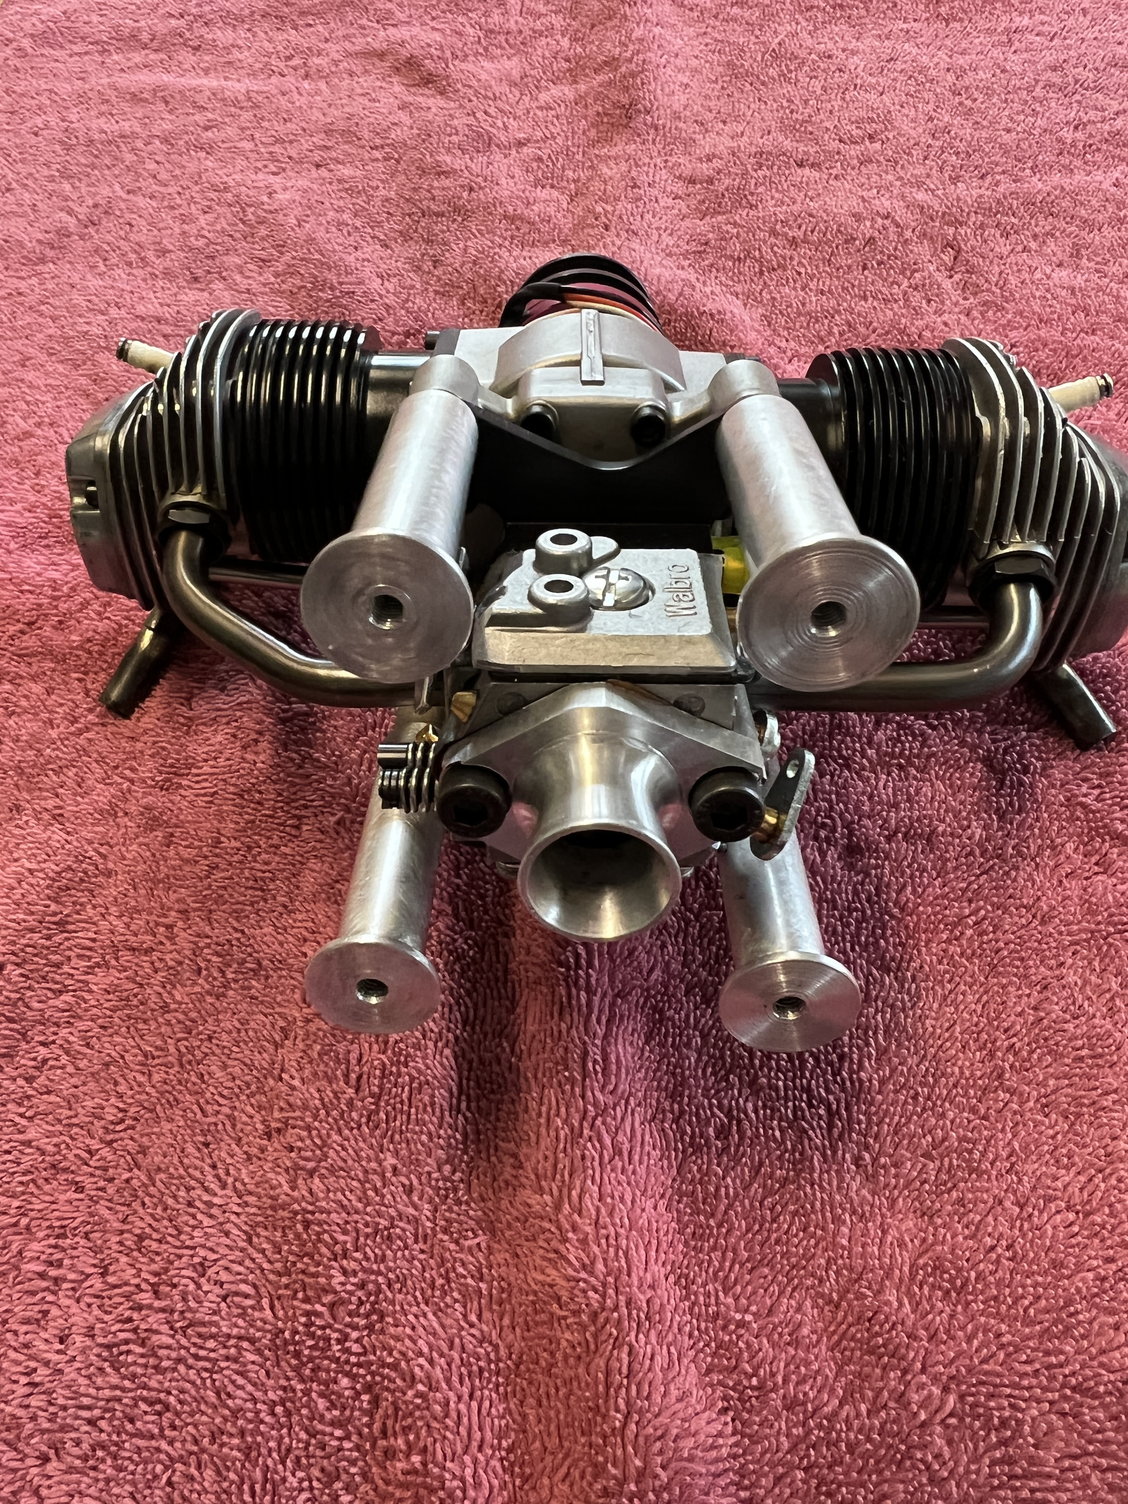
SO: over the years I devised a fix for each and every one of these shortcomings and I will present them here.. First let me give you a picture of the final, fully developed product.
1) When run on the factory recommended fuel, methanol with 15% nitro, the combustion byproducts are hideously corrosive to the engine internals.
2) The oil that blows by the rings in the combustion process is needed to lube the internals. As the engine runs, this sludge discharges all over your beautiful aircraft.
3) The glow fuel carb has an amazingly tiny venturi which CANNOT draw fuel in anything but static, level, conditions. Engine dies in even mild aerobatics.
4) Glowplugs are wonderfully simple but for max reliability require heavy onboard glow equipment.
SO: over the years I devised a fix for each and every one of these shortcomings and I will present them here.. First let me give you a picture of the final, fully developed product.

The following 3 users liked this post by mitchilito:
03-10-2022, 05:31 AM
#2
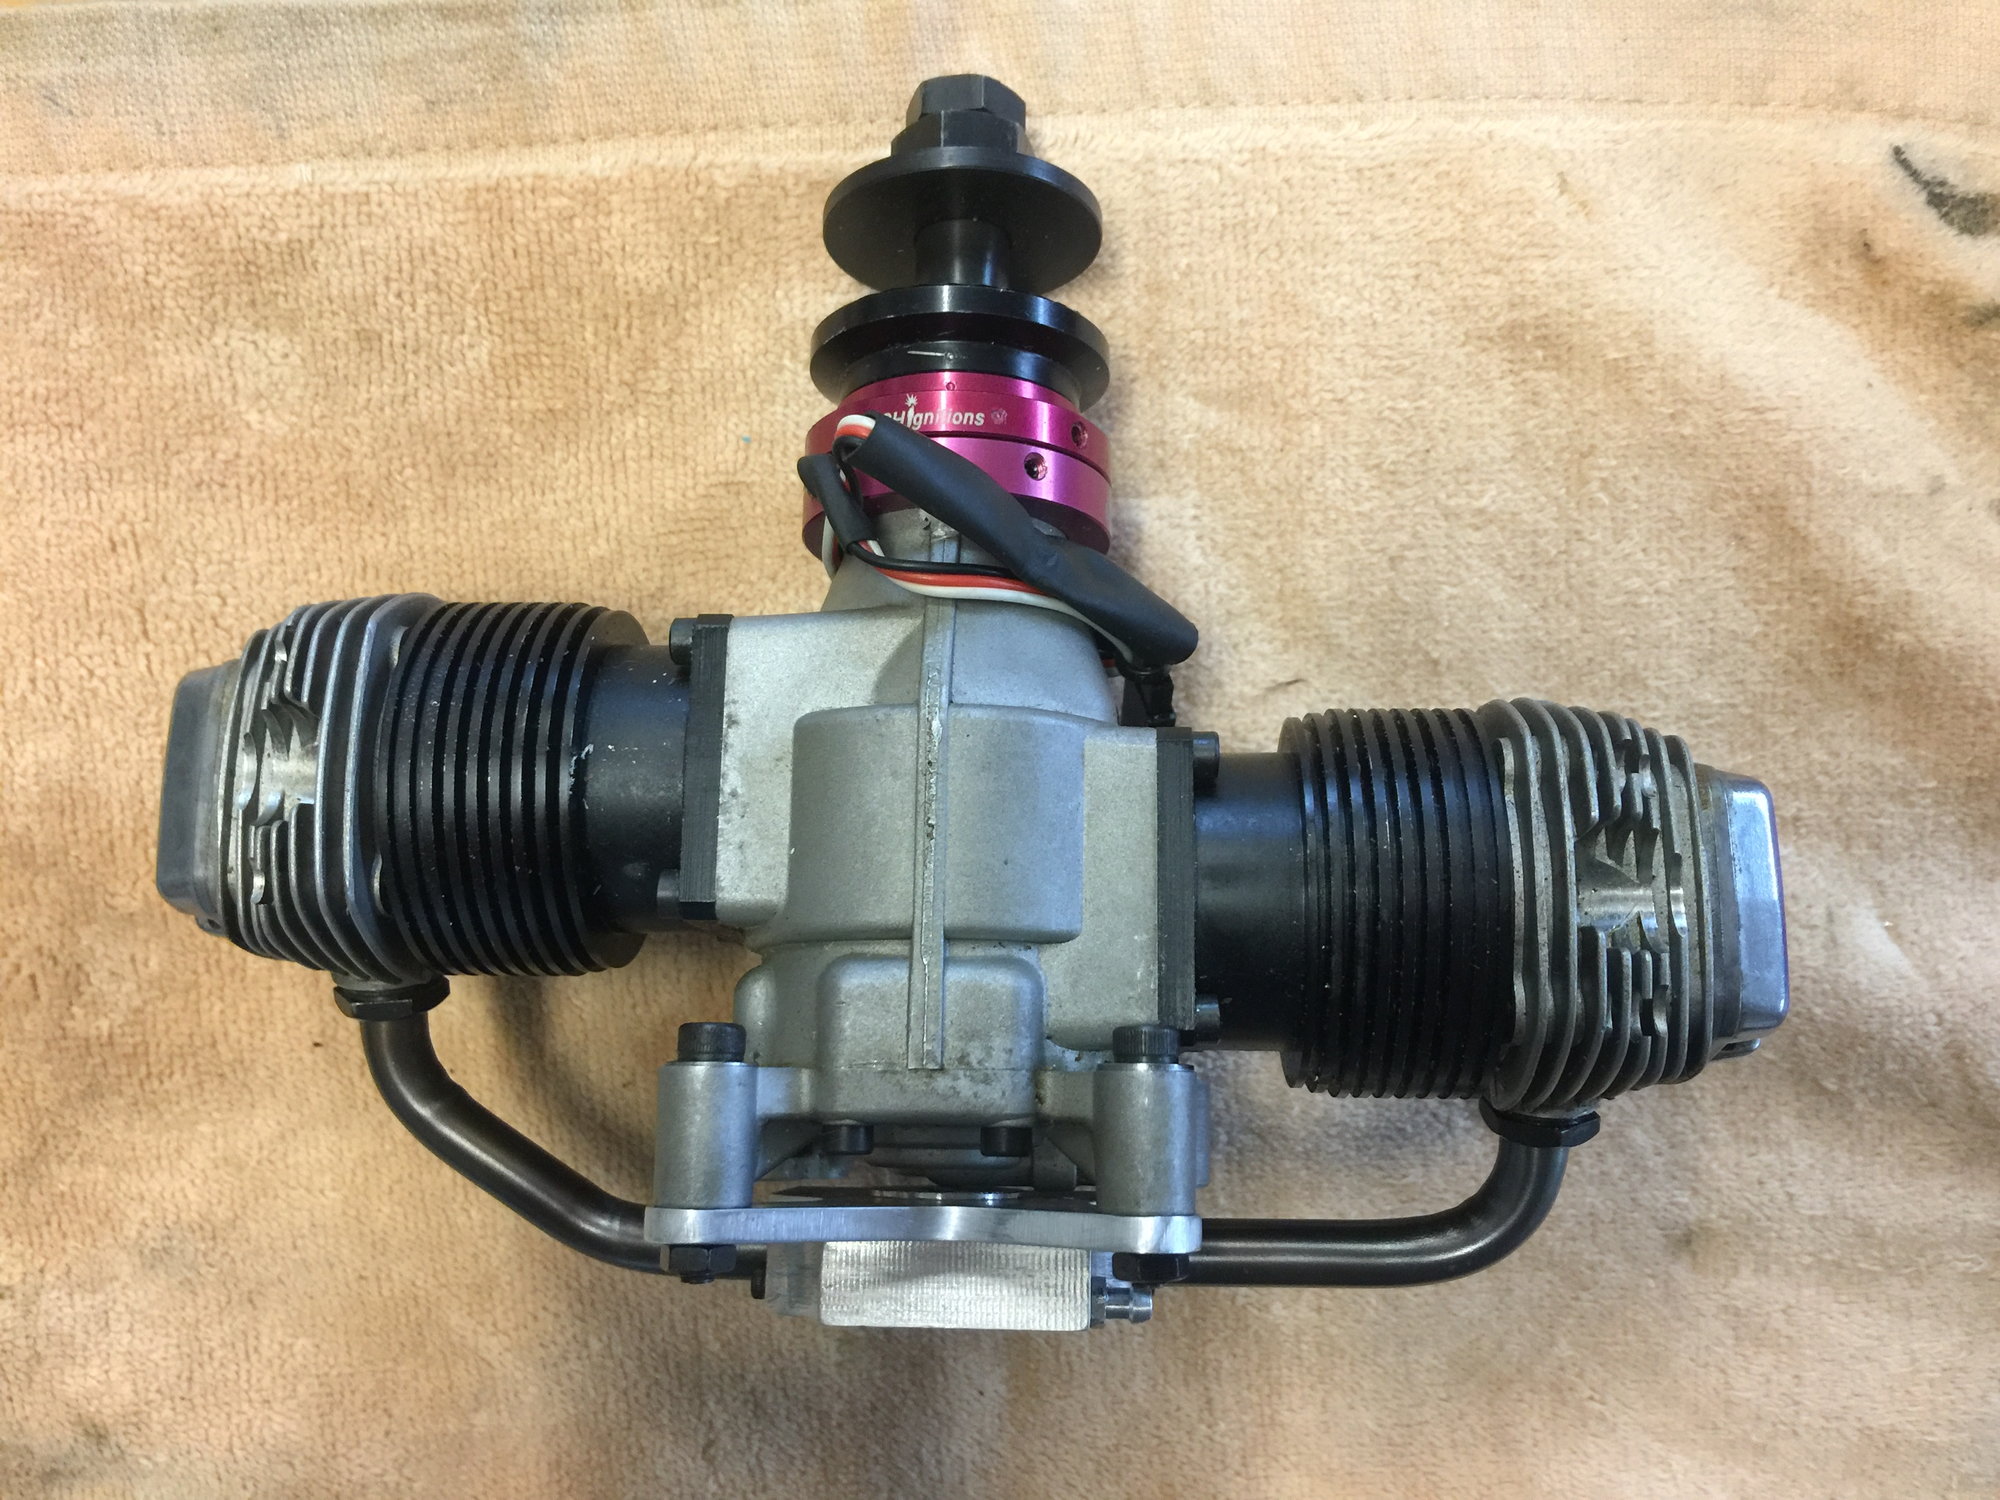
So the first thing I addressed was the glow situation. I contacted Adrian at C&H Ignitions and ordered his wonderful ignition conversion for this engine. It works great. Here it is in a Sig Rascal 110, which was a wonderful engine/airplane combo. This is running on straight methanol, no nitro, and 20% Redline two stroke racing oil. This eliminates the nitric residues in the engine case and added TONS of reliability:
The following users liked this post:
Steve (06-13-2022)
03-10-2022, 05:36 AM
#3
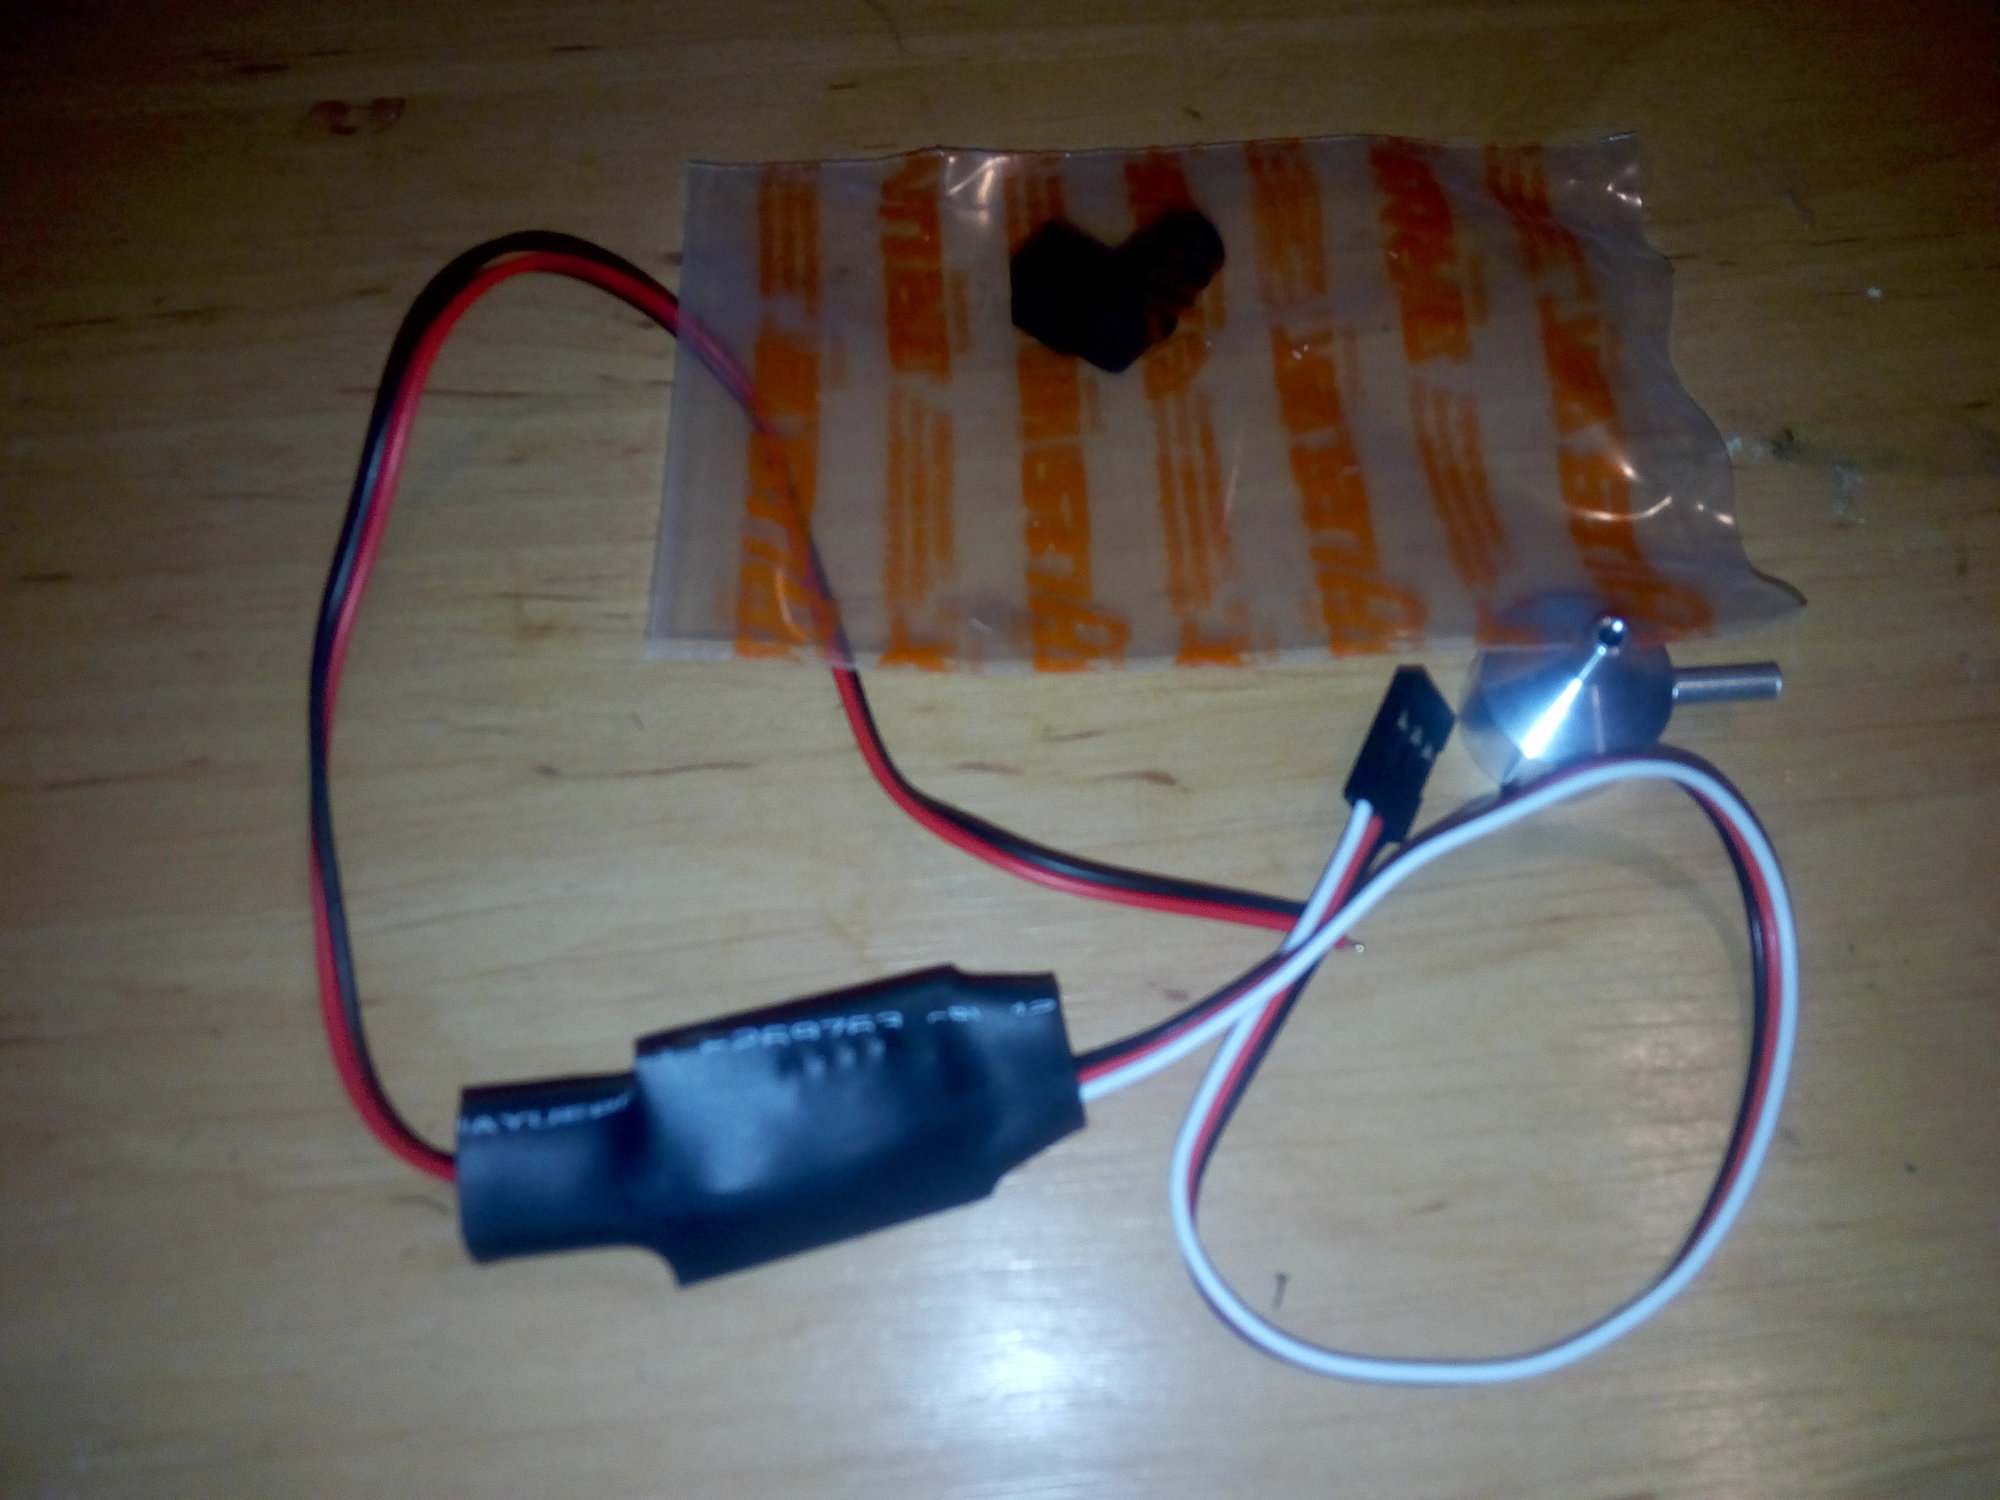
But I still had the tiny venturi/fuel draw problem. What I needed was pumper carb - Walbro style- which pumps and regulates fuel. Since I couldn't readily find one to fit this installation, I manufactured it out of Walbro and other parts.
First I machined off the pump section of a Walbro leaving just the pulse-operated pump. Then I happened to have a alcohol-friendly regulator already laying around. This was manufactured by a company named "Iron Bay" which is most likely out of business now. The whole contraption actually work PERFECTLY and provided a endless supply of regulated fuel to that little carb and ran like a watch in any attitude. The combination of pump/regulator/venturi perfectly mimics the simple Walbro carburator. The downside was it was hideously complex! See for yourself:

First I machined off the pump section of a Walbro leaving just the pulse-operated pump. Then I happened to have a alcohol-friendly regulator already laying around. This was manufactured by a company named "Iron Bay" which is most likely out of business now. The whole contraption actually work PERFECTLY and provided a endless supply of regulated fuel to that little carb and ran like a watch in any attitude. The combination of pump/regulator/venturi perfectly mimics the simple Walbro carburator. The downside was it was hideously complex! See for yourself:
The following 2 users liked this post by mitchilito:
leogabriels (04-07-2023),
Steve (06-13-2022)
03-10-2022, 05:37 AM
#4
And it's just starting to get interesting! So far I've addressed the Glow Plug drawback and the stock carb drawback. What I still had was ridiculous complexity, sludge down the bottom of the aircraft and some alcohol related corrosion albeit not as bad as when running nitromethane.
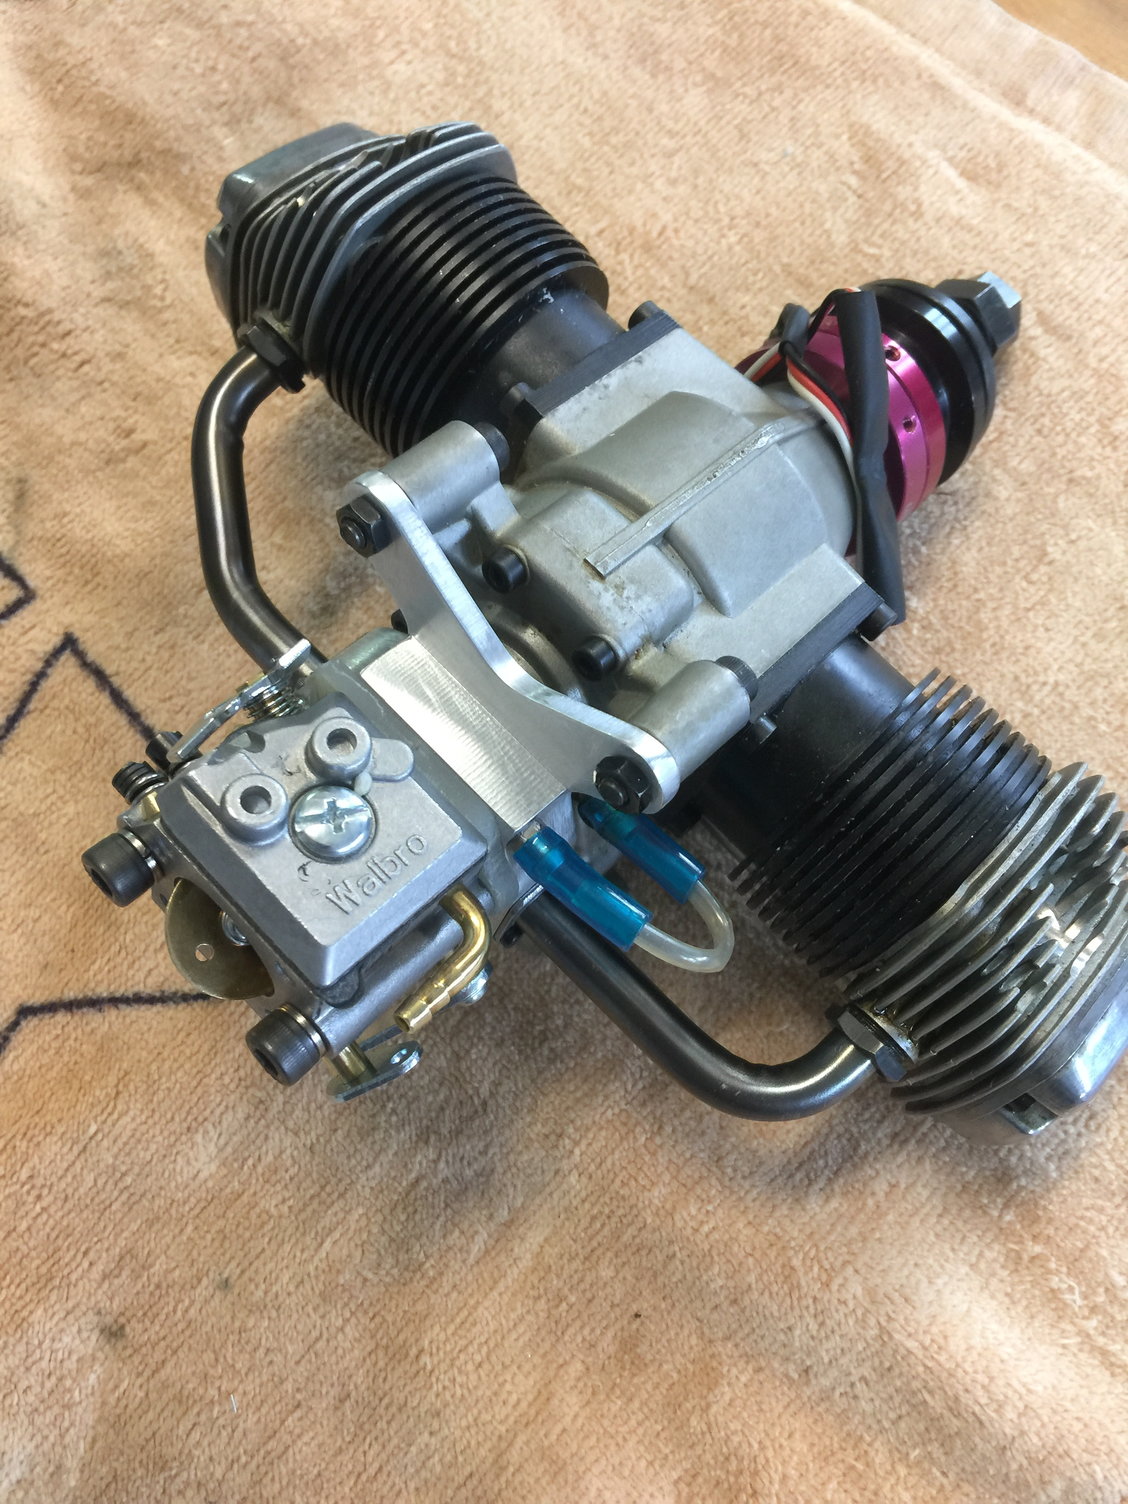
To solve the complexity AND the corrosion problems simulatiously I decided to convert to gasoline and instal an actual Walbro carb. I looked at the gas conversions for this engine that are already out there and frankly, I didn't like the way they approached it. These conversions have the carb slung under the engine and I can't see trying to fit all that into an airframe. Don't get me wrong, these conversions run great, I just did not like the look:
To solve the complexity AND the corrosion problems simulatiously I decided to convert to gasoline and instal an actual Walbro carb. I looked at the gas conversions for this engine that are already out there and frankly, I didn't like the way they approached it. These conversions have the carb slung under the engine and I can't see trying to fit all that into an airframe. Don't get me wrong, these conversions run great, I just did not like the look:
03-10-2022, 05:40 AM
#5
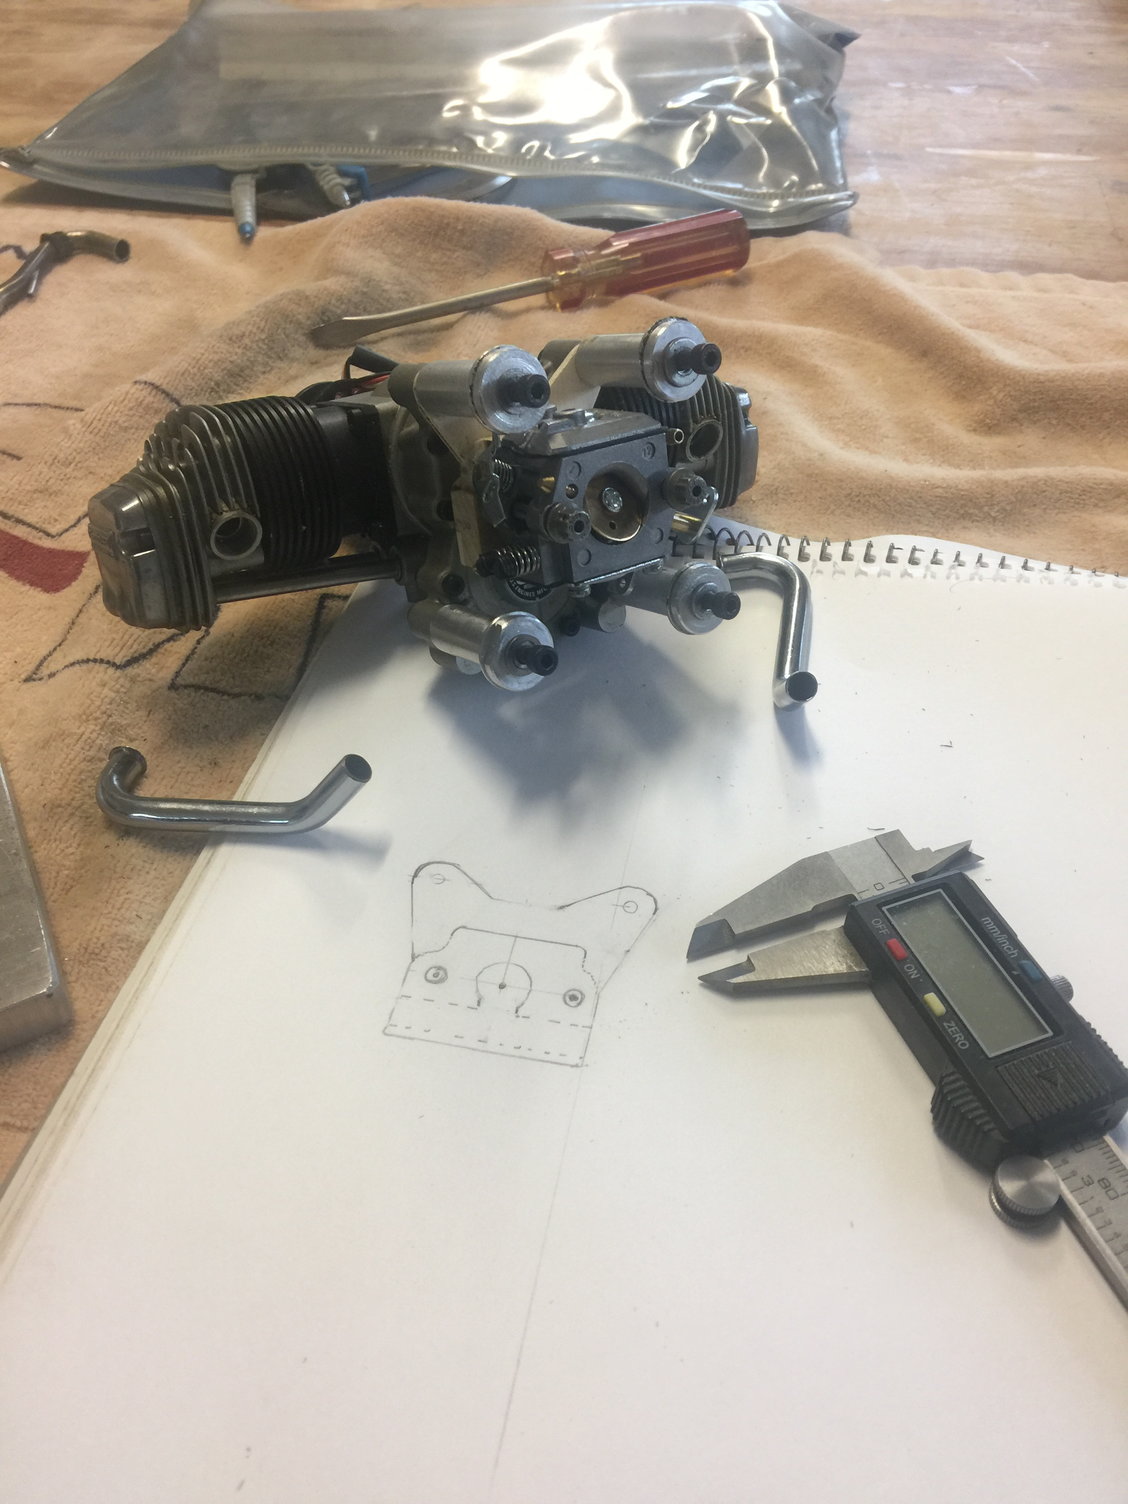
The first step is getting the proper Walbro for this engine. As I've said, the venturi on the stock carb is minuscule so I needed a Walbro set up for a tiny gas engine. Fortunately, Morris (I think in the video above) mentions that he's using a Walbro off of the RCGF 15cc engine. Bingo! I ordered one and had the starting point for this project. Thanks Morris!
https://www.rcgfusa.com/product/rcgf-stinger-15cc-re/
https://www.rcgfusa.com/product/rcgf-stinger-15cc-re/
The following users liked this post:
Steve (06-13-2022)
The following users liked this post:
Steve (06-13-2022)
03-10-2022, 05:50 AM
#8
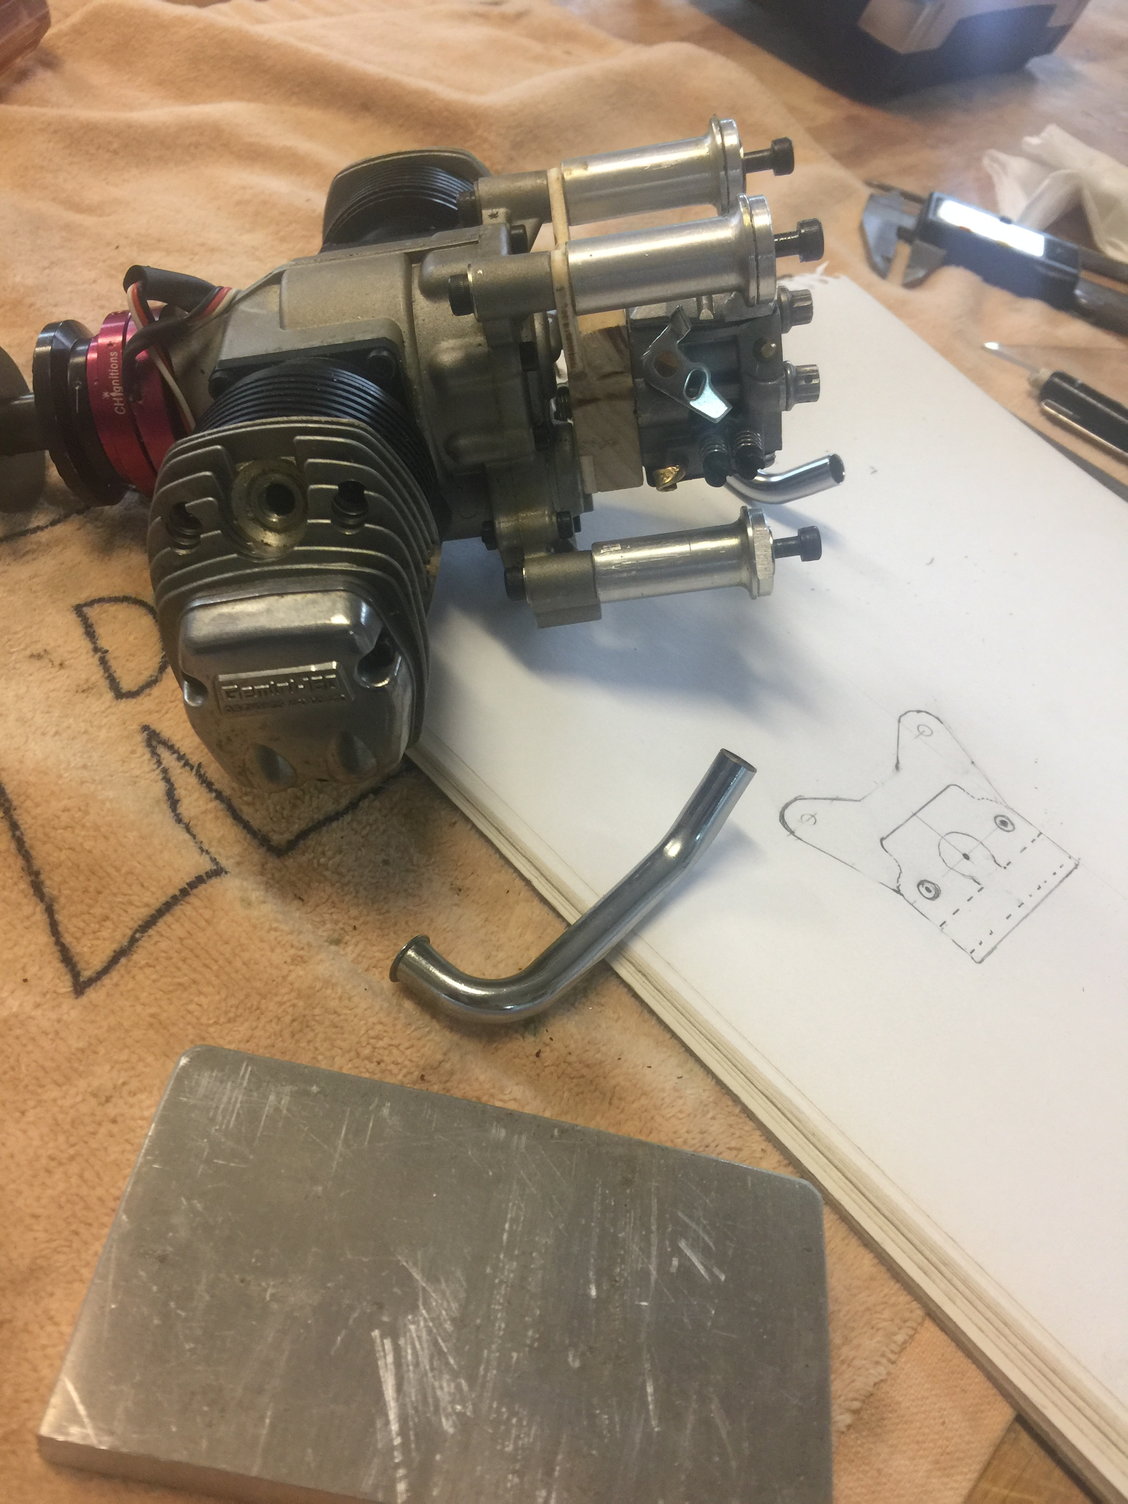
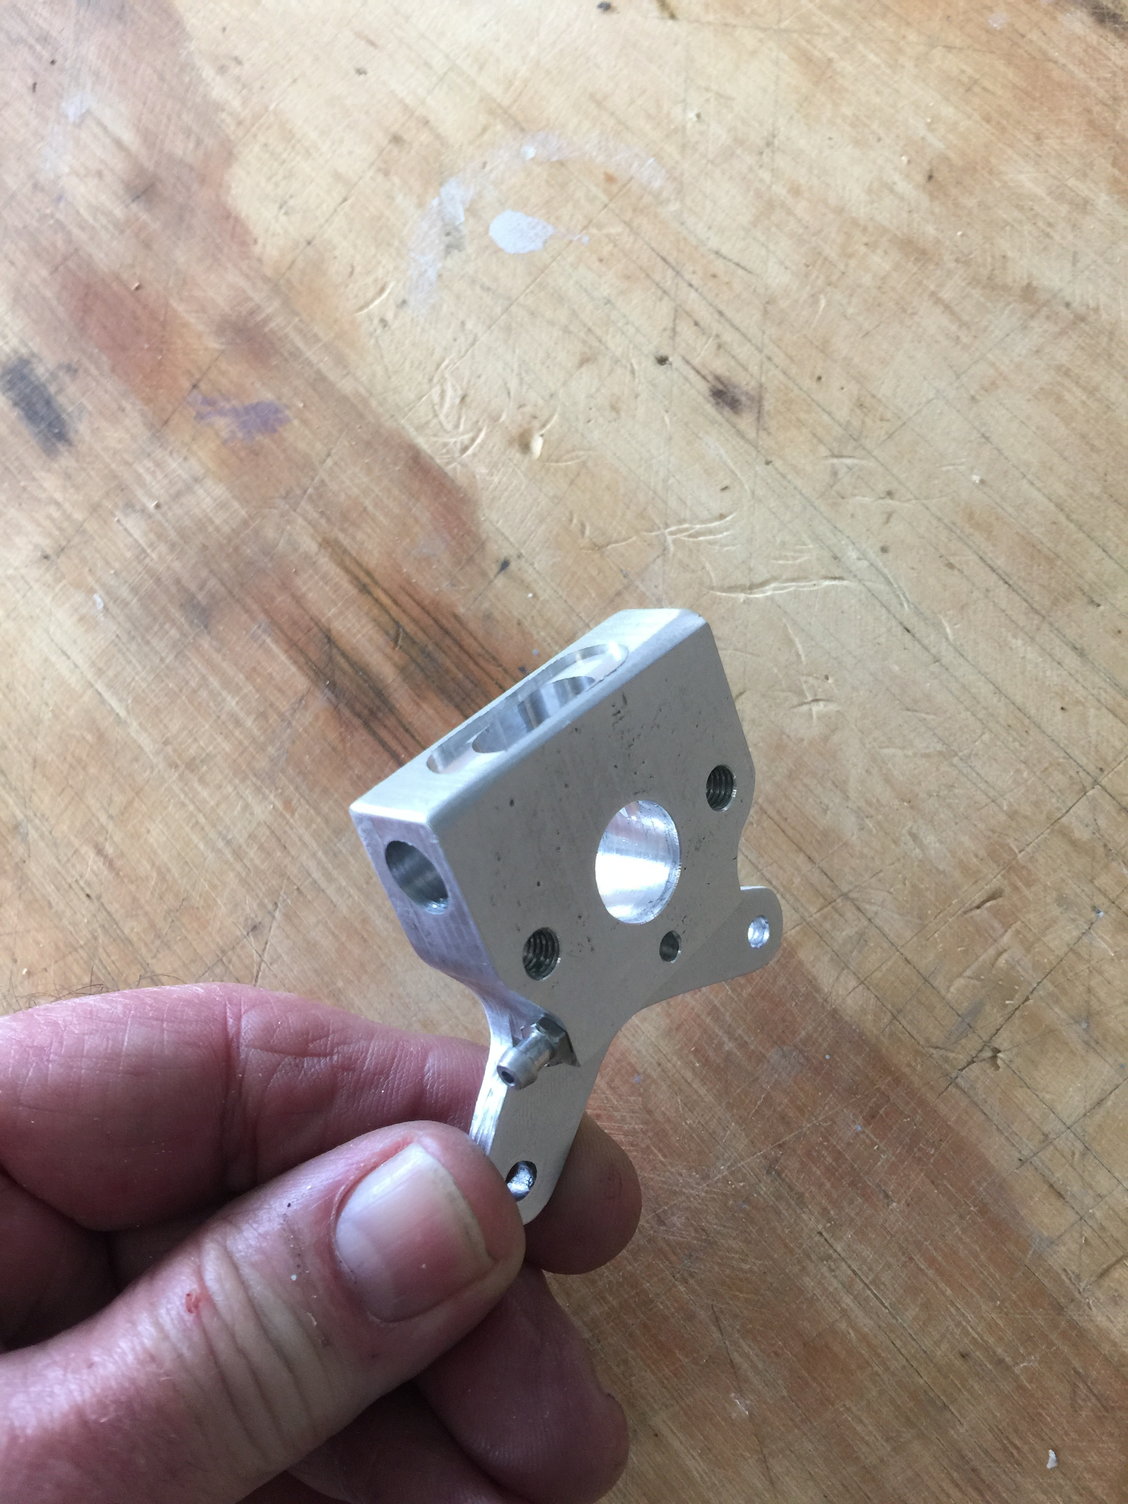
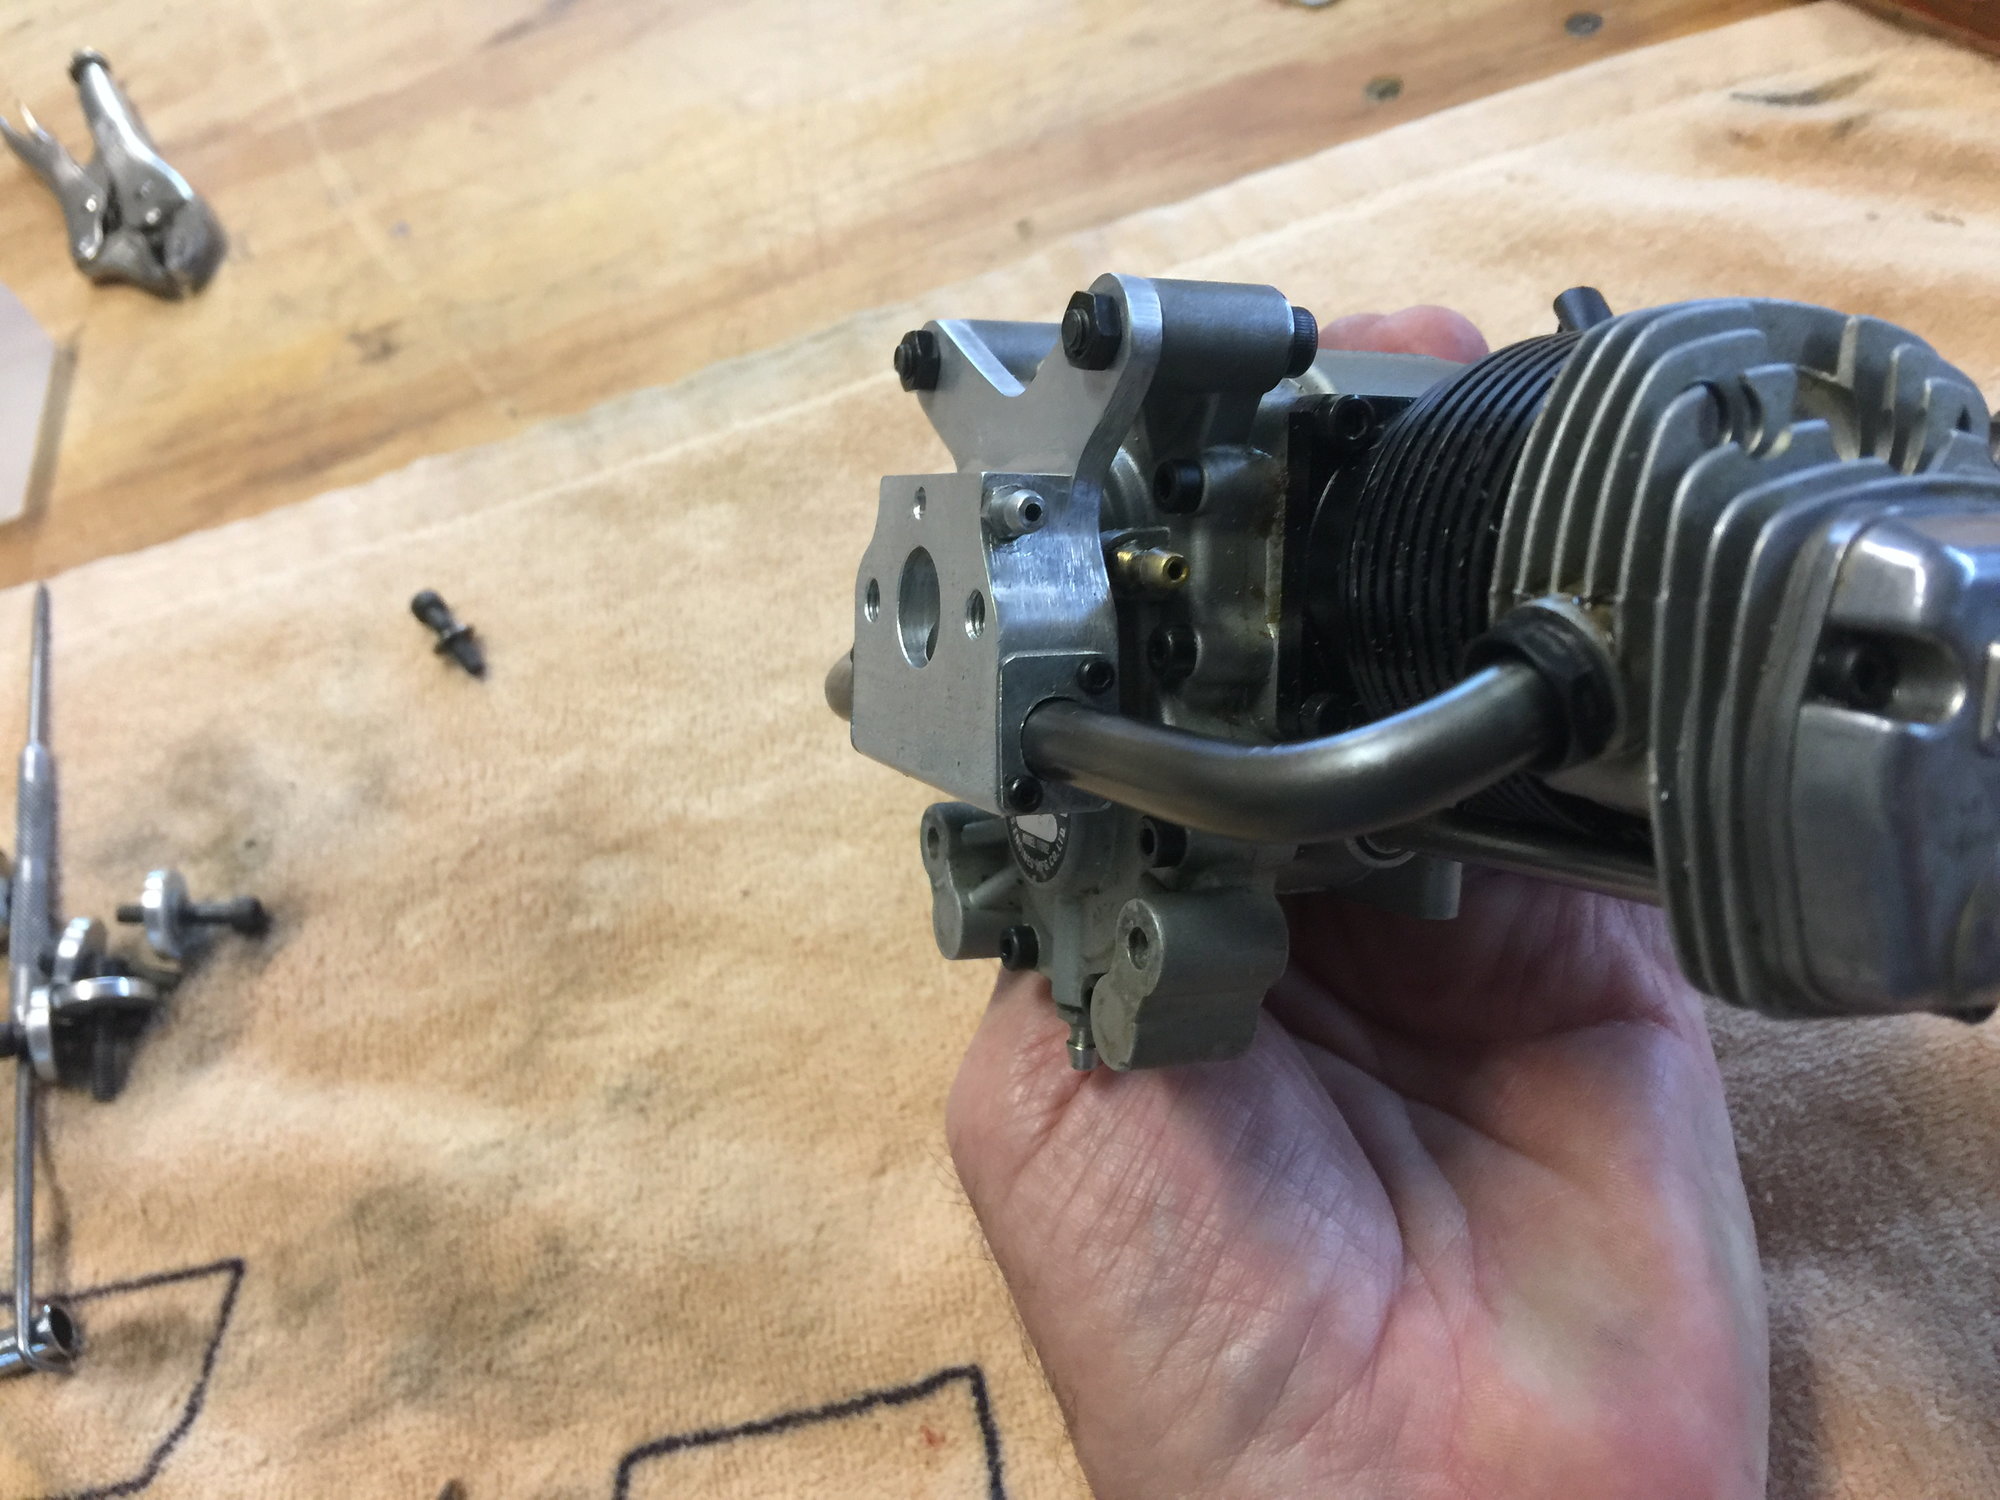
The Gemini twin has an untapped pressure port already present on the on the upper part of the crankcase. I drilled it through, threaded and tapped for a nipple long ago - so I could inject preservative oil into the cam case to limit said corrosion. So I designed my new induction manifold to tap right there for the pressure pulse that runs the Walbro pump. Convenient! That's the nipple you see above and you can see how it's drilled through to the center of the face where the Walbro has it pressure passage.
03-10-2022, 05:50 AM
#9
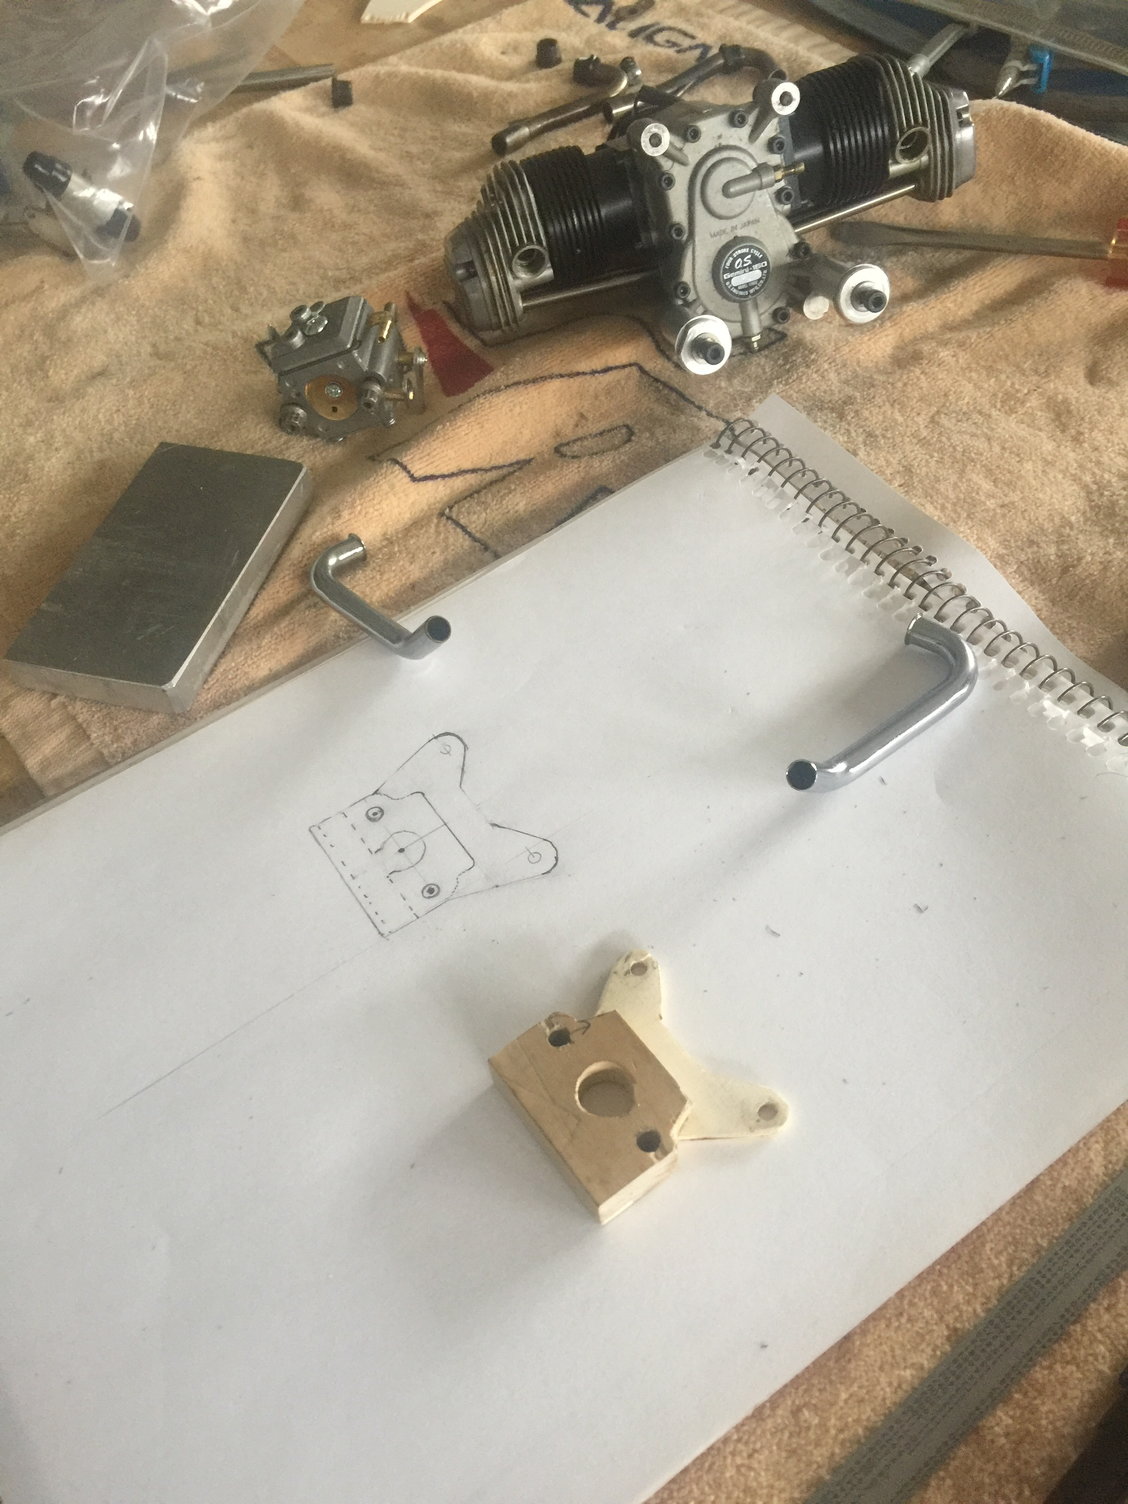
With the intake manifold completed it was time to bend up some intake pipes. I had some 8mm O.D.x.8mm wall stainless pipe already so I prepared to bend it up. I'll say now that .5mm wall would be better but I didn't have any. The .8mm wrinkled just a little on the insides of the tighter bends. Not a functional problem but I was going for perfection. Now, let's visit tube bending ABC's:
The first thing I do is heat the entire pipe to a dull red and let cool slowly. Then: I fill the pipe with low melt temperature bismuth metal (Cerobend). This step cannot be skipped or you will surely collapse your tubes. I made my own tubing bender long ago. I just need to make some 8mm particular parts for it:
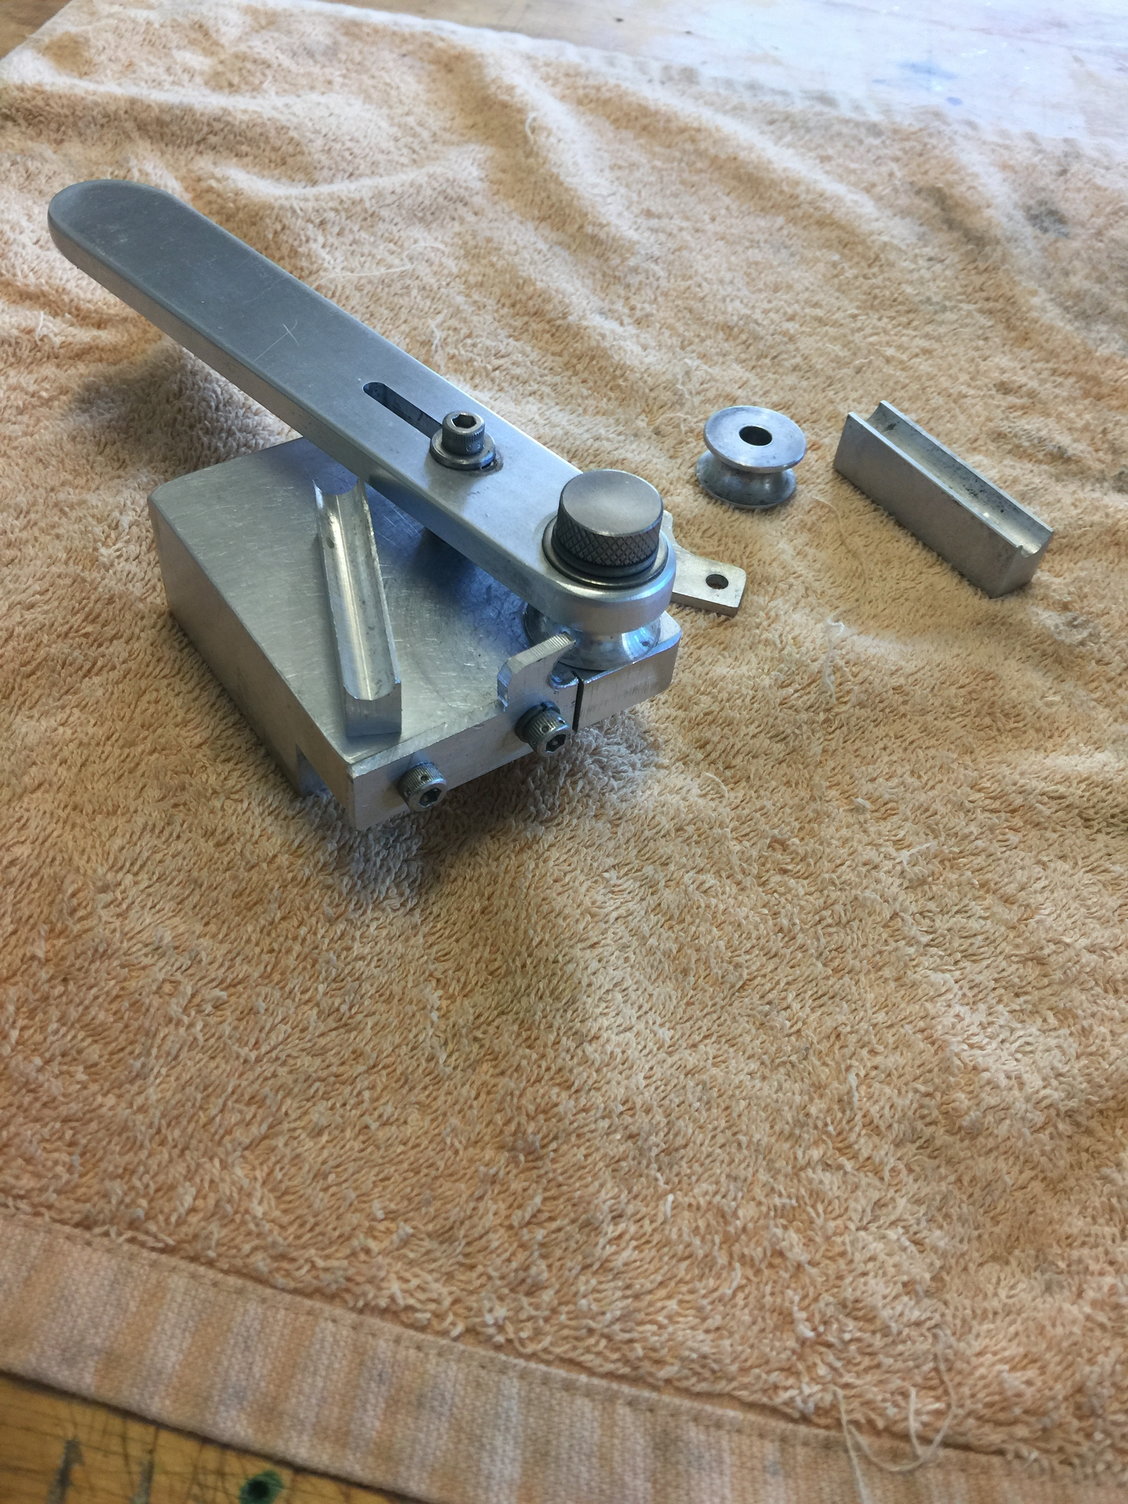
The first thing I do is heat the entire pipe to a dull red and let cool slowly. Then: I fill the pipe with low melt temperature bismuth metal (Cerobend). This step cannot be skipped or you will surely collapse your tubes. I made my own tubing bender long ago. I just need to make some 8mm particular parts for it:
Last edited by mitchilito; 03-10-2022 at 05:59 AM.
The following users liked this post:
Steve (06-13-2022)
The following users liked this post:
Steve (06-13-2022)
The following users liked this post:
Steve (06-13-2022)
03-10-2022, 06:00 AM
#14
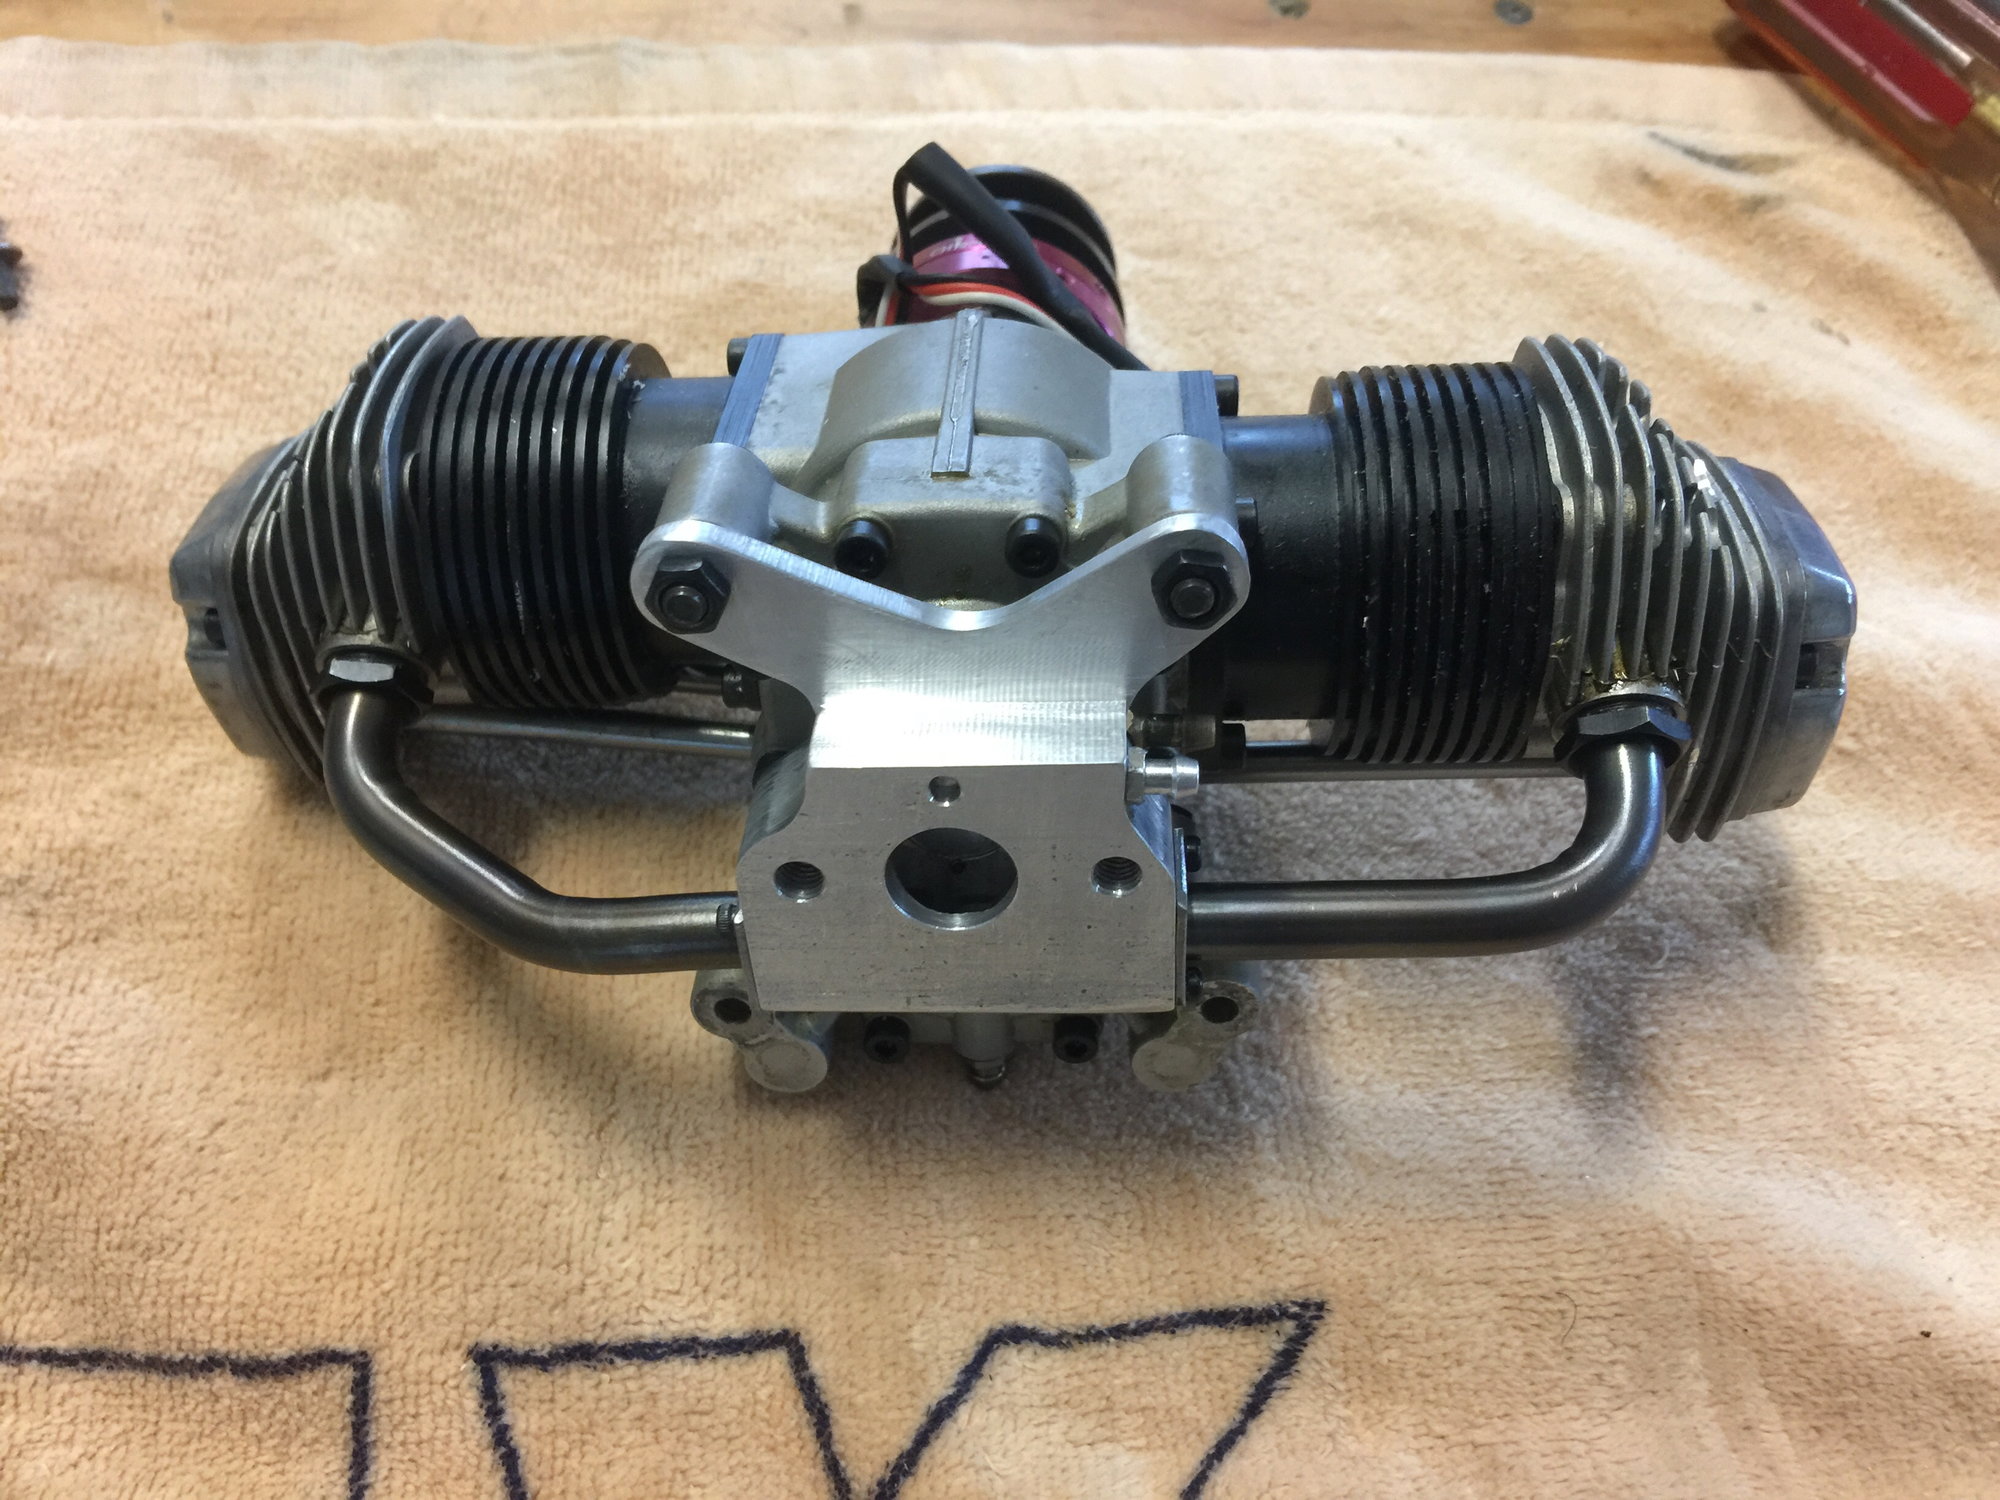
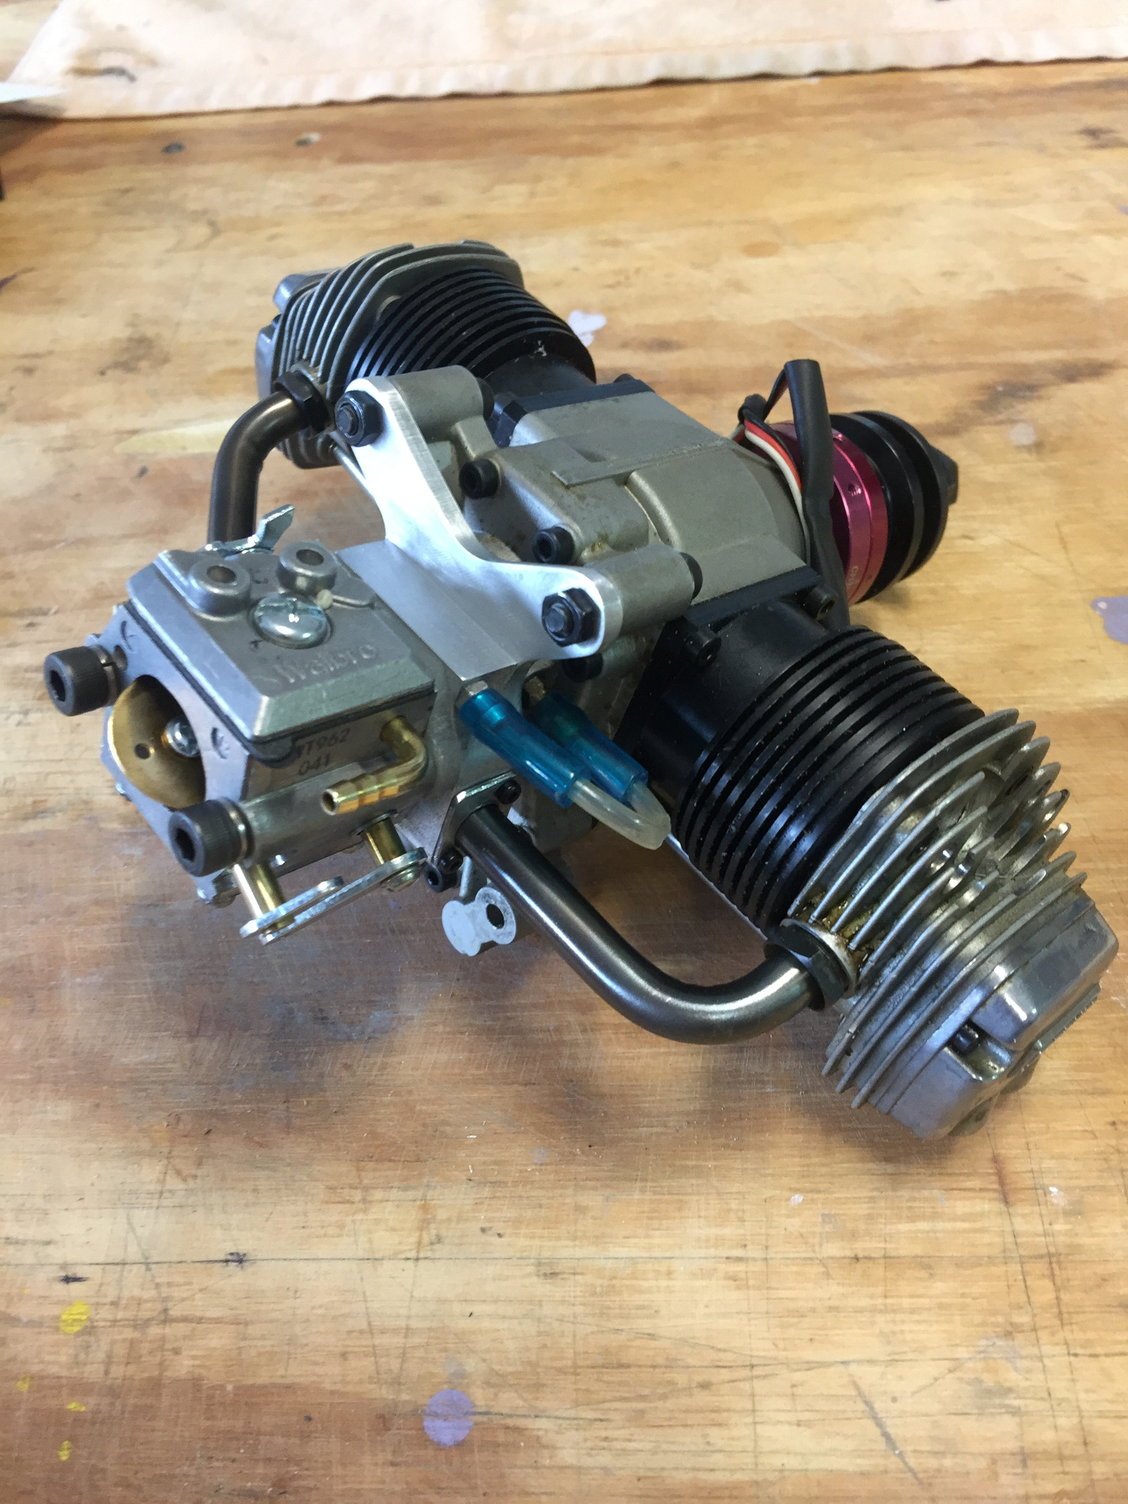
So to this point I addressed all the Gemini shortcomings but one: the waste oil discharge out the bottom of the engine. What a mess! Years ago, long before the manufacturers themselves started doing it, I ported this waste oil discharge straight to the carburetor induction manifold. Yes, in-between the carb and the cylinder head. It shouldn't work but it does - fabulously. Viola - no more waste oil running down the bottom of your aircraft!
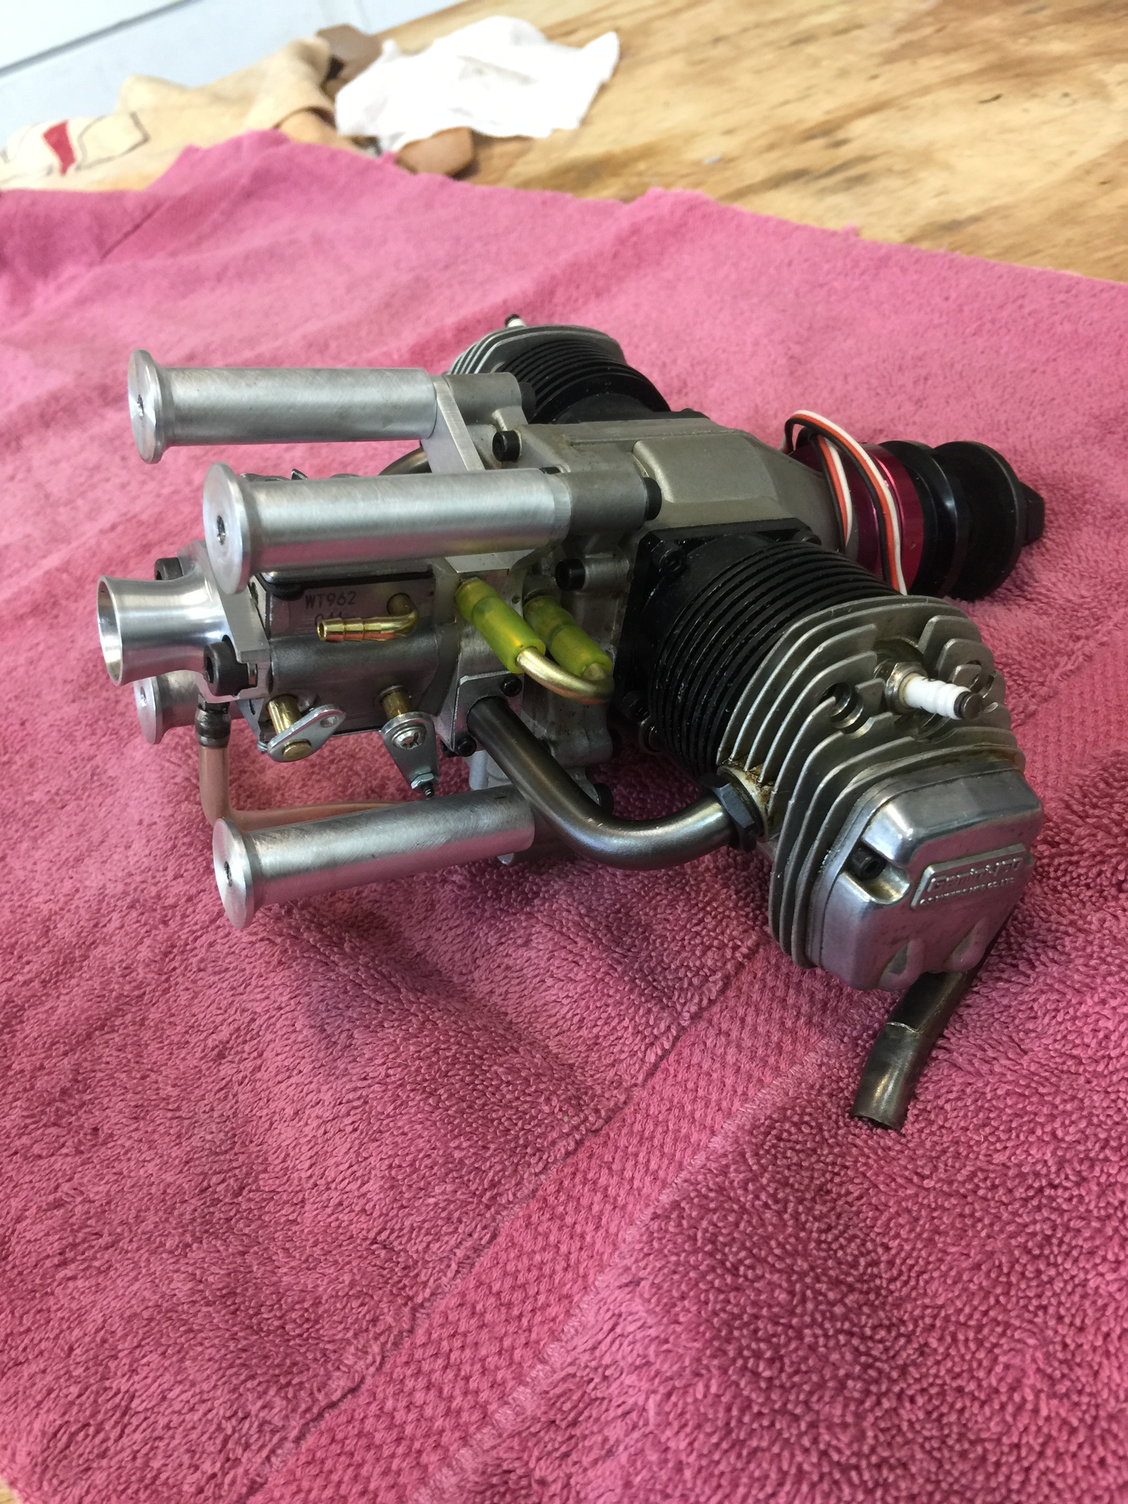
On this conversion I made a velocity stack and tapped it for the waste oil. This puts the case oil into the inlet although from past experience I know it would work plumbed directly into the induction manifold. The reason I didn't do that on this engine is because I've found that in between runs the crankcase on this engine drains a LOT of oil. l wouldn't want that collecting in the manifold and causing a potential hydro-lock.
This method of recirculating the oil has the added advantage of allowing one to reduce the amount of oil mixed into the gasoline. I'm shooting for a total oil content of 20 to 1 so I'll now mix my oil at 25 to 1.
Last edited by mitchilito; 03-11-2022 at 01:40 AM.
The following users liked this post:
Steve (06-13-2022)
The following users liked this post:
Steve (06-13-2022)
03-10-2022, 06:17 AM
#16
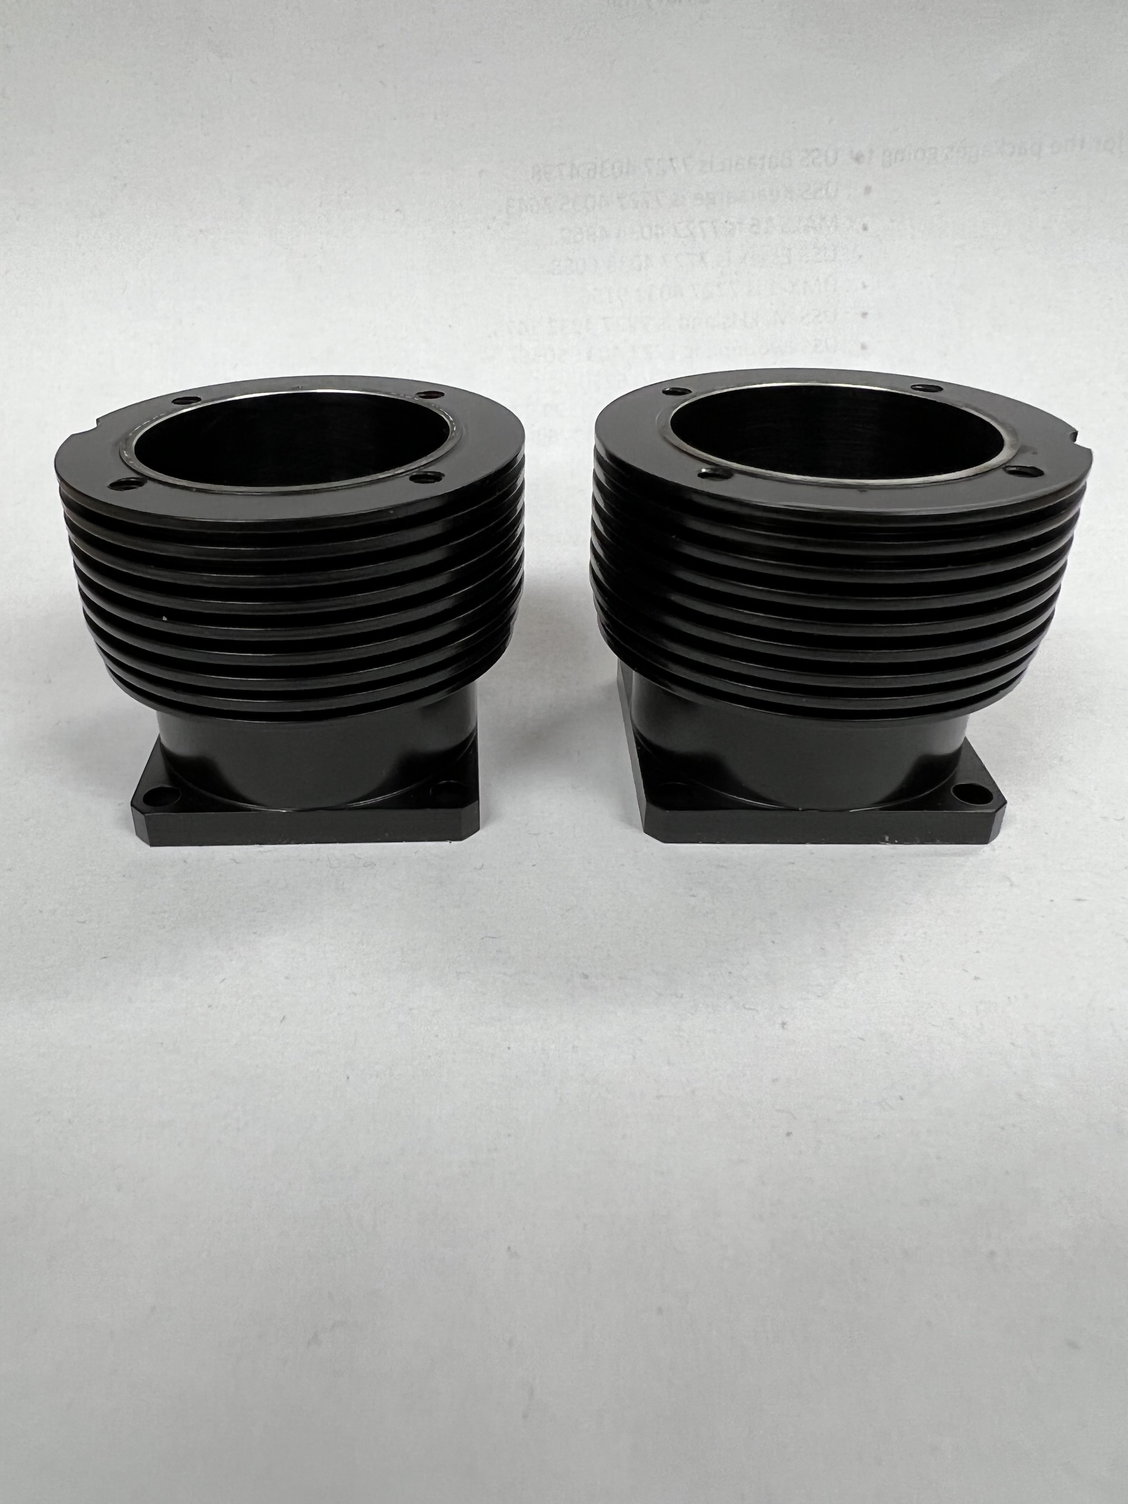
Let's call this the epilogue of this thread. When I got done I wanted to put the finishing touches on this engine and clean it up as best I could. I took an old soft bristled tooth brush and using kerosine cleaned it. The problem is, as many people know, the Gemini engines have a VERY delicate blackening on the cylinders. I don't know what the process is. I always assumed it was anodize but all anodized parts I've have were much more durable. It's really a (cosmetic) weakness on this otherwise fantastic little engine. When I got done cleaning all the gunk off the engine I had also cleaned off a lot of the cylinder black!
So what to do? I considered blasting and re-anodizing but to make a long story short I decided to try a process I'm somewhat familiar with from the gunsmithinn trade: Cerakote. The best way to describe this "paint-like" process is "wet applied powder coat." You spray it on like paint (it sprays MARVELOUSLY) then bake at 300 for 1 hour. The part preparation is very extensive but once that's done (properly) it's very easy. I'm going to show these pictures without anymore preamble but let me just say I am simply amazed at the final result. This stuff is good to 500 to 600 degrees and it's TOUGH. Almost like a ceramic coating. Here are the cylinders after a hot degrease bath followed by bead blasting:
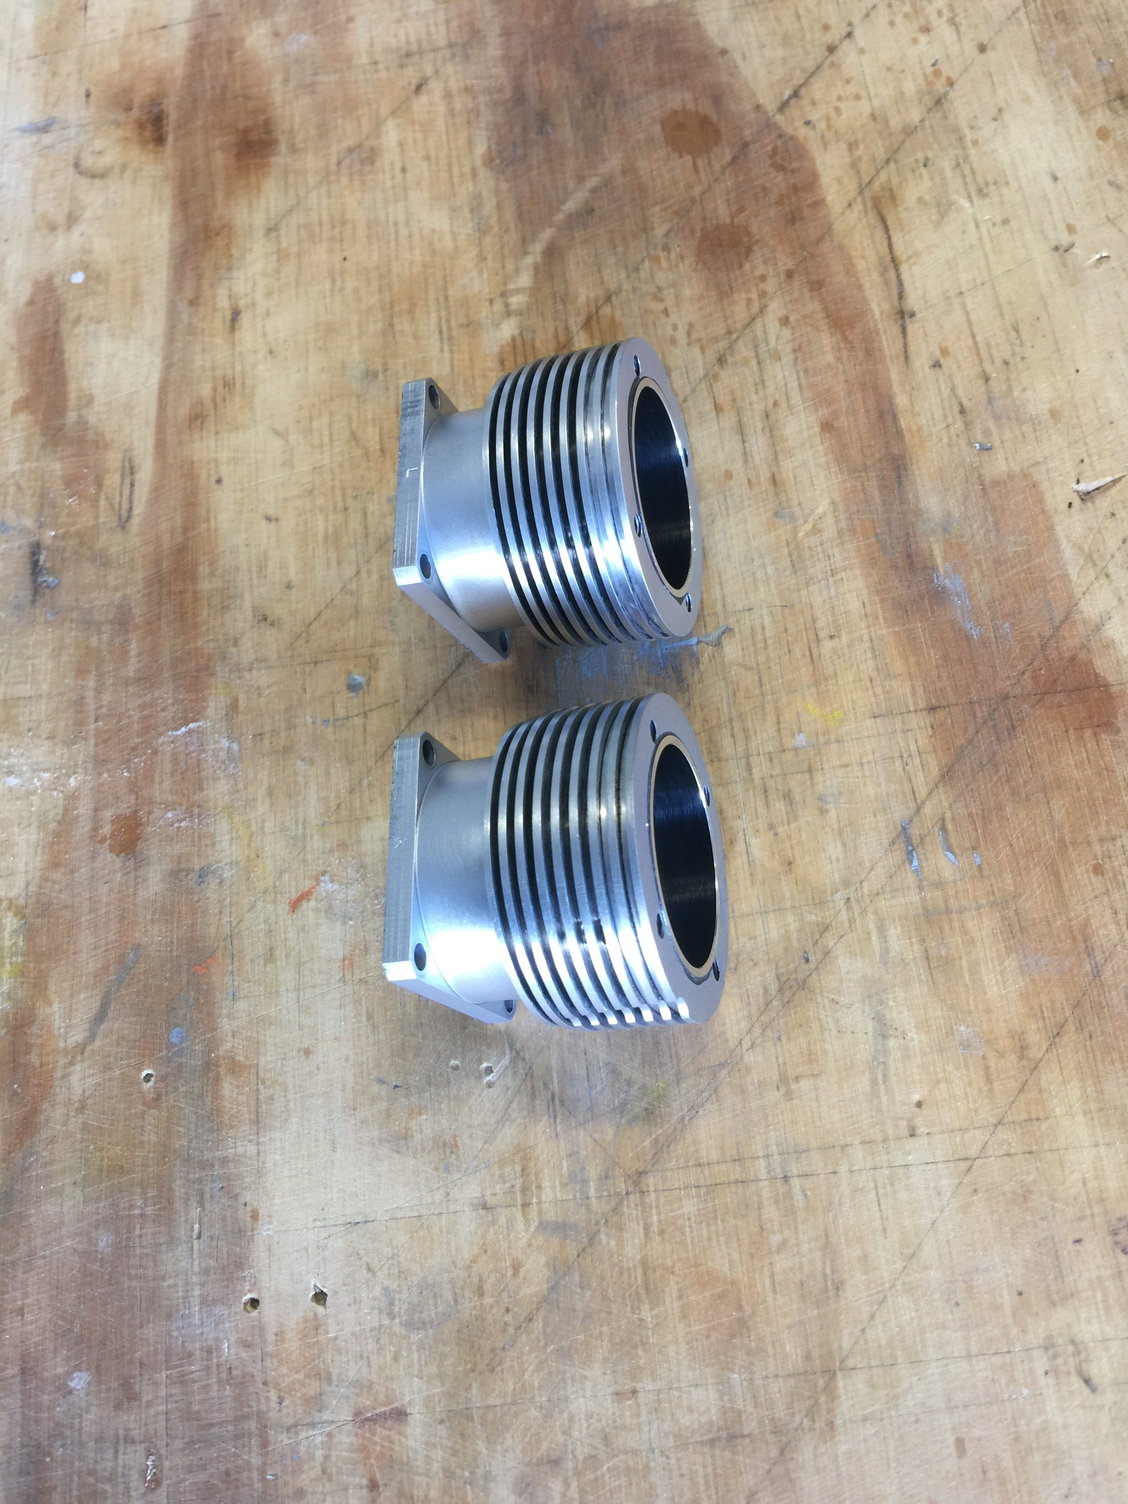
So what to do? I considered blasting and re-anodizing but to make a long story short I decided to try a process I'm somewhat familiar with from the gunsmithinn trade: Cerakote. The best way to describe this "paint-like" process is "wet applied powder coat." You spray it on like paint (it sprays MARVELOUSLY) then bake at 300 for 1 hour. The part preparation is very extensive but once that's done (properly) it's very easy. I'm going to show these pictures without anymore preamble but let me just say I am simply amazed at the final result. This stuff is good to 500 to 600 degrees and it's TOUGH. Almost like a ceramic coating. Here are the cylinders after a hot degrease bath followed by bead blasting:
Last edited by mitchilito; 03-10-2022 at 11:51 AM.
03-10-2022, 06:25 AM
#17
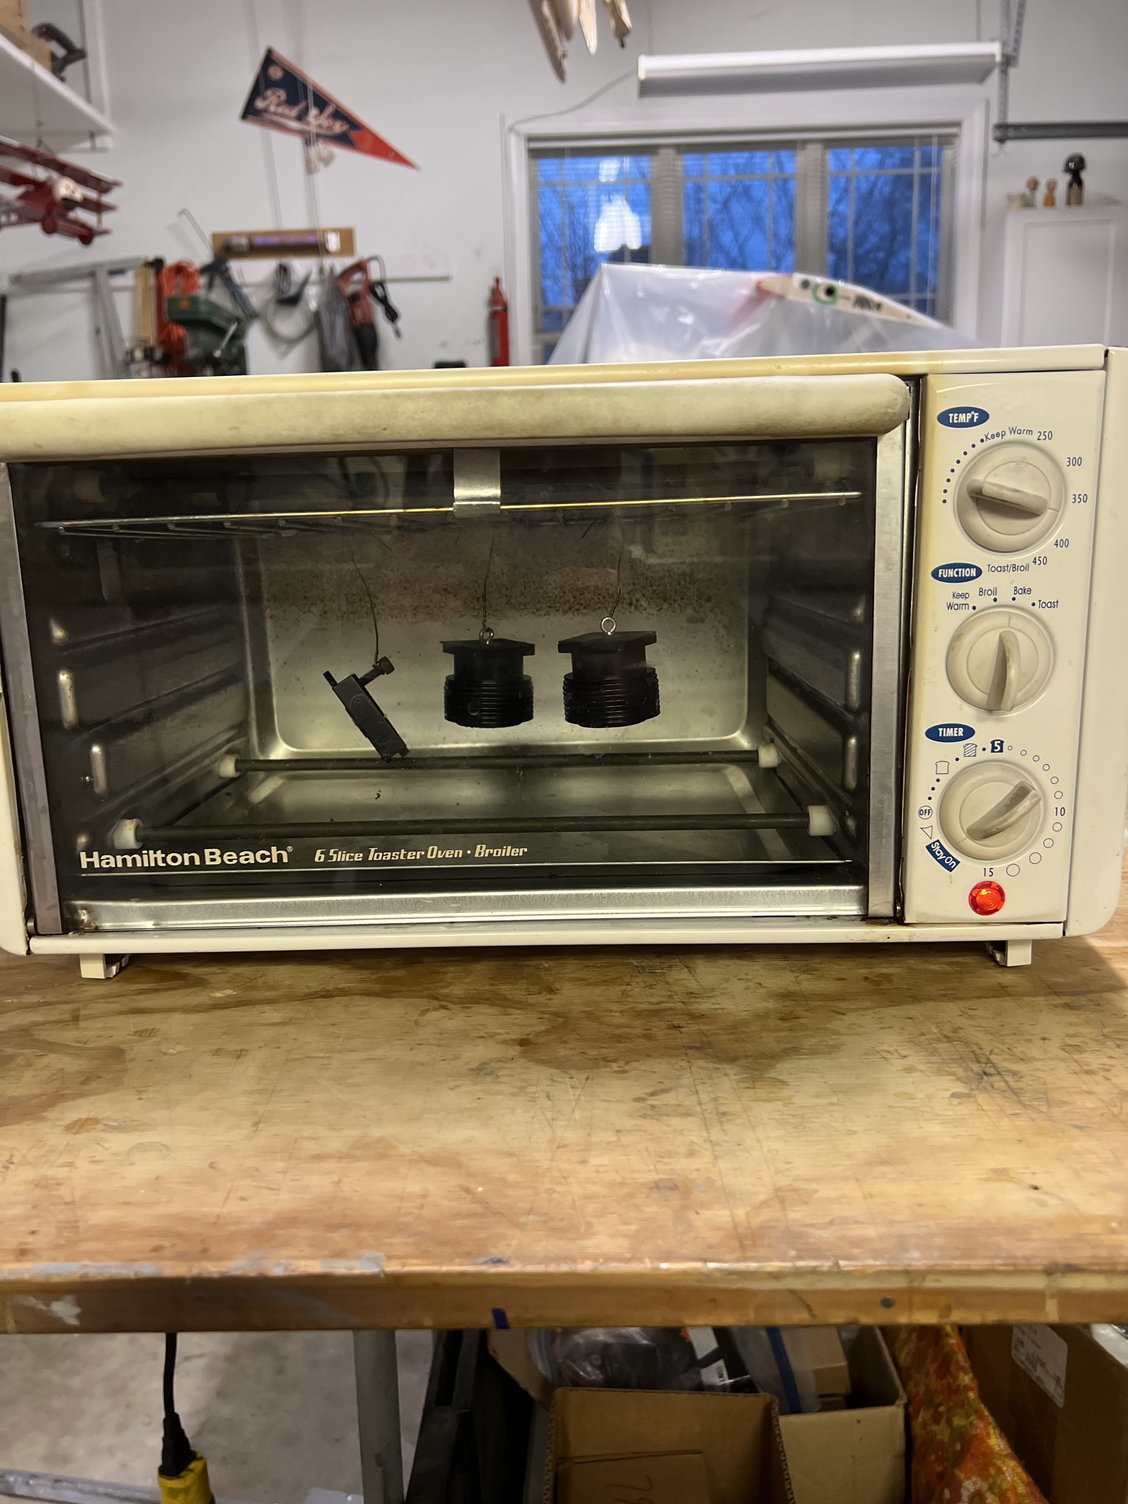
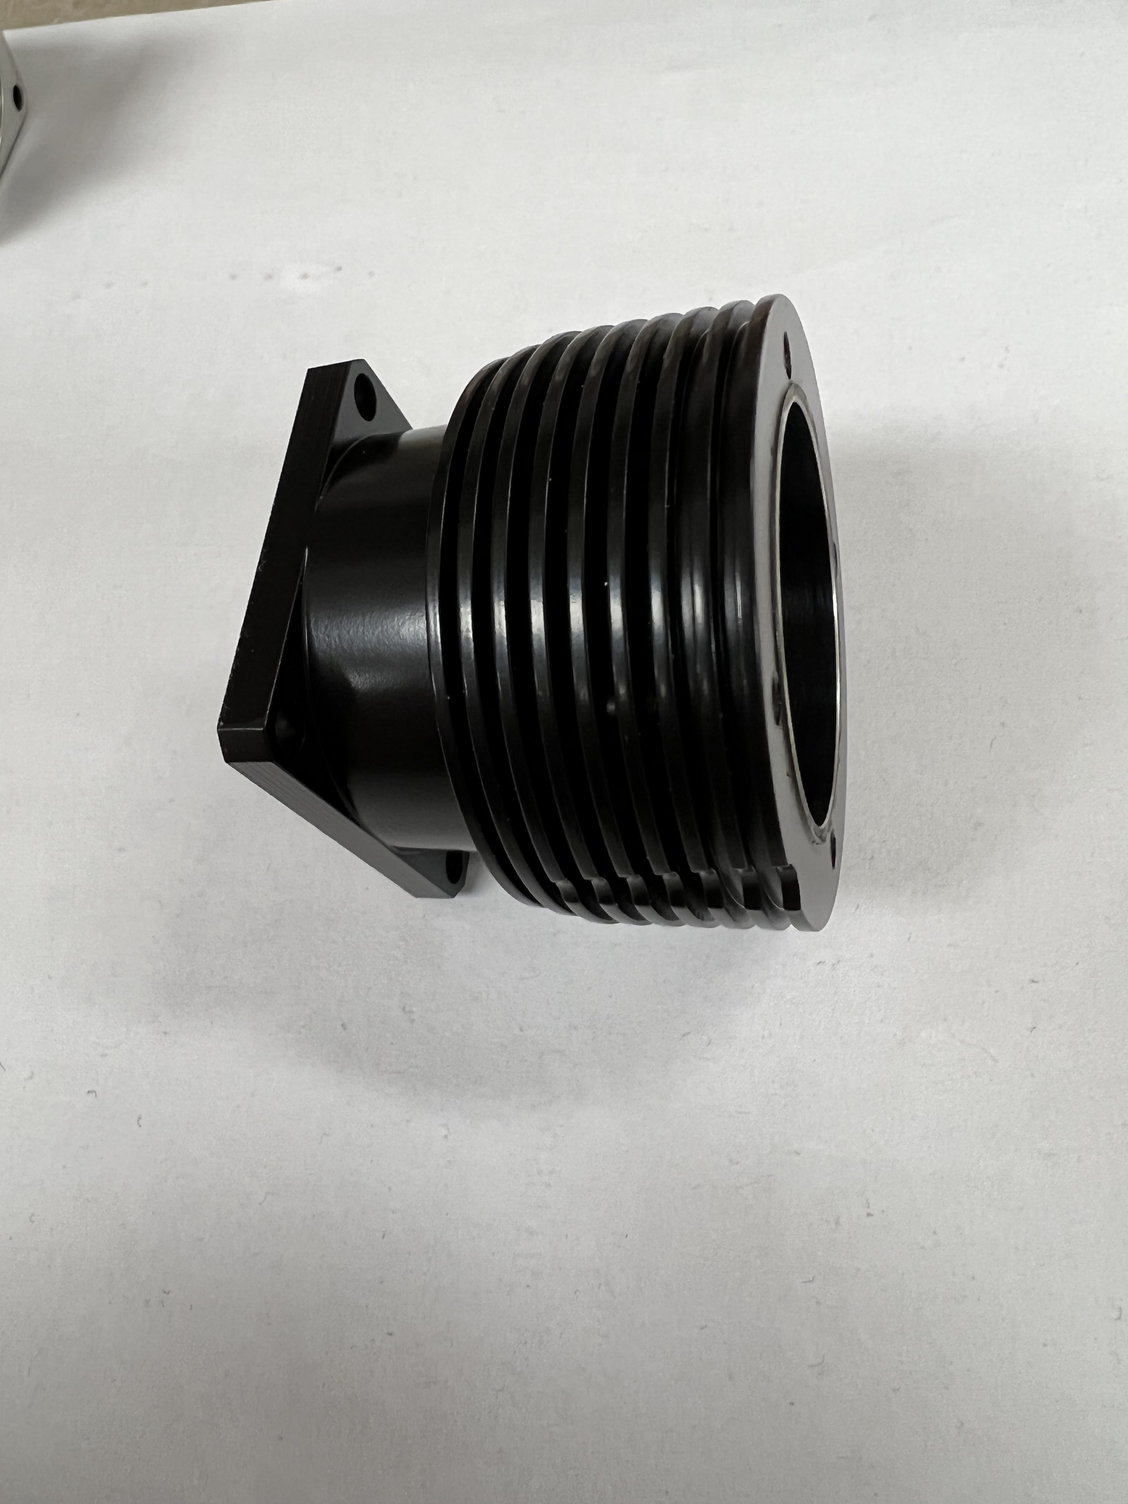
After blast the last thing to do is soak in Acetone for a couple hours, do a 1 hour "de-gas" bake then it's time to paint. Cerakote is interesting in that it's a two-part "paint" but how much catalyst you use determines whether it comes out Matt, Satin or Gloss. I went for something in-between satin and gloss. It's stunning. Here they are in the toaster oven at 300 degrees and then the final product. I went ahead and did the intake manifold while I was at it:
Last edited by mitchilito; 03-10-2022 at 07:03 AM.
The following users liked this post:
Steve (06-13-2022)
The following users liked this post:
Steve (06-13-2022)
03-10-2022, 01:42 PM
#19
Wow... Mechanically and WRT machining, that is a BEAUTIFUL job... Really, no way I would ever be able to match that.
However... Hate to break this to you....
Here is a 60 bucks and 60 minutes solution (15 minutes for installing, 45 minutes to set a fuel delivery curve) that makes use of the original carb, and leaves the original engine completely unchanged apart from one single O-ring (HS needle O-ring needs to be replaced for a gasoline resistant one):
Now this is the cheaper ASP copy of the OS twin, but I have done this mod to an OS Twin as well with identical results.
The initial short puff of smoke from the right hand cylinder is caused by that the engine prior to starting the shoot, had been idling for 10 minutes, during which it is inevitable that it collects a bit of oil in at least one of the intake headers, but after that, no visible smoke anymore despite me running a 10:1 fuel/oil mix (Personal choice, not a necessity for this engine).
It allows the user to infinitely tailor and adjust the mixture at each conceivable point along the entire throttle range, and allows for 100% burble-free and stutterfree operation.
It has in the mean time been proven over more than 2 years and about 40 different engines ranging from 5 to 65 cc, both 2 and 4stroke, to be completely reliable, stable and versatile.
03-10-2022, 05:14 PM
#21


Very, very nicely done. Well thought out and professionally executed. In a word, elegant
Real model-maker work. Nice miniature Parker-Hannifin style tube bender too.
Thanks for sharing, stick with it, you have a real winner there.
Real model-maker work. Nice miniature Parker-Hannifin style tube bender too.
Thanks for sharing, stick with it, you have a real winner there.
Last edited by Jesse Open; 03-10-2022 at 07:17 PM.
 03-11-2022, 12:43 PM
#23
Absolutely loved seeing this conversion. I think it was a really awesome build shown here! You have definitely gained a new follower on youtube and I hope you will do some more great stuff 
The following users liked this post:
yanicks (03-11-2022)
03-11-2022, 04:55 PM
#25
It was quite nice to see a modeler using real ingenuity for a change.
Being a retired metal model maker and machine designer I also appreciated the clean design and careful fabrication work.
Will be watching for more like that!
Being a retired metal model maker and machine designer I also appreciated the clean design and careful fabrication work.
Will be watching for more like that!