


Tarvin Model Products Quartermaster
 02-02-2016, 07:31 PM
#1

Thread Starter
Join Date: Oct 2004
Location: Wyoming,
MN
Posts: 233
Likes: 0
Received 0 Likes
on
0 Posts
I purchased at an auction a framed up Quartermaster along with the plans and instruction manual. It appears to have been built square and straight. The build still requires a lot of work as well as installing radio and engine, covering and finish. Before I get too deep into the project, I am curious to know if anyone has built one and how well it performs. Can anyone provide some info on this airplane?

 02-03-2016, 09:10 PM
#3
Thread Starter
Join Date: Oct 2004
Location: Wyoming,
MN
Posts: 233
Likes: 0
Received 0 Likes
on
0 Posts
Thanks ,Tom. Why didn't I think of that? I did call and speak to him but he unfortunately had never built one and had no information on the airplane. He seems to be a very likeable man who would be willing to help wherever he can. I committed to letting him know about the airplane when I get it built and flying, though it might be some time from now. Right now, I am just planning ahead.
In the mean time, if anyone has info on the Quartermaster, I am open to hearing about it.
In the mean time, if anyone has info on the Quartermaster, I am open to hearing about it.
02-06-2016, 03:44 PM
#5
Thread Starter
Join Date: Oct 2004
Location: Wyoming,
MN
Posts: 233
Likes: 0
Received 0 Likes
on
0 Posts
Thanks for the input, Jeffo. If it flies anything like my Aeromaster. it will be a great airplane. Plus, I have found that bigger is better so I am looking forward to a really fun airplane. I have no immediate plans to finish building this airplane since I have a couple of big projects ahead of it. Just doing some long range planning. When it comes time to finish the build, I'll be back with a report.
03-08-2016, 08:04 AM
#6

My Feedback: (13)
Join Date: Oct 2003
Location: Phelps, NY
Posts: 55
Likes: 0
Received 0 Likes
on
0 Posts
I was the owner of DGA Designs and Reid' Quality Model Products and my friend and I designed the QuarterMaster and I built the prototype. The plane flies awesome. What we did, as we are old time modelers who used to fly the Andrew's Aeromaster, took the airfoil and the basic wing/stab setup and drew an airplane around it. As we did not want to call it an Aeromaster, we came up with the name QuarterMaster as it was quater scale size designed around the Aeromaster. The original was powered with a Quadra 42 which was plenty of power swinging a 20-8 prop. I do not generally build a plane twice, but I dumb thumbed the prototype and rebuilt it as it flew so well. After about 600 flights I had a radio failure and lost the plane. I have a third one built and changed some outlines so it looks like a 1930's plane. Drop a line if you have any questions. Dave 

03-09-2016, 12:29 PM
#7
Thread Starter
Join Date: Oct 2004
Location: Wyoming,
MN
Posts: 233
Likes: 0
Received 0 Likes
on
0 Posts
Dave, Thanks for the info on the Quartermaster. Reading what you wrote makes it all the more important to put this higher in the order of my build list. When the time comes to build and fly my Quartermaster, I will be in touch with the details.
I am impressed with your great looking Quartermaster done as a 1930's style. I hope it serves you for years to come.
I am impressed with your great looking Quartermaster done as a 1930's style. I hope it serves you for years to come.
03-10-2016, 10:10 AM
#8
That is a very pretty plane and really tempting. Plans and a cowl delivered are $106. I've got so many projects. Just got back from Perry and spent a fortune.
Still, it's really tempting
carl
Still, it's really tempting
carl
03-29-2016, 03:41 PM
#9
My Feedback: (13)
Join Date: Oct 2003
Location: Phelps, NY
Posts: 55
Likes: 0
Received 0 Likes
on
0 Posts
Carl- I made some changes on the QM from what is on the plans. I rounded out the fuselage, rounded the wing tips and tail feathers, used a 1/4 scale Davis D1W cowl that I shortened and a set of wheel pants from a Stearman. I wanted the 1930's look and I think I got it. Dave
09-17-2019, 10:24 AM
#10
I couldn't stand it anymore so I ordered the plans. They came in last night. Very interesting build on this one. I'm going to start on the stab. Going to put a US 41 in it. Will whip up my own homemade cowl as well. Probably skip the pants. Probably.
carl
carl
04-06-2022, 09:07 AM
#12
Thread Starter
Join Date: Oct 2004
Location: Wyoming,
MN
Posts: 233
Likes: 0
Received 0 Likes
on
0 Posts
It has been 5 years since I touched the Quartermaster. So many fun projects to do and this one just got lost in the rafters. About a week ago, I was waiting for paint to dry and parts to arrive for other projects, so I pulled the QM down from the rafters and looked it over. This is a model I bought at a club auction Feb 2016 as if I needed another model. It was built very well except for the lower wing which had almost no dihedral contrary to what the plan showed. Correcting the problem might have been too big of a task so for that reason he might have sold it. Well, I am glad he did. I cut the wing in two at the centerline on my table saw and glued it together at the correct dihedral angle. I purchased wheel pants and an engine cowl from Fiberglass Specialties and still need a landing gear from TNT. The interesting task to do now is to accurately make the cabanes from 1/8" music wire. Getting that done well is always a challenge.
My biggest concern is engine size. I have a DLE 30 that fits perfectly but am concerned it might be on the light end for power. My DLE 55's are all in service and I have nothing in between. Weight showed come out around 18 lbs. I am hoping power to weight will be enough for a good sport flyer. Does anyone have any thoughts on that?
I'll try to get some pictures for a future post.
04-13-2022, 05:46 AM
#13
I'm going to stuff a Q42 in mine when I get around to building it. When I was considering buying the plans I think someone said a Q35 would fly it all day long.
I'm finishing up a Sukhoi. When it's done, I'm thinking about building either an Alley Kat or a Dragon Lady from the drawings you sent me. I ordered the Dragon Lady cowl from Fiberglass Specialties last week.
Carl
I'm finishing up a Sukhoi. When it's done, I'm thinking about building either an Alley Kat or a Dragon Lady from the drawings you sent me. I ordered the Dragon Lady cowl from Fiberglass Specialties last week.
Carl
04-23-2022, 08:44 AM
#14
Thread Starter
Join Date: Oct 2004
Location: Wyoming,
MN
Posts: 233
Likes: 0
Received 0 Likes
on
0 Posts
Making and installing cabane struts has been the challenge this week. The goal is to make them to hold the wing securely at exactly the correct incidence angle while being in correct alignment with the fuselage. To hopefully ensure that the incidence angle is correct, a jig is built and installed temporarily to suspend the upper wing at the correct angle. Interplane struts are made and temporarily attached in position to hold the wing level to the fuselage. The cabanes are made of 1/8" music wire with loops at one end for the wing bolts to go into the threaded wood in the wing and a dogleg at the other end to insert into the side of the fuselage. To get the cabanes to the correct length, it was necessary to make each one of the four struts in two pieces connected by a length of brass tubing. Once all is aligned and secured, the brass tubing and music wire are silver soldered together. To make the loop at the top, the music wire had to be heated with a torch to soften it and then the wire was wrapped around a 1/4" bolt for the loop. Then the wire at the loop end had to be bent over at nearly a right angle to match the angle to fit flush to the bottom of the wing. This has been a lengthy process of fit and try and repeat until a proper fit was achieved. It gets to a point where the "that's close enough" approach is valid to be done with the job. When all is measured the bottom wing is at 1 degree positive and the upper wing is 1/2 degree positive according to the plan. Man, am I glad that part of the build is over! Work should move along much quicker from here on.
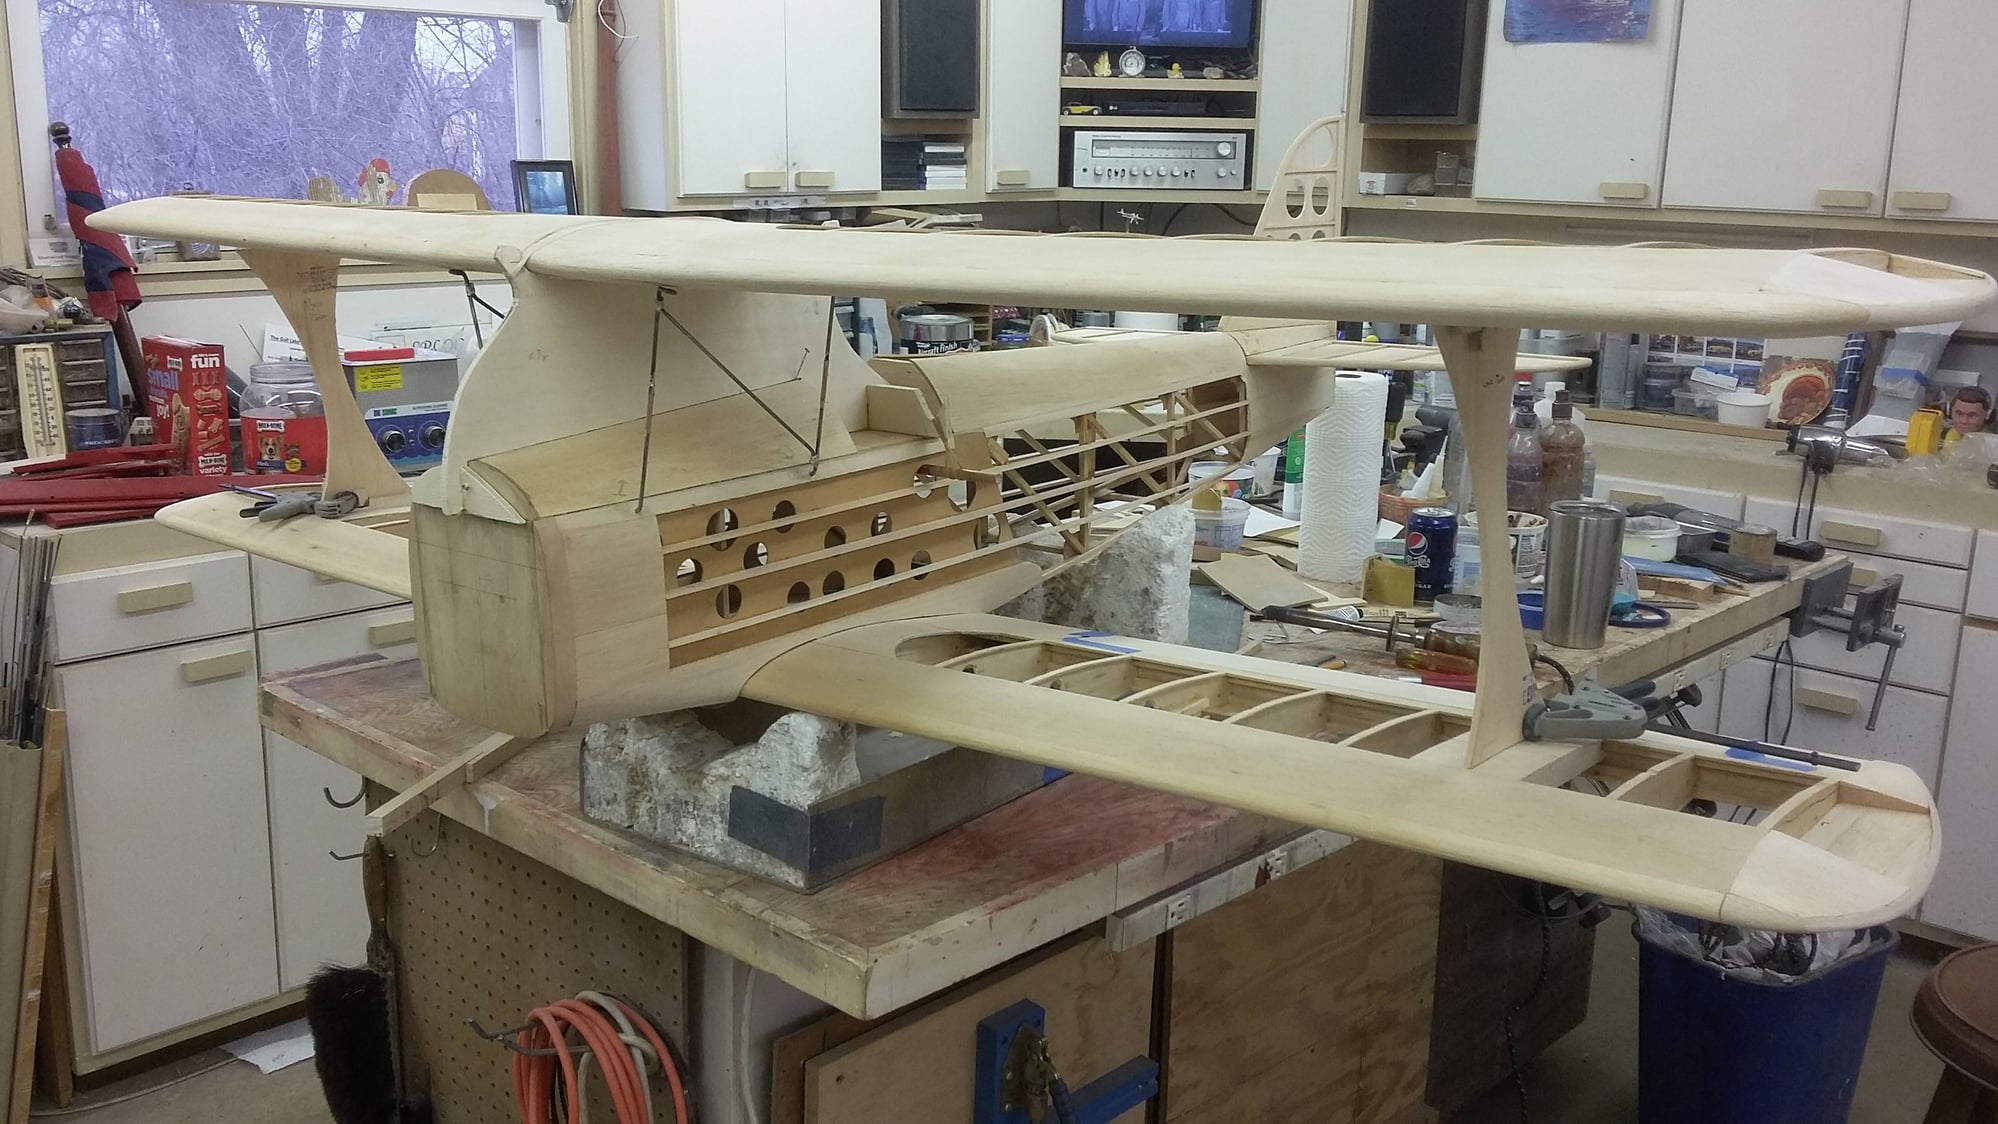
Alignment jig and interplane struts hod the wing in the correct position.
Alignment jig and interplane struts hod the wing in the correct position.
