


Cessna 152 - 2,7meter
 06-11-2017, 11:27 AM
#101

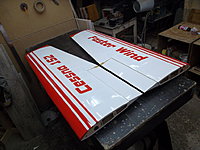
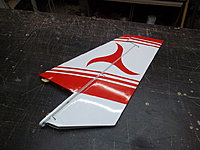
The color scheme was not invented until this time.
Now I started to draw, sort of acceptable, the main thing will not be difficult to do.
But there was another problem, COLOR !?
On the court of the audience, because I myself can not decide, maybe someone will advise.
Attachment 2219163
Attachment 2219164
Attachment 2219165
Attachment 2219166
Attachment 2219167
Are those color schemes your work?
 06-11-2017, 08:47 PM
#102
Senior Member
Thread Starter

Join Date: Nov 2016
Posts: 146
Likes: 0
Received 0 Likes
on
0 Posts
06-18-2017, 08:59 AM
#104
Senior Member
Thread Starter
Join Date: Nov 2016
Posts: 146
Likes: 0
Received 0 Likes
on
0 Posts
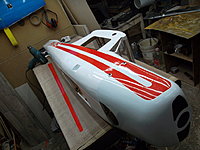
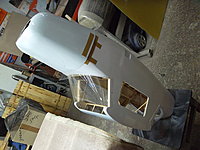
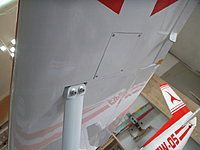
i did not sit idly by. From the inside, the fuselage was covered with nitro varnish, the nose part and the tail.
I made stickers for Cessna and Grunau, I decided to start with Cessna, later
I'll dress up the glider.


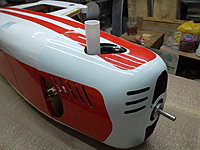
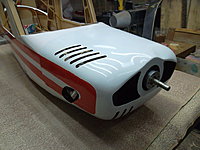
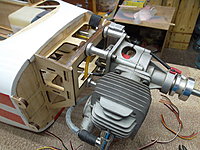
The hood with the engine rose as it should. The motor has a degree of 2.5 degrees and 2 degrees below.


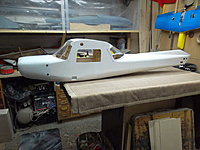
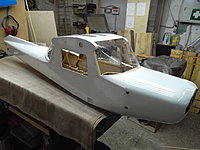
The fuselage remained to decorate. So far at this stage.
I made stickers for Cessna and Grunau, I decided to start with Cessna, later
I'll dress up the glider.
The hood with the engine rose as it should. The motor has a degree of 2.5 degrees and 2 degrees below.
The fuselage remained to decorate. So far at this stage.
06-18-2017, 08:59 AM
#105
Senior Member
Thread Starter
Join Date: Nov 2016
Posts: 146
Likes: 0
Received 0 Likes
on
0 Posts
i did not sit idly by. From the inside, the fuselage was covered with nitro varnish, the nose part and the tail.
I made stickers for Cessna and Grunau, I decided to start with Cessna, later
I'll dress up the glider.


The hood with the engine rose as it should. The motor has a degree of 2.5 degrees and 2 degrees below.


The fuselage remained to decorate. So far at this stage.

I made stickers for Cessna and Grunau, I decided to start with Cessna, later
I'll dress up the glider.
The hood with the engine rose as it should. The motor has a degree of 2.5 degrees and 2 degrees below.
The fuselage remained to decorate. So far at this stage.
06-24-2017, 01:38 AM
#107
Senior Member
Thread Starter
Join Date: Nov 2016
Posts: 146
Likes: 0
Received 0 Likes
on
0 Posts
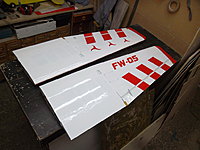
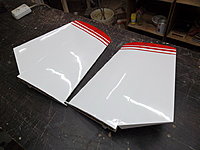
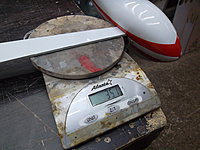
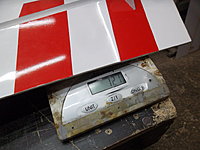
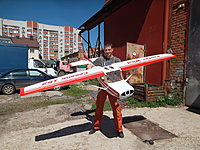
Finished dressing up the model.
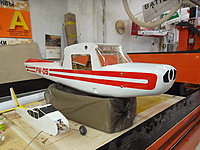

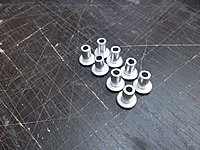
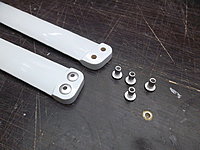
The wing struts are wrapped in aluminum rivets.


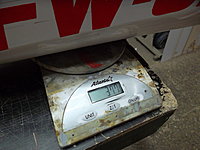
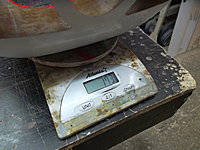
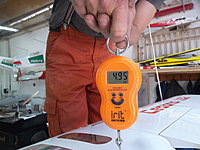
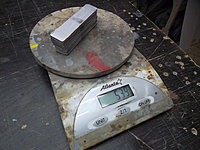
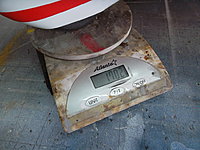
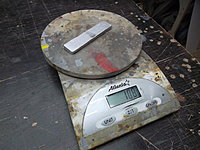
For the interest, each element was weighed separately.
Front landing gear.
Wings of the wing.

The basic racks of the chassis.


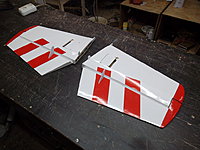
Horizontal plumage.
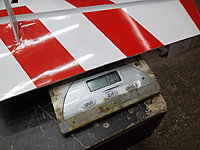

Vertical tail.

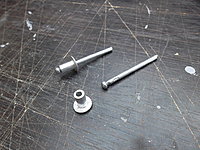
The wing center wing pipe, diameter 25mm. , The length of 640mm.

Wings.


The wing struts are wrapped in aluminum rivets.
For the interest, each element was weighed separately.
Front landing gear.
Wings of the wing.
The basic racks of the chassis.
Horizontal plumage.
Vertical tail.
The wing center wing pipe, diameter 25mm. , The length of 640mm.
Wings.
06-24-2017, 01:38 AM
#108
Senior Member
Thread Starter
Join Date: Nov 2016
Posts: 146
Likes: 0
Received 0 Likes
on
0 Posts
Finished dressing up the model.


The wing struts are wrapped in aluminum rivets.

For the interest, each element was weighed separately.
Front landing gear.

Wings of the wing.

The basic racks of the chassis.
Horizontal plumage.

Vertical tail.
The wing center wing pipe, diameter 25mm. , The length of 640mm.

Wings.

The wing struts are wrapped in aluminum rivets.
For the interest, each element was weighed separately.
Front landing gear.
Wings of the wing.
The basic racks of the chassis.
Horizontal plumage.
Vertical tail.
The wing center wing pipe, diameter 25mm. , The length of 640mm.
Wings.
06-24-2017, 01:41 AM
#109
Senior Member
Thread Starter
Join Date: Nov 2016
Posts: 146
Likes: 0
Received 0 Likes
on
0 Posts
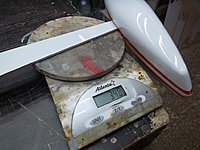
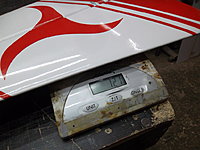
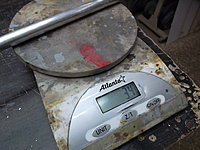
The forward part of the fuselage.

The tail part of the fuselage.

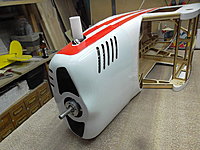
Engine hood.

Lantern of the cabin.

Pipe of the center wing of the horizontal tail, diameter 14mm. , Length 280mm.

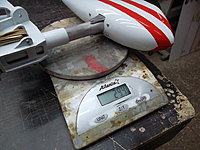
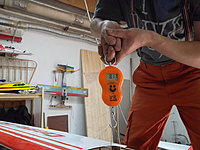
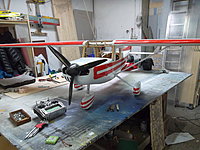
And of course I collected it!
Attaching the wing torso.


Weight in the collection!
To this we must add 40gr.
The side windows were not attached during weighing (forgot).

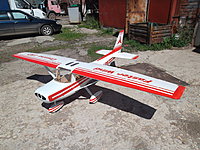
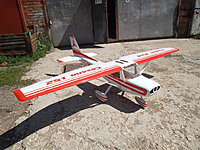
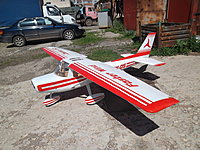
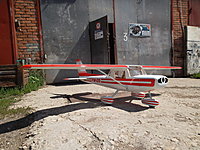
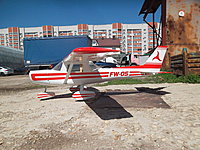
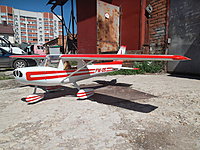
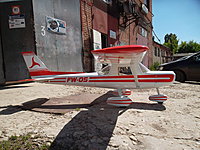
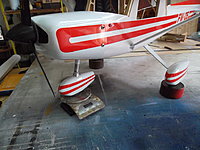
Photosession beauty Cessna 152.


The tail part of the fuselage.
Engine hood.
Lantern of the cabin.
Pipe of the center wing of the horizontal tail, diameter 14mm. , Length 280mm.
And of course I collected it!
Attaching the wing torso.
Weight in the collection!
To this we must add 40gr.
The side windows were not attached during weighing (forgot).
Photosession beauty Cessna 152.
06-24-2017, 01:41 AM
#110
Senior Member
Thread Starter
Join Date: Nov 2016
Posts: 146
Likes: 0
Received 0 Likes
on
0 Posts
The forward part of the fuselage.

The tail part of the fuselage.
Engine hood.
Lantern of the cabin.

Pipe of the center wing of the horizontal tail, diameter 14mm. , Length 280mm.
And of course I collected it!
Attaching the wing torso.

Weight in the collection!
To this we must add 40gr.
The side windows were not attached during weighing (forgot).
Photosession beauty Cessna 152.


The tail part of the fuselage.
Engine hood.
Lantern of the cabin.
Pipe of the center wing of the horizontal tail, diameter 14mm. , Length 280mm.
And of course I collected it!
Attaching the wing torso.
Weight in the collection!
To this we must add 40gr.
The side windows were not attached during weighing (forgot).
Photosession beauty Cessna 152.
06-27-2017, 02:14 AM
#112
Senior Member
Thread Starter
Join Date: Nov 2016
Posts: 146
Likes: 0
Received 0 Likes
on
0 Posts
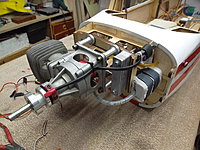
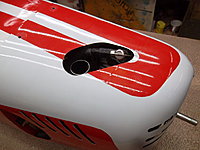
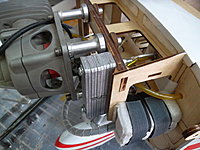
The bonnet is cut for better engine cooling.


In assembled form, I checked the location of the center of gravity.
The alignment rose 35% of the MAR, behind the spar.
I was planning 20-25% of the MAR, the centreplane pipe passes exactly there.

After the measurements, I found out that the alignment had risen where it should be, under the hood it was necessary to load 550 gr.
For the production of goods I used a plywood choker.


The ballast is fixed to the screws M4.


The center of gravity is now along the center-pipe, about 23% of the MAR.
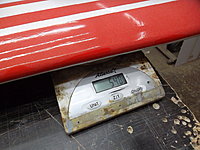
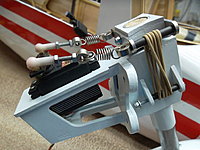
Now I took off the weight reading on the front rack.
On the front support comes 1700 gr. Of the total weight of the model.
These data will be needed to adjust the stiffness of the shock absorbers in the front rack.

Weight of the model without fuel.
On the scales the reading is 8110 gr. To this we need to add a glazing weight of 200 g.
The glazing was not installed during weighing.
It turns out weight without fuel 8300 gr. (Tank capacity 0.5 liters.)
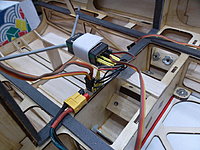
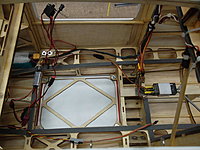
Now fuss with the placement of electronics.


In assembled form, I checked the location of the center of gravity.
The alignment rose 35% of the MAR, behind the spar.
I was planning 20-25% of the MAR, the centreplane pipe passes exactly there.
After the measurements, I found out that the alignment had risen where it should be, under the hood it was necessary to load 550 gr.
For the production of goods I used a plywood choker.
The ballast is fixed to the screws M4.
The center of gravity is now along the center-pipe, about 23% of the MAR.
Now I took off the weight reading on the front rack.
On the front support comes 1700 gr. Of the total weight of the model.
These data will be needed to adjust the stiffness of the shock absorbers in the front rack.
Weight of the model without fuel.
On the scales the reading is 8110 gr. To this we need to add a glazing weight of 200 g.
The glazing was not installed during weighing.
It turns out weight without fuel 8300 gr. (Tank capacity 0.5 liters.)
Now fuss with the placement of electronics.
06-27-2017, 02:14 AM
#113
Senior Member
Thread Starter
Join Date: Nov 2016
Posts: 146
Likes: 0
Received 0 Likes
on
0 Posts
The bonnet is cut for better engine cooling.


In assembled form, I checked the location of the center of gravity.
The alignment rose 35% of the MAR, behind the spar.
I was planning 20-25% of the MAR, the centreplane pipe passes exactly there.
After the measurements, I found out that the alignment had risen where it should be, under the hood it was necessary to load 550 gr.
For the production of goods I used a plywood choker.


The ballast is fixed to the screws M4.

The center of gravity is now along the center-pipe, about 23% of the MAR.
Now I took off the weight reading on the front rack.
On the front support comes 1700 gr. Of the total weight of the model.
These data will be needed to adjust the stiffness of the shock absorbers in the front rack.

Weight of the model without fuel.
On the scales the reading is 8110 gr. To this we need to add a glazing weight of 200 g.
The glazing was not installed during weighing.
It turns out weight without fuel 8300 gr. (Tank capacity 0.5 liters.)

Now fuss with the placement of electronics.


In assembled form, I checked the location of the center of gravity.
The alignment rose 35% of the MAR, behind the spar.
I was planning 20-25% of the MAR, the centreplane pipe passes exactly there.
After the measurements, I found out that the alignment had risen where it should be, under the hood it was necessary to load 550 gr.
For the production of goods I used a plywood choker.
The ballast is fixed to the screws M4.
The center of gravity is now along the center-pipe, about 23% of the MAR.
Now I took off the weight reading on the front rack.
On the front support comes 1700 gr. Of the total weight of the model.
These data will be needed to adjust the stiffness of the shock absorbers in the front rack.
Weight of the model without fuel.
On the scales the reading is 8110 gr. To this we need to add a glazing weight of 200 g.
The glazing was not installed during weighing.
It turns out weight without fuel 8300 gr. (Tank capacity 0.5 liters.)
Now fuss with the placement of electronics.
06-28-2017, 11:02 AM
#117
Senior Member
Thread Starter
Join Date: Nov 2016
Posts: 146
Likes: 0
Received 0 Likes
on
0 Posts
Today, Cessna first sniffed the fuel and learned how to ride.
I was very pleased with the chassis racks, the main cushions as it should, front vasche as real fulfills.
I was very pleased with the chassis racks, the main cushions as it should, front vasche as real fulfills.
07-04-2017, 05:06 AM
#119
Senior Member
Thread Starter
Join Date: Nov 2016
Posts: 146
Likes: 0
Received 0 Likes
on
0 Posts
Today Cessna has learned to fly and she clearly enjoyed it.
My joy has no limits - everything turned out as desired.
The first rise recalled childhood, hands and feet shaking spontaneously,
I did not expect that I will be able to experience this again, a long time ago the excitement passed by me, but here you are.
In the first flight it became clear that the model was a success, flying easily and obediently - as on rails.
On the throttle pitch, roll and course does not respond - it is particularly pleased with the removal of the engine hit the first time.
Very responsive and obedient on the senses on the sticks.
I made 4-5 sorties, all that fell into the frame will be uploaded as they come from those who shot the video.
07-20-2017, 11:33 AM
#123
Senior Member
Thread Starter
Join Date: Nov 2016
Posts: 146
Likes: 0
Received 0 Likes
on
0 Posts
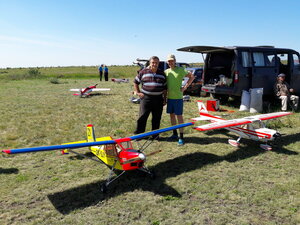
Last week, Cessna began to work as a tug.
My glider Grunau Baby was hoisted in the air.
In total, four take-offs were made, all that fell into the frame I hasten to demonstrate.
Takeoff.
Landing.
Video from the board.
And then, Mikhail, felt the car and with full confidence began to twist the aerobatics.
Unfortunately the video from the ground or who did not shoot.
The take-off weight was 5.5 kg.
Flyes superbly!
08-05-2017, 11:53 PM
#124
Senior Member
Thread Starter
Join Date: Nov 2016
Posts: 146
Likes: 0
Received 0 Likes
on
0 Posts
I took up flags. Frankly, I thought it would be easier.
Thanks to the calculations, we found out more or less reliable figures.
So it looks like the idea itself, the size of the flag is 700X400, the length of the line is 2 meters:

In real life, of course, the leer will not be at right angles to the ground.
In flight, the leer will deviate due to the resistance of the flag.
The weight of the load and the speed of the flight depends on how much the leer will deviate.
In this picture screen screen.
I scored in the excel formula and got the weight values of the load at different speeds.

Here is the file "Calculating the load of the flag".
As I understand it, according to calculations, the weight of the cargo should be not less than a kilogram.
And with this fact there was one more problem, it's dangerous to throw off the flag.
A kilogram of cargo, for 2 meters of flight, will gain a strong inertia and a jerk will be too strong.
Apparently, the leer must be exhausted or unwound in order to limit the speed of the release of the load.
Now I think how to organize it.
If you have any ideas, please share
Thanks to the calculations, we found out more or less reliable figures.
So it looks like the idea itself, the size of the flag is 700X400, the length of the line is 2 meters:
In real life, of course, the leer will not be at right angles to the ground.
In flight, the leer will deviate due to the resistance of the flag.
The weight of the load and the speed of the flight depends on how much the leer will deviate.
In this picture screen screen.
I scored in the excel formula and got the weight values of the load at different speeds.
Here is the file "Calculating the load of the flag".
As I understand it, according to calculations, the weight of the cargo should be not less than a kilogram.
And with this fact there was one more problem, it's dangerous to throw off the flag.
A kilogram of cargo, for 2 meters of flight, will gain a strong inertia and a jerk will be too strong.
Apparently, the leer must be exhausted or unwound in order to limit the speed of the release of the load.
Now I think how to organize it.
If you have any ideas, please share
