


Hangar 9 F22 Raptor Glow-To-Electric Conversion
 10-25-2015, 07:32 PM
#26

Thread Starter

Okay,
In similar manner the user manual (perhaps an updated manual) lists three options for flaps. This of course pertains to the modification I am about to do with Elevator halves.

In similar manner the user manual (perhaps an updated manual) lists three options for flaps. This of course pertains to the modification I am about to do with Elevator halves.
 10-26-2015, 02:21 PM
#27
Thread Starter
Guys,
I had an opportunity to measure the UP Elevator Deflection on each Elevator Halves and was horrified to witness that the LEFT Elevator Half has 1/2 inch more than the Right Elevator half.
This certainly caused the model to ROLL to the Left on each LOOP attempt and certainly caused a stall way UP high and subsequent spin.
I will try the least expensive and less intrusive solution to the issue by disconnecting the clevis at the Right and see about increasing the RIGHT Elevator Travel while decreasing the LEFT some as well.
10-26-2015, 04:08 PM
#28
Thread Starter
Okay guys,
Got down to get her done with the required adjustments and it turns out that I will not need to add another servo for making Elevator Halves with their independent servo. I did go to the Hobby Shop and bought the Reversed JR SPORT ST47 (Part Number JSP20050R ), however, I will not be needing it since I was able to perform the adjustments at the control surface clevis end.

Additionally, during the 2nd landing the Nose Wheel steering quit working and the Keeper just came off from the Rudder Servo Arm so, I didn't have any plastic lock to match the size diameter of the keeper I am using so, I used a Wheel lock collar and worked like magic.

Also, I activated the model and double checked (Verified) that both Elevator Halves were matched for the entire travel and at every level including when it is at neutral.


I can't wait to fly it again! opcorn:
Got down to get her done with the required adjustments and it turns out that I will not need to add another servo for making Elevator Halves with their independent servo. I did go to the Hobby Shop and bought the Reversed JR SPORT ST47 (Part Number JSP20050R ), however, I will not be needing it since I was able to perform the adjustments at the control surface clevis end.
Additionally, during the 2nd landing the Nose Wheel steering quit working and the Keeper just came off from the Rudder Servo Arm so, I didn't have any plastic lock to match the size diameter of the keeper I am using so, I used a Wheel lock collar and worked like magic.
Also, I activated the model and double checked (Verified) that both Elevator Halves were matched for the entire travel and at every level including when it is at neutral.
I can't wait to fly it again!
opcorn:
10-26-2015, 04:44 PM
#29
Thread Starter
Guys,
Reflecting on the Maiden Flight give me goose bumps that I didn't lose the model on Take-Off. Yes, I may have horse UP the model before its time but, I am certain that when I pull UP Elevator the model started its Roll maneuver to the Left as a result from the uneven Elevator halves!
I was lucky that I let go of the UP Elevator Pressure thinking that I was on a STALL due to my efforts of horsing up the model too soon.
In any regard, I just can't wait to see the model zoom like a home sick dove, like this LOW FAST PASS during the Maiden Flight!
https://youtu.be/uMujfDyVBLs
10-27-2015, 01:20 AM
#30
Thread Starter
This is perhaps my first RC Airplane Model that has a tapered trailing edge Elevator and for me was illusive for my eyes. The Elevator Halves looked okay when operated during my initial checks. My thoughts that the model had previously flown using GLOW power and the Elevators should have been setup properly during the previous owner, right? How WRONG that thought was! It may explain why (Chad) sold me the model as it looked pretty NEW! 
As far as the Speed, I am just guessing and was just messing around with a wild guess estimate. I am hoping to have someone with a Radar device to make things more accurate.
As far as the Speed, I am just guessing and was just messing around with a wild guess estimate. I am hoping to have someone with a Radar device to make things more accurate.
10-29-2015, 07:53 AM
#31
Thread Starter
Guys,
Wow!
She is a terrific flyer!
After the Post Maiden Flight Adjustments, especially the Elevator Halves, it turns like she is on rails and oh, I didn't stall her up high as I was ready for her during a large wide loop!
She still comes in fast even with flaps.
Select High Resolution and Full Screen!
https://youtu.be/UpZC1na9c1Q
10-31-2015, 12:50 PM
#32
Thread Starter
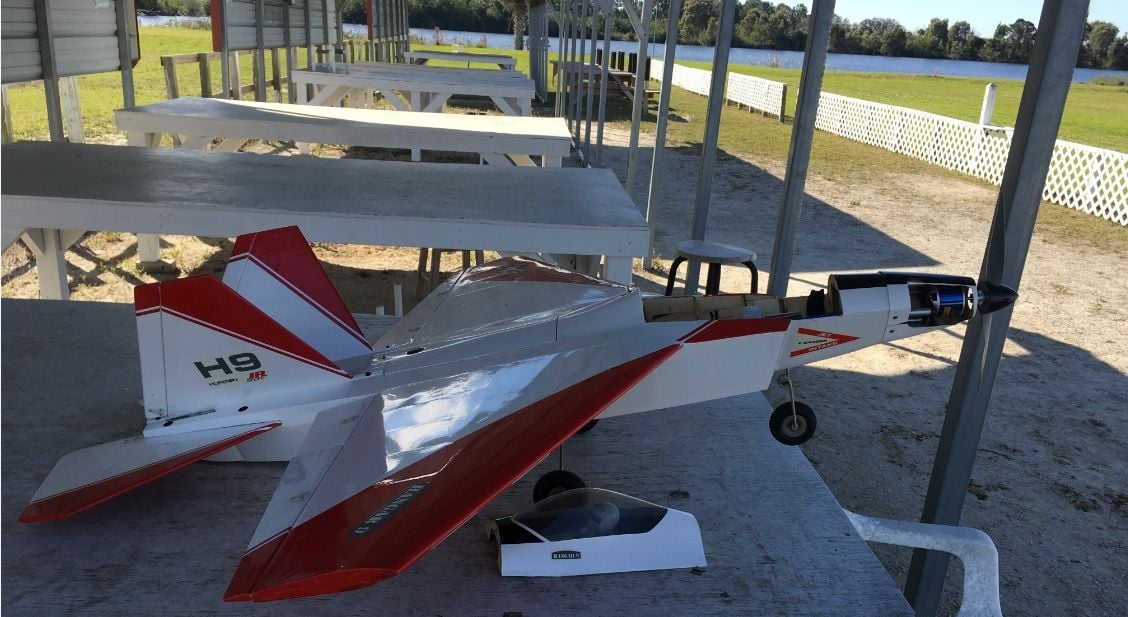
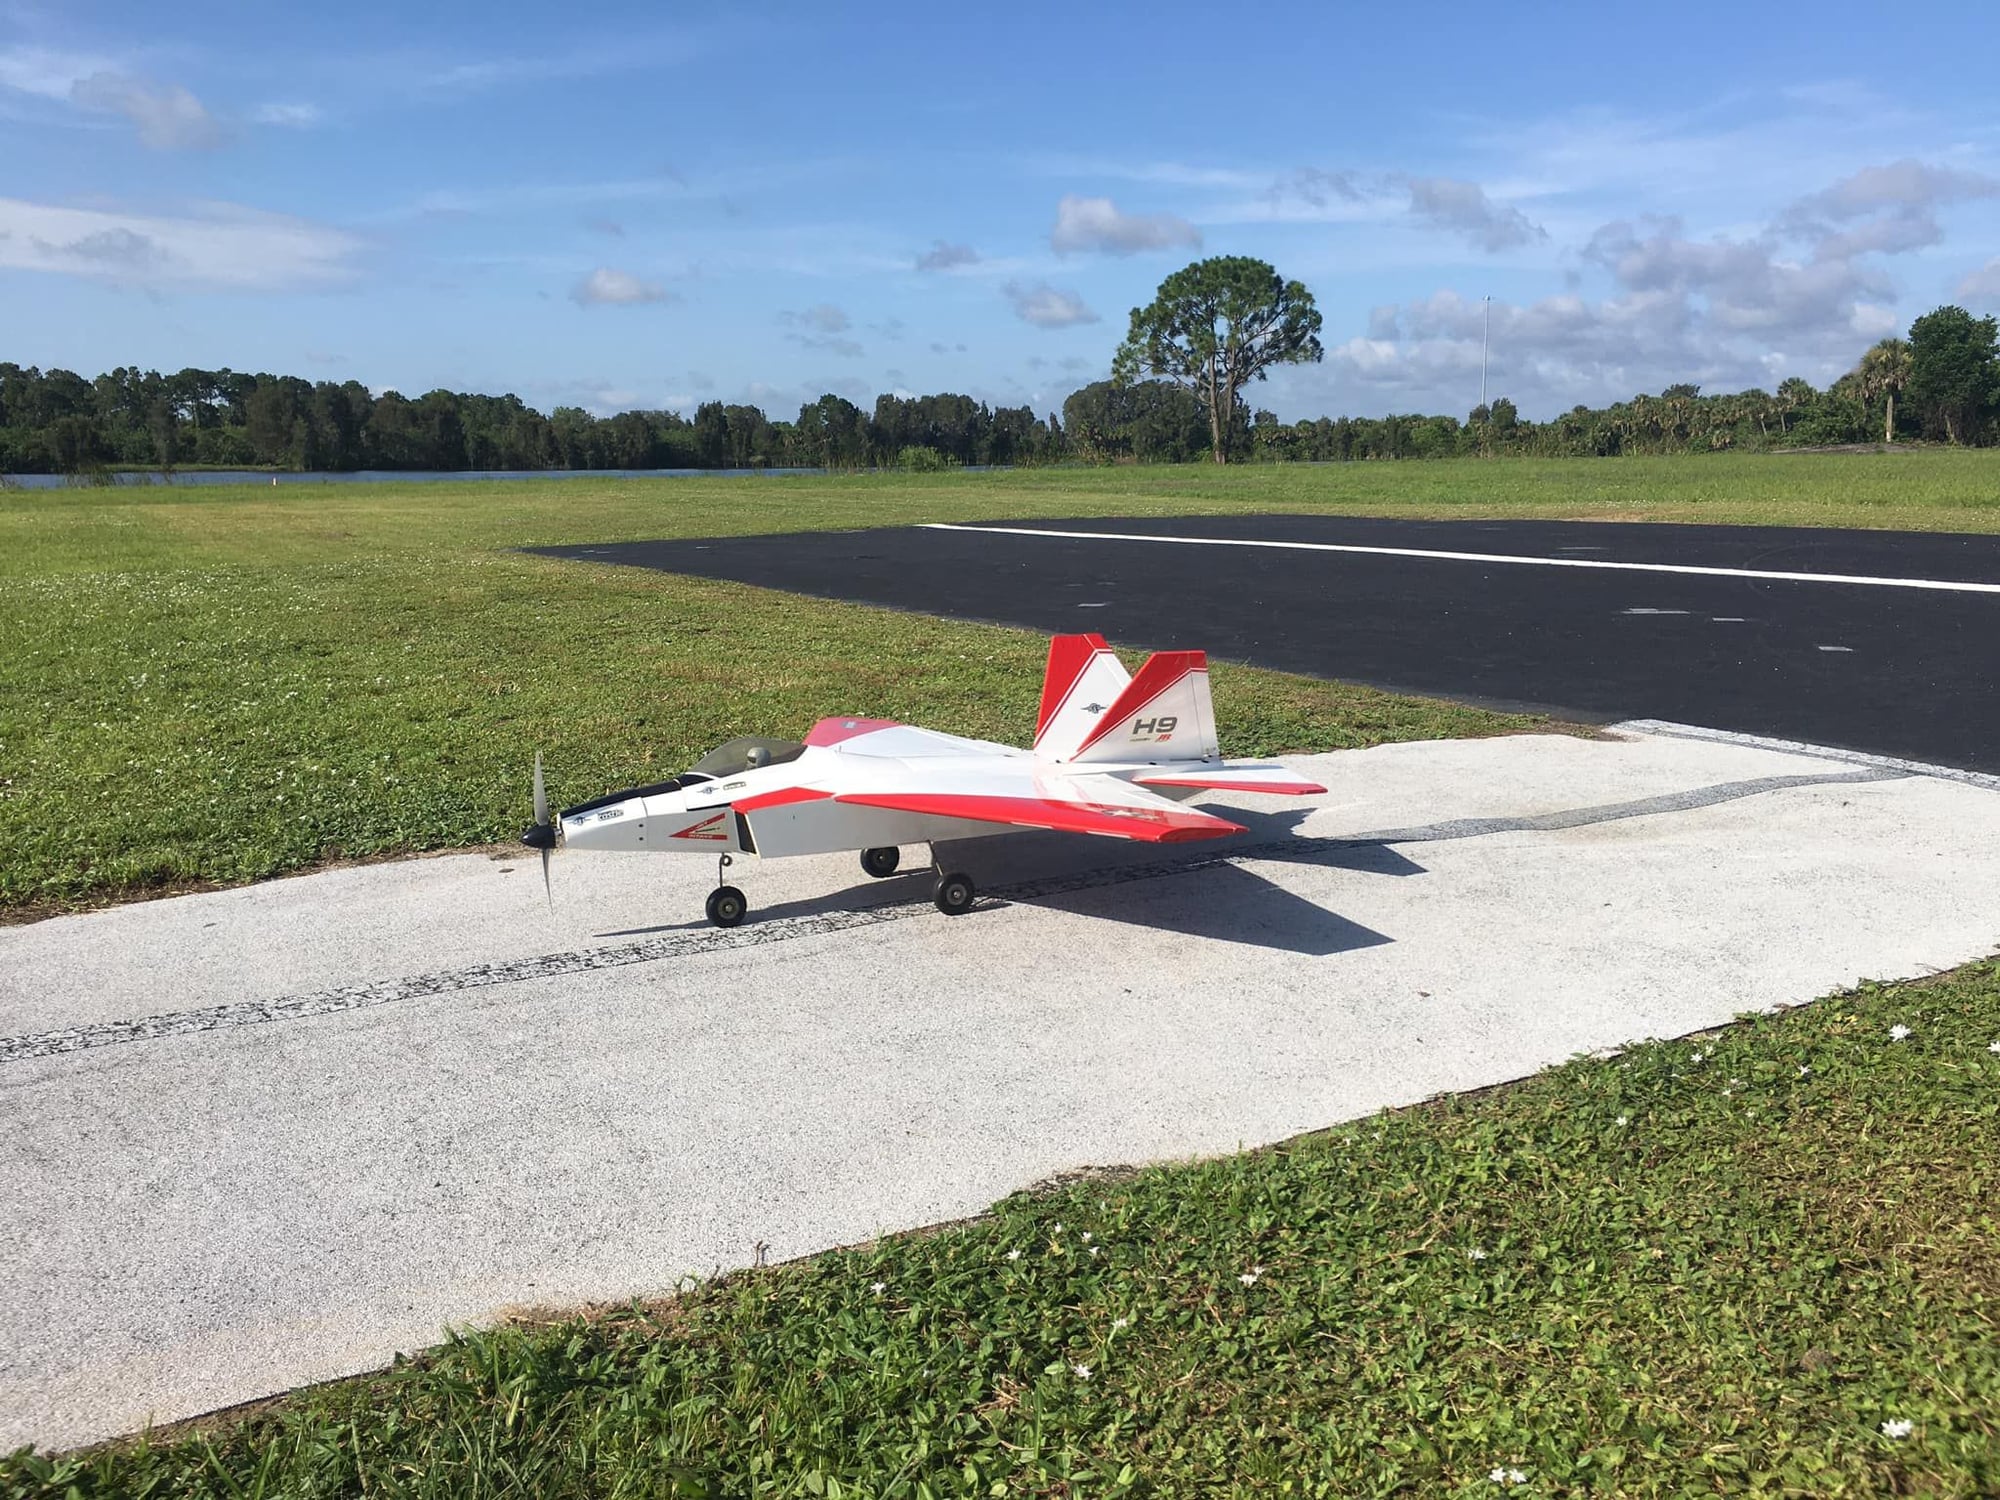
4th Flight
Guys,
Can't wait for Gerry's picture results as the sky was perfectly BLUE with partial clouds and he was able to place the camera in the optimum mode for best quality and sharpness.
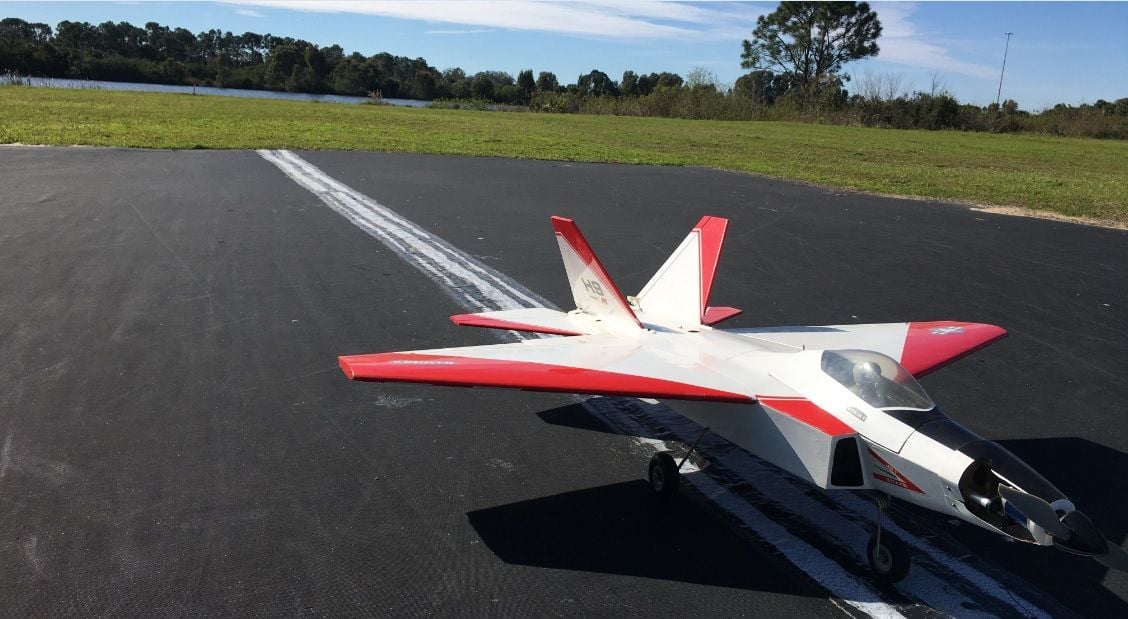
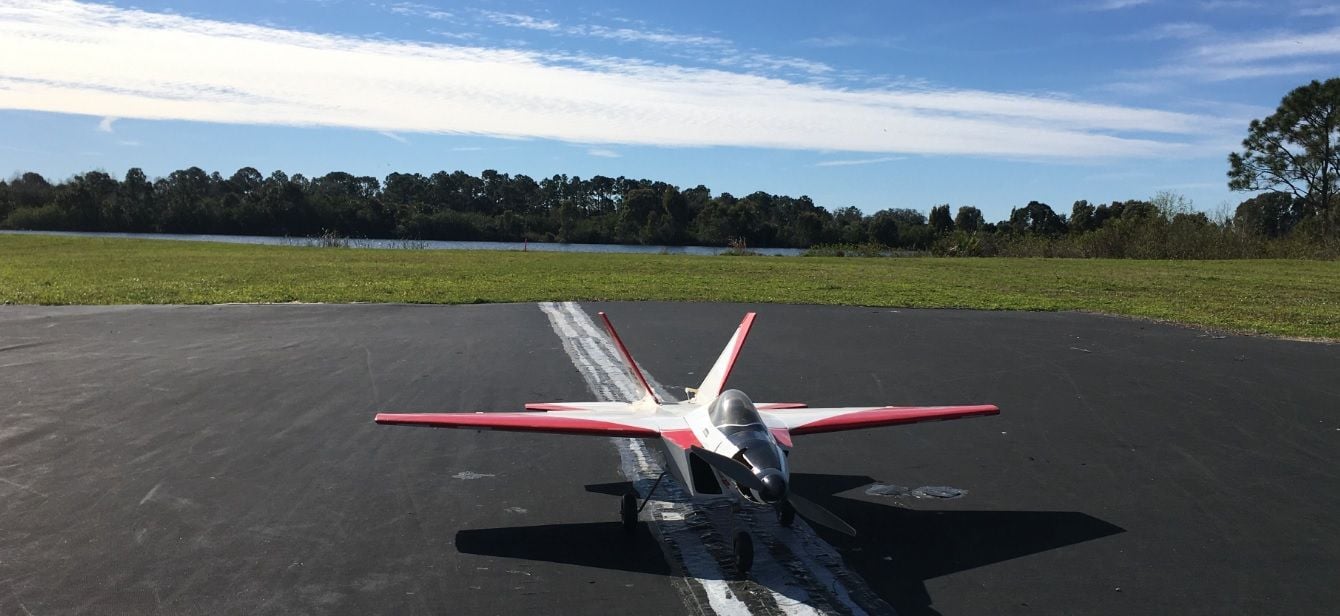
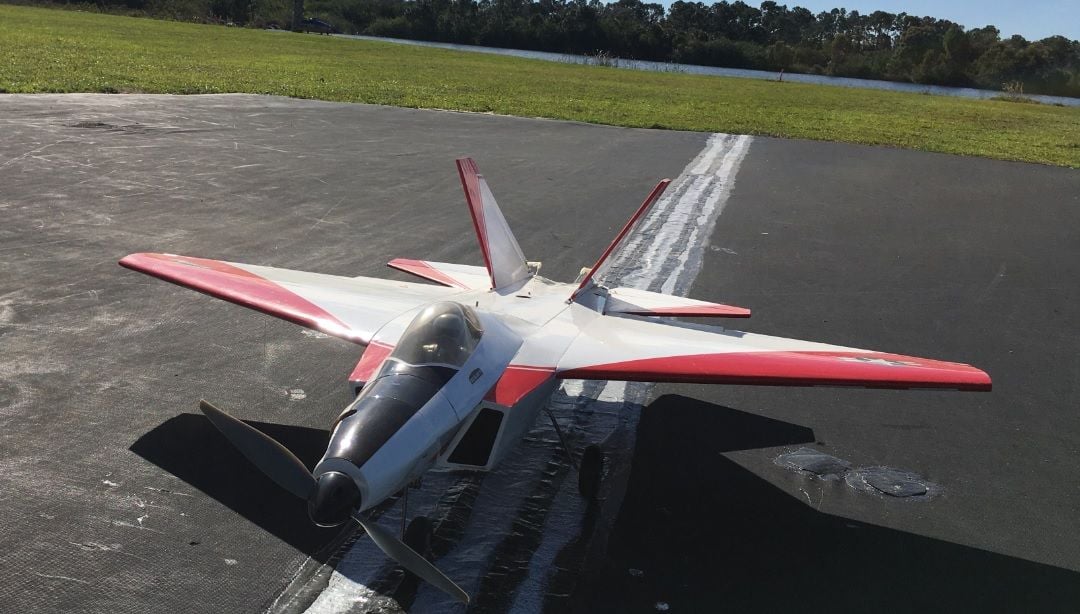
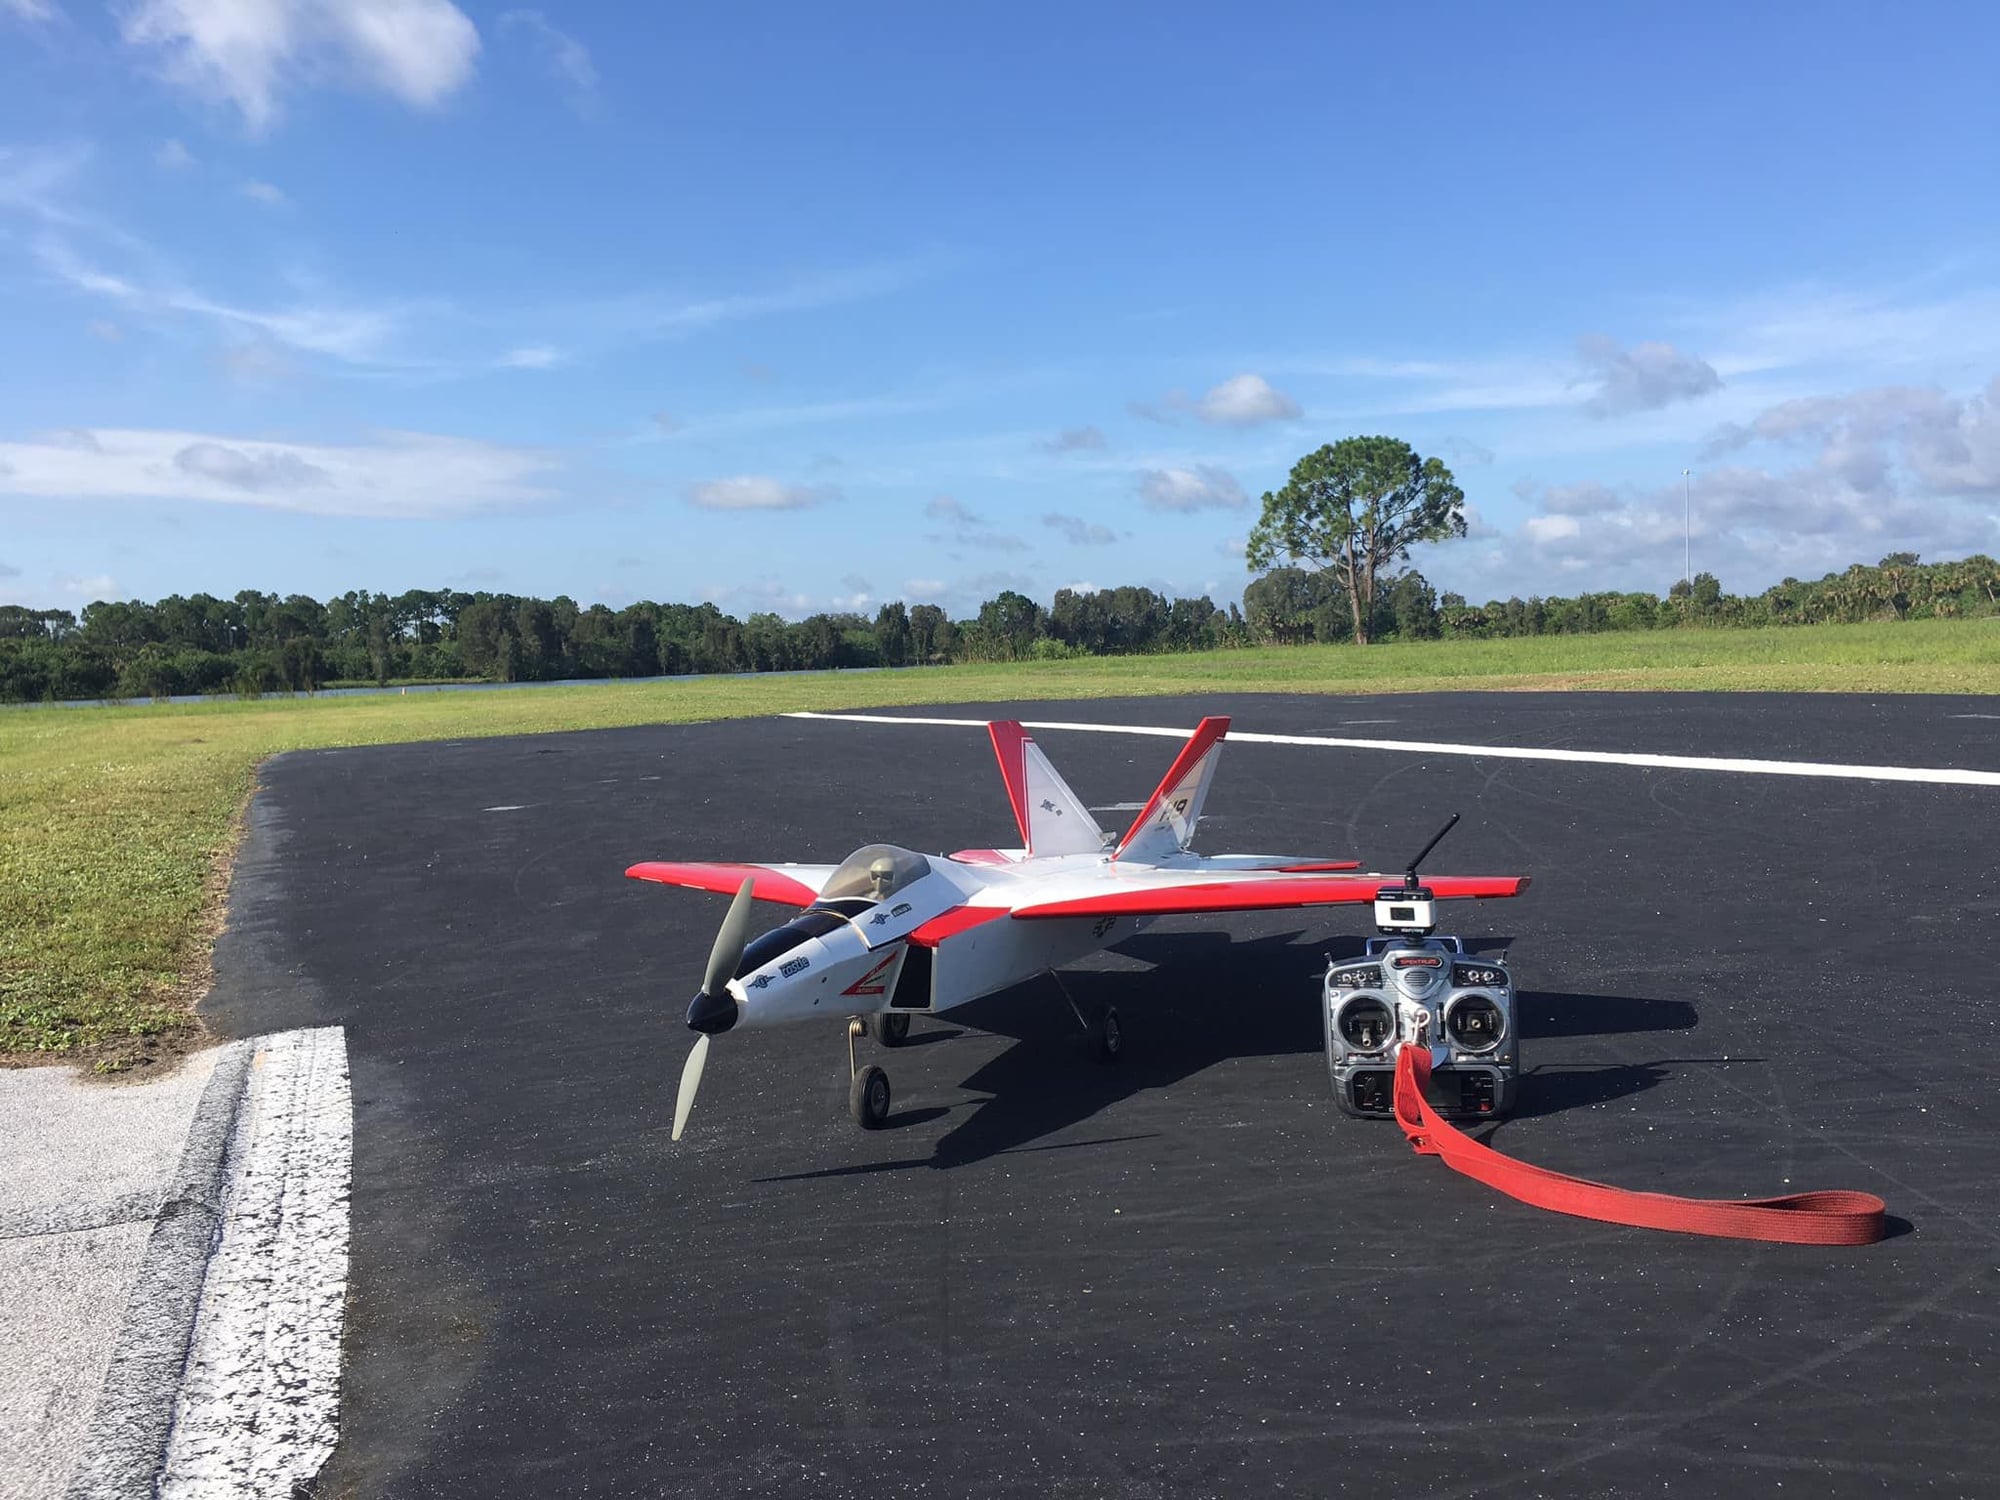
Here are my own pictures from my iPHONE 4S while the model was resting at the setup table.


Guys,
Can't wait for Gerry's picture results as the sky was perfectly BLUE with partial clouds and he was able to place the camera in the optimum mode for best quality and sharpness.
Here are my own pictures from my iPHONE 4S while the model was resting at the setup table.
10-31-2015, 06:08 PM
#33
Thread Starter
Wow,
Today, I flew my F22 Raptor for about 6 minutes and it was pretty much at 3/4 Throttle for exhilarating speed and performance.
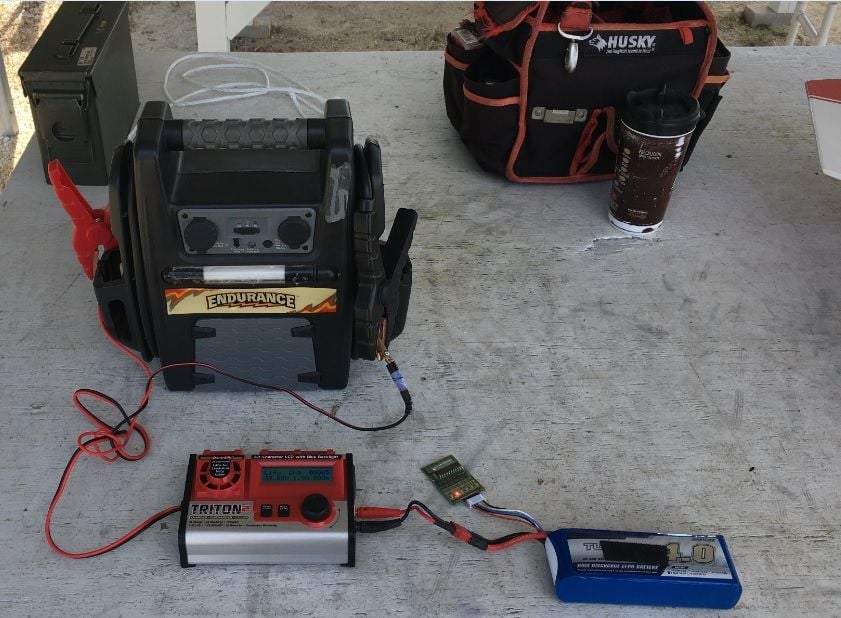
The charger just quit and placed back 2256mAH into the Admiral (MotionRC) 4-Cell, 4,000mAH, 40C, Lithium Polymer.
Seems like I am getting very good performance from these packs and I am planing on ordering some more.
Going to fly again in the morning!
Today, I flew my F22 Raptor for about 6 minutes and it was pretty much at 3/4 Throttle for exhilarating speed and performance.
The charger just quit and placed back 2256mAH into the Admiral (MotionRC) 4-Cell, 4,000mAH, 40C, Lithium Polymer.
Seems like I am getting very good performance from these packs and I am planing on ordering some more.
Going to fly again in the morning!
11-02-2015, 02:02 AM
#34
Thread Starter
Saturday, 10-31-2015
Okay guys,
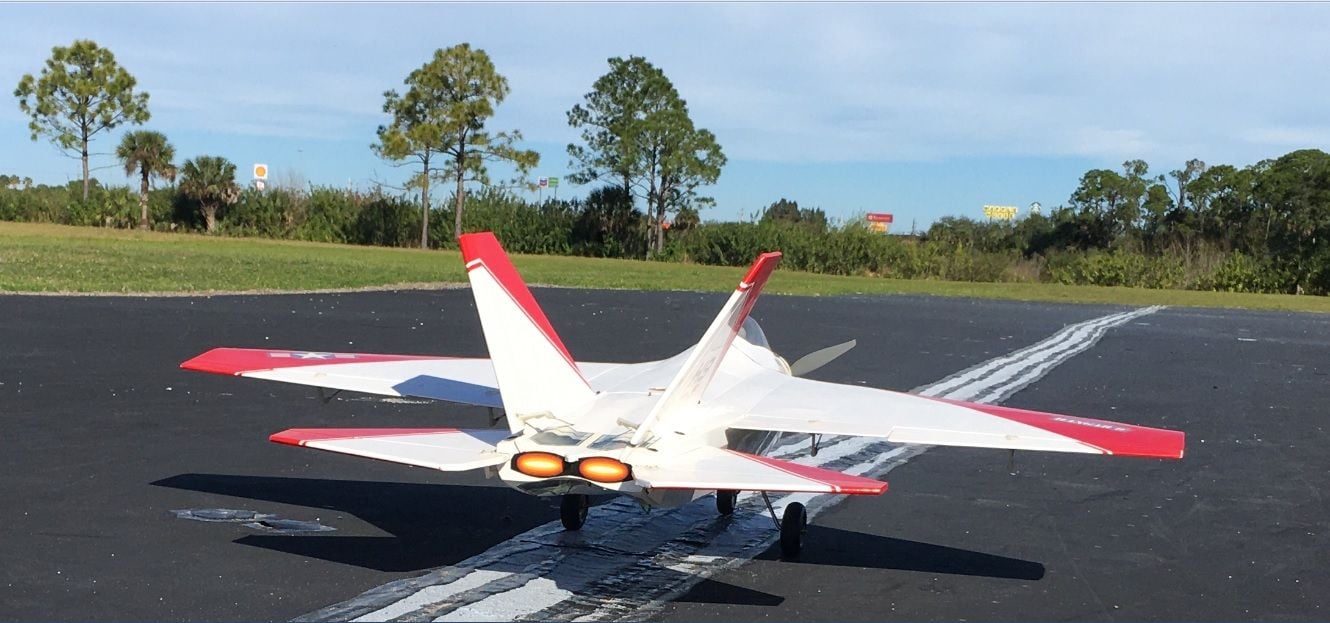
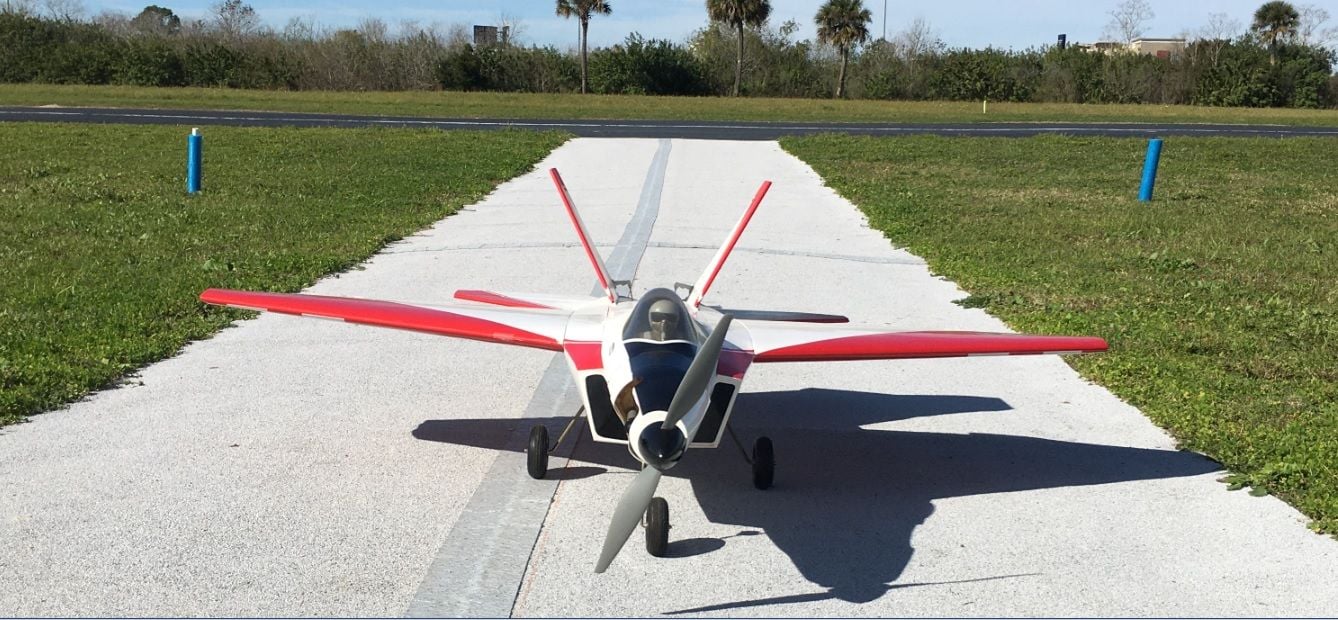
As promised, Gerry came through and captured some neat pictures of my Hangar9 F22 Raptor while In-Flight (Fast Passes). It really helps when nice weather conditions exist with BLUE sky!


Okay guys,
As promised, Gerry came through and captured some neat pictures of my Hangar9 F22 Raptor while In-Flight (Fast Passes). It really helps when nice weather conditions exist with BLUE sky!


 11-02-2015, 02:04 AM
#36
Thread Starter
Sunday, November 1st, 2015
Guys,
Sorry, no pictures nor video!
I was able to slow down the model in various high altitude circumstances and finally had the guts with a good Head Wind down the runway to slow it down a bit and the model majestically slowed down at the edge (beginning of runway) and it hit my target with was the grass immediately short of the runway and it rolled into and on top of runway for a spectacular taxi back to the pilots station!
Of course, "head wind" really helps!
Last edited by guapoman2000; 11-02-2015 at 02:48 AM.
11-27-2016, 12:00 PM
#37
Junior Member
Join Date: Nov 2016
Posts: 2
Likes: 0
Received 0 Likes
on
0 Posts
I found a new box on the web, installed a motor that i had (G60 500), a talon 90, some servos (Spektrum A6050), add a Ramoser with 5 blades (11x8), used a 4000mAh/6S nano-tech and here she flew again, what a nice place ...
01-27-2020, 06:42 AM
#39
Thread Starter
Hello gals & guys!
It has been several years and I dusted off the model and flew it for three wonder flights!
Sunday, January 26th, 2020 was a little windy but, this model was not affected at all......
A few pictures!


It has been several years and I dusted off the model and flew it for three wonder flights!
Sunday, January 26th, 2020 was a little windy but, this model was not affected at all......
A few pictures!
03-19-2020, 09:15 PM
#41
Thread Starter
Okay,
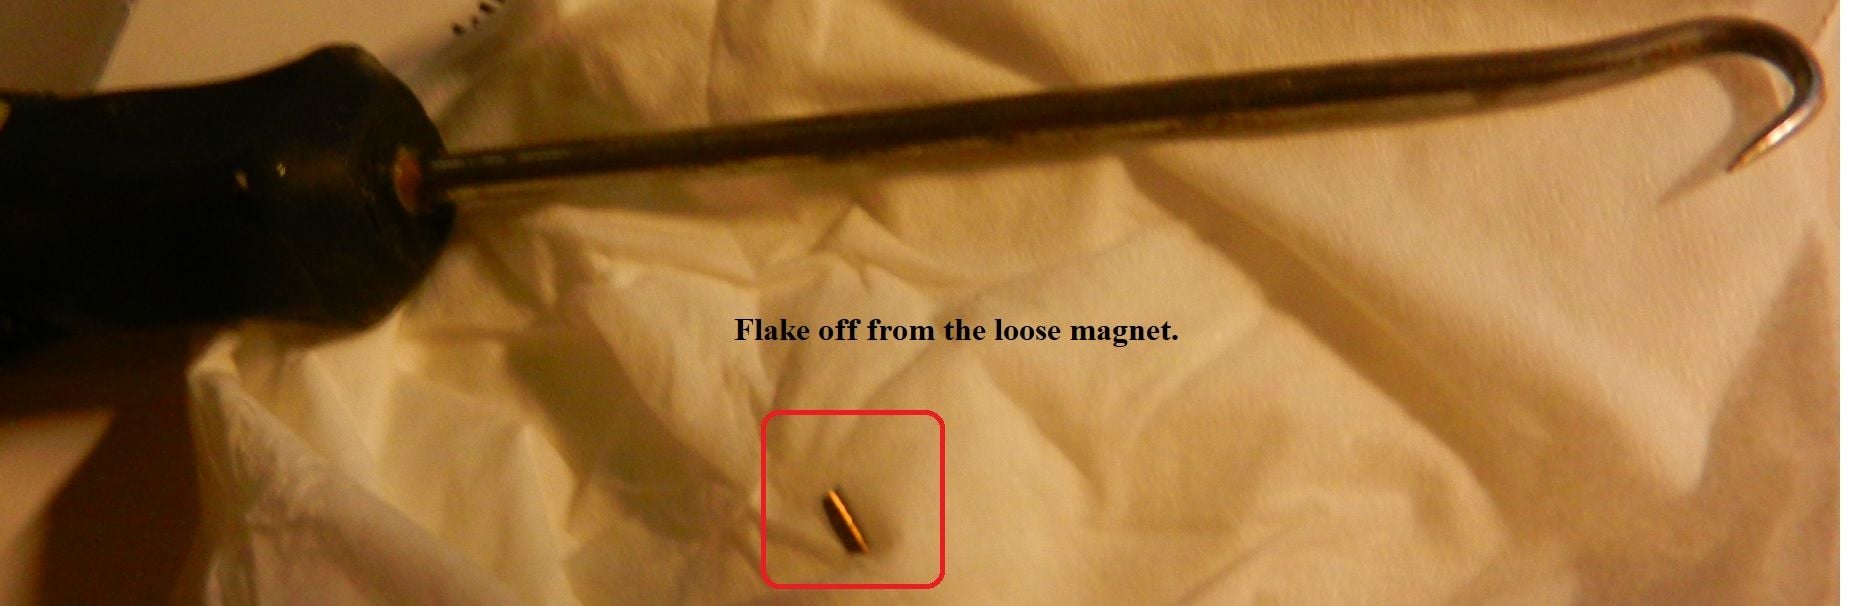
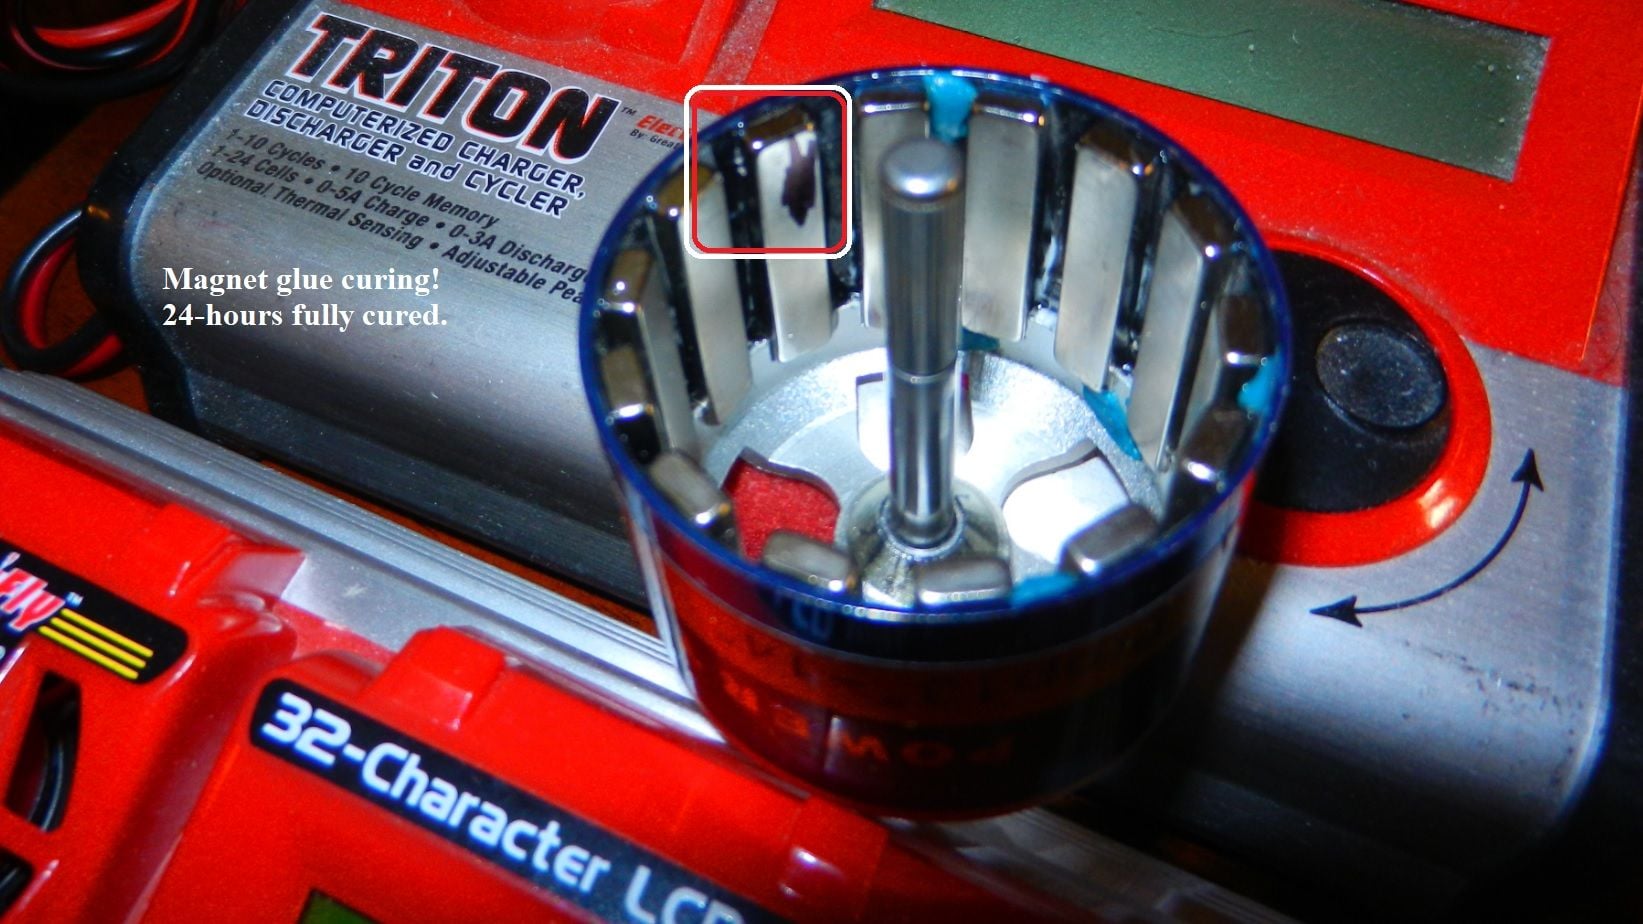
I can honestly say that I almost changed out the motor (Emax BL3526/04) a 860Kv motor with very good specifications that allows up to 5-Cells (18.5 Volts nominal), however, I found a few articles on how to glue back in the lose Magnet from the rotor (rotating bell housing) that contains all of the rotor's magnets.
https://www.google.com/url?sa=t&rct=...-71QEmCs4mYerR
This was possible because after careful disassembly I found ZERO damage inside the motor and inspection was possible using 30X times magnifying glass (Hand held). The Stator's windings at ALL Poles looked great and sounded great on subsequent test run.
After allowing the Gorilla "Clear" Glue to cure all of it's 24-hours as specified per instructions the motor test looked and sounded very good, like new. I am sharing a few pictures of my model's issue with this motor and I will be now going to fly it with the GForce Elite Series 4-Cells, 4000mAH, 30C Lithium Polymer packs.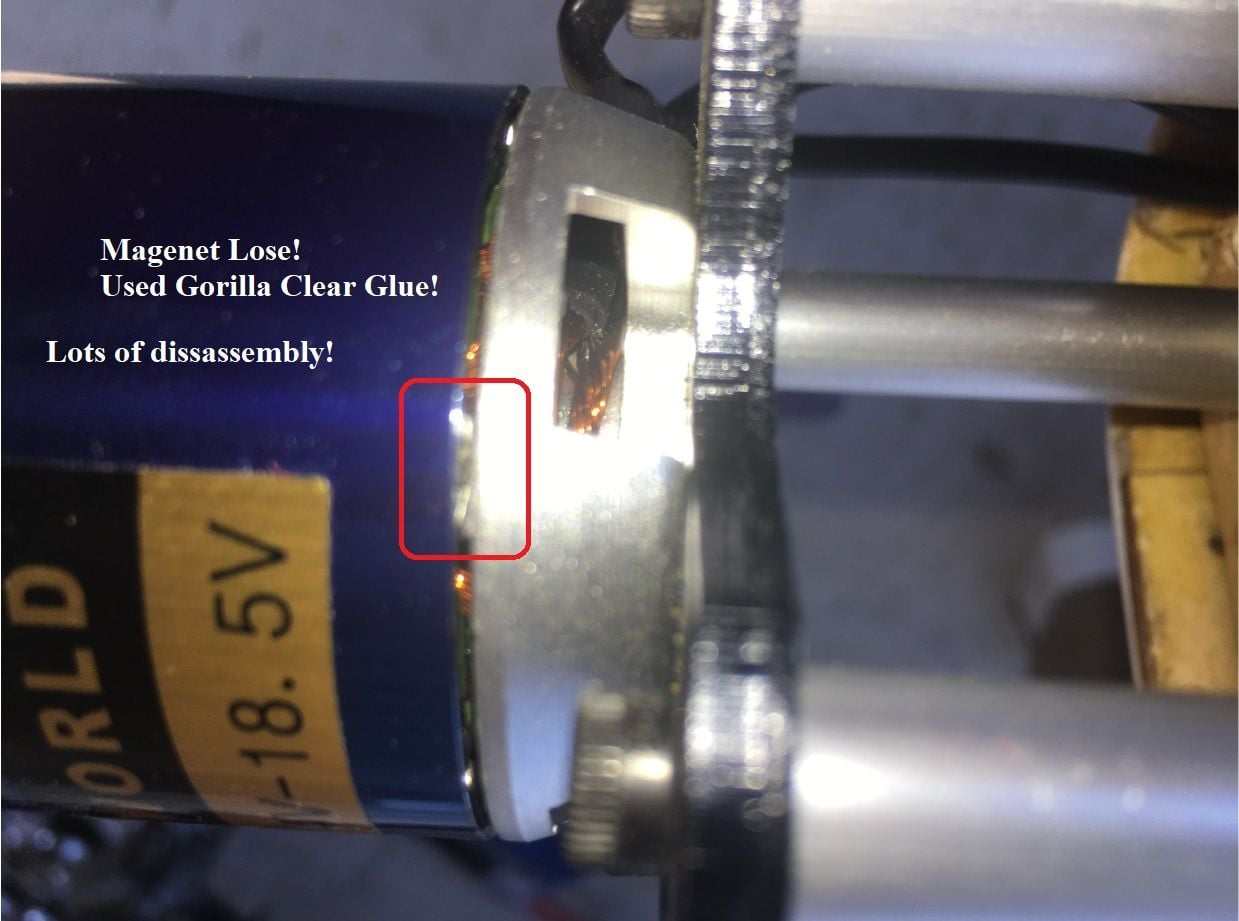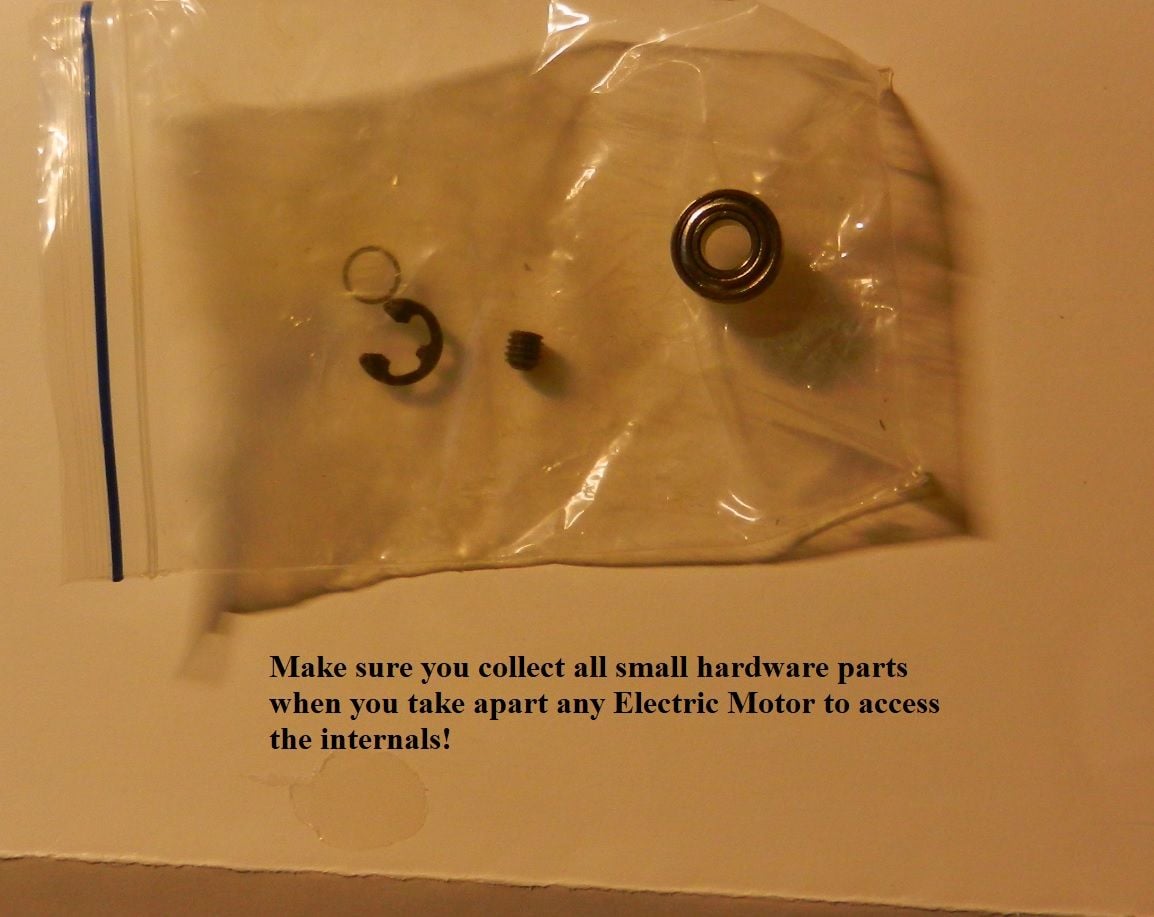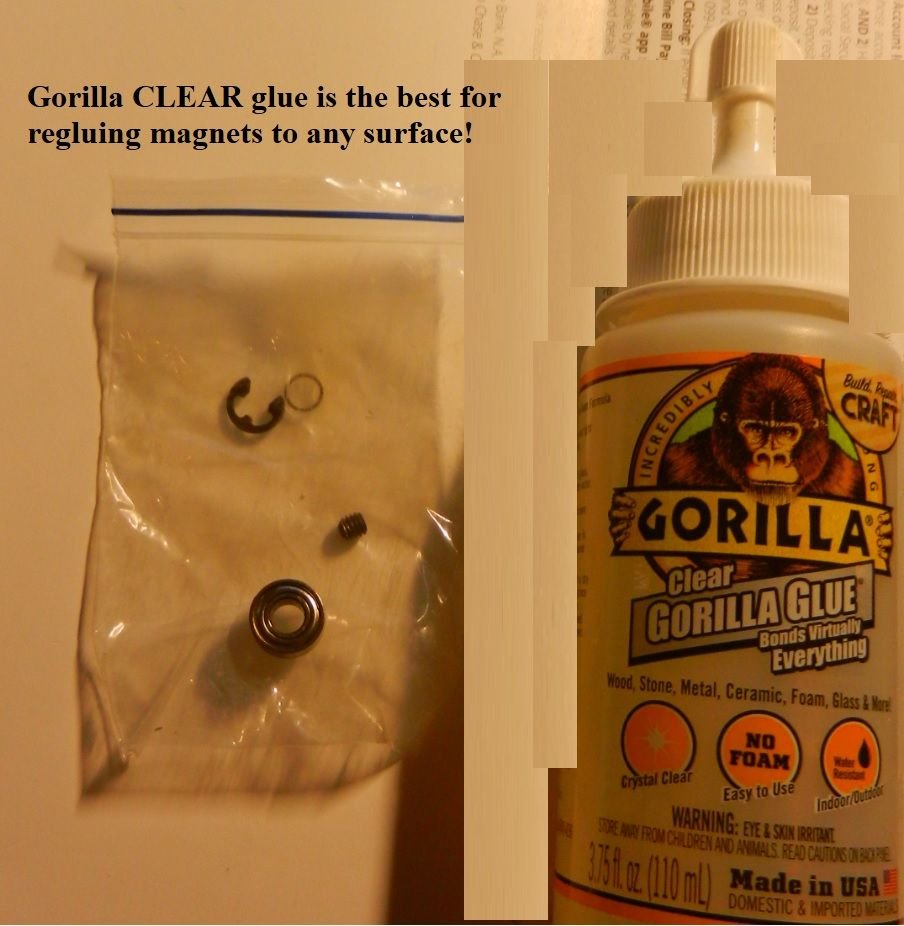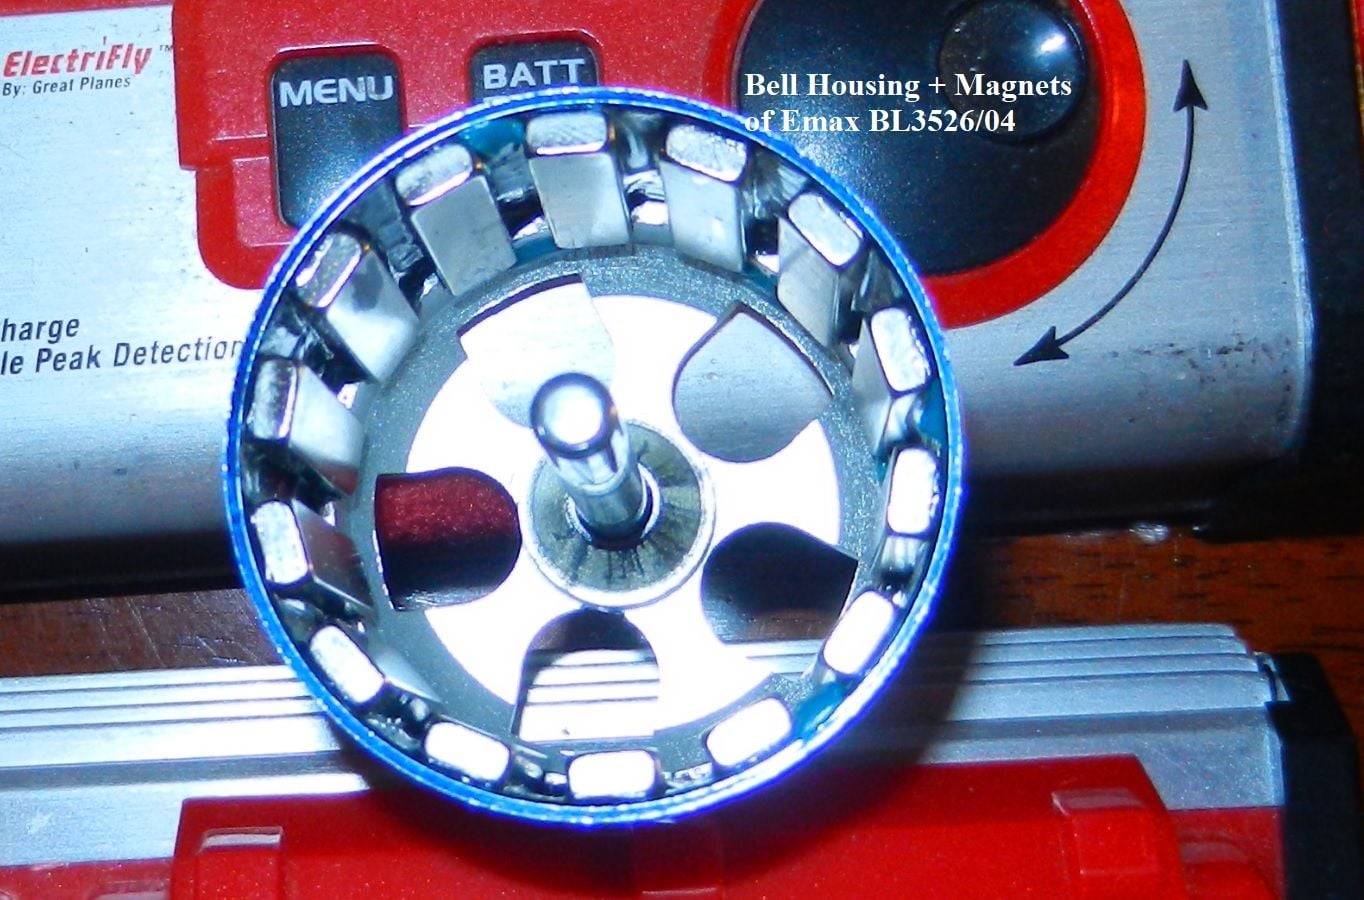
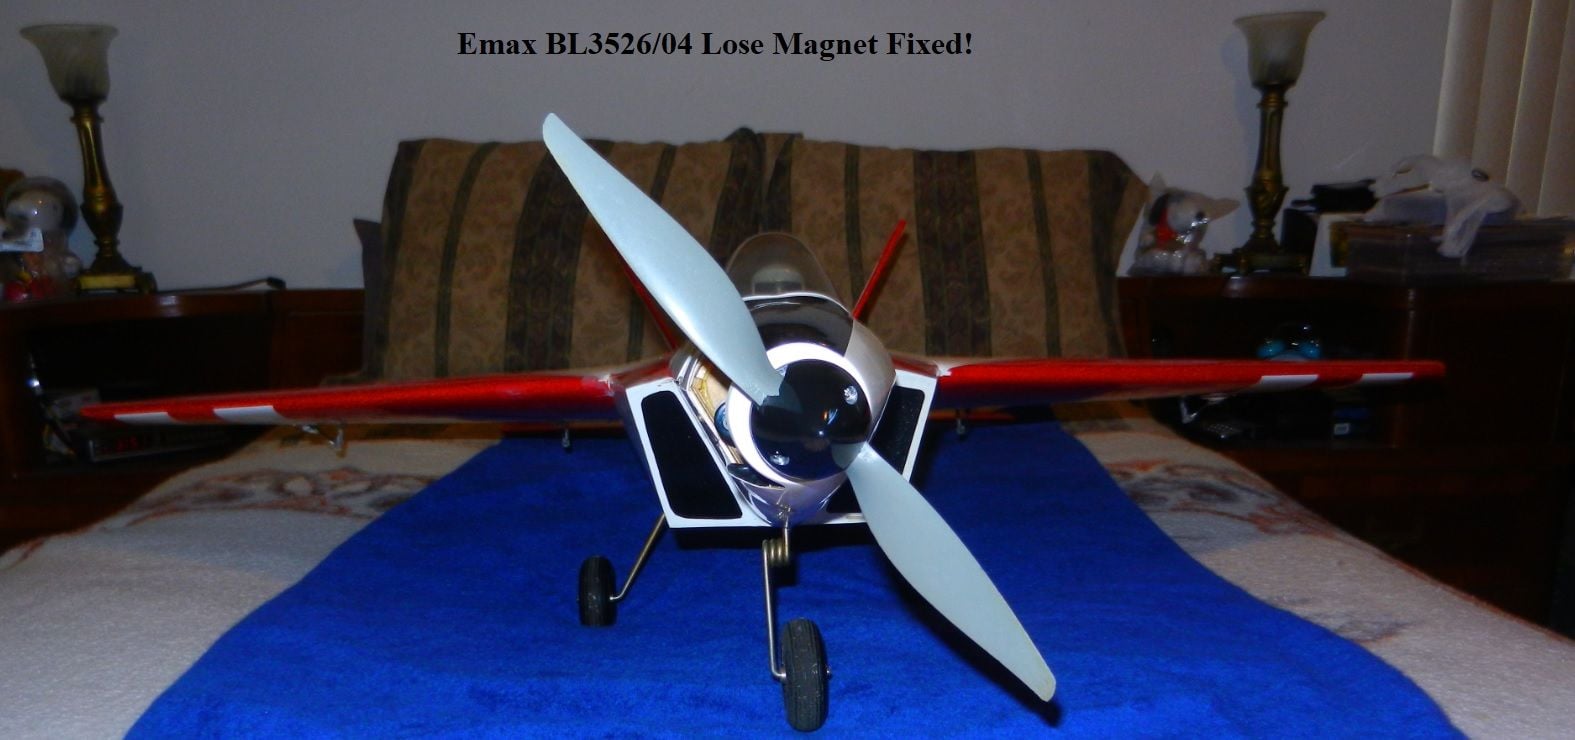
08-01-2021, 09:16 AM
#44
Thread Starter
Okay guys!
Got my Hangar9 F-22 Raptor converted to Electric RC airplane model back in the air for two wonderful flights after one year and two months hanging!
Just an amazing Sunday Central Florida morning! Performed the touch test after each flight on the motor and I was able to keep finger on motor rotating can so, it was two good flights without motor getting too hot on 5-cells.
Loose magnet was repaired one year ago and Gorilla Clear Glue operational temp goes up to 180 degrees F. Therefore, after two flights of 7 minutes each with spirited flights, I am declaring a success with repairs on Motor!
Repairs on motor can be seen at:
https://www.rcgroups.com/forums/show...otor-magnet%21
Video post improvements on my H9 F-22 Raptor:
https://www.rcgroups.com/forums/show...or-Improved%21
Amazing model!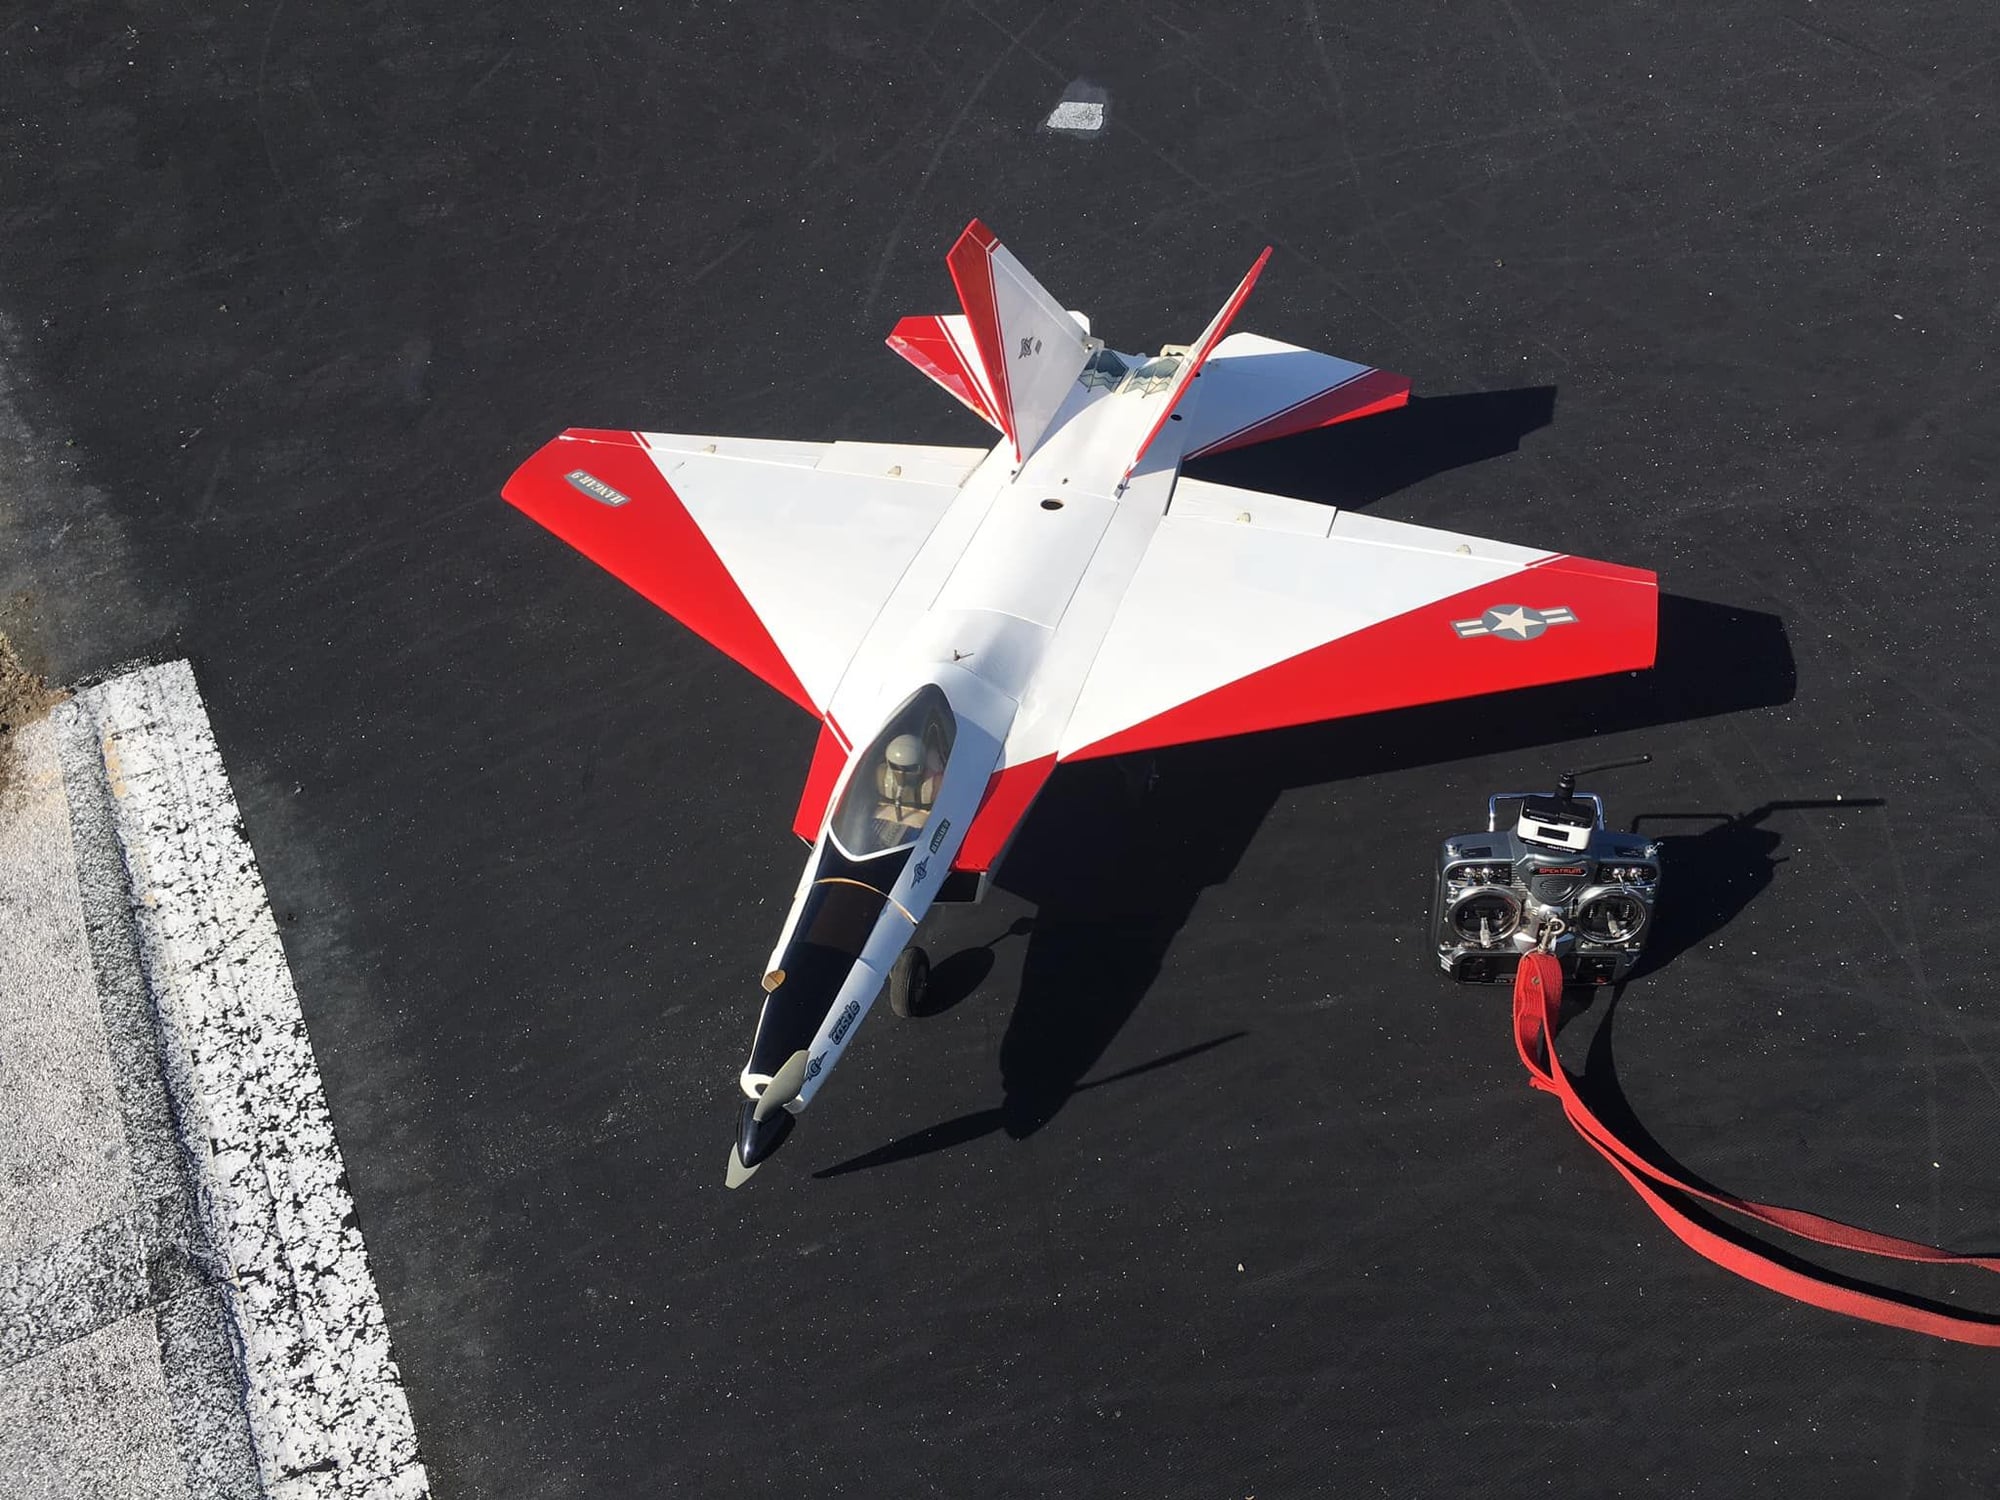
