


Hangar 9 F22 Raptor Glow-To-Electric Conversion
 10-05-2015, 03:56 AM
#1

Thread Starter

Guys,
I really could not sell it so, I am making it air worthy to have fun with it!
It will be powered by the Himax HC3528-1000 brushless motor and swinging the APC 10 X 9 propeller on three (3) Cells Li-Poly. This will yield approximately:
~400 Watts / 40-Amps / 84oz. of Static Thrust / 9,700 RPMs / a pitch speed of 83-MPH.
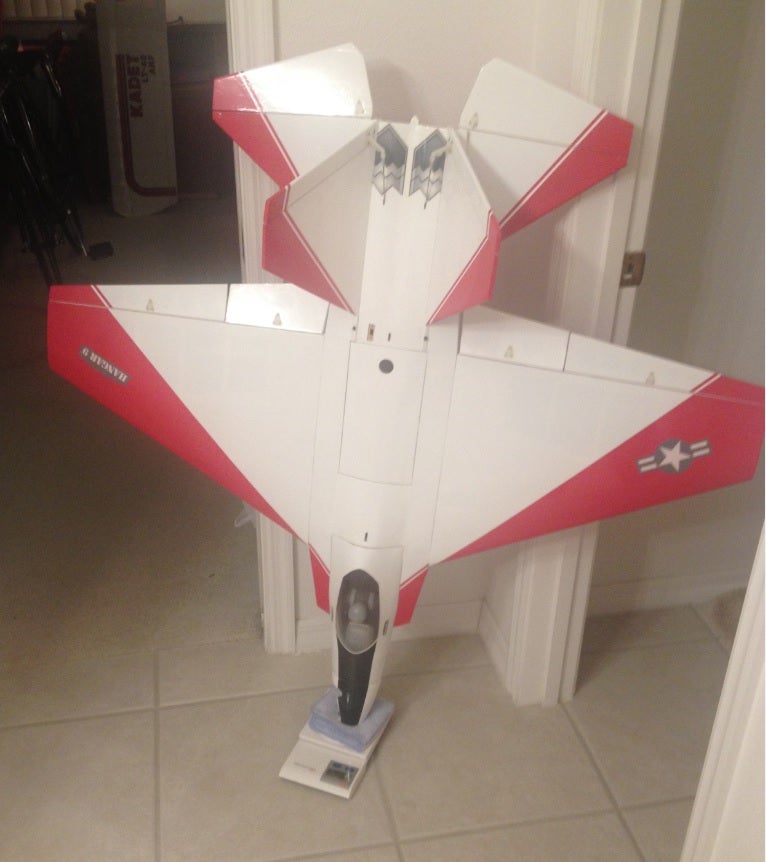
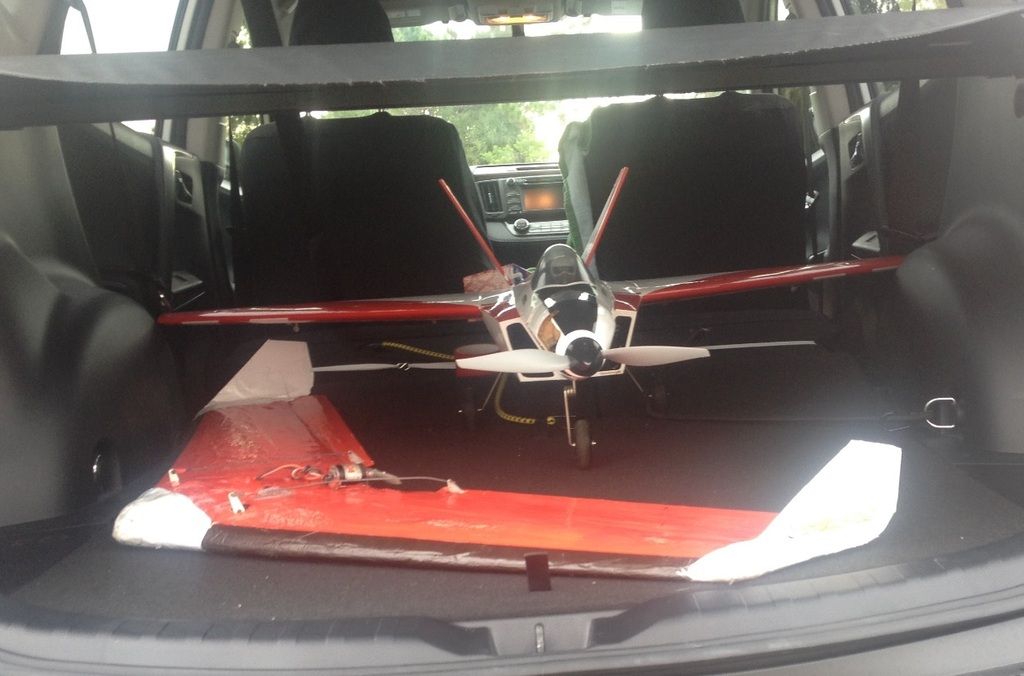
Dry Empty Weight tips the scale at 5lbs.-4 1/8oz.
We shall see.....
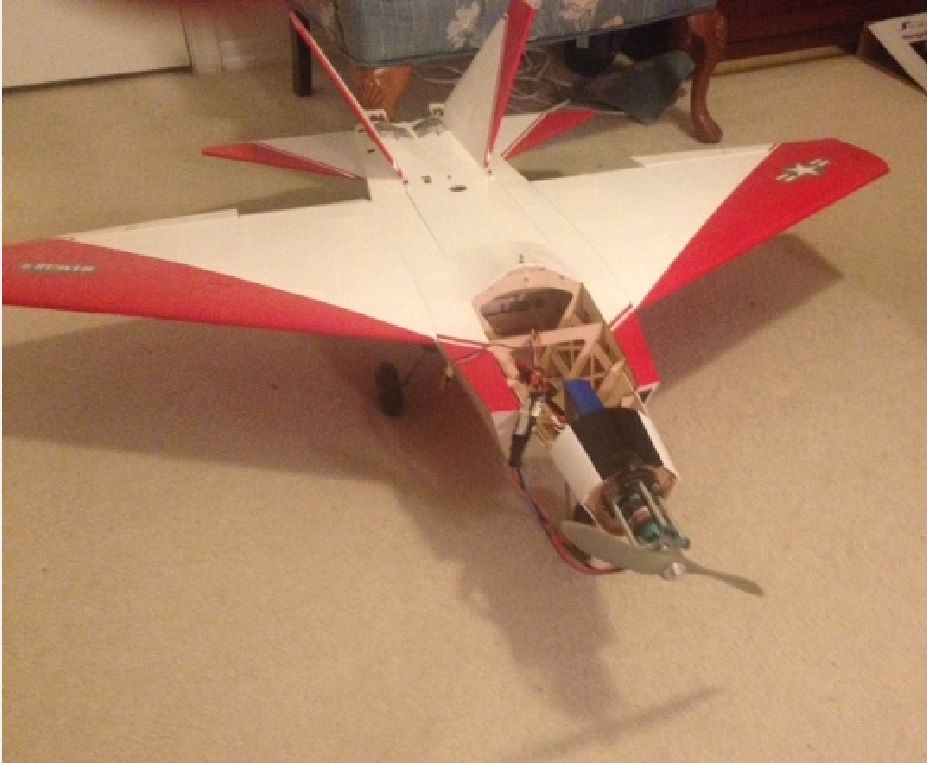
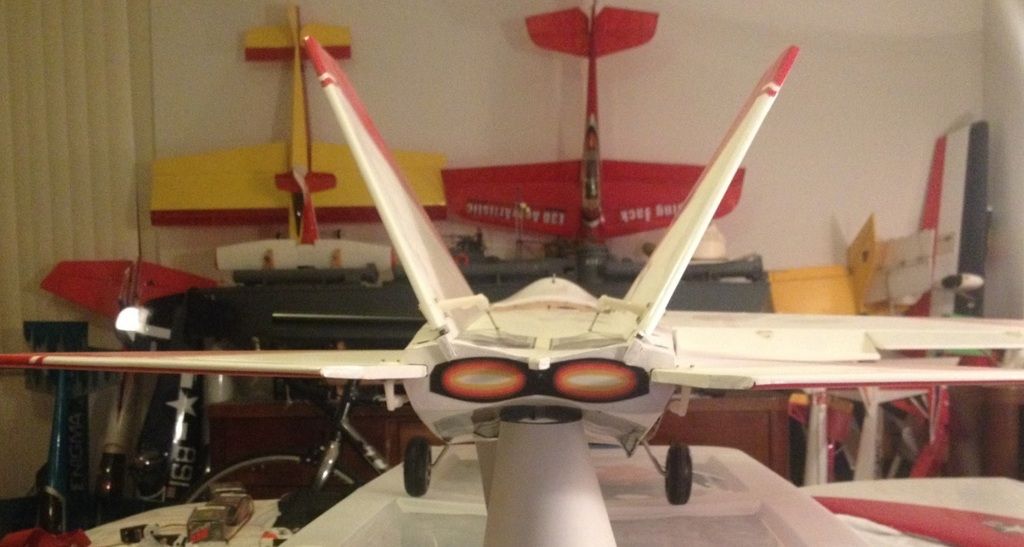
Here she sits Airframe Only:

Some recent pictures during Weigh-In for Dry Airframe only:

I really could not sell it so, I am making it air worthy to have fun with it!
It will be powered by the Himax HC3528-1000 brushless motor and swinging the APC 10 X 9 propeller on three (3) Cells Li-Poly. This will yield approximately:
~400 Watts / 40-Amps / 84oz. of Static Thrust / 9,700 RPMs / a pitch speed of 83-MPH.
Dry Empty Weight tips the scale at 5lbs.-4 1/8oz.
We shall see.....
Here she sits Airframe Only:
Some recent pictures during Weigh-In for Dry Airframe only:
 10-06-2015, 09:04 AM
#2
Thread Starter
Guys,
Started with the project and found that someone secured the Glow Engine Mount a little too secure and perhaps used the permanent type of LocTite! :censored:
Using an Electric "Adjustable" Impact Driver, I was able to remove two of the bolts (Phillips head) on the Left side but, the two on the right side just didn't want to come out! :censored:
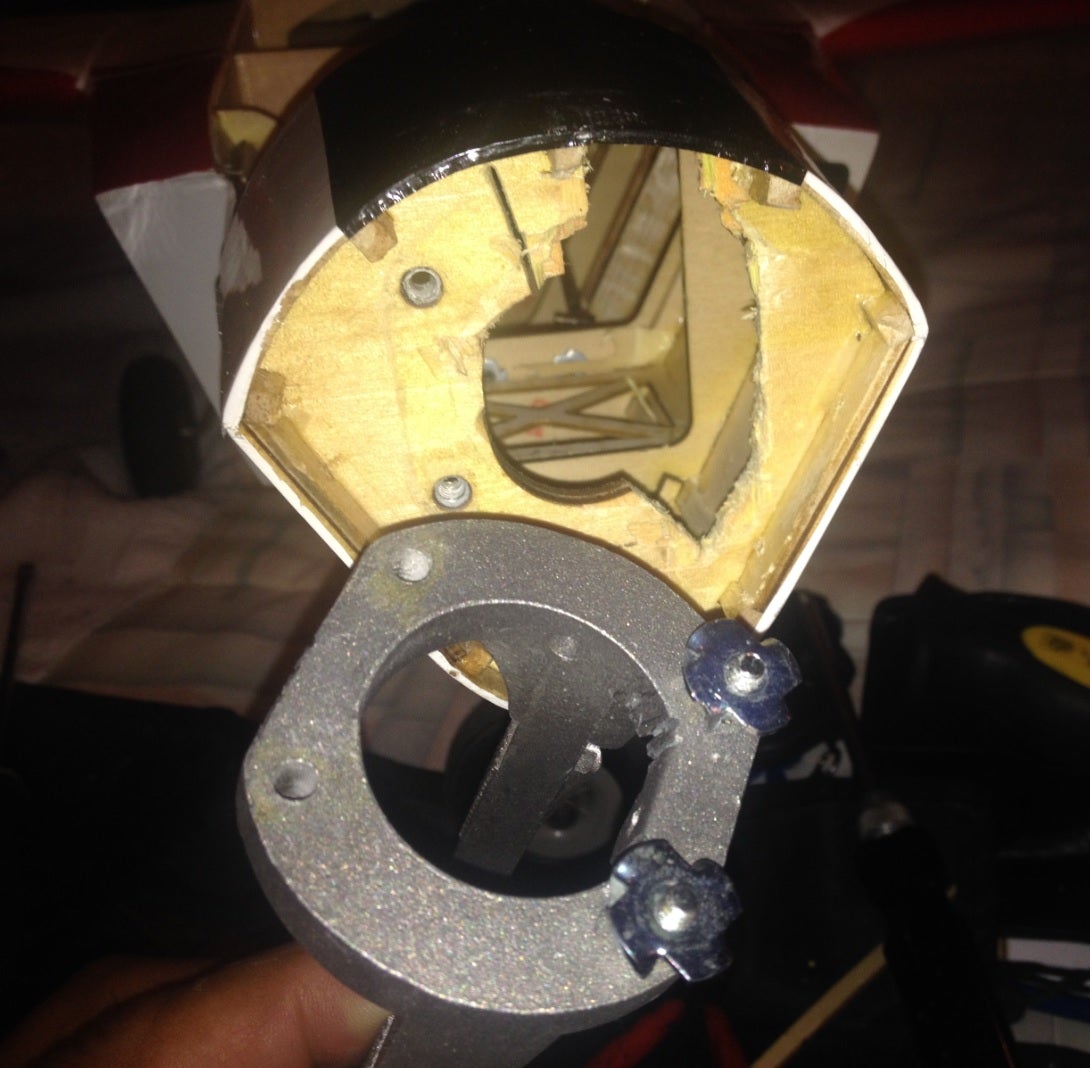
I carefully using a hand saw blade inside the FUSE and started to cut towards the blind nuts at the bolts that didn't want to come out and see about a neat way to slide the Blind Nuts and Bolts out but, it became messy! The FUSE is kind of tight and didn't want to destroy it with my large Gorilla Hands so, I took a screw driver and carefully pried the Glow Engine Mount that was lose toward the Left side and it finally came off the firewall with minor to moderate damage of the Firewall.
")
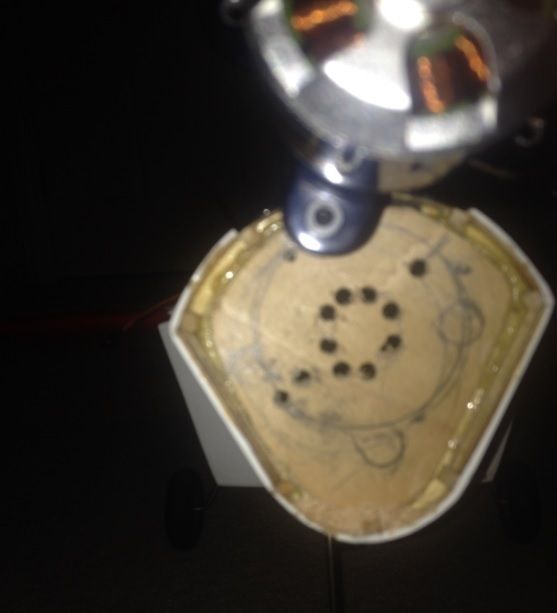
Found a large piece of 2/32nd plywood and worked a template and got some Gorilla Glue and now it is good as new and motor assembly is ready to be mounted. From measuring before taking off the cut-up cowling, I need at least 3/4th of an inch spacer to allow for the prop adapter to clear the cowling.
A few pictures of my ordeal.......


Started with the project and found that someone secured the Glow Engine Mount a little too secure and perhaps used the permanent type of LocTite!
:censored:Using an Electric "Adjustable" Impact Driver, I was able to remove two of the bolts (Phillips head) on the Left side but, the two on the right side just didn't want to come out!
:censored:I carefully using a hand saw blade inside the FUSE and started to cut towards the blind nuts at the bolts that didn't want to come out and see about a neat way to slide the Blind Nuts and Bolts out but, it became messy!
The FUSE is kind of tight and didn't want to destroy it with my large Gorilla Hands so, I took a screw driver and carefully pried the Glow Engine Mount that was lose toward the Left side and it finally came off the firewall with minor to moderate damage of the Firewall.Found a large piece of 2/32nd plywood and worked a template and got some Gorilla Glue and now it is good as new and motor assembly is ready to be mounted. From measuring before taking off the cut-up cowling, I need at least 3/4th of an inch spacer to allow for the prop adapter to clear the cowling.
A few pictures of my ordeal.......
Last edited by guapoman2000; 10-06-2015 at 09:08 AM.
10-07-2015, 06:17 AM
#3
Thread Starter
Guys,
Never use the stock Glow Engine Mount holes! I am glad that I only tried one of them to make me observe that it was off-set!

Needless to say this used motor seems to have suffered a nose in accident as the output shaft is slightly bent and a complete wave off is in effect and I am now looking for an alternative.
Oh, well......back to the hobby drawer!


Never use the stock Glow Engine Mount holes! I am glad that I only tried one of them to make me observe that it was off-set!
Needless to say this used motor seems to have suffered a nose in accident as the output shaft is slightly bent and a complete wave off is in effect and I am now looking for an alternative.
Oh, well......back to the hobby drawer!
10-07-2015, 06:32 AM
#4
Thread Starter
Hi there again,
Oh, I almost forgot.....seems like I really have the Himax HC3528-800 motor as the Watts, AMPs and Voltage from motor is in line with the characteristics of the 800Kv motor. Its too bad that the motor has a bend shaft as this lower Kv motor would have been interesting to increase the Prop Diameter slightly and/or use 4-Cell Li-Poly.
Oh well.......
10-08-2015, 03:49 AM
#5
Thread Starter
Okay Guys,
I believe that I am back in business as I found myself this Emax 46 size motor on hand.
I plan to use it on 4s 3300-4000. It draws about 850w at 52a with an APC 12 x 6. Could be propped up a little if more power is needed but, ground clearance is the factor here as the F22 Raptor has a limit.
Here is the Specifications of the E-Max 46 Motor:
http://www.headsuphobby.com/Emax-BL3...otor-A-274.htm
10-09-2015, 06:35 AM
#6
Thread Starter
Guys,
Second late night working on this F22 Raptor by Hangar9 and let me tell you that this is by far one of the most challenging models to convert as that dual heavy vertical stabs and overall weight of the rear with all that wood makes it really heavy to allow for a good reasonable power system and set of batteries to Off-Set all that weight in the AFT area.
Also, lets not forget the rather closed-in Frontal FUSE area to work with and the tiny tapered nose effect as you really can't use a metal cage hardware to mount any motor as it will interfer with the cowling. Resort is to use X-Mount with stand-off hardware and you have to be paying attention to every measurement before drilling.
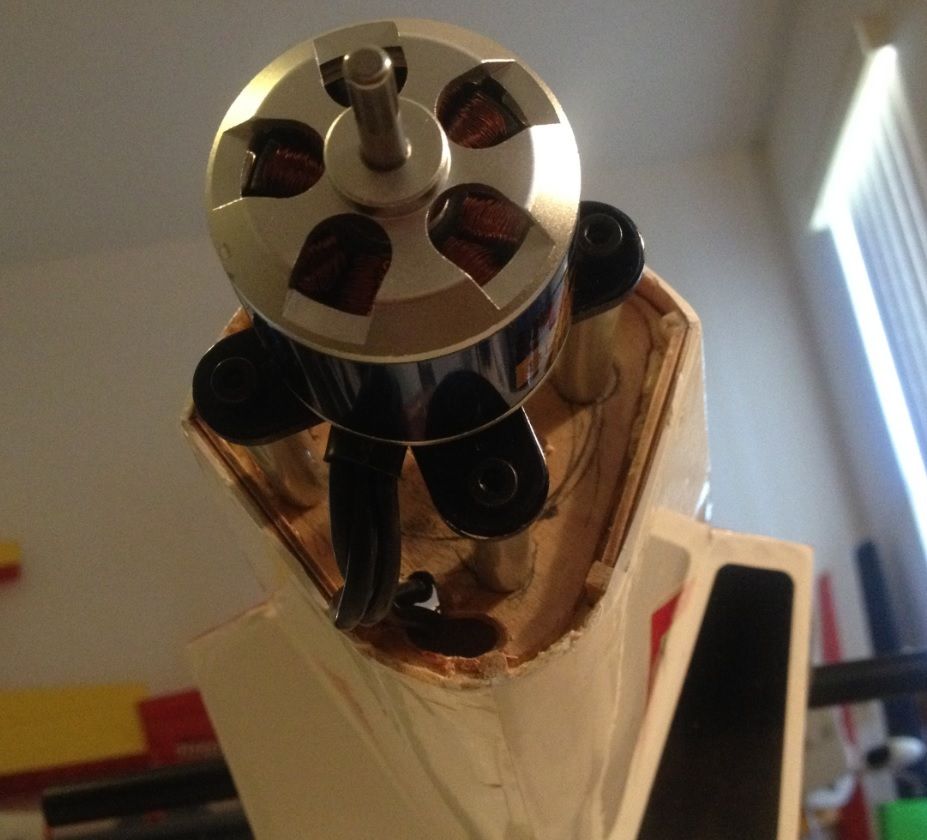
Okay so, I have spent Tuesday late night and Thursday late night on working with this model and I am exhausted and will take a break unless of course I get a good night sleep tonight. The worse is the horror to find my newest motor (Emax 46) with a bent shaft as well, however, not that badly like the Himax HC3528-1000 so, with some patience and vice gripe pliers I was able to straighten out the out-put shaft of this motor! It really pays to have Gorilla Hands after all!
Yes, I have run up the motor several times to note where the high and low points were on the shaft and after the fix as well. Now the shaft is very tuned and no wobble what-so-ever! In-between runs of the motor and without the battery connected, sprayed some CRC 2-26 into the motor as this helps with the bearings and cleaned out that motor and now it runs much smoother and quieter.
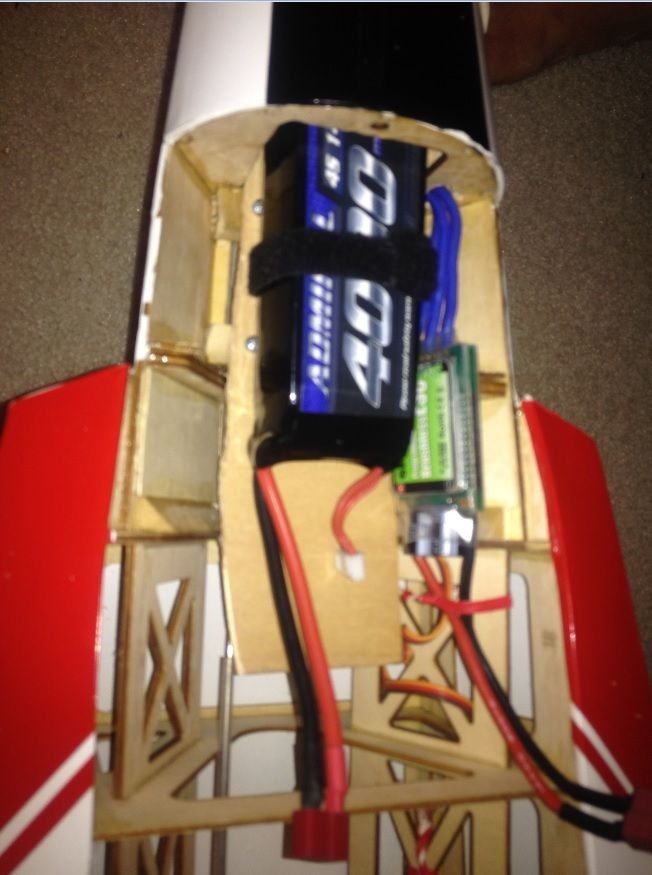
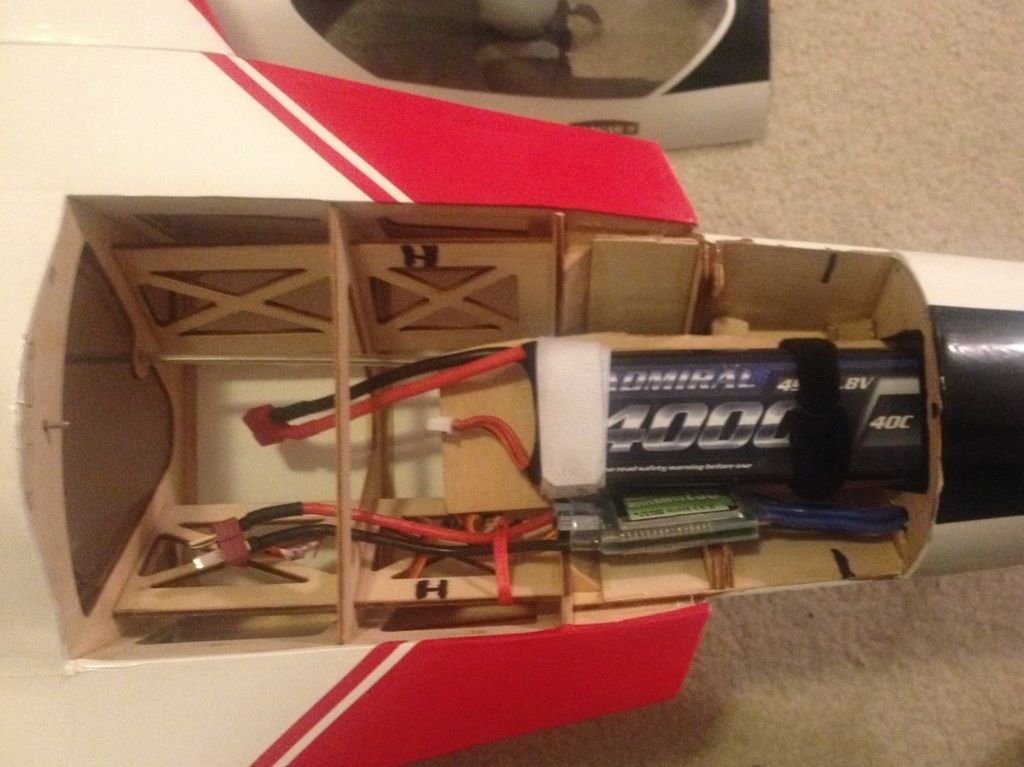
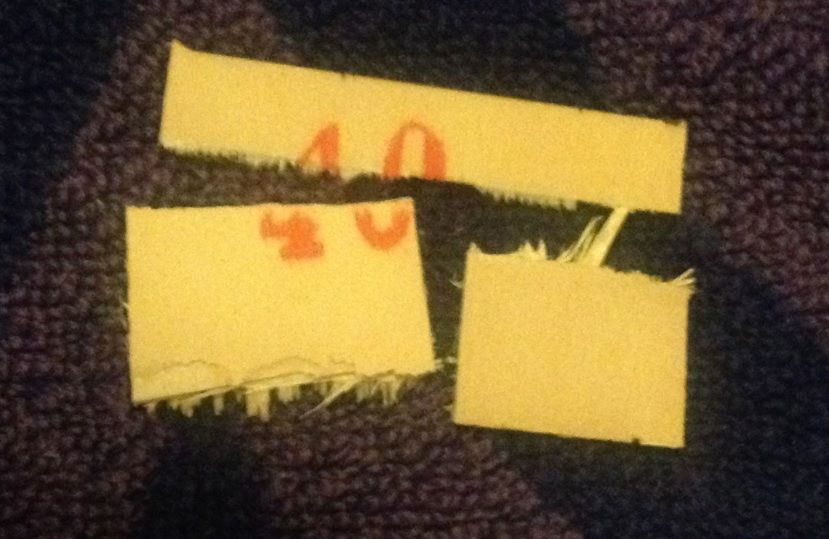
Here are some close-up pictures that hopefully be self explanatory for all to see what I used and why. Of course feel free to ask questions should you have any.


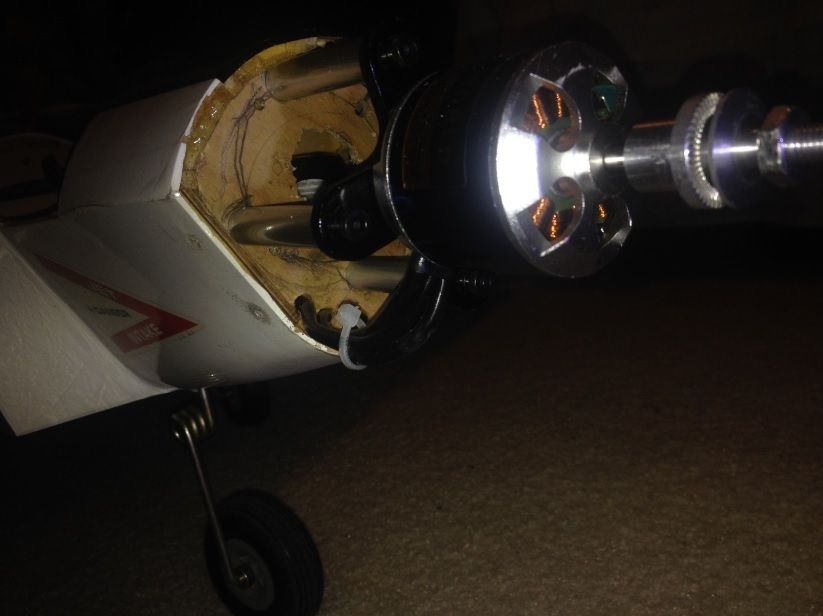

Close-up shows where I will be placing a small square piece of plywood to allow the battery to clear the ESC wires going to the motor and have a compartment for the ESC wires to stay safe from any unnecessary handling while inserting and taking out the flight battery.

Second late night working on this F22 Raptor by Hangar9 and let me tell you that this is by far one of the most challenging models to convert as that dual heavy vertical stabs and overall weight of the rear with all that wood makes it really heavy to allow for a good reasonable power system and set of batteries to Off-Set all that weight in the AFT area.
Also, lets not forget the rather closed-in Frontal FUSE area to work with and the tiny tapered nose effect as you really can't use a metal cage hardware to mount any motor as it will interfer with the cowling. Resort is to use X-Mount with stand-off hardware and you have to be paying attention to every measurement before drilling.
Okay so, I have spent Tuesday late night and Thursday late night on working with this model and I am exhausted and will take a break unless of course I get a good night sleep tonight.
The worse is the horror to find my newest motor (Emax 46) with a bent shaft as well, however, not that badly like the Himax HC3528-1000 so, with some patience and vice gripe pliers I was able to straighten out the out-put shaft of this motor! It really pays to have Gorilla Hands after all! Yes, I have run up the motor several times to note where the high and low points were on the shaft and after the fix as well. Now the shaft is very tuned and no wobble what-so-ever! In-between runs of the motor and without the battery connected, sprayed some CRC 2-26 into the motor as this helps with the bearings and cleaned out that motor and now it runs much smoother and quieter.
Here are some close-up pictures that hopefully be self explanatory for all to see what I used and why. Of course feel free to ask questions should you have any.
Close-up shows where I will be placing a small square piece of plywood to allow the battery to clear the ESC wires going to the motor and have a compartment for the ESC wires to stay safe from any unnecessary handling while inserting and taking out the flight battery.
Last edited by guapoman2000; 10-09-2015 at 08:52 AM.
10-14-2015, 01:34 AM
#7
Thread Starter
Guys,
Life keeps coming at me....work, family, house, cars, and friends and finally tonight ....wee hours of the early morning got some work done on this fantastic discontinued Hangar9 RC Raptor!
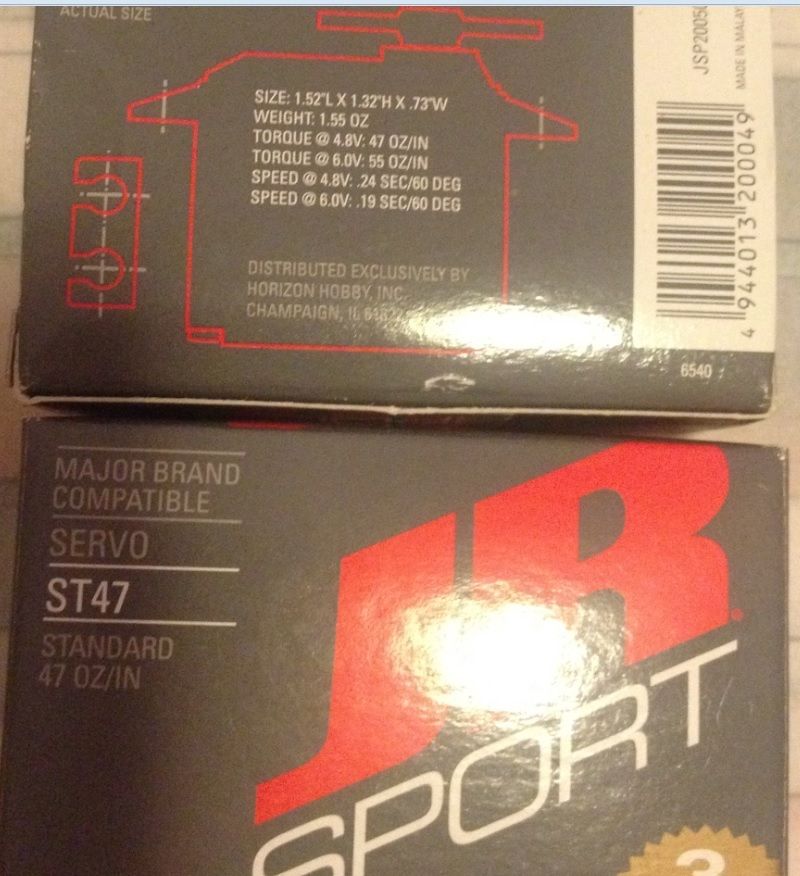
The servos used for Elevator & Rudder are the JR Sport (ST47). These are slightly smaller than the Hitec HS-311 / HS325HB and even the Futaba S3003.
I tried the Futaba 3003, Hitec HS-311 / HS325HB and they just didn't want to go in the STOCK cut-out so, I am thankful that I had the JR Sport ST47's on hand. I suspect that since the JR's are distributed by Horizon Hobbies and Hangar9 is a based product line of HH then, the JR SPORT were meant to be in this model.


Life keeps coming at me....work, family, house, cars, and friends and finally tonight ....wee hours of the early morning got some work done on this fantastic discontinued Hangar9 RC Raptor!
The servos used for Elevator & Rudder are the JR Sport (ST47). These are slightly smaller than the Hitec HS-311 / HS325HB and even the Futaba S3003.
I tried the Futaba 3003, Hitec HS-311 / HS325HB and they just didn't want to go in the STOCK cut-out so, I am thankful that I had the JR Sport ST47's on hand. I suspect that since the JR's are distributed by Horizon Hobbies and Hangar9 is a based product line of HH then, the JR SPORT were meant to be in this model.
10-14-2015, 01:35 AM
#8
Thread Starter
Guys,
I just confirmed that Horizon Hobby (Hangar9) indeed designed this model (Cut-Outs for Servos) were intended using the JR Sport ST47 servos!
The user manual shows using them for all applications!
The ones I have are much updated.

I just confirmed that Horizon Hobby (Hangar9) indeed designed this model (Cut-Outs for Servos) were intended using the JR Sport ST47 servos!
The user manual shows using them for all applications!
The ones I have are much updated.
 10-16-2015, 09:49 AM
#10
Thread Starter
Guys,
Another long night - Wing Assembly and Testing!
Always check your servos and make sure they are not reverse as I found an old Hitec HS-300 that was and it was giving me hell trying to figure out what was going on......FLAPS!
Here is what I used last night to complete the wing assemblies!


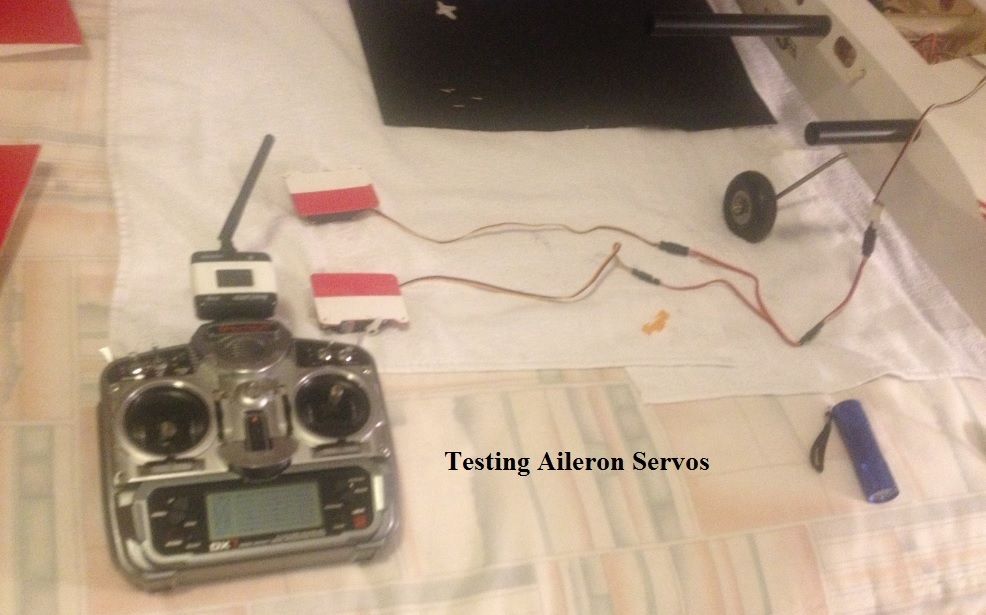

Another long night - Wing Assembly and Testing!
Always check your servos and make sure they are not reverse as I found an old Hitec HS-300 that was and it was giving me hell trying to figure out what was going on......FLAPS!
Here is what I used last night to complete the wing assemblies!
10-17-2015, 06:48 AM
#11
Thread Starter
Guys,
I am not going to use a switch harness on this one as my buddy who sold me that Giles G-202 did his homework and selected a very capable 60-AMP ESC with built-in 6-AMP Switch Mode BEC.
I looked up the specifications and providing them here:
http://www.headsuphobby.com/Sky-Powe...-BEC-H-110.htm
Just in case HeadsUPHobby no longer stocks this particular ESC, I have saved a screen capture showing the description and specifications here:
10-18-2015, 01:54 AM
#12
Thread Starter
READY FOR MAIDEN FLIGHT!
Guys,
After so many GO BACKS, I finally got the F22 Raptor the way I like it and it seems like it turned out very well. Its been a very challenging project in terms that you have to figure out placement of battery and working with a small and tight frontal FUSE area but, nevertheless, I believe this model shines with Electric over Glow any day!
1. I took out the Nose Wheel gear and rotating ARM to secure the push rod as it was left loose by the previous owner and made some additional adjustments.
2. Completed the propeller adapter and used a Great Planes propeller adapter using a SET SCREW to take advantage of the motor's flat spot on the output shaft. The pressure collar Adapter that came with the motor is just too scary since this motor produces lots and lots of power.
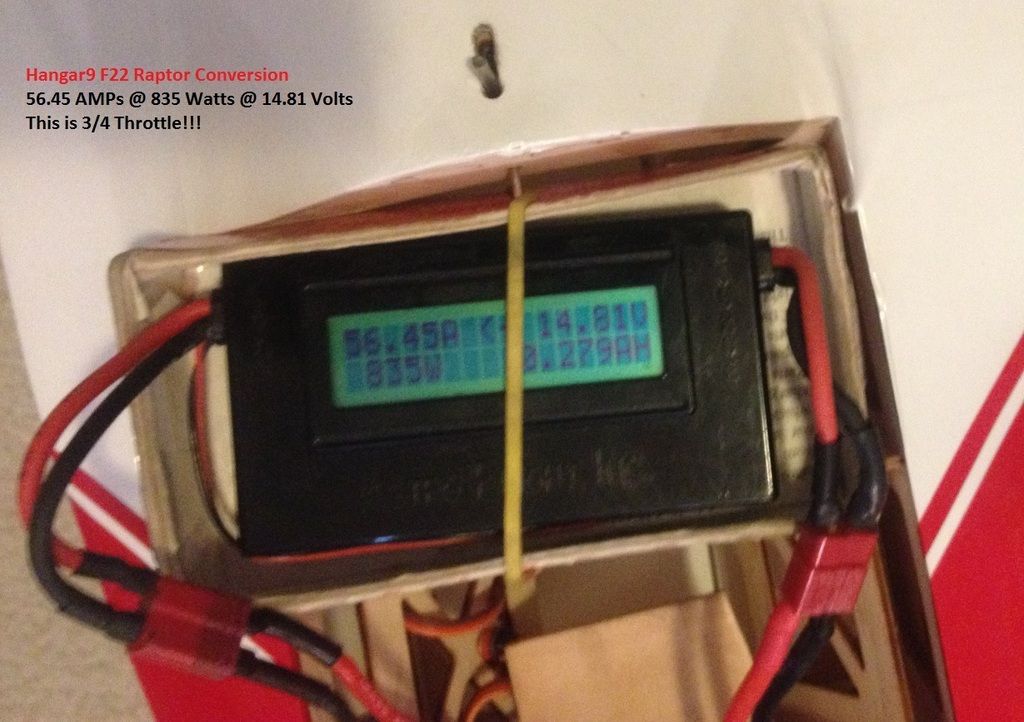
3. Tested the motor with the Pressure Adapter and swinging the APC 12 X 8 "E" and that thing was already up at 56-AMPS and above 835-Watts and it was very scary, besides this reading was done at 3/4 throttle.
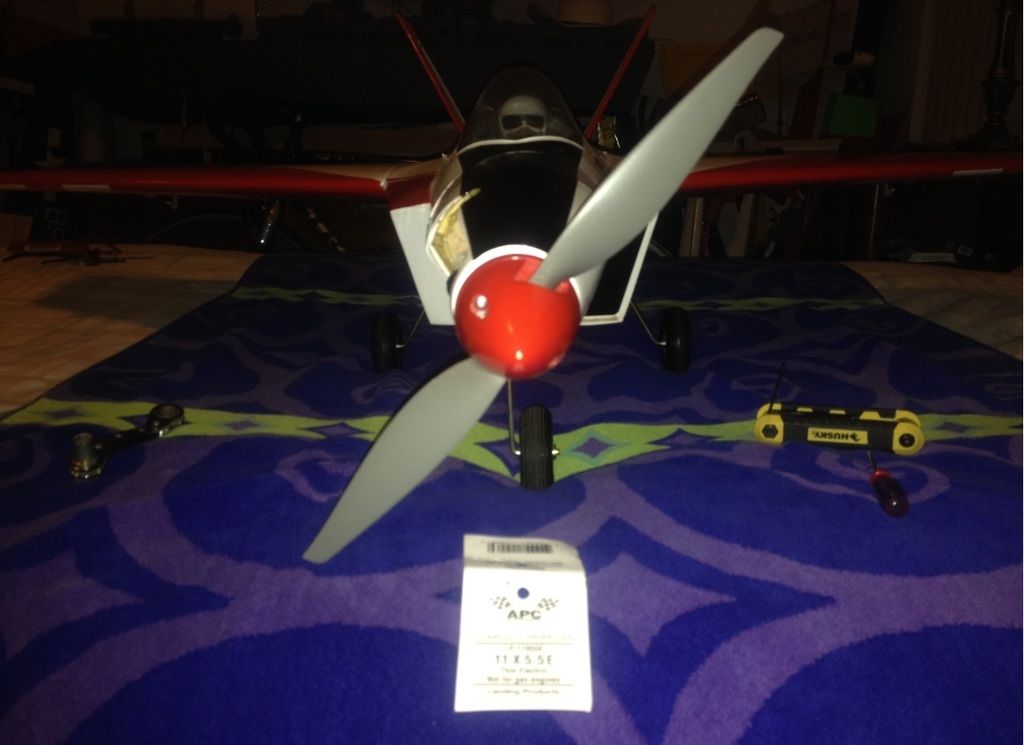
4. I have installed the APC 11 X 5.5 "E" Propeller but, I don't have time to test and like to keep the AMPs (Current) down as much as possible and increase "Airspeed" so, this is what the model will use for its maiden.
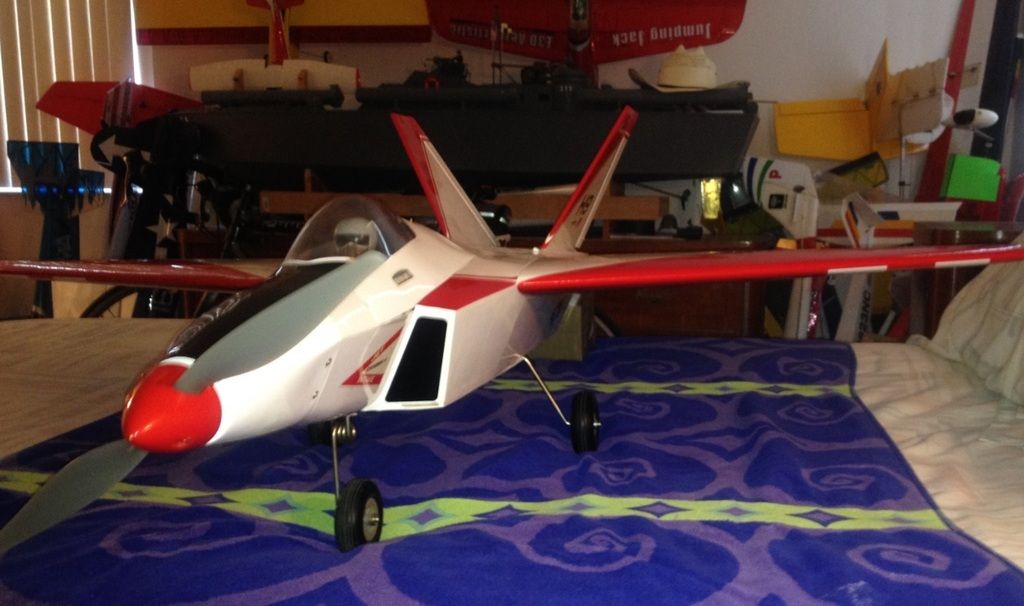
A few pictures!


Guys,
After so many GO BACKS, I finally got the F22 Raptor the way I like it and it seems like it turned out very well.
Its been a very challenging project in terms that you have to figure out placement of battery and working with a small and tight frontal FUSE area but, nevertheless, I believe this model shines with Electric over Glow any day!1. I took out the Nose Wheel gear and rotating ARM to secure the push rod as it was left loose by the previous owner and made some additional adjustments.
2. Completed the propeller adapter and used a Great Planes propeller adapter using a SET SCREW to take advantage of the motor's flat spot on the output shaft. The pressure collar Adapter that came with the motor is just too scary since this motor produces lots and lots of power.
3. Tested the motor with the Pressure Adapter and swinging the APC 12 X 8 "E" and that thing was already up at 56-AMPS and above 835-Watts and it was very scary, besides this reading was done at 3/4 throttle.
4. I have installed the APC 11 X 5.5 "E" Propeller but, I don't have time to test and like to keep the AMPs (Current) down as much as possible and increase "Airspeed" so, this is what the model will use for its maiden.
A few pictures!
10-18-2015, 02:14 AM
#13
Thread Starter
Guys,
Yes, I do realize that for good airspeed one has to select a high pitch propeller but, I want to take it easy on the new motor and most importantly the ESC and monitor the air cooling since this model has such a tight narrow FUSE.
I do have several propellers on hand for better airspeed results......
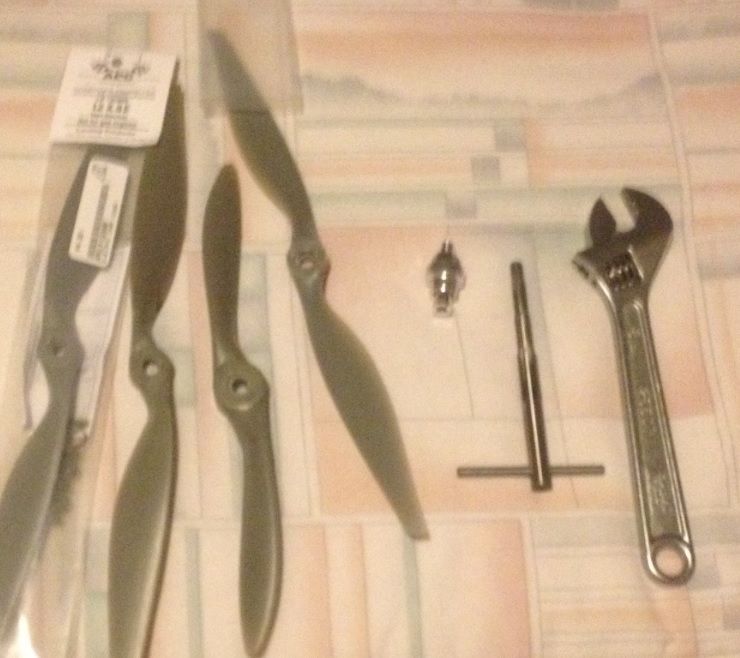
What I selected for Maiden Flight is the APC 11 X 5.5 "E" Propeller to give it that middle of the road technique and monitor the temperature after perhaps 3 - 4 minute flight.

Yes, I do realize that for good airspeed one has to select a high pitch propeller but, I want to take it easy on the new motor and most importantly the ESC and monitor the air cooling since this model has such a tight narrow FUSE.
I do have several propellers on hand for better airspeed results......
What I selected for Maiden Flight is the APC 11 X 5.5 "E" Propeller to give it that middle of the road technique and monitor the temperature after perhaps 3 - 4 minute flight.
10-18-2015, 06:48 AM
#14
Thread Starter
Hello!
I am glad that I fell asleep when I did because I have been working on this project a little too much and with too many nights so, a good night rest to see things in a better perspective does wonders.
For example, this morning I finally found the section of the Manual where it shows the Center-Of-Gravity and it is exactly 6 inches from the leading edge of the wing where the wing meets the FUSE!
This is great news since I can move the large battery a few inches back as right now it is NOSE HEAVY! By moving the battery a few inches back the top hatch can now be secured without any pressure or the need to take away any wood from it and not make any contact with the top side of the battery.
Again, I am glad that I didn't go out the RC Club field today to fly it as the conditions are nice but, with lots of wind and the pilot would have been tired!
Here is the manual showing you the balance point.
10-18-2015, 06:49 AM
#15
Thread Starter
Guys,
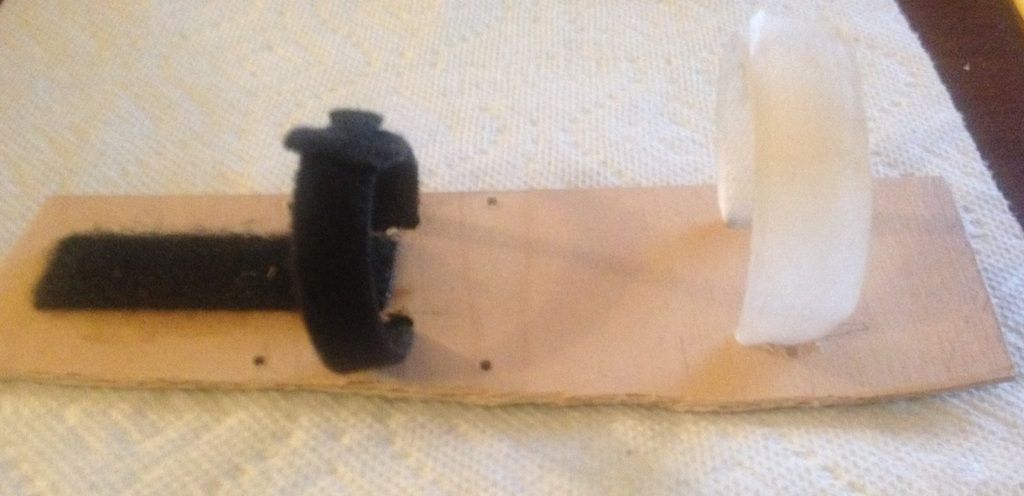
Taking out the custom battery platform to provide additional Velcro straps so, new holes would be required a few inches AFT on the platform.
Drilling now!
Taking out the custom battery platform to provide additional Velcro straps so, new holes would be required a few inches AFT on the platform.
Drilling now!
10-20-2015, 01:37 AM
#16
Thread Starter
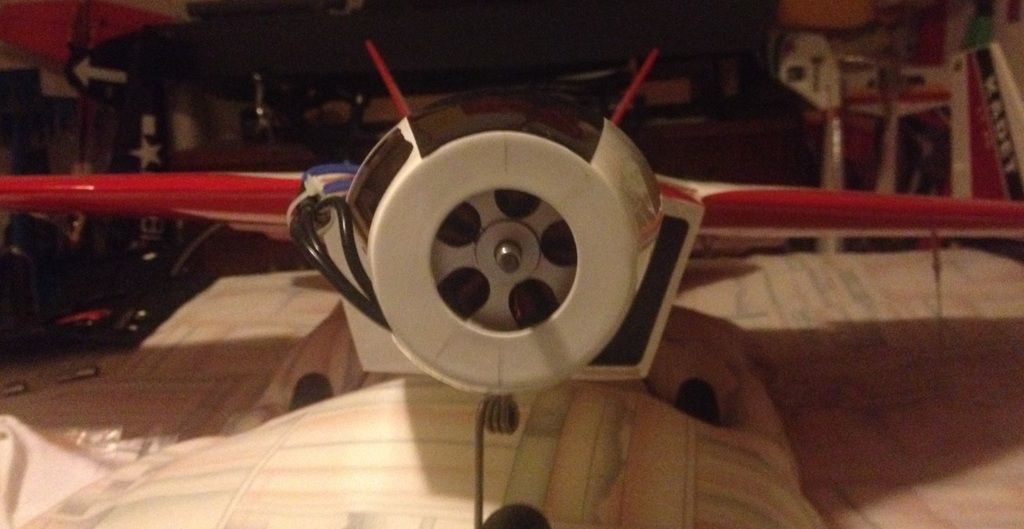
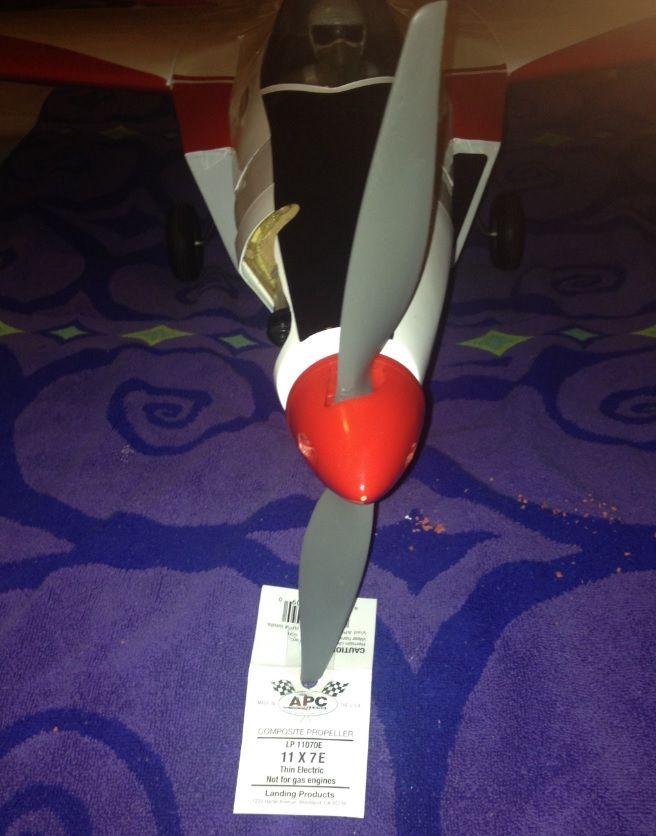
Got her done last night with the installation of the APC 11 X 7 "E" propeller and test running it up and found that the RED spinner just was not good enough (Balanced). So, a BLACK spinner that had better balance was installed and doing great.
Additionally, it was the first time that the wing servos (Ailerons & Flaps) were activated and the only item was the Left Aileron that required mechanical linkage adjustment and now all systems are a GO! opcorn:


Additionally, it was the first time that the wing servos (Ailerons & Flaps) were activated and the only item was the Left Aileron that required mechanical linkage adjustment and now all systems are a GO!
opcorn:
10-20-2015, 03:47 AM
#17
Thread Starter
Guys,
I am just hanging and waiting for good weather conditions for Central Florida.
Hopefully, by Sunday morning it will be good low wind conditions as I like as little cross wind conditions for this model. I have been reading up the FUEL section discussing this model that seems like there seems to be some sort of ugly reactions to cross wind. Or......perhaps lacking pilot skills from those reporting? In any case I will err on the conservative.
No wine before its time....
Here is the present forecast....
http://www.usairnet.com/cgi-bin/laun...=KTTS&state=FL
10-21-2015, 02:52 AM
#18
Thread Starter
Just attaching what Scott Todd posted at the "Other" RC thread Site and who converted his model to Electric.
I am getting a few different versions so, I and will Err on the conservative when I get to fly mine.

I am getting a few different versions so, I and will Err on the conservative when I get to fly mine.
10-23-2015, 12:34 AM
#19
Thread Starter
Guys,
Finally! Seems like Sunday early in the morning will be ideal to maiden my Hangar9 F22 Raptor conversion.
http://www.usairnet.com/cgi-bin/laun...=KTTS&state=FL
Will be there at the RC Club field early and ready!
Finally! Seems like Sunday early in the morning will be ideal to maiden my Hangar9 F22 Raptor conversion.
http://www.usairnet.com/cgi-bin/laun...=KTTS&state=FL
Will be there at the RC Club field early and ready!
10-24-2015, 09:06 PM
#20
Thread Starter
Hi Guys,
Completed the model to its fullest possible manner before the Maiden Flight on Sunday morning (Today!).
Performed some needed adjustments on both Flaps halves on both wings and Left Aileron control surface.

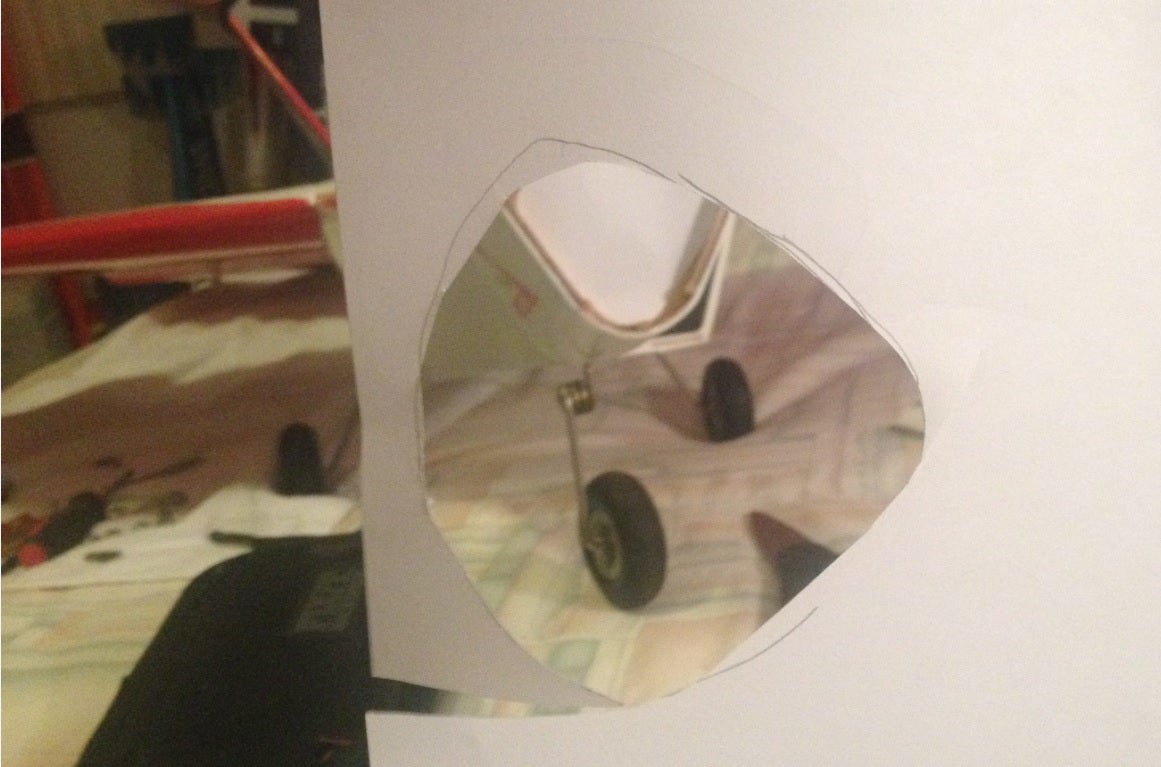
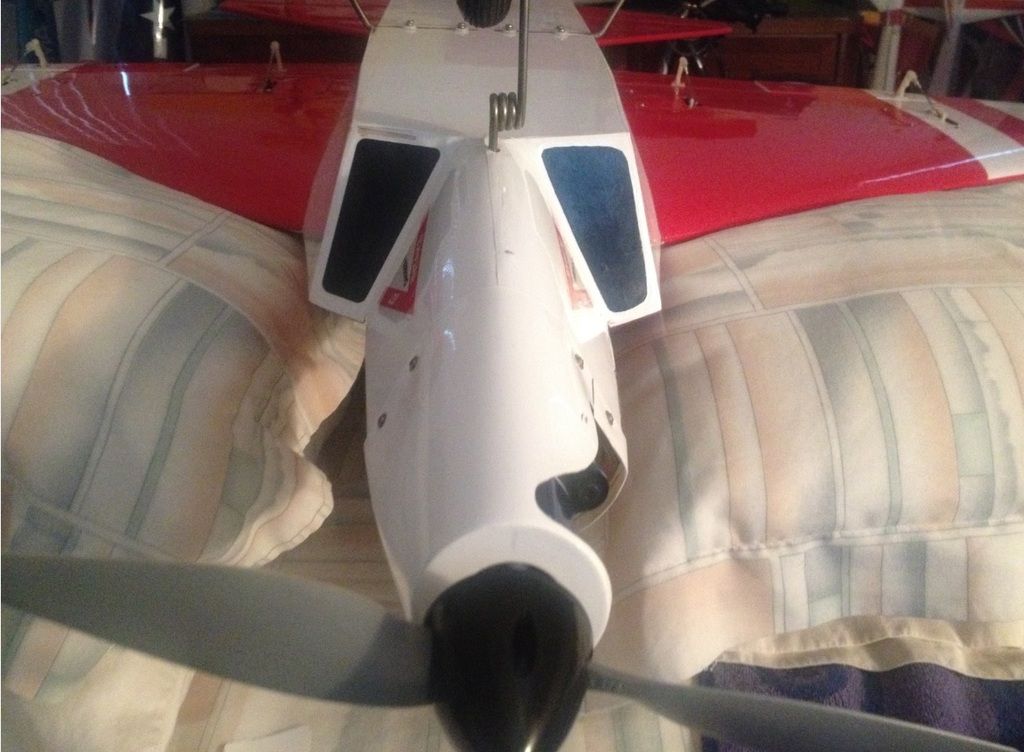
Black Intake decal missing ever since I took ownership of the model and it bothered me to no end so, I made my own decal and came out pretty good, if I may say so.


Worked on the Battery Tray Holder and came out really good.

Worked on the Top Cockpit Hatch to allow the battery to sit without making contact with the bottom end of the hatch.
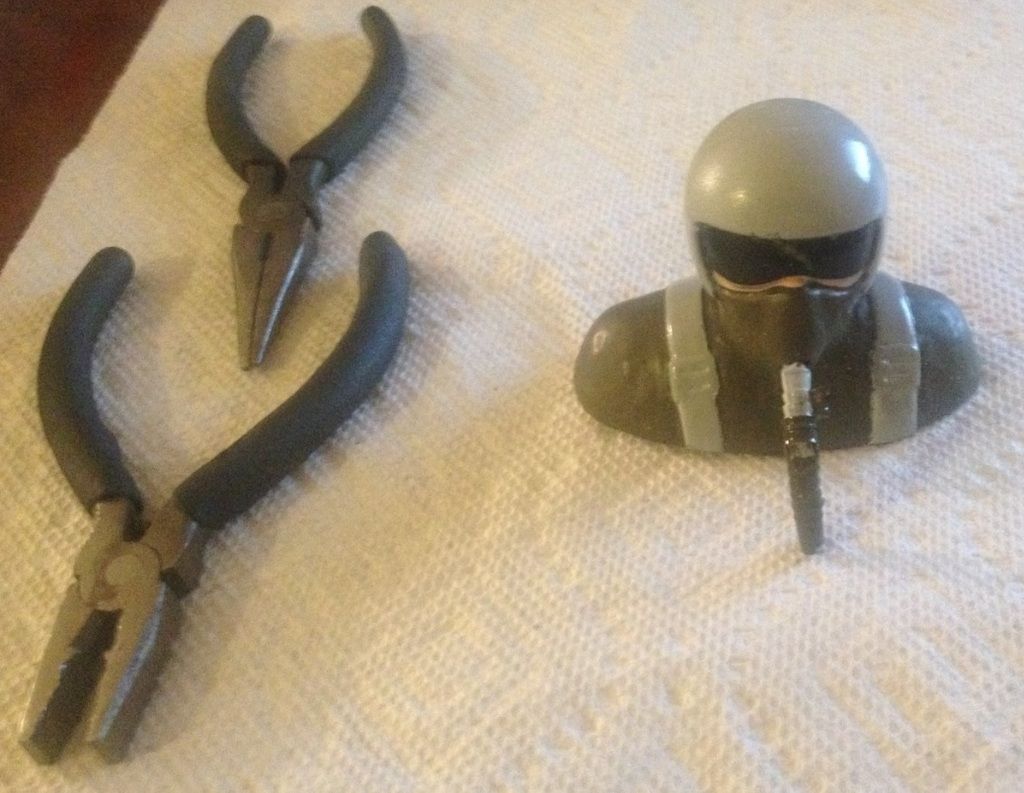
Relocated the Pilot Figure further AFT in the cockpit

READY FOR MAIDEN!
Completed the model to its fullest possible manner before the Maiden Flight on Sunday morning (Today!).
Performed some needed adjustments on both Flaps halves on both wings and Left Aileron control surface.
Black Intake decal missing ever since I took ownership of the model and it bothered me to no end so, I made my own decal and came out pretty good, if I may say so.
Worked on the Battery Tray Holder and came out really good.
Worked on the Top Cockpit Hatch to allow the battery to sit without making contact with the bottom end of the hatch.
Relocated the Pilot Figure further AFT in the cockpit
READY FOR MAIDEN!

 10-25-2015, 08:58 AM
#22
Thread Starter
Post Maiden Summary:
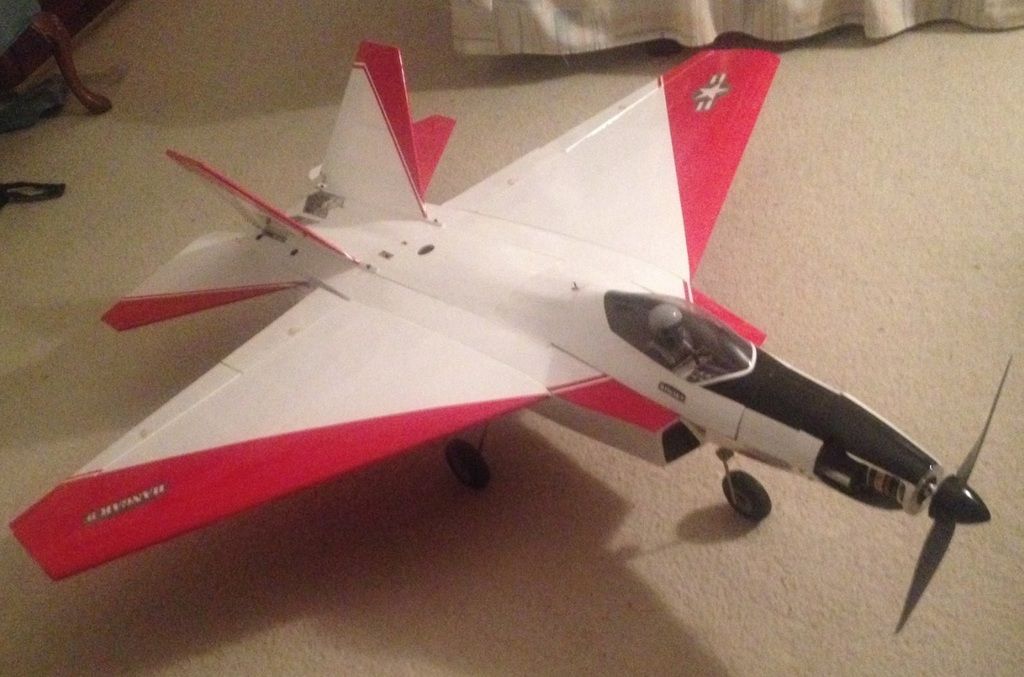
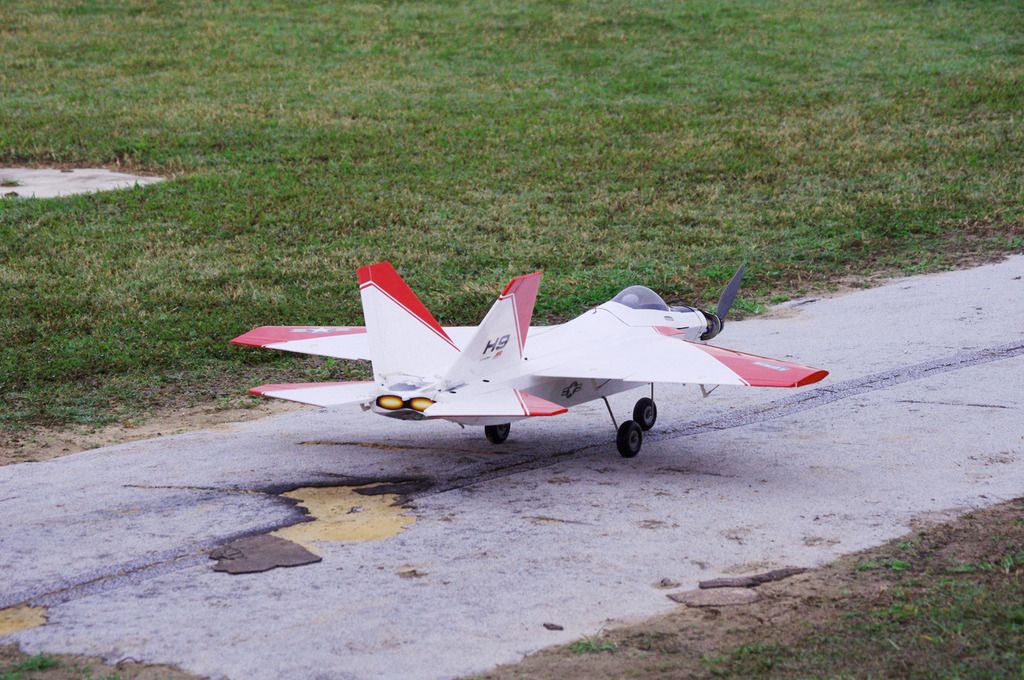
This model is just an amazing Prop Jet model that unfortunately Hangar9 (Horizon Hobby) discontinued a few years ago. Yes, the model is heavy due to the initial design of being GLOW but, it is my opinion that the Electric Conversion has improve its flying abilities in many ways.
Given the take-off without slats nor flaps the model was lifted-OFF from ground slightly before its time and the Propeller Torque (P-Factor) took it into a slightly Left bank but, nothing that an experienced RC Flyer can't get out of. On the second (2nd) flight and take-off, I was ready for it and allowed the model to speed up some more on the ground before applying UP Elevator.
The Loop attempts were unsuccessful, however, I attribute this from uneven push ROD adjustment(s) and while UP the Elevator Halves are not equal so, the model performs a lazy 1/2 barrow roll. As you can see in the Video, the 2nd Loop Attempt I allowed the model to stall and came down in a flat spin condition. I gave it down Elevator and slight power then, the model recovered. Thank goodness for the 5 Mistakes High!
The first landing was done without flaps and with a slight tail wind and she zoomed passed the landing strip. On the 2nd landing I used flaps and I did noticed just a hair indication of UP but, the model maintained level flight without too much Down Elevator input. 2nd landing was DEAD STICK and it floated slower and once again passed the landing target and onto the grass without any damage.
This has been an awesome project and the model looks great in the air!
Thanks ALL for chiming in with your recommendations and tips.
Carlos
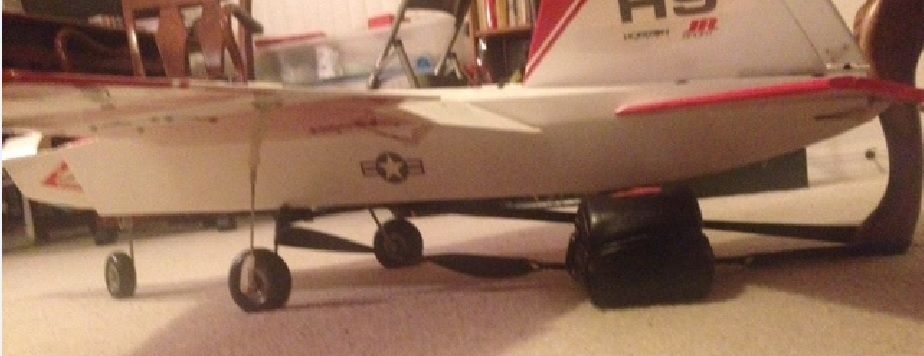
Post Maiden Flight Pictures!

This model is just an amazing Prop Jet model that unfortunately Hangar9 (Horizon Hobby) discontinued a few years ago. Yes, the model is heavy due to the initial design of being GLOW but, it is my opinion that the Electric Conversion has improve its flying abilities in many ways.
Given the take-off without slats nor flaps the model was lifted-OFF from ground slightly before its time and the Propeller Torque (P-Factor) took it into a slightly Left bank but, nothing that an experienced RC Flyer can't get out of. On the second (2nd) flight and take-off, I was ready for it and allowed the model to speed up some more on the ground before applying UP Elevator.
The Loop attempts were unsuccessful, however, I attribute this from uneven push ROD adjustment(s) and while UP the Elevator Halves are not equal so, the model performs a lazy 1/2 barrow roll. As you can see in the Video, the 2nd Loop Attempt I allowed the model to stall and came down in a flat spin condition. I gave it down Elevator and slight power then, the model recovered. Thank goodness for the 5 Mistakes High!
The first landing was done without flaps and with a slight tail wind and she zoomed passed the landing strip. On the 2nd landing I used flaps and I did noticed just a hair indication of UP but, the model maintained level flight without too much Down Elevator input. 2nd landing was DEAD STICK and it floated slower and once again passed the landing target and onto the grass without any damage.
This has been an awesome project and the model looks great in the air!
Thanks ALL for chiming in with your recommendations and tips.
Carlos
Post Maiden Flight Pictures!
10-25-2015, 04:09 PM
#24
Thread Starter
Guys,
My buddy Gerry took some neat in-flight photographs from my 2nd Flight today after my maiden flight as he came later on in the morning to our RC Club.
The morning was heavily overcast which forced him to shoot at iso 800 and f5.6, not the optimum settings for quality action photography, however , thanks to Photoshop, he was able to extract some life from the otherwise dull images.
A few pictures and thanks to Gerry!
10-25-2015, 07:21 PM
#25
Thread Starter
Well guys,
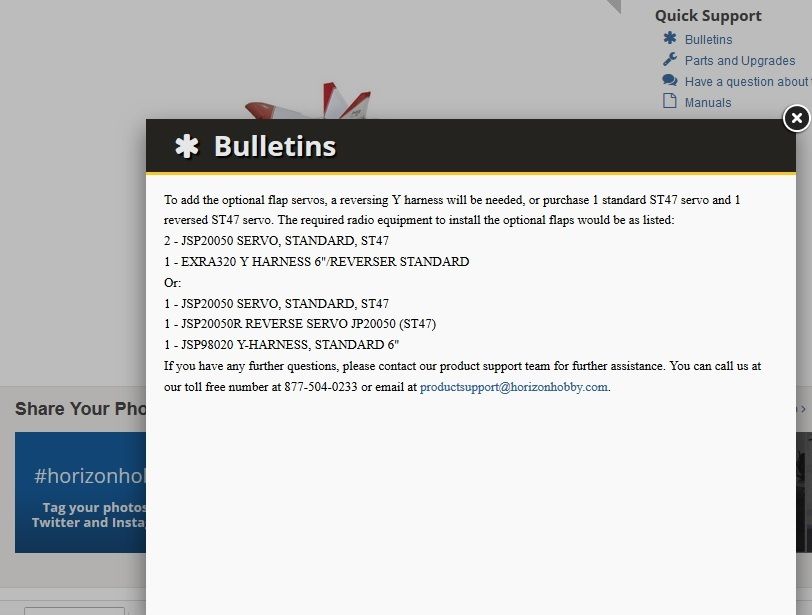
I found an interesting BULLETIN for this model over at the HORIZON HOBBY web site and allow me to share it with all of you.
http://s733.photobucket.com/user/gua...ohehd.jpg.html
My only reason for sharing is that I am just thinking out-loud as what direction I will take to make the Elevator halves to be controlled by separate servos. Additionally, I am considering to change out the Futaba Standard servos with the JR SPORT ST47's as well.