


Welcome to Club SAITO !
 04-24-2019, 02:47 AM
 04-24-2019, 02:48 AM

My Feedback: (102)

Join Date: Dec 2001
Location: Colonial Beach, VA
Posts: 20,370
Likes: 0
Received 25 Likes
on
25 Posts
Something that happens with all my saitos is that they won't hold peak. They all settle 100-200 rpm down from peak when I adjust them to check peak. It takes a couple of seconds for it to happen after coming off idle and it happens every time. I always start a little rich and work my way to peak. Once peaked it drops rpm and I cannot get it back up there by adjusting the hsn. I have to bring it back to idle and then go full throttle again to see the highest peak again. The lsn has no effect on the phenomenon. Any ideas?
It looks like Horizons specs online and the manual are different. Imagine that.
04-24-2019, 02:55 AM
04-24-2019, 02:57 AM
i recently purchased an analog 1-5 psi gauge. Easy enough to see if the tank pressure drops shortly after going wot. Doubtful, but I'll test it.
Last edited by Glowgeek; 04-24-2019 at 03:02 AM.
04-24-2019, 03:36 AM
Edited: When testing for peak rpm I've heard a few people say for example "Peak 8700 rpm with a pinch to 8800". This would imply to me that the engine wouldn't hold the 8800 peak rpm. Probably started getting hot and losing air/fuel charge density?
Last edited by Glowgeek; 04-24-2019 at 03:52 AM.

 04-24-2019, 05:10 AM
Welcome my world fellas. I get plagued with all the obscure and nonsensical electrical and mechanical problems anytime I have to fix stuff. I can change the gas cap on a car and immediately the water pump will start leaking!  Also, the harder it is to replace a part the higher likelihood it will be defective right out of the box or fail in short order eg my latest bout with SS bearings in my saitos. That said, I do often make things harder than they need to be in an attempt to improve upon perfection.
 Also, the harder it is to replace a part the higher likelihood it will be defective right out of the box or fail in short order eg my latest bout with SS bearings in my saitos. That said, I do often make things harder than they need to be in an attempt to improve upon perfection.
04-24-2019, 05:36 AM
Also, the harder it is to replace a part the higher likelihood it will be defective right out of the box or fail in short order eg my latest bout with SS bearings in my saitos. That said, I do often make things harder than they need to be in an attempt to improve upon perfection.
04-24-2019, 05:36 AM

Back in the Stone Ages I worked in a 2nd level support helpdesk of a major corporation. This translates into we were the people who actually had a clue on what were were doing and would tell the developers when they broke something. Whenever a user asked why something was happening being the wiseguy I was I answered "The computer is out to get you and you're not paranoid when its true!" Not one user ever disputed that statement.
It reminds me what a prolific R/C designer/builder who was published regularly said about build articles. He brought up the subject about how in most articles the author mentions how great the newly built airplane flies during the maiden flight without any major adjustments needing to be made. He called B.S. on these statements. He claimed every maiden flight of a new untried design was a textbook adventure in terror. He always would add lines on what it took to tame a particular design before flying so his readers didn't have to recreate his first flight.
It reminds me what a prolific R/C designer/builder who was published regularly said about build articles. He brought up the subject about how in most articles the author mentions how great the newly built airplane flies during the maiden flight without any major adjustments needing to be made. He called B.S. on these statements. He claimed every maiden flight of a new untried design was a textbook adventure in terror. He always would add lines on what it took to tame a particular design before flying so his readers didn't have to recreate his first flight.
04-24-2019, 06:21 AM


From what I can see, the CH ignition is the same thing as RCexl but hand soldered and not potted. This allows for parts access and replacement with the CH system.
Adrian has verified this in person at the Toledo RC Expo. Unless something has changed since then.
Adrian has verified this in person at the Toledo RC Expo. Unless something has changed since then.
Last edited by Jesse Open; 04-24-2019 at 06:24 AM.
04-24-2019, 06:54 AM
I always thought the epoxy works to help dissipate heat, and to make it somewhat water and vibration resistant. I have a CenturyJet gear control module that is uncased, and I tend to be concerned using it that it could be easily damaged just from securing it to the wing.
You posted that you couldn't find bore and stroke, so posted them for you. Not what you were looking for?
Originally Posted by Hobbsy  I guess I wasn't clear enough, the FG 14 says the displacement is 13.8 cc and the 82 b says it's 13.44. cc, in their respective specs.
I guess I wasn't clear enough, the FG 14 says the displacement is 13.8 cc and the 82 b says it's 13.44. cc, in their respective specs.
04-24-2019, 07:14 AM
Yes, and no. The potting itself usually traps heat, making the heat sinking enclosure a compromise to help relieve some of that heat..Potting is done for moisture proofing and vibration toughening in most cases. Potting is seldom needed for vibration toughening surface mount components. Potting is a means to better insulate high voltage components, the most applicable here. ..
The main drawback is it renders servicing as well as modifications near impossible. That is why some folks pay a bit more for the otherwise identical CH version of .RCexl ignitions.
With the effects of expansion and contraction, poor thermal conductivity, potting can create more problems than it cures.
Last edited by Jesse Open; 04-24-2019 at 07:18 AM.
04-24-2019, 09:21 AM
My Feedback: (102)
Join Date: Dec 2001
Location: Colonial Beach, VA
Posts: 20,370
Likes: 0
Received 25 Likes
on
25 Posts
I always thought the epoxy works to help dissipate heat, and to make it somewhat water and vibration resistant. I have a CenturyJet gear control module that is uncased, and I tend to be concerned using it that it could be easily damaged just from securing it to the wing.
You posted that you couldn't find bore and stroke, so posted them for you. Not what you were looking for?
You posted that you couldn't find bore and stroke, so posted them for you. Not what you were looking for?

Last edited by Hobbsy; 04-24-2019 at 09:25 AM.
04-24-2019, 11:50 AM
My Feedback: (1)
looks like I am not going to buy that Mustang with the Saito 72, RCG's site tells it's only 111 miles away, but when I searched it (how far) I found that 111 number is as a crow flies, the road trip would be a 300 mile trip, and I ant no crow, so I decided not to make the 300 mile trip, too bad, I wanted it, the plane looked to be in good shape, and I could have put my 82 in it. after all, it's a mustang and it should be flown like a mustang, fast and wild
Jim
Jim
04-24-2019, 01:29 PM
Testing today for tank pressure showed .51 psi at 10050 rpm peak and no noticeable drop in tank pressure when the rpm started to drop off. It dropped all the way down to 9500 when left at that fully leaned hsn setting and the tank pressure was then .49 psi. The head temps were noticeably higher there. Safe to say that falling tank pressure is not the reason that the engine drops off of peak rpm when the hsn is left leaned for peak. I tried several times, letting the engine idle to cool off and got the same results.
Now, if I peaked the hsn and immediately riched it 9700 rpm it would run there for a whole tank.
So I think we have our answer ie elevated combustion chamber temp is what causes a fully leaned for peak engine to begin dropping rpm after a second or two.
Disclaimer: ymmv
Now, if I peaked the hsn and immediately riched it 9700 rpm it would run there for a whole tank.
So I think we have our answer ie elevated combustion chamber temp is what causes a fully leaned for peak engine to begin dropping rpm after a second or two.
Disclaimer: ymmv
Last edited by Glowgeek; 04-24-2019 at 01:32 PM.
04-24-2019, 04:29 PM
04-24-2019, 06:41 PM
My Feedback: (1)
hey guys, please tell how you drill engine mounting holes, I am always looking for a better, faster way..
so I got my engine mount holes drilled today for my 100, I tried something new, it worked great, but it only took half a year to do it LOL
first I turned down an old x-acto knife on the lathe to make a center punch that fit in the engine's mounting holes rather tightly (what ! it's the only aluminum round stock I had), I made the point of the punch only .030" long,
I set the engine on the mounts where it should be and held the engine to the mounts with 2 c-clamps, installed the punch in one of the engine's mounting holes and tapped the punch to mark the center of the hole, then I marked the 2nd hole on that same tab,
I removed the engine and removed that 1 mount and mounted the mount in the vice on my Sherline mill/drill, leveled the mount.
I have a 2 inch long pin, it's .050" thick, I mounted it in the drill chuck and used the pin to find the center of the mark that my center punch made,,,,, drilled both holes,
remounted the engine mount to the plane, mounted the engine to that mount, and center punched the other 2 holes on the other side,,, removed that mount and drilled those 2 holes,
well it took a while because I never did it this way before, actually it was a pain in the back side to do it this way, but it came out great, actually it was the best engine mounting job I have done,
I could have got it done much faster with using a hand drill, or using a drill press, but I don't have a drill press, never the less I got the holes straight and where they should be>>>>>>
tell us how you do it guys ????
Jim
04-24-2019, 07:35 PM
I clamp the engine in place and use my Great Planes tool with the cone on the end to drill with the spring loaded bit inside a 1/16" hole and then use the hole to guide a larger bit as required.
04-24-2019, 11:09 PM

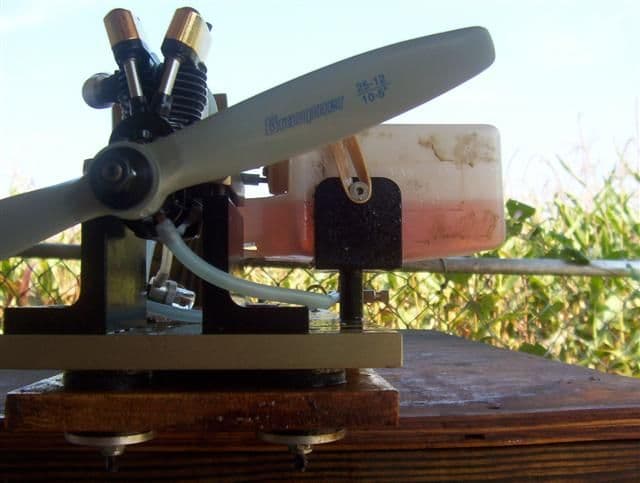
Jim use a flat sheet of glass laid flat on the bench top for a temp firewall.Stand a plastic engine mount beam on it and tack with super glue.then you just hold the engine in position so the carb is about 1/8" off the glass and use an engine mount bolt dipped in red paint to mark the holes,drill ONE and bolt the engine to it then tack the second engine mount to the glass and do the rest.I'd rather have my short and curlies ripped out one by one than use bolts and nuts/washers etc squashing a top quality plastic engine mount beam.Use good stainless steel caphead self tappers like the one's shown in the pic above.
Normally two clicks back off peak drops about 300rpm,if you use a cline demand regulator sometimes i leave it peaked but if the engine saggs a bit going vertical one click rich solves the problem.
04-25-2019, 03:00 AM
Well as far as mounting an engine I get the engine we�re i want it and then I take a long drill bit drill one hole put in screw then drill the next and so on. Or I will mark with the Great Planes tool then drill holes in plane. Or if by some chance I use an aluminum mount
i well mark and then drill tap and repeat.
So old subject on pullers got a three jaw puller last night and were has that tool been all my life works awesome.
i well mark and then drill tap and repeat.
So old subject on pullers got a three jaw puller last night and were has that tool been all my life works awesome.
04-25-2019, 03:06 AM
My Feedback: (102)
Join Date: Dec 2001
Location: Colonial Beach, VA
Posts: 20,370
Likes: 0
Received 25 Likes
on
25 Posts
Well as far as mounting an engine I get the engine we�re i want it and then I take a long drill bit drill one hole put in screw then drill the next and so on. Or I will mark with the Great Planes tool then drill holes in plane. Or if by some chance I use an aluminum mount
i well mark and then drill tap and repeat.
So old subject on pullers got a three jaw puller last night and were has that tool been all my life works awesome.
i well mark and then drill tap and repeat.
So old subject on pullers got a three jaw puller last night and were has that tool been all my life works awesome.
Did you get a Posi-Loc or other, Thanks
04-25-2019, 03:09 AM