


Bud Nosen Mr. mulligan


 03-26-2015, 12:23 PM
#602

Thread Starter

Join Date: Jun 2012
Location: Bristol, CT
Posts: 4,002
Likes: 0
Received 0 Likes
on
0 Posts
Here ya go Kevin. My version of balance buddies. Now, I can hang the airframe from the dowel and add weight where ever needed until the datum line is level. These are at 33% MAC. I figure a good starting point. It's a lot easier than trying to use your finger tips. There not pretty, but they don't need to be.

 03-28-2015, 08:52 AM
#605
Thread Starter
Join Date: Jun 2012
Location: Bristol, CT
Posts: 4,002
Likes: 0
Received 0 Likes
on
0 Posts
I'm hoping to have the top hatch finished today. It's taken a long time for a couple of reasons. One is that after getting home from work, I have been having a hard time to get into it. I find myself more often than not on the couch snoozing. Two, is that like the rest of the build from day one, I wasn't happy with the wing to fuse joints, and the cabin top in general so I did some demo work and am getting everything to line up better. Anyway, just about done with that. My fiberglass specialties order is out for delivery today so that excites me a bit. I'll take some pics when the hatch is complete.
03-28-2015, 12:45 PM
#606

Steve
Take a look at the fuselage to wing joints in my pics in post 598. You'll notice a strip of 1/32 ply running the length of the joint. I let the fuselage mounted ply over hang the the wing by approximately 3/16", effectively hiding any inaccuracies in the fuse to wing joint.
The ply is really two layers of 1/64. Only the top layer straddles the joint. The bottom layer is to provide spacing, so that the ply will clear the wing.
After I get the ply fitted well, I glass the strip for strength.
03-28-2015, 01:22 PM
#607
Thread Starter
Join Date: Jun 2012
Location: Bristol, CT
Posts: 4,002
Likes: 0
Received 0 Likes
on
0 Posts
Pretty much what I did on my Speedster except the top layer was aluminium. I thought it came out ok. Not really scale, but looked ok.the glass parts arrived today. Kind of opens up some more work to be done. Btw, my issues were in the heights at the fuse to wing joints. Didn't really line up good. They do now.
03-28-2015, 01:53 PM
#608
03-28-2015, 03:46 PM
#609
Thread Starter
Join Date: Jun 2012
Location: Bristol, CT
Posts: 4,002
Likes: 0
Received 0 Likes
on
0 Posts
No, i forgot to bend an offset into the music wire. Looked rediculous. So, im looking at three views, and at the cowl, and back at the 3 views, and scaling 3 views, and dangit, the nose is way to long. At least 1 1/4. So the 3 options i can think of are to chop the nose back, find a new engine thats a better length for it, or swap engines with the Speedster. The last would involve alot of cutting of the speedsters engine box as well as finishing the spare cowl i have to suit the new engine. Really dont feel like doing all that. Im open to suggestions.
Last edited by stevegauth30; 03-28-2015 at 03:49 PM.
03-28-2015, 05:07 PM
#610

Tom would be the answer man here (and just about any where). Anything I said would not help much I'm afraid.
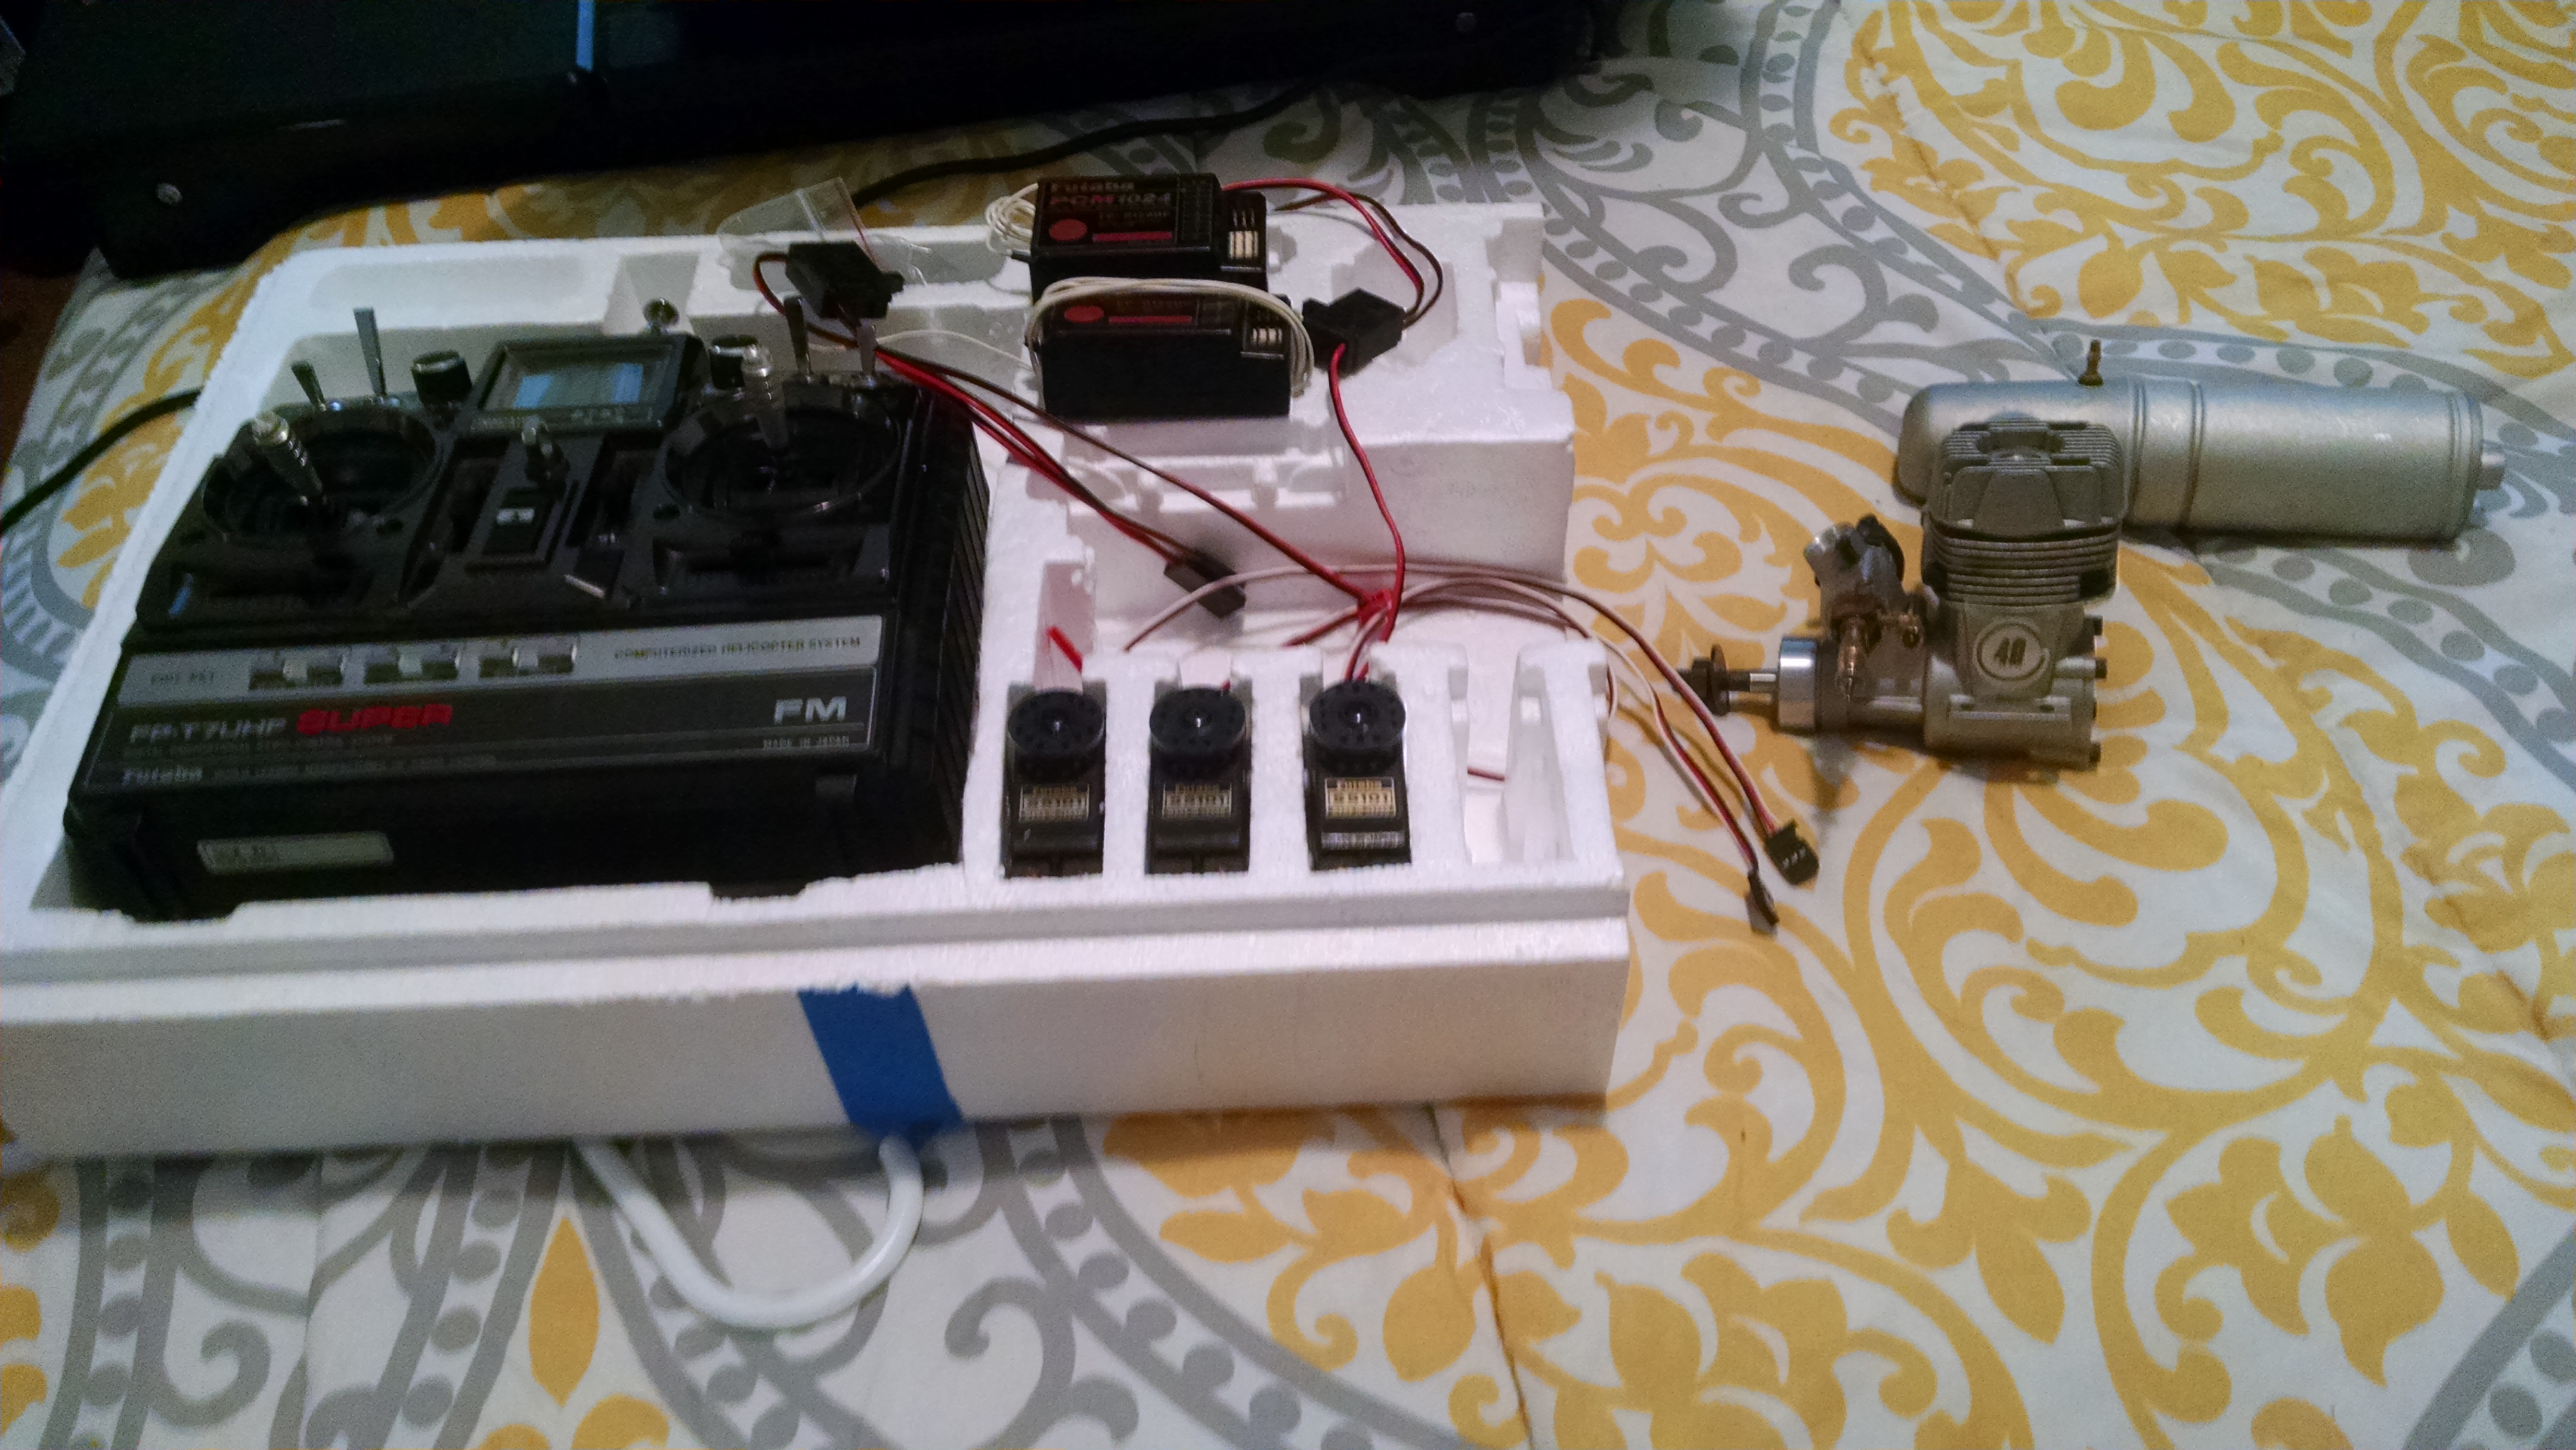
I got a rather nice package today. I only paid shipping.
Another super seven (heli version). two 9 channle rx's, 3 futaba s5101's, 2 switch harnesses, plus a ST .40 ringed engine.
The package was here after we got home from a guided tour of Castle air force museum. Put our little pooch in day care for the day.
Still going to oder the gimbal assymbly for the one had with the cracked gimbal.
Then I got 2. And I have a trainer cord that I bought when I got my super seven.

I have a 520 square inch wing that has no body so that wing gets the ST. Now got to build the rest of it.
Ken
I got a rather nice package today. I only paid shipping.
Another super seven (heli version). two 9 channle rx's, 3 futaba s5101's, 2 switch harnesses, plus a ST .40 ringed engine.
The package was here after we got home from a guided tour of Castle air force museum. Put our little pooch in day care for the day.
Still going to oder the gimbal assymbly for the one had with the cracked gimbal.
Then I got 2. And I have a trainer cord that I bought when I got my super seven.
I have a 520 square inch wing that has no body so that wing gets the ST. Now got to build the rest of it.
Ken
03-28-2015, 05:18 PM
#611
Thread Starter
Join Date: Jun 2012
Location: Bristol, CT
Posts: 4,002
Likes: 0
Received 0 Likes
on
0 Posts
A plane in a box. Nice score Ken. You'll be in the air in no time. I should have mentioned too that when I did the initial balance at 33%, it was quite nose heavy. And I read somewhere that other guys shortened the nose as well. I really don't want to, but it's seeming like the right move.
03-28-2015, 06:34 PM
#612
My Feedback: (19)
Tom would be the answer man here (and just about any where). Anything I said would not help much I'm afraid.
I got a rather nice package today. I only paid shipping.
Another super seven (heli version). two 9 channle rx's, 3 futaba s5101's, 2 switch harnesses, plus a ST .40 ringed engine.
The package was here after we got home from a guided tour of Castle air force museum. Put our little pooch in day care for the day.
Still going to oder the gimbal assymbly for the one had with the cracked gimbal.
Then I got 2. And I have a trainer cord that I bought when I got my super seven.
I have a 520 square inch wing that has no body so that wing gets the ST. Now got to build the rest of it.
Ken

Enjoy!
03-28-2015, 06:44 PM
#613
My Feedback: (19)
No, i forgot to bend an offset into the music wire. Looked rediculous. So, im looking at three views, and at the cowl, and back at the 3 views, and scaling 3 views, and dangit, the nose is way to long. At least 1 1/4. So the 3 options i can think of are to chop the nose back, find a new engine thats a better length for it, or swap engines with the Speedster. The last would involve alot of cutting of the speedsters engine box as well as finishing the spare cowl i have to suit the new engine. Really dont feel like doing all that. Im open to suggestions.
Have enjoyed following this project by the way ...... Monocoupes and the Mulligan are all time favorite designs of mine. And don't forget the seldom if ever modeled but modern Mullicoupes.
03-29-2015, 02:44 AM
#615
Thread Starter
Join Date: Jun 2012
Location: Bristol, CT
Posts: 4,002
Likes: 0
Received 0 Likes
on
0 Posts
Yeah truck racer, well If I had half a brain rattling around up there I probably would have listened. Lol. I'm starting to wonder if I don't secretly just like to do things twice, and the hard way. Every time I think I'm making forward progress, I take three steps back.
03-29-2015, 04:19 AM
#617
Thread Starter
Join Date: Jun 2012
Location: Bristol, CT
Posts: 4,002
Likes: 0
Received 0 Likes
on
0 Posts
I think is the only option. I ain't adding tail weight, that's for sure. Plus, it would look like poo with a long beak. So, here we go again. Honestly, it doesn't look like it will be too bad. ( famous last words.)
03-29-2015, 05:25 AM
#619
Thread Starter
Join Date: Jun 2012
Location: Bristol, CT
Posts: 4,002
Likes: 0
Received 0 Likes
on
0 Posts
Your right about that Kevin. I hate regrets. And I hate even more having to cut up a painted airplane. It's gotta get done. I'm just about done with the cabin top, then that's up next.
03-29-2015, 07:14 AM
#620
Thread Starter
Join Date: Jun 2012
Location: Bristol, CT
Posts: 4,002
Likes: 0
Received 0 Likes
on
0 Posts
Well, like Kevin just said, the rework is a PITA, but well worth it in the end. The top hatch that seemed to drag on forever and ever, is finally done, and I'm happy with it. Just for the record, it wasn't just making the hatch. There's nothing to that, and it was made months ago. I had to pull sheeting from the leading and trailing edges of the wings, as well as the sheeting directly behind the hatch, and keep sanding and shaping until every bit was flush. Anyway, it's done. I hadn't planned to use 8 bolts to secure it, but the middle didn't want to sit flat. I used eight 4*40 SHCS and blind nuts. I'm happy with it, and glad I fixed it. On to bigger and better.
03-29-2015, 07:48 AM
#622
Thread Starter
Join Date: Jun 2012
Location: Bristol, CT
Posts: 4,002
Likes: 0
Received 0 Likes
on
0 Posts
Will it help enough to make it worth the effort? Not that it takes very much effort to glass it. Lol. I was thinking that it probably wouldn't work out too well to put solartex on it. So, yeah. Probably.
03-29-2015, 10:00 AM
#623
My Feedback: (19)
Yeah truck racer, well If I had half a brain rattling around up there I probably would have listened. Lol. I'm starting to wonder if I don't secretly just like to do things twice, and the hard way. Every time I think I'm making forward progress, I take three steps back.
03-29-2015, 02:33 PM
#624
It won't be solid, like a cowl, but it should be firm enough to keep your paint from cracking.

