


Read this before you think about starting your RTR Savage
 02-25-2007, 05:30 PM
#1
Senior Member
Thread Starter

Join Date: Jun 2004
Location: Loomis,
CA
Posts: 4,290
Likes: 0
Received 0 Likes
on
0 Posts
Thanks Thunderbird Junkie... you old thread just turned to garbage.
Hopefully you're reading this before your Savage even comes out of the box, or is delivered by Brown Santa. This will save
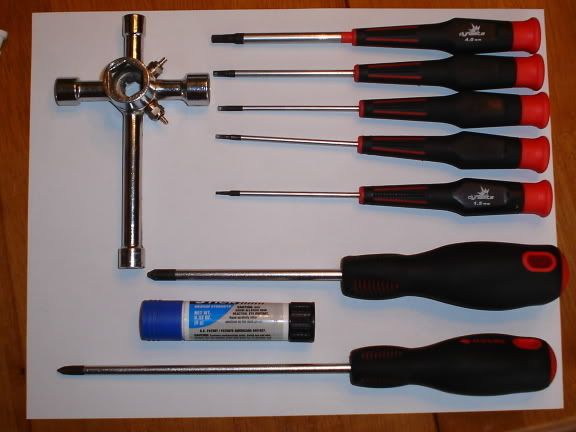
you quite a few headaches, especially if it's your first nitro. With these tips we experianced guys have seen gallons upon gallons of trouble-free running from our Savages without the problems that most people encounter. First and foremost, you need tools. Dynamite has a nice set of five metric hex drivers, which is what I'm using here, for about $15. I'm also using Husky screwdrivers, which a whole set of 10 (I think it was 10) set me back about $20. good screwdrivers and hex drivers will definitely save you some pains with rounding out screws-somethin none of us like to do, but we've all done. I've also got a Duratrax 5 way wrench, which has four handy little holes to screw spare glow plugs into, and it doubles as a glow plug wrench, wheel wrench, and a hammer
You'll also need thread locker. I'm using a blue Loctite stick. It works like chapstick, and should last almost forever when only
workin on RC cars.
First thing you need to do, before you do ANYTHING else, is set your gear mesh. Yes, this thing IS "RTR", but you're also buying a high-maintenance, high dollar toy, like a Ferrari or Lamborghini-and those things aren't cheap to maintain either.
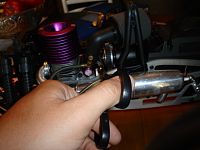
Part 1-setting gear mesh
To set the gear mesh, loosen your motor mount screws. There are two readily visible on the bottom of the motor plate, and the rear two are accessible via holes in the rear skidplate-look close and you'll see 'em.
Right now would be a good time to just take all of them out and loctite them. When you have them screwed back into the motor mount/motor plate with loctite on the threads, slide the motor all the way to the left until the clutchbell hits the spur gear, and gently snug the motor mount screws down. Spin the spur gear clockwise (when looking at it from the rear of the truck) and if it doesn't spin freely, tap the engine mount lightly with your 5 way wrench until it spins freely.
And yes, I forgot to add, that you should remove your fuel tank before doing this
When you do get the spur to spin freely, or at least semi-freely, hold the clutchbell stationary with one hand/finger, while moving the spur gear. you should barely feel the spur gear rock back and forth between the teeth of the clutchbell. If it doesn't, then lightly tap the engine mount with your 5 way wrench again until you have a TINY bit of play between the gears. If you're not sure if you set it right, tear a strip of printer paper, fold it over, and put it between the clutch and spur. if the spur spins freely, but binds up when you put the paper through the gear, you've got it right
Once you're fairly certain you got the gear mesh setting right, tighten the engine mount screws, and double check that the
spur still spins freely (It should).
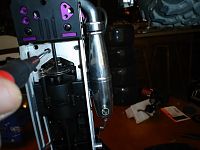
Part 2-air filter
This is the easiest part
Being as paranoid as I am, I'm afraid that the factory didn't make my zip tie on my air filter tight enough. So this may just be me, LOL.
cut off the old zip tie
get a new one
install-and yes, i'm using pliers to pull it good 'n' tight.

then cut off the excess
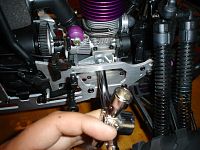
Part 3-make sure everything is tight and loctited
First, go through every screw that threads into plastic you can find and make sure it's good and snug. All the screws that thread into metal need to be loctited.
here are the screws that need to be loctited:

the two arrows that you can't see what they're pointing to are actually pointing toward the engine screws on the right side that hold the engine to the engine mount, and don't forget to loctite the engine mount screws when you set your gear mesh
I'll be editing this post through the day, adding pictures and information. any questions or anything, feel free to ask in the thread. Also, if you think I missed something, let me know
Hopefully you're reading this before your Savage even comes out of the box, or is delivered by Brown Santa. This will save
you quite a few headaches, especially if it's your first nitro. With these tips we experianced guys have seen gallons upon gallons of trouble-free running from our Savages without the problems that most people encounter. First and foremost, you need tools. Dynamite has a nice set of five metric hex drivers, which is what I'm using here, for about $15. I'm also using Husky screwdrivers, which a whole set of 10 (I think it was 10) set me back about $20. good screwdrivers and hex drivers will definitely save you some pains with rounding out screws-somethin none of us like to do, but we've all done. I've also got a Duratrax 5 way wrench, which has four handy little holes to screw spare glow plugs into, and it doubles as a glow plug wrench, wheel wrench, and a hammer
You'll also need thread locker. I'm using a blue Loctite stick. It works like chapstick, and should last almost forever when only
workin on RC cars.
First thing you need to do, before you do ANYTHING else, is set your gear mesh. Yes, this thing IS "RTR", but you're also buying a high-maintenance, high dollar toy, like a Ferrari or Lamborghini-and those things aren't cheap to maintain either.
Part 1-setting gear mesh
To set the gear mesh, loosen your motor mount screws. There are two readily visible on the bottom of the motor plate, and the rear two are accessible via holes in the rear skidplate-look close and you'll see 'em.
Right now would be a good time to just take all of them out and loctite them. When you have them screwed back into the motor mount/motor plate with loctite on the threads, slide the motor all the way to the left until the clutchbell hits the spur gear, and gently snug the motor mount screws down. Spin the spur gear clockwise (when looking at it from the rear of the truck) and if it doesn't spin freely, tap the engine mount lightly with your 5 way wrench until it spins freely.
And yes, I forgot to add, that you should remove your fuel tank before doing this
When you do get the spur to spin freely, or at least semi-freely, hold the clutchbell stationary with one hand/finger, while moving the spur gear. you should barely feel the spur gear rock back and forth between the teeth of the clutchbell. If it doesn't, then lightly tap the engine mount with your 5 way wrench again until you have a TINY bit of play between the gears. If you're not sure if you set it right, tear a strip of printer paper, fold it over, and put it between the clutch and spur. if the spur spins freely, but binds up when you put the paper through the gear, you've got it right
Once you're fairly certain you got the gear mesh setting right, tighten the engine mount screws, and double check that the
spur still spins freely (It should).
Part 2-air filter
This is the easiest part
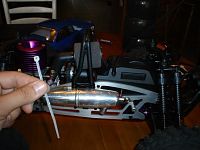
Being as paranoid as I am, I'm afraid that the factory didn't make my zip tie on my air filter tight enough. So this may just be me, LOL.
cut off the old zip tie
get a new one
install-and yes, i'm using pliers to pull it good 'n' tight.
then cut off the excess
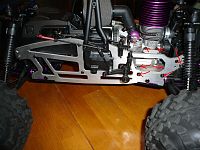
Part 3-make sure everything is tight and loctited
First, go through every screw that threads into plastic you can find and make sure it's good and snug. All the screws that thread into metal need to be loctited.
here are the screws that need to be loctited:
the two arrows that you can't see what they're pointing to are actually pointing toward the engine screws on the right side that hold the engine to the engine mount, and don't forget to loctite the engine mount screws when you set your gear mesh
I'll be editing this post through the day, adding pictures and information. any questions or anything, feel free to ask in the thread. Also, if you think I missed something, let me know

