


warbird replicas hurricane
 09-29-2010, 03:56 PM
#1
Member
Thread Starter
Join Date: Jul 2006
Location: CAMBRIDGEENGLAND, UNITED KINGDOM
Posts: 44
Likes: 0
Received 0 Likes
on
0 Posts
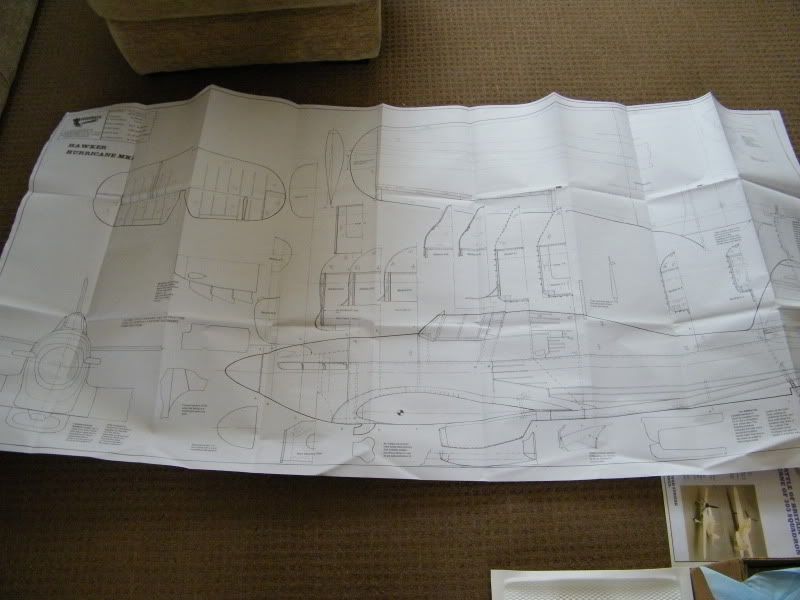
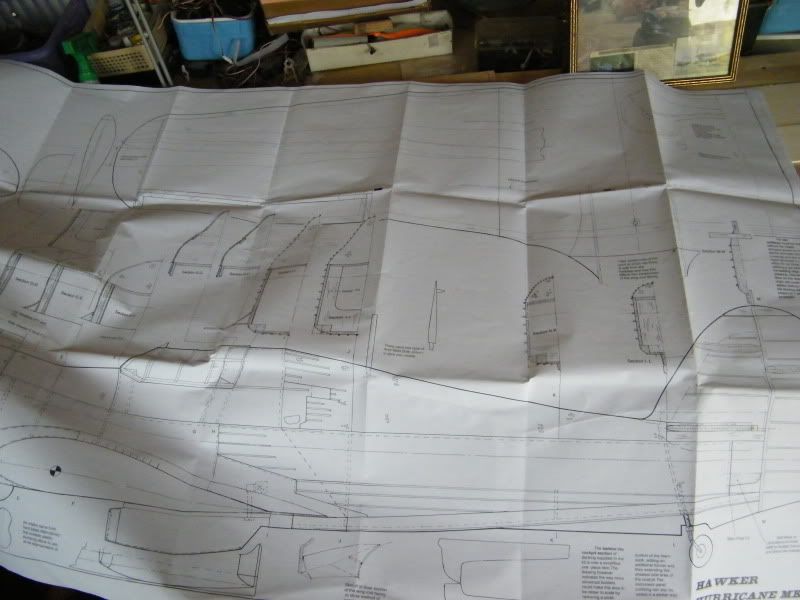
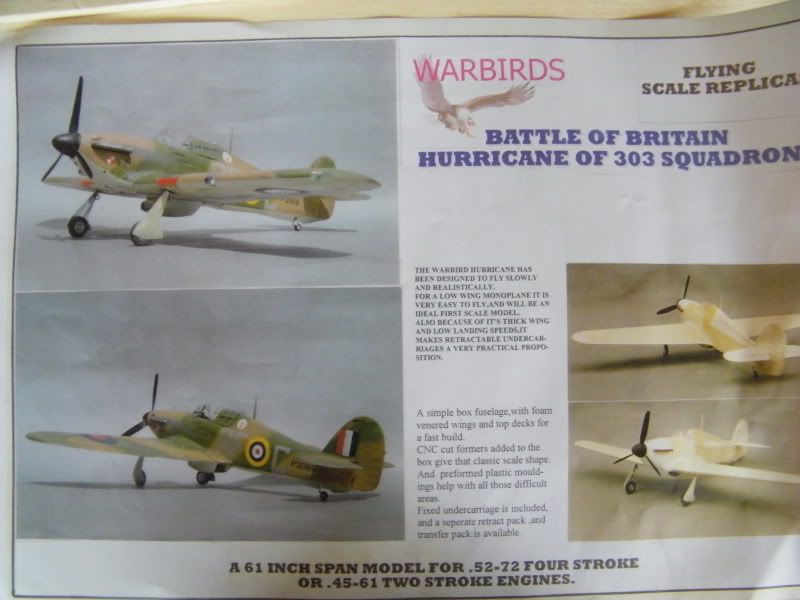
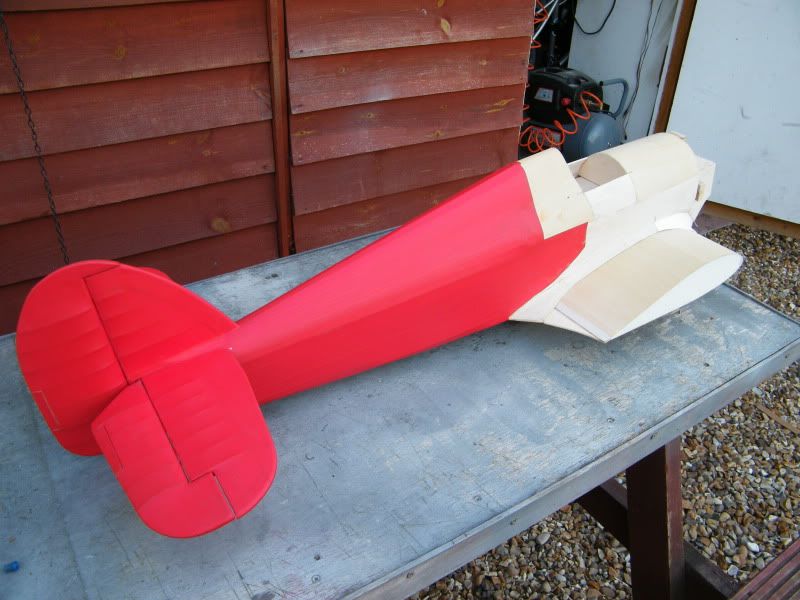
Images of the contents of the box now being laid out ready to start construction. this will be a build from box to flying video. enjoy the ride.
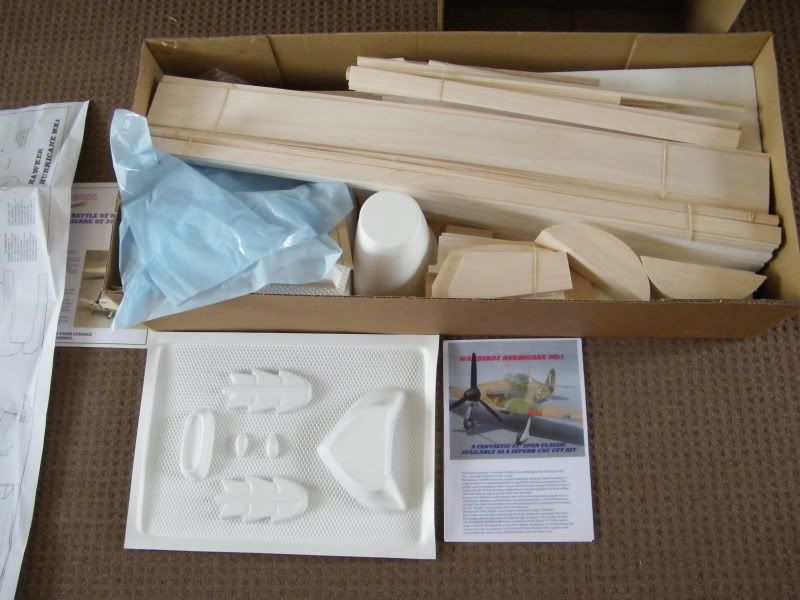


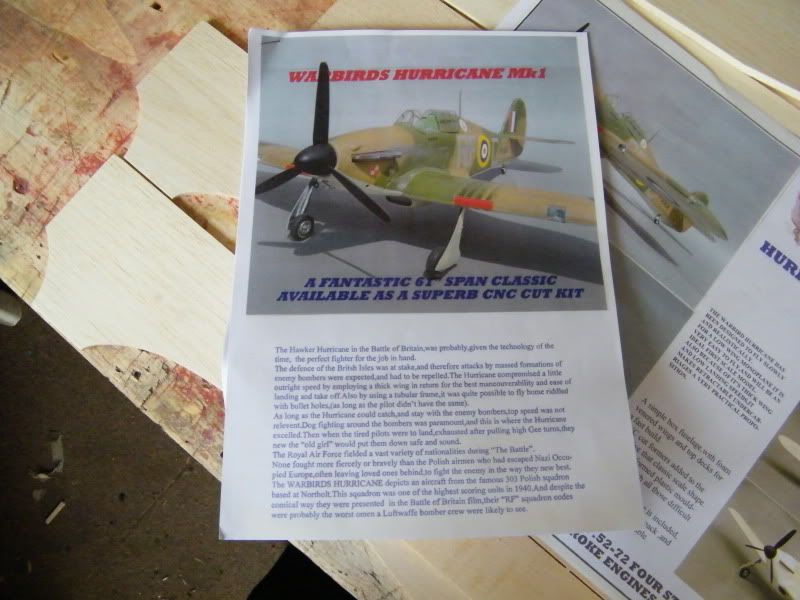
nice fibreglass cowling.

nice fibreglass cowling.
 09-29-2010, 03:59 PM
#2
Member
Thread Starter
Join Date: Jul 2006
Location: CAMBRIDGEENGLAND, UNITED KINGDOM
Posts: 44
Likes: 0
Received 0 Likes
on
0 Posts
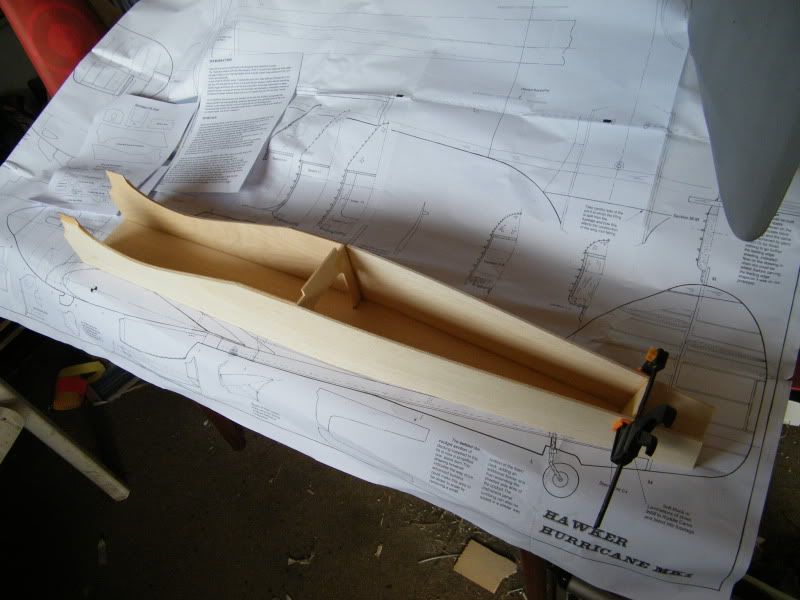
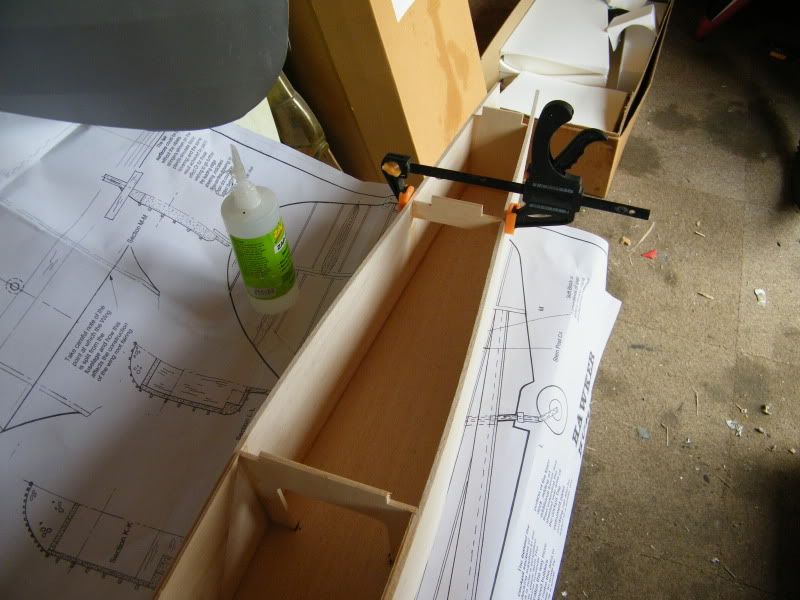
Okay to start the construction. we take the two side pieces of the fuse.
which we bond the ply wing supports onto. making sure to make an opposeing pair.
leave an 1/8th gap along the top edge for the next panel to fit onto.
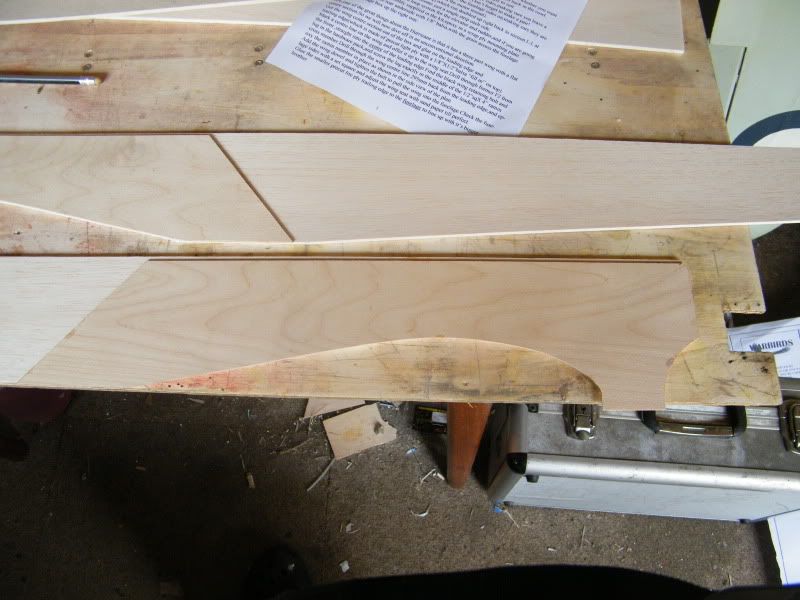
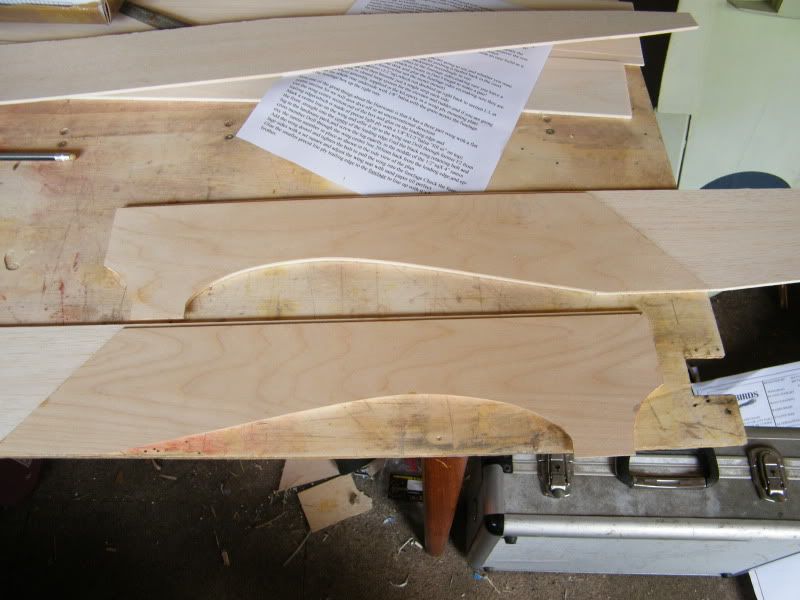
Next we lay the top panel flat on the workbench. and fit the two fuse sides onto it making sure all is squire.

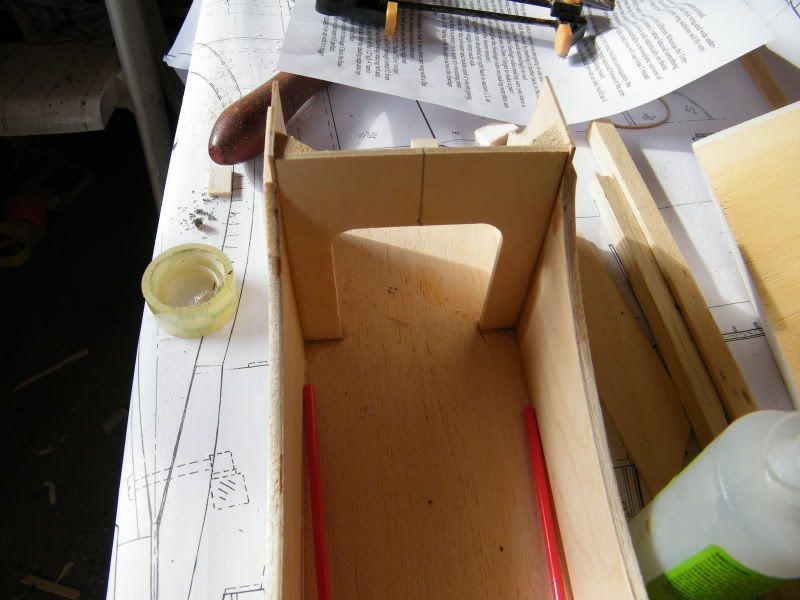
Then we take a few of the formers and fit them into the fuse. use the plan to mark where they fit.
DO NOT FIT ENGINE FIREWALL UNTIL YOU KNOW WHERE YOU REQUIRE IT....
More to come soon Gary.
which we bond the ply wing supports onto. making sure to make an opposeing pair.
leave an 1/8th gap along the top edge for the next panel to fit onto.
Next we lay the top panel flat on the workbench. and fit the two fuse sides onto it making sure all is squire.
Then we take a few of the formers and fit them into the fuse. use the plan to mark where they fit.
DO NOT FIT ENGINE FIREWALL UNTIL YOU KNOW WHERE YOU REQUIRE IT....
More to come soon Gary.
09-29-2010, 04:00 PM
#3
Member
Thread Starter
Join Date: Jul 2006
Location: CAMBRIDGEENGLAND, UNITED KINGDOM
Posts: 44
Likes: 0
Received 0 Likes
on
0 Posts
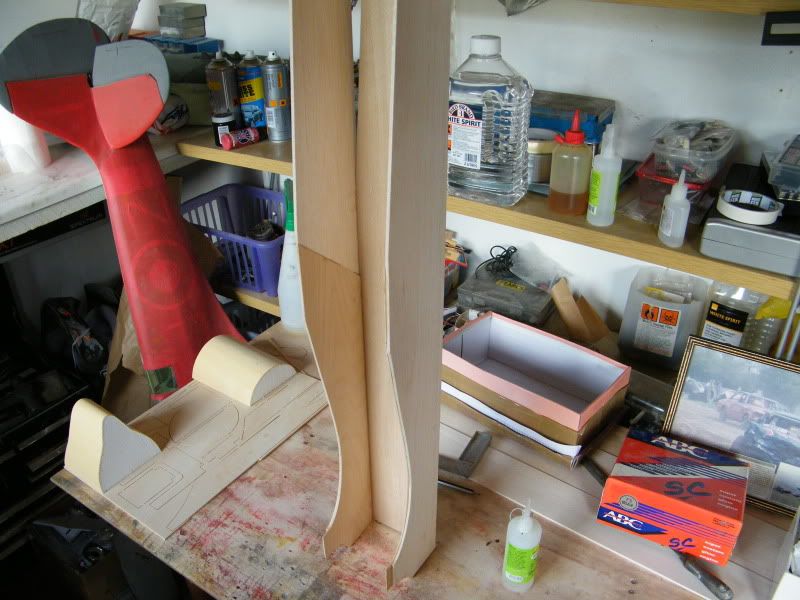
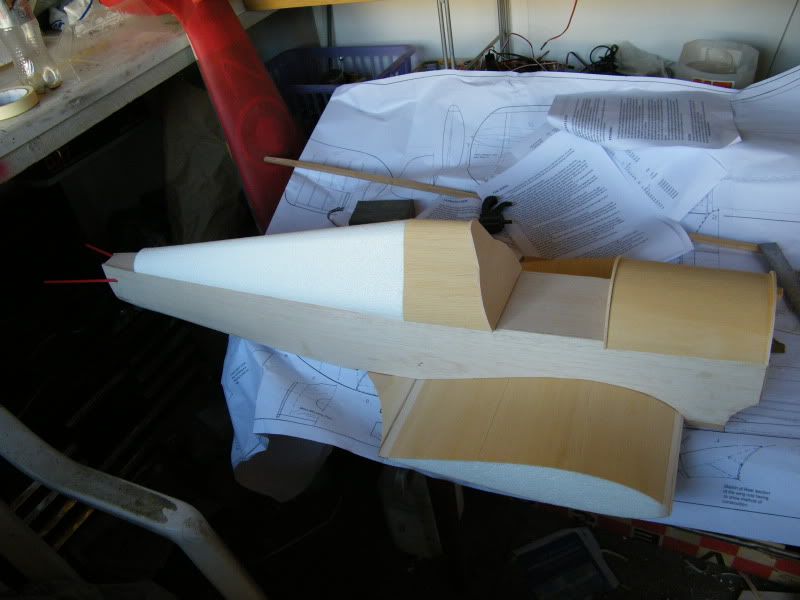
Today more work has been done on the hurricane.
Here we see the control rods I have fed down the rear of the fuse.
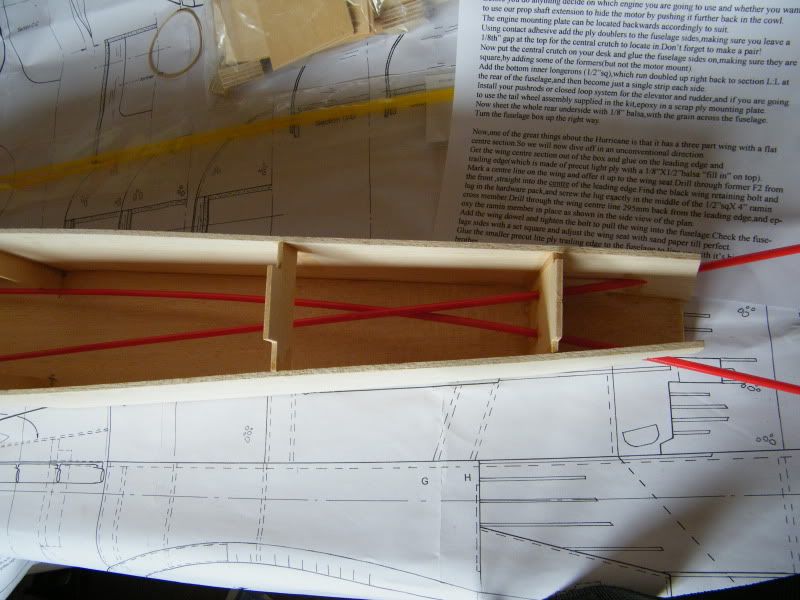
The next job was take two pieces of ¼ sq balsa and bond to the fuse as longerons, they will over lap at rear. Trim them to side of the fuse.

Next I bonded on a piece of hardwood in the area the tail wheel will be fixed, and then sheeted the fuse cross grain with 1/8th balsa.

Sand the balsa sheets to create a curve to the bottom of the fuse, careful not to overdo it. Mark out where the longerons are and shape upto them.
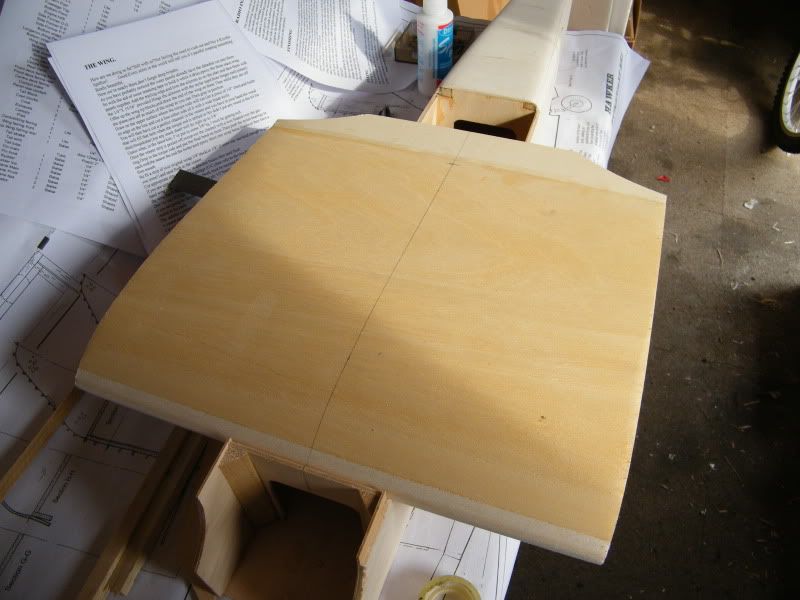
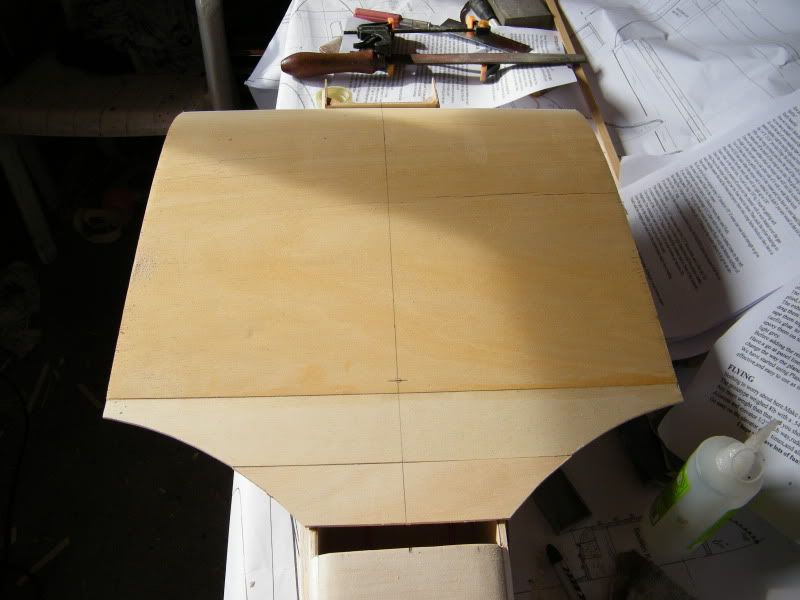
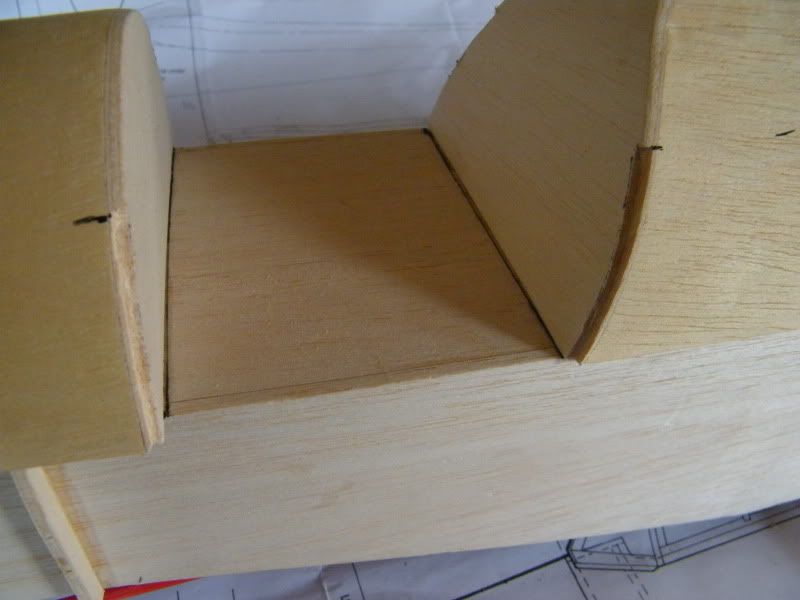
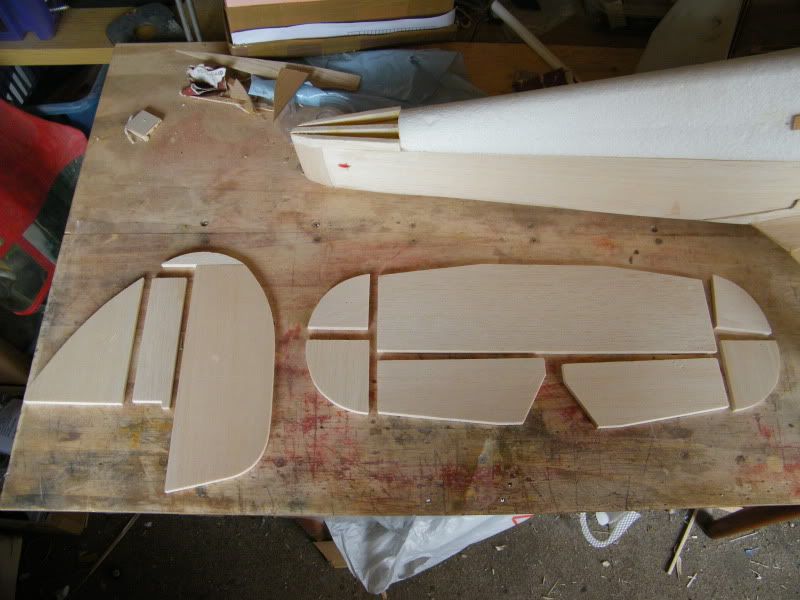
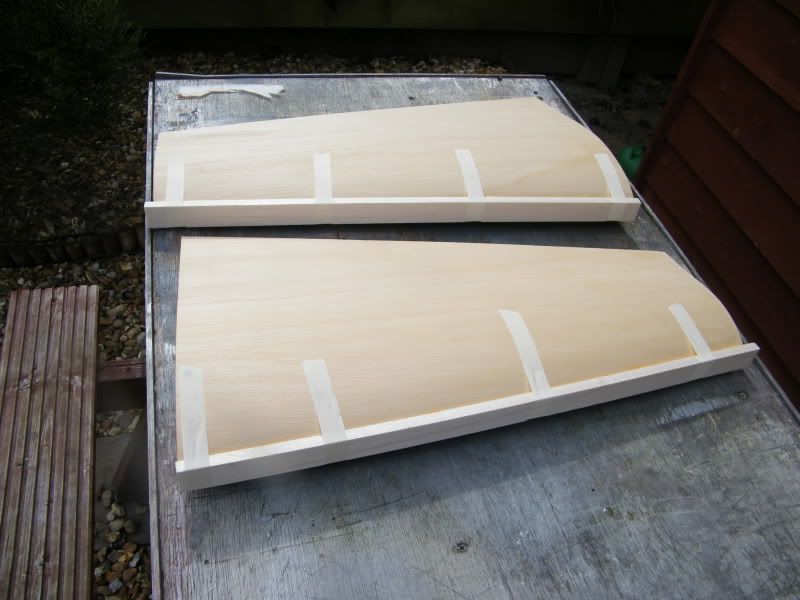
Next we jump to the centre wing section. Here we glue on the leading edge & the trailing edge. This is made up of a piece of shaped 1/8th lite ply and ¼ x 5/8 balsa. Bond the ply to the bottom of the wing with the balsa strip on top. Leave to dry.
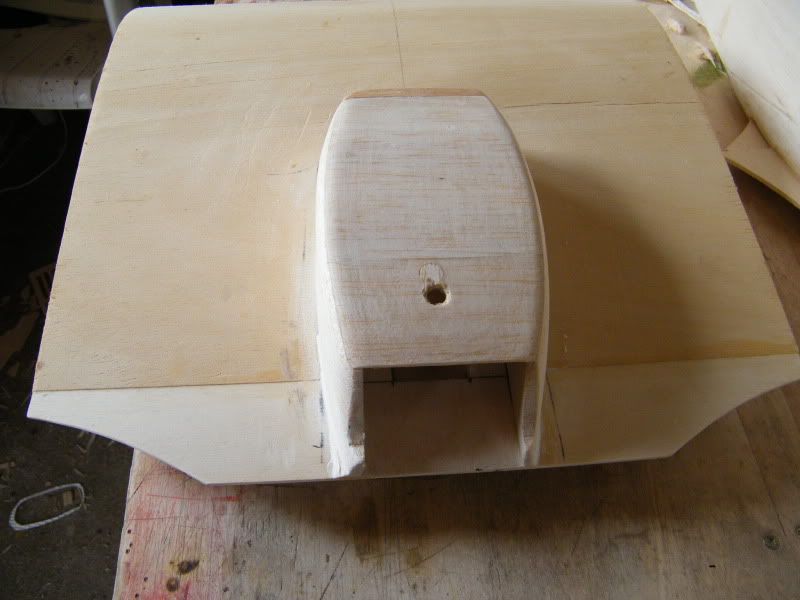
At this point I decided to take whats known as the dog house and bond on the front piece of ply. And bonded on the front and rear ply plates on the turtle deck section.
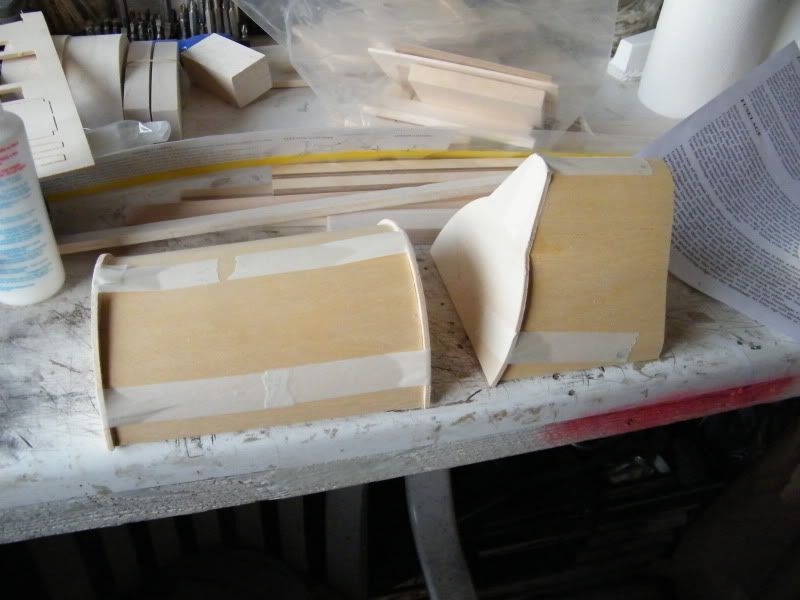
Last image is the parts just sitting in position NOT FIXED left to dry overnight to give you an idea of how she is very quickly already looking like a hurricane…..a very enjoyable build so far.
I do enjoy these warbird replica kits very much…gary
Here we see the control rods I have fed down the rear of the fuse.
The next job was take two pieces of ¼ sq balsa and bond to the fuse as longerons, they will over lap at rear. Trim them to side of the fuse.
Next I bonded on a piece of hardwood in the area the tail wheel will be fixed, and then sheeted the fuse cross grain with 1/8th balsa.
Sand the balsa sheets to create a curve to the bottom of the fuse, careful not to overdo it. Mark out where the longerons are and shape upto them.
Next we jump to the centre wing section. Here we glue on the leading edge & the trailing edge. This is made up of a piece of shaped 1/8th lite ply and ¼ x 5/8 balsa. Bond the ply to the bottom of the wing with the balsa strip on top. Leave to dry.
At this point I decided to take whats known as the dog house and bond on the front piece of ply. And bonded on the front and rear ply plates on the turtle deck section.
Last image is the parts just sitting in position NOT FIXED left to dry overnight to give you an idea of how she is very quickly already looking like a hurricane…..a very enjoyable build so far.
I do enjoy these warbird replica kits very much…gary
09-29-2010, 04:02 PM
#4
Member
Thread Starter
Join Date: Jul 2006
Location: CAMBRIDGEENGLAND, UNITED KINGDOM
Posts: 44
Likes: 0
Received 0 Likes
on
0 Posts
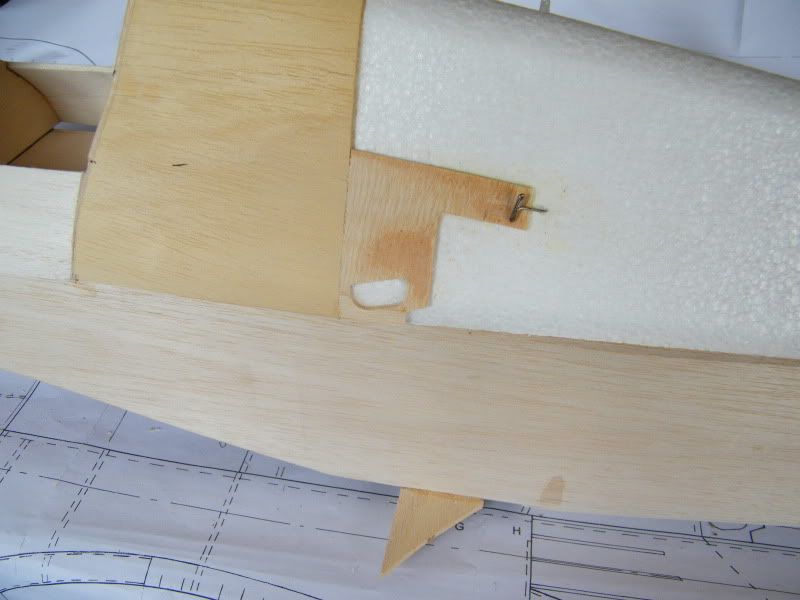
Ok at this point none of the top deck is fixed on, we need to turn the fuse upside down now and set about fitting the centre wing section.
Fit the front former which will take the wing dowel which will be fitted to the leading edge of the wing. Mark the centre line of the fuse on this.
Mark the centre line of the wing section.
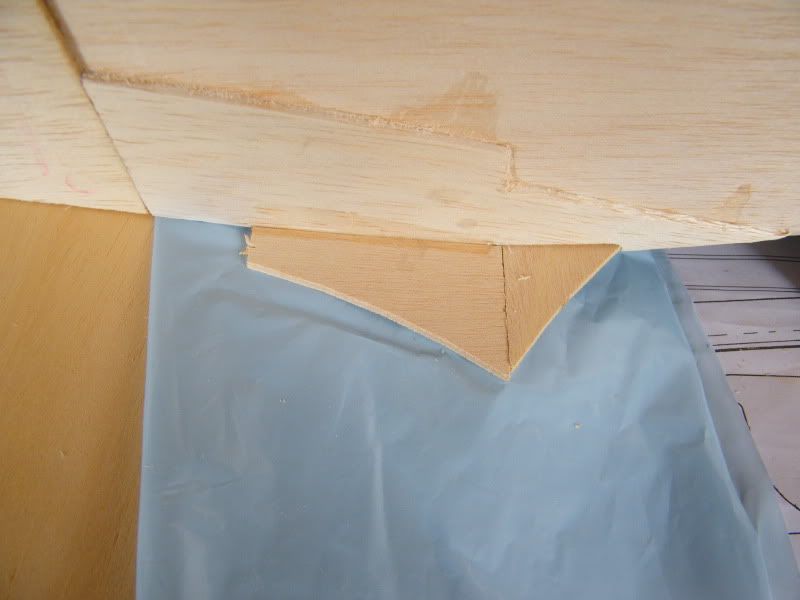
With the wing seated in place trial fit the rear piece of triangle lite ply that will be bonded to the fuse rear of the wing.
Next we will drill through the front former and into the wing to take the locating dowel.
We then drill the wing for the wing bolt. Then we take the bearer which we fix the wing bolt retainer to. I attached the wing bolt with bearer and lowered the wing into place. I made the bearer a tight fit, so I could remove the wing bolt and wing leaving it in the correct place. I then marked it and glued it permanent.
When dry fit the wing and check for alignment with fuse. Adjust wing seat with file until the wing is sitting squire.
I also applied a small ply plate over the wing bolt hole to give added strength to this area.
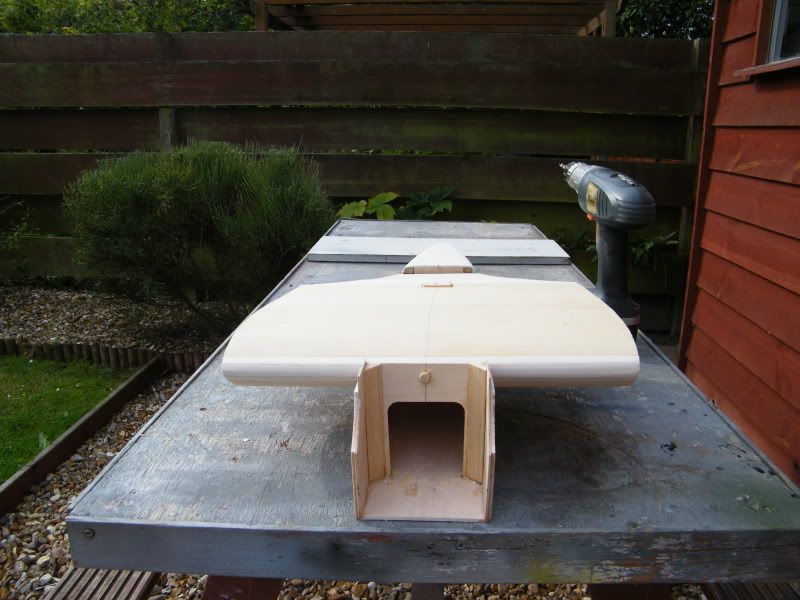
With the wing now seated and secure so it can bolt on and off we proceed onto the top deck.
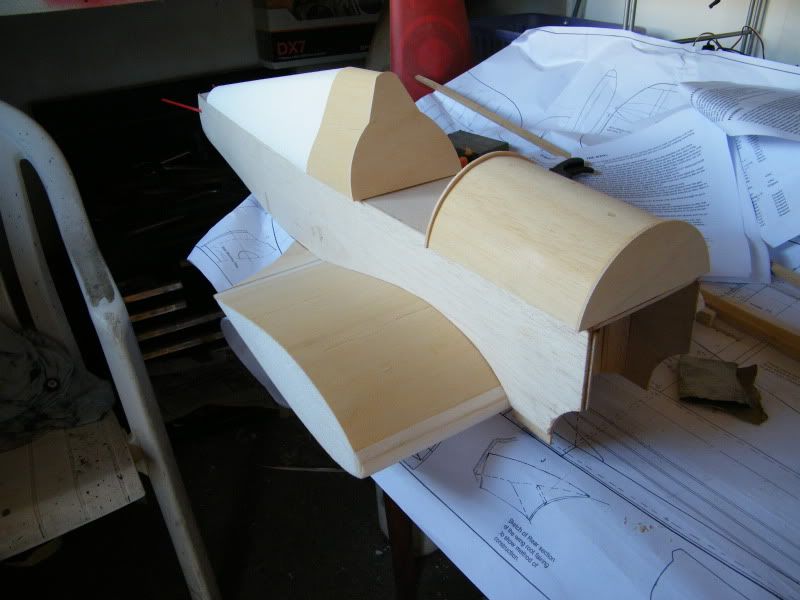
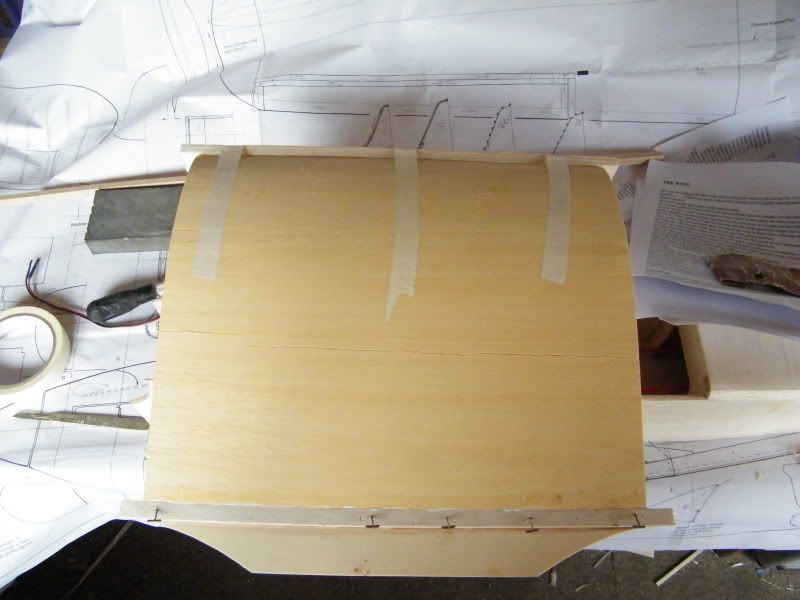
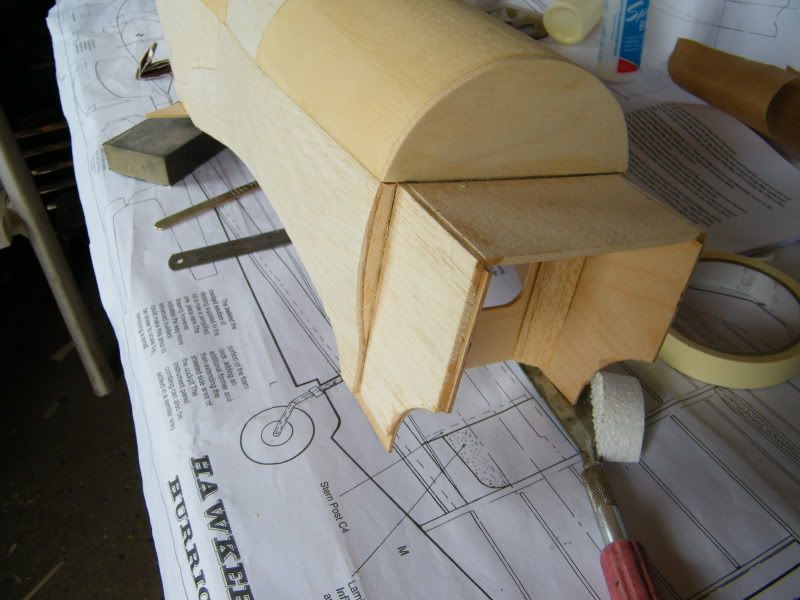
Sand of the excess wood around the top fittings the dog house and turtle deck. These are then bonded into place. They will over hang at the sides. Make equal. As we will be adding the side cheeck formers next.
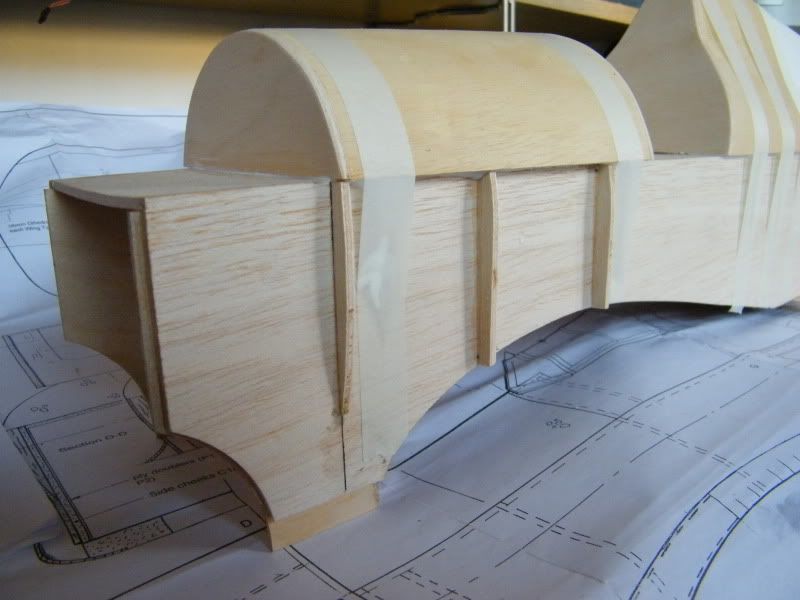
Side formers fitted and everything drying on top.
Next day when everything is dry. We go to the cockpit sides. Here I used my dremmel with a routing bit and we cut inlets to take balsa sheet. This we fit so it if flush with the sides. Sand of any excess.
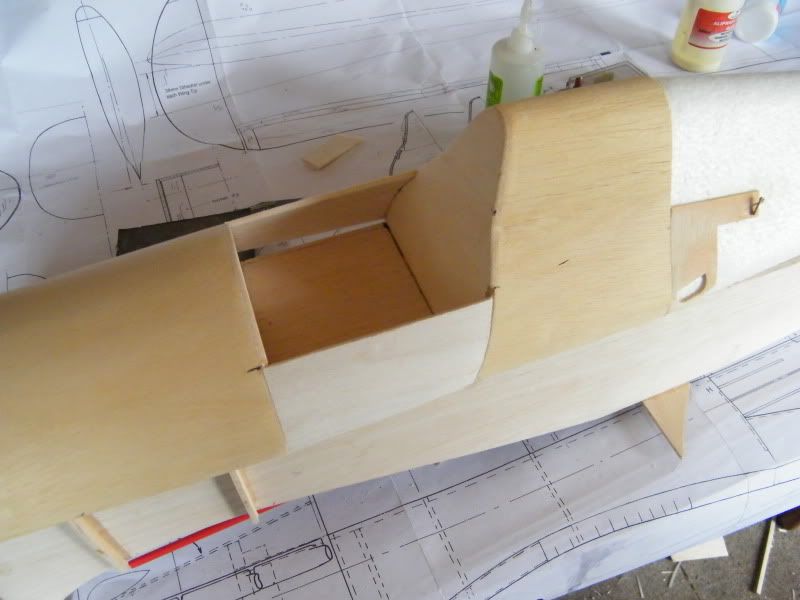
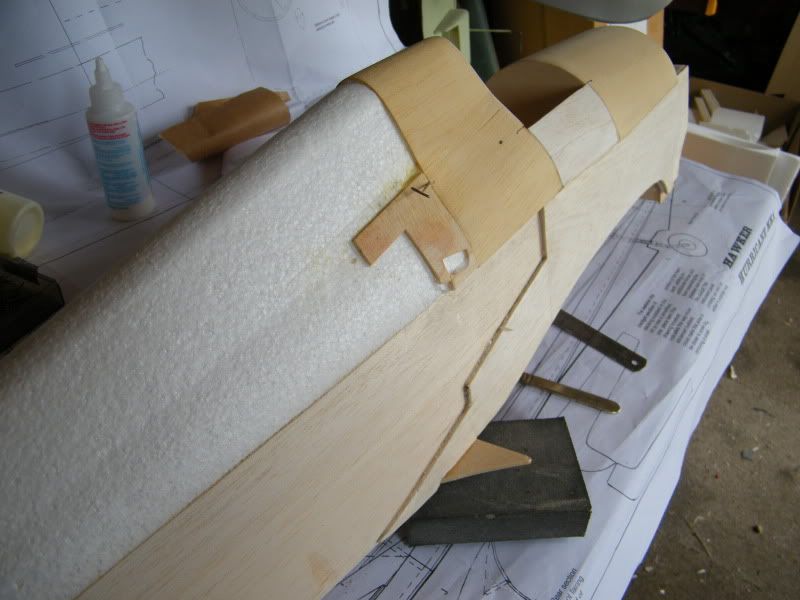
With cockpit sides complete we add the two rear sections left and right.
We then move onto sheeting the sides to get that curved shape of the hurricane.
Here you can see how the sheeting sits on the front former.
Last image shows how the sheeting finish’s this is where the stringers will come to when we fit them.
Fit the front former which will take the wing dowel which will be fitted to the leading edge of the wing. Mark the centre line of the fuse on this.
Mark the centre line of the wing section.
With the wing seated in place trial fit the rear piece of triangle lite ply that will be bonded to the fuse rear of the wing.
Next we will drill through the front former and into the wing to take the locating dowel.
We then drill the wing for the wing bolt. Then we take the bearer which we fix the wing bolt retainer to. I attached the wing bolt with bearer and lowered the wing into place. I made the bearer a tight fit, so I could remove the wing bolt and wing leaving it in the correct place. I then marked it and glued it permanent.
When dry fit the wing and check for alignment with fuse. Adjust wing seat with file until the wing is sitting squire.
I also applied a small ply plate over the wing bolt hole to give added strength to this area.
With the wing now seated and secure so it can bolt on and off we proceed onto the top deck.
Sand of the excess wood around the top fittings the dog house and turtle deck. These are then bonded into place. They will over hang at the sides. Make equal. As we will be adding the side cheeck formers next.
Side formers fitted and everything drying on top.
Next day when everything is dry. We go to the cockpit sides. Here I used my dremmel with a routing bit and we cut inlets to take balsa sheet. This we fit so it if flush with the sides. Sand of any excess.
With cockpit sides complete we add the two rear sections left and right.
We then move onto sheeting the sides to get that curved shape of the hurricane.
Here you can see how the sheeting sits on the front former.
Last image shows how the sheeting finish’s this is where the stringers will come to when we fit them.
09-29-2010, 04:03 PM
#5
Member
Thread Starter
Join Date: Jul 2006
Location: CAMBRIDGEENGLAND, UNITED KINGDOM
Posts: 44
Likes: 0
Received 0 Likes
on
0 Posts
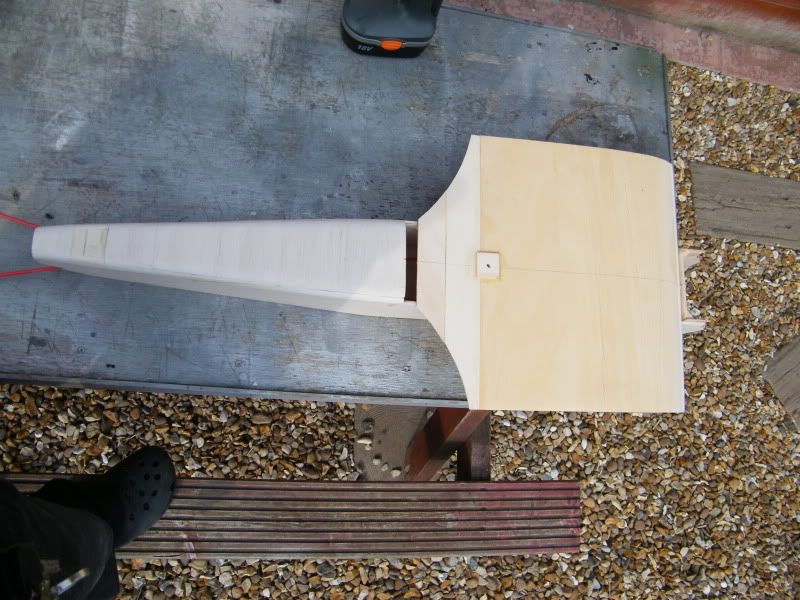
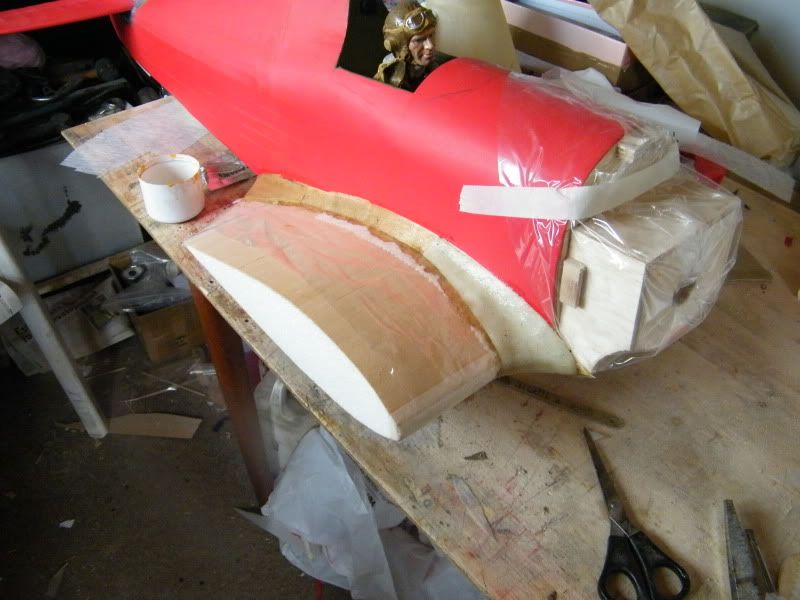
Onto the next part of the hurricane build. Place the centre section of the wing onto the fuse. Place a piece of plastic paper between the wing and fuse. We then take the 2 triangle pieces of lite ply which will support the rear of the fairing. These you bond to the fuse sides.
Once this is dry. Loosen the wing and then slide some plastic paper again between the fuse and wing on top. Ok measure the piece of triangle stock that comes with the kit.
I soaked my piece of triangle with water. Then used cyano. (Which will glue wet wood) and pushed the piece of triangle into place and shape. Held it for a few minutes until bonded. Do this both sides.
Next cut out the two front wing fairings from the plastic pressed sheet supplied.
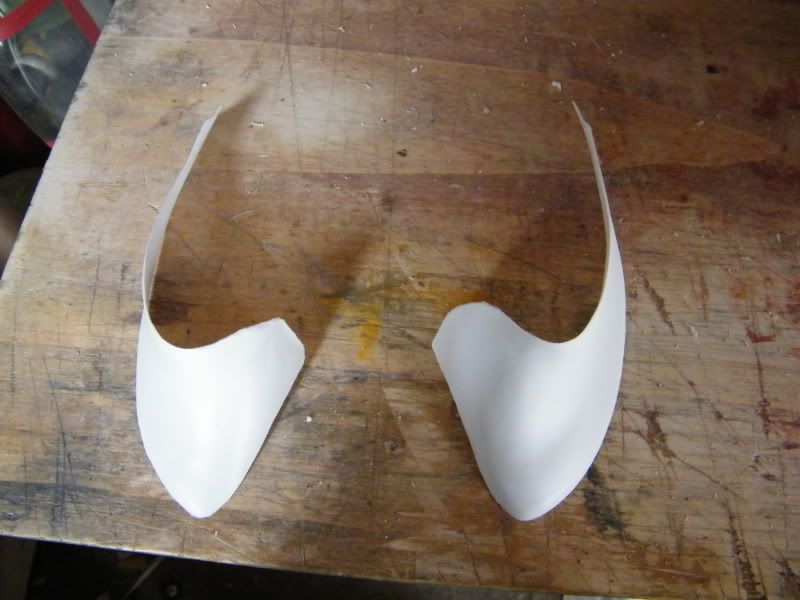
These we glue on at the front, note there will be a gap where the front pass’s where the rear of the cowling will slide in.
Now ive set out the tail plain sections ready to glue them together. Again lay a plastic sheet on your desk to avoid bonding them to it.
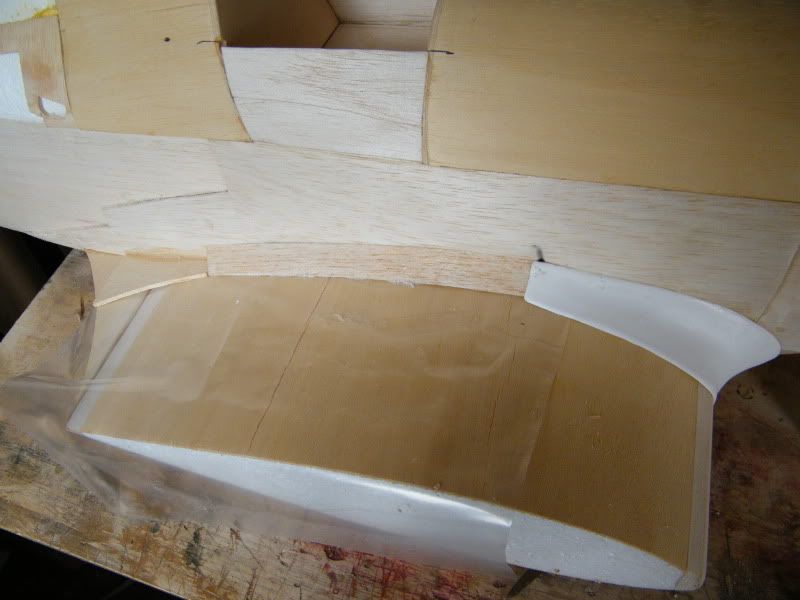
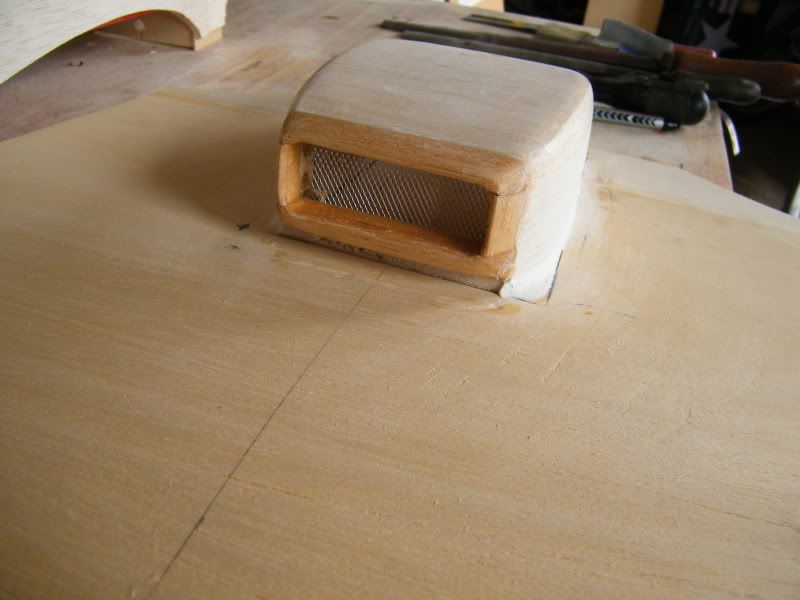
While they were drying I set about fitting the under wing radiator. This consists of a balsa sheet plate that you bond onto the bottom of the wing. Then two very wide side pieces that cut for you are then bonded on top. Next you balsa sheet the top. Once this is done I took my small sander and sanded the rad into shape, in the kit on the pressed plastic sheet is a mouth to the rad. I chose not to use that. I put alloy grill in the front of my rad. Then bonded on a nice piece of hard wood and again sanded that to shape. So here is the rad.
Note. The small hole in bottom of the rad is for the screwdriver to work the wing bolt.
Once this is dry. Loosen the wing and then slide some plastic paper again between the fuse and wing on top. Ok measure the piece of triangle stock that comes with the kit.
I soaked my piece of triangle with water. Then used cyano. (Which will glue wet wood) and pushed the piece of triangle into place and shape. Held it for a few minutes until bonded. Do this both sides.
Next cut out the two front wing fairings from the plastic pressed sheet supplied.
These we glue on at the front, note there will be a gap where the front pass’s where the rear of the cowling will slide in.
Now ive set out the tail plain sections ready to glue them together. Again lay a plastic sheet on your desk to avoid bonding them to it.
While they were drying I set about fitting the under wing radiator. This consists of a balsa sheet plate that you bond onto the bottom of the wing. Then two very wide side pieces that cut for you are then bonded on top. Next you balsa sheet the top. Once this is done I took my small sander and sanded the rad into shape, in the kit on the pressed plastic sheet is a mouth to the rad. I chose not to use that. I put alloy grill in the front of my rad. Then bonded on a nice piece of hard wood and again sanded that to shape. So here is the rad.
Note. The small hole in bottom of the rad is for the screwdriver to work the wing bolt.
09-29-2010, 04:04 PM
#6
Member
Thread Starter
Join Date: Jul 2006
Location: CAMBRIDGEENGLAND, UNITED KINGDOM
Posts: 44
Likes: 0
Received 0 Likes
on
0 Posts
A bit more work today, not much as i havnt been too good with my back & legs. but got in the workshop tonight and did this much.
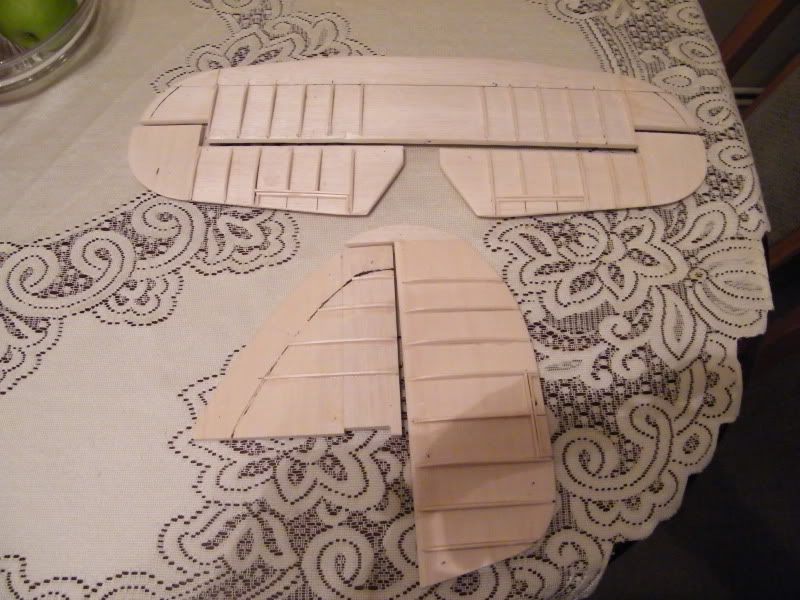
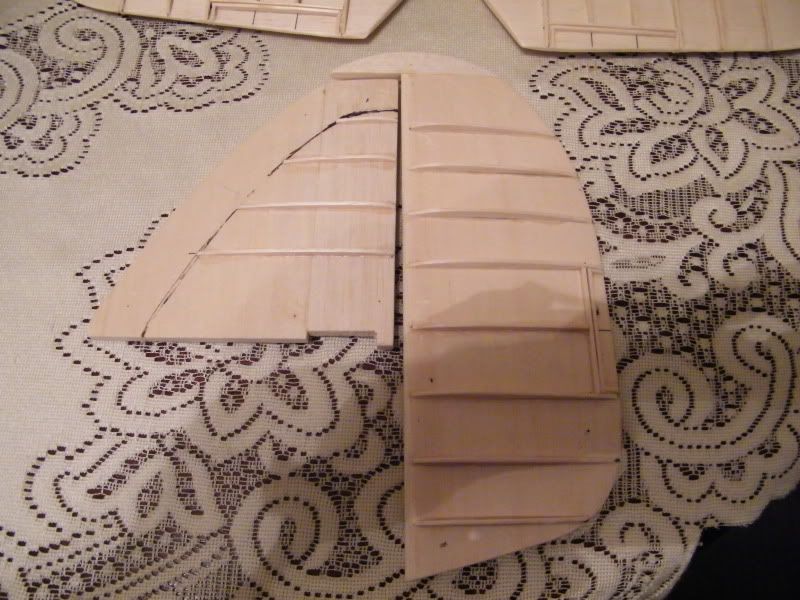
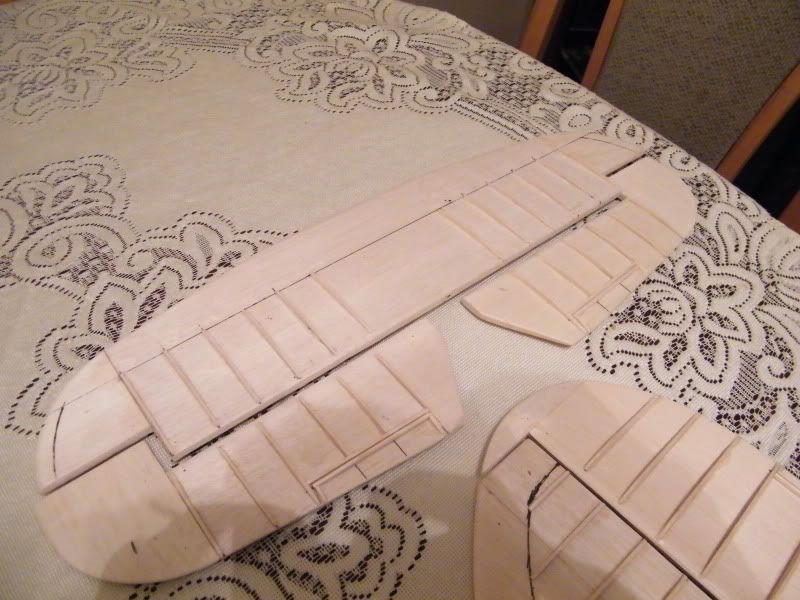
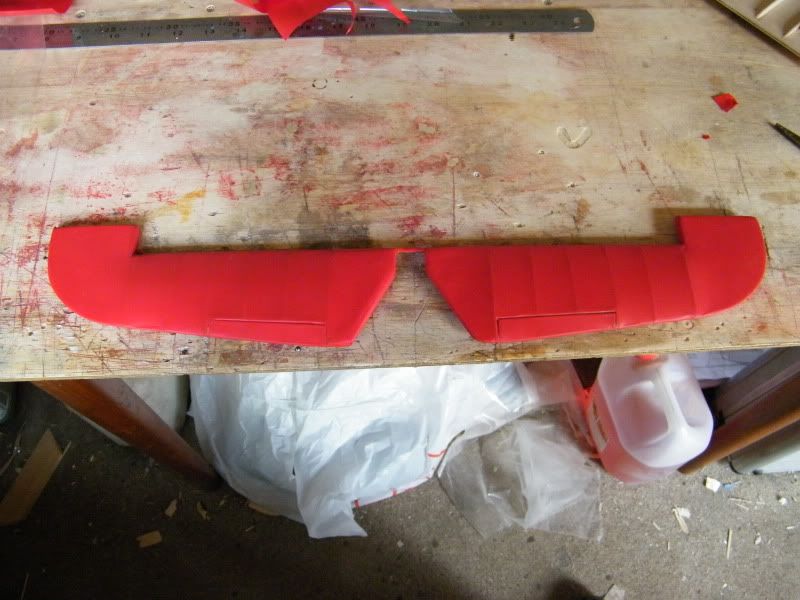
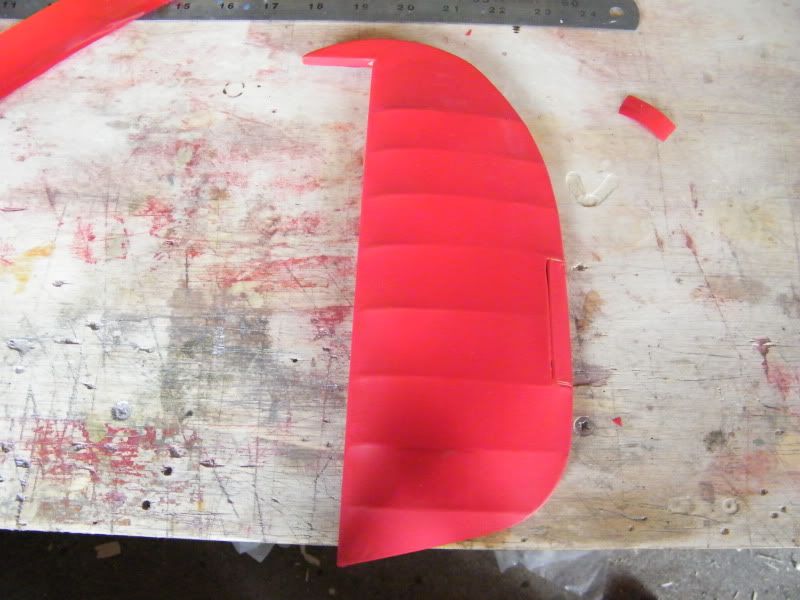
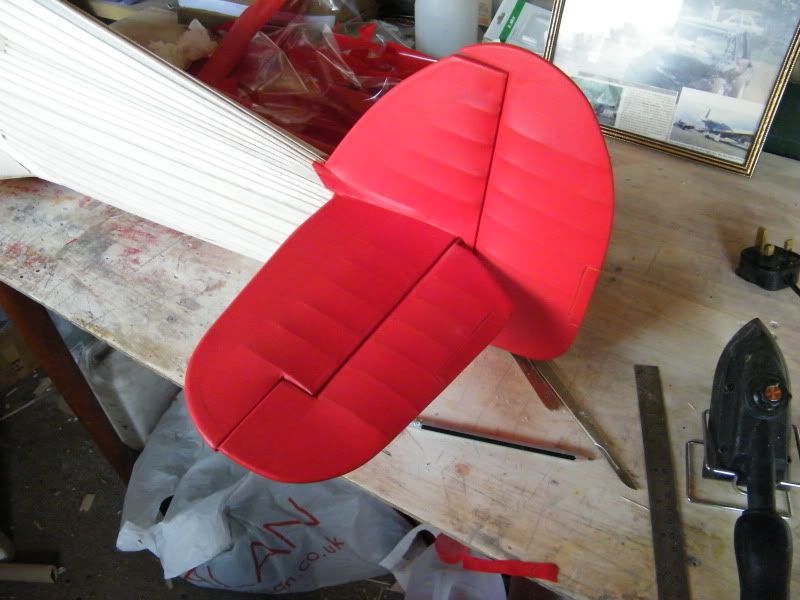
the last image i posted was the tail feathers set out in parts.
well i have glued them together. the next step as they will be covered in solatex was to rib them to give the scale look.
so i copied from the plans where all the ribs should be. i made riblets and glued them onto the tail feathers. ( note do this after you have sanded the tail feathers to shape )
once all glued on i then sanded to final shape. these will look very nice onece covered and painted.
09-29-2010, 04:06 PM
#7
Member
Thread Starter
Join Date: Jul 2006
Location: CAMBRIDGEENGLAND, UNITED KINGDOM
Posts: 44
Likes: 0
Received 0 Likes
on
0 Posts
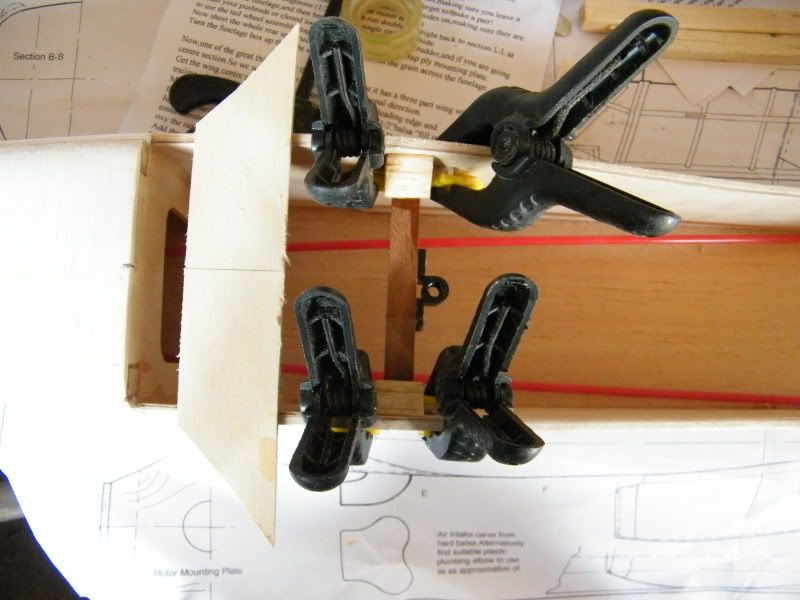
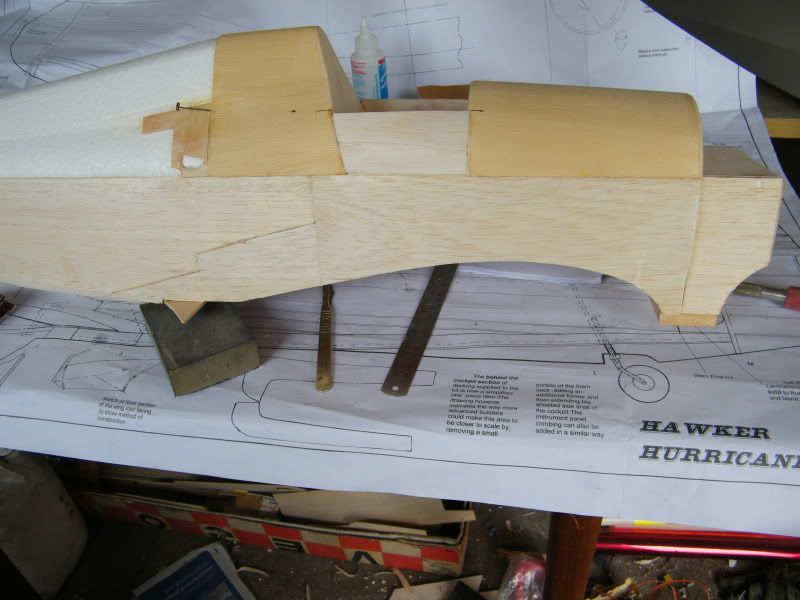
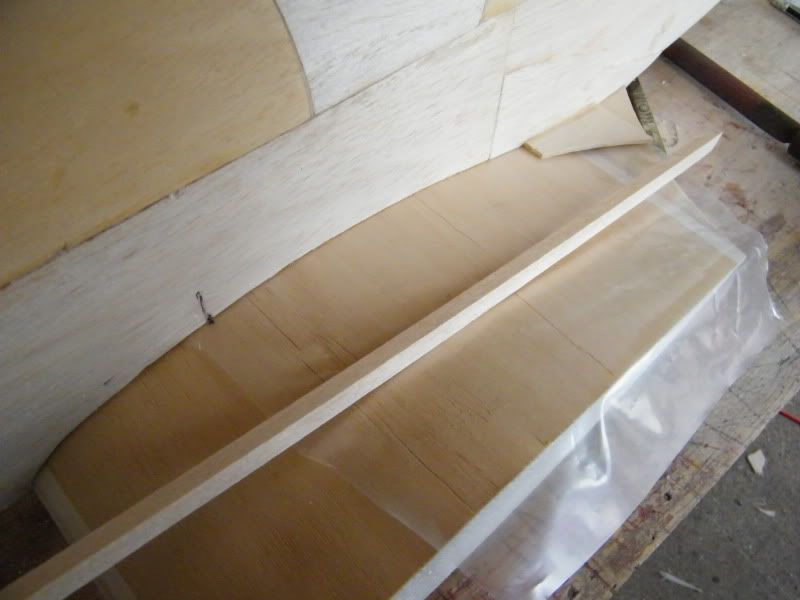
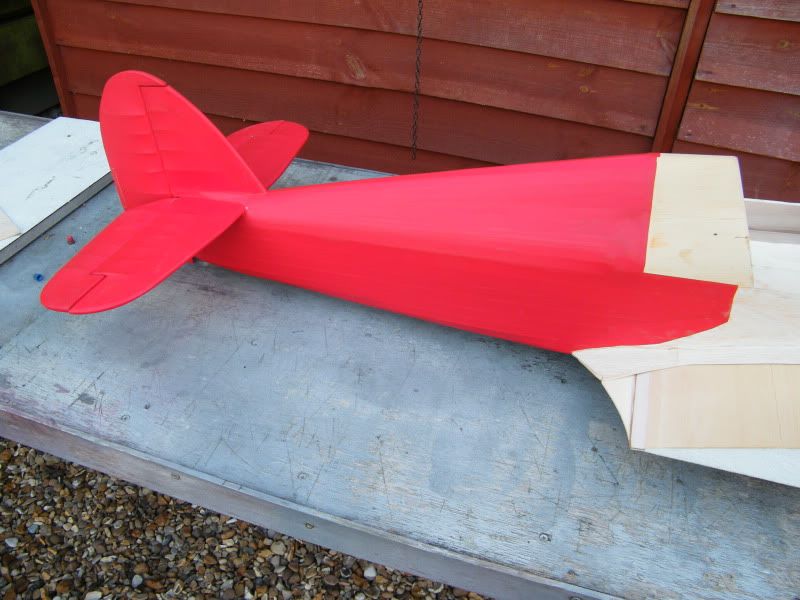
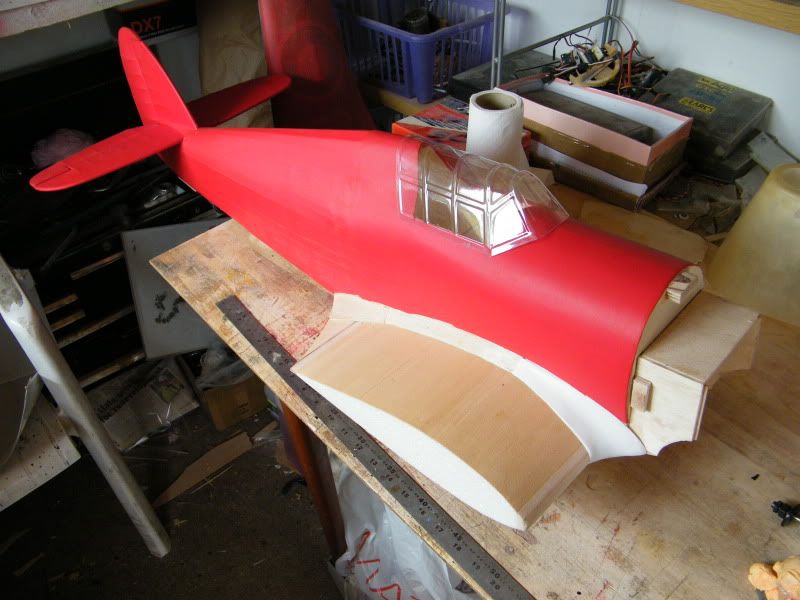
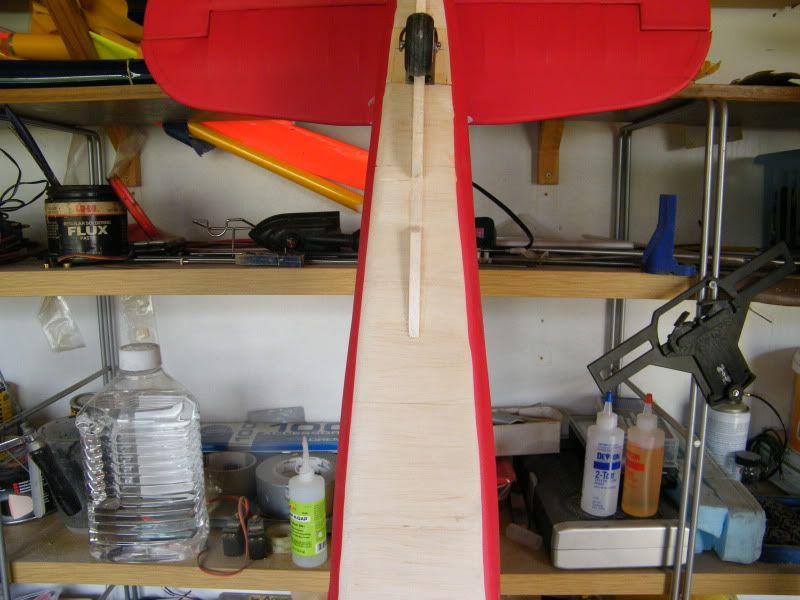
Once the tail plane was ready I bonded it into position. I also started adding the stringers down the fuse.
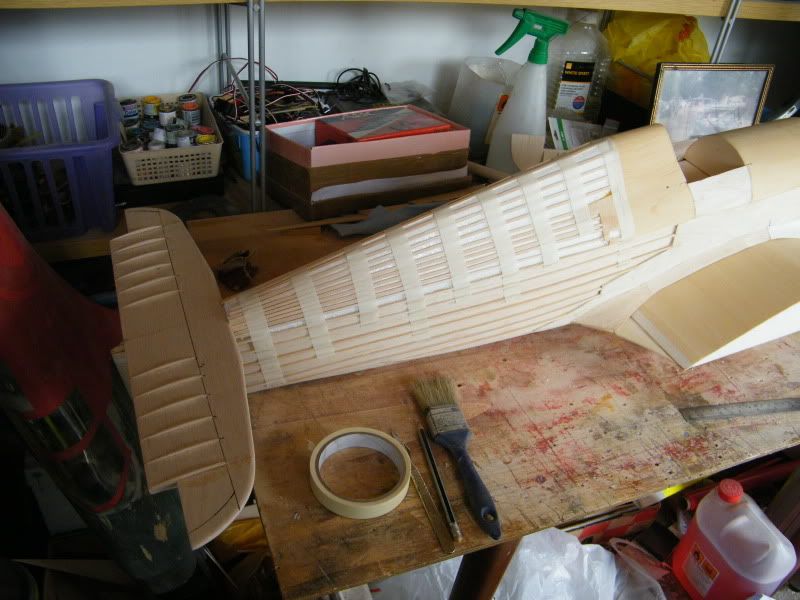
I then covered the elevator and rudder.
Next I hinged and fixed the elevator into place.
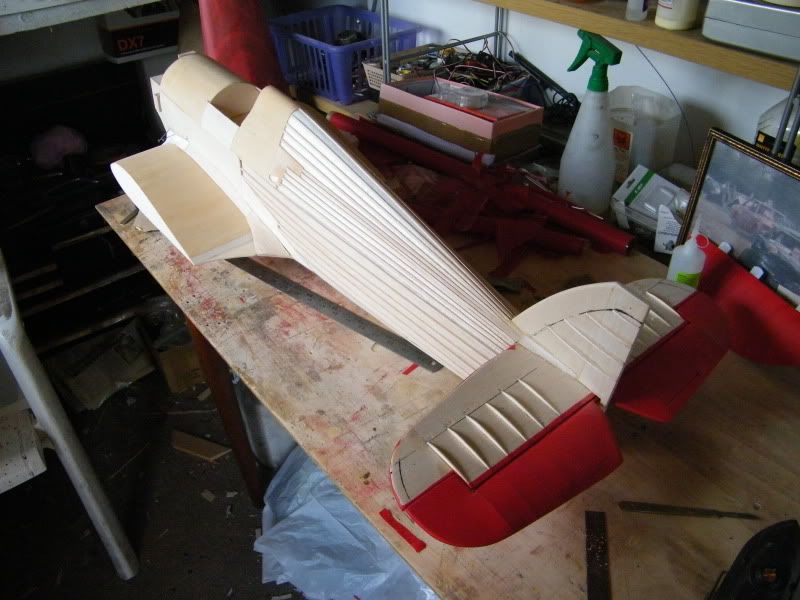
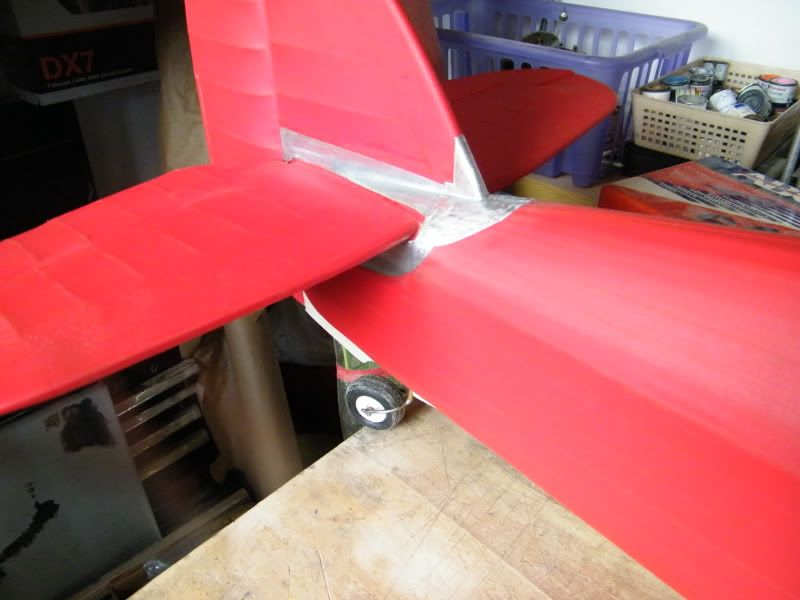
I then bonded into place the fin. There are two small pieces of triangle balsa that go either side of this. Add those and shape.
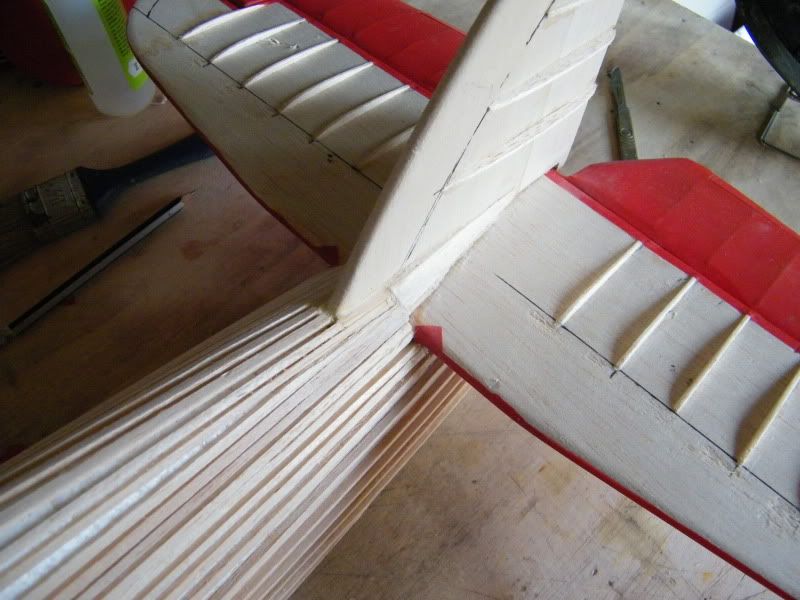
Next I fitted the rudder on hinges and then covered the tail section.
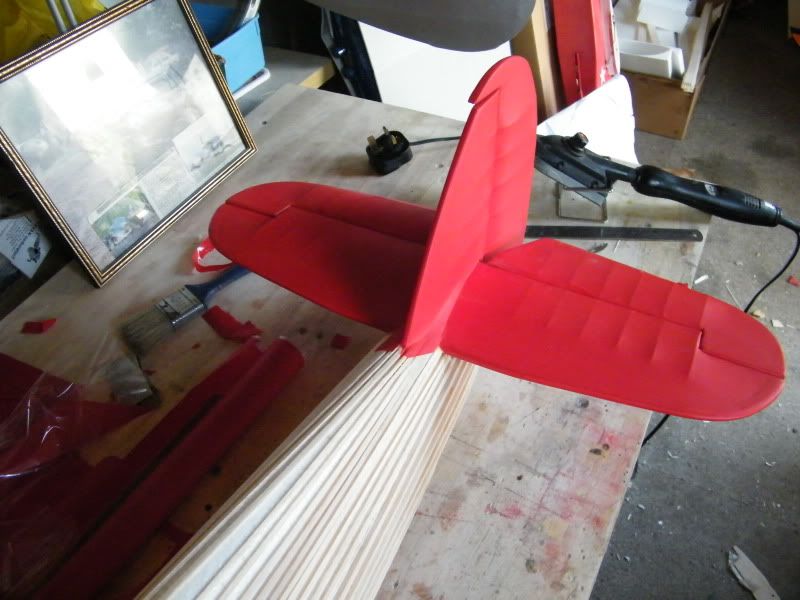
I then proceeded to cover the stringers as these left uncovered are very easy to damage.
I then covered the elevator and rudder.
Next I hinged and fixed the elevator into place.
I then bonded into place the fin. There are two small pieces of triangle balsa that go either side of this. Add those and shape.
Next I fitted the rudder on hinges and then covered the tail section.
I then proceeded to cover the stringers as these left uncovered are very easy to damage.
09-29-2010, 04:07 PM
#8
Member
Thread Starter
Join Date: Jul 2006
Location: CAMBRIDGEENGLAND, UNITED KINGDOM
Posts: 44
Likes: 0
Received 0 Likes
on
0 Posts
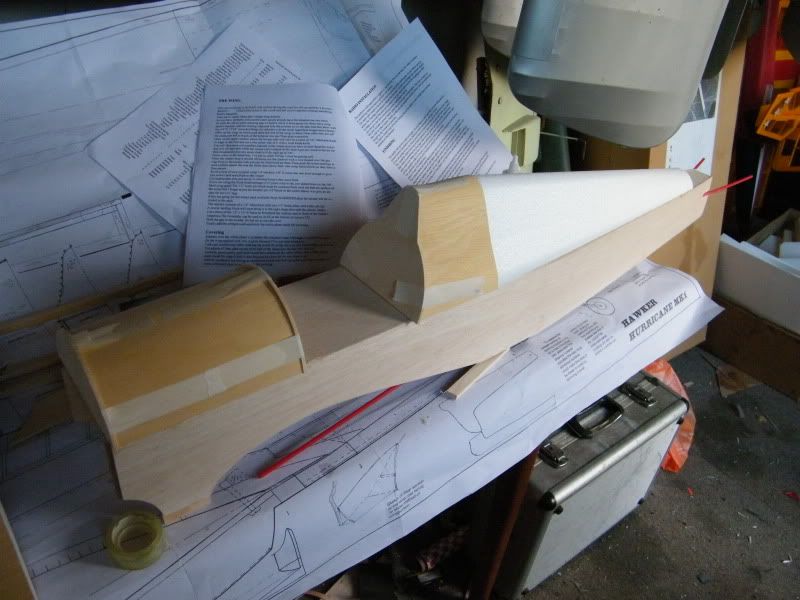
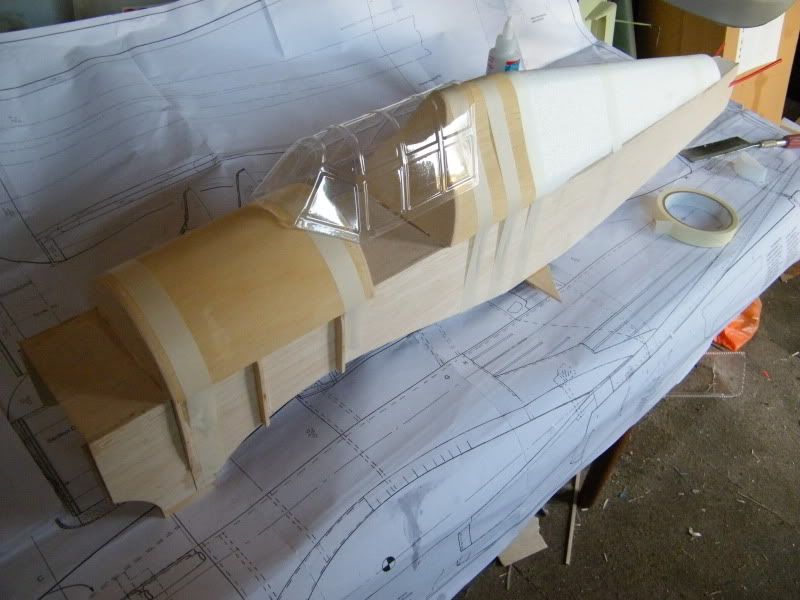
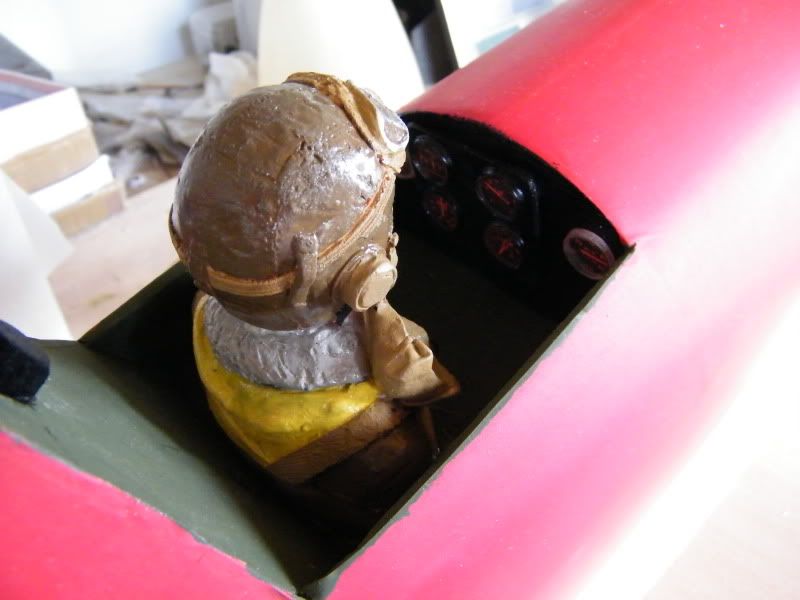
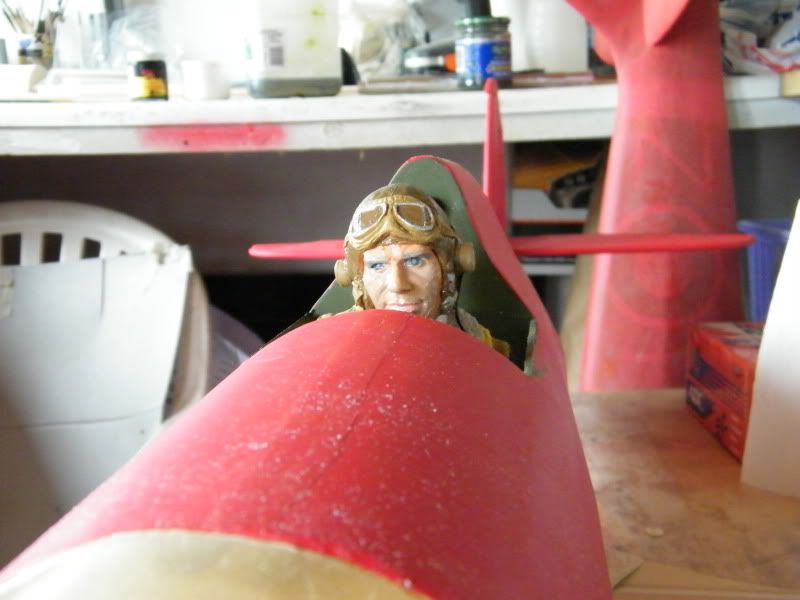
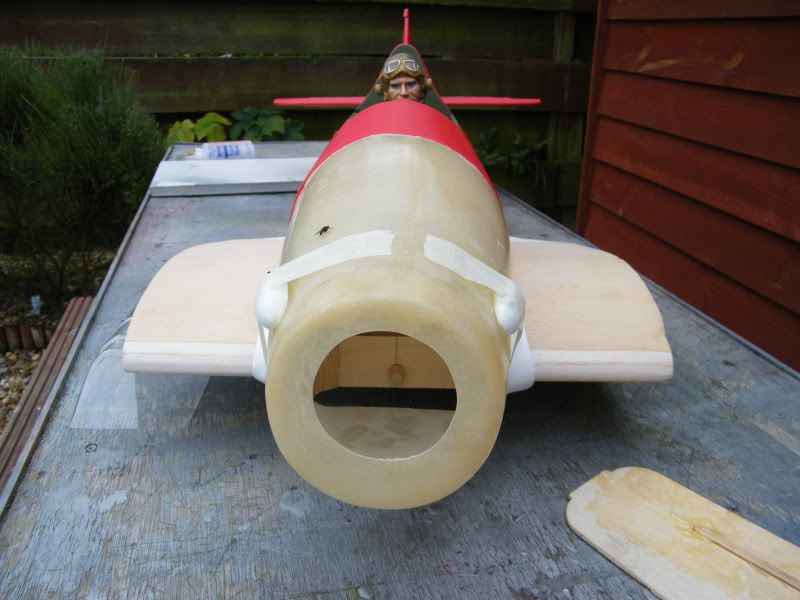
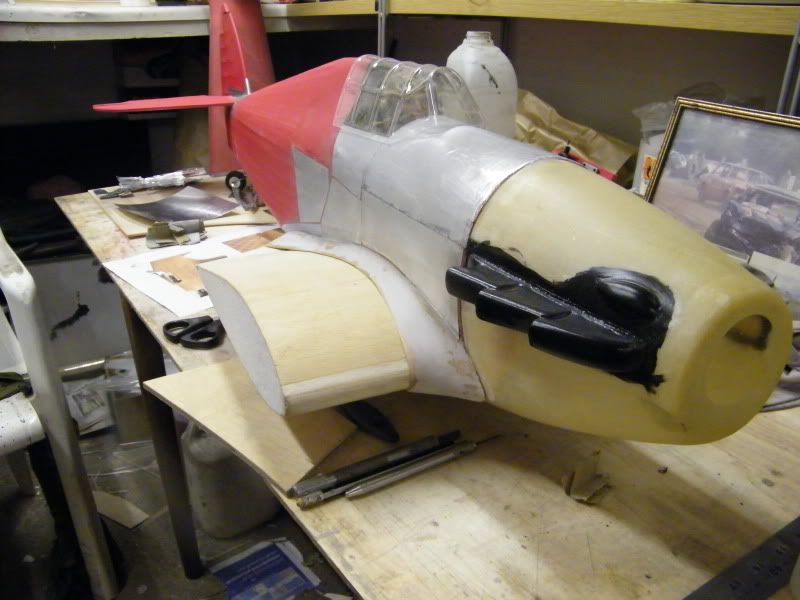
Well one of my pet hates is a model with nobody in the office. so here is biggles.
the covering was finished on the fuse too.
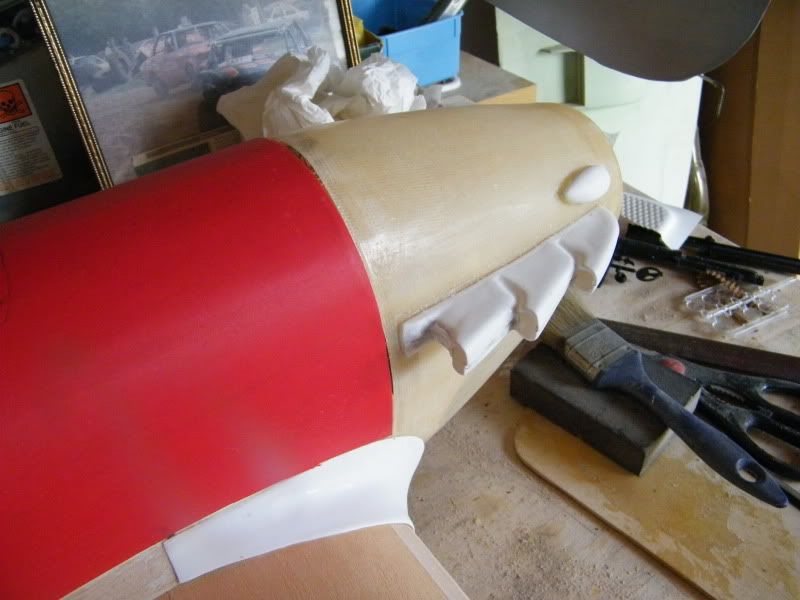
next i added the two nose blisters which come on the pressed plastic sheet supplied with the kit.
next stage was o cut out the exhaust pieces from the plastic sheet. there are two half's which have to be bonded together.
once bonded i glued a piece of balsa in the back. shaped the exhaust and then glued it to the cowling both sides.


more to come soon Gary
the covering was finished on the fuse too.
next i added the two nose blisters which come on the pressed plastic sheet supplied with the kit.
next stage was o cut out the exhaust pieces from the plastic sheet. there are two half's which have to be bonded together.
once bonded i glued a piece of balsa in the back. shaped the exhaust and then glued it to the cowling both sides.
more to come soon Gary
09-29-2010, 04:09 PM
#9
Member
Thread Starter
Join Date: Jul 2006
Location: CAMBRIDGEENGLAND, UNITED KINGDOM
Posts: 44
Likes: 0
Received 0 Likes
on
0 Posts
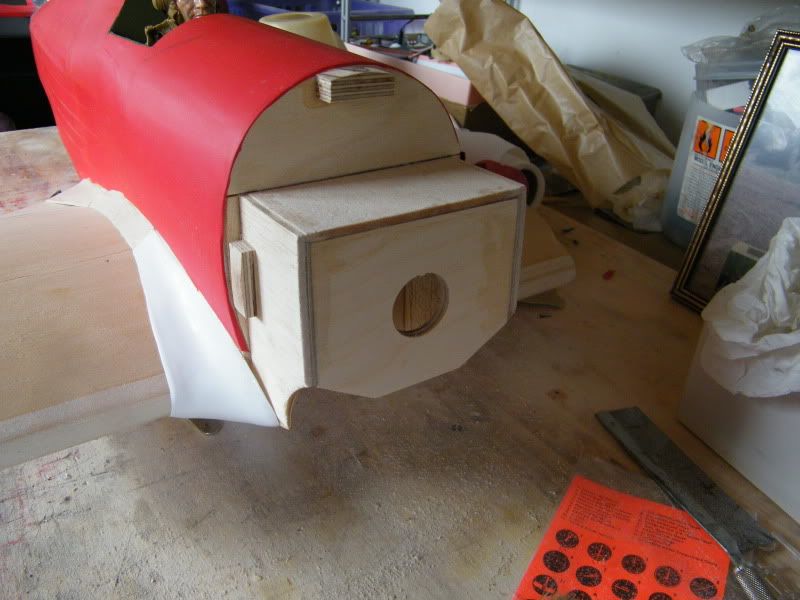
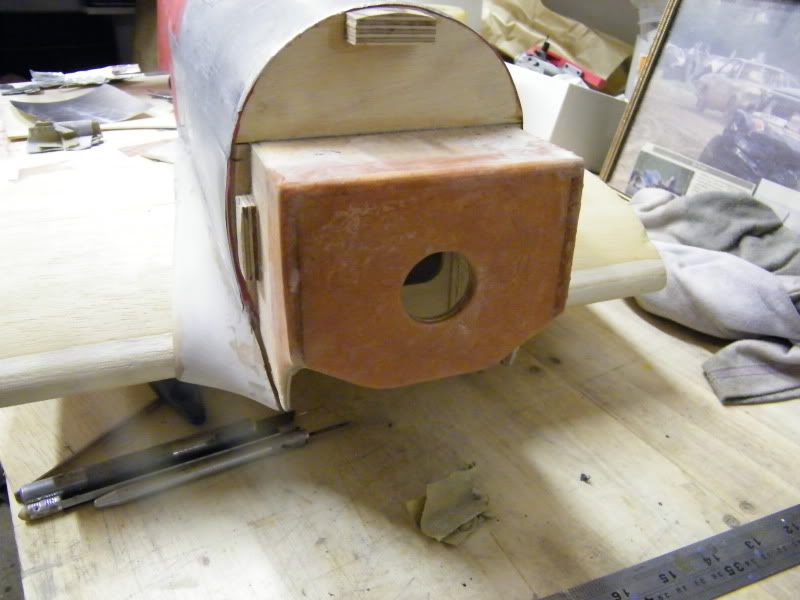
Firewall now bonded into the hurricane. i found with the sc80 engine i will be useing the forewall position is good. i used triangle stock behind the firewall to strengthen it.
[img width=533 height=400]http://i172.photobucket.com/albums/w28/garyflyer/Hurrican%20build/DSCF4133.jpg[/img]
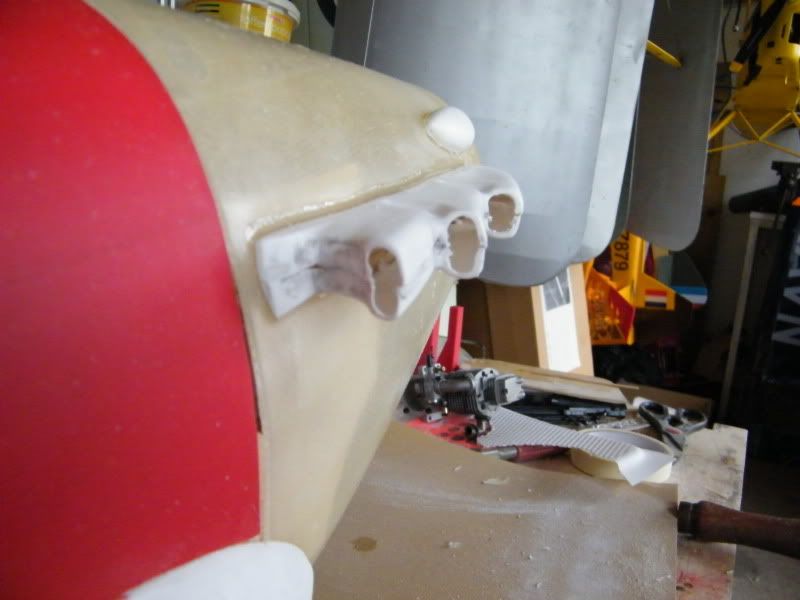
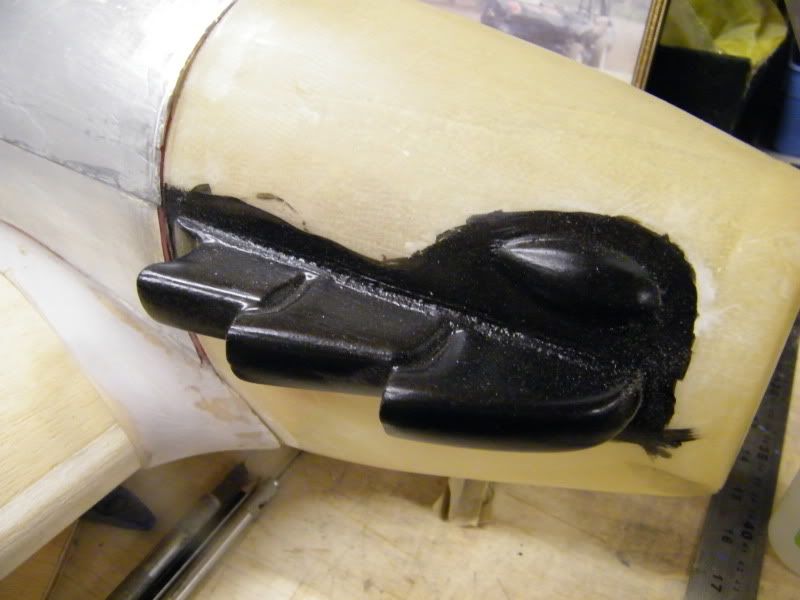
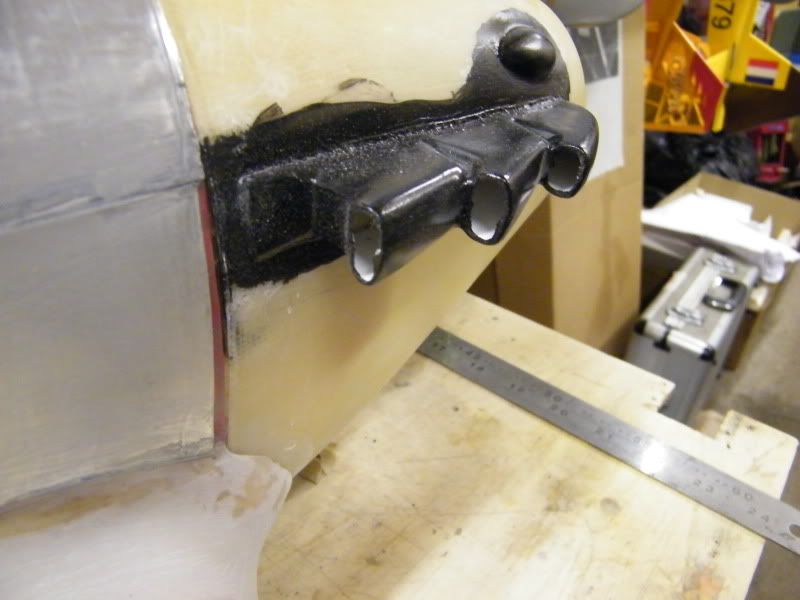
the exhaust stubbs fitted to the cowling and blisters.
[img width=533 height=400]http://i172.photobucket.com/albums/w28/garyflyer/Hurrican%20build/DSCF4132.jpg[/img]
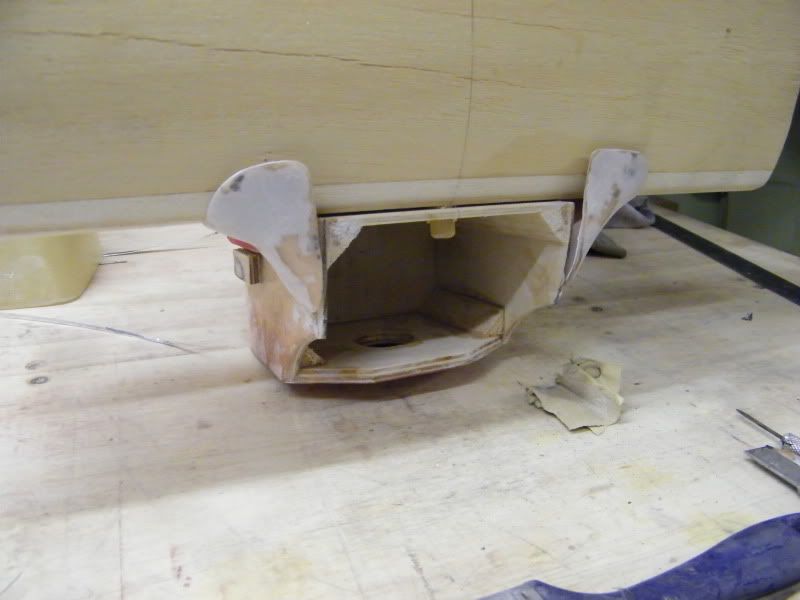
Litho plate fitted to the rear of fuse to simulate metal plateing.
[img width=533 height=400]http://i172.photobucket.com/albums/w28/garyflyer/Hurrican%20build/DSCF4131.jpg[/img]
next i chose to strengthen the wing fillets with glass clothe and resin. i covered the wing section with plastic to stop the resin sticking everything together. this can be trimmed off when dry.
[img width=533 height=400]http://i172.photobucket.com/albums/w28/garyflyer/Hurrican%20build/DSCF4134.jpg[/img]
[img width=533 height=400]http://i172.photobucket.com/albums/w28/garyflyer/Hurrican%20build/DSCF4133.jpg[/img]
the exhaust stubbs fitted to the cowling and blisters.
[img width=533 height=400]http://i172.photobucket.com/albums/w28/garyflyer/Hurrican%20build/DSCF4132.jpg[/img]
Litho plate fitted to the rear of fuse to simulate metal plateing.
[img width=533 height=400]http://i172.photobucket.com/albums/w28/garyflyer/Hurrican%20build/DSCF4131.jpg[/img]
next i chose to strengthen the wing fillets with glass clothe and resin. i covered the wing section with plastic to stop the resin sticking everything together. this can be trimmed off when dry.
[img width=533 height=400]http://i172.photobucket.com/albums/w28/garyflyer/Hurrican%20build/DSCF4134.jpg[/img]
09-29-2010, 04:12 PM
#10
Member
Thread Starter
Join Date: Jul 2006
Location: CAMBRIDGEENGLAND, UNITED KINGDOM
Posts: 44
Likes: 0
Received 0 Likes
on
0 Posts
WARNING dont make my mistake i fitted firewall upside down here . i fixed it later with a mod.
Firewall now bonded into the hurricane. i found with the sc80 engine i will be useing the forewall position is good. i used triangle stock behind the firewall to strengthen it.
the exhaust stubbs fitted to the cowling and blisters.
Litho plate fitted to the rear of fuse to simulate metal plateing.
next i chose to strengthen the wing fillets with glass clothe and resin. i covered the wing section with plastic to stop the resin sticking everything together. this can be trimmed off when dry.
09-29-2010, 04:23 PM
#12
Member
Thread Starter
Join Date: Jul 2006
Location: CAMBRIDGEENGLAND, UNITED KINGDOM
Posts: 44
Likes: 0
Received 0 Likes
on
0 Posts
today i glass clothe and resined the fairings to give them more strength. and this also helped me shape the front of the fairings where they go over the leading edge of the wing to the underside.
Once this was done i thin filled out any imperfections.
next i trimmed the front of the fairings to allow the cowl to slide on neat.
i also class clothed the firewall wrapping the clothe around the sides to help with strength.
i filled any blemish's in the exhaust stacks and blisters on the cowling. and gave them a coat of black to make sure i had got all the gaps.
Once this was all done i started to litho plate the front of the fuse where there is metal work on the original.
09-29-2010, 04:31 PM
#13
Member
Thread Starter
Join Date: Jul 2006
Location: CAMBRIDGEENGLAND, UNITED KINGDOM
Posts: 44
Likes: 0
Received 0 Likes
on
0 Posts
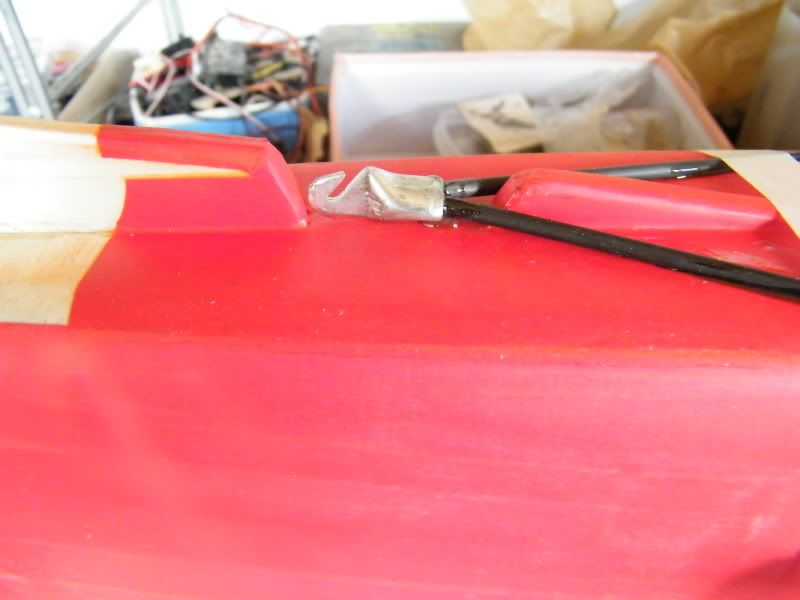
started today with bonding the leading edges onto the main wing sections.
next as this hurricane is based on the sea hurricane 7L i started to make the dummy catch hook witch sits under the tail belly.
i used to pieces of carbon rod and then make an alloy hook. set them into the fuse belly and are now drying with epoxy.

the retracts were ordered last week from mick reeves, no sign of them so i rang him and they havnt got any yet so i was told will have to wait. hopefully grahamd has a set kicking around so i can keep things moving on this model.
next as this hurricane is based on the sea hurricane 7L i started to make the dummy catch hook witch sits under the tail belly.
i used to pieces of carbon rod and then make an alloy hook. set them into the fuse belly and are now drying with epoxy.
the retracts were ordered last week from mick reeves, no sign of them so i rang him and they havnt got any yet so i was told will have to wait. hopefully grahamd has a set kicking around so i can keep things moving on this model.


