


Sig Spacewalker 1/3 scale (by rookie)
 05-26-2014, 01:58 PM
#201

Thread Starter

Join Date: Jul 2012
Location: Missouri
Posts: 1,127
Likes: 0
Received 0 Likes
on
0 Posts
Thanks Robert . I feel really good about the field joint.
Say, I have a couple of questions for you.
I believe you said you have a DLE 55.
What size fuel tank will give me 15 min flight time plus cushion ?
Also, do I use 1 battery for both ignition and receiver or a battery for each ?
Kevin
Say, I have a couple of questions for you.
I believe you said you have a DLE 55.
What size fuel tank will give me 15 min flight time plus cushion ?
Also, do I use 1 battery for both ignition and receiver or a battery for each ?
Kevin
 05-26-2014, 02:59 PM
#202


Join Date: Sep 2006
Location: The Sunshine state, when it's not raining!
Posts: 8,131
Likes: 0
Received 2 Likes
on
2 Posts
Yes, I do have a DLE 55, it's in the Ultimate. I generally fly a couple times (8-10min) before refueling with a (I believe) 24oz tank. So 24 oz for 15min with some good cushion sounds right. As for batteries, well, that can be a can of worms. But, I am running single Lithium Ion 2600mah batteries with dual leads. I install a bridge rectifier on the Ign lead and run each lead through a separate on/off switch. There are other battery chemistries as sufficient, A123's for example, but I like the measurability of the Lithium Ion.
05-26-2014, 04:30 PM
#204
Join Date: Sep 2006
Location: The Sunshine state, when it's not raining!
Posts: 8,131
Likes: 0
Received 2 Likes
on
2 Posts
The bridge rectifier reduces the volts for the Ign. Lithuim Ion is 7.4v and most Ign's are rated at 6.0v hence reducing volts. There are several voltage reguators that would do the job but the BR's are only about three buck's and easy to install. I have even used two to really reduce the volts for the telemetry on my big Pitts. I have a how to with the product # if you want I can post or send it to ya.
Last edited by acerc; 05-26-2014 at 04:42 PM.
05-26-2014, 04:36 PM
#205
Join Date: Sep 2006
Location: The Sunshine state, when it's not raining!
Posts: 8,131
Likes: 0
Received 2 Likes
on
2 Posts
Here's the link. http://pages.suddenlink.net/arlyn/rcvotagedrop.html
Takes all of five minutes to complete, and cheap in comparison to anything else.
Takes all of five minutes to complete, and cheap in comparison to anything else.
05-26-2014, 04:46 PM
#206
Thread Starter
Join Date: Jul 2012
Location: Missouri
Posts: 1,127
Likes: 0
Received 0 Likes
on
0 Posts
Thanks Robert
My electrical acumen just rose from -.9 to +3 tonight.
Or, to put it another way. My torn up empty box of 100 count crayons was just replaced with a brand new hundred count box with 3 crayons.
Kevin
My electrical acumen just rose from -.9 to +3 tonight.
Or, to put it another way. My torn up empty box of 100 count crayons was just replaced with a brand new hundred count box with 3 crayons.
Kevin
05-29-2014, 09:21 AM
#210
Kevin you have done alot of nice work. From a different perspective on the field joint I like the wedge lock design for torsional anti-racking and can be contained with 2 nylon bolts, Kinda like the connection of bed rails to post which can get a pretty good work out but never get lose if you know what I mean. Given the amount of force generated by a large elevator (make a like size elevator shape and stick it out of a window at 60 MPR and you'll get the idea real fast) this is not a 6 lb. airplane. At any rate there is no load on fasteners with the wedge lock design. just my perspective and food for thought for others considering doing this, great idea for hauling around a big plane as I have looked at the options of doing it. Thanks for the idea Kevin and I hope yours holds up well.
Leroy
Leroy
05-31-2014, 10:05 AM
#211
Thread Starter
Join Date: Jul 2012
Location: Missouri
Posts: 1,127
Likes: 0
Received 0 Likes
on
0 Posts
Thanks Leroy
I wish you were a neighbor and could come over and man handle this joint. It is solid as a rock with the rear turtle deck not on yet.
Thought it would be a good time to consider internals before proceeding further on the fuse.
Decided to determine how the servos would be mounted so there would be not messing with linkage when putting fuse together or taking it apart.
First made up a couple of servo trays from ac ply.


Mounted the tiller bar for the rudder one bay rearward from plan. Plan had tiller bar at field joint.
The spruce bar was set into the ply side. Currently it is just sitting there. It will get epoxied in place and reinforced with Gussets.
The bottom servo is rudder and the side mount is for the elevator.


Decided to reinforce the servo trays with some 4 oz fiberglass cloth to make sure they don't come apart.
The cloth would not conform well to the 90 deg corners so I waxed up some blocks to hold it down until cured.

Kevin
I wish you were a neighbor and could come over and man handle this joint. It is solid as a rock with the rear turtle deck not on yet.
Thought it would be a good time to consider internals before proceeding further on the fuse.
Decided to determine how the servos would be mounted so there would be not messing with linkage when putting fuse together or taking it apart.
First made up a couple of servo trays from ac ply.
Mounted the tiller bar for the rudder one bay rearward from plan. Plan had tiller bar at field joint.
The spruce bar was set into the ply side. Currently it is just sitting there. It will get epoxied in place and reinforced with Gussets.
The bottom servo is rudder and the side mount is for the elevator.
Decided to reinforce the servo trays with some 4 oz fiberglass cloth to make sure they don't come apart.
The cloth would not conform well to the 90 deg corners so I waxed up some blocks to hold it down until cured.
Kevin
05-31-2014, 07:03 PM
#212
Thread Starter
Join Date: Jul 2012
Location: Missouri
Posts: 1,127
Likes: 0
Received 0 Likes
on
0 Posts
Next up on the menu, Throttle and choke servo.
Made up some aluminum angle servo mounts like Vince suggested.
The throttle and the choke lever are almost on top of each other on the 55ra.


The cockpit hood slips right over and covers them up.


That is all
Kevin
Made up some aluminum angle servo mounts like Vince suggested.
The throttle and the choke lever are almost on top of each other on the 55ra.
The cockpit hood slips right over and covers them up.
That is all
Kevin
06-04-2014, 05:59 PM
#213
Thread Starter
Join Date: Jul 2012
Location: Missouri
Posts: 1,127
Likes: 0
Received 0 Likes
on
0 Posts
If you have spent much time looking for 1/3 scale pilots you will find there is not much out there.
Let me introduce you to Big Betty.
She will be my pilot. Her bust is from Light Pilots. Carv-foam will be used to make her body parts.
I will make her a fabric shirt and pants. Flesh colored Sculpy will be used for her hands. The hands will be a challenge for sure.
Meet Big Betty


The lower torso will get gorilla glued into the upper.
The existing shirt collar will get ground down so fabric shirt will lay nice.
Will probably paint the foam with wood glue to strengthen surface.


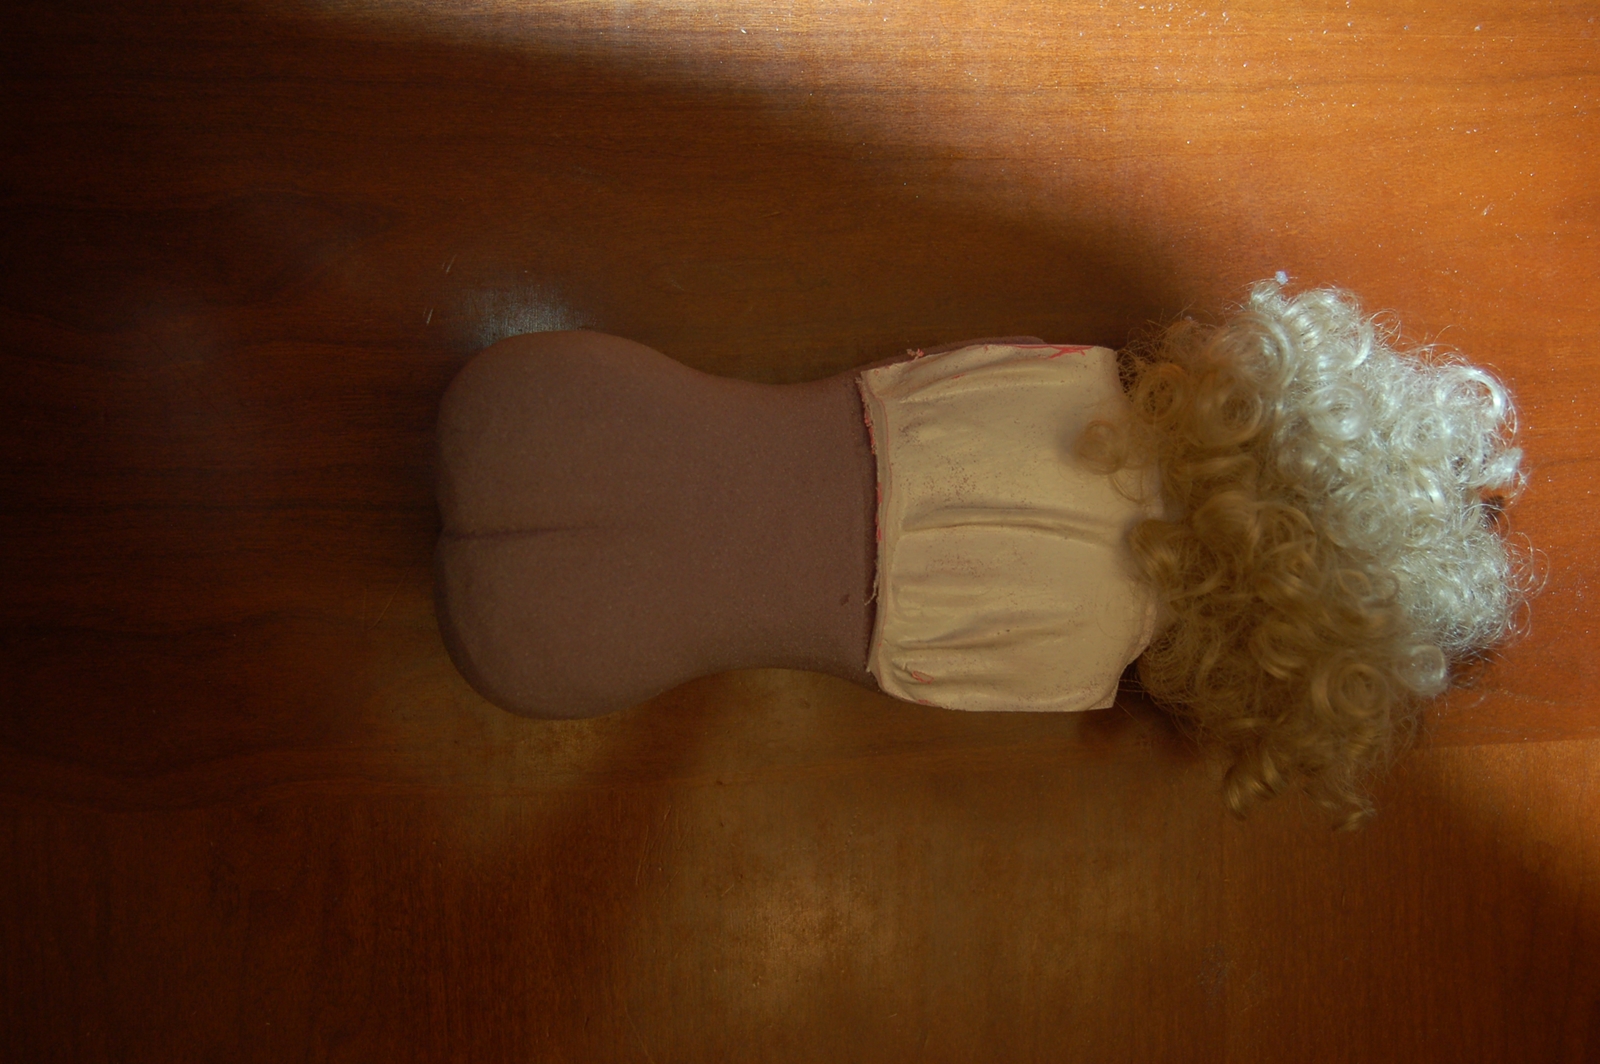

Arms, legs, hands to come.
Kevin
Let me introduce you to Big Betty.
She will be my pilot. Her bust is from Light Pilots. Carv-foam will be used to make her body parts.
I will make her a fabric shirt and pants. Flesh colored Sculpy will be used for her hands. The hands will be a challenge for sure.
Meet Big Betty
The lower torso will get gorilla glued into the upper.
The existing shirt collar will get ground down so fabric shirt will lay nice.
Will probably paint the foam with wood glue to strengthen surface.
Arms, legs, hands to come.
Kevin
Last edited by Melchizedek; 06-04-2014 at 06:05 PM.
06-07-2014, 09:36 AM
#216
Thread Starter
Join Date: Jul 2012
Location: Missouri
Posts: 1,127
Likes: 0
Received 0 Likes
on
0 Posts
Well Robert, you could do what I am doing and save a pile of money. But then again maybe not ")
A little more progress on Big Betty. I am really enjoying see her come to life. Grown man playing with dolls (don't tell anyone )
)
Paid a visit to (learn to draw . com) and got a nice drawing of a female figure. I then dropped it in a photo editor and enlarged it until the head size matched.
In ms paint you can print across a few pages if your image is bigger than a page. That is what I did then taped them together.
Then harvested the upper legs from the drawing and transferred them to the foam and band sawed both profiles out then hand shaped.
After the upper legs were shaped I then hollowed out the lower torso for said legs.
After the legs are glued to torso I will be blend them together. Right now everything is just dry fit.


Kevin
A little more progress on Big Betty. I am really enjoying see her come to life. Grown man playing with dolls (don't tell anyone
)Paid a visit to (learn to draw . com) and got a nice drawing of a female figure. I then dropped it in a photo editor and enlarged it until the head size matched.
In ms paint you can print across a few pages if your image is bigger than a page. That is what I did then taped them together.
Then harvested the upper legs from the drawing and transferred them to the foam and band sawed both profiles out then hand shaped.
After the upper legs were shaped I then hollowed out the lower torso for said legs.
After the legs are glued to torso I will be blend them together. Right now everything is just dry fit.
Kevin
06-15-2014, 01:06 PM
#217
Thread Starter
Join Date: Jul 2012
Location: Missouri
Posts: 1,127
Likes: 0
Received 0 Likes
on
0 Posts
Update
Well no work has been happening to the SW or Big Betty. I have been working though.
I had been wanting a Glider for some time now. I settled on an Albatross 2.4 from Esprit models.
It is an ARF, my first. I thought maybe an afternoon or so is all it would take to get it ready for flight.
Wrong. First the directions were minimalist, just drawings. A Glider guy in my club said.
"Well they think if you are getting a glider you know what you are doing" Well, kinda.
The drawings were very accurate just took me a lot of head scratching to get through it.
I am about 30 hours in and still a little to do, but it's almost there.
I have to say this ARF was first rate. Nothing I could find wrong on the build. Covering was flawless.
Fiberglass fuse flawless. Engineering Great. All parts present and accounted for. Wing light as a feather and strong.
Came well packaged and damage free. I was impressed. Those Czech's know what they are doing.
I will get back on the SW and Big Betty as soon as this is all tidied up.
This is what she looks like less spinner. Can't wait to learn how to soar .
.

Kevin
Well no work has been happening to the SW or Big Betty. I have been working though.
I had been wanting a Glider for some time now. I settled on an Albatross 2.4 from Esprit models.
It is an ARF, my first. I thought maybe an afternoon or so is all it would take to get it ready for flight.
Wrong. First the directions were minimalist, just drawings. A Glider guy in my club said.
"Well they think if you are getting a glider you know what you are doing" Well, kinda
.The drawings were very accurate just took me a lot of head scratching to get through it.
I am about 30 hours in and still a little to do, but it's almost there.
I have to say this ARF was first rate. Nothing I could find wrong on the build. Covering was flawless.
Fiberglass fuse flawless. Engineering Great. All parts present and accounted for. Wing light as a feather and strong.
Came well packaged and damage free. I was impressed. Those Czech's know what they are doing.
I will get back on the SW and Big Betty as soon as this is all tidied up.
This is what she looks like less spinner. Can't wait to learn how to soar
.Kevin
06-21-2014, 06:22 PM
#219
Thread Starter
Join Date: Jul 2012
Location: Missouri
Posts: 1,127
Likes: 0
Received 0 Likes
on
0 Posts
Leroy,
Took the glider up this week. She fly's beautifully, she is so graceful and relaxing to fly.
This has been a great learning experience for me. I have been using a Futaba 7c. I've had a Futaba 14sg unopened for a year now.
I got the 14sg for building war birds (yet to happen) but havn't needed it as of yet. The 14sg has glider mode witch gives a lot of featchers for gliders that the 7c lacked.
At first the 14 was Greek to me and got frustrated and I went back to the 7. Became disappointed in the 7 so forced myself to get familiar with the 14. Now I am and glad I did.
Because of the glider I am now familiar with mixes, conditions, throttle curve, flaps, butterfly (crow) and program mix. All these things are new for me.
So back to the Space Walker. Some of you may have been wondering why I have been working on Big Betty instead of the SW.
Well, Betty is going to determine cockpit size. The SW is big but the depth of the cockpit well is very limited because of the wing passing through the fuse.
The space for a 1/3 scale pilot is on the inadequate side concerning depth. I will most likely have to alter the wing at the fuse saddle to make space.
I am planning on permanently attaching the center wing section to fuse so alterations to the wing core at cockpit well will be a little more forgiving.
But this is all yet to be worked out cause Big Betty keeps powdering her nose instead of getting in her plane.
Ok, when we left of 14 days ago Betty's upper legs were joined to her torso. There were some gaps at her but and lap. So I had one of those great Ideas that didn't work out so much.
I decided to take the foam dust and make foam sparkle to fill the voids. I thought for sanding the density would be similar, problem was I chose yellow glue as the medium.
First it dried on the surface but not in the cracks. The cracks were air tight once surface dried and stayed soft. So I put Betty in the oven on warm for a few hours. Long story short,
It took a week for Betty to dry. Then I went to sand the foam spackle and it was infinitely harder than the foam until you got thru the surface, then it was gummy but dry.
I had to pull my big Idea out of poor Betty and it left huge divots in her ars and crotch. So I decided to use drywall mud to repair her.


The drywall mud sanded much better but it was harder than the foam and it was painstaking not to damage the foam.
After the drywall mud was sanded in, I coated her with a thick layer of epoxy laminating resin. This really toughened up the foam with a nice shell.
I should have coated her in epoxy before the fill, this would have made sanding much easier. Then coated the mud . Oh well, live and learn.


Betty's attire will be a blouse and her pants will be Capri and ether red or blue thongs for her feet. Capri pants stop just below the knee.
So her lower legs will be exposed. So I got some flesh toned Skulpy and began making her lower legs.


When I started Betty I had intended for her legs to have a greater bend at the knee but cockpit well limitations required her to have her legs extended more.
So put the legs in the oven to cure them. Then hollowed out miss Betty's knee to receive her lower legs.


Kevin
Took the glider up this week. She fly's beautifully, she is so graceful and relaxing to fly.
This has been a great learning experience for me. I have been using a Futaba 7c. I've had a Futaba 14sg unopened for a year now.
I got the 14sg for building war birds (yet to happen) but havn't needed it as of yet. The 14sg has glider mode witch gives a lot of featchers for gliders that the 7c lacked.
At first the 14 was Greek to me and got frustrated and I went back to the 7. Became disappointed in the 7 so forced myself to get familiar with the 14. Now I am and glad I did.
Because of the glider I am now familiar with mixes, conditions, throttle curve, flaps, butterfly (crow) and program mix. All these things are new for me.
So back to the Space Walker. Some of you may have been wondering why I have been working on Big Betty instead of the SW.
Well, Betty is going to determine cockpit size. The SW is big but the depth of the cockpit well is very limited because of the wing passing through the fuse.
The space for a 1/3 scale pilot is on the inadequate side concerning depth. I will most likely have to alter the wing at the fuse saddle to make space.
I am planning on permanently attaching the center wing section to fuse so alterations to the wing core at cockpit well will be a little more forgiving.
But this is all yet to be worked out cause Big Betty keeps powdering her nose instead of getting in her plane.
Ok, when we left of 14 days ago Betty's upper legs were joined to her torso. There were some gaps at her but and lap. So I had one of those great Ideas that didn't work out so much.
I decided to take the foam dust and make foam sparkle to fill the voids. I thought for sanding the density would be similar, problem was I chose yellow glue as the medium.
First it dried on the surface but not in the cracks. The cracks were air tight once surface dried and stayed soft. So I put Betty in the oven on warm for a few hours. Long story short,
It took a week for Betty to dry. Then I went to sand the foam spackle and it was infinitely harder than the foam until you got thru the surface, then it was gummy but dry.
I had to pull my big Idea out of poor Betty and it left huge divots in her ars and crotch. So I decided to use drywall mud to repair her.
The drywall mud sanded much better but it was harder than the foam and it was painstaking not to damage the foam.
After the drywall mud was sanded in, I coated her with a thick layer of epoxy laminating resin. This really toughened up the foam with a nice shell.
I should have coated her in epoxy before the fill, this would have made sanding much easier. Then coated the mud . Oh well, live and learn.
Betty's attire will be a blouse and her pants will be Capri and ether red or blue thongs for her feet. Capri pants stop just below the knee.
So her lower legs will be exposed. So I got some flesh toned Skulpy and began making her lower legs.
When I started Betty I had intended for her legs to have a greater bend at the knee but cockpit well limitations required her to have her legs extended more.
So put the legs in the oven to cure them. Then hollowed out miss Betty's knee to receive her lower legs.
Kevin
06-22-2014, 05:36 PM
#220
Thread Starter
Join Date: Jul 2012
Location: Missouri
Posts: 1,127
Likes: 0
Received 0 Likes
on
0 Posts
Big Betty gets an arm. Not much of an update but more work than you would think.
The legs came out great but the feet I am a little disappointed in. But they will be tucked under the dash and after thongs, those flippers wont be to bad.
Now the arms will be up front and center. It's a lot easier making an masculine arm or leg than a famine one. All the sculpy parts came out masculine at first.
I am still thinking of slimming down the thigh and knee area but undecided at this point. Well, at first the arm was a HeMan arm. Then I decided to keep shaving material off until I got what seemed appropriate for Big Betty. The hand was a challenge (duh), but since it will be wrapped around the control stick this made things much easier.
I am very satisfied with the arm and hand, on the next arm the fingers will most likely be more exposed so feel a little trepidation.
So with out further ado, Miss Betty's arm.


Kevin
The legs came out great but the feet I am a little disappointed in. But they will be tucked under the dash and after thongs, those flippers wont be to bad.
Now the arms will be up front and center. It's a lot easier making an masculine arm or leg than a famine one. All the sculpy parts came out masculine at first.
I am still thinking of slimming down the thigh and knee area but undecided at this point. Well, at first the arm was a HeMan arm. Then I decided to keep shaving material off until I got what seemed appropriate for Big Betty. The hand was a challenge (duh), but since it will be wrapped around the control stick this made things much easier.
I am very satisfied with the arm and hand, on the next arm the fingers will most likely be more exposed so feel a little trepidation.
So with out further ado, Miss Betty's arm.
Kevin
06-26-2014, 11:56 AM
#222
Thread Starter
Join Date: Jul 2012
Location: Missouri
Posts: 1,127
Likes: 0
Received 0 Likes
on
0 Posts
Thanks so much Vince.
Well I took Miss Betty down to the shop today. I needed to place her in the cockpit to find out where her left hand was to be placed. The left hand will rest on the throttle lever. Because the left arm will not be articulating the angle has to be just right. I set Miss Betty on the end of my bench and walked away. It was then that I heard a blood curdling shreeeeek!!!!!! I turned to find Miss Betty in agony on the floor all busted up. I picked her up and rushed to the emergency room and the Doc fixed her all up with that miracle invention CA.

I had epoxied the lower legs in but a chain is only as strong as its weakest link. The foam just behind the epoxy gave way. I will glass her lower leg to her knee to strengthen this. The glass will stop just above the bottom of her capri pant leg. All is good, Miss Betty on the mend.
As you can see by the next photos the space for the cockpit is not there without alteration. So I placed her on the drawing to see how much alteration is necessary.


In the next shot you will see that the wing root needs to be altered.

So I made a jig for Mr. Knees to cut the floor out. The inside of the jig is the shape of the cockpit floor. I leveled the jig to the datum line. The jig spanned larger than Mr. Knees base plate so I used some stretcher boards to cover the span for Knees to ride on. It was a drag cutting through the laminated spruce. But slowly we went.


Next I cut a 1/2 by 3/4 main wing spar to span the left and right main wing spars. This is to replace what I cut out. It was skinned with 1/8 aircraft ply to replace the 1/8 thick dihedral brace that was cut away. After this dries the four bays will be skinned with W2 shear webs. The two middle shear webs will be notched around the cockpit floor. All this will be epoxied. A 1/8 ac ply floor will then be epoxied on top of framing and to left and right wing rib. Then I can make Miss betty a seat and figure out where her left hand will end up.


Kevin
Well I took Miss Betty down to the shop today. I needed to place her in the cockpit to find out where her left hand was to be placed. The left hand will rest on the throttle lever. Because the left arm will not be articulating the angle has to be just right. I set Miss Betty on the end of my bench and walked away. It was then that I heard a blood curdling shreeeeek!!!!!! I turned to find Miss Betty in agony on the floor all busted up. I picked her up and rushed to the emergency room and the Doc fixed her all up with that miracle invention CA.
I had epoxied the lower legs in but a chain is only as strong as its weakest link. The foam just behind the epoxy gave way. I will glass her lower leg to her knee to strengthen this. The glass will stop just above the bottom of her capri pant leg. All is good, Miss Betty on the mend.
As you can see by the next photos the space for the cockpit is not there without alteration. So I placed her on the drawing to see how much alteration is necessary.
In the next shot you will see that the wing root needs to be altered.
So I made a jig for Mr. Knees to cut the floor out. The inside of the jig is the shape of the cockpit floor. I leveled the jig to the datum line. The jig spanned larger than Mr. Knees base plate so I used some stretcher boards to cover the span for Knees to ride on. It was a drag cutting through the laminated spruce. But slowly we went.
Next I cut a 1/2 by 3/4 main wing spar to span the left and right main wing spars. This is to replace what I cut out. It was skinned with 1/8 aircraft ply to replace the 1/8 thick dihedral brace that was cut away. After this dries the four bays will be skinned with W2 shear webs. The two middle shear webs will be notched around the cockpit floor. All this will be epoxied. A 1/8 ac ply floor will then be epoxied on top of framing and to left and right wing rib. Then I can make Miss betty a seat and figure out where her left hand will end up.
Kevin
06-27-2014, 09:03 PM
#223
I have never seen a guy go to such lengths to put a woman pilot in a plane, hope you put her hair in a pony tail when she flies it, ha ha, she'll never see where shes going. Kinda cool, maybe you can turn her imto a Patty Wagstaff stunt girl.
Leroy
Leroy
06-28-2014, 08:43 AM
#224
Thread Starter
Join Date: Jul 2012
Location: Missouri
Posts: 1,127
Likes: 0
Received 0 Likes
on
0 Posts
Hey Leroy, Nice to hear from you.
Any man would go to great lengths for this woman. She is the kind of woman that will get up before dawn, plow the lower fourty acres. get back and wake up the household with bacon frying. And then if that weren't enough. She will make her man feel shinny and new. What a Woman. 
This is not your fathers Space Walker. It is your mothers Space Walker!
Speaking of the Space Walker......
Oh, Leroy. I took your advice and decided to skin the center section and first bay of outer wing panel. As I was working on the floor and pondering it all, it just made sense.
Work progressed on the floor. I went with light ply on the floor instead of ac ply.


The rear dihedral brace is fitted and epoxied in, and a floor brace is added to keep floor level and supported at that unsupported place


I will need to shim the wing saddle just a smidge when it comes time to glue the wing to the fuse.


Kevin
This is not your fathers Space Walker. It is your mothers Space Walker!
Speaking of the Space Walker......
Oh, Leroy. I took your advice and decided to skin the center section and first bay of outer wing panel. As I was working on the floor and pondering it all, it just made sense.
Work progressed on the floor. I went with light ply on the floor instead of ac ply.
The rear dihedral brace is fitted and epoxied in, and a floor brace is added to keep floor level and supported at that unsupported place
I will need to shim the wing saddle just a smidge when it comes time to glue the wing to the fuse.
Kevin