


G&L 1/5 DHC chipmunk - diary of a build.
 06-26-2014, 08:25 AM
#201


Progress is moving along. took a fraction of the time to do the second door ")
Both doors look good and I am adjusting them as I go.


I added the second of three rails to secure the cowl baffle the act as the front cowl ring. The three should do it. I will reinforce the pane when I am all done messing with the doors.

She is starting to look like a true chipmunk
TB
Both doors look good and I am adjusting them as I go.
I added the second of three rails to secure the cowl baffle the act as the front cowl ring. The three should do it. I will reinforce the pane when I am all done messing with the doors.
She is starting to look like a true chipmunk
TB
 06-26-2014, 09:34 AM
#202
Banned
This is the best 'build thread' I have ever seen.
I am still trying to figure out what is all the carbon fiber ( the black cloth ) doing on the fuselage and the canopy.
Congrat on your nice work and all the pictures.
Zor
I am still trying to figure out what is all the carbon fiber ( the black cloth ) doing on the fuselage and the canopy.
Congrat on your nice work and all the pictures.
Zor


 06-26-2014, 11:08 AM
#204
Thanks Zor, The carbon fiber on the canopy is the layup of the frame for the sliding canopy. I haven't cut it yet. The blue one over the frame is a template. The carbon fiber on the fuselage is the extensions from when I cut the fiberglass super chipmunk canopy off so I could convert to the trainer and have a clear sliding canopy.
On my first build of this kit the fuselage suffered some stress bruising where the fiberglass flexed and cracked the paint during some of the mishaps (cartwheeling, hard landings, dead sticks). I am using scraps to reinforce the inside of the fuselage being I will only have two formers, one at the wing dowels, and one at the back of the wing.
TB
Last edited by TonyBuilder; 06-26-2014 at 11:52 AM.
06-26-2014, 11:28 AM
#205
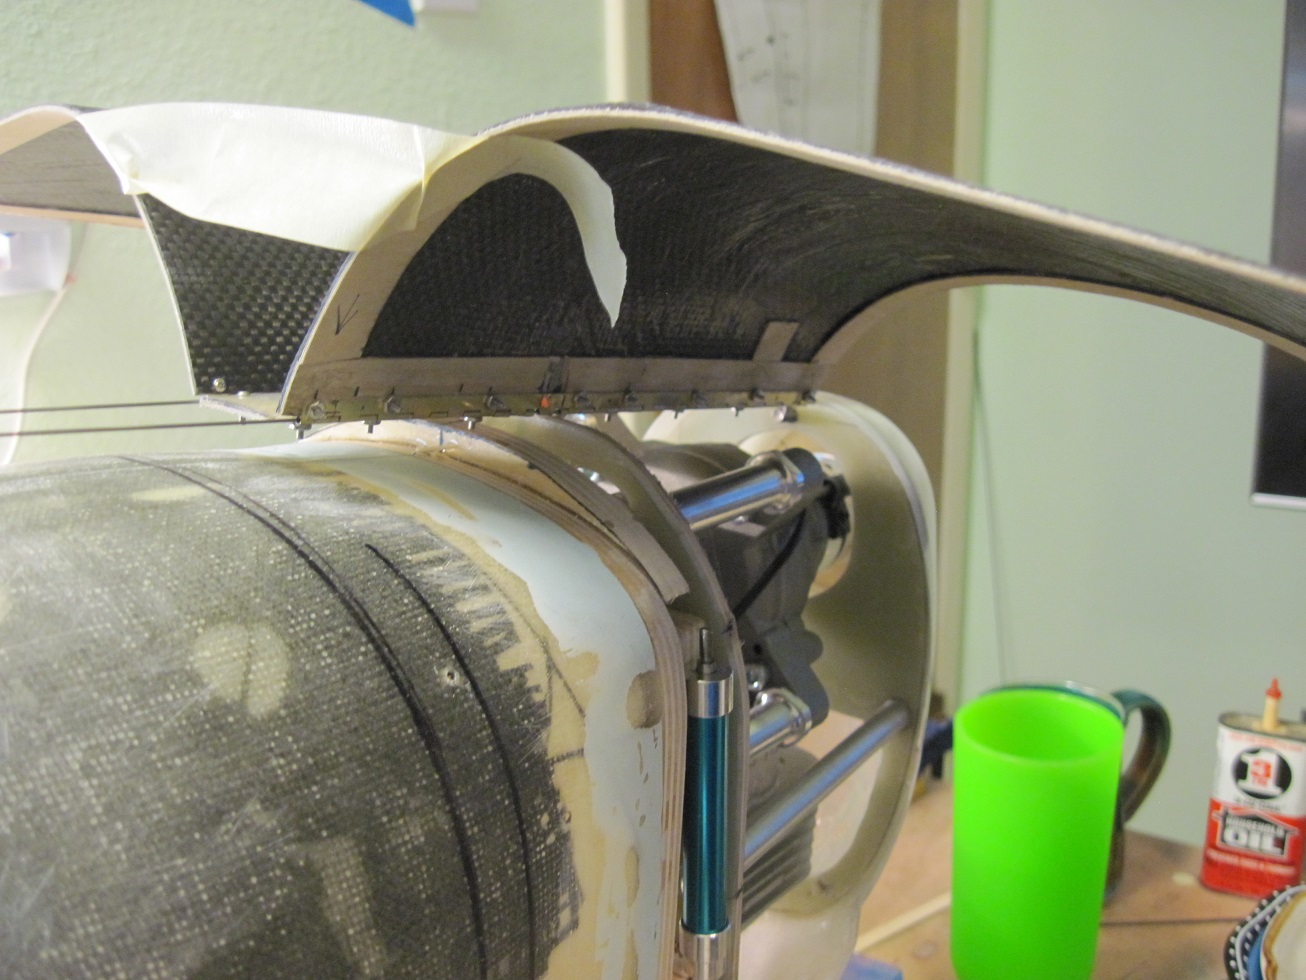
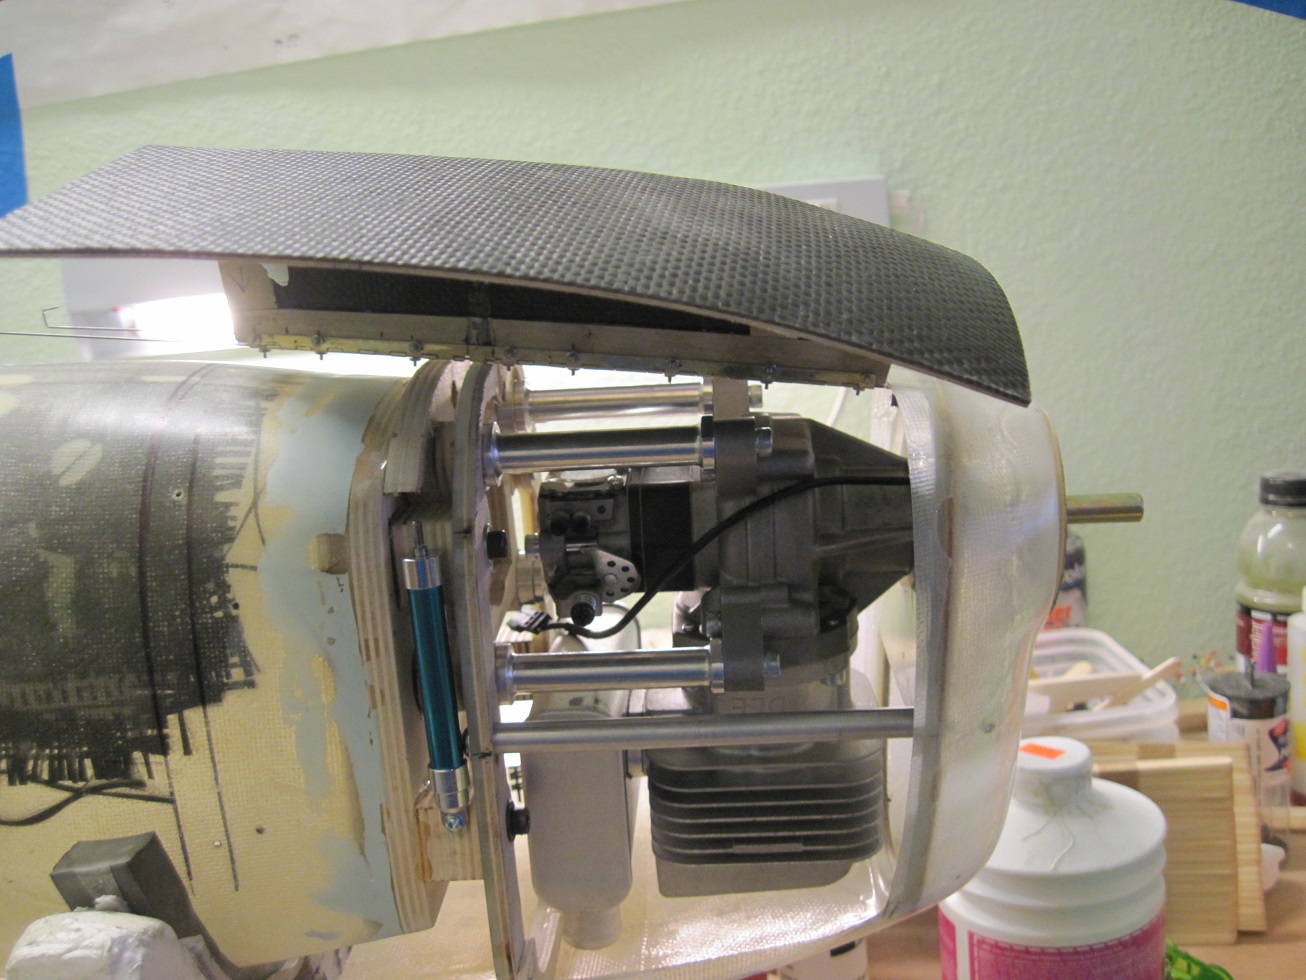
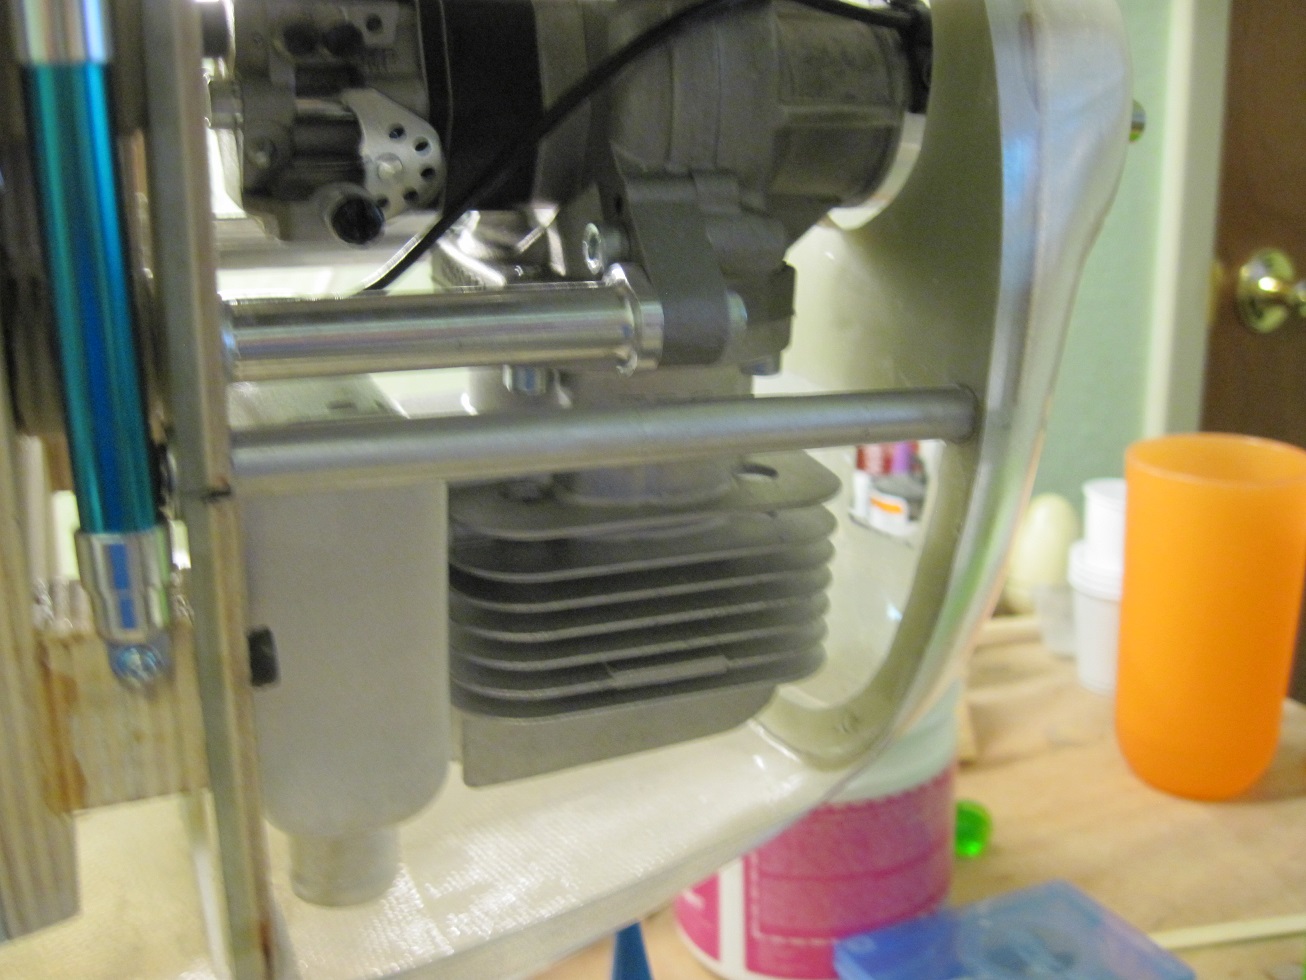
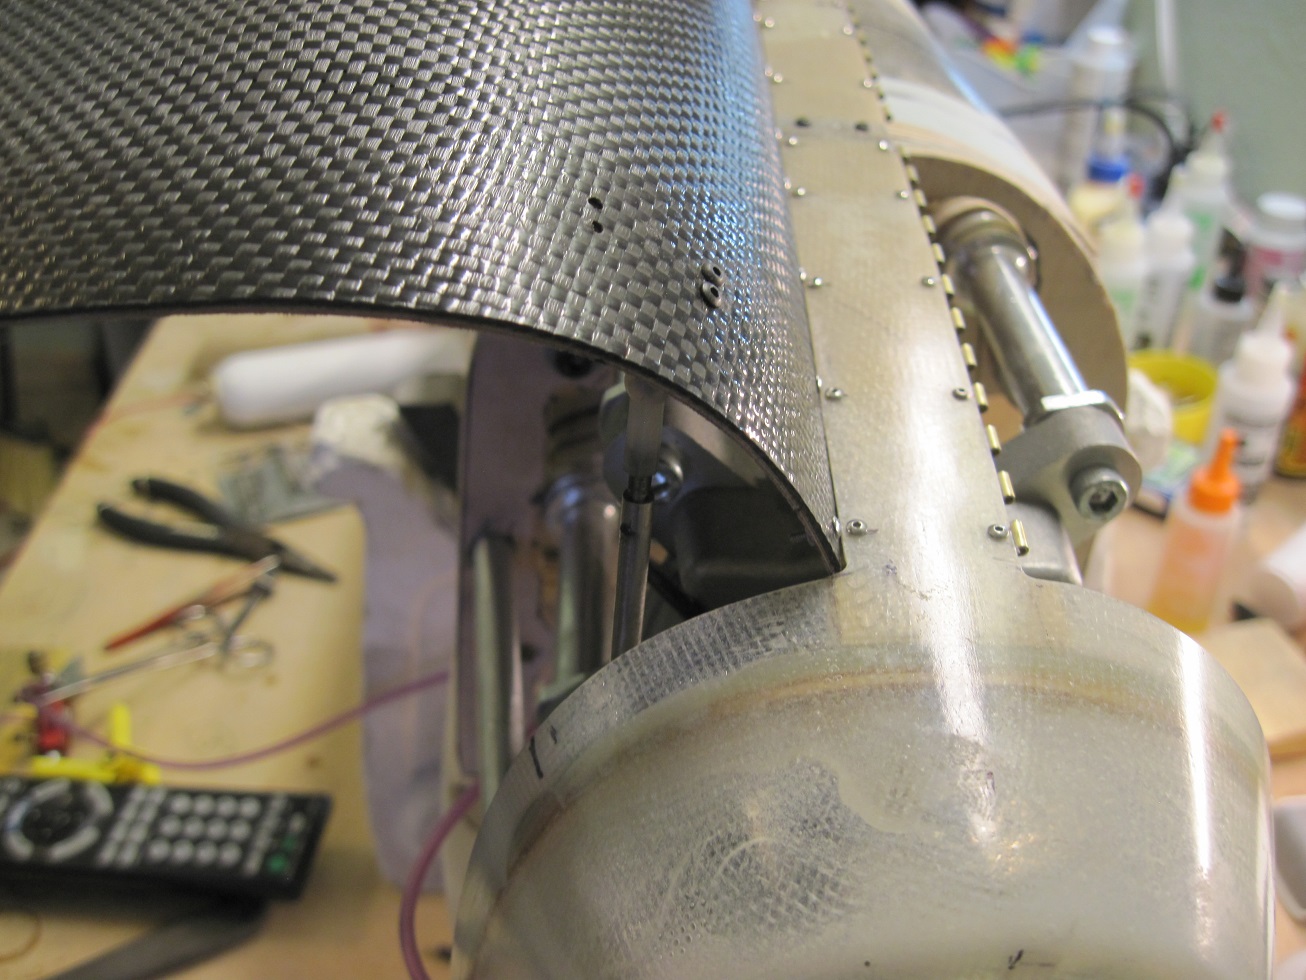
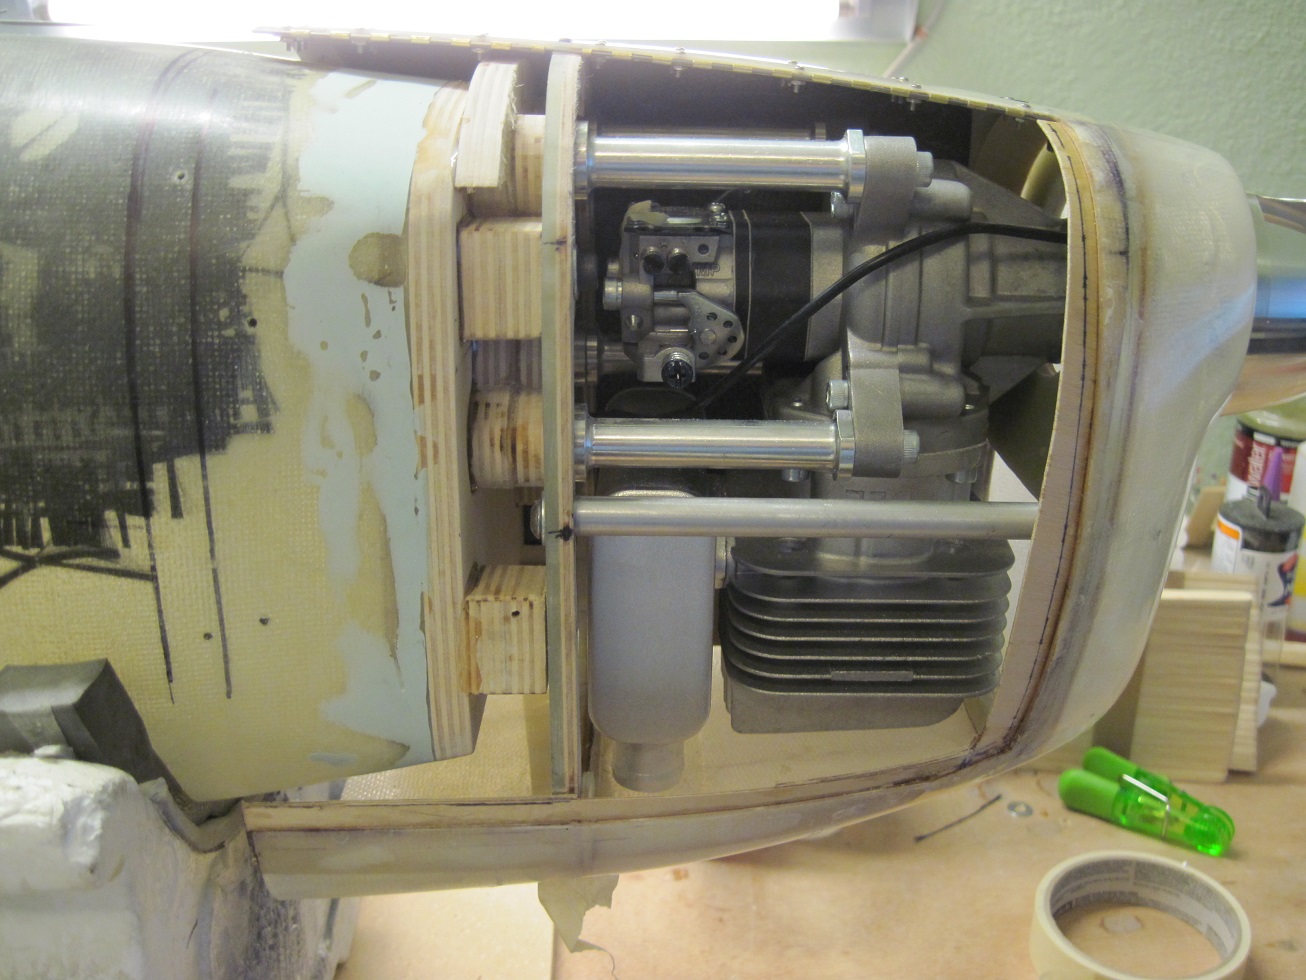
So I found where I will attach the air cylinders to open and close the doors, this is the prototype.
I put it at the front being this is where I have the most room. Also I want it to such the door closed at this area.


The cylinder is a one way spring loaded closed cylinder so it only has one air line to rout threw the cowl.
Plus I have no other use for it so why not. The only times I need to open these doors is at a show and to tune the engine, otherwise it will remain closed.


Next I need to fit the door and do all the lips and the fasteners.
Post video
http://youtu.be/3onQkkhGfR8
TB
I put it at the front being this is where I have the most room. Also I want it to such the door closed at this area.
The cylinder is a one way spring loaded closed cylinder so it only has one air line to rout threw the cowl.
Plus I have no other use for it so why not. The only times I need to open these doors is at a show and to tune the engine, otherwise it will remain closed.
Next I need to fit the door and do all the lips and the fasteners.
Post video
http://youtu.be/3onQkkhGfR8
TB
06-26-2014, 11:36 AM
#206
ACP is where I get the carbon fiber from. No I don't have an endless supply. I have used every bit I have. I just figure what I want to do on a build, gear doors, hatches and other details and go from there.
http://www.acpsales.com/5.6-oz-Carbo...ain-Weave.html
TB
Last edited by TonyBuilder; 06-26-2014 at 11:55 AM.
 06-26-2014, 12:28 PM
#211
Tony, since you probably have more experience with CF of anyone I talk to what areas do you recommend reinforcing with CF besides doors and moving canopies? What does carbon fiber provide as far as strength when applied of sheeting or balsa planking?
Last edited by FlyerInOKC; 06-26-2014 at 12:34 PM.
06-26-2014, 01:09 PM
#212
As for structurally I use it anywhere I need strength whether I layup or use rod and stick, even laminates are great.
TB
06-26-2014, 04:57 PM
#213
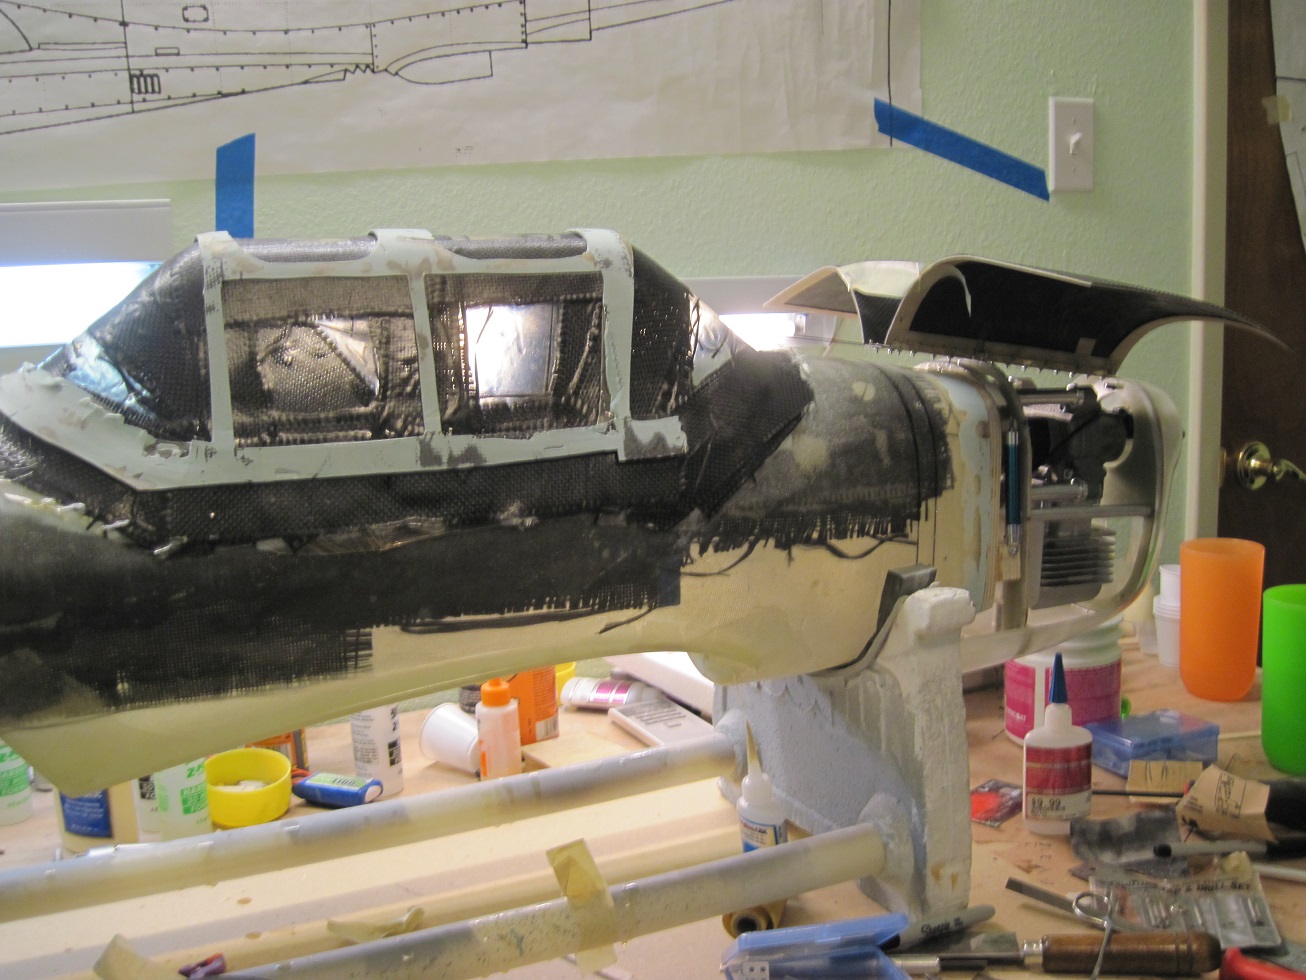
Today was a good day. I feel like I am over the hump and the rest is all down hill from here.
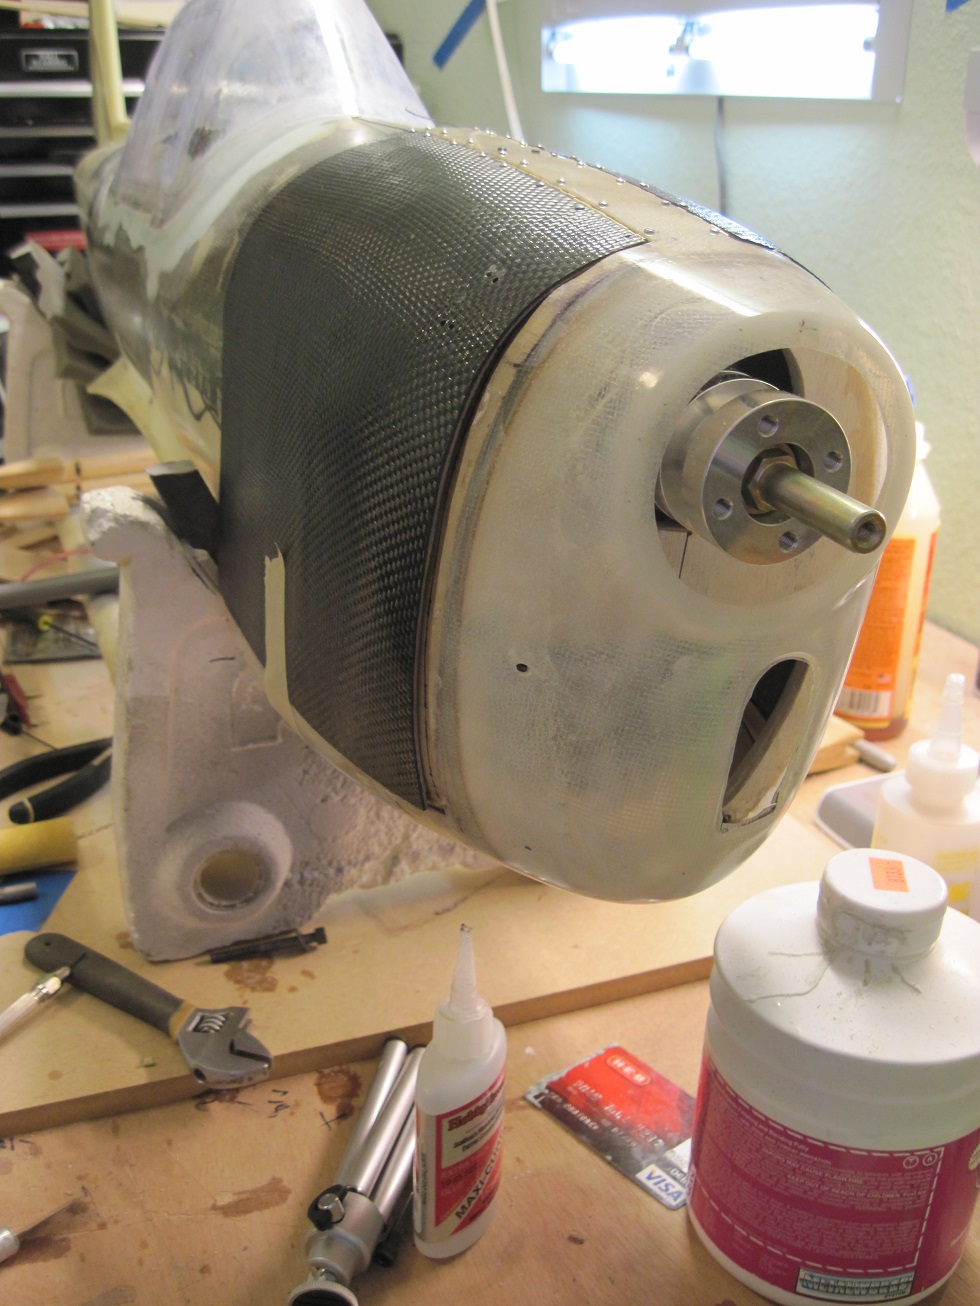
My spinner came today, looks and fits great, thanks Amanda
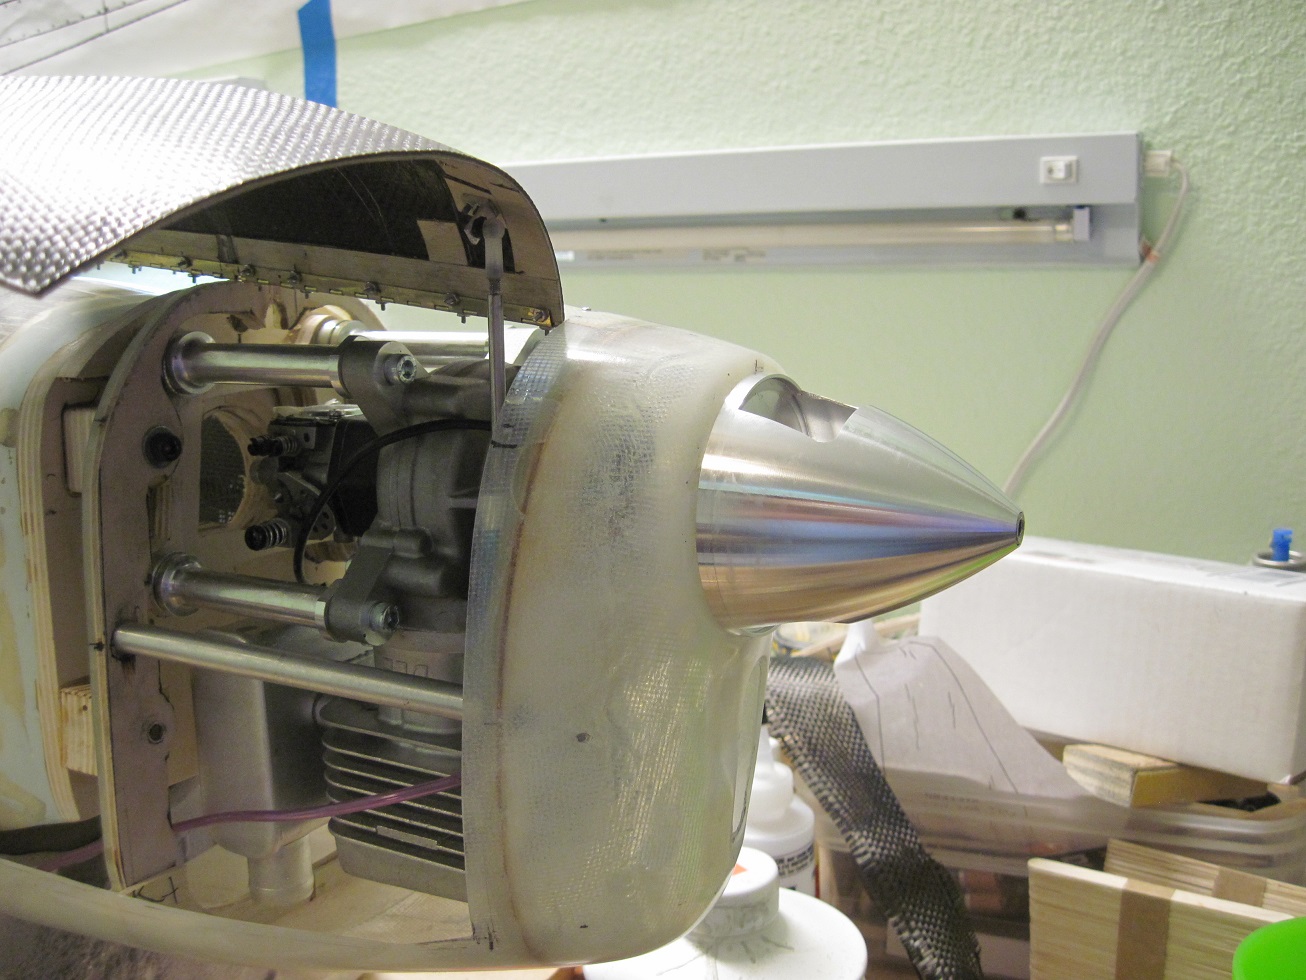
All the backing for the doors is in and she is ready for the easy sand.
Trying to get the door and the opening perfect was and is not easy. The easy sand will fill in any gaps and frame the opening. I will hit the doors and the front of the cowl tomorrow morning and then I will install the latches.
I may try the two way cylinders to get better control of the speed. Anyways I should be able to wrap the cowl up by Friday and move onto the canopy this weekend, not sure we will have a good flyable weekend so building is just fine by me.


TB
My spinner came today, looks and fits great, thanks Amanda
All the backing for the doors is in and she is ready for the easy sand.
Trying to get the door and the opening perfect was and is not easy. The easy sand will fill in any gaps and frame the opening. I will hit the doors and the front of the cowl tomorrow morning and then I will install the latches.
I may try the two way cylinders to get better control of the speed. Anyways I should be able to wrap the cowl up by Friday and move onto the canopy this weekend, not sure we will have a good flyable weekend so building is just fine by me.
TB

 06-27-2014, 05:31 AM
#219
The mornings progress.
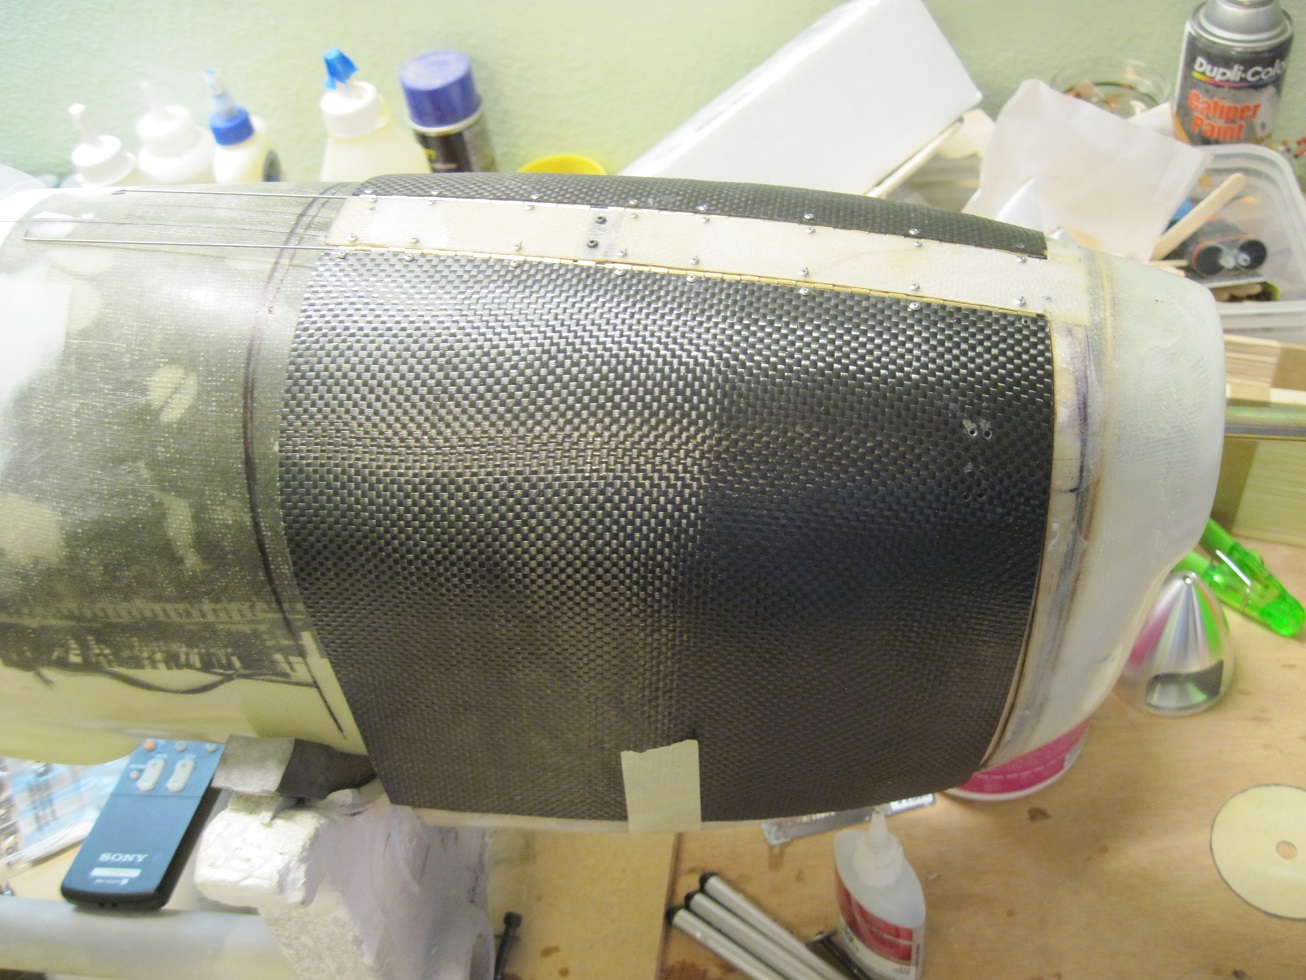
I hit the engine doors with the EverCote easy sand.
You can see how easy it goes on. I use an old CC to spread it on. It dries very fast so I was barley able to get one door covered before it dried. It will sand in 15-20 min.

After the first sanding I apply a second coat in the low spots, this should do it.


All the facing and door lips are installed on the cowl. I left them oversized until final fitting of the doors is complete, then I will cut them back.


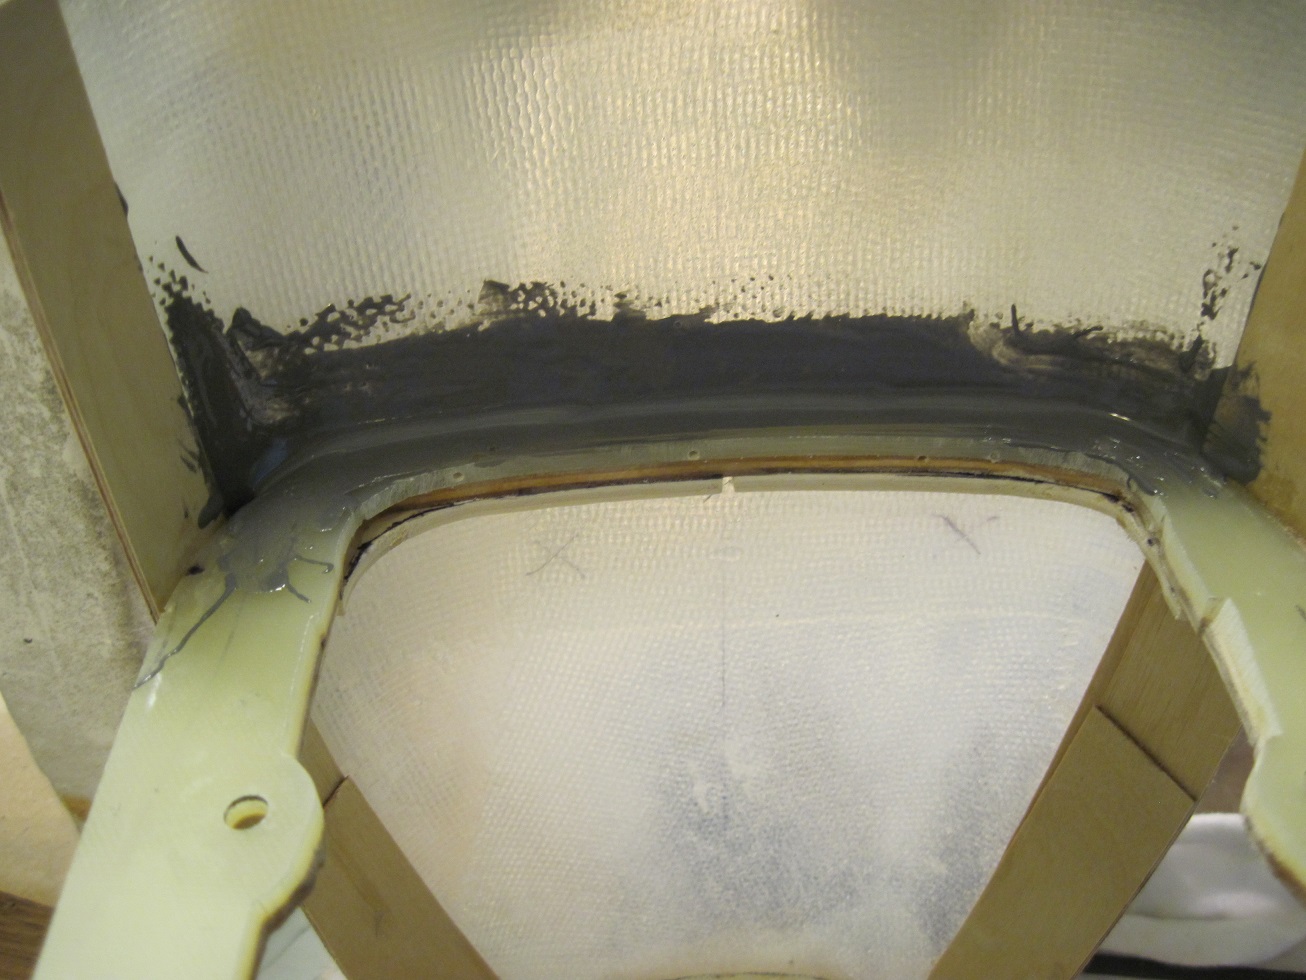
I have some J-B Weld I have never used so I thought I would try it. I hit all the joints inside of the cowl. Once this dries I will glass the bottom pan.


While I wait on things to dry I am working on the engine door latches.
 e
e
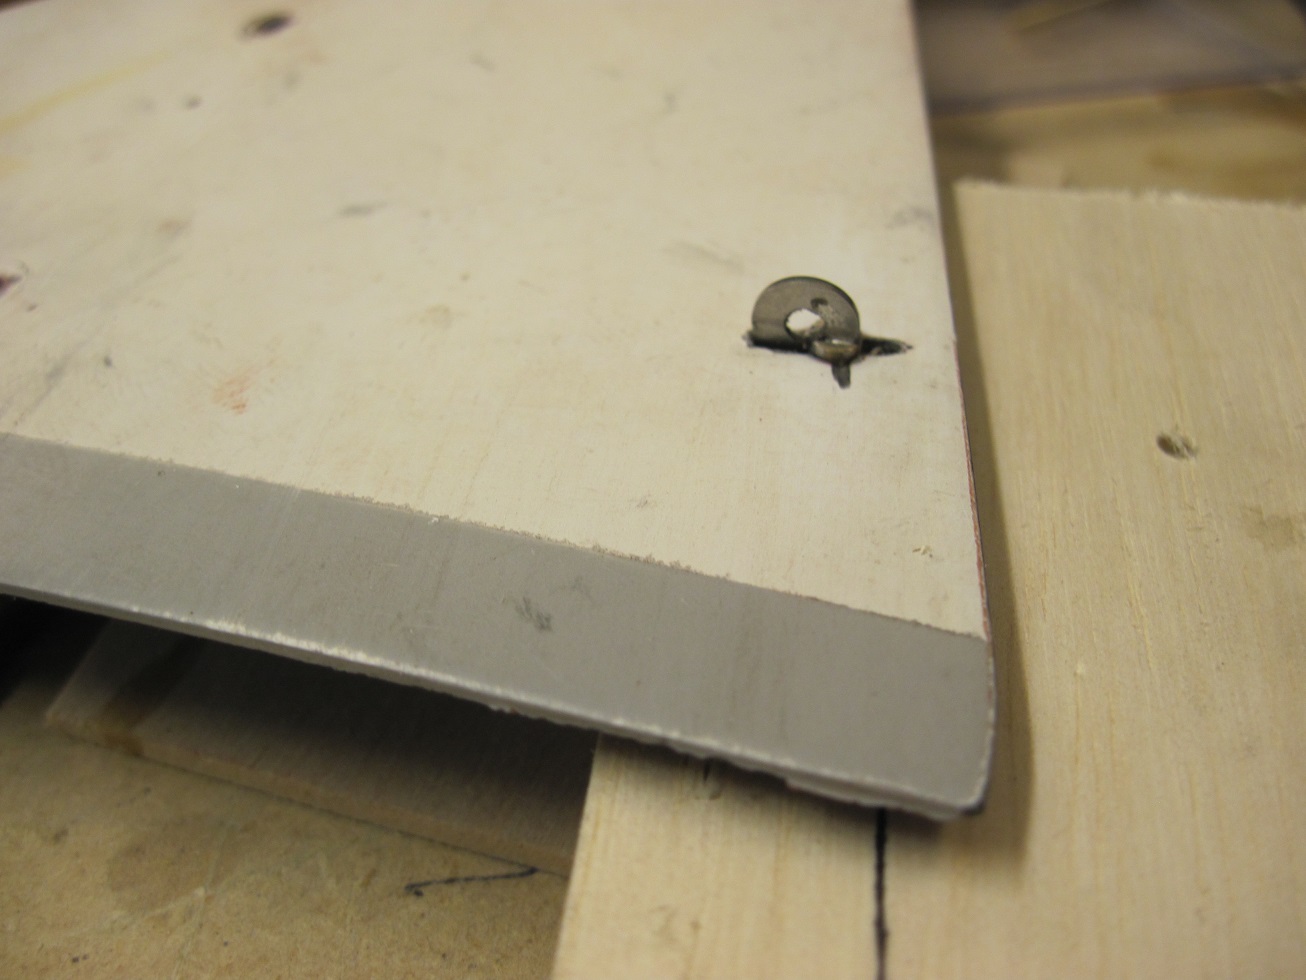
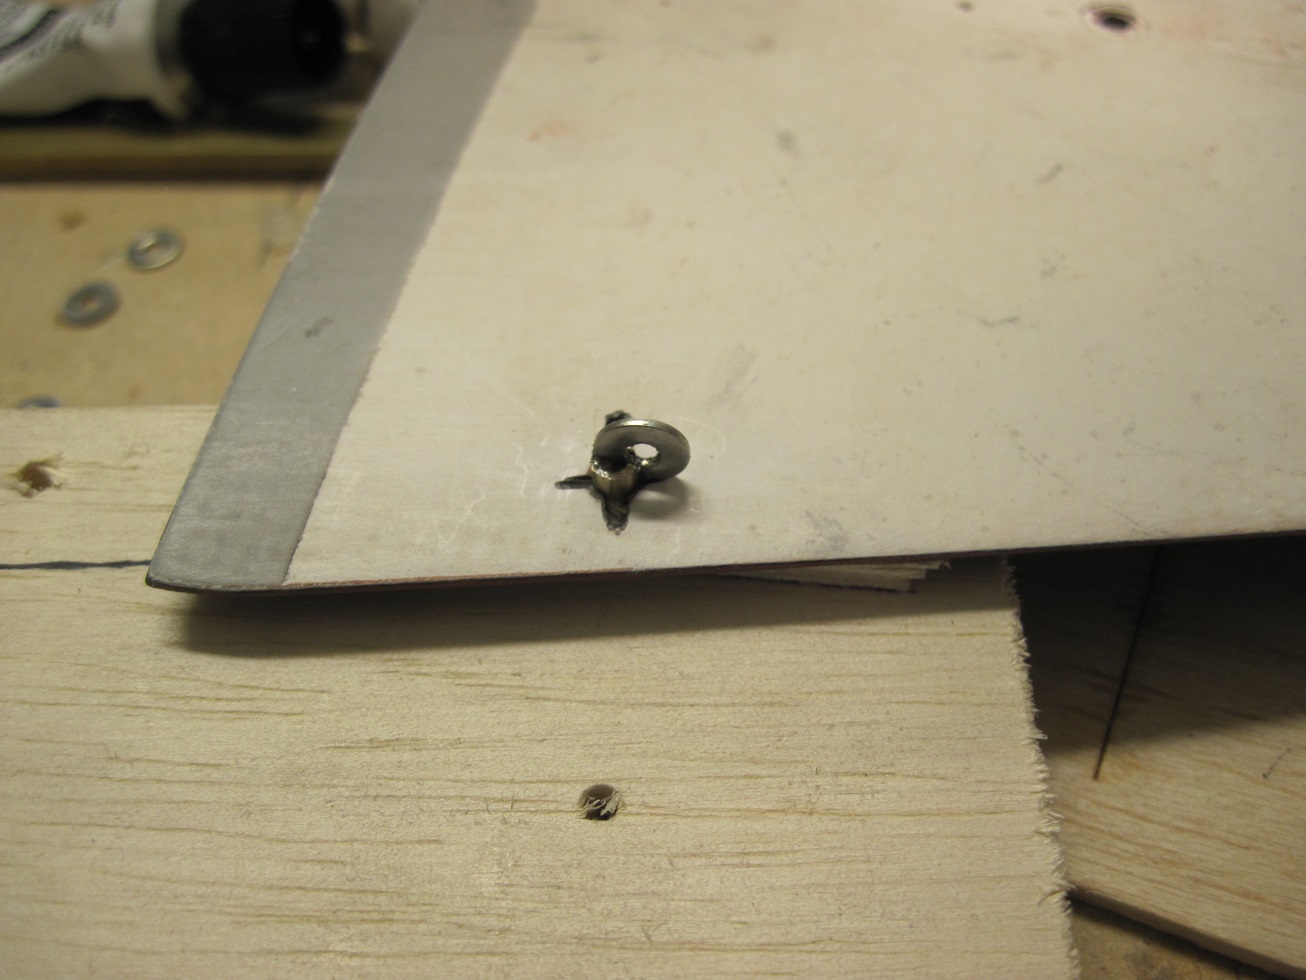
I am using some 2-56 threaded couplers and #2 washers.
I cut them down to size and cut a grove for the washer, this gets soldered.


Two washers, a spring and a nut complete the latch.

I cut down these spring I had laying around.

Here is the prototype.


This should work

TB
I hit the engine doors with the EverCote easy sand.
You can see how easy it goes on. I use an old CC to spread it on. It dries very fast so I was barley able to get one door covered before it dried. It will sand in 15-20 min.
After the first sanding I apply a second coat in the low spots, this should do it.
All the facing and door lips are installed on the cowl. I left them oversized until final fitting of the doors is complete, then I will cut them back.
I have some J-B Weld I have never used so I thought I would try it. I hit all the joints inside of the cowl. Once this dries I will glass the bottom pan.
While I wait on things to dry I am working on the engine door latches.
I am using some 2-56 threaded couplers and #2 washers.
I cut them down to size and cut a grove for the washer, this gets soldered.
Two washers, a spring and a nut complete the latch.
I cut down these spring I had laying around.
Here is the prototype.
This should work
TB
Last edited by TonyBuilder; 06-27-2014 at 05:33 AM.
06-27-2014, 07:27 AM
#220
Banned
TonyBuilder,
It keeps bothering my mind while I closely follow your nice progress.
I understood the fuselage is made of cloth and fiberglass resin.
The carbon fiber material we see I have to guess is on the inside and eventally the painting of the outside will hide its view.
Am I guessing correctly ?
I also wonder how you will remove the carbon fibers from the canopy so the canopy is clear between the frame.
Thanks for your response and my apologies to disturb you. I just cannot chase these questions out of my mind.
Zor
Last edited by Zor; 06-27-2014 at 07:34 AM. Reason: Changed wonde to wonder
06-27-2014, 07:47 AM
#221
TonyBuilder,
It keeps bothering my mind while I closely follow your nice progress.
I understood the fuselage is made of cloth and fiberglass resin.
The carbon fiber material we see I have to guess is on the inside and eventally the painting of the outside will hide its view.
Am I guessing correctly ?
I also wonder how you will remove the carbon fibers from the canopy so the canopy is clear between the frame.
Thanks for your response and my apologies to disturb you. I just cannot chase these questions out of my mind.
Zor
It keeps bothering my mind while I closely follow your nice progress.
I understood the fuselage is made of cloth and fiberglass resin.
The carbon fiber material we see I have to guess is on the inside and eventally the painting of the outside will hide its view.
Am I guessing correctly ?
I also wonder how you will remove the carbon fibers from the canopy so the canopy is clear between the frame.
Thanks for your response and my apologies to disturb you. I just cannot chase these questions out of my mind.
Zor
Zor, these build threads are here for you to ask questions!
Yes the carbon fiber you see mostly on the fuselage is inside and when I prime all you will see is the primer.
The carbon fiber frame is laid up over the plastic canopy. I use mold release by Evercoat.
The template frame is also been laid up over the plastic canopy.
I don't cut the plastic canopy, I just lay the cut out frame over the plastic and glue and bolt it to the canopy.
Hope this helps
TB
Last edited by TonyBuilder; 06-27-2014 at 07:50 AM.
06-27-2014, 08:30 AM
#224
Well thank you guys. I build everyday flyers. I would think the guys building "Top Gun" planes build them specifically for competition. I may take my fleet out to a reginal scale competition and see how they do. But I don't build competition planes, just well made good looking everyday go to flyers.
TB
TB

