


G&L 1/5 DHC chipmunk - diary of a build.
 08-19-2014, 09:33 AM
#501

Tony the prep to paint is like a never ending project, when you think your done you find there is still more to get it right. All the pannel lines and rivets and other small details seem to take longer than the building of it. Dupli-Color is a fine product, espacially the primers when it comes to the pannel lines, I use High Build for that, it sands to a glass like finish, I also use the 3-M fine and micro fine foam pads, never use a hard faced block when doing this, always have a light foam pad under the sand paper and don't wet sand the gray primers, you can the white, it's a different kind of primer that will allow the use of any paints. Because there is some intrest here on color I might add, with the transparenency of todays paints best results of top coats are achieved useing light primers under light colors and dark primers under dark colors, it is also true that primer color effects the depth or lack of it on top coats and can cause the use of more top coats to eliminate what can look blotchie because of the wrong color of primers and thin top coats. Done right will save weight also.
Plane is looking very nice at this stage. Tony, Dupli-Color in the quart can will produce a better top coat than the thinness of the paint in the rattle cans and the only fuel proof paints today are catalized acrylic urethanes and clear coats of the same product, other words automotive paints.
Leroy
 08-19-2014, 10:01 AM
#502


Thank you Leroy for the info. Yes prep is most of the work and the results are based on the prep. I'm just plugging away and hopping I don't screw things up. I have klass Koat paint but this would require day trips to my friends shop, and cooler weather, it is just easier to do the rattle can and do it at my pace and leisure. I know it wont be the best finish but it will be abdicate.
My first chippie was rattle can and it came out good and lasted, my buddy is refinishing the plane and the paint did not come off easily.
TB
My first chippie was rattle can and it came out good and lasted, my buddy is refinishing the plane and the paint did not come off easily.
TB
08-19-2014, 09:08 PM
#504
Tony if you did one already then you are one step ahead. Follow the steps I laid out in my PM, you'll be happy with the results and get the right sand paper for the job and allow time for the primer to dry before sanding. You'll do fine.
Leroy
Leroy
08-20-2014, 03:02 AM
#507
Progress.
So yesterday I got the fuselage all prepped for panel lines.
I still had a bunch of pinholes to fill so I hit them, then ones I could see with the bondo glazing.
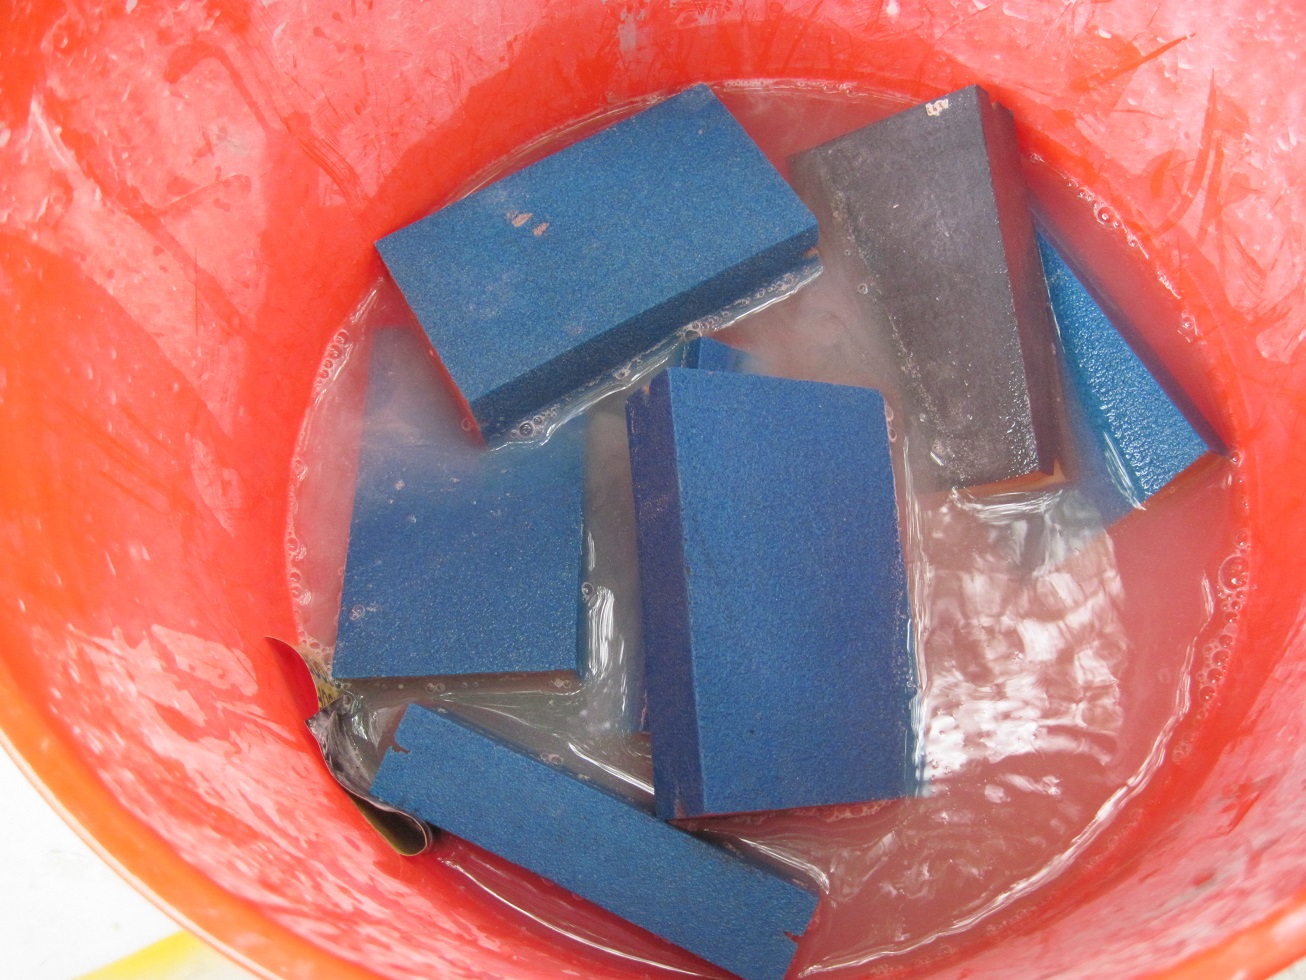
Then I mix up my homer soup and sand the frame. I wet sand because the dust is everywhere with dry sanding.
The foam blocks get clogged up so the wet sanding has worked for me. I use 60-80- and 120 grit.
Once the frame is dry I hit it with dry sandpaper to prep the surface for the primer.

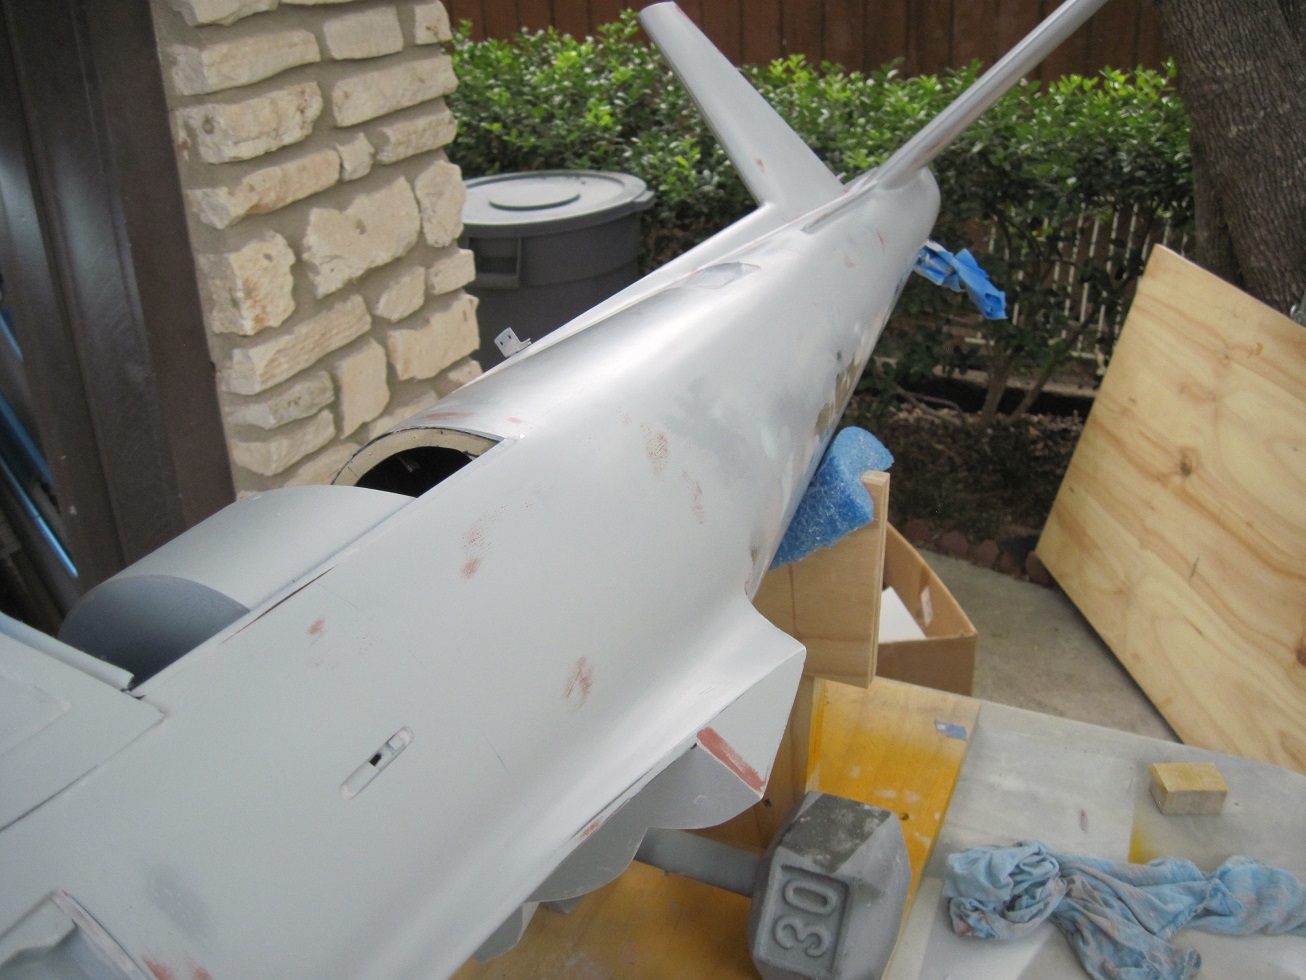

She is ready for panel lines, I got 90% of the imperfections but don't want it perfect.


There is still the panel line priming and the white so that should get the rest.
Leroy has helped me as I learn about finishing. This is one of the reasons I wanted to do this plane before I finished Angie.


I ordered my paint stencils, also I am doing dry ink transfers for the flag and the nomenclatures.

TB
So yesterday I got the fuselage all prepped for panel lines.
I still had a bunch of pinholes to fill so I hit them, then ones I could see with the bondo glazing.
Then I mix up my homer soup and sand the frame. I wet sand because the dust is everywhere with dry sanding.
The foam blocks get clogged up so the wet sanding has worked for me. I use 60-80- and 120 grit.
Once the frame is dry I hit it with dry sandpaper to prep the surface for the primer.
She is ready for panel lines, I got 90% of the imperfections but don't want it perfect.
There is still the panel line priming and the white so that should get the rest.
Leroy has helped me as I learn about finishing. This is one of the reasons I wanted to do this plane before I finished Angie.
I ordered my paint stencils, also I am doing dry ink transfers for the flag and the nomenclatures.
TB
Last edited by TonyBuilder; 08-20-2014 at 03:05 AM.
08-20-2014, 03:24 AM
#508
Panel lines.
I got the panel lines done this morning.
I am doing it free hand and taking some liberties as to the correct placement.


The chart tape is 1/64 and not has hard to work with as I thought it would be.
I am surprised as to how much I used, one roll to do the fuselage.


She is ready for primer and I hope to get her all primed today. I need to go and get some more primer and some cleaner.
I am going to hit the lines with the high build gray then hit the entire frame with the white.


Then more sanding to release the chart tape and rivets to fallow.
My plan as of now is to get the fuselage ready for paint, paint it and let it cure for a week before I do the overlay colors.
In the meantime I will work on the wing while the fuselage cures.


I know that rattle can paint is not the best but it is my only option right now. I think it will be fine for this everyday sports scale plane")
TB
I got the panel lines done this morning.
I am doing it free hand and taking some liberties as to the correct placement.
The chart tape is 1/64 and not has hard to work with as I thought it would be.
I am surprised as to how much I used, one roll to do the fuselage.
She is ready for primer and I hope to get her all primed today. I need to go and get some more primer and some cleaner.
I am going to hit the lines with the high build gray then hit the entire frame with the white.
Then more sanding to release the chart tape and rivets to fallow.
My plan as of now is to get the fuselage ready for paint, paint it and let it cure for a week before I do the overlay colors.
In the meantime I will work on the wing while the fuselage cures.
I know that rattle can paint is not the best but it is my only option right now. I think it will be fine for this everyday sports scale plane
TB
08-20-2014, 11:28 AM
#512
The morning progress.
Ok so I primed the cowl, canopy and fuselage this morning.
On the cowl and fuselage I did a three coats of high build grey primer.
Then after that dried I hit it with two coats of white. It takes a bit to cover the grey.
Then after a couple of hours I wet sanded the panel lines down to the tape on the cowl only.
At first I thought that the tape was not completely covered. When it is painted it is high and looks like it is on the surface.
So I got good coverage and a nice even panel line. But I sanded the white off at all the panel lines.
I will hit the areas that are gray with white again, just like Leroy told me to do in the first place, but how is a guy going to learn without sticking his hand in the fire to feel the burn


So this was test number one, heavy primer, good coverage. Leroy suggested that I only hit it with the grey then sand the tape free then do the white.
This is the method that will be used from here on. If I did not need the white primer then I would be good to go but it is very necessary.


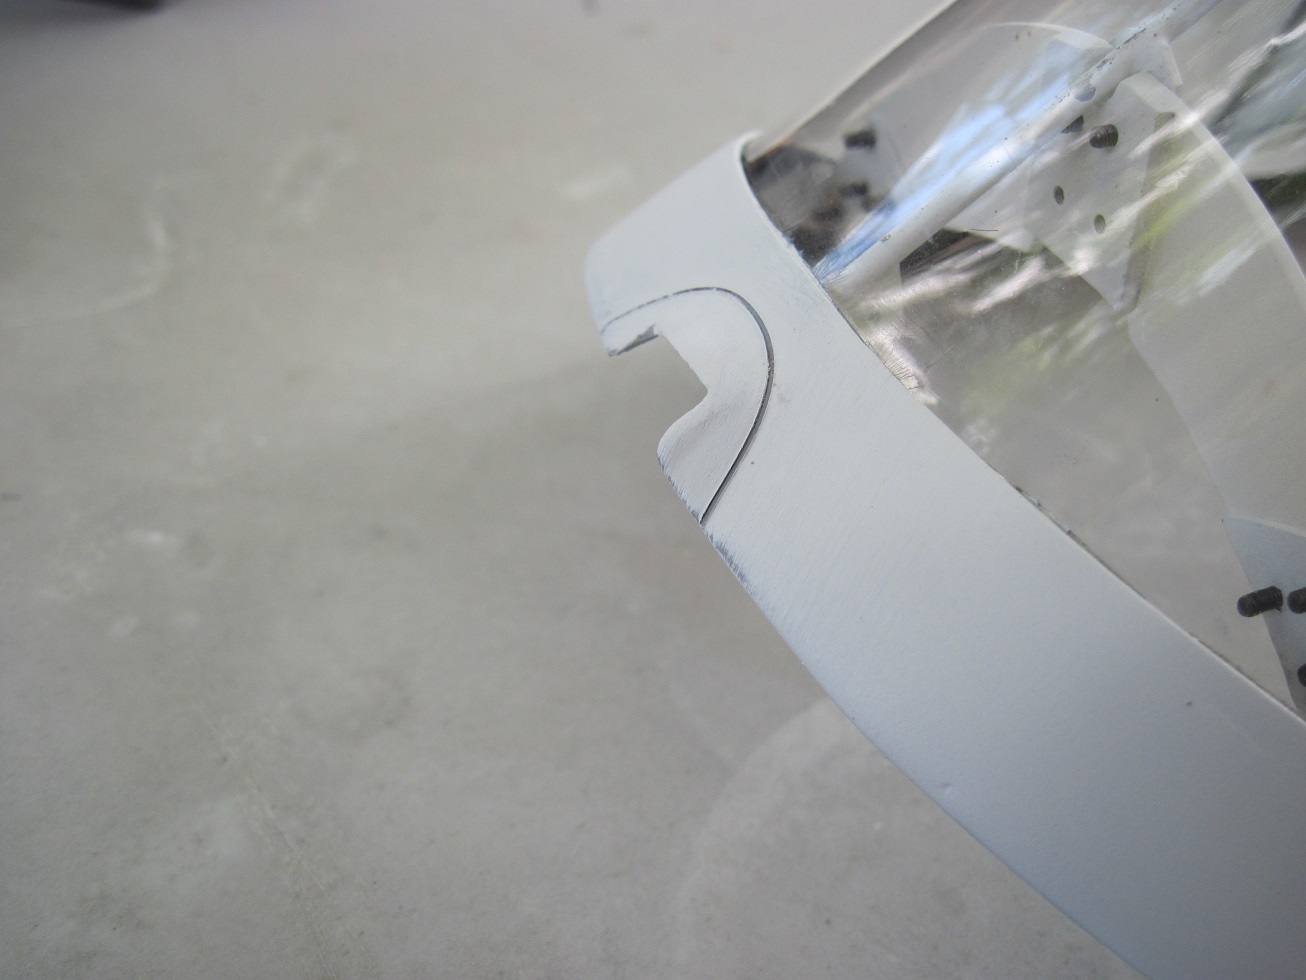
The second test was on the canopy frame. This is a much lighter piece so I did not hit it as hard with the filler as the cowl and fuselage.
The tape was not berried and was easily exposed without burning threw the white, but not as deep of a line.
This is fine for more delicate parts.


So for the fuselage I will sand it down exposing the tape not worrying if I burn threw the white. Then once the tape is out I will hit it with the white to cover the exposed areas.
I'm learning, I'm learning, by the time I get to Angie I will know what I am doing.
Meanwhile I am doing some tests with the rivets, glue drops and vinyl. Plus more paint tests.
TB
Ok so I primed the cowl, canopy and fuselage this morning.
On the cowl and fuselage I did a three coats of high build grey primer.
Then after that dried I hit it with two coats of white. It takes a bit to cover the grey.
Then after a couple of hours I wet sanded the panel lines down to the tape on the cowl only.
At first I thought that the tape was not completely covered. When it is painted it is high and looks like it is on the surface.
So I got good coverage and a nice even panel line. But I sanded the white off at all the panel lines.
I will hit the areas that are gray with white again, just like Leroy told me to do in the first place, but how is a guy going to learn without sticking his hand in the fire to feel the burn
So this was test number one, heavy primer, good coverage. Leroy suggested that I only hit it with the grey then sand the tape free then do the white.
This is the method that will be used from here on. If I did not need the white primer then I would be good to go but it is very necessary.
The second test was on the canopy frame. This is a much lighter piece so I did not hit it as hard with the filler as the cowl and fuselage.
The tape was not berried and was easily exposed without burning threw the white, but not as deep of a line.
This is fine for more delicate parts.
So for the fuselage I will sand it down exposing the tape not worrying if I burn threw the white. Then once the tape is out I will hit it with the white to cover the exposed areas.
I'm learning, I'm learning, by the time I get to Angie I will know what I am doing.
Meanwhile I am doing some tests with the rivets, glue drops and vinyl. Plus more paint tests.
TB
Last edited by TonyBuilder; 08-20-2014 at 11:32 AM.
08-20-2014, 04:29 PM
#515
Daily Progress
So today was a good day, stressful at times but all in all very satisfying and a big relief.
The panel lines came out great.
At first look, and the deceiving part is as you prime it looks like the tape is siting on the surface and your not putting enough primer on.
Three coats of rattle can primmer, and three coats of rattle can whit is what was put on this frame.
I was siding on the be safe and have more then enough primer then, **** I wish I put more primer.


I started sanding with a fresh foam 180 grit sanding block, wet.
First I would see gray, the white still around the line, then black as the whit started to fade....perfect
There are some spots that had more primer then the body but that was expected and was not an issue.
The good thing is most of the white is still intact. I think a light coat of white and she is done.


Pulling the tape out was not to bad, a #11 blade and some tweezers worked fine. You have to make sure you get the black out, the top is clear and will peal off.
The other thing is start at one end and keep track of what you have pulled out, it can be hared to see what has tape and what does not.
Lastly it is wise to overlap when you can and to leave a piece in areas that don't get seen so you can pull it up easily.
The hardest areas are in tight corners and where there is no dead end.


I am very pleased and relived, thanks to Leroy for his advice and support.
There are a dozen ways to do the same thing with the same results, but until you have done it and can touch it and feel it, you just got to figure out what works for you.


I will hit the cowl and the fuselage in the morning and ready them for rivet detailing.


So stoked
TB
So today was a good day, stressful at times but all in all very satisfying and a big relief.
The panel lines came out great.
At first look, and the deceiving part is as you prime it looks like the tape is siting on the surface and your not putting enough primer on.
Three coats of rattle can primmer, and three coats of rattle can whit is what was put on this frame.
I was siding on the be safe and have more then enough primer then, **** I wish I put more primer.
I started sanding with a fresh foam 180 grit sanding block, wet.
First I would see gray, the white still around the line, then black as the whit started to fade....perfect
There are some spots that had more primer then the body but that was expected and was not an issue.
The good thing is most of the white is still intact. I think a light coat of white and she is done.
Pulling the tape out was not to bad, a #11 blade and some tweezers worked fine. You have to make sure you get the black out, the top is clear and will peal off.
The other thing is start at one end and keep track of what you have pulled out, it can be hared to see what has tape and what does not.
Lastly it is wise to overlap when you can and to leave a piece in areas that don't get seen so you can pull it up easily.
The hardest areas are in tight corners and where there is no dead end.
I am very pleased and relived, thanks to Leroy for his advice and support.
There are a dozen ways to do the same thing with the same results, but until you have done it and can touch it and feel it, you just got to figure out what works for you.
I will hit the cowl and the fuselage in the morning and ready them for rivet detailing.
So stoked
TB
Last edited by TonyBuilder; 08-20-2014 at 04:33 PM.
08-21-2014, 02:18 AM
#516
On the bench for today.
I will do touch up priming of the cowl and the fuselage. Then I will start rivet detailing. I have been testing glue drop rivets and I just don't like the results so I'm just doing all vinyl rivets.
This is a quick build....right
So onto the rivets we go.
TB
I will do touch up priming of the cowl and the fuselage. Then I will start rivet detailing. I have been testing glue drop rivets and I just don't like the results so I'm just doing all vinyl rivets.
This is a quick build....right
So onto the rivets we go.
TB

 08-21-2014, 06:52 AM
#518
Got a start on the rivets.
The canopy frame is ready to go.
I am using Chad Veich vinyl rivet sets.
They are easier to use then the Meirce set. Plus I can get custom sizes and shapes.


I will paint this in the morning. I don't want parts sitting around once they are ready, they get painted.
On some parts some rivets will be applied after paint and then clear coated.


Onto the cowl.
TB
The canopy frame is ready to go.
I am using Chad Veich vinyl rivet sets.
They are easier to use then the Meirce set. Plus I can get custom sizes and shapes.
I will paint this in the morning. I don't want parts sitting around once they are ready, they get painted.
On some parts some rivets will be applied after paint and then clear coated.
Onto the cowl.
TB
08-21-2014, 08:55 AM
#520
Banned
On the bench for today.
I will do touch up priming of the cowl and the fuselage. Then I will start rivet detailing. I have been testing glue drop rivets and I just don't like the results so I'm just doing all vinyl rivets.
This is a quick build....right
So onto the rivets we go.
TB
Hope you are wearing ear plugs when riveting . . . The noise warrants it . . . L O L
A quick build ? _ _ _ Looks to me like a full time job.
Your last posted pictures of the canopy are superb. Watch for the factory to copy your craftsmanship if they ever build more full size Chipmunk.
I remember when earlier you mentioned that you did not try to match the full scale details.
You are doing very good at it.
You can only be very proud of your work.
Zor.
08-21-2014, 11:41 AM
#523
Cowl rivets
Well the cowl is done and ready for paint.
The vinyl rivets go fast, you just get a system and go at it.
I have a variety of sizes, and spacing's, plus you can also remove every other for farther spaced rivets.
I have some ideas for Chad to add to his arsenal of vinyl rivet sets.


I am kind of free handing the rivets and taking liberties as to the full scale.
Should be good for sports scale


Weather permitting I will paint this in the morning.
I need to layup the cowl door popsicles so I can finish those pieces.
TB
Well the cowl is done and ready for paint.
The vinyl rivets go fast, you just get a system and go at it.
I have a variety of sizes, and spacing's, plus you can also remove every other for farther spaced rivets.
I have some ideas for Chad to add to his arsenal of vinyl rivet sets.
I am kind of free handing the rivets and taking liberties as to the full scale.
Should be good for sports scale
Weather permitting I will paint this in the morning.
I need to layup the cowl door popsicles so I can finish those pieces.
TB
Last edited by TonyBuilder; 08-21-2014 at 11:44 AM.
08-22-2014, 03:17 AM
#525
Morning progress
Well I got a start on the fuselage last night, very addicting this rivet laying!
I am free handing it, no high tech lasers or levels, just eying it.
I am using the larger rivets to represent the domed rivets, there is no way I am putting glue on every one of these


The intermediate rivets that are flush rivets on the full scale are the smaller rivets.
They lay pretty good and I can do a whole run at a time. I may drop one or loos one here and there but I just go back and add it later.
The screws are the hardest because there are two components and it is hard to get them both down and staying in tight areas.
This kind of work requires lots of small breaks.


TB
Well I got a start on the fuselage last night, very addicting this rivet laying!
I am free handing it, no high tech lasers or levels, just eying it.
I am using the larger rivets to represent the domed rivets, there is no way I am putting glue on every one of these
The intermediate rivets that are flush rivets on the full scale are the smaller rivets.
They lay pretty good and I can do a whole run at a time. I may drop one or loos one here and there but I just go back and add it later.
The screws are the hardest because there are two components and it is hard to get them both down and staying in tight areas.
This kind of work requires lots of small breaks.
TB