


Alien Aircraft FunMaster 72 Build
 08-10-2014, 07:02 PM
#1
Member
Thread Starter
Join Date: Sep 2012
Location: Frisco, TX
Posts: 54
Likes: 0
Received 0 Likes
on
0 Posts
I have been looking to try my hand at a kit for a while and I have also been looking for a high wing .60 size sport plane with crow flap capability. I came across the FunMaster 72 from Alien Aircraft in both Model Aviation Magazine and Model Airplane News over the last several months and it seemed to fit the bill for both marks. So last week I ordered it and I am embarking on the build.
One of my other requirements is that this airplane must also be able to fly off water using floats, so I am also going to be adding the capability to quickly mount floats to the plane. I am also going to be building and installing the internal bomb bay module.
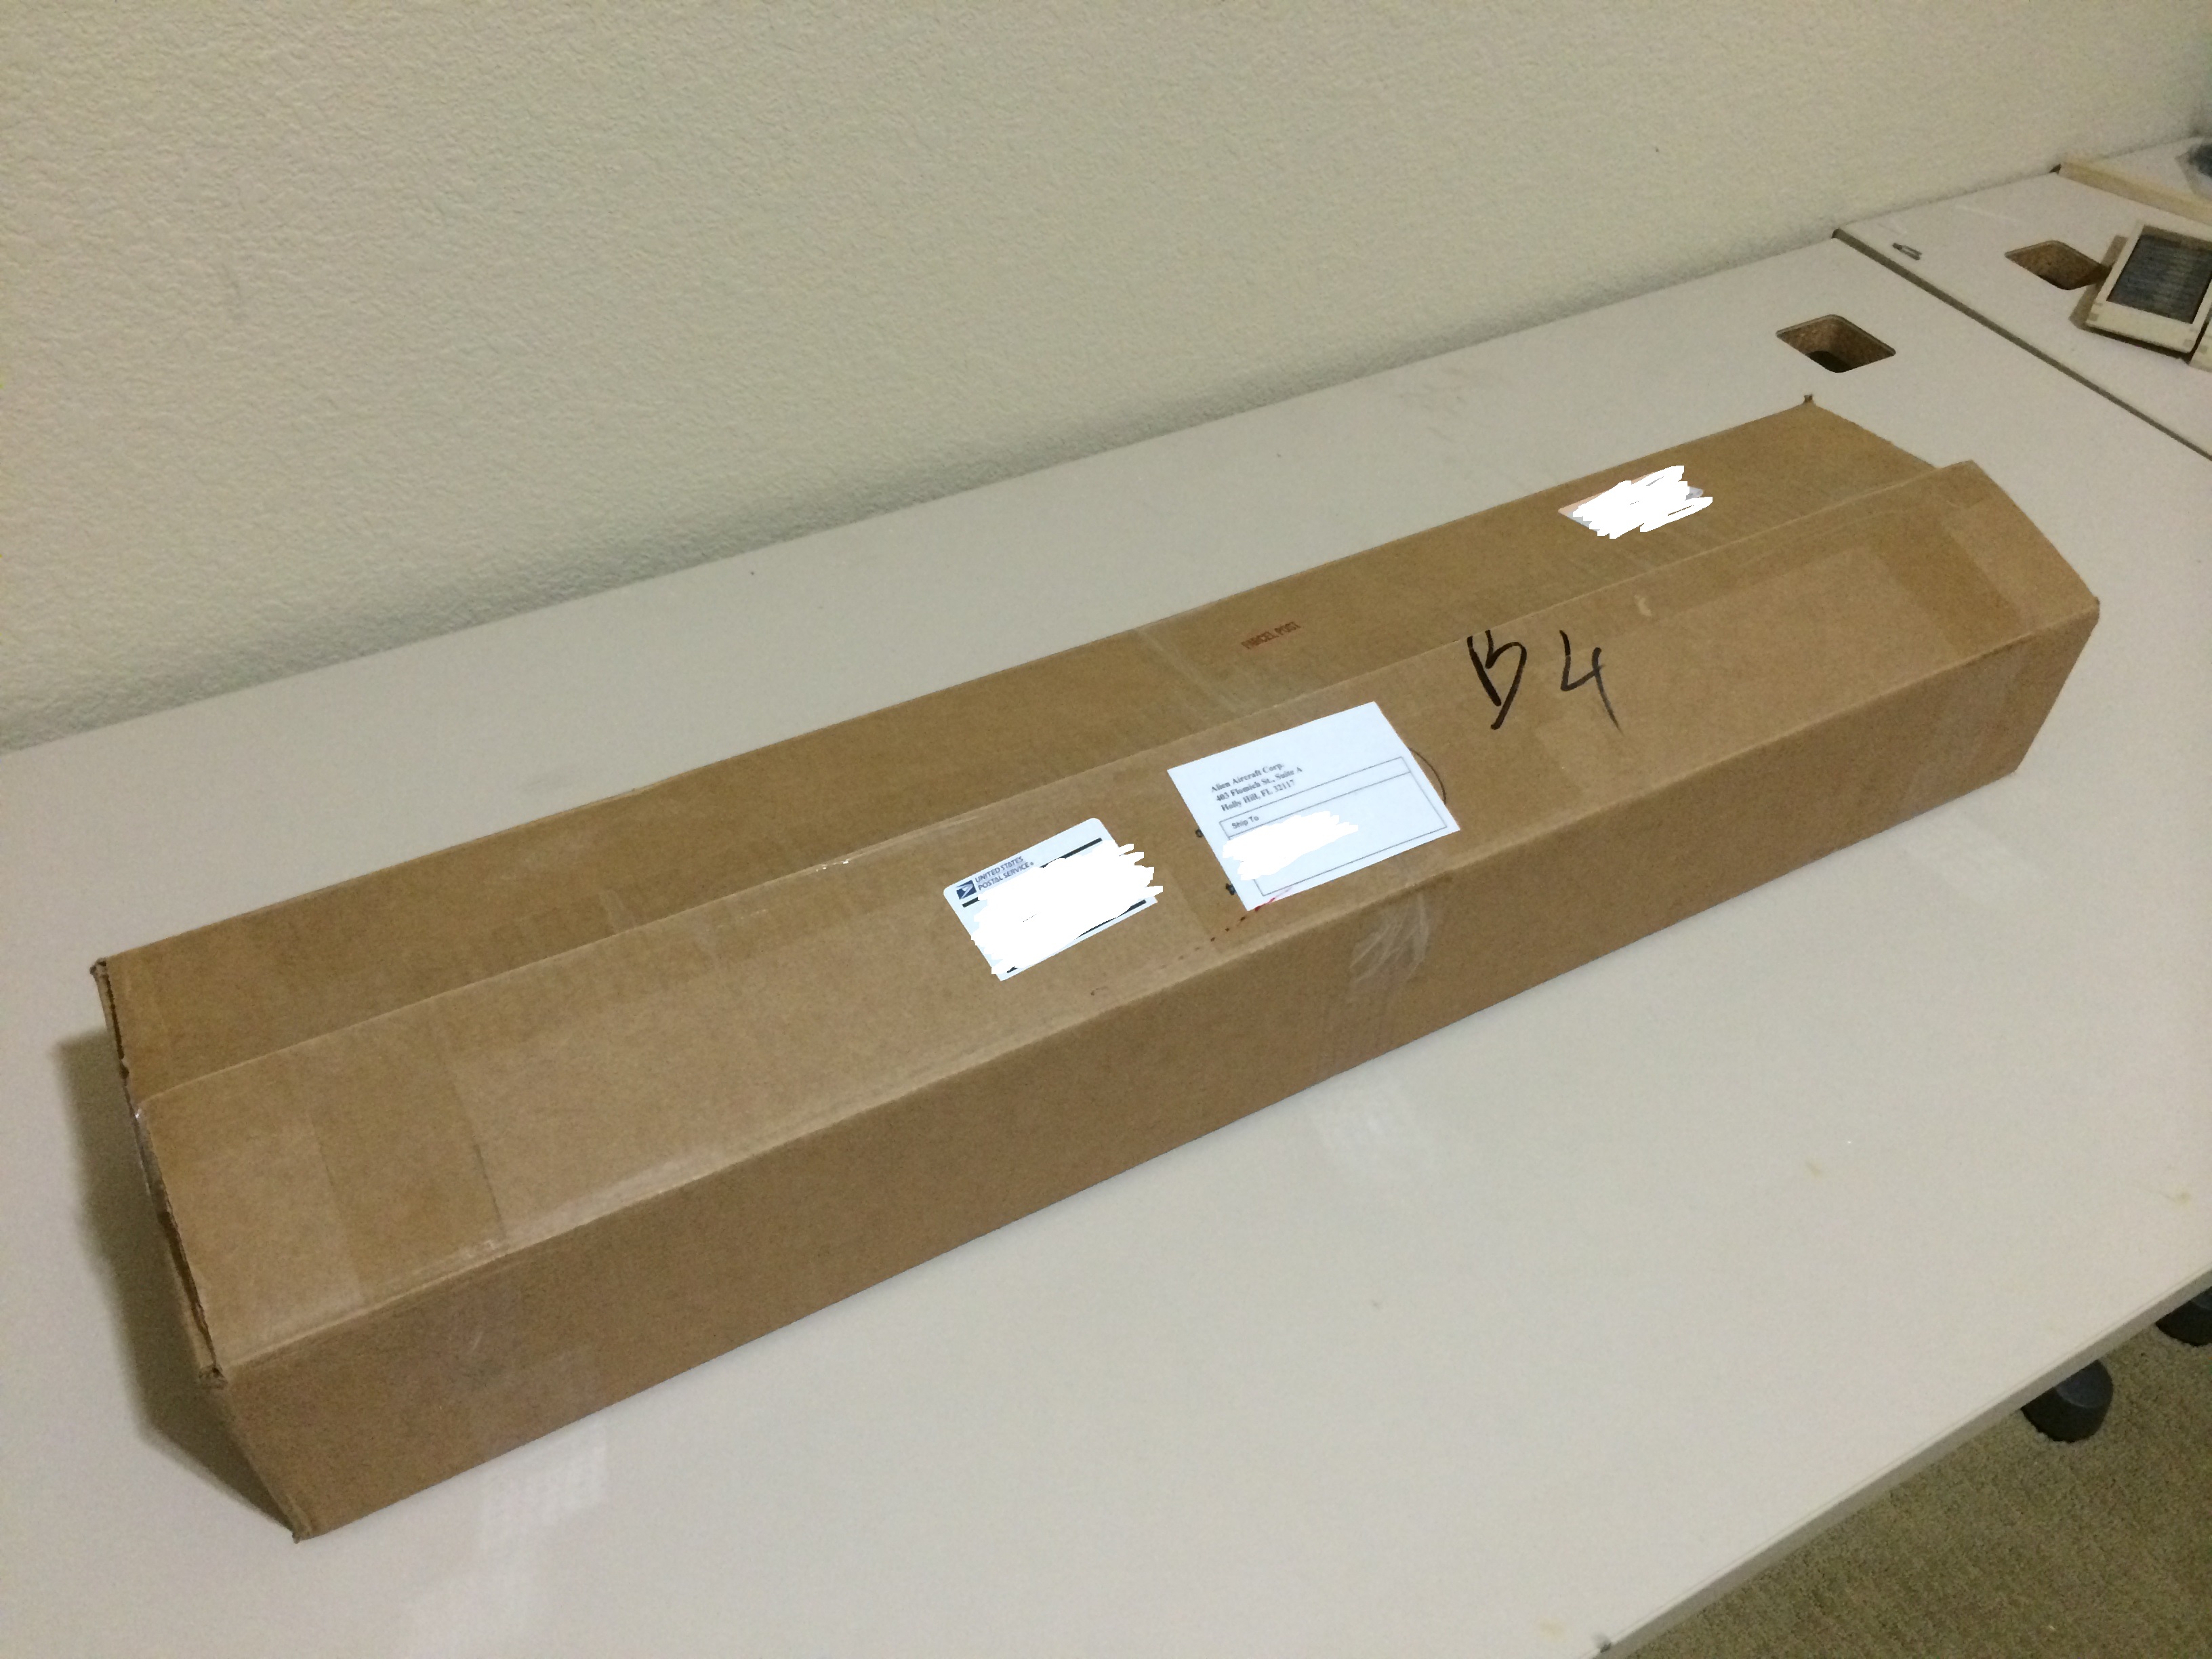
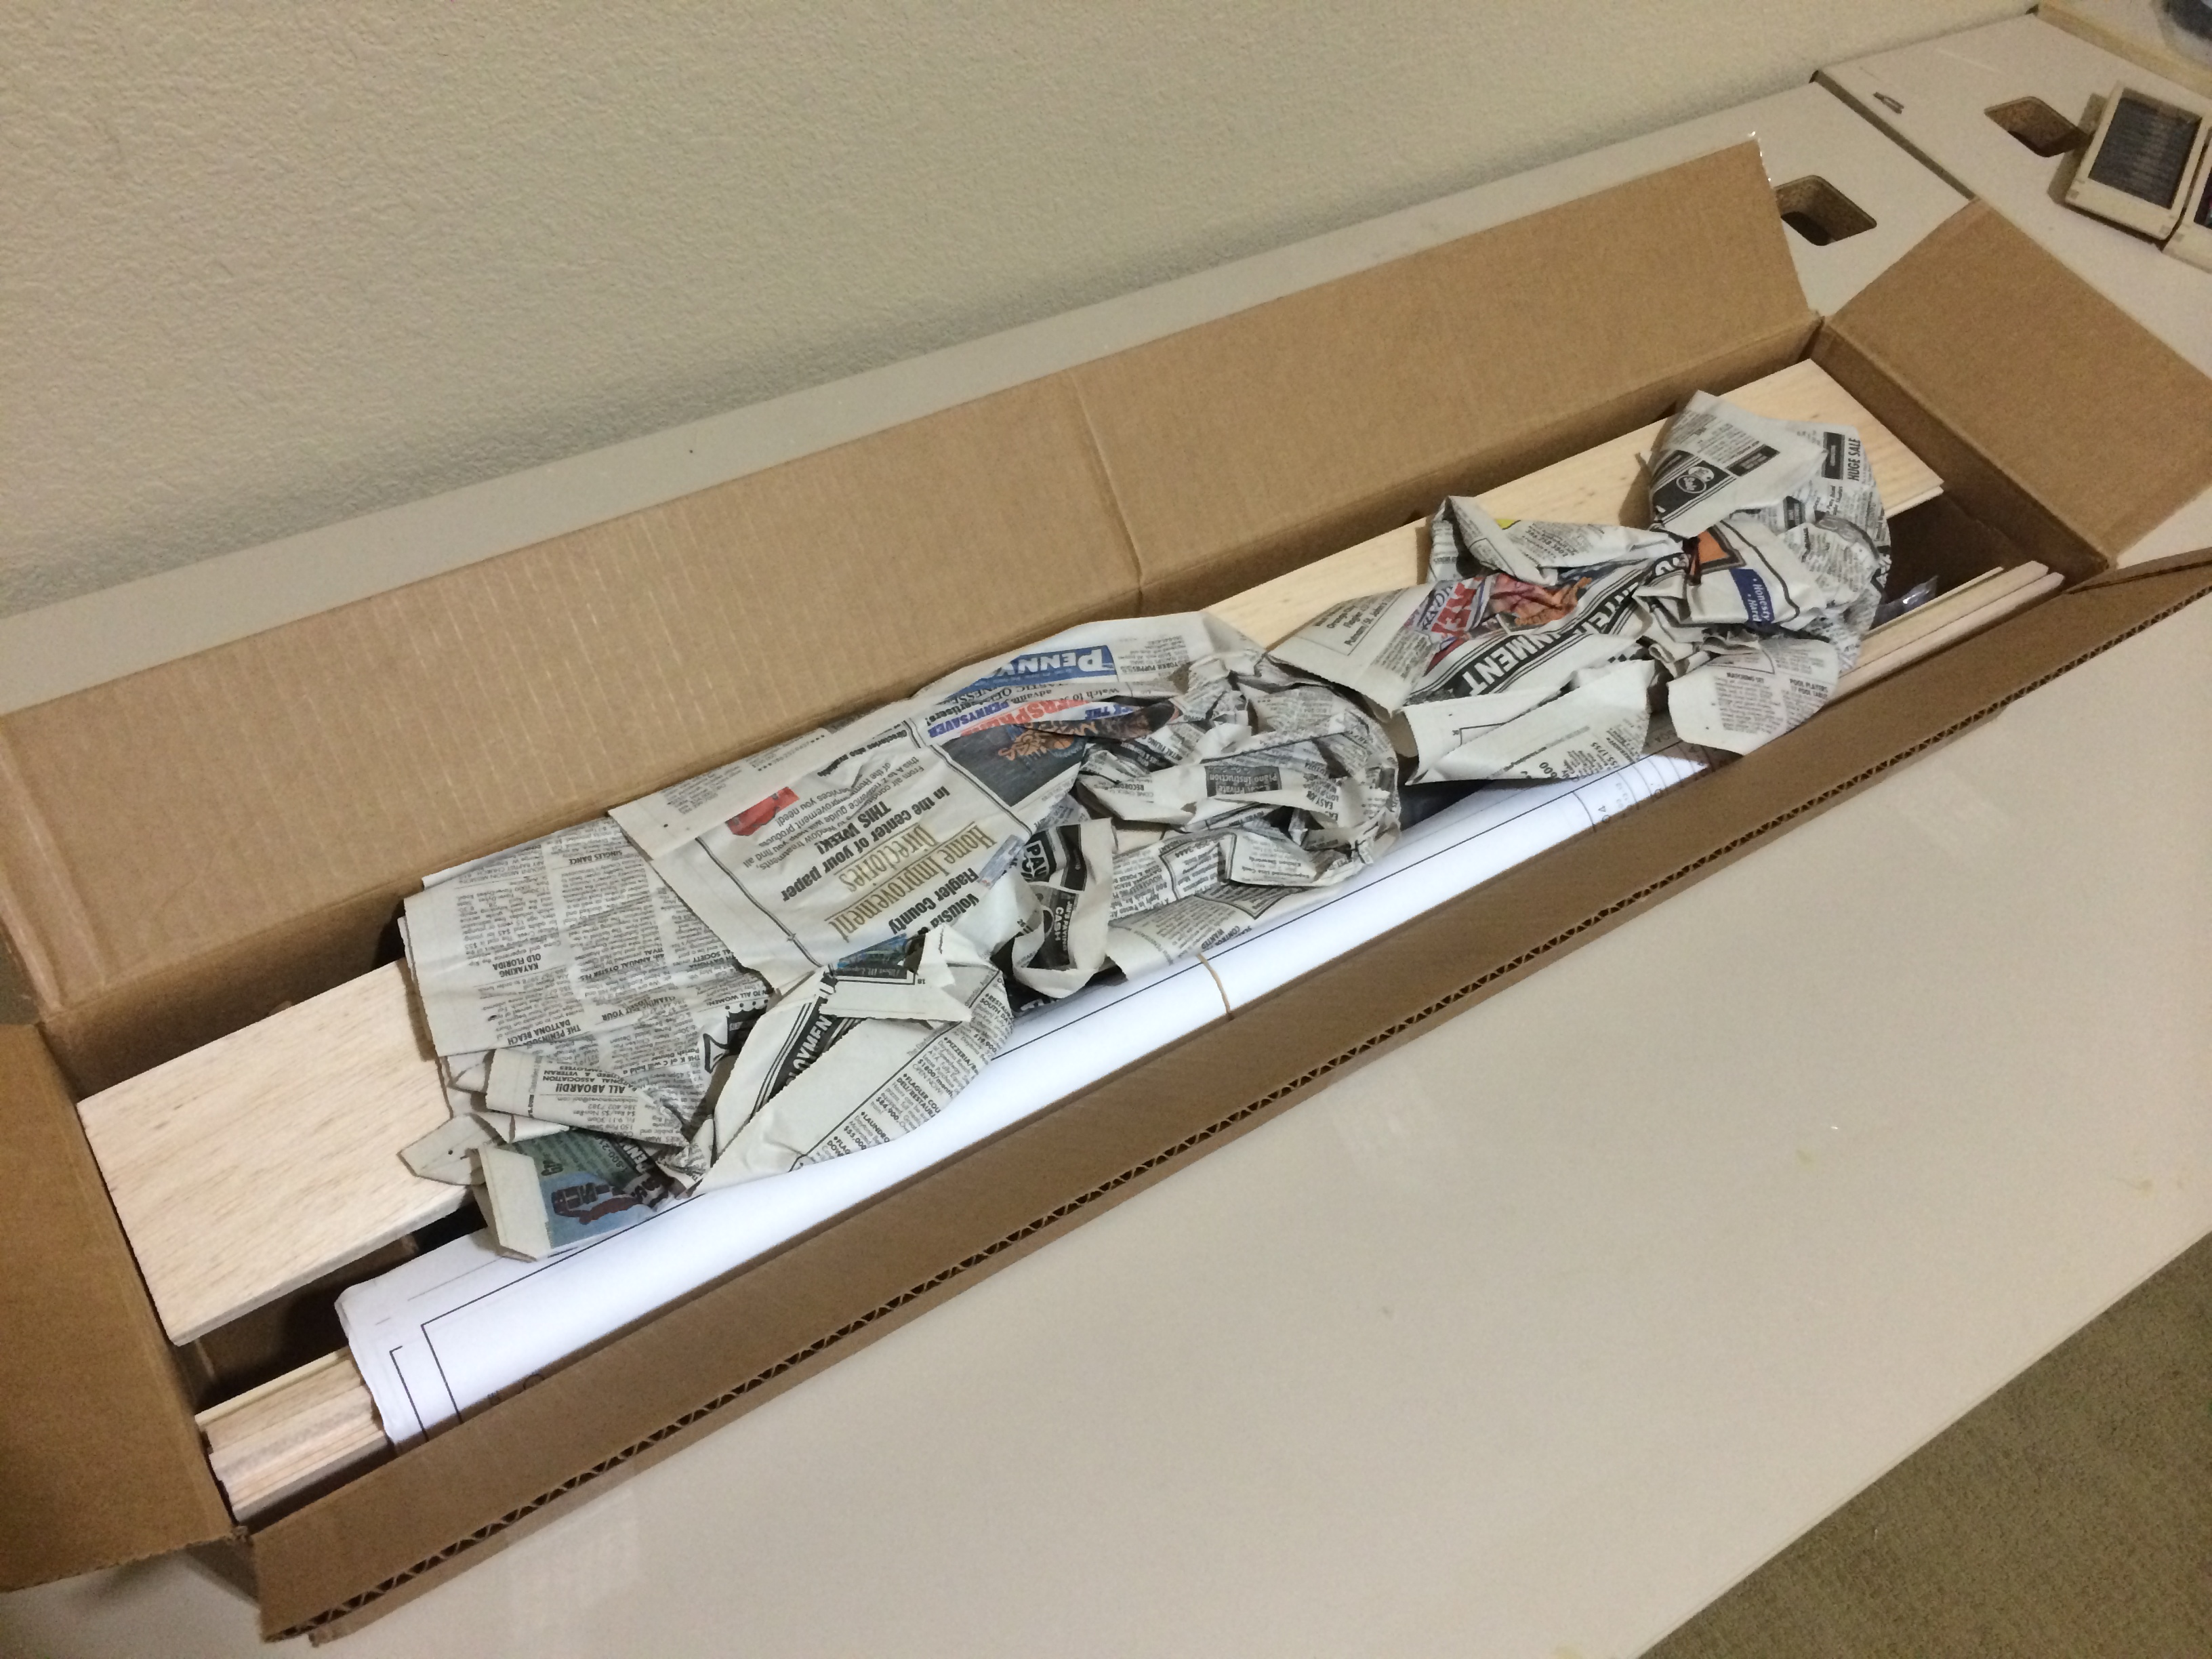
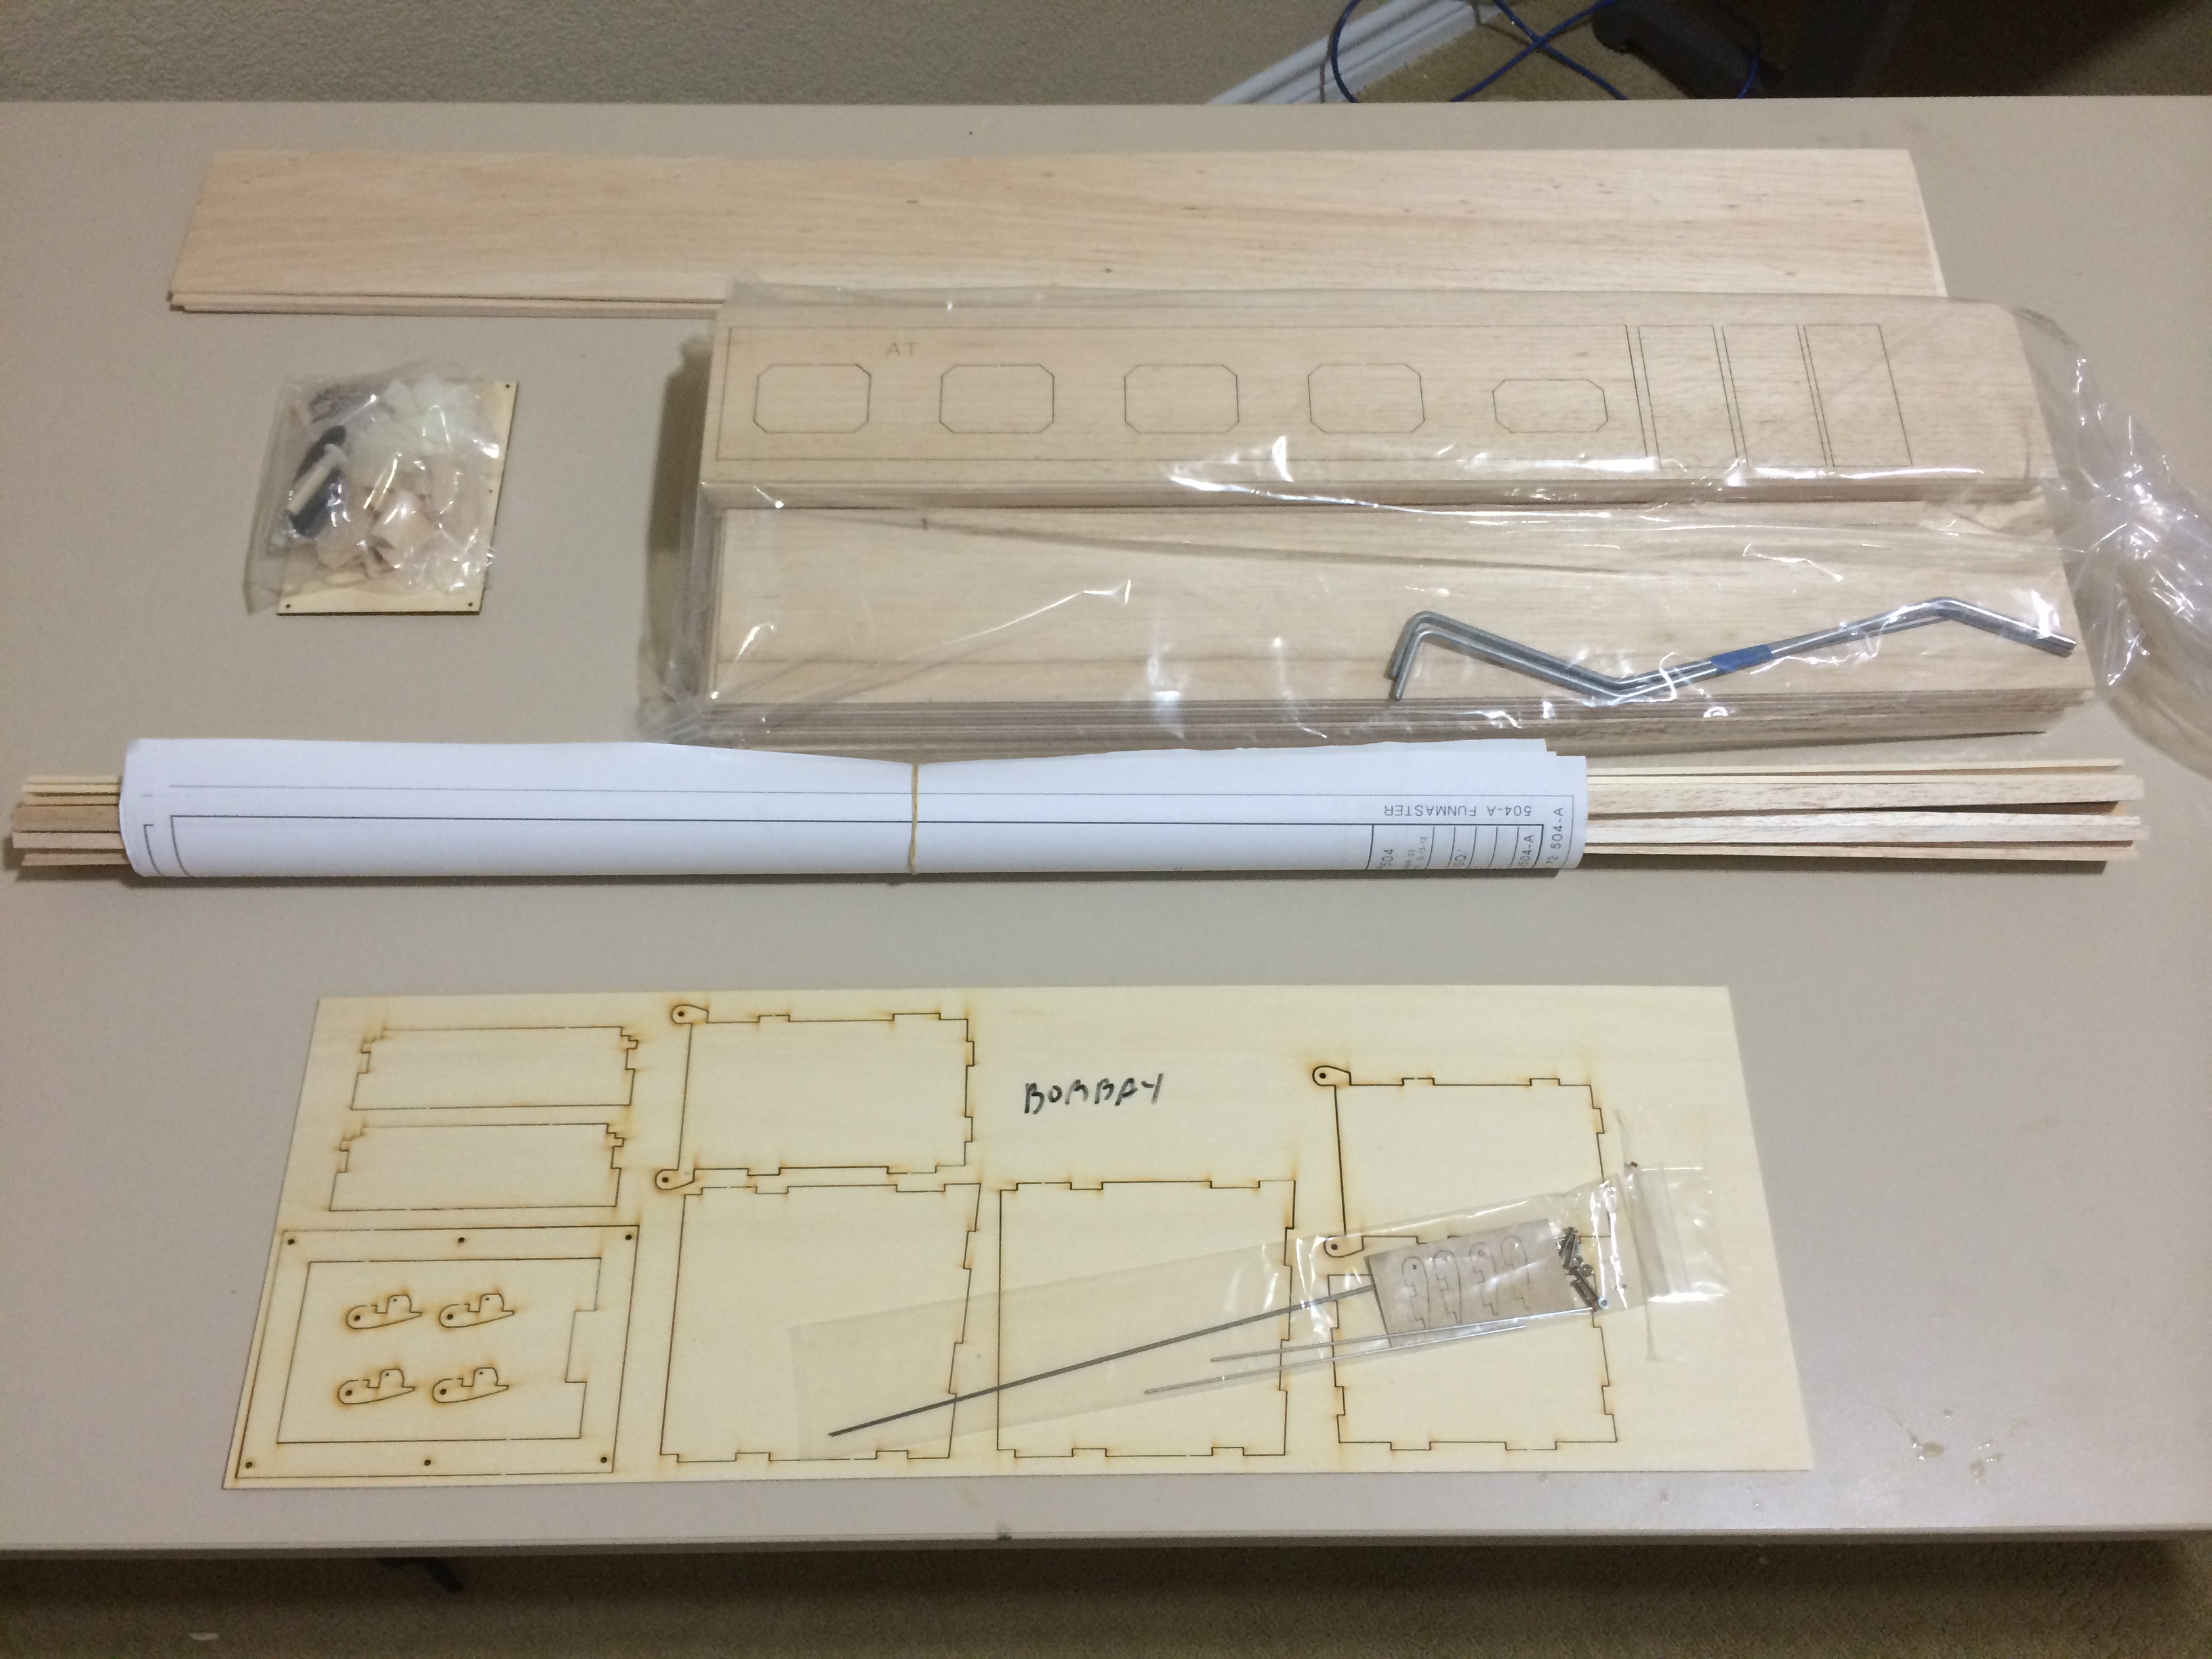
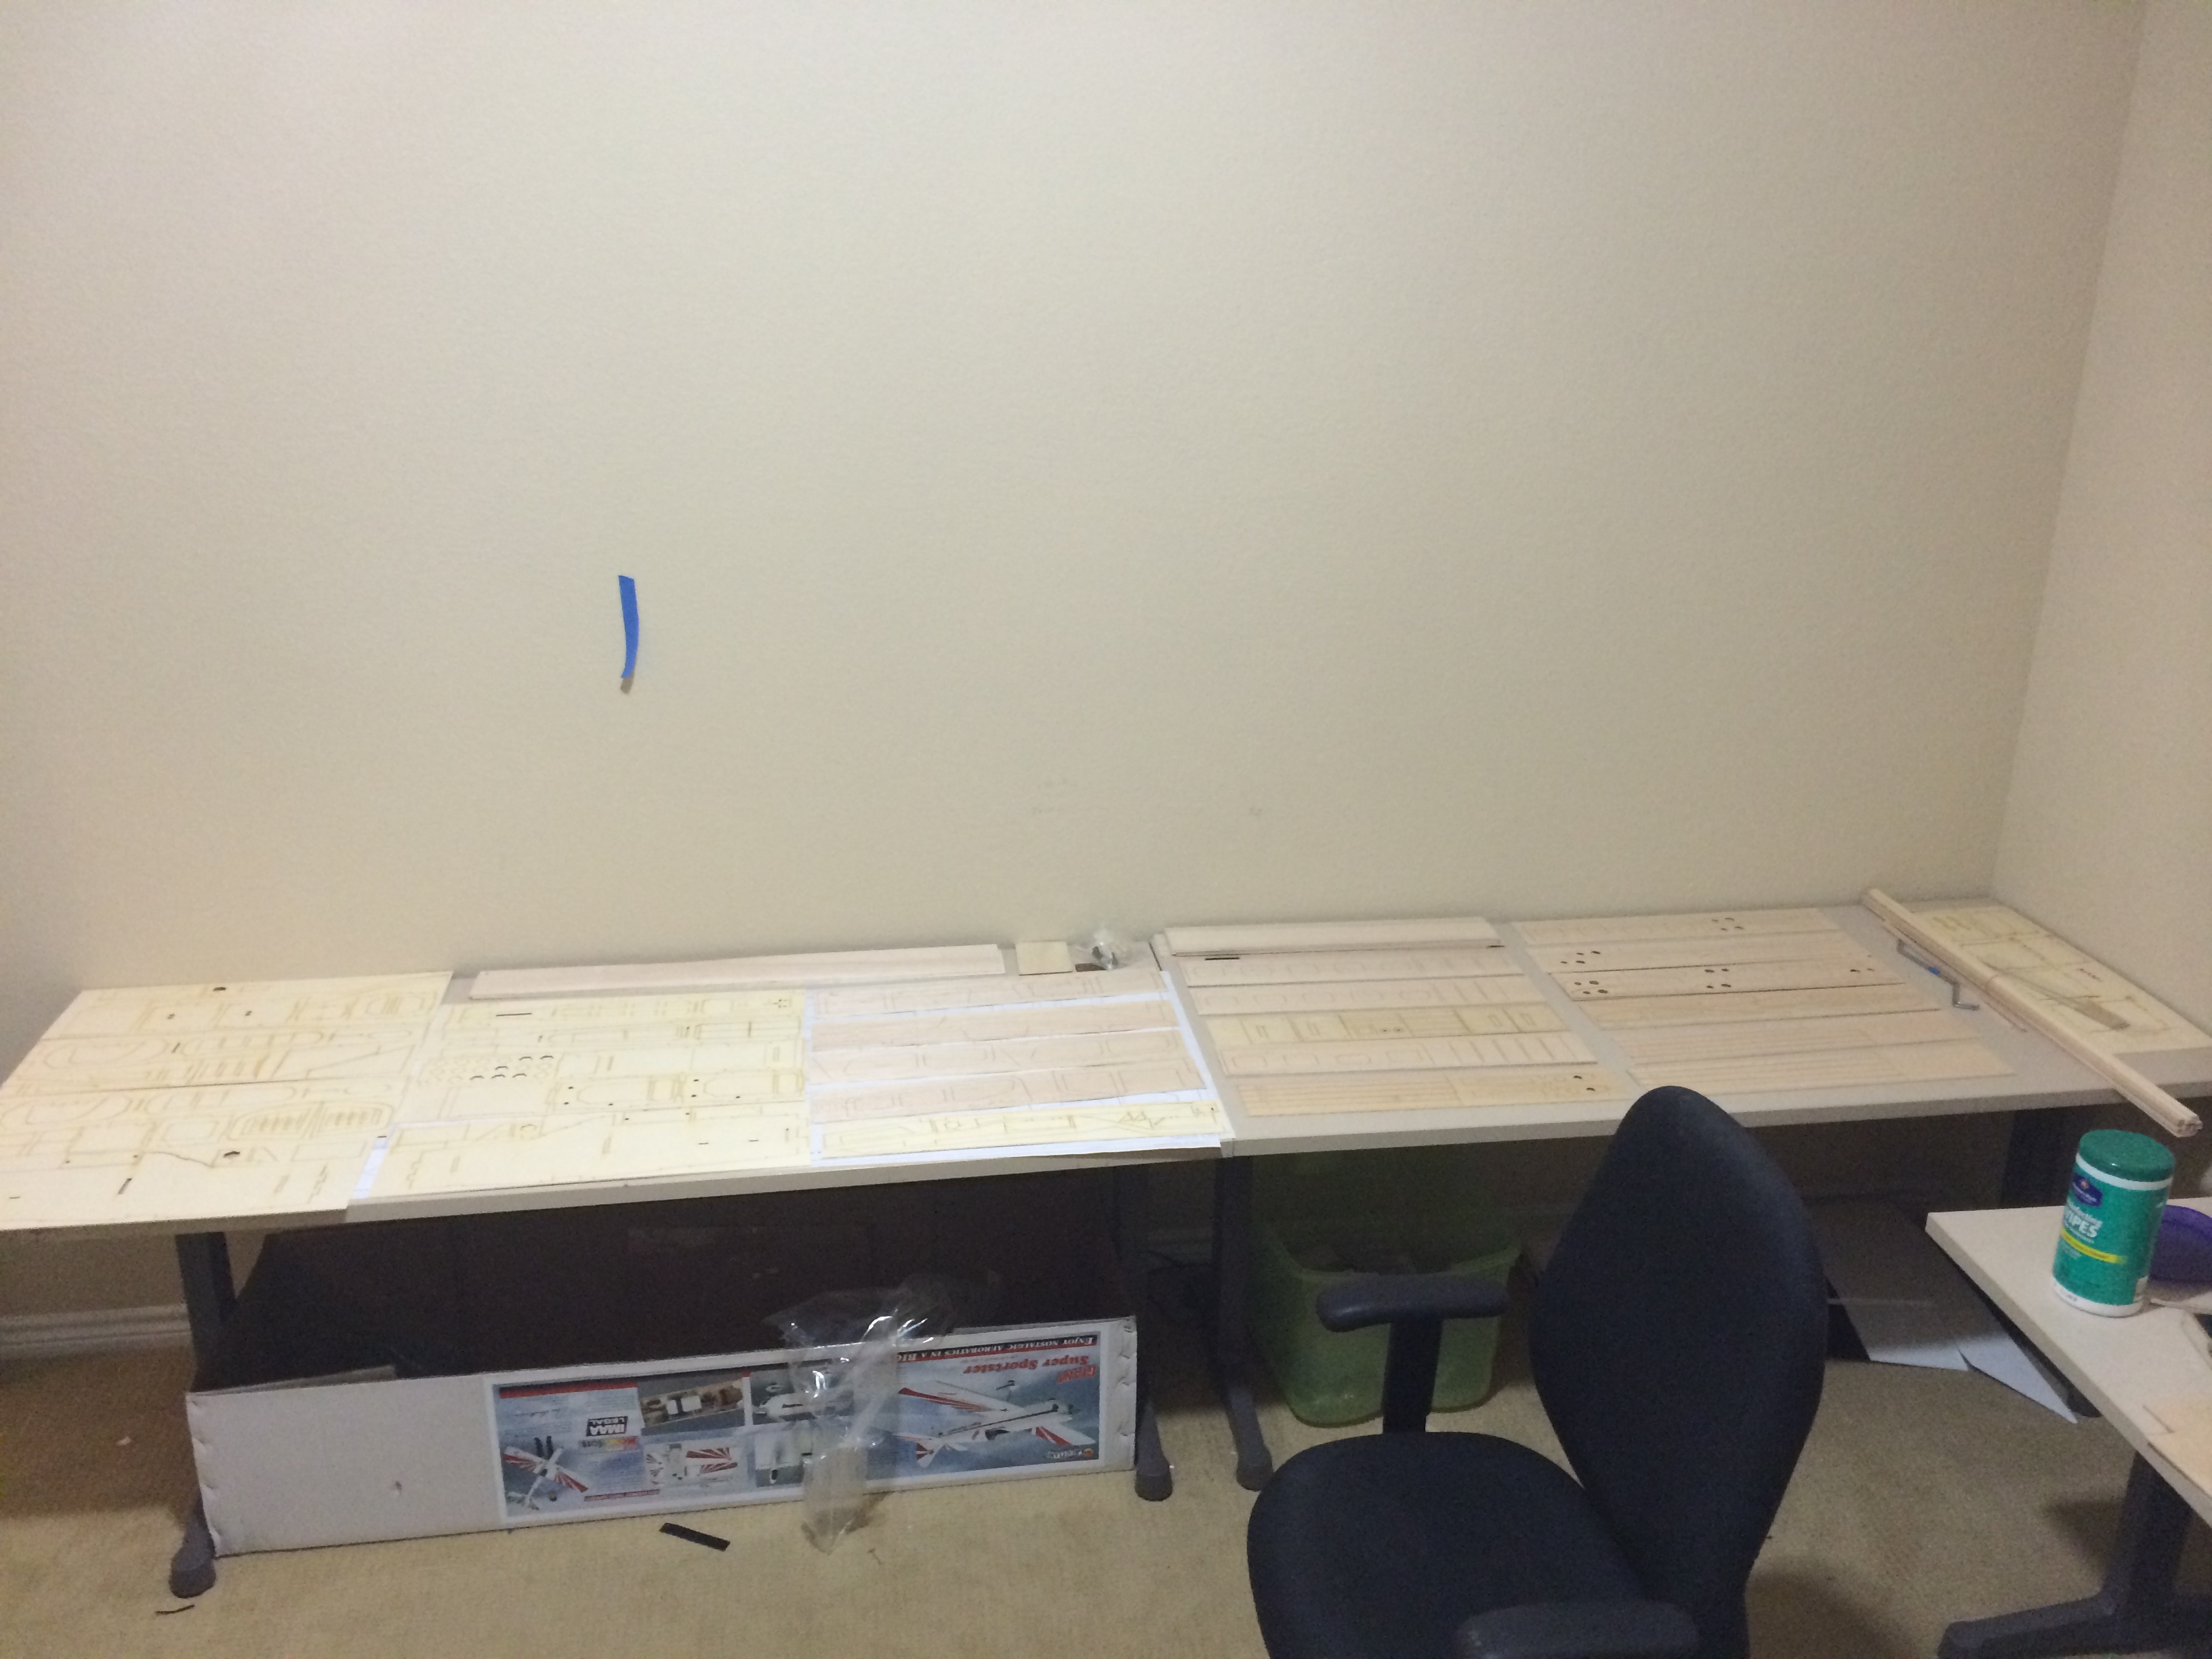
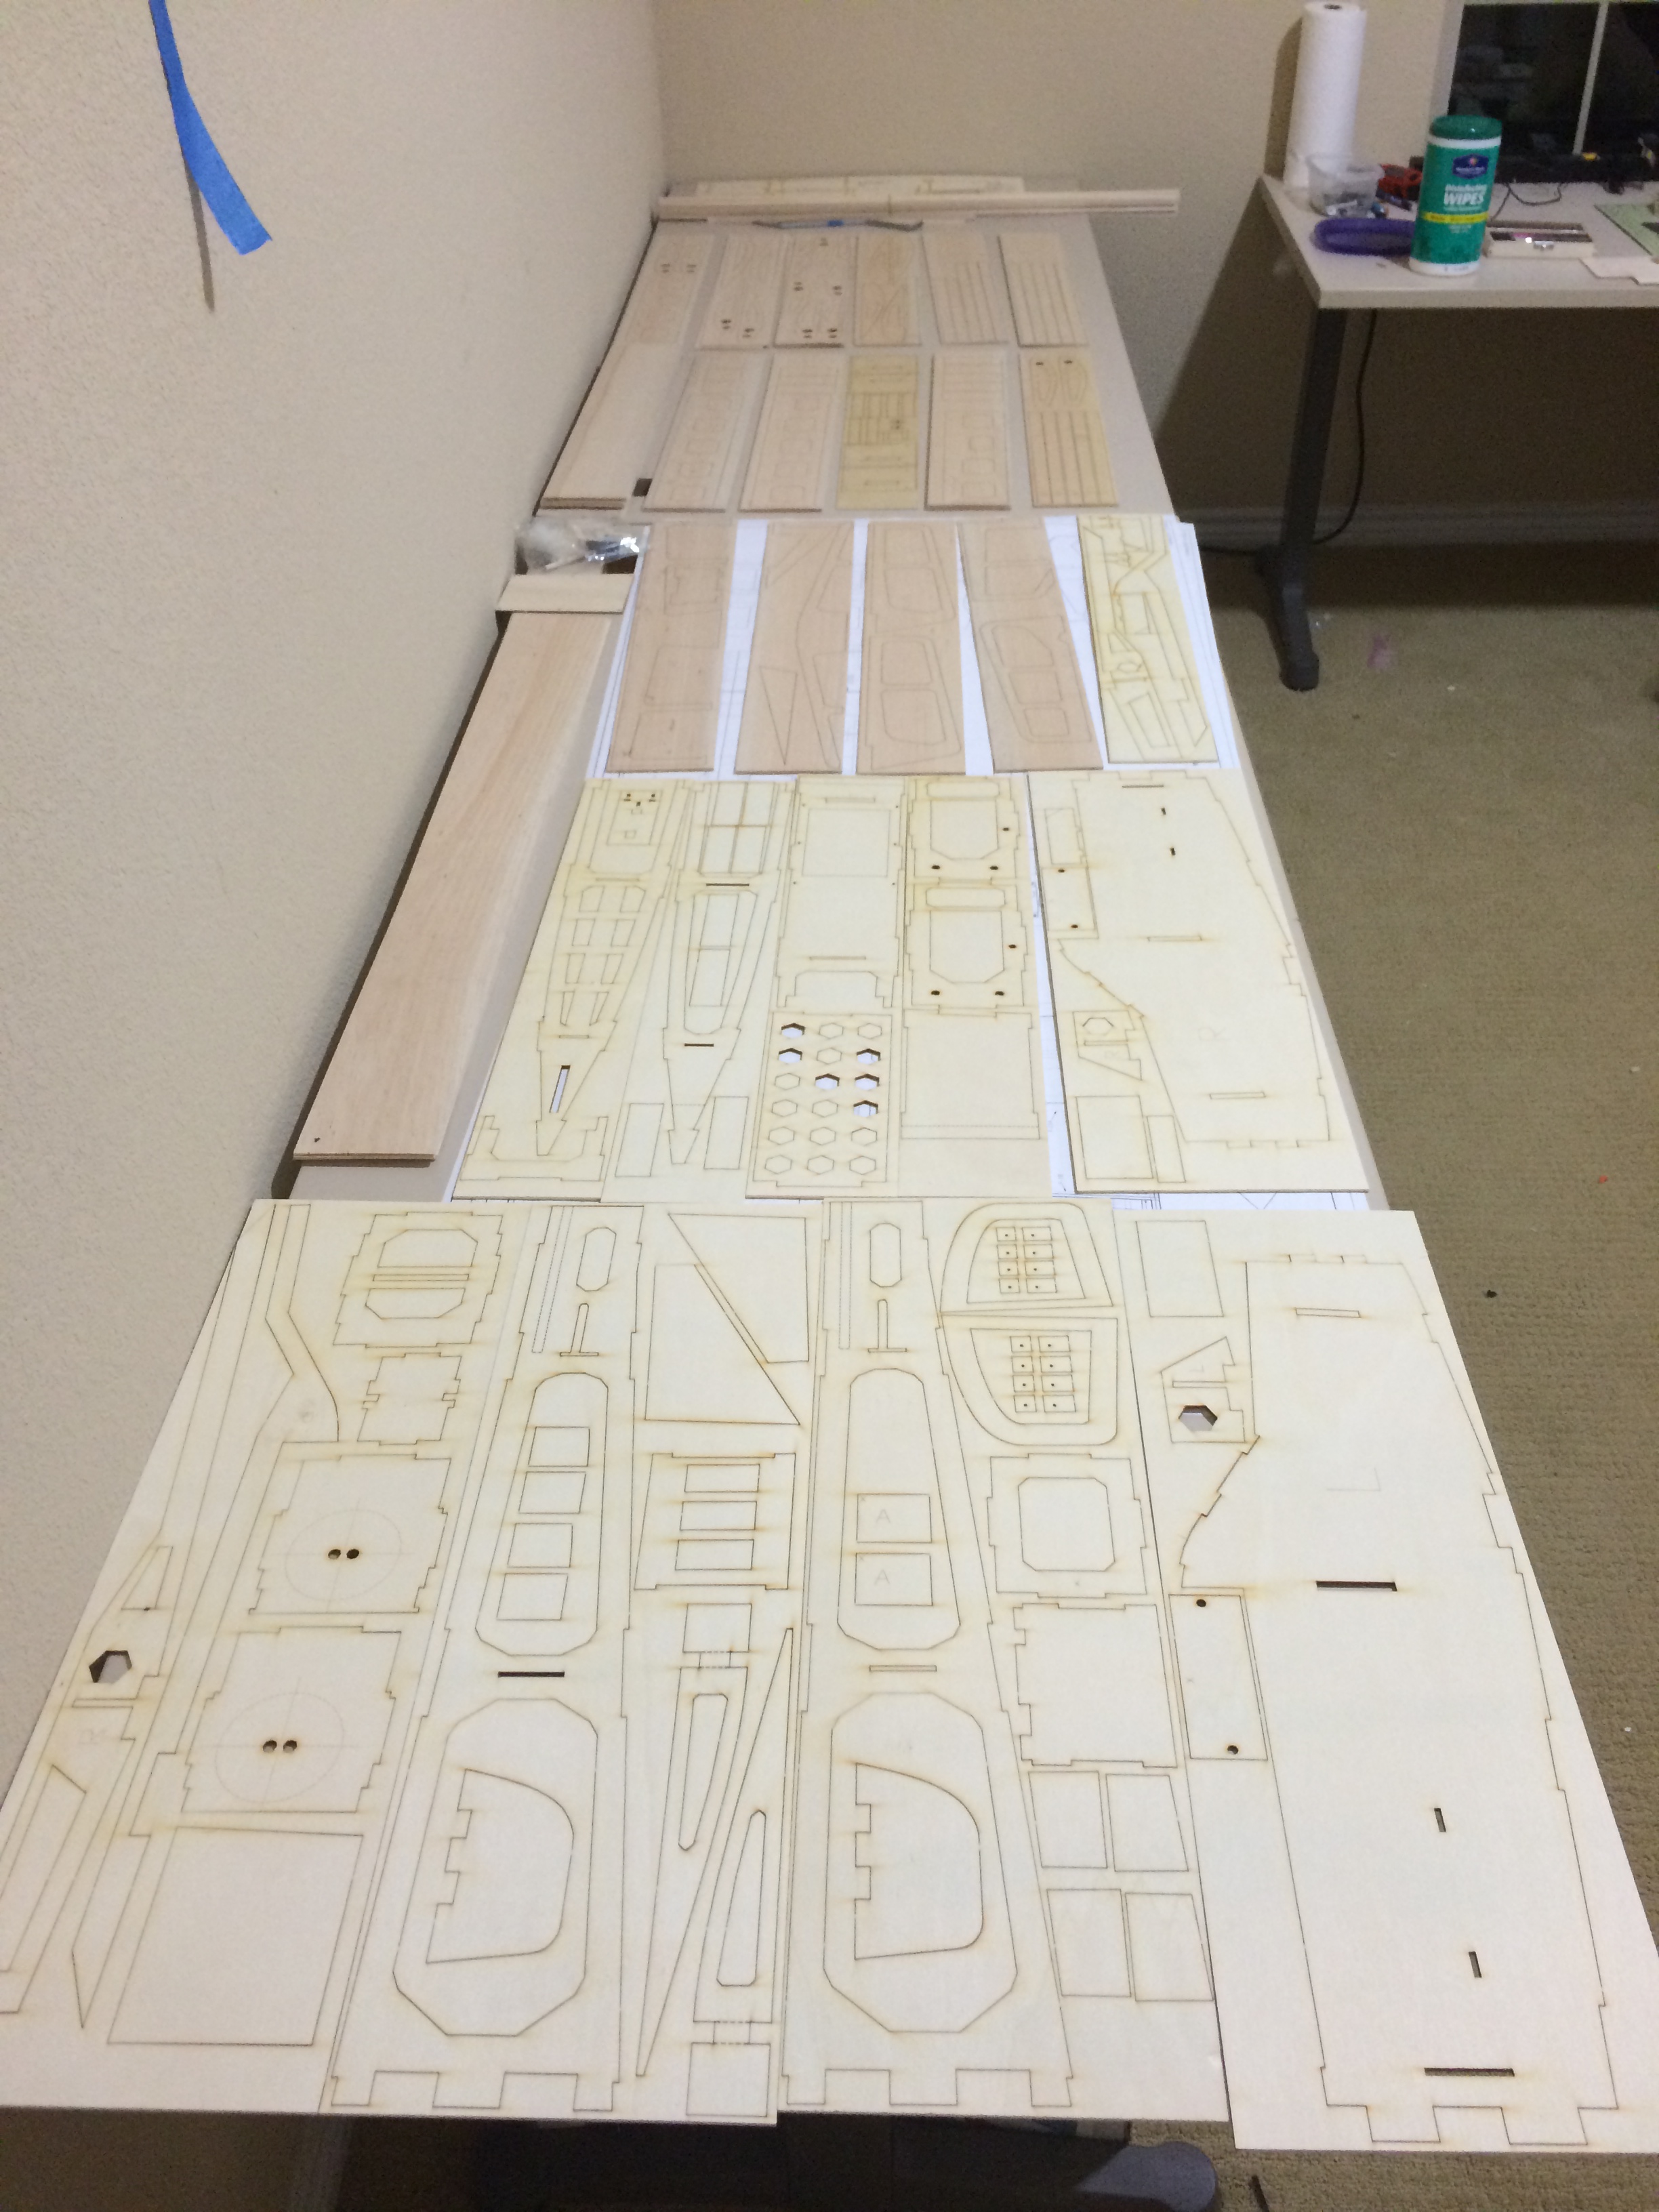
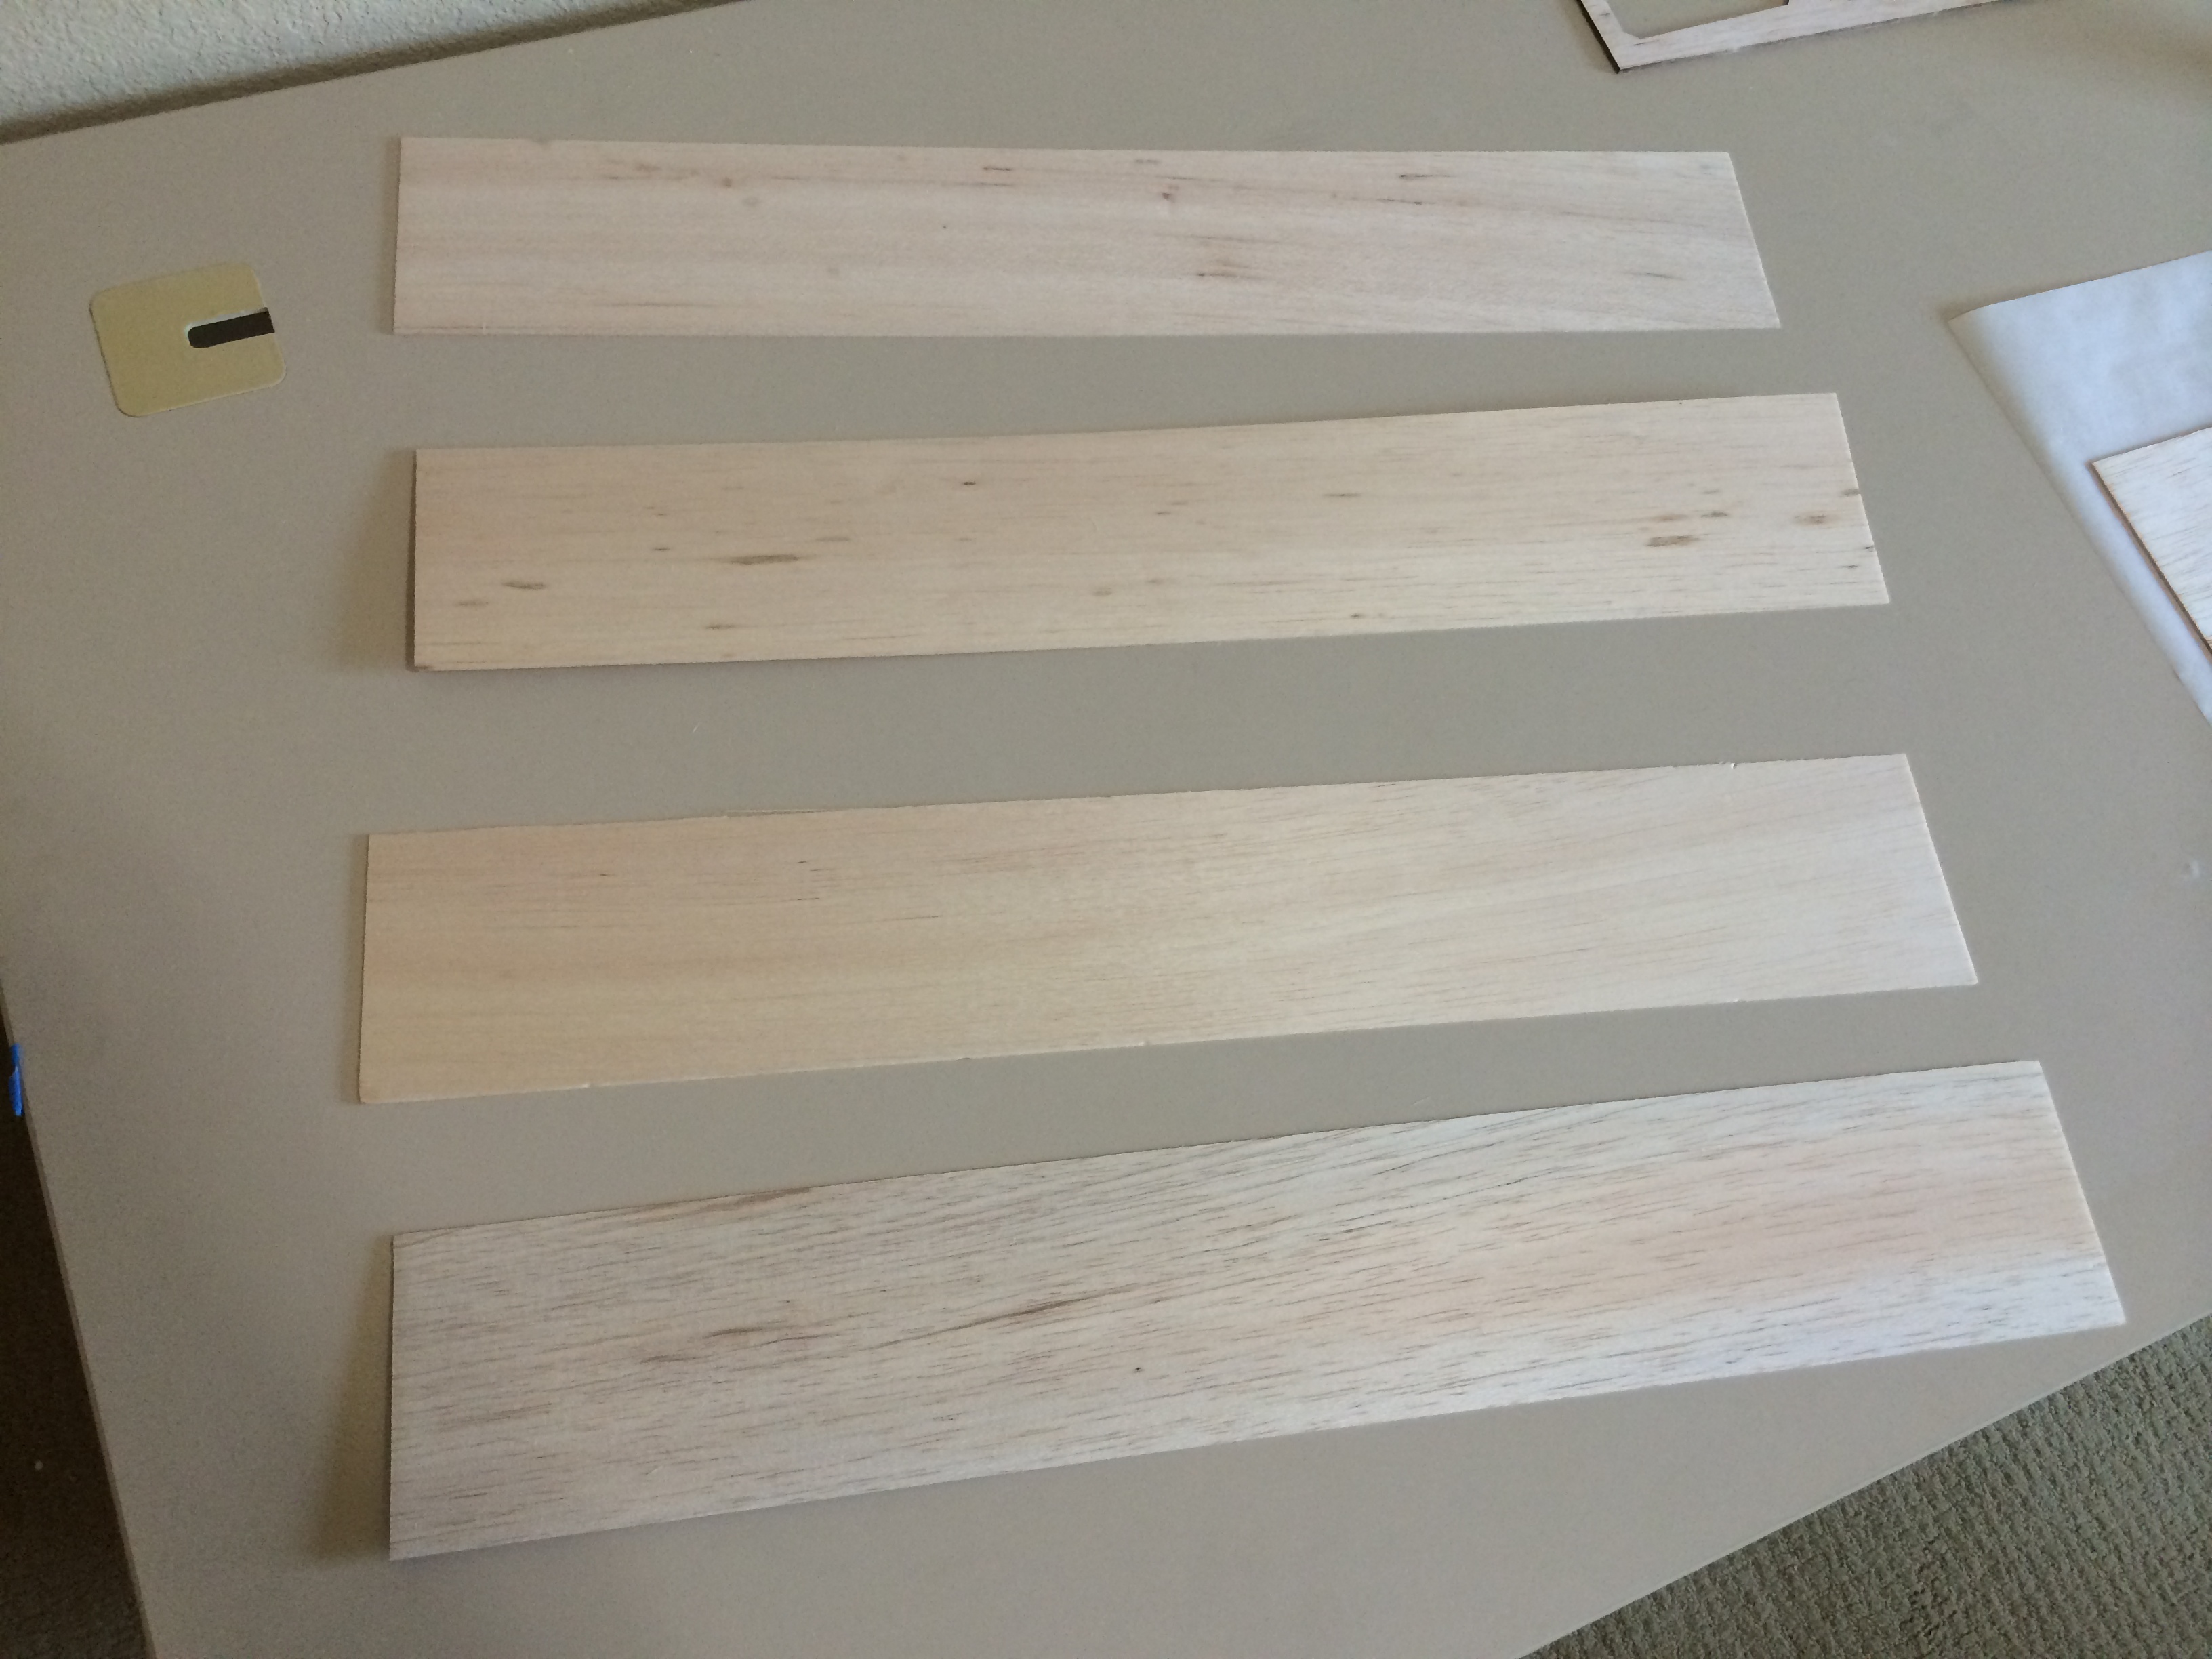
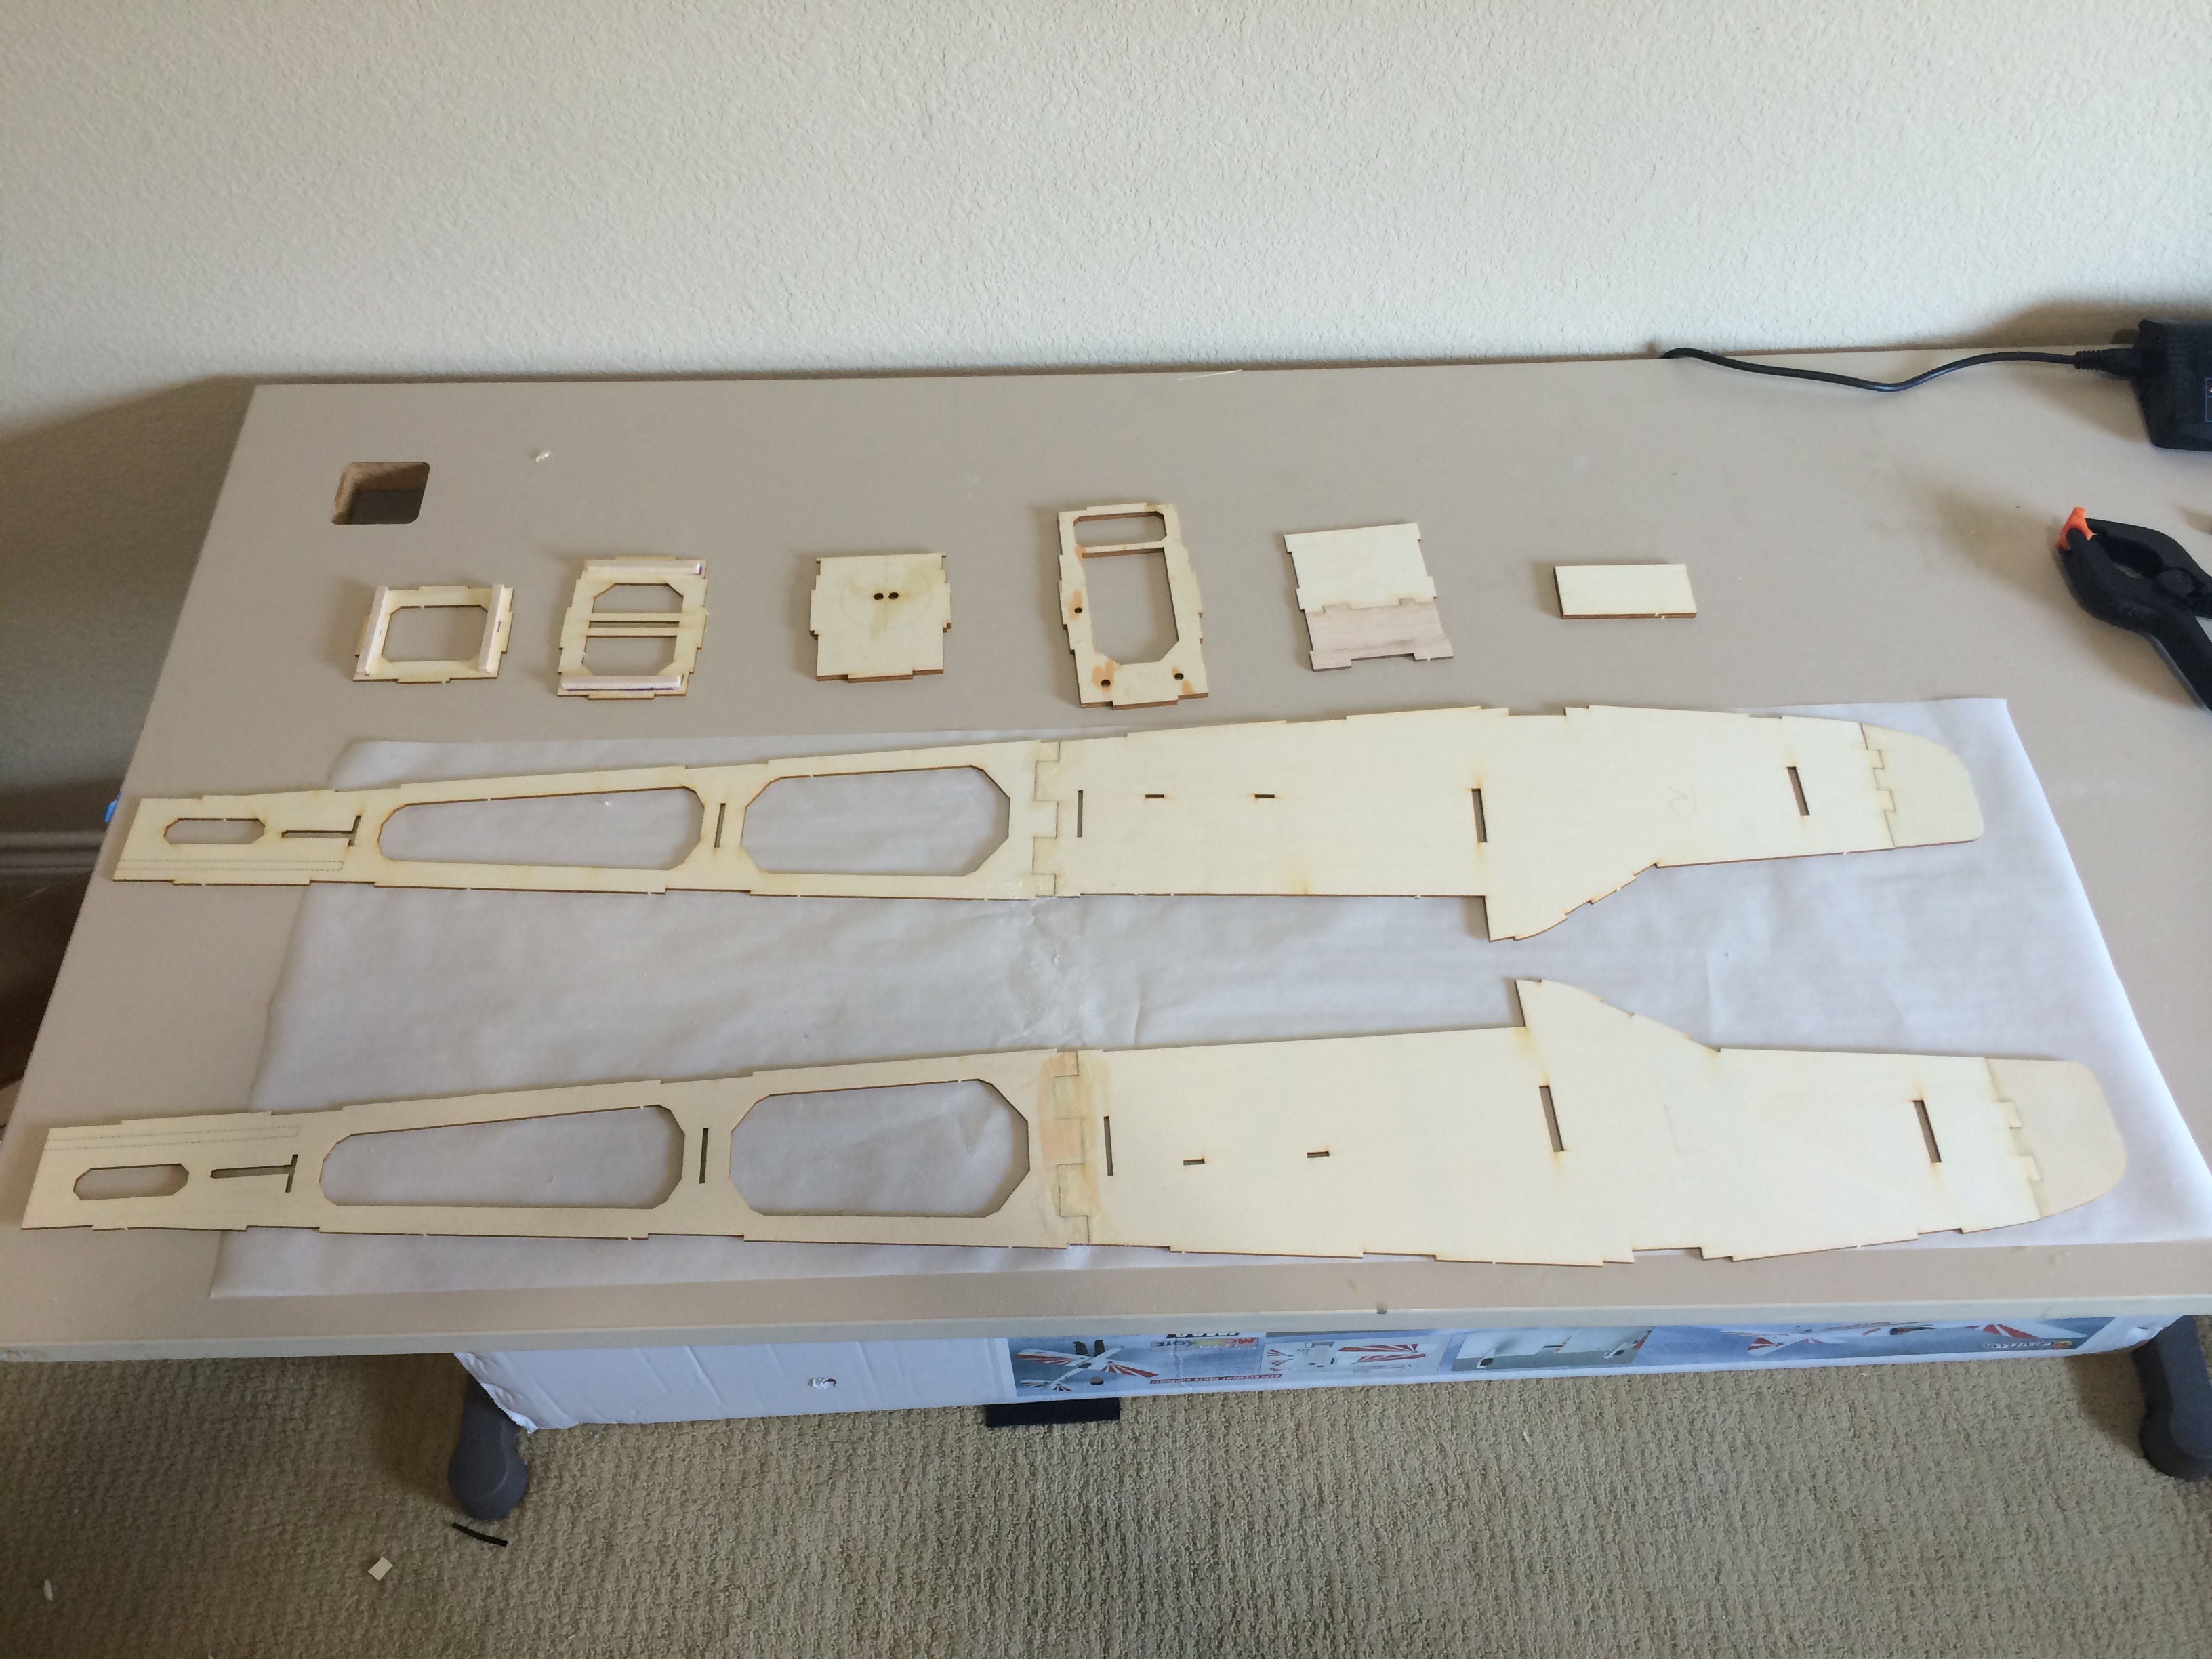
The kit arrived yesterday and I quickly started unpacking, organizing and preparing for the build. You can see from the pictures, it came well packed, with good laser cut wood. The plans are full size and clear to understand. The instruction book is available for download on their website which I find very nice because they can update it and provide higher resolution pictures if you have questions. The only item I found that I didn't like so far was that the tail wheel wire does not come prebent into shape. That is something I will need to do as part of the build. While that is certainly minor, it seems to me that it would be something very easy for them to do.
I hope you enjoy following this build as much as I believe I am going to enjoy building this. My goal is to maiden the plane in 5 weeks. As I get going, I will post more about the specs for the engine (it will be glow to lower risk of damage from float flying), servos, and other accessories. Stay tuned.
Josh
One of my other requirements is that this airplane must also be able to fly off water using floats, so I am also going to be adding the capability to quickly mount floats to the plane. I am also going to be building and installing the internal bomb bay module.
The kit arrived yesterday and I quickly started unpacking, organizing and preparing for the build. You can see from the pictures, it came well packed, with good laser cut wood. The plans are full size and clear to understand. The instruction book is available for download on their website which I find very nice because they can update it and provide higher resolution pictures if you have questions. The only item I found that I didn't like so far was that the tail wheel wire does not come prebent into shape. That is something I will need to do as part of the build. While that is certainly minor, it seems to me that it would be something very easy for them to do.
I hope you enjoy following this build as much as I believe I am going to enjoy building this. My goal is to maiden the plane in 5 weeks. As I get going, I will post more about the specs for the engine (it will be glow to lower risk of damage from float flying), servos, and other accessories. Stay tuned.
Josh
 08-12-2014, 06:23 PM
#3
Member
Thread Starter
Join Date: Sep 2012
Location: Frisco, TX
Posts: 54
Likes: 0
Received 0 Likes
on
0 Posts
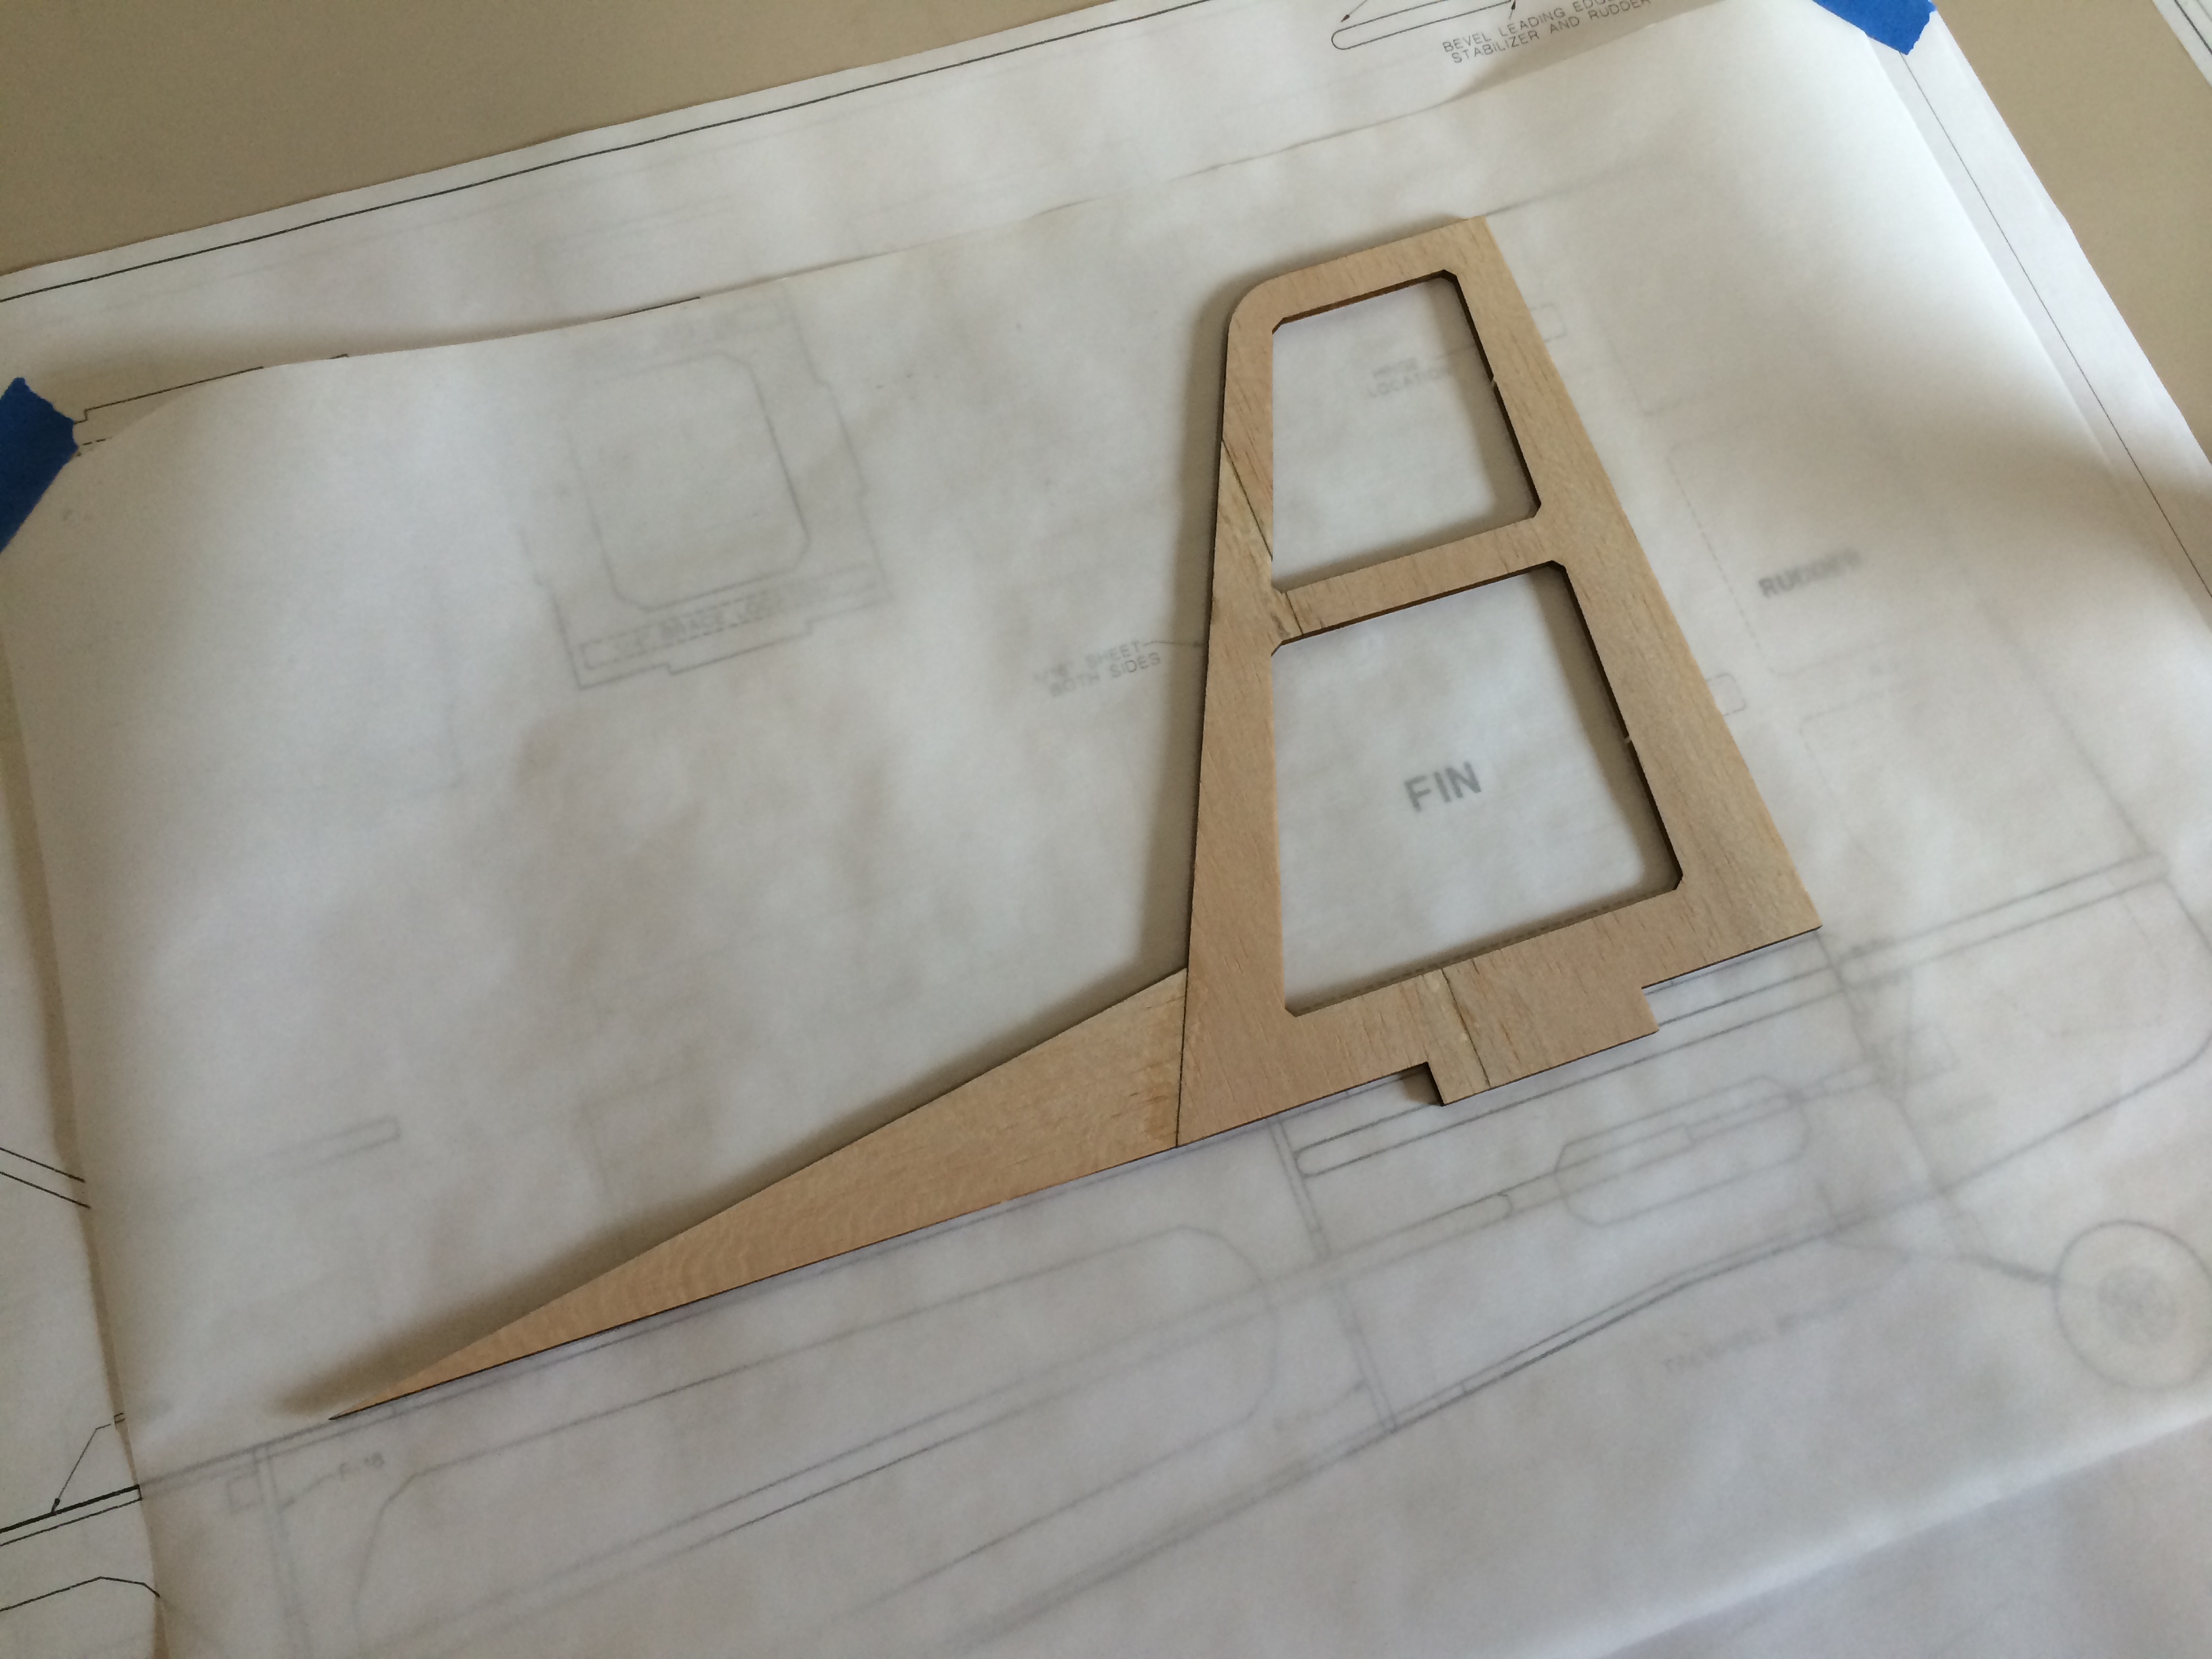
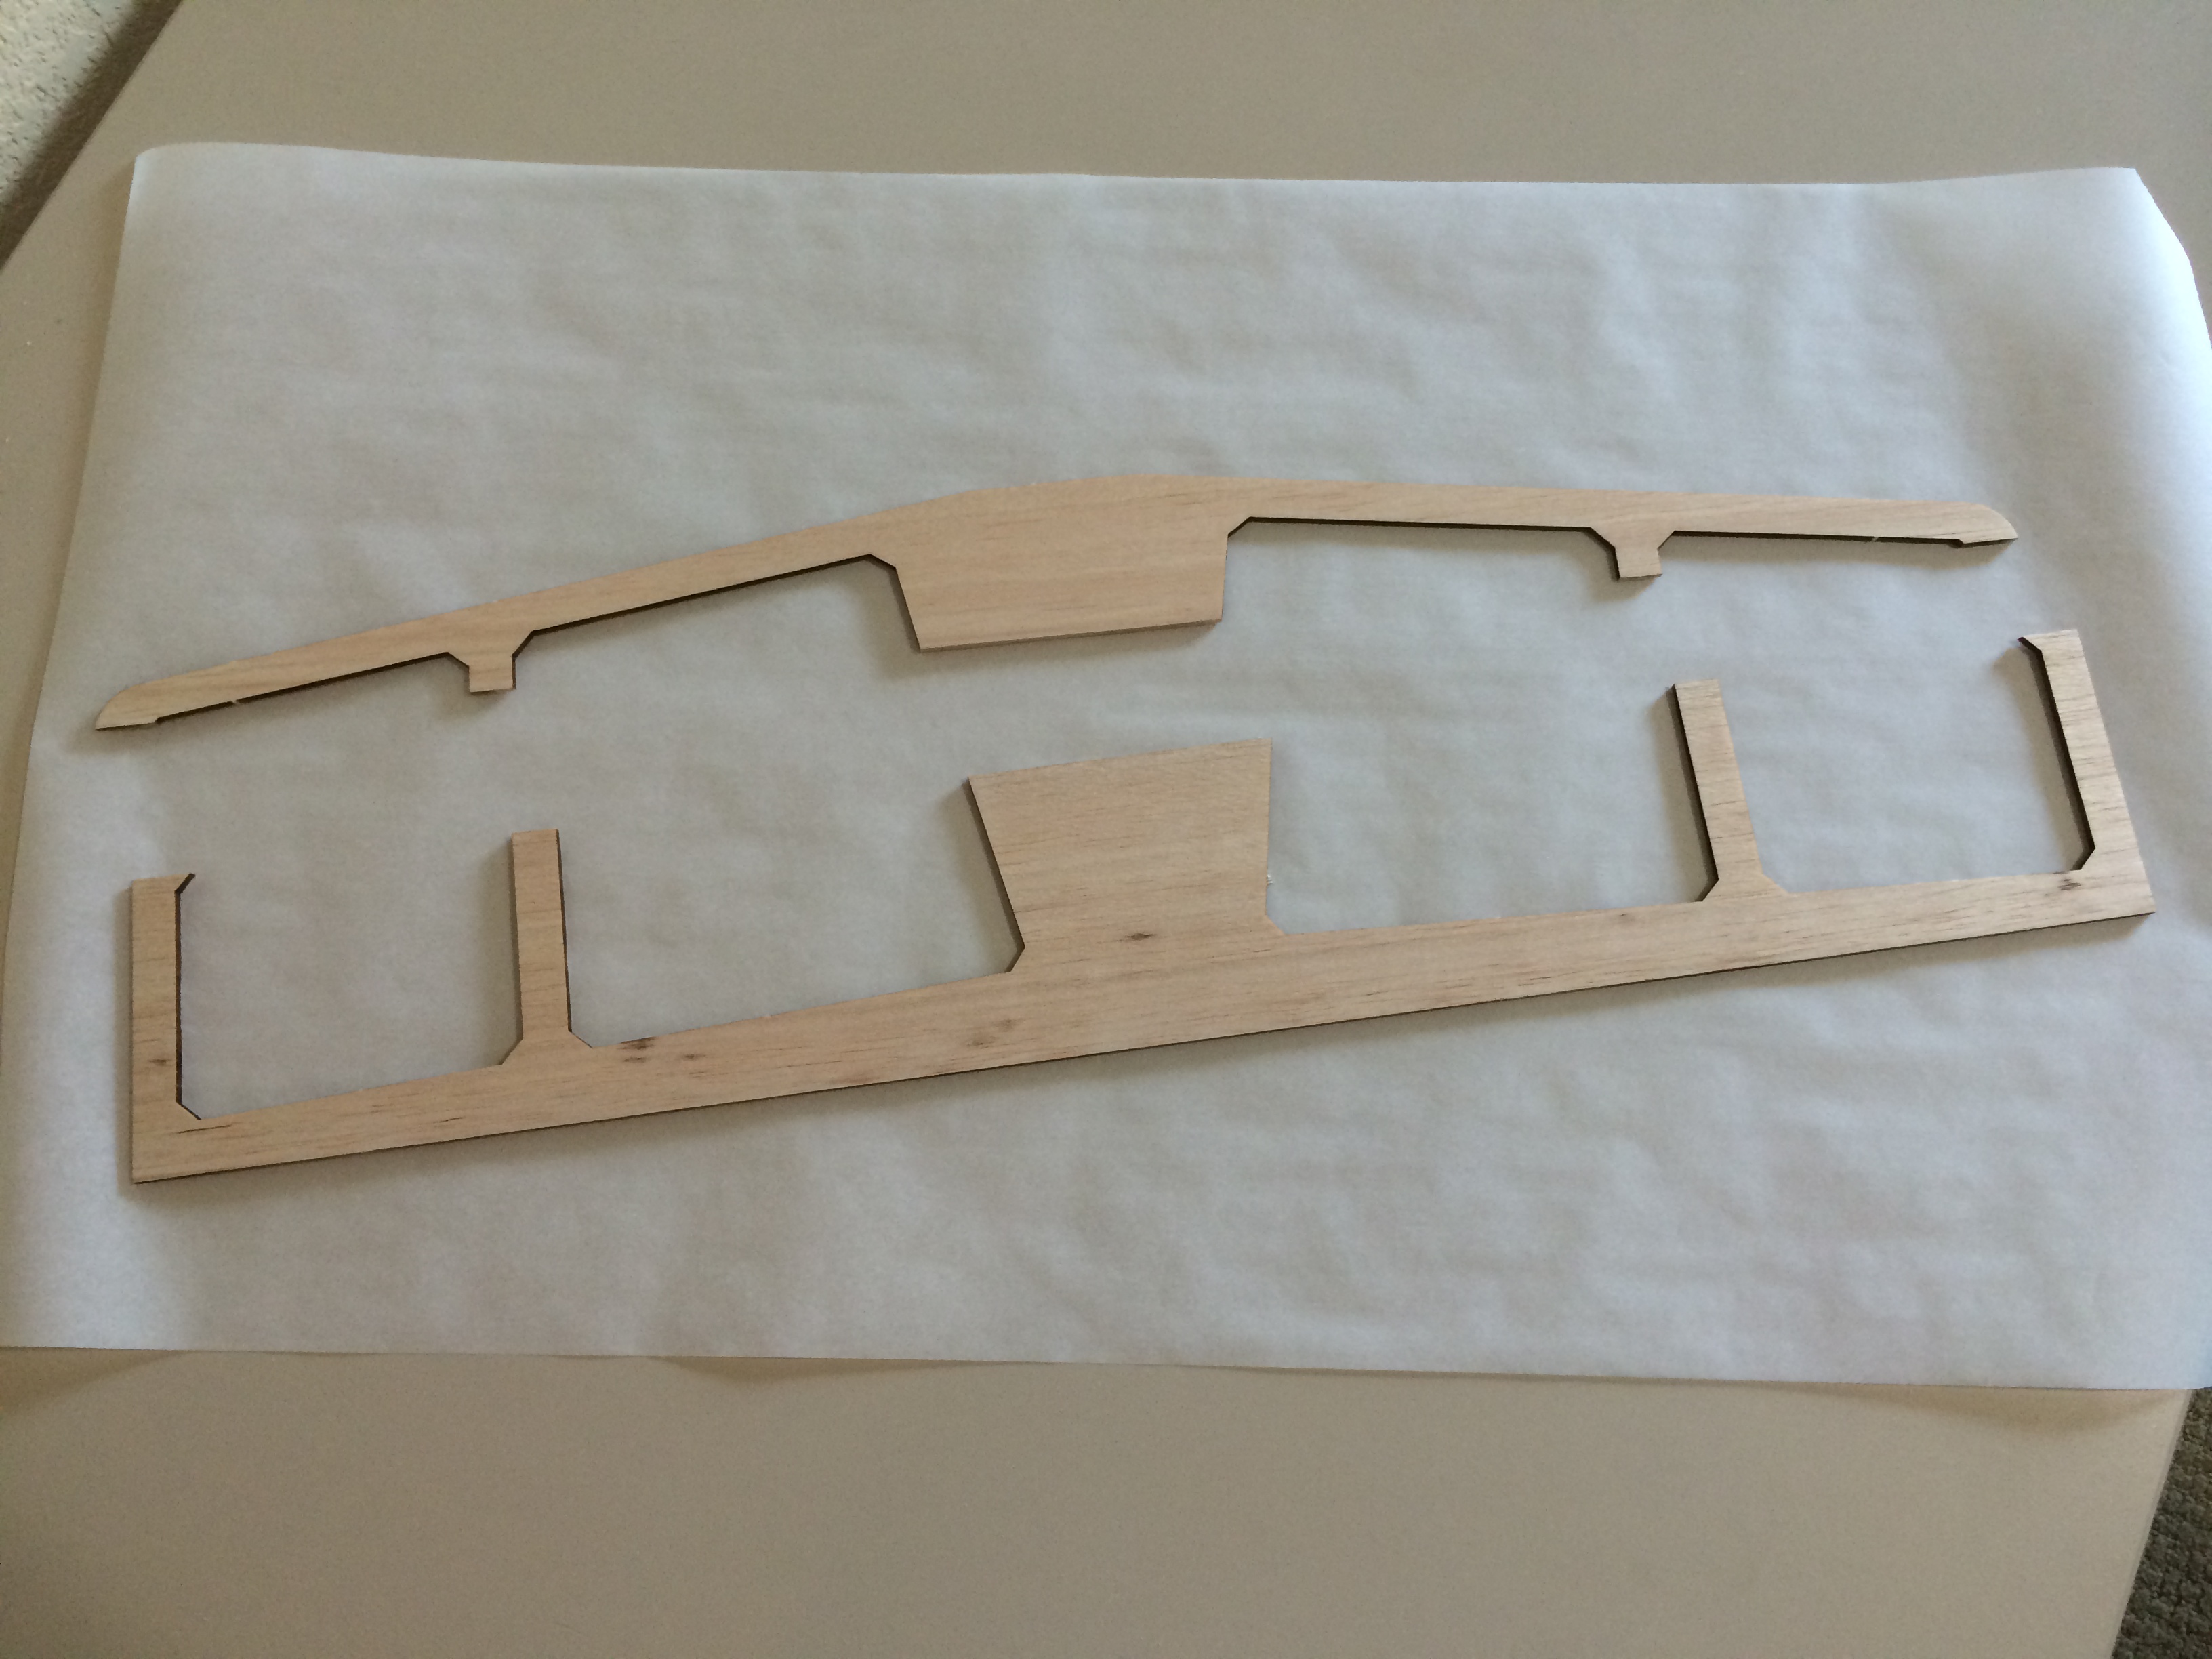
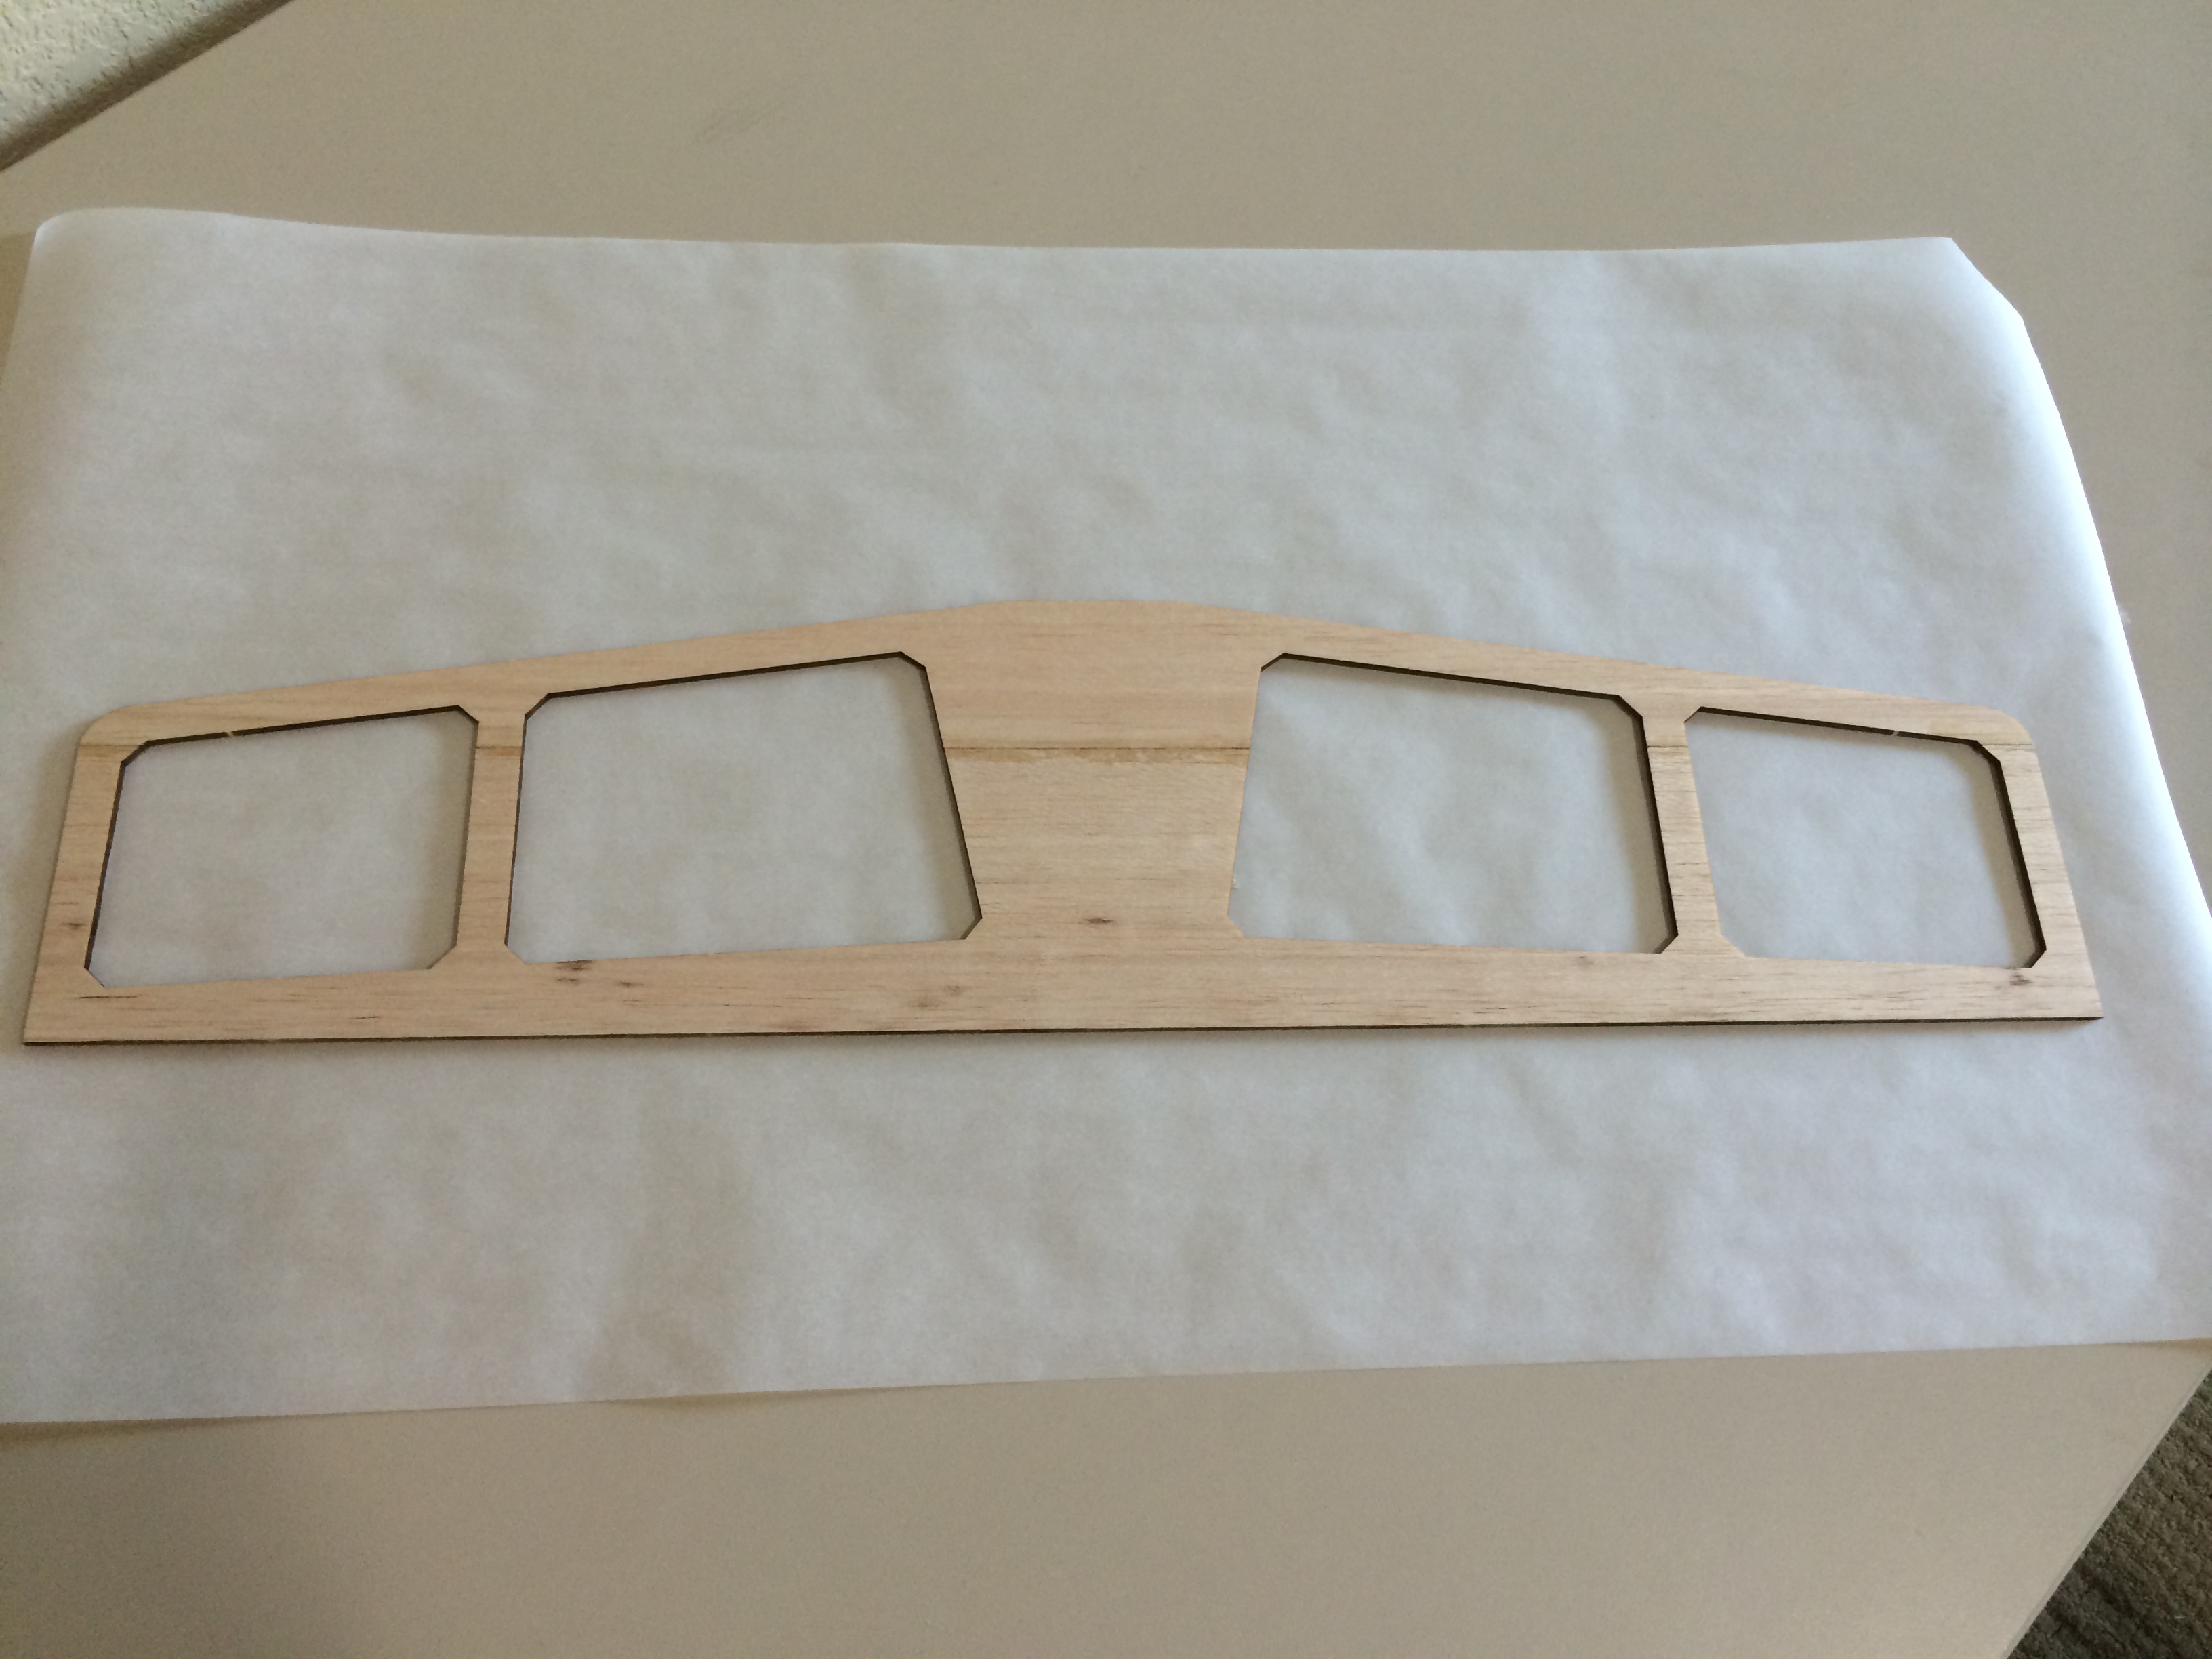
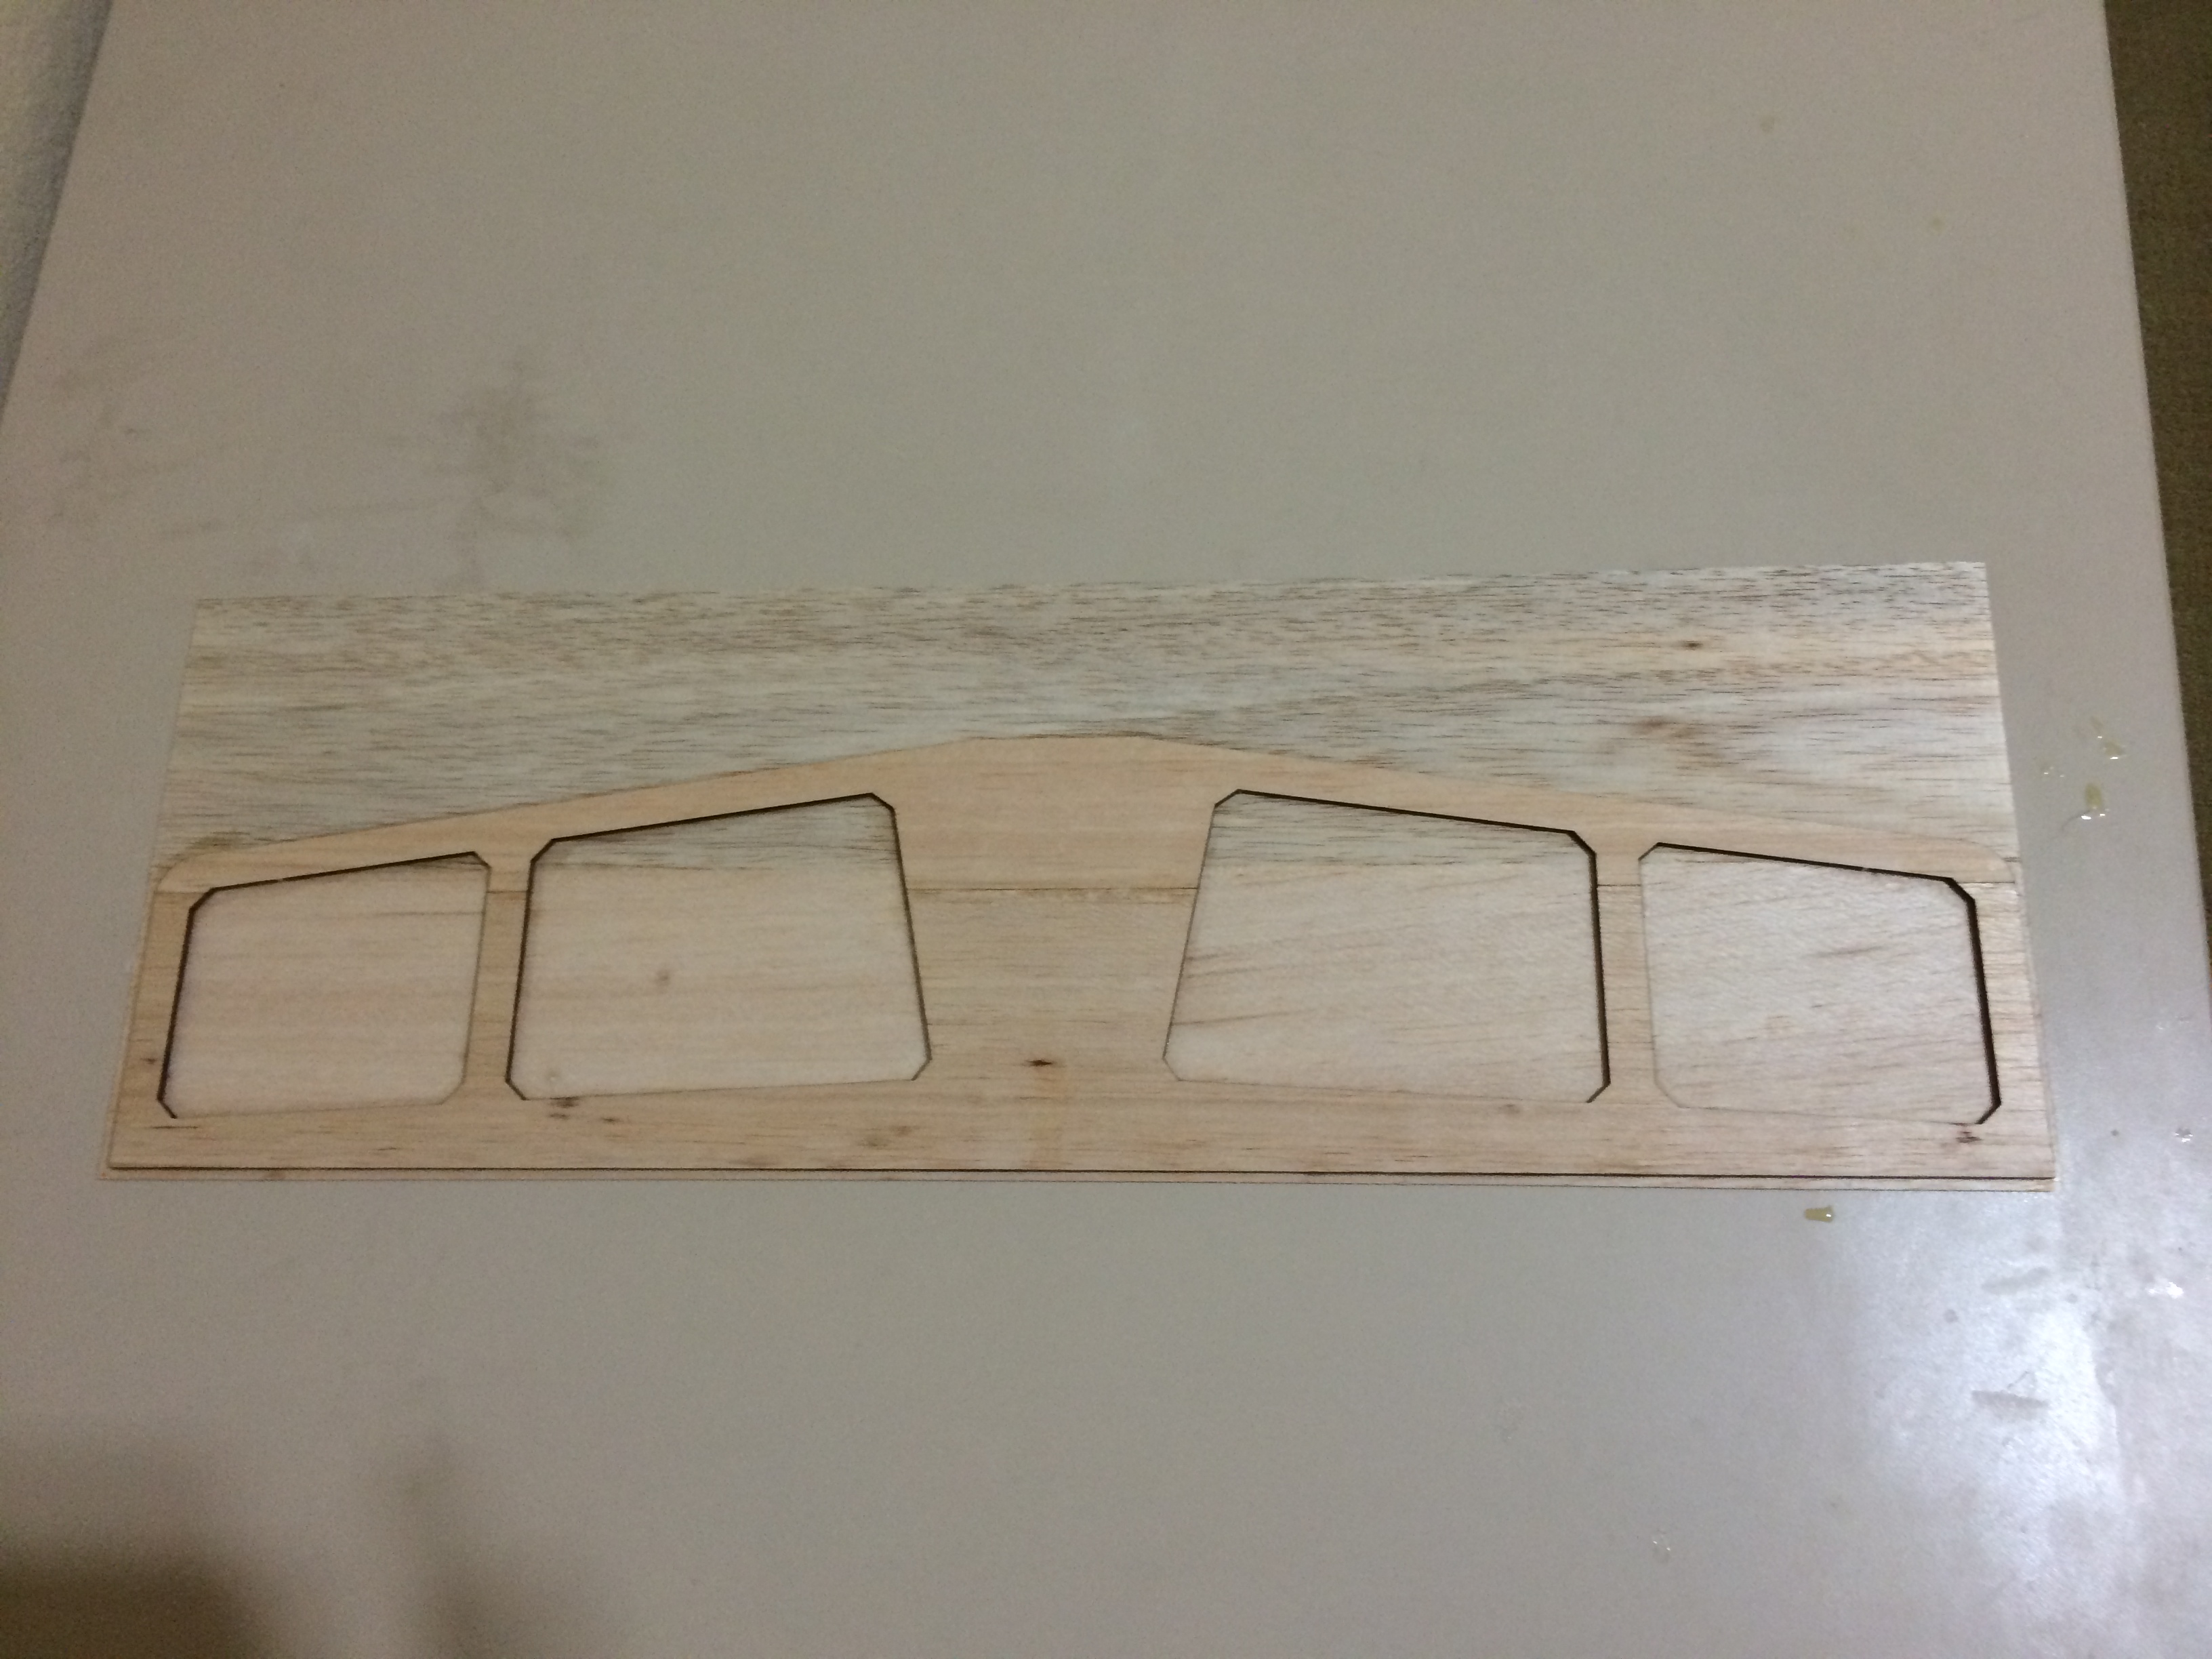
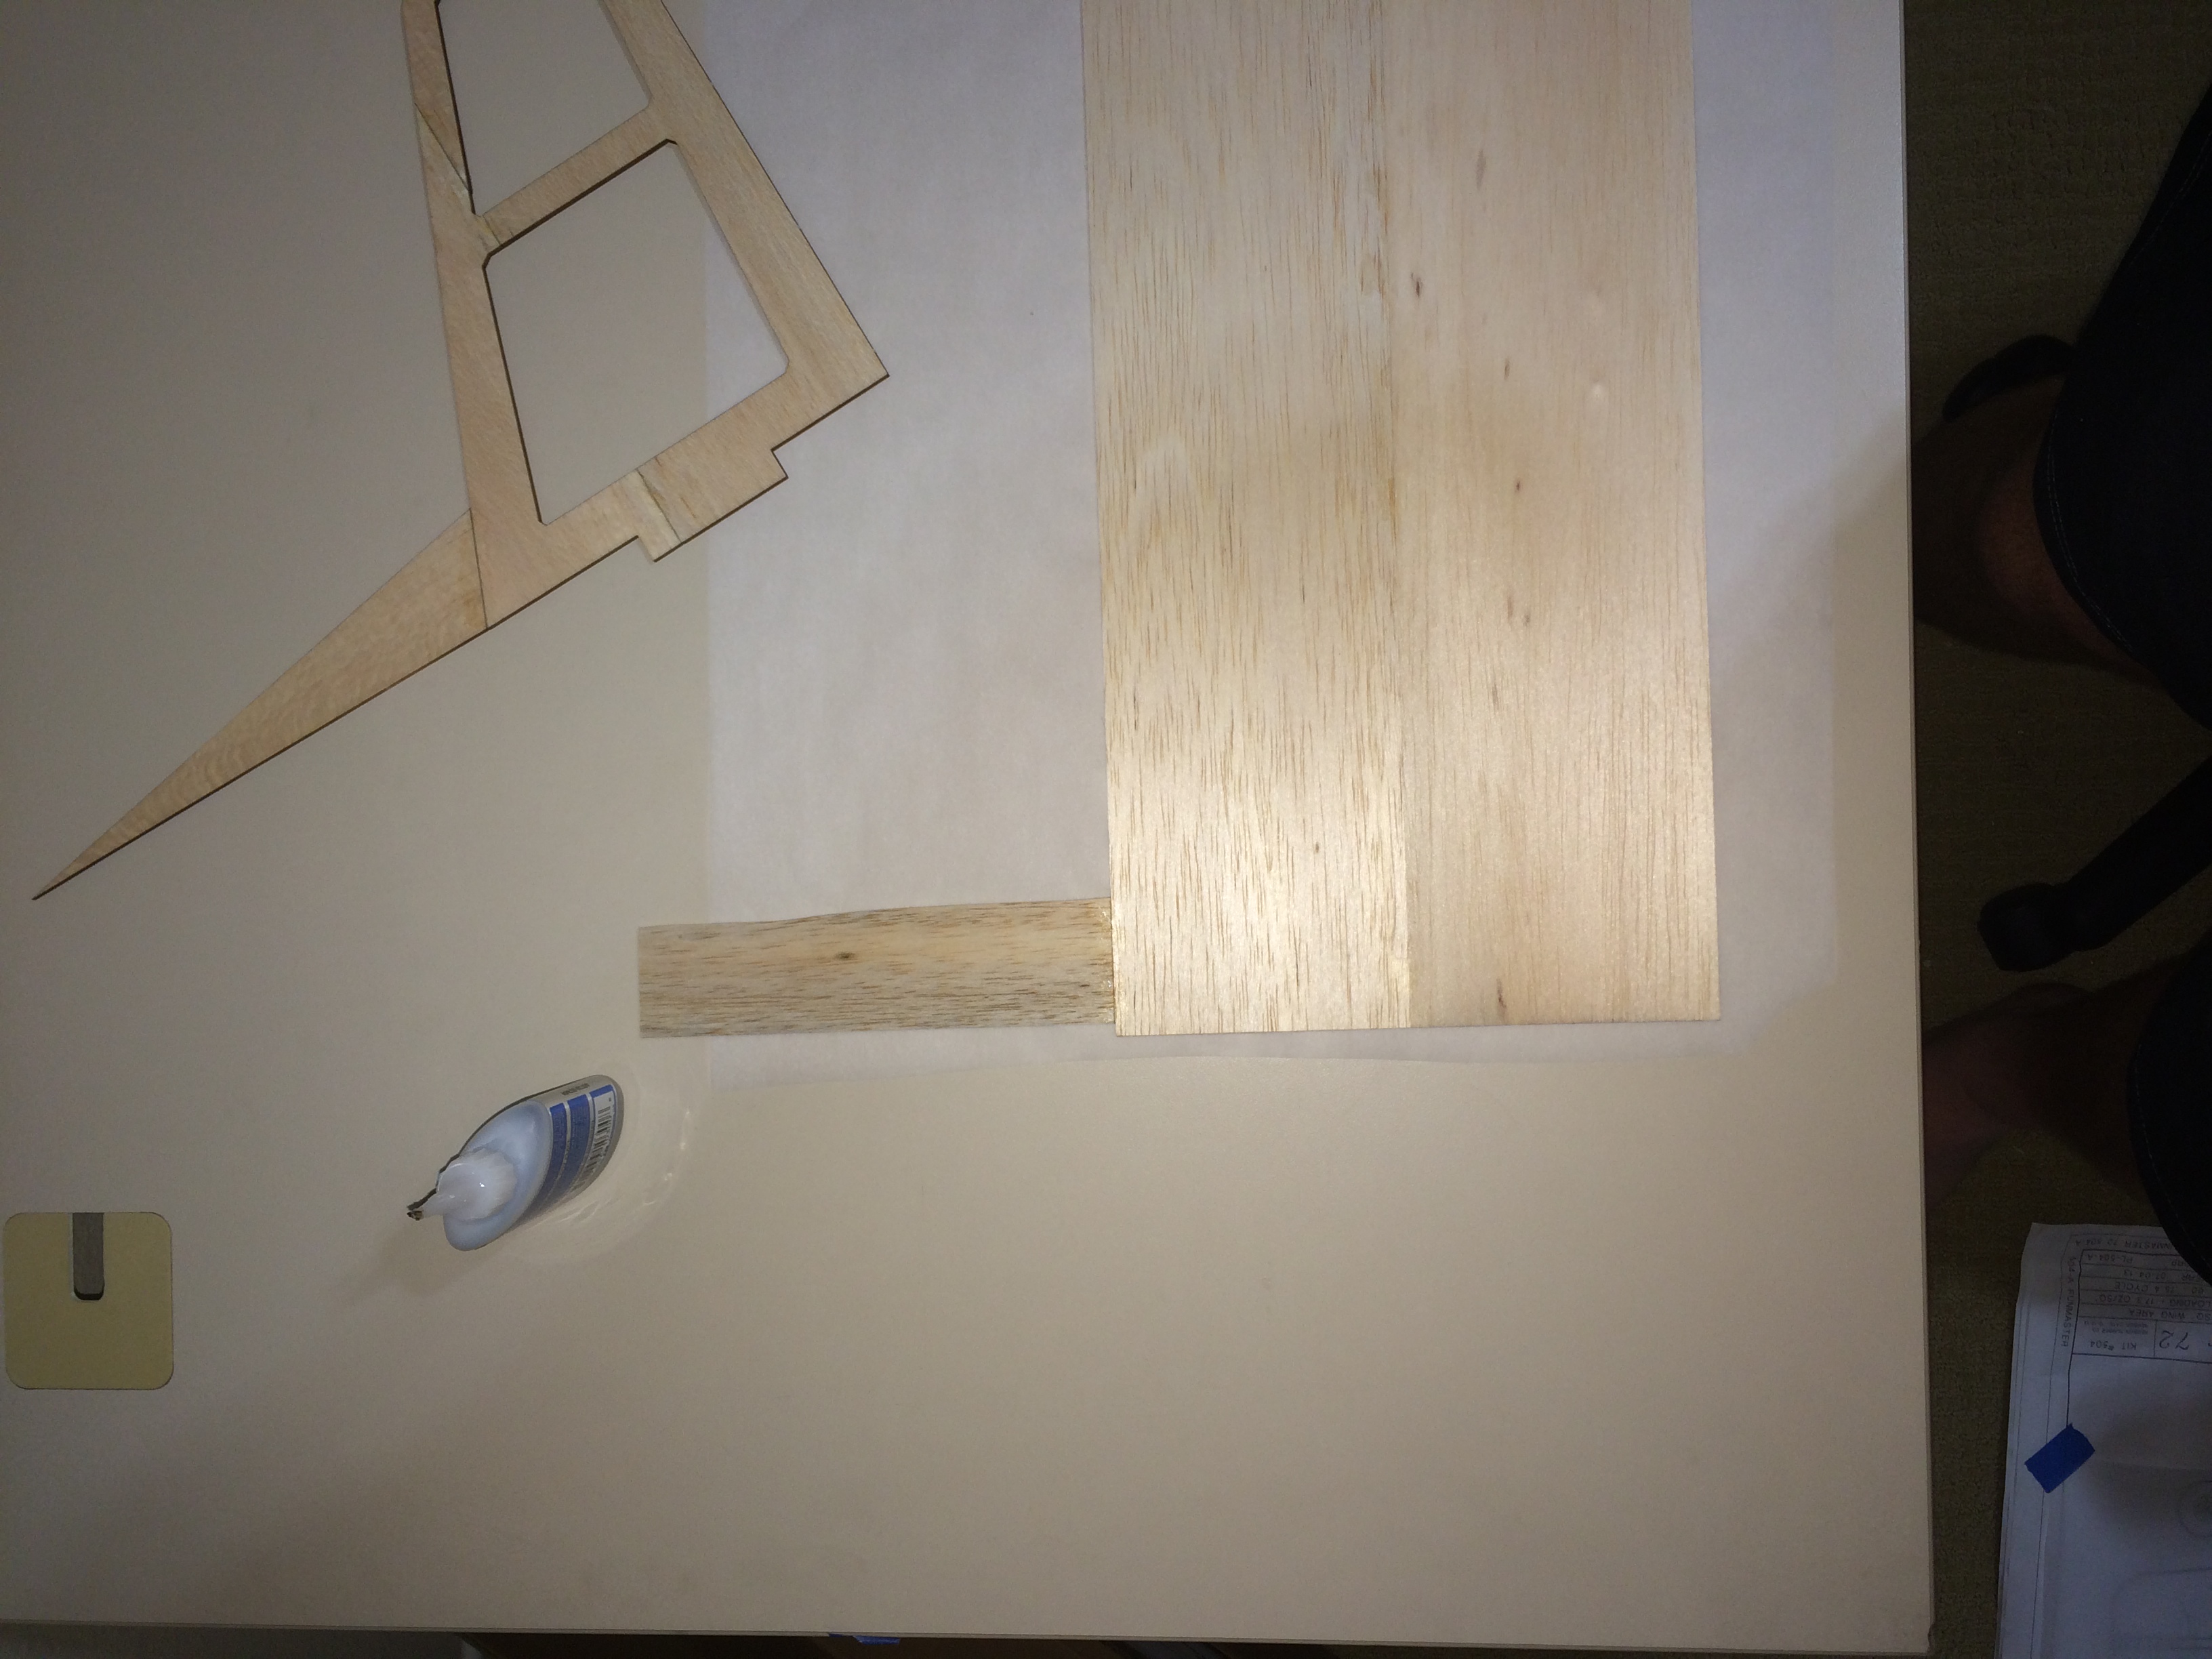
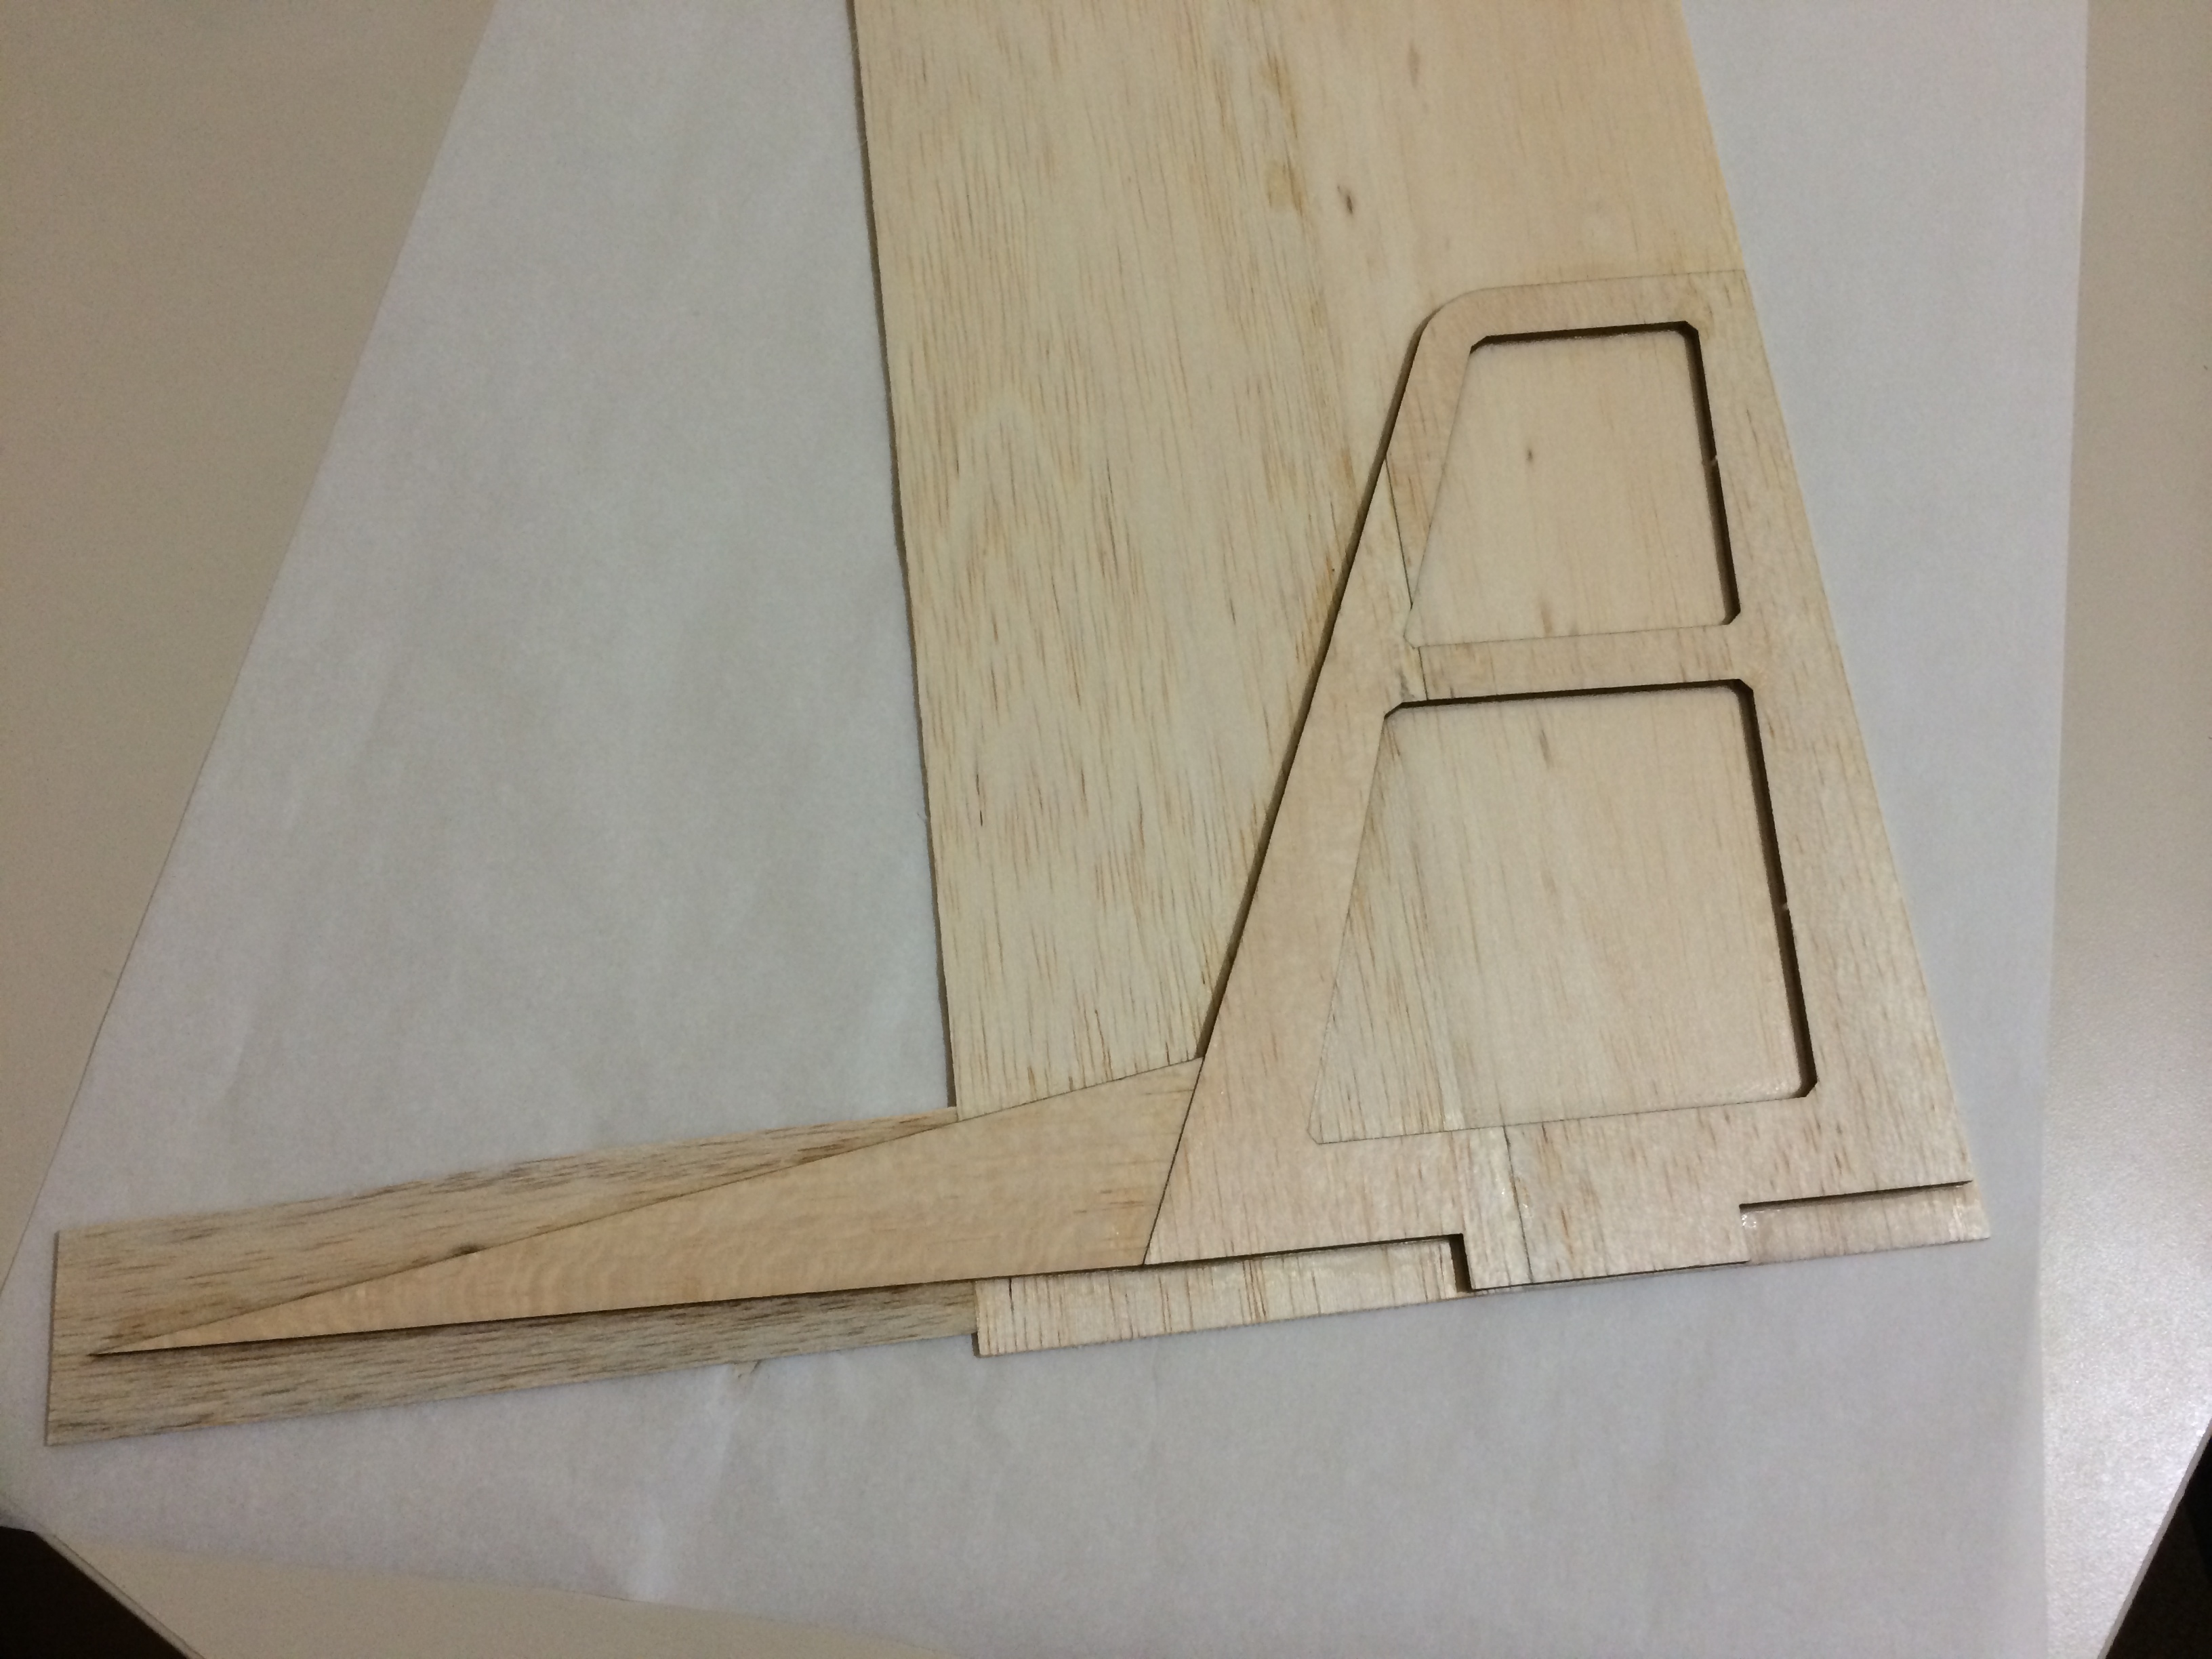
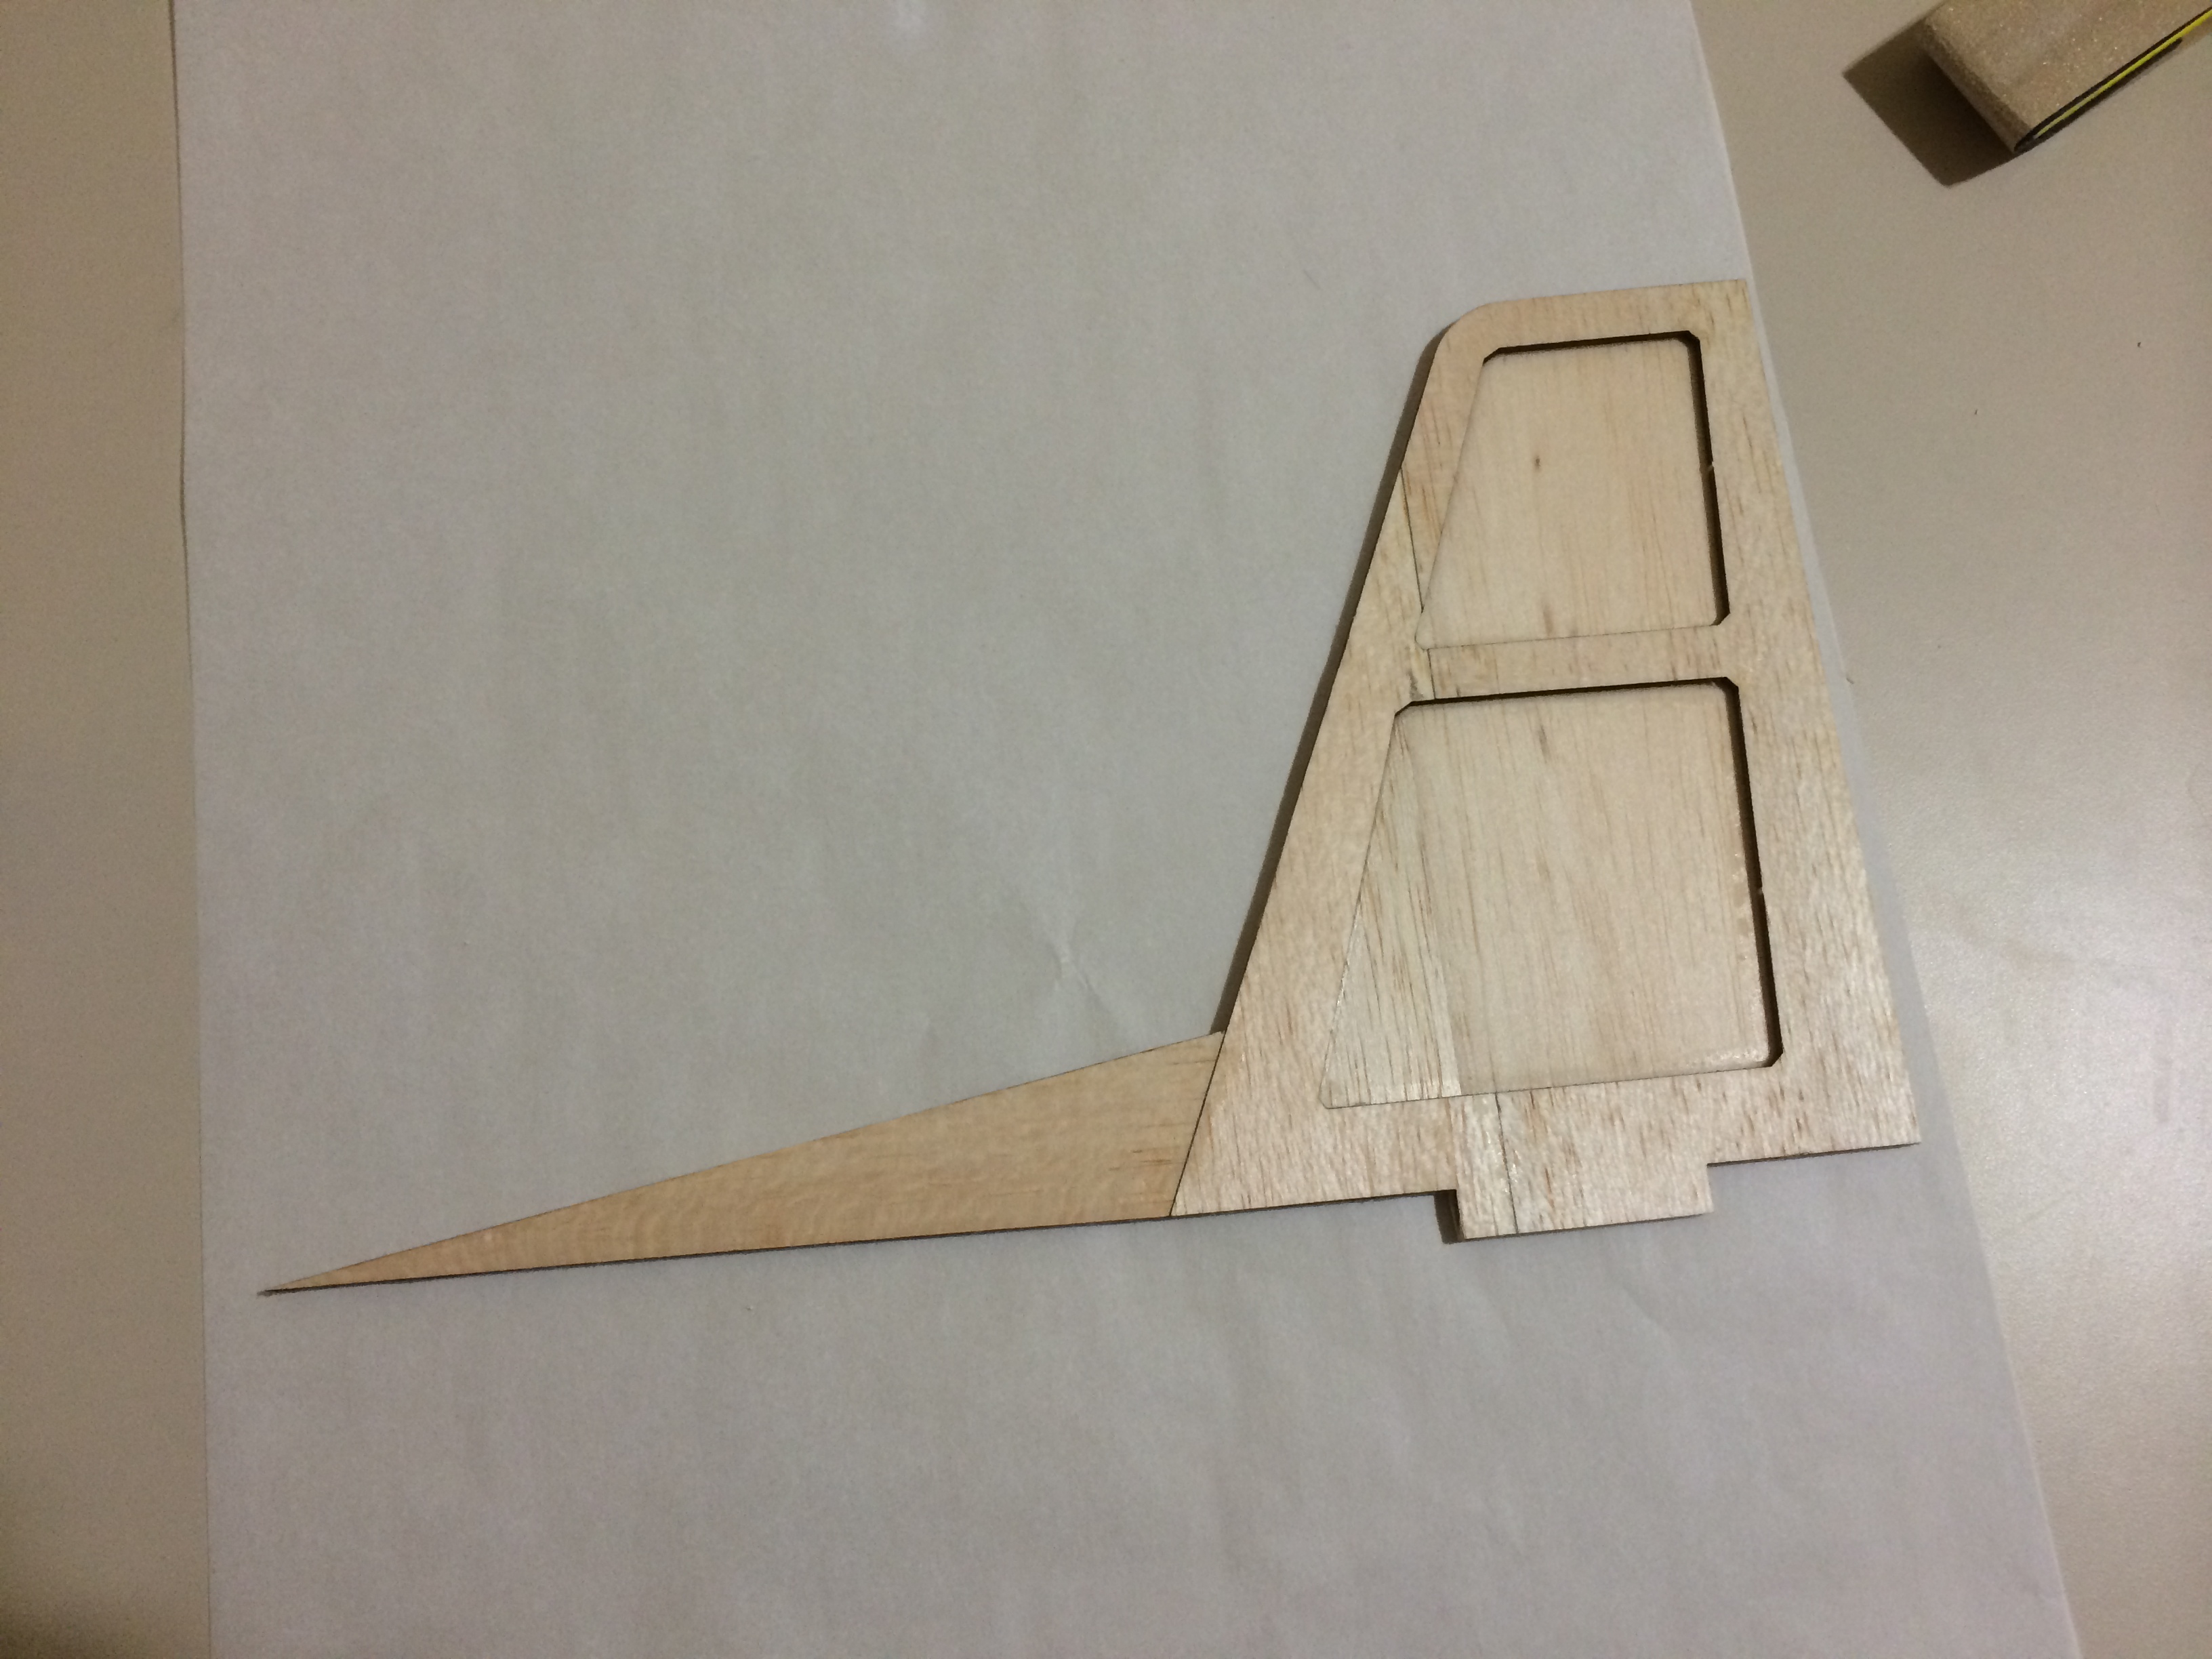
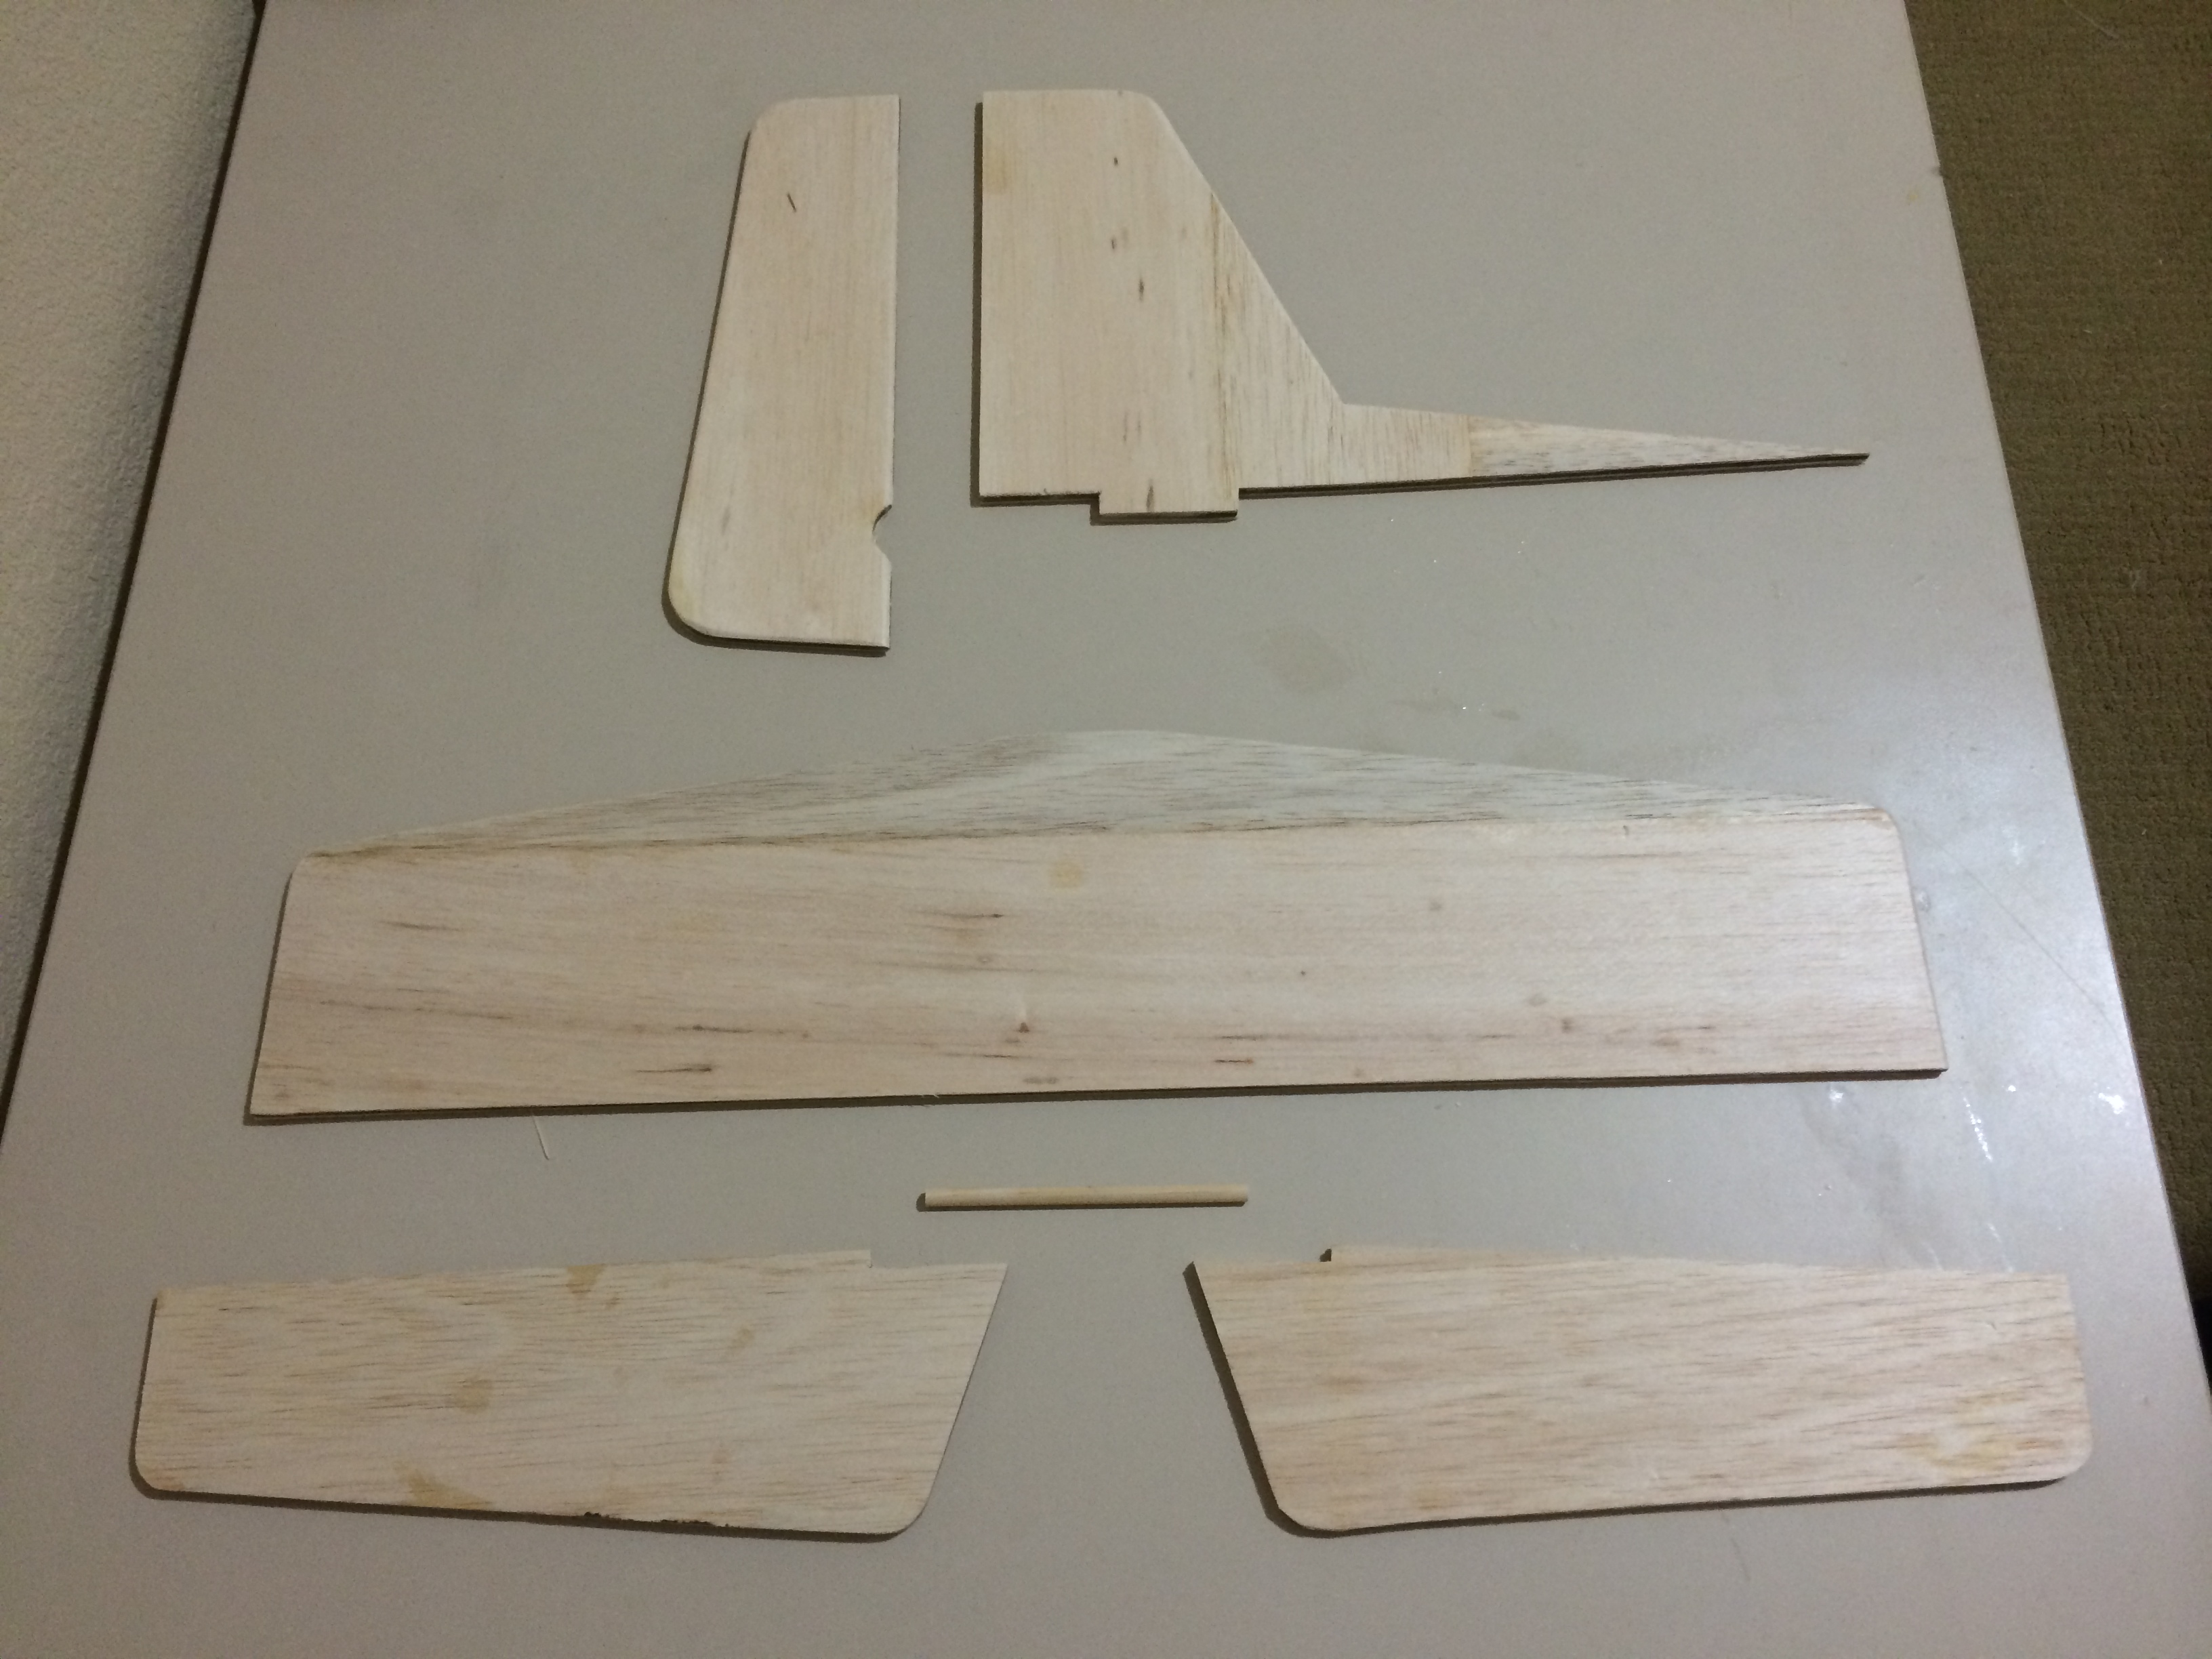
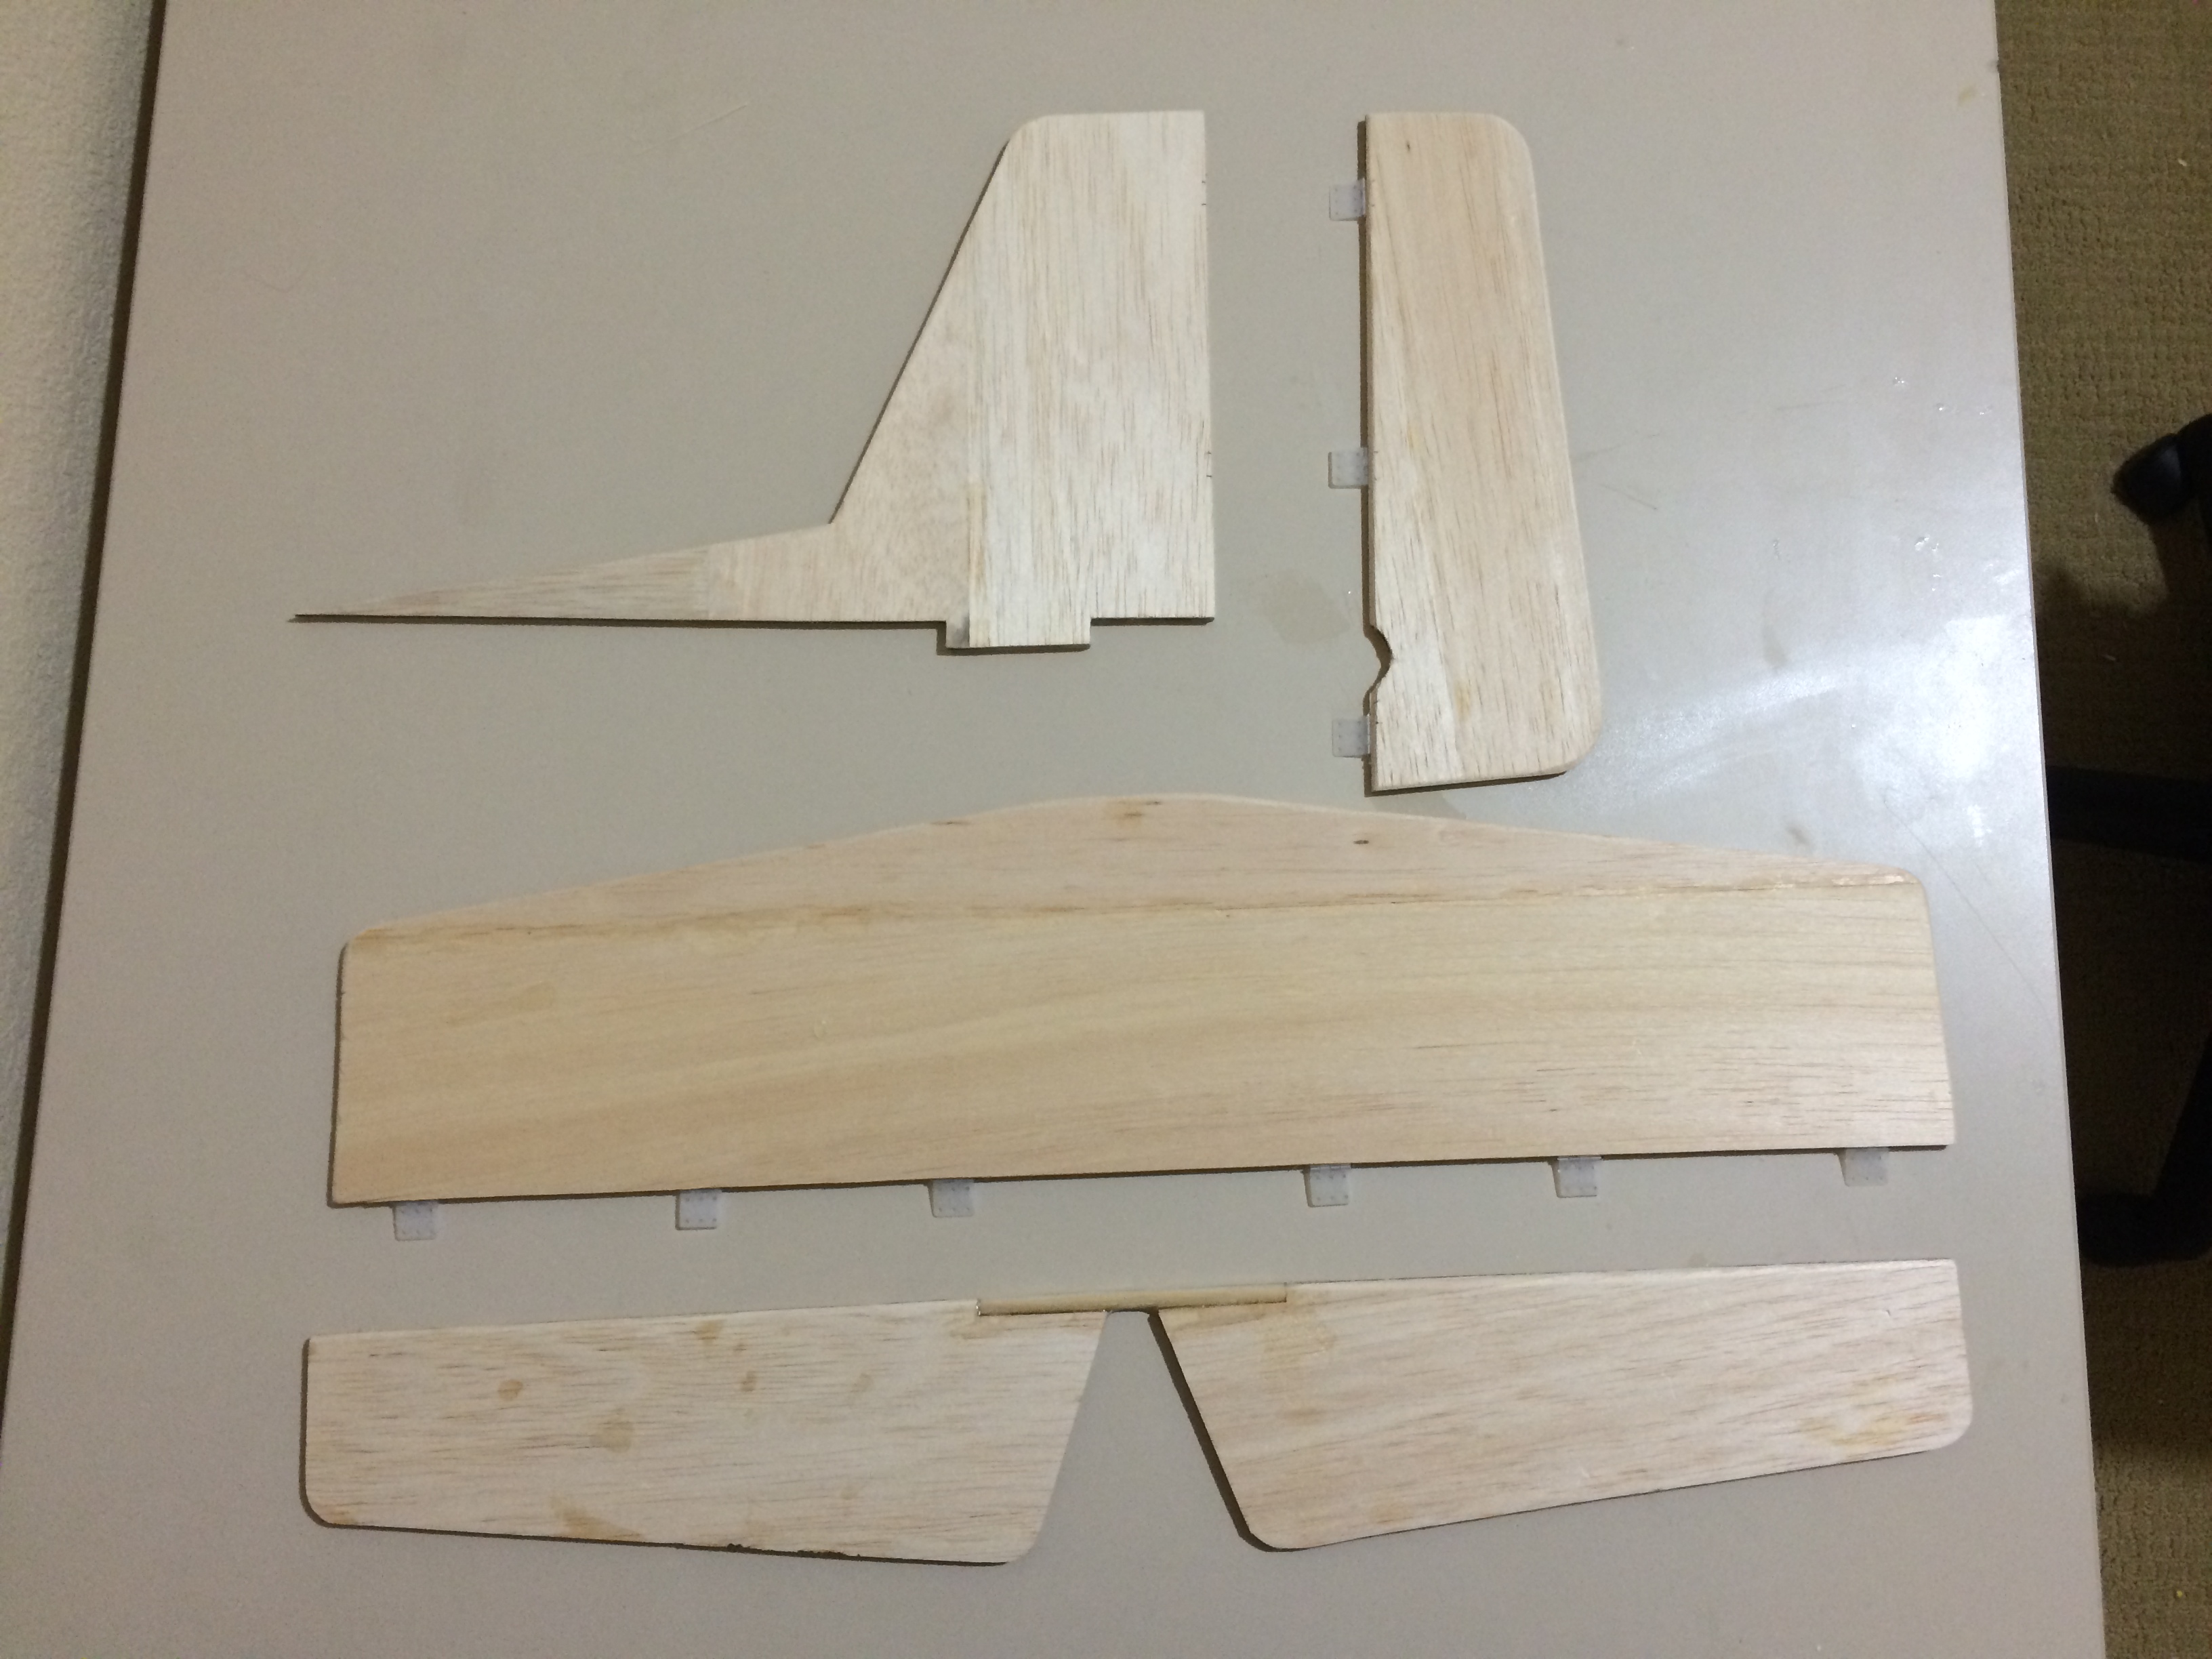
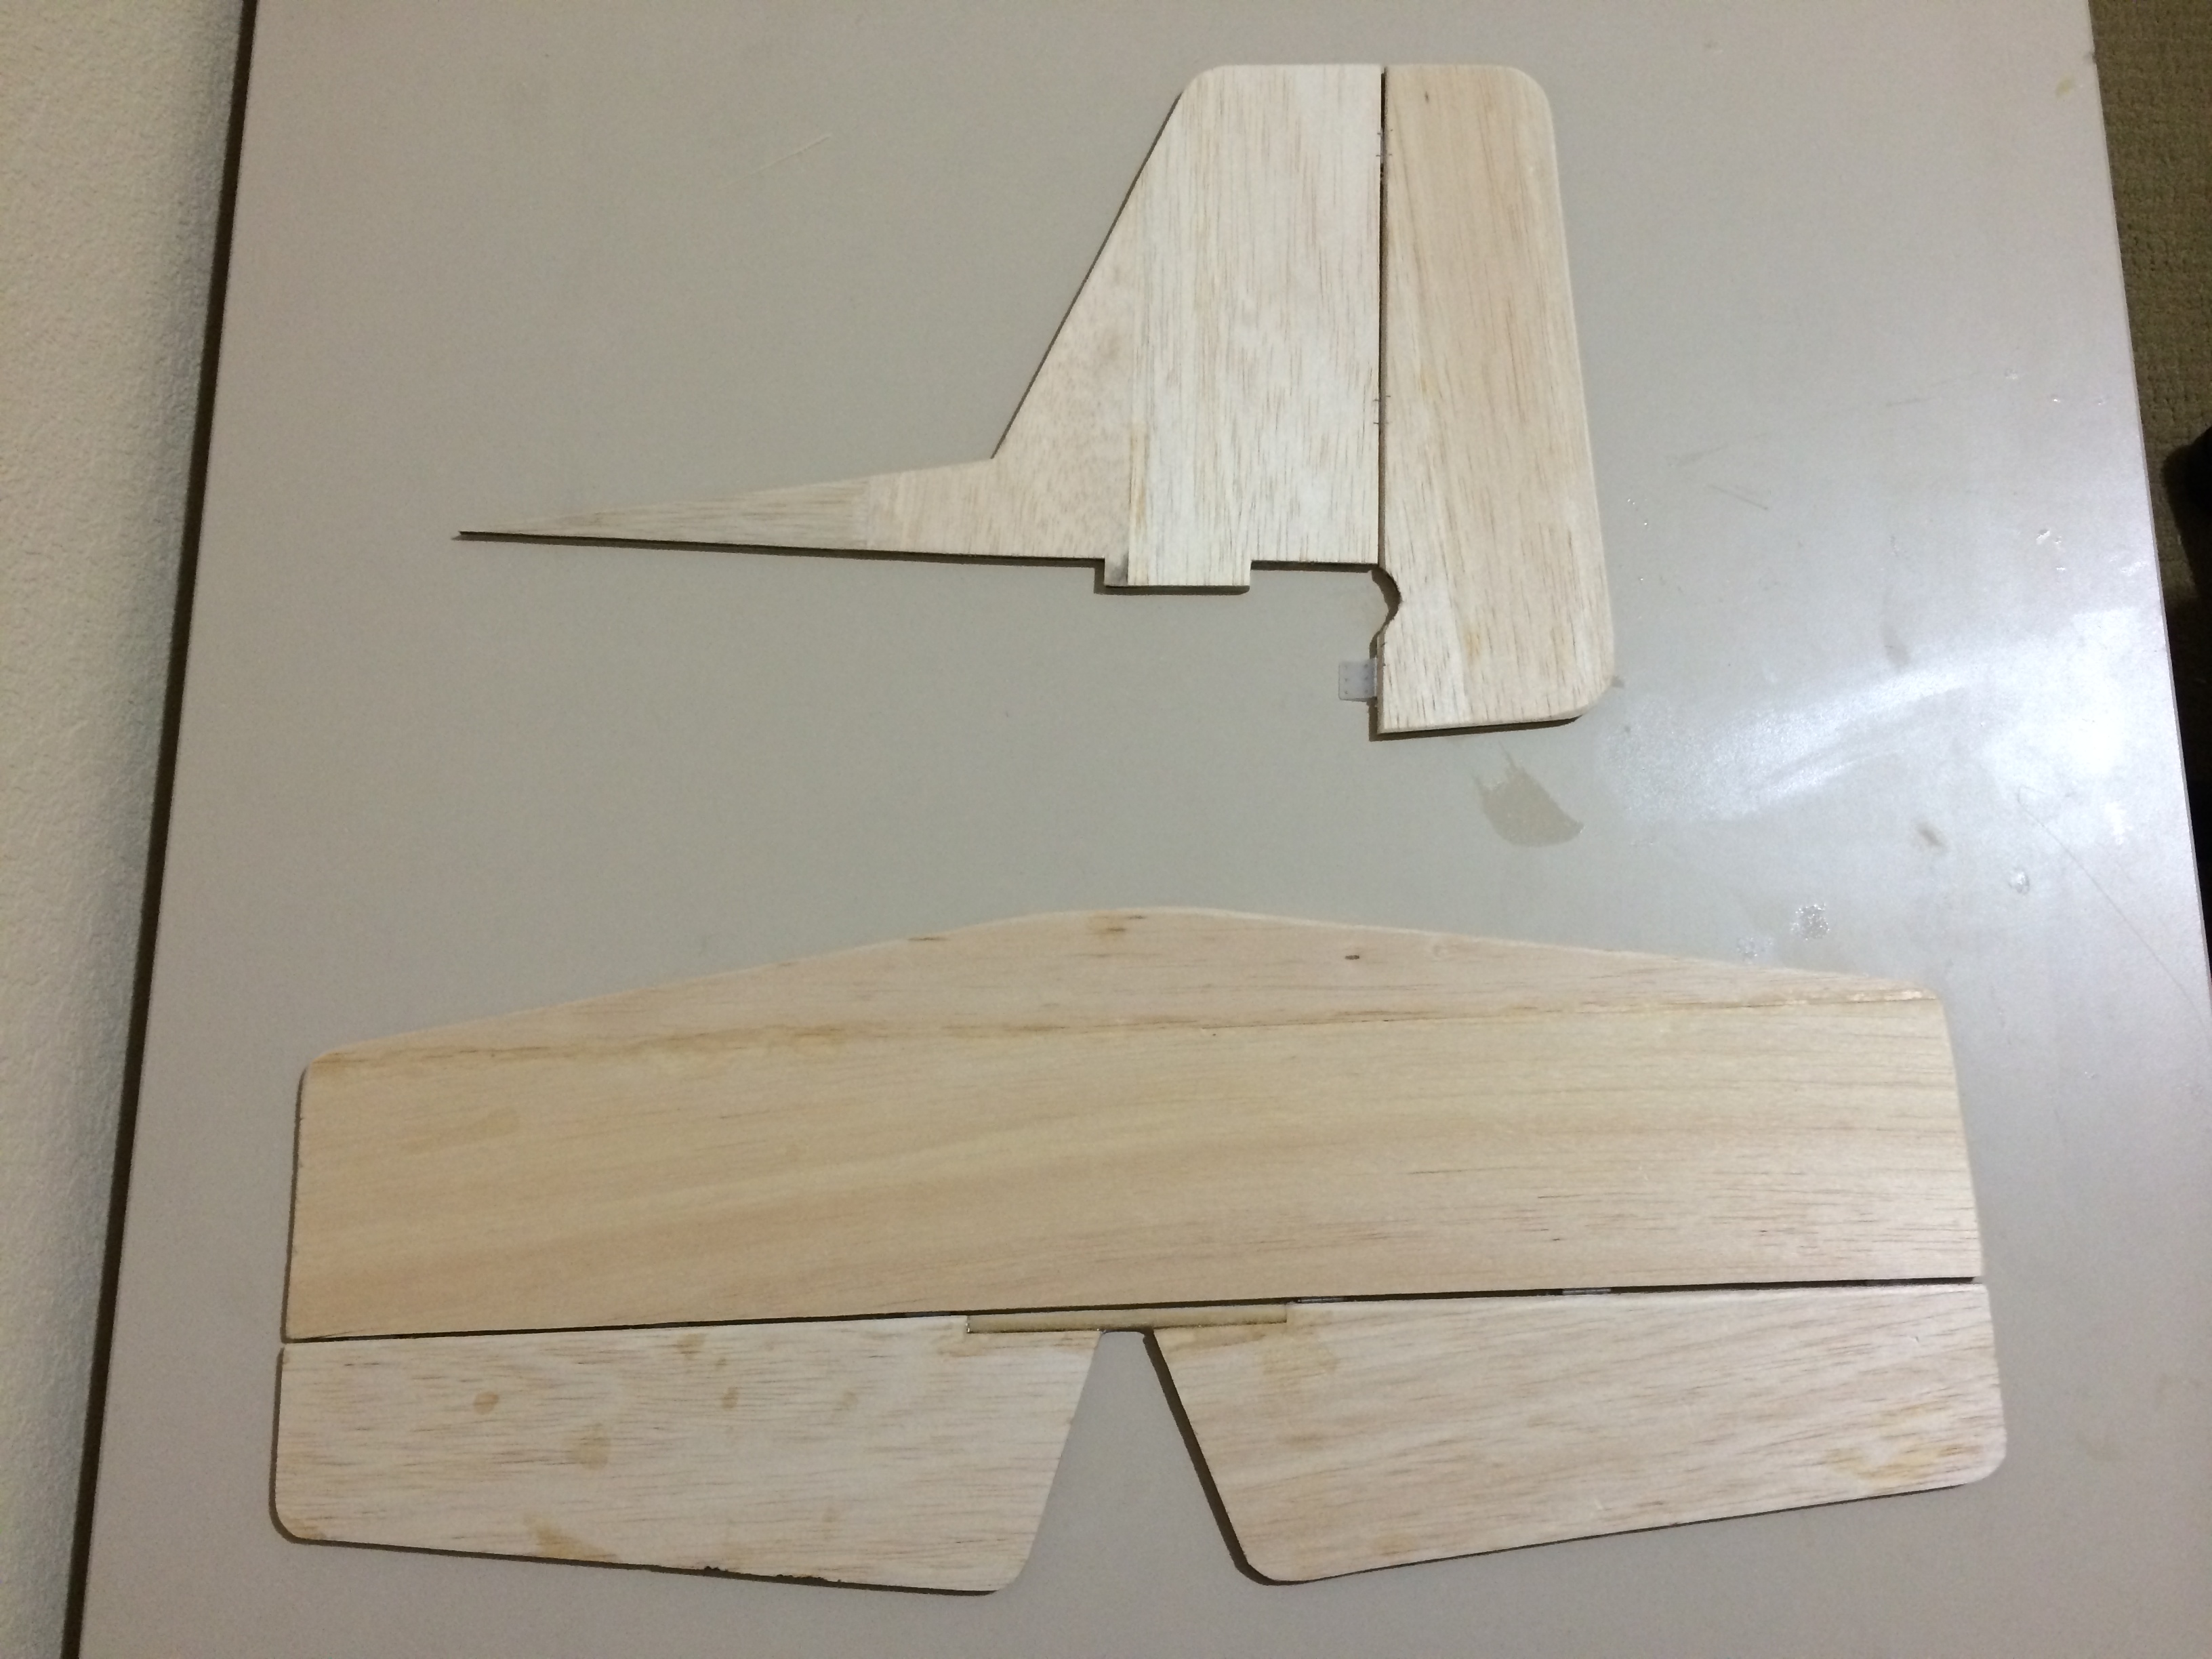
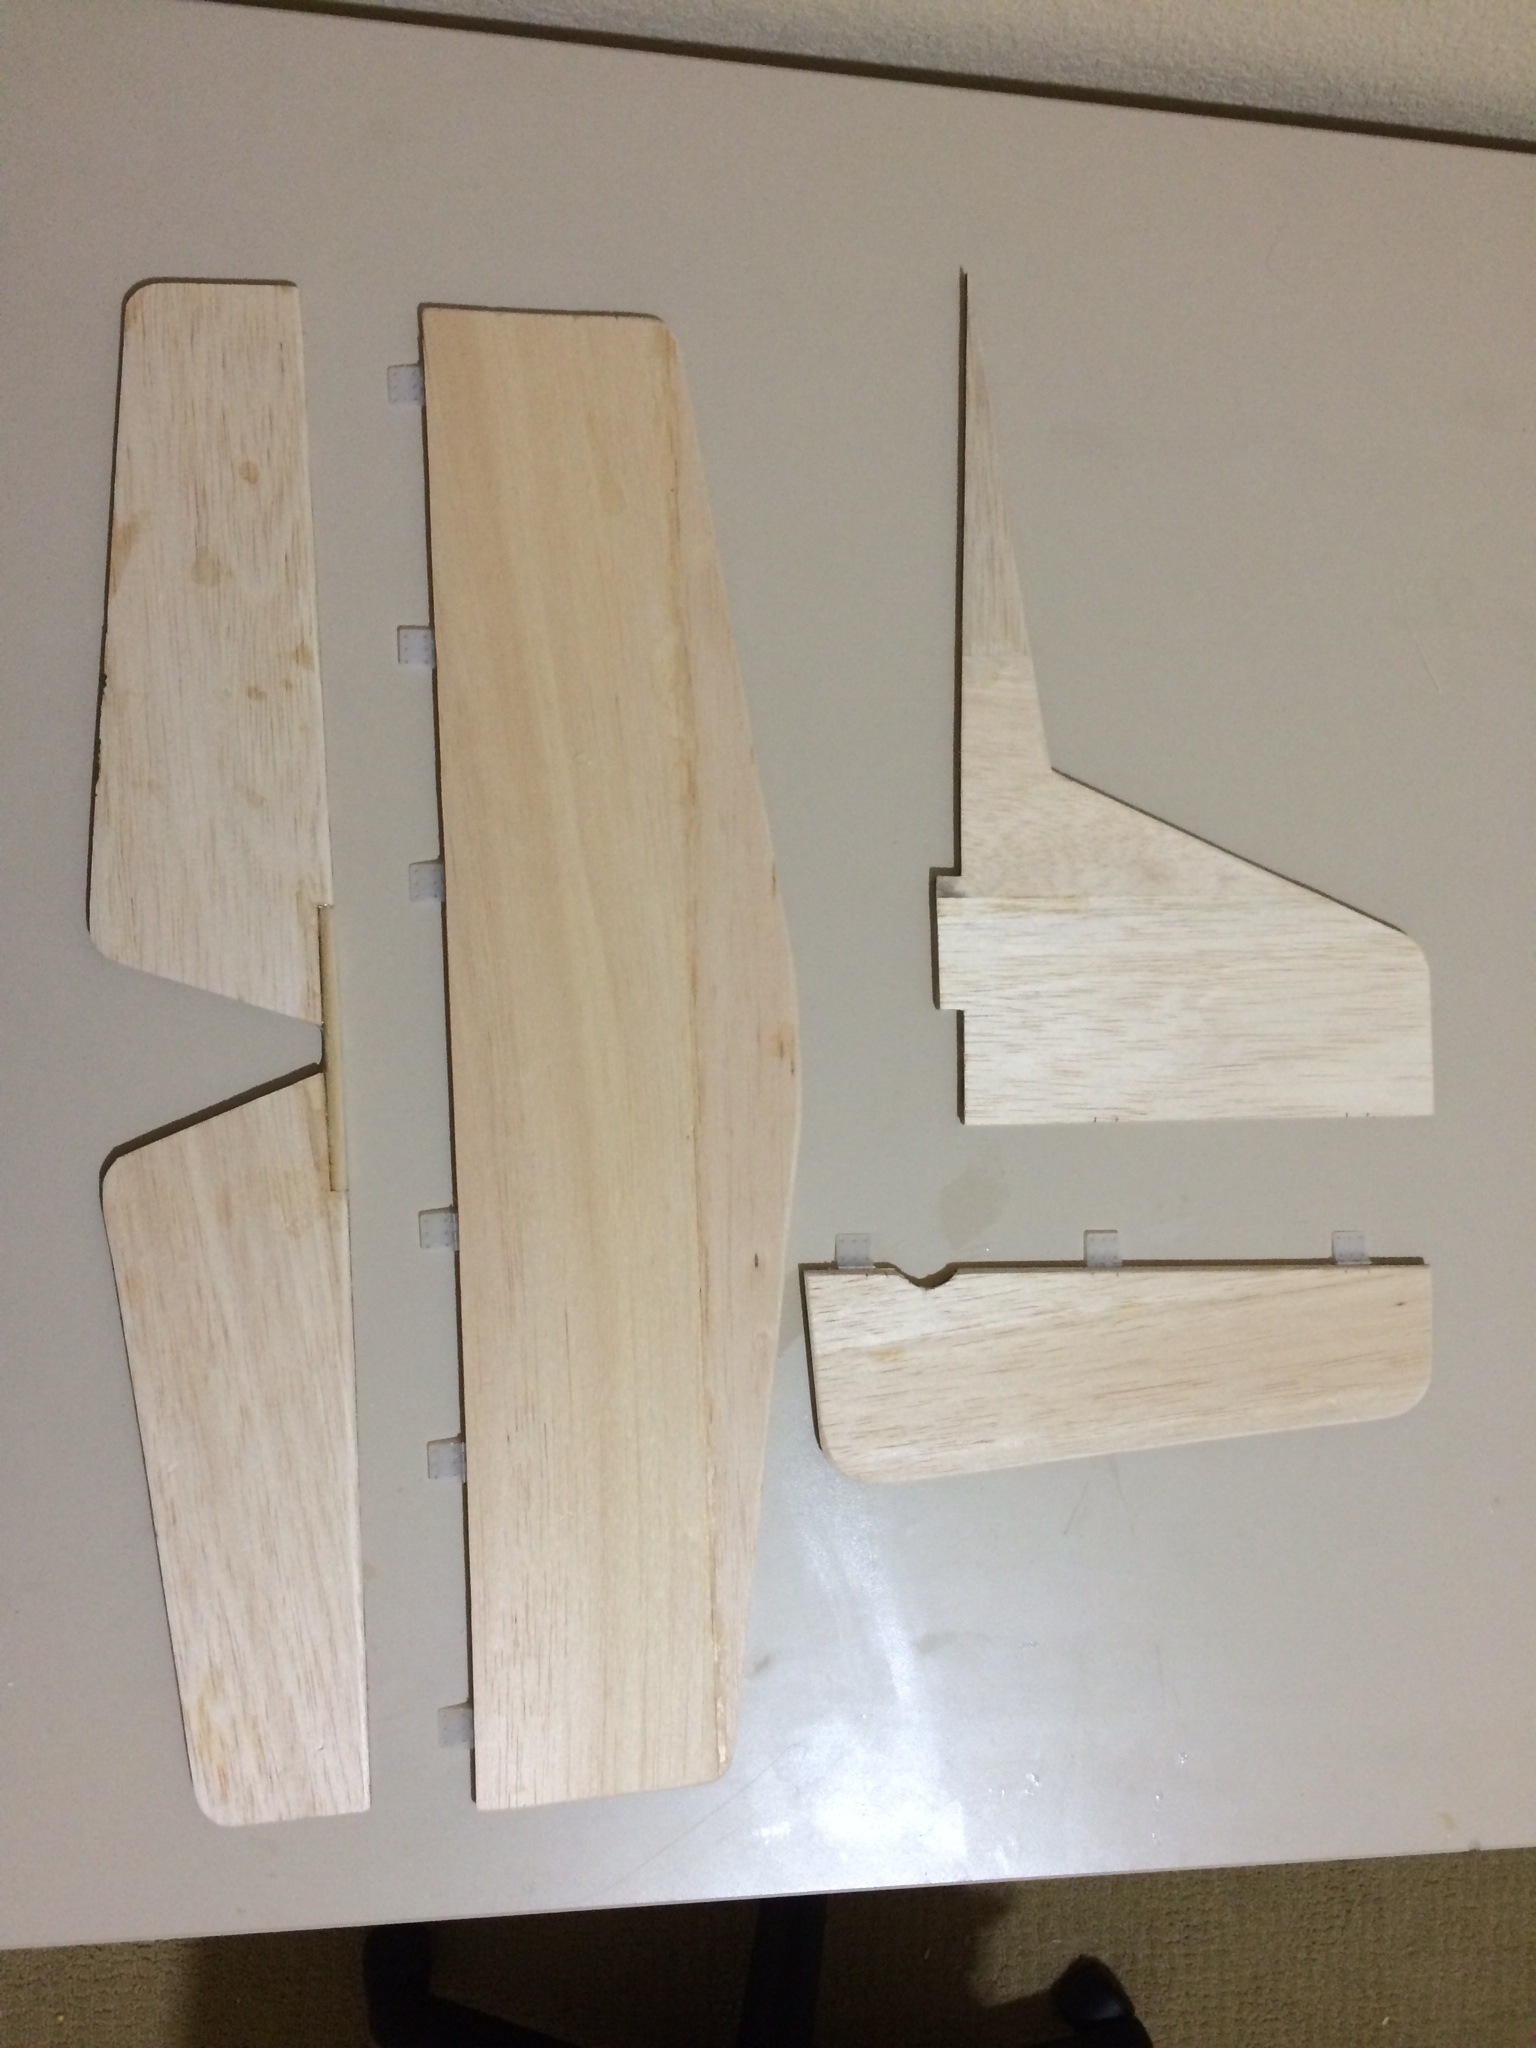
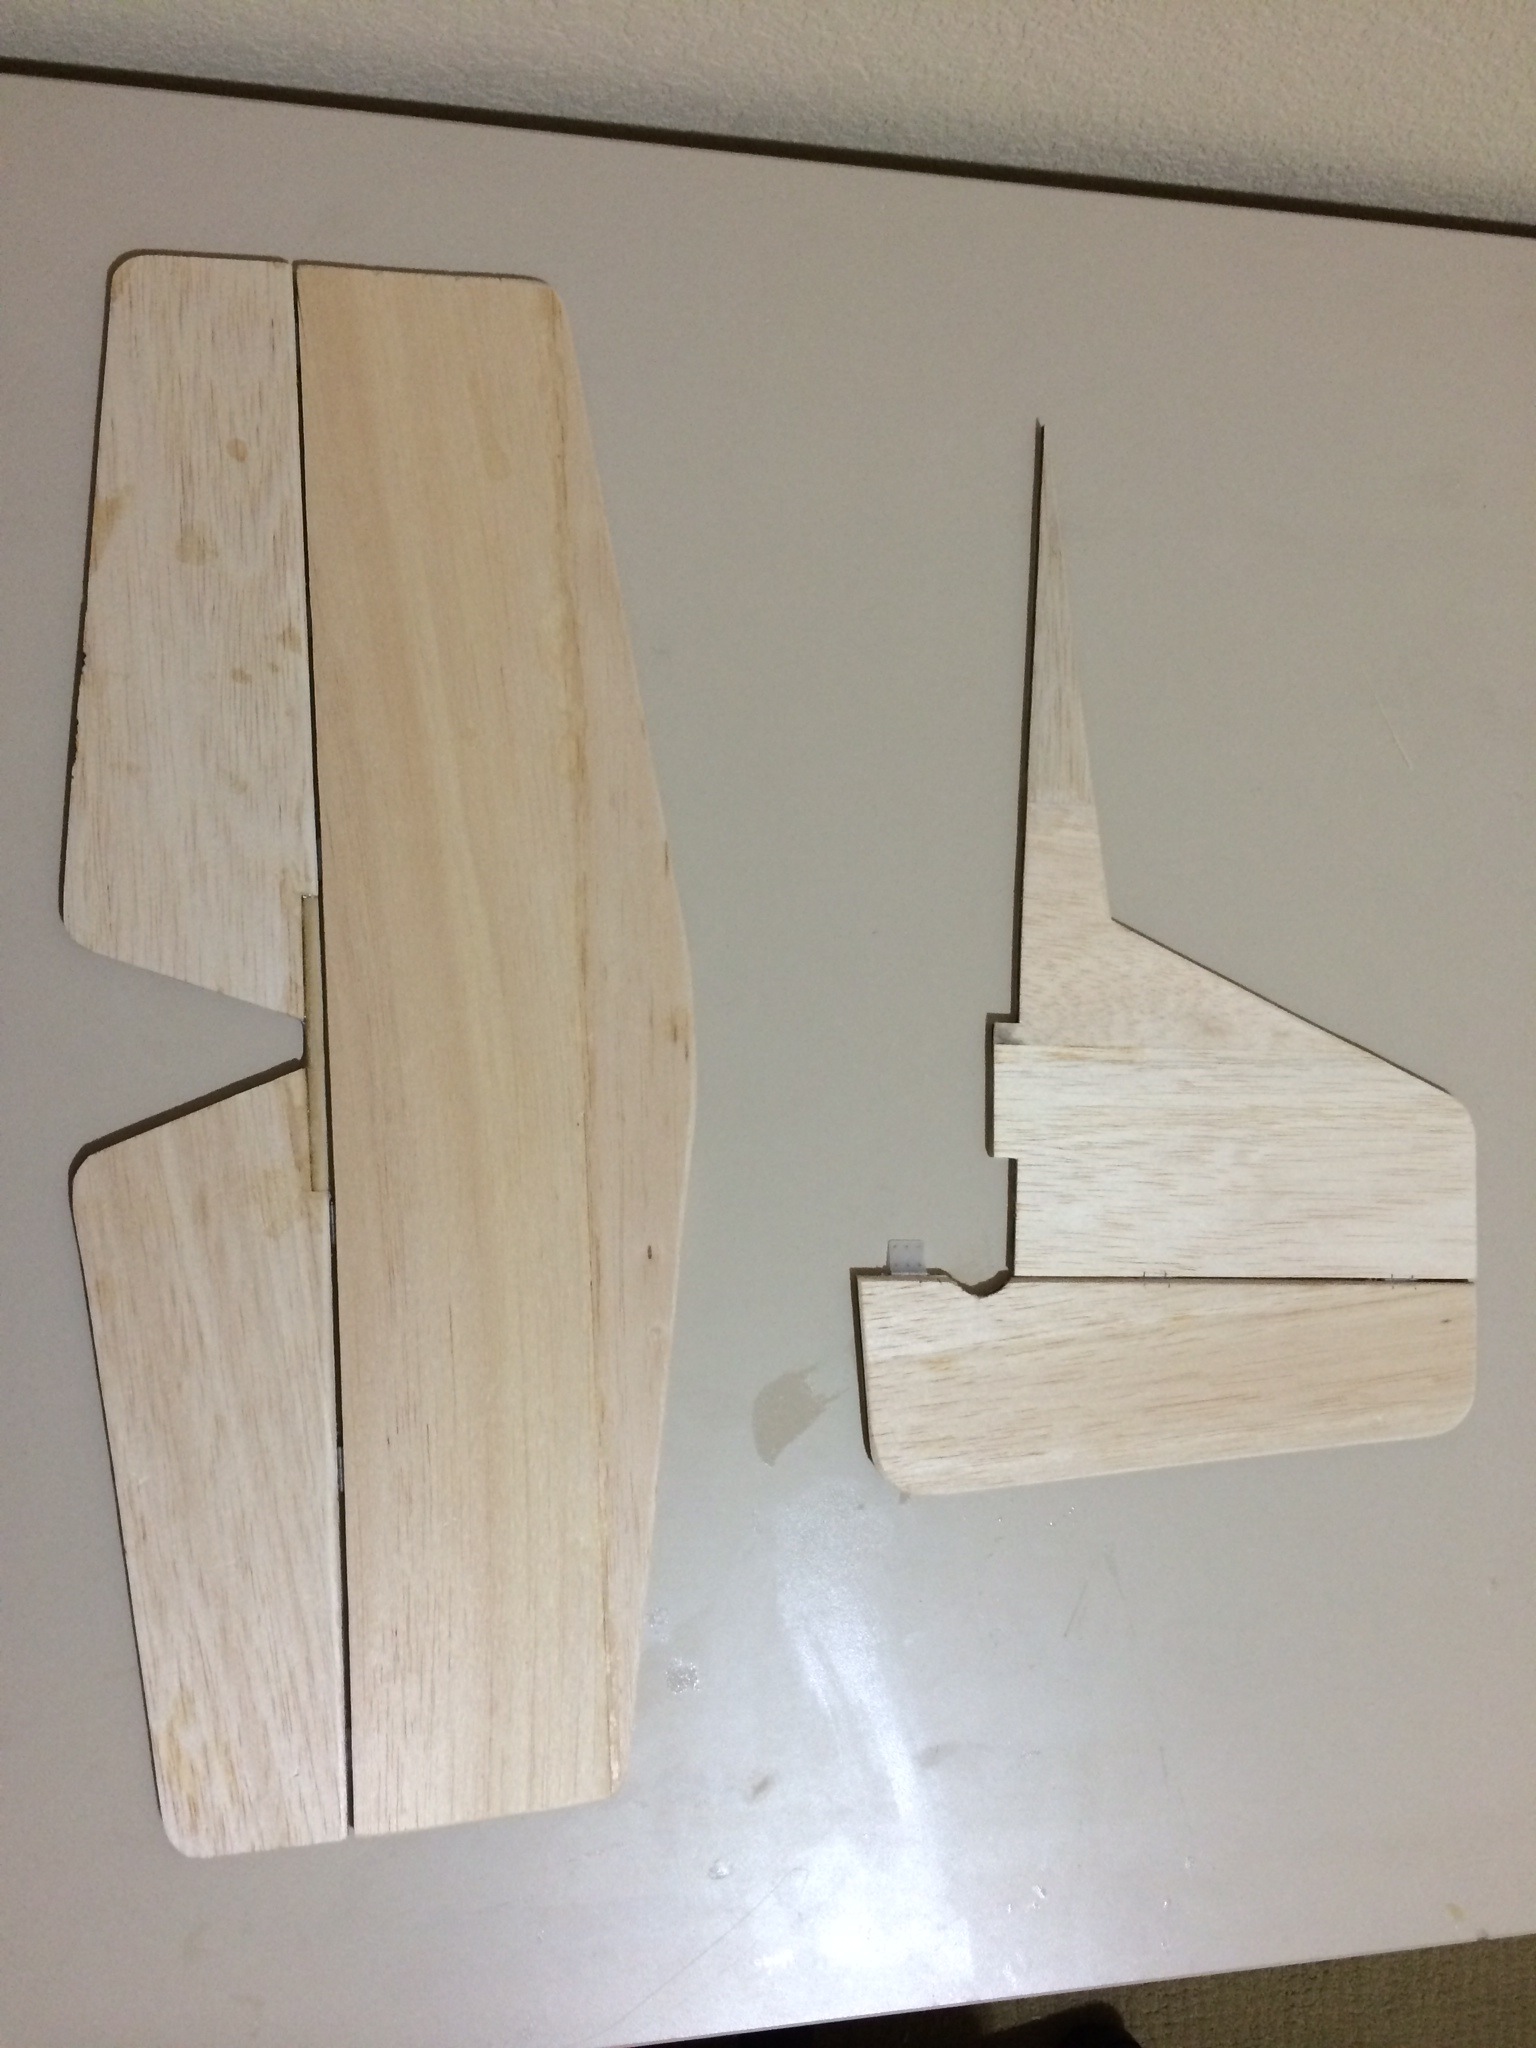
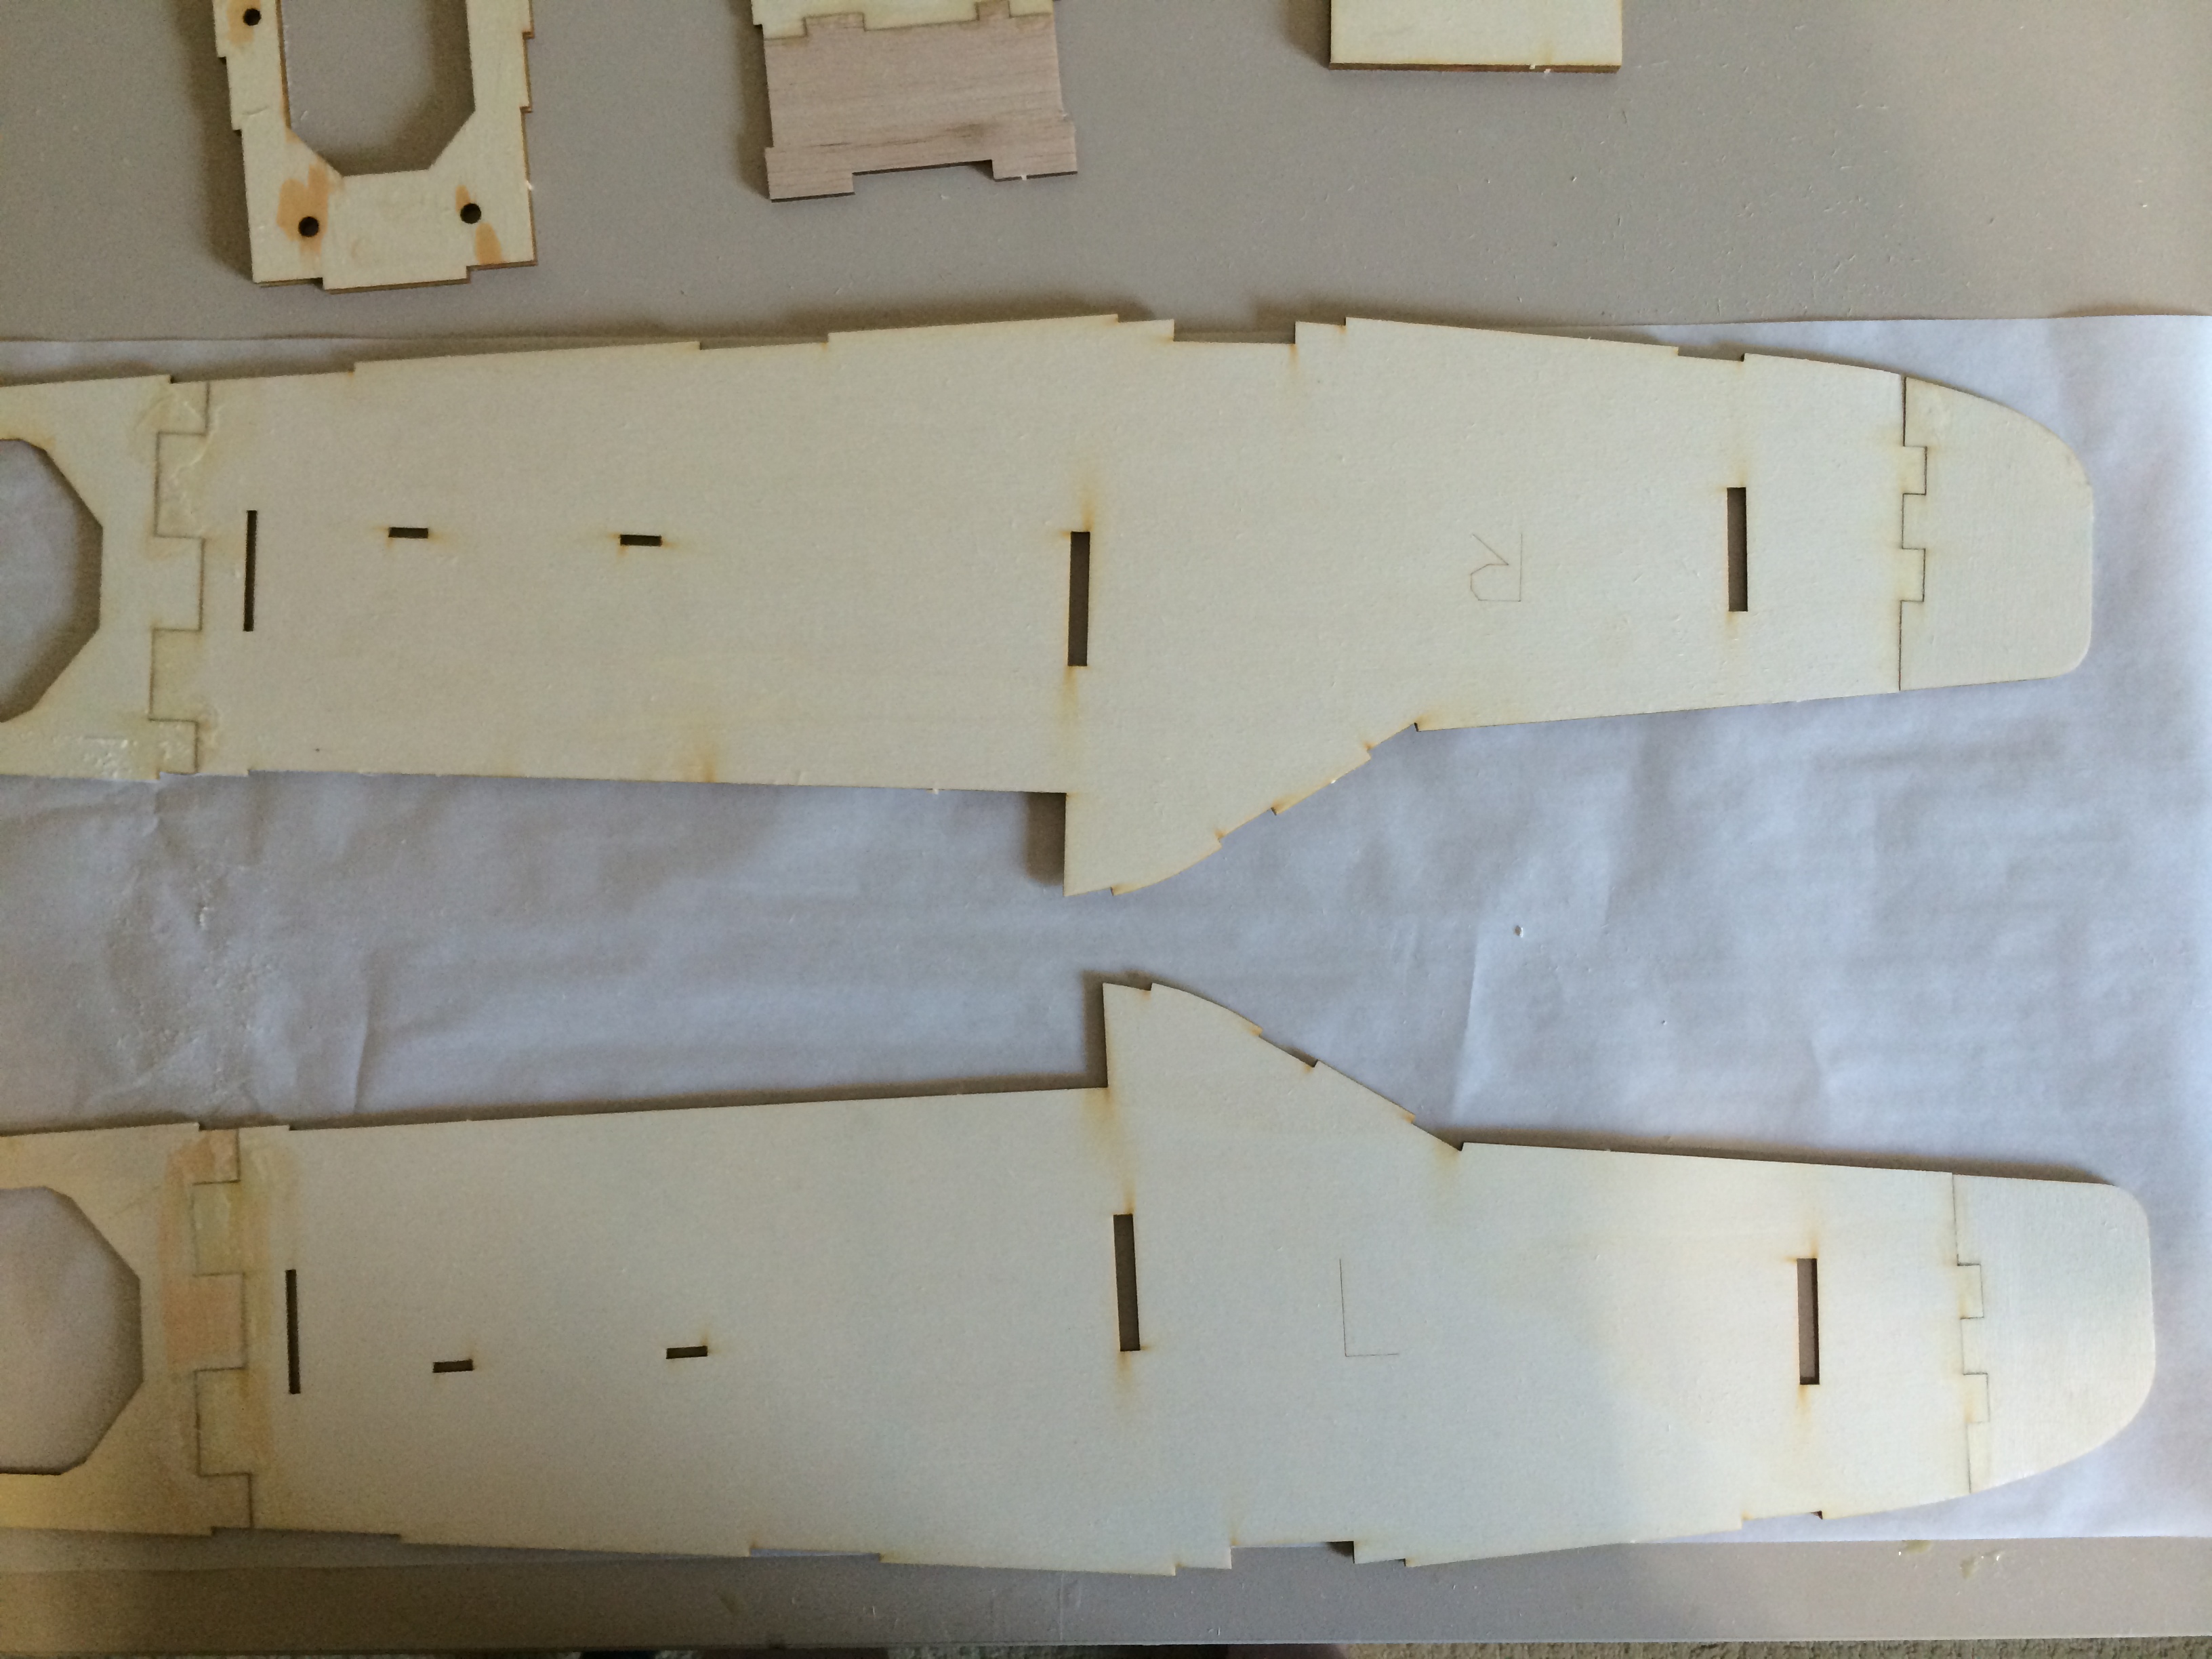
Spent some time on the build and I have nearly completed the tail feathers. So far, it has been very straight forward. Just some simple gluing and light sanding. The only observation I would make is that it would be nice for them to include some kind of template to help lay out the sheeting to keep it down to the 7 sheets they provided. I ended up using an extra sheet of balsa I had to make all the pieces fit easily because I couldn't quite get the jig saw puzzle solved of how to maximize the usage and minimize the waste of the balsa sheeting. Very minor problem though and someone that has built kits before could probably solve the problem very easily. I also used a scrap piece of balsa turned 90 degrees for the vertical fin to easily sheet the extended length that part R-1 adds to the structure. If you look at the picture associated with step 6 in the manual, you can see something similar was done but it was not pointed out in the text.
My plan is to start the fuselage tomorrow night and if all goes well and time doesn't get away from me, I hope to get most of that structure done by the end of the weekend.


My plan is to start the fuselage tomorrow night and if all goes well and time doesn't get away from me, I hope to get most of that structure done by the end of the weekend.
08-13-2014, 10:24 AM
#5
Member
Thread Starter
Join Date: Sep 2012
Location: Frisco, TX
Posts: 54
Likes: 0
Received 0 Likes
on
0 Posts
I have settled on a Saito 100. I wanted a glow engine since i plan on float flying this plane and glow is the least sensitive to getting dunked. Since i am going for power here and not speed, I wanted the torque of a 4 cycle and I also really like the sound and the reliability of the Saito engines. I had used one in a previous .60 size plane and it was a perfect power plant for that plane. I am looking forward to having success again with it here.
08-15-2014, 06:41 AM
#6
Member
Thread Starter
Join Date: Sep 2012
Location: Frisco, TX
Posts: 54
Likes: 0
Received 0 Likes
on
0 Posts
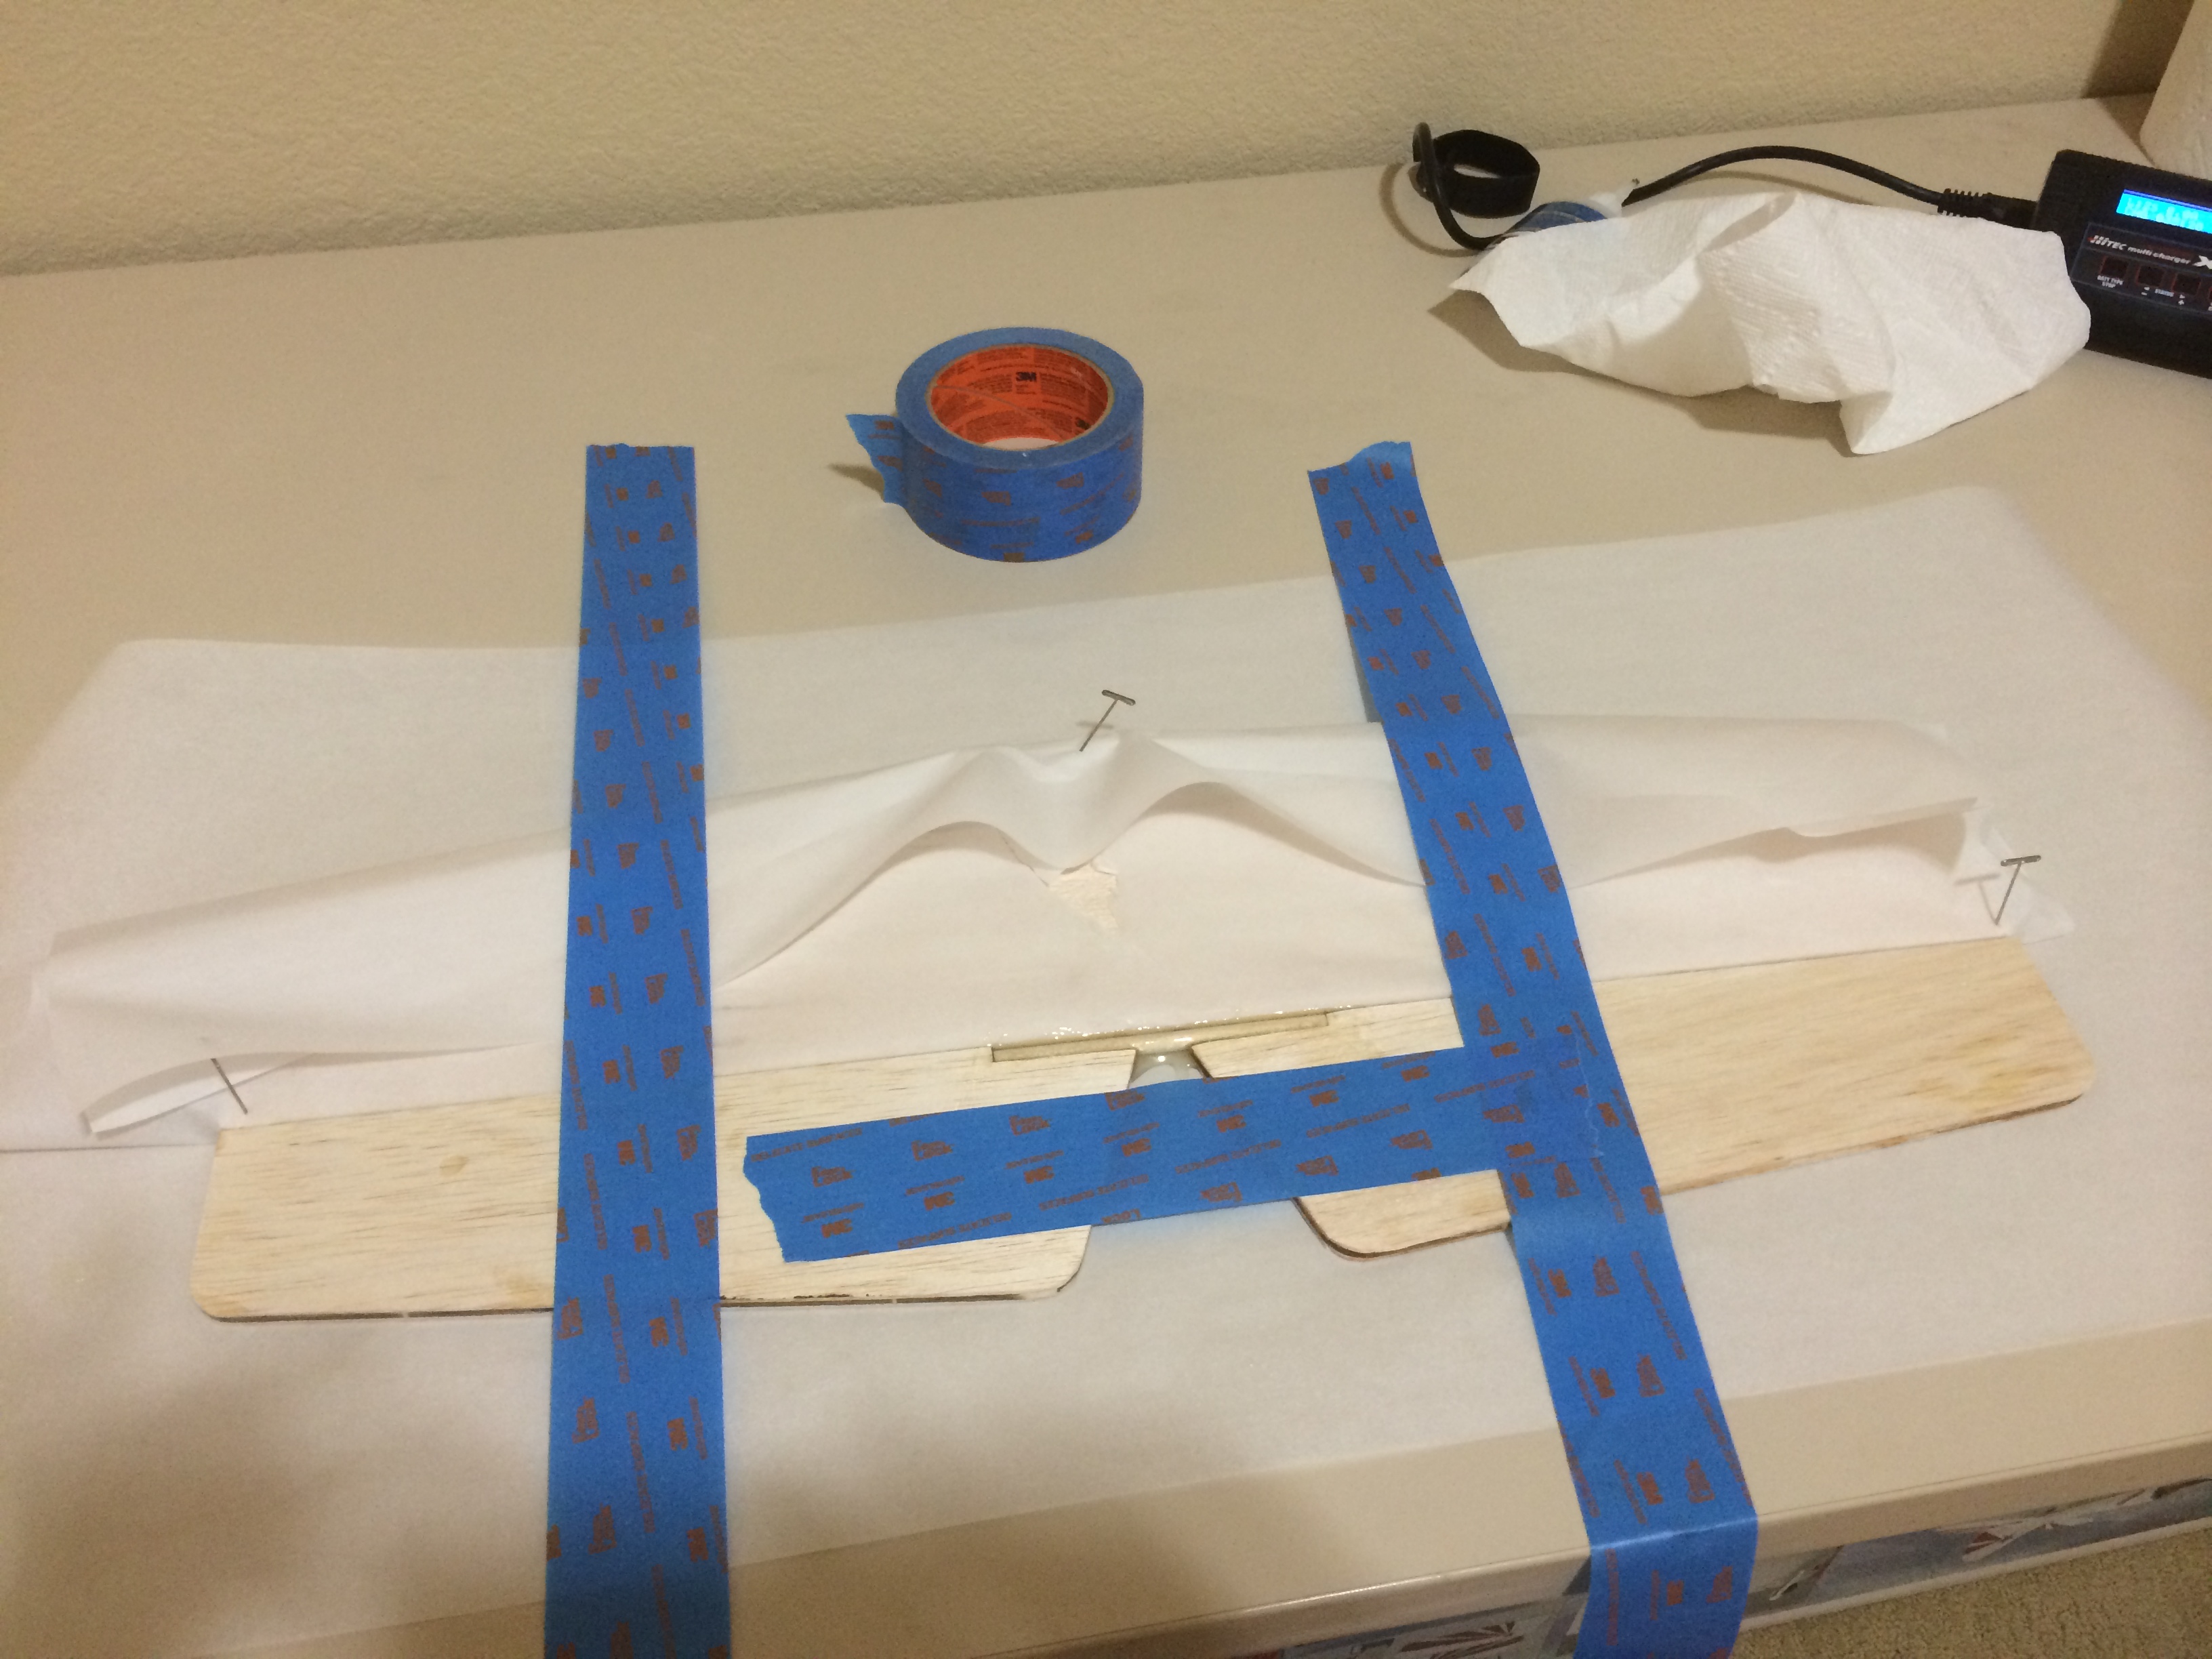
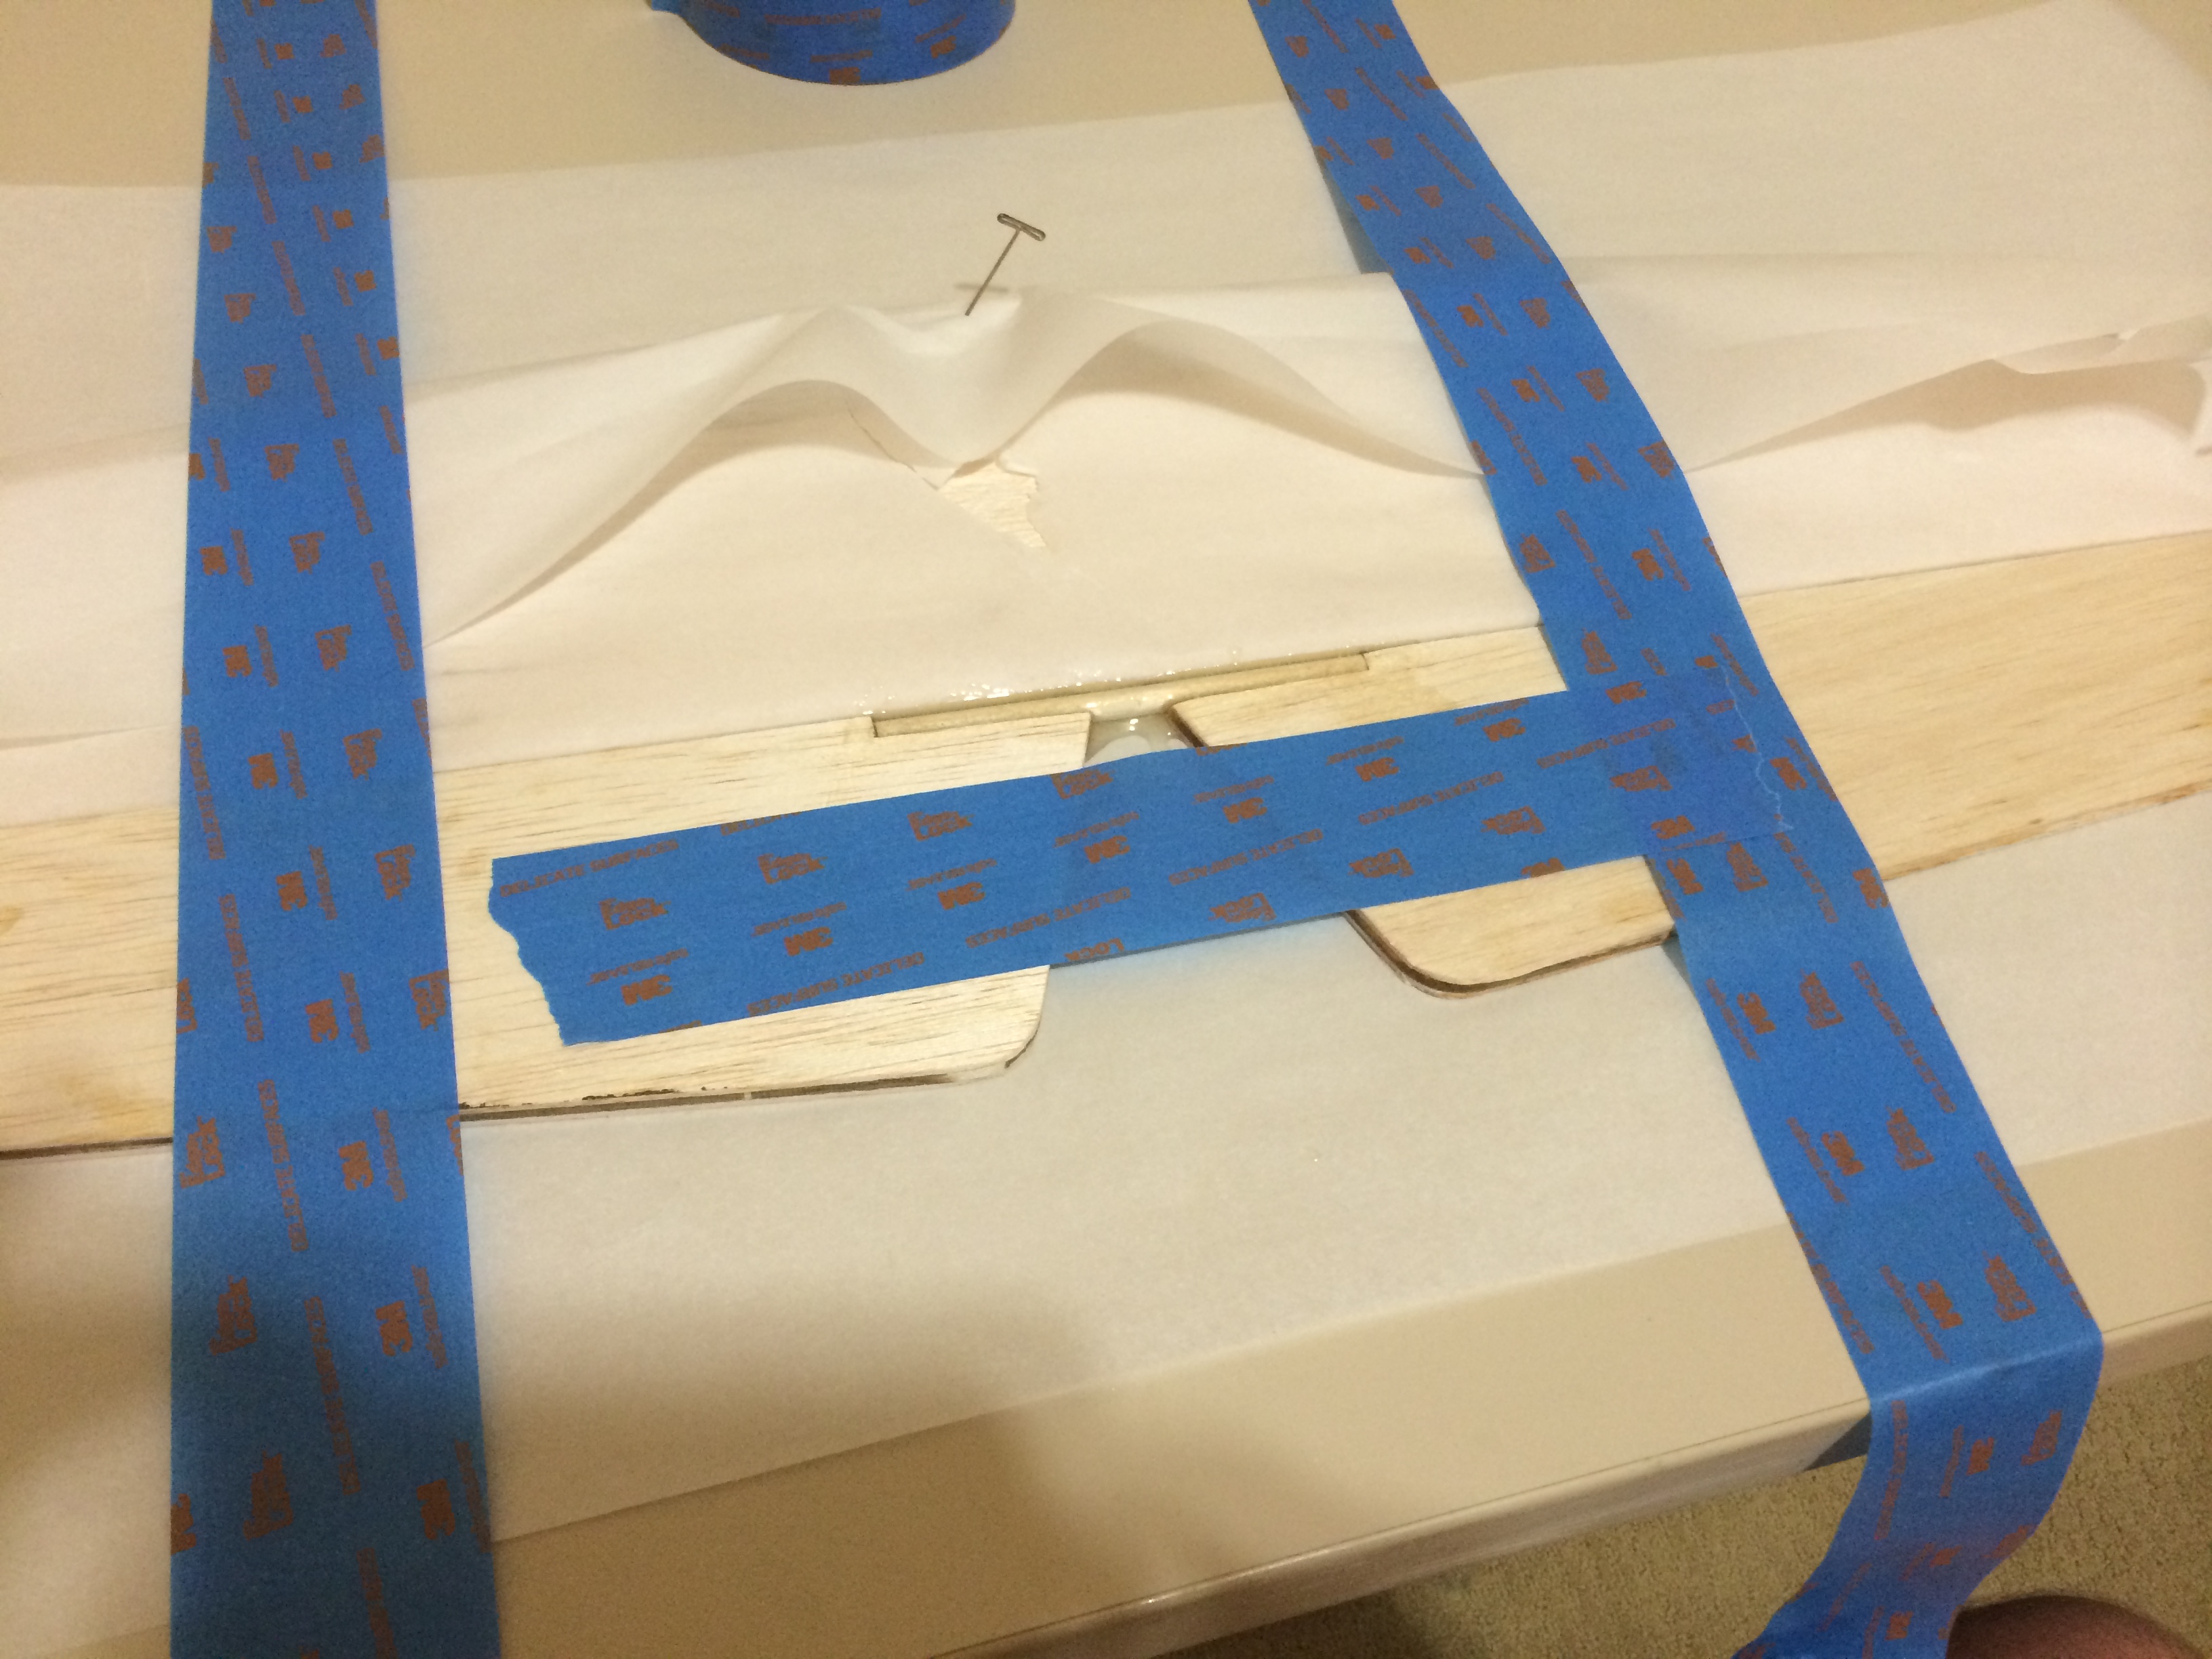
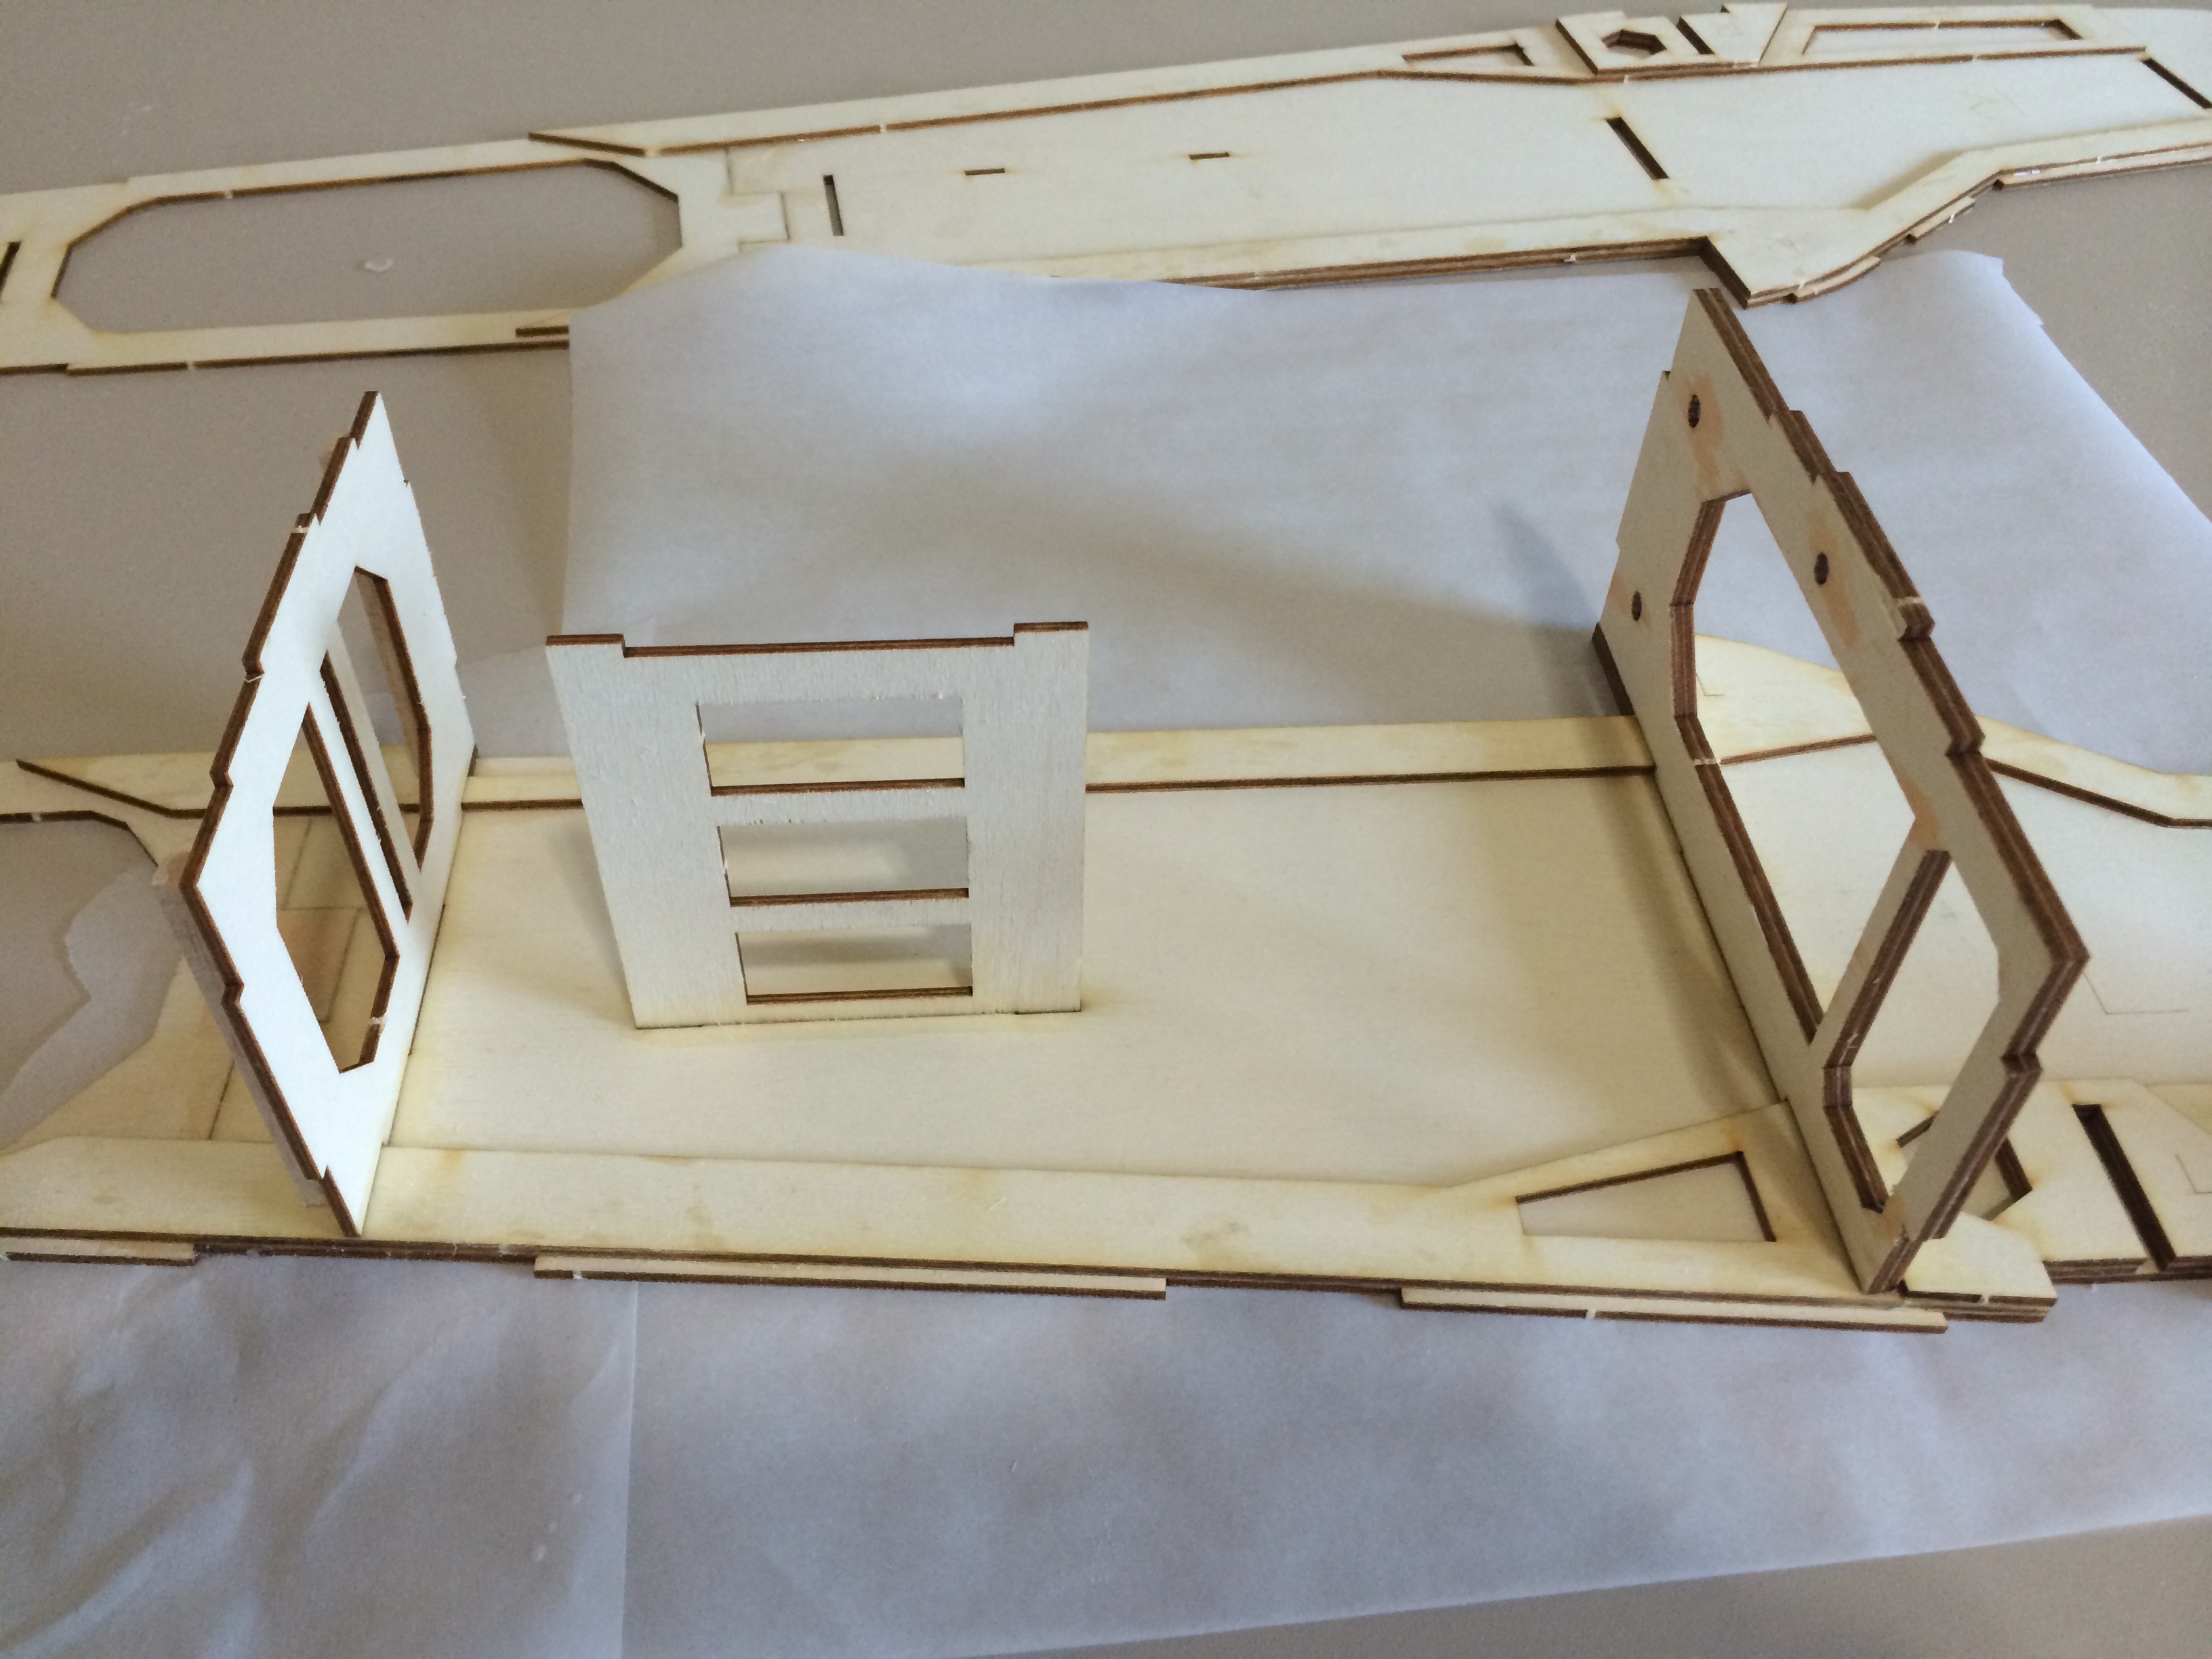
Finally got some more work in on the Funmaster. Tail is completely finished and I started some of the initial work on the fuse. I hope to get a good start on it today. All things considered the build is going well so far and I am happy with the results. Pictures of the fuselage will come as a get a little more done on it.
 08-17-2014, 07:40 PM
#8
Member
Thread Starter
Join Date: Sep 2012
Location: Frisco, TX
Posts: 54
Likes: 0
Received 0 Likes
on
0 Posts
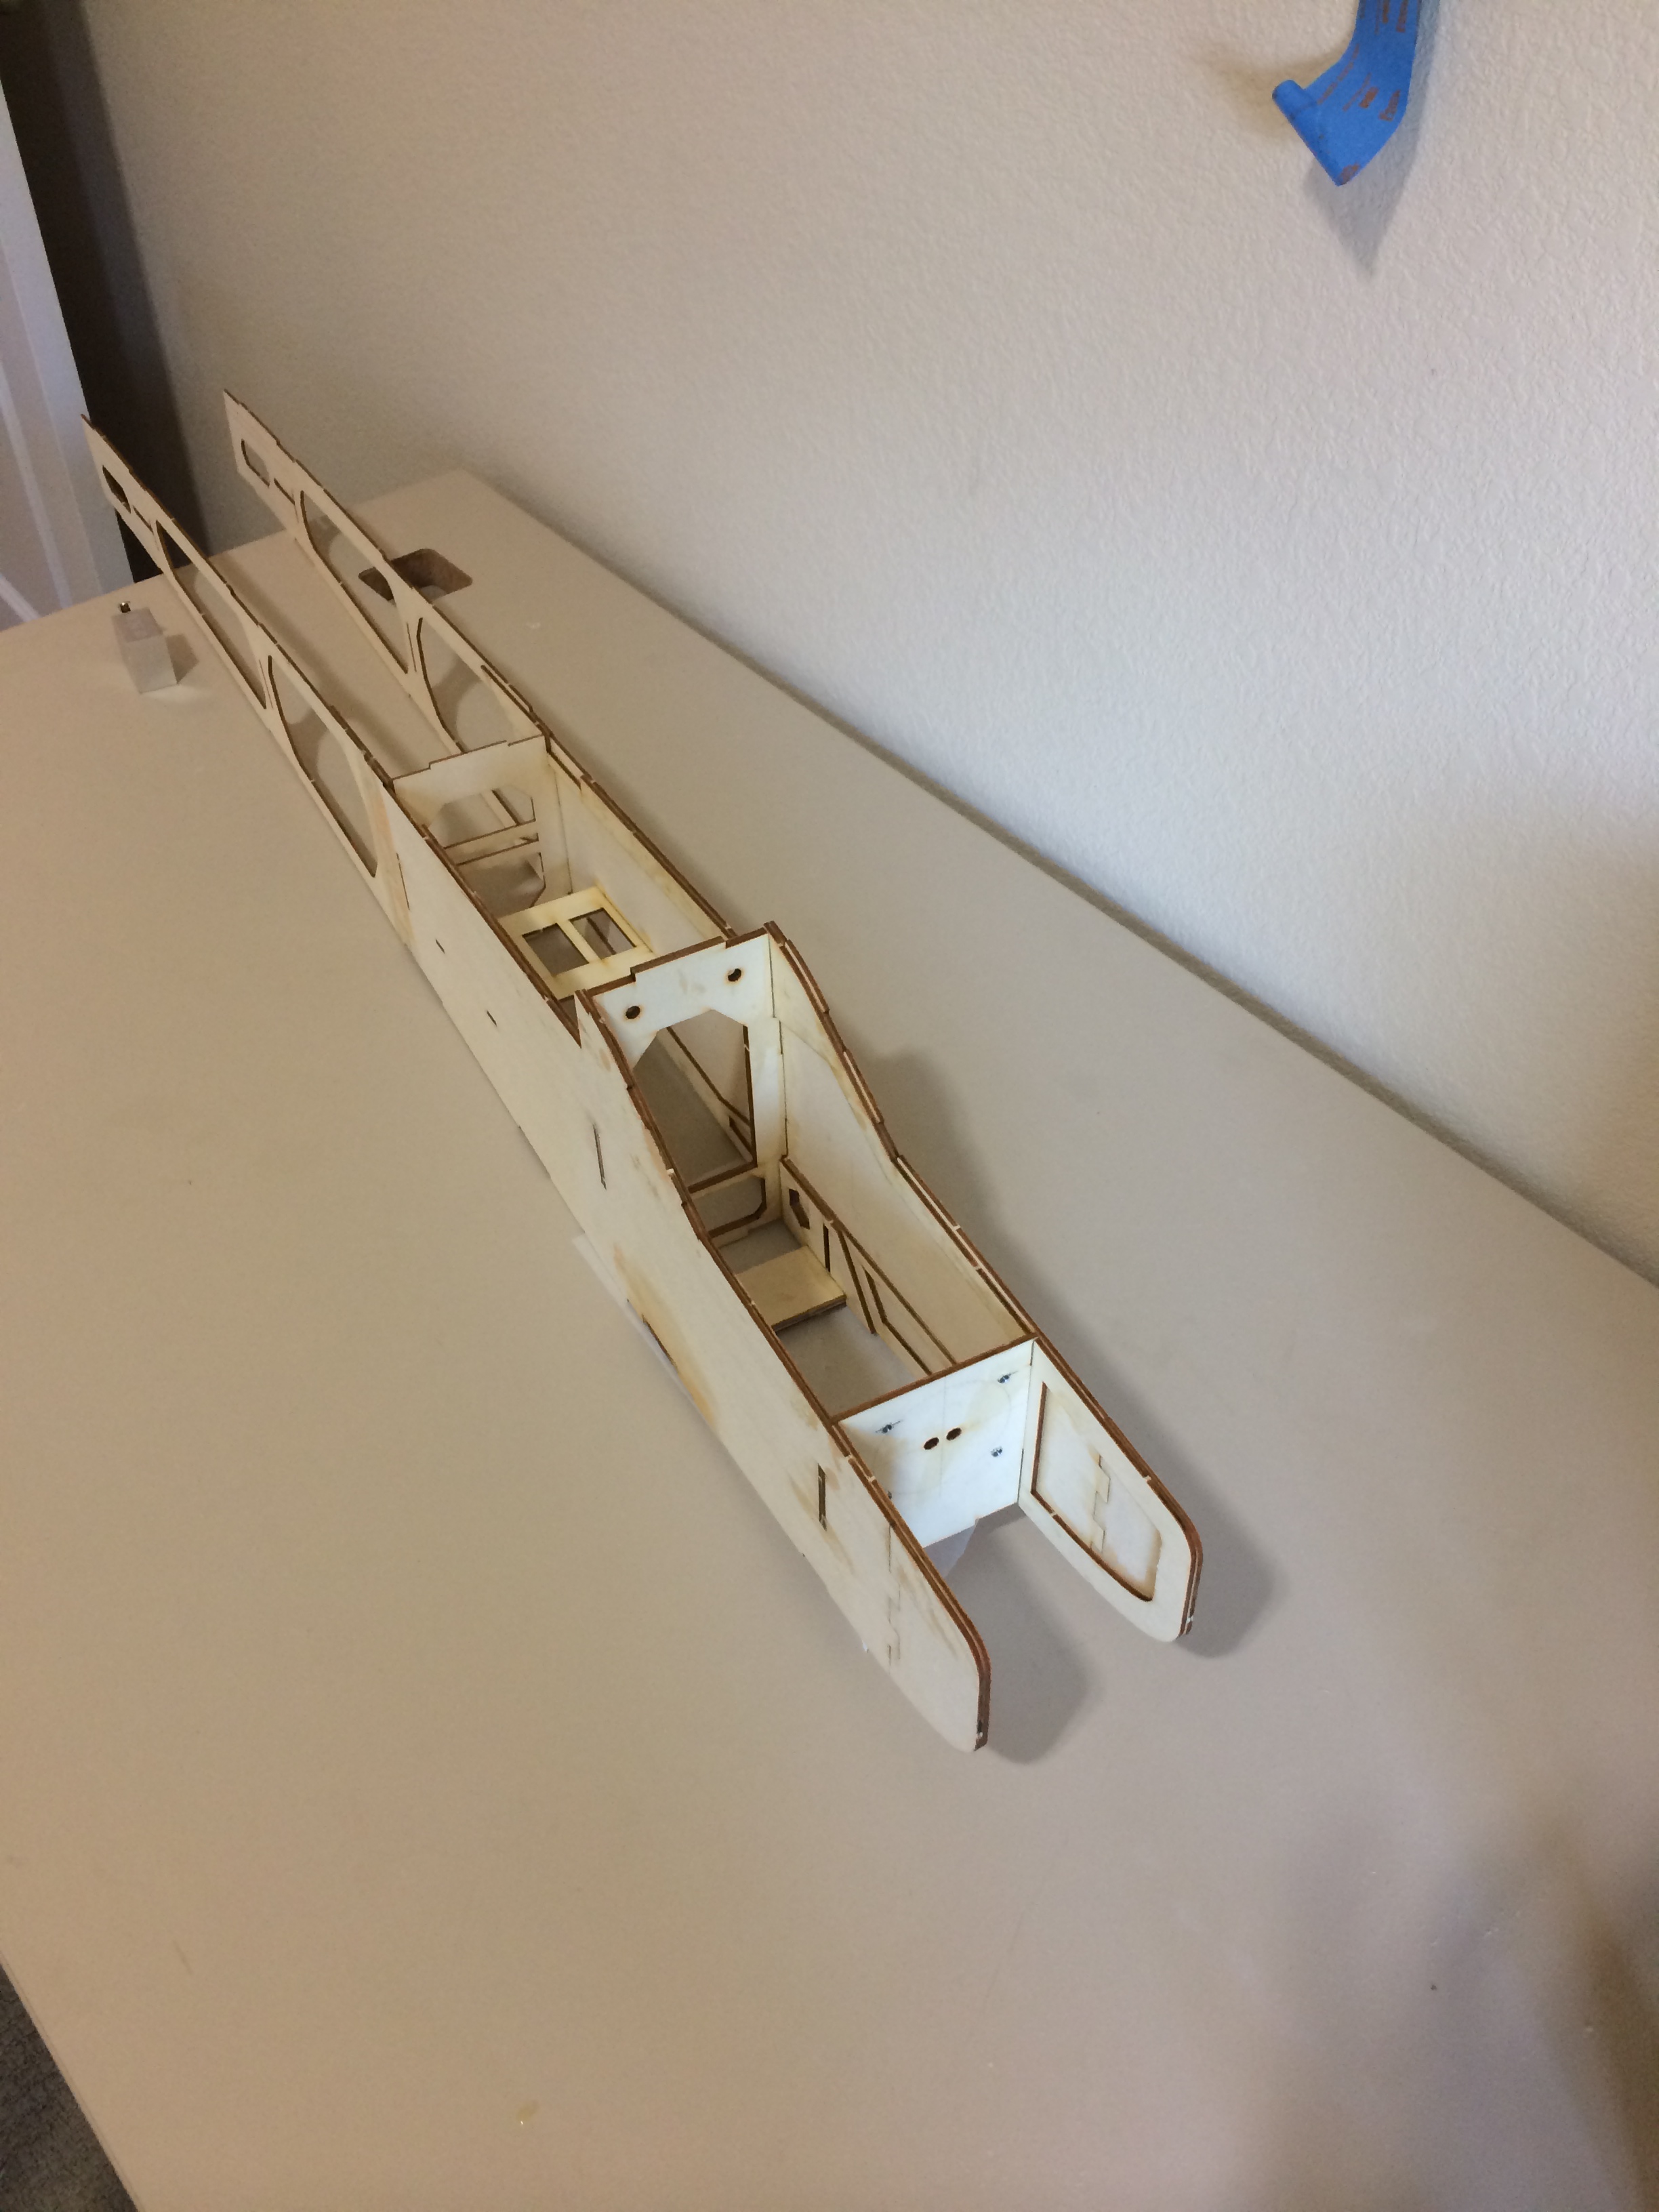
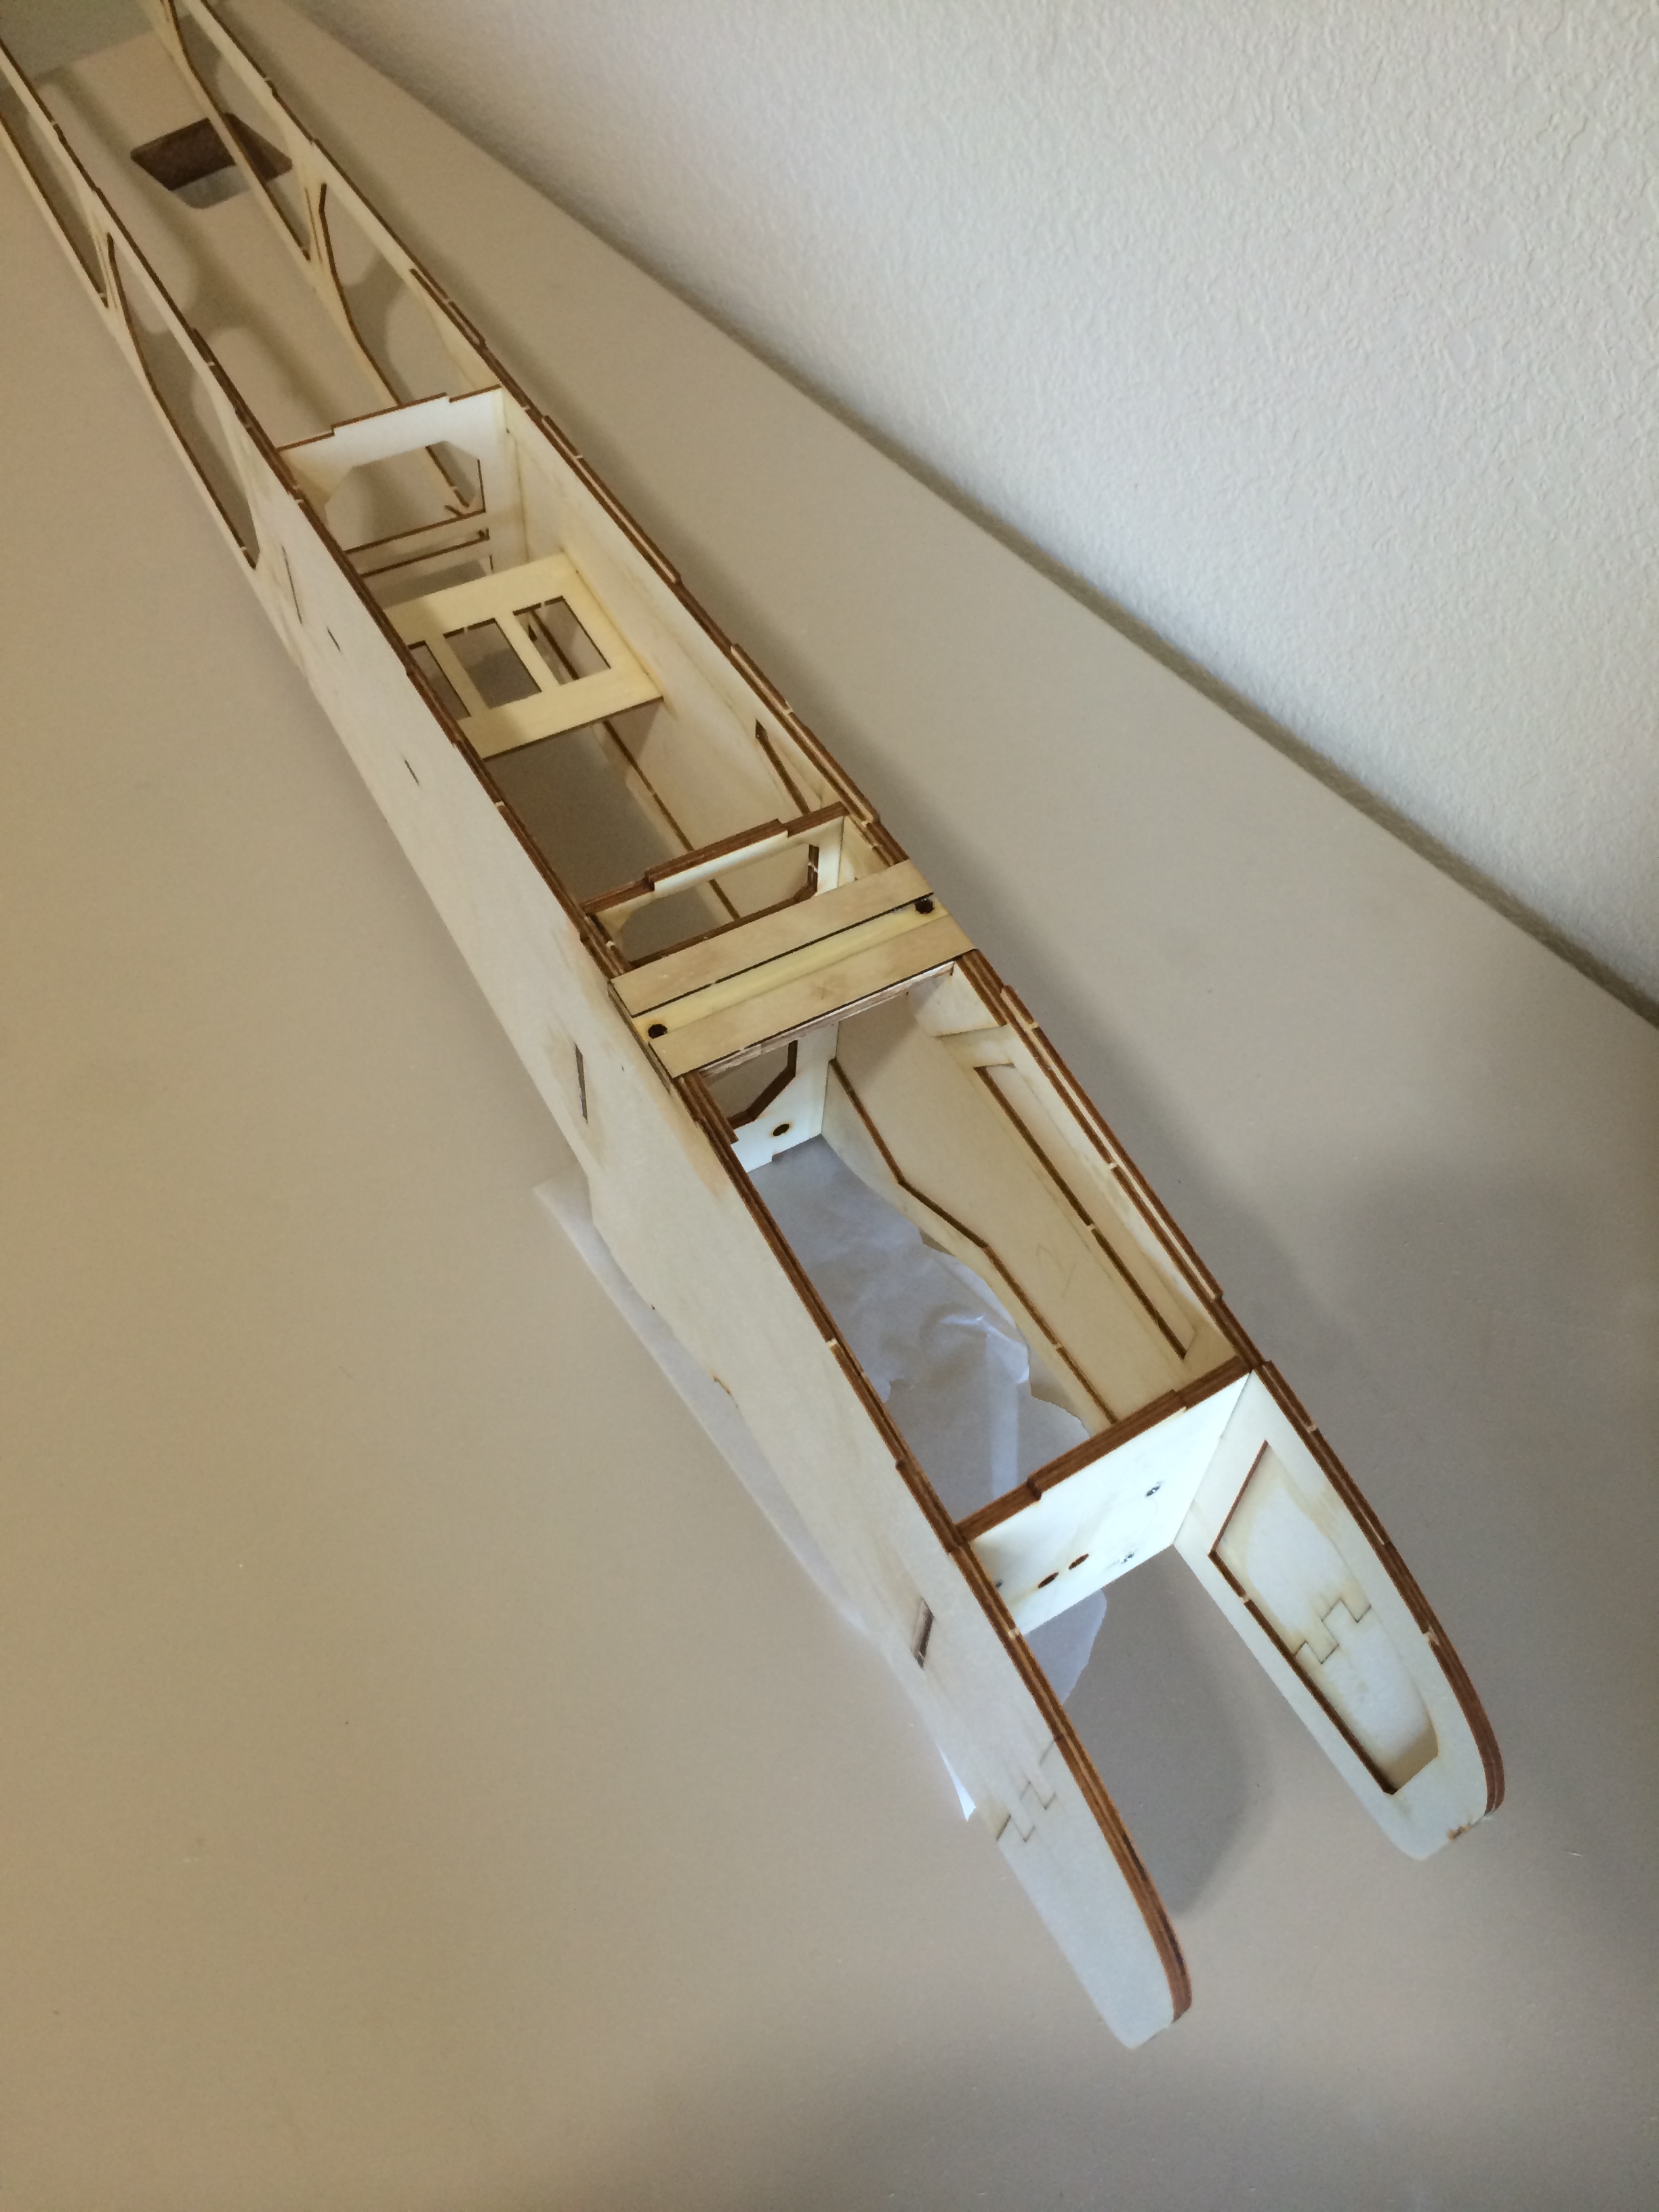
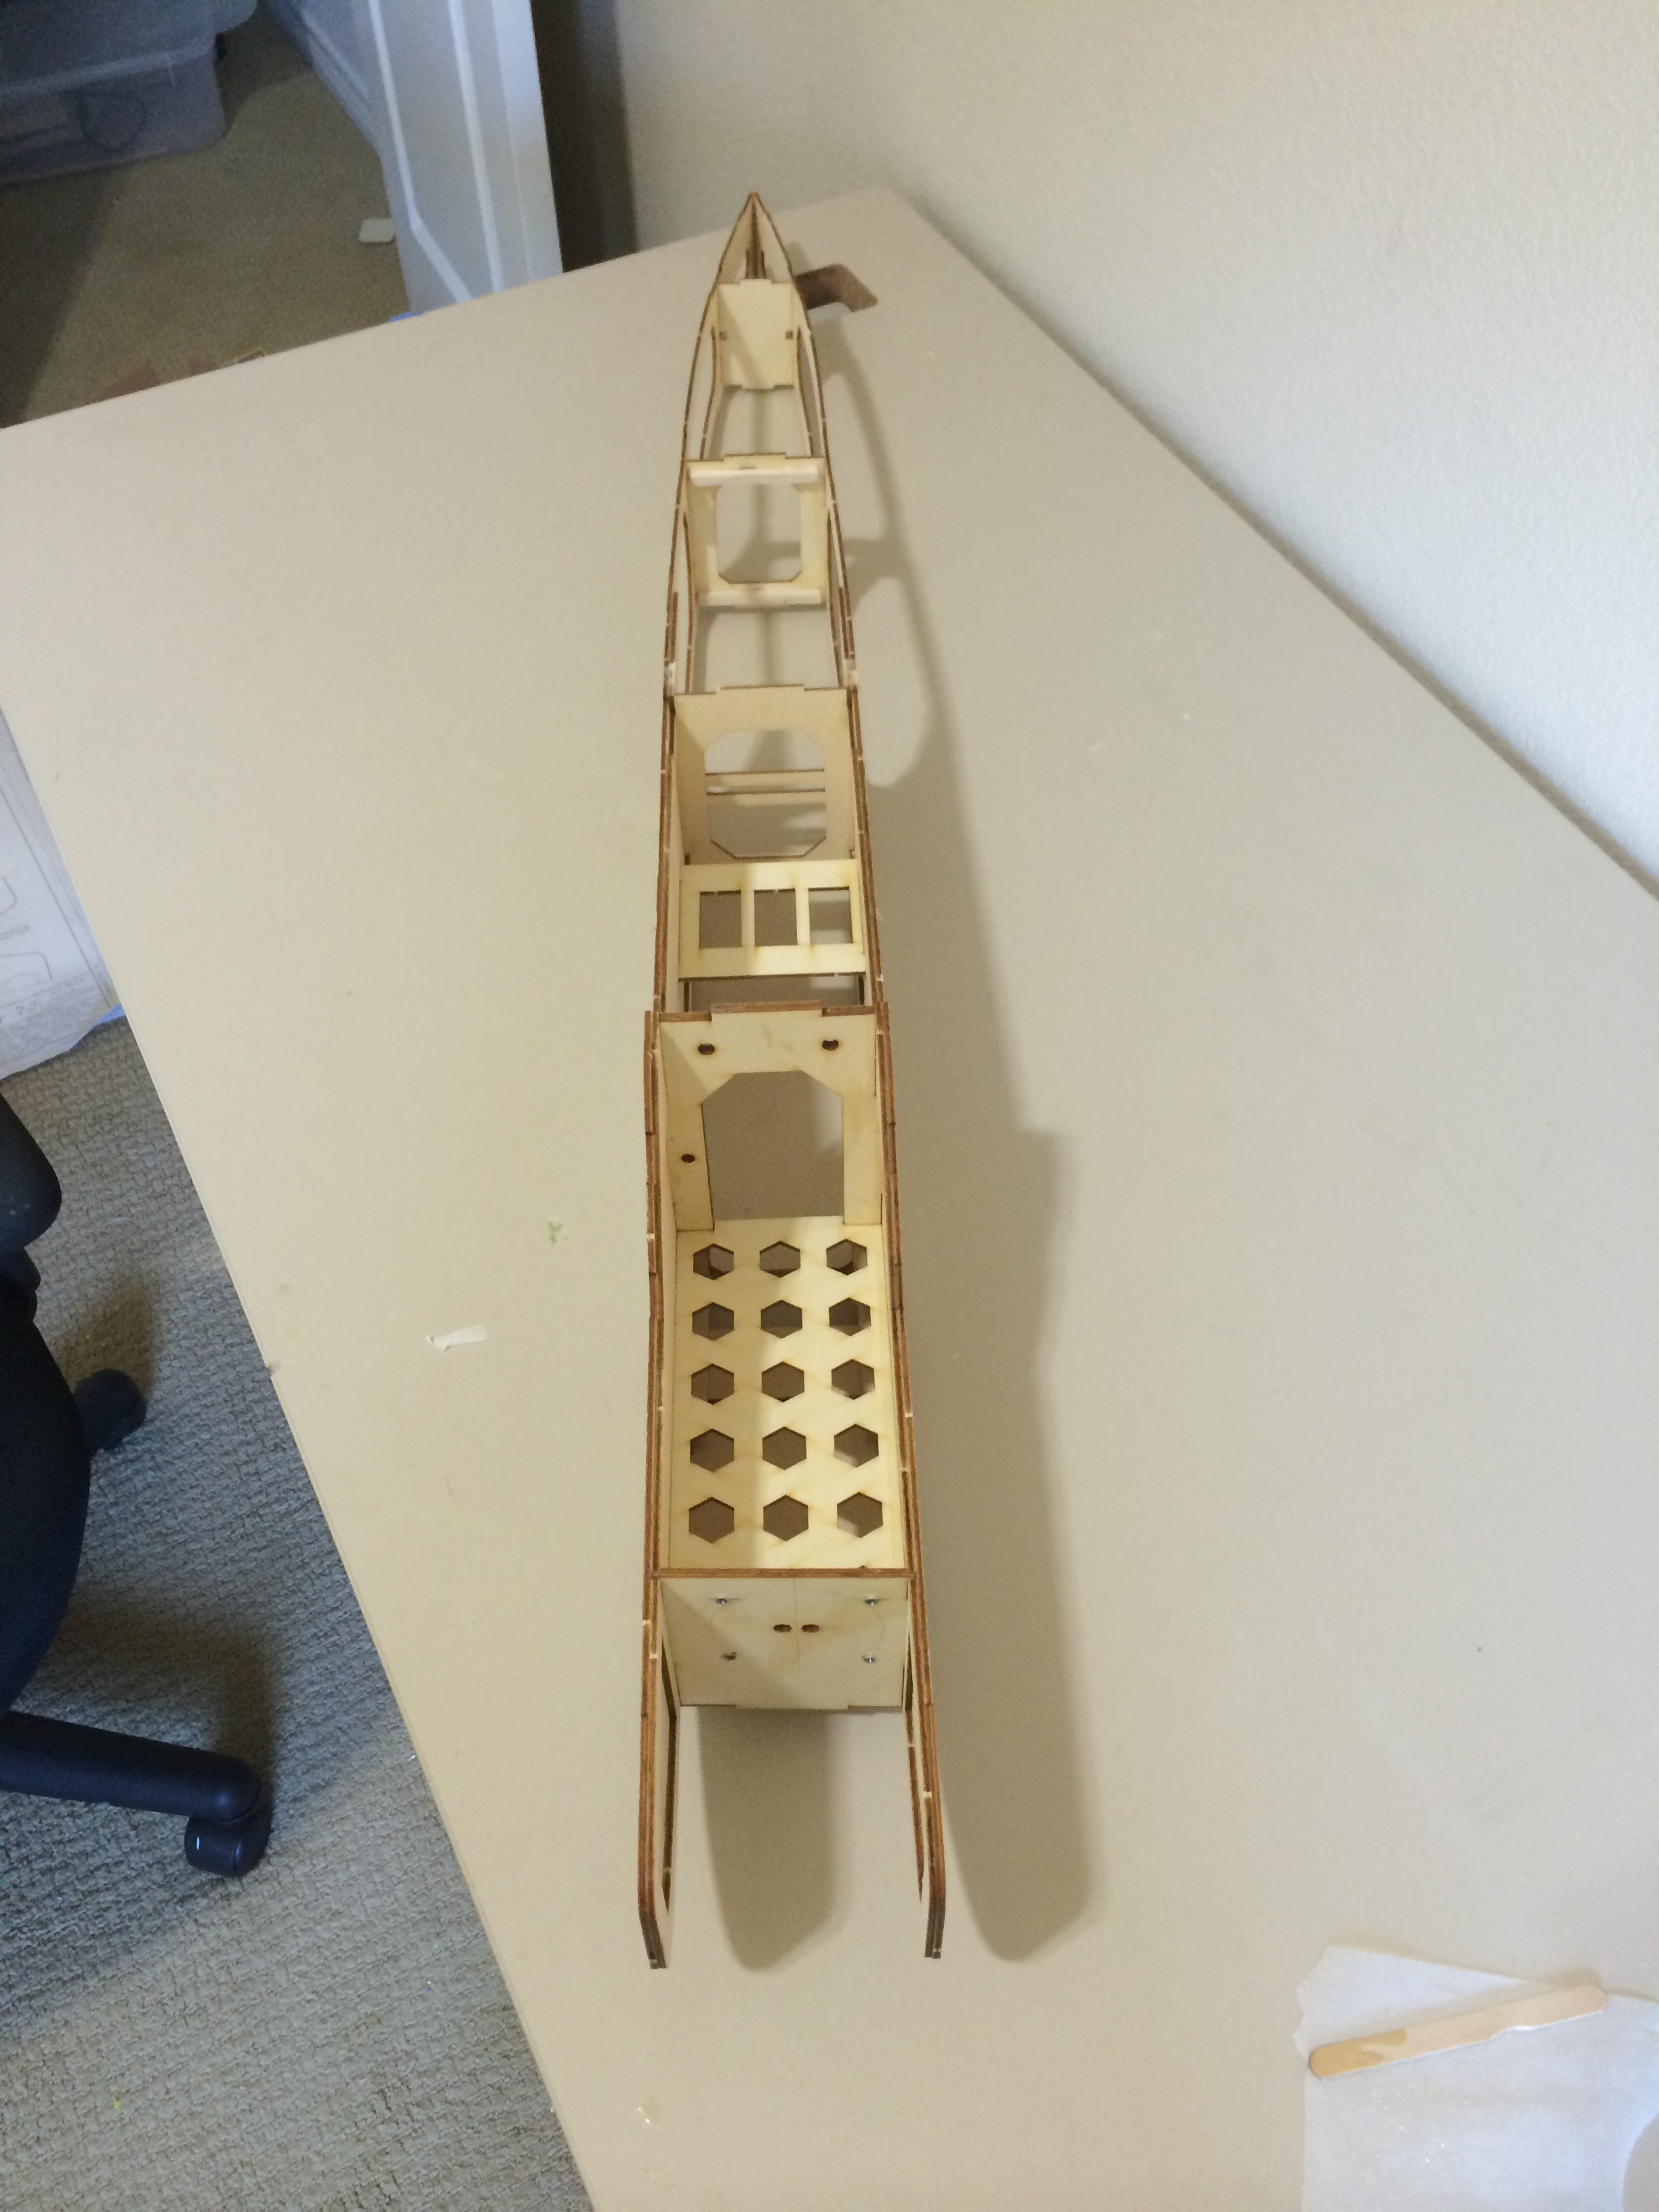
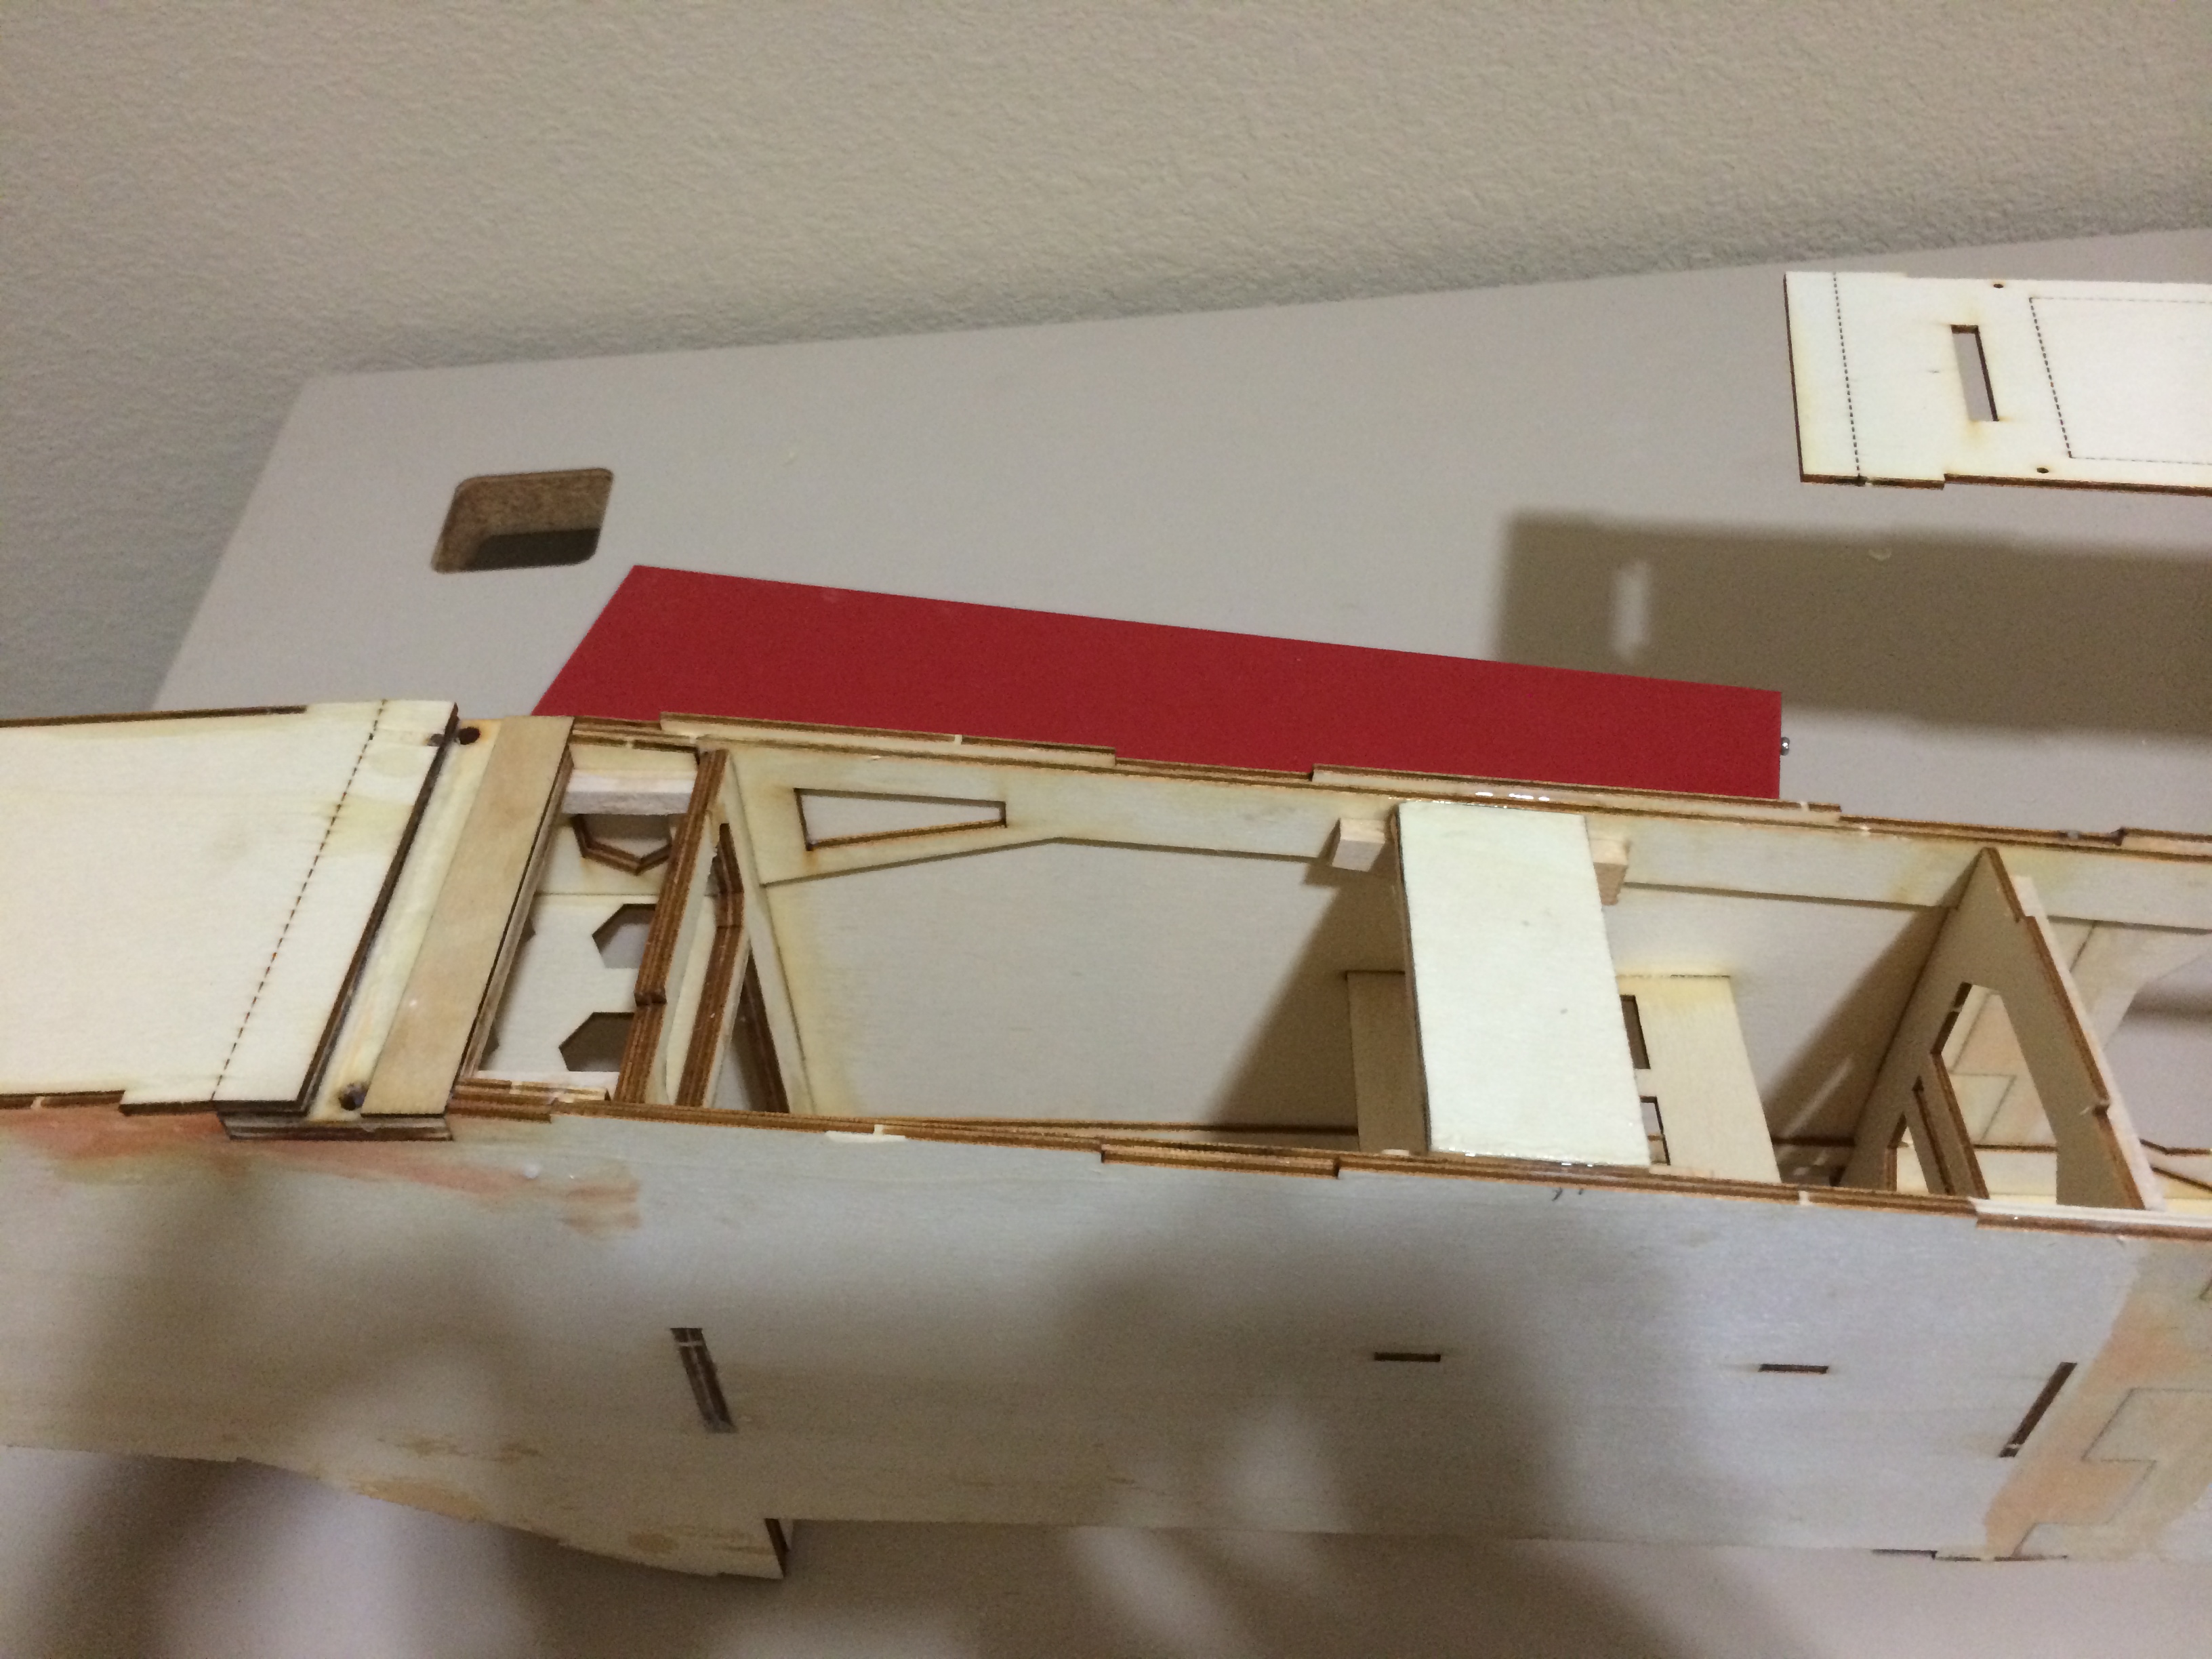
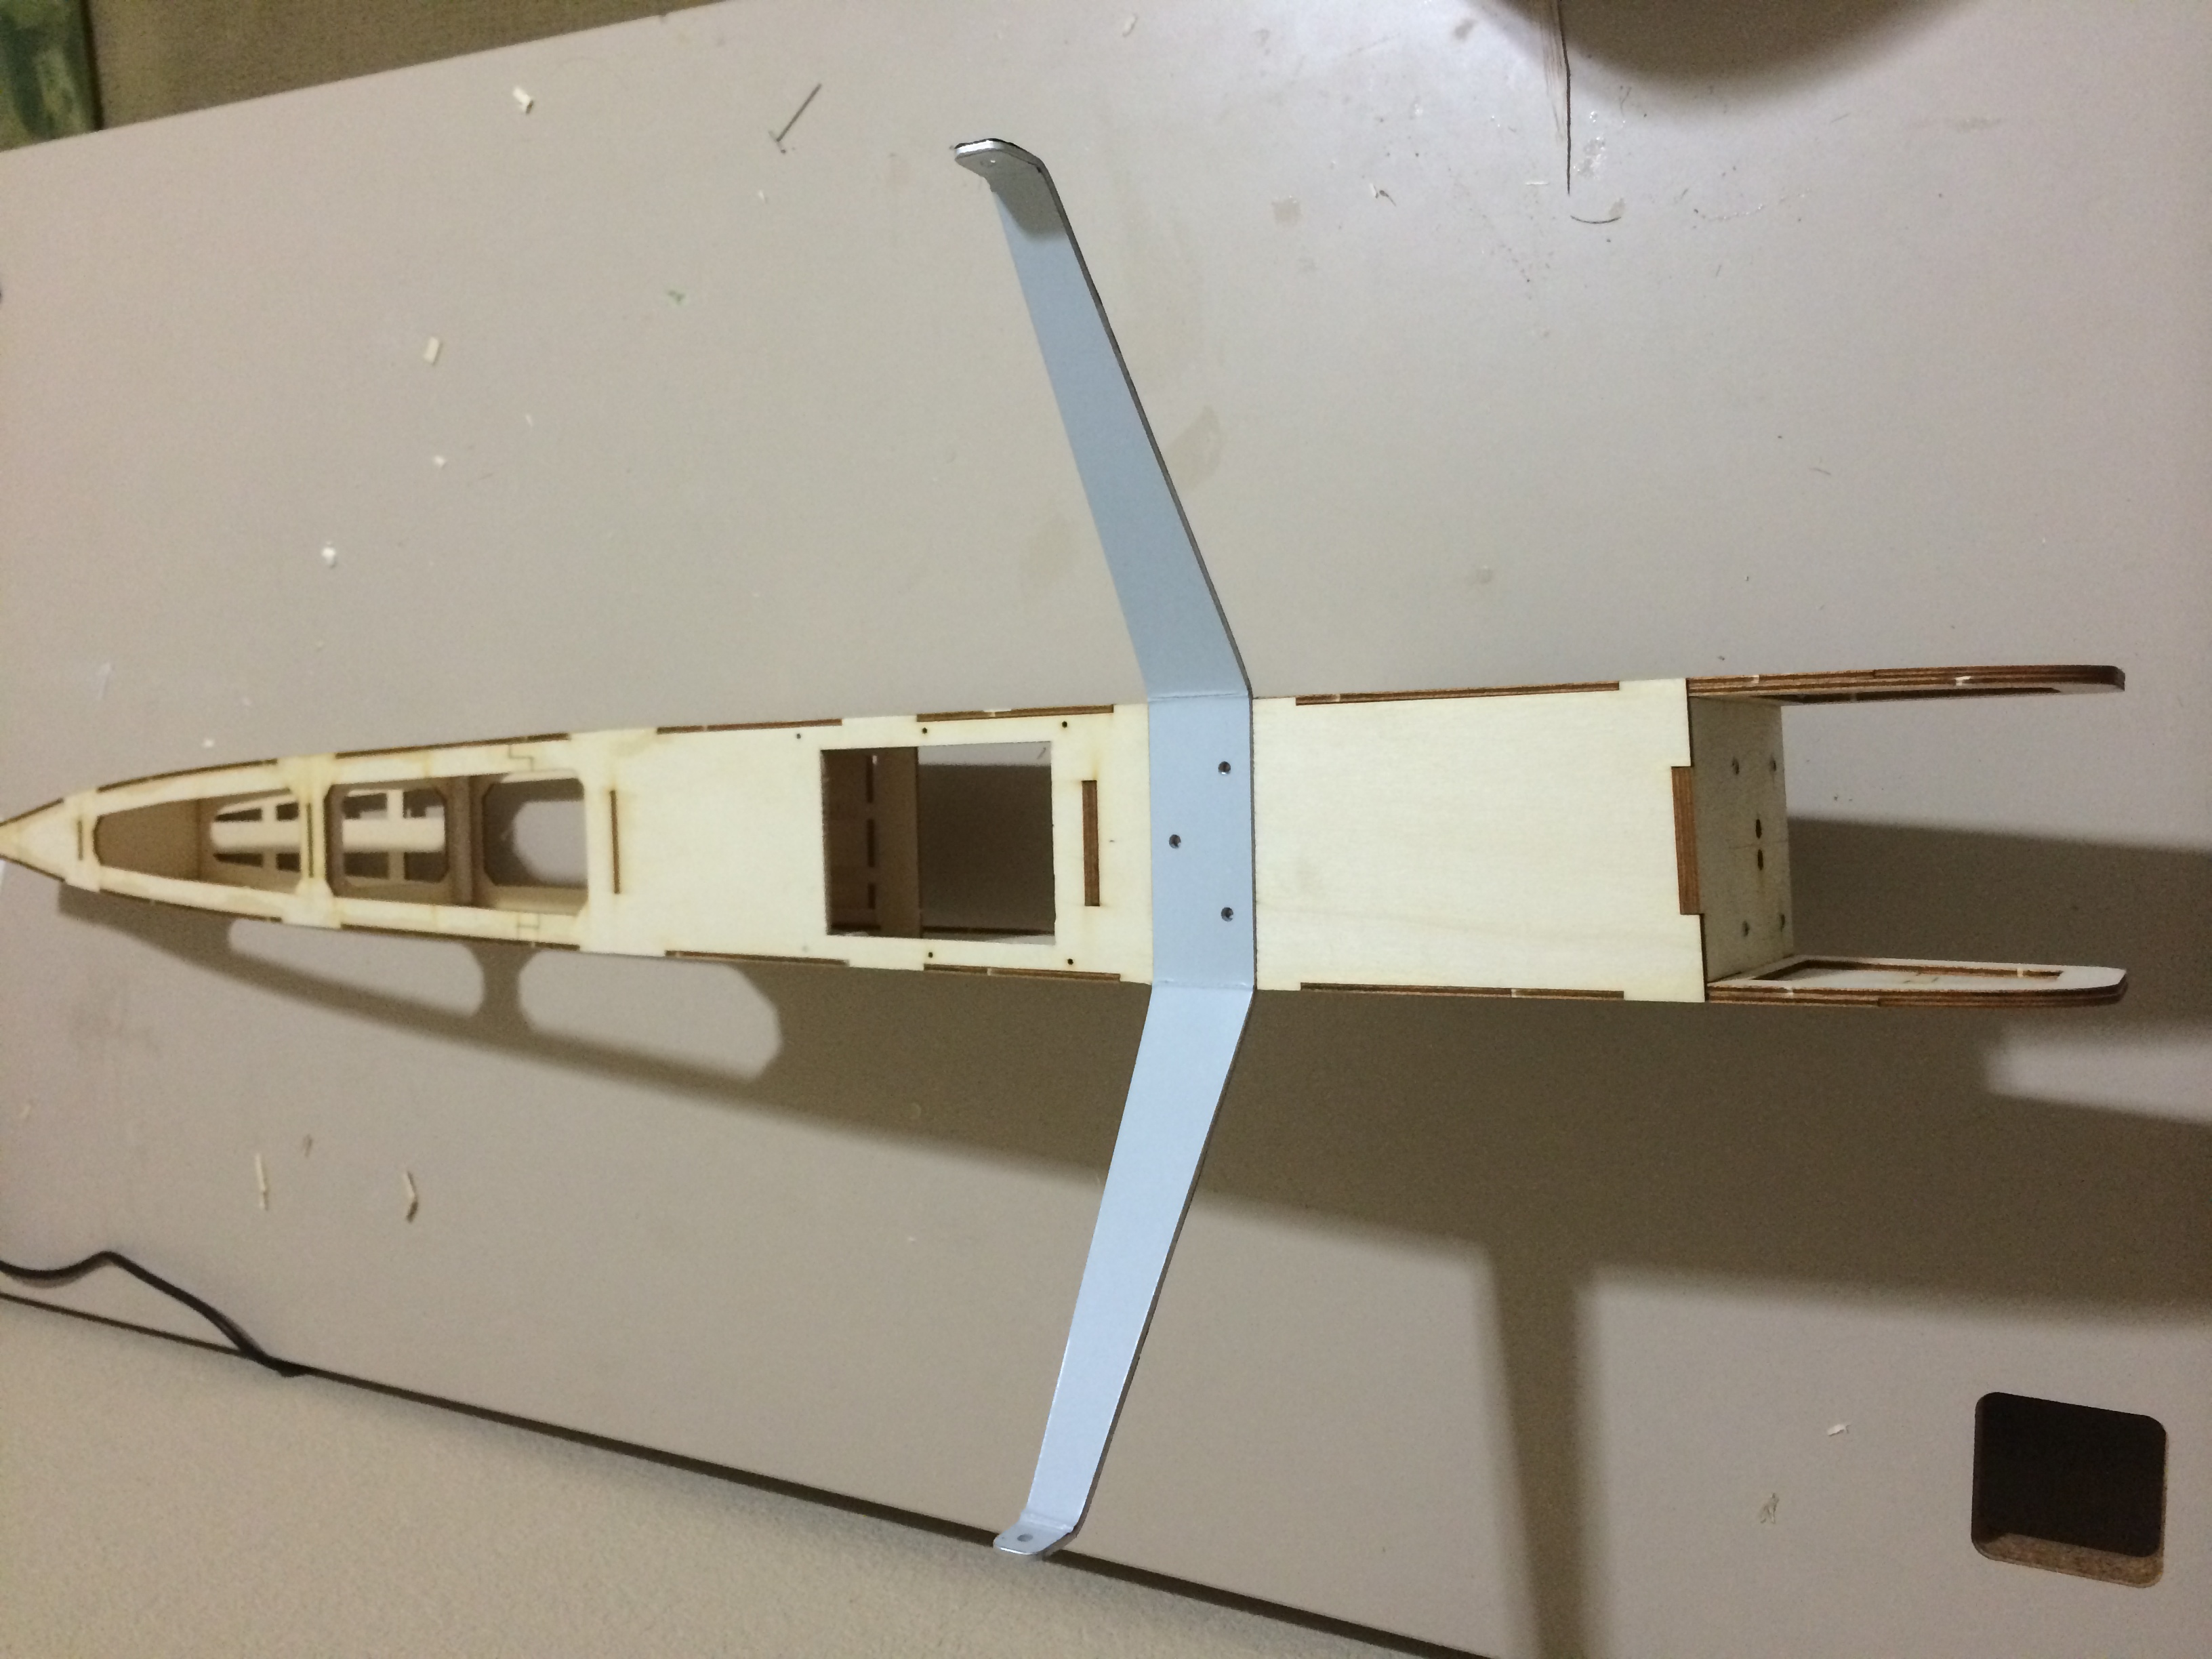
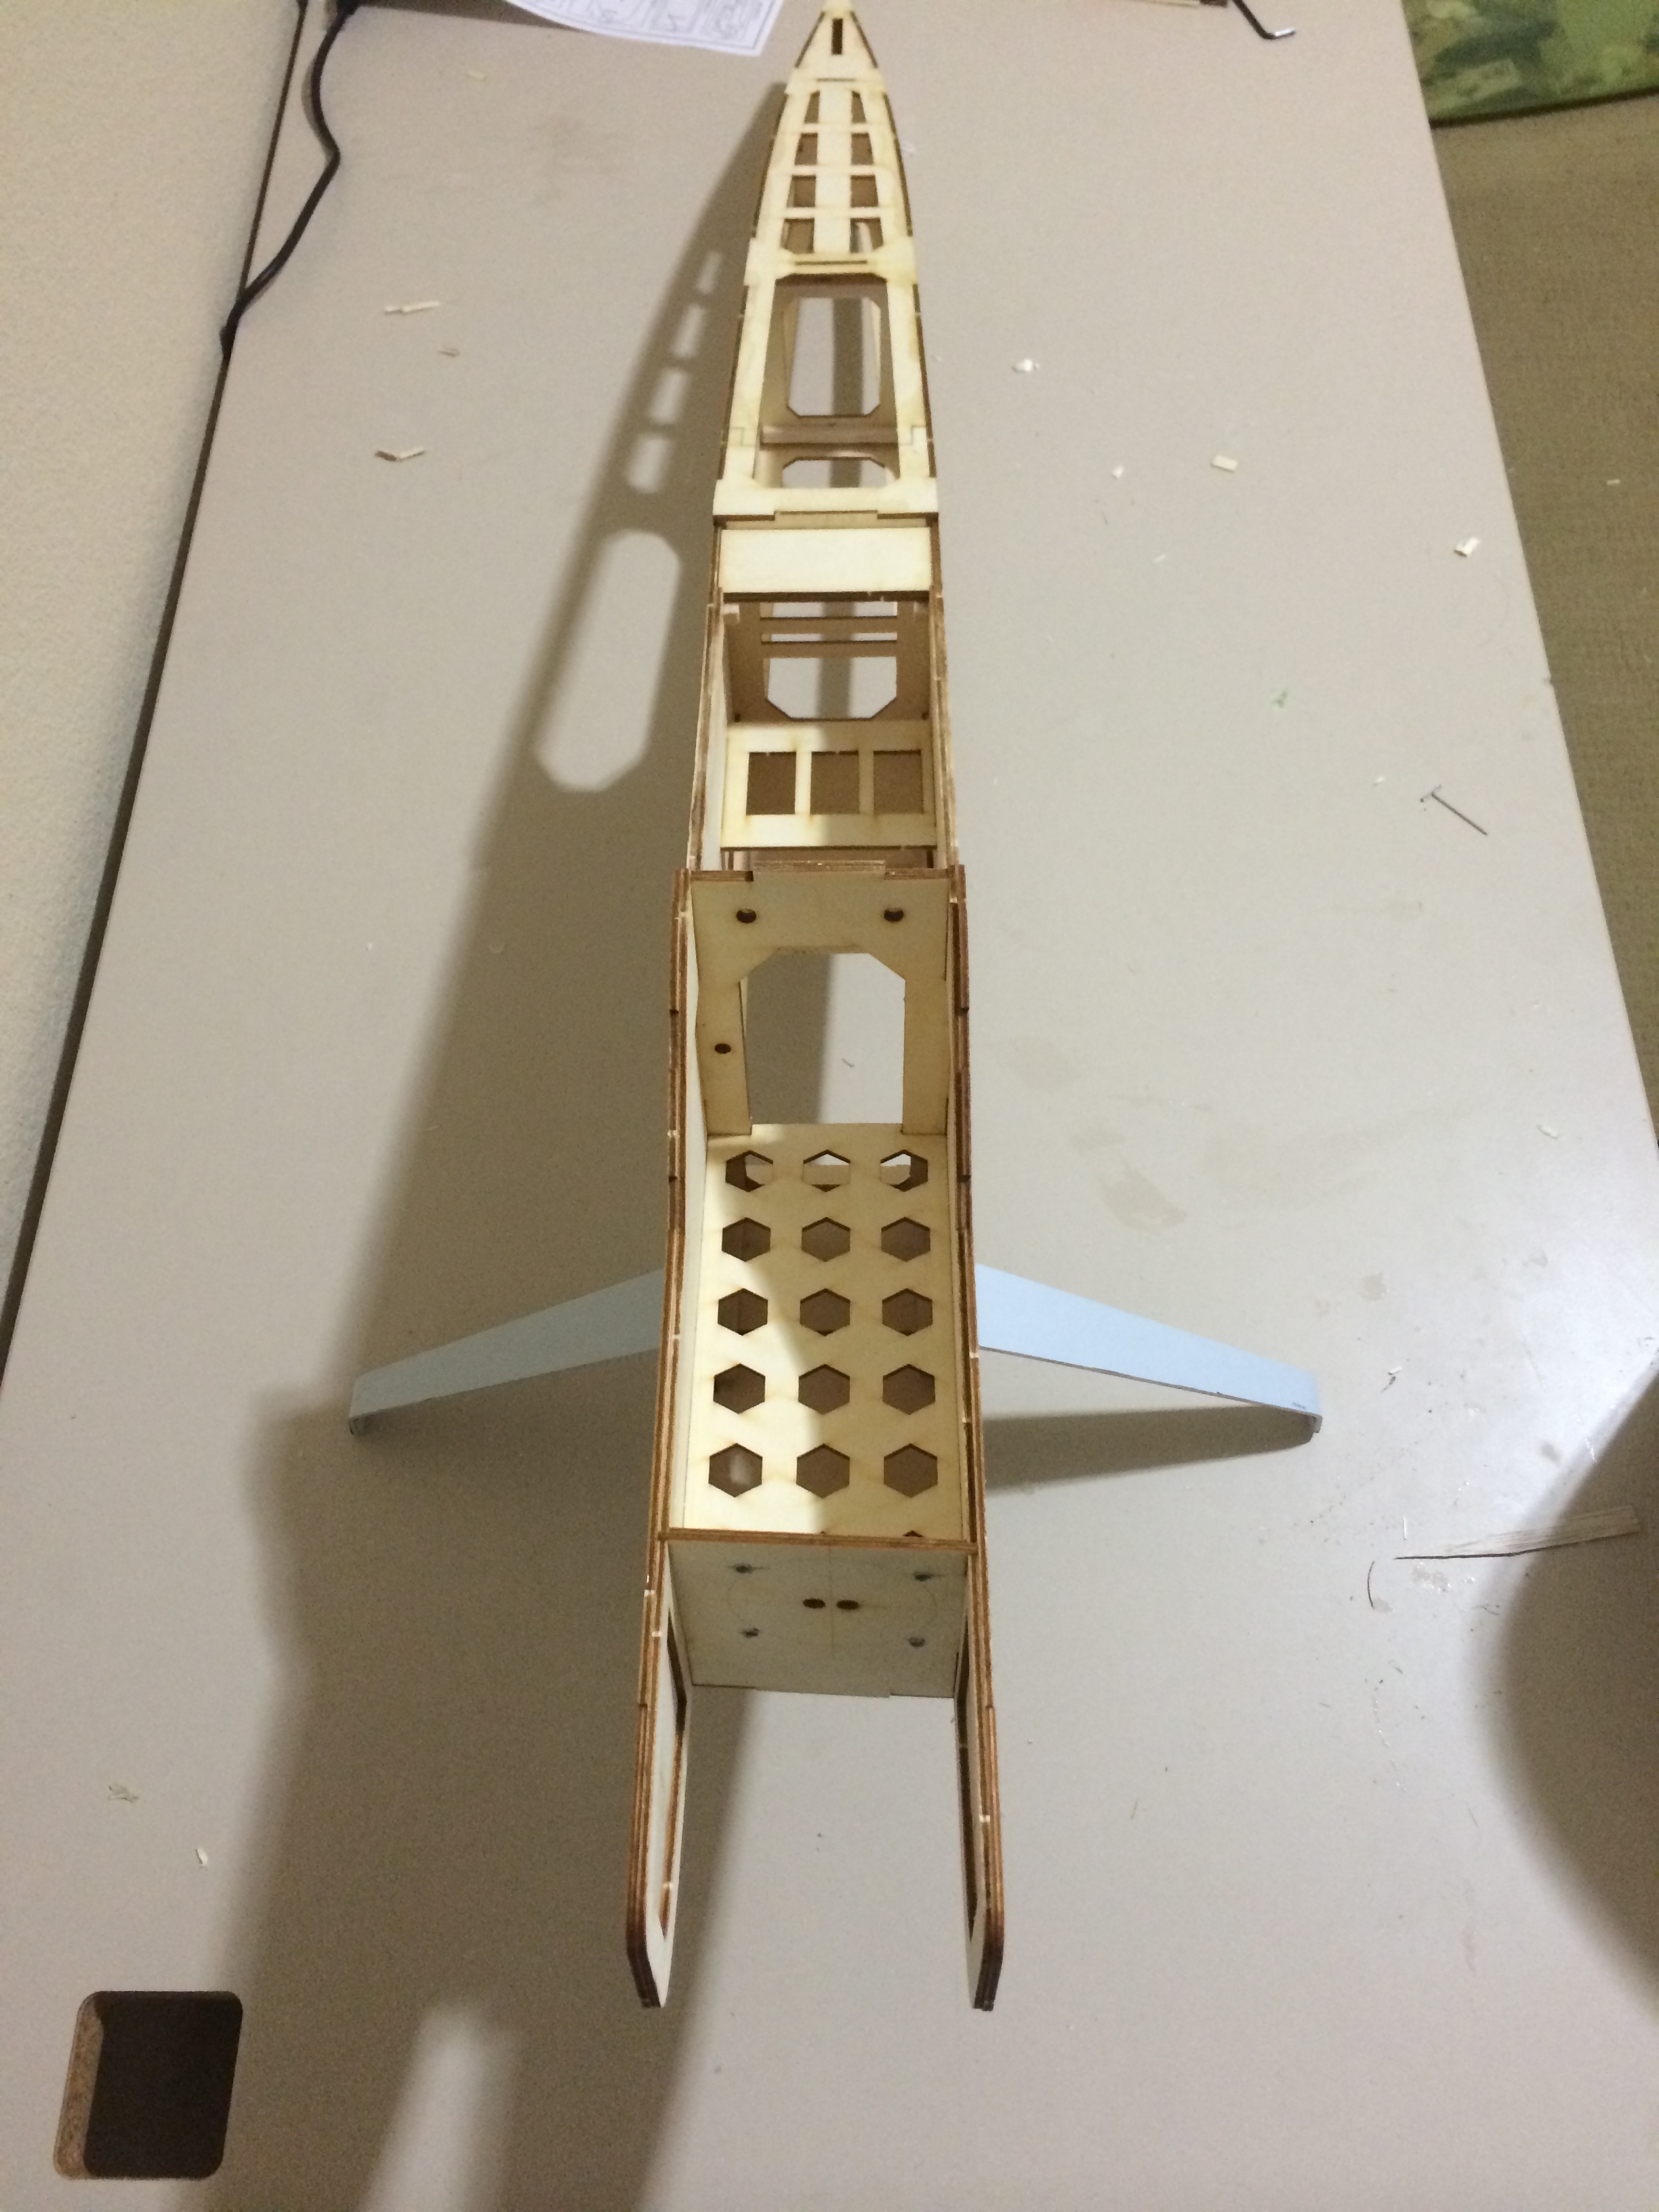
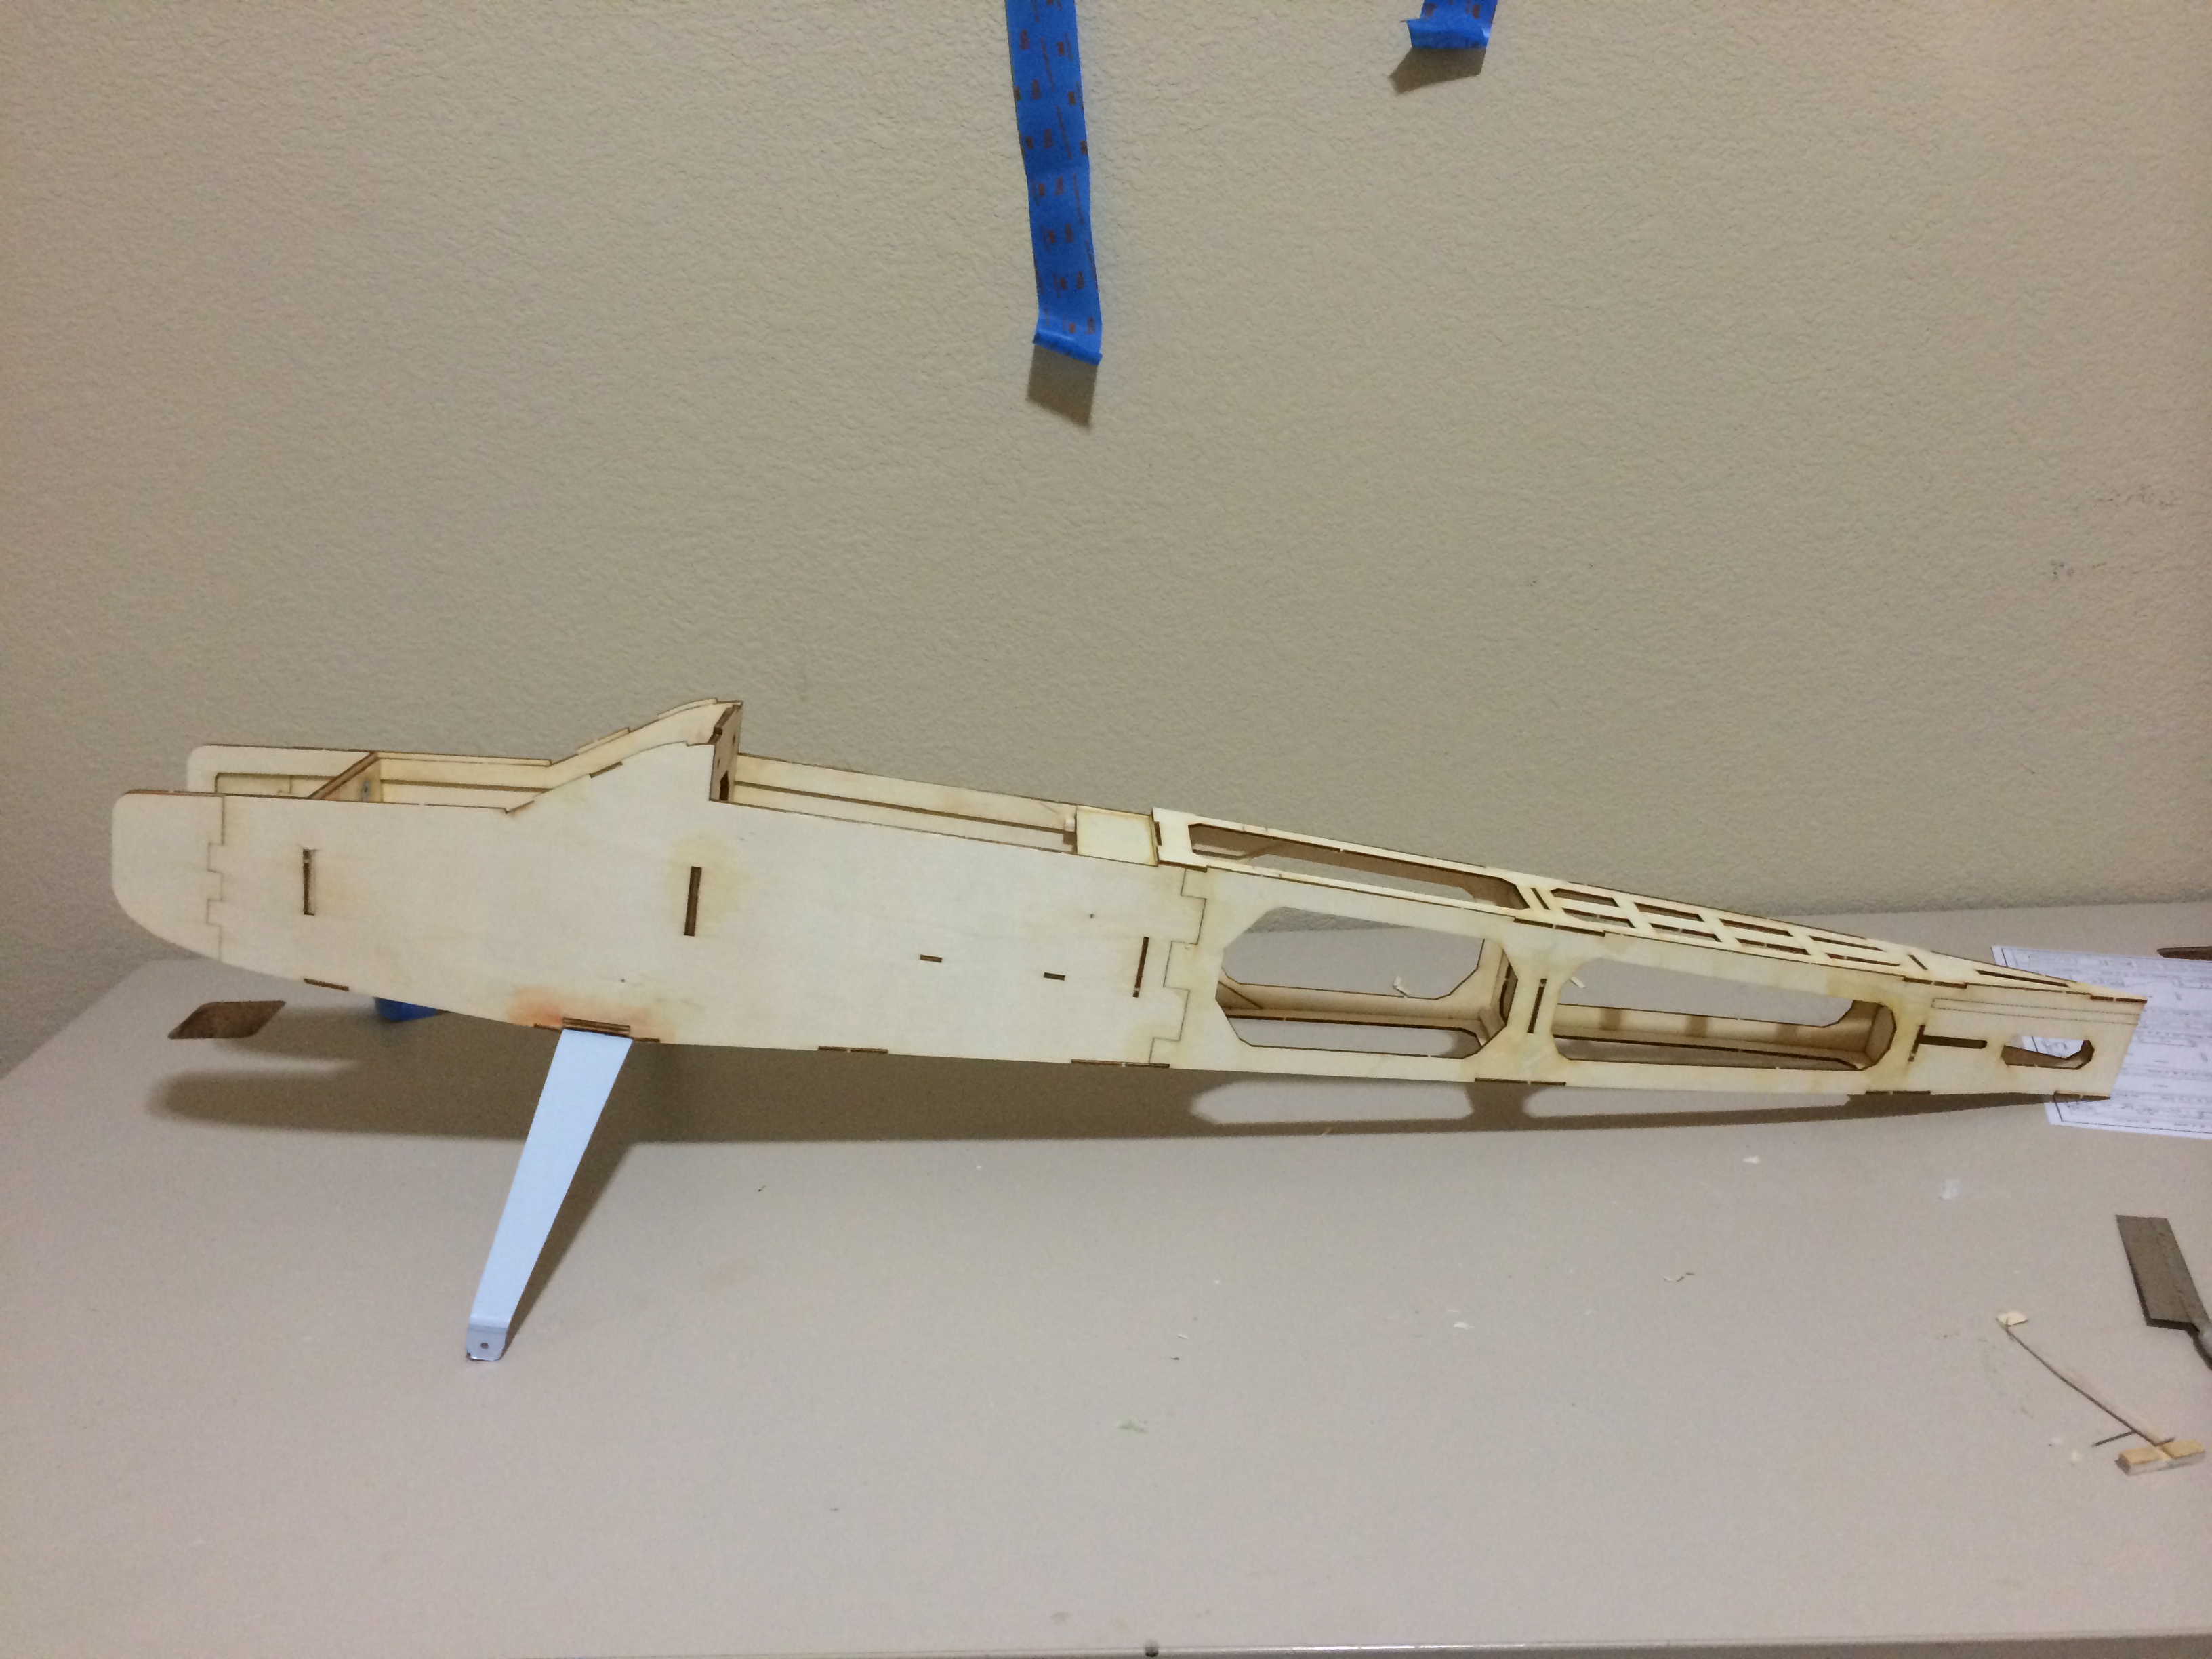
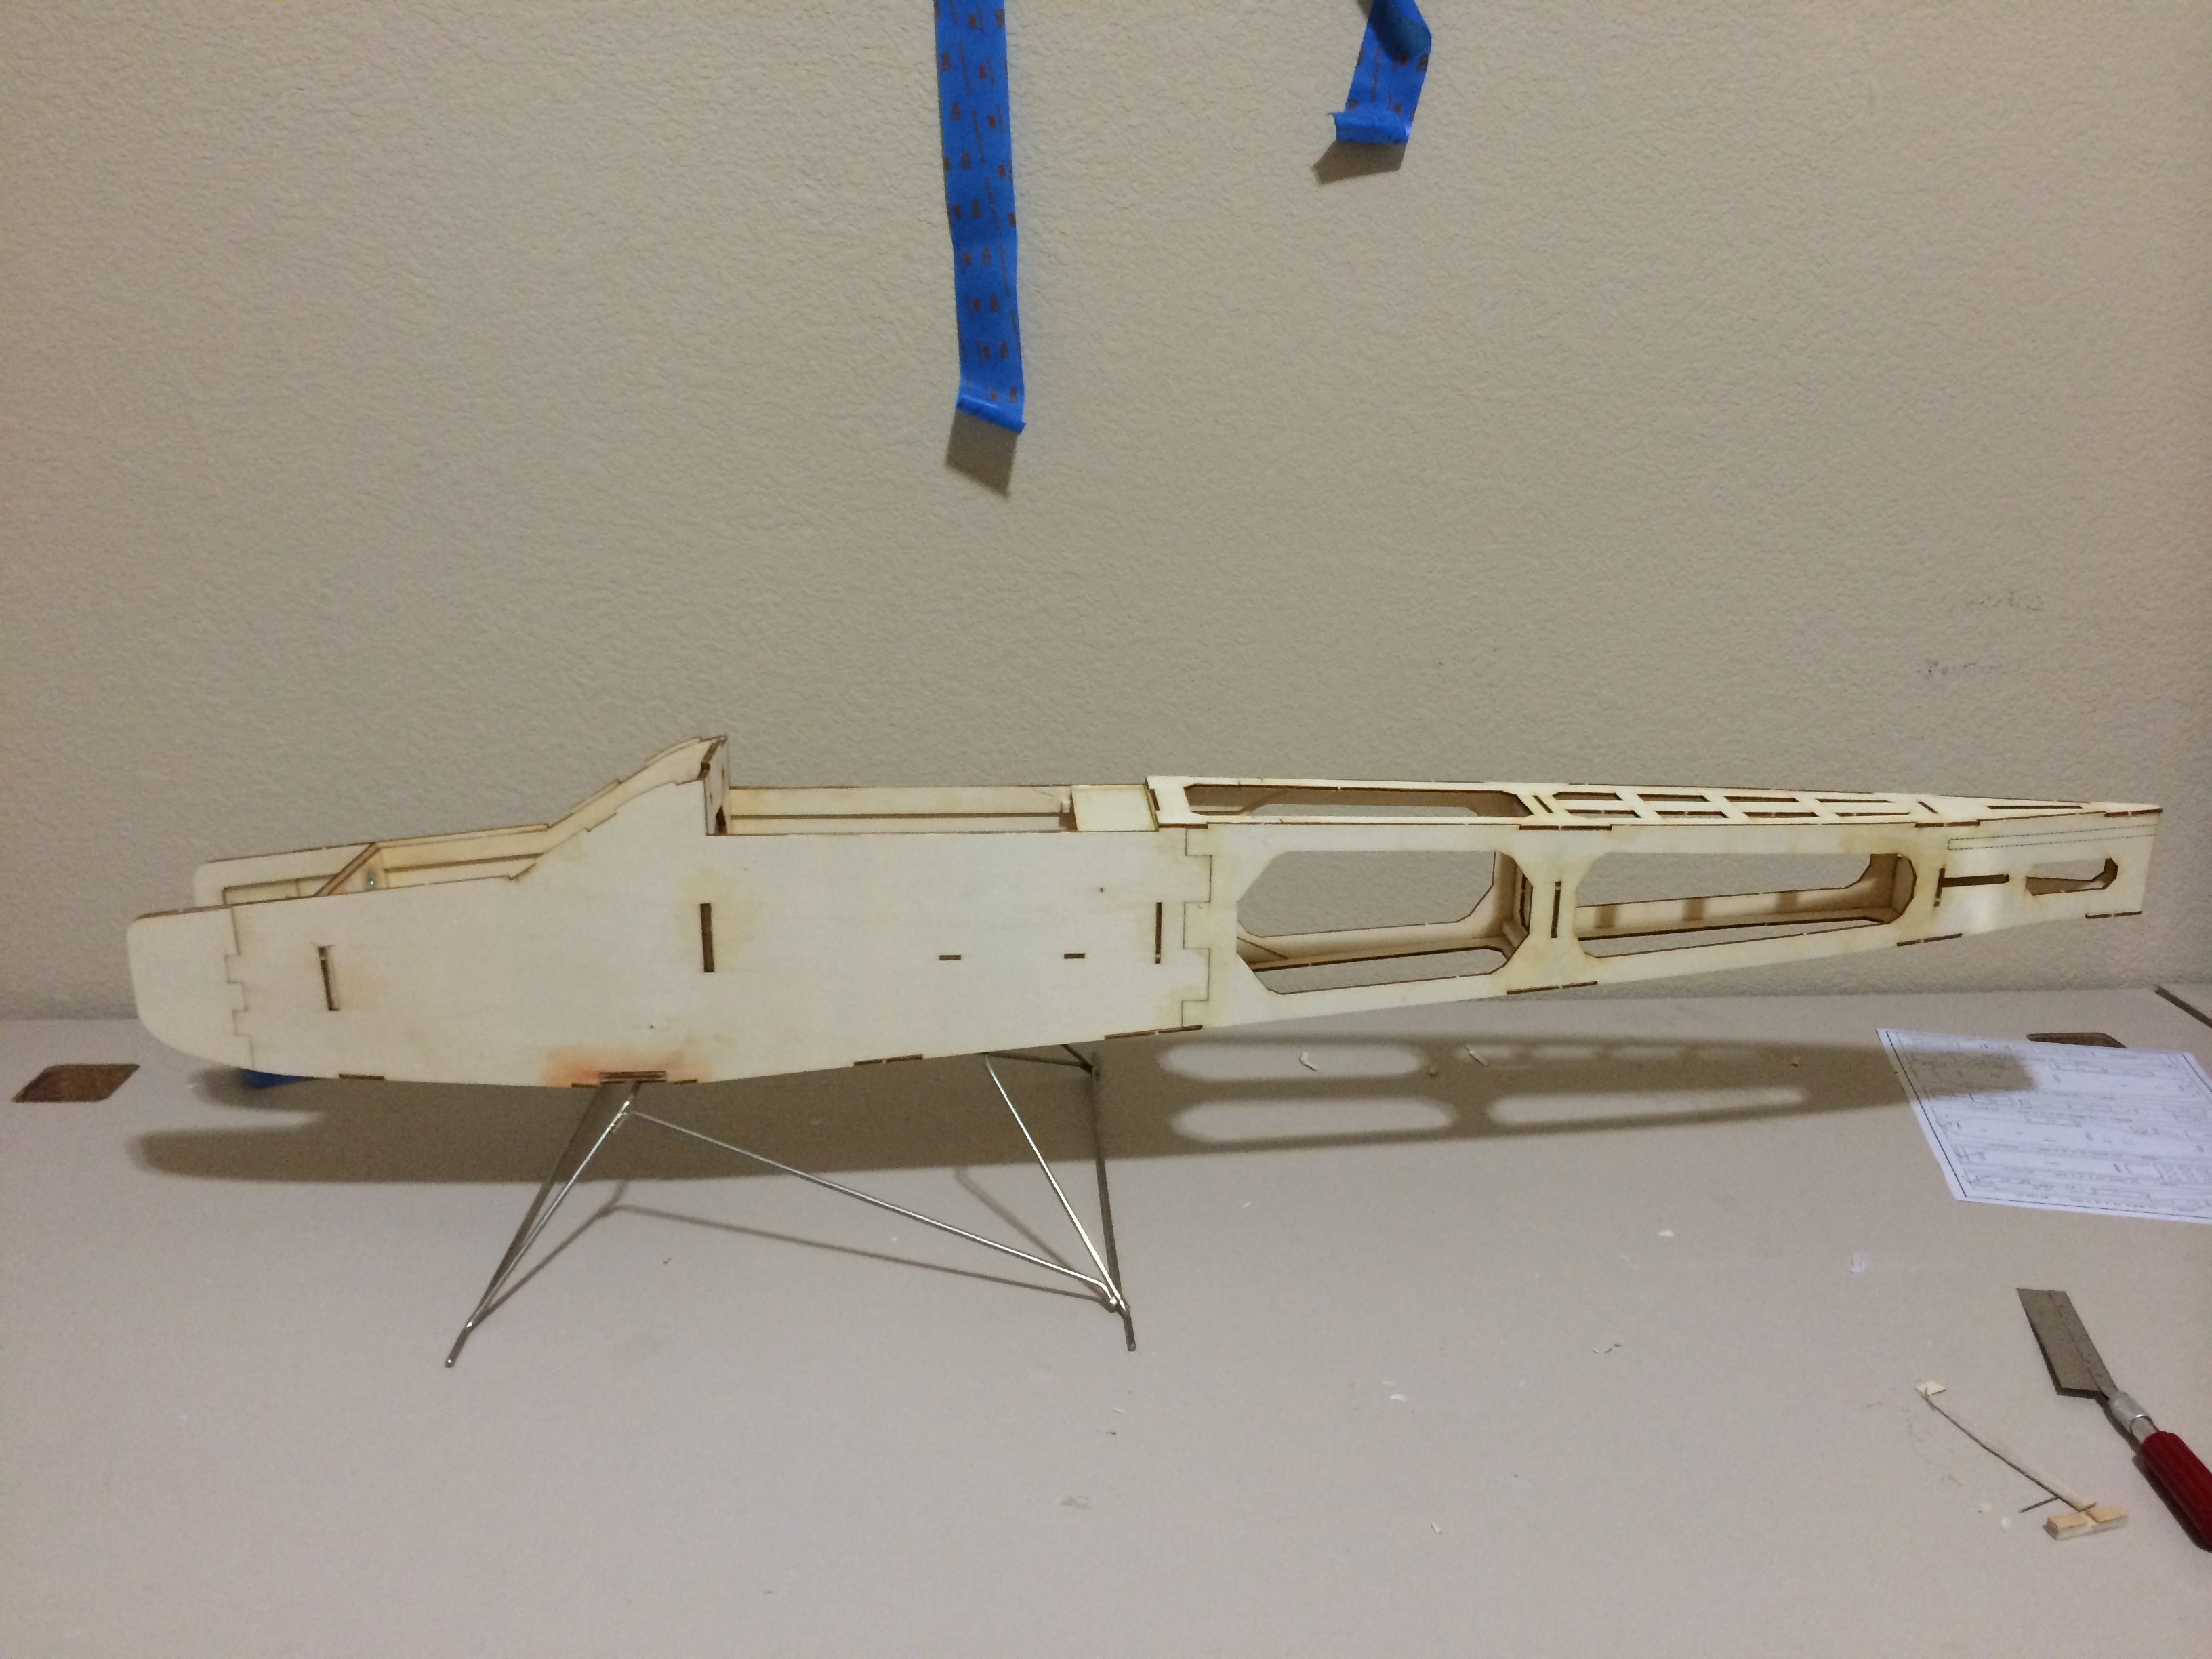
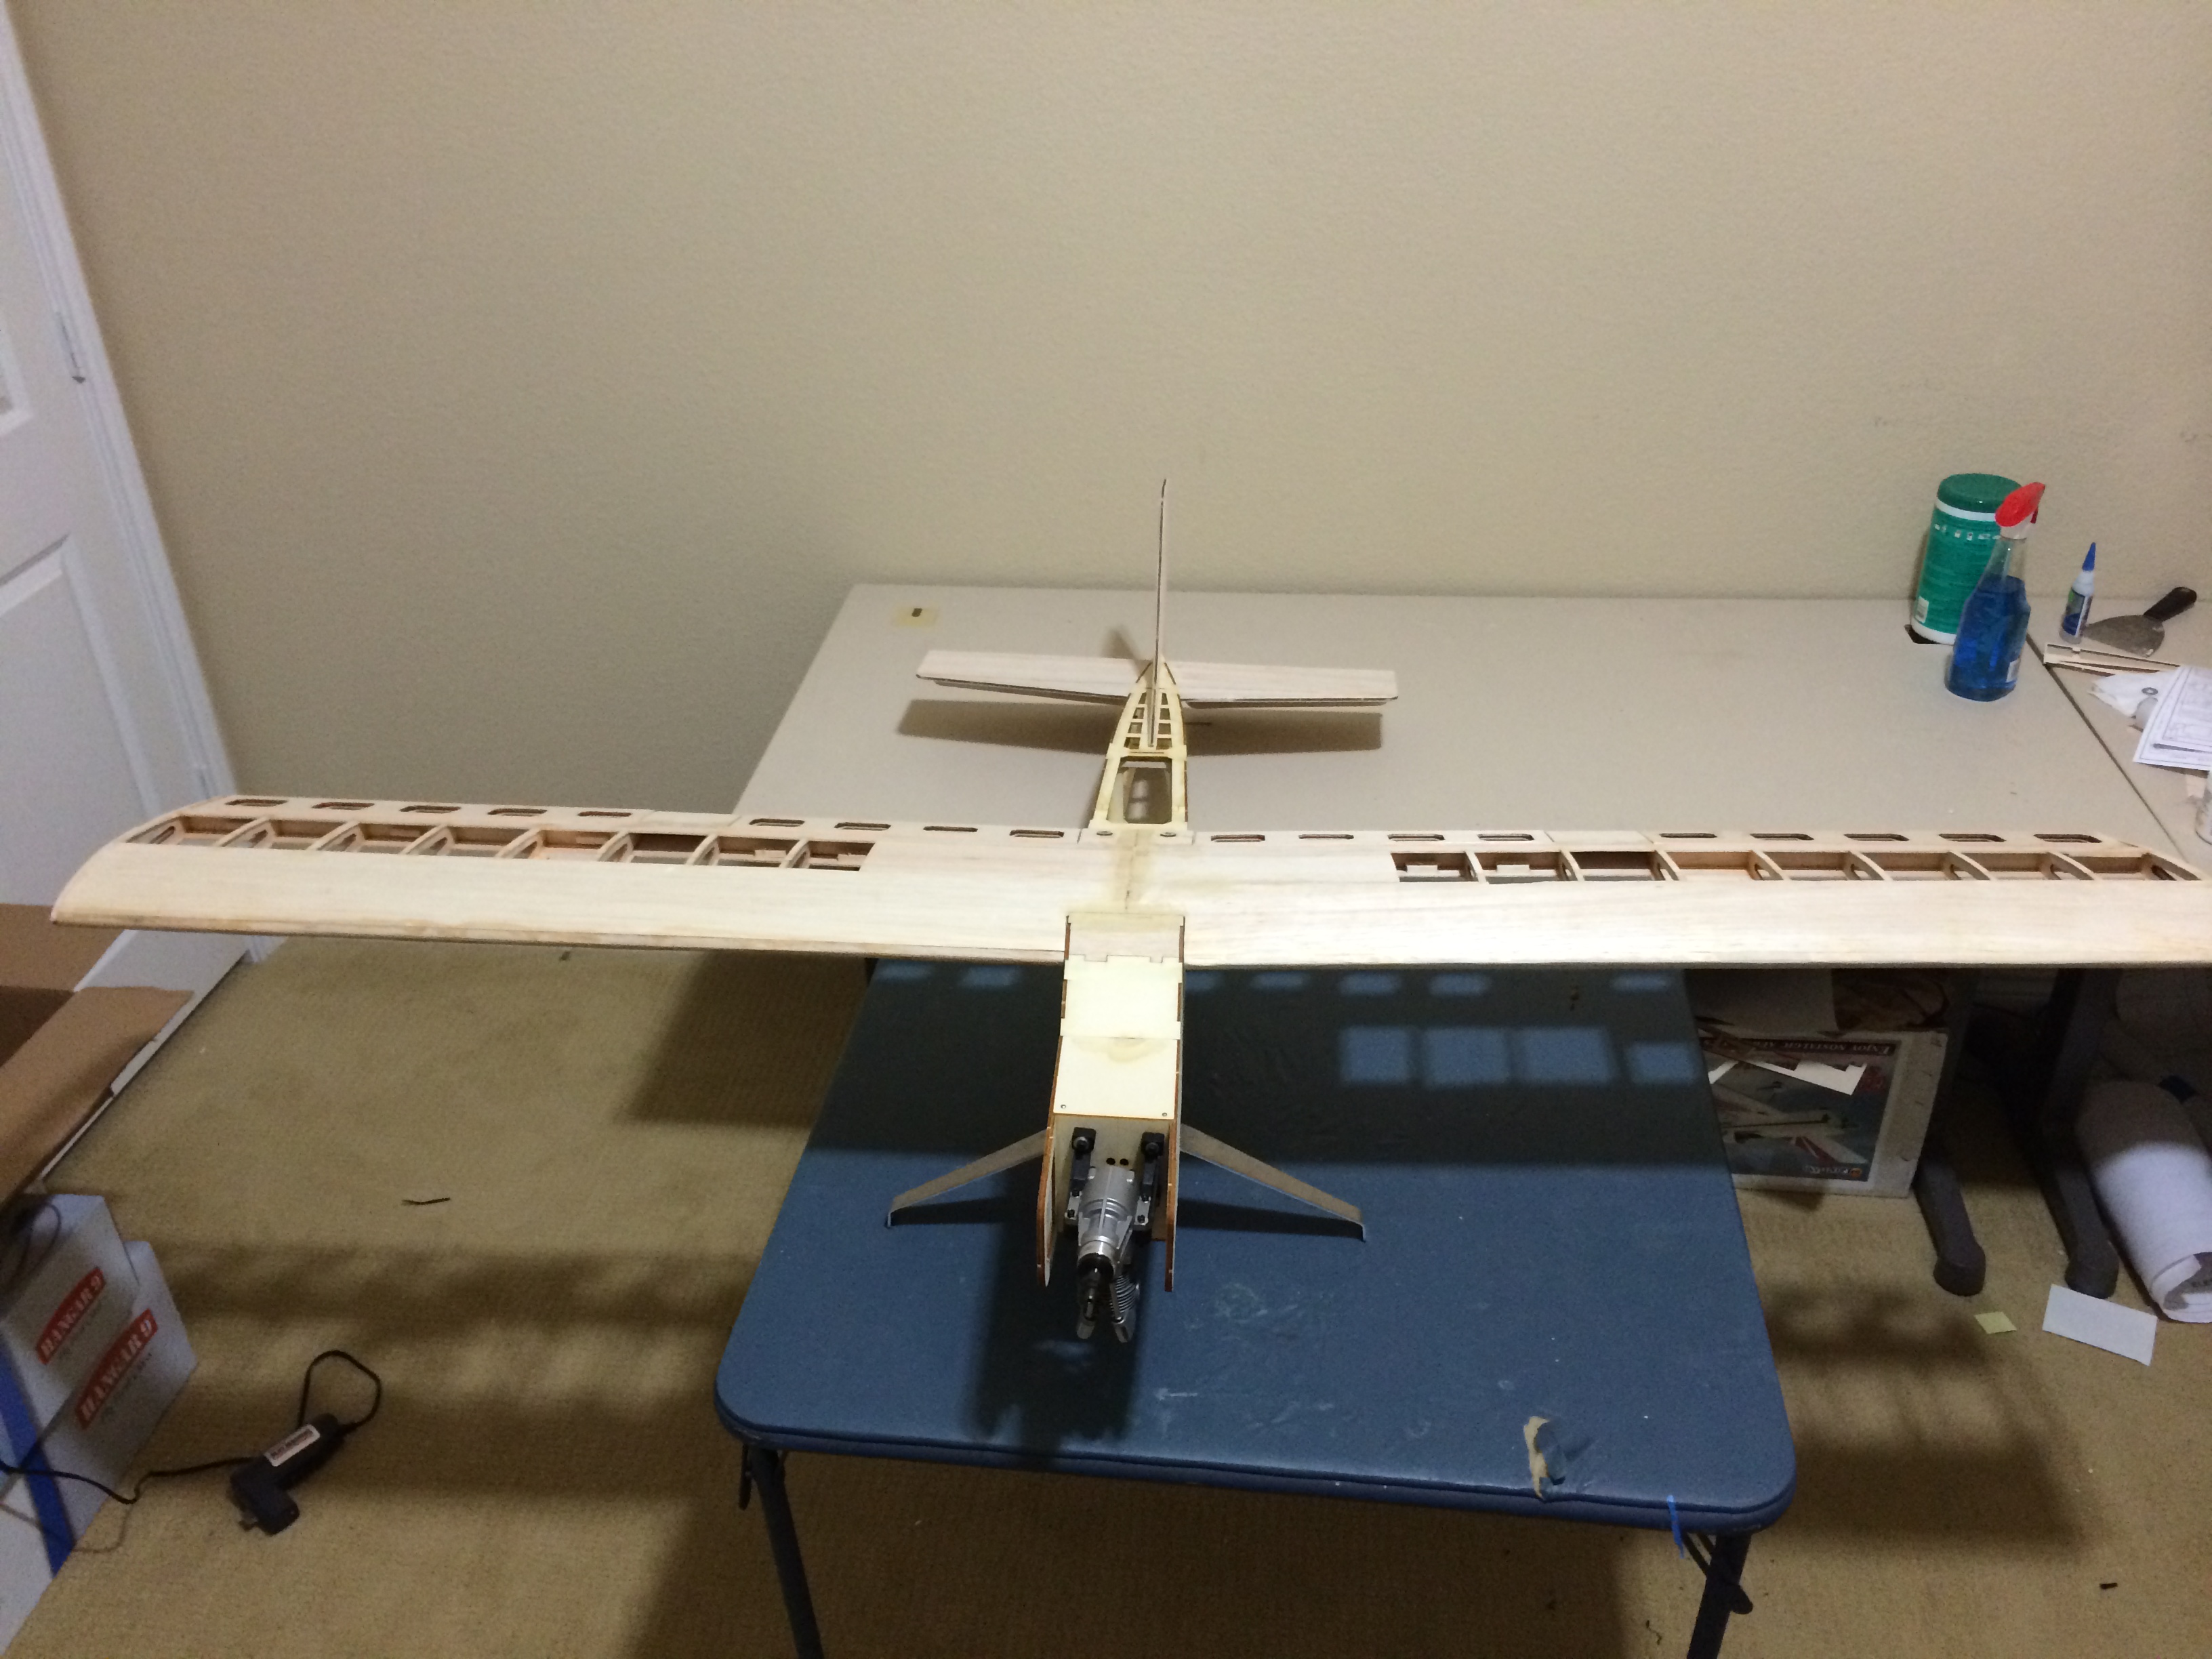
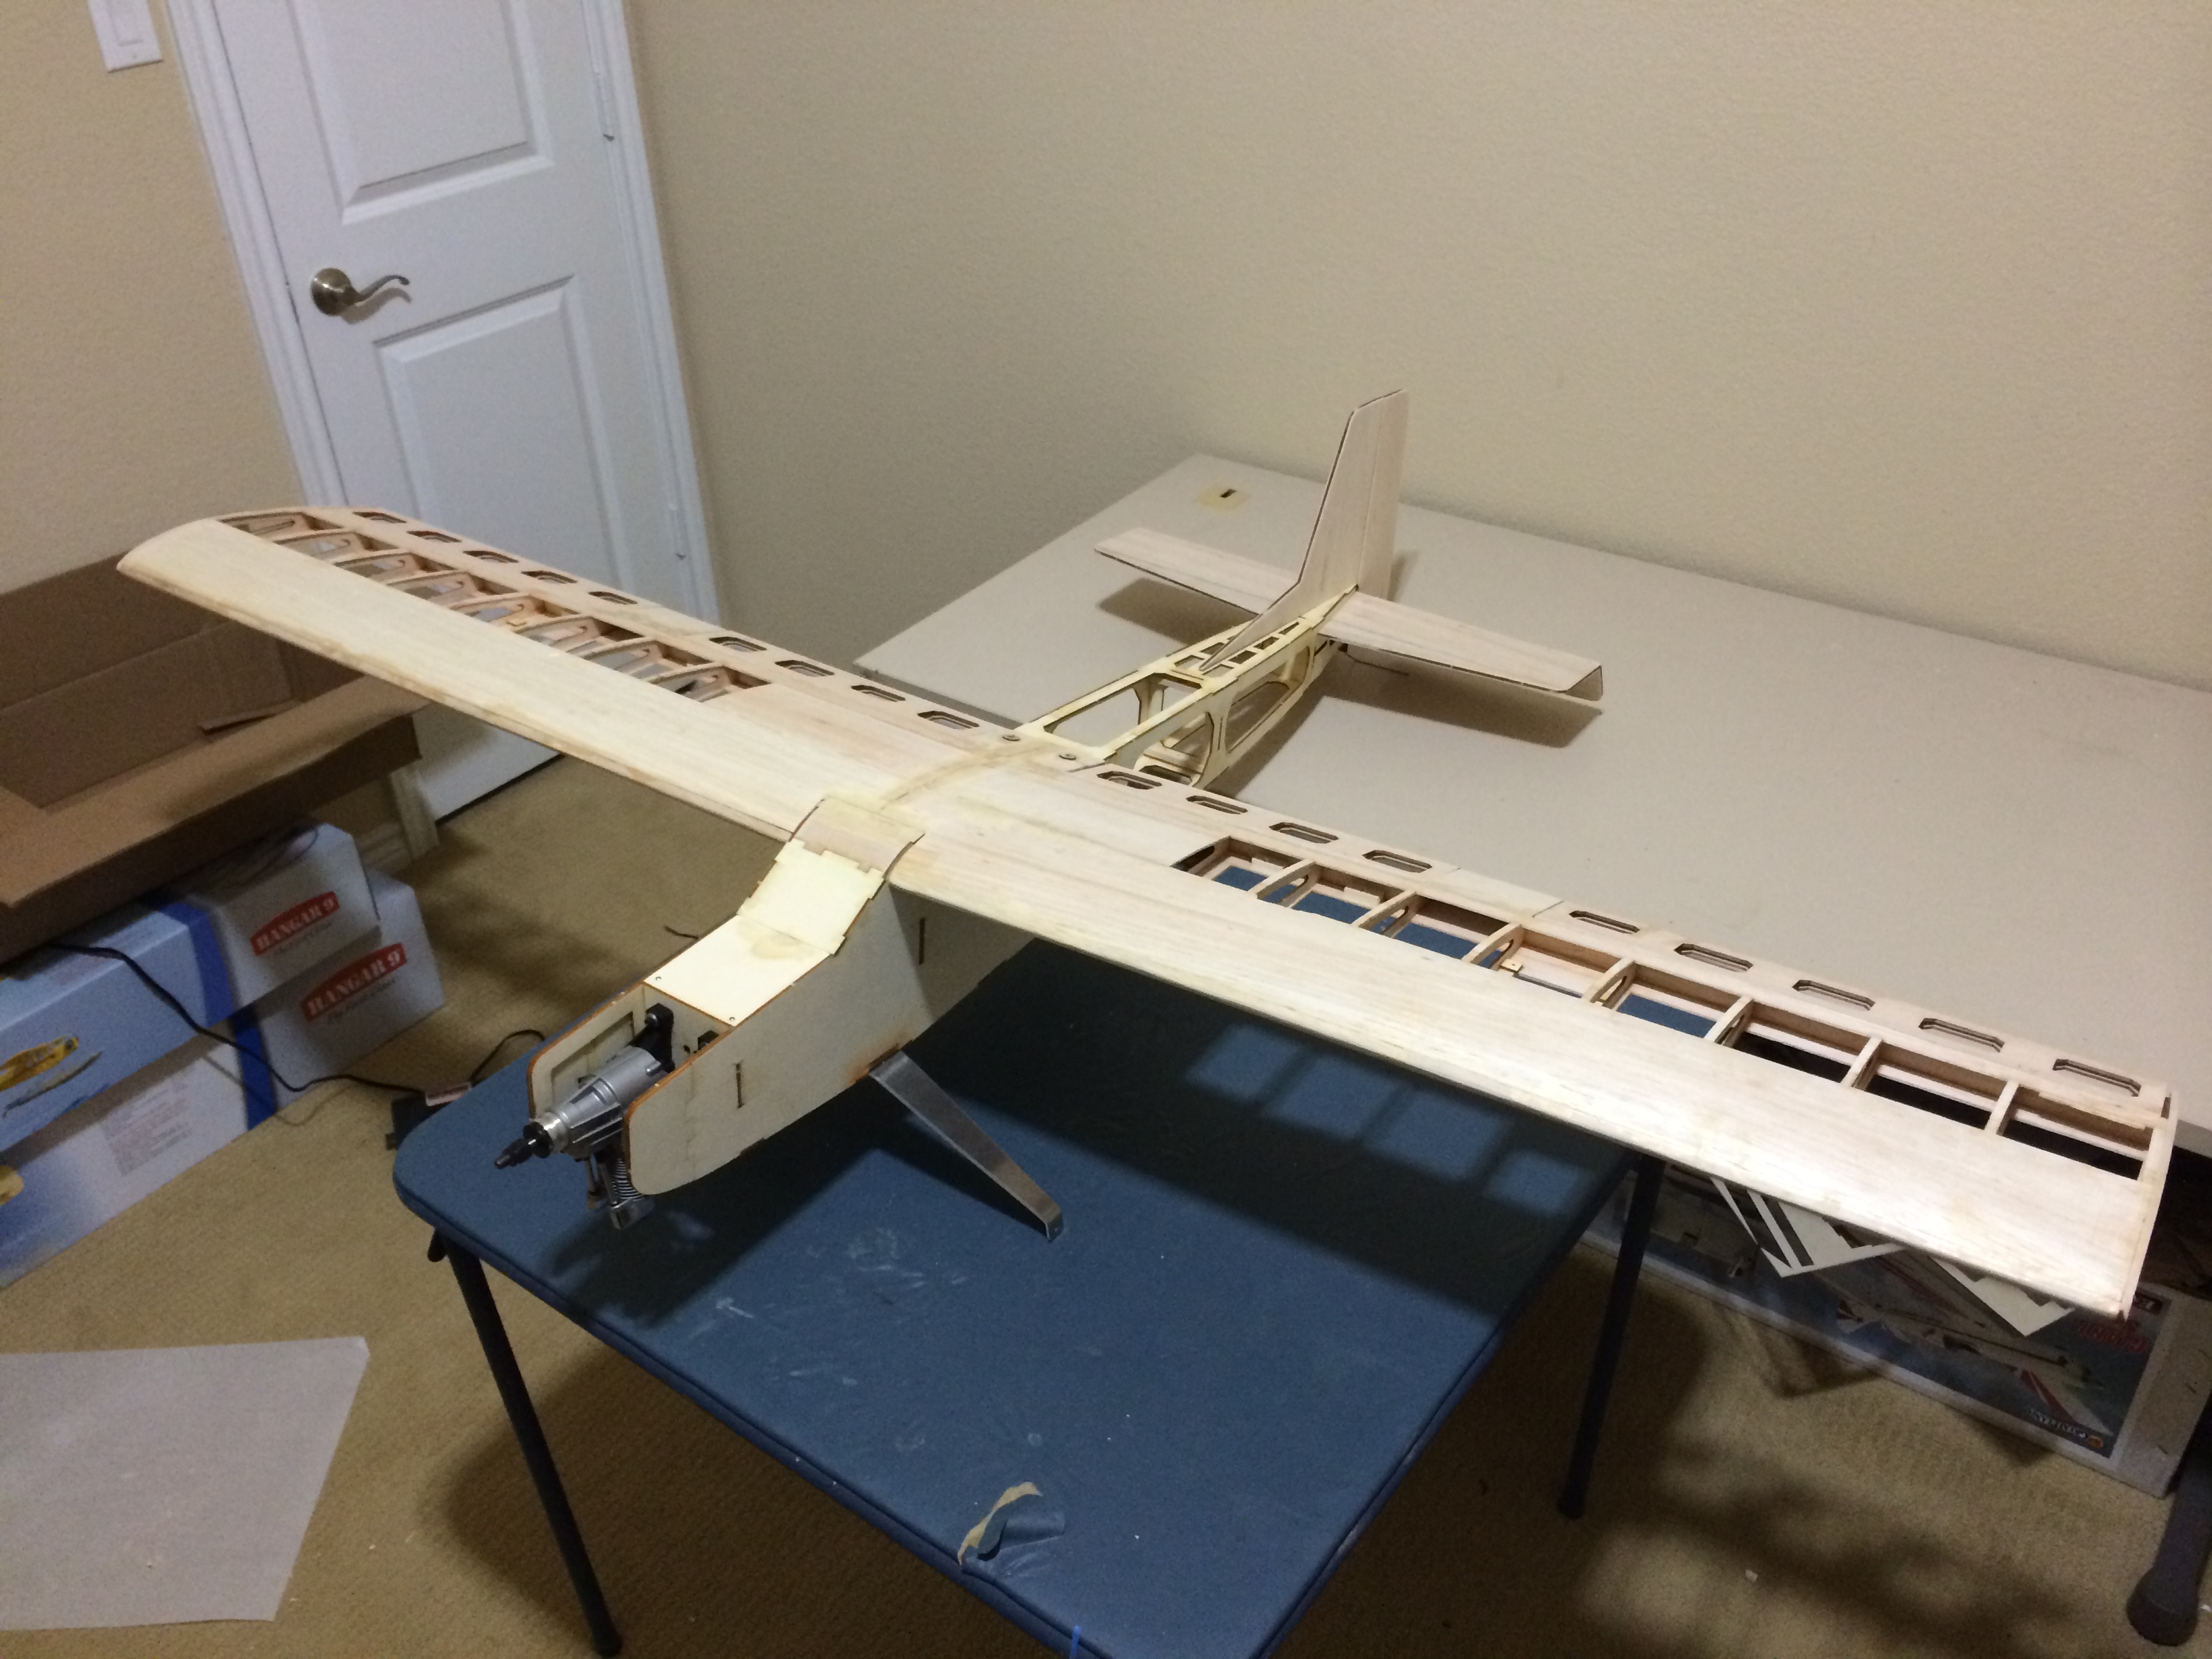
Well, this weekend proved to be very fruitful. I have the fuselage completed and I am ready to start on the wings. This kit really is an easy build. I have been very impressed. A few things you will notice as you walk through the pictures. First, I installed an extra gear mounting block where the back mount will go for the float bracket. I also am going to be using an aftermarket set of landing gear instead of the music wire ones that come with the kit. There is nothing wrong with those, I just prefer to use the stamped aluminum type of gear over bent music wire. I did leave the gear retainers though so I can use them to mount the floats. All together, I couldn't be happier. At the pace things are going, My goal is to have the plane together by labor day weekend and to maiden it then. The only thing I am still waiting on are the waterproof servos I ordered for the wings and the covering. Both should be in this week so it looks like things are going nicely.

08-21-2014, 12:24 PM
#9
Member
Thread Starter
Join Date: Sep 2012
Location: Frisco, TX
Posts: 54
Likes: 0
Received 0 Likes
on
0 Posts
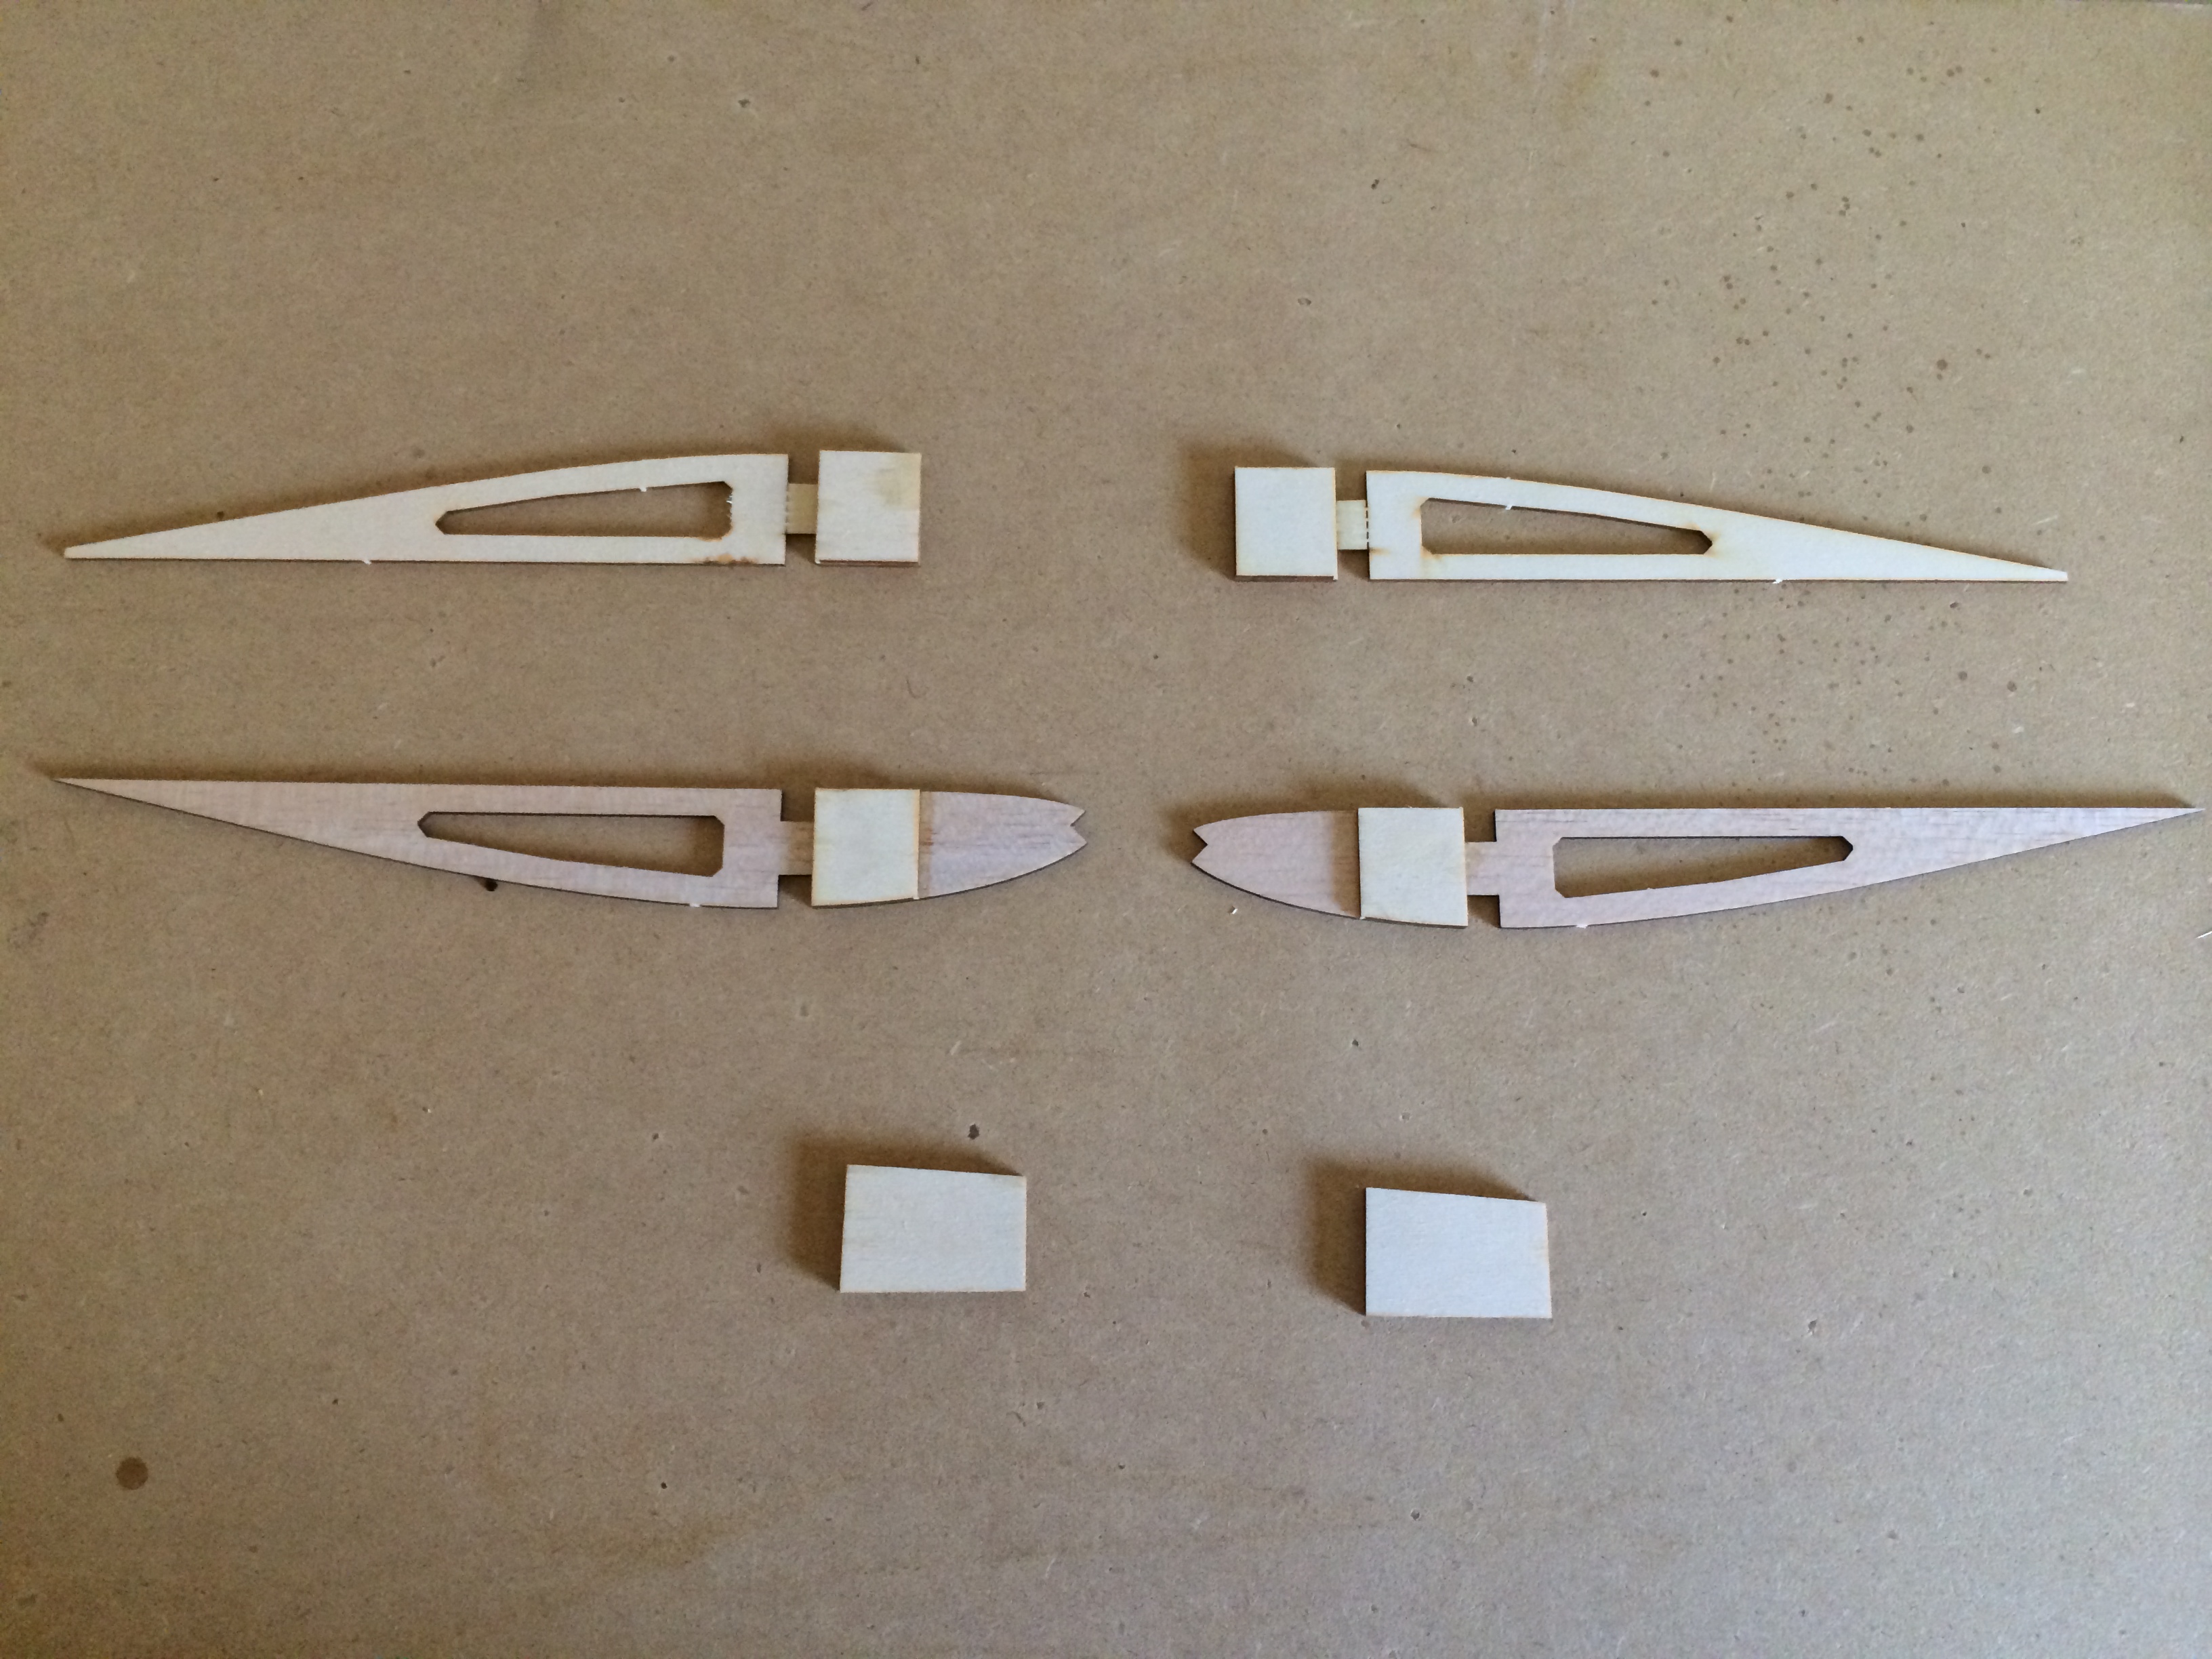
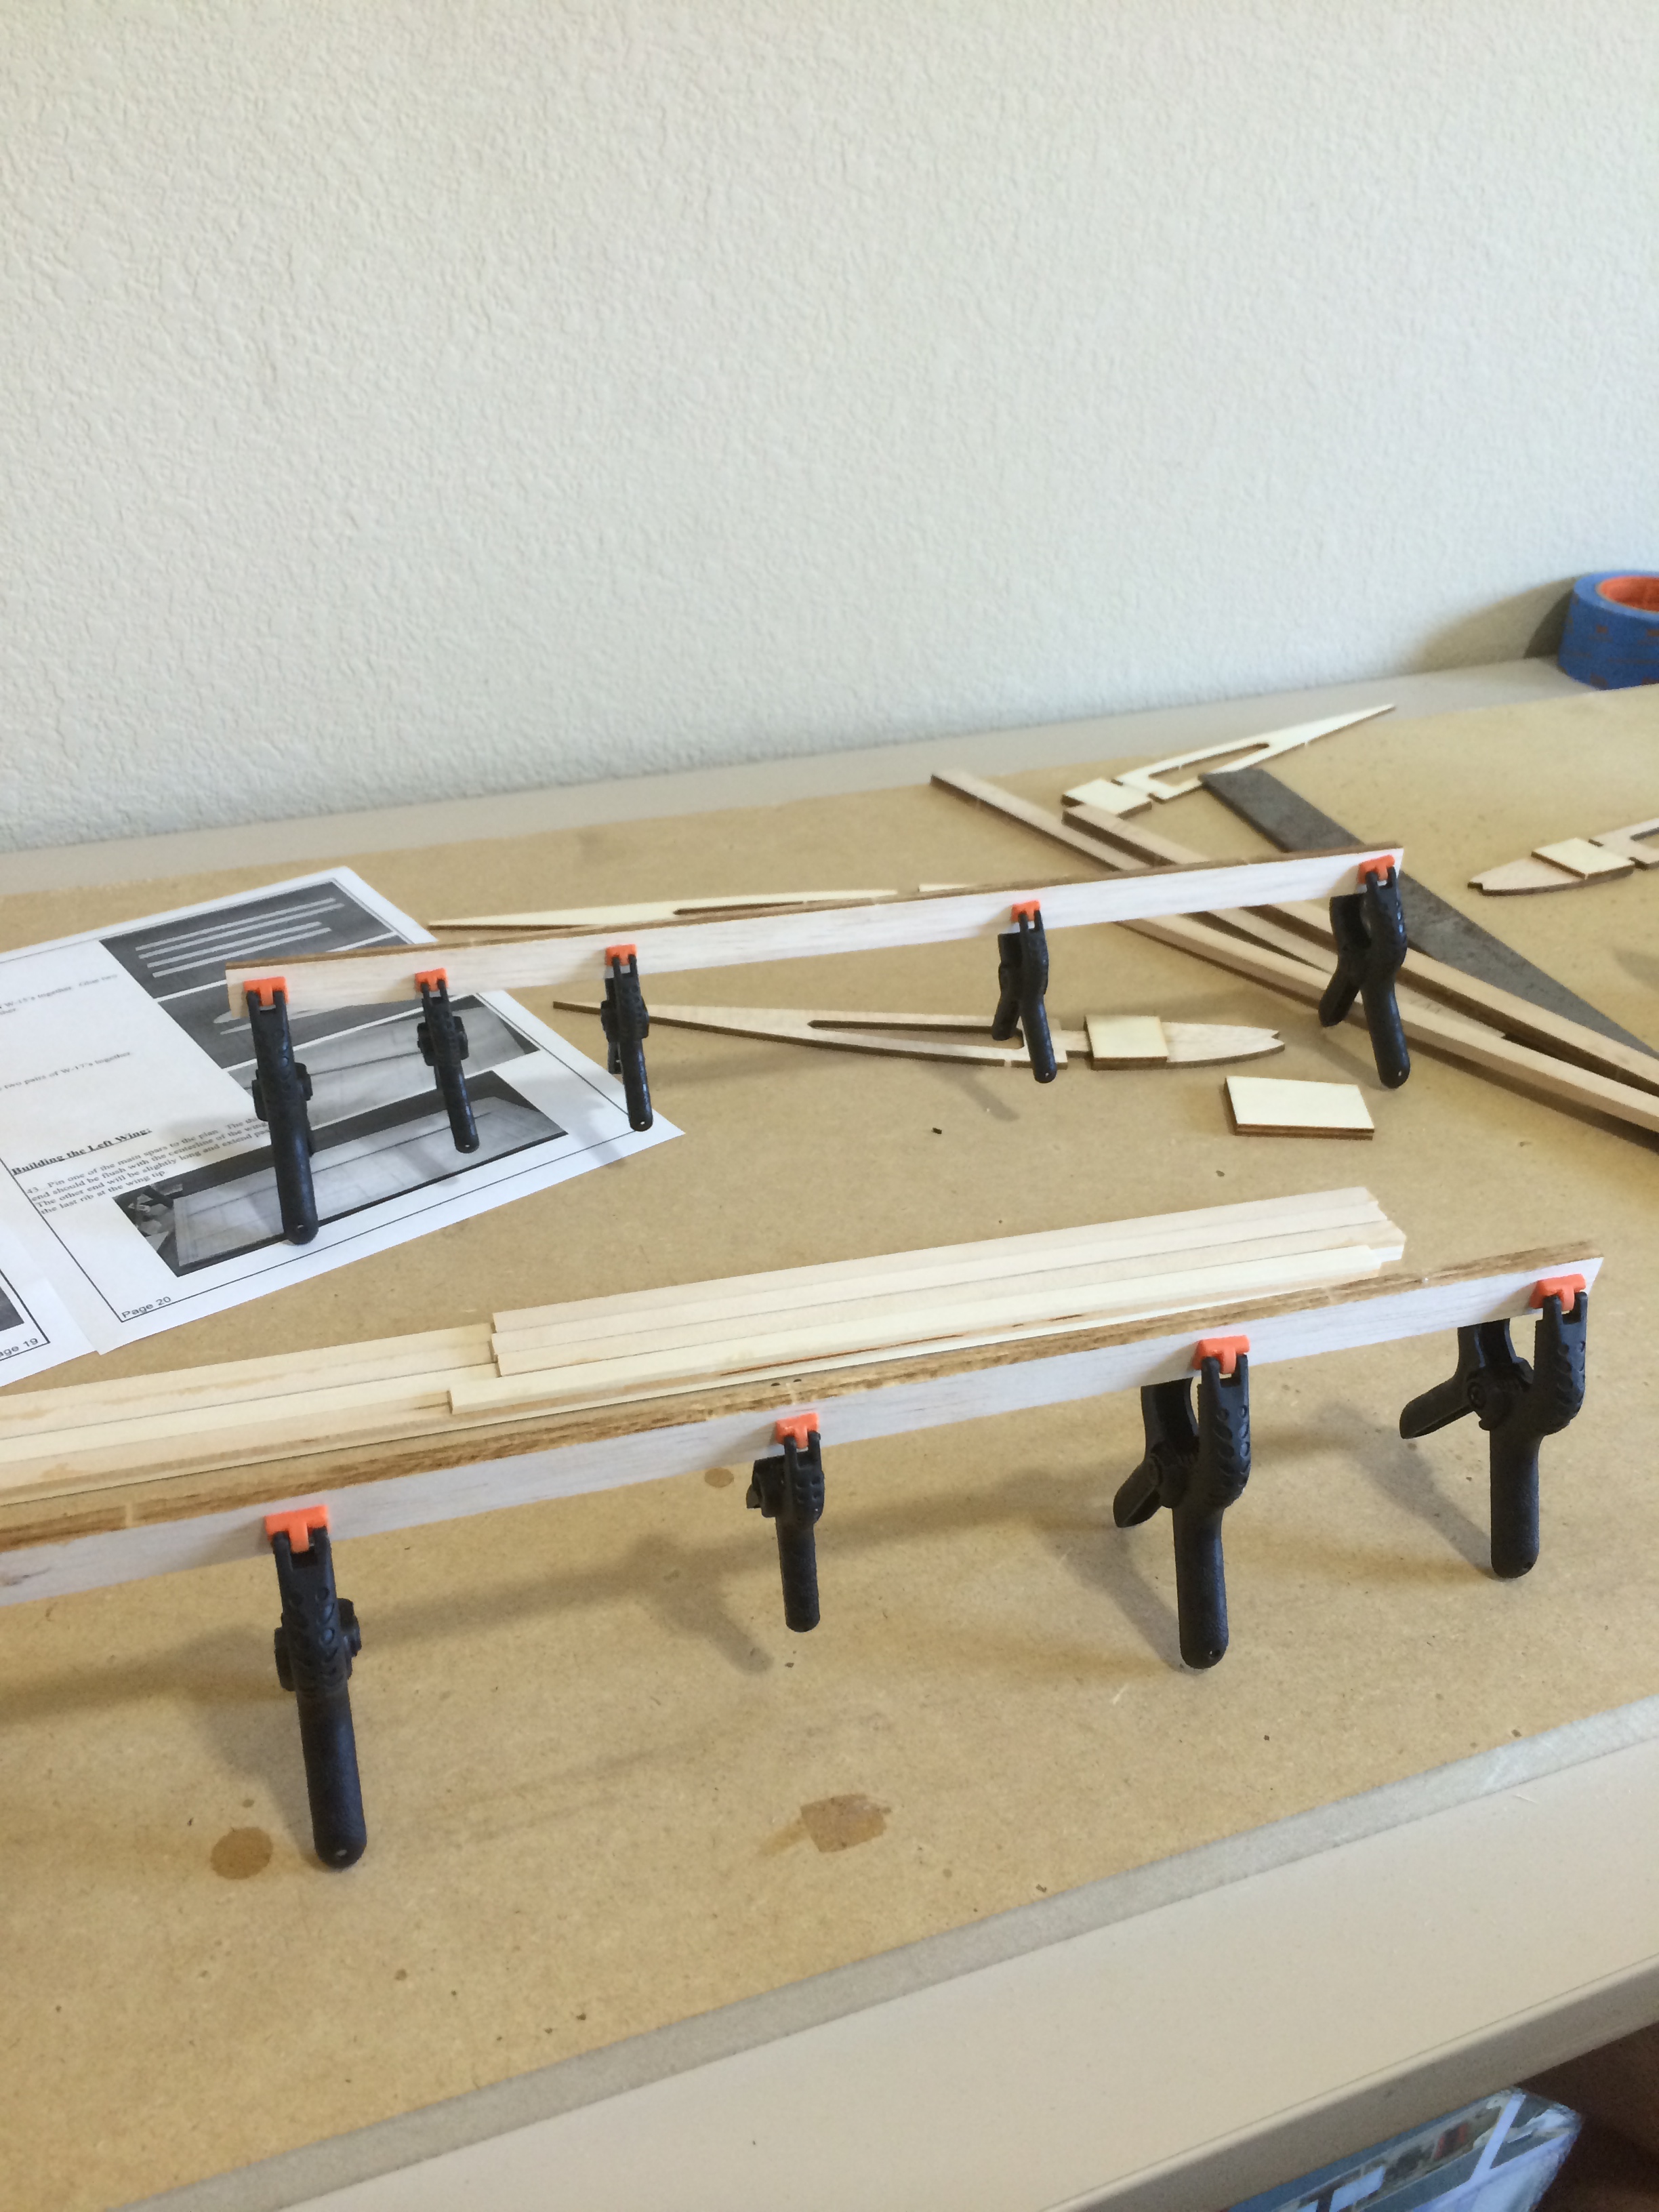
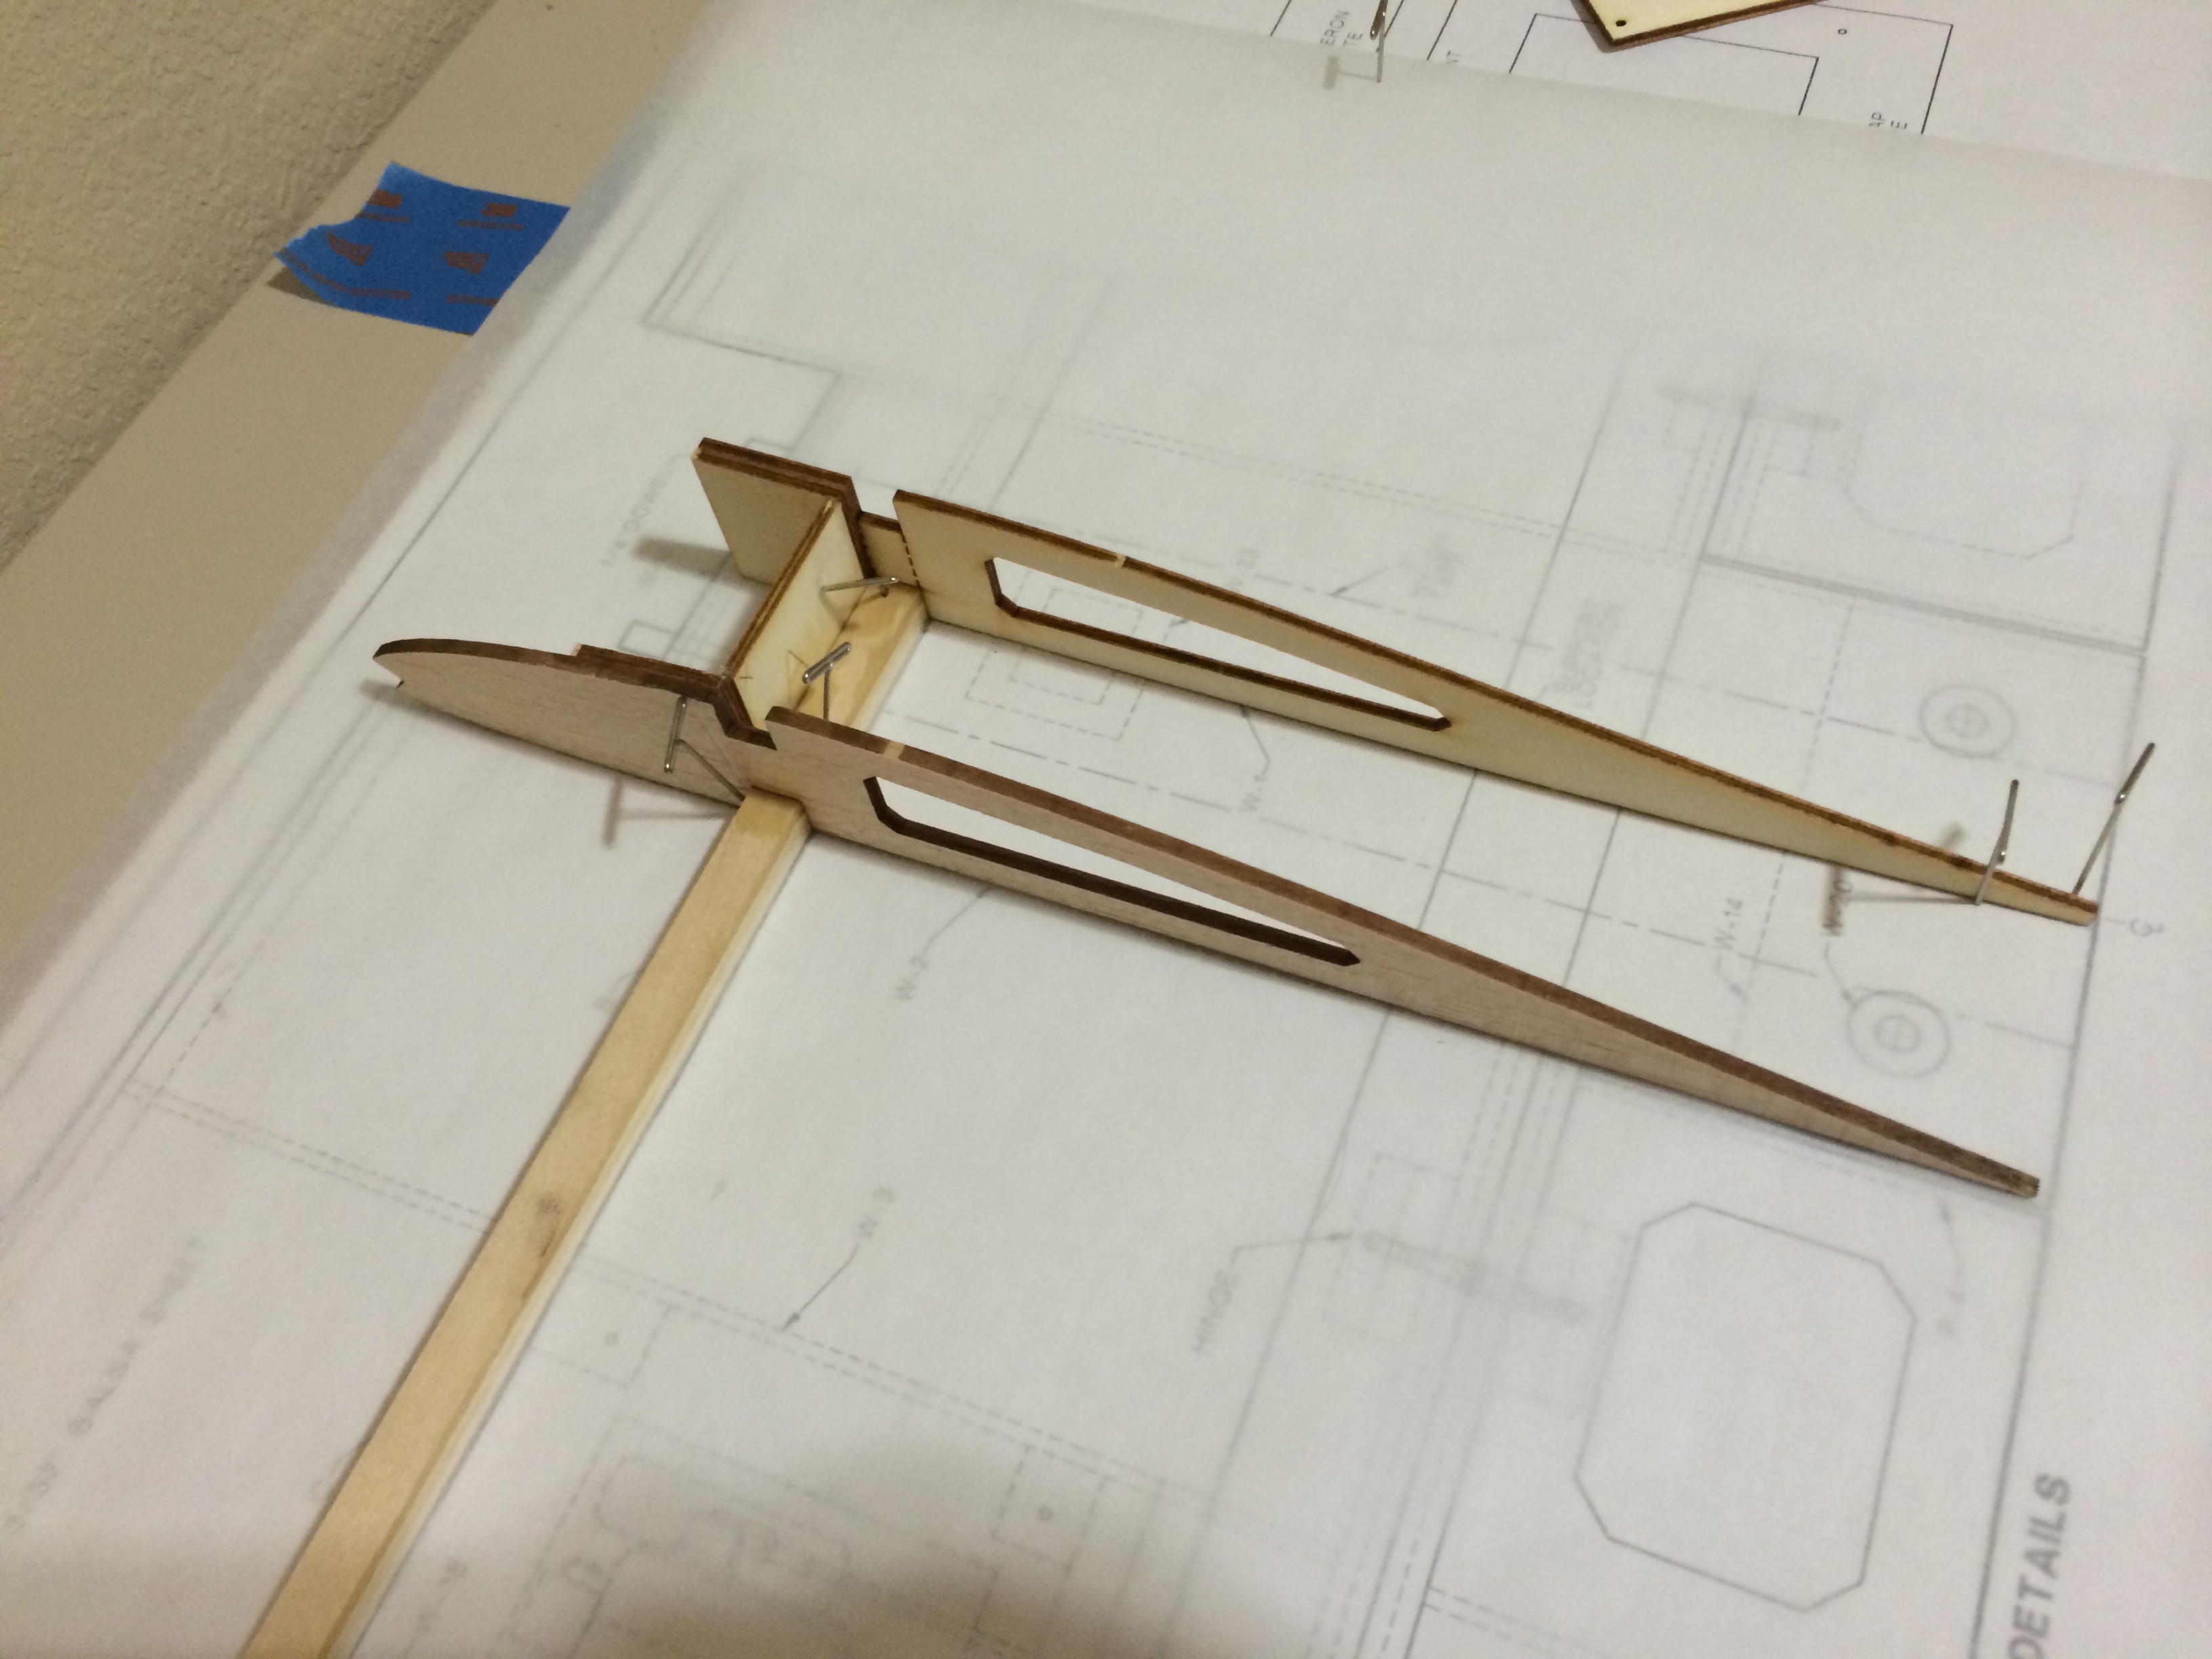
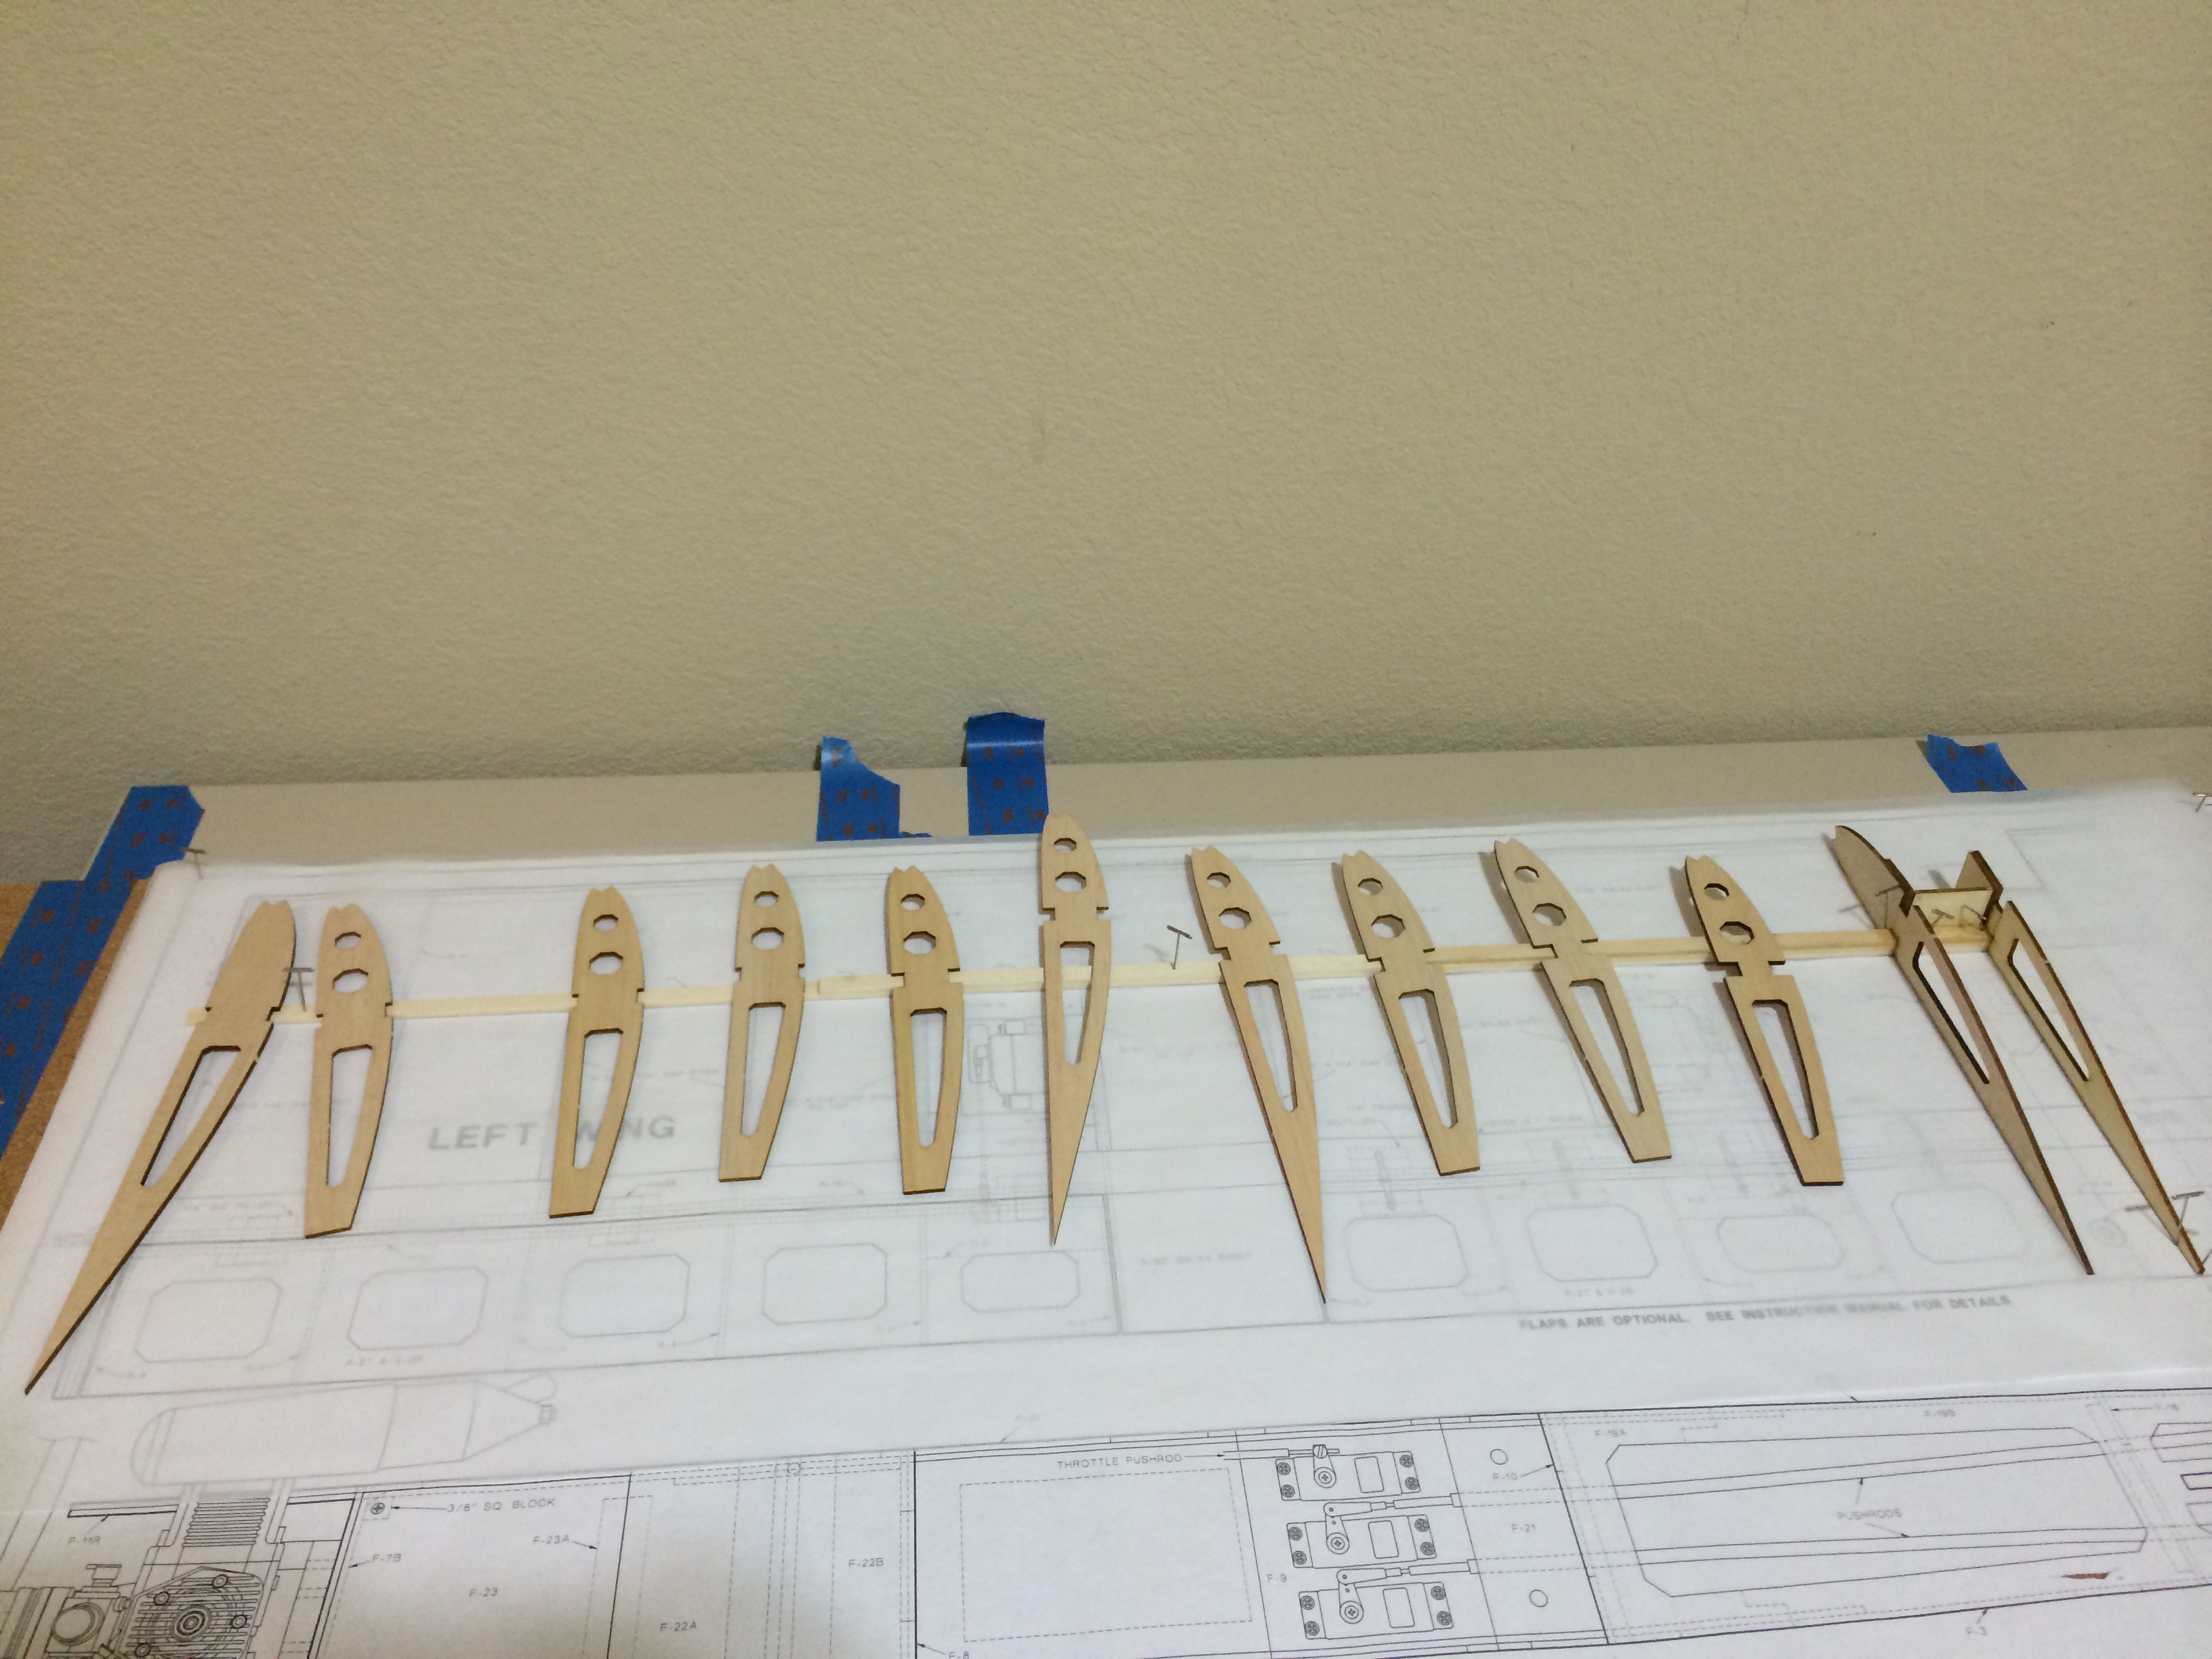
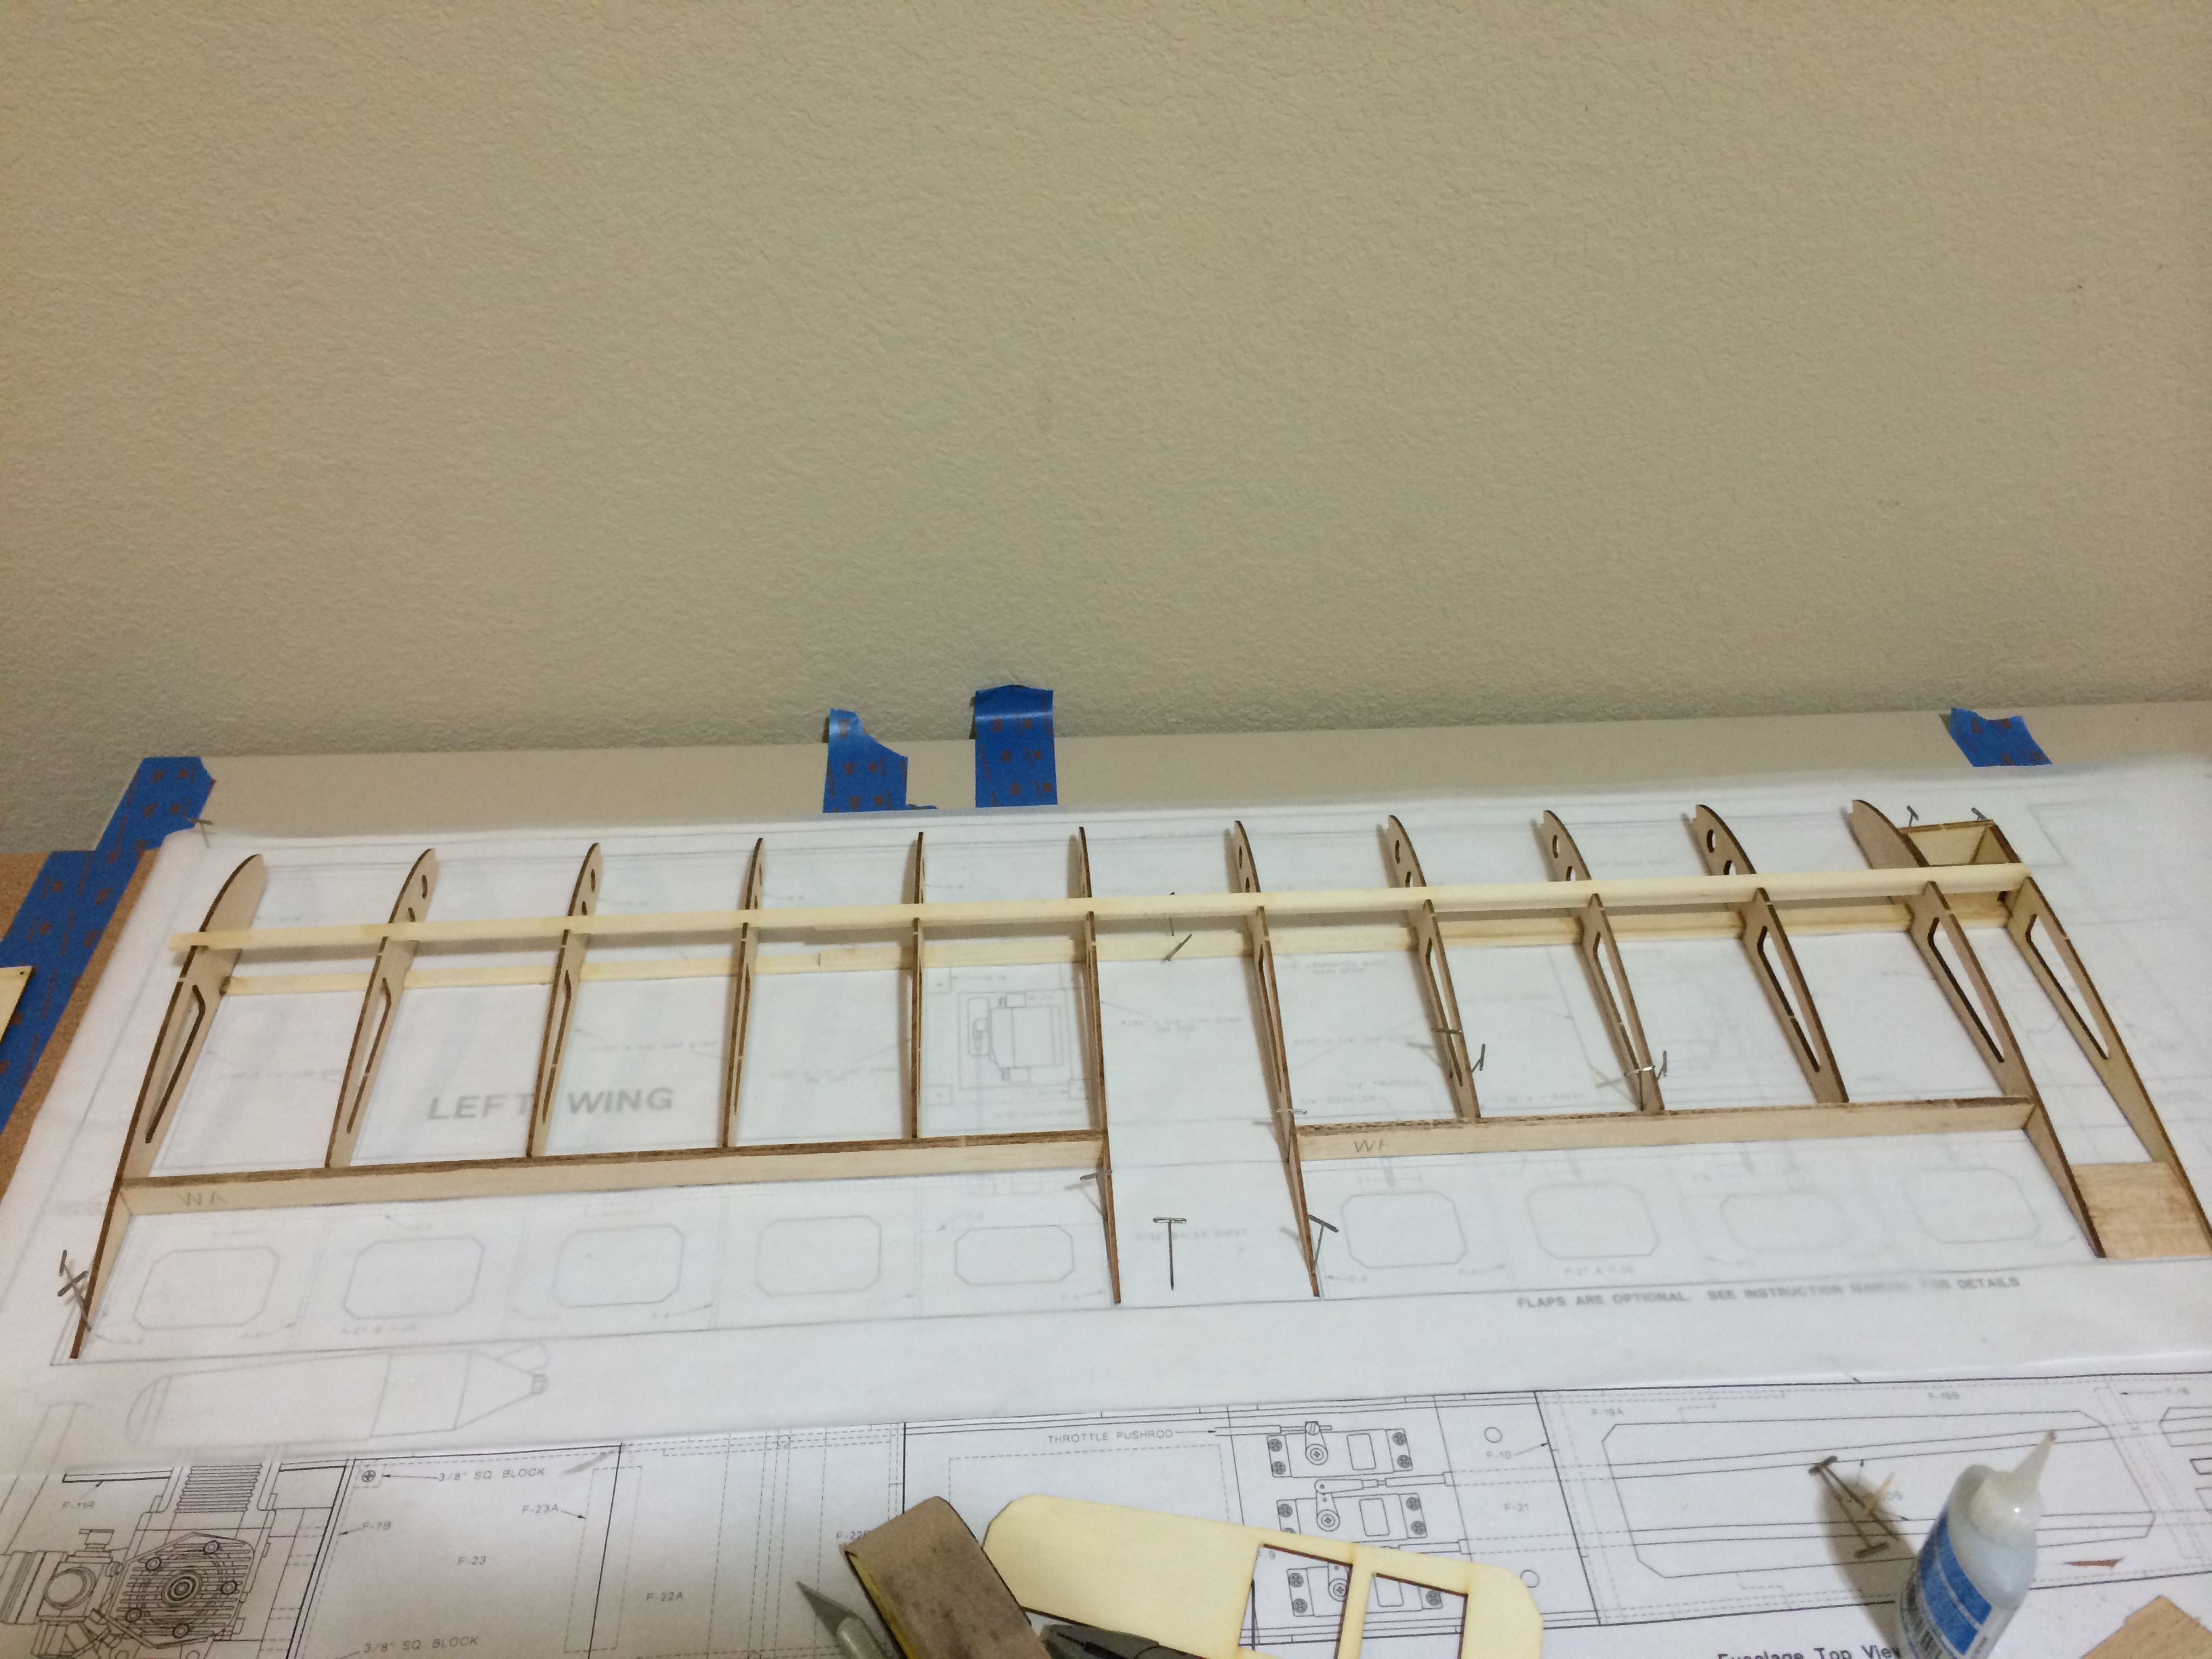
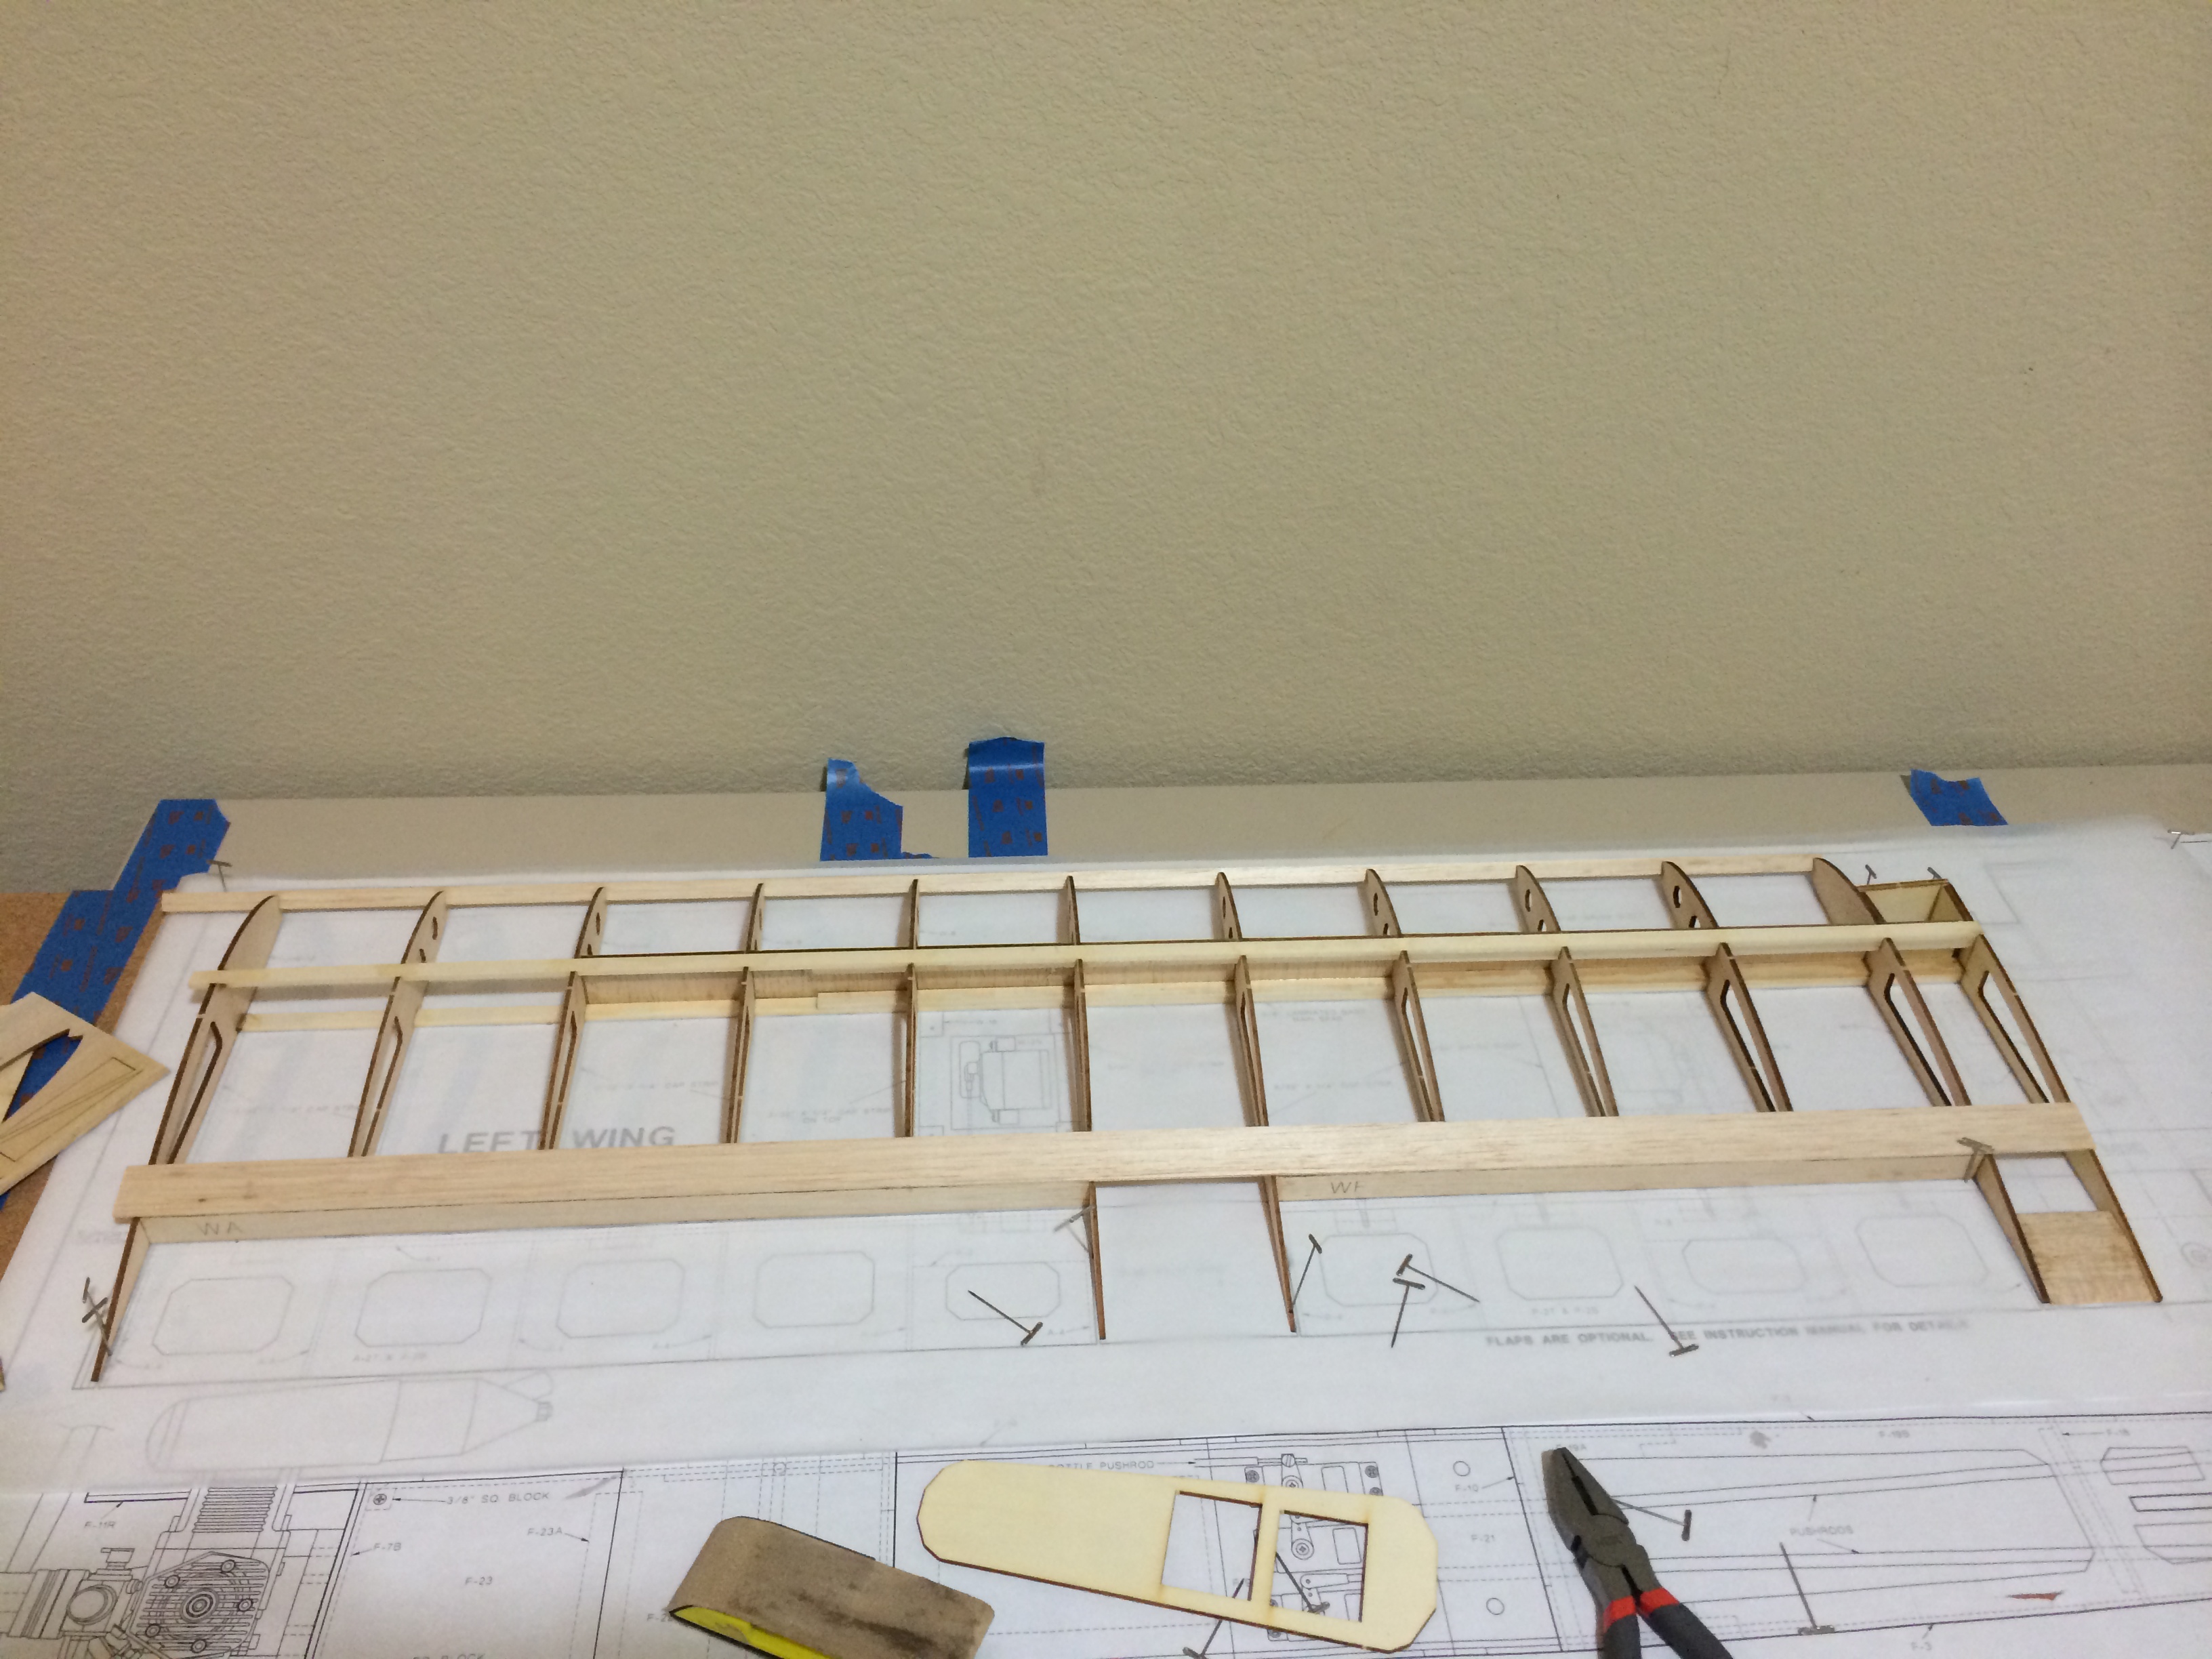
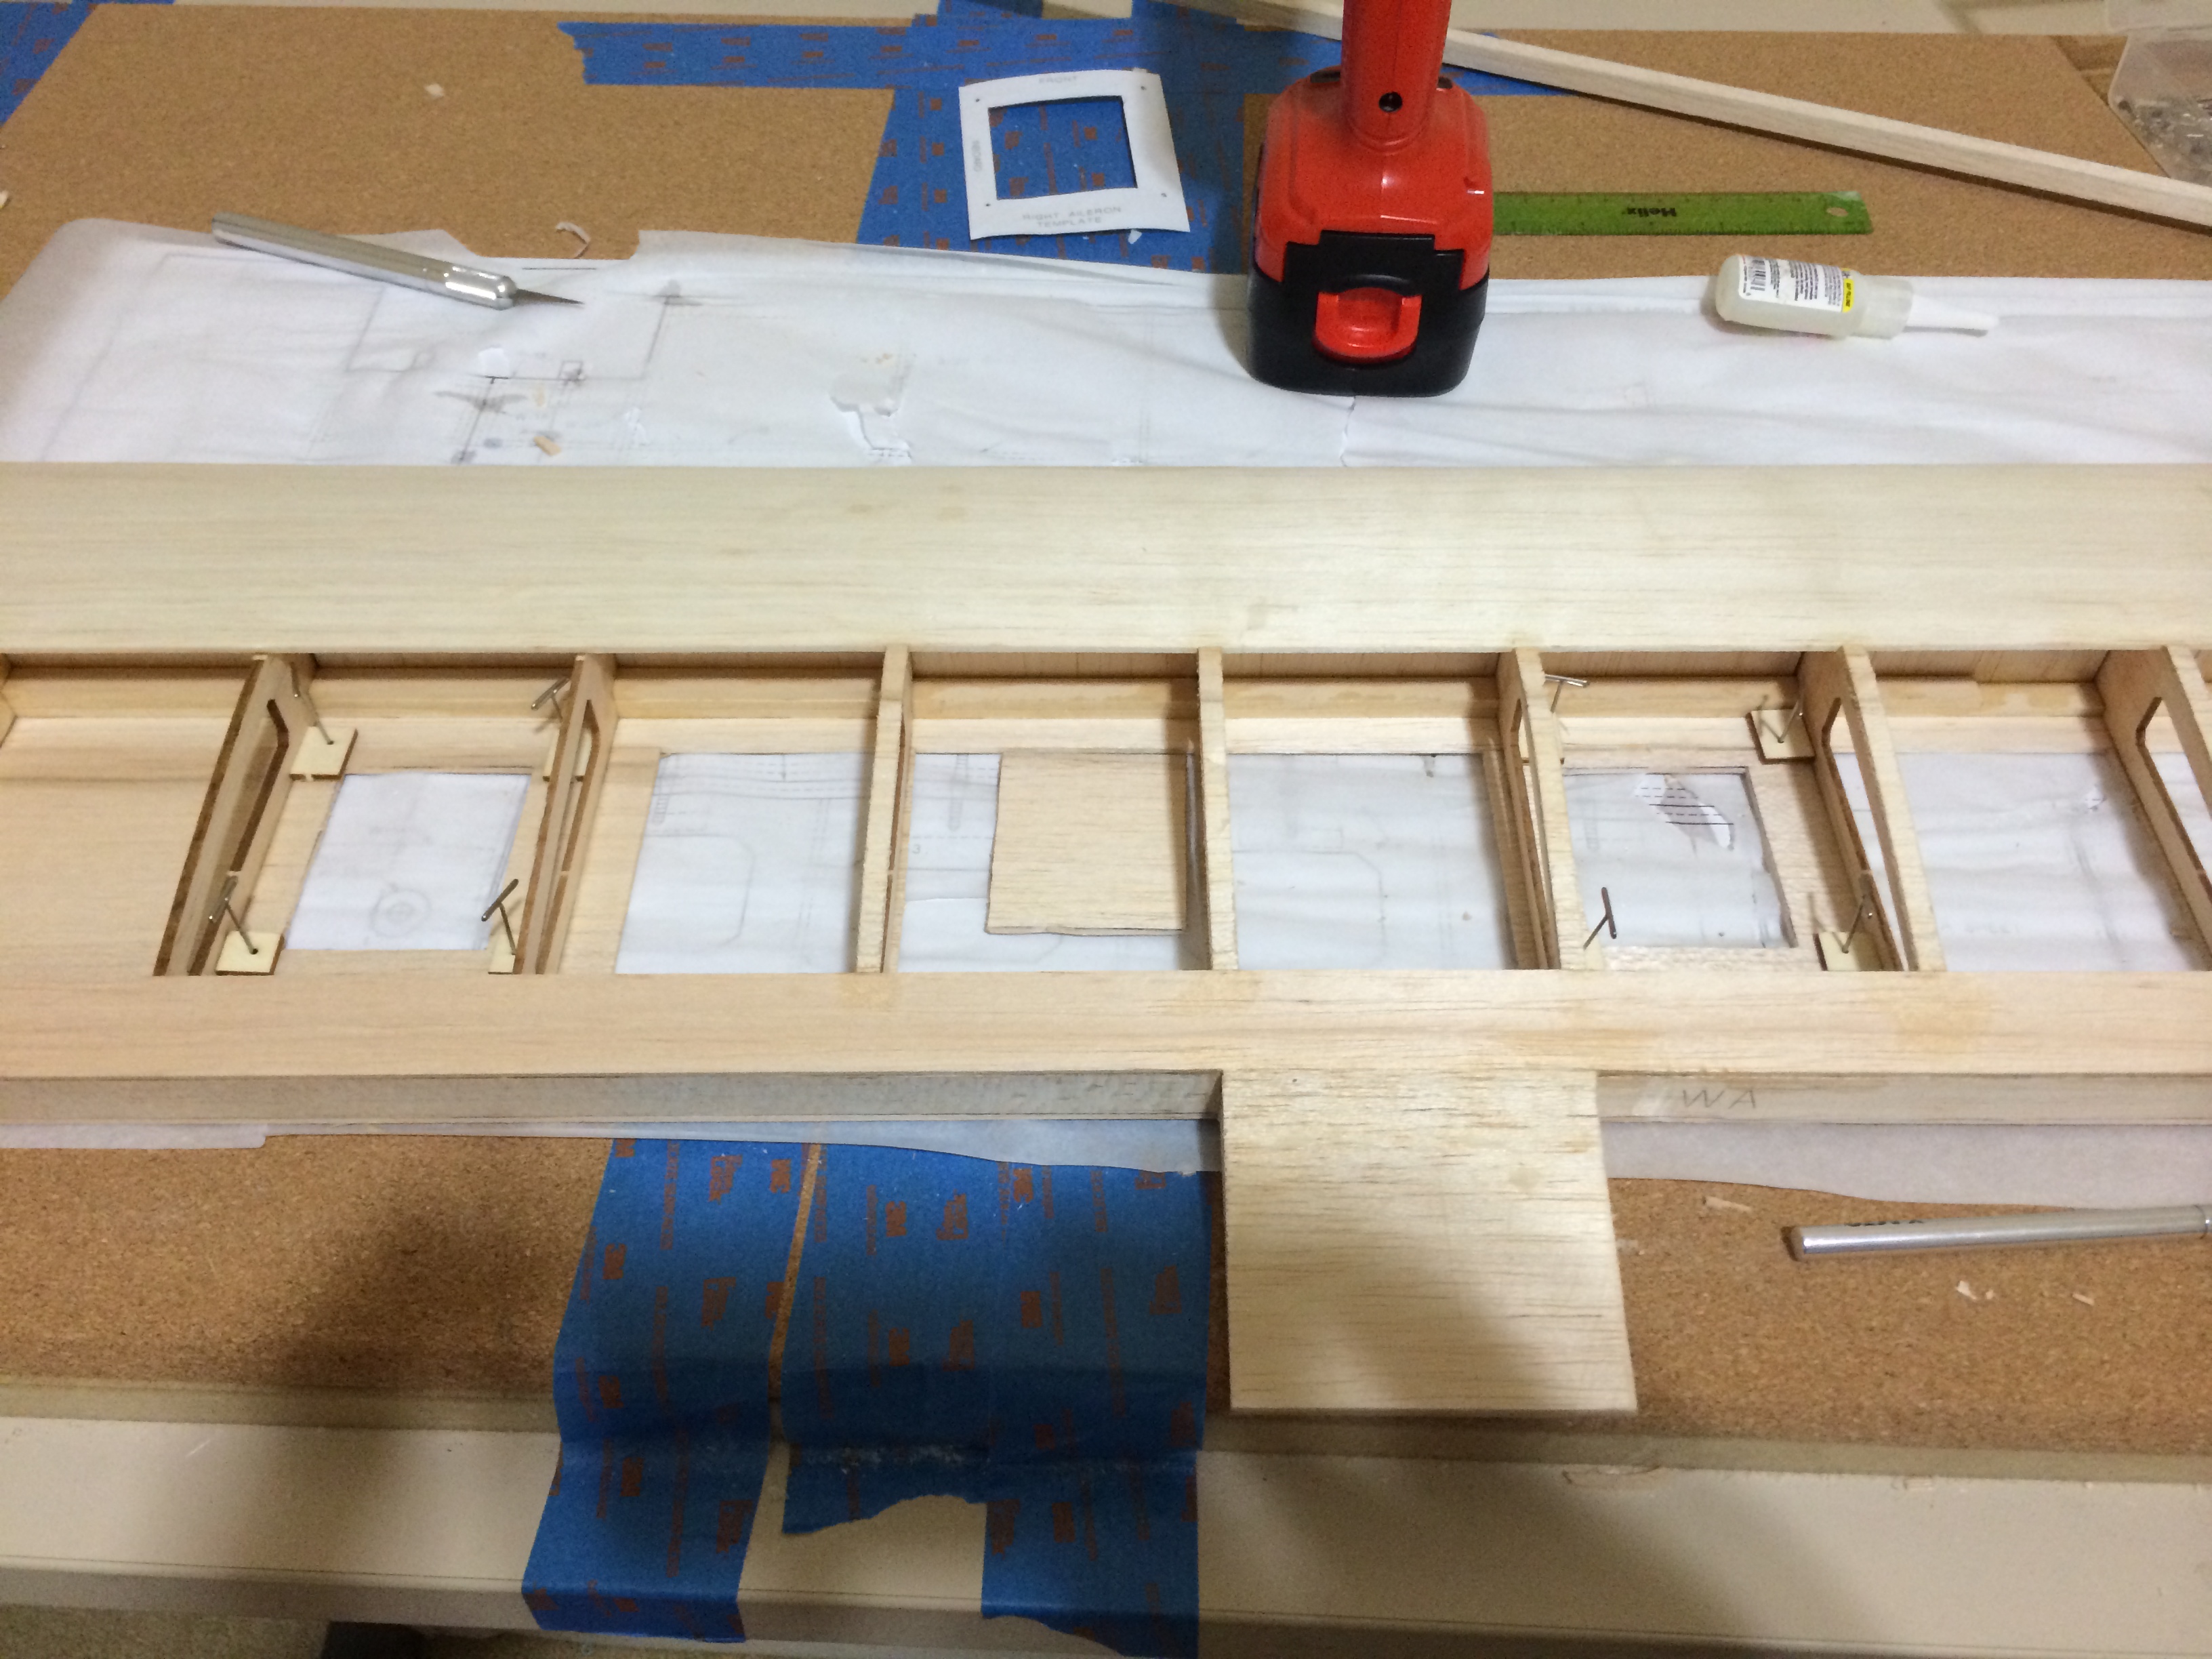
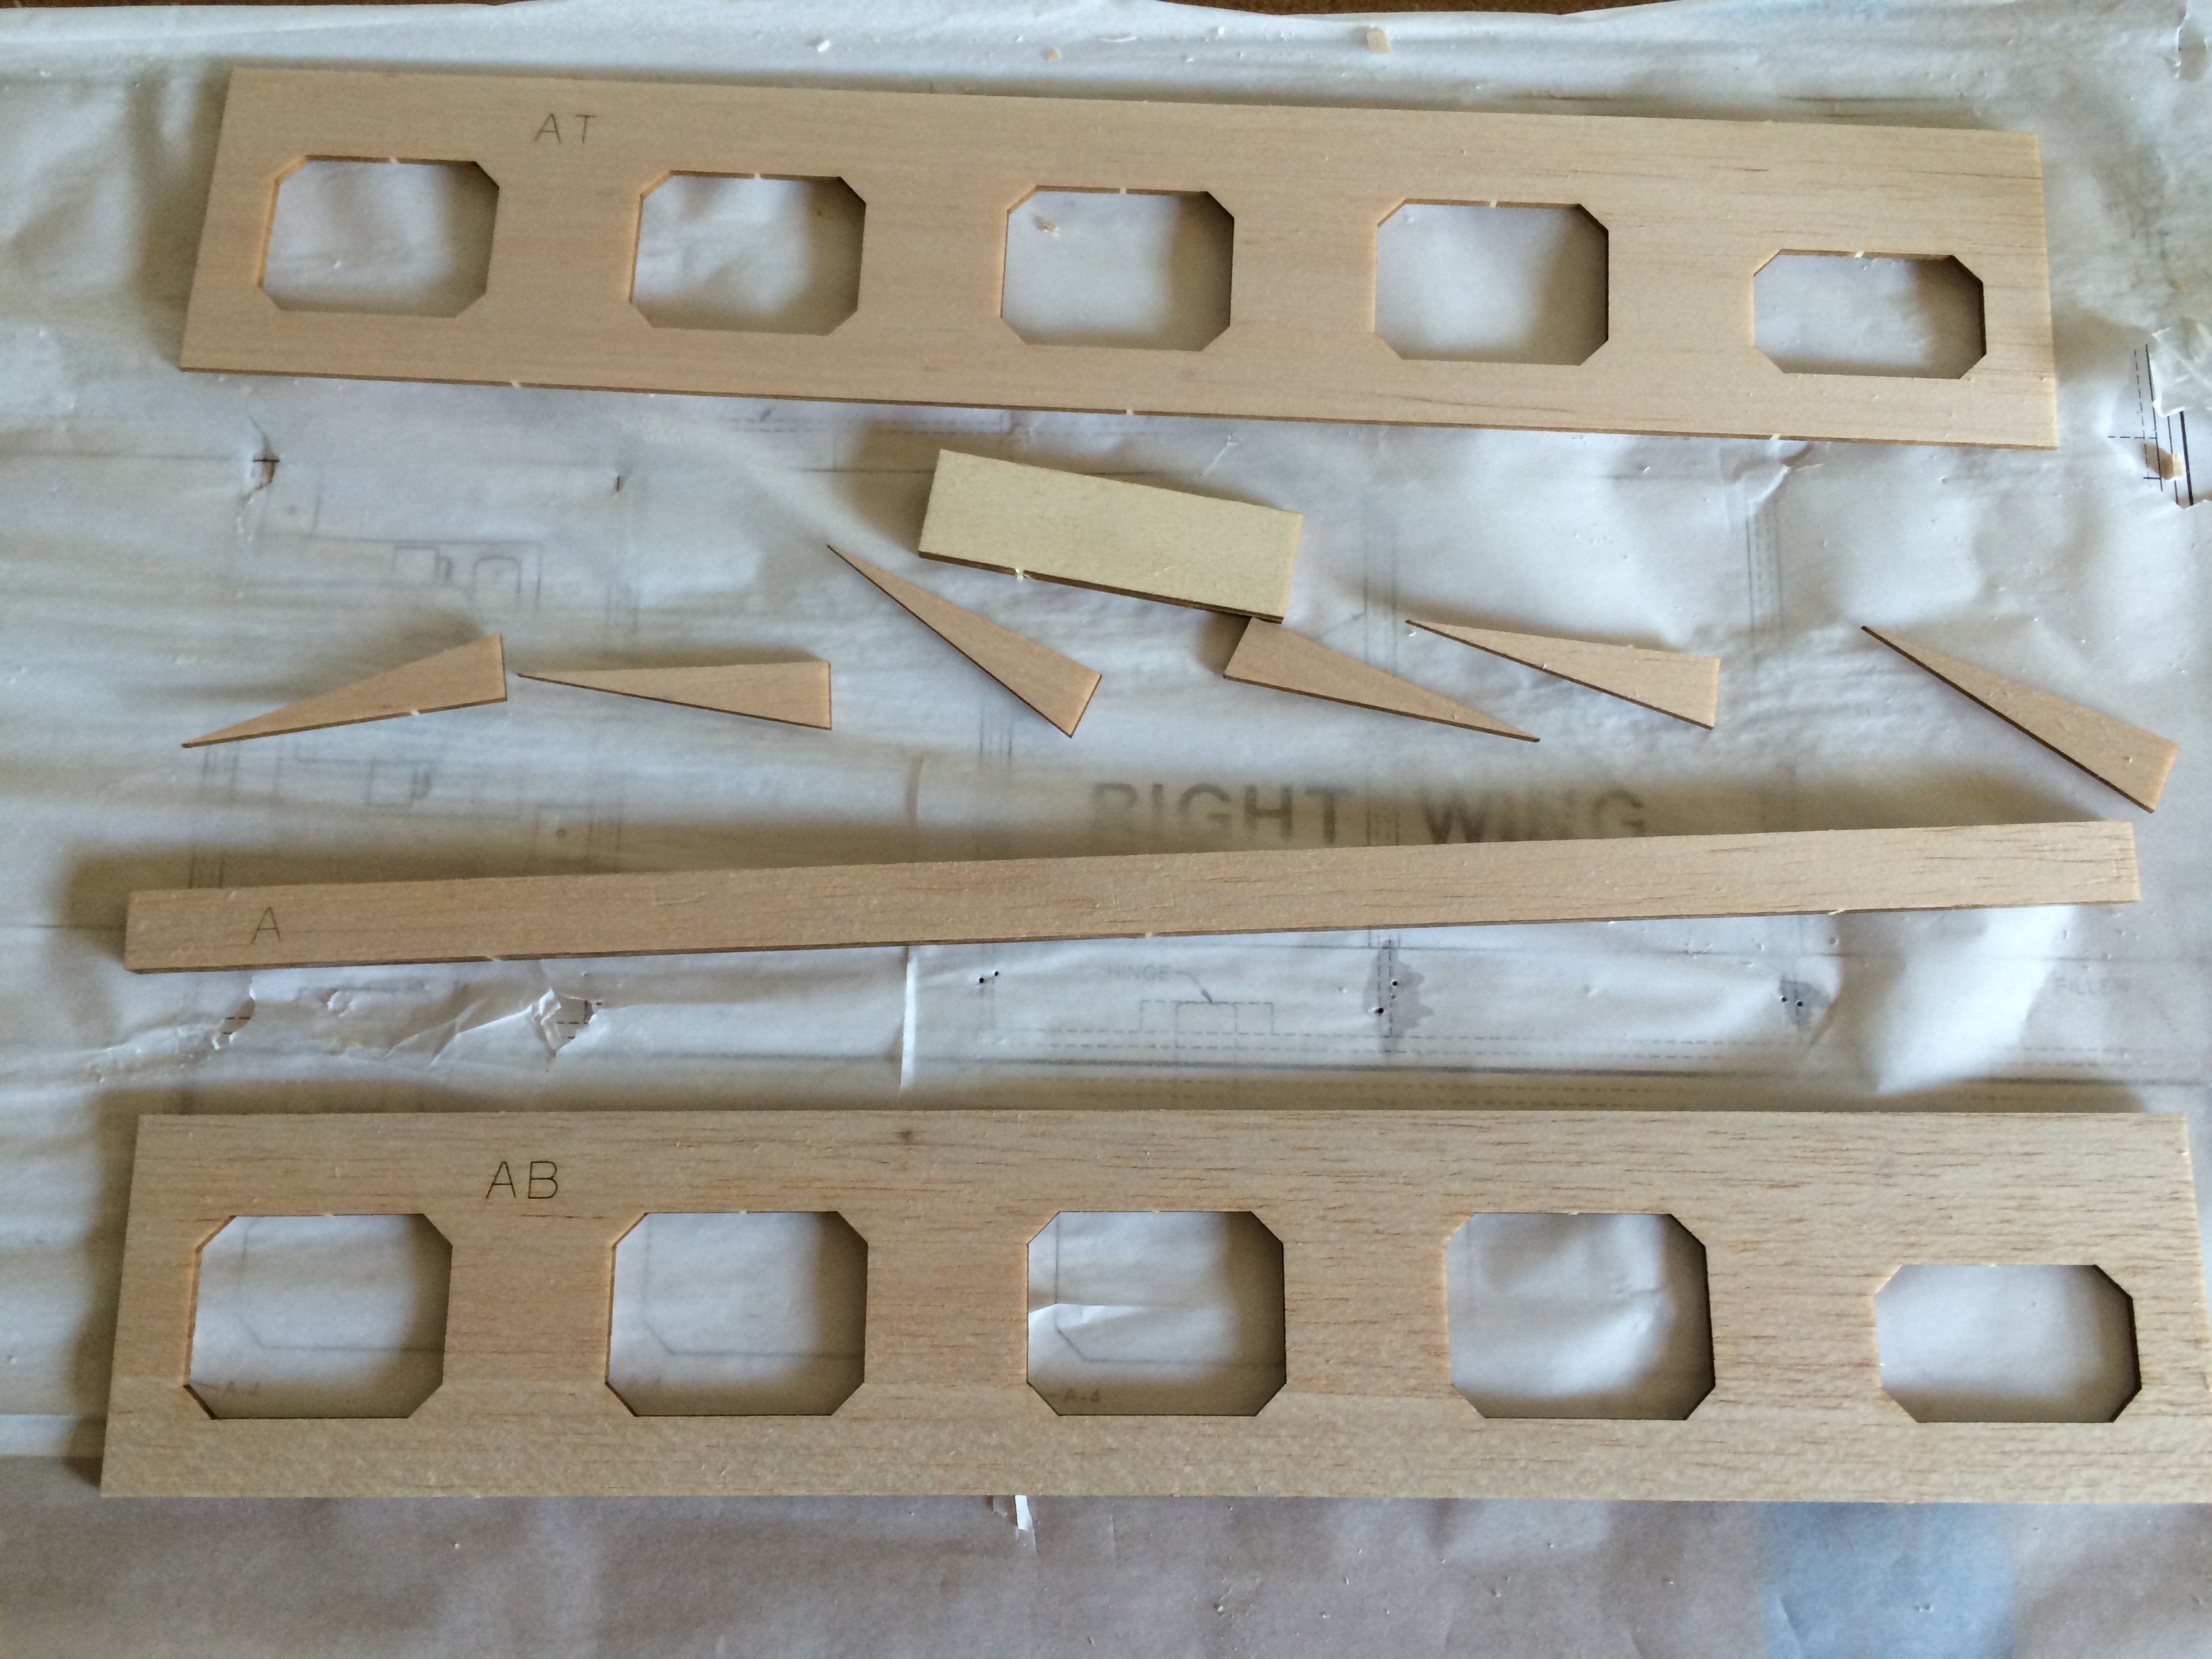
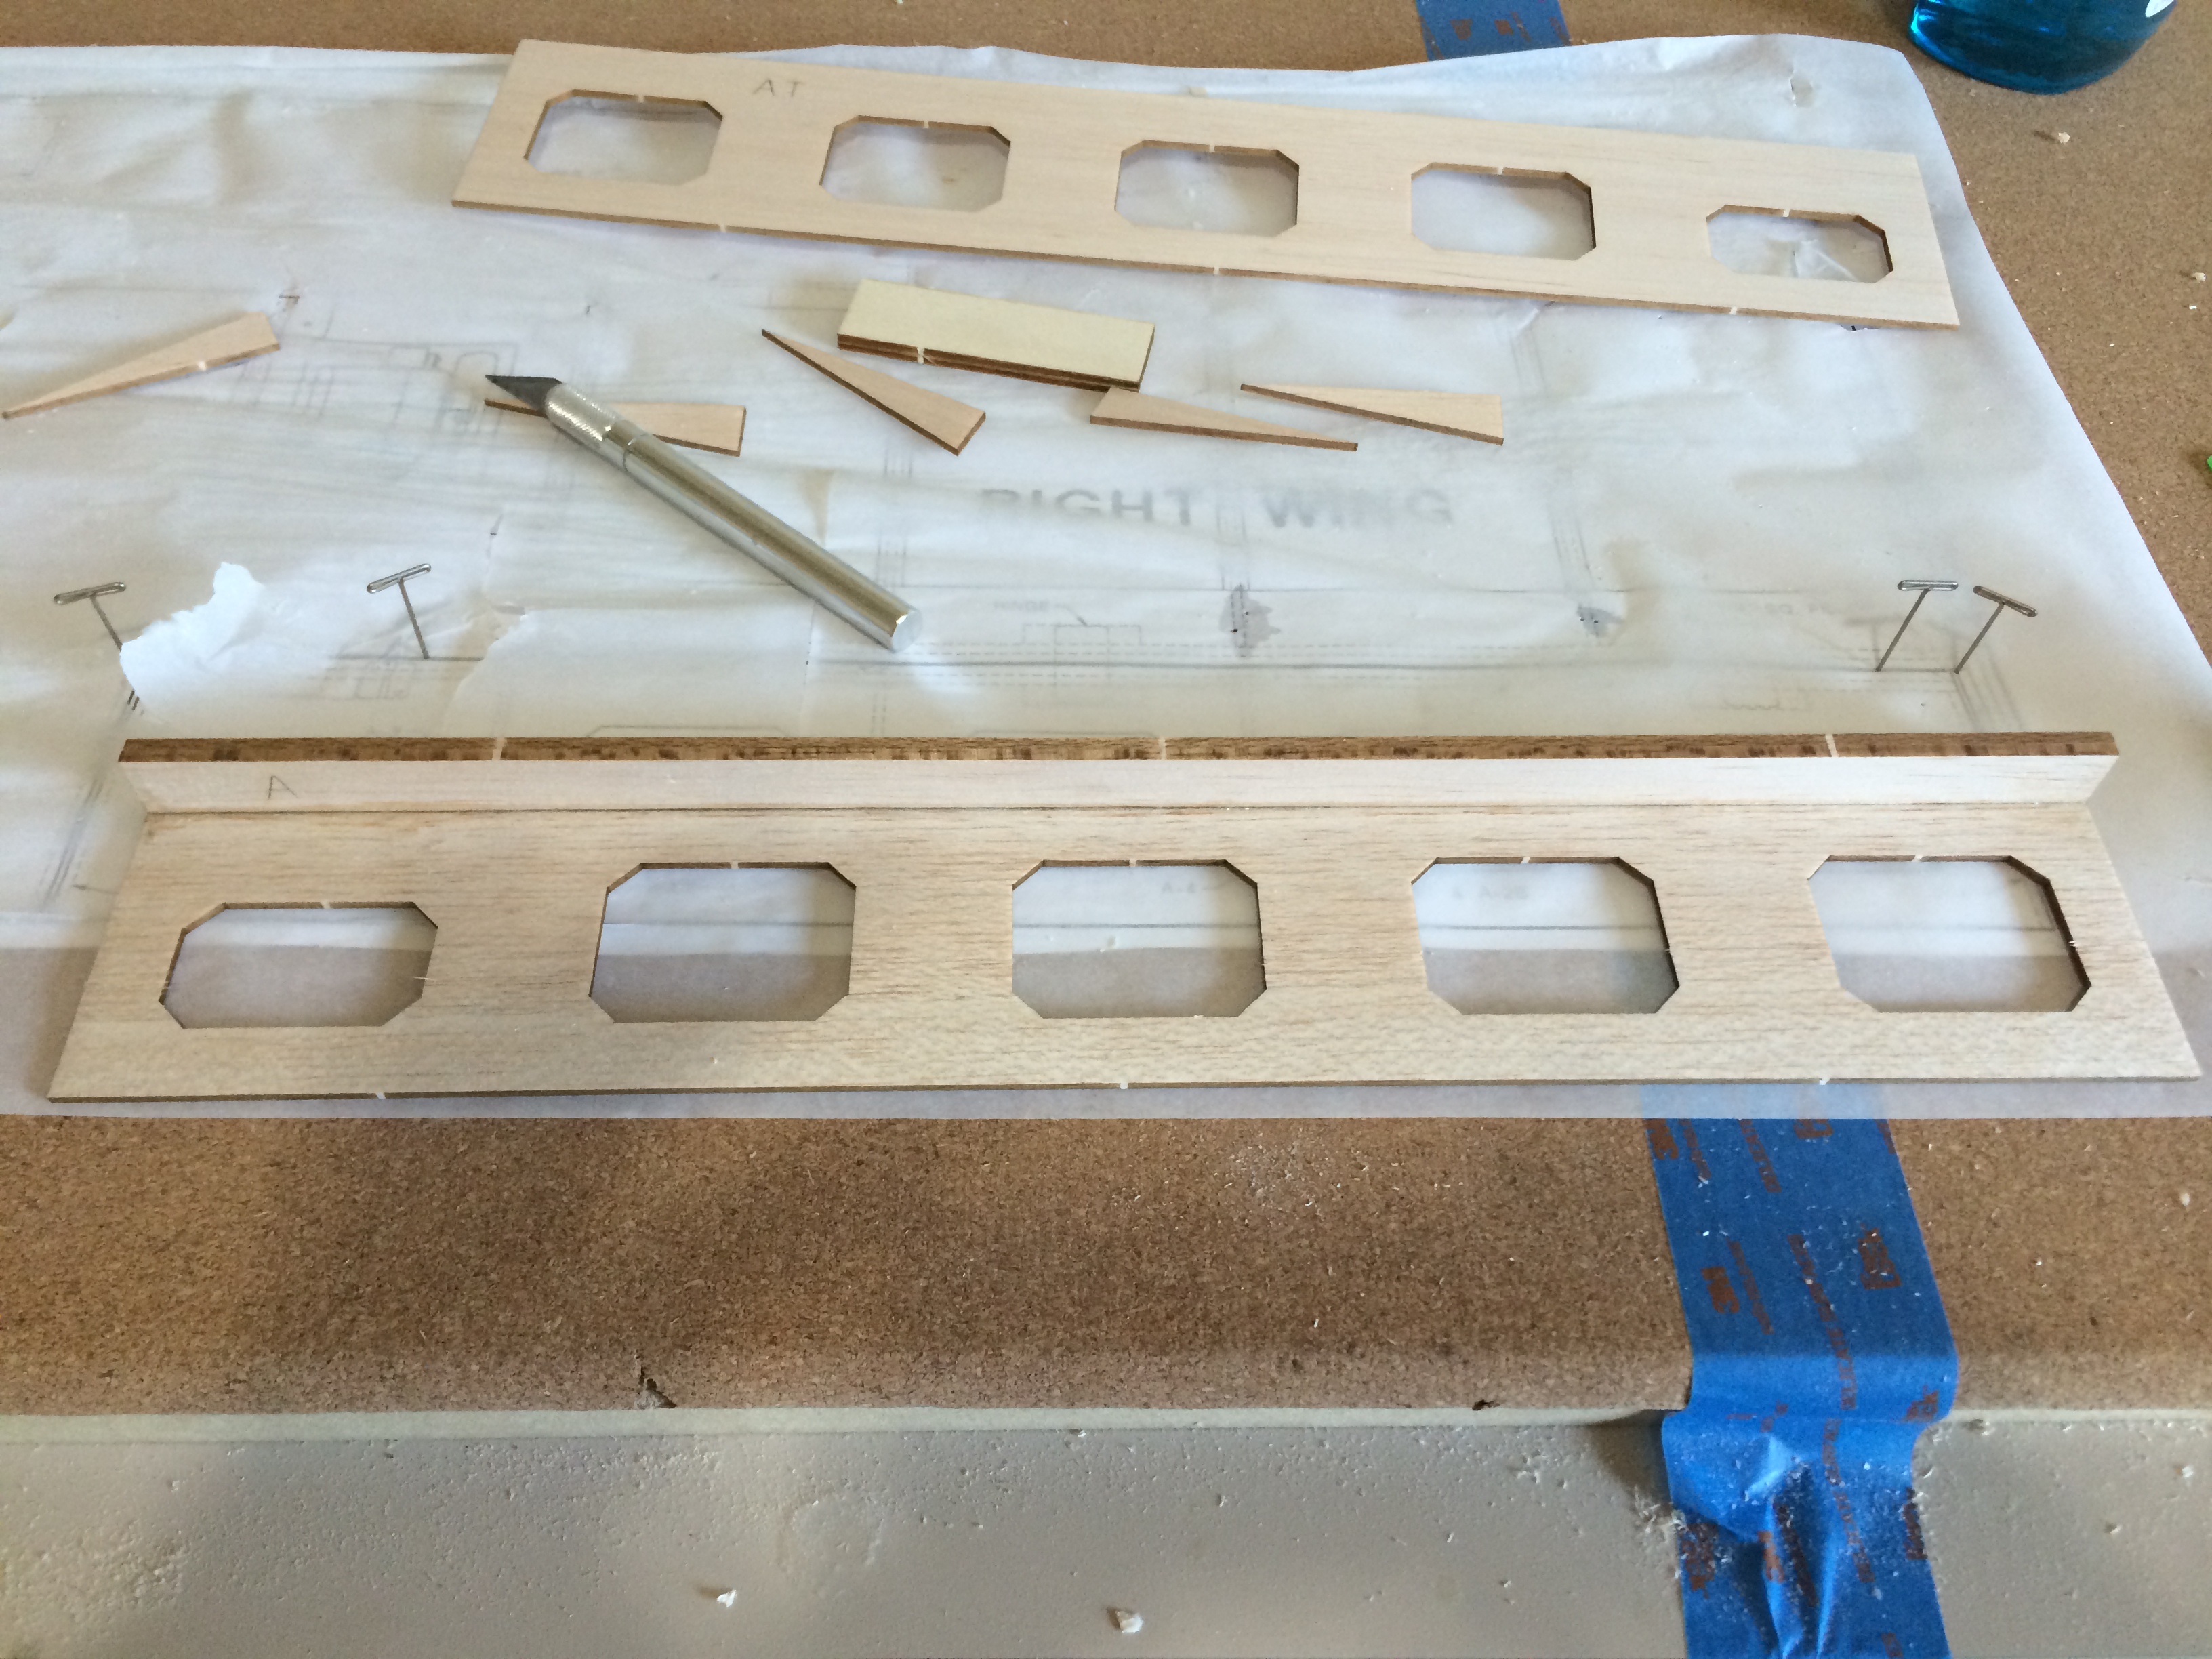
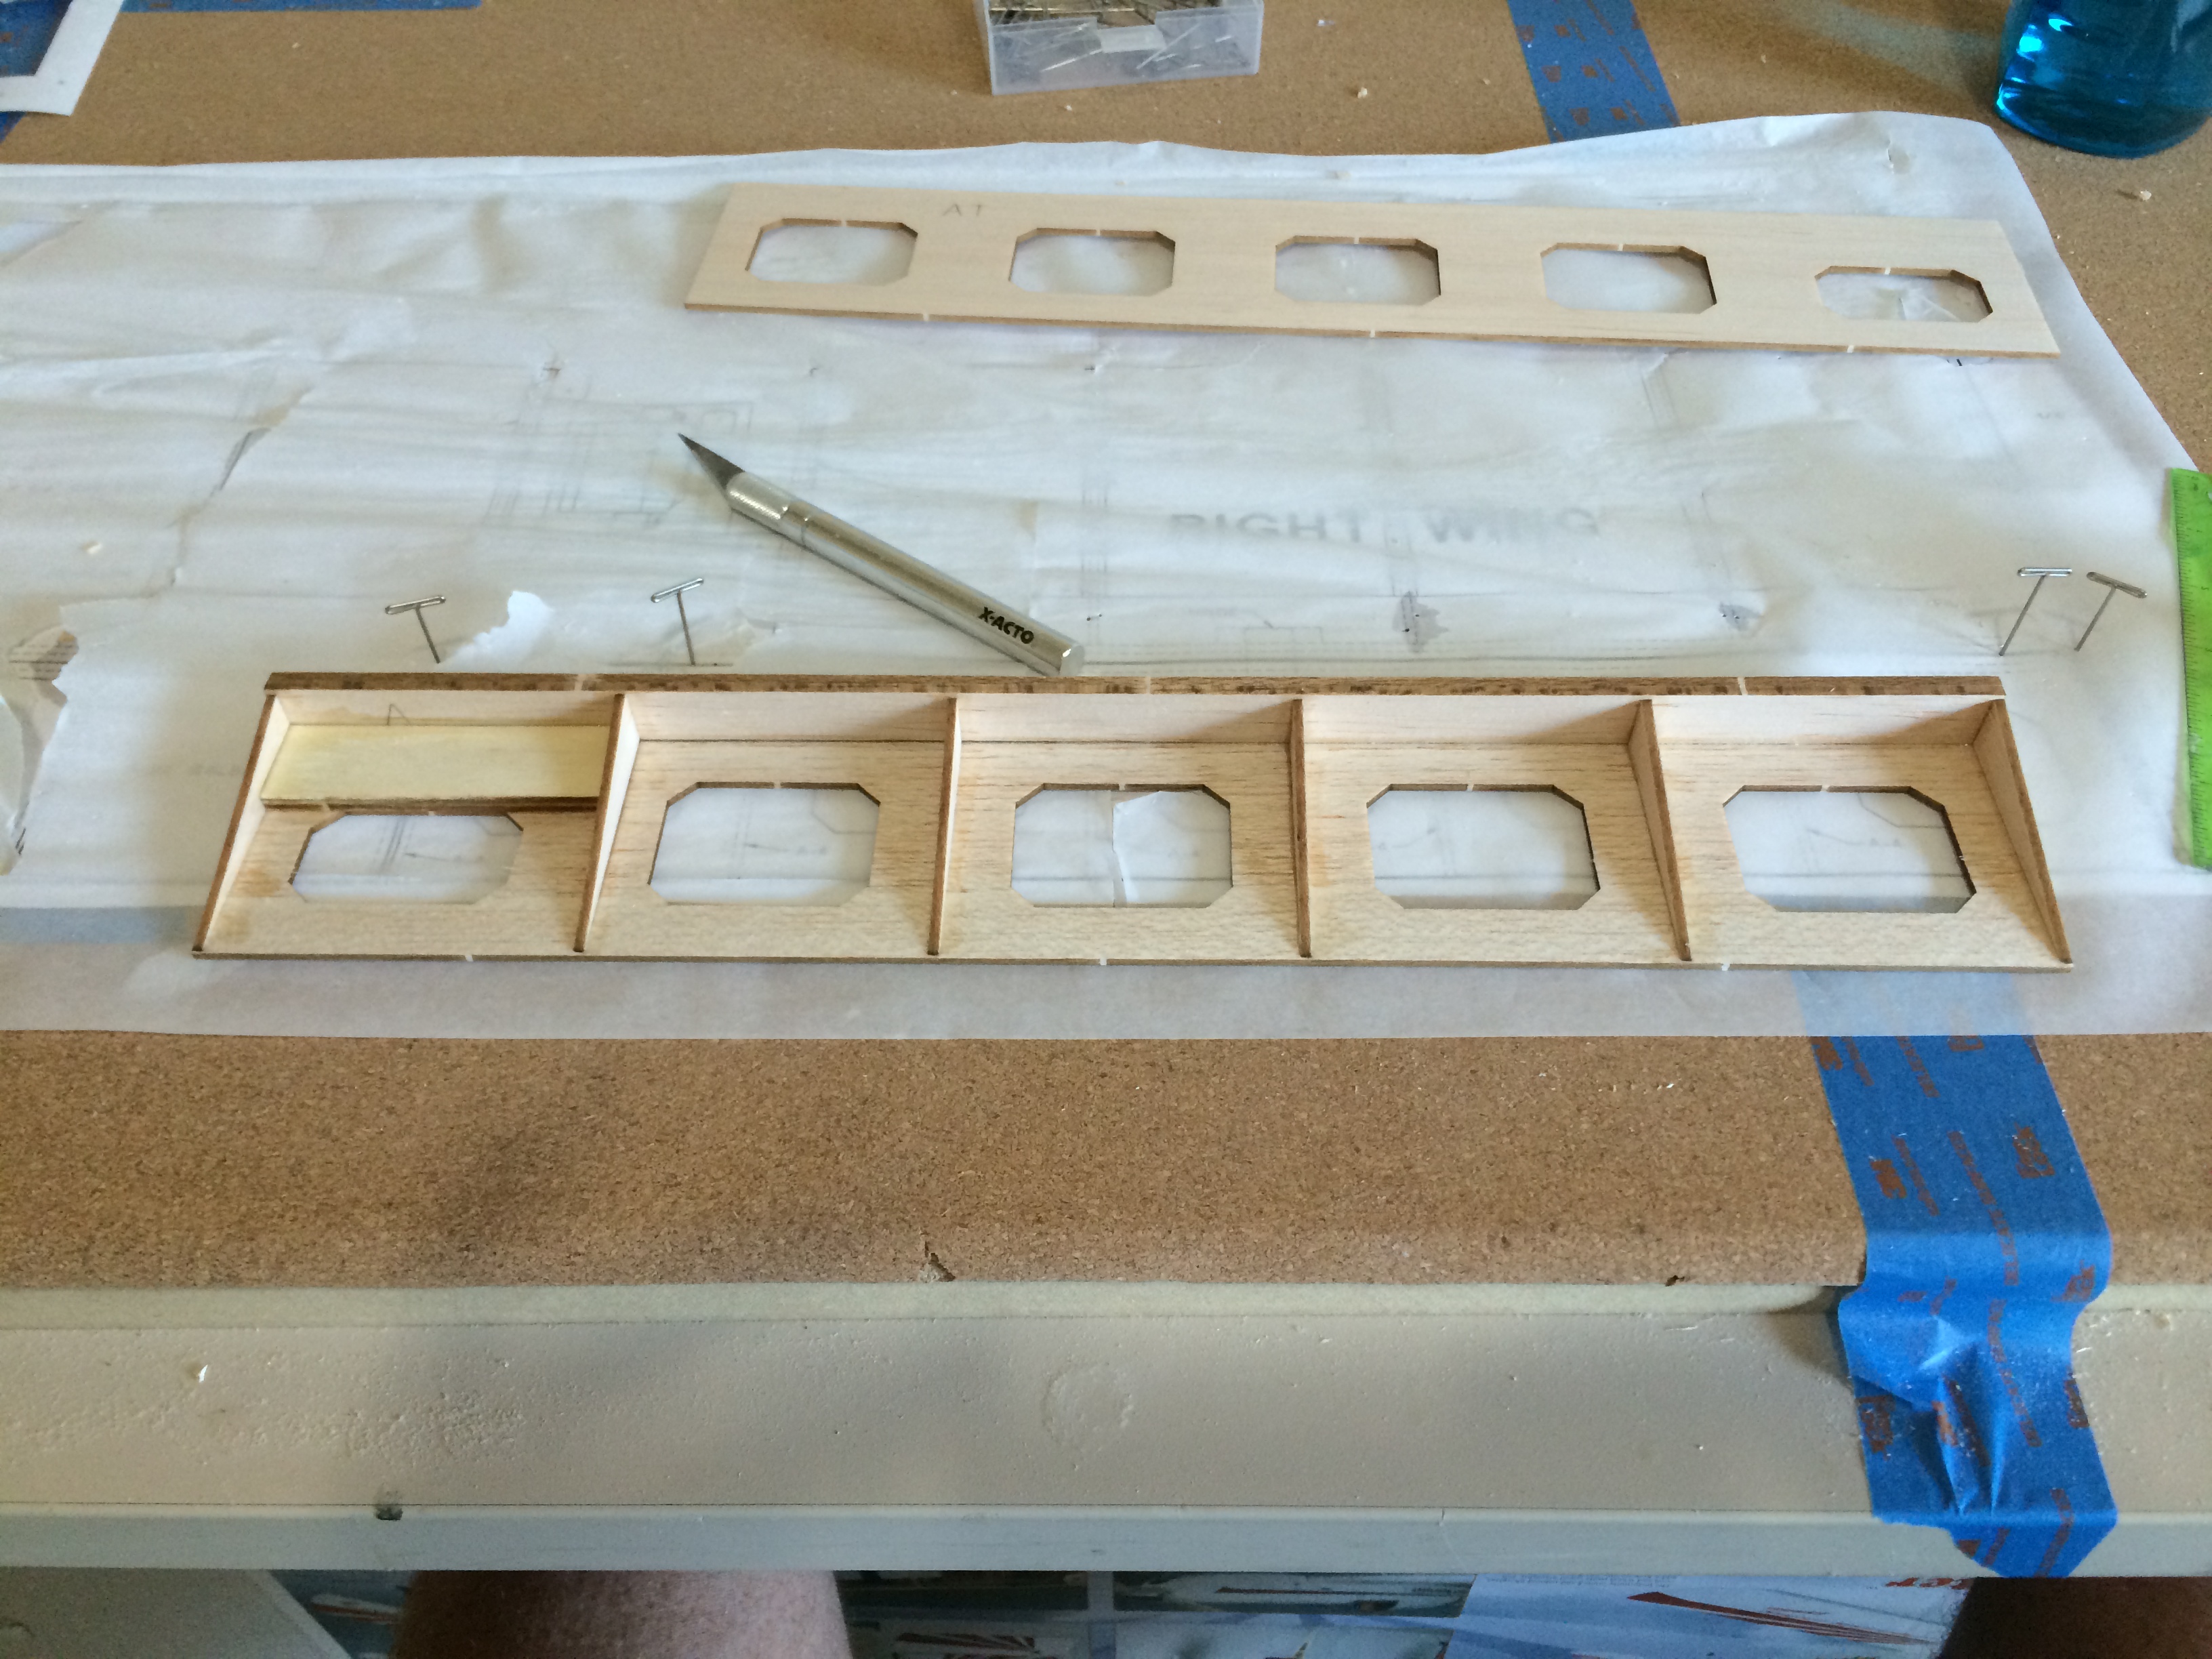
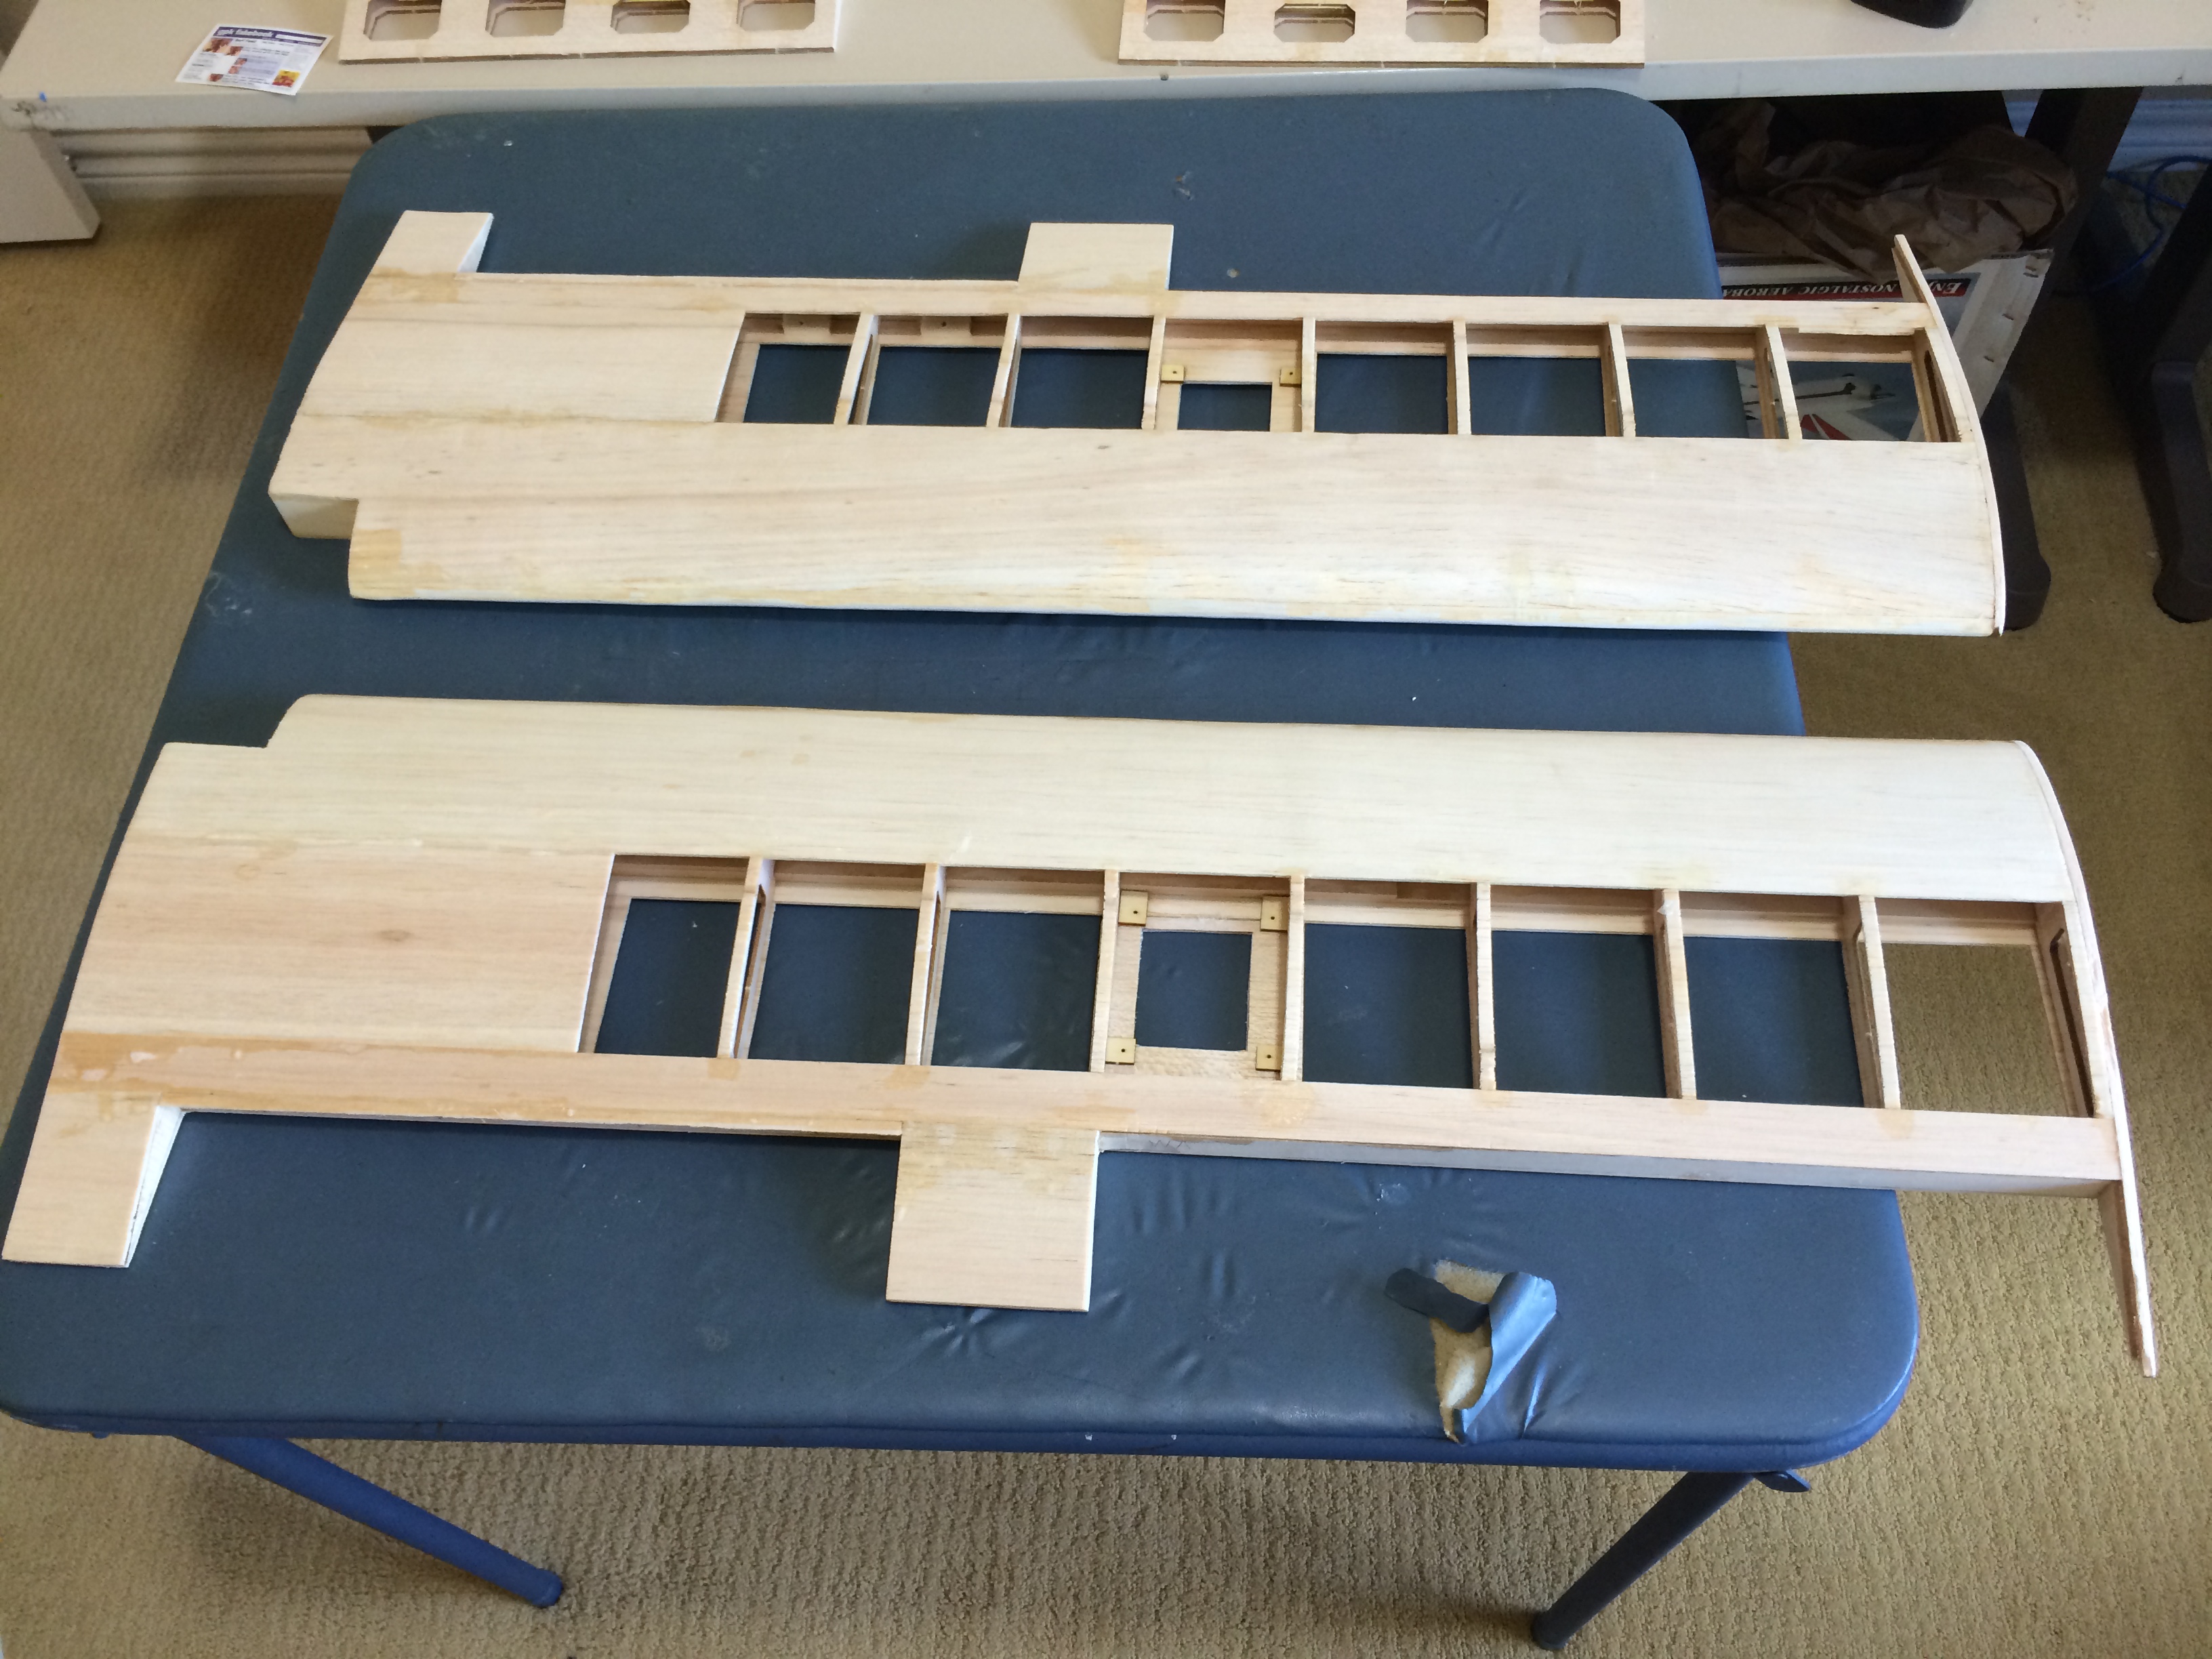
Well, I got side tracked and helped a friend with one of their planes and then had to do some minor repair work on two of mine. But I am back on track now and have started the left wing. Good progress so far. I am still shooting for a labor day weekend maiden but it is getting tight and the water proof servos still haven't arrived. We shall see. In any case, here is the wing.

08-25-2014, 01:38 PM
#10
Member
Thread Starter
Join Date: Sep 2012
Location: Frisco, TX
Posts: 54
Likes: 0
Received 0 Likes
on
0 Posts
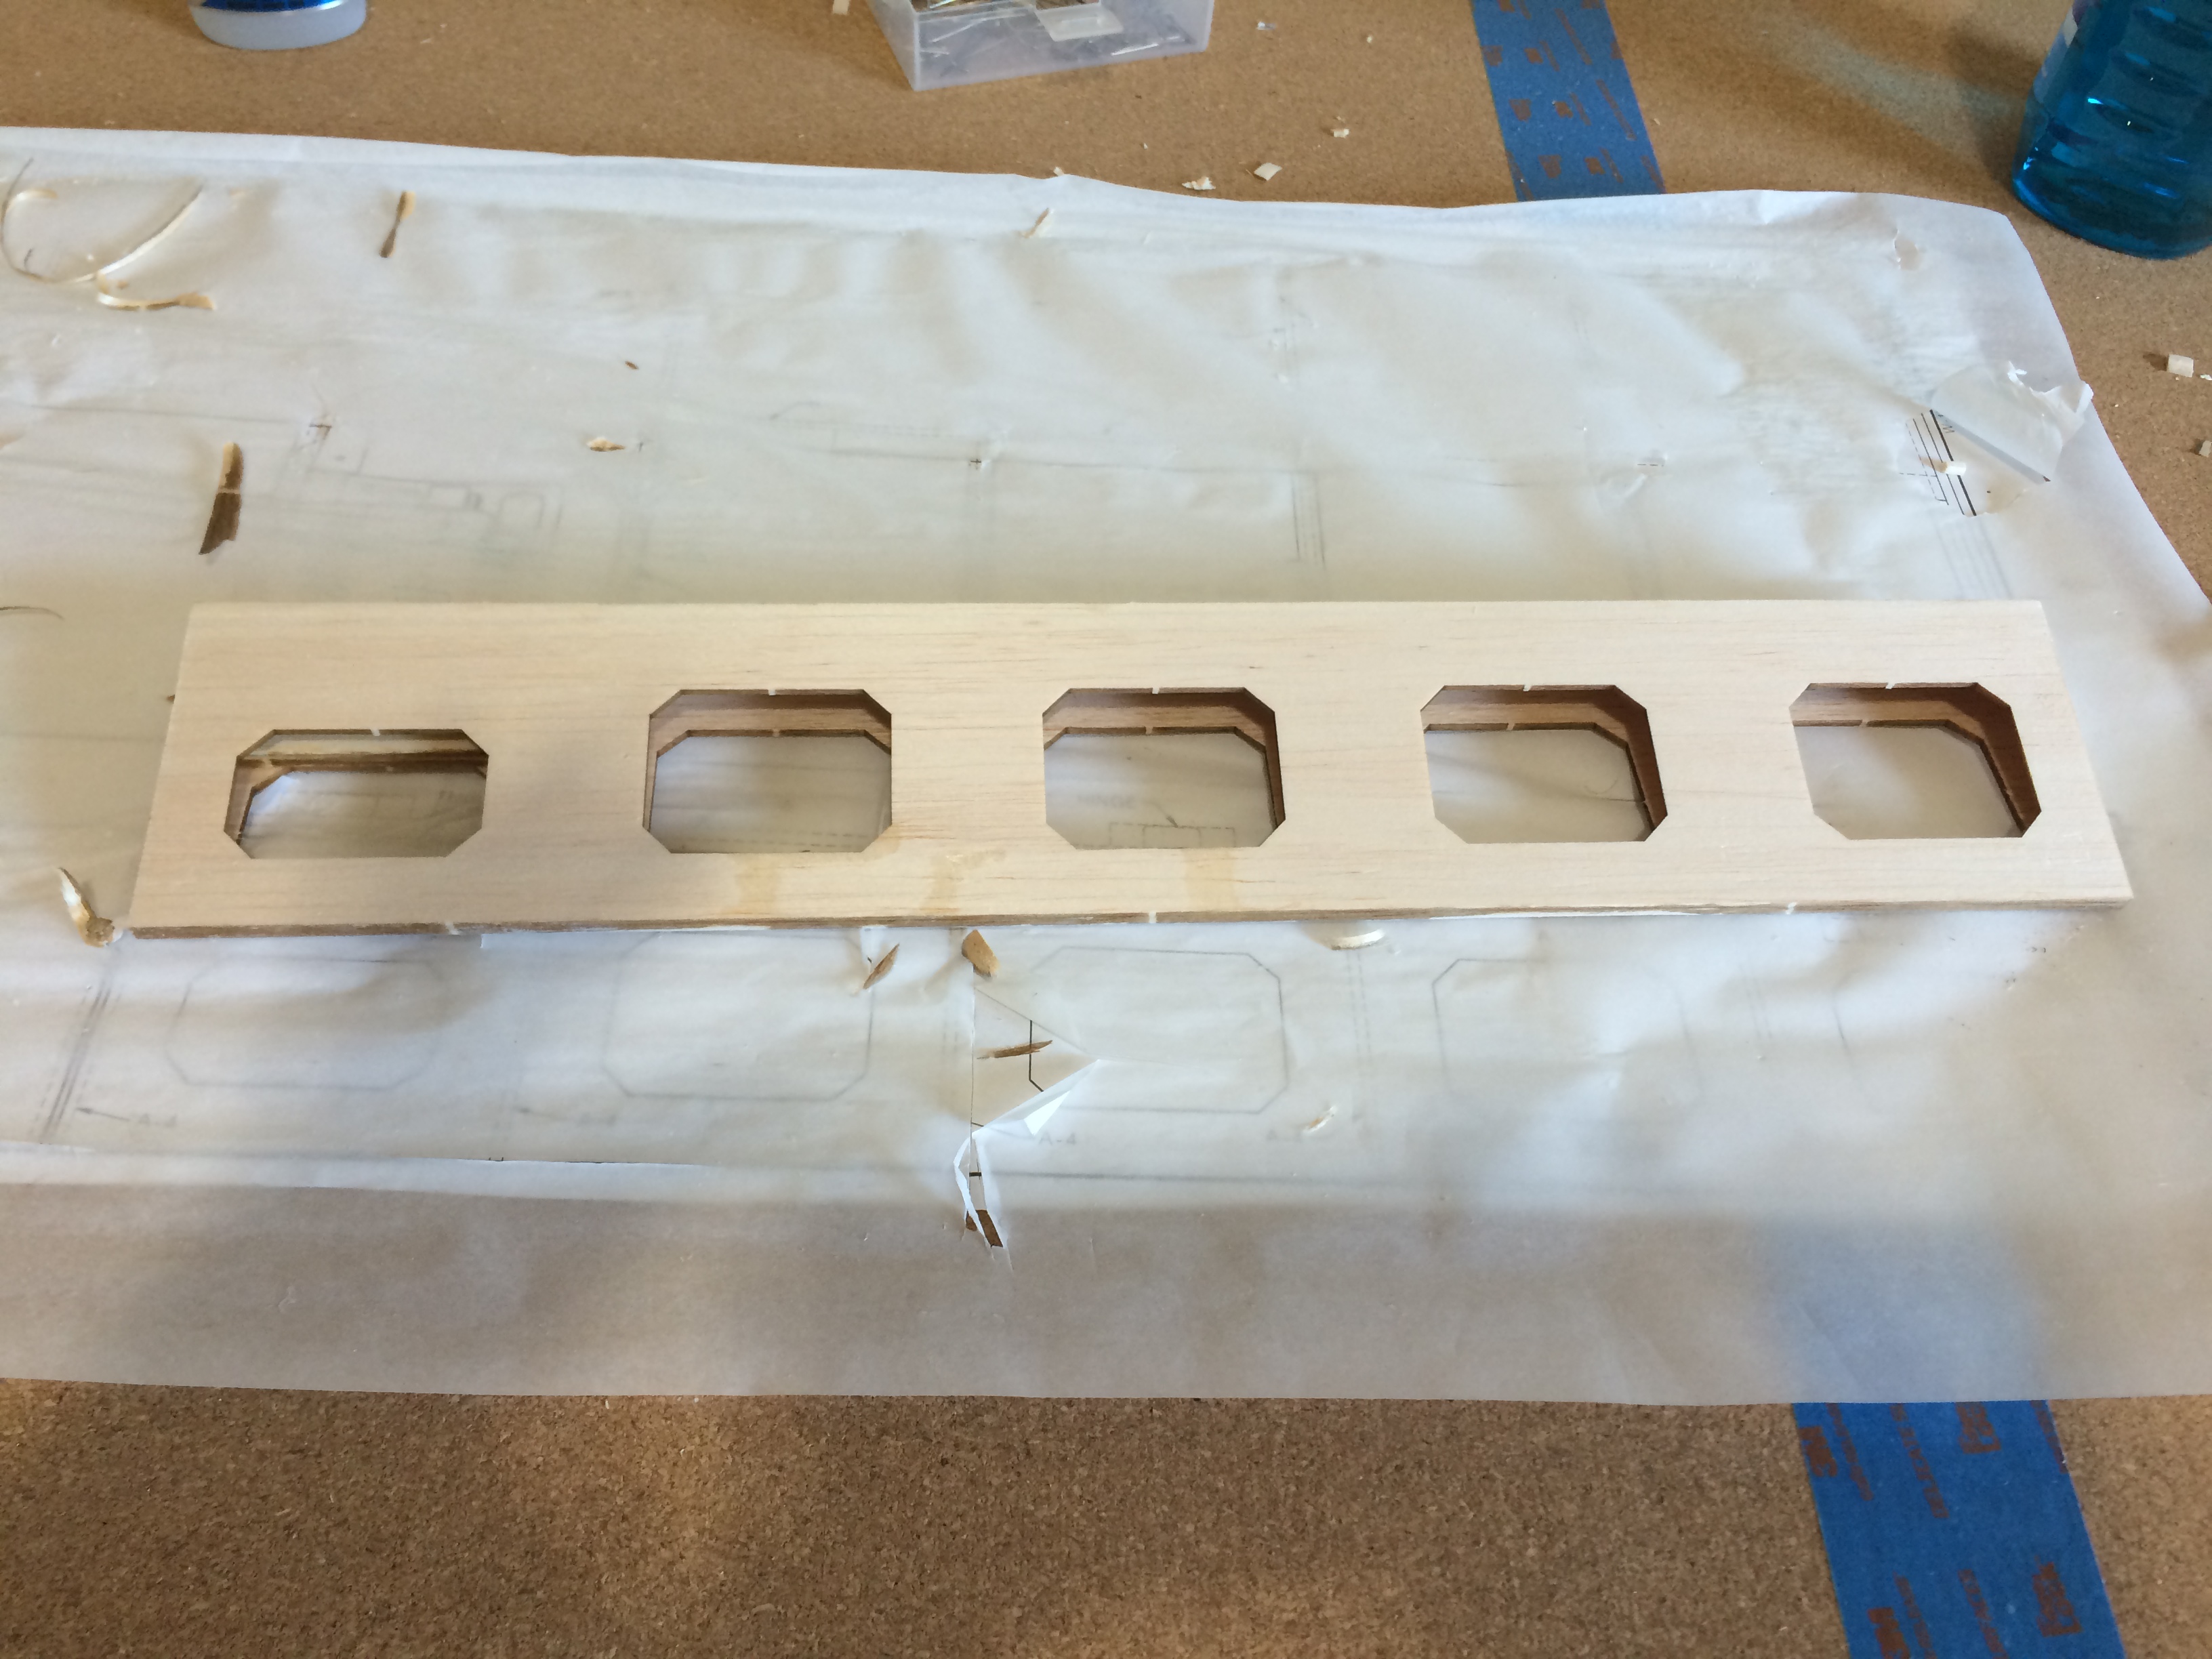
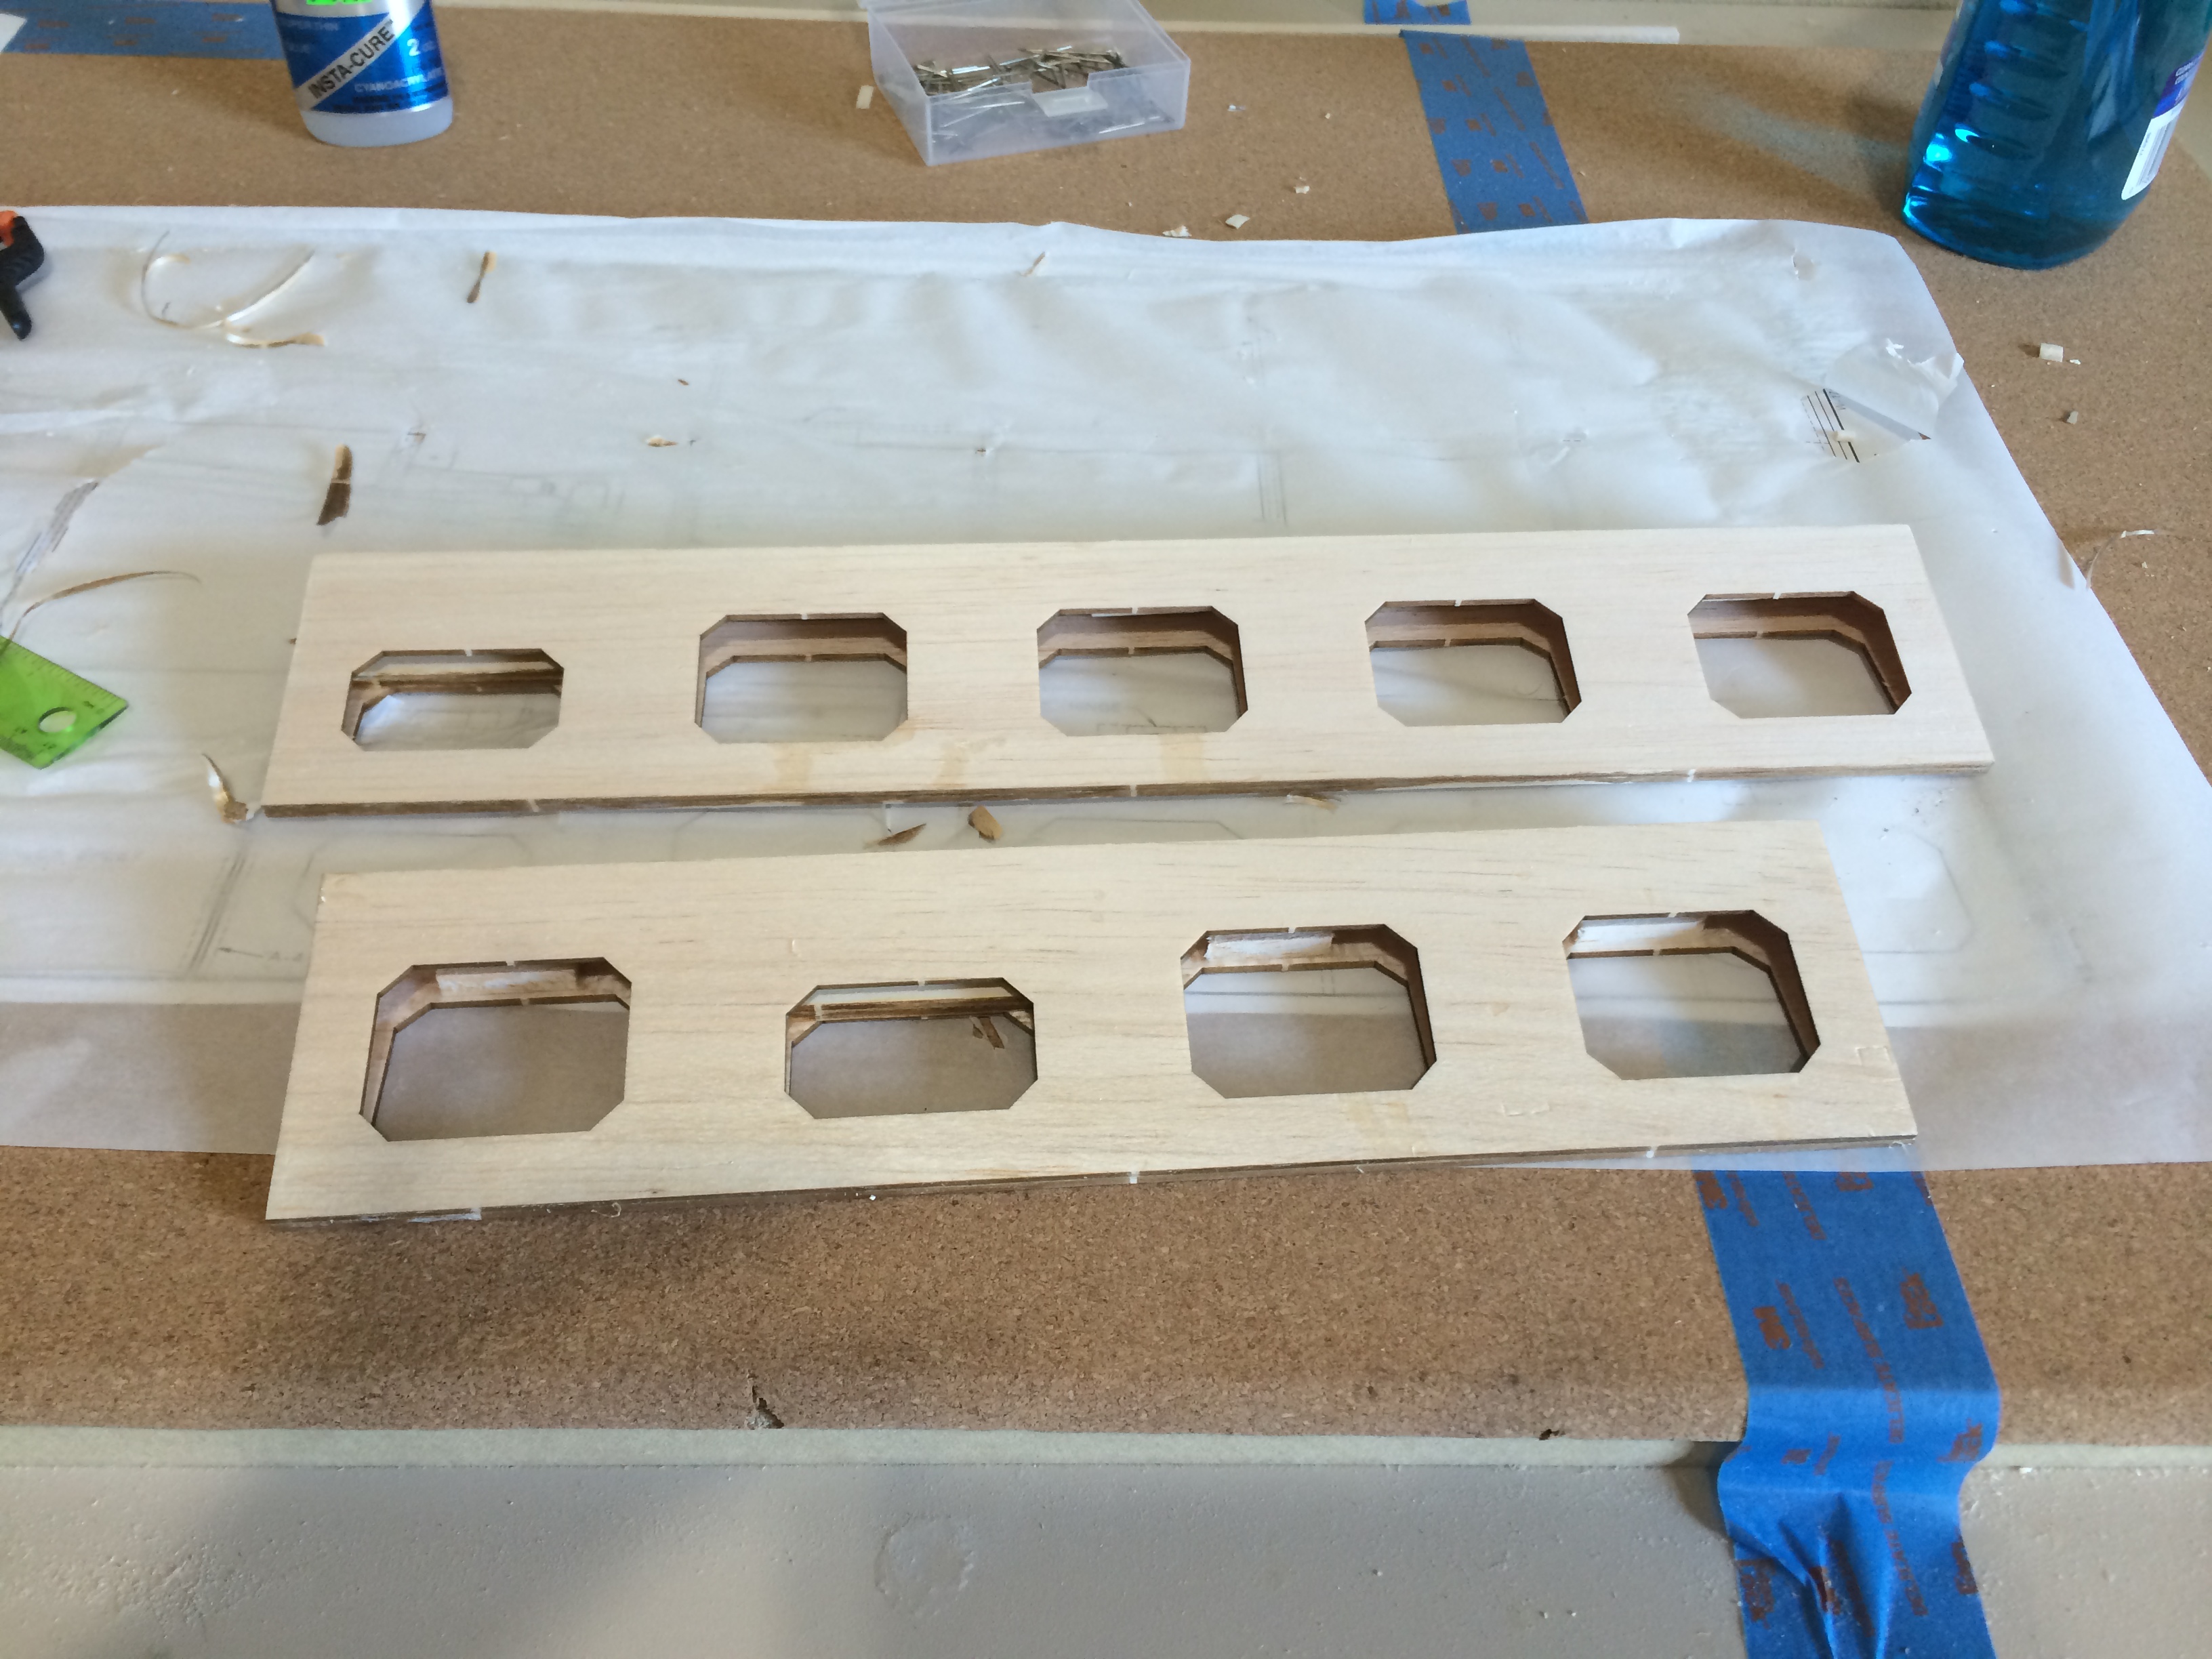
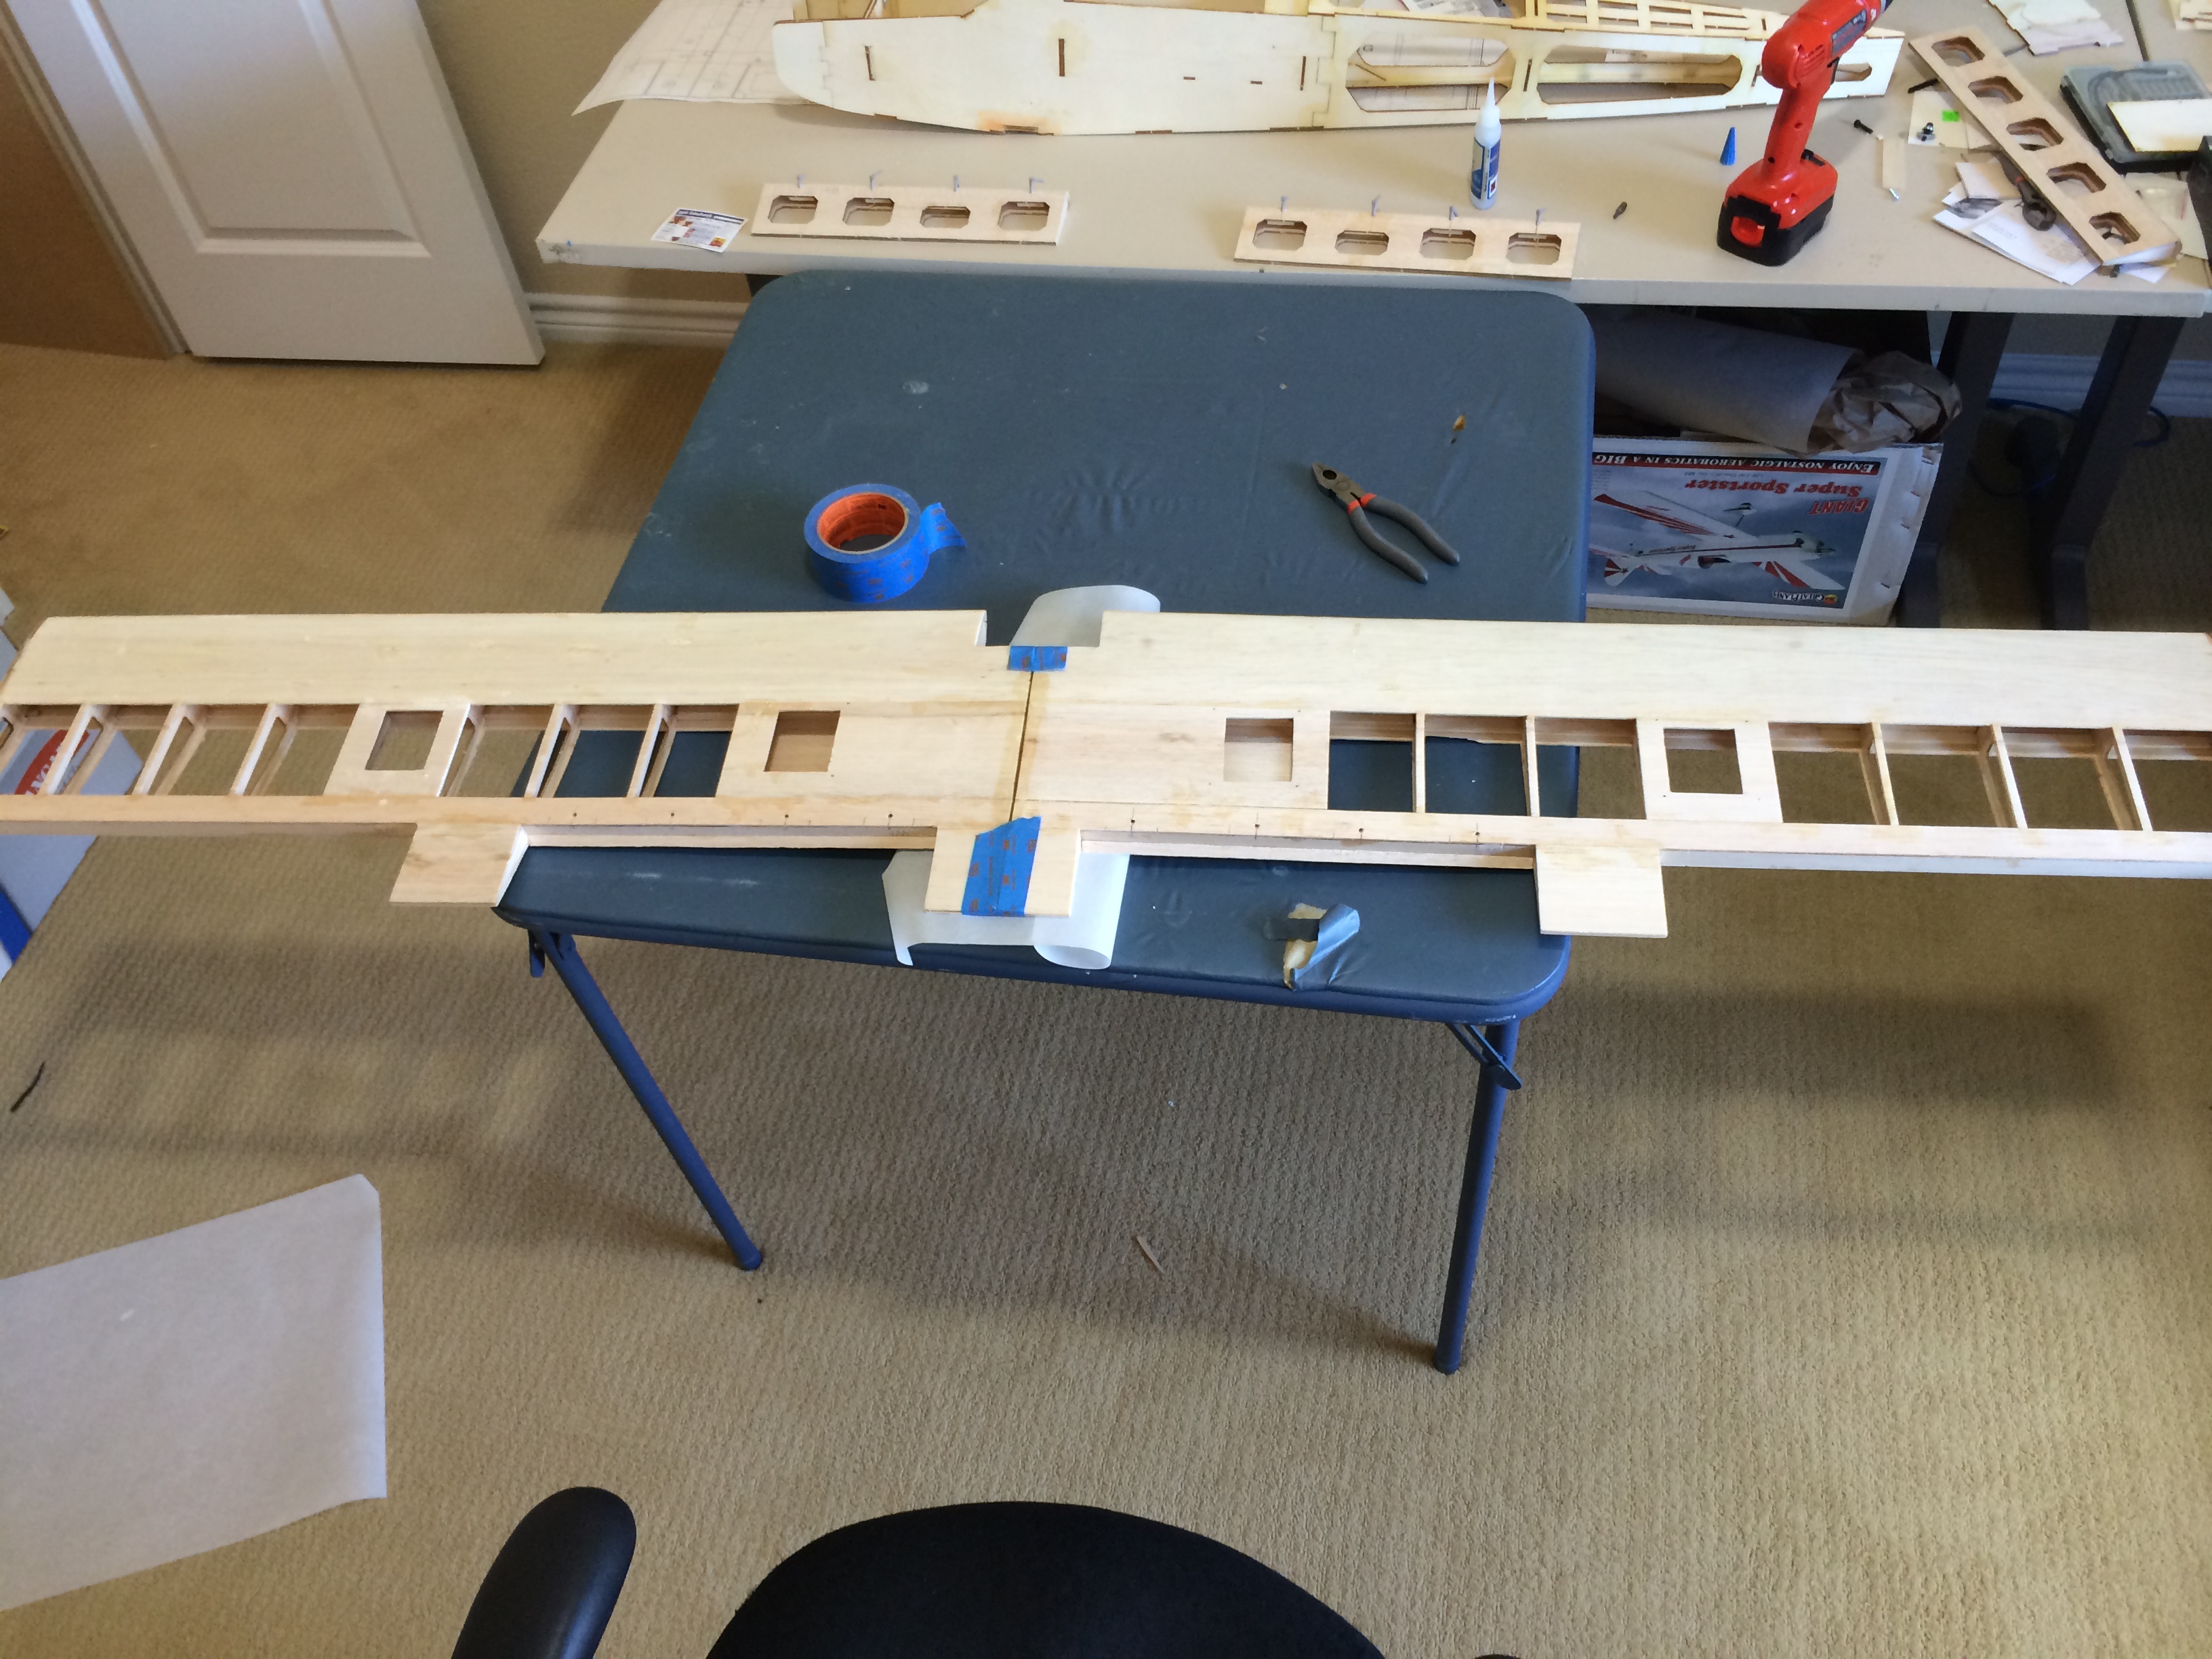
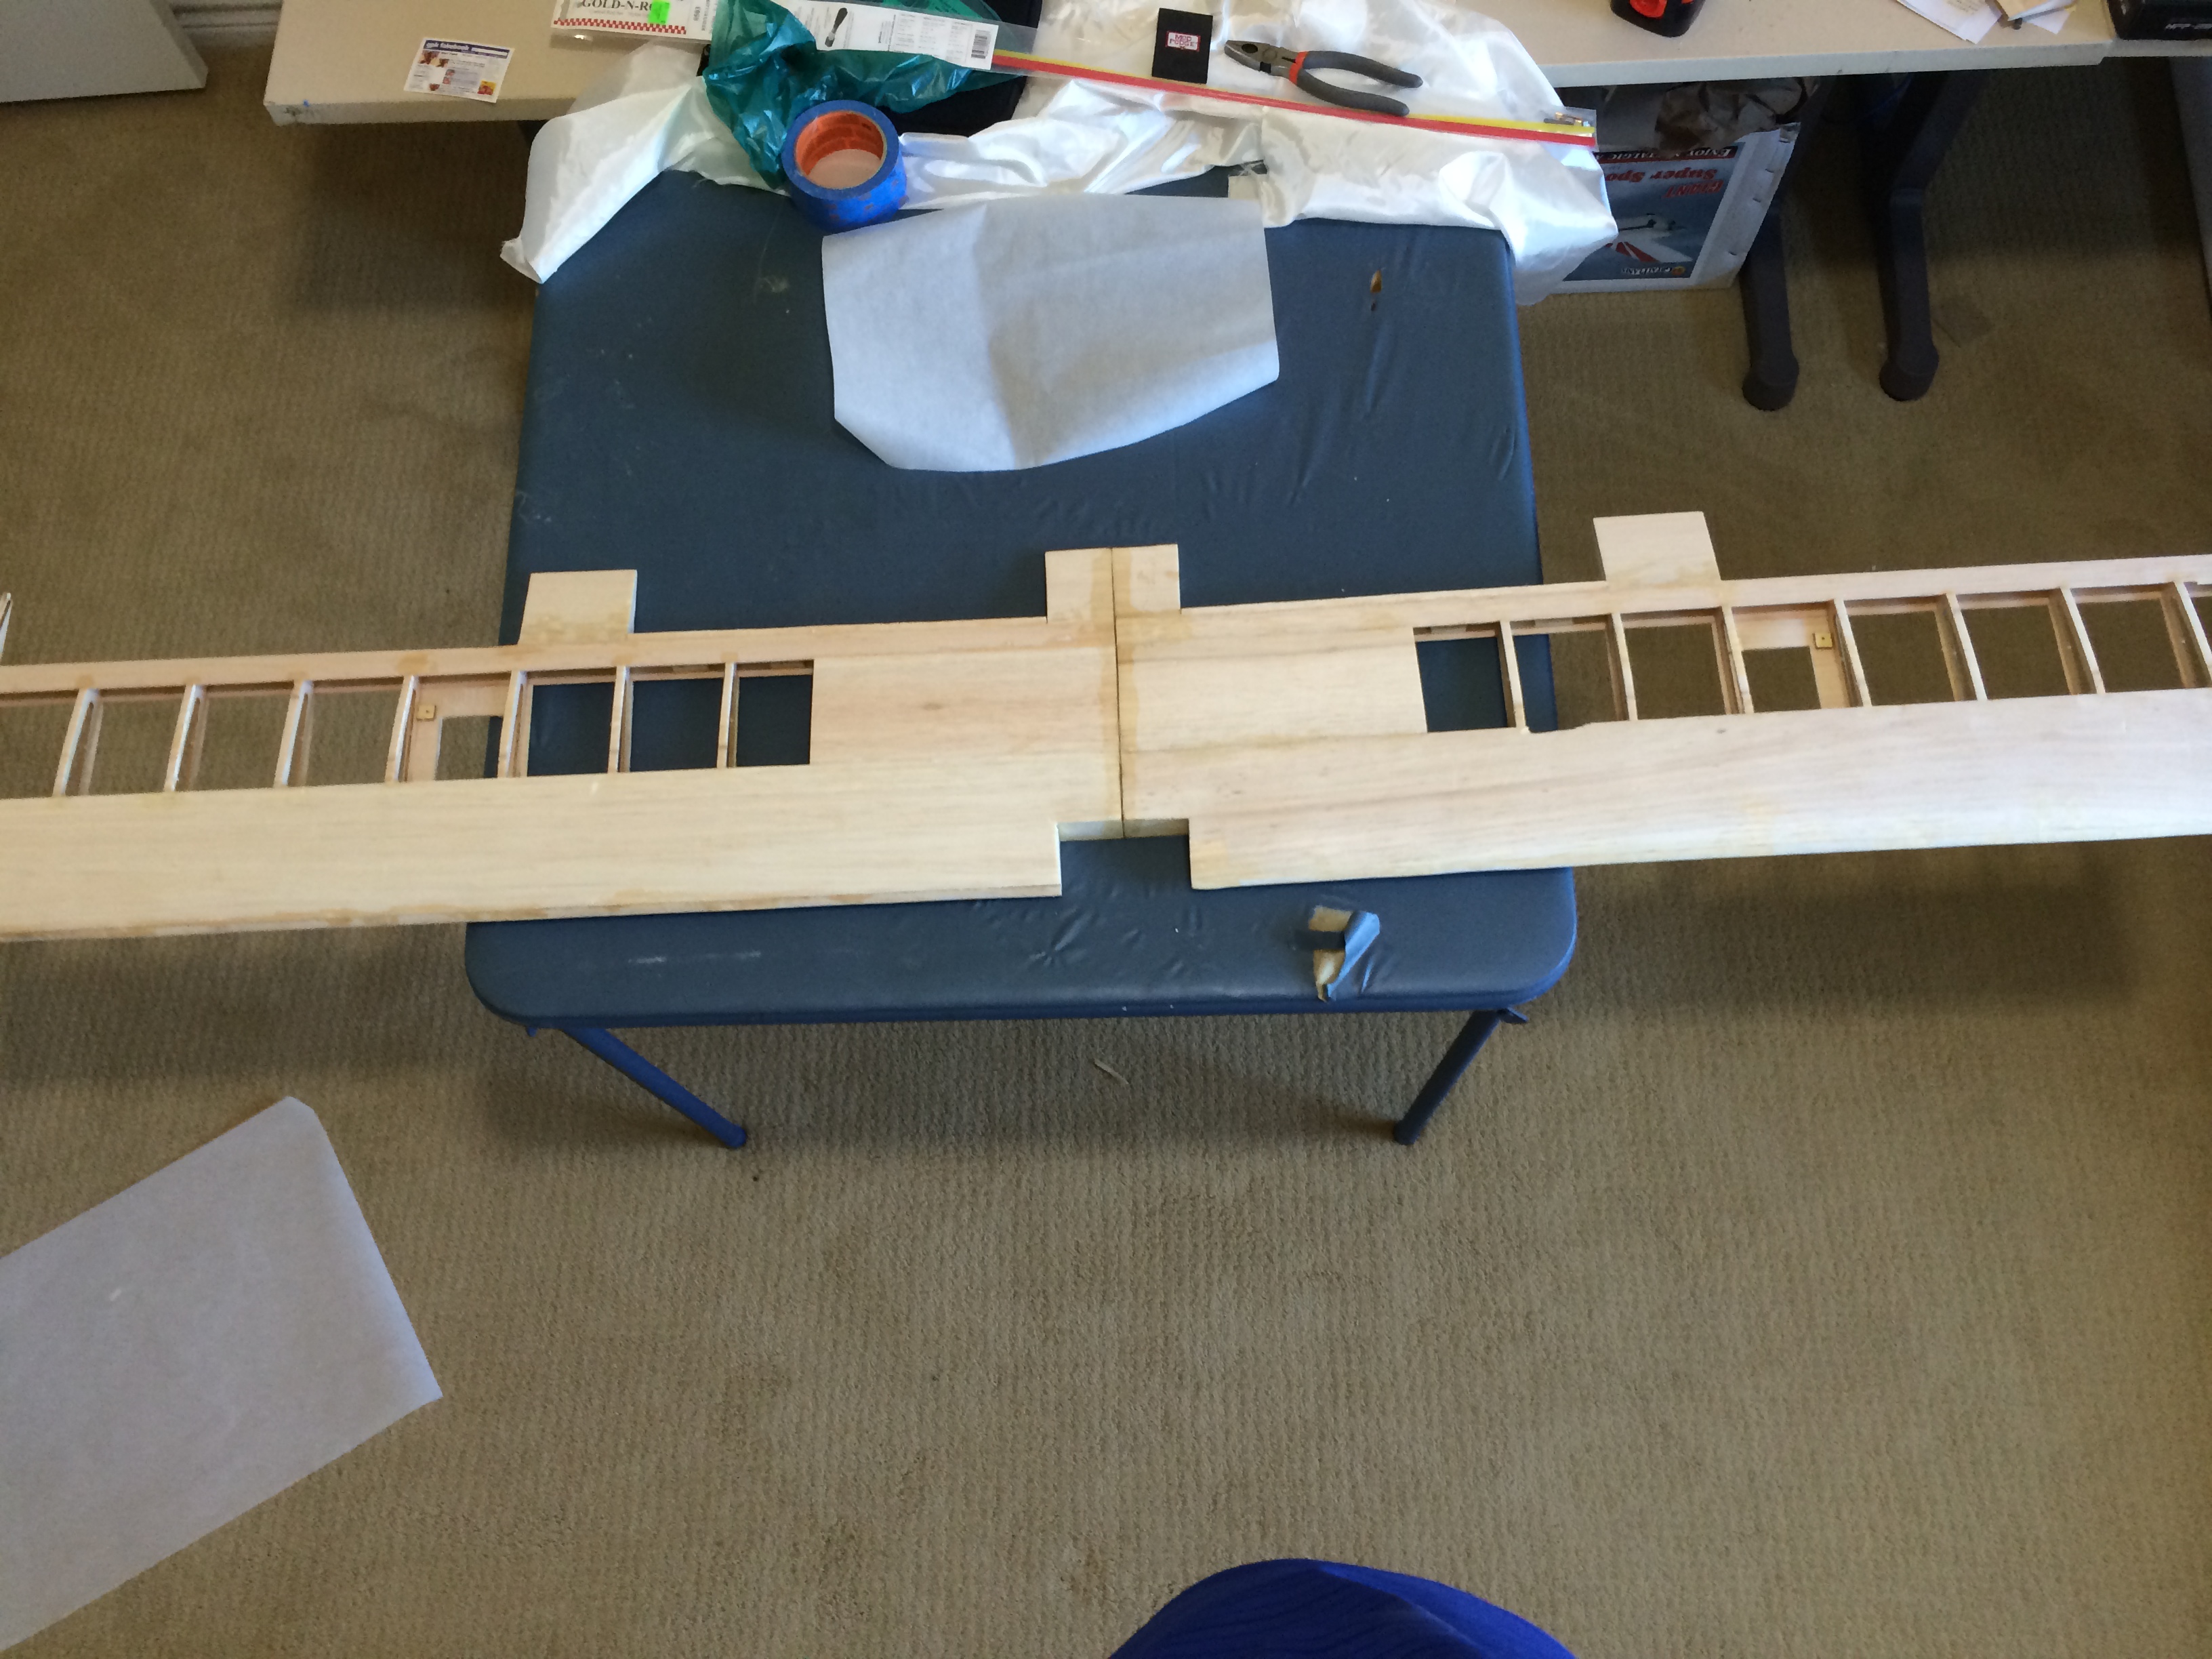
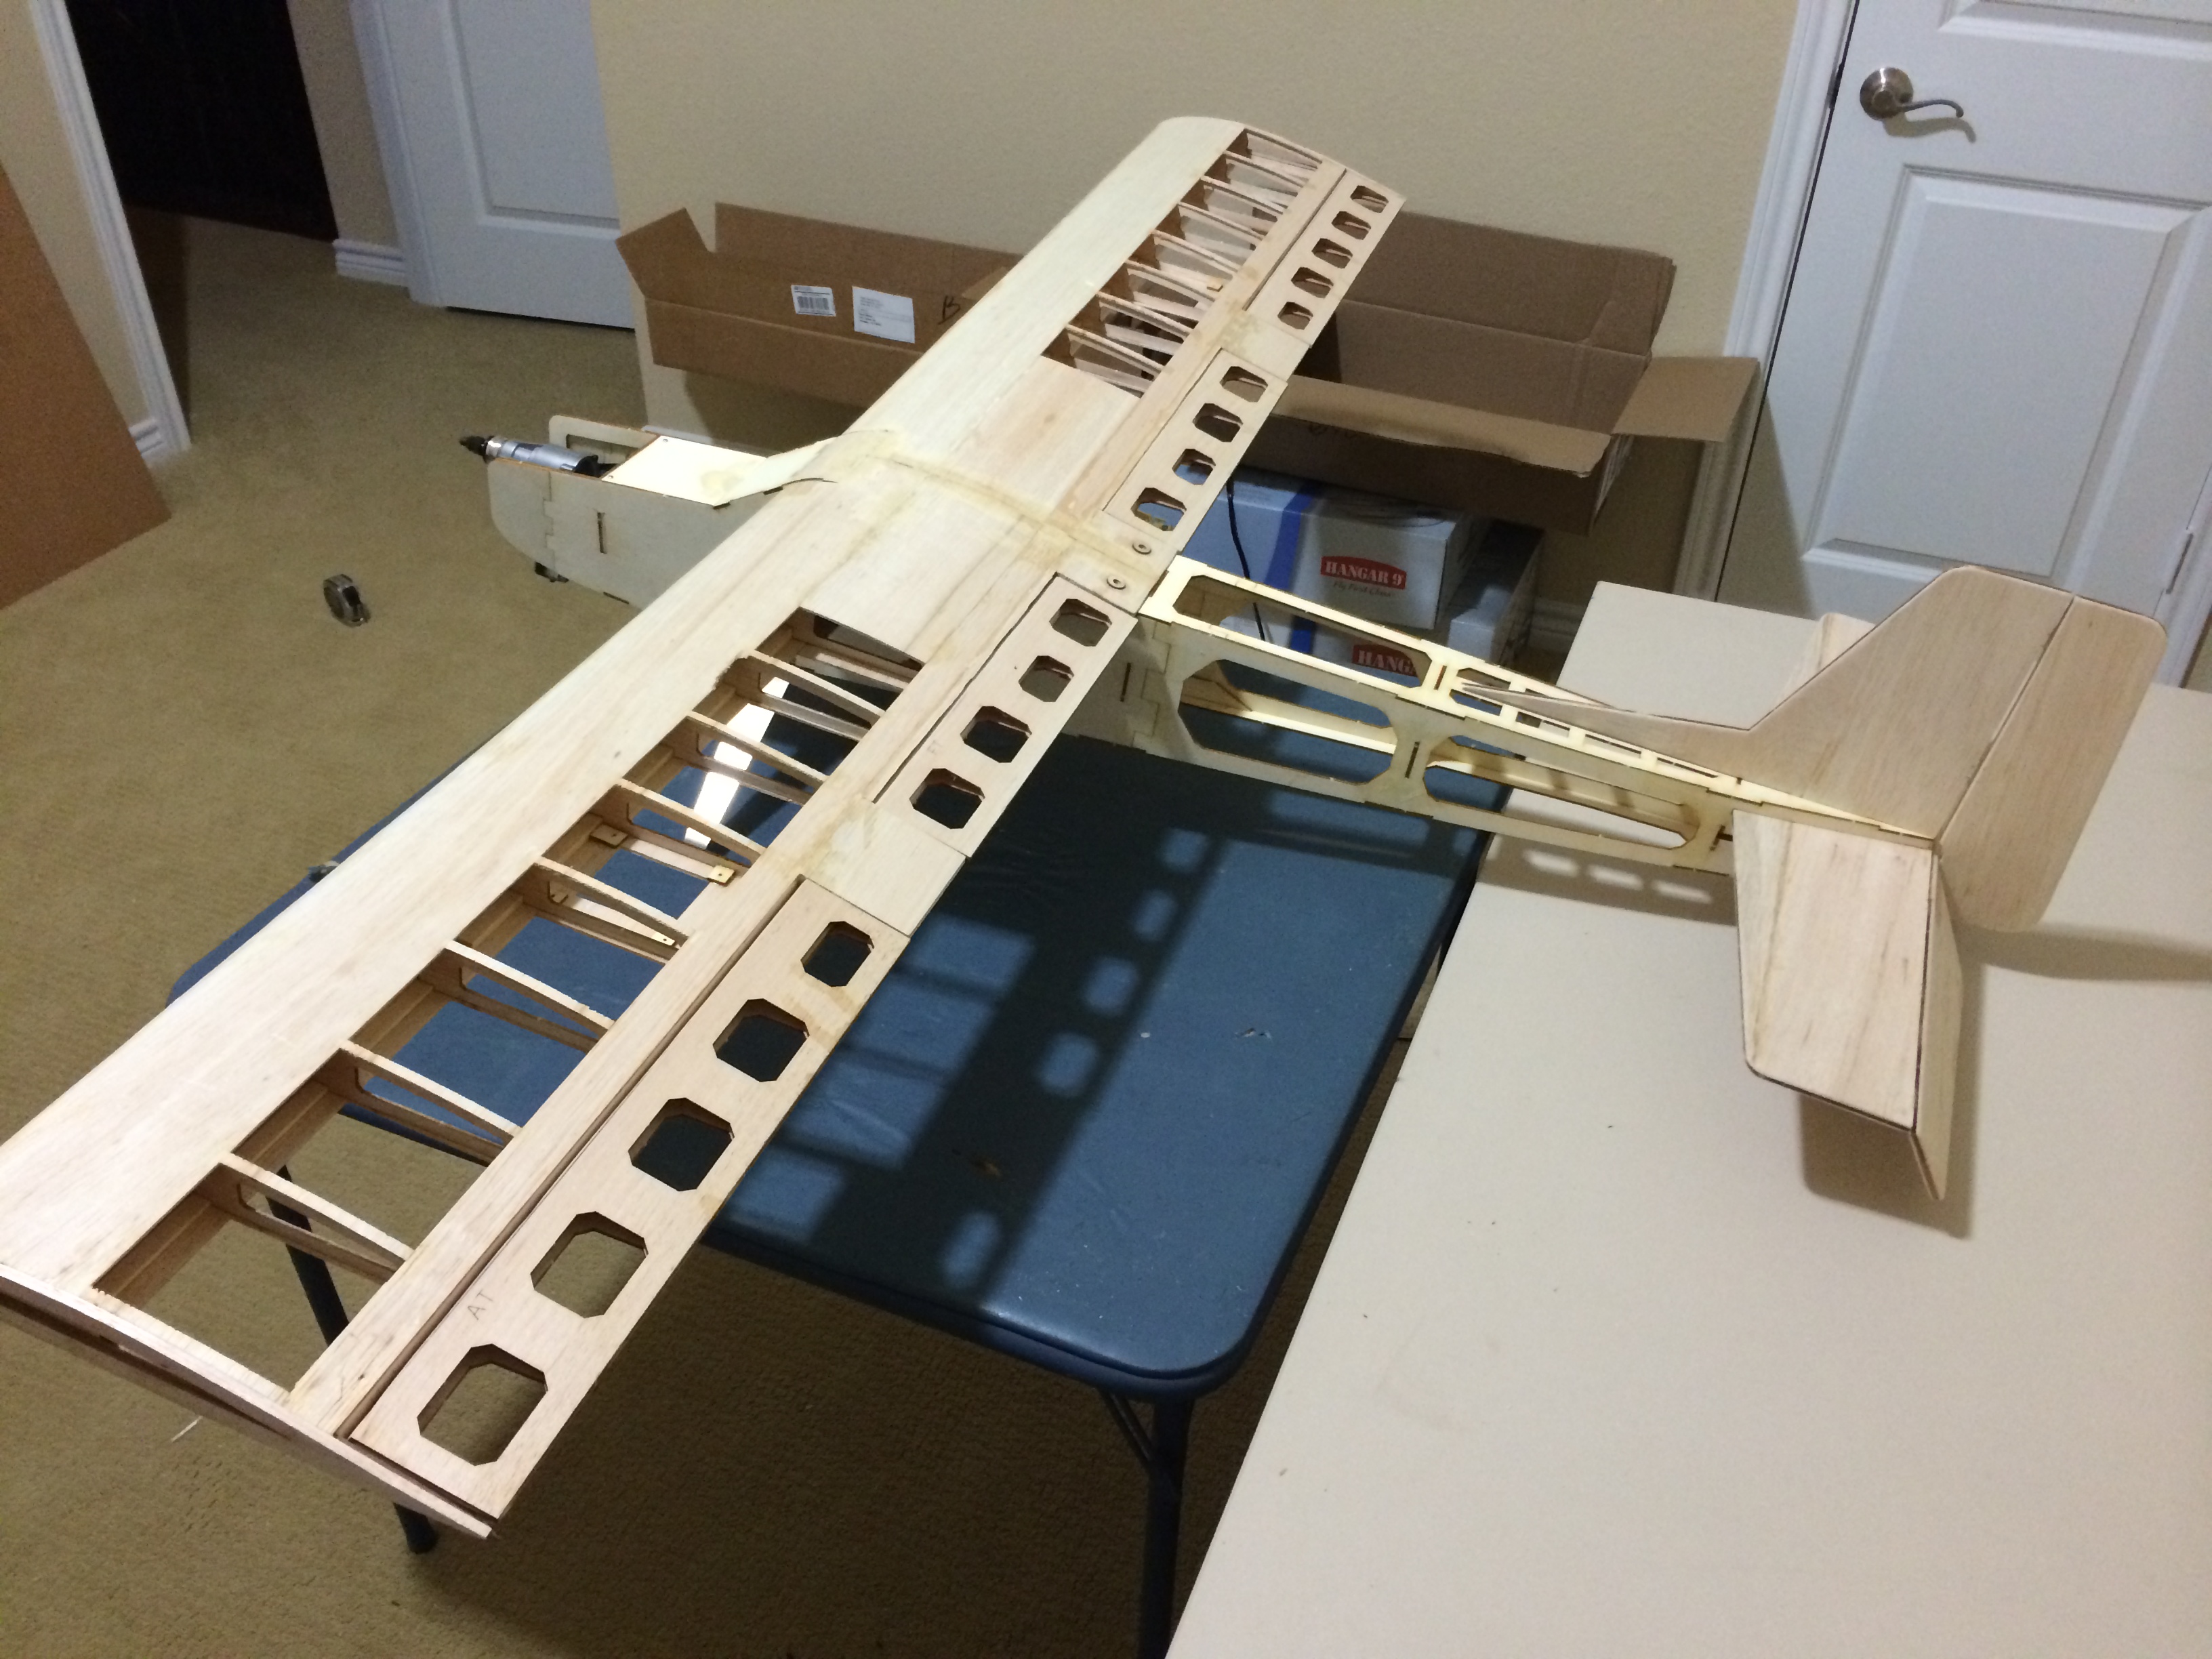
This weekend produced great results. Both wings are now complete and they are joined together. Both flaps and both ailerons are done. I am in the process right now of getting the final assemblies done. I have not been doing as good a job at taking pictures as I would have liked to have been, but below is what I have. In other good news, the servos made it in today, so I now have everything I need to finish. My goal is to maiden Saturday morning and I am definitely on track to make it.
I am impressed with the ease of this build. It is certainly a great (re)introduction into kit building. I can't wait to see how well this thing flies.
I am impressed with the ease of this build. It is certainly a great (re)introduction into kit building. I can't wait to see how well this thing flies.
08-25-2014, 06:22 PM
#11

My Feedback: (9)
Join Date: Jan 2002
Location: Copperas Cove, Tx.
Posts: 552
Likes: 0
Received 0 Likes
on
0 Posts
Glad to see someone building this kit and looking forward to how it turns out. Like you I've had my eye on it for some time. But to complicate matters did you see the Biplane he just introduced!
Good luck on making your maiden due date.
Mike
Good luck on making your maiden due date.
Mike
08-25-2014, 08:35 PM
#13
Member
Thread Starter
Join Date: Sep 2012
Location: Frisco, TX
Posts: 54
Likes: 0
Received 0 Likes
on
0 Posts
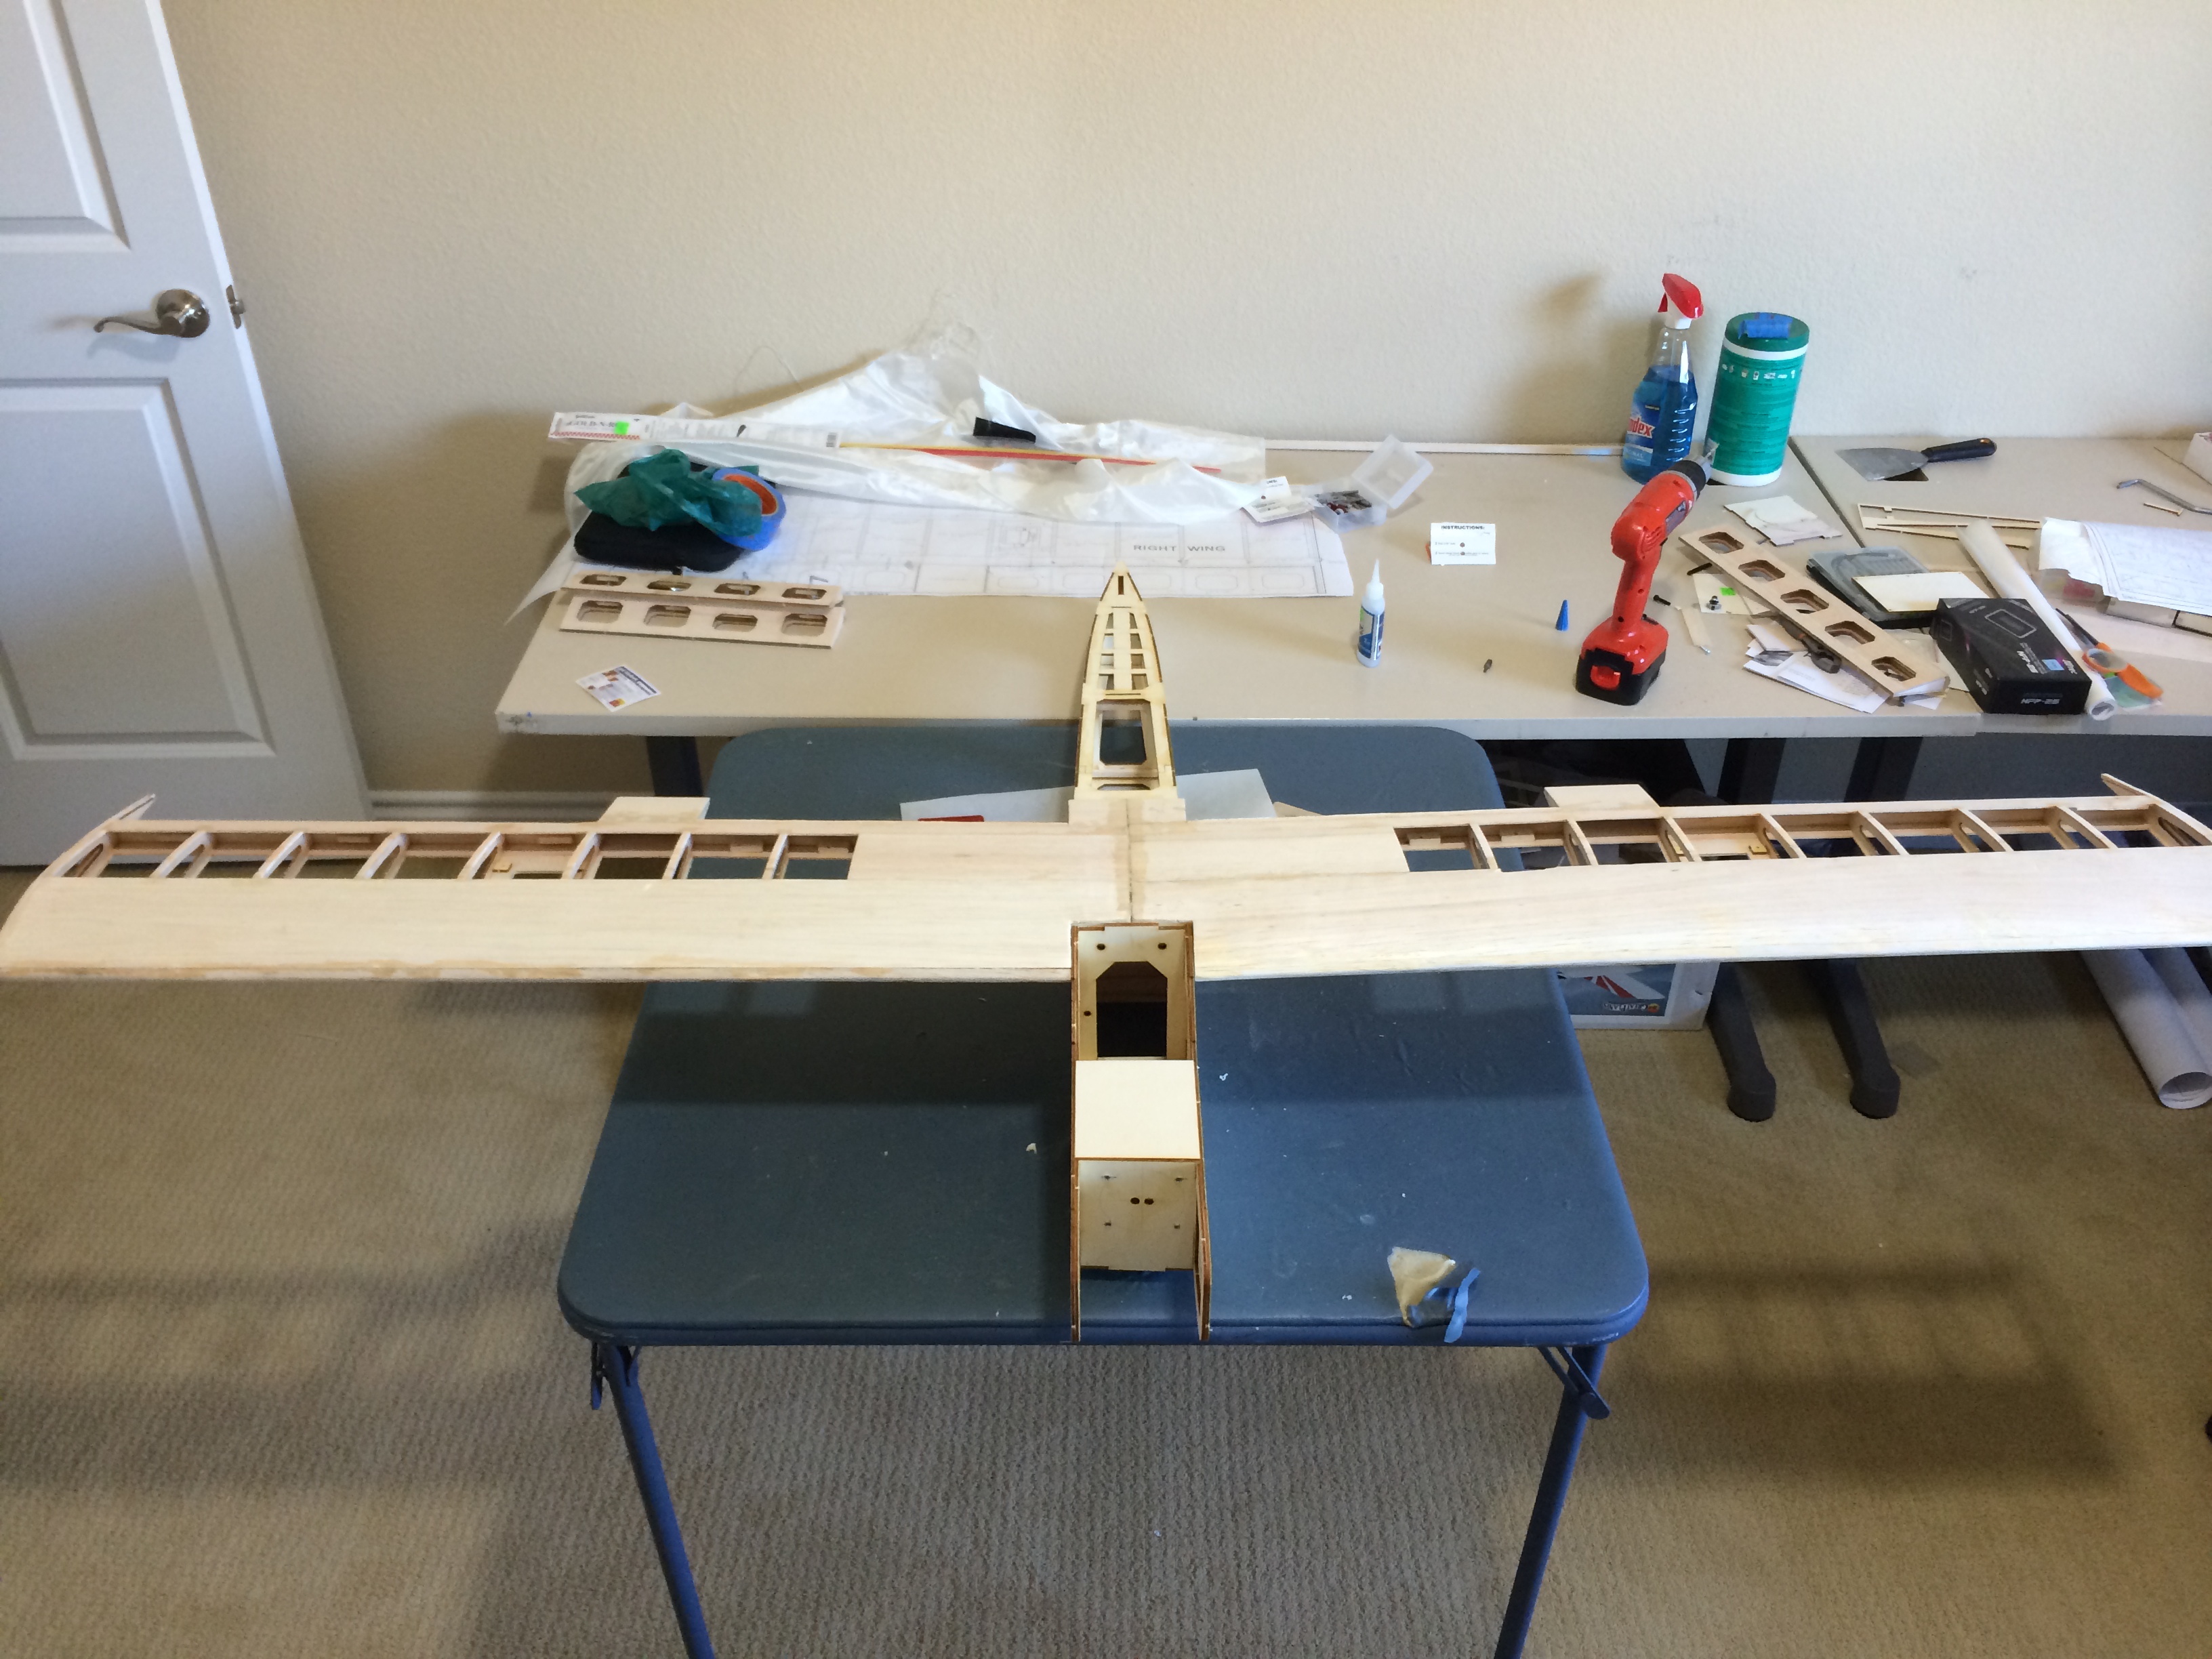
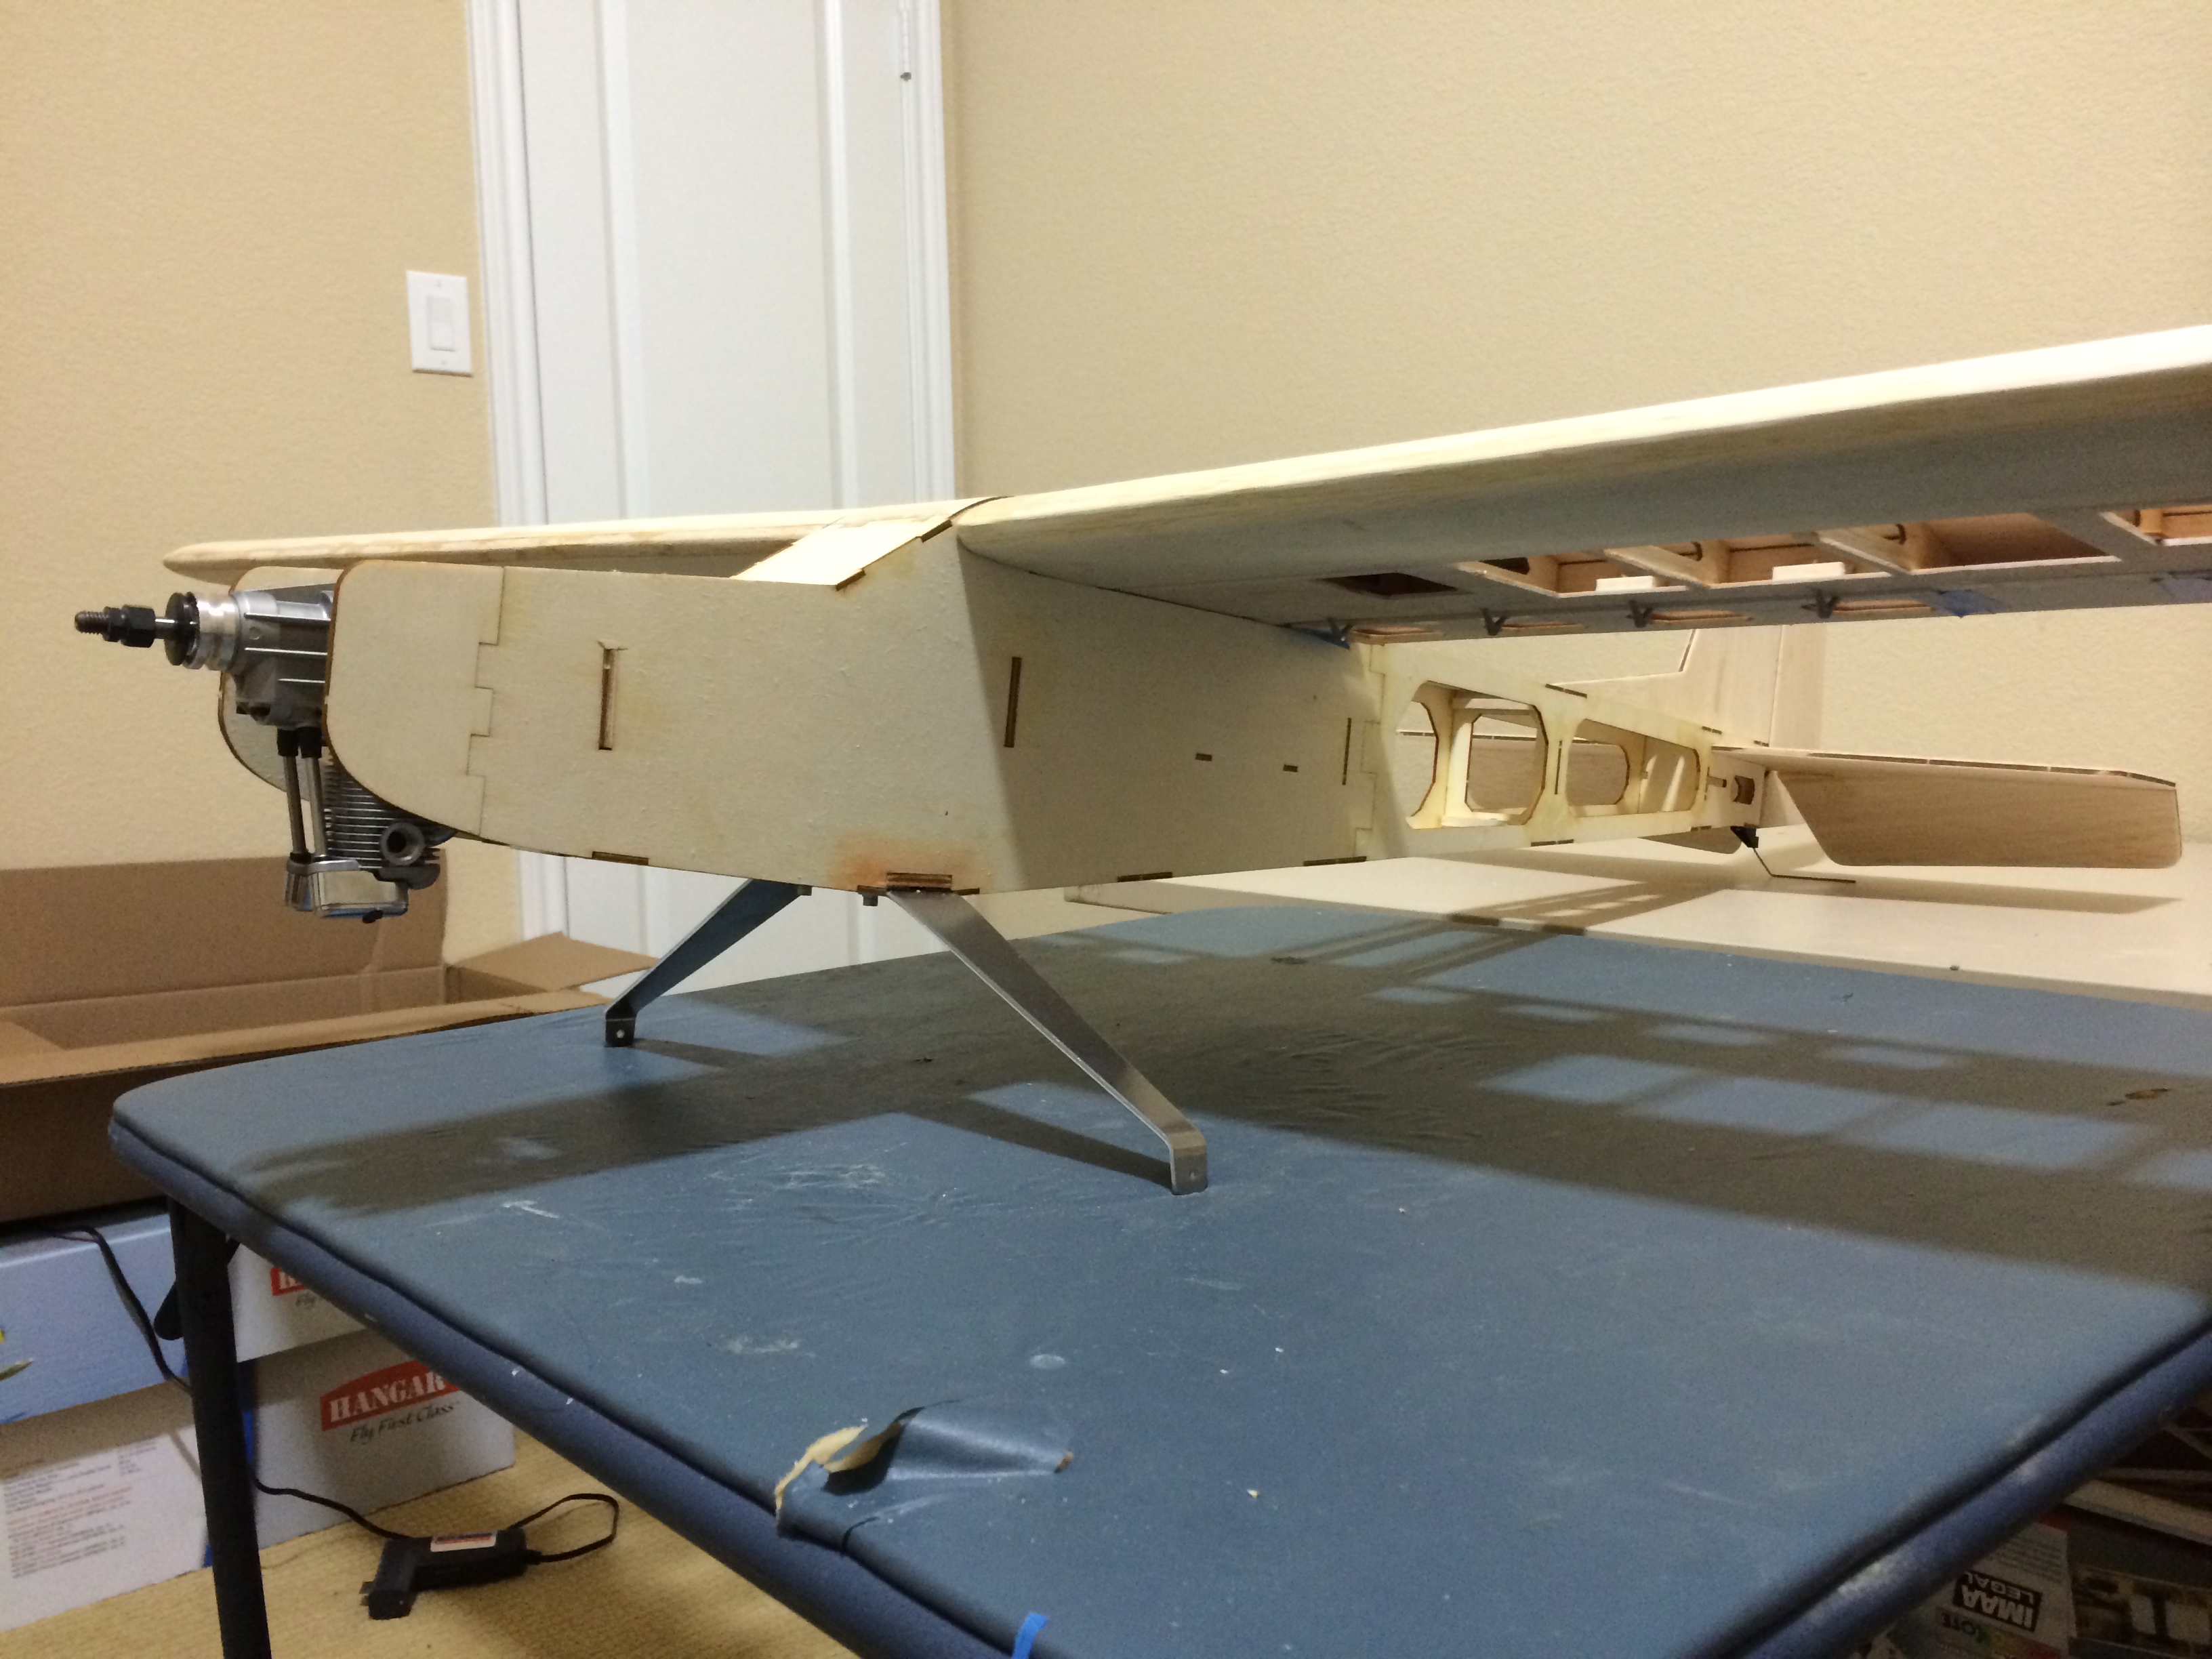
I agree. The air frame is very well built. It is very strong and it should be a VERY rugged plane. The wing is HUGE and the FLAPS are too. I can't wait to fly this thing. That is one reason I am excited to put floats on it and try it off the water too.
I got to put a good chunk of time at it this evening and I am THRILLED with the results. I have all of the construction done and everything is dry fit and looting great. I won't get much done on it tomorrow but my goal is to spend Wednesday and Thursday evenings covering and finishing up the plane and then spend Friday installing servos, push rods and breaking the engine in, and then Saturday morning it should fly. (I will shoot video) I am still working out the finer details of the covering scheme but I have a pretty good idea of what I want it to look like. I hope it turns out as good as it looks in my head!!! :-)
Josh
08-26-2014, 01:09 PM
#14
My Feedback: (9)
Join Date: Jan 2002
Location: Copperas Cove, Tx.
Posts: 552
Likes: 0
Received 0 Likes
on
0 Posts
Wow, ambitious schedule. I'm crossing my fingers you can make it!
I can build fast but covering takes twice as long for me. Its a real love-hate thing. I love the idea of it, and get all motivated to do it, but an hour in I want to be anywhere else. I think its because I'm too detailed and I really hate doing things twice. Like two fuse sides, two ailerons... ugh.
Mike
08-27-2014, 06:24 PM
#16
Member
Thread Starter
Join Date: Sep 2012
Location: Frisco, TX
Posts: 54
Likes: 0
Received 0 Likes
on
0 Posts
The process of covering the plane is continuing. I have the flaps, ailerons, horizontal and vertical stabs, rudder, and half of the wing done. My goal is to finish the wing tonight and then I should have some pictures to show.
I am going to delay the maiden though to Monday. My wife reminded me that she won't be in town this weekend and my maiden flight track record when she is not in attendance is abysmal at best. ;-) I guess my planes like her in the audience. Or maybe subconsciously I do.
I am going to delay the maiden though to Monday. My wife reminded me that she won't be in town this weekend and my maiden flight track record when she is not in attendance is abysmal at best. ;-) I guess my planes like her in the audience. Or maybe subconsciously I do.
08-27-2014, 09:21 PM
#17
Member
Thread Starter
Join Date: Sep 2012
Location: Frisco, TX
Posts: 54
Likes: 0
Received 0 Likes
on
0 Posts
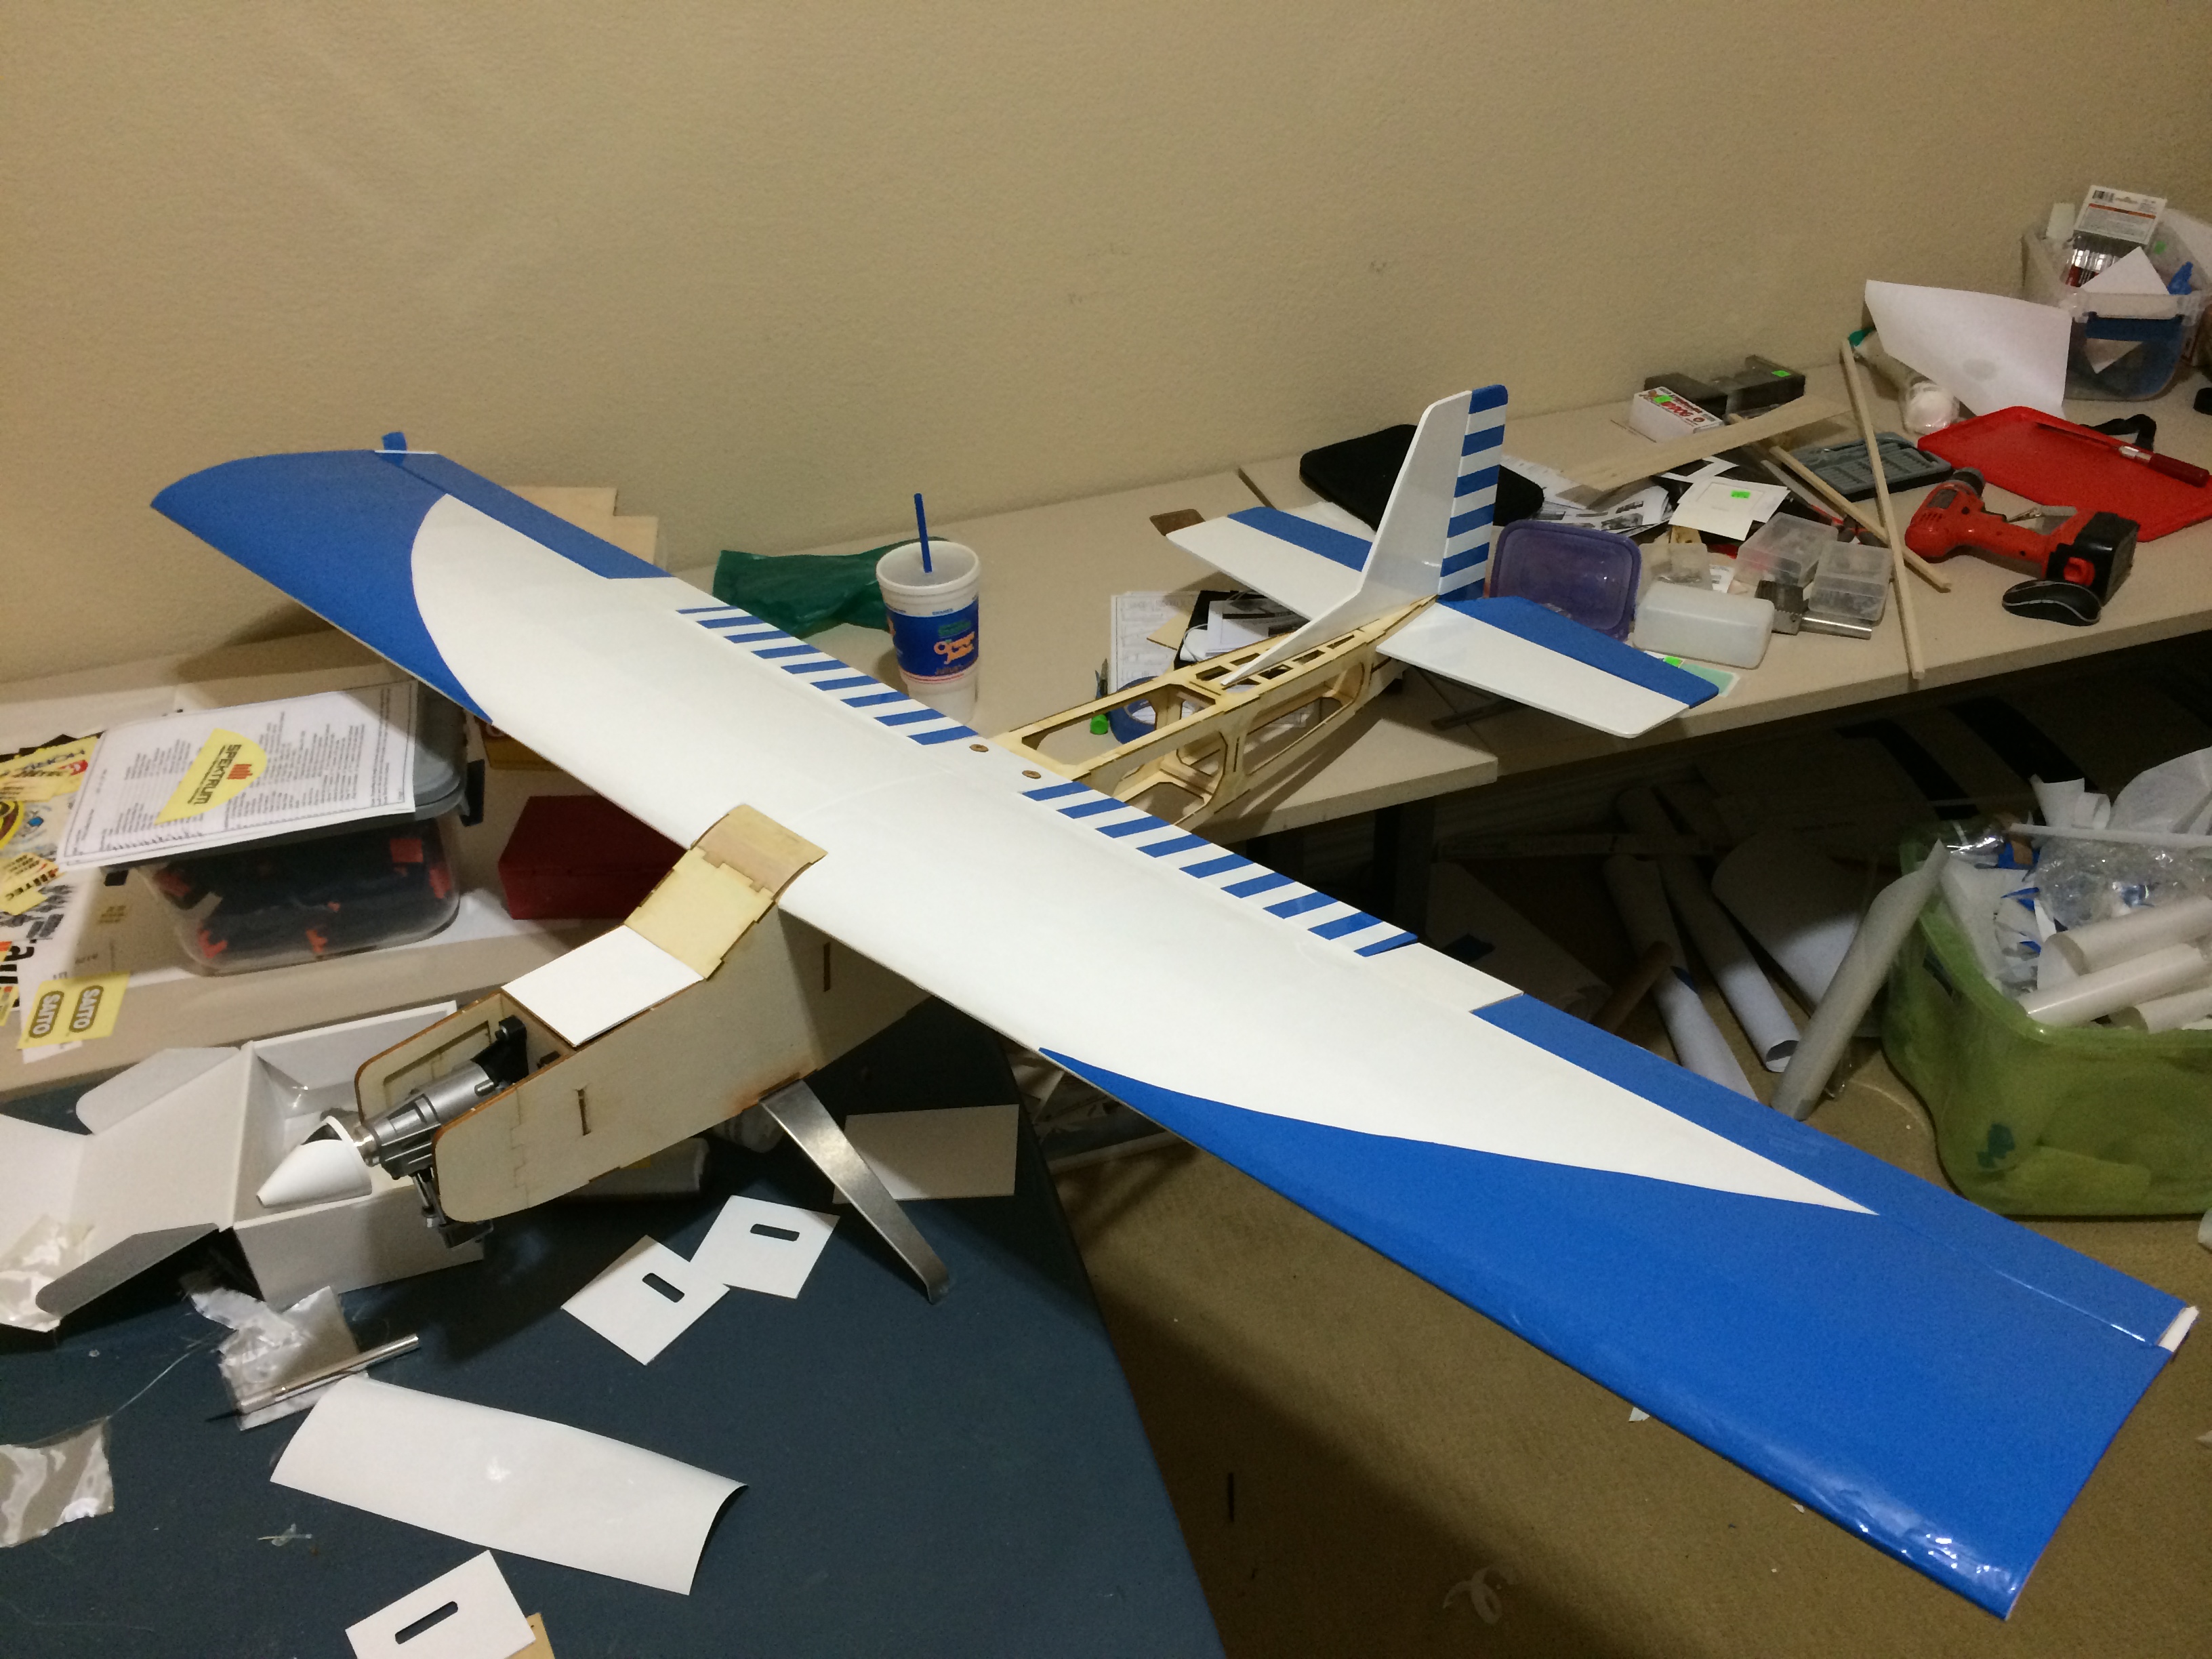
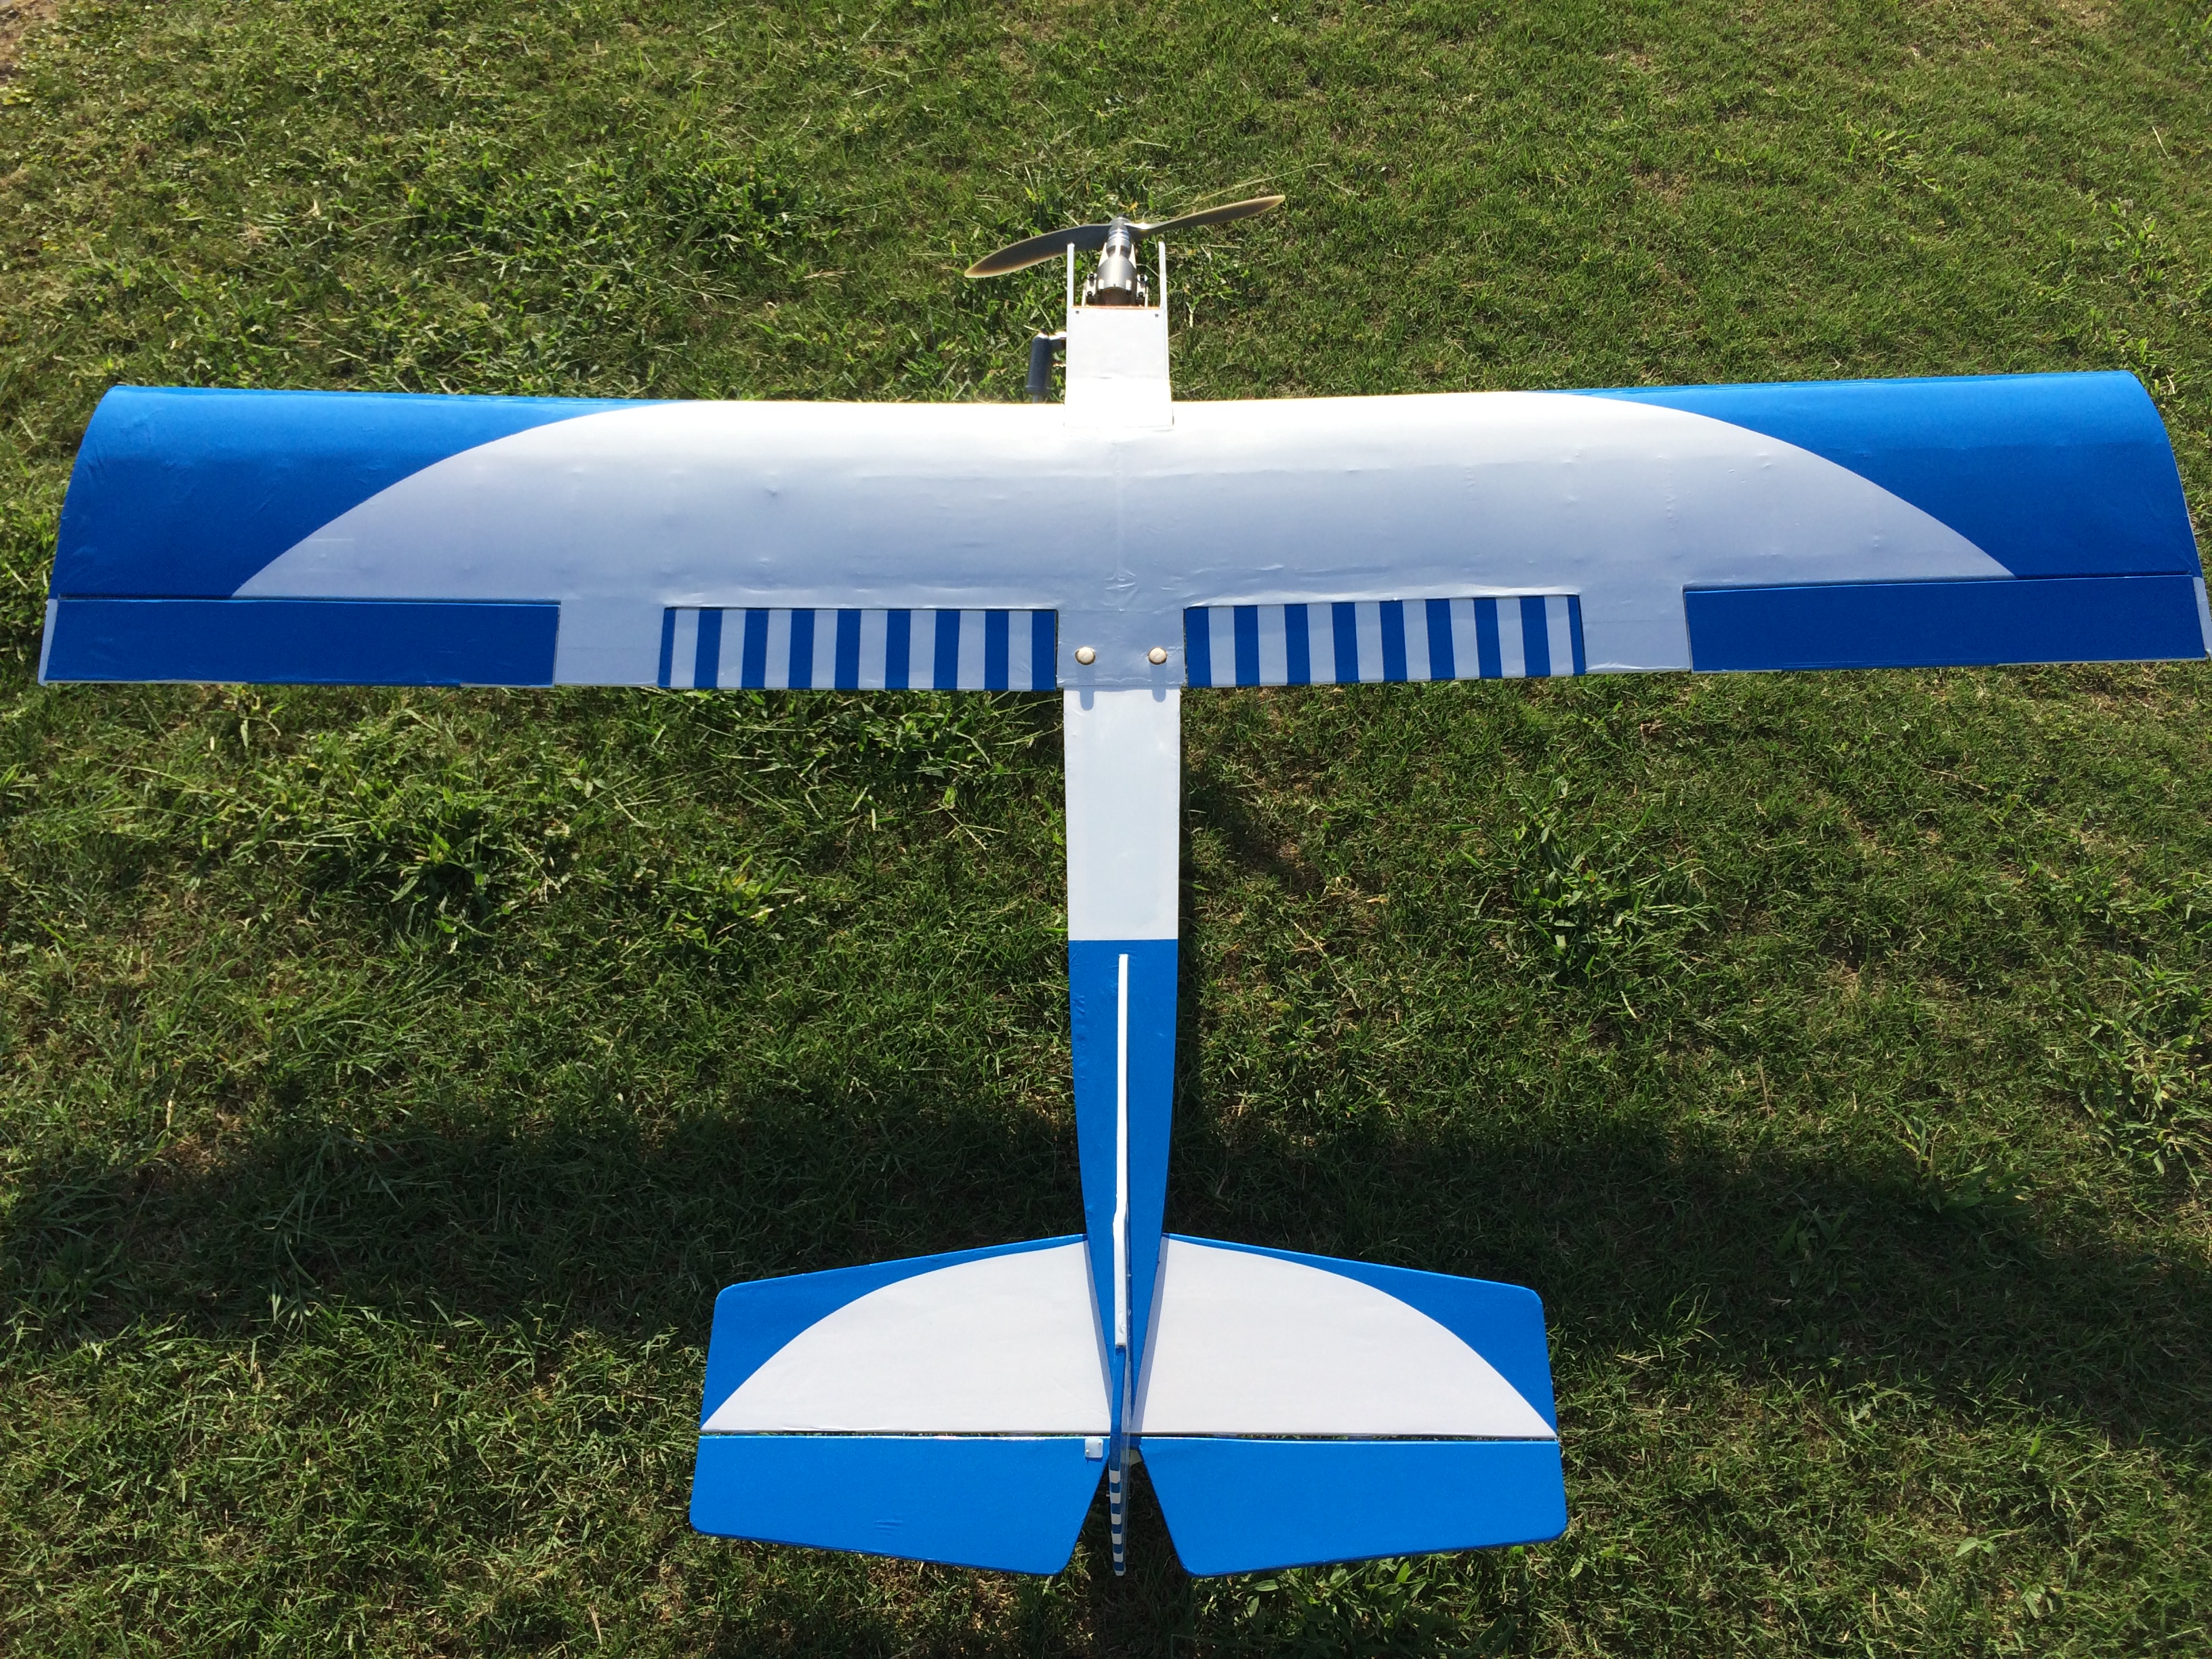
So here is the first look at the covering design. It certainly isn't finished and seeing as to how this is the first design I have done and the first full covering job I have done in FOREVER, I think it is coming together nicely. Still more accents to do and obviously the fuse still needs to be done, but I am pretty happy with the results so far.
08-28-2014, 11:57 AM
#18
My Feedback: (9)
Join Date: Jan 2002
Location: Copperas Cove, Tx.
Posts: 552
Likes: 0
Received 0 Likes
on
0 Posts
Your really moving it along. I'm especially surprised at the detailed covering job your doing. Sweet......! I figured with your time frame a simple two color bing-bang-boom done job.
Mike
Mike
09-01-2014, 10:46 AM
#20
Member
Thread Starter
Join Date: Sep 2012
Location: Frisco, TX
Posts: 54
Likes: 0
Received 0 Likes
on
0 Posts
IT'S FINISHED!!!!!!! I will have picture later but I am just too excited to not post that. It has been crazy, ridiculous hours To get this thing done over the last few days but it's done. I still need to get some time on the engine, but I am still going to try and maiden this evening, wind permitting. It is currently at 20mph and while I will fly in that, doing a maiden in that isn't something I am fond of doing. If it drops to 15 I'm in, otherwise I will push it a day or two.
Mother Nature is in control now.
josh
Mother Nature is in control now.
josh
09-01-2014, 04:06 PM
#21
Member
Thread Starter
Join Date: Sep 2012
Location: Frisco, TX
Posts: 54
Likes: 0
Received 0 Likes
on
0 Posts
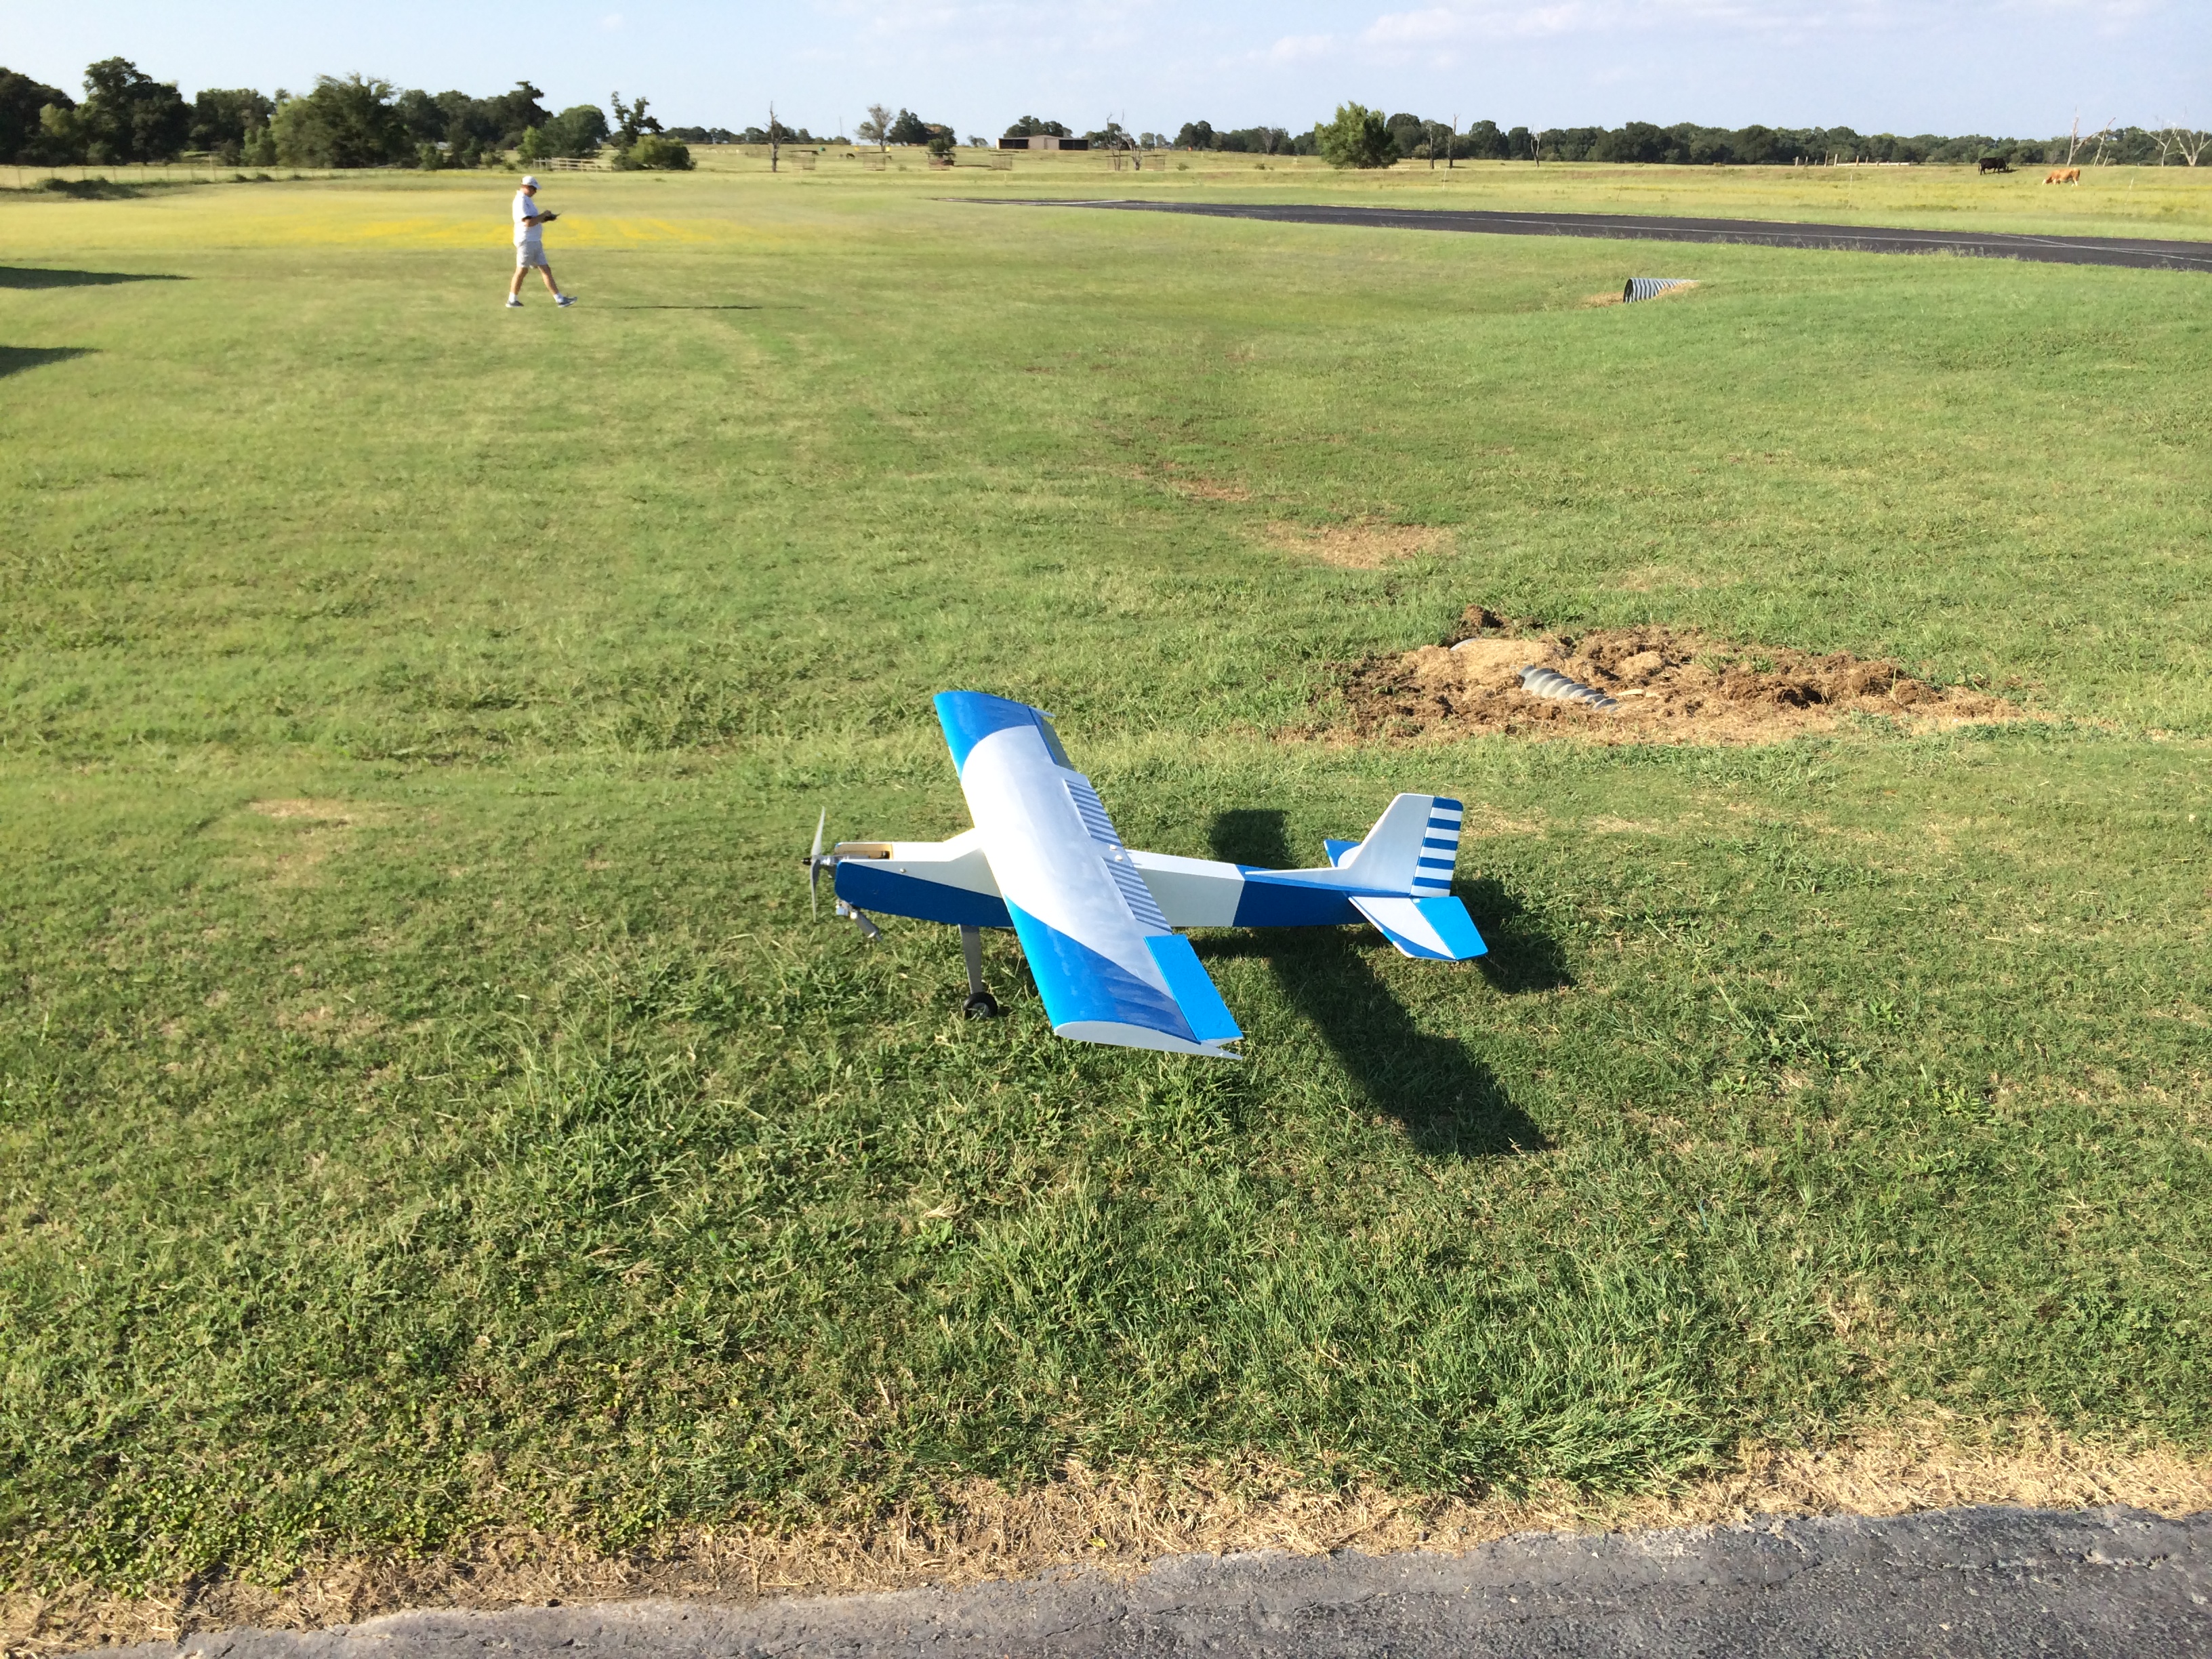
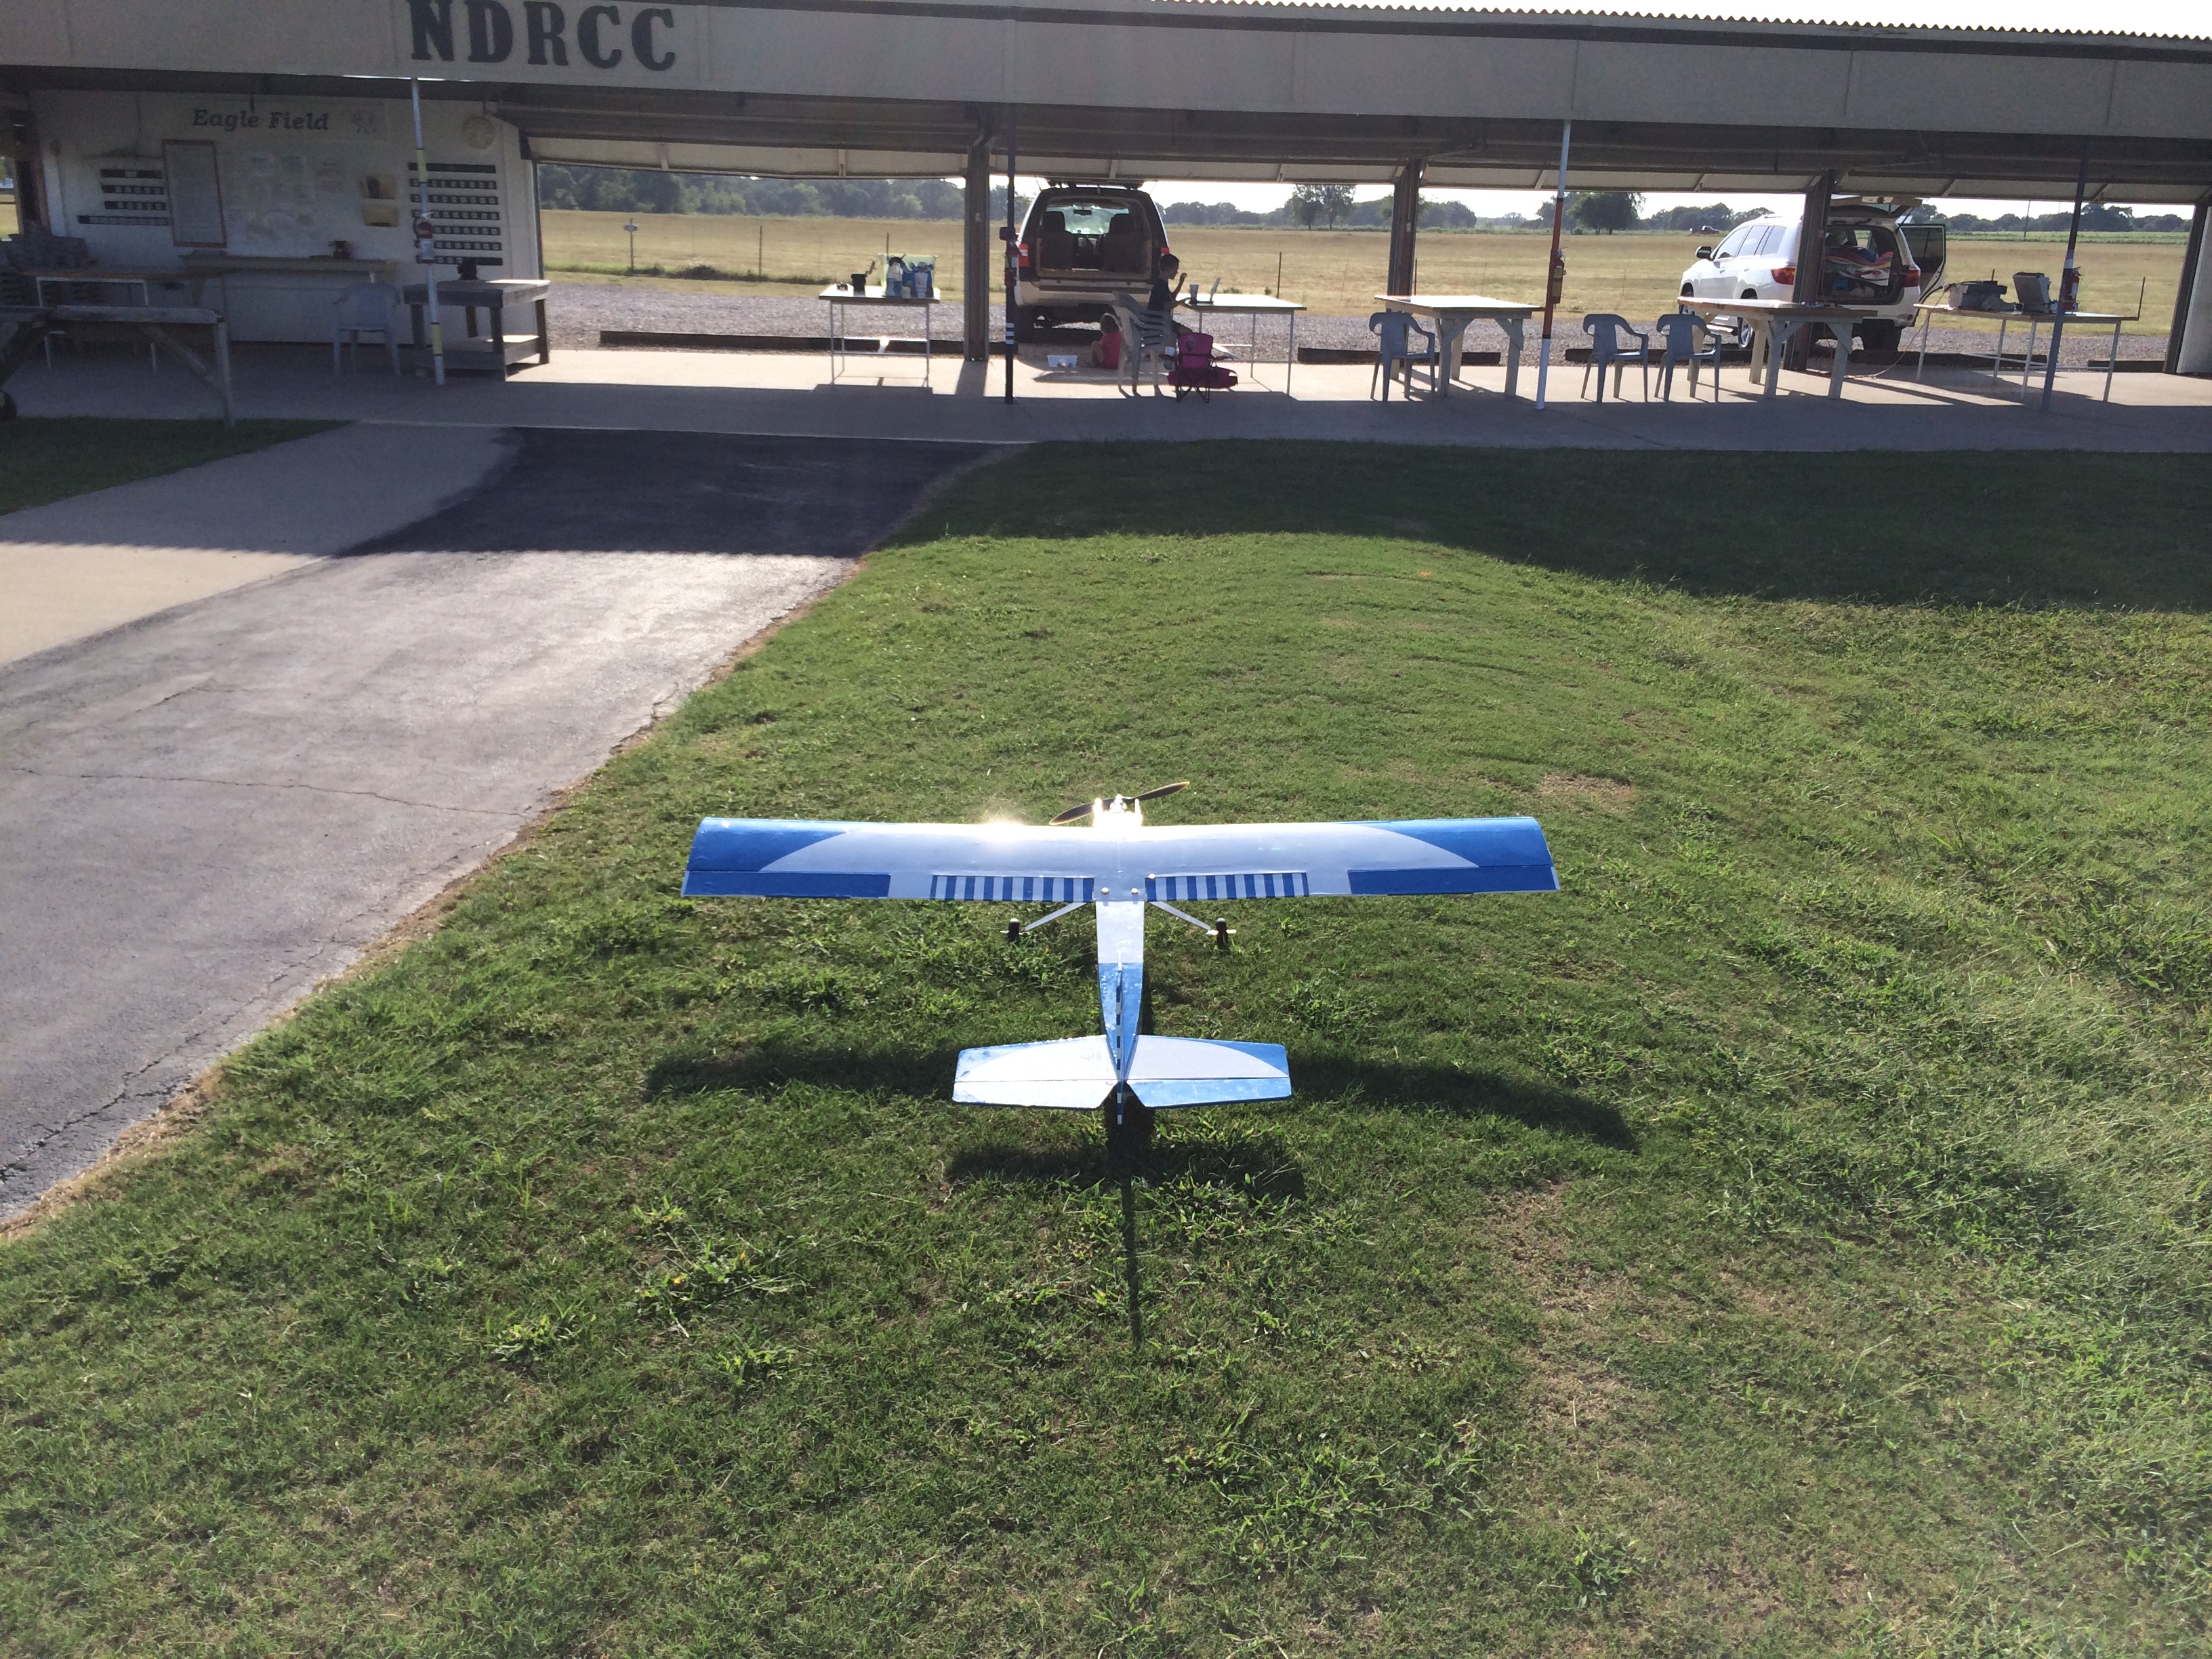
IT FLIES!!!!! And it flies well. I am leaving the field now and I will upload the video tonight after the kiddos are in bed. I will say this, even in a 15mph wind that was gusting to 18 or 20, it's a good flying plane. Can't wait to take it out when the winds are calmer.
09-01-2014, 07:05 PM
#23
Member
Thread Starter
Join Date: Sep 2012
Location: Frisco, TX
Posts: 54
Likes: 0
Received 0 Likes
on
0 Posts
Video just finished uploading to YouTube. Here is the link.
https://www.youtube.com/watch?v=lZJCYbdsoU0
I do have some more work to do on the plane still but I am excited that it has now actually flown. My to do list includes finishing out the trim scheme and placing logos and stickers on the covering. I need to build the bomb bay and install it. I need to get the floats together that will go on the plane and then test mount them. I also need to replace the spinner. I have long used Tru-Turn spinners and for some reason, I decided to use an extra plastic one I had laying around. Dumb move on my part as the spinner broke on me at the field. So I will be ordering a Tru-Turn spinner tomorrow. But most importantly, I need to just fly this thing.
As for its flight characteristics, I simply couldn't be happier. The plane balanced perfectly, both longitudinally and laterally without the need for any weight. I was amazed!!!! The engine has plenty of power for the plane but it doesn't feel over powered to me. Take off was quick (15-20 mph wind helps but I was still surprised) and the climb out was true. It took a bit of down elevator trim, but that was the only trim adjustment I needed to get straight level flight. The flaps really slowed things down too. In fact, at full flaps, I was able to get the plane to fly backwards in the wind. I am running a lot of flaps in the full down position, so I under estimated the amount of elevator I needed to mix in but that was easily corrected after landing.
As you see in the video, landing was a bit tricky with the winds up as the huge wing just loved to float. On a calmer day and with some expo dialed in (I didn't have any in for the maiden to get a feel for the controls), I fully expect that it will make for a much smoother landing.
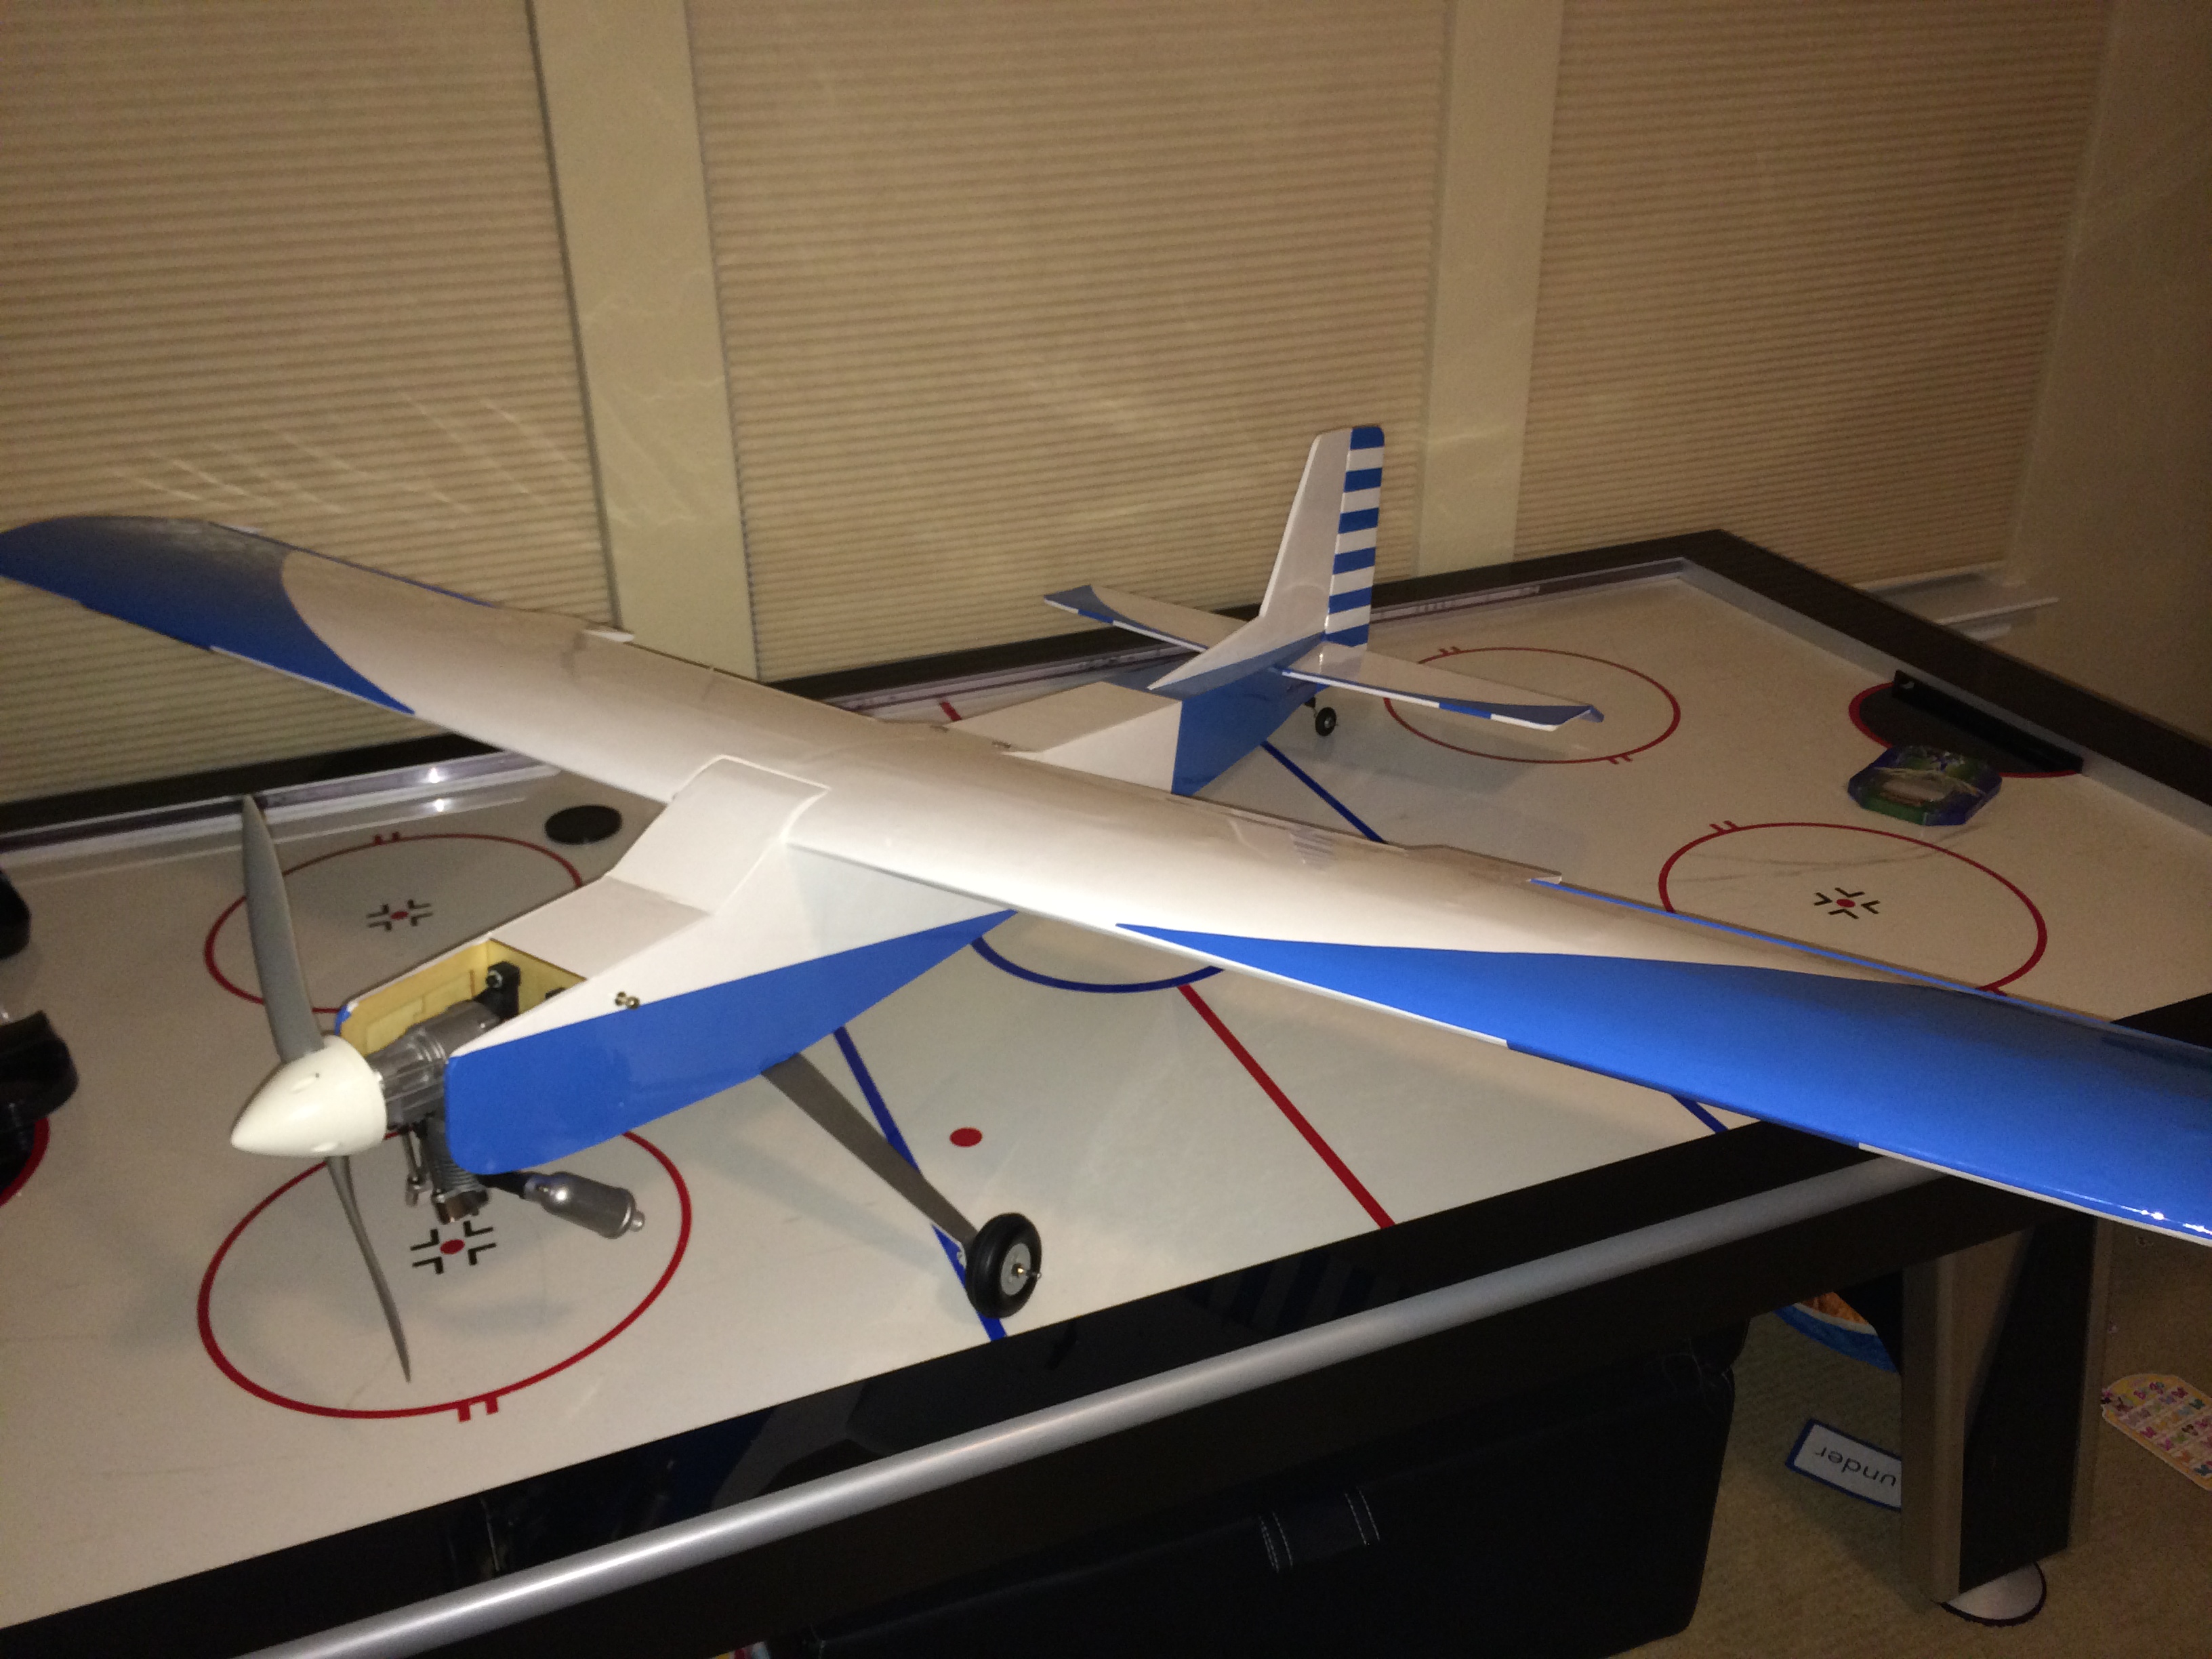
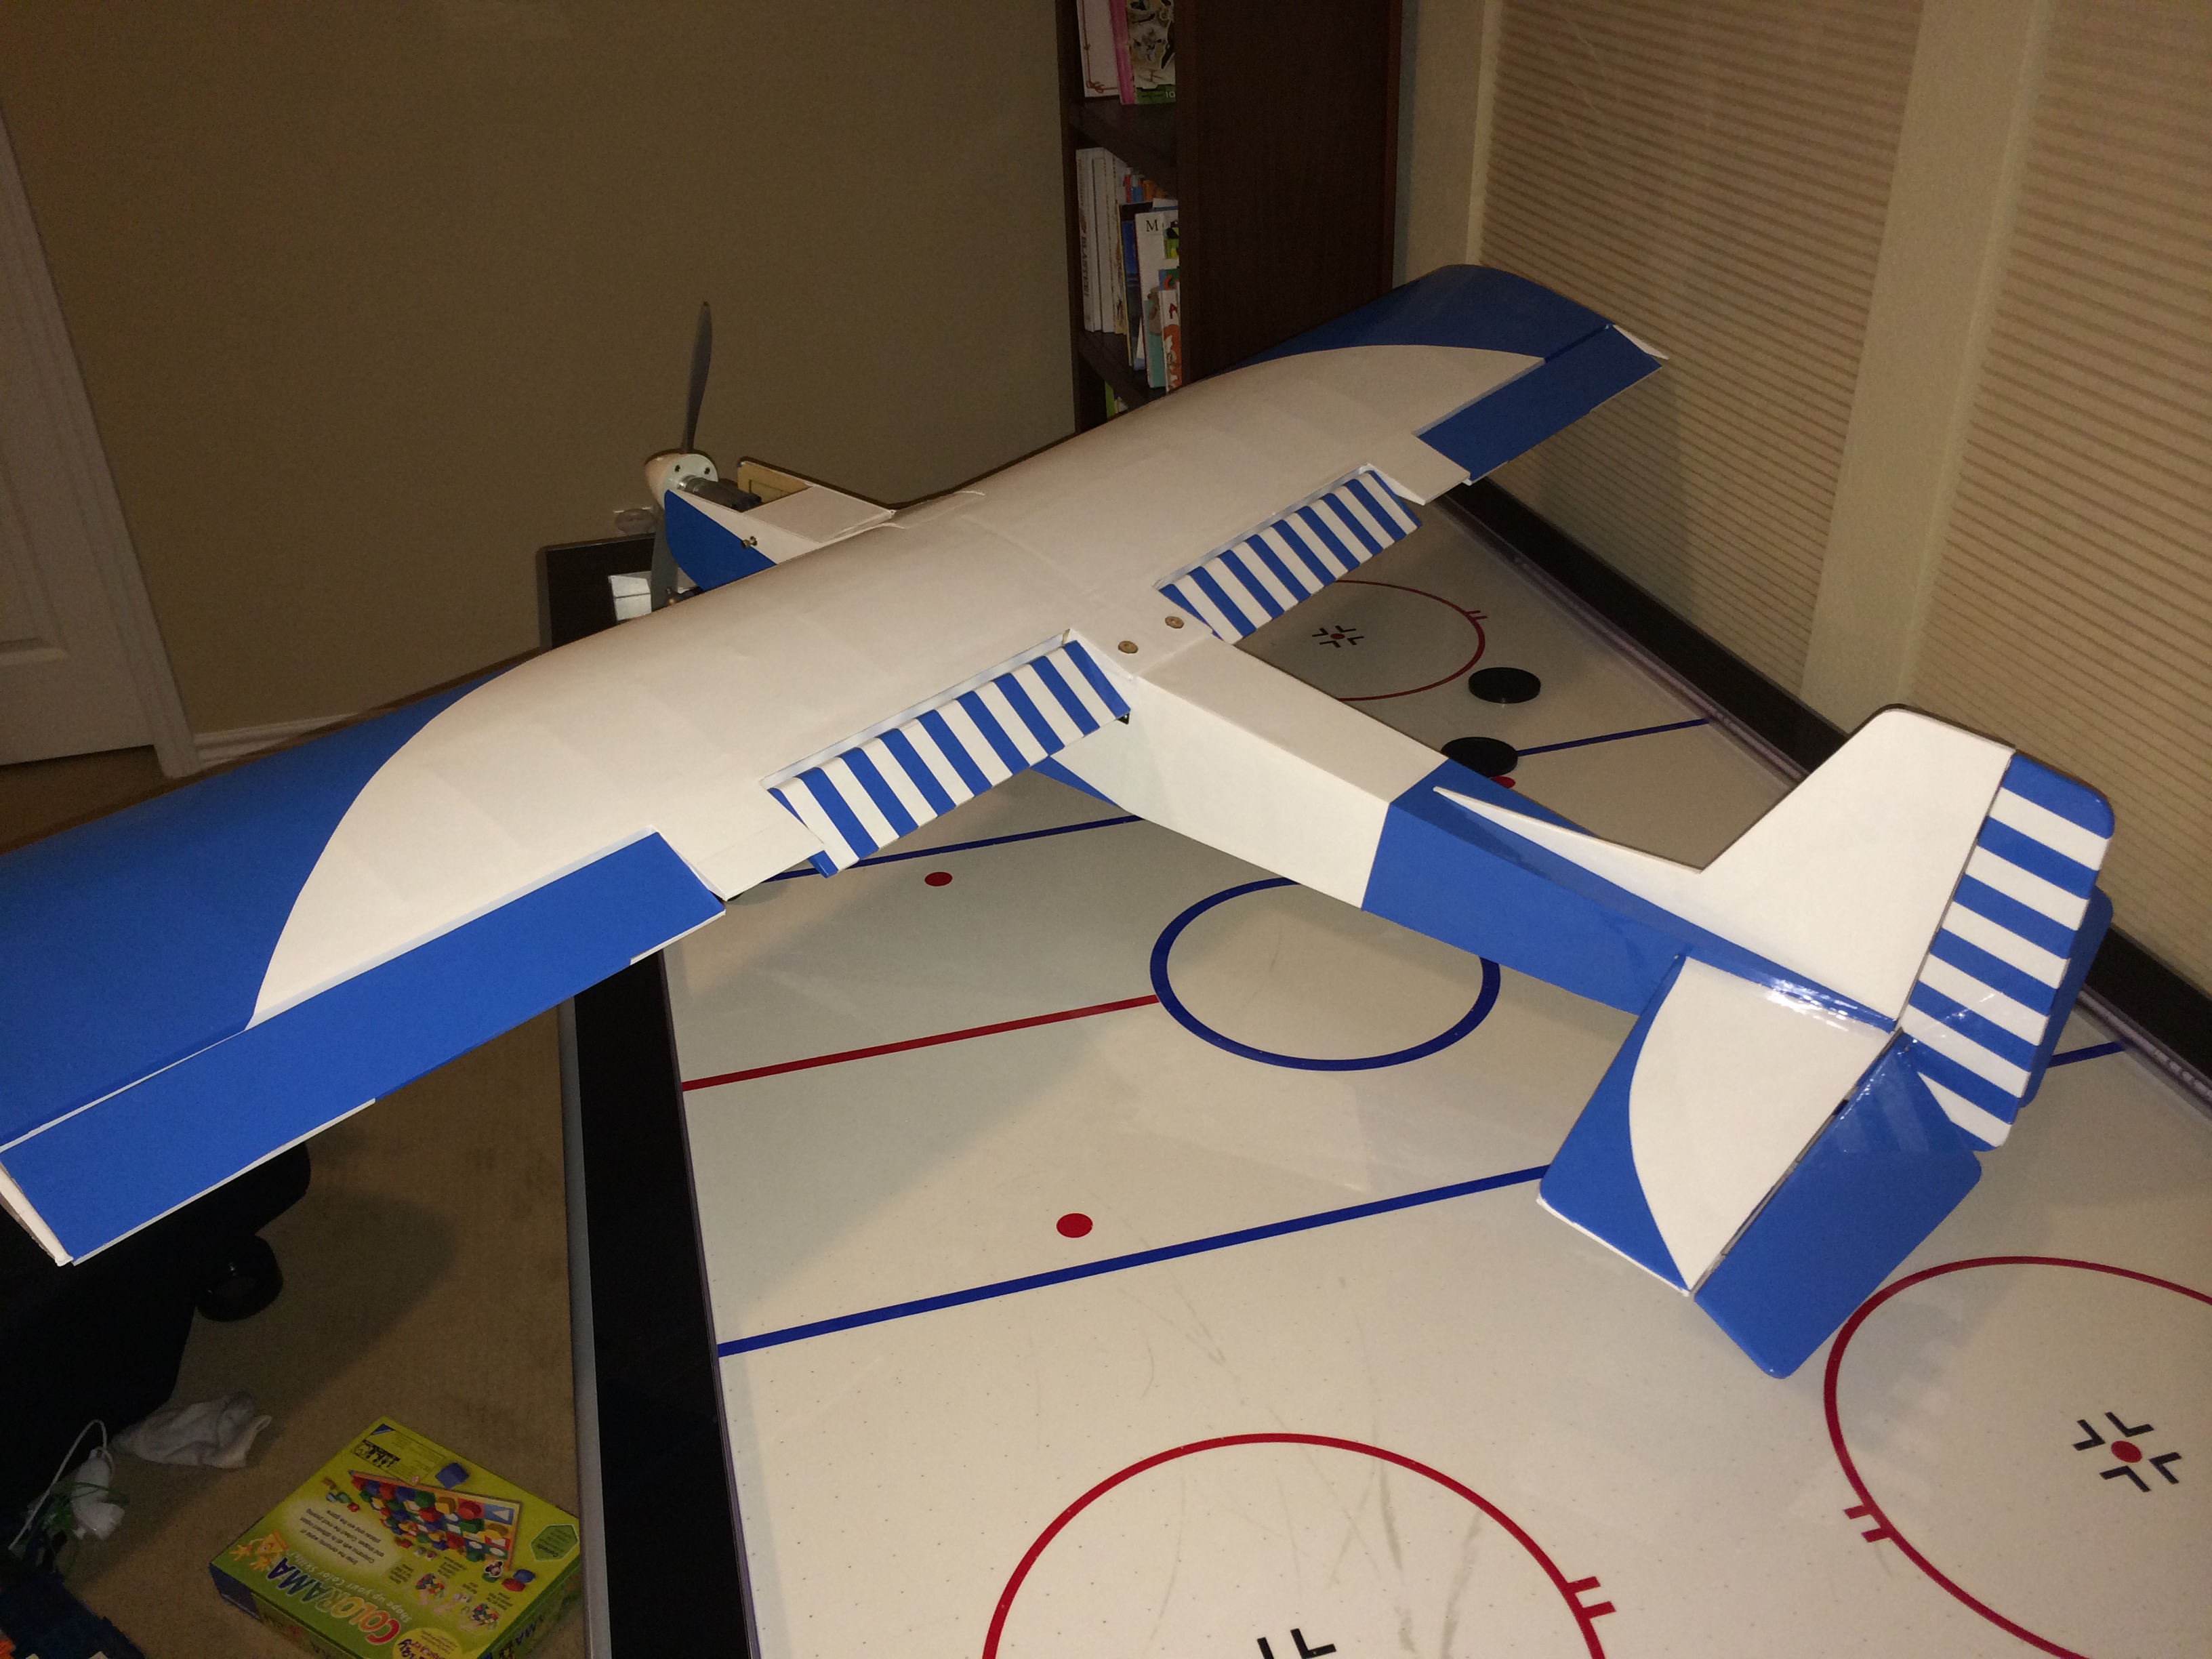
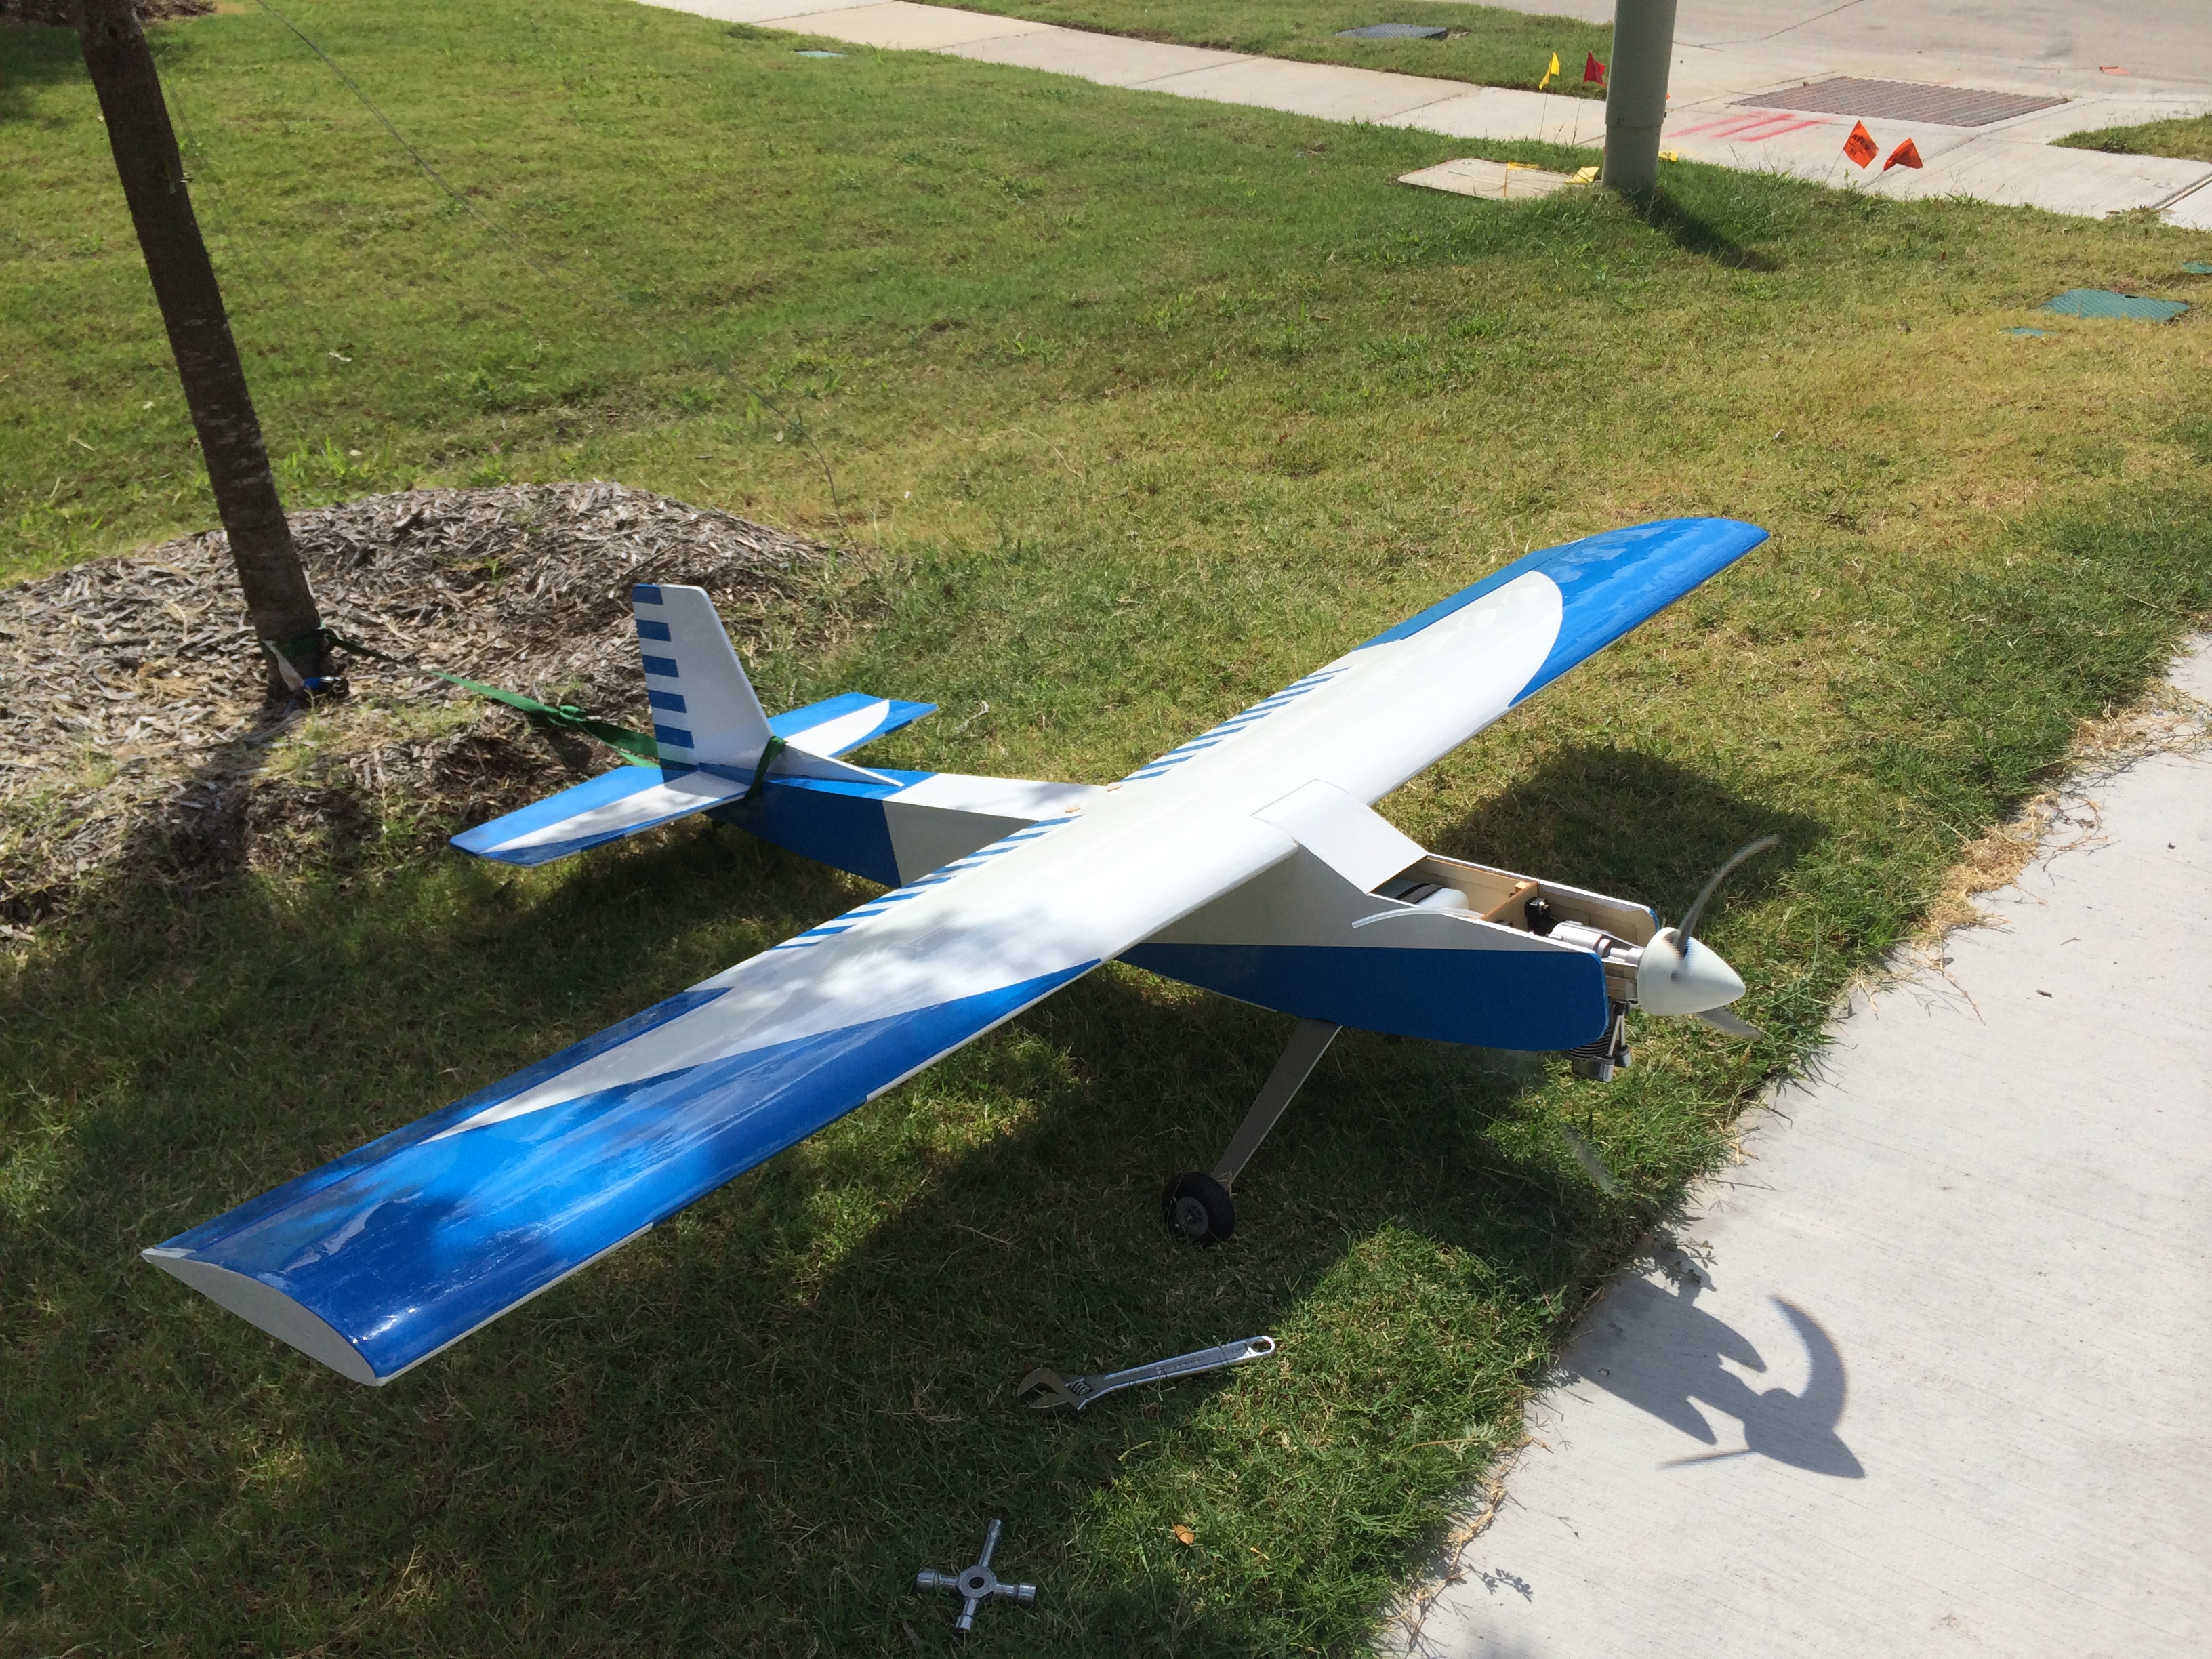
All in all, I have to say this plane is a winner. If you are looking for a 60 size plane that is fun and easy to fly, is durable and is tailored to exactly how you want it, this is it. I will keep posting on here as I make changes to the plane and keep breaking it in. Our club also has a float fly in a few weeks, so I will be able to tell you how it performs off water soon too. I am looking forward to it. Thanks again, and thanks to my wife for the good karma and for shooting the video. Also, here are some pics of the finished plane, during the engine break in and just prior to the maiden.

https://www.youtube.com/watch?v=lZJCYbdsoU0
I do have some more work to do on the plane still but I am excited that it has now actually flown. My to do list includes finishing out the trim scheme and placing logos and stickers on the covering. I need to build the bomb bay and install it. I need to get the floats together that will go on the plane and then test mount them. I also need to replace the spinner. I have long used Tru-Turn spinners and for some reason, I decided to use an extra plastic one I had laying around. Dumb move on my part as the spinner broke on me at the field. So I will be ordering a Tru-Turn spinner tomorrow. But most importantly, I need to just fly this thing.
As for its flight characteristics, I simply couldn't be happier. The plane balanced perfectly, both longitudinally and laterally without the need for any weight. I was amazed!!!! The engine has plenty of power for the plane but it doesn't feel over powered to me. Take off was quick (15-20 mph wind helps but I was still surprised) and the climb out was true. It took a bit of down elevator trim, but that was the only trim adjustment I needed to get straight level flight. The flaps really slowed things down too. In fact, at full flaps, I was able to get the plane to fly backwards in the wind. I am running a lot of flaps in the full down position, so I under estimated the amount of elevator I needed to mix in but that was easily corrected after landing.
As you see in the video, landing was a bit tricky with the winds up as the huge wing just loved to float. On a calmer day and with some expo dialed in (I didn't have any in for the maiden to get a feel for the controls), I fully expect that it will make for a much smoother landing.
All in all, I have to say this plane is a winner. If you are looking for a 60 size plane that is fun and easy to fly, is durable and is tailored to exactly how you want it, this is it. I will keep posting on here as I make changes to the plane and keep breaking it in. Our club also has a float fly in a few weeks, so I will be able to tell you how it performs off water soon too. I am looking forward to it. Thanks again, and thanks to my wife for the good karma and for shooting the video. Also, here are some pics of the finished plane, during the engine break in and just prior to the maiden.
09-01-2014, 08:01 PM
#25

My Feedback: (-1)
That was fun, being color blind those aren't my color choices and I had to really look hard to see it even on your approaches but once it was over the runway I saw it very well.
Great flying plane and a well designed kit. I would keep it as a top choice if I ever build another trainer.
I was really impressed with how fun it is with the flaps down. I think you really have a winner!! Nice Job!!
Great flying plane and a well designed kit. I would keep it as a top choice if I ever build another trainer.
I was really impressed with how fun it is with the flaps down. I think you really have a winner!! Nice Job!!

