


SIG Somethin Extra Build - 2nd Plane
 02-16-2015, 05:40 PM
#76

Thread Starter
Join Date: Sep 2014
Location: Scottsdale, AZ
Posts: 169
Likes: 0
Received 0 Likes
on
0 Posts
I have not thought too much about mounting. I figured I would add blocks to the face of the firewall and screw in from the sides. I have checked into some other methods but I am not sure I understand the bracket method. I would prefer something as hidden as possible. It's kind of a shame to mess the outside up with screws after working so hard on the forward appearance.
If you have any pics that illustrate a different attachment, please send.
As for progress, I started under sizing the plug today. In the following pics, I worked on bringing everything in 1/16" and making sure edges are rounded. I assume sharp inside corners fracture easier. When sanding this down, you need to think in terms of the thickness of the cowl that will result.
The first step was to sand the sides, top and bottom, just like before. Then I worked on the nose of the cowl followed by creating the transition at the prior size. The fun part is I get to do this all over again after the FG process is finished. That's where the shaping really counts.


I created the opening for the air scoop and finished with a thin coat of spackle to fill in the voids in the foam. I would like to give the surface some strength to save the plug - something thin that doesn't eat foam. I had planned to give it several coats of paste wax. But the plug has a slight undercut for the scoop and I would need to have this in at least 2 pieces to be able to pull it out after FGing.


If you have any pics that illustrate a different attachment, please send.
As for progress, I started under sizing the plug today. In the following pics, I worked on bringing everything in 1/16" and making sure edges are rounded. I assume sharp inside corners fracture easier. When sanding this down, you need to think in terms of the thickness of the cowl that will result.
The first step was to sand the sides, top and bottom, just like before. Then I worked on the nose of the cowl followed by creating the transition at the prior size. The fun part is I get to do this all over again after the FG process is finished. That's where the shaping really counts.
I created the opening for the air scoop and finished with a thin coat of spackle to fill in the voids in the foam. I would like to give the surface some strength to save the plug - something thin that doesn't eat foam. I had planned to give it several coats of paste wax. But the plug has a slight undercut for the scoop and I would need to have this in at least 2 pieces to be able to pull it out after FGing.
 02-17-2015, 08:18 AM
#77

Bob, I know some people use packing tape-the clear stuff to cover the mold which makes the mold release easier. I've just tried spraying my plaster molds with epoxy appliance paint (Lowes) with excellent results. I don't know what it does to foam though. For me, I'd just FG over the foam and dig out the foam after it dries. If you want to make more cowls like this one, you'd use the new FG cowl to make more anyway, not the foam cowl. Looking good. I'll see if I can snag a pic of a cowl with molded bracket for you.
Rick
Rick
02-17-2015, 11:53 AM
#78
My Feedback: (-1)
Dig out?? I have just used acetone and it removes the foam in seconds. It does leave behind the glue you used to glue the foam blocks and those need to be scraped or cut out. Lots of things will remove the foam in a hurry. When we made forms for scales we removed the foam with gas.
02-17-2015, 12:17 PM
#79
Yea, I know some people melt the foam out. There's just something that seems so toxic about that. I just choose a more environmentally compatible solution.
To each their own.
Rick
To each their own.
Rick
02-17-2015, 07:52 PM
#81
Thread Starter
Join Date: Sep 2014
Location: Scottsdale, AZ
Posts: 169
Likes: 0
Received 0 Likes
on
0 Posts
Living in downtown Milwaukee, I'm not sure where I would go with the leftovers. I realize now that the plug would not do me much good unless it was prestine. I'd rather make a mold from the finished cowl.


I did some final finish sanding to 320 grit. I have two coats of wax on. (Wax on, wax off). One more to go. I added a paint stick inside with some glue so I can hold it better or mount it in a vise, etc.


You'll notice the rings of the ply are a bit off center. This is because the face was slightly out of alignment, and while this will be a bigger concern in the finished cowl (having a nice, uniform gap between the face of the cowl and the back of the spinner), I wanted to make sure the thickness was uniform.
During the whole process of sanding the cowl, I was always trying to think about wall thickness, inside radius of corners, etc. I picked up a good pair of scissors, so I expect to cut the pieces tomorrow and start glossing. I have Z-poxy and I plan to use a 1:1 ratio of hardener & resin, mix and add alcohol at a 1:1 ratio to the epoxy.
I did some final finish sanding to 320 grit. I have two coats of wax on. (Wax on, wax off). One more to go. I added a paint stick inside with some glue so I can hold it better or mount it in a vise, etc.
You'll notice the rings of the ply are a bit off center. This is because the face was slightly out of alignment, and while this will be a bigger concern in the finished cowl (having a nice, uniform gap between the face of the cowl and the back of the spinner), I wanted to make sure the thickness was uniform.
During the whole process of sanding the cowl, I was always trying to think about wall thickness, inside radius of corners, etc. I picked up a good pair of scissors, so I expect to cut the pieces tomorrow and start glossing. I have Z-poxy and I plan to use a 1:1 ratio of hardener & resin, mix and add alcohol at a 1:1 ratio to the epoxy.
02-18-2015, 07:30 AM
#82
I'd skip the addition of alcohol to thin the resin in this application. Thinning the resin isn't necessary to make the cowl. It also affects the strength of the FG, which you don't want. Thinning when glassing over balsa or foam structure is pretty common though, but that's a different application. Just my .02!
Rick
Rick
02-18-2015, 10:47 AM
#83

My Feedback: (53)
Join Date: Jul 2003
Location: milwaukee, WI
Posts: 941
Likes: 0
Received 0 Likes
on
0 Posts
I'd skip the addition of alcohol to thin the resin in this application. Thinning the resin isn't necessary to make the cowl. It also affects the strength of the FG, which you don't want. Thinning when glassing over balsa or foam structure is pretty common though, but that's a different application. Just my .02!
Rick
Rick
02-18-2015, 11:18 AM
#84
Bob, I snapped a pic of a cowl for a Sig Citabria that I'm just finishing up. This plane has been converted to electric and I made a removable battery tray/cowl/motor assembly for it. Although my application is different than yours, the idea is similar for a mounting flange molded into the cowl. For your new cowl, you would need to FG a flange flat along the back edge of the cowl where it meets the fuselage. This flange would mate to the firewall and screw on with blind nuts in the firewall and screws through the flange. Hope that makes sense. I usually drill a few holes in the spinner ring (behind the spinner) to access the mounting screws for the cowl. If the cowl has a few air vents molded in, I can usually use those to fish the screws through instead of drilling more holes in the spinner ring. . I like to use socket head screws for this because they hold onto the driver better. If the bolts fall off the driver, stick a rare earth magnet on the driver shaft to make it magnetic. I hope this helps.
Rick
Rick
02-18-2015, 04:07 PM
#85
Thread Starter
Join Date: Sep 2014
Location: Scottsdale, AZ
Posts: 169
Likes: 0
Received 0 Likes
on
0 Posts
Rick, again thanks for the advice. I took your tip and used straight epoxy without dilution.
I prepared by cutting the FG pieces for the first 2 layers. I used 5 pieces - one for the inside of the scoop and the rest for the 4 sides.
I finished with 3 coats of wax prior to starting the glassing. Here's the first layer.


I cut the overlap at the top to create tabs and then folded each over, one at a time.


So that's 3 layers. I'm thinking of adding one more and maybe a layer of nylons. Saw where that gives a nice finish that's easier to sand smooth. Any opinions on that? Is it crazy? The cowl seems very thin. I'm a little concerned that while it might be strong enough, it won't be thick enough for sanding smooth and for fitting flush to the fuse. I'm guessing I can fix that by sanding the fuse sides to match e cowl. Or is it easy to add a little more epoxy in coats to build up to the right thickness?
Rick - back to your last post about the mounting. I think I can provide access through the cowl face presuming the motor is not in the way, but how do I add an epoxy backplate? Is this done in a secondary process after if get the cowl shaped?
I prepared by cutting the FG pieces for the first 2 layers. I used 5 pieces - one for the inside of the scoop and the rest for the 4 sides.
I finished with 3 coats of wax prior to starting the glassing. Here's the first layer.
I cut the overlap at the top to create tabs and then folded each over, one at a time.
So that's 3 layers. I'm thinking of adding one more and maybe a layer of nylons. Saw where that gives a nice finish that's easier to sand smooth. Any opinions on that? Is it crazy? The cowl seems very thin. I'm a little concerned that while it might be strong enough, it won't be thick enough for sanding smooth and for fitting flush to the fuse. I'm guessing I can fix that by sanding the fuse sides to match e cowl. Or is it easy to add a little more epoxy in coats to build up to the right thickness?
Rick - back to your last post about the mounting. I think I can provide access through the cowl face presuming the motor is not in the way, but how do I add an epoxy backplate? Is this done in a secondary process after if get the cowl shaped?
Last edited by BatteryBob; 02-18-2015 at 06:31 PM.
02-19-2015, 05:49 AM
#86
Good morning Bob. This all looks about right. It's like playing with liquid plastic, right? I can't remember what weight of FG cloth you used, You'll get a better feel for it once the foam is removed. Running the cloth on the bias would have conformed to the curves a little better, but it all works. Epoxying a back plate on would go like this. Remove the foam, sand the interior back edge about an inch in, flatten the back edge that sits against the firewall, set the cowl on a flat surface (glass works well), FG the new back plate from the inside. You might want to wait a few days before you sand anything. FG needs to cure and it just gums up the sand paper if you sand too soon. I'd skip the nylon, but that's just me. I know some people use it It's looking very good Bob.
Rick
Rick
02-19-2015, 07:13 PM
#87
Thread Starter
Join Date: Sep 2014
Location: Scottsdale, AZ
Posts: 169
Likes: 0
Received 0 Likes
on
0 Posts
Rick - thanks for the advice. I think I understand and will give that a try. As for the nylon trick, I put this on just to see and you get a real nice even surface, no seam, but where the mesh comes up and over the front of the nose (under the spinner) you get a whole bunch of puckered nylons that is impossible (for me) to get smooth. So I'll stick to giving a final epoxy coat at the end.
So between Rick and the Thrusday morning RC breakfast club, I got talked off the ledge. The guys said to give it some rest (drying time) and plan on adding more layers. I was panicked that there was no way I could get the cowl to match up with the fuse and spinner.
So I spent the day letting it dry in a more room temperature area. I pre-cut 4 more layers and will start that tomorrow. It looks like it will take at least 4 more layers, maybe 8-10 total of the 3/4 oz glass to get to 1/16". The cowl is hard as a rock now, and I went over the surface to get it rough up a bit.
I also found that it's better to fill in the hollow core of the foam (in my case, others I have seen use a solid foam core). I think this avoids shrinkage. The side tend to want to bow in.
So I'm hoping I'm within reach of getting the right. Need to start doing some more work on a design.
02-22-2015, 04:01 PM
#88
Thread Starter
Join Date: Sep 2014
Location: Scottsdale, AZ
Posts: 169
Likes: 0
Received 0 Likes
on
0 Posts
So here is where I am as of today - I finished 9 layers of the 3/4 oz glass Friday. It's like tissue paper for those that have not worked with the material. Building up to 1/16" is a process. We (my RC buddies) talked about using a heavier layer in the early phase. There was probably a way to do it, but I would have had a harder time with the compound curves in the scoop area. I think I would have used this on the main outer surface and avoided the intricate scoop.
I let the cowl harden up and did a rough sand. I'm happy with the shaping. I put the cowl on the fuse and the fit is almost there. My main concern is still getting out to 2.75" and having a sharp edge right behind the spinner. I took the approach of letting the side pieces extend beyond the face of the cowl rather than wrap over the face. This is helping to fill in the edge I need.
maybe these pics will be easier to see what I mean


And this is after 2 more layers

I plan to go up to 13 layers. That should get the cowl a bit oversized for rough thru finish sanding.
When it comes time to remove the foam, I had planned to also remove the ply piece I had on the face. I think this is (A) not possible, probably never was and (B) not good for the strength depending on how I attach the cowl.
I let the cowl harden up and did a rough sand. I'm happy with the shaping. I put the cowl on the fuse and the fit is almost there. My main concern is still getting out to 2.75" and having a sharp edge right behind the spinner. I took the approach of letting the side pieces extend beyond the face of the cowl rather than wrap over the face. This is helping to fill in the edge I need.
maybe these pics will be easier to see what I mean
And this is after 2 more layers
I plan to go up to 13 layers. That should get the cowl a bit oversized for rough thru finish sanding.
When it comes time to remove the foam, I had planned to also remove the ply piece I had on the face. I think this is (A) not possible, probably never was and (B) not good for the strength depending on how I attach the cowl.
02-22-2015, 04:29 PM
#89
My Feedback: (-1)
Bob, you made me wonder so I went out to my shop and measured three production cowls I have, one is from a H-9 giant Sukhoi, the other two I don't know for whom they were made for but one is a 40% Extra and the third is a mystery. Only thing they have in common is being 1/32 thick and they are all made with some serious thick cloth and look like they are just one layer. How they get them so nice and smooth on the outside is also a mystery to me.
Be fun to take a tour of a place like FGS and see how they make there cowls.
Be fun to take a tour of a place like FGS and see how they make there cowls.
02-23-2015, 07:47 AM
#90
Good morning Bob. Well, it looks like you'll be sanding a bunch, but for a first attempt I think it looks good. Don't worry about the ply behind the spinner. Once it's painted nobody will know about it and it won't hurt anything. I think you might be too caught up with the 1/16 thickness. At this point you're probably just adding weight. If the cowl is strong enough you could stop adding more layers. I typically start with 2 layers of heavy cloth and a final layer of .75oz cloth. Once that's dry and sanded to shape, I paint on one more coat of resin to fill any irregularities, then sand again when dry. Then it's on to primer (Duplicolor Hi Fill) and paint. I think you're beginning to see why making just one FG cowl can be such a pain. But when it's all done and flying, you'll be proud of the cowl on the plane and forget the hard work involved. Then you'll decide to make another cowl for some insane reason!
Rick
Rick
02-23-2015, 05:29 PM
#91
Thread Starter
Join Date: Sep 2014
Location: Scottsdale, AZ
Posts: 169
Likes: 0
Received 0 Likes
on
0 Posts
I got too aggressive and downsized my plug by a little more than 1/16". That has been the challenge. I was afraid it would get too thin as I finished sanded. I also should have started with a heavier guage glass. But now I know. The only reason I added all the layers has been to get flush with the spinner and fuse. I think I am Ok now, unless I have some areas to fill.
Which brings me to a question. What do I fill with? Can I use just epoxy?


Things look good. The fit (up against the FW) is close but I would like to get as close to perfect as possible. The fit to the spinner is (finally) right. But it's a little plump as you go from the FW to the spinner. I don't need to remove too much material so I have to be really careful not to take any more off around the spinner/nose and back at the FW.
I need to pick up a Dremel. And I need to think about attaching the inside mount.
Which brings me to a question. What do I fill with? Can I use just epoxy?
Things look good. The fit (up against the FW) is close but I would like to get as close to perfect as possible. The fit to the spinner is (finally) right. But it's a little plump as you go from the FW to the spinner. I don't need to remove too much material so I have to be really careful not to take any more off around the spinner/nose and back at the FW.
I need to pick up a Dremel. And I need to think about attaching the inside mount.
02-23-2015, 05:37 PM
#92
My Feedback: (53)
Join Date: Jul 2003
Location: milwaukee, WI
Posts: 941
Likes: 0
Received 0 Likes
on
0 Posts
Bob,
If you need a lot of fill use small pieces of FG and epoxy. If need minor amounts use epoxy only. If need even less then that use glazing putty.If you need glazing putty, you are in luck. I received a tube of 3m glazing putty today.
It's more then I will use in a life time. Let me know if you need it.
02-24-2015, 04:18 AM
#93
Hey Bob. you're pretty close now. I usually block sand all of the still glossy areas out and then if I need to add more bulk, I add resin or resin and glass. I'm no expert, that's just what I do. Glazing putty is great stuff to have around also. I make sure to sand off all the glossy areas so that resin or paint has something to grip to.
A Dremel tool is a great investment. I found mine at a Pawn shop. It was in good shape, with case, flex shaft and attachments and only cost $20. It would make sanding anything on the insde a lot easier, as well as that air vent under the spinner.
Rick
A Dremel tool is a great investment. I found mine at a Pawn shop. It was in good shape, with case, flex shaft and attachments and only cost $20. It would make sanding anything on the insde a lot easier, as well as that air vent under the spinner.
Rick
02-24-2015, 08:09 PM
#94
Thread Starter
Join Date: Sep 2014
Location: Scottsdale, AZ
Posts: 169
Likes: 0
Received 0 Likes
on
0 Posts
Chris - is this the putty you are referring to:

Fumes are pretty strong.
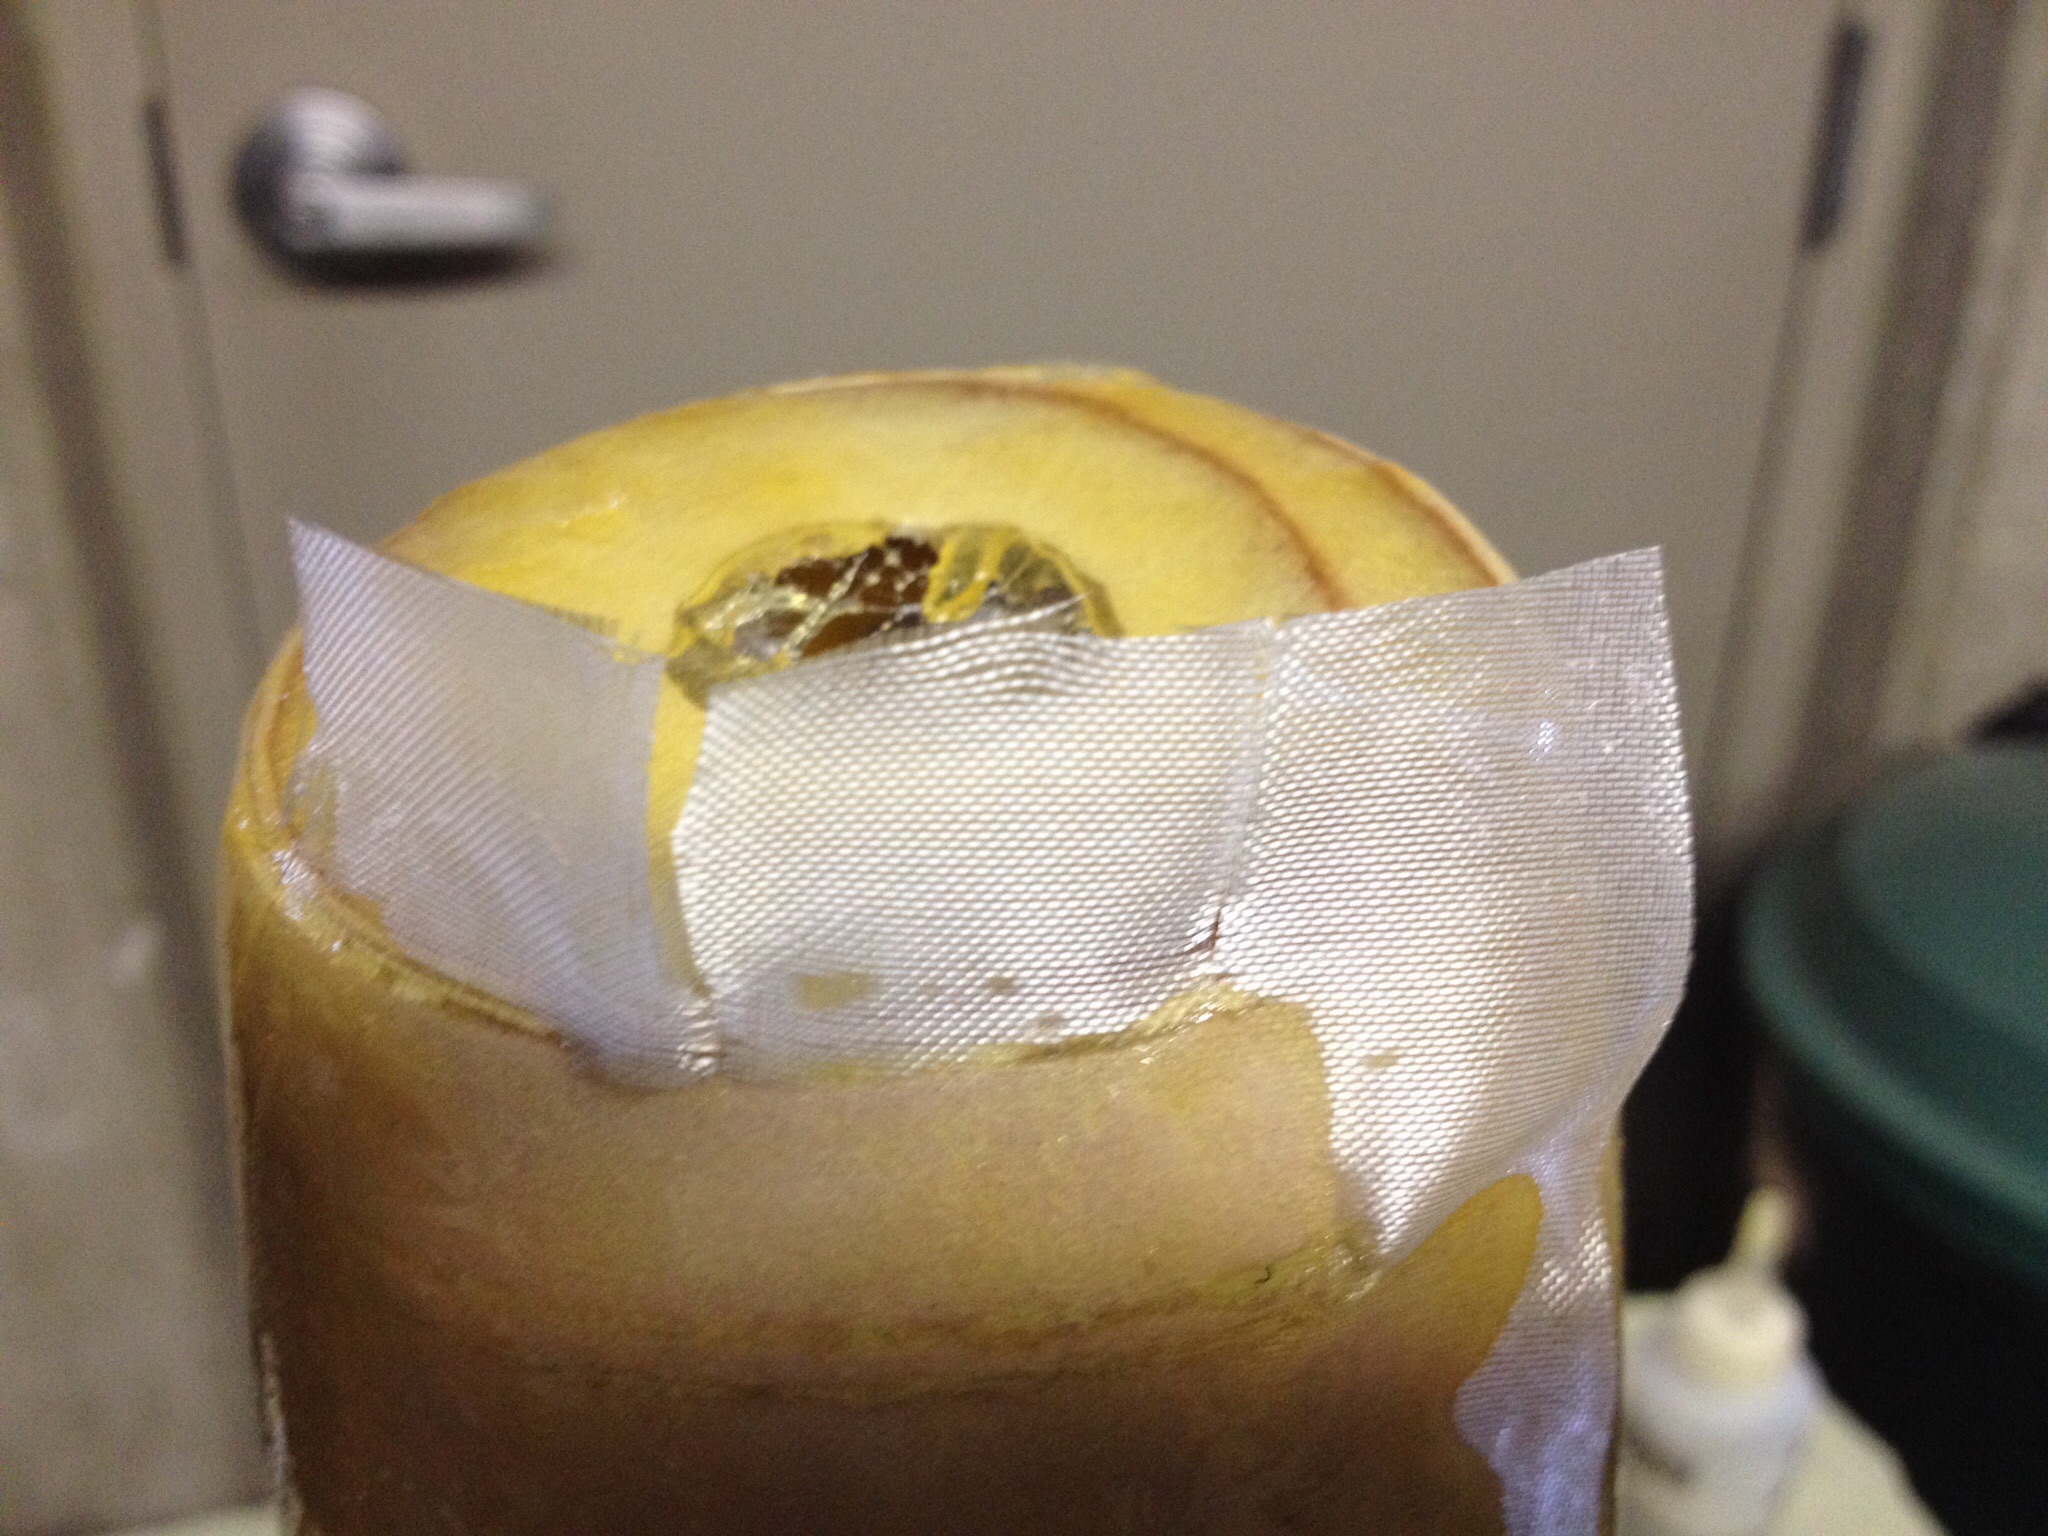
I did more sanding and fitting. I snugged the cowl up using a ply washer on the face. As I mentioned earlier, the contour was a bit heavy. I added the ply spinner ring to make sure I didnt go any deeper around the front nose ring and I taped off around the fuse in case I got carried away.
I'm using 100 grid on a long sanding bar and it still is going slow. But that's ok. Rather not have to add back in.


I will probably have a couple of thin areas to fill in around the nose - you can see the glossy areas. I will need to remove the foam soon and start to think about the mounting flange. Rick - would you use ply and use epoxy and a layer off glass to reinforce the joint? I was thinking I would glue some alignment tabs on the face of the FW.
Fumes are pretty strong.
I did more sanding and fitting. I snugged the cowl up using a ply washer on the face. As I mentioned earlier, the contour was a bit heavy. I added the ply spinner ring to make sure I didnt go any deeper around the front nose ring and I taped off around the fuse in case I got carried away.
I'm using 100 grid on a long sanding bar and it still is going slow. But that's ok. Rather not have to add back in.
I will probably have a couple of thin areas to fill in around the nose - you can see the glossy areas. I will need to remove the foam soon and start to think about the mounting flange. Rick - would you use ply and use epoxy and a layer off glass to reinforce the joint? I was thinking I would glue some alignment tabs on the face of the FW.
02-25-2015, 02:48 AM
#95
My Feedback: (53)
Join Date: Jul 2003
Location: milwaukee, WI
Posts: 941
Likes: 0
Received 0 Likes
on
0 Posts
Chris - is this the putty you are referring to:
Fumes are pretty strong.
I did more sanding and fitting. I snugged the cowl up using a ply washer on the face. As I mentioned earlier, the contour was a bit heavy. I added the ply spinner ring to make sure I didnt go any deeper around the front nose ring and I taped off around the fuse in case I got carried away.
I'm using 100 grid on a long sanding bar and it still is going slow. But that's ok. Rather not have to add back in.
I will probably have a couple of thin areas to fill in around the nose - you can see the glossy areas. I will need to remove the foam soon and start to think about the mounting flange. Rick - would you use ply and use epoxy and a layer off glass to reinforce the joint? I was thinking I would glue some alignment tabs on the face of the FW.
02-25-2015, 01:01 PM
#96
Bob, I've played around with a few different materials for flanges. I've settled on fiber glass. It's the toughest and your in there fiber glassing anyway so what the heck. This first attempt is always a learning experience. Next time you'll know a few things that will speed up the process. As you do more with FG, you start to know what you can get away with and what just won't fly (pun intended)! It's a very handy skill to have some experience in.
Rick
Rick
02-25-2015, 05:31 PM
#97
Thread Starter
Join Date: Sep 2014
Location: Scottsdale, AZ
Posts: 169
Likes: 0
Received 0 Likes
on
0 Posts
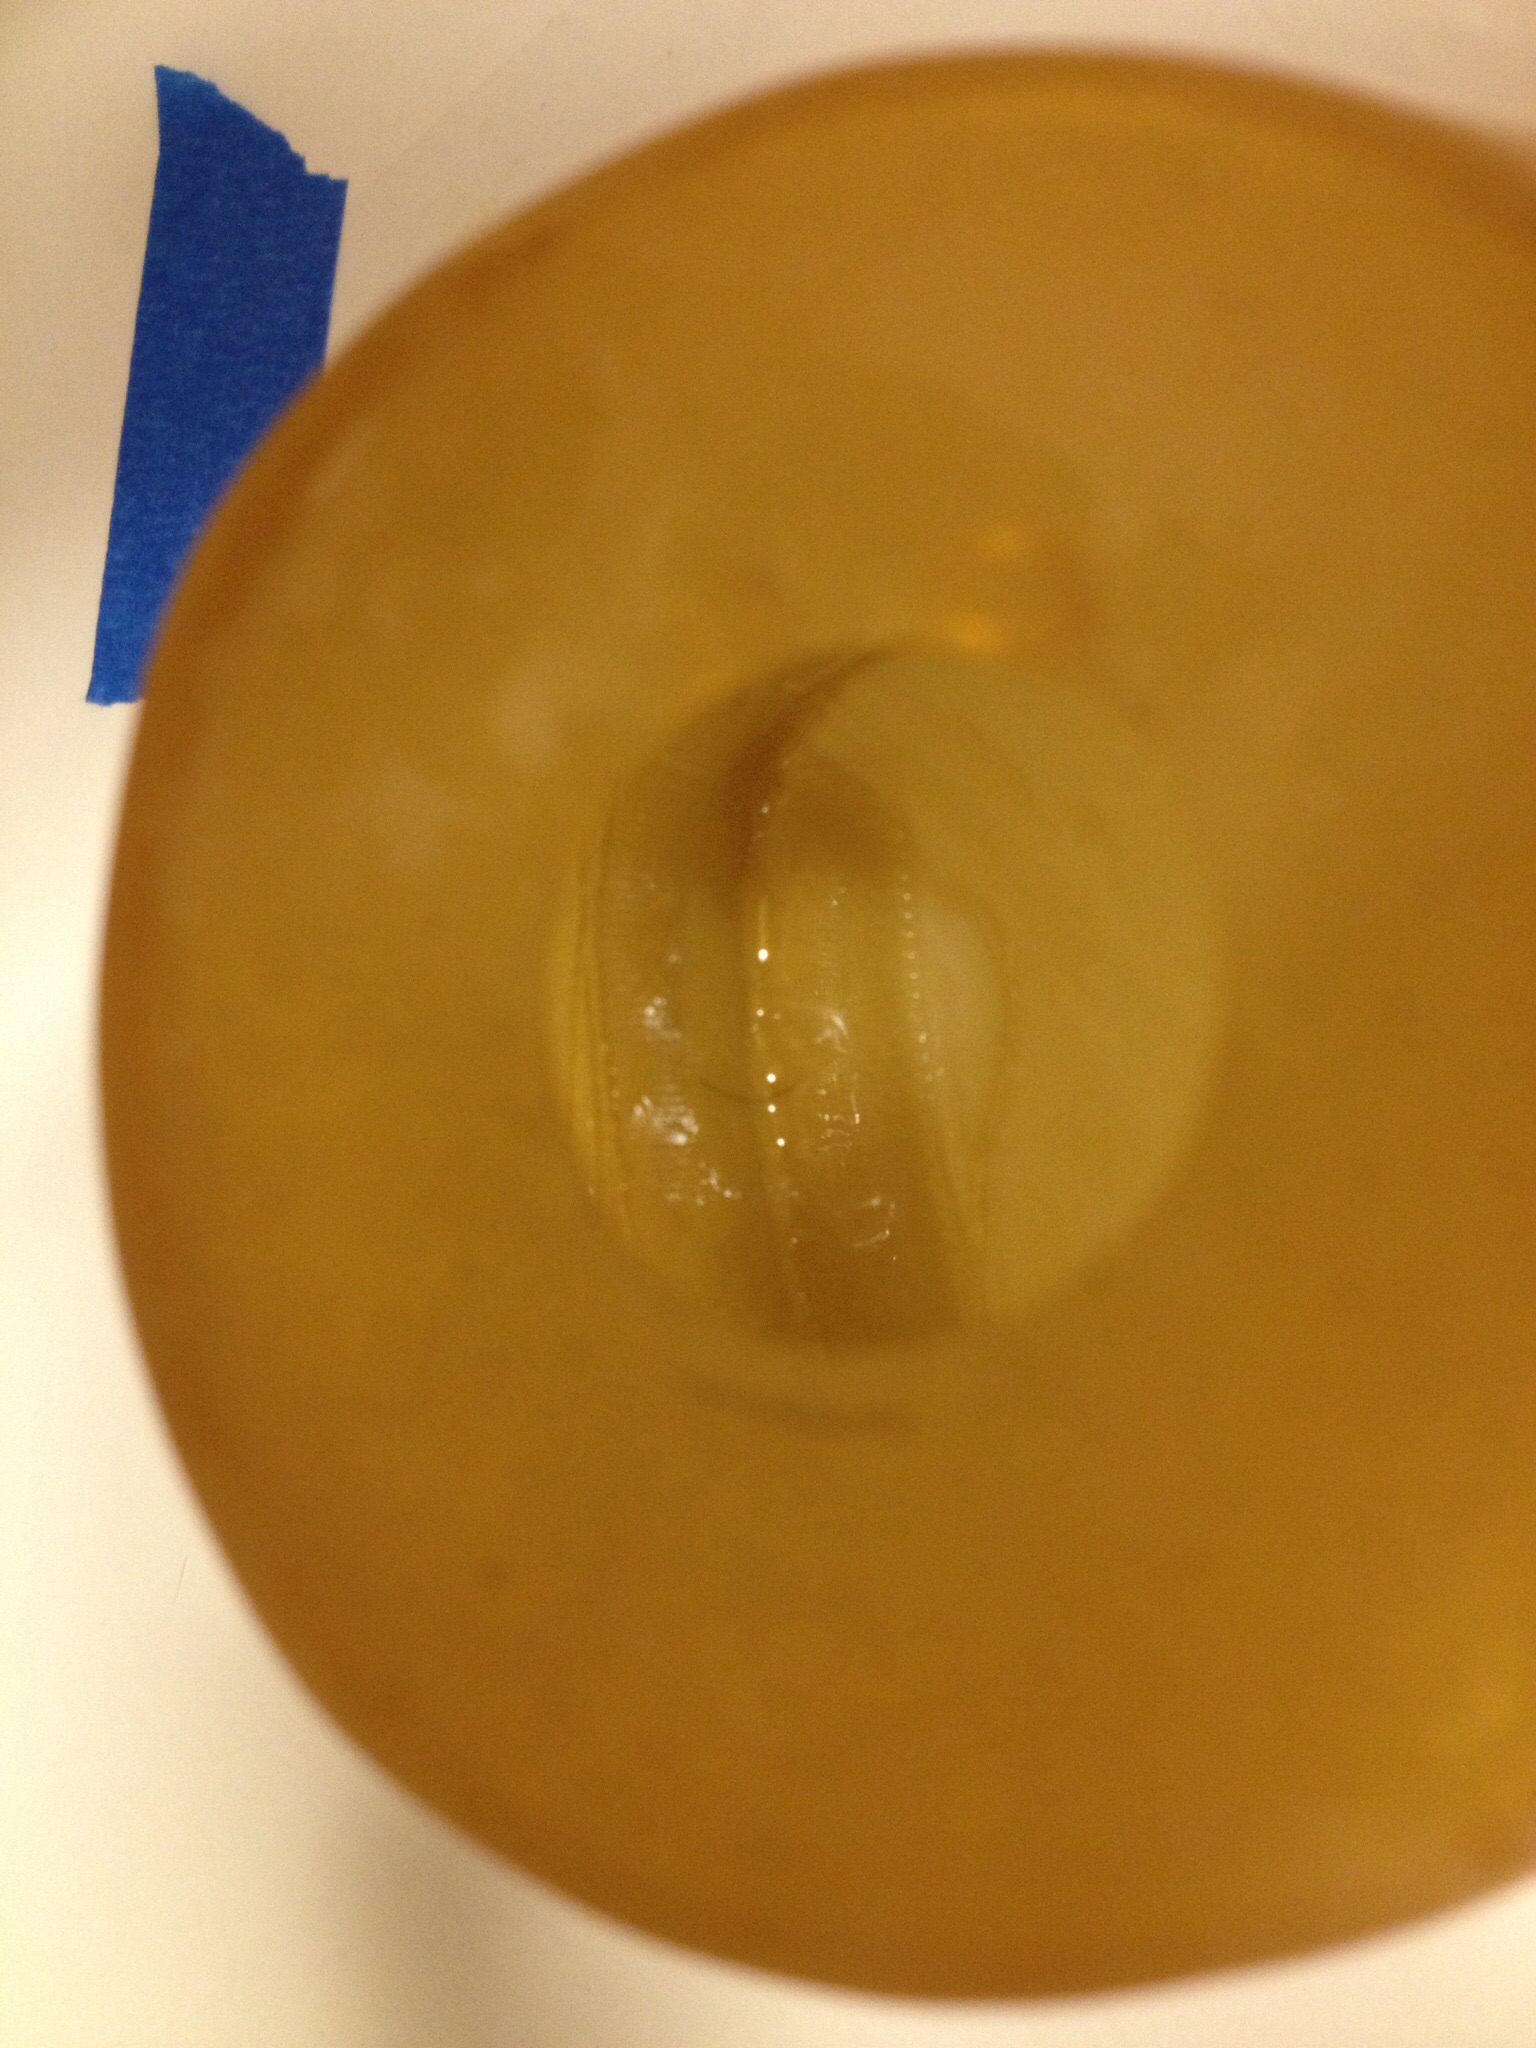
Spent more time sanding. Also removed all of the foam and the balsa that formed the scoop. It came out pretty easy thanks to the coats of wax. Here's the cowl.
 Inside view
More shaping needed of course. And the air scoop needs to be opened up. That will probably come last. To really get the shaping finished I will need to create the flange and mount the cowl. I'm thinking this will be an upper and lower flange, that will go right up against the firewall. Just not exactly sure how to go about this yet.
But tomorrow is Thursday. And that means time for "ask the experts at Breakfast".
Rick - since that would be a long commute, I'll ask you. I was thinking of cutting a foam mold for the inside top and bottom, to form a L shaped bracket. I would need to lay the glass along the inside of the cowl and then bend 45 degrees to form the lip, maybe 3/4" wide for drilling a pair of holes. Two holes on the top, two on the bottom. Does that make sense?
02-26-2015, 03:53 AM
#99
Bob, that does look good! For the flanges, I think you're on the right track for size. What I'd probably do is: sand the inside where the flanges attach, form in some heavy FG cloth and resin it onto the inside of the cowl. Then, before it all sets up, I'd place the cowl, fire wall down, onto a flat surface, preferably glass. Then reach in the nose hole and finish putting resin on the flange and pretty things up along the seam inside. Hope that makes sense. Those long metal handled acid brushes come in handy for this. I would think 2 or 3 layers of heavy cloth would be plenty strong enough. Keep up the good work.
Rick
Rick
02-27-2015, 04:07 PM
#100
Thread Starter
Join Date: Sep 2014
Location: Scottsdale, AZ
Posts: 169
Likes: 0
Received 0 Likes
on
0 Posts
Made some more progress. Thanks for all the encouragement guys! The breakfast club also thought I was on the right track.
I picked up some heavy glass and used a small sheet of shelf board that checked out to be flat. I taped a small square of thin plastic film to work over. I prepared 3 pieces of glass for each mounting flange and tried to pre-bend them so they would hold a 90 degree shape. Make sure you remember to remove the wax left from the plug and sand the inside well.


Here are some shots after I got the 3rd layer on. With the cowl flush on the shelf, it was a good time to add a little epoxy around the outside. You can kind of make out the tab looking in thru the cowl opening.


This peeled off real nice from the plastic. It left a very flat back edge. I cut a ply piece and added that on the inside, on top of the tab, followed by another layer of heavy glass.


This looks to be pretty strong. I'll work next on getting this mounted. Not yet sure how I'll get the blind nuts in behind the FW.
I picked up some heavy glass and used a small sheet of shelf board that checked out to be flat. I taped a small square of thin plastic film to work over. I prepared 3 pieces of glass for each mounting flange and tried to pre-bend them so they would hold a 90 degree shape. Make sure you remember to remove the wax left from the plug and sand the inside well.
Here are some shots after I got the 3rd layer on. With the cowl flush on the shelf, it was a good time to add a little epoxy around the outside. You can kind of make out the tab looking in thru the cowl opening.
This peeled off real nice from the plastic. It left a very flat back edge. I cut a ply piece and added that on the inside, on top of the tab, followed by another layer of heavy glass.
This looks to be pretty strong. I'll work next on getting this mounted. Not yet sure how I'll get the blind nuts in behind the FW.