


Handley Page H.P. 42 Hannibal Build from S. Newton plans and LDS short kit
 12-15-2014, 08:02 PM
#1

Thread Starter

Ok I got a short kit from Laser Design Services about a year ago and I am just now getting started. I am planning on electric but nitro is still not off the board. I will post pictures as I go. Any pointers will be appreciated. But keep in mind I am not a contest builder and if it resembles an H.P. 42 When I finish I will be good with that. It might take a while and it might not but I could not find a completed thread for a build on one of these so I decided to try and give back. If anyone is up for it you are welcome to build along. I will post links to the plans and LDS page. LDS sent 3 sets of plans to make sure the plane was covered. I am not sure what the plans are saying in a few spots so I am guessing and if I need to modify later I will. Particularly in the tail and where the formers stop and the tail starts. I think I will be moving the 1/16" strips but that is no biggie. I saw a build thread that was never finished so part of this are not known to me. I was not sure where to put this, Scale, Kits, 1/2A or scratch so it ended up here. More later.
http://www.outerzone.co.uk/plan_details.asp?ID=465
http://store.laser-design-services.c...roducts_id=221


http://www.outerzone.co.uk/plan_details.asp?ID=465
http://store.laser-design-services.c...roducts_id=221
Last edited by Bonified Wingnut; 12-15-2014 at 08:10 PM.
 02-05-2015, 09:30 AM
#4
 02-05-2015, 04:00 PM
#6
Thread Starter
Yeah Michaelj2k
I saw that one and there is another somewhere of one started but I have seen no build logs. Gray Beard it is new to me also. The plans are not very accurate in some respects so I am trying not to deal with some of it till I get to it. Still not decided on glow or electric. I have motors and engines for either option. Also the horizontal stab ribs are inverted. I am debating on making them flat and setting the incidence at 0 degrees.
02-17-2015, 08:24 PM
#7
Thread Starter
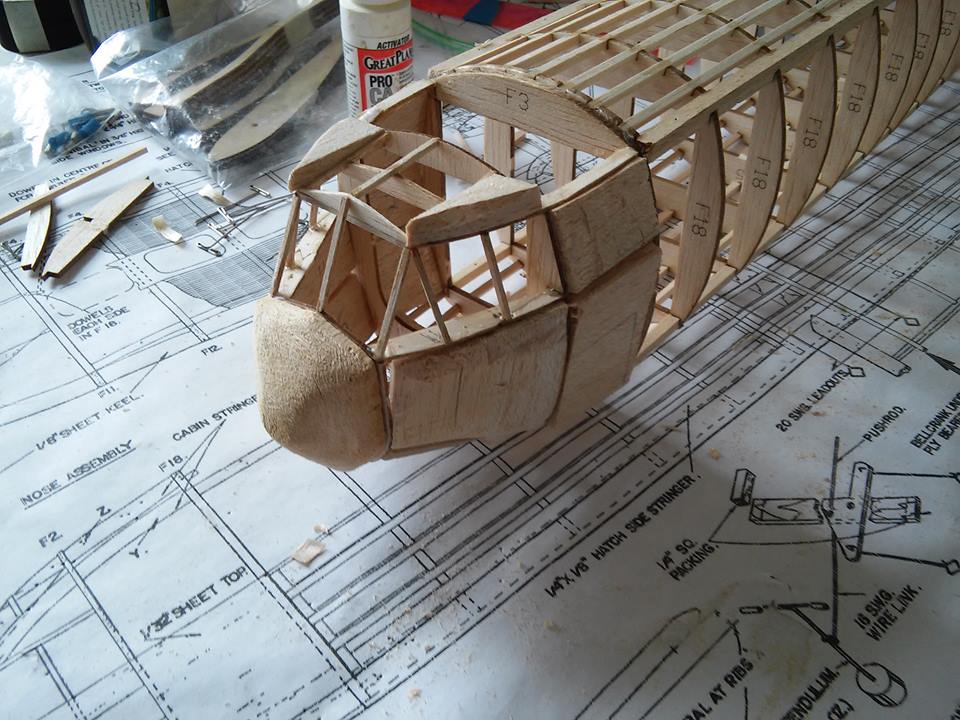
Ok got caught up with another project and worked on the H.P. 42 a bit. I see some mistakes I made on the longerons when I built the other half of the fuse on the reverse side of the plans. I added a couple spacers to the bottom inside of the fuse as I added the top formers to give it a little stability when I removed the fuse. The hatch sides were not so self explanatory so I put a couple sticks under to raise them to where I thought they should be. I will probably cut the sides off and adjust when I get the fuse sides done to make the hatch fit better.
Last edited by Bonified Wingnut; 02-17-2015 at 08:29 PM.
02-18-2015, 03:33 PM
#8
Thread Starter
Ok so I did my best to understand the plans some more and worked on the nose. For some reason I just could not get some of the formers straight. So after cutting them off and turning them around I still had the problem. So I continued on anyway.


02-19-2015, 06:01 PM
#9
Thread Starter
Today I soaked some 1/8" sq stringers in a 2 liter bottle half full of water. Then I bent them along the nose outline in prep for the nose bends. It worked pretty good and made it a lot easier.


The fuse is coming out straight enough for me although it doesn't look like it in these pictures. I was not sure how far forward to bring the bottom stringers so I went all the way to the nose. I guess it will be filled in from there up.


I saw no mention of stringers on the bottom rear of the fuse so it will stay open. There is also a small rectangular strip right at the beginning of the tail section that I don't quite understand what it is.


Next I think I need to soak the rear of the fuse and make some formers to bend it around. it looks like it will be tough and I might have to make some relief cuts.

The fuse is coming out straight enough for me although it doesn't look like it in these pictures. I was not sure how far forward to bring the bottom stringers so I went all the way to the nose. I guess it will be filled in from there up.
I saw no mention of stringers on the bottom rear of the fuse so it will stay open. There is also a small rectangular strip right at the beginning of the tail section that I don't quite understand what it is.
Next I think I need to soak the rear of the fuse and make some formers to bend it around. it looks like it will be tough and I might have to make some relief cuts.
02-23-2015, 05:31 PM
#10
Thread Starter
Re worked the tail. I was not happy with it and I still am not. But....moving along.


Blocked in the nose and started shaping it. I will finish it up after I put the sides on the Fuse


Next I will work on the Vertical and horizontal stab. Not sure if I want to invert the ribs and make the airfoil upside down or not. I will do some research on similar models. I had a float plane with a high mounted engine and it didn't need it. I would just give the top engines some up thrust and the bottom ones some down thrust.


Sorry about all the photos but if someone decides to build this in the future it will be nice to have some kind of reference....as misshapen and wrong as mine might be...lol
Blocked in the nose and started shaping it. I will finish it up after I put the sides on the Fuse
Next I will work on the Vertical and horizontal stab. Not sure if I want to invert the ribs and make the airfoil upside down or not. I will do some research on similar models. I had a float plane with a high mounted engine and it didn't need it. I would just give the top engines some up thrust and the bottom ones some down thrust.
Sorry about all the photos but if someone decides to build this in the future it will be nice to have some kind of reference....as misshapen and wrong as mine might be...lol
Last edited by Bonified Wingnut; 02-23-2015 at 05:35 PM.
02-25-2015, 08:55 PM
#11
Thread Starter
I decided to build the plane as stated in the plans. The vertical and horizontal stabs have been pretty straight forward. I have seen other another build that they used solid sheet for the tail surfaces but after building them I don't think it is needed. They seem pretty solid. But I might ad a stick across where the fins connect.
I built one side of the verticals, then flipped it and added sticks to the other side. I will separate the rudders when I am closer to finishing them.


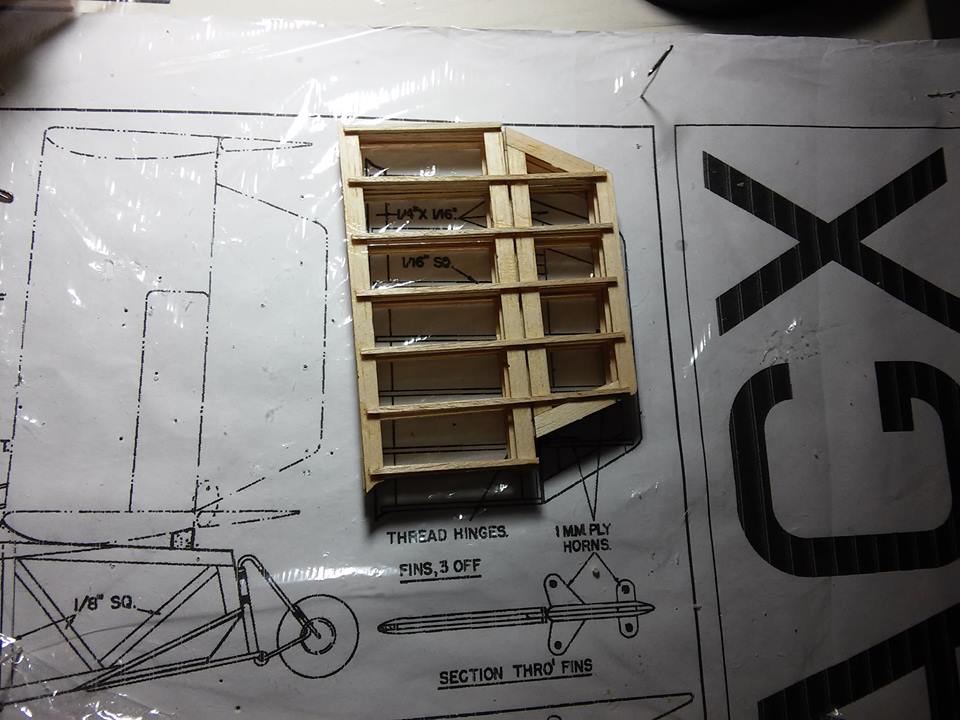
I did have to cut a couple pieces for the tail that seemed to be missing from the short kit. No biggie I am sure it was because 2 surfaces were not accounted for.


This is an interesting plane. It is about the size of a 40 sized trainer....with a wingspan that would be considered "Giant scale" ...built about like a rubber powered plane. If I don't get some weather worth testing the glow engines I have for it before I get to that point. I will be installing 4x 100 watt electrics. I was estimating the flying weight at about 4 lbs but I am not so sure now. I think a lot of the list of wood that was called for was actually taken by the pieces in the Laser cut short kit and a lot of the sheet will not be needed.
I built one side of the verticals, then flipped it and added sticks to the other side. I will separate the rudders when I am closer to finishing them.
I did have to cut a couple pieces for the tail that seemed to be missing from the short kit. No biggie I am sure it was because 2 surfaces were not accounted for.
This is an interesting plane. It is about the size of a 40 sized trainer....with a wingspan that would be considered "Giant scale" ...built about like a rubber powered plane. If I don't get some weather worth testing the glow engines I have for it before I get to that point. I will be installing 4x 100 watt electrics. I was estimating the flying weight at about 4 lbs but I am not so sure now. I think a lot of the list of wood that was called for was actually taken by the pieces in the Laser cut short kit and a lot of the sheet will not be needed.
Last edited by Bonified Wingnut; 02-25-2015 at 09:17 PM.
02-28-2015, 04:16 PM
#12
Thread Starter
Well Now for some more puzzles. The plan calls for pre shaped leading edge with a slot cut in it and I could not find any. So I used the CNC machine I got on Ebay that I am still learning to cut a groove in a 3/8 ' square stick of balsa.

Now I am trying to figure out the inner lower wing panel. I don't quite understand the nacelles.


The motor mount is 2 layers of 1/8" ply to make a 1/4" but the rest of the wing in that area is balsa. Doesn't seem to be much to support it. I am not sure if anyone is following this but if you see something I don't please let me know.
Now I am trying to figure out the inner lower wing panel. I don't quite understand the nacelles.
The motor mount is 2 layers of 1/8" ply to make a 1/4" but the rest of the wing in that area is balsa. Doesn't seem to be much to support it. I am not sure if anyone is following this but if you see something I don't please let me know.
02-28-2015, 04:30 PM
#13
My Feedback: (-1)
Over 390 hits so there are more people then myself following along. I have never even seen a photo of this plane and sure never seen the kit so there isn't a lot to say about it. All we can do is watch you do the build. Know nothing of the kit so any advice would just be BS, I am surprised you haven't gotten a ton of that yet!!
02-28-2015, 04:48 PM
#14
Thread Starter
Thanks GB. BS is good once in a while. I am kinda waiting for myself to come to the point that something just makes no sense. After a few headaches I just start putting the pieces together and hope it starts to.
02-28-2015, 05:50 PM
#16
My Feedback: (-1)
OK, you want some help, I really don't have any to give, UNTIL we come to the gull wing. I'm really good with gull wings. Well, I got my really good idea from Nick Ziroli a long time ago but it works as well today as it did in the 60s!!
Kidding aside, this is just one of those planes you don't see so you are pretty much on your own. Years ago I met/made a friend during a Krier Kraft plans build and it was just dumb luck we were both building it at the same time. It's an American plane but something you just never see.
Looks like you are on your own but there are a few of us following the build.
02-28-2015, 06:12 PM
#17
Thread Starter
I figured I was on my own since I never found a completed build of this plane. At least not from these plans. Thats why I decided to post the build. As far as the gull wing goes I am not sure about the attachment. I will probably build it as per plans, but if I find I don't care for the assembly I will glue it all permanent. I am sure it would fit in my trailer with the wings on. I really appreciate you chiming in. At least if I do come to a brick wall I know you might be able to help.
03-01-2015, 09:05 AM
#18
Thread Starter
Speaking of brick walls. I am at one. I know there isn't much help from these pictures but if any one wants to help with the puzzle i sure could use some advice on how these engine nacelles are attached. I am not saying that what I have done so far is correct just the best I could figure. The nacelles do not sit flat onto anything. They are clearly supposed to be above the top spar. But I don't know if it is built onto the wing or separate. The upper wing goes under so it will be easy. Any ideas would greatly be appreciated.


The following users liked this post:
EricGreeson (08-13-2023)
03-02-2015, 02:57 PM
#19
Thread Starter
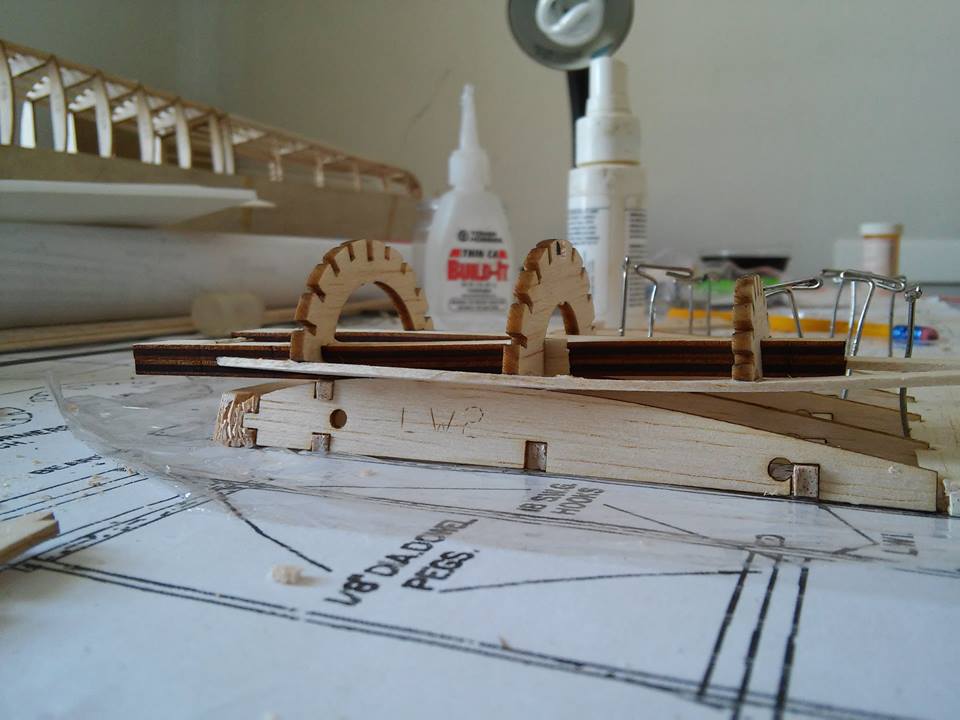
Ok I moved on I will figure that out when I need to or I will just make it work. I said I was going to stick to the plans and now I changed my mind. I added shear webs and some 1/16" ply where the struts mount. I wish I would have used basswood for the spars since they will be taking the load of the landing gear. I will add some ply in the areas to make sure it is strong.


03-03-2015, 06:45 PM
#22
Thread Starter
Something like this,
https://www.youtube.com/watch?v=z4bT...otation_339628
But I need to design one that actually grips a plane like a hand does. So i can launch combustion engine planes and electrics. I have built several launchers and they all had downfalls. I think air is the answer. My friend Bob died earlier this year and he was the only one brave (or crazy) enough to launch the slice and dice pushers. I already have the plumbing designed I just need to design a rail and a mechanism that will grip a plane and release at the end. Shouldn't take long.
Something like this but I don't want to have to add hooks to any plane if I can avoid it.
https://www.youtube.com/watch?v=y6rG4LEaBRQ
Last edited by Bonified Wingnut; 03-03-2015 at 06:53 PM.
") Kinda a lot ah work when ya could just hand launch or use a PVC launch ramp.
03-03-2015, 08:05 PM
Kinda a lot ah work when ya could just hand launch or use a PVC launch ramp.
03-03-2015, 08:05 PM
#24
Thread Starter
Tried em all. Hand launching by yourself a heavy, high powered plane is tough. They want to roll and do all kinds of stuff before you can get your hands on the sticks...Nobody wants wants to hold on to a plane with a 25,000 rpm prop headed for there hand.
Bungee launchers have to be adjusted a lot for every different plane. and then as they set ready to launch they slowly lose there pull.
I don't think of it as a lot of work. I think of it as finding a permanent solution. It would be easy if it was for a specific plane but I want it to be able to launch anything as well as a hand does. The one type of plane that will be a problem is one with no fuse. A tab or something to grab onto will probably have to be installed.
03-06-2015, 08:49 PM
#25
Thread Starter

