


Great Planes RV-4 40 Kit build thread
 03-28-2015, 05:26 AM
#26
Member
Thread Starter

Join Date: Aug 2013
Location: Wheaton, IL USA
Posts: 64
Likes: 0
Received 0 Likes
on
0 Posts
OK, so again I spent time adding ABS/acetone slurry to the cowl in an attempt to fill void areas. It's looking better, but... not much.
I cut out a wheel pant the other day. My wheels don't look like they'll fit, the margins are terrible and I don't see how to get the bolts through as it is. I'm talking myself out of doing the wheel pants. We'll see.
PD.
I cut out a wheel pant the other day. My wheels don't look like they'll fit, the margins are terrible and I don't see how to get the bolts through as it is. I'm talking myself out of doing the wheel pants. We'll see.
PD.
Last edited by marmalade1; 03-28-2015 at 08:51 AM.
 03-28-2015, 07:11 AM
#27
Member
Thread Starter
Join Date: Aug 2013
Location: Wheaton, IL USA
Posts: 64
Likes: 0
Received 0 Likes
on
0 Posts
Last night I added a small piece of dowl to the hatch door to enable opening and closing without tools. The velcro holds it well. I really didn't want to add an external switch to the fuse near the cockpit. This seems both convenient for the battery in the tail and more discrete.

I used canopy glue to bond the canopy. A small bead was added to the sanded edge of the cleaned canopy, secured and left overnight. Looking at it this morning revealed that it has indeed dried clear and almost colourless. I'll take off the bands tonight.

Next:
1) Continuing work on the cowl (uggh), eventually using Bondo, sanding, spray painting.
2) Installing control horns to elevator and attaching the two elevator control rods together.
3) Adding stripes to the wings.
4) Attaching wing tips
5) Spray painting wing tips / cowl.
6) Adjusting throttle for engine / testing.
7) Attaching wheels. Wheel pants TBD.
8) Pre-flight checks... maiden.
PD.
I used canopy glue to bond the canopy. A small bead was added to the sanded edge of the cleaned canopy, secured and left overnight. Looking at it this morning revealed that it has indeed dried clear and almost colourless. I'll take off the bands tonight.
Next:
1) Continuing work on the cowl (uggh), eventually using Bondo, sanding, spray painting.
2) Installing control horns to elevator and attaching the two elevator control rods together.
3) Adding stripes to the wings.
4) Attaching wing tips
5) Spray painting wing tips / cowl.
6) Adjusting throttle for engine / testing.
7) Attaching wheels. Wheel pants TBD.
8) Pre-flight checks... maiden.
PD.
 04-02-2015, 11:52 AM
#29
Member
Thread Starter
Join Date: Aug 2013
Location: Wheaton, IL USA
Posts: 64
Likes: 0
Received 0 Likes
on
0 Posts
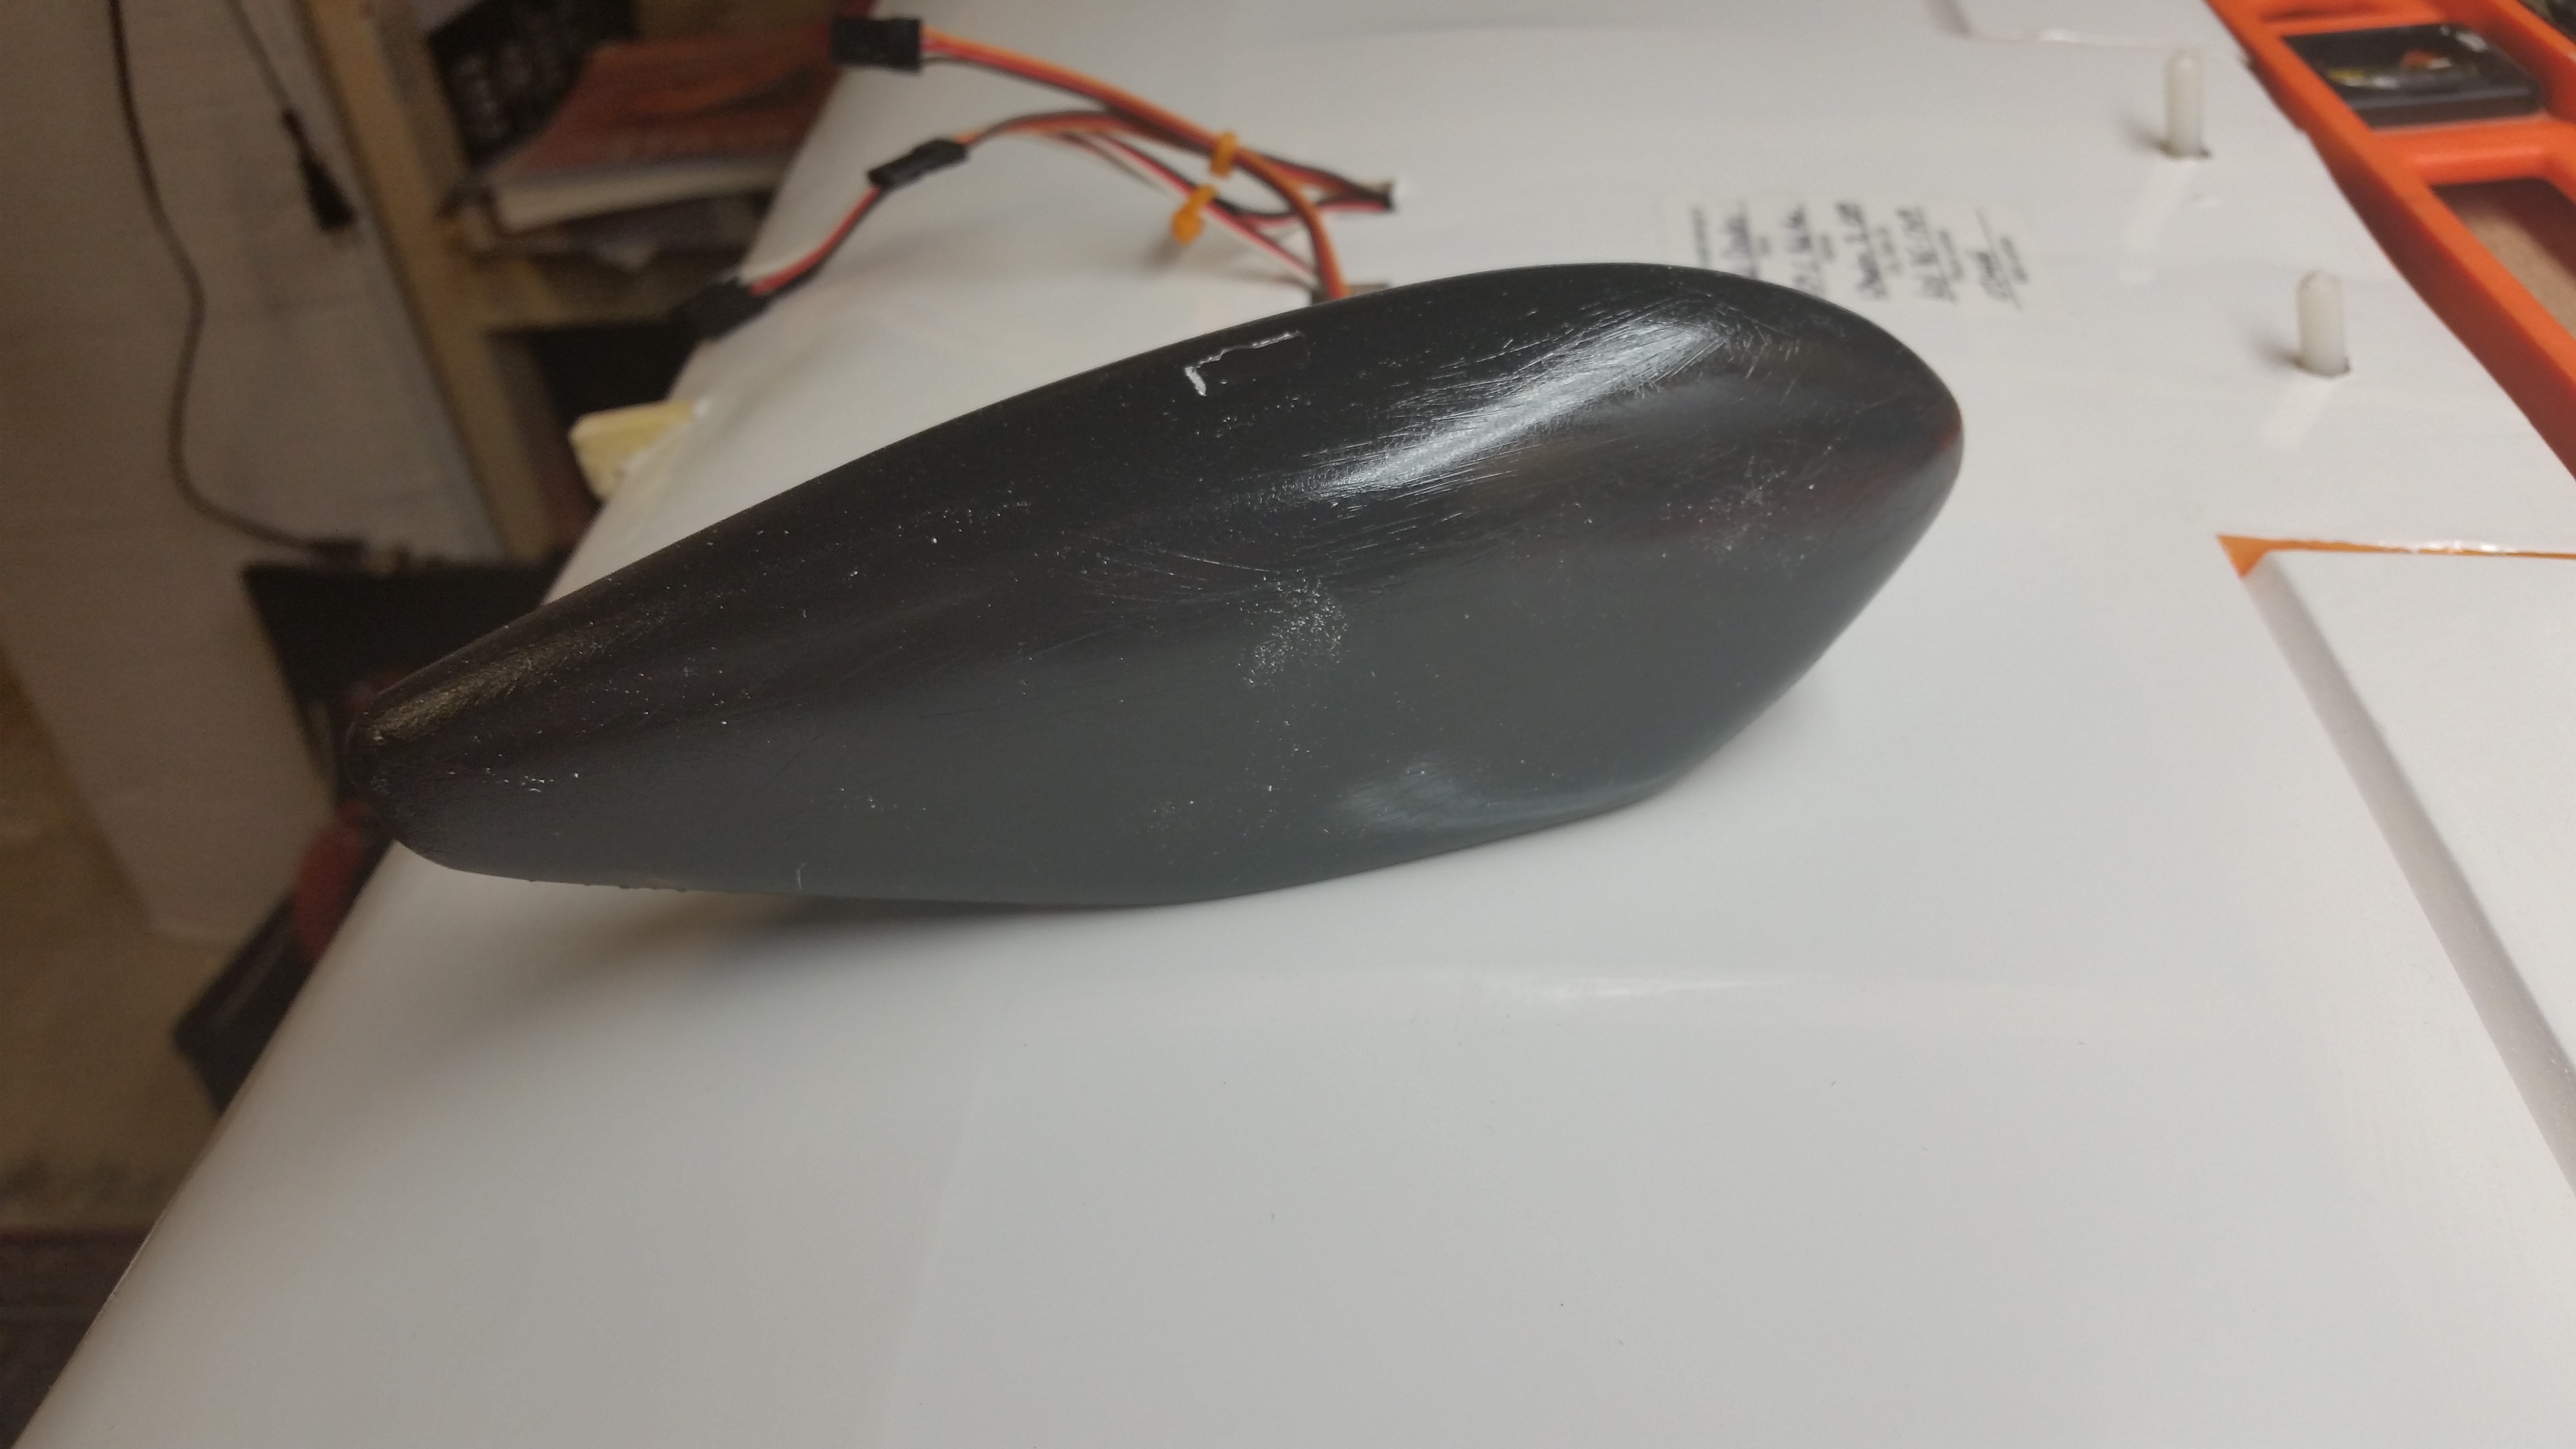
This week I have almost completed the cowl (only took a couple of hours a night for two weeks). I used a 400 grit sandpaper to roughen (using an inexpensive 3x3" electric hand held sander). I then rinsed the cowl in the sink and used regular hand soap to remove debris and oils. I applied masking tape and hung the cowl. I used Monokote white and black paint on alternating nights to add black cheeks and white to the rest.
I wanted to keep the design and colours simple. The coating I'm using is from Value Hobby and likely won't be a good colour match for Monokote sprays, so I stuck with simple black and white which are easier to match.
The canopy was carefully sanded around the edges for a flush fit and cleaned with Windex/Windolene inside and out before being carefully seated. Rubber bands held it in place while I carefully applied canopy glue and wiped off excess. It dried clear, just as the bottle said. It seems that one bottle will last for at least my next 200 planes.


Next up: Wheel pant recoating and the attachment of the wheels (which looks to be quite a fiddly task).
PD.
I wanted to keep the design and colours simple. The coating I'm using is from Value Hobby and likely won't be a good colour match for Monokote sprays, so I stuck with simple black and white which are easier to match.
The canopy was carefully sanded around the edges for a flush fit and cleaned with Windex/Windolene inside and out before being carefully seated. Rubber bands held it in place while I carefully applied canopy glue and wiped off excess. It dried clear, just as the bottle said. It seems that one bottle will last for at least my next 200 planes.
Next up: Wheel pant recoating and the attachment of the wheels (which looks to be quite a fiddly task).
PD.
04-07-2015, 05:56 AM
#30
Member
Thread Starter
Join Date: Aug 2013
Location: Wheaton, IL USA
Posts: 64
Likes: 0
Received 0 Likes
on
0 Posts
After refining and respraying the cowl 3 times now it's looking better. Not ideal, but smooth and shiny with only minor blemishes. The wheel pants were scratched due to the excessively coarse sand paper I used (50 grit followed by 400 grit... with no inbetween stages!). I've since spend a long time sanding off the old paint and getting from 320 grit, 400 grit to 600 grit paper then respraying them.
The second time around for the wheel pants I sprayed just the 'outsides' sides black and I will spray the 'insides' white for a crisp 50/50 split. I want the black on the outside to aid visibility and to match the wingtips and cowl cheeks.
I've also test run my engine. I'm using an OS 70 Surpass ii. It took a while to start, likely as it was so full of oil from storage. But it burst to life and after a moment to warm up was soon ticking over nicely with a 12x8 prop. I decided on a 12x8 as I'm worried that with the hefty weight of the plane I'll need more airspeed to prevent stalling. This is the heaviest plane I'll have flown and also has one of the smallest wing areas. I'll be careful. Flaps should help low speed stability.
I leaned out the low end a little so that it accelerates for a few seconds before dying upon the idle pinch test. I used a tach to peak and drop 400 or so RPM (I tend to over richen). I think it was about 10,000 RPM. I'll check again. Idle was about 2300 RPM. I'm not looking for any records with high/low RPM, just stable, reliable operation.
The exhaust on the bottom is wonderful. Almost no residue on the plane!
PD
04-10-2015, 07:50 AM
#31
Member
Thread Starter
Join Date: Aug 2013
Location: Wheaton, IL USA
Posts: 64
Likes: 0
Received 0 Likes
on
0 Posts
Last night I aligned the cowl to the spinner and added a small screw to the top center, which along with two screws on the bottom hold the cowl on.
I added the cheek stripes first in orange, but removed it when I tried black on the other side. It seems to look better that way. In the image you'll see the black stripe is slightly too narrow at the front. I'll replace it tonight, I want the cowl cheek and the stripe to be consistent in size and colour.


The wheel pants are drying. I've applied a coat of MonoKote white on the 'inside' of each. The'll be black on the outside half and white on the inside half.
I adjusted the CG last night with all but the wheel pants in place. I added 1/4oz more tail weight using velcro in the battery bay at the back. Turns out my rearward battery bay wasn't necessary, the plane balanced well with the battery (1100mAh LiFe from ValueHobby.com) above the wing brace. Still, I'm using the 'battery' bay for adding weight and I'm keeping the switch there as it is discrete. 3 1/4oz lead in the tail seems ideal.
Next: Reapplying a black stripe / installing wheel pants / final checks / maiden .
.
PD
I added the cheek stripes first in orange, but removed it when I tried black on the other side. It seems to look better that way. In the image you'll see the black stripe is slightly too narrow at the front. I'll replace it tonight, I want the cowl cheek and the stripe to be consistent in size and colour.
The wheel pants are drying. I've applied a coat of MonoKote white on the 'inside' of each. The'll be black on the outside half and white on the inside half.
I adjusted the CG last night with all but the wheel pants in place. I added 1/4oz more tail weight using velcro in the battery bay at the back. Turns out my rearward battery bay wasn't necessary, the plane balanced well with the battery (1100mAh LiFe from ValueHobby.com) above the wing brace. Still, I'm using the 'battery' bay for adding weight and I'm keeping the switch there as it is discrete. 3 1/4oz lead in the tail seems ideal.
Next: Reapplying a black stripe / installing wheel pants / final checks / maiden
.PD
04-10-2015, 08:23 AM
#32
Member
Thread Starter
Join Date: Aug 2013
Location: Wheaton, IL USA
Posts: 64
Likes: 0
Received 0 Likes
on
0 Posts
One more thought on the cowl and spraying.
Next time I'll attach the cowl to the plane before masking off areas to be sprayed. My black 'cheeks' were not symmetrical leading to another round of spraying.
I'd consider the fiberglass cowl next time; it's really taken more time than $37 is worth to me. The wing tips were quick and the wheel pants were much easier than the cowl. It's just galling to spend (after shipping) 1/2 the cost of the plane on a cowl that you don't 'need'.
PD.
PD.
04-11-2015, 02:20 PM
#35
Member
Thread Starter
Join Date: Aug 2013
Location: Wheaton, IL USA
Posts: 64
Likes: 0
Received 0 Likes
on
0 Posts
Overall I'm very happy. The die-cut parts were a bit of a challenge, but more than likely, it was my impatience that led to some imperfect alignments early on with the fuselage. The covering was easy and honestly, no part was complicated. The cowl was by far the biggest frustration, but I'm happy with the result. I expect I'd do it a lot faster next time; the cowl alone was weeks of work. The fuse and wing (besides the warp and unwarping) were quick builds, it's the finishing that takes me the longest.
The prop I'm using is a Dynathrust 12x8. The testing in the garden just now achieved 10,500 RPM with an idle of 2300 RPM. I'm concerned that I'll not get much vertical performance as a full-throttle test resulted in gravity winning. Perhaps I'll switch to the APC 13x6.
The AUW was a hefty 6.9lbs. A full 1/2 lb overweight despite my LiFe battery and 3 mini-servos. Likely culprits for the over-weight plane are me using too much CA (2oz total used) and the hefty engine (23oz). The added weight pushes the wingloading to about 25oz/sqft - war-bird territory.
I was careful to follow the CG guidelines placing the CG on the front edge of the main spar. Used my 'digital' CG machine (read: fingers).
The control surface throws were set as suggested in the manual for both high and low. The flaps were set as between the suggested high and low settings. I'm keen to experiment with the flaps.
For grass, my biggest concern is the 2.5" wheels barely peek out of the wheel pants. Testing around the garden revealed the plane is keen to nose-over. I'll have to head to the field with the runway to minimize aggravation.
I'm excited to maiden her!
PD.
Next: Maiden.
04-12-2015, 03:43 AM
#38
Junior Member
Join Date: Jan 2011
Location: , MA
Posts: 5
Likes: 0
Received 0 Likes
on
0 Posts
To save you time in the future this company makes high quality fiberglass parts for most kits. I checked they have cowl 38 dollars and wheel pants. http://www.fiberglassspecialtiesinc.com/catalog.htm. Those plastic parts suck to assemble. Great job on build.
04-12-2015, 08:32 PM
#39
Member
Thread Starter
Join Date: Aug 2013
Location: Wheaton, IL USA
Posts: 64
Likes: 0
Received 0 Likes
on
0 Posts
Thanks for the compliments guys; it's a pleasure to hear from each of you.
daman - yes, I know. Believe me, I looked many times! Maybe for the next build. We'll see. The wheelpants and wingtips were much faster, I expect it was that I was just more experienced with the ABS by then.
I've just added a blockout piece of ABS to the left hand side cowl opening to improve in/out air through-flow ratio as has been suggested on several other build threads. The engine was rather hot (entirely subjective) after testing the other day. I'll paint the ABS, which is slightly recessed, in a matte black paint to minimize it's presence. I noted that I'm able to adjust the HSN directly through the front cowl opening using a long hemostat (ACE hardware) - a useful realization that will allow me to keep the top of the cowl untouched.
In fact, I could make a small opening on the bottom of the cowl for the crankcase vent to allow easy administration of after run oil as the short line dosen't have to be attached to the updraft intake. Something to think about.
PD.
04-21-2015, 04:22 PM
#40


Join Date: May 2012
Location: Reinholds,
PA
Posts: 24
Likes: 0
Received 0 Likes
on
0 Posts
Hello mamalade1,
I'm the same guy that sent you info on RCG regarding what to expect from your RV-4 in flight (my handle there is SeaEraCaptain). Here's a few pics of my RV-4, the air-frame has plenty of flights on it but still flies great - and the .70 Surpass II really moves it along! Good luck on your maiden flight!

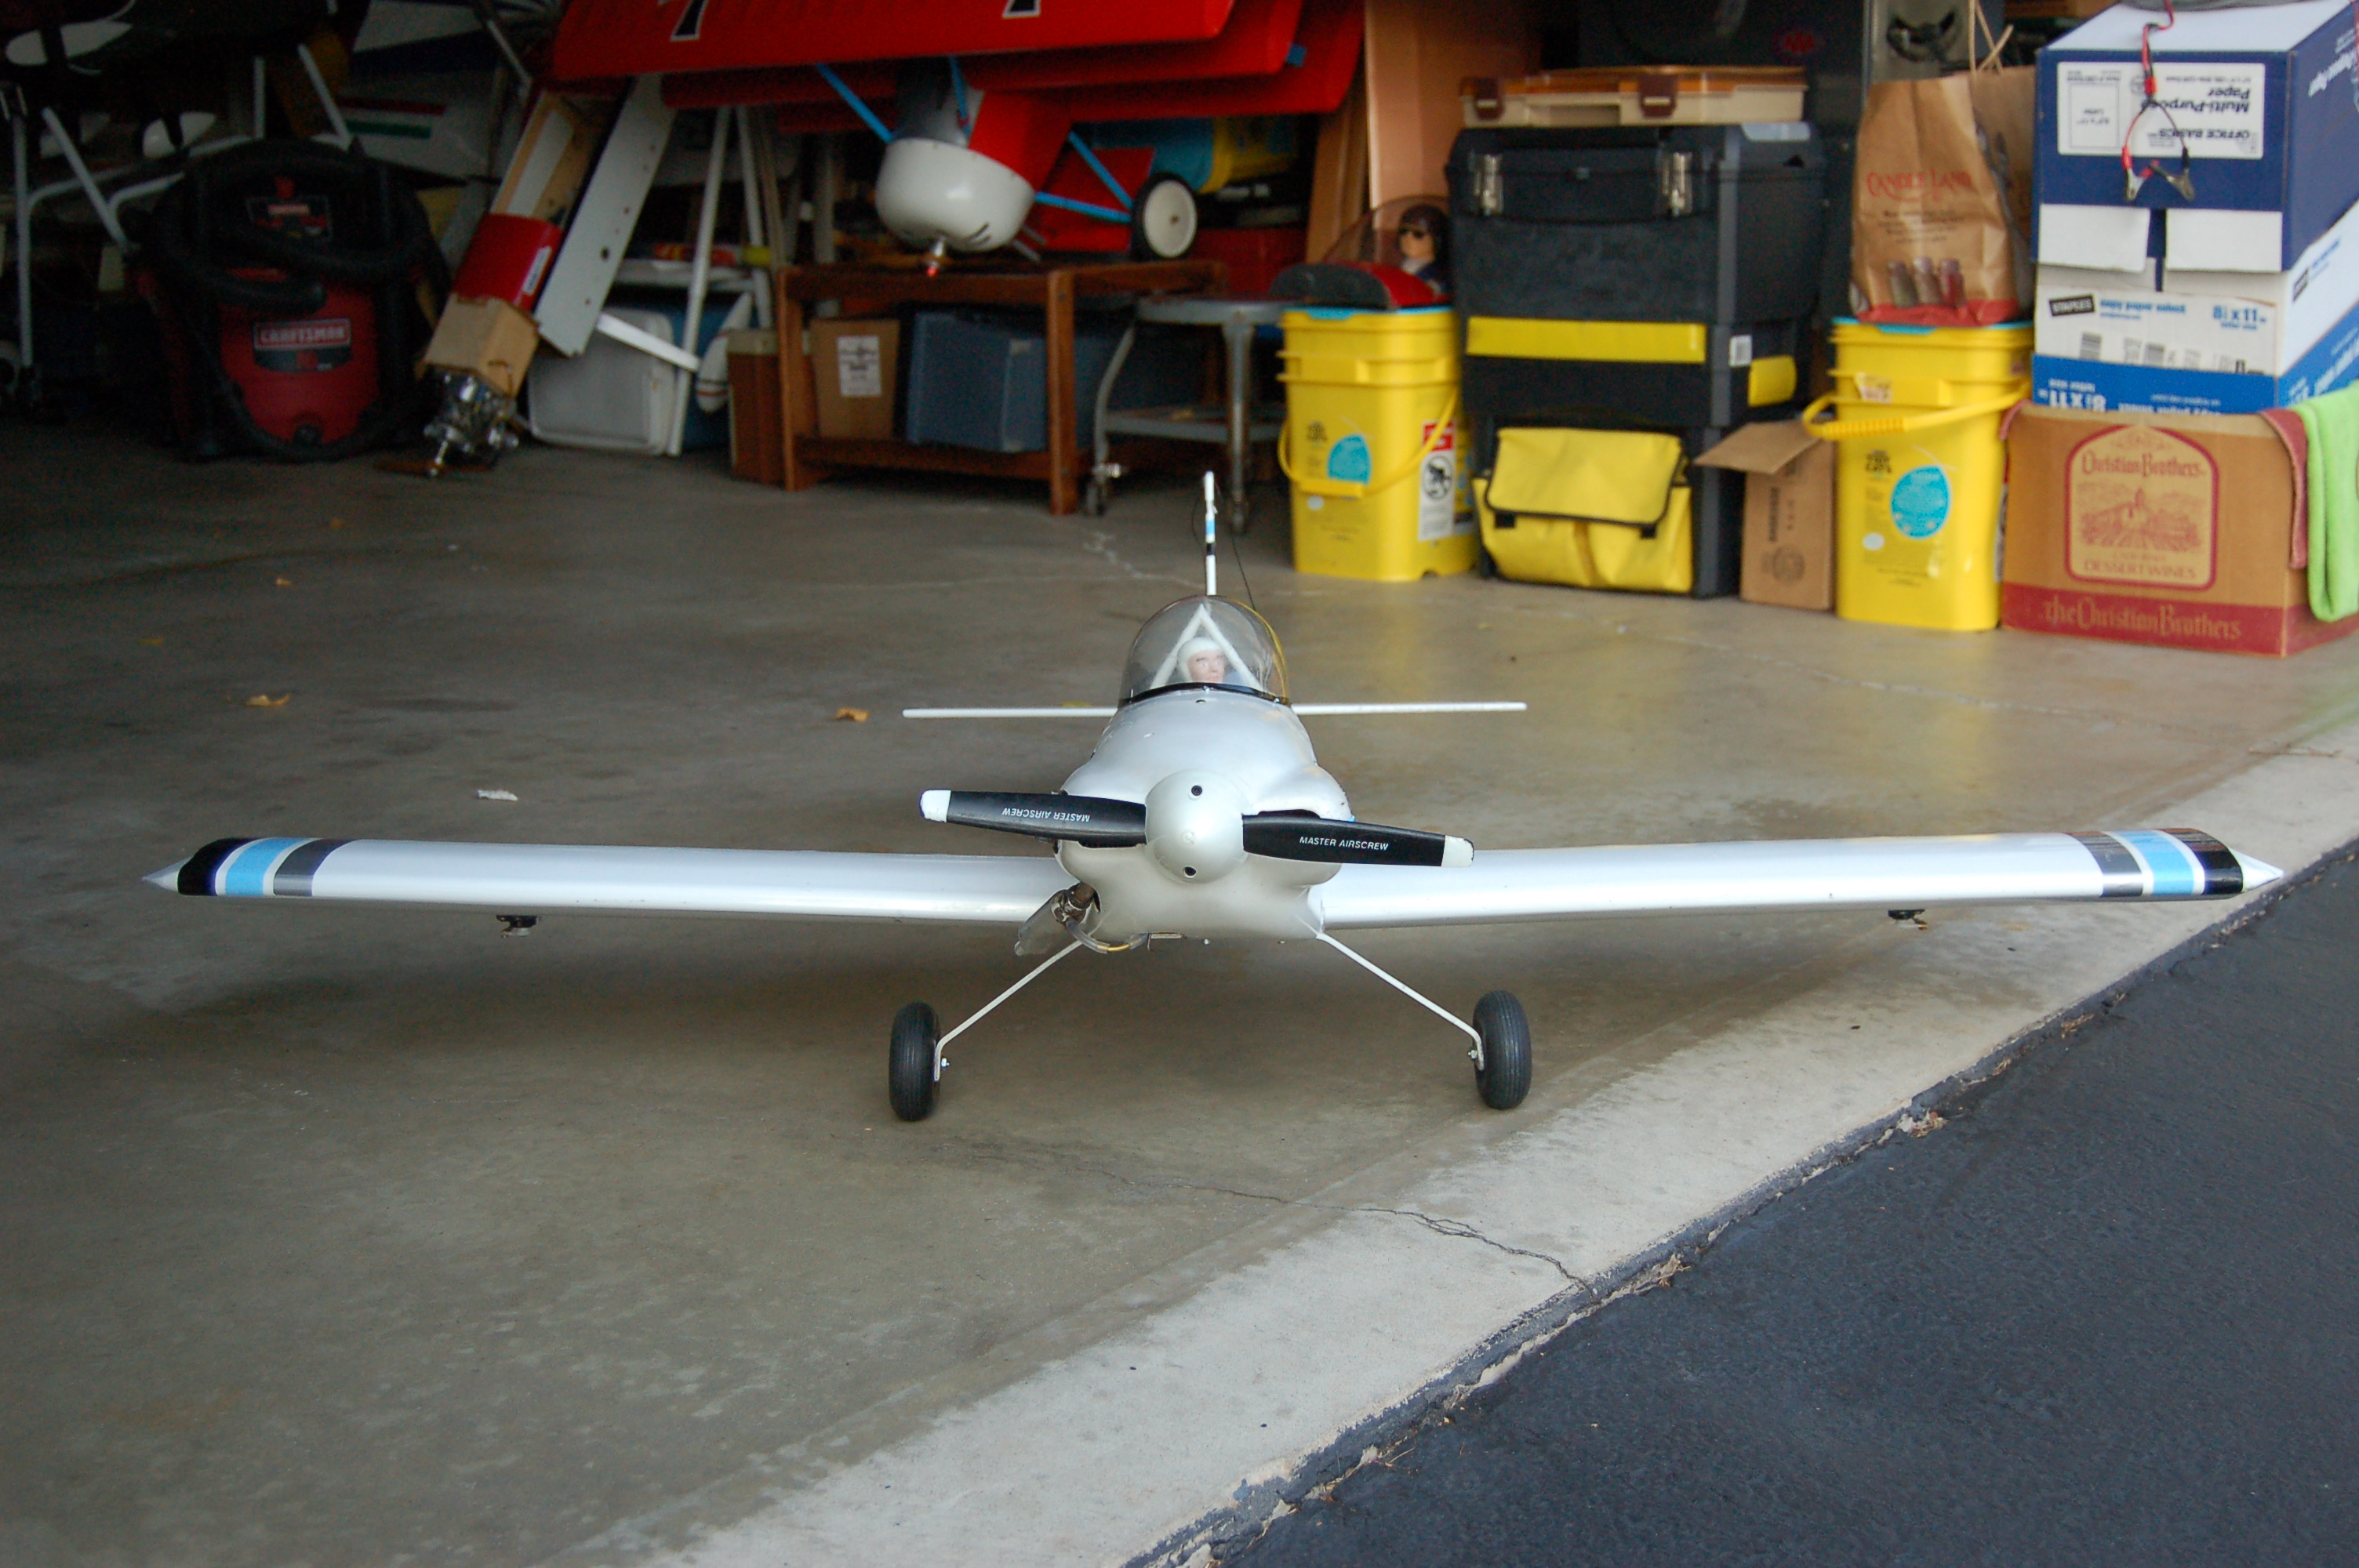
I'm the same guy that sent you info on RCG regarding what to expect from your RV-4 in flight (my handle there is SeaEraCaptain). Here's a few pics of my RV-4, the air-frame has plenty of flights on it but still flies great - and the .70 Surpass II really moves it along! Good luck on your maiden flight!
04-21-2015, 08:17 PM
#41
Member
Thread Starter
Join Date: Aug 2013
Location: Wheaton, IL USA
Posts: 64
Likes: 0
Received 0 Likes
on
0 Posts
SeaEraCaptain,
Looks good! Interesting to see it without the wheel pants. I may be flying off grass, but I just want to try them out. 1st time for me.
Latest weather forecast says 21MPH winds tomorrow. Flyin' Wednesday is looking patchy. Maybe no maiden. Maybe just time for my Sig Somethin' Extra to battle the breeze?
The RV-4 ought to handle wind well having short wings, being heavy, and well powered. But for a maiden? I don't want to be posting a crashed photo this time tomorrow.
PD.
04-22-2015, 10:33 AM
#42
Member
Thread Starter
Join Date: Aug 2013
Location: Wheaton, IL USA
Posts: 64
Likes: 0
Received 0 Likes
on
0 Posts
21MPH winds. Blustery. 40F. Even a little snow in the air. Not a great day to maiden... but, it's been a long time coming.
I took up my Sig Somethin' Extra to warm up and noticed a lot of wing twitching and significant rudder needed to track straight due to crosswinds. One brief flight. Then a pause for thought. Should I fly?
I reasoned the weight and short wings of the RV-4 would help. I decided to go for it.
Flaps down to help me get off the long grass ASAP. An inelegant take off (nearly full power with up elevator to prevent nose over) with an a unsurprising near tip stall due to low air speed and strong elevator use (again, no surprise). She was up fast and quickly got safely high. Essentially no trimming! Tracked well. No elevator adjustments (a first for me), rudder was of course fine (easy to set/check) and no aileron trim; although the strong gusts made that hard to fully assess as it was never really long before it was blown about.
I flew for just a few minutes, my most timid maiden to date. Following good advice I checked for trim and then started to practice landing. The potent wind allowed a very slow and thankful landing leaving the engine running and me relieved.
My nerves are gone and now I look forward to putting many fun flights on her!
Thanks for all your comments and advice.
Happy Landings.
PD
04-22-2015, 03:33 PM
#43
Join Date: May 2012
Location: Reinholds,
PA
Posts: 24
Likes: 0
Received 0 Likes
on
0 Posts
Glad to hear your maiden flight went well! It was brave to give it a go in such conditions - but these chunky little RV-4's do fare pretty well in the wind. I've yet to fly my RV-4 this season but I'll be knocking the cob webs off it soon enough. Here's to hoping all your future flights go well with this bird!
04-24-2015, 06:08 AM
#45
Member
Thread Starter
Join Date: Aug 2013
Location: Wheaton, IL USA
Posts: 64
Likes: 0
Received 0 Likes
on
0 Posts
Let's be honest, it was a bad idea to maiden in that weather. But I got away with it.
Next time I'll be far more relaxed now the maiden nerves are gone.
Thank you to everyone for your support and kind words.
PD.
Next time I'll be far more relaxed now the maiden nerves are gone.
Thank you to everyone for your support and kind words.
PD.
04-26-2015, 04:26 PM
#46
Join Date: May 2012
Location: Reinholds,
PA
Posts: 24
Likes: 0
Received 0 Likes
on
0 Posts
Hello marmalade1,
I flew my RV-4 for the first time this season. You had asked how long I can fly mine (we're both running OS .70 Surpass II's). I have the timer set on my Futaba 7CAP for 12:30 (I always forget to set the thing - but today I remembered to switch it on for each flight). I flew mine for a little over 12:30 one flight and I still had about a quarter tank left on my 12 ounce tank - so I would say 10 to 12 minute flights should not be a problem. Remember - I'm spinning a 12 x 9 - if you're spinning a 13 x 6 you might be a little more fuel efficient. I hardly ever move the throttle any higher than 3/4 - that thing tears right around at 1/2 to 2/3 throttle so that's about how heavy I usually am on the hammer with this airplane.
How are you for ground clearance with that 13 x 6? The tips of my 12 x 9 "turn a little green" in the grass at my field but I've never had any taxiing incidents or nosed it over. I'm considering switching to a 13 x 6 - but am hesitant to try that since I'm mowing the grass a little with my 12" prop as it is.
I would refer to this airplane as a "high speed cruiser" with the .70 Surpass II - it's heavy but it can move and it does fare well in the wind. It climbs well and does nice stall (hammerhead) turns - it also has a good aileron roll rate as well. Loops are not a problem either but you need to carry good speed into them and all the way over the top to make them look pretty (weight issues with the airframe balanced for the .70 Surpass II). My RV4 also flies well inverted.
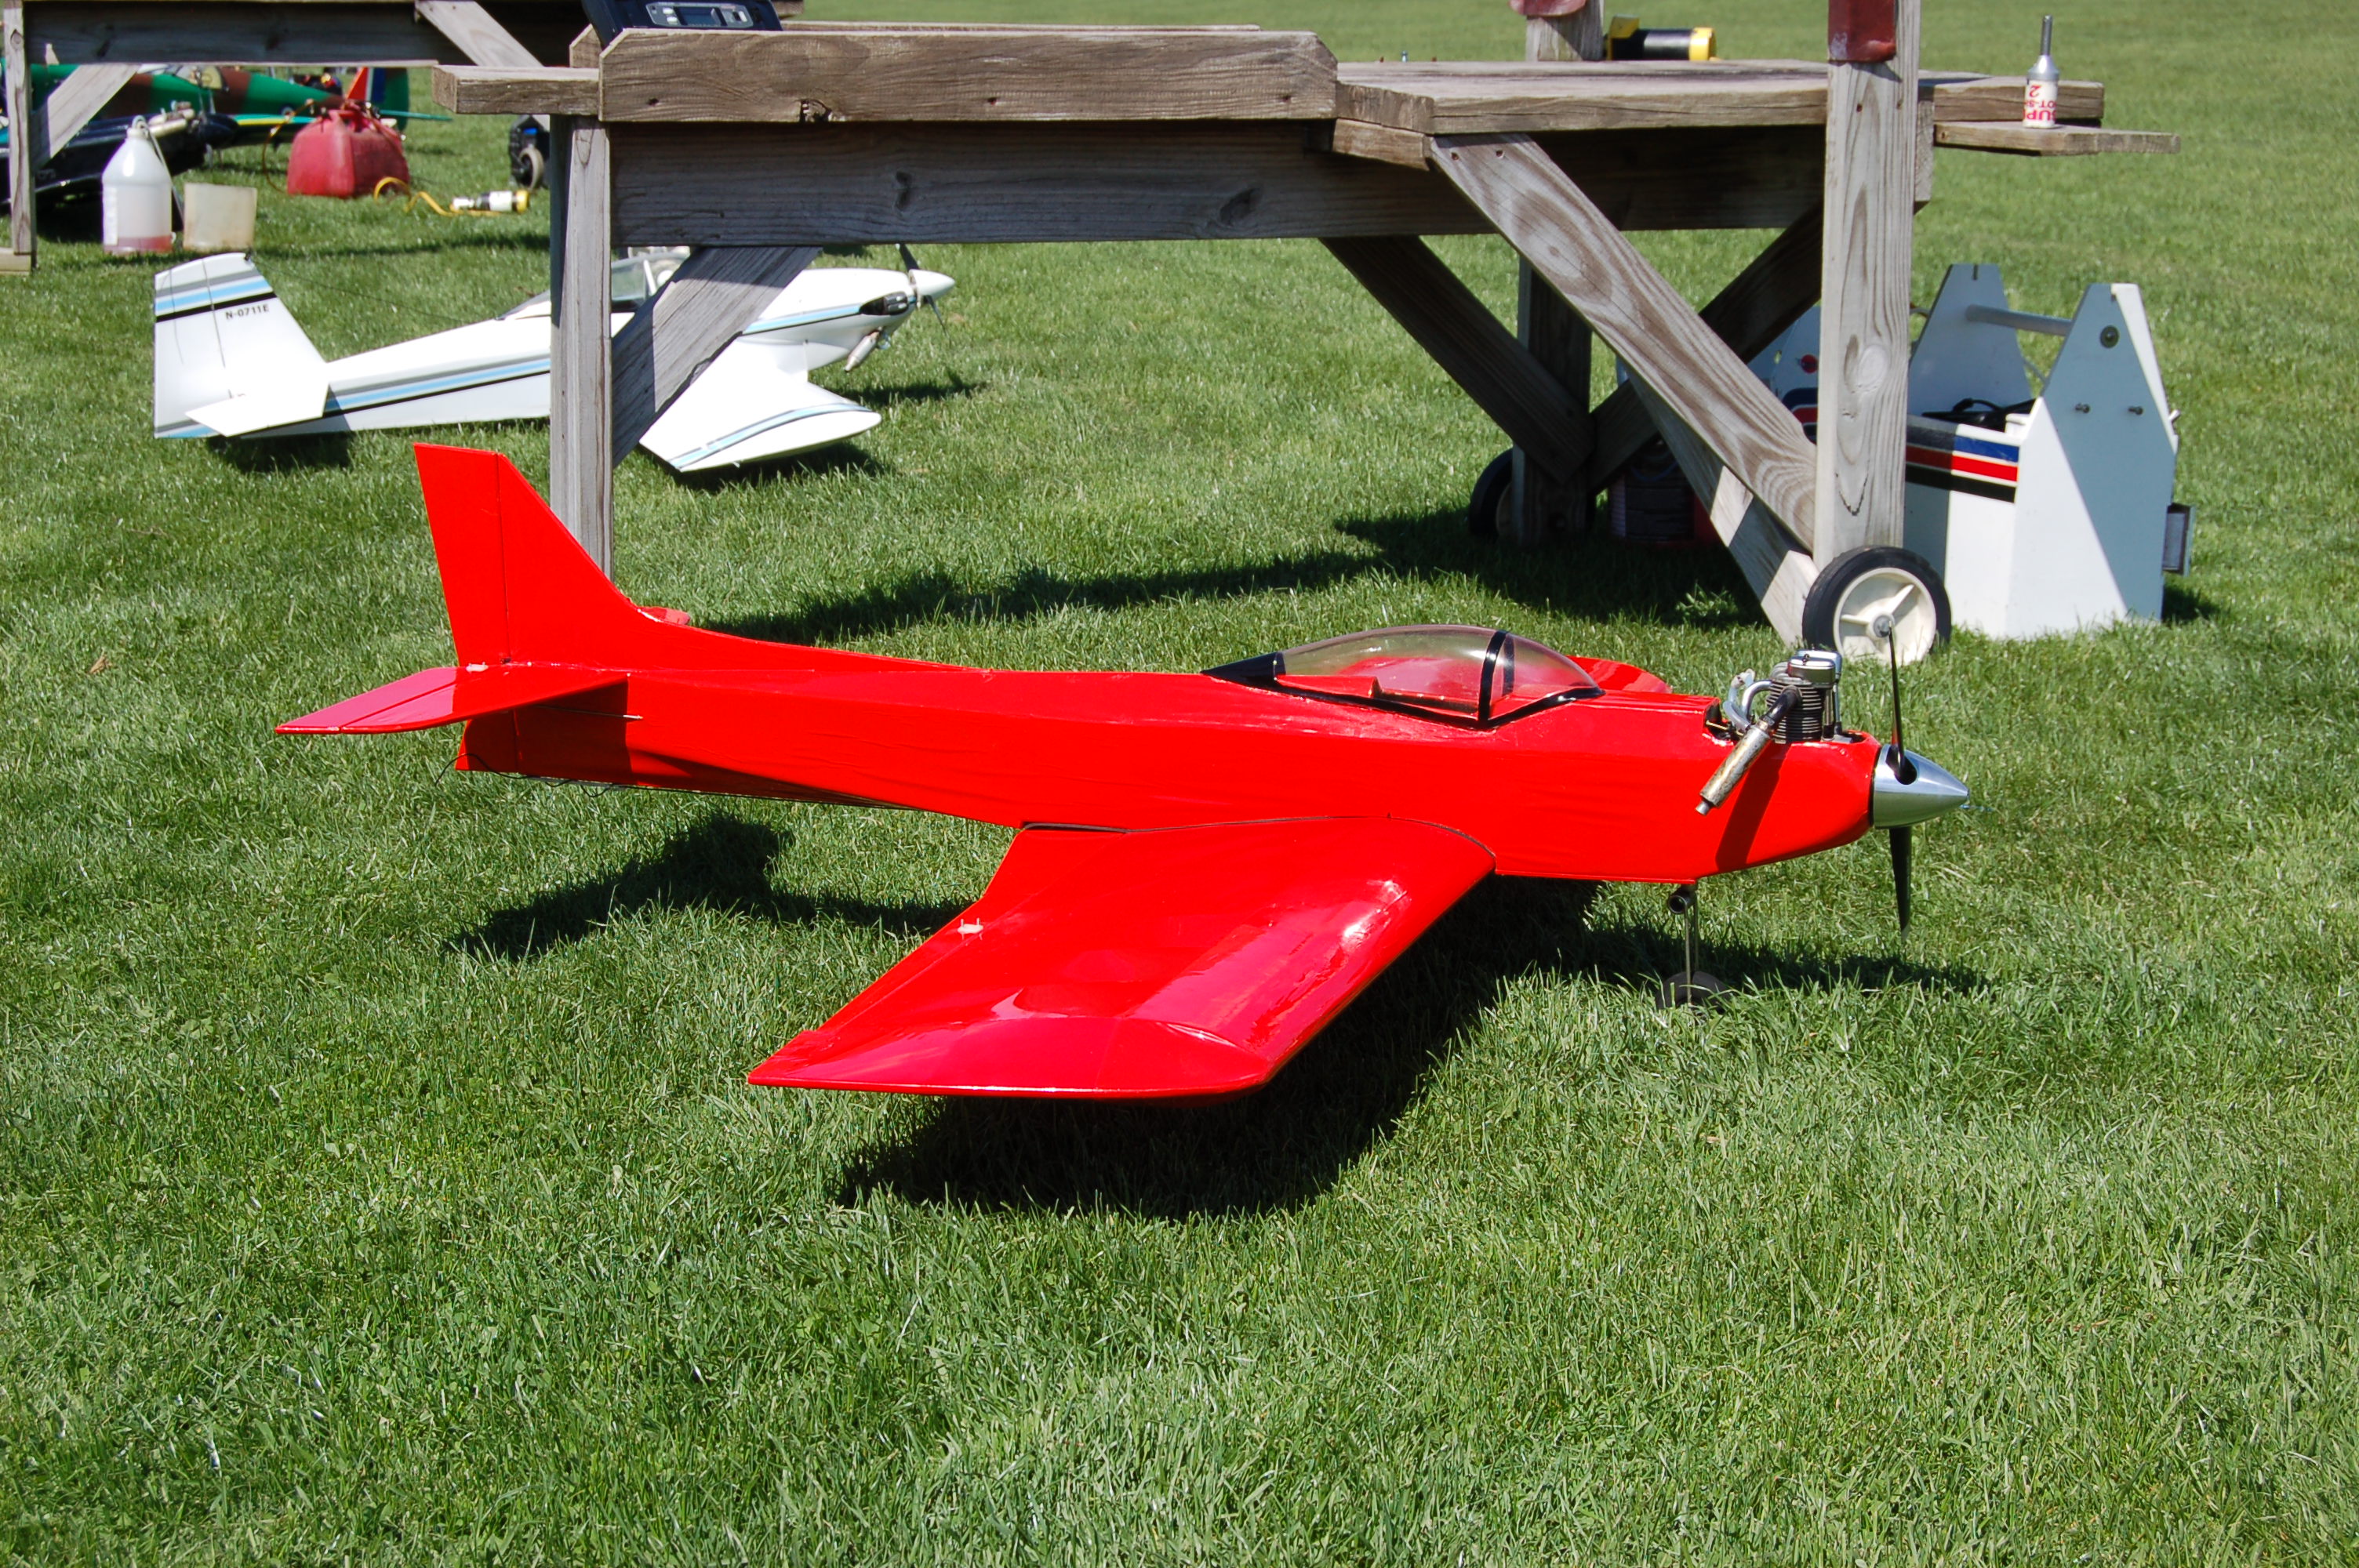
Here's a shot from my field today - weird winds from periods of calm to 10 - 15 mph from the north, east, south and west (more than a couple of times I took off in one direction and landed the opposite). The shot shows the Top Flite Contender I'm breaking in - my RV4 is in the background.
Happy Flying!
I flew my RV-4 for the first time this season. You had asked how long I can fly mine (we're both running OS .70 Surpass II's). I have the timer set on my Futaba 7CAP for 12:30 (I always forget to set the thing - but today I remembered to switch it on for each flight). I flew mine for a little over 12:30 one flight and I still had about a quarter tank left on my 12 ounce tank - so I would say 10 to 12 minute flights should not be a problem. Remember - I'm spinning a 12 x 9 - if you're spinning a 13 x 6 you might be a little more fuel efficient. I hardly ever move the throttle any higher than 3/4 - that thing tears right around at 1/2 to 2/3 throttle so that's about how heavy I usually am on the hammer with this airplane.
How are you for ground clearance with that 13 x 6? The tips of my 12 x 9 "turn a little green" in the grass at my field but I've never had any taxiing incidents or nosed it over. I'm considering switching to a 13 x 6 - but am hesitant to try that since I'm mowing the grass a little with my 12" prop as it is.
I would refer to this airplane as a "high speed cruiser" with the .70 Surpass II - it's heavy but it can move and it does fare well in the wind. It climbs well and does nice stall (hammerhead) turns - it also has a good aileron roll rate as well. Loops are not a problem either but you need to carry good speed into them and all the way over the top to make them look pretty (weight issues with the airframe balanced for the .70 Surpass II). My RV4 also flies well inverted.
Here's a shot from my field today - weird winds from periods of calm to 10 - 15 mph from the north, east, south and west (more than a couple of times I took off in one direction and landed the opposite). The shot shows the Top Flite Contender I'm breaking in - my RV4 is in the background.
Happy Flying!
04-28-2015, 03:49 PM
#47
Member
Thread Starter
Join Date: Aug 2013
Location: Wheaton, IL USA
Posts: 64
Likes: 0
Received 0 Likes
on
0 Posts
Slapshot1997,
Thanks for the flight time information; that'll help ease my fears of running out of fuel. From what I can remember, the plane was scooting along at 1/2 throttle. Tomorrow is forecast for highs of 65F (about 18C) and with winds of 12 MPH. I'm excited.
Tonight I'll take a sleeping pill (always needed before a flying day), check all LiFe batteries, field battery, tx charge, surfaces, connectors, LG bolts and get the car ready with 2 planes. RV-4 40 and... to be decided.
The Contender looks good. I have heard good things about them. I fear I've reached 'Peak plane' - my hangar is full. I expect the'll be a loss at some point in the season. At the moment I've got ready to fly:
1) RV-4 40 (no surprise)
2) Sig Somethin' Extra with TT Pro .46
3) 4 Star 60 copy from Value Hobby
4) 40 size Stick with OS .46 LA
5) Sig 4 star 40 with Saito 56
I've got a CG Tiger 60 kit and a Tower 75 waiting... but perhaps I've had enough '2nd planes'. We'll see.
PD.


