


Beginner Build - Top Flite Spitfire Build - the ugly pictures
 02-06-2016, 07:20 AM
#1

Thread Starter
This build is intended to show beginners what it looks like to build a kit. The pics purposely show the plane in its ugliest condition – it’s quite easy to make things look great when posting pics.
I was going to wait until the plane was painted, but there seems to be several people starting the kit so I'll start now.
The plane is relatively good looking although there are quite a few out-of-scale areas that we all know: tail section enlargement, dorsal fin, gull wings... With that said, I did not put a cockpit in mine, no modifications other than lightening holes in the stab.
I did mount the retracts as far forward as possible, and made no modifications to ribs, or fuse formers. I did cheat on the engine placement but we’ll get to that later. So real quick:”
Tail section and wing building are easy and quick.
Main pit falls are coming up are:
Mounting the stab – incidence meter is required
Mounting retracts – patience required
Glassing – waterbased poly over 1/16” sheet will not work (I spent quite a long time repairing this mistake).Waterbased poly 3/32 or 1/8 is fine
I was going to wait until the plane was painted, but there seems to be several people starting the kit so I'll start now.
The plane is relatively good looking although there are quite a few out-of-scale areas that we all know: tail section enlargement, dorsal fin, gull wings... With that said, I did not put a cockpit in mine, no modifications other than lightening holes in the stab.
I did mount the retracts as far forward as possible, and made no modifications to ribs, or fuse formers. I did cheat on the engine placement but we’ll get to that later. So real quick:”
- I use tape on trailing edges when sanding because I don’t like the edges nicked up from sanding.
- Things have to be straight. I use machinist block I bought on eBay for about $15 for an almost complete kit. All block have perfectly flat surfaces and perfect right angles.
- I use a magic marker on leading edges to preserve the gentle curves (especially important on the Spitfire)
Tail section and wing building are easy and quick.
Main pit falls are coming up are:
Mounting the stab – incidence meter is required
Mounting retracts – patience required
Glassing – waterbased poly over 1/16” sheet will not work (I spent quite a long time repairing this mistake).Waterbased poly 3/32 or 1/8 is fine
 02-06-2016, 07:35 AM
#2
Thread Starter
not much to say about the fin/stab/wing framing. No issues that I remember. Just a few notes. Don't glob on the epoxy when gluing fin to the stab, there isn't much of a fillet there. Again note the blue marker on the leading edge of fin. If I sand that blue line I change the shape of the fin...
To this point there really are not any major issues to deal with, things together fit well and the build is straight forward. however, next comes retracts and wing sheeting...
To this point there really are not any major issues to deal with, things together fit well and the build is straight forward. however, next comes retracts and wing sheeting...
02-06-2016, 10:23 AM
#3
Thread Starter
I almost forgot (remembered when looking through my pics), other than very few exceptions, there is no such thing as a flat building board. I absolutely cannot stand to start a build with a board that isn't perfectly flat. Errors are going to creep into the build, so you have to start off perfectly flat. This is how:
The pics below show my board being taken off the table once it was no longer needed.
Quick note about glues (not epoxy). I think I've tried most of them and found that Titebond Original works best for me. Titebond III is "rubbery". I sparingly use thin, medium and thick CA, mostly in gluing in ribs. I also like my 5 minute epoxy, dabbing it here and there (forward of the balance point). Ratio of glue use is something like Titebond - 85+%, CA - 5 to 10% and epoxy 5 to 10%.
- Find a strong table that is as flat as possible. The building surface will be a 2’x4’ suspended ceiling panel from Home Depot or somewhere.
- Place a long ruler lengthwise and widthwise over the table to find where it sags – they all sag.
- Use 1/8”, 3/32”, 1/16” balsa scraps under the celling panel to level it out.
- Once you get close to perfect, take scrap 8 ˝”x11” paper to get it perfect.
The pics below show my board being taken off the table once it was no longer needed.
Quick note about glues (not epoxy). I think I've tried most of them and found that Titebond Original works best for me. Titebond III is "rubbery". I sparingly use thin, medium and thick CA, mostly in gluing in ribs. I also like my 5 minute epoxy, dabbing it here and there (forward of the balance point). Ratio of glue use is something like Titebond - 85+%, CA - 5 to 10% and epoxy 5 to 10%.
Last edited by Scratchie; 02-06-2016 at 11:00 AM. Reason: typo typo forgot
02-06-2016, 10:23 PM
#5
 02-07-2016, 02:33 PM
#7
Thread Starter
Construction of the wing ribs and spars was easy and very fast (used CA here), everything fit well no issues.
When finished and joined together there was a small gap between the wing. Since the wing alignment and dihedral were correct I filled the gap with 5 minute epoxy – just one of those errors that creep into a build.
When finished and joined together there was a small gap between the wing. Since the wing alignment and dihedral were correct I filled the gap with 5 minute epoxy – just one of those errors that creep into a build.
02-07-2016, 02:48 PM
#8
Thread Starter
Sheeting the underside the wing was again straight forward, quick, with no issues. However, the upper side of the wing has a lot of compound curves. I had to put way too much weight the get the balsa to lay flat – even after soaking in alcohol. The issues is that there is just too much wood sheeting at the wing tip.
One pet peeve of mine in building is incorporating stress into the plane – forcing pieces to fit. I don’t like it, and down the road it’s a great source for problems. So I cut stress relief lines into the sheeting, removed excess wood, and then glued. In the pics below you can see how much weight it took to get the sheeting to lay flat without the stress relief. The pics with blue tape and just a few weights were taken after the cuts were made and the glue was drying (Titebond).
Btw, I’m a big fan of plank and frame construction, it always gives truer corves. Although I followed the manual to a tee on this build, any more Top Flite kits I build will use plank and frame throughout.
Last edited by Scratchie; 02-07-2016 at 02:56 PM.
02-08-2016, 12:32 PM
#9
Thread Starter
I used no CA in applying the wing sheeting, just Titebond. Once the sheeting was on and trimmed down, I sand out imperfections. On the pics below you’ll see light areas on the wing (dashed line and arrows). These areas are where the wing ribs are and the light areas have been over-sanded, creating a slightly rolling surface. This something I always do and is not a problem because once the wing is fiberglassed and sanded (100, 240, 400 grit – 600 grit right before final paint) the entire wing will nice and smooth with no bumps, hills or valleys. Do not be afraid of 100 grit sandpaper, just go a little slower with it and be careful.
I try the get the wing as close to perfect before sanding. On all surfaces of the plane, everywhere, I’ll periodically turn off the lights and use a flash light to find high and low spots. It might sound like it’s overdoing it, but I guarantee every imperfection will show in daylight. I use a light-weight home depot filler for low spots, sparingly. I avoid filler AMAP aft of the balance point.
I try the get the wing as close to perfect before sanding. On all surfaces of the plane, everywhere, I’ll periodically turn off the lights and use a flash light to find high and low spots. It might sound like it’s overdoing it, but I guarantee every imperfection will show in daylight. I use a light-weight home depot filler for low spots, sparingly. I avoid filler AMAP aft of the balance point.
02-09-2016, 01:46 PM
#11
Thread Starter
Retracts were a real pain to install. I checked every post and thread before I decided that there was no way to install them (Robart pneumatic) without really cutting into the wing ribs. Unfortunately I can’t find any pics of the install other than what was below. I can say that I placed them as far forward as possible, and used a Dremel to sand away wing ribs. After sanding I took leftover plywood to reinforce what was left of the ribs. I should have used expanding foam to reinforce but that will be for another build.
A note about wheels. I chose the ultralight (I think made by Don Brown), and ordered flat instead of round by mistake. I saved around 5 oz. on the mains, and 2 oz. on the tail. This weight savings, especially in the tail, will cancel out any weight gain from painting rather than using monocote. Yes they look like toy wheels, but then when the plane is assembled at the field nobody’s really going to see them anyway, and I want this airplane to be as light as possible. And again, if I want scale, I’d better find a different kit.
Wheel well inserts are 1-16” balsa, soaked in alcohol and taped around a jar of peanut butter until dry. Once dried they are pre-shaped to fit within the wheel well.
Last edited by Scratchie; 02-09-2016 at 01:49 PM.
02-11-2016, 09:36 AM
#13
Thread Starter
I think it was actually the retract rails that I had to cut into. It could have been that the bends in the struts were off a little. How much were those electric retracts - I should have used those.
02-11-2016, 11:36 AM
#14

I used no CA in applying the wing sheeting, just Titebond. Once the sheeting was on and trimmed down, I sand out imperfections. On the pics below you’ll see light areas on the wing (dashed line and arrows). These areas are where the wing ribs are and the light areas have been over-sanded, creating a slightly rolling surface. This something I always do and is not a problem because once the wing is fiberglassed and sanded (100, 240, 400 grit – 600 grit right before final paint) the entire wing will nice and smooth with no bumps, hills or valleys. Do not be afraid of 100 grit sandpaper, just go a little slower with it and be careful.
I try the get the wing as close to perfect before sanding. On all surfaces of the plane, everywhere, I’ll periodically turn off the lights and use a flash light to find high and low spots. It might sound like it’s overdoing it, but I guarantee every imperfection will show in daylight. I use a light-weight home depot filler for low spots, sparingly. I avoid filler AMAP aft of the balance point.
I try the get the wing as close to perfect before sanding. On all surfaces of the plane, everywhere, I’ll periodically turn off the lights and use a flash light to find high and low spots. It might sound like it’s overdoing it, but I guarantee every imperfection will show in daylight. I use a light-weight home depot filler for low spots, sparingly. I avoid filler AMAP aft of the balance point.
02-11-2016, 03:53 PM
#16
Thread Starter
I never had, but I do expect that my retract rails will fail during a hard landing, the rails were also cut into to accommodate the retracts, I'll post a pic...
02-20-2016, 08:36 AM
#19
Junior Member

Join Date: Jan 2016
Posts: 12
Likes: 0
Received 0 Likes
on
0 Posts
03-28-2018, 07:04 PM
#25
Thread Starter
Well this project was put on hold for quite a while, but when winter hit I decided to finish it up. I think the problems with the kit are well documented so I'm not going to go into them - if someone has a quesrion they can email me.
First set of pics are just the control surfaces attached. I used solartex because I was planning on painting rather than monocoat. Painting lets me make a distinct model, not just another kit. Anyway, pics...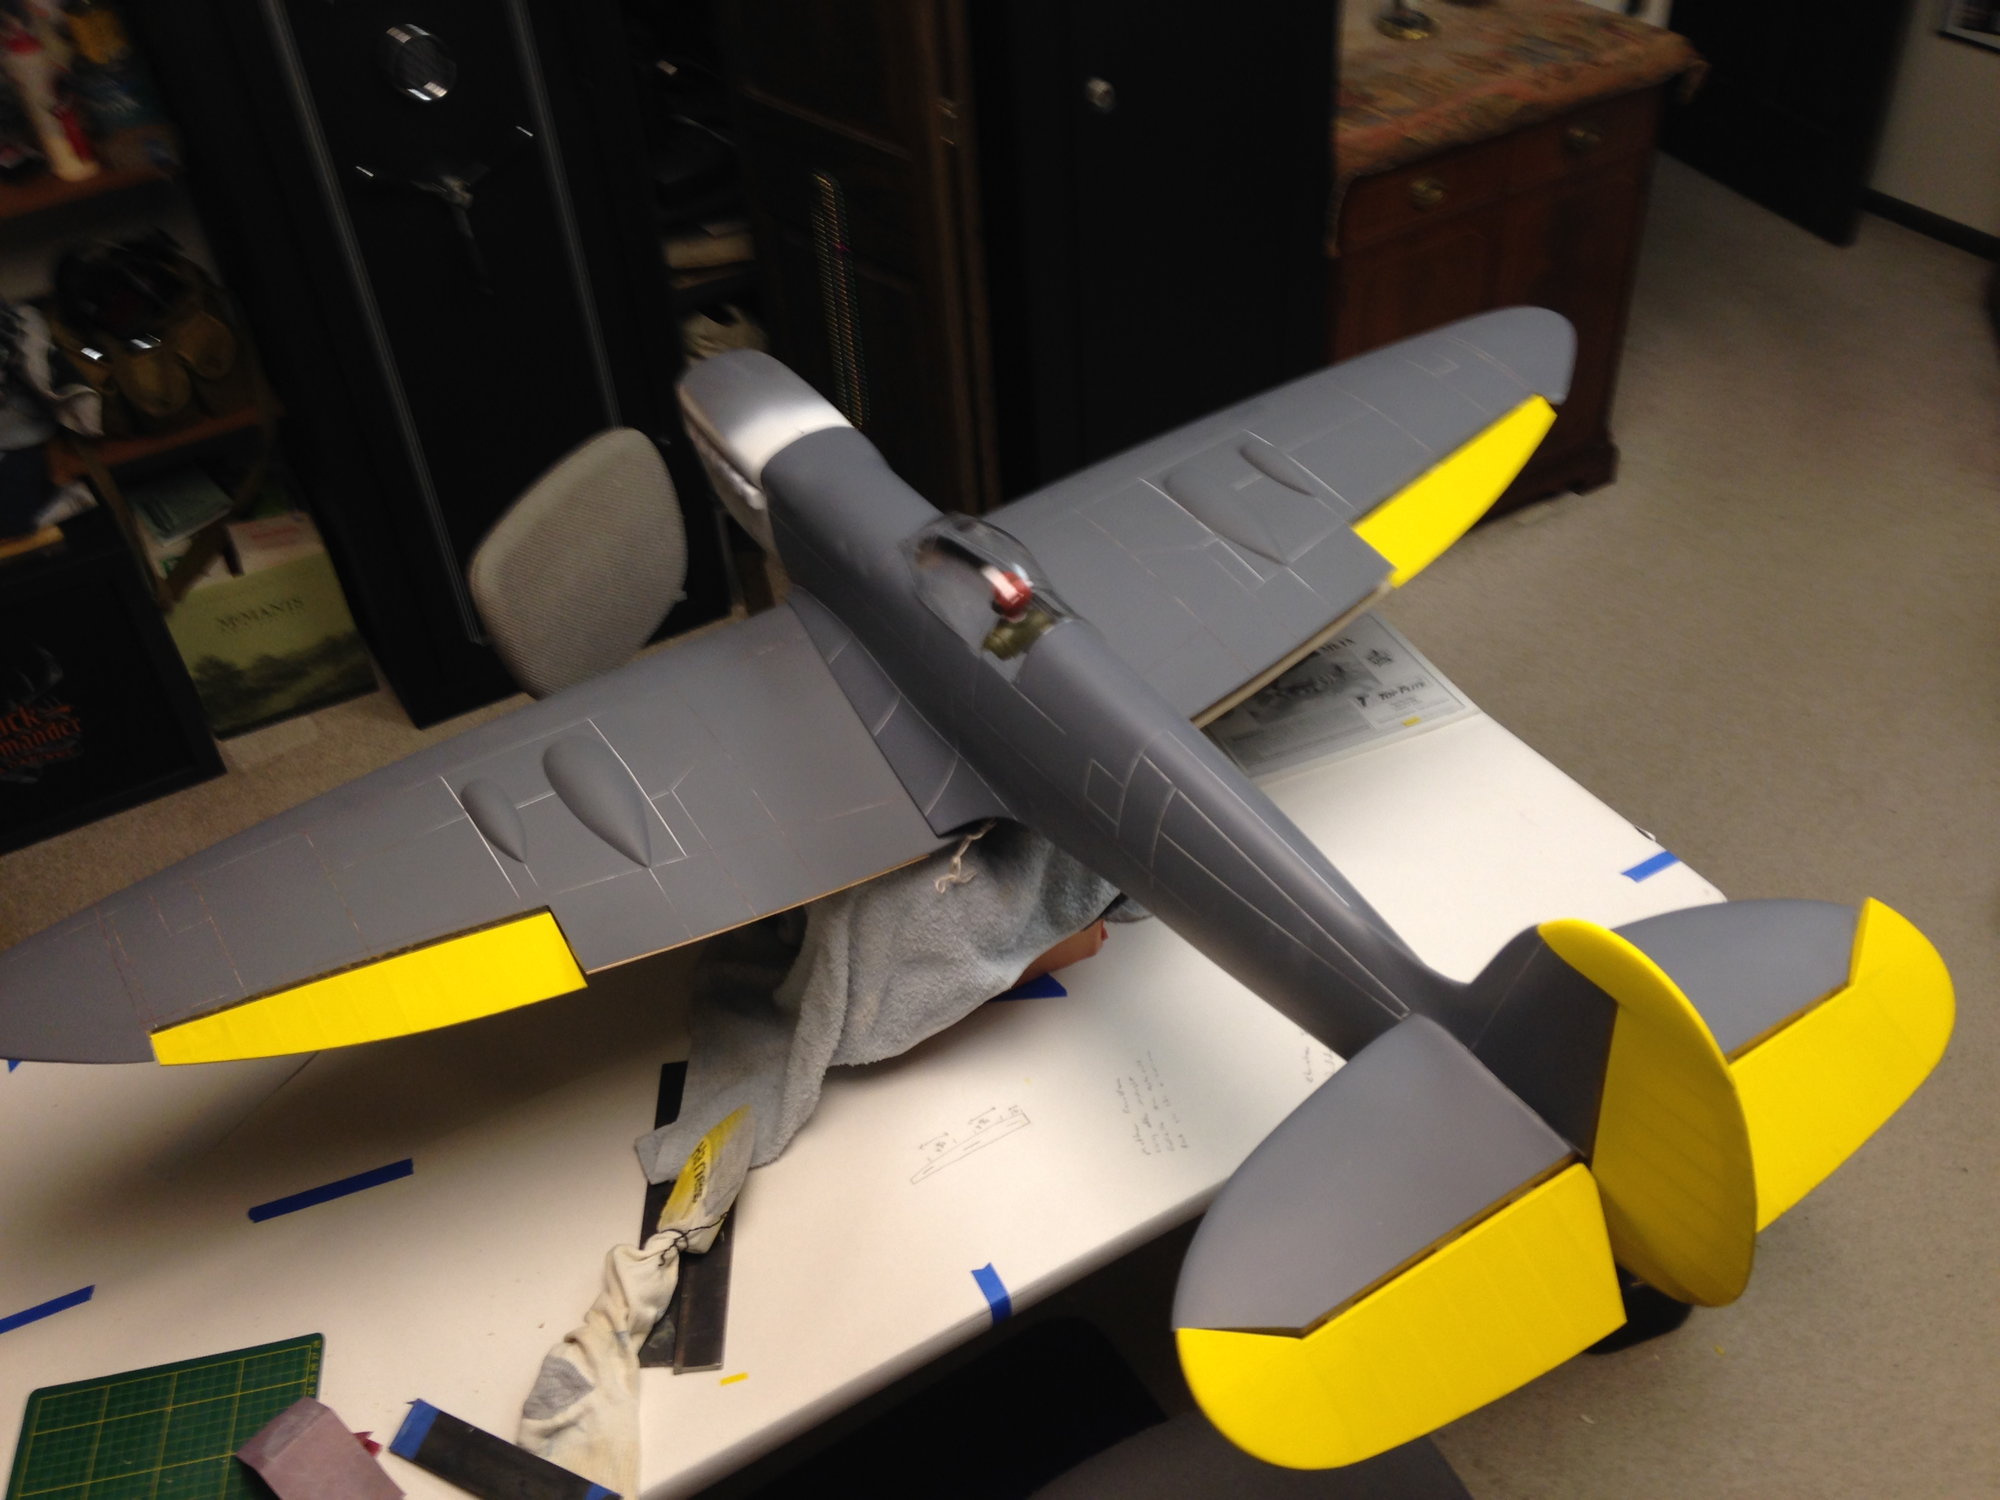
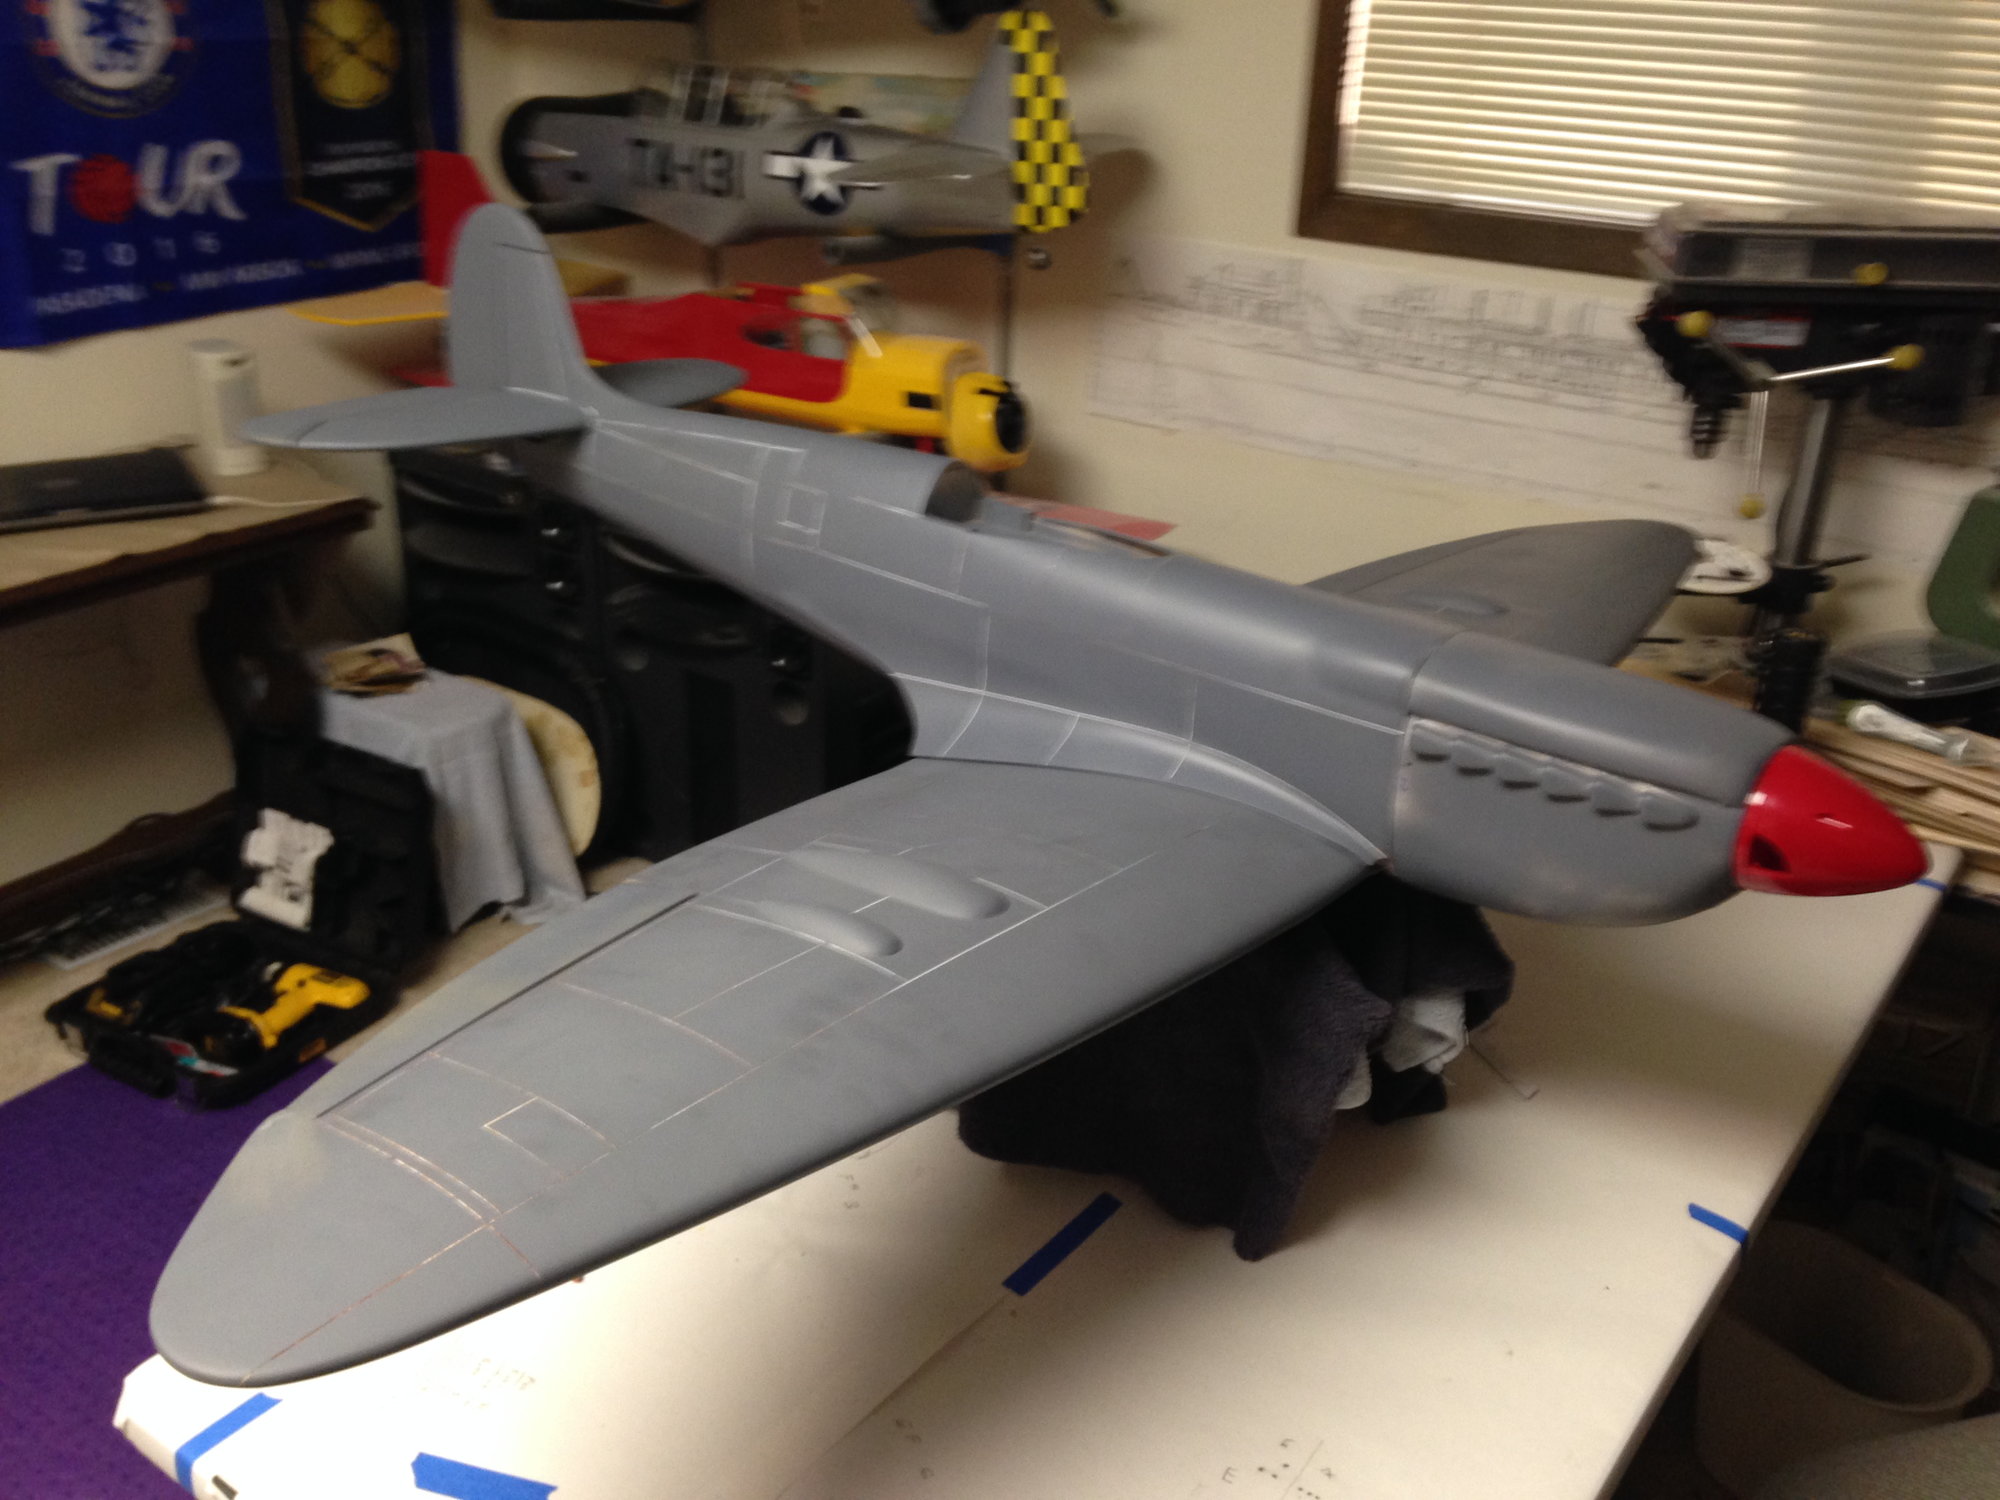
First set of pics are just the control surfaces attached. I used solartex because I was planning on painting rather than monocoat. Painting lets me make a distinct model, not just another kit. Anyway, pics...