


Balsa USA 1/4 Sopwith Camel rebuild , or.... what I have been doing this winter.
 01-27-2017, 09:47 AM
#1

Thread Starter

I am not going to do a lot of talking since most of these pics are pretty old, and I am winding down on the repairs...
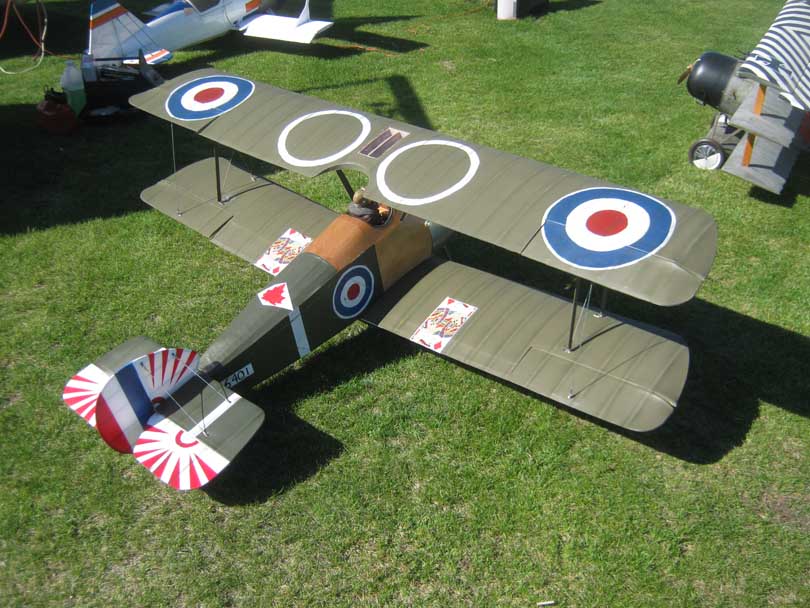
But here is the story. My good friend built this Camel, and it had a SHORT life. It broke the bottom wing off in flight at about 100 feet or so.. I didn't see it as I heard him yelling
"I need help I lost my trim"
As I was flying my 1/4 N11..and there were 3 or 4 other 1/4 scale WW1 planes up.. Only the pilot of the plane saw it...It hammered hard right on the nose straight in..
Here is the before....

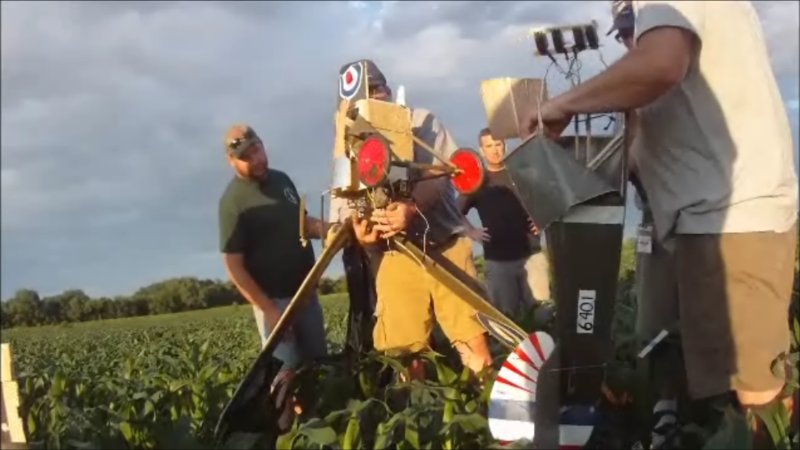
And here is the after !
[img]http: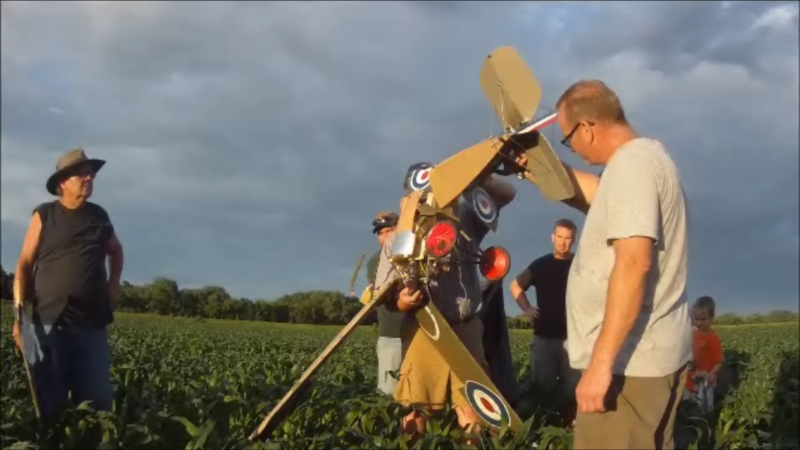
But here is the story. My good friend built this Camel, and it had a SHORT life. It broke the bottom wing off in flight at about 100 feet or so.. I didn't see it as I heard him yelling
"I need help I lost my trim"
As I was flying my 1/4 N11..and there were 3 or 4 other 1/4 scale WW1 planes up.. Only the pilot of the plane saw it...It hammered hard right on the nose straight in..
Here is the before....
And here is the after !
[img]http:
Last edited by foodstick; 01-27-2017 at 09:52 AM.
 01-27-2017, 09:50 AM
#2
Thread Starter
Here are a few videos we managed to get before that fateful day...
https://www.youtube.com/watch?v=h1rhnFrwG88 https://www.youtube.com/watch?v=DBZFYJFMpxs https://www.youtube.com/watch?v=07LXxS-J4k4
https://www.youtube.com/watch?v=h1rhnFrwG88 https://www.youtube.com/watch?v=DBZFYJFMpxs https://www.youtube.com/watch?v=07LXxS-J4k4
01-27-2017, 10:05 AM
#3
Thread Starter
My friend was heartbroken to say the least.. but wanted nothing to do with rebuilding it either...
I kept saying "Just don't throw it away" Finally he wanted to get rid of it as he had stripped the internals for his new BUSA 1/4 Spad.. So he dropped it at my house. I had picked up a Camel kit second hand so I passed the crashed Camel to another person interested in rebuilding it. After he had it a day and stripped the wings he called me and said..
"Come get this thing or I am trashing it" it was pretty bad...
Well I couldn't stand that it had been so short lived, and after he had stripped the wings I thought heck.. Thats a big help. I started cutting the damage out of the wings center sections.. removed the wingtips to build them differently, and started cutting parts for a new fuse...
There is no doubt now I could have built new wings faster than repairing these ! But since the tail was good, and the landing gear and bulk of the wings were saveable, I had to do it...Some parts of the fuse were reusable, though not many.
01-27-2017, 10:12 AM
#4
Thread Starter
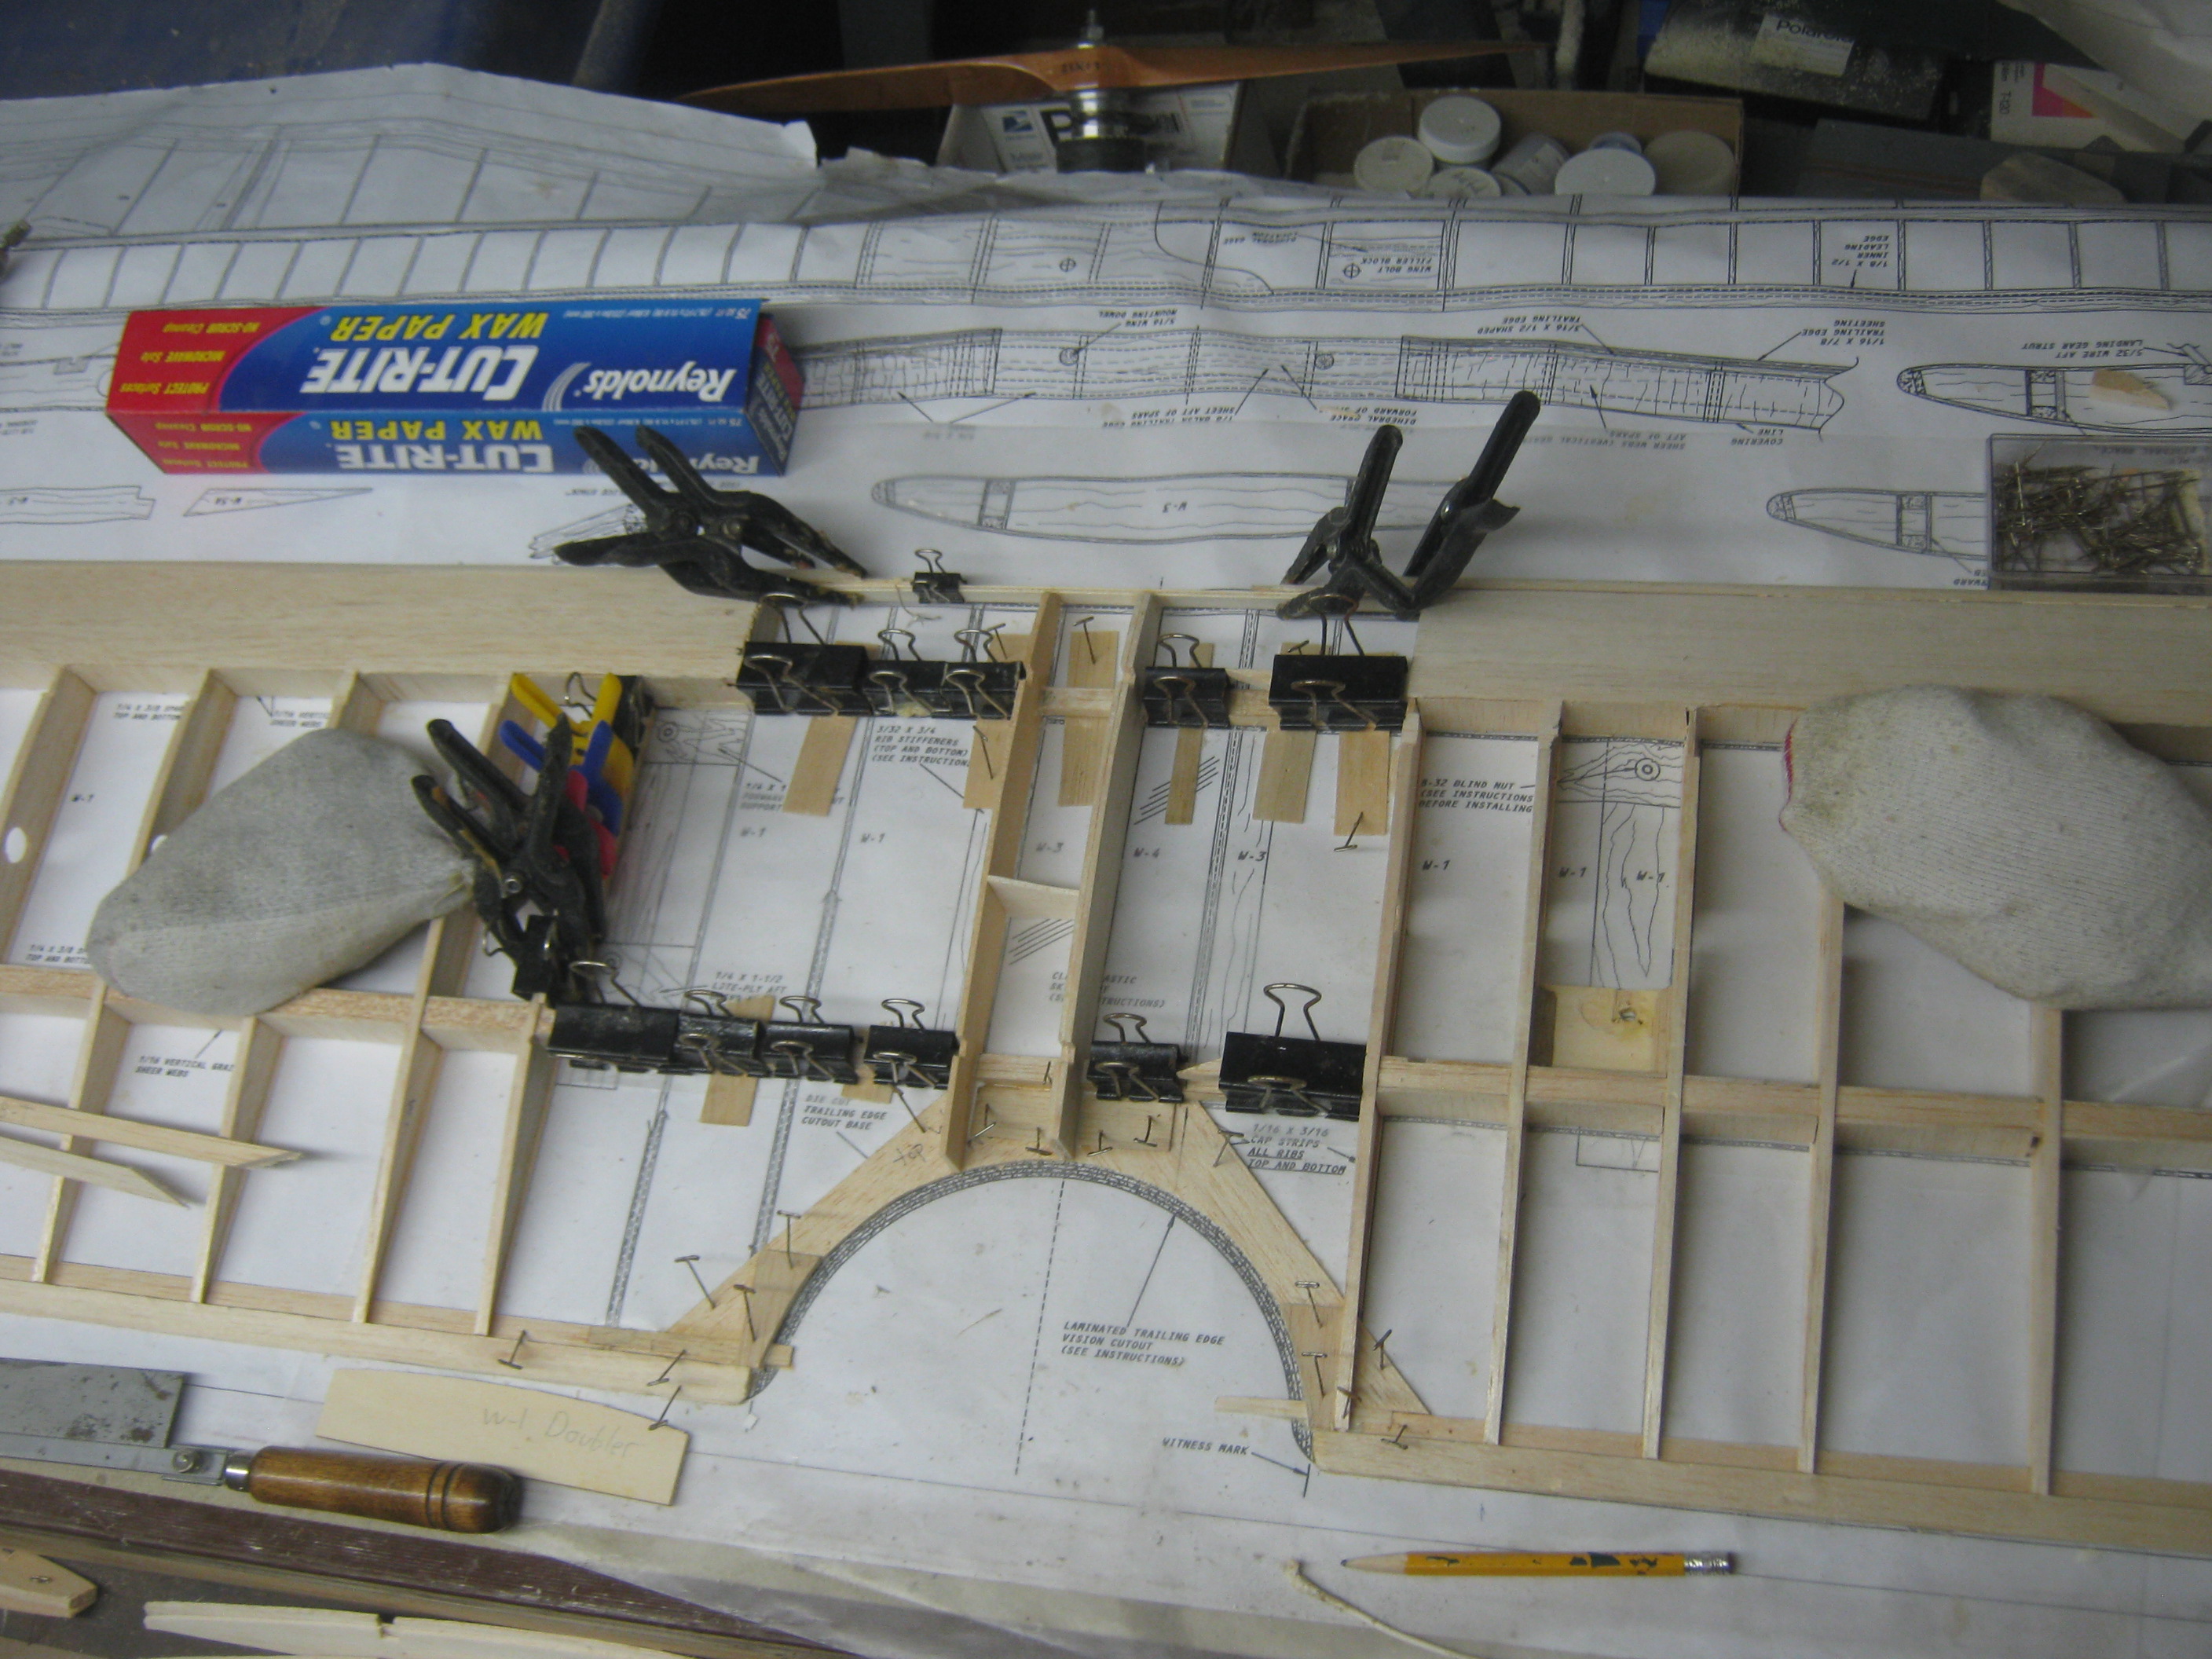
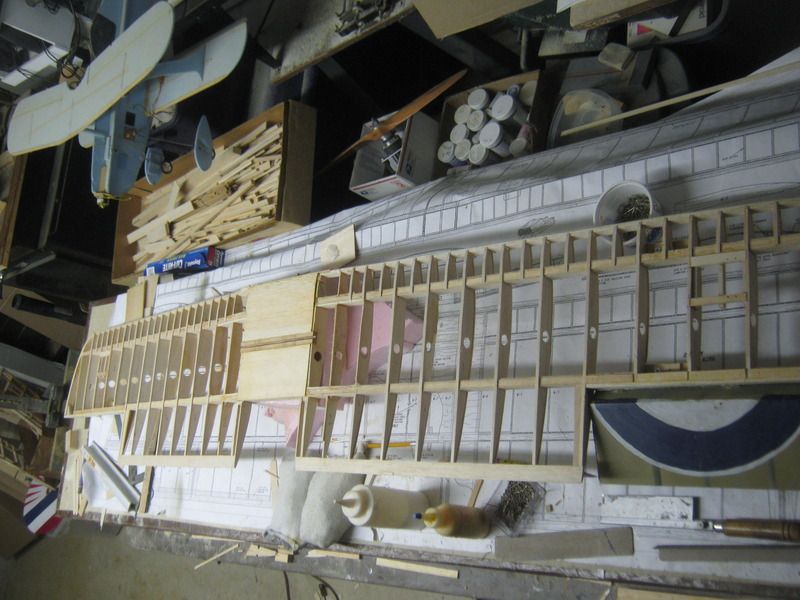
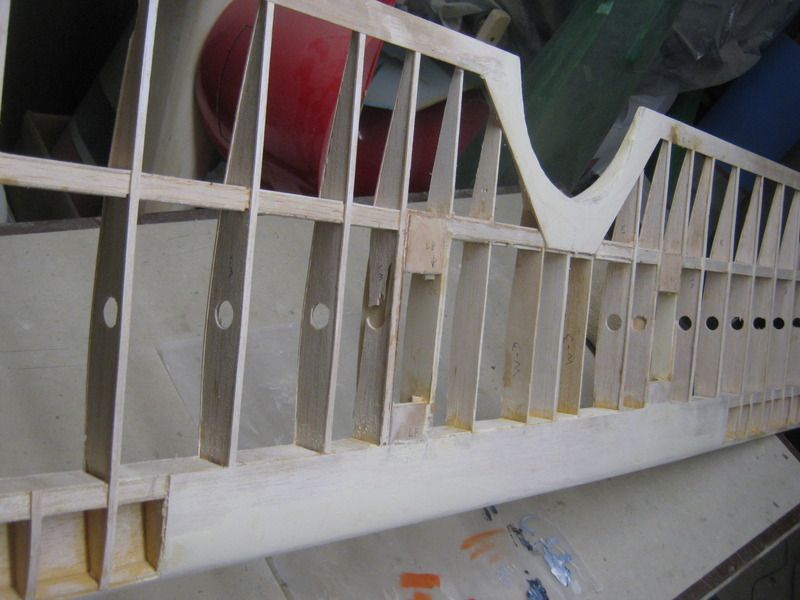
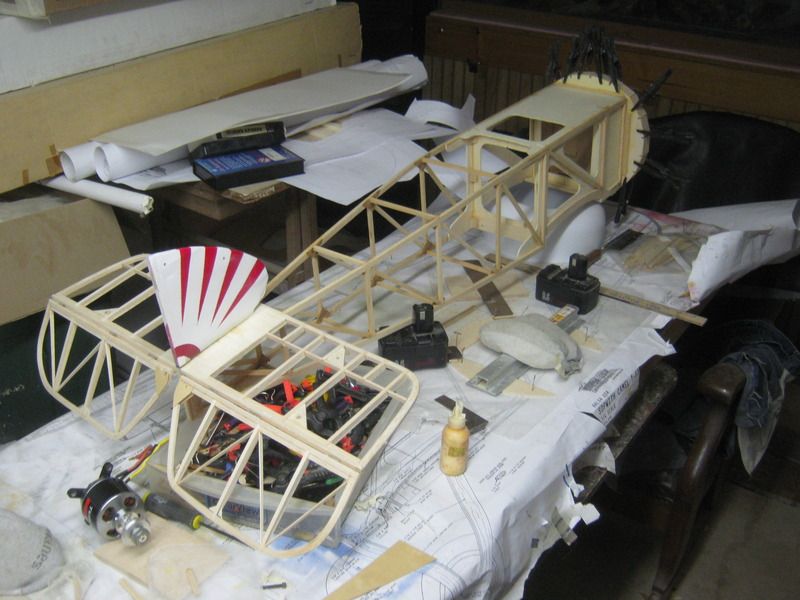
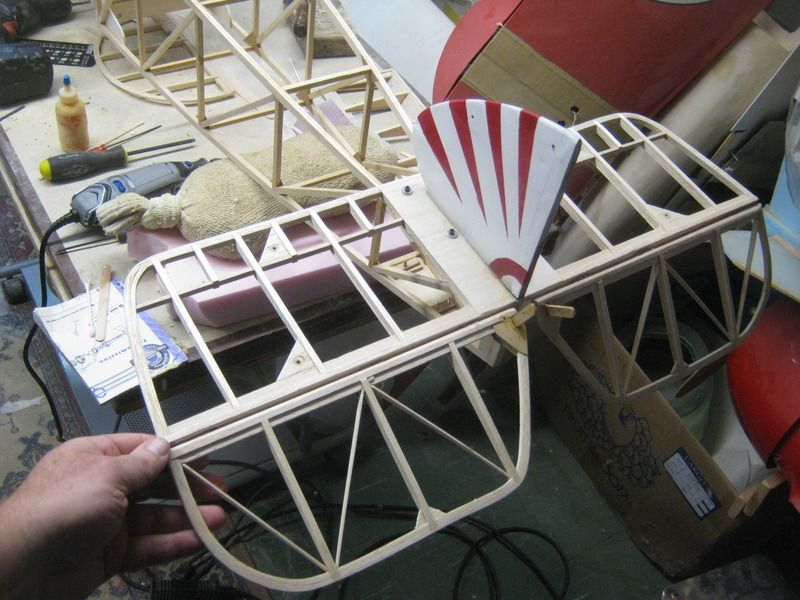
Parts on the mend ..... About a foot to eighteen inches of the center of both wings was gone, and had to be rebuilt from scratch...Spars pieced in,new ribs, and braces.


 01-27-2017, 10:20 AM
#7
Thread Starter
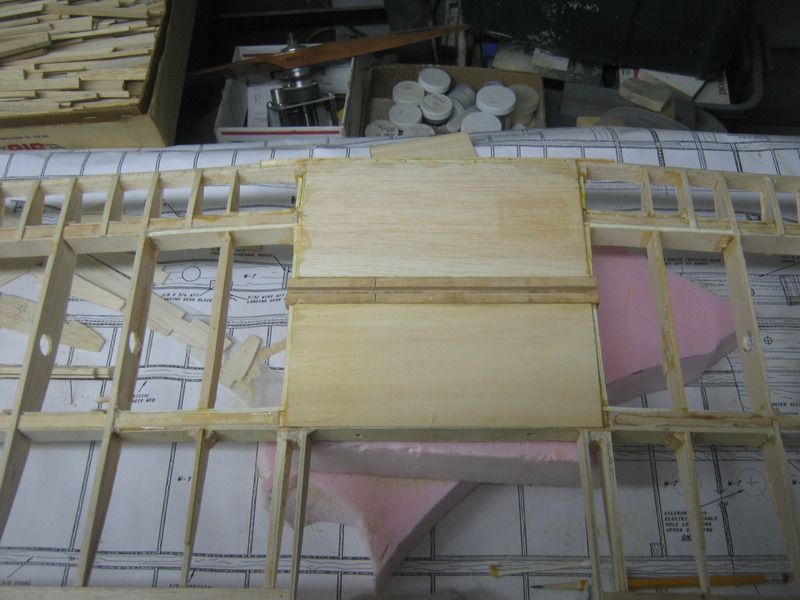
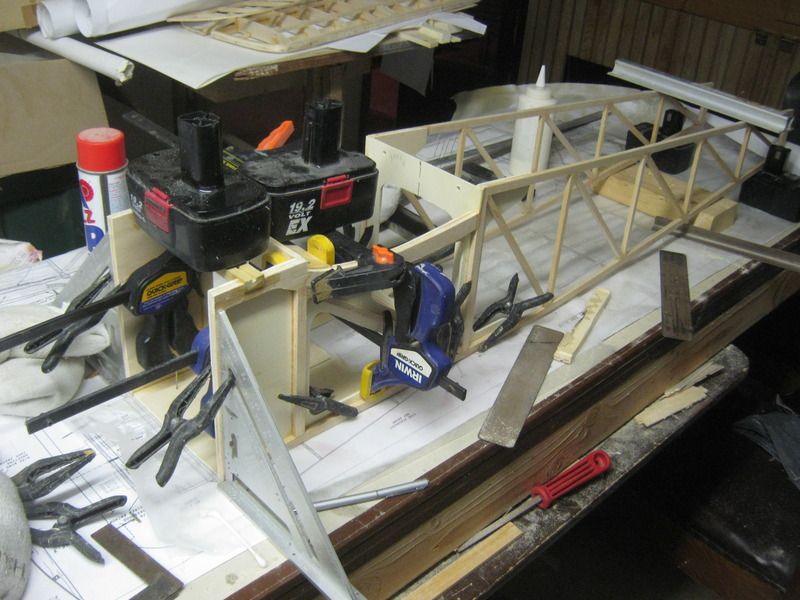
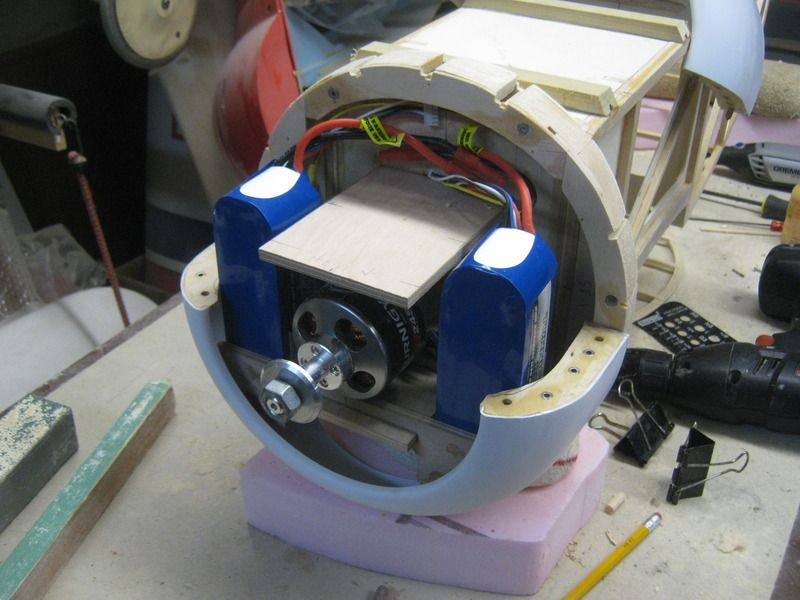
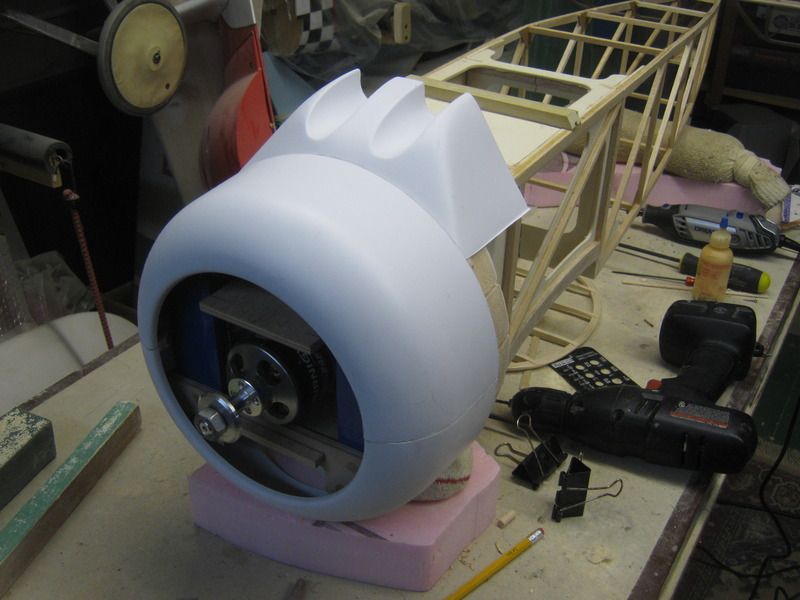
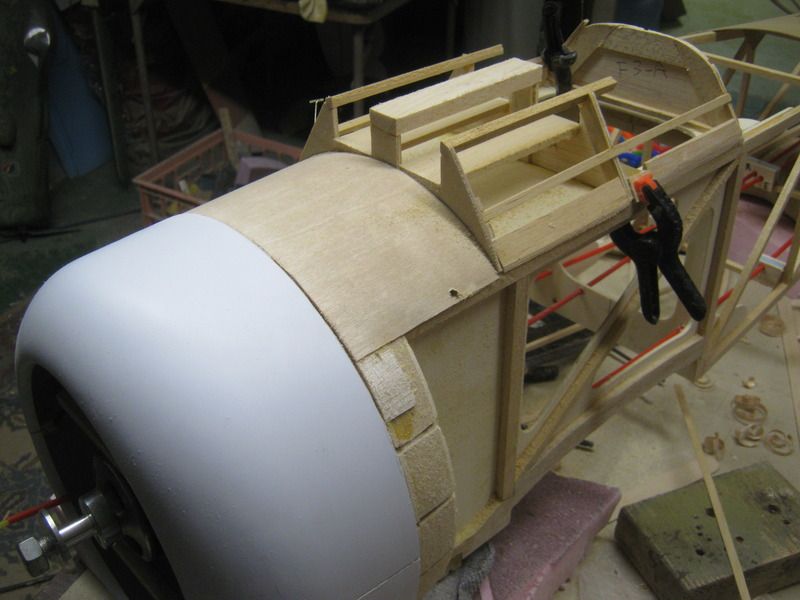
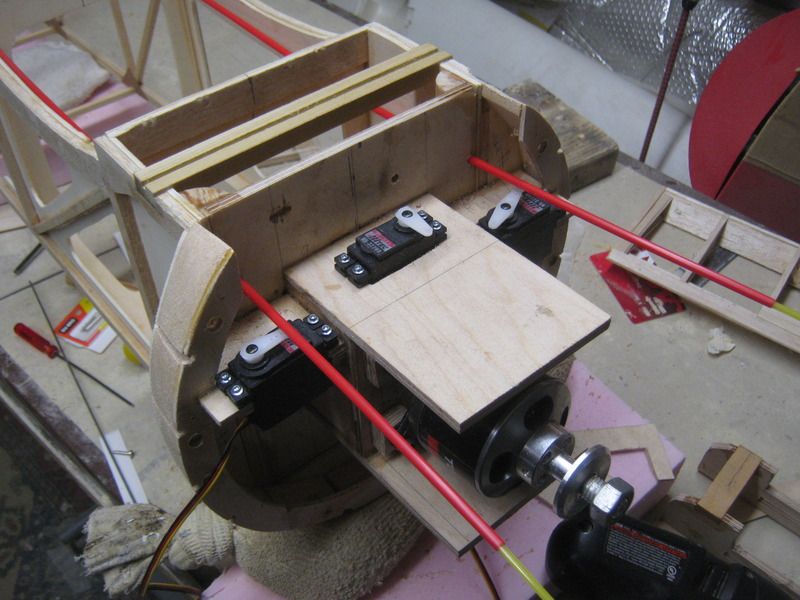
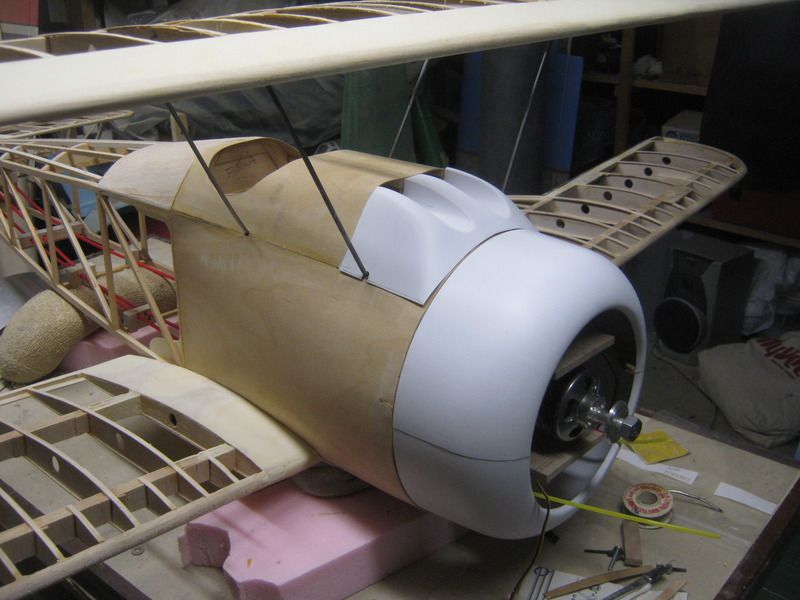
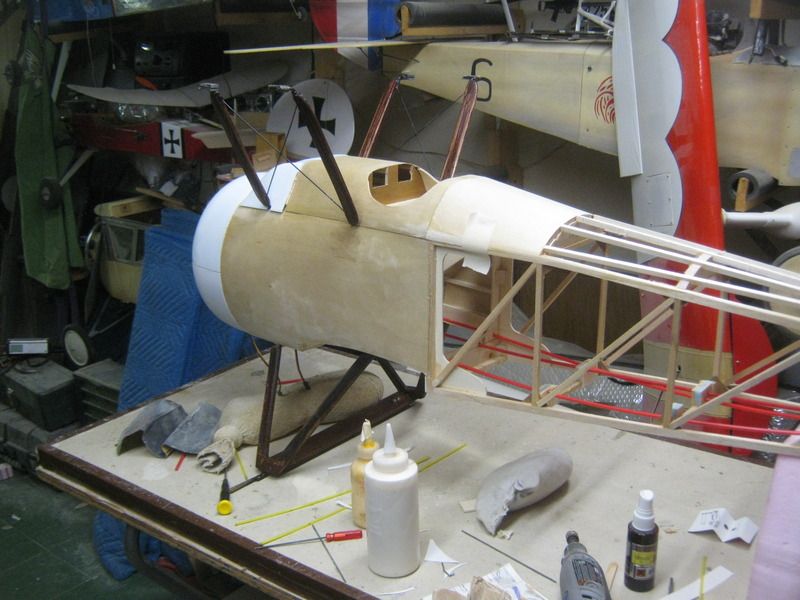
Its going to be electric with the same setup as My 1/4 N11.. So started designing the split cowl for battery access. Putting everything way up front for balance.... Also I stretched the nose 1 inch for more room and leverage.
Last edited by foodstick; 02-02-2017 at 12:57 PM.
01-27-2017, 10:22 AM
#8
Thread Starter
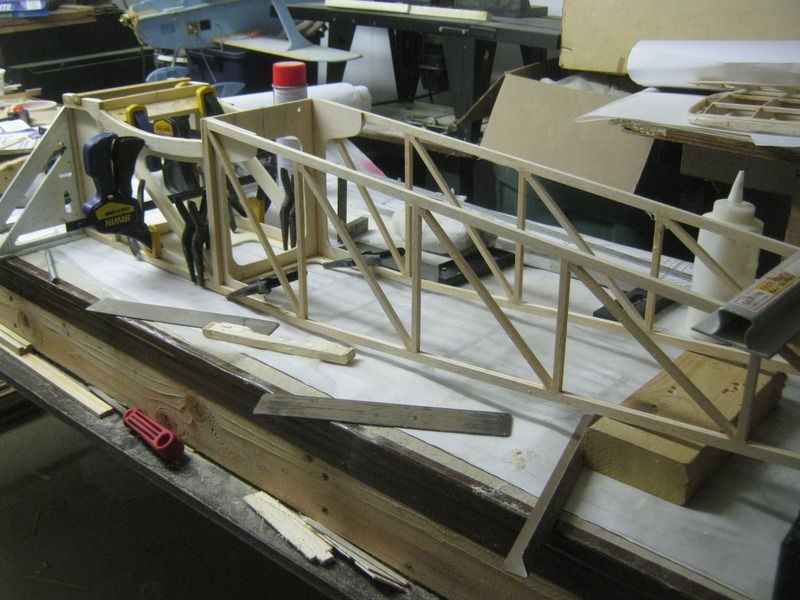
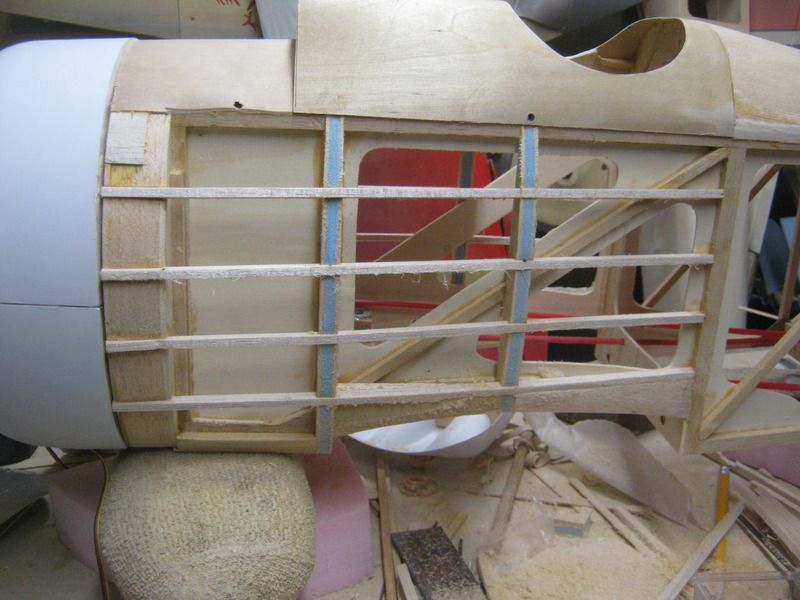
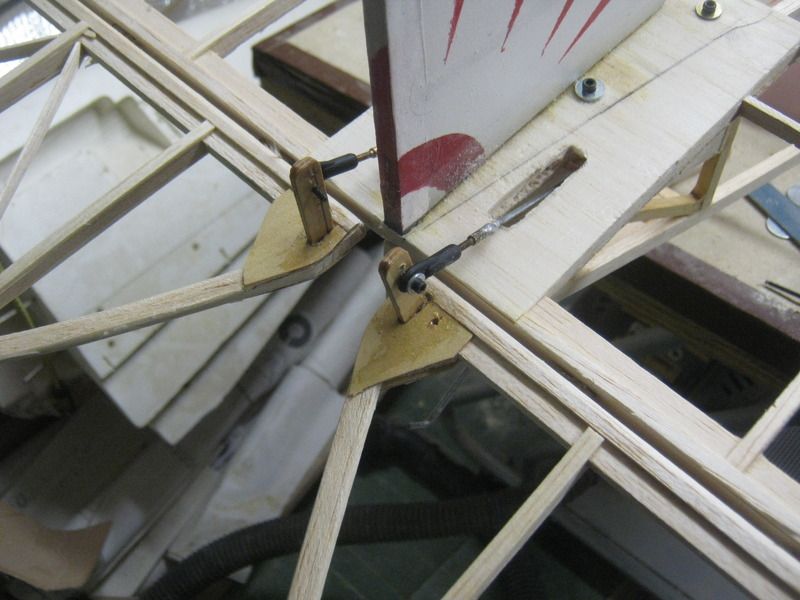
Nyrod exits the TOP of the stab to make a strong but light pull setup,experimental blue foam between balsa in a few former locations,
Last edited by foodstick; 02-02-2017 at 01:12 PM.
 01-27-2017, 10:25 AM
#10
Thread Starter
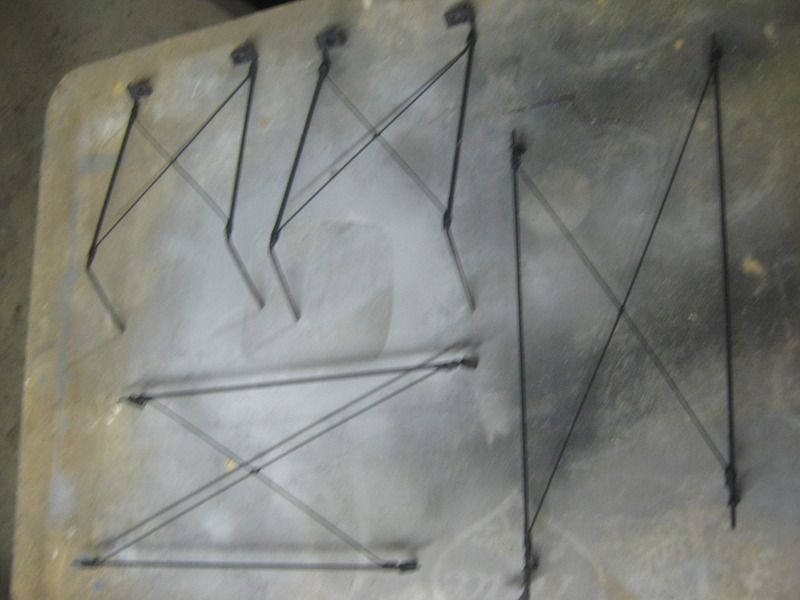
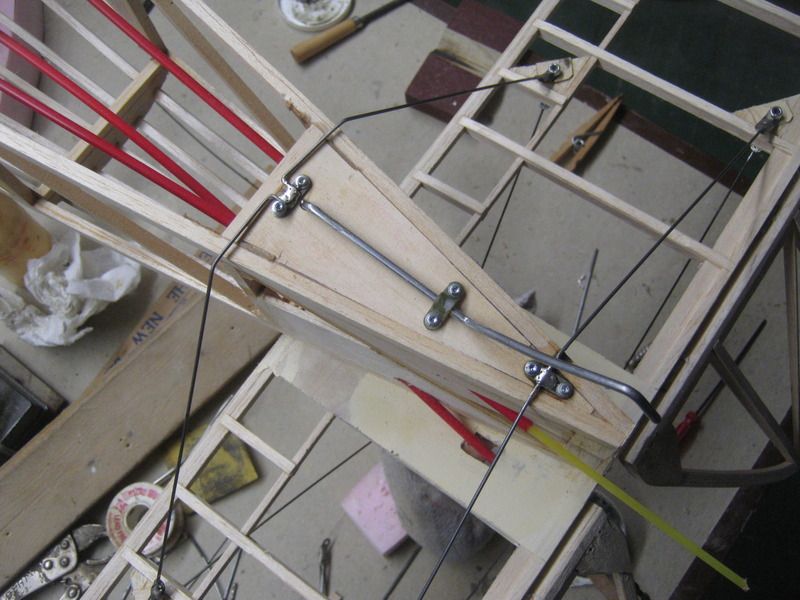
Built the hood cabanes and tail wires from scratch, recycled the outer wing struts and all thesolder tabs.. things are coming together and MAN it is great when soldering is done !
Last edited by foodstick; 02-02-2017 at 01:03 PM.
01-27-2017, 10:27 AM
#11
Thread Starter
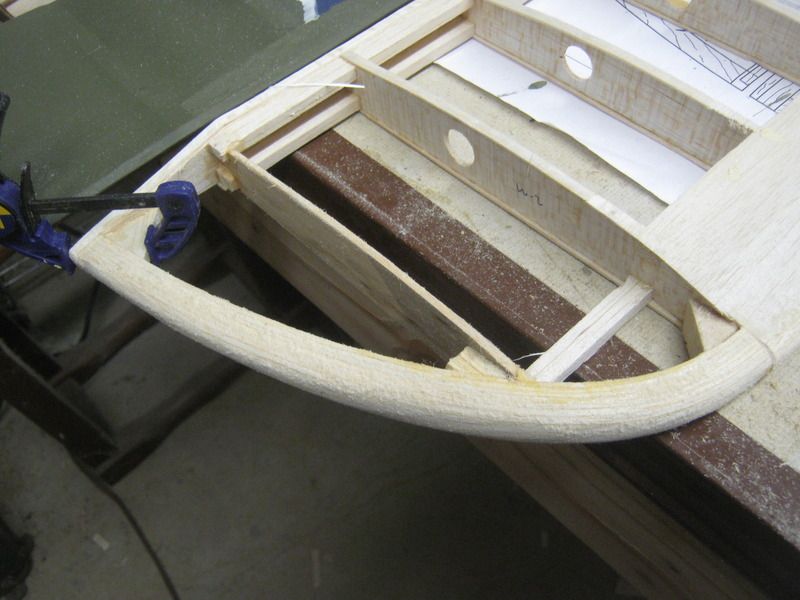
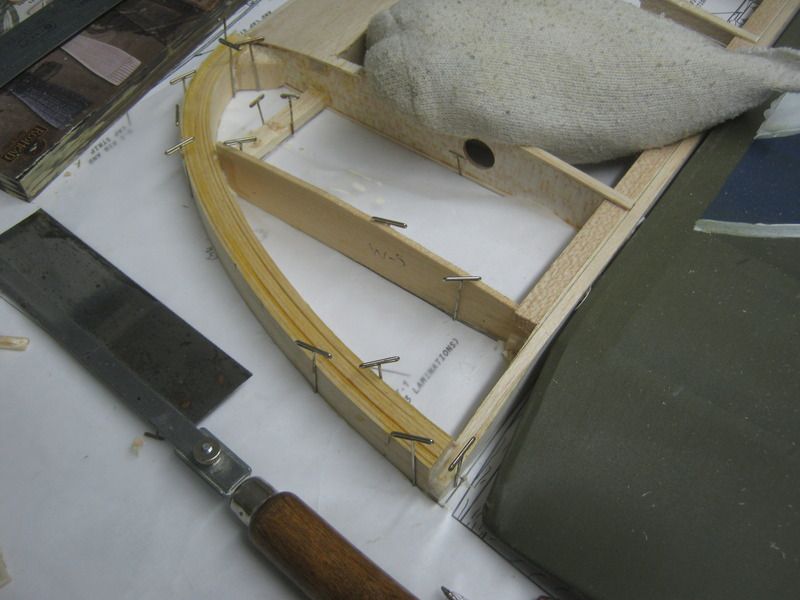
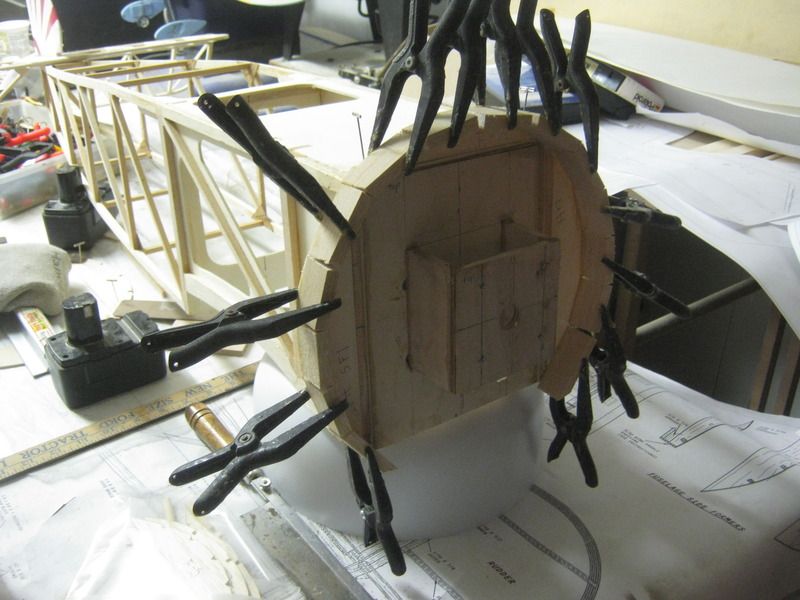
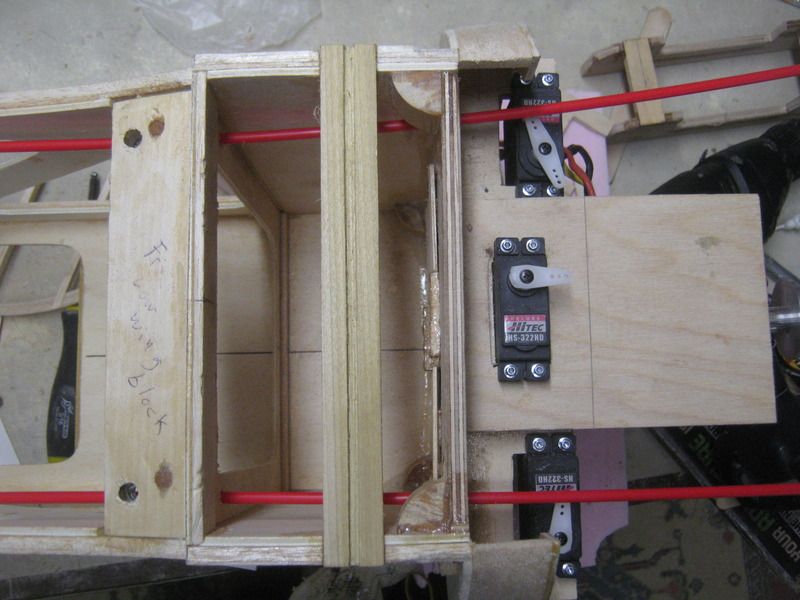
My friend had built a spring loaded landing gear, I changed it a bit but its very similar to his. Mine uses two cross wires to aid the mounting of the connecting board.. His used one wire.
I got the routing table out and the bandsaw and knocked out the wood boards for the wires this morning.. A little dremel work and I had the hood cabanes clamped with slow epoxy to the wires...
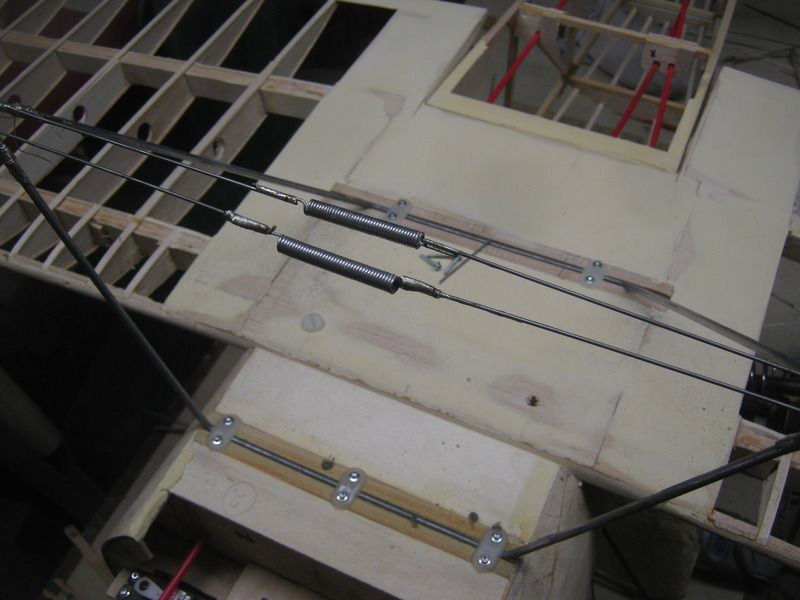
I got the routing table out and the bandsaw and knocked out the wood boards for the wires this morning.. A little dremel work and I had the hood cabanes clamped with slow epoxy to the wires...
Last edited by foodstick; 02-02-2017 at 01:04 PM.
02-02-2017, 12:37 PM
#13
Thread Starter
You better be careful Jeffee, The Camel was a pretty good match against the Fokkers 
As long as the pilot survived the takeoffs and landings
I did get some pictures back up !
As long as the pilot survived the takeoffs and landings
I did get some pictures back up !
Last edited by foodstick; 02-02-2017 at 01:27 PM.
02-08-2017, 08:53 AM
#16
Thread Starter
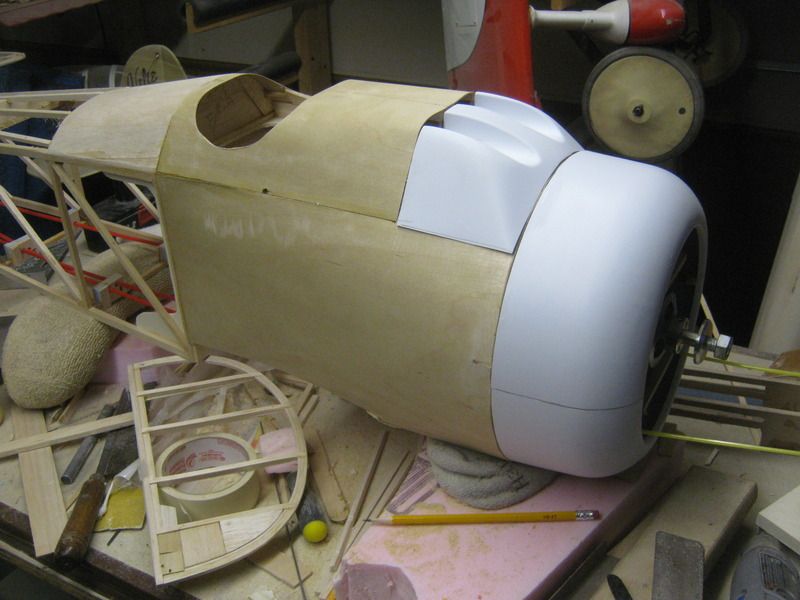
Up on its legs and waiting on wheels. I haven't been able to find the right baby stroller wheels at the DAV, or Goodwill, none on the curb... or at the Iowa City and Kansa City swap meets so I had to buy a new pair ! It feels sacrilegious at this point not recycling some buggy wheels ! I have some covering on the way but I am not sure I ordered enough. I couldn't find anything fabric at the swap meets, so I will try to use scraps and a new short roll. I already know It will be close ! I could use ceconite on the wings ..but it will have to be warmer outside for that smelly process. I would like to cover it this winter...
Anyhow a couple pics to go with the story..

Anyhow a couple pics to go with the story..
 02-12-2017, 12:41 PM
#18
Thread Starter
This camel flew well when my buddy first got it in the air. I don't think you will have any problems if its balanced ok. And the wing loading isn't to bad. We still are not sure why the wings let loose. But I think it might have been due to a repair to try and adjust a small wing twist.
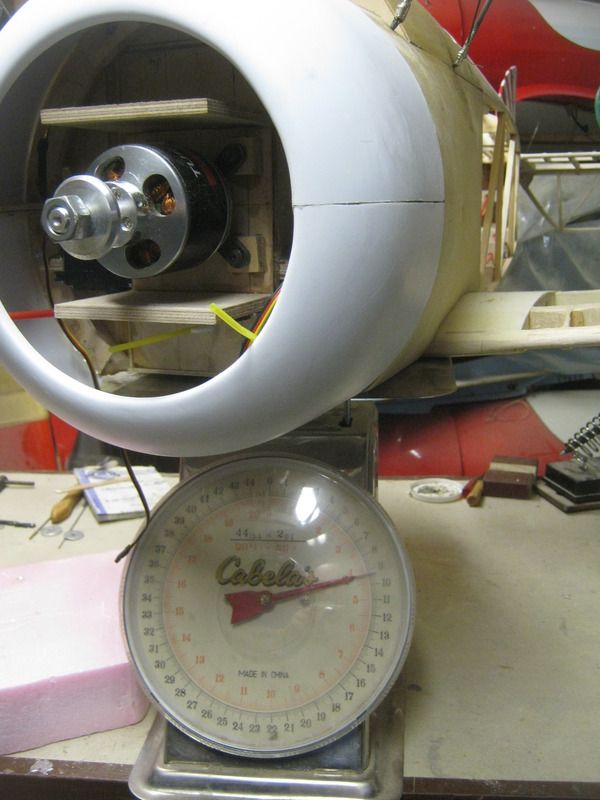
What did your friends Camel end up weighing? I think they have flown at 20 pounds, but I am trying to come in 3-4 pounds under that on my electric version rebuild.
One thing that surprised me is I think the BUSA 1/4 Camel actually has more wing than the 1/4 Pup.
What did your friends Camel end up weighing? I think they have flown at 20 pounds, but I am trying to come in 3-4 pounds under that on my electric version rebuild.
One thing that surprised me is I think the BUSA 1/4 Camel actually has more wing than the 1/4 Pup.
02-12-2017, 12:42 PM
#19
Thread Starter
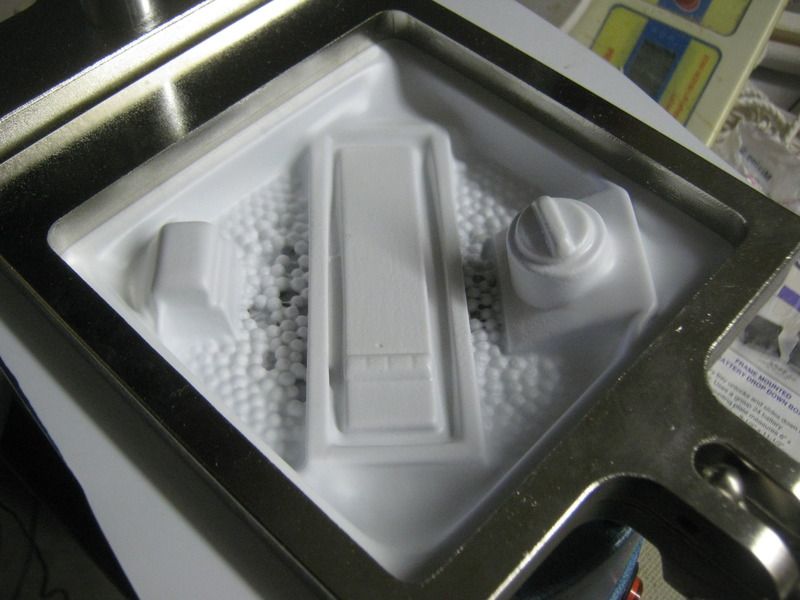
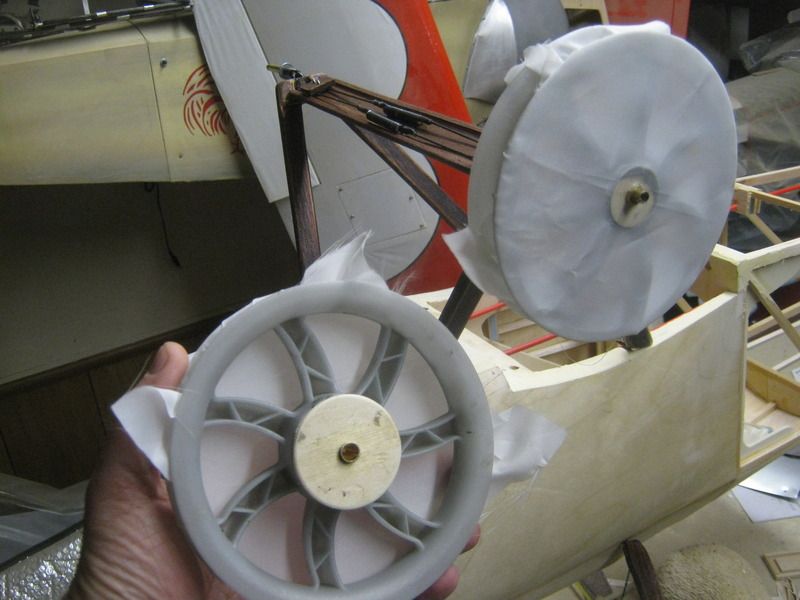
I picked up the small vacuform machine from Ir3, and I made a few parts..still learning and need to get some more plastic, if anyone knows the best place online to order it in small sheets let me know. Tool uses 5 by 5 inch sheets..using some scrap PETG I think?
Anyhow I made the gun tops that peek thru the top of the hood on the camel, the backs of the guns, and the fuel and oil tank filler lids/necks that are behind the cockpit.. Here are the pics !
original plugs and parts...
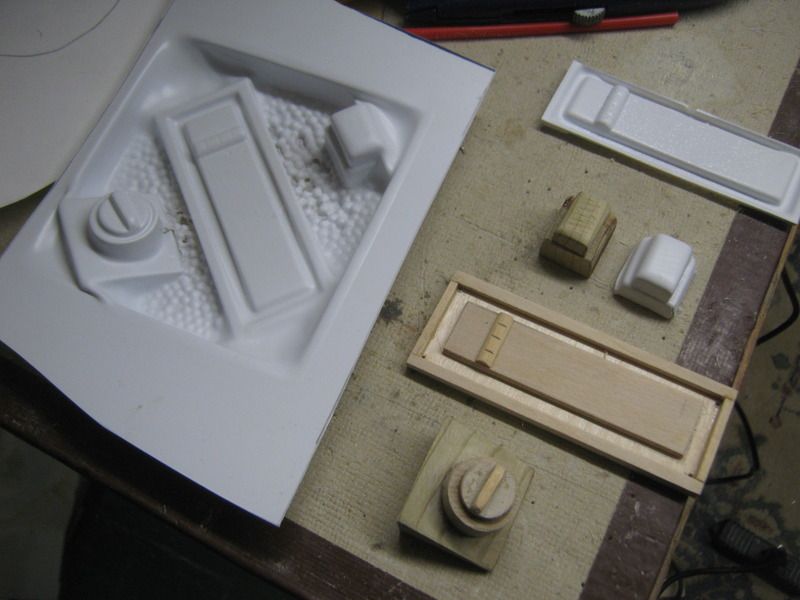
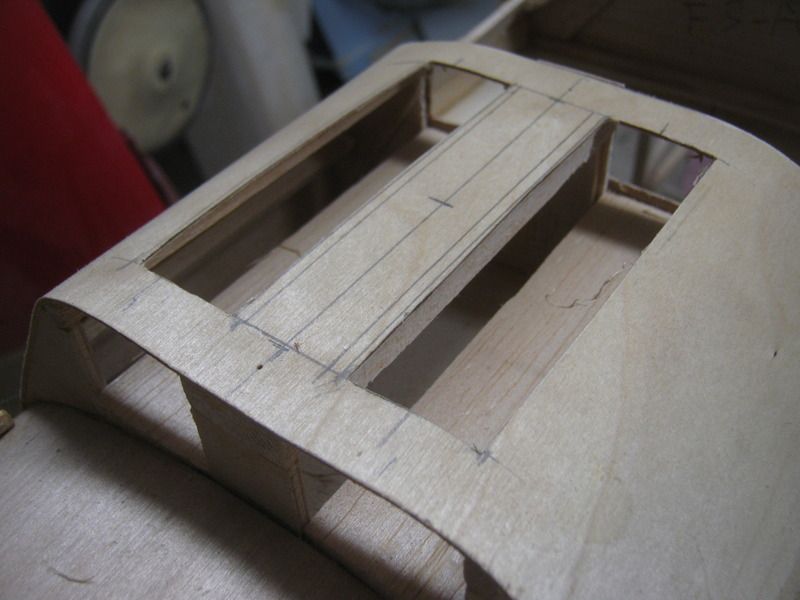
and the long flat top of gun section will be glued into thes openings on the hood. Once painted I think it will make real respectable detail.. Maybe not scale national level !
5024
Anyhow I made the gun tops that peek thru the top of the hood on the camel, the backs of the guns, and the fuel and oil tank filler lids/necks that are behind the cockpit.. Here are the pics !
original plugs and parts...
and the long flat top of gun section will be glued into thes openings on the hood. Once painted I think it will make real respectable detail.. Maybe not scale national level !
5024
02-12-2017, 12:43 PM
#20
Thread Starter
After ordering Dubro wheels I found out they were to wide for the axles that my buddy had made..So I was lucky enough to find another set of stroller wheels which I like ten times better ! A friend had them in a drawer. So I started modifying them, and covering them. I will add I was having a hard time finding these now, and I found out why ! Goodwill and other resell stores won't take them anymore do to recall and safety issues ! So if you see them on the curb set out for garbage grab them ! There is one brand that has EIGHT wheels on one stroller and they are perfect for 1/4 WW1 planes.
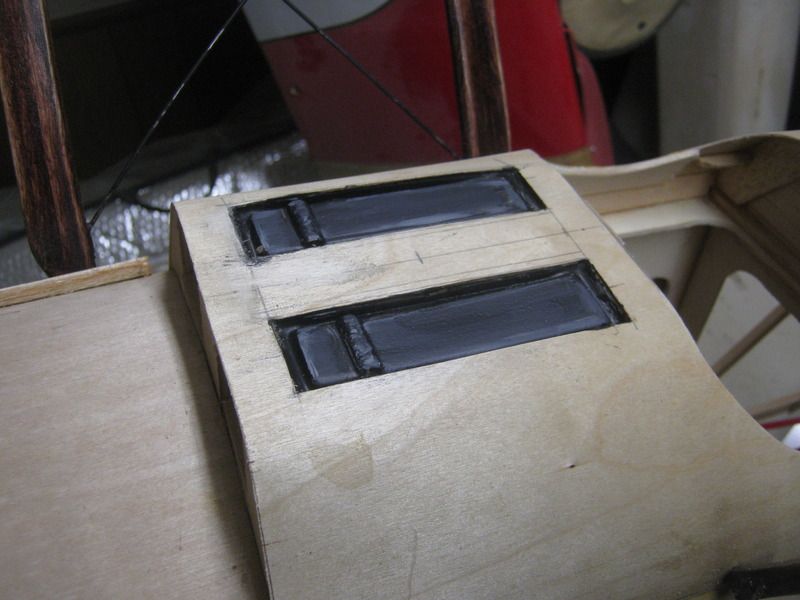
And here is a quick peak at the faked gun tops thru the hood.. this is behind the CG, and weighs nothing !
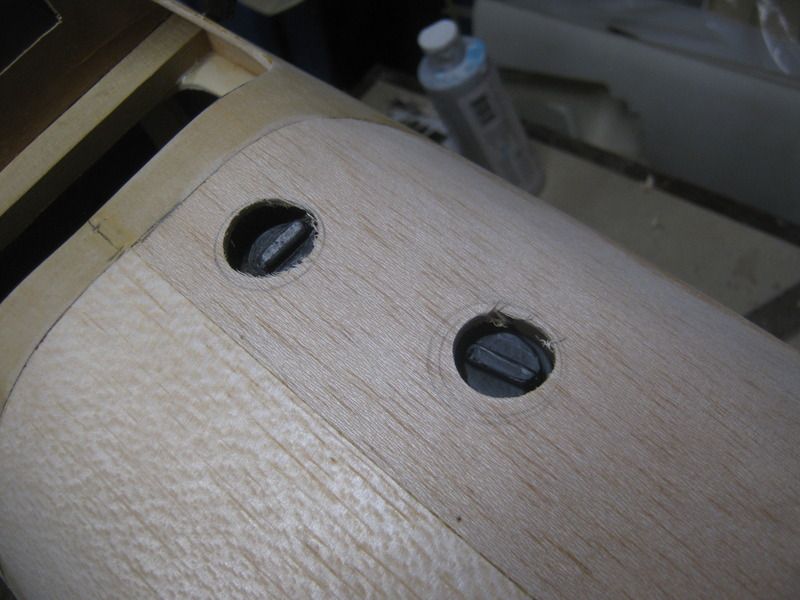
Here are the filler caps behind the cockpit.. also very light details... I will do some more painting after covering..
And here is a quick peak at the faked gun tops thru the hood.. this is behind the CG, and weighs nothing !
Here are the filler caps behind the cockpit.. also very light details... I will do some more painting after covering..
02-12-2017, 01:49 PM
#21
I have not been able to handle his Camel yet. He was gonna drop it off so I could go through it. I will test run the engine and make sure that is all in order. I think it has a DLE 35 on it. It looks like they handle good on the ground. If I end up liking it, I may build my own one day.
02-14-2017, 01:15 PM
#22
Thread Starter
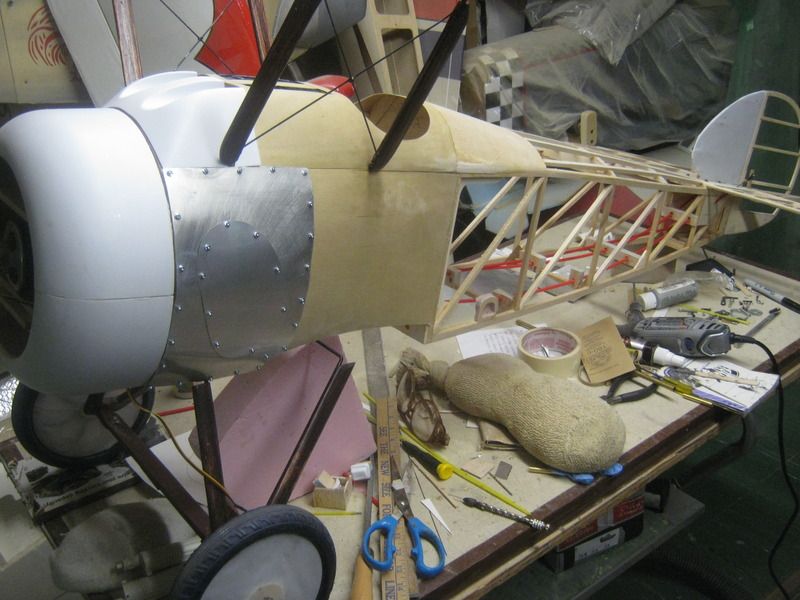
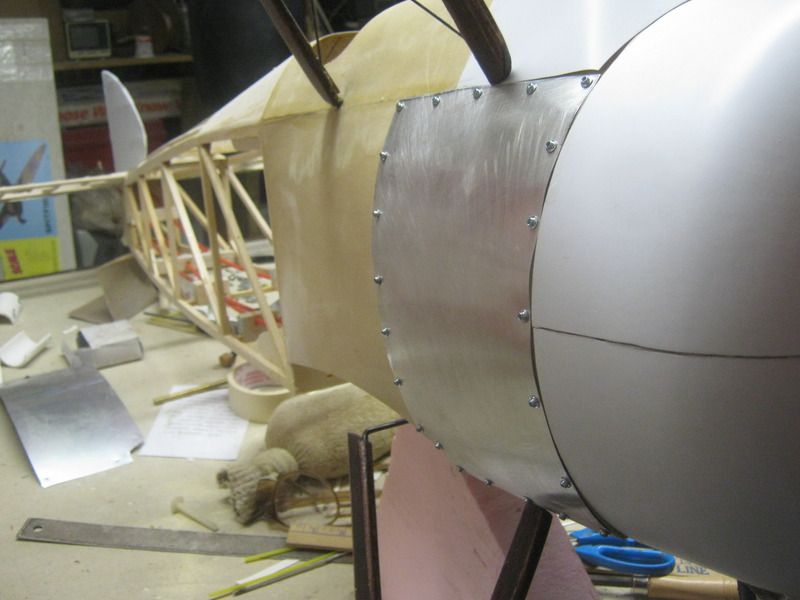
Finished a little tin work. When I put it back on the plane for the the last time I will use some nice button head screws instead of the servo socket head type. Wheels are covered and temporarily mounted, I ended up needing to make some axle mods..but it worked out fine in the end. The tires are a dark navy color, I will make them black with a die,paint or marker ....
02-14-2017, 01:29 PM
#23
Thread Starter
Vertical, be sure to put some pics of your friends camel on here if you don't want to start a new thread. I am always anxious to see new WW1 pics and video.
02-17-2017, 04:14 PM
#24
Thread Starter
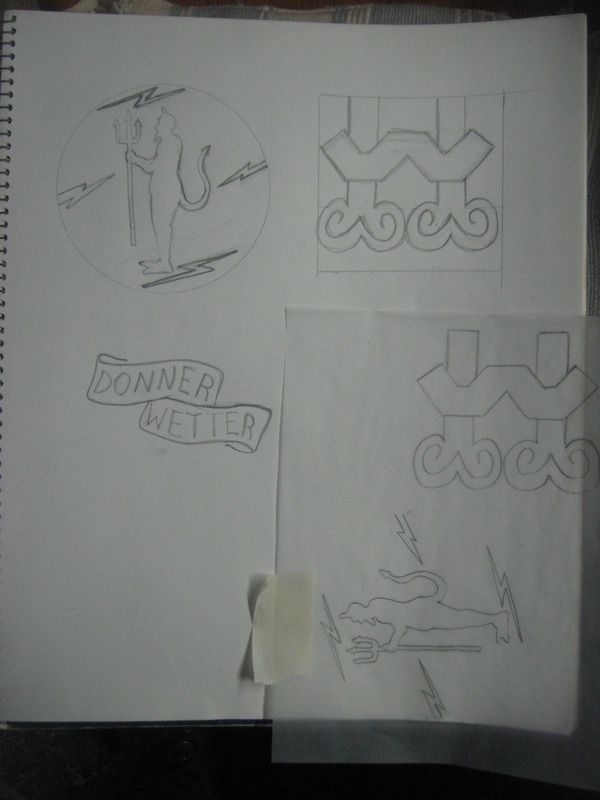
Drawing out the side banner (DONNER WETTER) and the strange W? on the turtle deck. Does anyone have a clue as what these are? I haven't looked it up yet but I am guessing the W is related to the Wetter on the side.. probably just an odd name.. EDIT, just looked up the words, German for "Thunder Weather" interesting
I also got my small vacuum formed gun backs and pads painted and installed..added a quick clearing arm mechanism.. nothing to extravagant. I will do a little more paint work later...
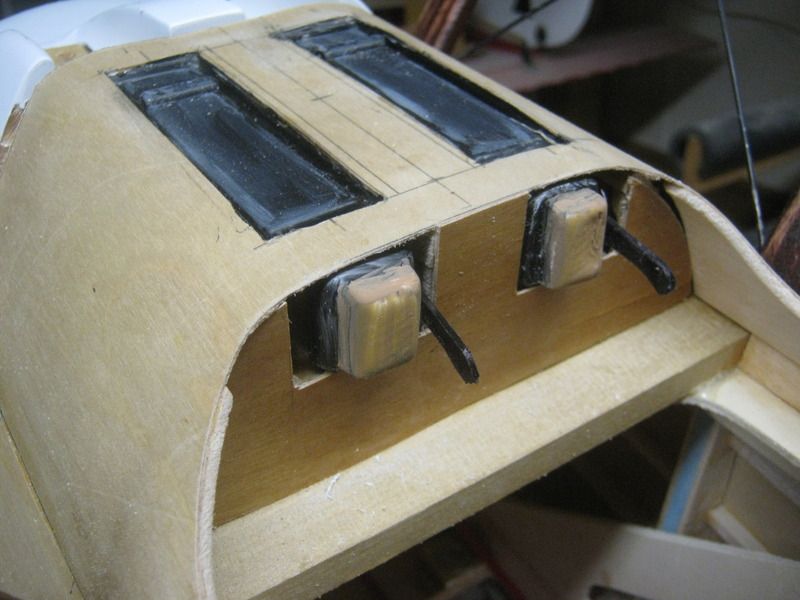
I also got my small vacuum formed gun backs and pads painted and installed..added a quick clearing arm mechanism.. nothing to extravagant. I will do a little more paint work later...
02-17-2017, 04:15 PM
#25
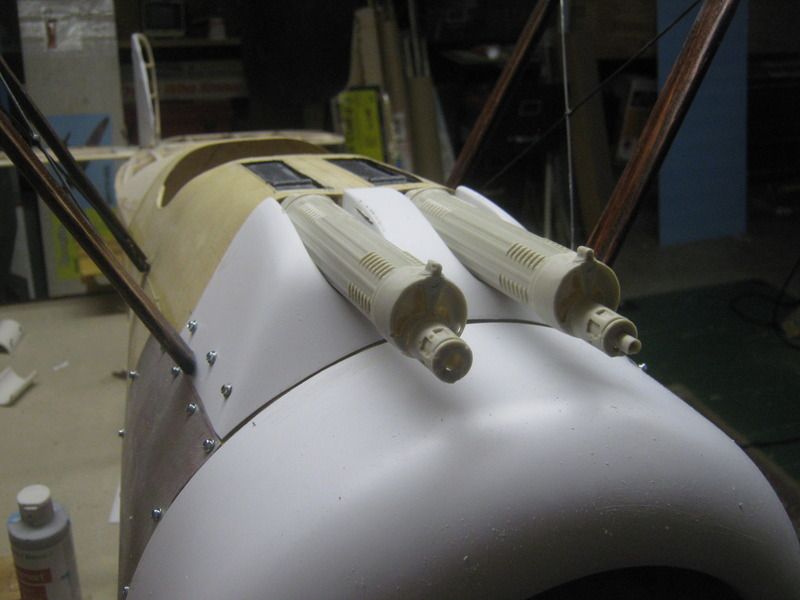
Thread Starter
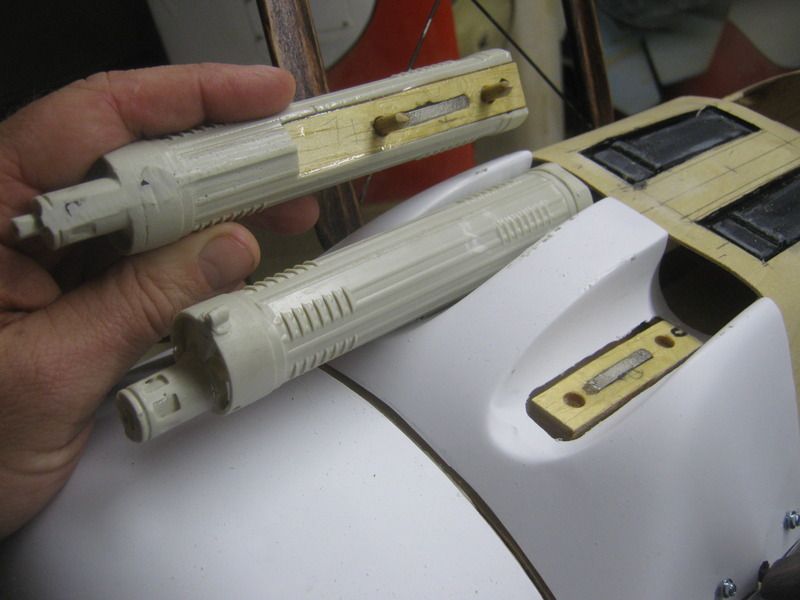
In order to make the top half of the cowl removable for battery swaps... That means the gun barrels need to come off as well. After making the fake light top and rear sections of the gun (behind the cg) out of vacuform.. I made the barrel coolers pin down in some blocks, and they are retained with magnets.. From some slot cars.. very strong stuff.
Check my youtube on our homemade digital wood routed slot car tracks !
https://www.youtube.com/watch?v=YcZonfjHM2w
https://www.youtube.com/watch?v=gdWhJYgYXpI
Check my youtube on our homemade digital wood routed slot car tracks !
https://www.youtube.com/watch?v=YcZonfjHM2w
https://www.youtube.com/watch?v=gdWhJYgYXpI