1/4 Sig J3 Cub Build
 01-08-2018, 02:18 PM
#101

Thread Starter
Join Date: Feb 2017
Location: Philippines
Posts: 65
Likes: 0
Received 0 Likes
on
0 Posts
 01-08-2018, 03:15 PM
#102

Hi Beibitoi
I have just barely started the build and I think I'm going with the DLE 35ra, I'll have to modify the firewall area to make this engine work for me, but I need the power, it'll be worth it for me. Your way ahead of me building the cub. Once I get going, I'll take photos and will post them here.
I have just barely started the build and I think I'm going with the DLE 35ra, I'll have to modify the firewall area to make this engine work for me, but I need the power, it'll be worth it for me. Your way ahead of me building the cub. Once I get going, I'll take photos and will post them here.
01-08-2018, 04:11 PM
#103
My Feedback: (19)
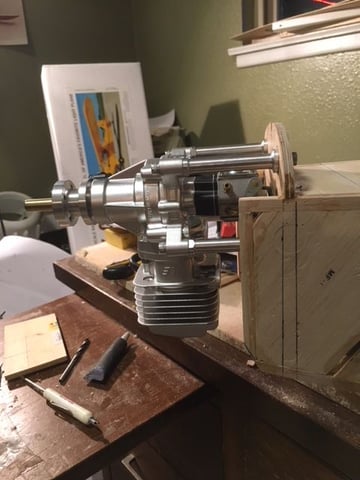
Here are a few photos of a DLE 35 installed in a SIG CUB in 2014. Easy install overall. New firewall constructed and moved back about an inch to give the necessary 6 1/2" clearance between the firewall and the prop / cowl. The engine was also lowered about 1/2" to a more scale location and to allow for easier engine mounting. For most people, a 35 isn't needed in a CUB but the power is there when you want it and the plane flies so well with the large prop at just a few ticks over idle speed. The plane balances w/o any additional weight. The plane also has quite a few modifications to modernize it. Great old plane but the design is over 40 years old now. The kit could stand a bunch of modernizing. Few CUBs fly better than the SIG CUB though!
 01-08-2018, 08:32 PM
#104
Maybe a Cub on floats would need more power then a cub not on floats. J3 cubs also fly off water and normally have more power then the original J3 Cub as designed. You never know, one might pull the wheels off and add floats.
I just started building a Sig J3 Cub, did some research, found most J3 Cub flying off water requires more power, most likely the 1.20 will suffice, but in the long run, you'll be disappointed in the power your getting with floats attracted to the plane. That could be why some people will choose larger engines for the little cubs. I know, cuz I fly nothing but float-planes, plus I add cameras, which adds weight. In my experience, power is great, throttle back if you want it to fly like the old cub back in the day. They are great flying airplanes and I love the J3 Cub, or I would have built something else. I guarantee, my cub will fly good and I will be a happy bird in the air.
01-08-2018, 08:58 PM
#105
My Feedback: (19)
Over the years, I've flown 1/4 CUBs with engines ranging from a .60 glo engine on through the 35 cc gasser. Probably the sweet spot power wise (for a land plane) would be something like a DLE 20 or 30 gasser. These are much lighter weight than something like a Zenoah of similar displacement and frankly they are of a similar weight to some of the early 1.20 4 stroke engines that were quite heavy for their size. The 20 cc allows for scale size props which are a plus in my book. With a larger engine, one has the option to go wild and crazy and not fly scale like at all (yes CUBs will 3D and are very aerobatic) or you can throttle back to just a few clicks above idle and cruise around in a very scale like manner. With a small engine, it is usually wound out most of the time just pulling the fairly large, draggy airframe around. While the 35 may be extreme, it fits and balances well in the airframe. I think I'll be sticking with my gassers in these lovable and somewhat awkward yellow beasts I've grown to enjoy so much.
01-10-2018, 05:36 PM
#106

My Feedback: (20)
I know your well into this build and I have not read all of the post but I wanted to ;share my experience with my Sig 1/4 cub. It weighed 15.25 lbs and I used the MLD 28 with a 18 X 6 prop which worked out perfect. It would hold a hover for a minute or so but the main reason for using the 28 is because I installed floats to fly off of the lake and the extra power comes in handy.
If you plan to fly off water be sure to setup the mounting locations for the floats before you finish the plane. This will make it easier to add the floats in the future.
I also used the Robart gear for the Cub and I highly recommend it, It will make your landings more scale and also much easier.
If you plan to fly off water be sure to setup the mounting locations for the floats before you finish the plane. This will make it easier to add the floats in the future.
I also used the Robart gear for the Cub and I highly recommend it, It will make your landings more scale and also much easier.
01-10-2018, 08:56 PM
#107
I know your well into this build and I have not read all of the post but I wanted to ;share my experience with my Sig 1/4 cub. It weighed 15.25 lbs and I used the MLD 28 with a 18 X 6 prop which worked out perfect. It would hold a hover for a minute or so but the main reason for using the 28 is because I installed floats to fly off of the lake and the extra power comes in handy.
If you plan to fly off water be sure to setup the mounting locations for the floats before you finish the plane. This will make it easier to add the floats in the future.
I also used the Robart gear for the Cub and I highly recommend it, It will make your landings more scale and also much easier.
If you plan to fly off water be sure to setup the mounting locations for the floats before you finish the plane. This will make it easier to add the floats in the future.
I also used the Robart gear for the Cub and I highly recommend it, It will make your landings more scale and also much easier.
Thank you for the info on the MLD 28cc. From the specs I've got off the net about the 28, it's 6 inches long, is that right? I would still have to move the firewall back 3/4" The 35 firewall moved 1 to 1 1/4". I just barely started the build, I have a little ways to go before deciding on the engine to us. I normally would have an engine already, but the J3 Cub was a Christmas gift, so I couldn't wait to start on it. I have an DLE 30cc already mounted in another plane, I like it and it's easy to start, the 35 is the same length as the 30, 6.5", but if I have to move the firewall, I just as well go with the 35.
I have been flying float planes since the mid 90s, so I know all the how's & does about float flying. I have the Cub planes already marked up and drawings for the float rigging install.
Can I ask you what float system you used on your Cub? Do you have any pictures you can share? I'm always interested in float rigging and mounting of different planes. I'm hoping to go scale on this Cub. I have to say this is the first 1/4 scale plane I've built, all the others have been all 1/5th scales, no difference, just a little bigger.
I'll be flying all water, never on land. I haven't flown on land since probably the early 90s. So I won't need landing gear.
If you have photos of the floats mounted on our Cub, I would like to see them.
Thanks again for your info. It's always nice getting new information on power-plants, and new input on float ideas & plans. '
02-20-2018, 01:33 PM
#108
My Feedback: (20)
WB,
I've been digging for photos however have not found any. I lost the plane about 3 years ago do to a fuel tank malfunction causing a stall when I was about 10' or so altitude, inverted. You know the rest of the story....
Anyway, I bought mine at an estate auction already built so the FW was in the stock location. It was flown with a 120fs but I converted it to the MLD. I used an after market cowl that if memory serves me correctly I purchased it from Fiberglass Specialties. I don't recall have any issues with the fit of the MLD using the new cowl and the stock FW location. I don't have the engine any more so I can't confirm and measurements.
I should mention that I removed all the covering to repair some broken stringers etc. That is when I installed the float mounts, Robart gear etc.
As for the floats, I used the Hangar Nine fiberglass ARF floats that were available for their 1/4 scale cub. They were pricy and did not hold up to well, one of them split out at the seam on my second or third landing.
The MLD 28 to me was perfect, a little overpowered but not by much. The Cub was probably the plane I enjoyed flying the most especially the touch and goes with the Robart gear working their magic.
03-06-2018, 10:25 PM
#110
Thread Starter
Join Date: Feb 2017
Location: Philippines
Posts: 65
Likes: 0
Received 0 Likes
on
0 Posts
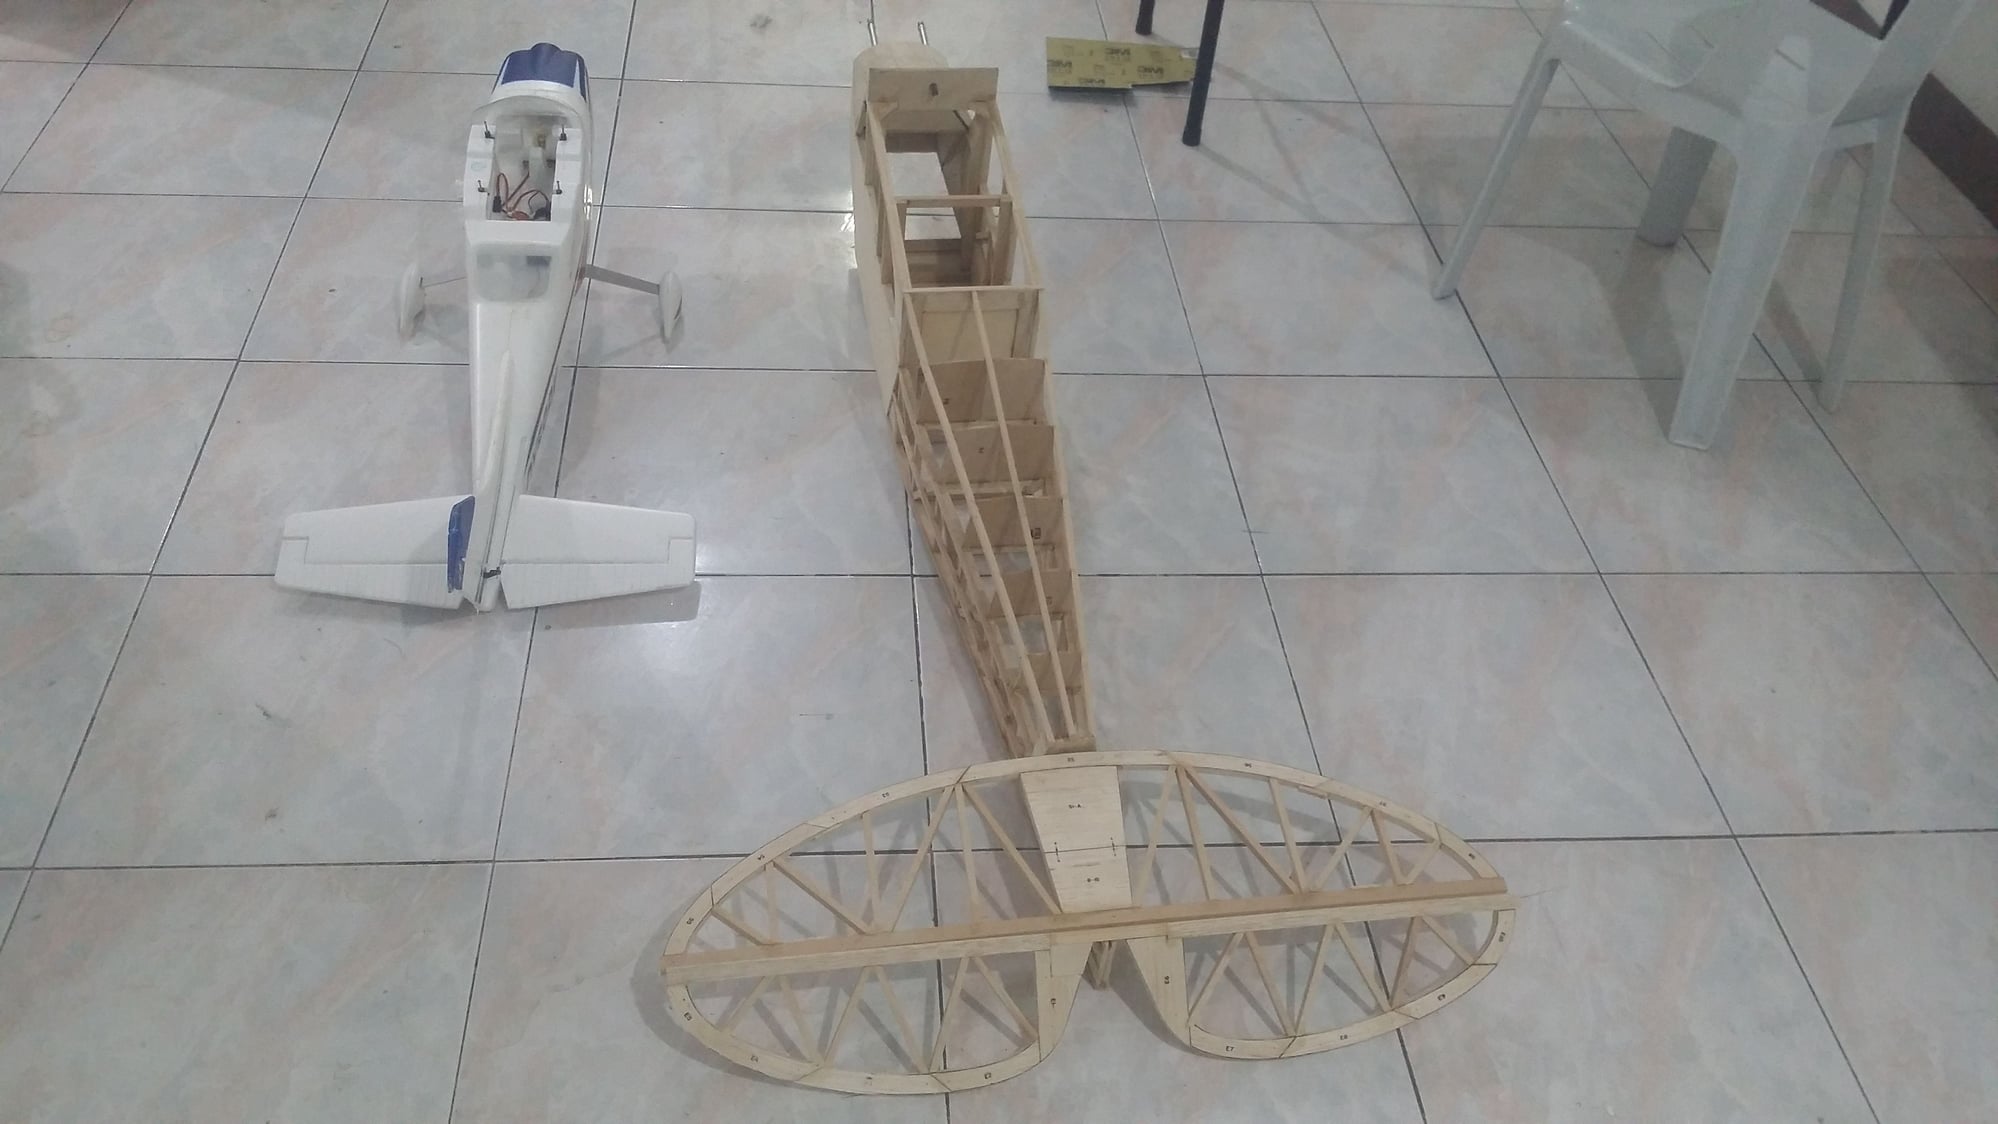
I'm back again! Havent done much since my last post but here's where I'm at now. Got too lazy to manually sand the rounded/curved parts. It's about time to invest on a sander or scroll saw I think.
Just finished doing the horizontal stab and elevator. Now, the manual calls for rounding up the outer portions, similar to what it would look like if these parts were made of rounded steel. So before I start, any tips on how to accomplish this? Is there a proper way to do this to uniformly sand these parts?
Just finished doing the horizontal stab and elevator. Now, the manual calls for rounding up the outer portions, similar to what it would look like if these parts were made of rounded steel. So before I start, any tips on how to accomplish this? Is there a proper way to do this to uniformly sand these parts?
03-07-2018, 03:12 AM
#111
A couple of different ways. Probably the easiest is to get a piece of pvc or similar that has the same radius that you want and attach sandpaper with spray adhesive to the the inside radius. Obviously,you would need to cut the tube in half.
Another way would be to wrap sandpaper around a dowel the same size as you want and “rout” a groove in balsa, foam,etc and then attach sandpaper to that for shaping.
i can think of at least one more but they’re just variations of the above. Hope this helps.
Also, store bought radius sanders are an option but you’re stuck with the size of the machined radius.
03-07-2018, 04:59 AM
#112
That's the way I do it, wrap a dowel or piece of tubing with sandpaper and use that to make a groove in a balsa block. Then contact cement or something to stick sandpaper into the groove. Then use that on the edges of the stab.
03-09-2018, 06:03 PM
#113
My Feedback: (6)
What Sig needs to do is up grade the kit with laser cut parts, if they haven't already. I built the 1/5 Cub and it went together very fast. I did make a few changes like pull-pull for the rudder and tail wheel and I set up the elevator with the pushrod installed inside the fuse attached to a brass control horn soldered to the elevator connecting rod.
Bought some scale stuff from IFly Tailies and have a set of Robart gear on it.
I also made a change to the wing struts in that they attached to the wing using 4/40 ball ends and some parts from metal toggle bolts. I discovered that one from RCSB poster who was building the 1/6 Cub.
I am looking forward to acquiring the 1/4 Cub though I would like to change it to a PA-12....with floats.........some sort of Alaskan bush plane so it won't have that real pretty just out of the plant at Lockhaven look.
03-16-2018, 09:10 PM
#114
Thread Starter
Join Date: Feb 2017
Location: Philippines
Posts: 65
Likes: 0
Received 0 Likes
on
0 Posts
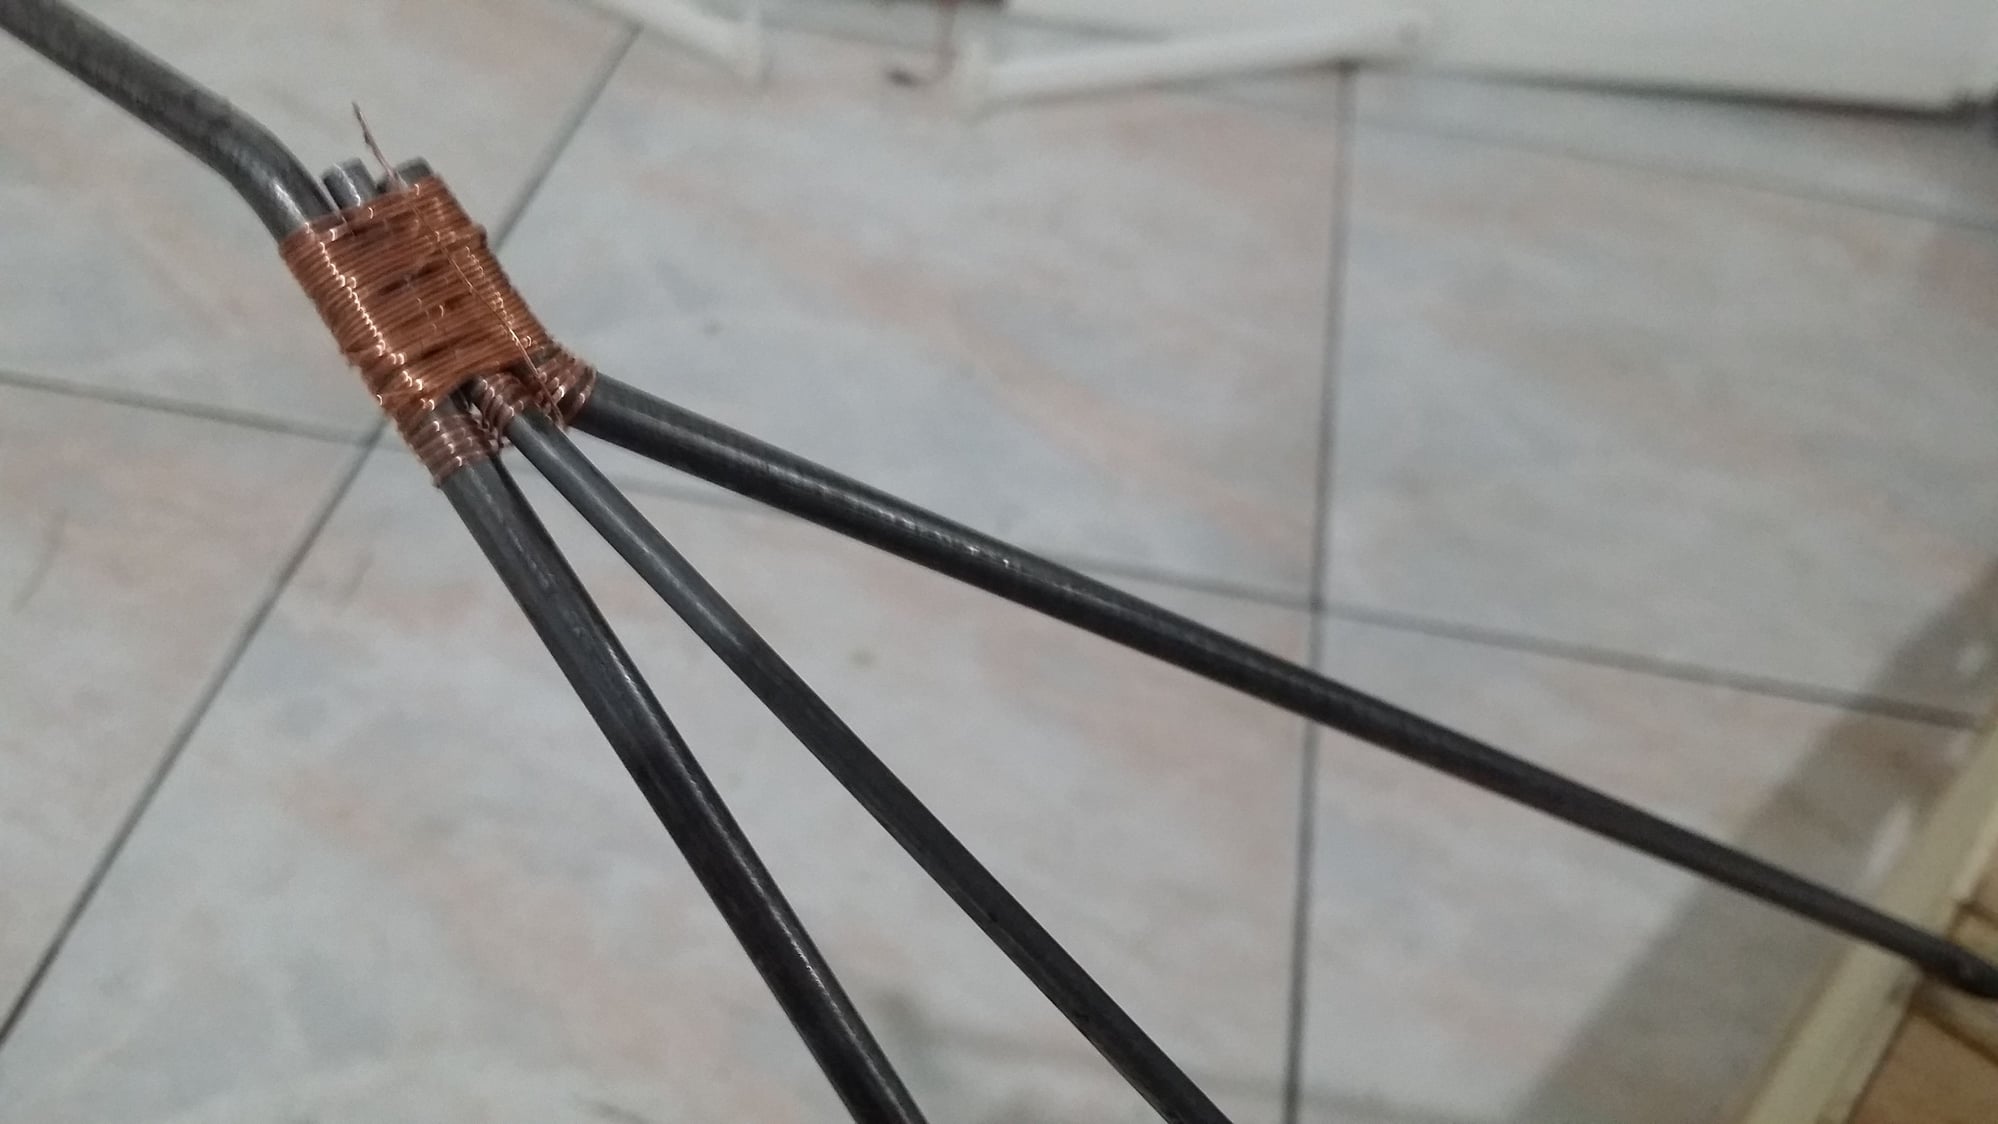
I'm having trouble with this. My 40w soldering iron doesn't seem to work. I might need the help of a pro welder here.
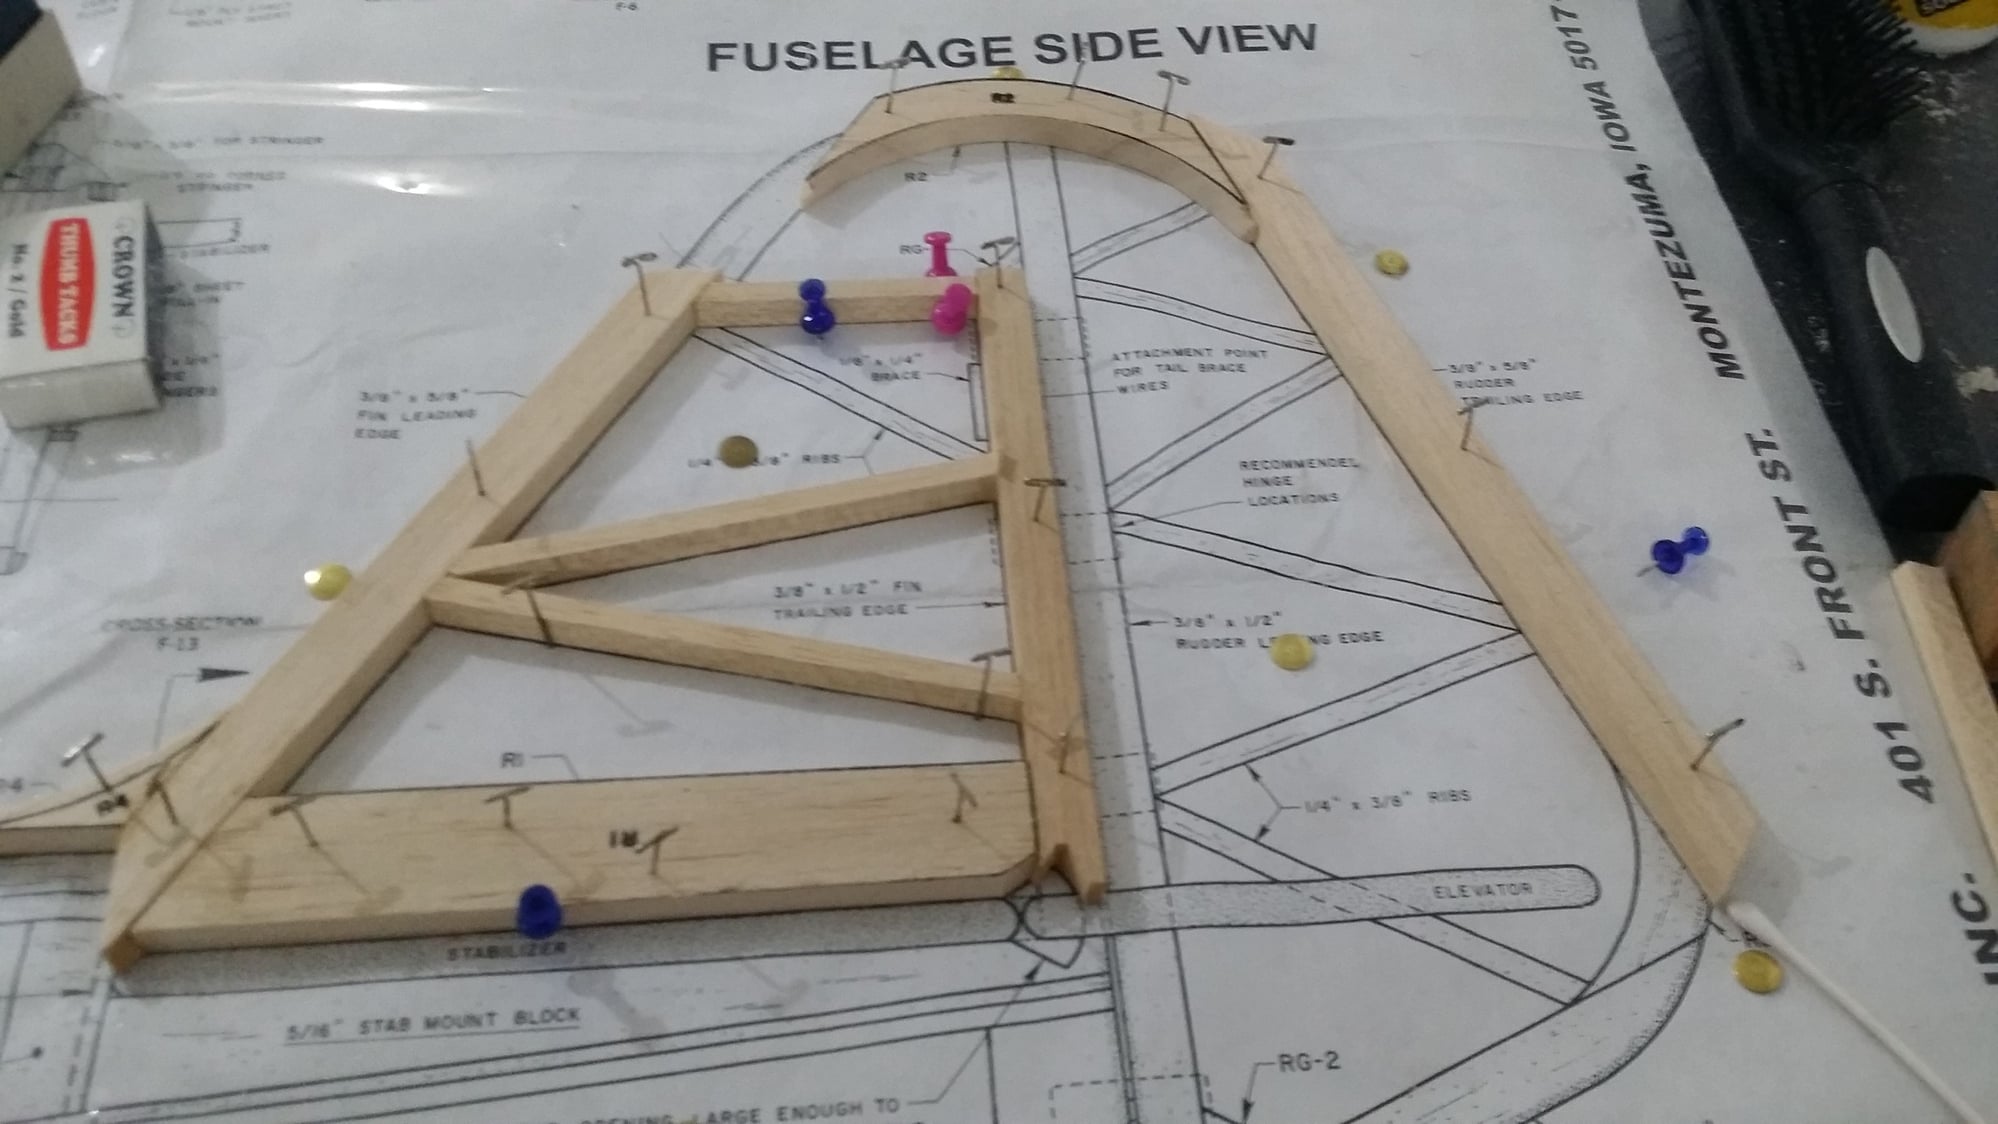
Just finished doing the stabs, elev and rudder. I guess I'm ready to sand and install hinges on those parts.
now, for the worst part, again. I tried to check the wings, put it on my table and noticed it's still flat. To make sure, i bought a long leveller to check my table. I then noticed that the table i've been working on wasn't flat at all! To make the long story short, i made fine adjustments on the table, made sure it's flat, checked the wings, and so you guessed it right. There is that warp again.
lesson learned: i should have made sure the table was 100% flat from the get go!
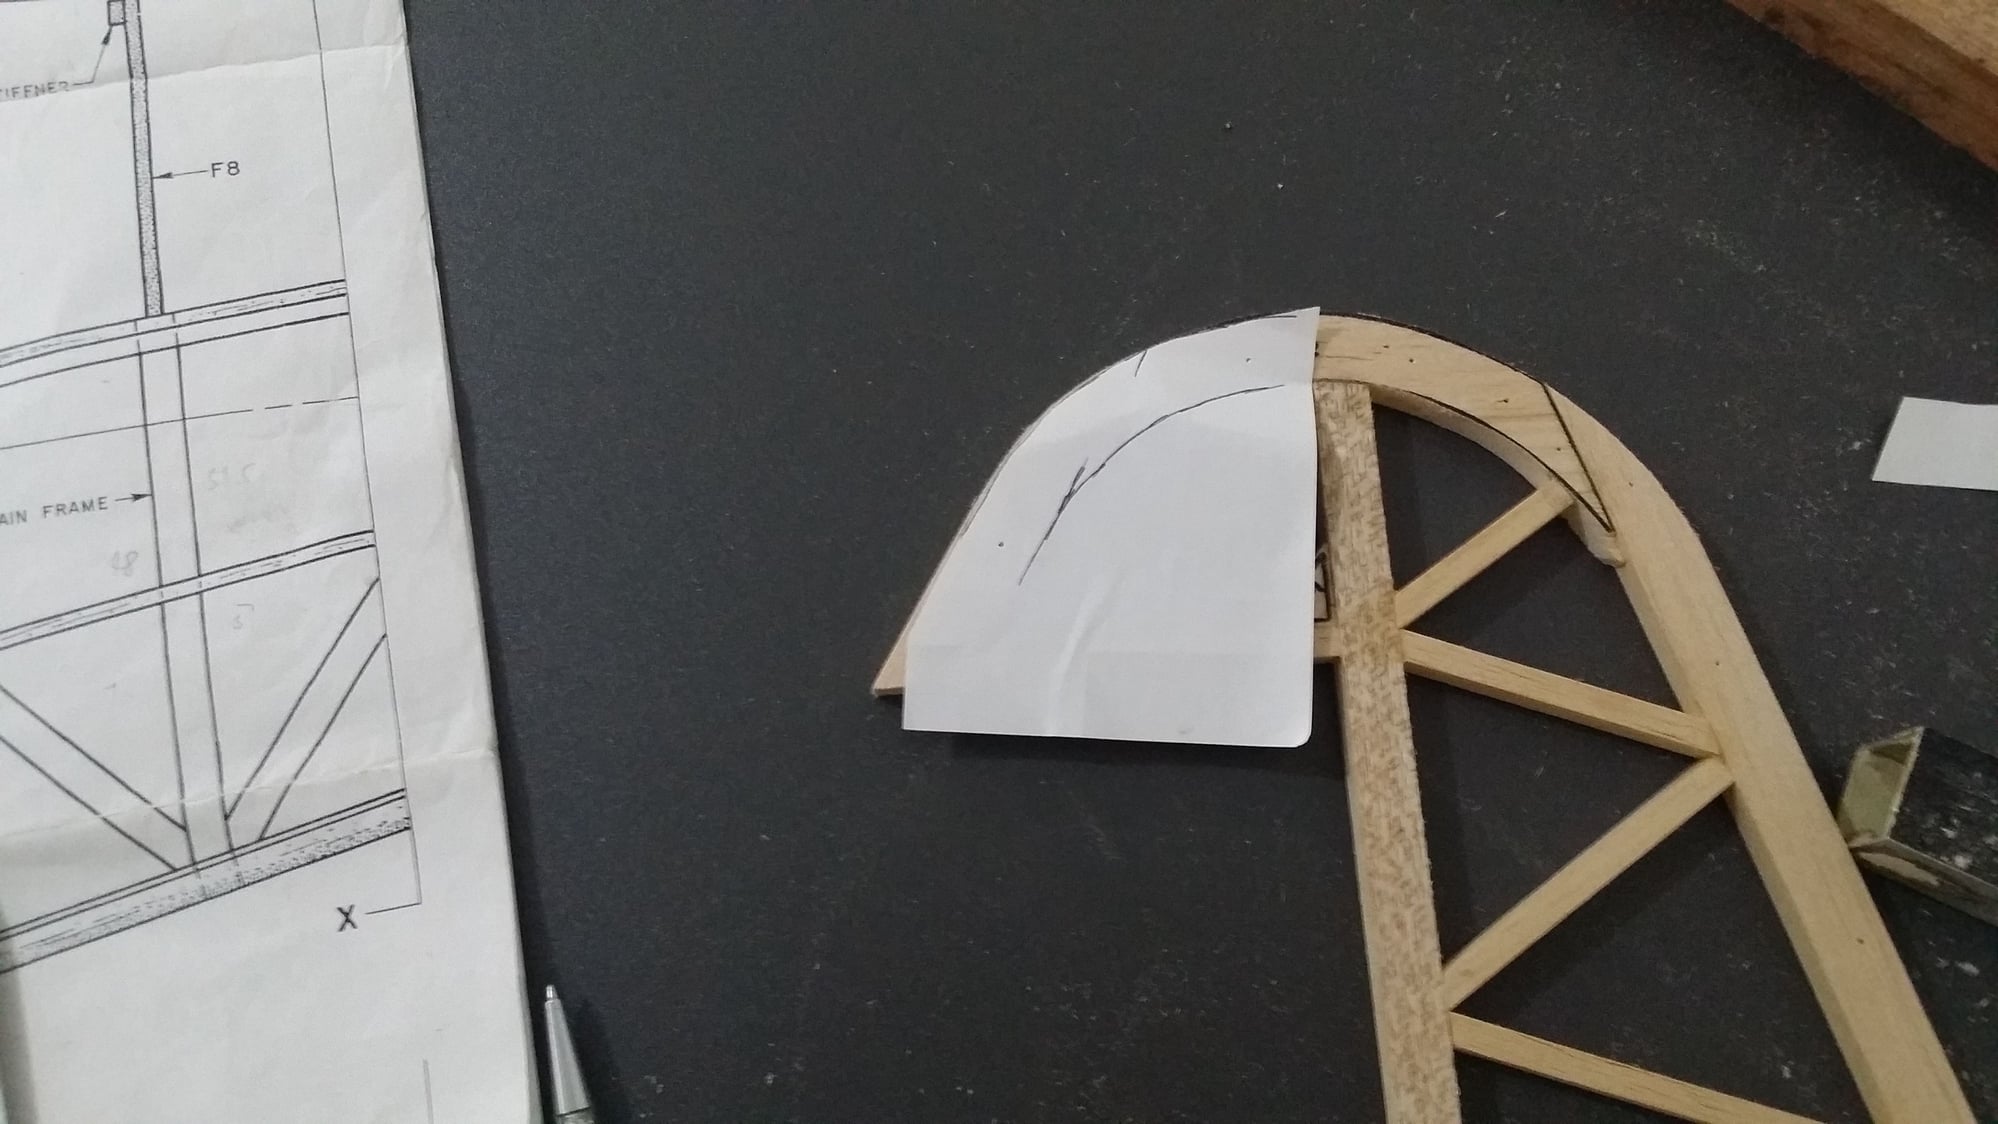
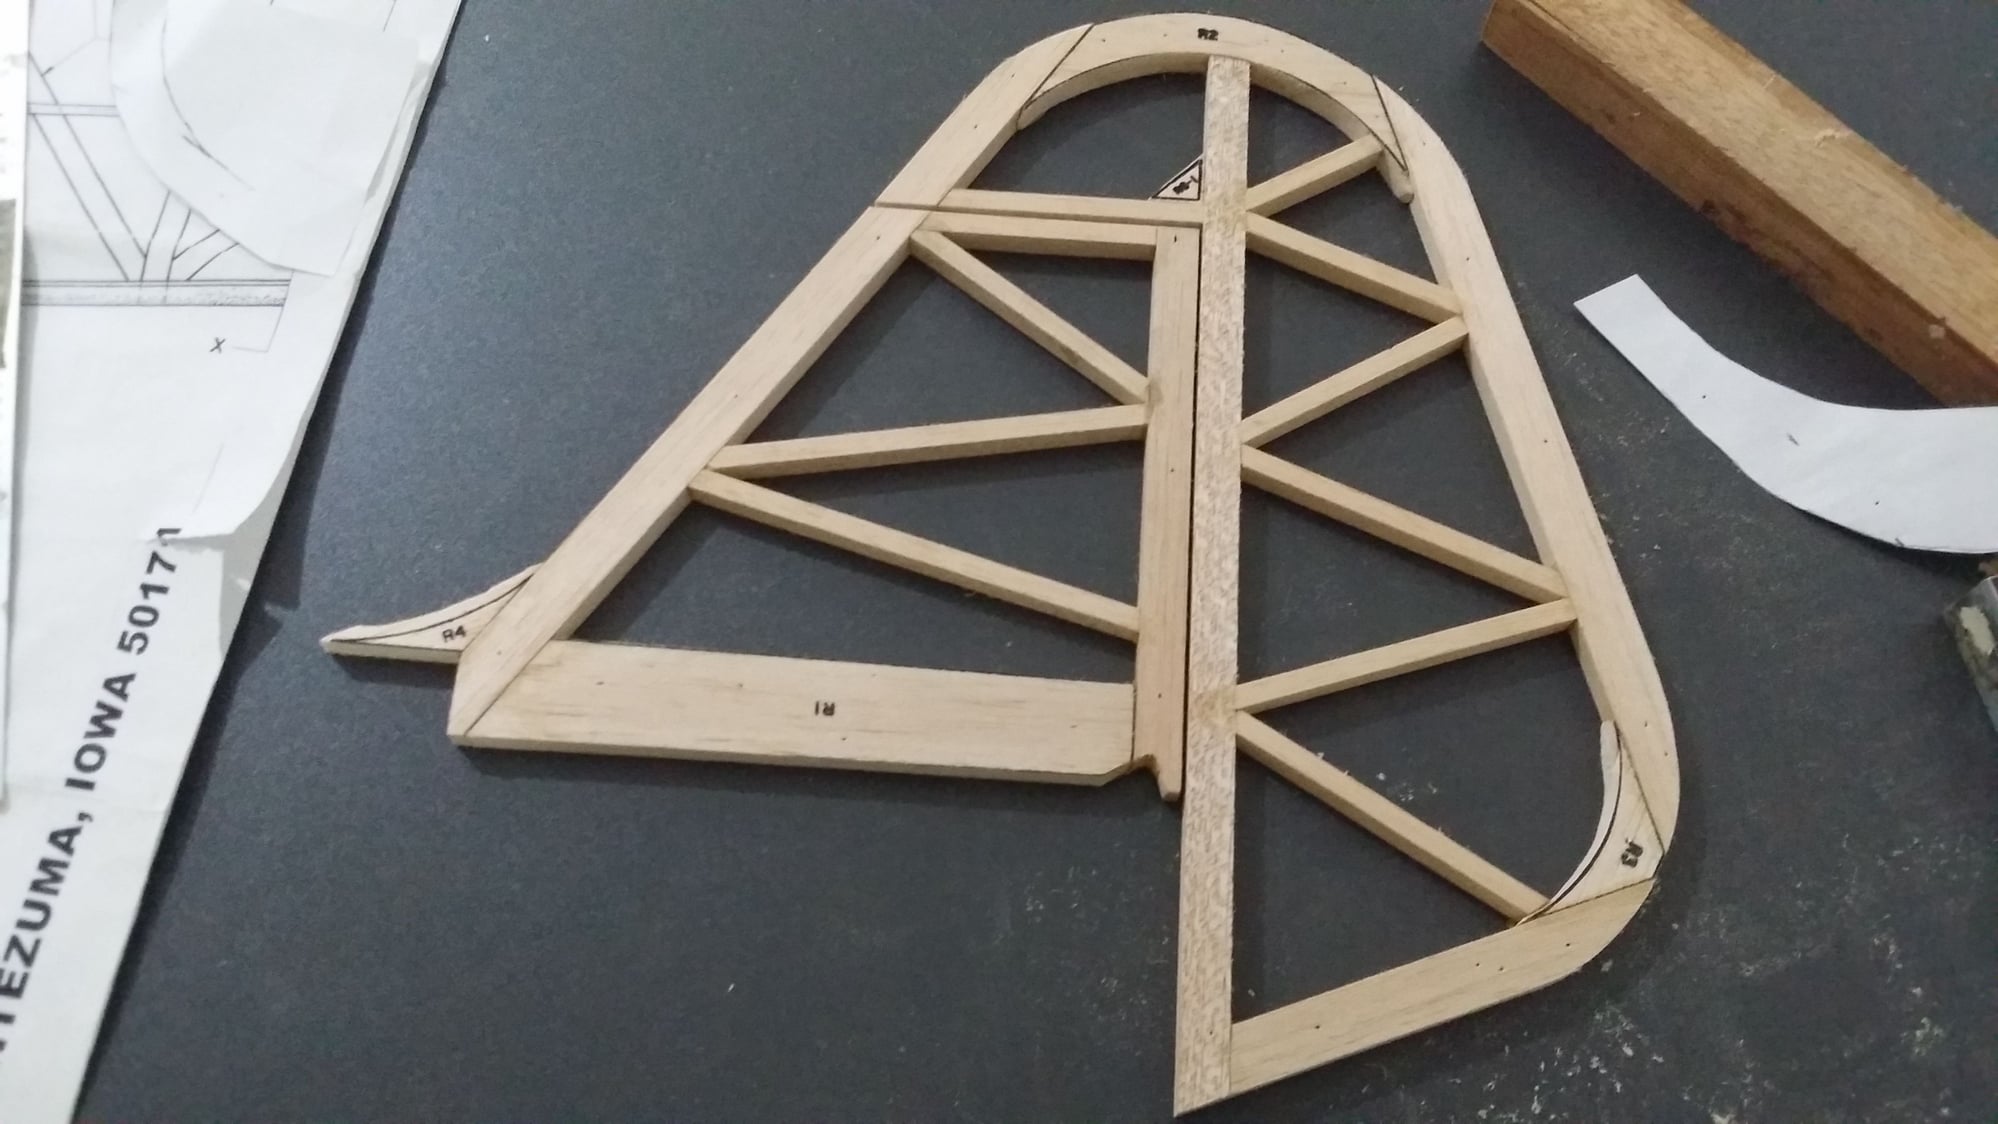
moving on, notice how I sanded the rounded parts of the rudder. I traced the plans, then attached it to the piece. It made shaping easier for me. I think I'm learning.
Last edited by Beibitoi; 03-16-2018 at 09:13 PM.
03-17-2018, 05:41 AM
#115
A 40w iron isn't going to cut it for soldering music wire. You need at least a small butane torch. Make sure the parts are clean by sanding until shiny, cleaned with alcohol and fluxed. Cleanliness is the key to soldering.
03-18-2018, 07:50 AM
#116

Harbor Freight sells a small refillable butane torch that is just the ticket for soldering landing gear. It's cheap, has a small tightly pointed flame, and has a built in igniter. As Tubig notes, cleanliness is key. You may even want to brighten up the areas to be soldered with a bit of emory cloth.
03-20-2018, 02:15 AM
#117
My Feedback: (3)
Join Date: Oct 2002
Location: Indianapolis, IN
Posts: 1,348
Likes: 0
Received 0 Likes
on
0 Posts
I use the Harbor Freight torch as well. Works great! Silver Solder with flux insures a neat and sturdy job.
https://www.harborfreight.com/butane...rch-63170.html
https://www.harborfreight.com/butane...rch-63170.html
03-20-2018, 08:10 AM
#118
WB,
I've been digging for photos however have not found any. I lost the plane about 3 years ago do to a fuel tank malfunction causing a stall when I was about 10' or so altitude, inverted. You know the rest of the story....
Anyway, I bought mine at an estate auction already built so the FW was in the stock location. It was flown with a 120fs but I converted it to the MLD. I used an after market cowl that if memory serves me correctly I purchased it from Fiberglass Specialties. I don't recall have any issues with the fit of the MLD using the new cowl and the stock FW location. I don't have the engine any more so I can't confirm and measurements.
I should mention that I removed all the covering to repair some broken stringers etc. That is when I installed the float mounts, Robart gear etc.
As for the floats, I used the Hangar Nine fiberglass ARF floats that were available for their 1/4 scale cub. They were pricy and did not hold up to well, one of them split out at the seam on my second or third landing.
The MLD 28 to me was perfect, a little overpowered but not by much. The Cub was probably the plane I enjoyed flying the most especially the touch and goes with the Robart gear working their magic.
I've been digging for photos however have not found any. I lost the plane about 3 years ago do to a fuel tank malfunction causing a stall when I was about 10' or so altitude, inverted. You know the rest of the story....
Anyway, I bought mine at an estate auction already built so the FW was in the stock location. It was flown with a 120fs but I converted it to the MLD. I used an after market cowl that if memory serves me correctly I purchased it from Fiberglass Specialties. I don't recall have any issues with the fit of the MLD using the new cowl and the stock FW location. I don't have the engine any more so I can't confirm and measurements.
I should mention that I removed all the covering to repair some broken stringers etc. That is when I installed the float mounts, Robart gear etc.
As for the floats, I used the Hangar Nine fiberglass ARF floats that were available for their 1/4 scale cub. They were pricy and did not hold up to well, one of them split out at the seam on my second or third landing.
The MLD 28 to me was perfect, a little overpowered but not by much. The Cub was probably the plane I enjoyed flying the most especially the touch and goes with the Robart gear working their magic.
You stated you used Hanger 9 fiberglass ARF floats on your Cub. I've been looking at these floats, they are pricey $279.00 and wondered how they would hold up in rough landings. It's not sounding all that good, your split at the seam. They are nice looking floats in pictures and some videos I've seen. But always wondered how tough they are. In knowing the trouble you had with your scale floats, is there anything you think you can do to make them stronger/tougher, before flying them?
I've been using (High Performance Foam RC Floats Flat bottom Vee bottom PONTOONS floats, very nice, but would be hard to make them look as nice as Hanger 9 floats.
Any idea's would be greatly appreciated, I just might go back to Seaplane Supply floats and get the float struts from Hanger 9.
03-20-2018, 09:29 AM
#119
WB,
I've been digging for photos however have not found any. I lost the plane about 3 years ago do to a fuel tank malfunction causing a stall when I was about 10' or so altitude, inverted. You know the rest of the story....
Anyway, I bought mine at an estate auction already built so the FW was in the stock location. It was flown with a 120fs but I converted it to the MLD. I used an after market cowl that if memory serves me correctly I purchased it from Fiberglass Specialties. I don't recall have any issues with the fit of the MLD using the new cowl and the stock FW location. I don't have the engine any more so I can't confirm and measurements.
I should mention that I removed all the covering to repair some broken stringers etc. That is when I installed the float mounts, Robart gear etc.
As for the floats, I used the Hangar Nine fiberglass ARF floats that were available for their 1/4 scale cub. They were pricy and did not hold up to well, one of them split out at the seam on my second or third landing.
The MLD 28 to me was perfect, a little overpowered but not by much. The Cub was probably the plane I enjoyed flying the most especially the touch and goes with the Robart gear working their magic.
I've been digging for photos however have not found any. I lost the plane about 3 years ago do to a fuel tank malfunction causing a stall when I was about 10' or so altitude, inverted. You know the rest of the story....
Anyway, I bought mine at an estate auction already built so the FW was in the stock location. It was flown with a 120fs but I converted it to the MLD. I used an after market cowl that if memory serves me correctly I purchased it from Fiberglass Specialties. I don't recall have any issues with the fit of the MLD using the new cowl and the stock FW location. I don't have the engine any more so I can't confirm and measurements.
I should mention that I removed all the covering to repair some broken stringers etc. That is when I installed the float mounts, Robart gear etc.
As for the floats, I used the Hangar Nine fiberglass ARF floats that were available for their 1/4 scale cub. They were pricy and did not hold up to well, one of them split out at the seam on my second or third landing.
The MLD 28 to me was perfect, a little overpowered but not by much. The Cub was probably the plane I enjoyed flying the most especially the touch and goes with the Robart gear working their magic.
I'm having trouble with this. My 40w soldering iron doesn't seem to work. I might need the help of a pro welder here.
Just finished doing the stabs, elev and rudder. I guess I'm ready to sand and install hinges on those parts.
now, for the worst part, again. I tried to check the wings, put it on my table and noticed it's still flat. To make sure, i bought a long leveller to check my table. I then noticed that the table i've been working on wasn't flat at all! To make the long story short, i made fine adjustments on the table, made sure it's flat, checked the wings, and so you guessed it right. There is that warp again.
lesson learned: i should have made sure the table was 100% flat from the get go!
moving on, notice how I sanded the rounded parts of the rudder. I traced the plans, then attached it to the piece. It made shaping easier for me. I think I'm learning.
I'm glad to see you're back to your build. They are right, a butane torch is the way to go when soldering a large area like the landing gear struts. In looking at your picture with the cooper wire, it doesn't look like it's been sanded, the area to be soldered should be rubbed down with alcohol and sanded before soldering is done. The landing gear struts from the factory as it comes out of the box could have oil residue on it, they do that to keep the medal rod from rusting, the solder will not stick.
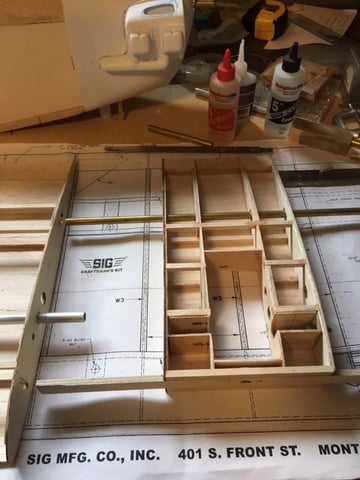
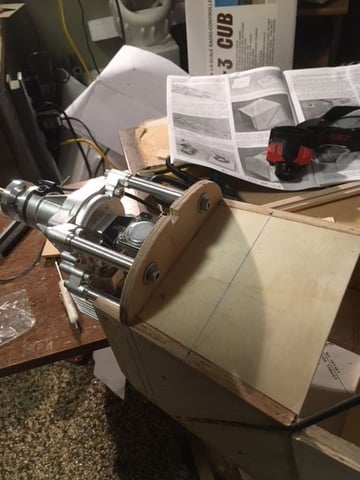
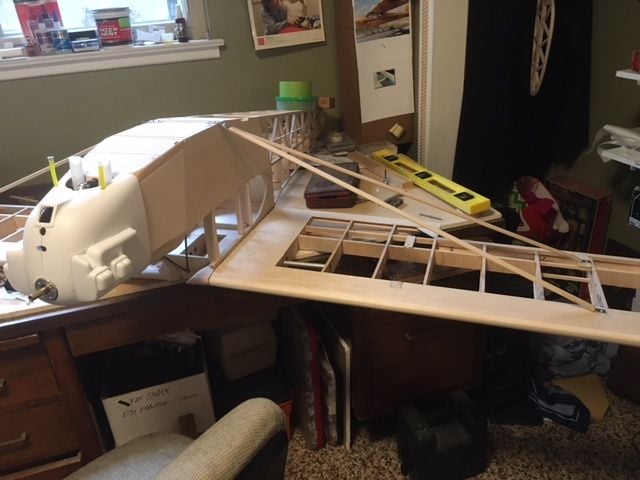
With that said, I have been building on my Sig 1/4 scale Piper Cub. I did purchase the DLE 35-RA engine and I did install it on my cub. I know there's a lot of slack out there on installing a large engine on a Cub that will fly nicely with a smaller glow engine or smaller gas engine as J-3 cubs should fly. It's a matter of preference! I went with the 35 because I'll be flying with floats, all my planes are float planes, never runway. The DLE 35 will get me out of trouble if I have to suddenly add power to get me out of a jam. I did have to move the firewall back 1 inch, doing away with former F-2. and making a new firewall. I also modernized the center wing suction. I made the wing a 3 piece wing, where the two wing panels will slide into the center suction. I'll add pictures if I can. My Cub will be transported by boat to where I normally fly, so the wings have to come off fairly easily to keep my wife happy, she says my planes are too big for the boat. Plus I didn't like the way the wing was set up for transportation as per the plans. I have a small room to build in, this is the largest plane I've built. I'll post some photos.
Good luck in your build, happy landing!