


Lazerworks Slim Jim .20 Group Build
 07-22-2018, 07:59 AM
#51

Thread Starter

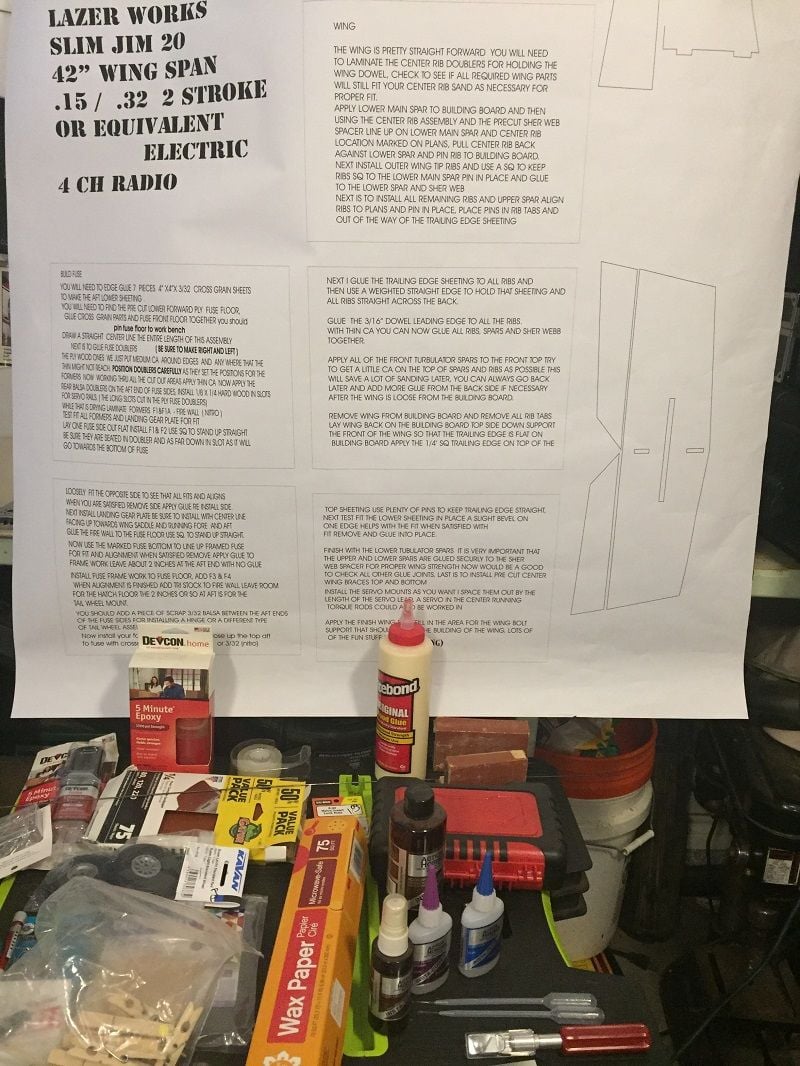
One of our WFRCC club members , Steve Chandler, sent a batch of photos on his build. The plans, as seen in earlier photos, have quite a bit of instruction on how to build the model written out on the left hand side of the plans. At the bottom of the photo Steve has more than enough supplies to start building the model.
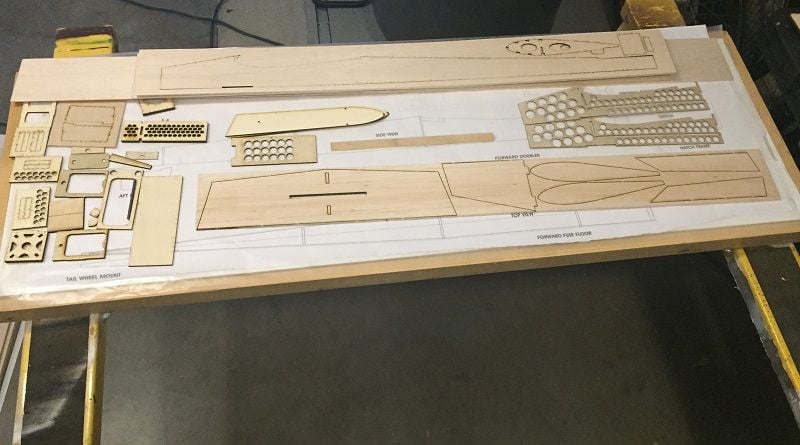
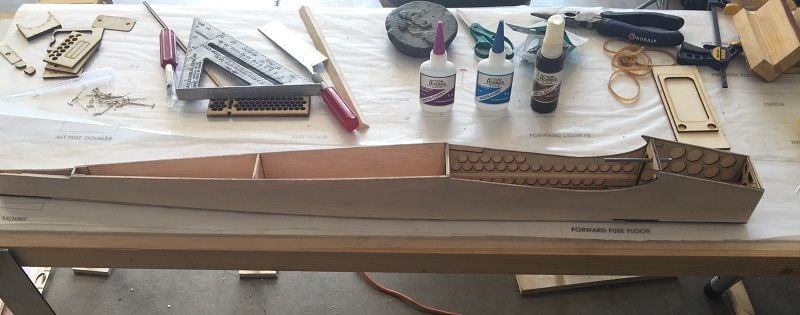
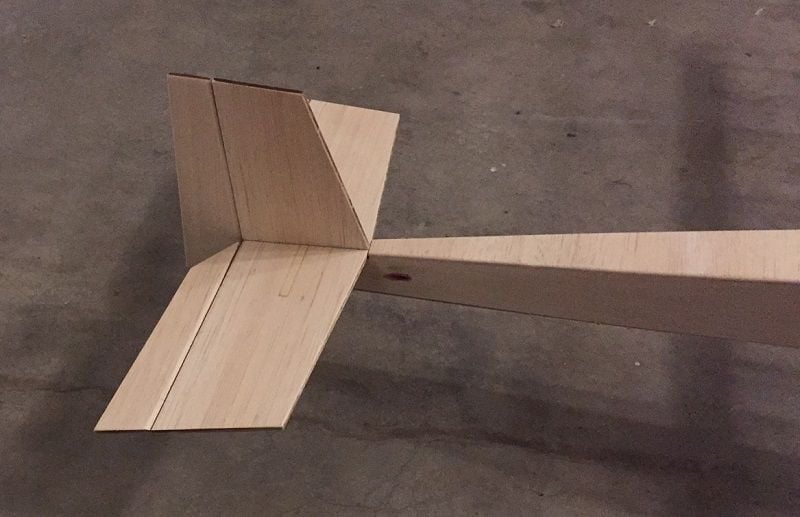
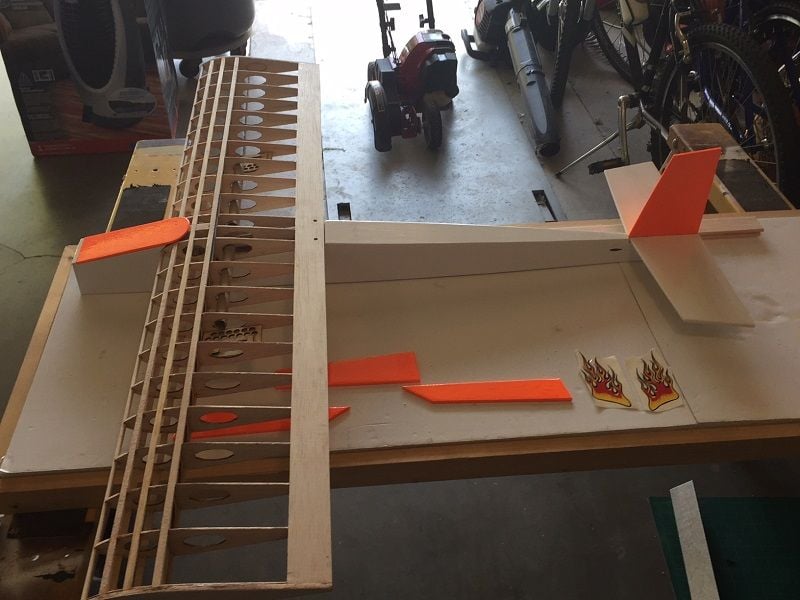
You don't need a huge building space to assemble this model. Here are all of the parts of the fuselage along with the optional drooped wing tips. Steve has a slightly later iteration of the kit with two F1 and F1a formers. The formers have different size holes for the front wing mounting dowel. The original 1/4 inch dowel may be a bit large and a smaller dowel is easier to install and is entirely strong enough. As can be seen in the photos that follow Steve has used the smaller dowel.
You don't need a huge building space to assemble this model. Here are all of the parts of the fuselage along with the optional drooped wing tips. Steve has a slightly later iteration of the kit with two F1 and F1a formers. The formers have different size holes for the front wing mounting dowel. The original 1/4 inch dowel may be a bit large and a smaller dowel is easier to install and is entirely strong enough. As can be seen in the photos that follow Steve has used the smaller dowel.
 07-22-2018, 08:10 AM
#52
Thread Starter
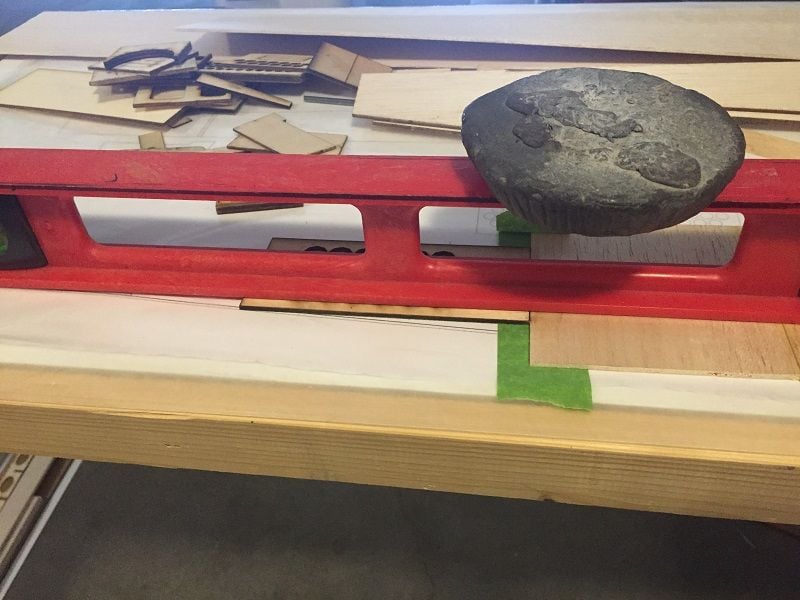
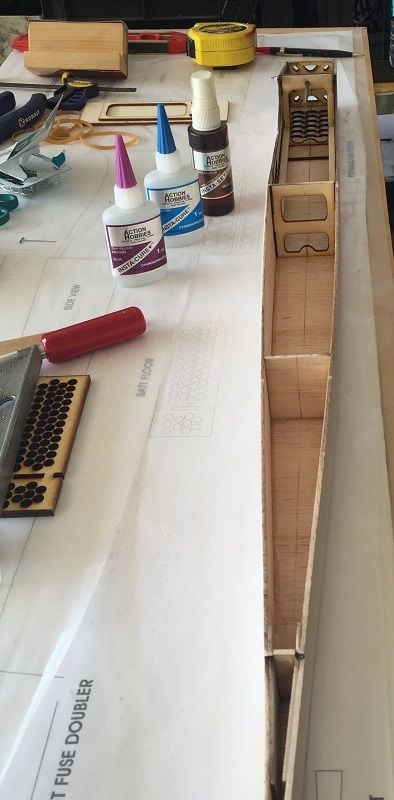
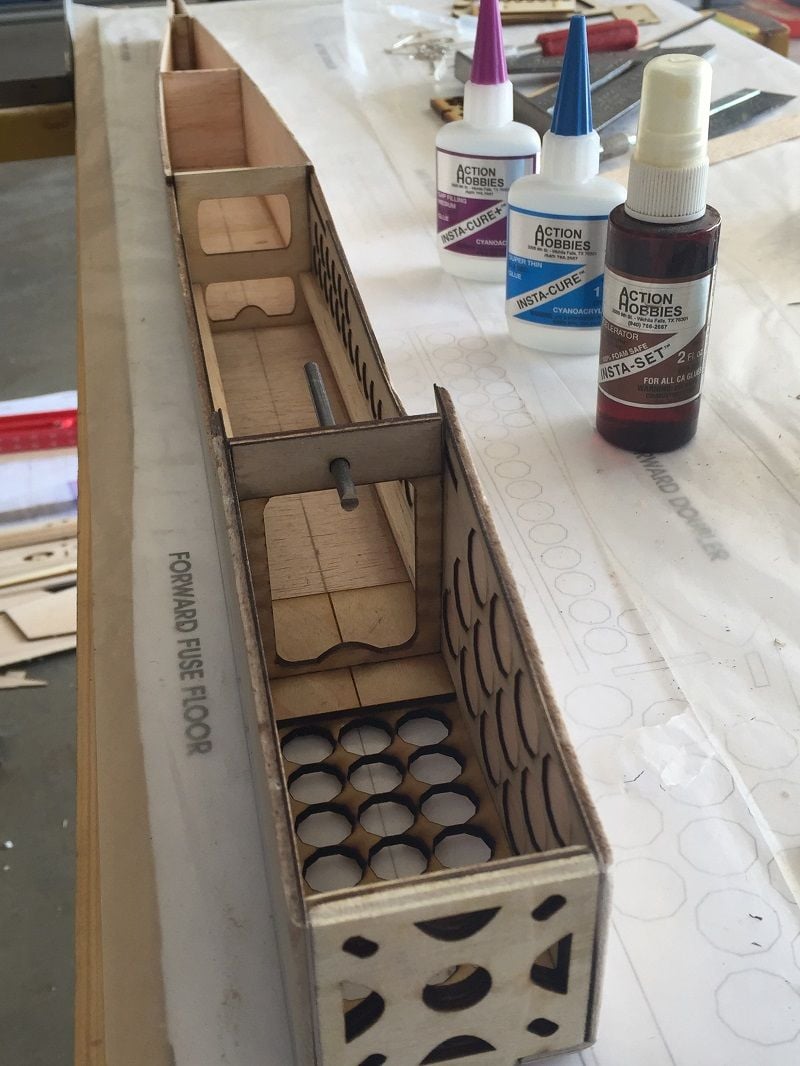
Here we can see that Steve is gluing up the bottom of the fuselage from cross grain balsa, followed with gluing in the bottom of the battery compartment. A little masking tape is handy for edge gluing sheet stock.

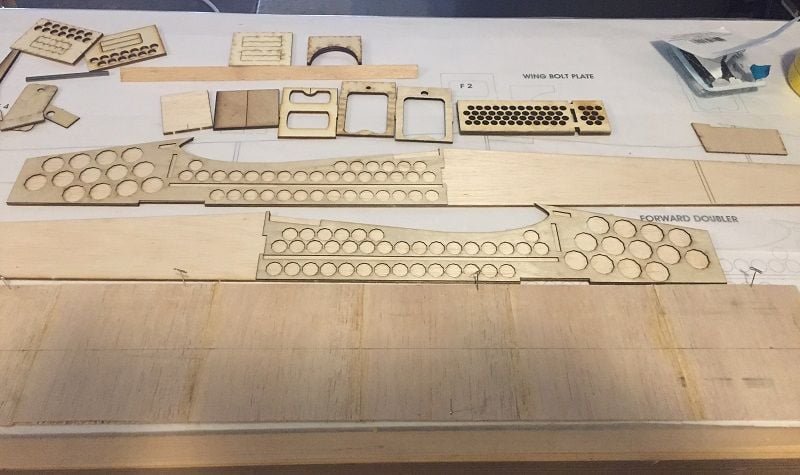
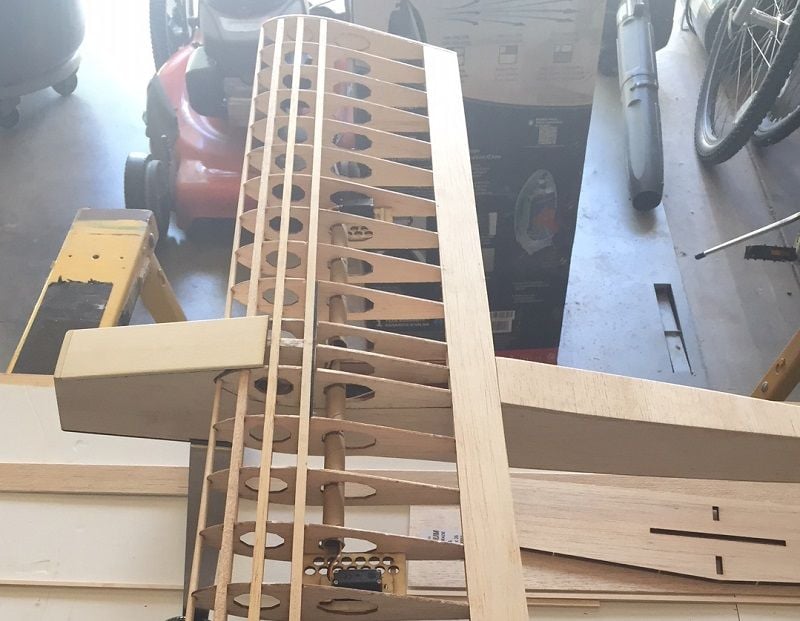
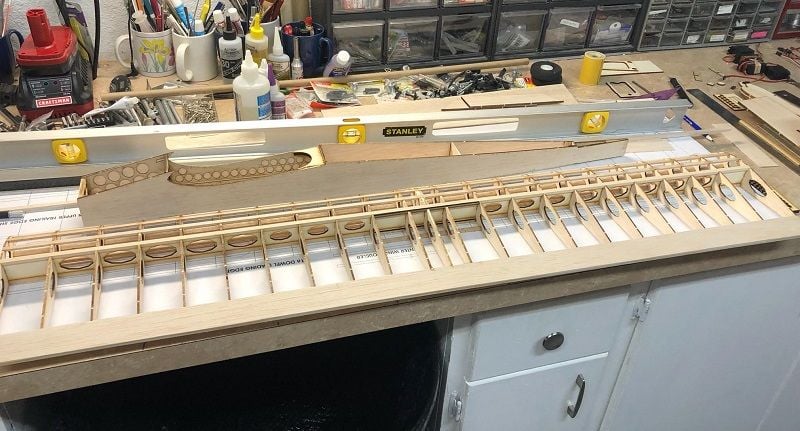
Here he has the bottom sheeting pinned in place. the line is a little faint in the photo but you can see the centerline drawn down the middle of the bottom sheeting. This line is important for building a straight airplane. also in this photo is a nice illustration of the location of the fuselage doublers. In the upper left corner are the wing servo plates with the fuselage servo plate and the rear wing mounting plate just to their right above a bit of triangle stock. Just below them you can see the formers laid out from F4 on the left to the pair of F1 formers on the right. Note the etched centerlines on the formers. and the presence of both types of F1 former with the two sizes of wing peg holes. In building the plane you will use one or the other of the F1s.
Here he has the bottom sheeting pinned in place. the line is a little faint in the photo but you can see the centerline drawn down the middle of the bottom sheeting. This line is important for building a straight airplane. also in this photo is a nice illustration of the location of the fuselage doublers. In the upper left corner are the wing servo plates with the fuselage servo plate and the rear wing mounting plate just to their right above a bit of triangle stock. Just below them you can see the formers laid out from F4 on the left to the pair of F1 formers on the right. Note the etched centerlines on the formers. and the presence of both types of F1 former with the two sizes of wing peg holes. In building the plane you will use one or the other of the F1s.
07-22-2018, 08:35 AM
#53
Thread Starter
In the first two photos we can see where Steve has offered up the fuselage sides to the bottom sheet. Although things aren't glued down yet you can see where the etch lines on the formers line up with the bottom sheet centerlne. Note that the firewall is first glued to the battery compartment floor while the rest of the formers are glued to the fuselage sides,
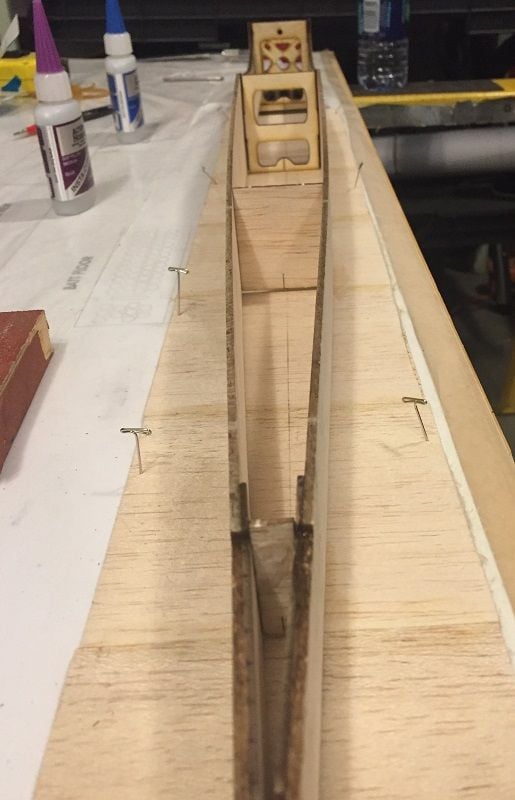
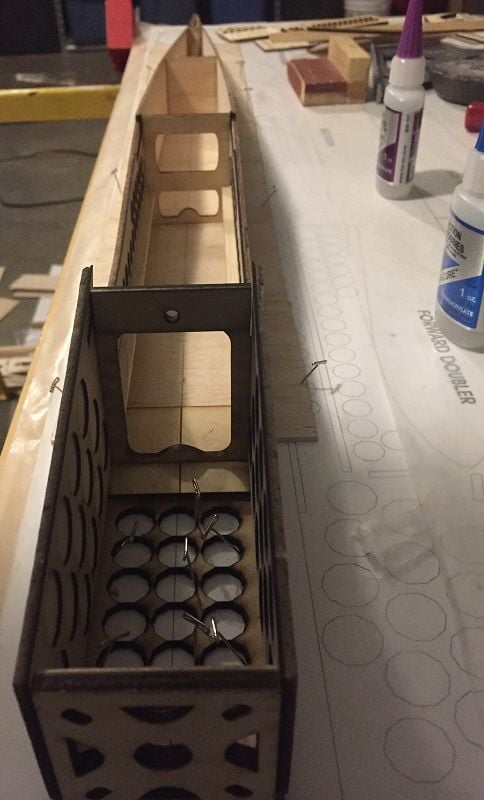
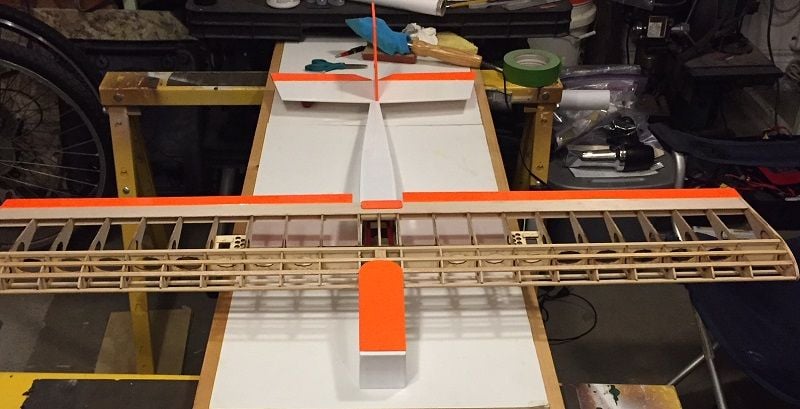
Here the fuselage bottom has been glued to sides. You can see the fuselage centerline pretty clearly but note that the camera angle distorts things a bit. When lining up the marks it is best to look directly down from above the model. After the bottom is glued to the fuselage sides you can trim the bottom flush with the sides. When trimming the cross grain on the fuselage top and bottom is it best to use multiple passes with a fresh, sharp blade and or cut the bottom a little wide and sand it flush with the sides. Steve's cuts are nice and clean but I can say from experience that a dull blade, especially when cutting across the grain can produce a rough edge.
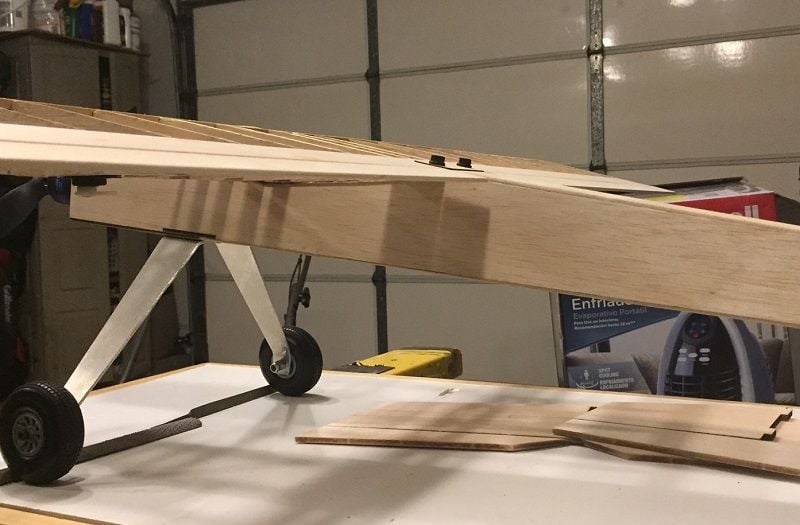
Here is a nice side view of the fuselage. Note the battery compartment hatch and the nifty homemade sanding block in the upper right corner.
Here the fuselage bottom has been glued to sides. You can see the fuselage centerline pretty clearly but note that the camera angle distorts things a bit. When lining up the marks it is best to look directly down from above the model. After the bottom is glued to the fuselage sides you can trim the bottom flush with the sides. When trimming the cross grain on the fuselage top and bottom is it best to use multiple passes with a fresh, sharp blade and or cut the bottom a little wide and sand it flush with the sides. Steve's cuts are nice and clean but I can say from experience that a dull blade, especially when cutting across the grain can produce a rough edge.
Here is a nice side view of the fuselage. Note the battery compartment hatch and the nifty homemade sanding block in the upper right corner.
07-28-2018, 08:03 AM
#54
Thread Starter
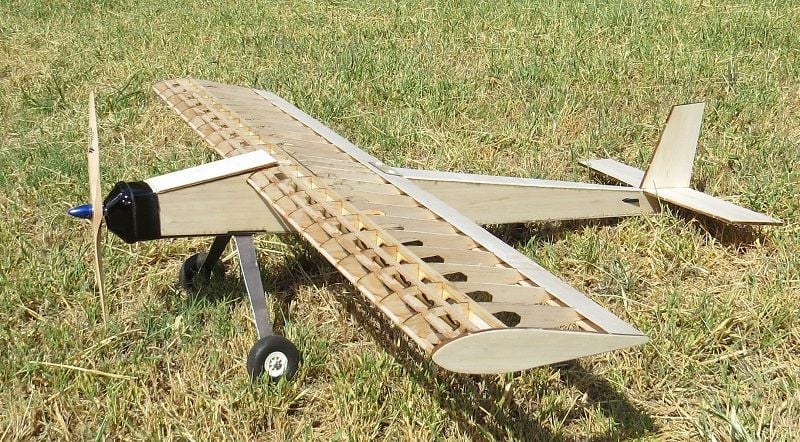
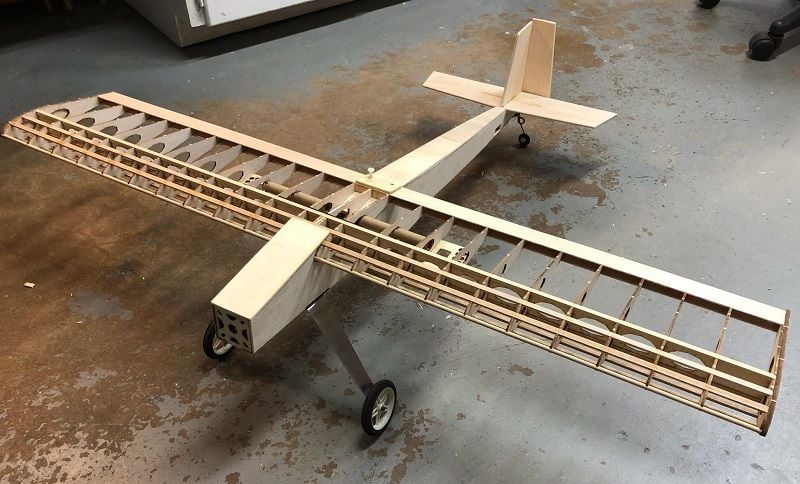
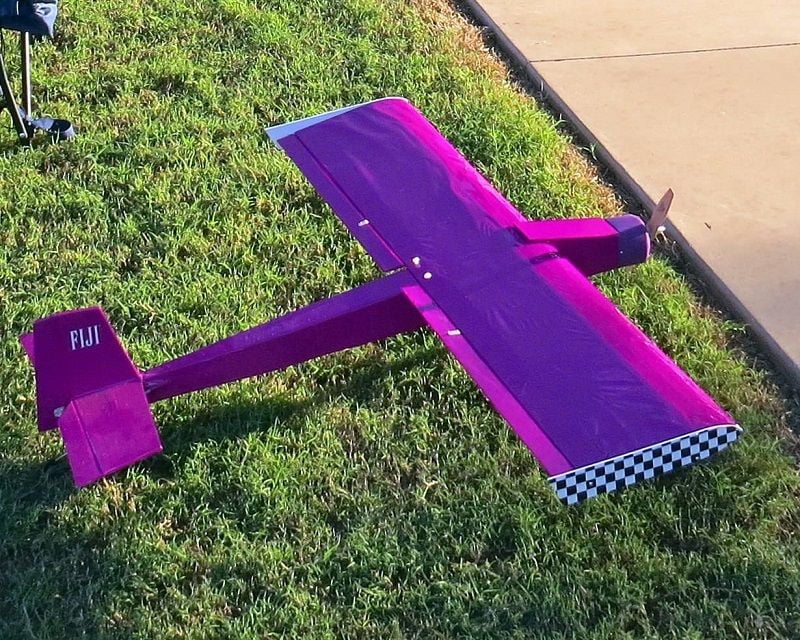
A nice view of Bob Redmond's Slim Jim taken at our last club meeting. The transparent red covering really shows off the wing structure.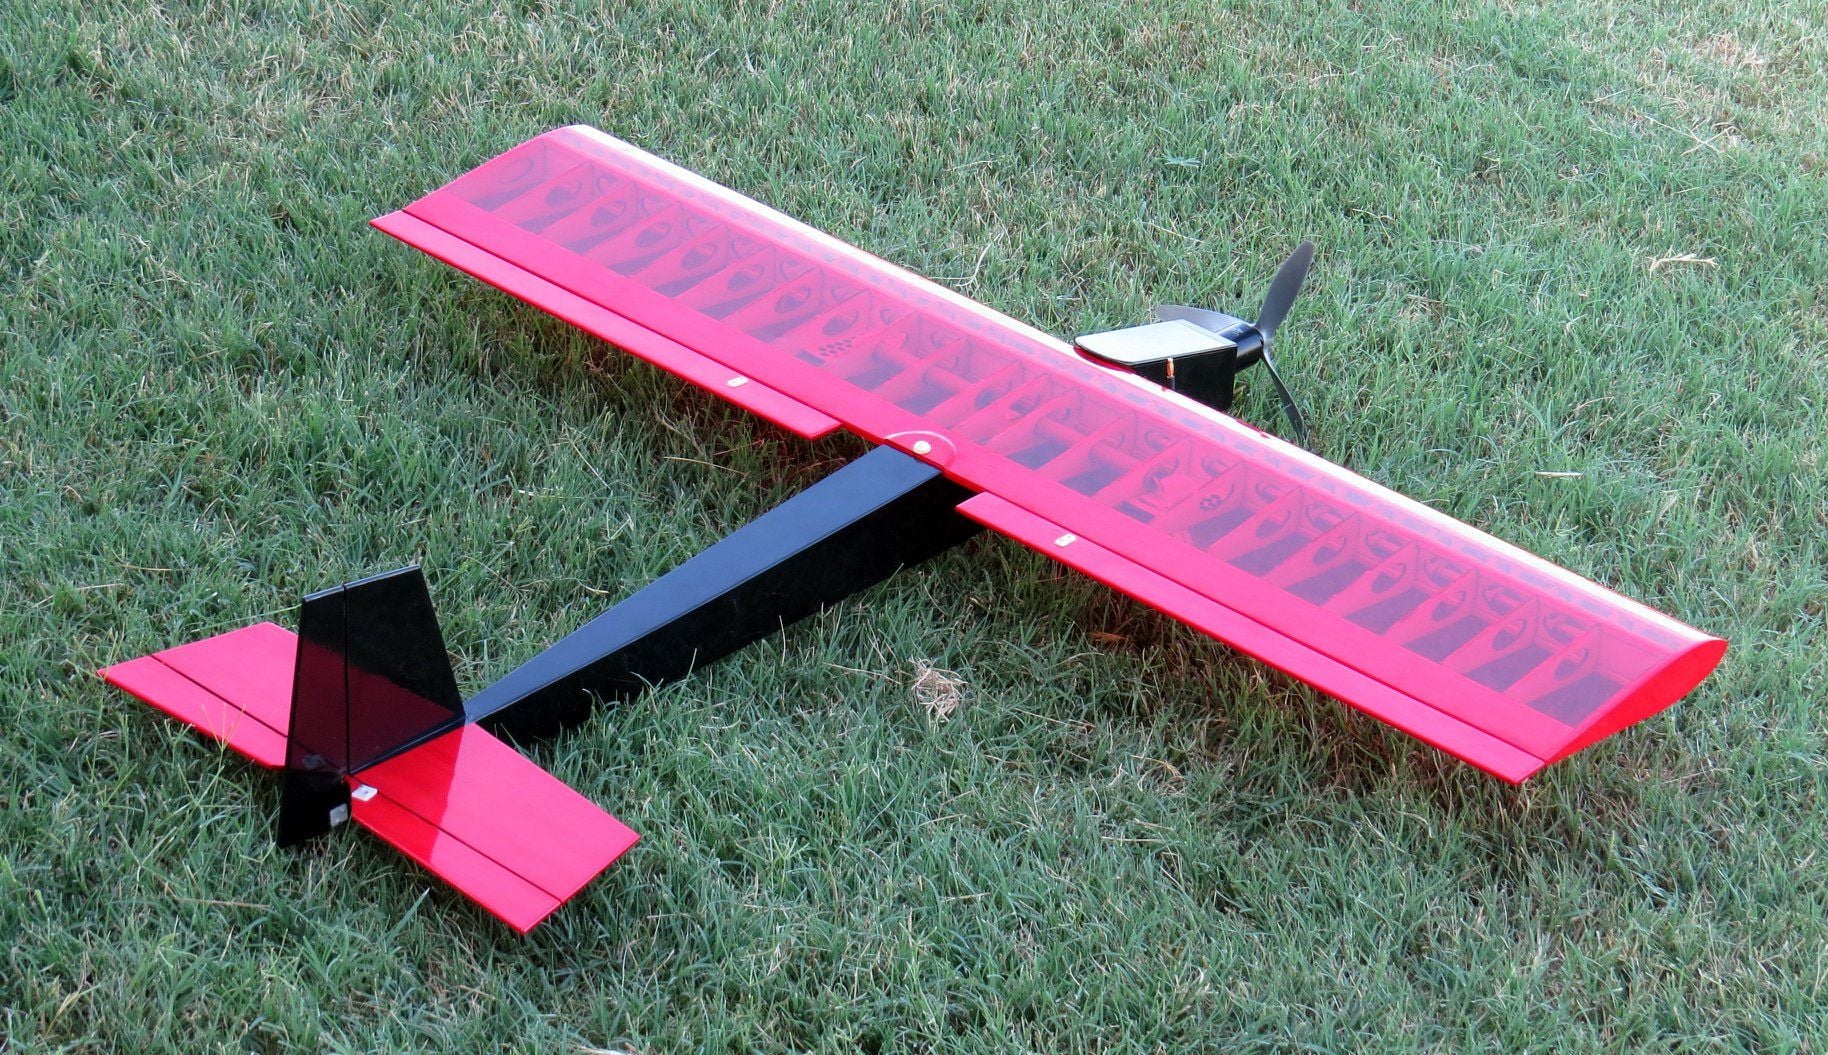

 08-14-2018, 07:26 AM
#56
Thread Starter
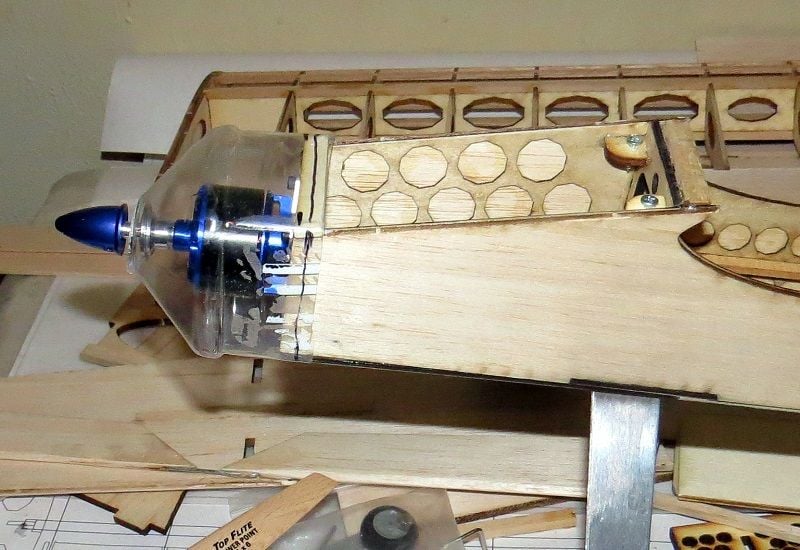
Club member George Bailey has been working on his Slim Jim and has been in the process of developing a cowl for his plane. George also notes that the screws allow for adjusting the fit of the magnetically retained battery hatch.
08-14-2018, 07:45 AM
#57
Thread Starter
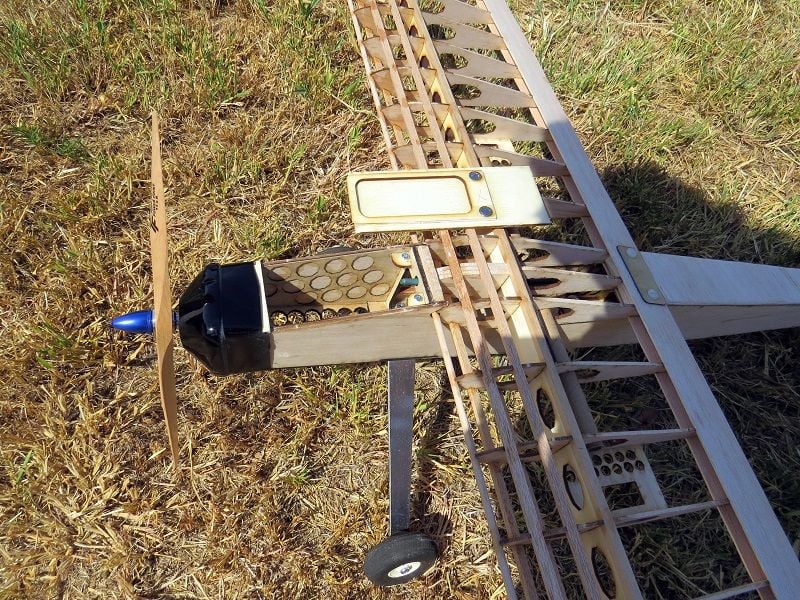
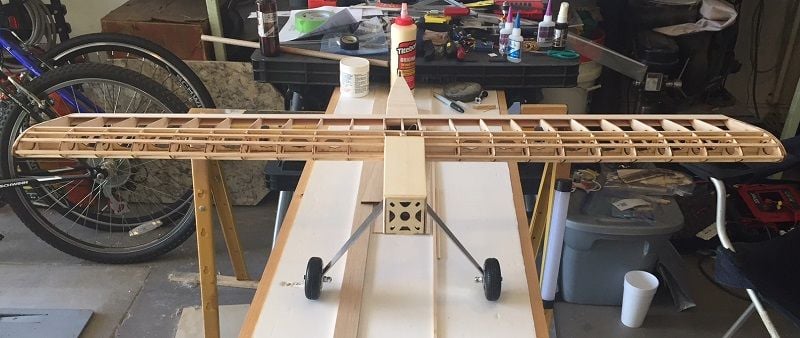
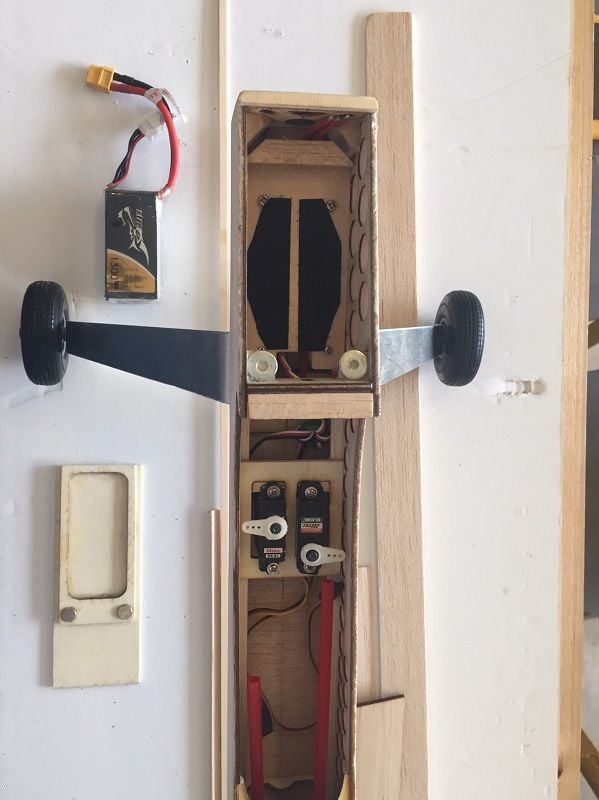
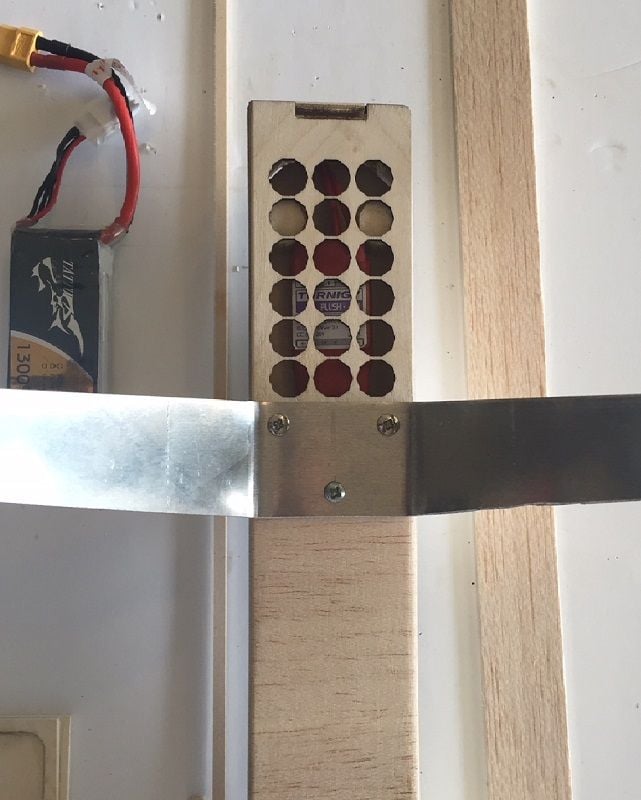
Steve Chandler has provided some photos of his Slim Jim build. A couple of items of particular interest are the way that he has mounted the speed controller and the battery tray. Although they are all variations on the aluminum strap landing gear, no two of the five are exactly alike. One club member has discussed laying up a set of carbon fiber gear legs. In a discussion with the designer, Eddie Taylor, he indicated that music wire landing gear would also be practical.
Last edited by mgnostic; 08-14-2018 at 07:58 AM.
08-14-2018, 07:52 AM
#58
Thread Starter
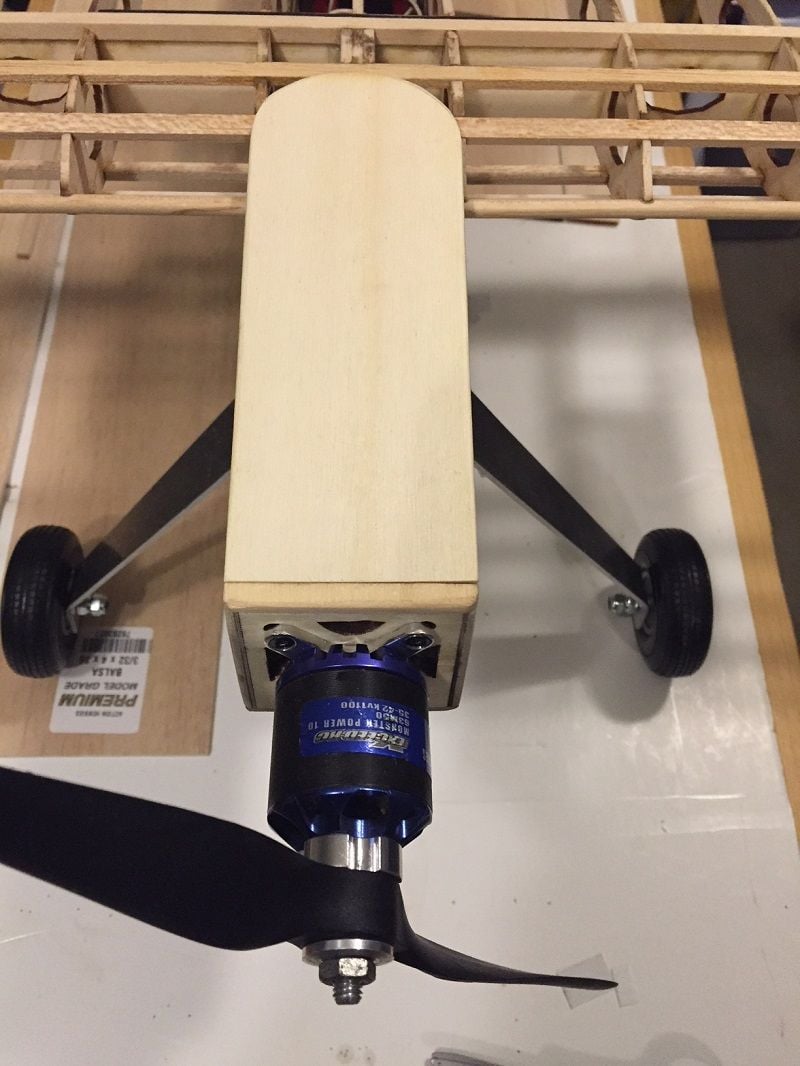
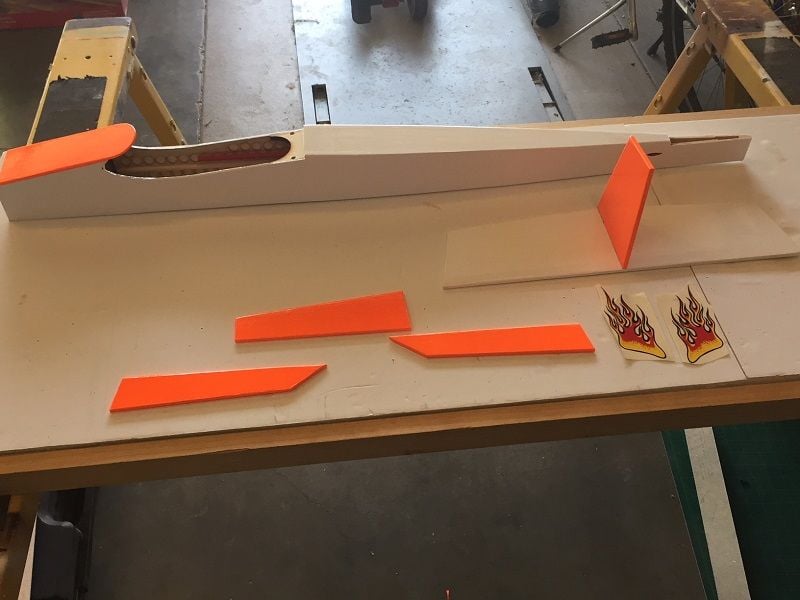
Here are a few more photos of Steve Chandler's efforts. A few builders have have opted as Steve has done, rounding the aft end of the battery hatch.

08-14-2018, 07:54 AM
#59
Thread Starter
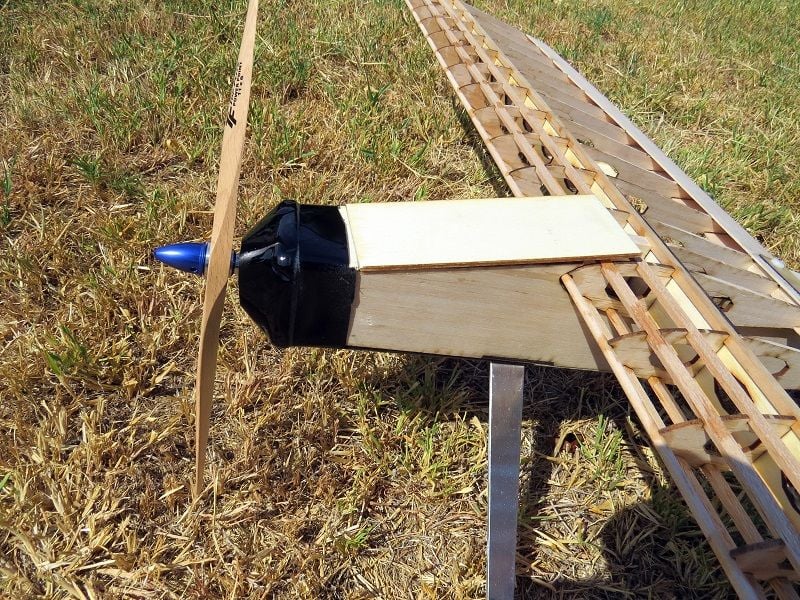
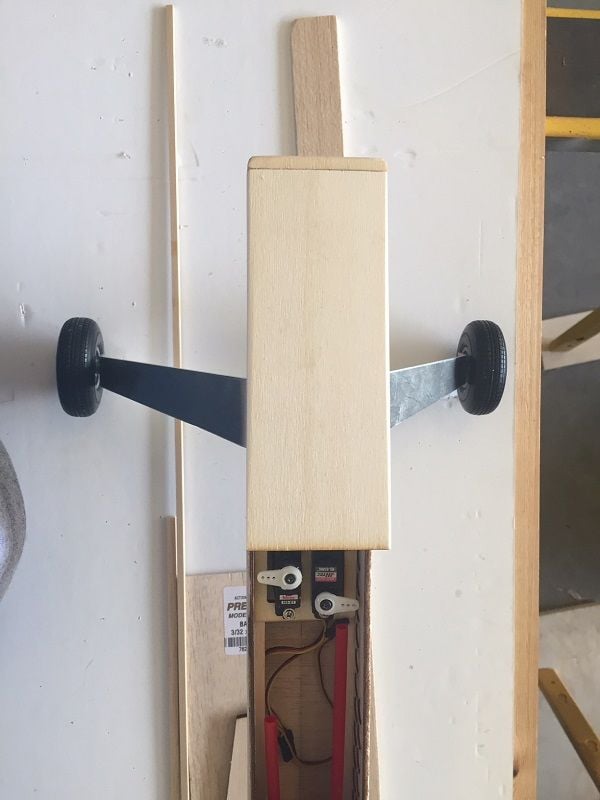
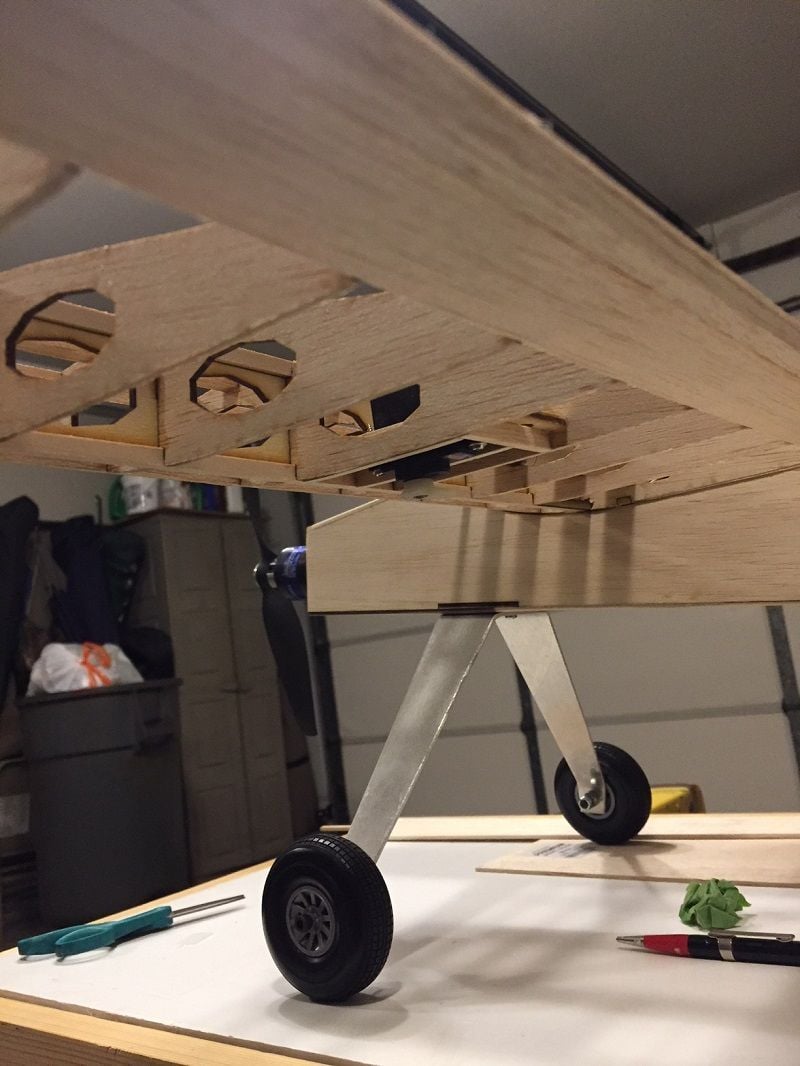
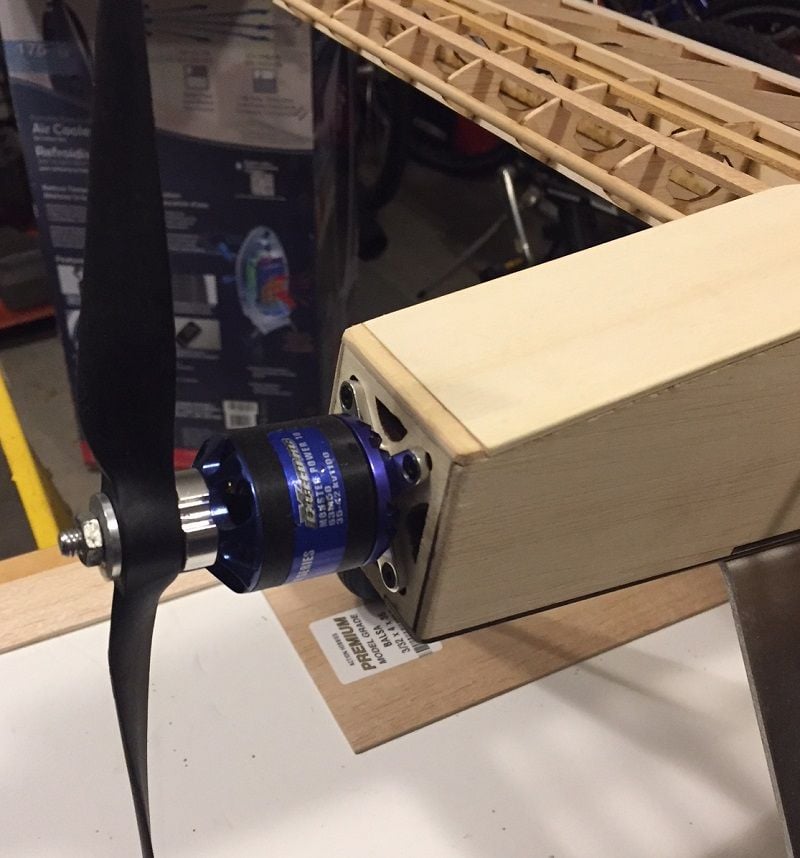
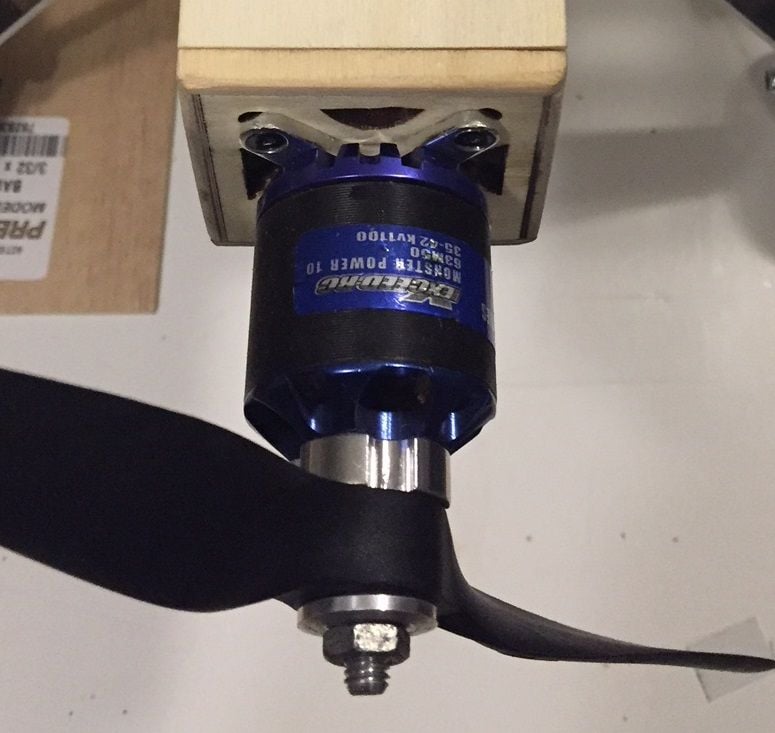
Here are some detail shots of Steve's landing gear and motor installation.
08-14-2018, 05:58 PM
#60
Thread Starter
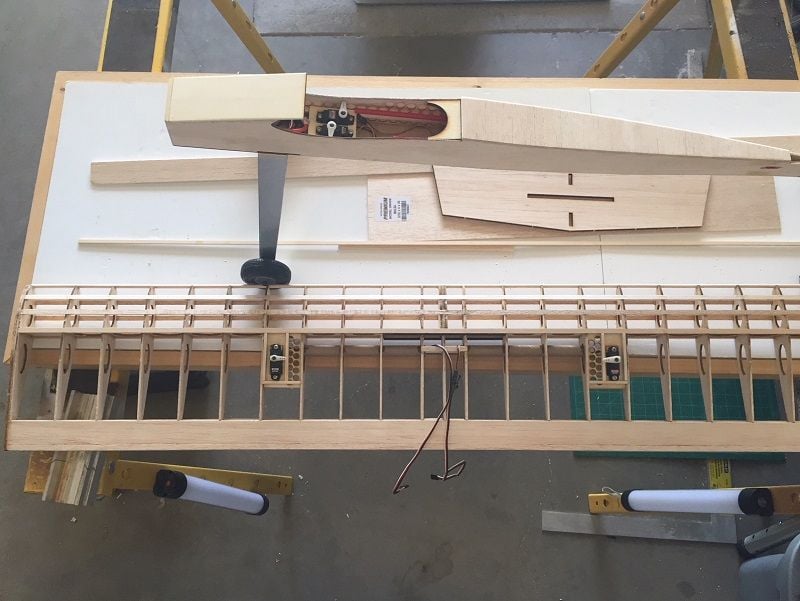
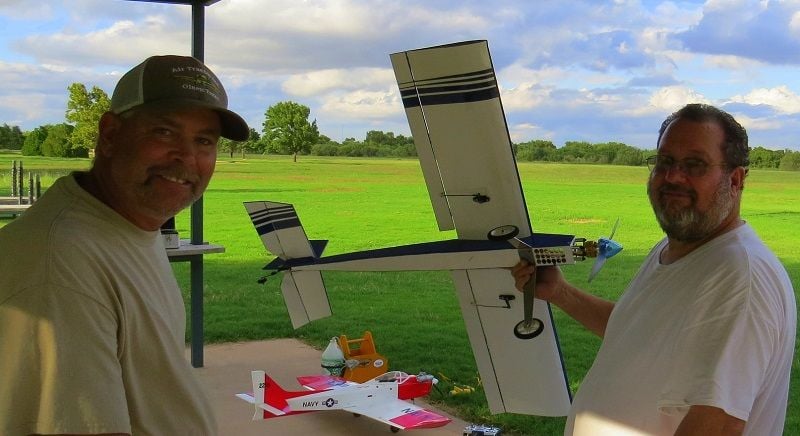
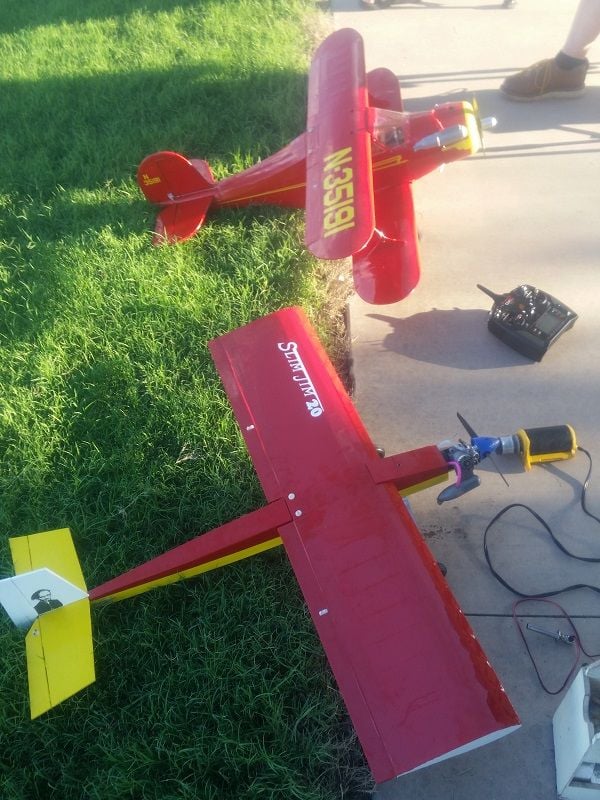
As I have mentioned, my local club, Wichita Falls RC Club, is doing a group build on the Slim Jim. This one belongs to the club's VP Tony Breyen. He is using lightweight wheels and it looks like he may be planning to mount his rudder and elevator servos out on the tail. the club is hoping to have a dozen or more Slim Jims at our club's October Fun Fly along with one plane to be given away as one of the pilot raffle prizes.
08-15-2018, 10:01 AM
#61

Join Date: Oct 2005
Location: Dublin,
VA
Posts: 1,181
Likes: 0
Received 0 Likes
on
0 Posts
Hey,
Thanks sooooooooooooooo much for posting this build thread!!!!!!!!!!!!!! I've ALWAYS wanted a Slim Jim .40 or .60 but couldn't find a thing really about them other than the one pic floating around on Google. You've done a great job on this thread and I really appreciate it.
So, let's say that I wanted to build either the .40 or ,60 Slim Jim, where does a person get the plans to match these laser cut short kits? Thanks for any help/tips you can give!!
08-15-2018, 10:22 AM
#62
Join Date: Oct 2005
Location: Dublin,
VA
Posts: 1,181
Likes: 0
Received 0 Likes
on
0 Posts
Ok so..........
I just called Lazer Works and he answered my questions mentioned above. I'd def. like to build one of the larger sized Slim Jim's one day. Keep up the great work!
I just called Lazer Works and he answered my questions mentioned above. I'd def. like to build one of the larger sized Slim Jim's one day. Keep up the great work!
08-16-2018, 05:35 AM
#63
Thread Starter
To expand on what flygilmore found out; while Lazerworks generally focuses on short kits cut for existing plan sets, the owner does have plans for the SlimJim. The kit is available in .20, .40 and .60 size.
08-25-2018, 06:57 PM
#64
Thread Starter
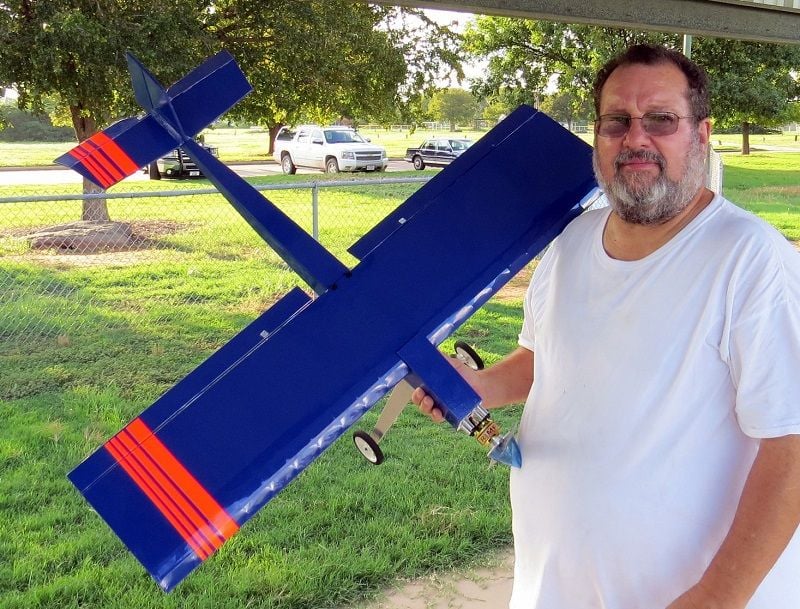
I finally got the electronics into my Slim Jim. As compared to Bob Redmond's svelte 38 ounce bird mine is going to be a bit of a porker at 45 ounces. It's probably fair to say that I haven't been as mindful of the grams as Bob has been. I'm also using a Thunder Tiger .25 nitro engine, larger servos and largish flight pack battery that I had on hand and which fit well right on the CG. Pictures to follow as soon as I tidy up the servo leads.
09-01-2018, 01:52 PM
#65
Thread Starter
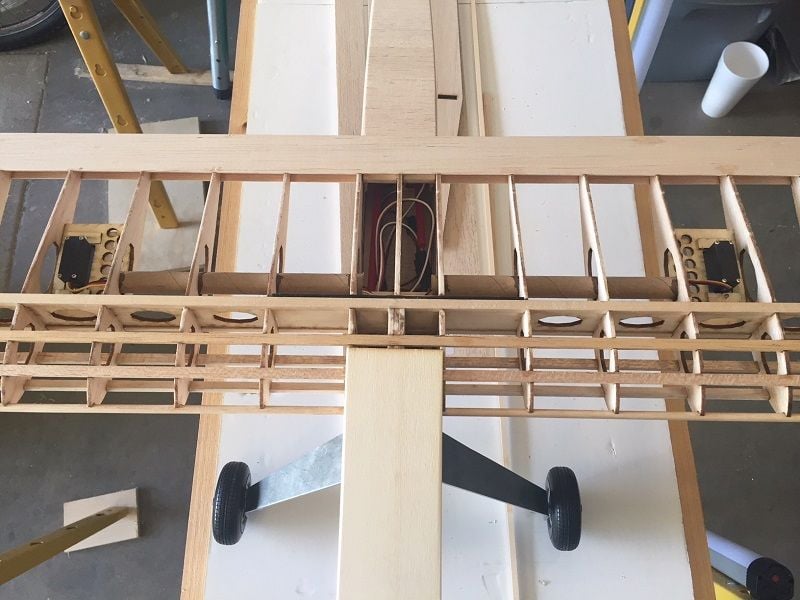
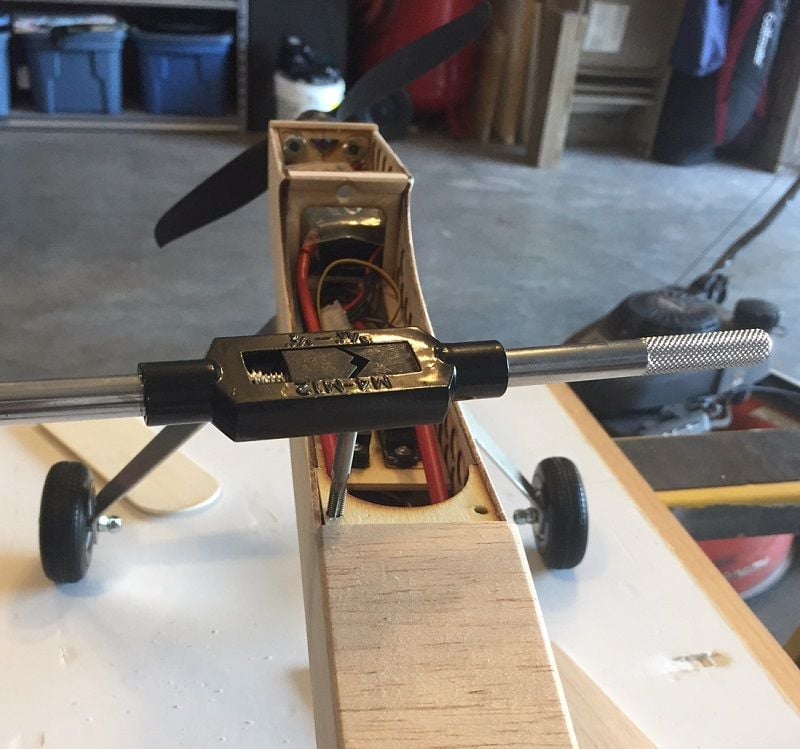
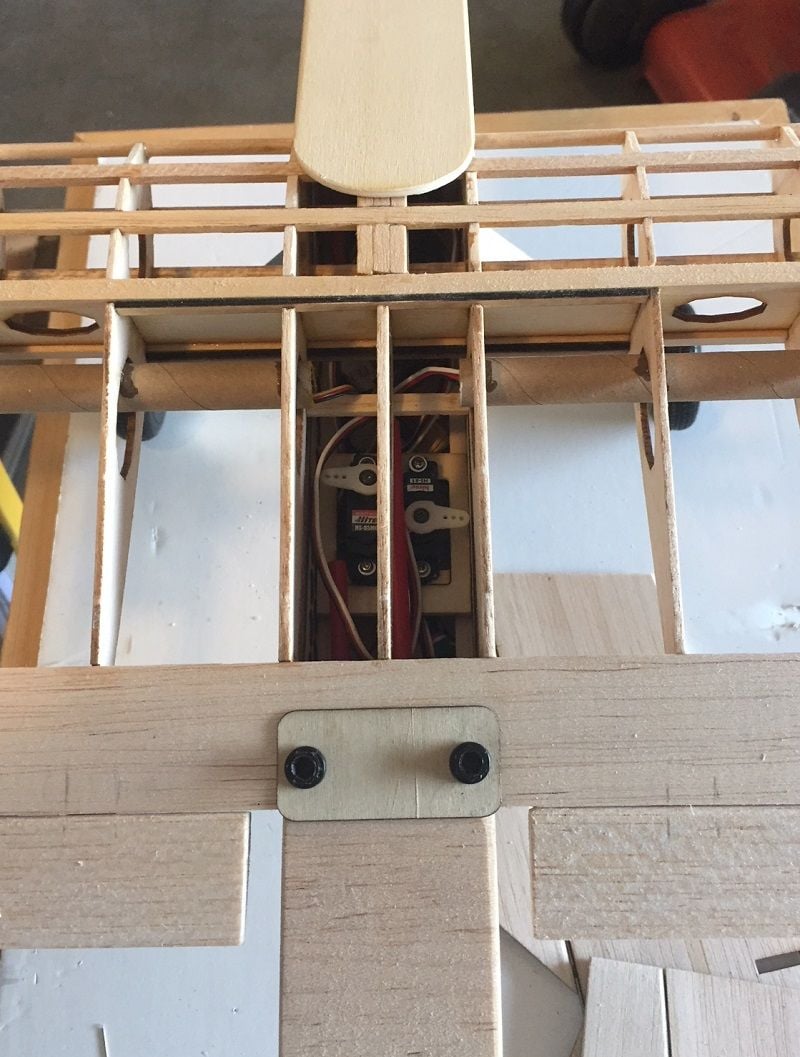
Steve Chandler has dropped off some more photos of his build. The first photo show a view down into the fuselage with the wing in place. The second photo the holes for the wing bolts being tapped. Steve's tools look pretty nice but tapping wood doesn't require high end hardware. An inexpensive tap will last for years if its main job is tapping wood. The process is pretty simple, just drill the hole one size under and run the tap in and out of the hole. Harden your new threads with some thin CA. Let the CA harden and repeat.
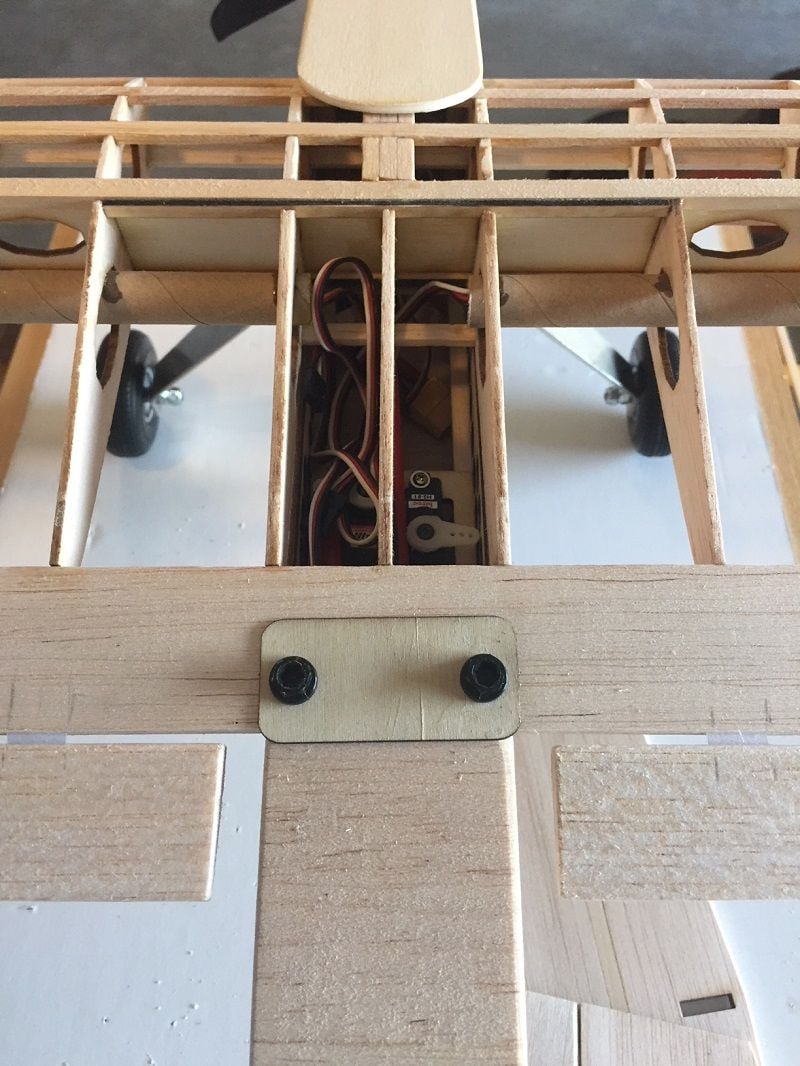
Another view shows the servos in the fuselage. Small servos and electric power means plenty of room in the fuselage.
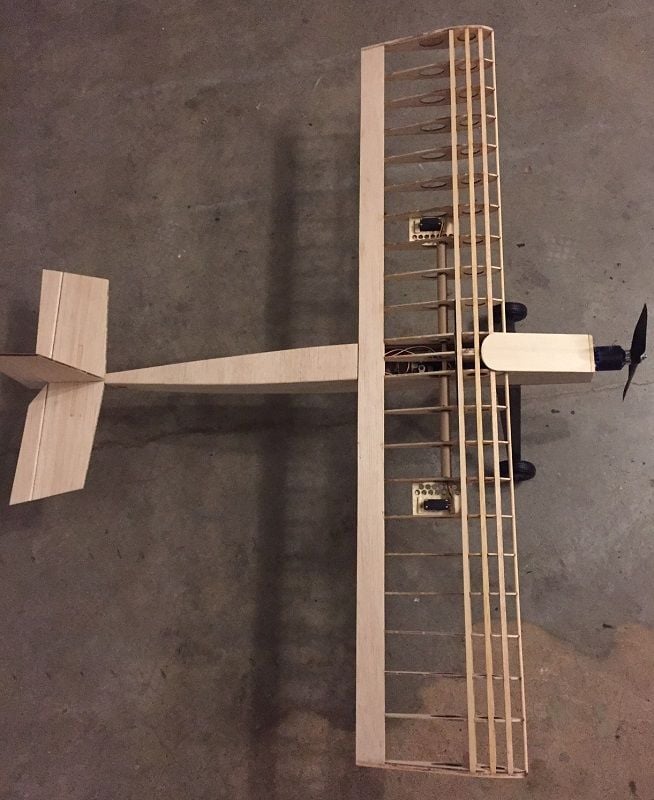
A view of the wing with its servos n place. Then the covering begins.

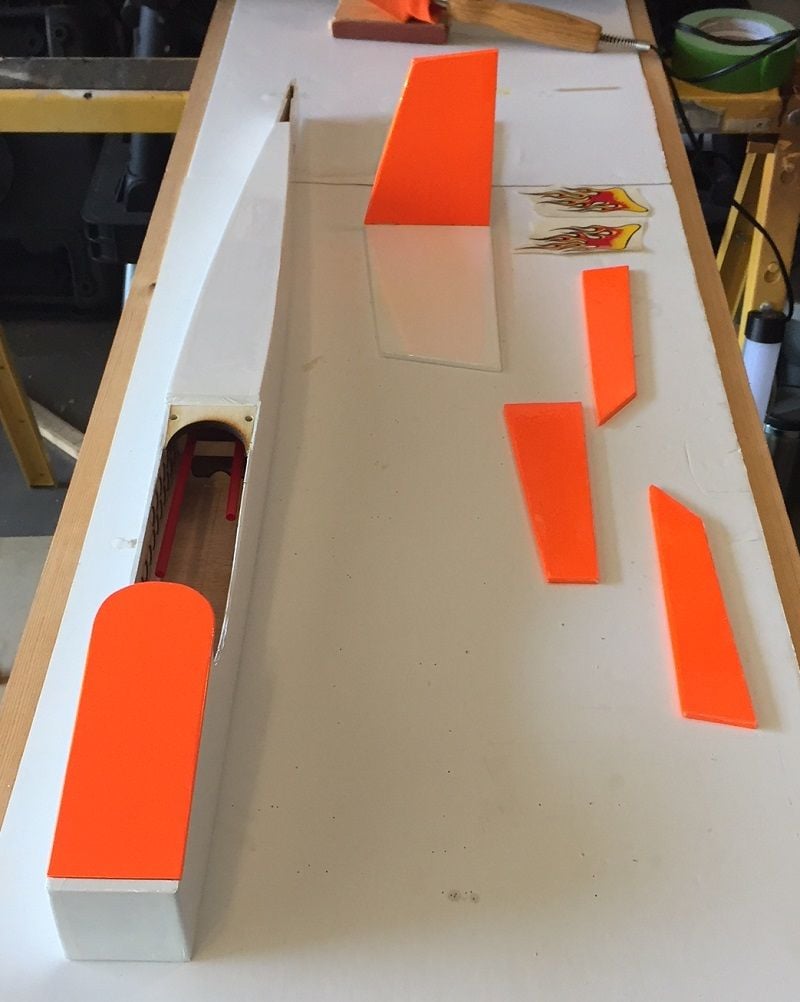
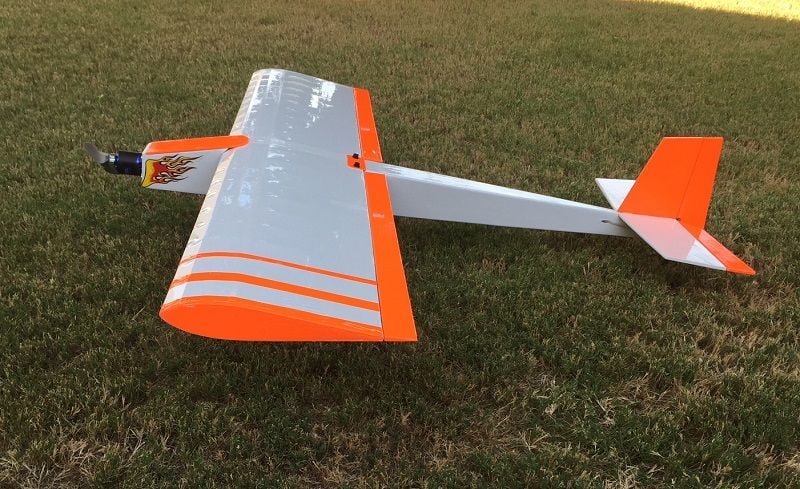
One of the nice things about electric power is that you don't have to worry about the fuel attacking your decals.

Steve says it's almost ready for its maiden fight.
Another view shows the servos in the fuselage. Small servos and electric power means plenty of room in the fuselage.
A view of the wing with its servos n place. Then the covering begins.
One of the nice things about electric power is that you don't have to worry about the fuel attacking your decals.
Steve says it's almost ready for its maiden fight.
09-03-2018, 06:10 PM
#66
Thread Starter
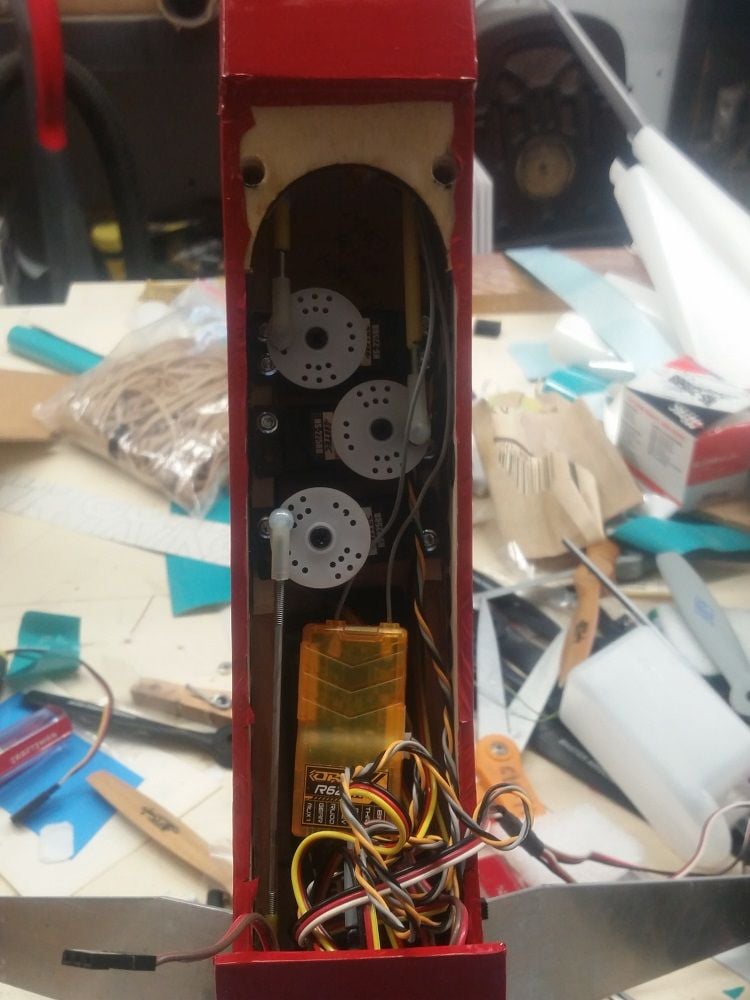
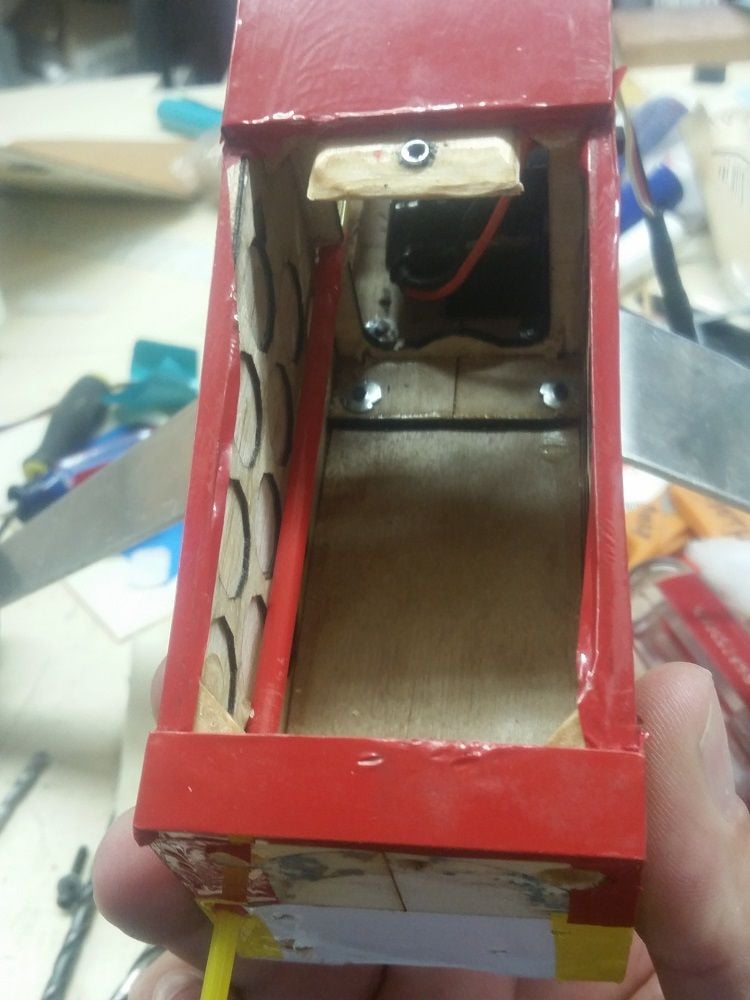
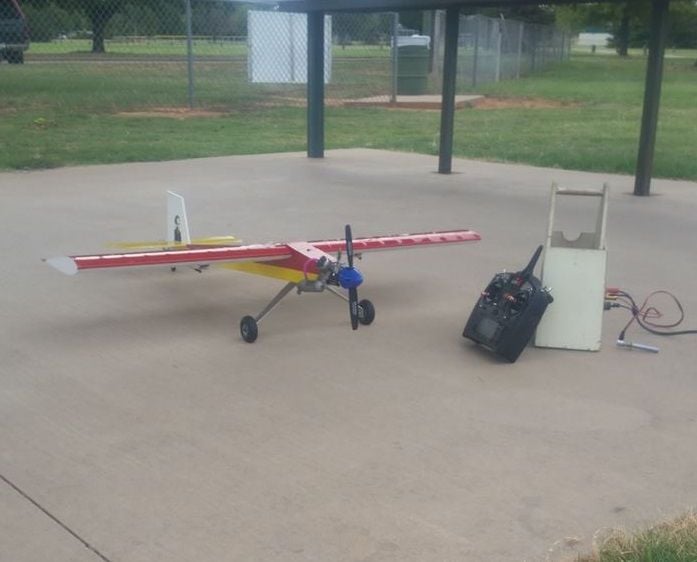
Well, I'm wrapping up my Slim Jim. While I haven't finished tucking every thing away, you can see it is pretty well stuffed. I'm running Hitec HS-225BB servos and I would expect that this is about a big as you could reasonably go with the servos. As can be seen in the earlier posts the smaller servos fit with room to spare. You can barely see it under the receiver but the 1600 MAh NiMH battery is way over kill. It's heavy but I wanted 6.0 v, it was on hand and it fit. A small LiPo with a voltage regulator would be a significant weight saving.
This photo shows where I relocated the throttle push rod. it originally started off going through the firewall at the floor of the tank compartment but when the engine was installed and the throttle linkage hooked up it was binding pretty severely due to rubbing against the engine case. By raising the push rod to a point about halfway up the fuselage I was able to get a straighter line from the servo to the throttle with much smoother functioning.
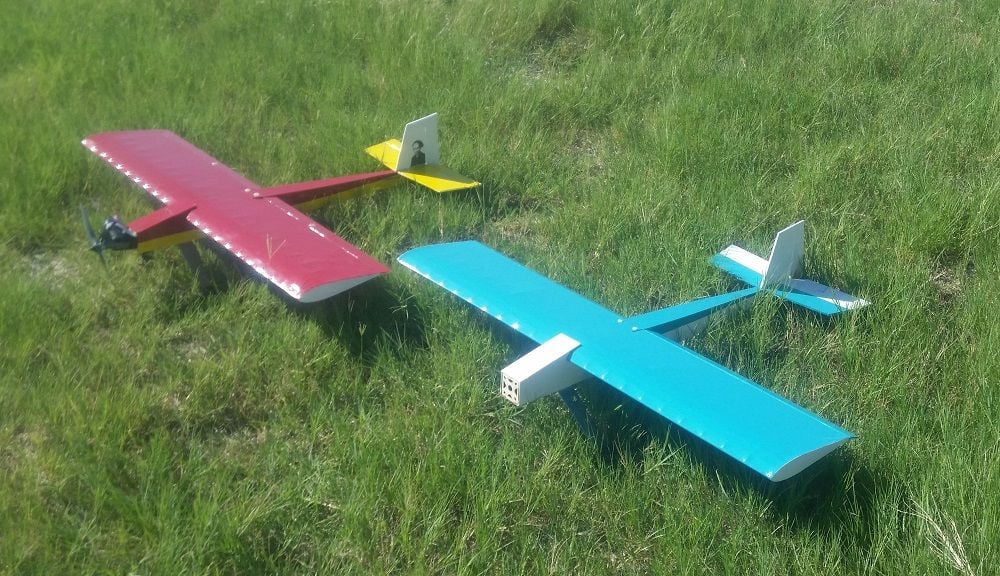
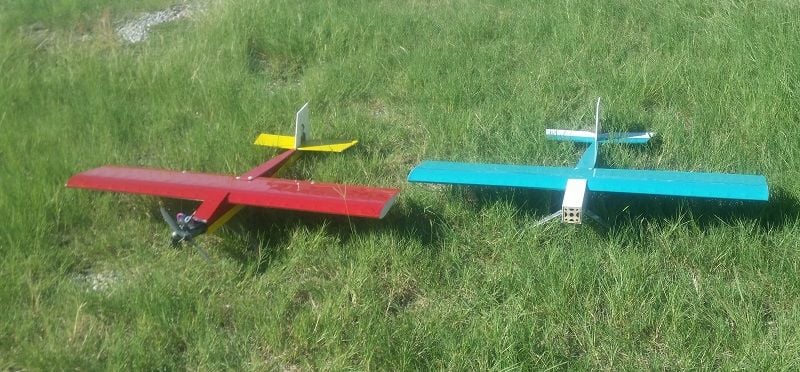
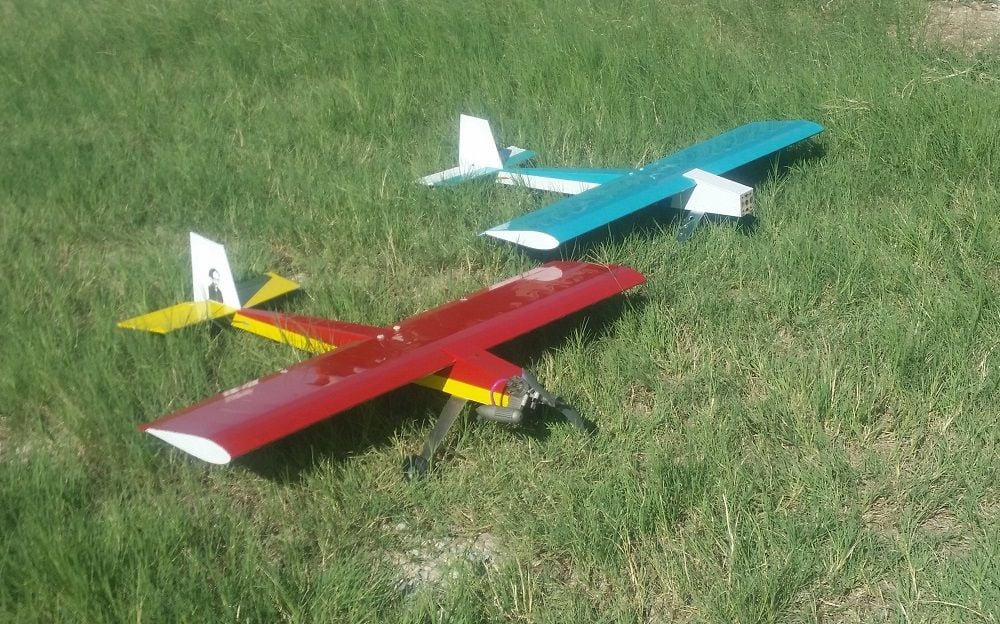
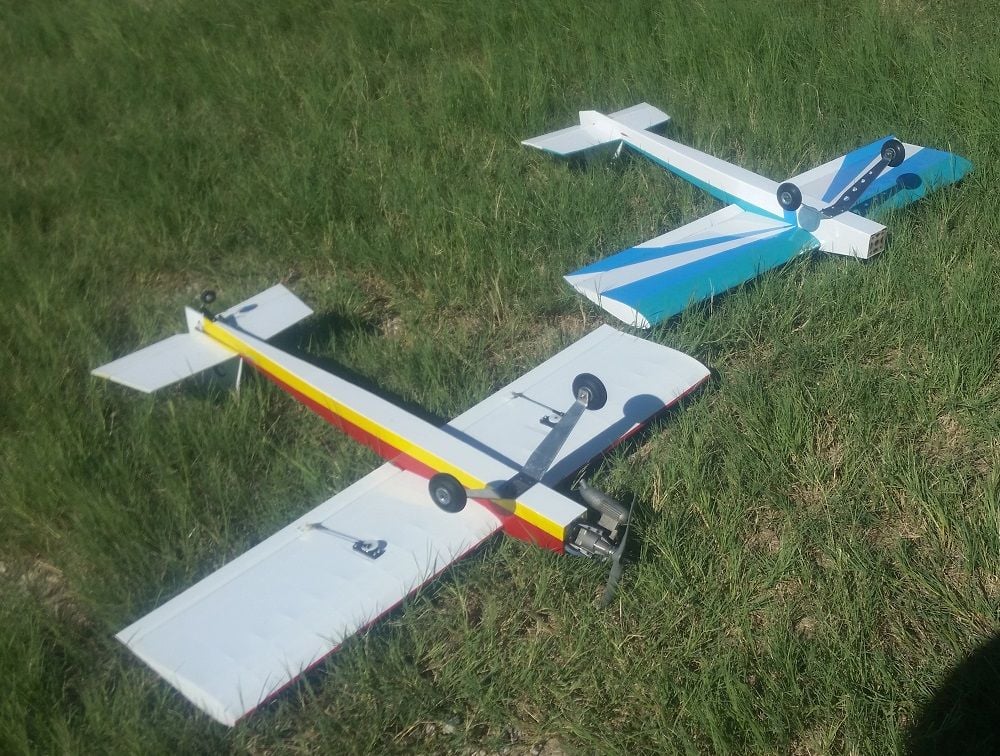
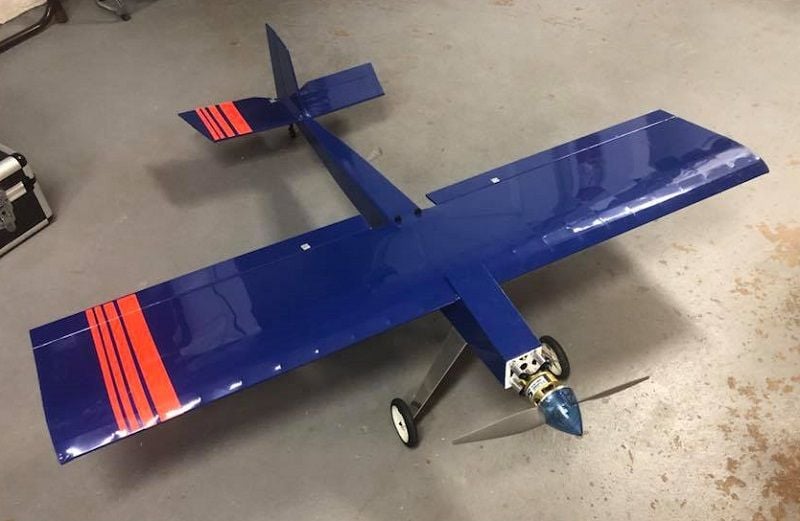
Here are photos of my finished Slim Jim along side of the teal and white electric version that the WFRCC is going to give away at our annual fun fly in October at Wichita Falls,Tx
This photo shows where I relocated the throttle push rod. it originally started off going through the firewall at the floor of the tank compartment but when the engine was installed and the throttle linkage hooked up it was binding pretty severely due to rubbing against the engine case. By raising the push rod to a point about halfway up the fuselage I was able to get a straighter line from the servo to the throttle with much smoother functioning.
Here are photos of my finished Slim Jim along side of the teal and white electric version that the WFRCC is going to give away at our annual fun fly in October at Wichita Falls,Tx
09-03-2018, 07:28 PM
#67
Thread Starter
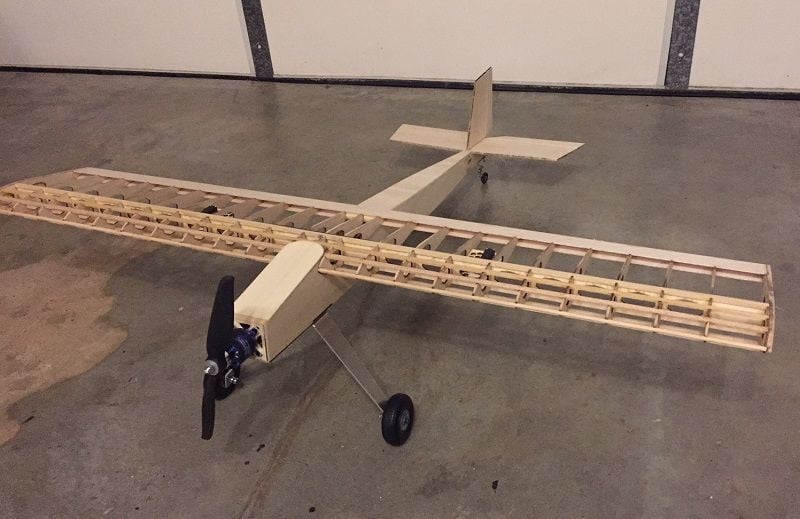
I maidened my Lazer-works Slim Jim 20 this evening. At 45 ounces, ready to fly, it is probably going to be the heaviest of the planes in our club's group build. My plane is powered by a Thunder Tiger plain bearing .25 spinning a 9x4 prop. The plane is carrying around five mini servos and an overly large 6 v. battery. It has a four ounce fuel tank. The airplane balanced on the main spar with no added weight. The flight pack battery straddles the center of gravity. I suppose a really ambitious person could figure out a way to hang a .40 on the firewall but there are easier ways to get a pylon racer and flight time would be limited because there is room for a four ounce tank and that is it unless you want to figure out drop tanks. Seriously, a .25 is probably as large as you want to go with a nitro engine. Deep grass is a bit of an issue with a plane this small so I carried my plane out to the runway.The temp was in the 90's and there was a 15 mile per hour cross wind blowing across the runway. Being a tail dragger, it wanted to weathervane a bit in the cross wind but some down elevator kept the tailwheel planted while taxiing. Although the engine was well broken in, it hadn't been used in close to a decade and I set the needle a little rich. Nobody is happy when the engine goes lean just after take off. I advanced the throttle slowly and it probably ran 75 feet before unsticking. I had to hold a bit of back stick to get the airplane to take off and unlike the airplanes in the advertisements, mine required some trim adjustments. Mostly, it need a bit of up trim. I believe I misjudged the neutral point on the elevator because it doesn't appear to have any noticeable up deflection on the elevator following the adjustment. As for flight characteristics, it flies the way that a stick is supposed to. With the relatively large .25 engine it is pretty fast at full throttle and vertical performance just goes on until the airplane gets hard to see. As balanced, the stall is totally benign.If you hold back stick to keep the nose up at idle it just slows down until it finally stalls and the nose drops. It will spin with full elevator and rudder but you have to work at it and it stops as soon as the controls are neutralized. Aileron rolls are crisp and the plane snap rolls well with a little speed. Loops are tight, about what you would expect for this type of plane. Having had only two flights I haven't had made many adjustments yet. I think there is room for some more throw on the rudder and elevator and it is probably reasonable to scoot the CG back a little at a time. This isn't a 3-D plane but it seems to have capacity for a lot of maneuverability. The airplane maneuvers very comfortably at half throttle and as long as you mind your airspeed you can loop and roll all over the sky at that setting. The plane landed easily. It does set up a significant rate of decent as it quickly slows down at idle but only needs a little bit of throttle to slow the decent and flair for landing. I'm betting that some of the lighter versions can really slow down for landing. Although I haven't set mine up yet, with the separate aileron servos, a computer radio makes setting up flaperons as easy as programming the radio.
So, I suppose you could argue that "It's just another stick" and you'd be right. But, it is a nice example of the type. The larger Slim Jims have proven to be able fliers and so far this plane is as well. While not really a trainer this airplane would make a good first aerobatic plane or tail dragger. While it is true that "bigger flies better" in this case it is also true that smaller flies cheaper. This is a plane that can fit in a sub compact car and in the course of a six minute flight, much of it at full throttle, I only used about three ounces of fuel.
I would say that this one is a keeper.
Last edited by mgnostic; 09-03-2018 at 07:32 PM.
09-04-2018, 07:26 AM
#69
Thread Starter
09-13-2018, 06:08 PM
#70
Thread Starter
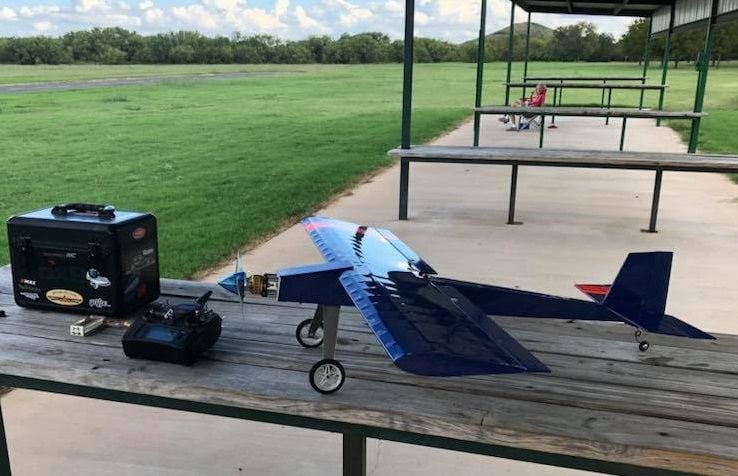
Tony Breyen is showing of his version of the Slim Jim 20 after his successful maiden flight. Of note in the second photo are the cooling vents for the battery and ESC on the bottom of the fuselage.
09-13-2018, 06:11 PM
#71
Thread Starter
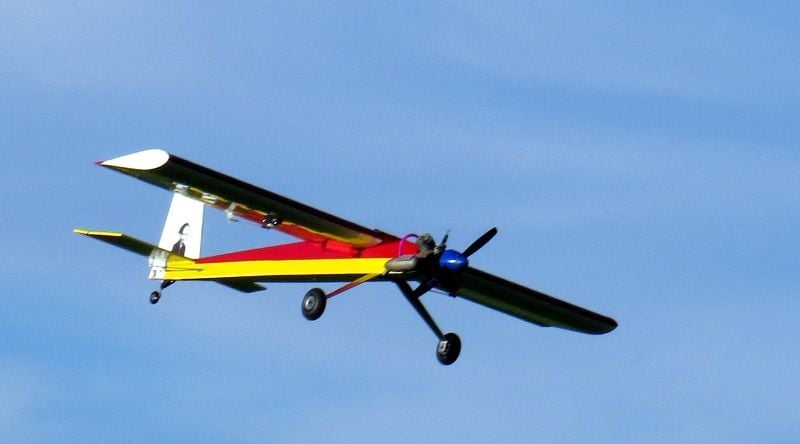
Here is a photo of the Slim Jim with the available logo on the wing along with a couple of in flight photos.
09-13-2018, 06:23 PM
#72
Thread Starter
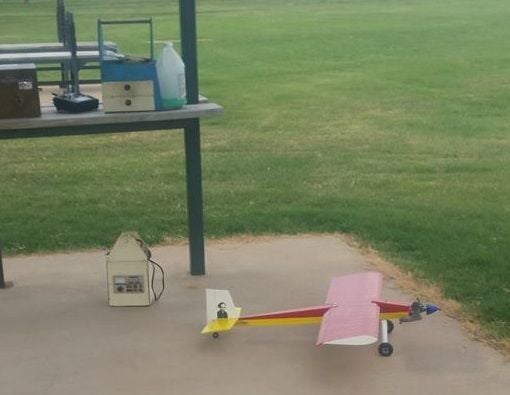
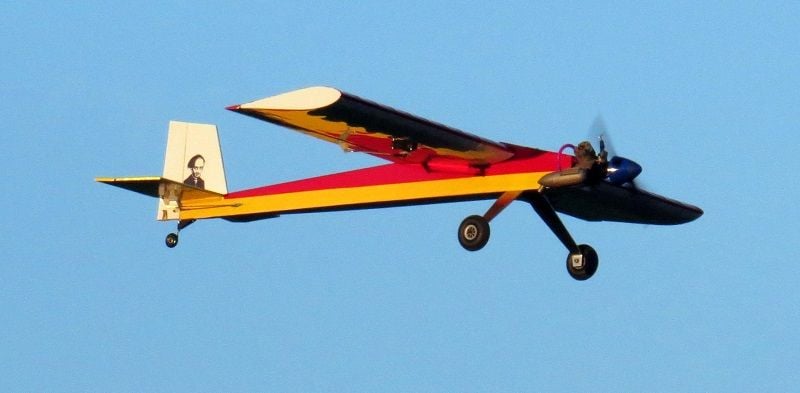
Big skies on a sunny North Texas afternoon. This photo and most of the inflight photos on this thread are courtesy of George "Dusty" Bayley.
10-02-2018, 05:38 PM
#73
Thread Starter
Dusty Bayley, our clubs photographer just about has his Slim Jim ready to go. Bill Perry has been out to the shop for a couple of marathon building sessions and I should soon have some photos of a Slim Jim in light blue and florescent yellow.
10-03-2018, 07:25 AM
#75
Thread Starter
I'm not sure what brand Dusty used. I used Ultracote on mine. Bill got some of the latest version of Monokote. Right now the only good thing I can say about Monokote is that you can still use the clear backing to keep glue from sticking to your plans. I would suggest that you stick with Ultracote. They have a florescent purple color and it is MUCH easier to apply. .