


*** Ultra Sport Brotherhood ***
 04-12-2018, 10:56 AM
#3026

My Feedback: (9)
Congrats on your US 1000 kit. If you start a build thread I’ll follow along as well.
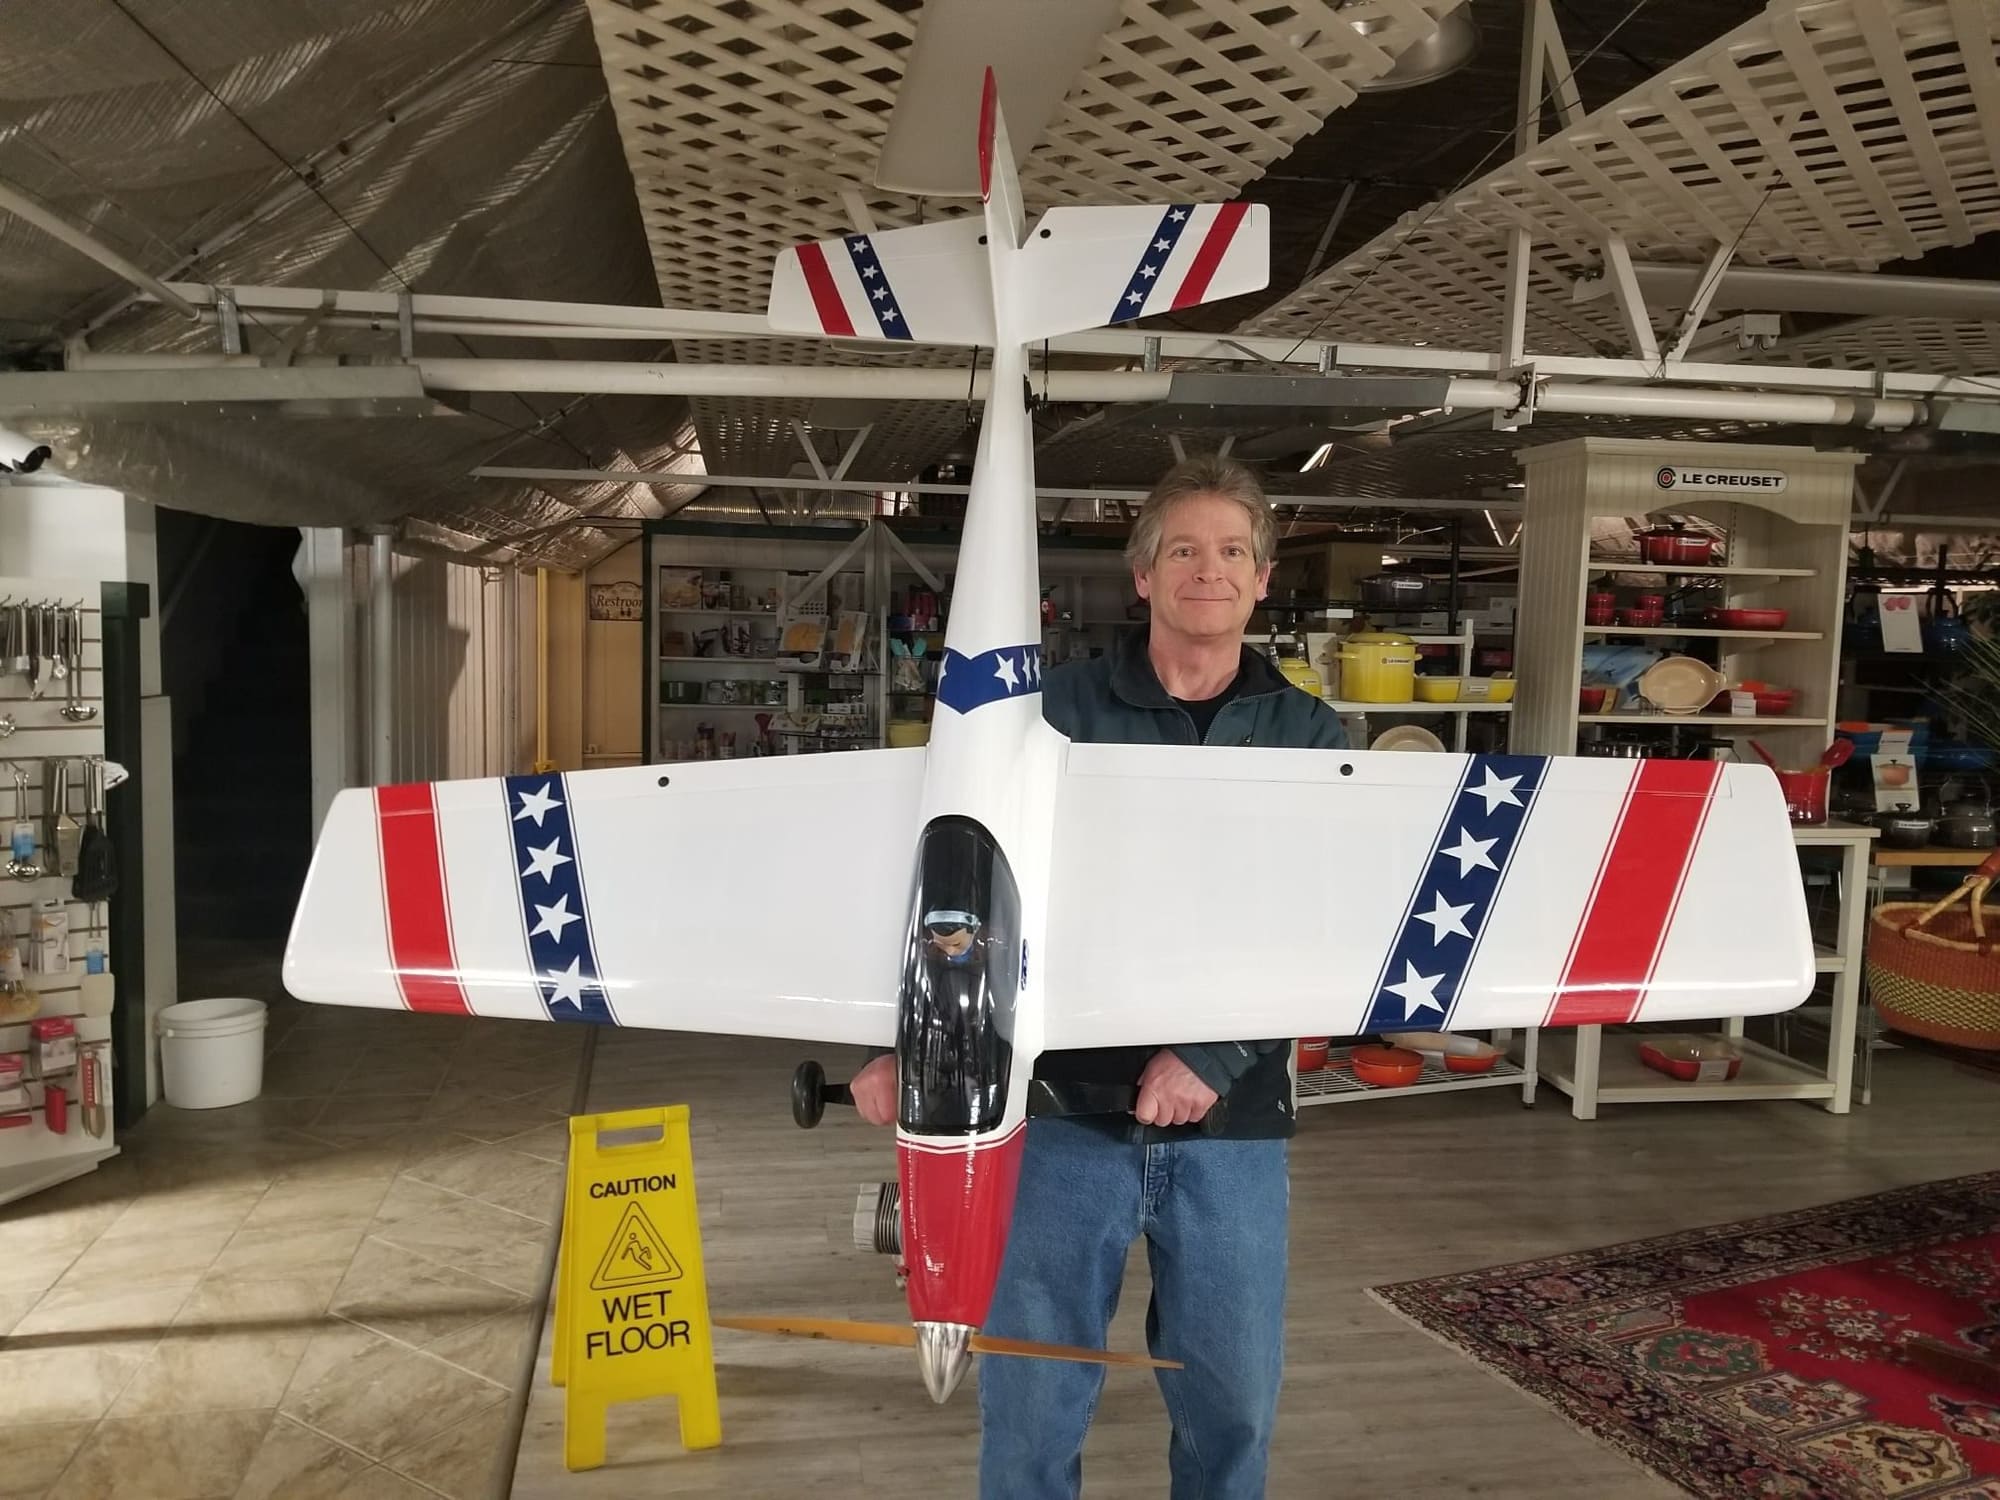
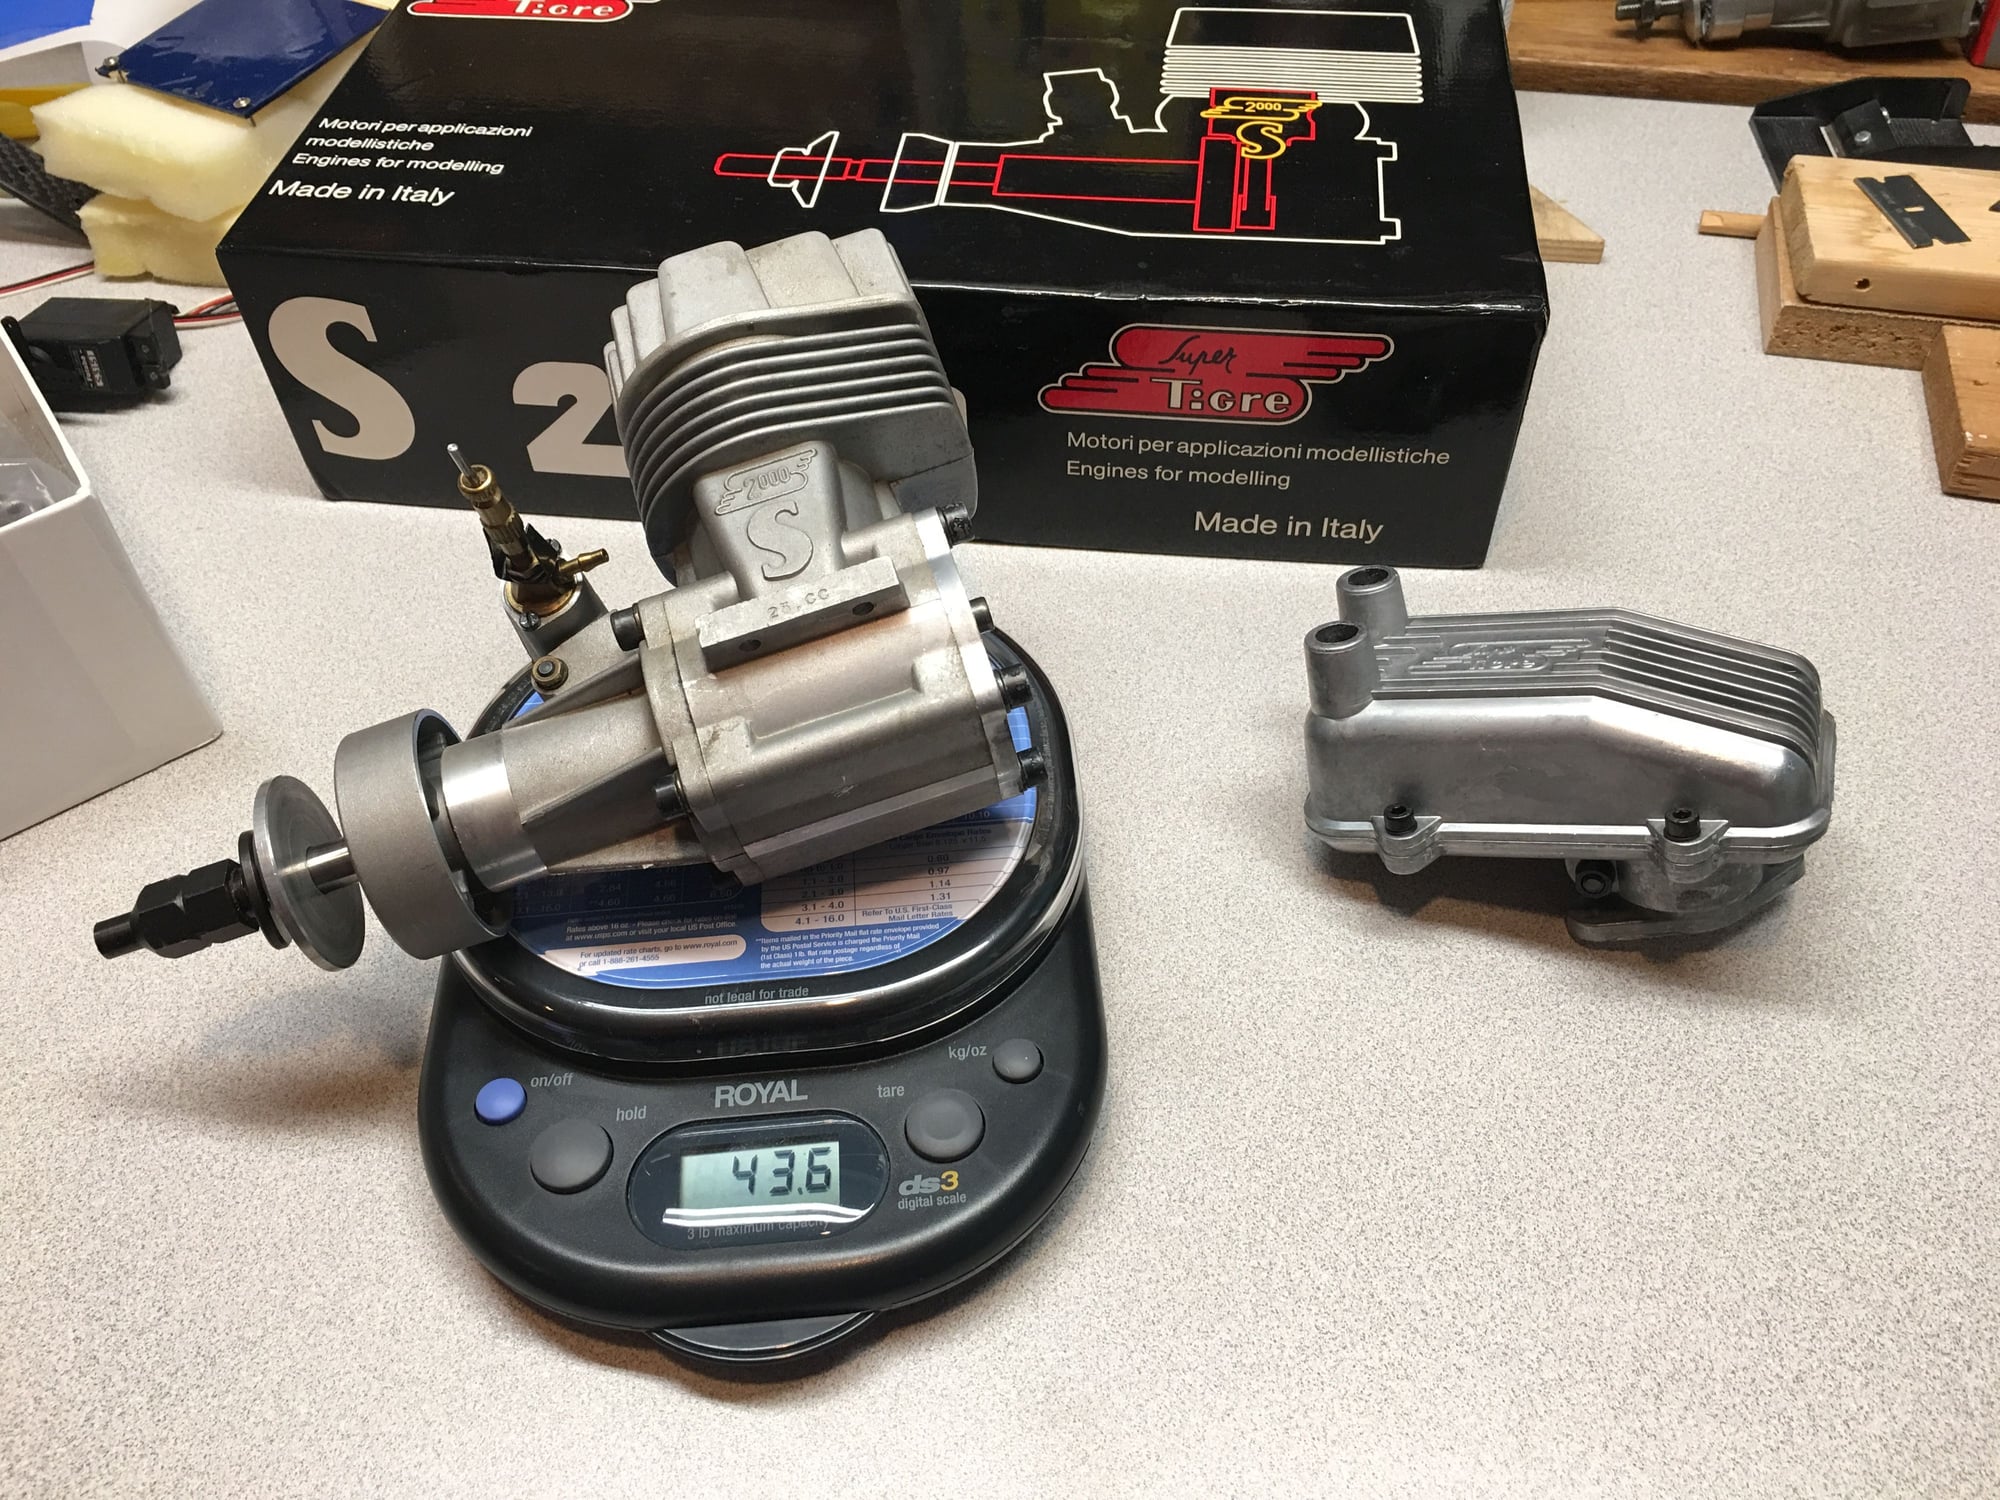
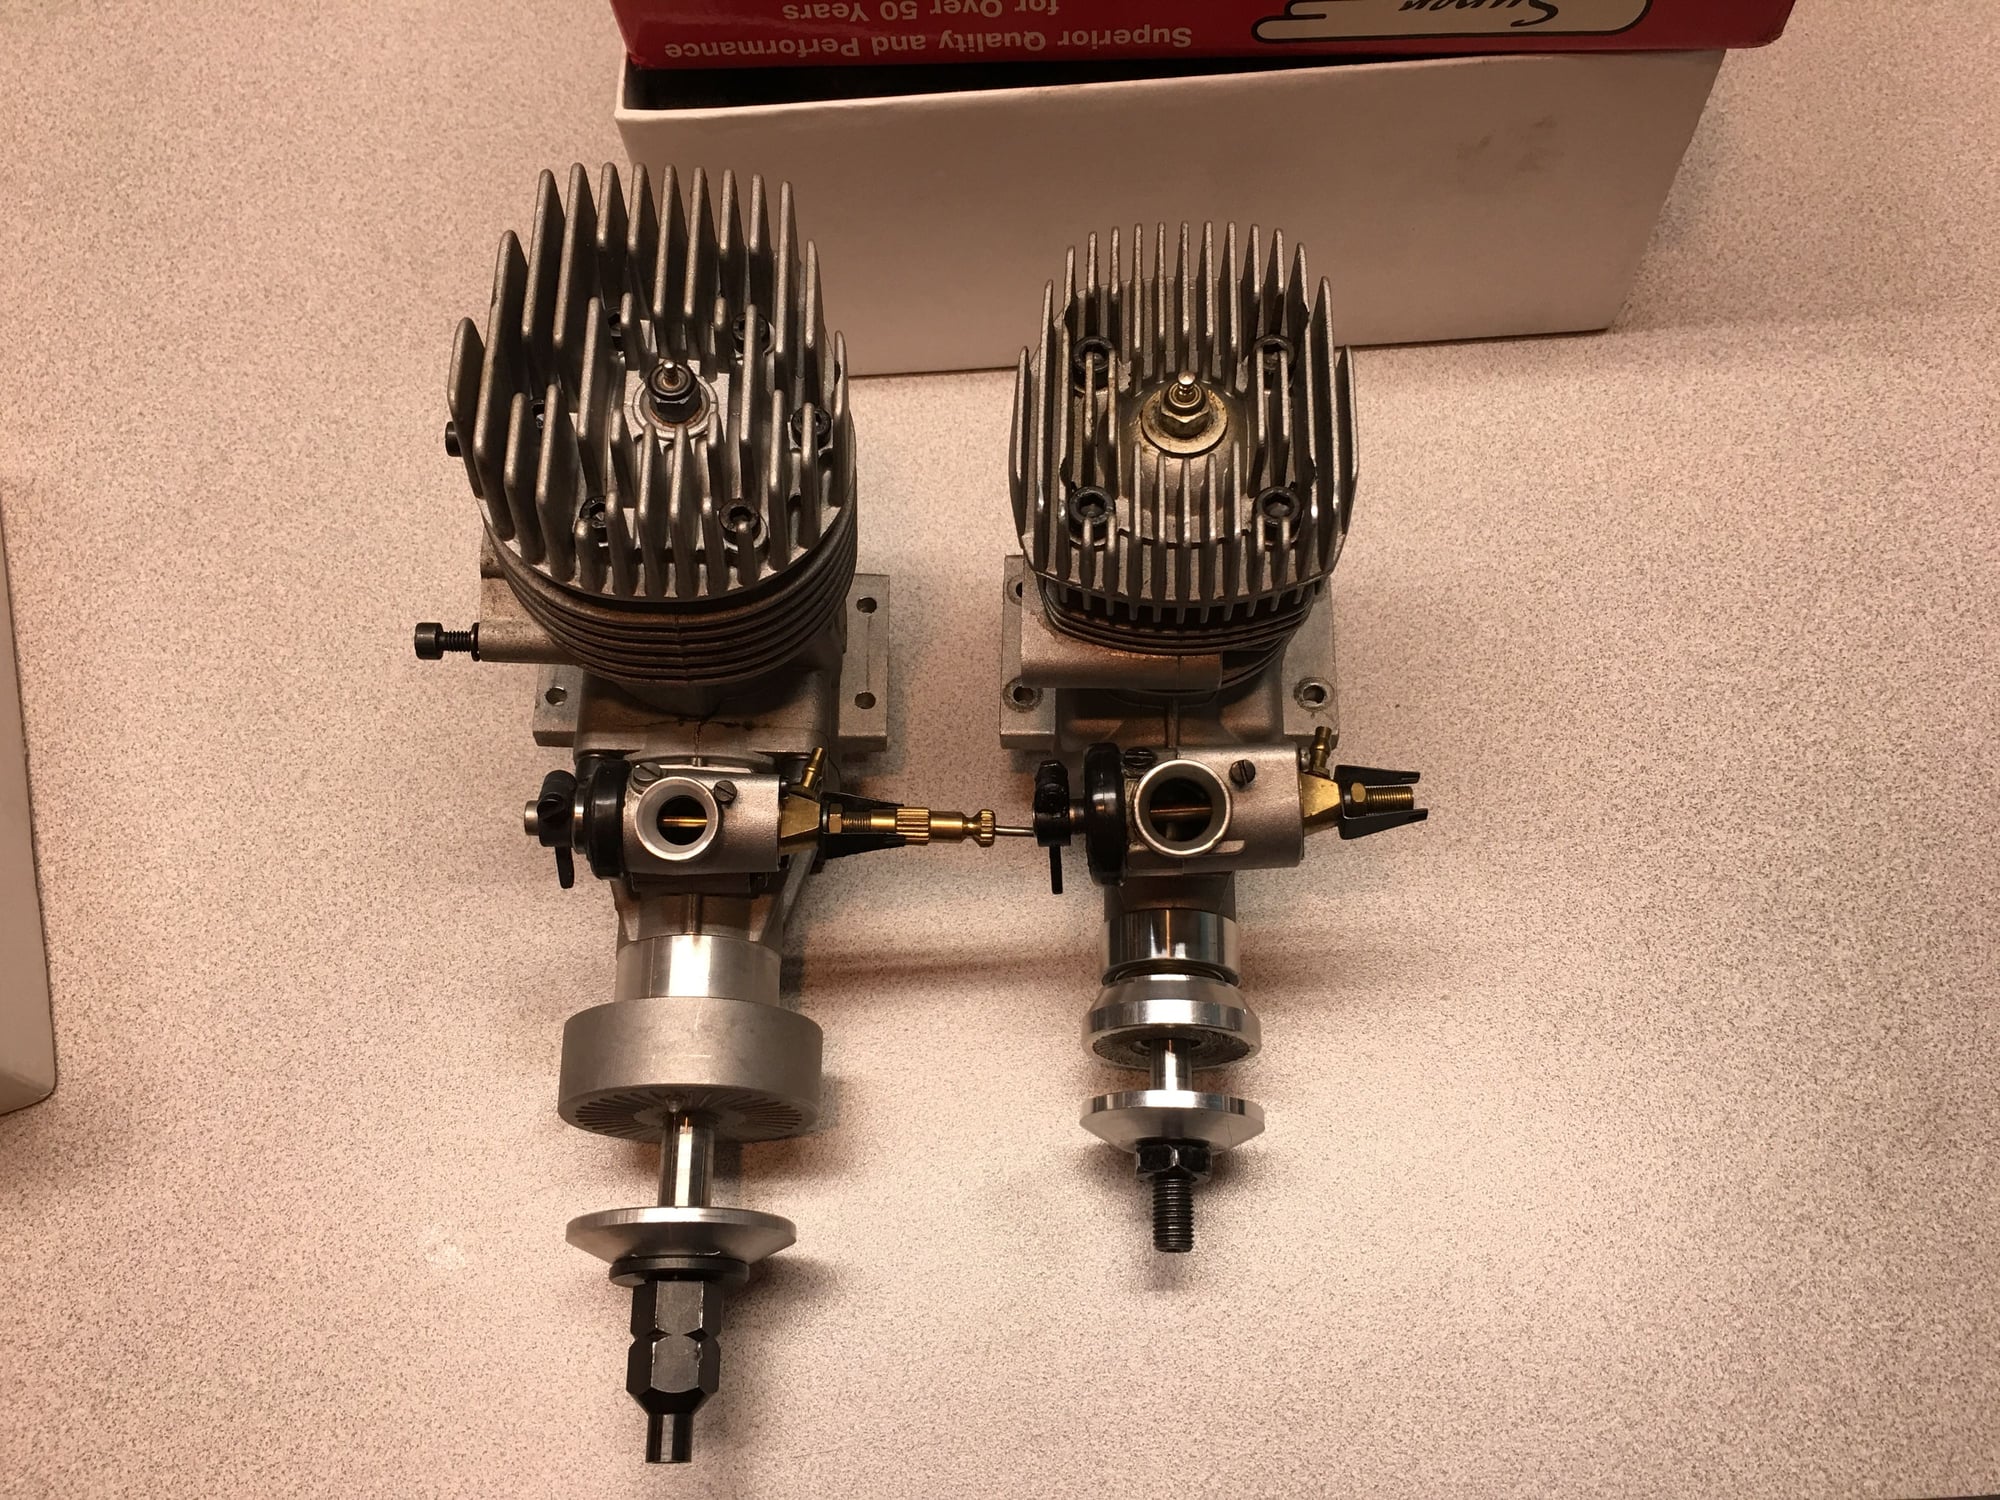
A good friend of mine gave me an already built US 1000 airframe. The covering job is real ugly (all black with orange flames?) so I need to recover it and maybe put some retracts in it. It currently has fixed tricycle gear. I bought a Super Tigre S2500 and G2300 for it. I think they’re both similar in power but the S2500 is quite a bit heavier.
A good friend of mine gave me an already built US 1000 airframe. The covering job is real ugly (all black with orange flames?) so I need to recover it and maybe put some retracts in it. It currently has fixed tricycle gear. I bought a Super Tigre S2500 and G2300 for it. I think they’re both similar in power but the S2500 is quite a bit heavier.
joe


 04-14-2018, 08:16 AM
#3028
Hey Ken my name is Ken as well anyway I have plans and also provide a kit for Ultrasport at 120"ws if youd be interested..My Ph# is 734/895/1913 as I love this plane as well and have several sets of plans so let me know if youd be interested...Ken
04-15-2018, 08:34 PM
#3030

I had the 2500 in mine, I had to quite it to 98 db, the chocking that required lead to the phrase sicker tiger. cause it was always needing attention, but enough about that. either of your engines should fly it nicely. how is the wt of the airframe, and what is it already set up for? I had the e and r servos in the tail and did not have to add dead wt to balance it. mine started life as a trike and I moved it to a tail dragger down the road.
joe
joe
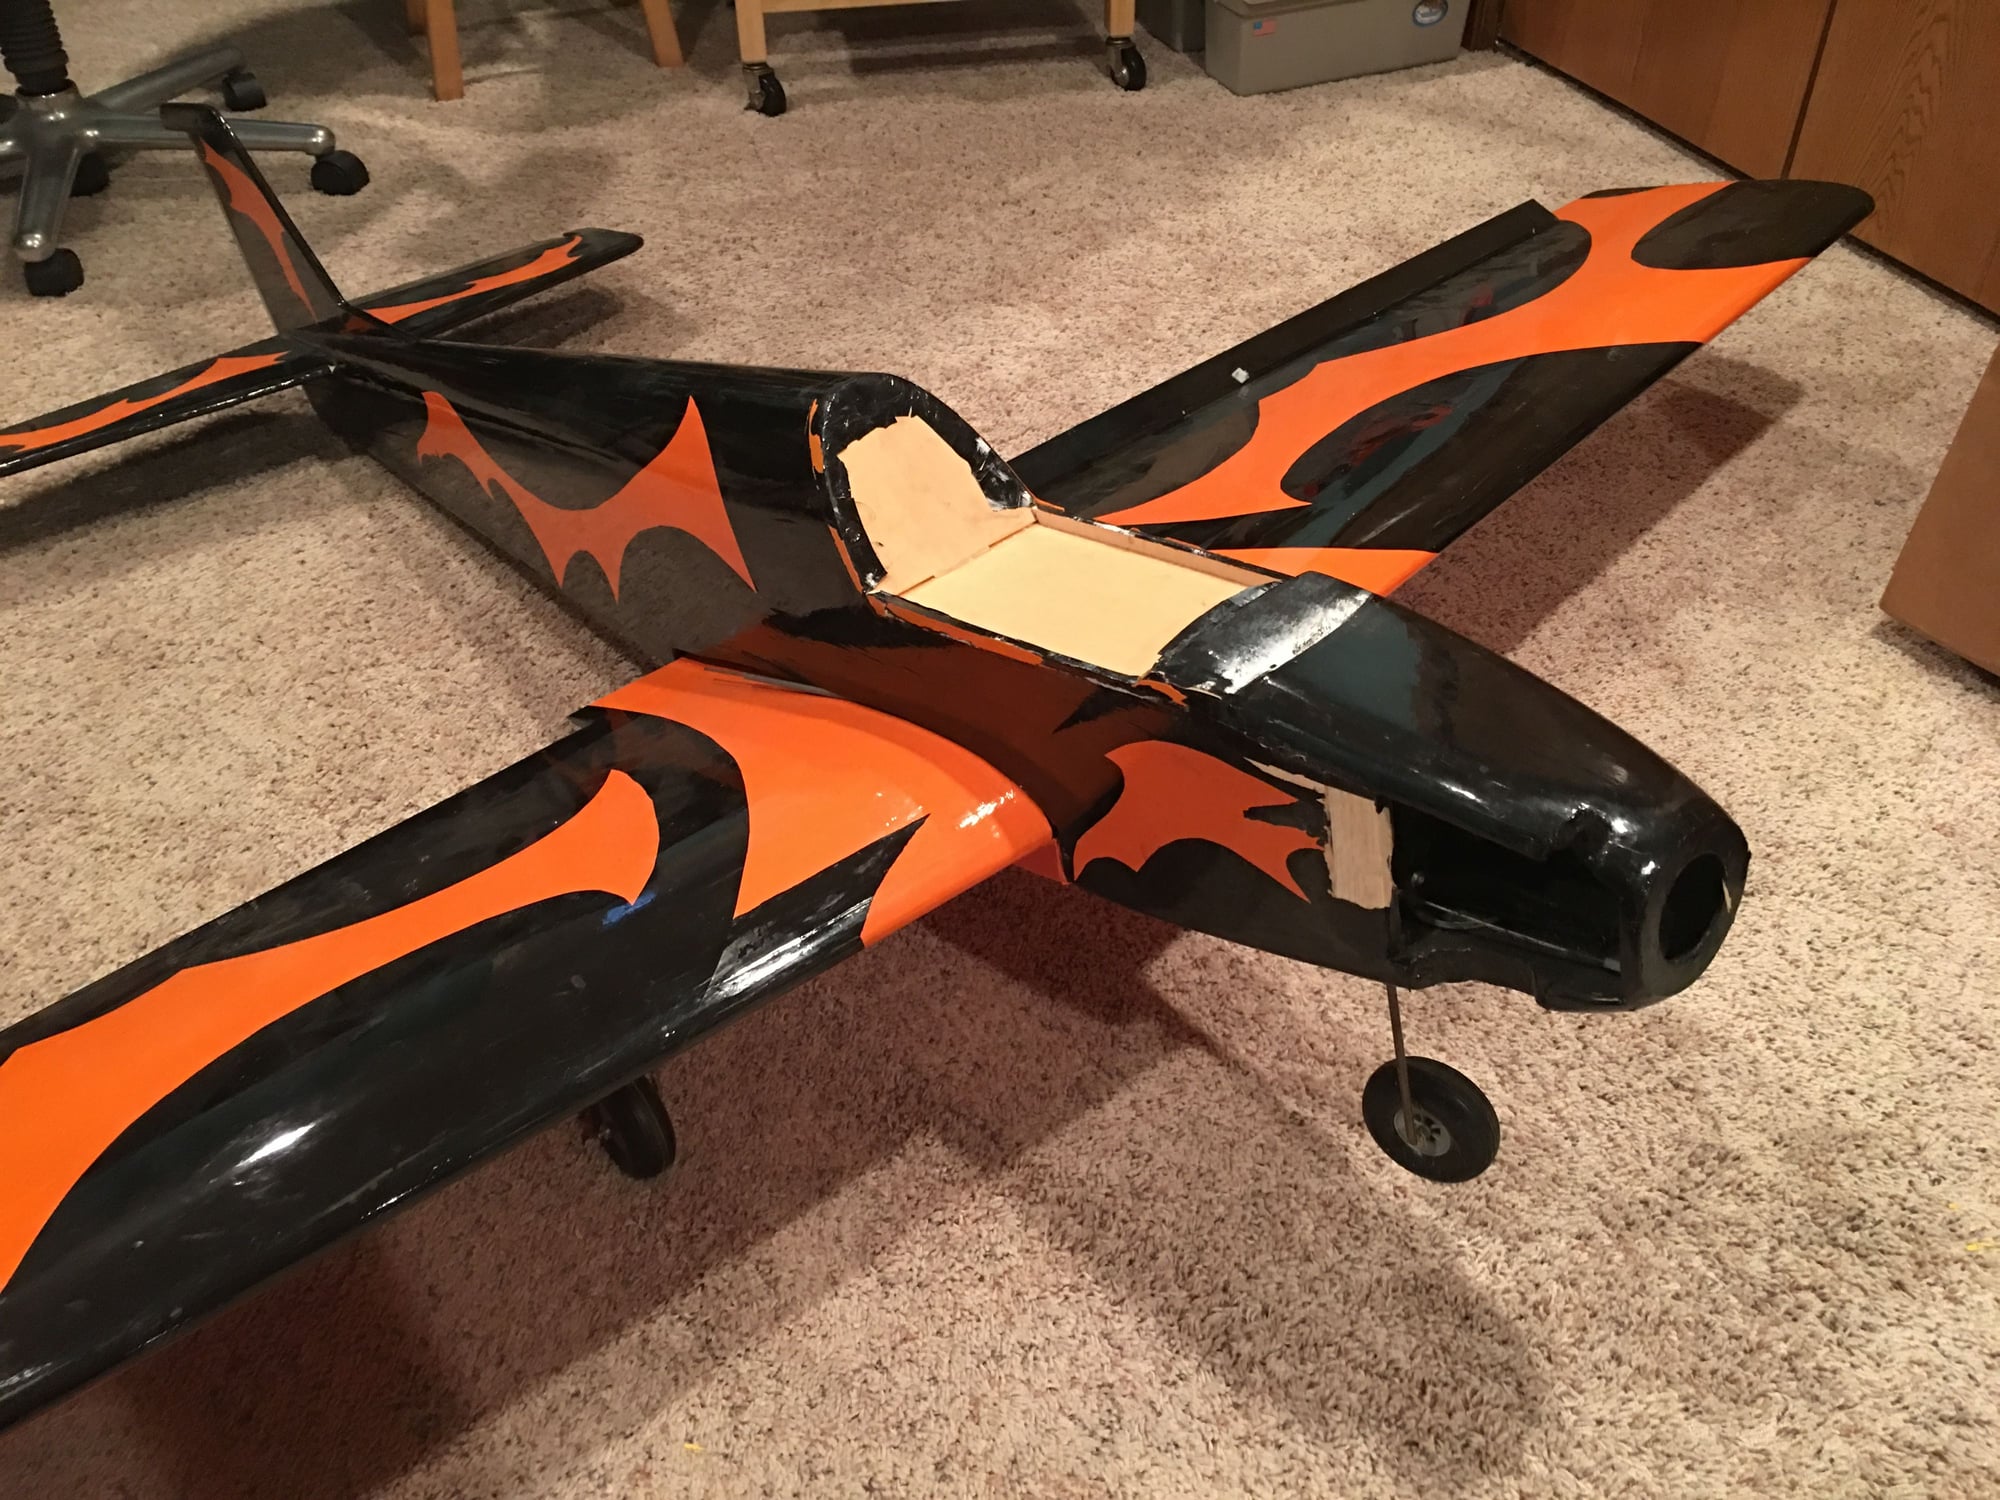
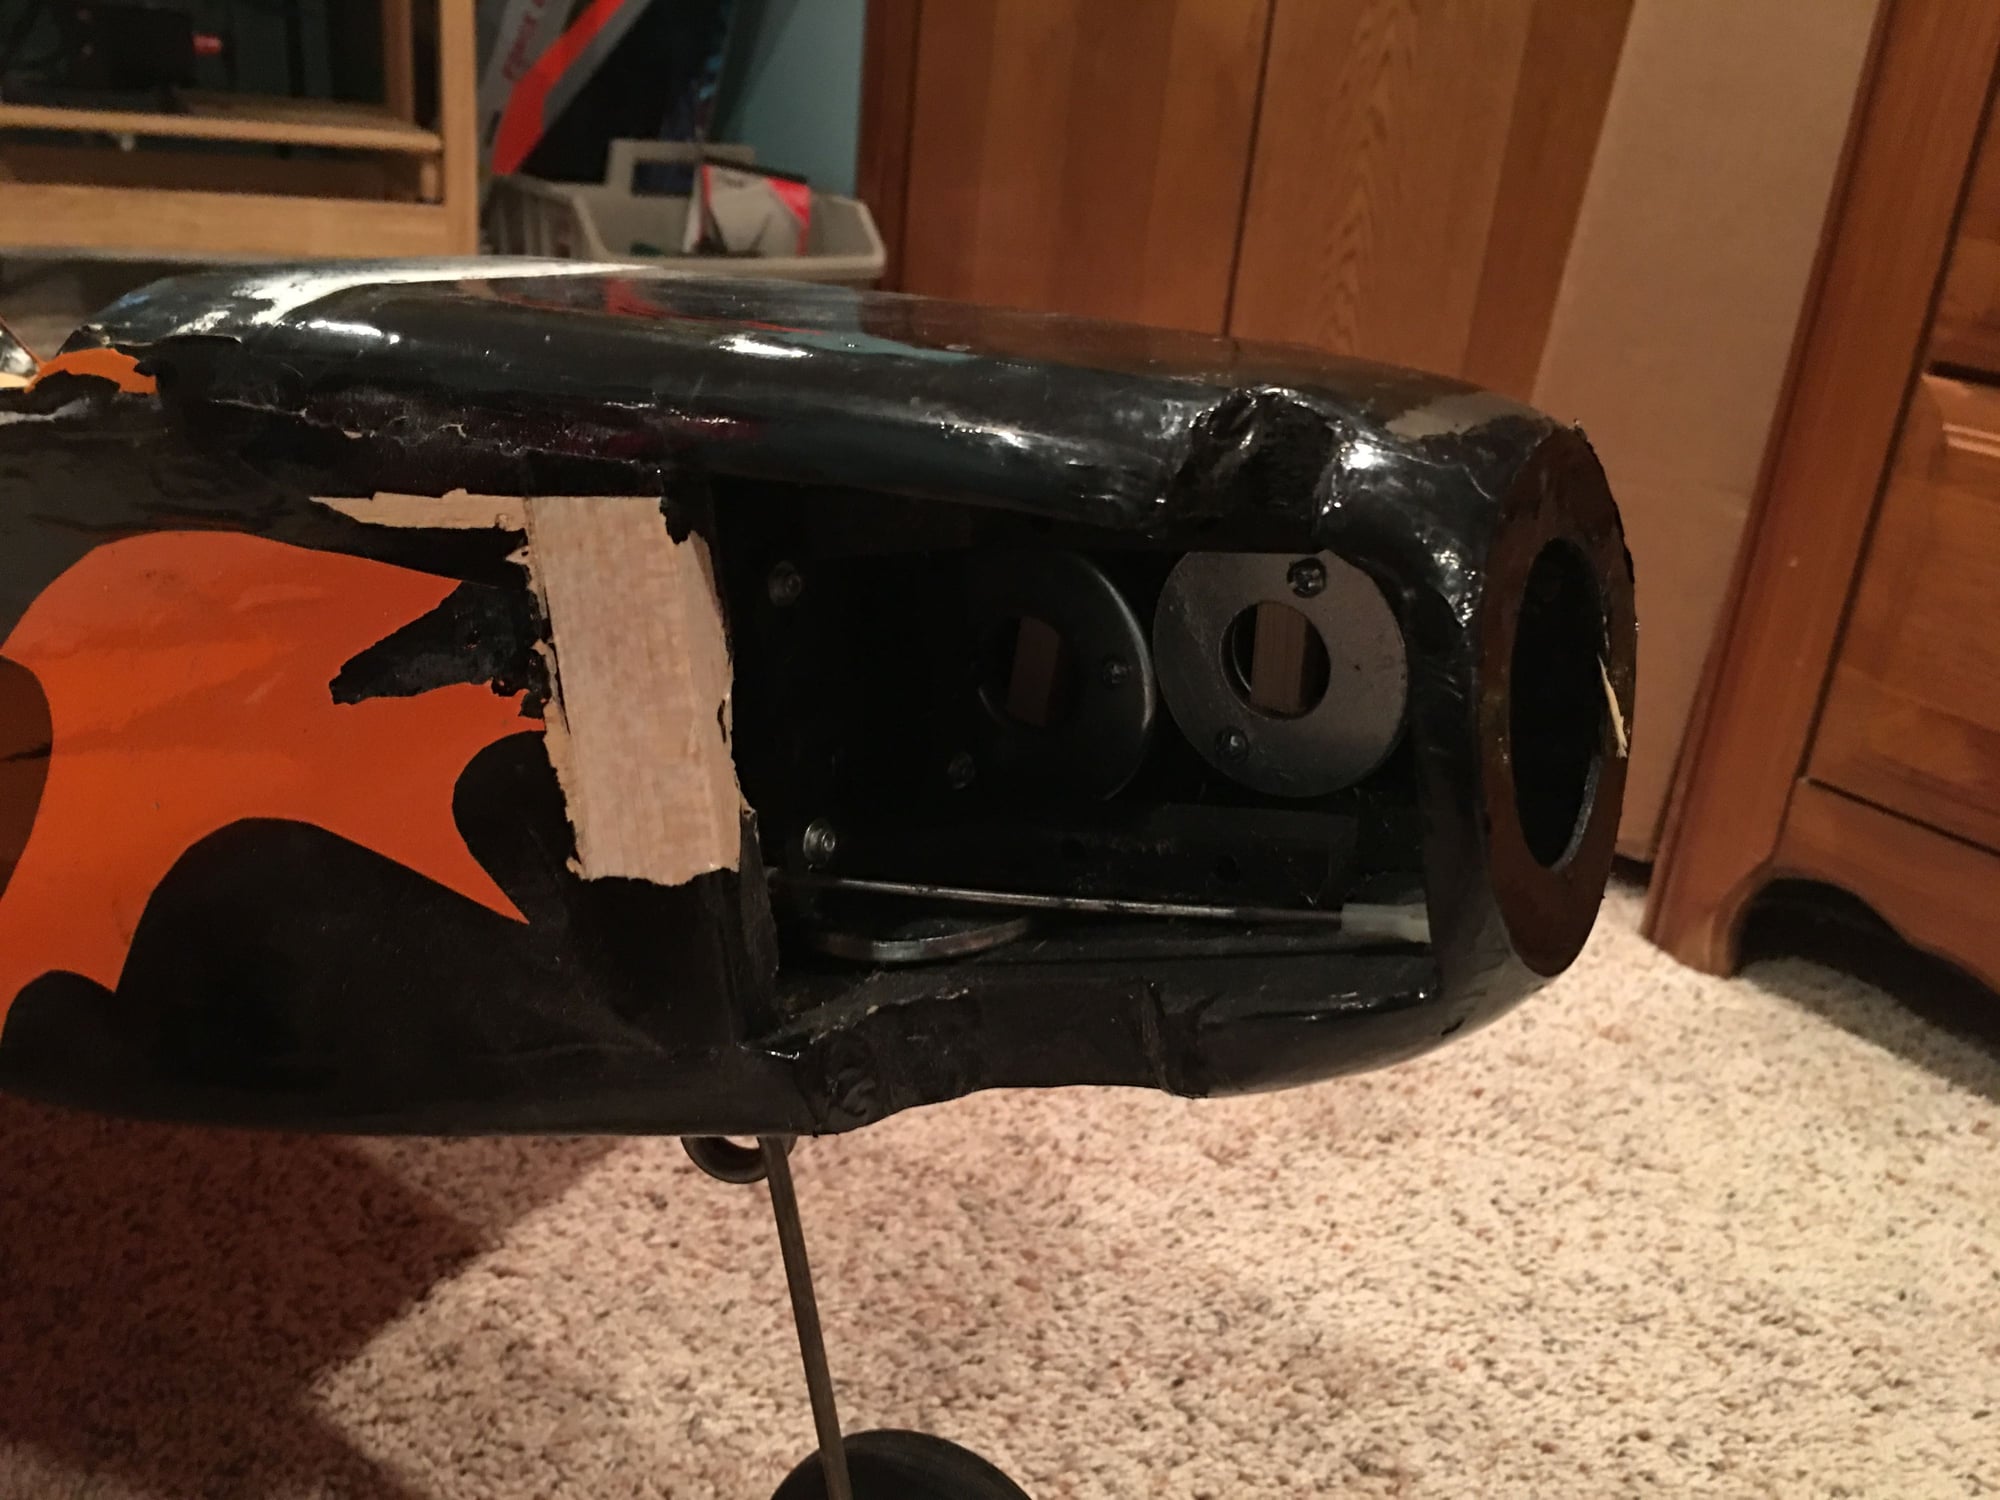
I told you it was ugly!

G2300
S2500
 04-16-2018, 06:22 AM
#3032

So I'm guessing from others experiences that the US 1000 comes out tail heavy. That being the case this thing is going to have to go on a diet for my 1.20 to work out. Lightening the tail feathers shouldn't be much of a problem. I'm thinking if I put some lightening holes in the 3/16th sides or maybe replace the 3/16th with 1/8th side sheeting that would get rid of a lot of weight behind the cg.
What do you guys think?
What do you guys think?
04-16-2018, 08:15 AM
#3033
My Feedback: (9)
KaP2011 - I built up my empennage (thought that was part of the kit) and mounted the servos in the tail (2x 99in-oz futaba servos) and it balanced w/o nose wt w a true turn spinner.
Quikturn - your front end is just a bunch of balsa blocks, the plans should show that correct size if you have to replace them. also check the annular ring (the ply ring in front of the balsa blocks). anyway the previous owner did not have the correct tools and did not sand down the nose, I would clamp my vibrating sander in the vice on my work bench w 60 grit sand paper up turn it on and sand it down to the annular ring.
I assume it is glassed from the pic's that will make it really tail heavy. I would look at moving the engine as far forward on those mounts as you can and making new balsa chunks to surround it.
Last edited by paladin; 04-16-2018 at 08:24 AM.
04-19-2018, 08:09 AM
#3036
My Feedback: (9)
Joe
04-19-2018, 10:22 AM
#3038
In the past, I had lots of problems removing old monokote without heat. It would tear easily. Then I tried using a heat gun while pulling on the covering and it came off much easier. I don’t use a lot of heat. Just enough to make the covering a bit softer.
Also, I had color/adhesive remain with & without heat. Never tried trim solvent to remove covering. I imagine it would drive the coloring deeper into the wood.
If im lucky, it’ll be Ultra Cote.
Also, I had color/adhesive remain with & without heat. Never tried trim solvent to remove covering. I imagine it would drive the coloring deeper into the wood.
If im lucky, it’ll be Ultra Cote.
04-20-2018, 05:12 AM
#3039
My Feedback: (9)
ya, they took the uv protectant out of monokote. so even the extra on roles in my workshop goes bad (the color layer and the Mylar fracture together or separately). my ultra sport 60 (maddened in 1986) was recovered in 2005 needs another recover. but the last flight of my us60 it lost pieces, I landed and found three wing bays shattered. its mostly stripped now the metal flake blue from 2005 came off well, but the original yellow is coming off in little shards, any amount of bending and it shatters like glass.
also had a lot of luck removing old color layer that sticks to wood with a razor plain.
joe
also had a lot of luck removing old color layer that sticks to wood with a razor plain.
joe
 05-22-2018, 09:20 PM
#3042
05-23-2018, 05:07 AM
#3044
Join Date: Nov 2006
Location: Pueblo West,
CO
Posts: 404
Likes: 0
Received 0 Likes
on
0 Posts
When they released them a few years ago I bought two. I built one and had a elevator servo failure and lost it. I have the one kit left. I guess if I build that and crash my Ultra Sport days will be over.
Maybe I'll save it for posterity.
Maybe I'll save it for posterity.
05-23-2018, 05:10 AM
#3045
Since you have the plans Roy, make templates of all the Wing Ribs and Formers from your other kit and you'll always be able to have a US60 in your hangar!
05-27-2018, 08:10 PM
#3047

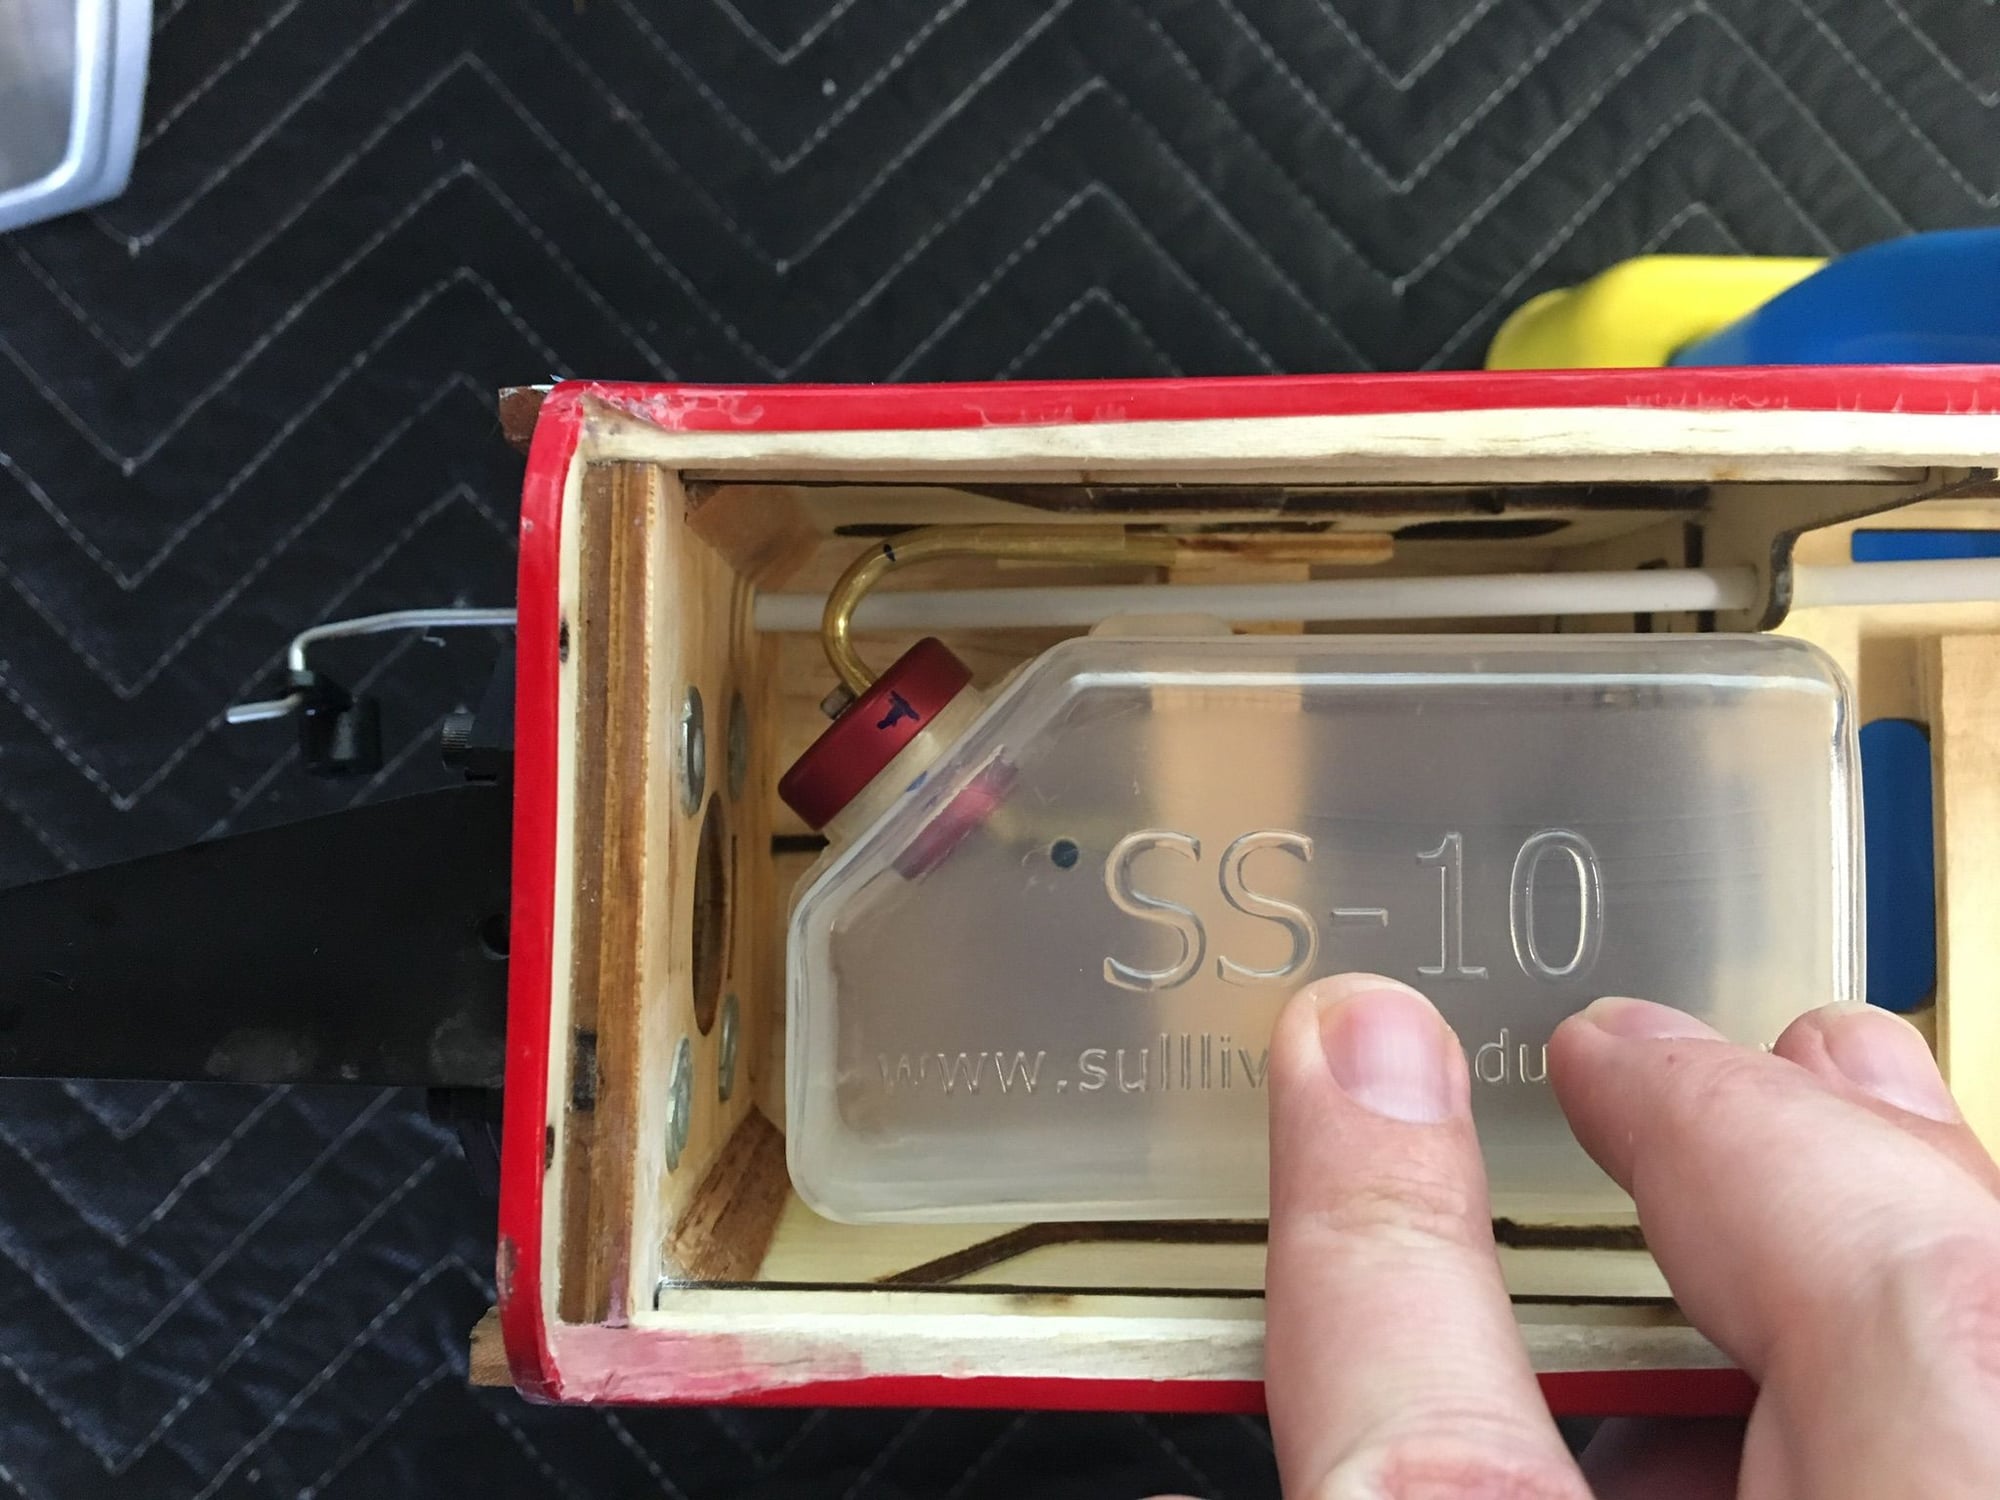
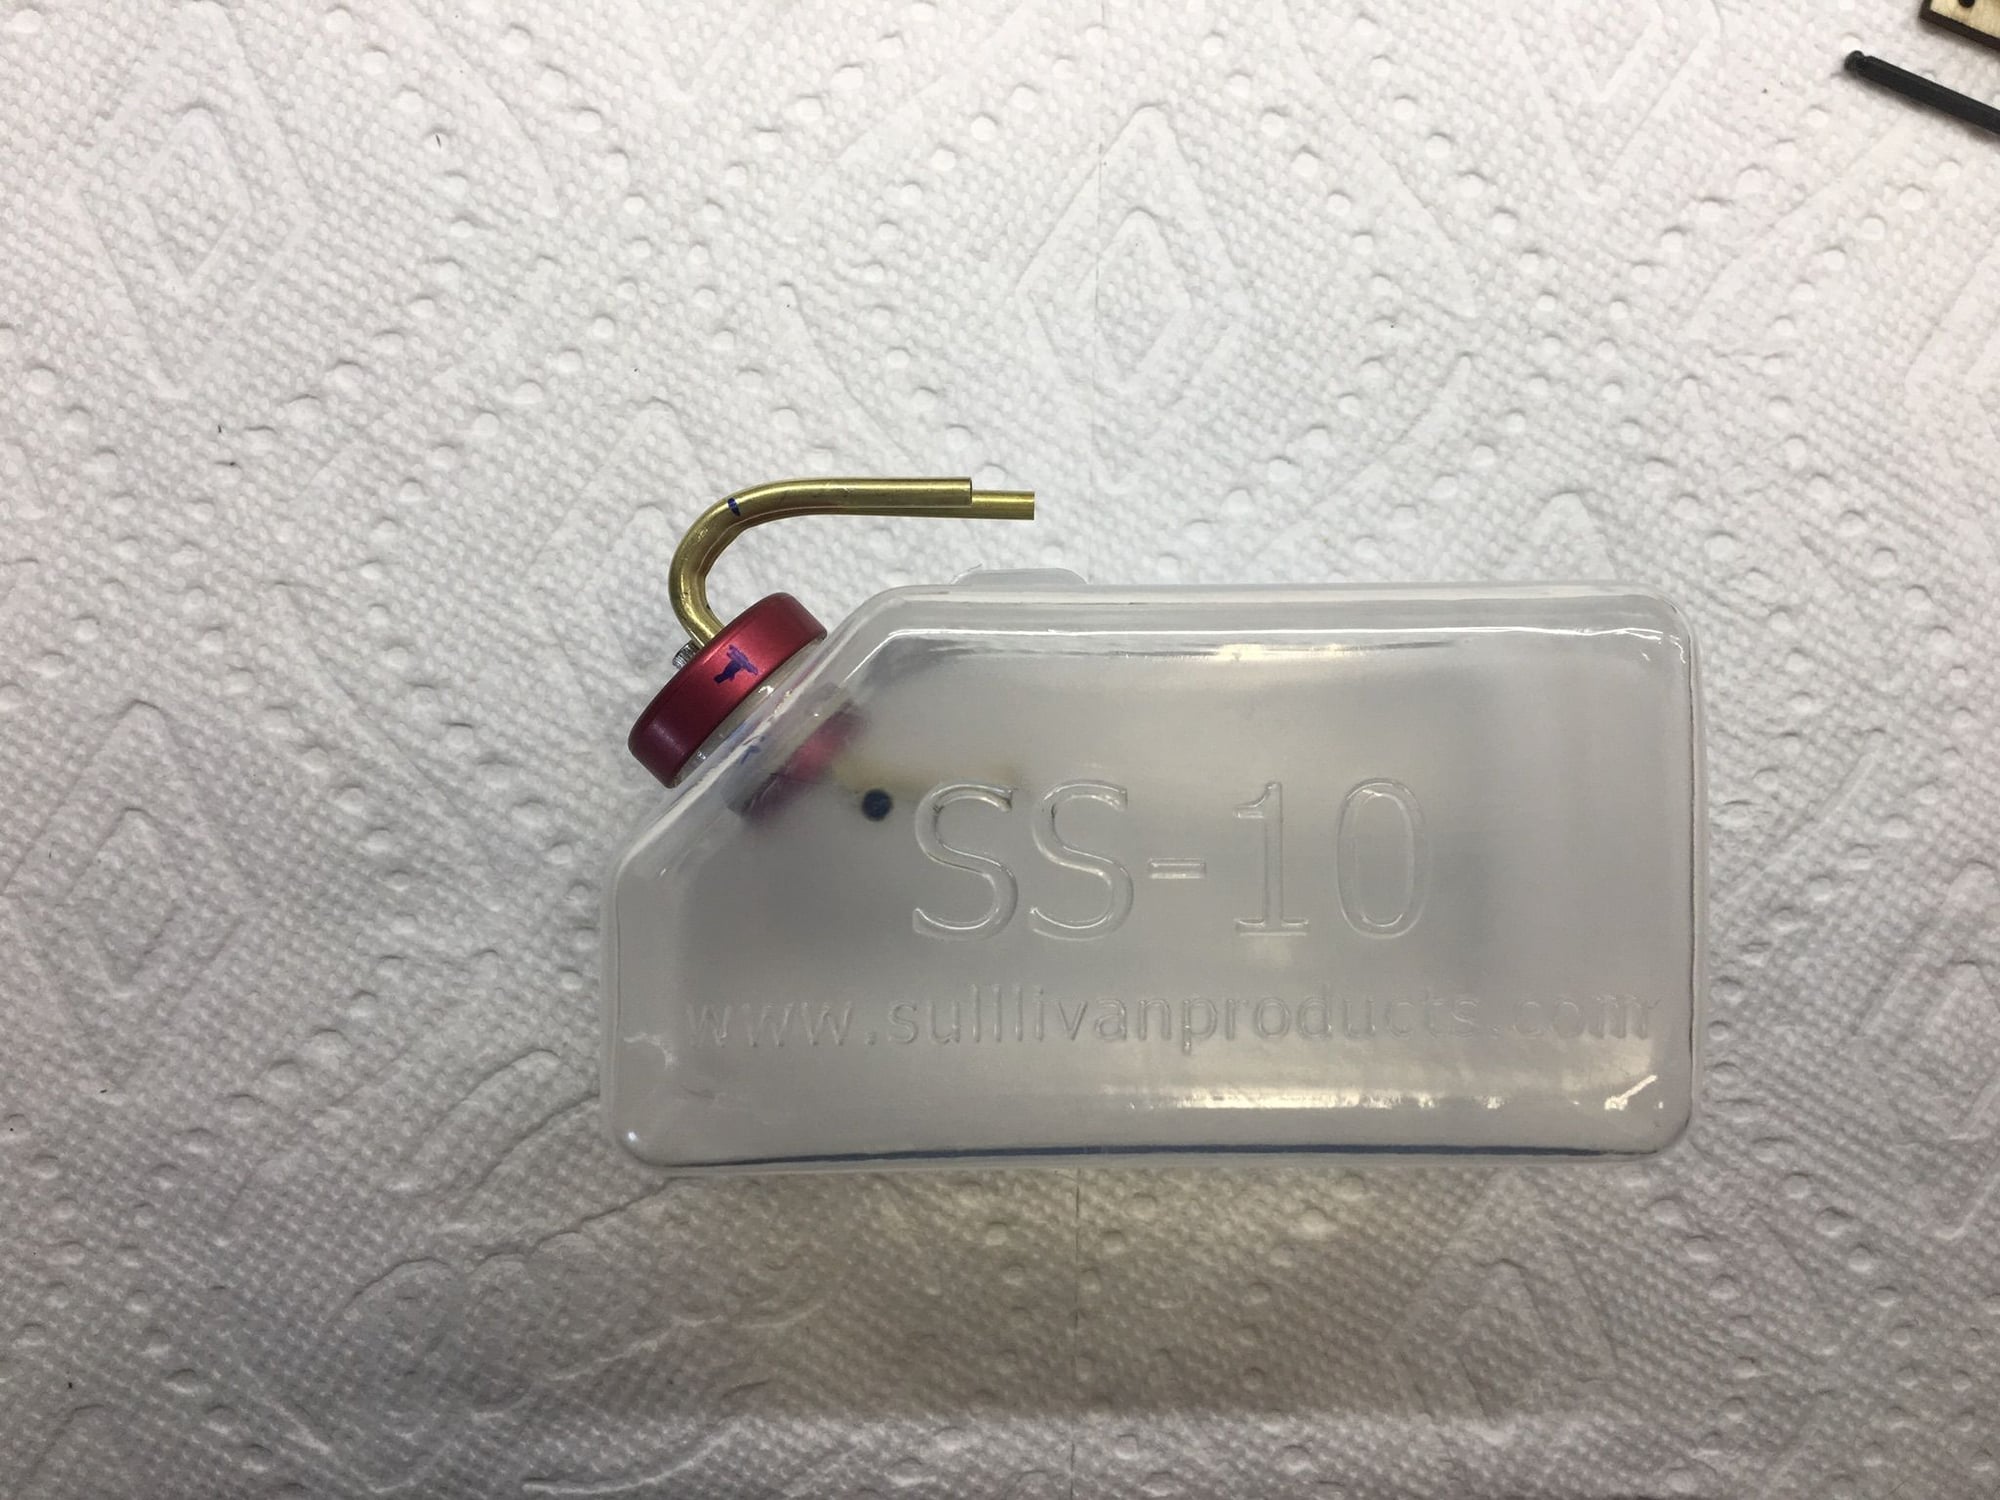
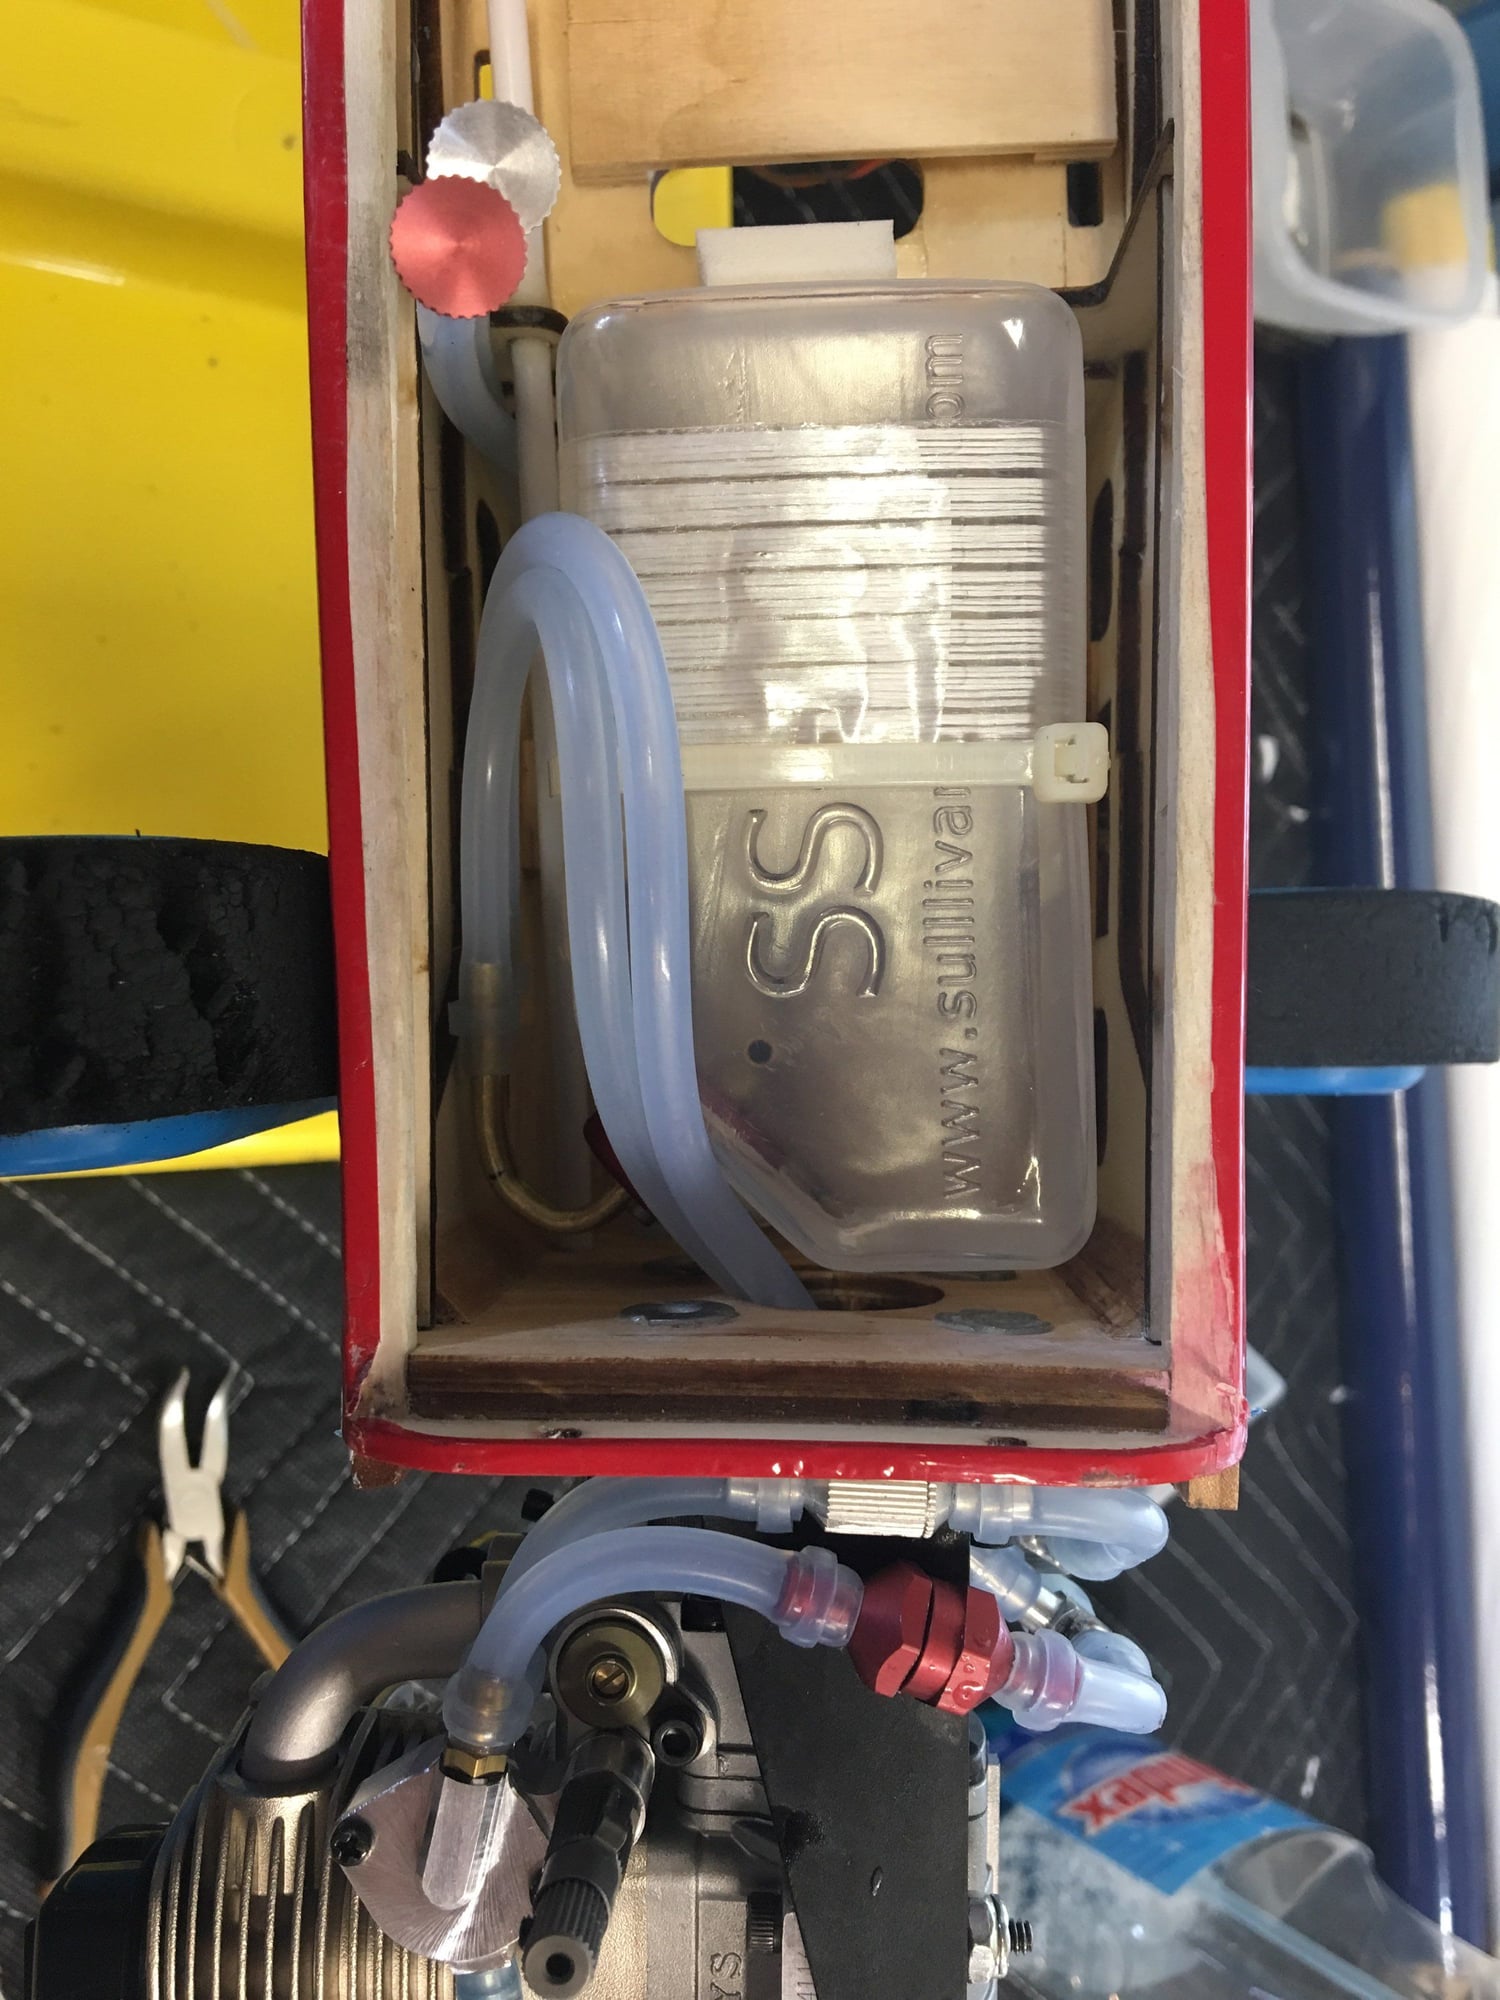
Flew the 46 ARF’s again today, last time out the YS blew the stopper out of the stock tank. I replaced it with a 10 oz Sullivan flex tank which if you put it on its side fits perfectly. Some creative tube bending and with the pressurized YS system it worked perfectly today! We flew the two together for the first time today, although they aren’t meant to be race planes we couldn’t help ourselves, the YS80 appeared to everyone watching to be faster the than the one with the OS55 but to me flying the YS they were really close! Didn’t get any pics of the planes but here’s a pic of the tank install in case anyone else has plans for the YS.
05-29-2018, 04:58 AM
#3048
My Feedback: (9)
cam, when I was doing liquid fuel I used dubro tanks because they don't have seams. I don't remember if the flex tanks have seams, but the reason no seams are so important is it will start to tear right at the stopper and leak. just an FYI.
I used to resize tanks by spraying pam on a cookie sheet, heating in the oven then pushing the end I wanted to resize down on the cookie sheet and leaving it to get solid again. some times it took a couple of these attempts to get it to fit. the cookie sheet lost heat fast so there was not a lot of working time. but the most important part was having a spare tank to get the temp right. I would put shavings on the tray and slowly bring the oven temp up till it melted the shavings but did not burn them. fyi again.
Joe
05-29-2018, 05:28 PM
#3049
cam, when I was doing liquid fuel I used dubro tanks because they don't have seams. I don't remember if the flex tanks have seams, but the reason no seams are so important is it will start to tear right at the stopper and leak. just an FYI.
I used to resize tanks by spraying pam on a cookie sheet, heating in the oven then pushing the end I wanted to resize down on the cookie sheet and leaving it to get solid again. some times it took a couple of these attempts to get it to fit. the cookie sheet lost heat fast so there was not a lot of working time. but the most important part was having a spare tank to get the temp right. I would put shavings on the tray and slowly bring the oven temp up till it melted the shavings but did not burn them. fyi again.
Joe
I used to resize tanks by spraying pam on a cookie sheet, heating in the oven then pushing the end I wanted to resize down on the cookie sheet and leaving it to get solid again. some times it took a couple of these attempts to get it to fit. the cookie sheet lost heat fast so there was not a lot of working time. but the most important part was having a spare tank to get the temp right. I would put shavings on the tray and slowly bring the oven temp up till it melted the shavings but did not burn them. fyi again.
Joe
05-30-2018, 04:54 PM
#3050
Join Date: Nov 2006
Location: carmel,
IN
Posts: 258
Likes: 0
Received 0 Likes
on
0 Posts
Hi all, heading out to muncie this comming sunday for first session of the season.
this time my fire breathing moki 140 will have a 18x8 prop with a few inches of ground clearance .
still new engine running on the rich side for now .
long live the us 1000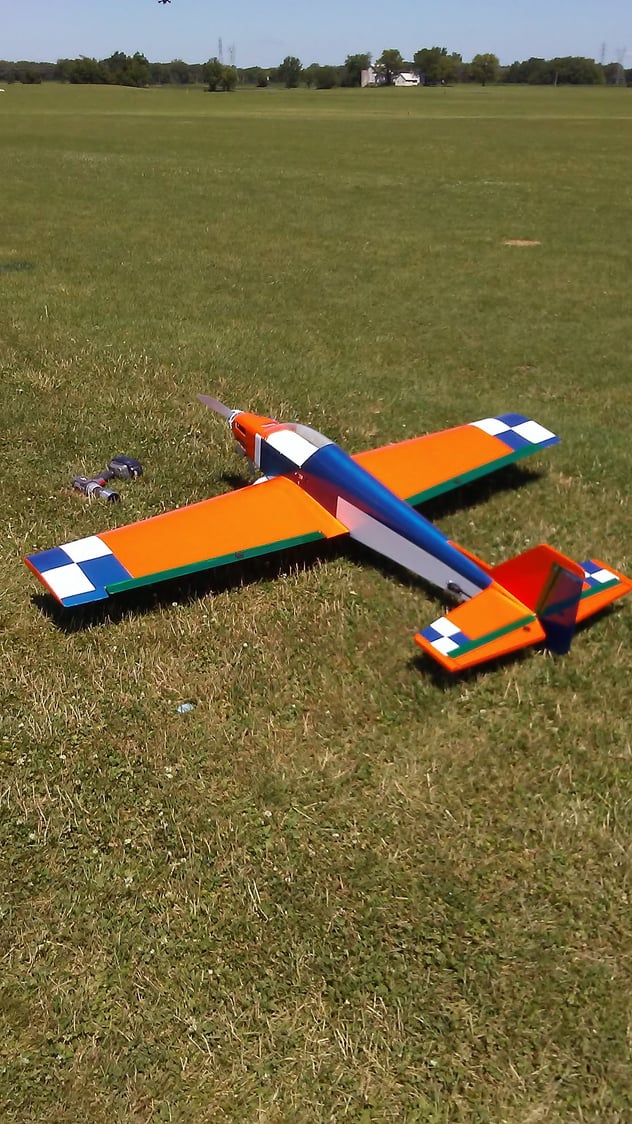
this time my fire breathing moki 140 will have a 18x8 prop with a few inches of ground clearance .
still new engine running on the rich side for now .
long live the us 1000